

Harman kardon FESTIVAL 80, FESTIVAL 60 Owner’s Guide

®
Owner ’s Guide
Guide du propriétaire
Guía del propietario
80
60
festival
For more information and your nearest
Harman Kardon dealer please call 800-422-8027.
Harman Kardon
250 Crossways Park Drive,Woodbury,NY 11797
8500 Balboa Boulevard, Northridge, CA 91329
A Harman International Company
* Manufactured under license from Dolby Laboratories Licensing
Corporation. "Dolby," the double-D symbol ,and "Pro Logic"
are trademarks of Dolby Laboratories Licensing Corporation.
© 1998 Harman Kardon, Incorporated
FEST60/80-OM-1
Festival 60/80
Owner
’
s Guide
Important Safeguards 2
Safety Information 3
Quickstart 4-7
Tuner 8-9
CD Changer 10-11
Aux 12
Clock 13
Speaker Placement 14-15
Bass Treble 15
Balance 15
Surround Setup 16-17
Surround Operation 18
Troubleshooting 19
Specifications 20
festival 60 festival 80
Important Safeguards
Read Instructions
All the safety and operating instructions should be
read before the product is operated.
Follow Instructions
All operating and use instructions should be
followed.
Retain Instructions
The safety and operating instructions should be
retained for future reference.
Heed Warnings
All warnings on the appliance and in the operating
instructions should be adhered to.
Water and Moisture
The appliance should not be used near water –
for example, near a bathtub, washbowl, kitchen
sink, laundr y tub, in a wet basement, near a
swimming pool, etc.
Carts and Stands
The appliance should be used only with a cart or
stand that is recommended by the manufacturer.
An appliance and cart combination should be
moved with care. Quick stops, excessive force,
and uneven surfaces may cause the appliance
and cart combination to overturn.
Wall or Ceiling Mounting
The appliance should be mounted to a wall or
ceiling only as recommended by the manufacturer.
Ventilation
The appliance should be situated so that its
location or position does not interfere with its
proper ventilation. For example, the appliance
should not be situated on a bed, sofa, rug, or
similar surface that may block the ventilation
openings; or,placed in a built-in installation
such as a bookcase or cabinet that may impede
the flow of air through the ventilation openings.
Heat
The appliance should be situated away from heat
sources such as radiators, heat registers, stoves, or
other appliances (including amplifiers) that produce
heat. Do not expose to direct sunlight.
Moving the Unit
Before moving the unit, be certain to disconnect
any cords connected to other components, and
make certain that you disconnect the unit from the
AC outlet.
Grounding or Polarization
This appliance is equipped with a polarized plug
and must be used with a polarized receptacle.The
polarization or grounding of the plug should not be
defeated. If the type of receptacle being used is not
polarized, an electrician should be contacted.
Power-Cord Protection
Power-supply cords should be routed so that
they are not likely to be walked on or pinched
by items placed upon or against them, paying
particular attention to cords at plugs, convenience
receptacles, and the point where they exit from
the appliance.We do not recommend the use
of extension cords with this product.
Power Lines
An outdoor antenna should be located away from
power lines.
Nonuse Periods
The power cord of the appliance should be
unplugged from the outlet when left unused for
a long period of time.
Object and Liquid Entry
Care should be taken so that objects do not fall
and liquids are not spilled into the enclosure
through openings.
Servicing
Do not attempt to service this product yourself
as opening or removing covers may expose you
to dangerous voltage or other hazards. Refer all
servicing to qualified service personnel.
Overloading
Do not overload wall outlets and extension cords as
this can result in a risk of fire or electric shock.
Damage Requiring Service
The appliance should be serviced by qualified
service personnel when:
The power-supply cord of the plug has been
damaged; or
Objects have fallen, or liquid has been spilled into
the appliance; or
The appliance has been exposed to rain; or
The appliance does not appear to operate normally,
or exhibits a marked change in performance; or
The appliance has been dropped, or the enclosure
damaged.
Replacement Parts
When replacement parts are required, be sure the
service technician has used replacement parts
specified by the manufacturer or have the same
characteristics as the original part. Unauthorized
substitutions may result in fire, electric shock, or
other hazards.
Safety Check
Upon completion of any service or repairs, ask the
service technician to perform a safety check to
determine that the product is in proper operating
condition.
U.S. and Canadian customers should use 120 volts
AC only.Other customers should use voltages
appropriate to their area. Connecting the units to
an outlet supplying a higher voltage may create
a fire hazard.
festival 60/80
2
ELECTRIC
SERVICE
EQUIPMENT
NATIONAL ELECTRICAL CODE
ANTENNA
LEAD IN WIRE
GROUND
CLAMP
ANTENNA
DISCHARGE UNIT
GROUNDING CONDUCTIONS
GROUND CLAMPS
POWER SERVICE GROUNDING
ELECTRIC SYSTEM
Verify Line Voltage Before Use
Festival has been designed for use with 120 volt
AC current. Connection to a line voltage other than
120 volts can create a safety and fire hazard, and
may damage the unit.
If you have any questions about the voltage
requirements for your specific model or about
the line voltage in your area, consult your selling
dealer
before plugging the unit into a wall outlet.
Do Not Use Extension Cords
To avoid safety hazards,use only the power cord
supplied with your unit.We do not recommend that
extension cords be used with this product.
As with all electrical devices, do not run power
cords under rugs or carpets or place heavy
objects on them. Damaged power cords should
be replaced immediately with cords meeting
factory specifications.
Handle the AC Power Cord Gently
When disconnecting the power cord from an AC
outlet, always pull the plug,
never pull the cord
.
If you do not intend to use the unit for any
considerable length of time, disconnect the
plug from the AC outlet.
Do Not Open the Cabinet
There are no user serviceable components inside
this product. Opening the cabinet may present a
shock hazard, and any modification to the product
will void your warranty.If water or any metal object
such as a paper clip, a wire or a staple accidentally
falls inside the unit, disconnect it from the AC
power source immediately and consult an
authorized service station.
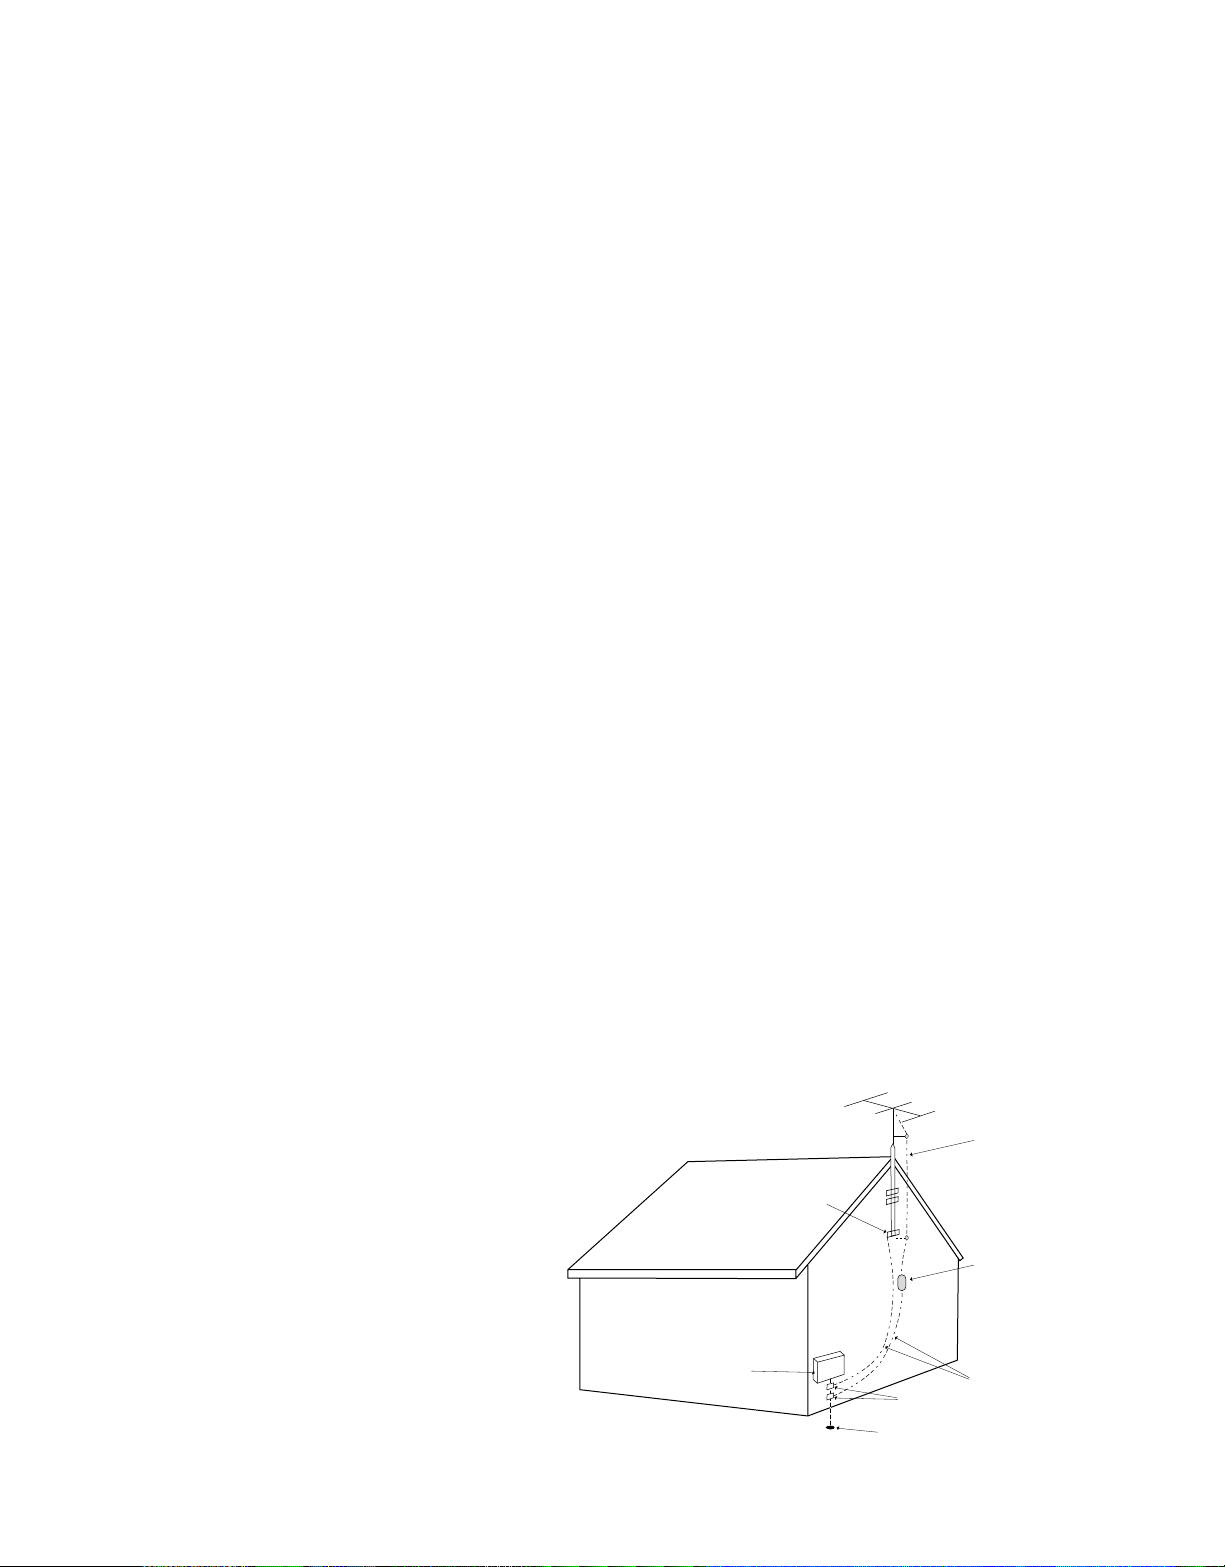
CATV or Antenna Grounding
If an outside antenna or a cable system is
connected to this product, be certain that it is
grounded to provide some protection against
voltage surges and static charges. Section 810 of
the National Electrical Code,ANSI/NFPA No. 701984, provides information with respect to proper
grounding of the mast and supporting structure,
grounding of the lead-in wire to an antenna
discharge unit, size of grounding conductors,
location of antenna discharge unit, connection to
grounding electrodes and requirements of the
grounding electrode.
NOTE TO CATV SYSTEM INSTALLER
This reminder is provided to call the CATV (Cable
TV) system installer's attention to article 820-40
of the NEC that provides guidelines for proper
grounding and, in particular, specifies that the
cable ground shall be connected to the grounding
system of the building, as close to the point of
cable entry as possible.
Installation Location
To assure proper operation and to avoid the
potential for safety hazards, place the unit on a
firm and level surface.When placing the unit on a
shelf, be certain that the shelf and any mounting
hardware can support the weight of the product.
Make certain that proper space is provided both
above and below the unit for ventilation. If this
product will be installed in a cabinet or other
enclosed area, make certain that there is sufficient
air movement within the cabinet. Under some
circumstances a fan may be required.
Do not place the unit directly on a carpeted surface.
Avoid installation in extremely hot or cold locations,
or an area that is exposed to direct sunlight or
heating equipment.
Avoid moist or humid locations.
Do not obstruct the ventilation slots on the top
of the unit, or place objects directly over them.
Cleaning
When the unit gets dirty,wipe it with a clean, soft,
dry cloth. If necessary,wipe it with a soft cloth
dampened with mild soapy water,and then a fresh
cloth with clean water.Wipe dry immediately with
a dry cloth. NEVER use benzene,aerosol cleaners,
thinner,alcohol or any other volatile cleaning agent.
Do not use abrasive cleaners, as they may damage
the finish.Avoid spraying insecticide near the unit.
Moving the Unit
Before moving the unit, be certain to disconnect
any interconnection cords with other components,
and make certain that you disconnect the unit from
the AC outlet.
Important Information for the User
NOTE:This equipment has been tested and found
to comply with the limits for a Class B digital
device, pursuant to Part 15 of the FCC Rules.
The limits are designed to provide reasonable
protection against harmful interference in a
residential installation.This equipment generates,
uses and can radiate radio frequency energy
and, if installed and used in accordance with
the instructions, may cause harmful interference
to radio communication. However, there is no
guarantee that harmful interference will not occur
in a particular installation. If this equipment does
cause harmful interference to radio or television
reception, which can be determined by tuning the
equipment off and on, the user is encouraged to
try to correct the interference by one or more of
the following measures:
Reorient or relocate the receiving antenna.
Increase the separation between the equipment
and receiver.
Connect the equipment into an outlet on a circuit
different from that to which the receiver is connected.
Consult the dealer or an experienced radio/TV
technician for help.
This device complies with Part 15 of the FCC
Rules. Operation is subject to the following two
conditions: 1) this device may not cause harmful
interference, and 2) this device must accept
interference received, including interference
that may cause undesired operation.
NOTE: Changes or modifications may cause this
unit to fail to comply with Part 15 of the FCC
Rules and may void the user’s authority to
operate the equipment.
CAUTION: TO REDUCE THE RISK OF ELECTRIC SHOCK,DO NOT REMOVE COVER (OR BACK).
NO USER-SERVICEABLE PARTS INSIDE.REFER SERVICING TO QUALIFIED SERVICE PERSONNEL.
WARNING: TO REDUCE THE RISK OF FIRE OR ELECTRIC SHOCK,
DO NOT EXPOSE THIS APPLIANCE TO RAIN OR MOISTURE.
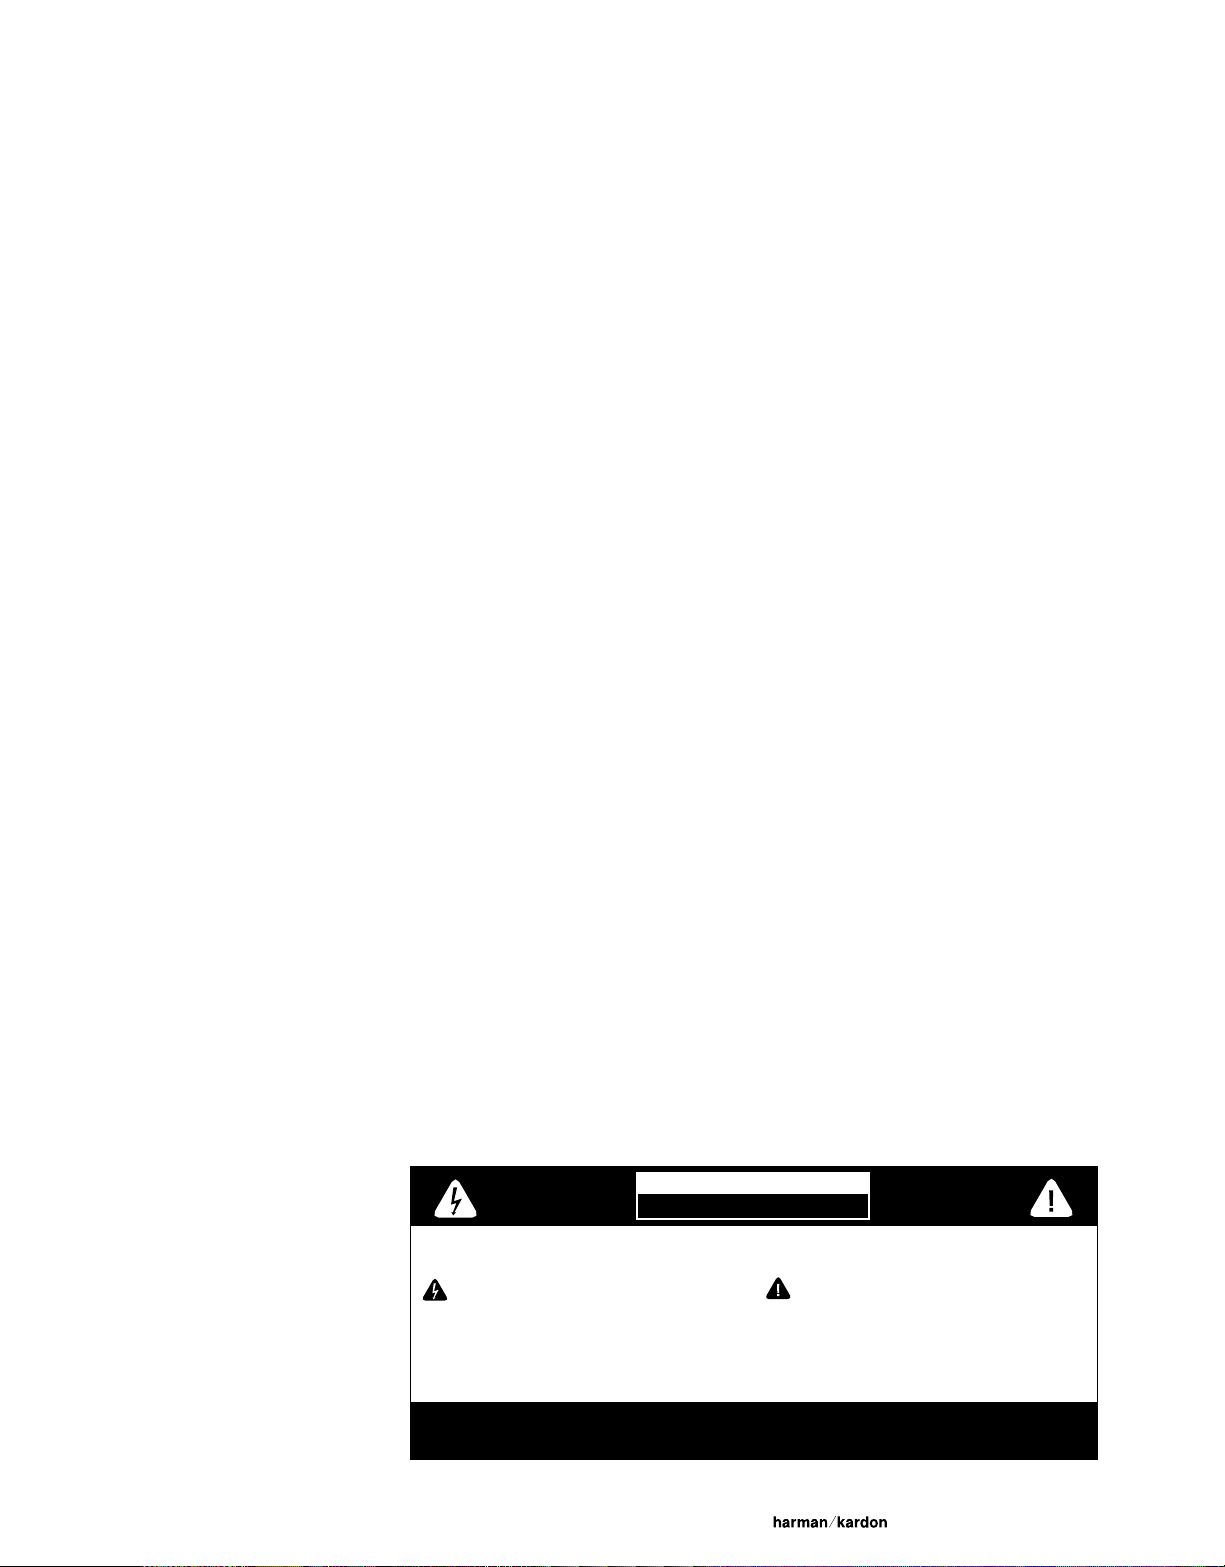
The lightning flash with arrowhead symbol, within
an equilateral triangle, is intended to alert the user to
the presence of uninsulated “dangerous voltage”within the
product’s enclosure that may be of sufficient magnitude to
constitute a risk of electric shock to persons.
The exclamation point within an equilateral triangle
is intended to alert the user to the presence of
important operating and maintenance (servicing) instructions
in the literature accompanying the appliance.
3
Safety Information
CAUTION
RISK OF ELECTRIC SHOCK
DO NOT OPEN
CAUTION: TO PREVENT ELECTRIC SHOCK,MATCH WIDE BLADE OF PLUG TO WIDE SLOT, FULLY INSERT.
ATTENTION: POUR EVITER LES CHOCS ELECTRIQUES,INRODUIRE LA LAME LA PLUS LARGE DE LA FICHE DANS LA BORNE
CORRESPONDANTE DE LA PRISE ET POUSSER JUSQU‘AU FOND.
festival 60/80
Quickstart
1 Be Safe
Read the safety instructions on pages 2 and 3.
2 Unpack & Stack
Stack components as shown below.
festival 80
festival 60
4
@
1
2
3
4
5
festival 60
6
7
8
9
10
Power
Open
Close
festival 60
festival 60
=
5
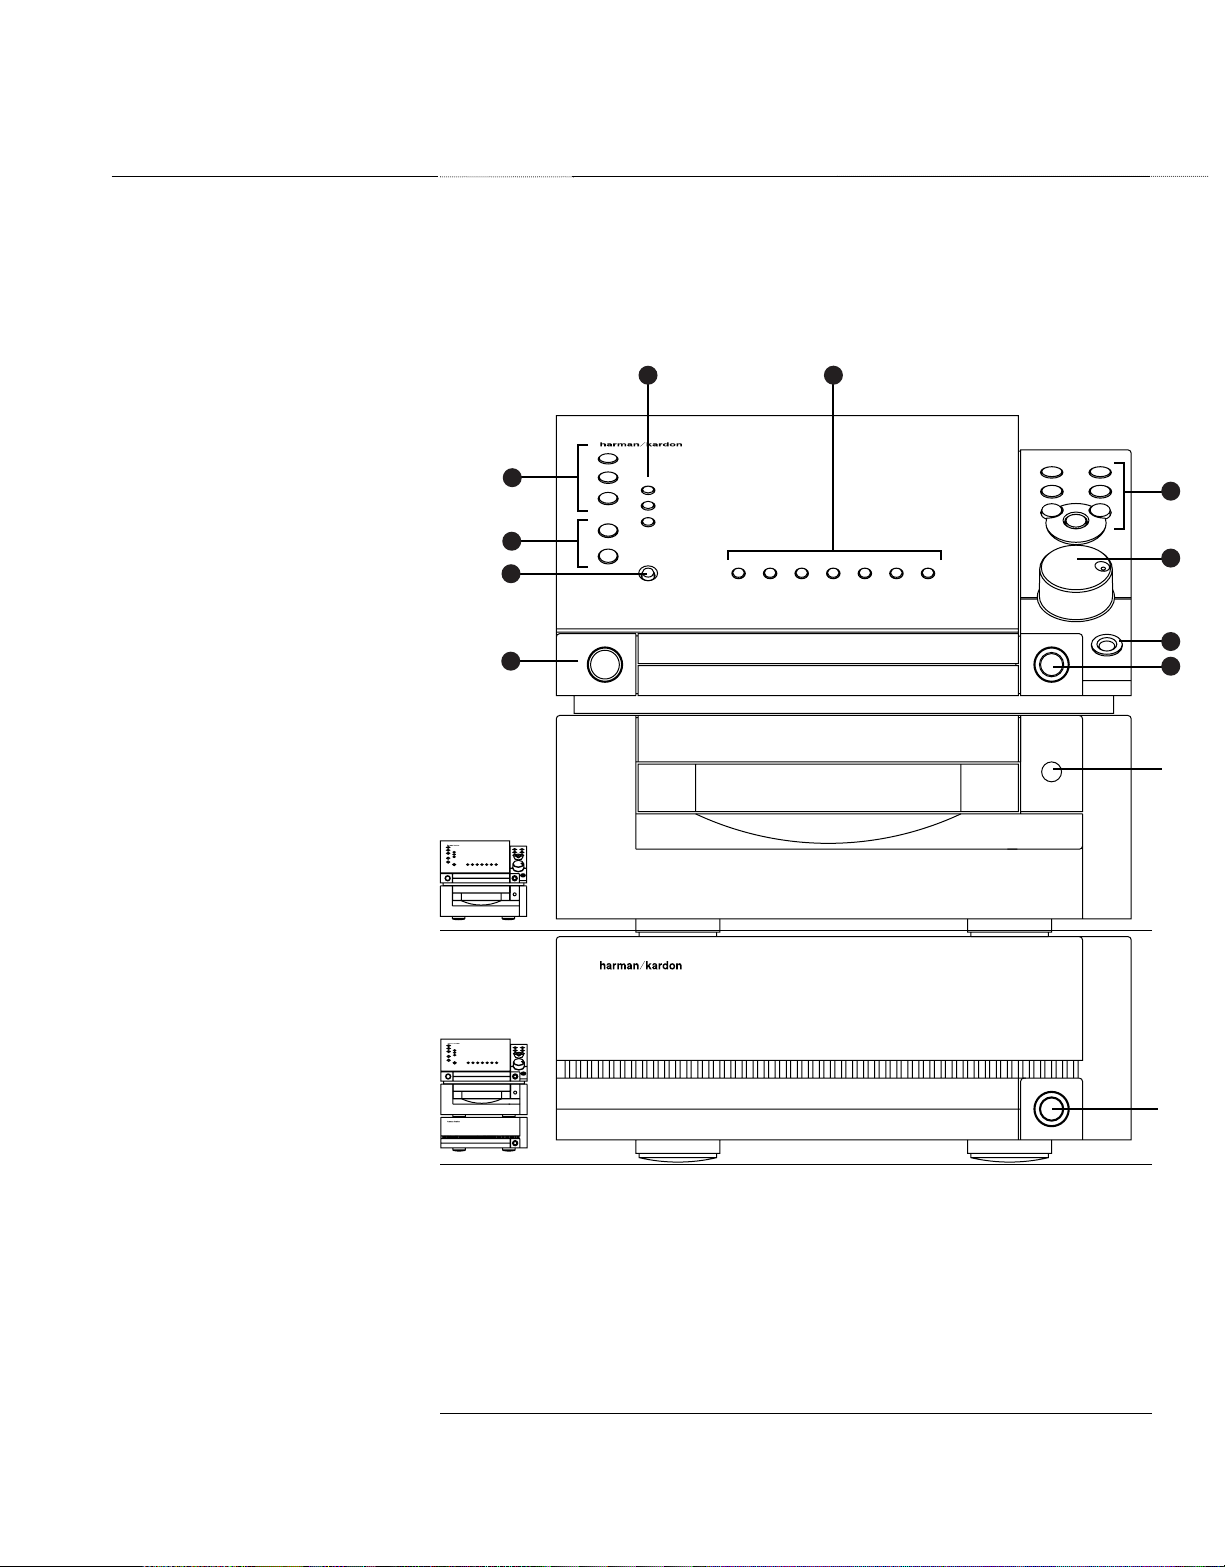
Product Overview Front
1 Source Buttons
Press desired source button to select input source.
2 Sound Keys
Press to access sound quality and tone control
functions for all sources.
3 Clock
Press to access the clock, sleep and wake functions.
4 Remote Control Receiver
Point remote control at this area for optimum
remote operation. (Remote range is 15 feet.)
5 Option Buttons
These buttons change function based on the source
being used. Press to select functions specific to each
source. Some functions require more than one press
for adjustment or selection.
6 Selection Buttons
In the Tuner mode these buttons store or recall preset
stations,in the CD mode they select discs, and in the
Aux mode they select Aux inputs.In the Clock mode they
adjust the time and the wake time setting.
7 Play Controls
Press to select, adjust and operate functions specific
to each source. Some functions require more than
one press for adjustment or selection.
8 Volume Knob
Rotate to adjust volume level.
9 Headphone Jack
Accepts 1/8" headphone connector.
0 Power
Press lightly to put the system into Standby
(which saves all settings). Press firmly to turn
unit completely Off.The power light is green when
the system is On and orange when the system is
in Standby.
= Open/Close
Press to open and close the CD drawer.
@ Power Indicator
(Festival 60 only)
This indicator is green when the system is On and
orange when the system is in Standby.
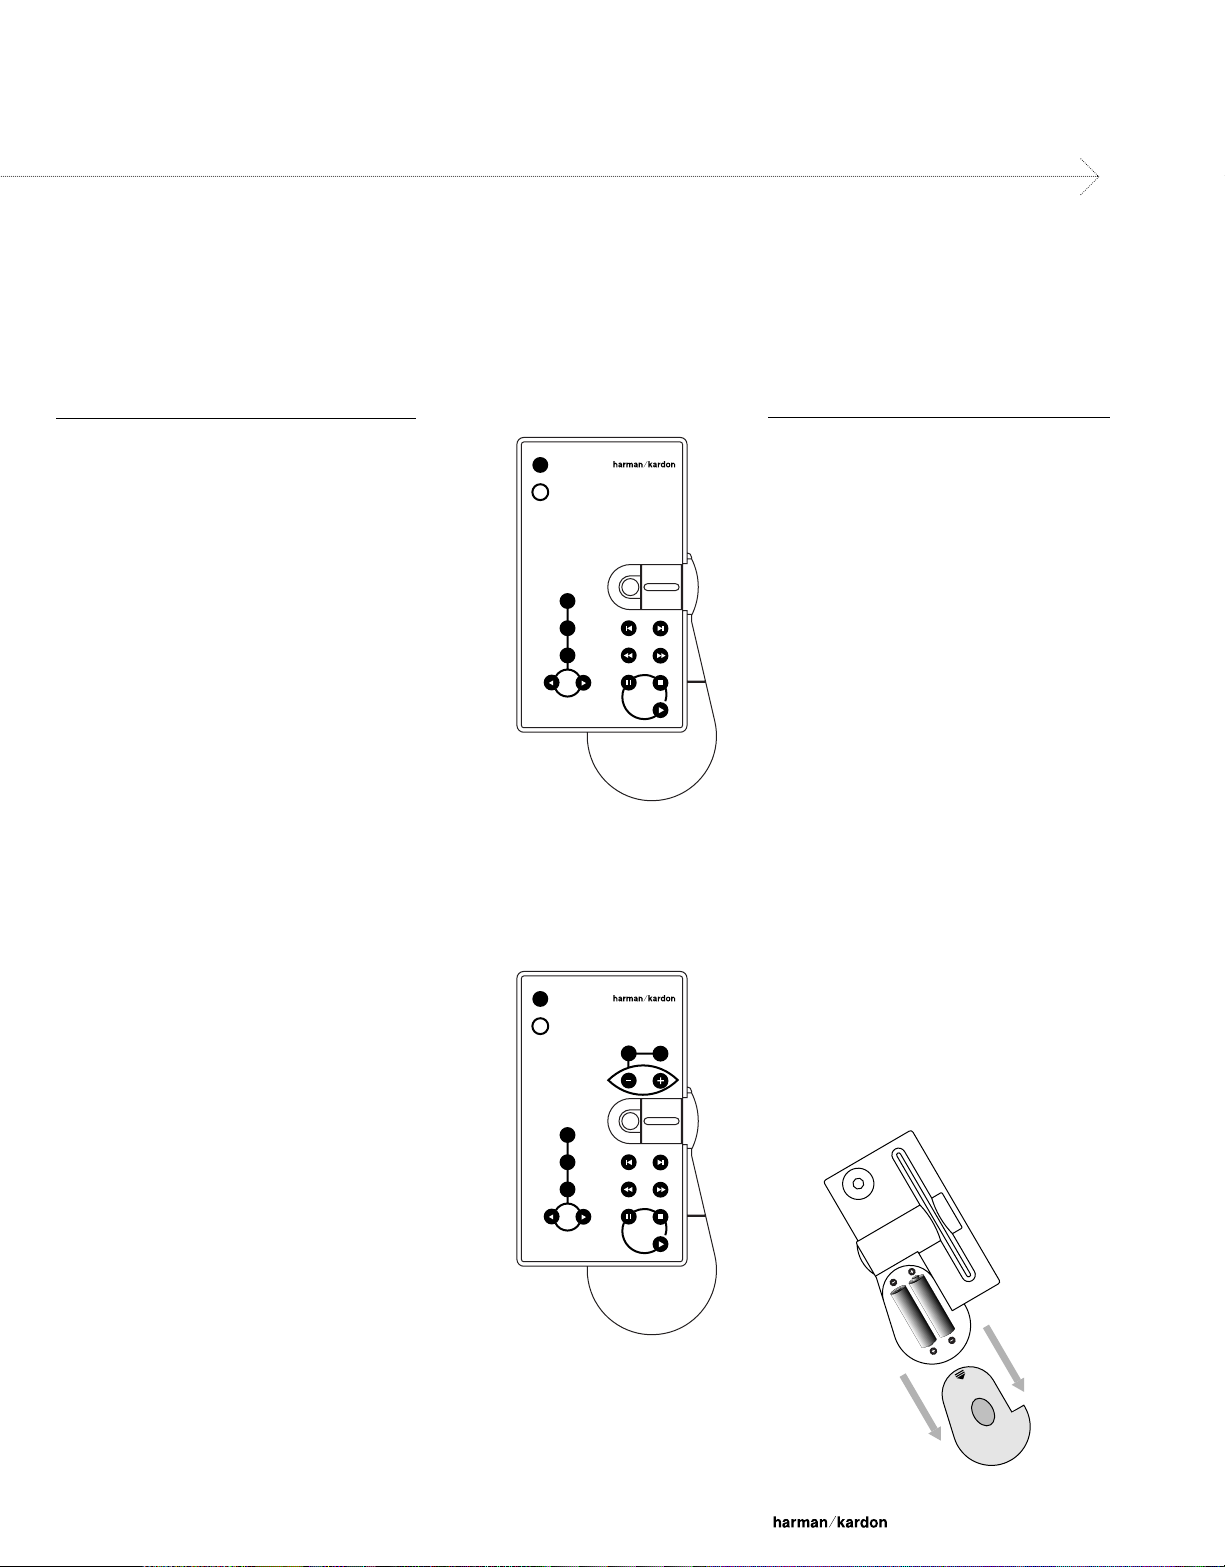
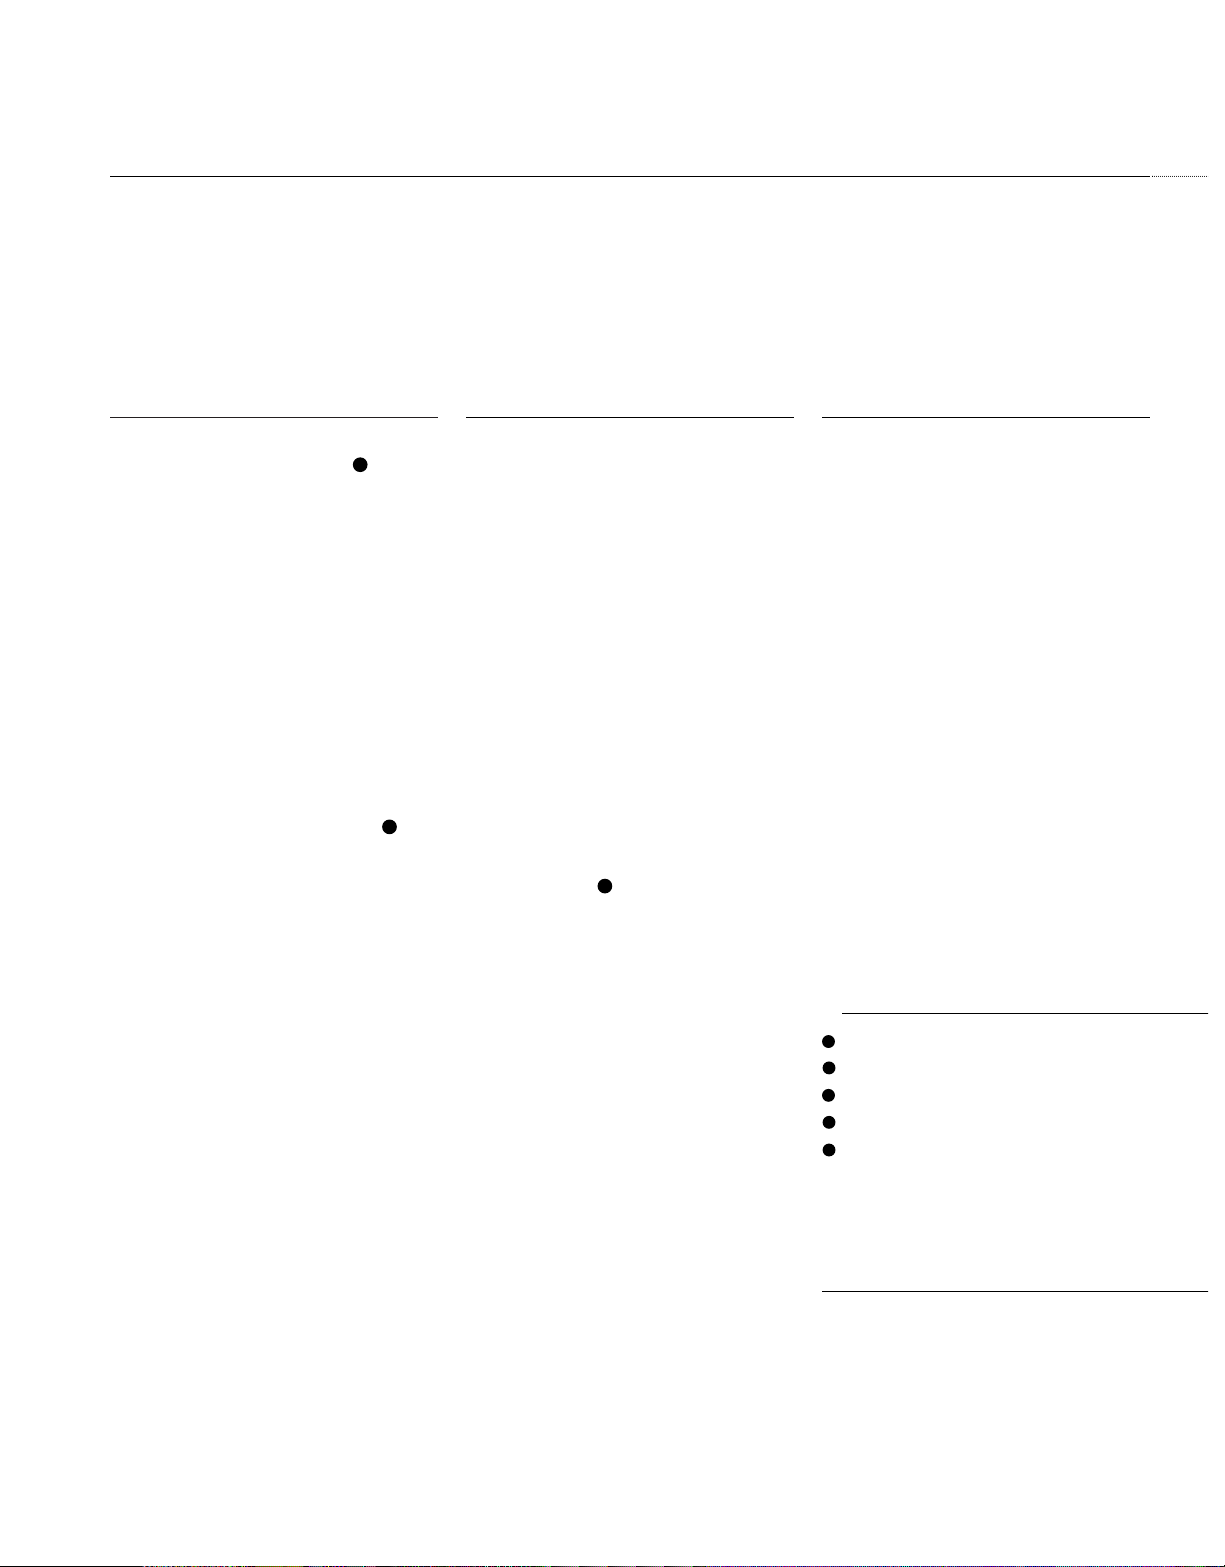
Remote
Place batteries (included) in the remote as shown
below.Most of the buttons and controls on the
remote have functions identical to the buttons and
controls on the control unit.The remote control
requires two AA batteries.The range is 15 feet.
Power
Press to put the unit in Standby.
Sleep
Press to put the system into the Sleep mode. (See
clock section on page 13 for more information).
Source Buttons
Press desired source button to select an input source.
Selection Buttons
Press to scroll through and select functions
specific to each source.
Volume Controls
Press Volume to adjust sound level.
Press Mute to temporarily silence speaker output.
Play Controls
Press to select, adjust and operate functions
specific to each source.
Festival 80 only
Surround
Press to access surround sound control functions.
Center
Press to access center speaker control functions.
Wrap
Press to adjust surround sound effects.
festival 60 remote
festival 80 remote
Power
Sleep
Mute
Tuner
CD
Aux
Power
Sleep
Wrap
Mute
Tuner
CD
Aux
Surround
Center
Slide cover
to expose
battery
compartment
Electronics
1 Connect the Ribbon Wire
Push the plugs on the ribbon wire firmly
into corresponding connectors on the Controller
until they “click”into place. Slip the wire edges
beneath cable management clips.
2 Connect the Antenna
FM
Connect the included antenna or an external
FM antenna to the FM (75 ohm) connector.
The included 300 ohm to 75 ohm adapter is
required for connections from twin lead or
inside dipole antennas.
AM
Assemble the included AM Loop Antenna and
connect it to the AM and GND connectors.If
an external AM antenna is used,follow the
instructions supplied with the antenna.
3 Connect the Power Cord
Plug the female end of the power cord
(
provided) into the AC power jack on the rear of
the unit. Do not plug the male end into an AC
outlet until all other connections have been
made. In addition to the power connection
to the controller,Festival 60 has a power
connection to the Amplifier and Festival 80 has
a power connection to the Powered Subwoofer.
E
A
Optional Connections
0 Aux 1, 2 & 3 Inputs
Connect the audio and video outputs of up to
three external sources (DVD,VCR, cassette,
etc.) to these jacks. Connect computers and
portable audio products to the R/L jack linked
to Aux 2.If the R/L jack is used, the Aux 2 input
is disabled.
= Aux 1 Output
Connect these jacks to the audio and video
inputs of a VCR or cassette deck to record
Festival’s output.Connect the “To TV” output
jack to the video input of your TV, projector or
video monitor to view the video source selected
by Festival.
@ Remote IR Extension
If the Festival's front panel remote control
receiver is blocked, connect an external IR
(InfraRed) sensor to this jack and place
sensor in an unobstructed area.
6
3 Connect Components
Connectors
Ribbon wire
Speaker wire
Subwoofer cable
(Festival 80 only)
Antenna
Power cord
Speakers
Festival 80
4 Position the Speakers
Festival 80 includes five 2-way satellite
speakers and one powered subwoofer.The
satellite speakers all connect to the subwoofer.
The subwoofer connects directly to the
controller.See page 14 for speaker placement
recommendations.
5 Connect the Speakers
The five speakers each have a pair of springloaded wire clips.The subwoofer has five pairs
of corresponding connectors. Run a length of
the provided wire from each speaker to the
subwoofer.Cut the wire and strip the two leads
at each end.Attach the leads at the speaker to
the red and black clips.To ensure proper
polarity,attach the leads at the subwoofer to the
corresponding colored spring clips. Repeat for
all four remaining speakers.
6 Connect the Subwoofer
Connect the round multi-pin connector of the
subwoofer cable to the subwoofer jack on
the Controller.Connect the other end to the jack
on the back of the subwoofer as shown.
Festival 60
7 Position the Speakers
Festival 60 includes two 2-way “bookshelf”
speakers that can be placed almost anywhere
in a room and still provide superior sound
quality.Both speakers connect directly to the
controller.See page 14 for speaker placement
recommendations.
8 Connect the Speakers
Both speakers have a pair of screw-type wire
connectors.The amplifier has two pairs of
similar connectors. Run a length of the provided
wire from each speaker to the amplifier.Cut
the wire and strip the two leads at each end.
Unscrew the knobs on the back of the speaker
to reveal a hole in each post. Insert one lead
in the red post hole and the other in the black,
then tighten.To ensure proper polarity, attach
the leads at the amplifier to the two
corresponding colored connectors.
9 Connect the Subwoofer (optional)
If you are adding an optional powered
subwoofer to this system, connect the
subwoofer to the jacks on the back of the
amplifier.
C
festival 60/80
festival 60
festival 80
A
B
C
D
E
 Loading...