How it Works
Log In / Sign Up
Buy Points
How it Works
FAQ
Contact Us
Questions and Suggestions
Users
Hakko
Loading...
F
FM-202
2
FM-2020
FM-2022
3
FM-2023
2
FM-2024
2
FM-2026
FM2029
2
FM-203
5
FM-2030
3
FM-2031
FM-2032
FM204
3
FM-205
3
FM-206
3
FP-101
FP-102
2
FR-1012
FR-1012B
FR-1418
FR-300
2
FR-301
FR-400
FR-410
2
FR-701
FR-702
FR-801
FR-802
2
FR-803
FR-803B
FR-810
2
FR-810B
2
FR-811
FR-820
FR830
FR-860
FR-870
FR870B
FR-871
FR-872
FT-700
FT-710
2
FT720
FT-800
FT-8002
FT8003
2
FT-8004
FT-801
2
FT-802
FU-500
FU-600
FX-100
2
FX1002
FX1003
FX-300
FX-301
FX-301B
FX305
FX-601
FX-780
FX791
FX-801
3
FX-838
FX-8801
FX-8802
FX-8803
2
FX-8804
FX-888
FX-888D
3
FX-889
3
FX-901
FX-950
FX-951
6
FX-952
FX971
H
Hakko 152BV12
Hakko 153-2
Hakko 155-1
Hakko 375-03
Hakko 980-V12/P
Hakko FA430-KIT1
Hakko FG100B-03
Hakko FG101B-03
Hakko FM2026-KIT
Hakko FR300-05/P
Hakko FR301-03/P
Hakko FR400-02
Hakko FR410-52
Hakko FR810-05
2
Hakko FT802-03
2
Hakko FU500-21X
2
Hakko FX1003-84
Hakko FX305
Hakko FX805
HJ2150
HJ2250
HJ3001
HJ3010
HJ3080
HJ3100
2
HU-200
Loading...
Loading...
Nothing found
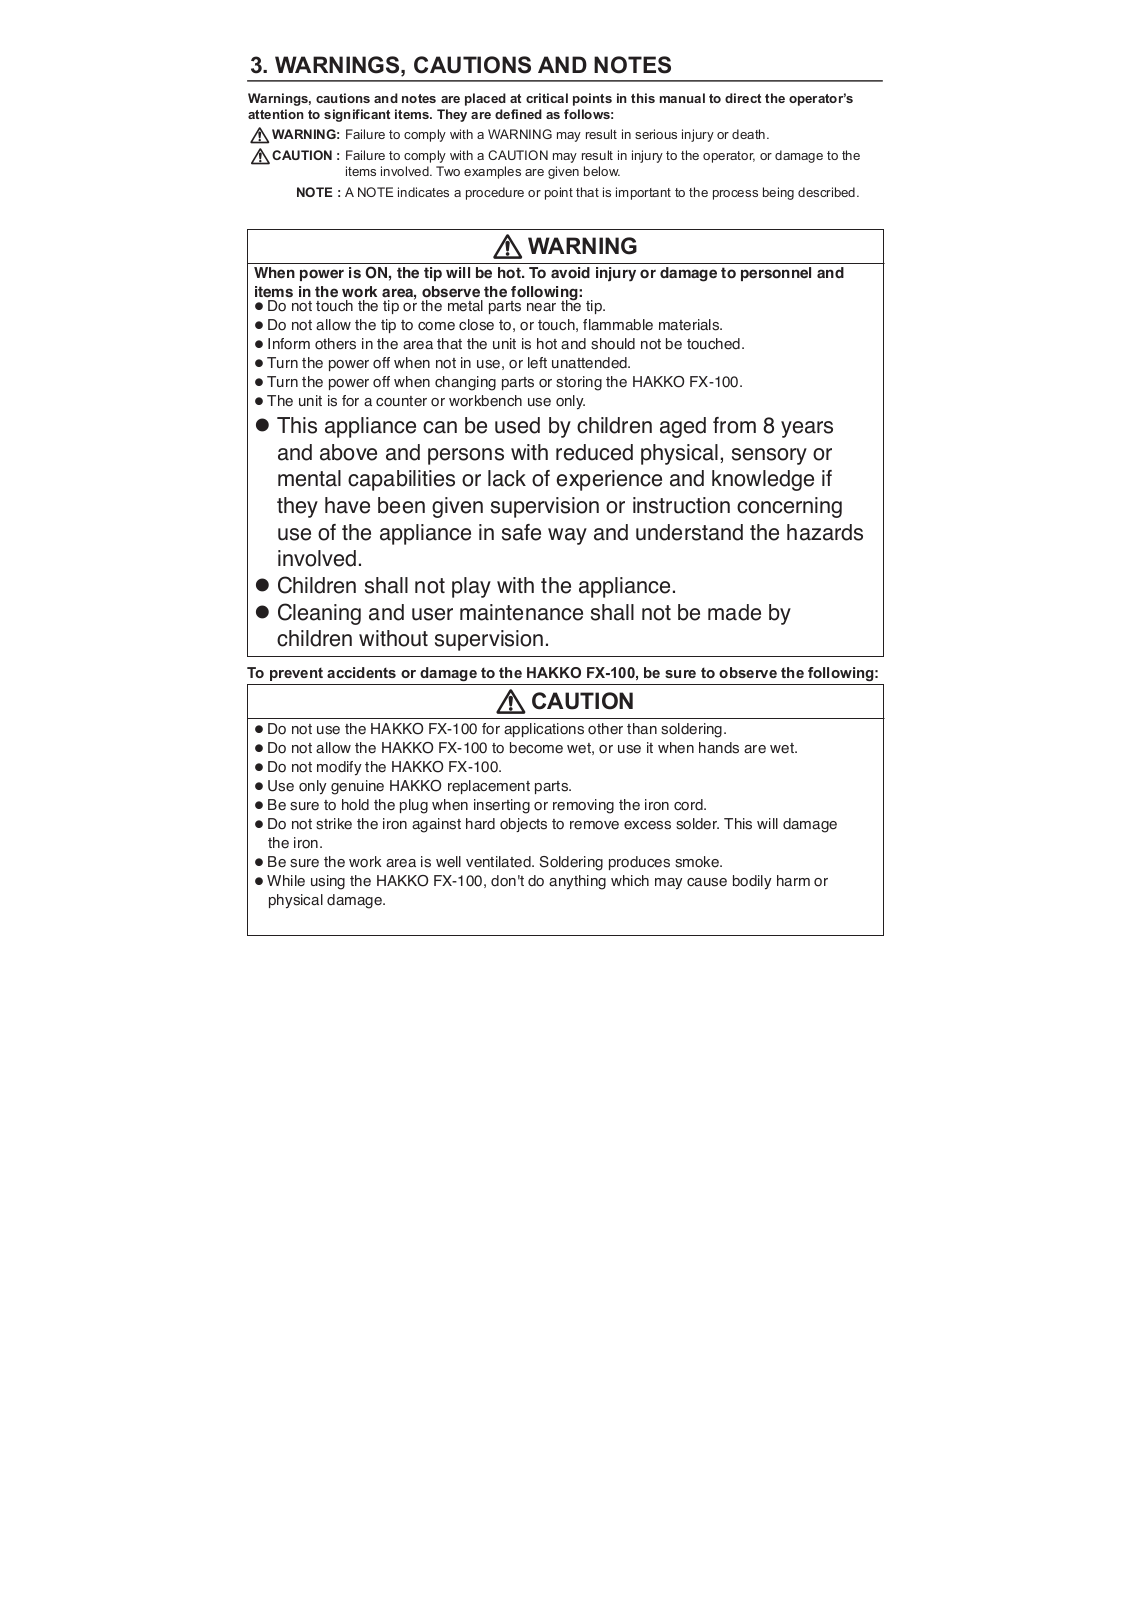
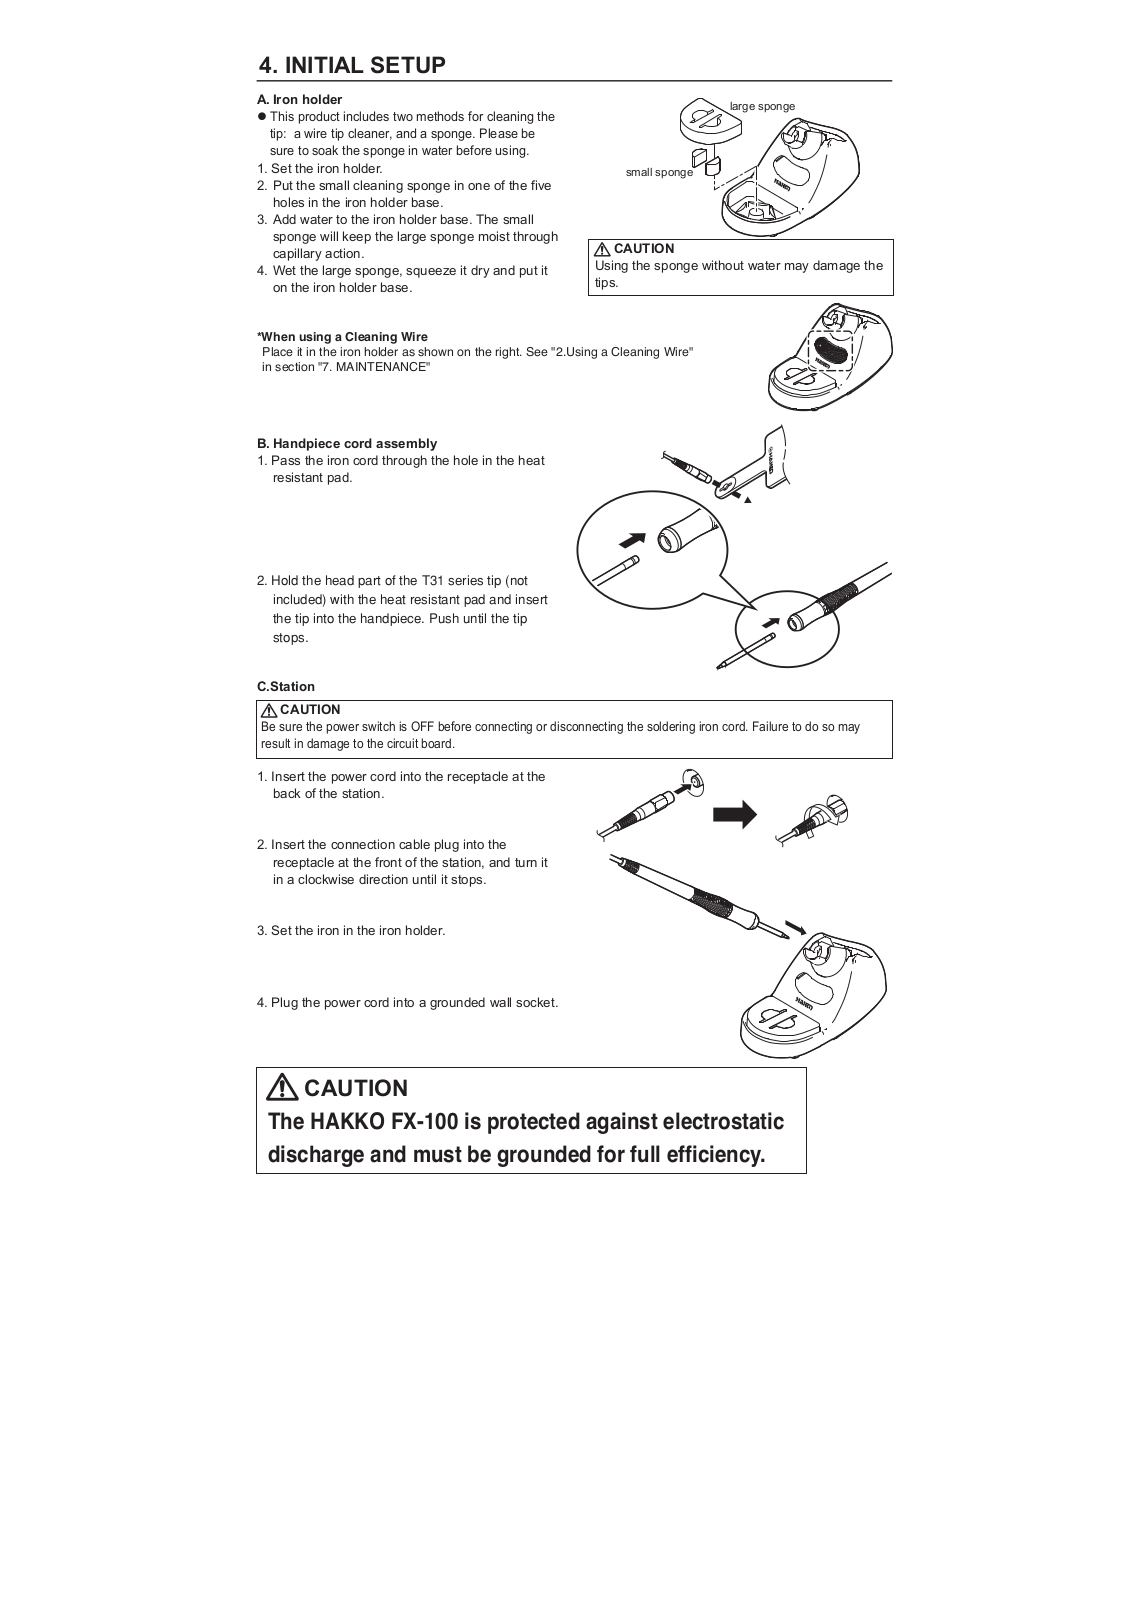
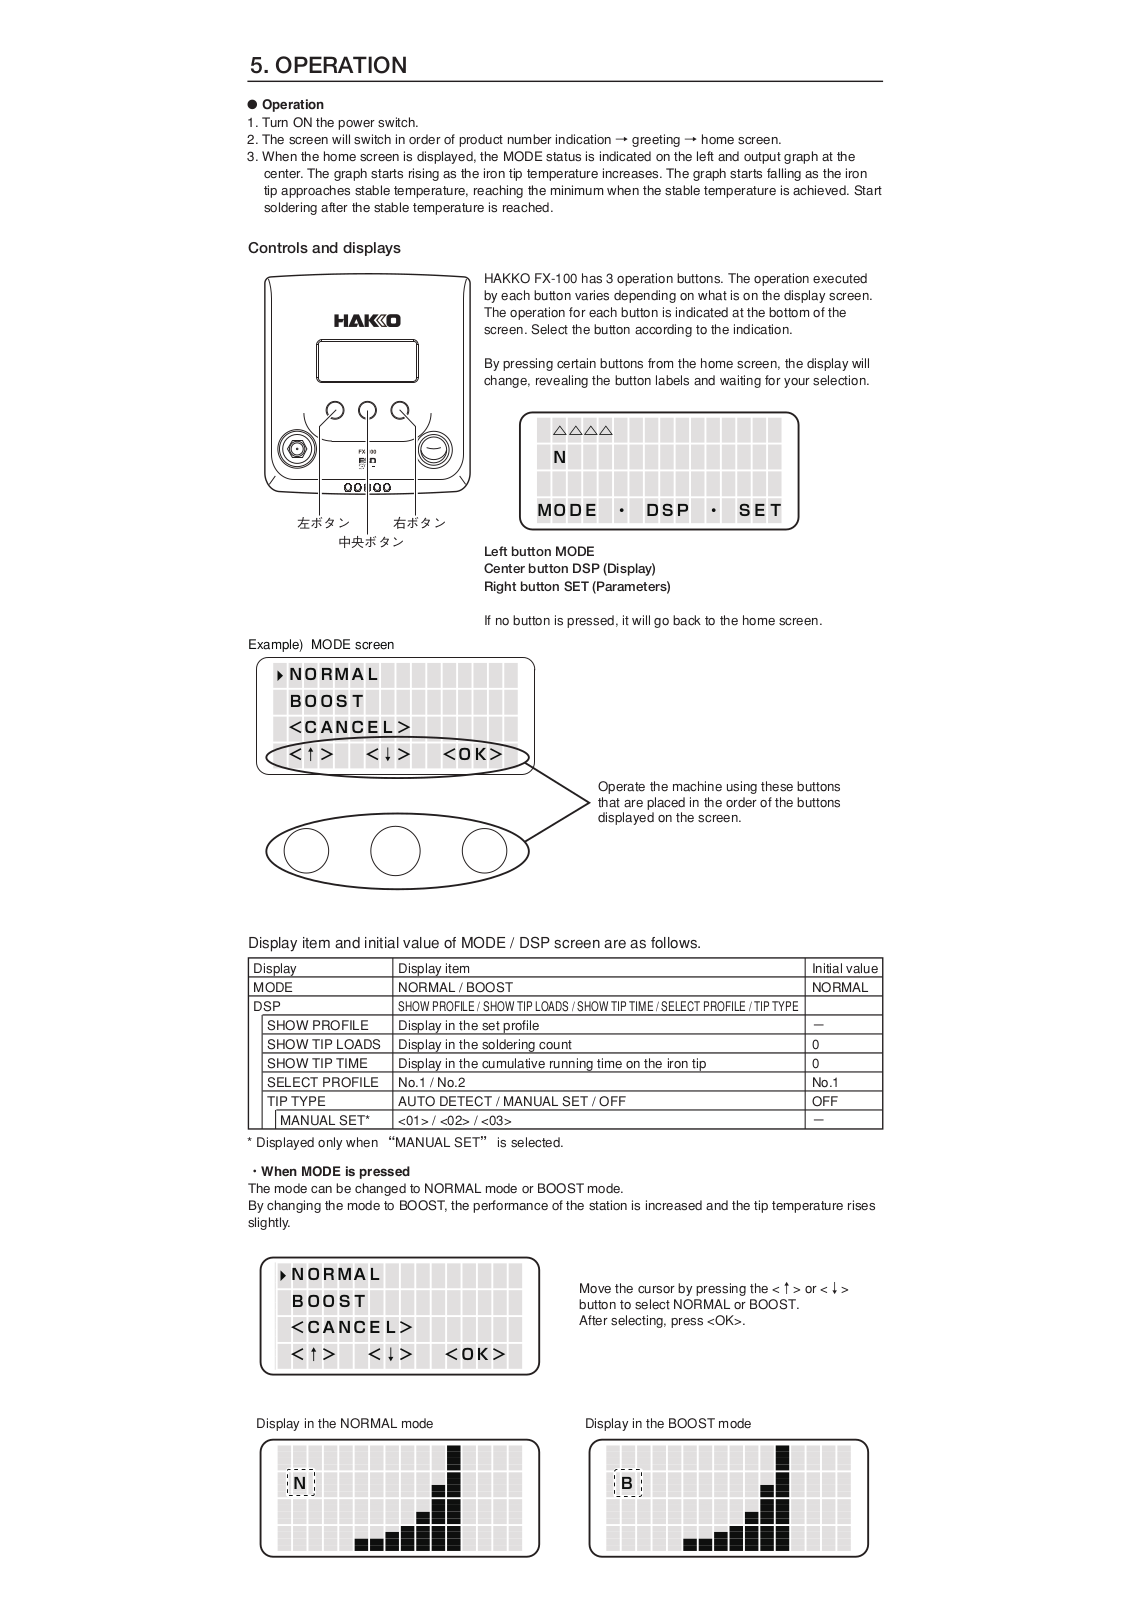
FX-100
Instruction Manual
4 pgs
1.61 Mb
0
User Manual
11 pgs
1.59 Mb
0
Table of contents
Loading...
Hakko FX-100 User Manual
...
Hakko User Manual
Download
Specifications and Main Features
Frequently Asked Questions
User Manual
Download
Page 1
Page 2
Page 3
Page 4
Page 5
Page 6
Page 7
Page 8
Page 9
Page 10
Page 11
Loading...
+
hidden pages
Unhide
You need points to download manuals.
1 point = 1 manual.
You can buy points or you can get point for every manual you upload.
Buy points
Upload your manuals
 Loading...