

Haier HNRQB05VS Owner's Manual
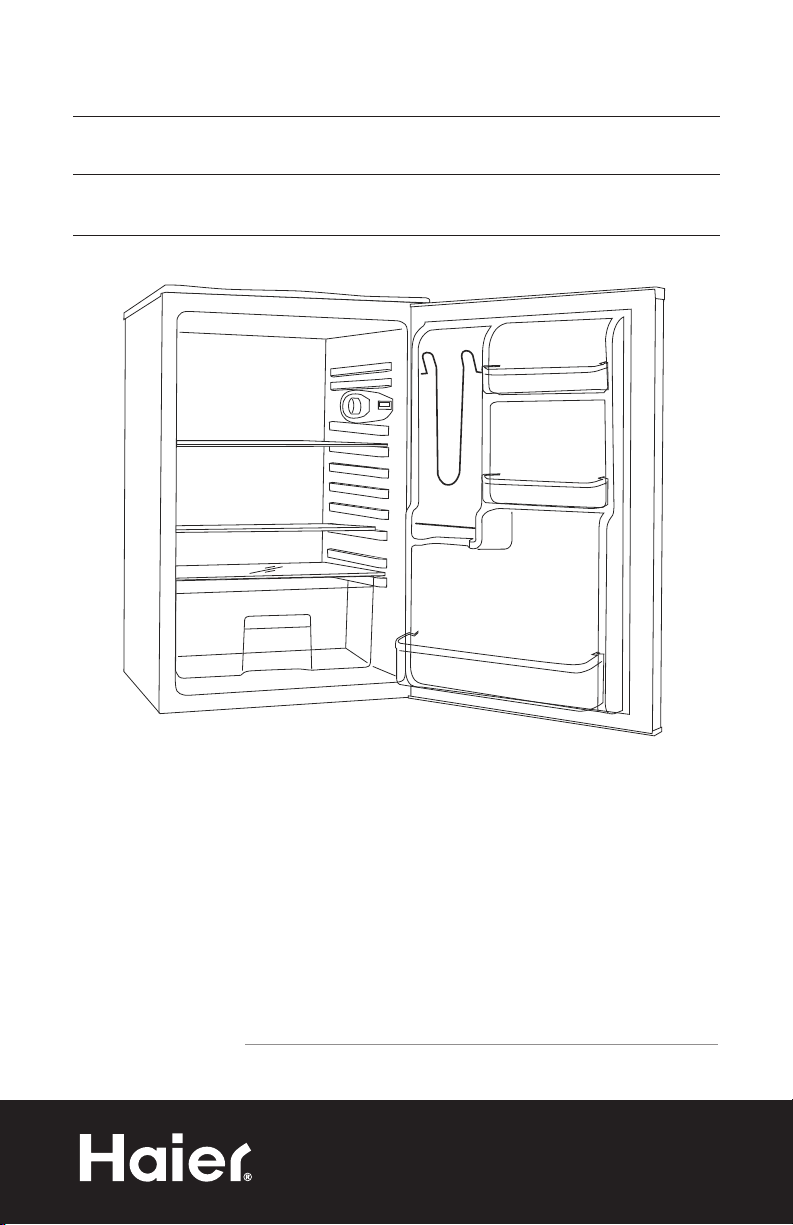
Compact Refrigerator
Réfrigerateur Compact
Refrigerador Compacto
User Manual
Guide de l’Utilisateur
Manual del Usuario Modelo
HNRQB05
Quality n Innovation n Style


English
SAFETY PRECAUTIONS
Read all of the instructions before using this appliance. When using
this appliance, always exercise basic safety precautions, including the
following:
NOTE: If the refrigerator has been placed in a horizontal or tilted position
for any period of time wait 24 hours before plugging the unit in.
1) Use this appliance only for its intended purpose as described in this use
and care guide.
2) This refrigerator must be properly installed in accordance with the
installation instructions before it is used. See grounding instructions in
the installation section.
3) Never unplug your refrigerator by pulling on the power cord. Always
grasp the plug firmly and pull straight out from the outlet.
4) Repair or replace immediately, all electric service cords that have
become frayed or otherwise damaged. Do not use a cord that shows
cracks or abrasion damage along its length, the plug or the connector
end.
5) Unplug your refrigerator before cleaning or before making any repairs.
Note: If for any reason this product requires service, we strongly
recommend that a certified technician performs the service.
6) Do not use any electrical device or any sharp instrument in defrosting
your refrigerator.
7) If your old refrigerator is not being used, we recommend that you
remove the doors and leave the shelves in place. This will reduce the
possibility of danger to children.
8) This refrigerator should not be recessed or built-in in an enclosed
cabinet. It is designed for freestanding installation only.
9) Do not operate your refrigerator in the presence of explosive fumes.
SAVE THESE INSTRUCTIONS
1

English
DANGER
Risk of child entrapment. Before you throw away your old
refrigerator or freezer, take off the doors. Leave the shelves
in place so that children may not easily climb inside.
PRODUCT REGISTRATION
Thank you for using our Haier
product. This easy-to-use manual
will guide you in getting the best
use of your refrigerator.
Remember to record the model and
serial number. They are on a label
in the rear of the refrigerator.
Staple your receipt to your manual. You will need it to obtain
warranty service.
Model number
Serial number
Date of purchase
2

English
TABLE OF CONTENTS
Safety Precautions ...................................................................1
Parts And Features ..................................................................4
Installing Your Refrigerator ....................................................5
Unpacking Your Refrigerator ..........................................................5
Leveling Your Refrigerator ..............................................................5
Proper Air Circulation ....................................................................5
Electrical Requirements ..................................................................5
Use of Extension Cord ...................................................................5
Installation Limitations ....................................................................6
Door Alignment ............................................................................6
Refrigerator Features And Use ...............................................6
General Features ..........................................................................8
Refrigerator Interior Shelves ............................................................8
Dispense-A-Can® ...........................................................................7
Gallon Door Bin ...........................................................................7
Food Storage Information ..............................................................8
Normal Operating Sounds .............................................................8
PAGE
Proper Refrigerator Care and Cleaning ................................9
Cleaning and Maintenance ............................................................9
Power Interruptions ..................................................................... 10
Vacation and Moving Care ......................................................... 10
Troubleshooting .................................................................... 11
Warranty Information .......................................................... 12
3
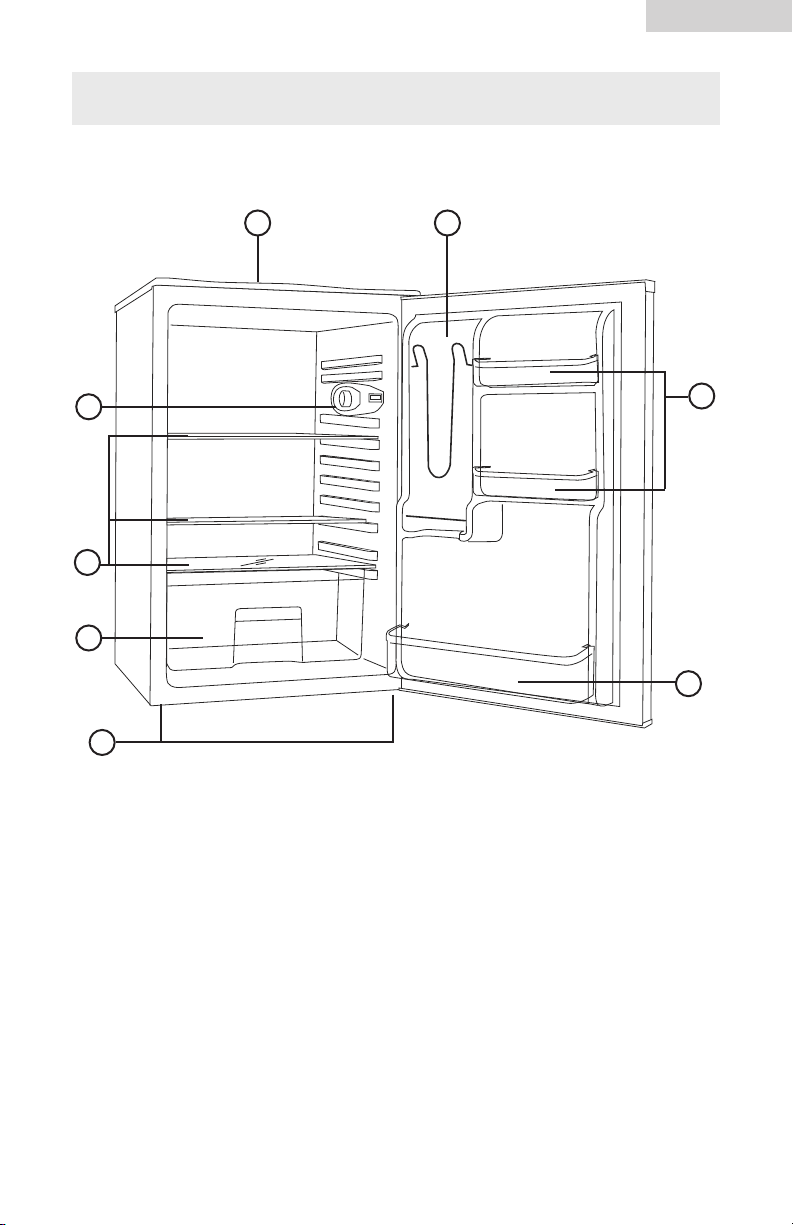
PARTS AND FEATURES
English
32
1
8
7
6
1. Adjustable Temperature Control
2. Worktop
3. Dispense-A-Can® Can Storage Bins
4 (2) Clear Door Storage Bins
5. Gallon Door Bin Accommodates Tall
Bottles
4
5
6. Adjustable Leveling Legs (Not
Shown)
7. Clear Crisper
8. Removable Glass Shelves
4

English
INSTALLING YOUR REFRIGERATOR
Unpacking Your Refrigerator
1. Remove all packaging material. This includes the foam base and all adhesive
tape holding the refrigerator accessories inside and outside.
2. Inspect and remove any remains of packing, tape or printed materials before
powering on the refrigerator.
Leveling Your Refrigerator
• Your refrigerator has two leveling legs which are located in the front bottom
corners of your refrigerator. After properly placing your refrigerator in its final
position, you can level your refrigerator.
• Leveling legs can be adjusted by turning them counter clockwise to raise
your refrigerator or by turning them clockwise to lower your refrigerator. The
refrigerator door will close easier when the leveling legs are extended.
Proper Air Circulation
• To ensure your refrigerator works at the maximum efficiency it was designed
for, you should install it in a location where there is proper air circulation,
plumbing and electrical connections.
• The following are recommended clearances around the refrigerator:
Sides……………3/4" (19mm)
Top....................2" (50mm)
Back..................2" (50mm)
Electrical Requirement
• Make sure there is a suitable power outlet (115 volts, 15 amps outlet) with
proper grounding to power the refrigerator.
• Avoid the use of three prong adapters or cutting off the third grounding prong
in order to accommodate a two prong outlet. This is a dangerous practice
since it provides no effective grounding for the refrigerator and may result in
shock hazard.
Use of Extension Cords
• Avoid the use of an extension cord because of potential safety hazards under
certain conditions. If it is necessary to use an extension cord, use only a 3-wire
extension cord that has a 3-blade grounding plug and a 3-slot outlet that will
accept the plug. The marked rating of the extension cord must be equal to or
greater than the electrical rating of the appliance.
5

English
Installation Limitations
• Do not install your refrigerator in any location not properly insulated or heated,
e.g. garage, etc. Your refrigerator was not designed to operate in temperature
settings below 55˚ Fahrenheit.
• Select a suitable location for the refrigerator on a hard even surface away
from direct sunlight or heat source, e.g. radiators, baseboard heaters, cooking
appliances, etc. Any floor unevenness should be corrected with the leveling legs
located on the front bottom corners of the refrigerator.
Door Alignment
1. Remove the (3) screws from the back, top securing the worktop. Remove the
worktop.
2. Loosen the top hinge screws using a phillips head screwdriver.
3. Adjust the door or put a spacer in between and then tighten the screws.
4. Replace the worktop and tighten the screw. Do not over tighten.
REFRIGERATOR FEATURES AND USE
General Features
Adjustable temperature dial:
Your refrigerator will automatically maintain the temperature level you select.
The temperature control dial has 7 settings plus "0". 1 is the warmest. 7 is the
coldest. At first, set the dial to 4 and allow 24 hours to pass before adjusting the
temperature to your needs.
Note: If the refrigerator has been placed in a horizontal or tilted position for any
period of time wait 24 hours before plugging the unit in.
Refrigerator Interior Shelves
To remove or replace a full-width slide-out shelf: (see fig. # 1)
1. Gently tilt the shelf up and slide forward until the shelf has been
completely removed.
2. To replace the shelf, gently slide the shelf back.
fig. # 1
6
English
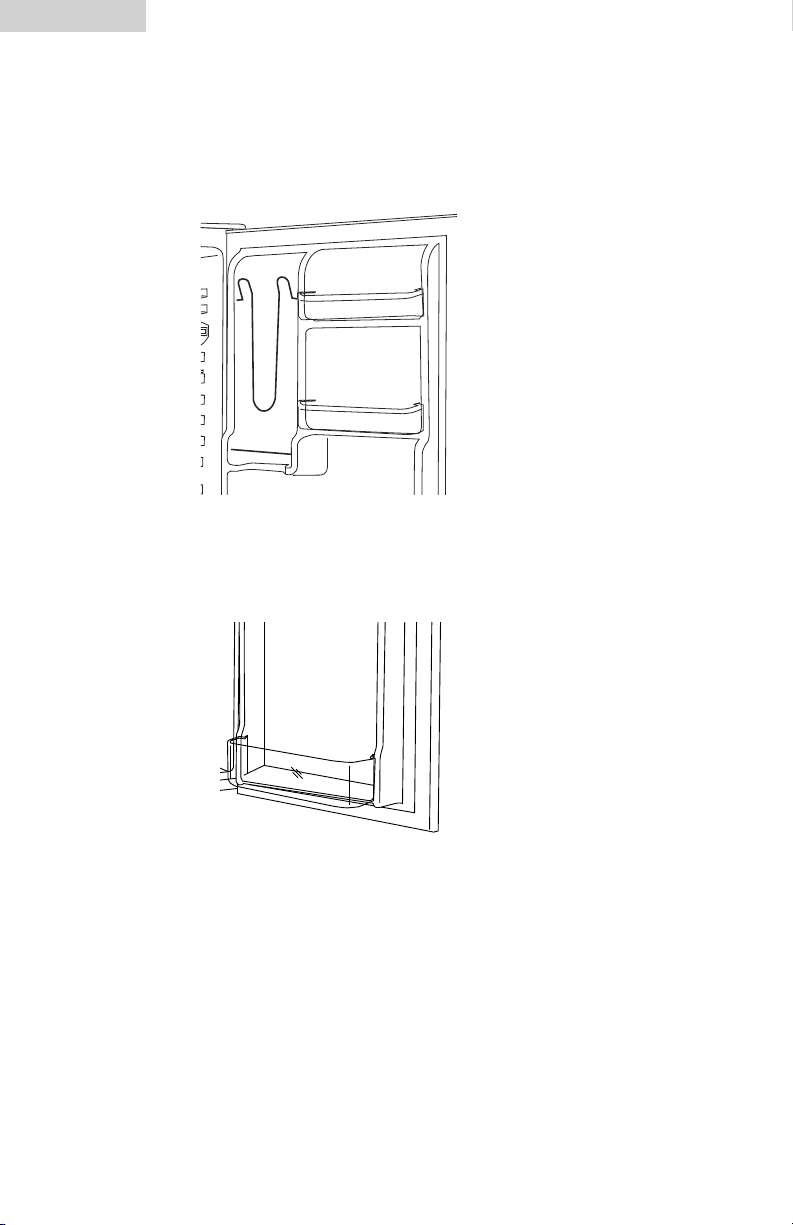
Using the Dispense-A-Can
®
• Your refrigerator is equipped with the convenient “Dispense-A-Can®”
compartment. Each compartment will hold up to four cans in each compartment.
Simply load the cans from the top. To dispense a can, simply draw one out
from the bottom. It is that easy.
fig. # 2
Gallon Door Bin
• Your refrigerator is featured with a gallon door bin that can also accommodate
large and tall bottles.
fig. # 3
7

English
Food Storage Information
Fresh Food
• When storing fresh food that is not prepackaged, be sure to wrap or store food
in airtight and moisture proof material unless otherwise noted. This will ensure
proper shelf life and prevent the transfer of odors and tastes.
• Wipe containers before storing to avoid needless spills.
• Eggs should be stored in an upright position in their original carton to
maximize shelf life.
• Fruit should be washed and dried, then stored in sealed plastic bags before
storing in the refrigerator.
• Vegetables with skins should be stored in plastic bags or containers.
• Leafy vegetables should be washed and drained and then stored in plastic
bags or containers.
• Hot food should be allowed to cool before storing in the refrigeration. This will
prevent unnecessary energy use.
• Fresh seafood should be used the same day as purchased.
• When storing meats in the fresh food section, keep in the original
packaging or rewrap as necessary. Follow the suggestions below for safe
storage:
• Chicken 1-2 Days
• Ground Beef 1-2 Days
• Cold Cuts 3-5 Days
• Steaks/Roasts 3-5 Days
• Smoked/Cured Meats 7-10 Days
• All others 1-2 Days
Normal Operating Sounds You May Hear
• Boiling water, gurgling sounds or slight vibrations that are the result of the
refrigerant circulating through the cooling coils.
• The thermostat control will click when it cycles on and off.
8

English
PROPER REFRIGERATOR CARE AND CLEANING
Cleaning and Maintenance
Warning: To avoid electric shock, always unplug your
refrigerator before cleaning. Ignoring this warning may result
in death or injury.
Caution: Before using cleaning products, always read and follow
manufacturer’s instructions and warnings to avoid personal
injury or product damage.
General: Prepare a cleaning solution of 3-4 tablespoons of baking soda
mixed with warm water. Use sponge or soft cloth, dampened
with the cleaning solution, to wipe down your refrigerator.
• Rinse with clean warm water and dry with a soft cloth.
• Do not use harsh chemicals, abrasives, ammonia, chlorine
bleach, concentrated detergents, solvents or metal scouring
pads. Some of these chemicals may dissolve, damage and/
or discolor your refrigerator.
Door Gaskets: Clean door gaskets every three months according to general
instructions. Gaskets must be kept clean and pliable to assure
a proper seal.
• Petroleum jelly applied lightly on the hinge side of gaskets
will keep the gasket pliable and ensure a good seal.
9

English
Power Interruptions
• Occasionally there may be power interruptions due to thunderstorms or other
causes. Remove the power cord from AC outlet when a power outage occurs.
When power has been restored, replug power cord to AC outlet. If outage
is for a prolonged period, inspect and discard spoiled or thawed food in
refrigerator. Clean refrigerator before reusing.
Vacation and Moving Care
• For long vacations or absences, empty food from refrigerator, move the
temperature dial to the "0" position and clean the refrigerator and door gaskets
according to "General Cleaning" section. Prop doors open, so air can circulate
inside.When moving, always move the refrigerator vertically. Do not move with
the unit lying down. Possible damage to the sealed system could occur.
Energy Saving Tips
• The refrigerater should be located in the coolest area of the room, away from
heat-producing appliances or heating ducts, and out of direct sunlight.
• Let hot foods cool to room temperature before placing in the refrigerator.
Overloading the refrigerator forces the compressor to run longer and thus
increases energy consumption. Foods that refrigerate too slowly may lose
quality or spoil.
• Be sure to wrap foods properly, and wipe containers dry before placing in the
refrigerator.
• The wire shelves should not be lined with aluminum foil, wax paper, or paper
towels. Liners interfere with cold air circulation, making the refrigerator less
efficient.
• Organize food to reduce door openings and extended searches. Remove as
many items as needed at one time, and close the door as soon as possible.
10
 Loading...