

Page 1

RADIO RECORDER WITH CD
RR 740 CD / RR 770 CD
1
Page 2

2
3 Sicherheit und Pflege 10 CD-Betrieb
4 Auf einen Blick 14 Cassetten-Betrieb
7 Stromversorgung 16 Informationen
8 Lautstärke/Klang 17 Fehlersuche
8 Radio-Betrieb 154 Service
18 Care and safety 26 CD mode
19 Overview 30 Tape mode
22 Power supply 32 Information
24 Volume/tone 33 Troubleshooting
24 Radio mode 154 Service
34 Sécurité et entretien 41 Fonction CD
35 Vue d’ensemble 45 Fonction cassette
38 Alimentation en courant 47 Informations
39 Volume/son 48 Recherche des erreurs
39 Fonction radio 154 Service après-vente
49 Sicurezza e cura 56 Funzionamento CD
50 In breve 60
Funzionamento Cassetta
53 Alimentazione elettrica 62 Informazioni
54 Volume/suono 63 Ricerca degli errori
54 Funzionamento Radio 154 Service
64 Segurança e conservação 71 Função CD
65 Vista geral 75 Função cassete
68 Alimentação de corrente 77 Informações
69 Volume/som 78 Identificação de erros
69 Função rádio 154 Assistência a clientes
79 Seguridad y cuidado 86 Modo CD
80 Vista general 90 Modo casete
83 Alimentación de corriente 92 Información general
84 Volumen/sonido 93 Búsqueda de fallos
84 Modo radio 154 Servicio
94 Veiligheid en onderhoud 101 CD-mode
95 In een oogopslag 105 Cassette-mode
98 Stroomtoevoer 107 Informatie
99 Volume/geluid 108 Foutopsporing
99 Radiofunctie 154 Service
109 Sikkerhed og vedligeholdelse 116 CD-funktion
110 Kort oversigt 120 Kassettebåndfunktion
113 Strømforsyning 122 Informationer
114 Lydstyrke/klang 123 Fejlfinding
114 Radiofunktion 154 Service
124 Säkerhet och skötsel 131 CD-användning
125 En överblick 135 Kassettanvändning
128 Strömförsörjning 137 Information
129 Volym/Ljud 138 Felsökning
129 Radioanvändning 154 Service
139 Turvallisuus ja hoito 146 CD-käyttö
140 Yleiskatsaus 150 Kasettikäyttö
143 Virransyöttö 152 Tietoja
144 Äänenvoimakkuus/-sävy 153 Vianetsintä
144 Radiokäyttö 154 Service
INHALT
_____________________________________________________
DEUTSCH
ENGLISH
FRANÇAIS
ITALIANO
PORTUGUÊS
ESPAÑOL
NEDERLANDS
DANSK
SVENSKA
SUOMI
Page 3

Page 4
18
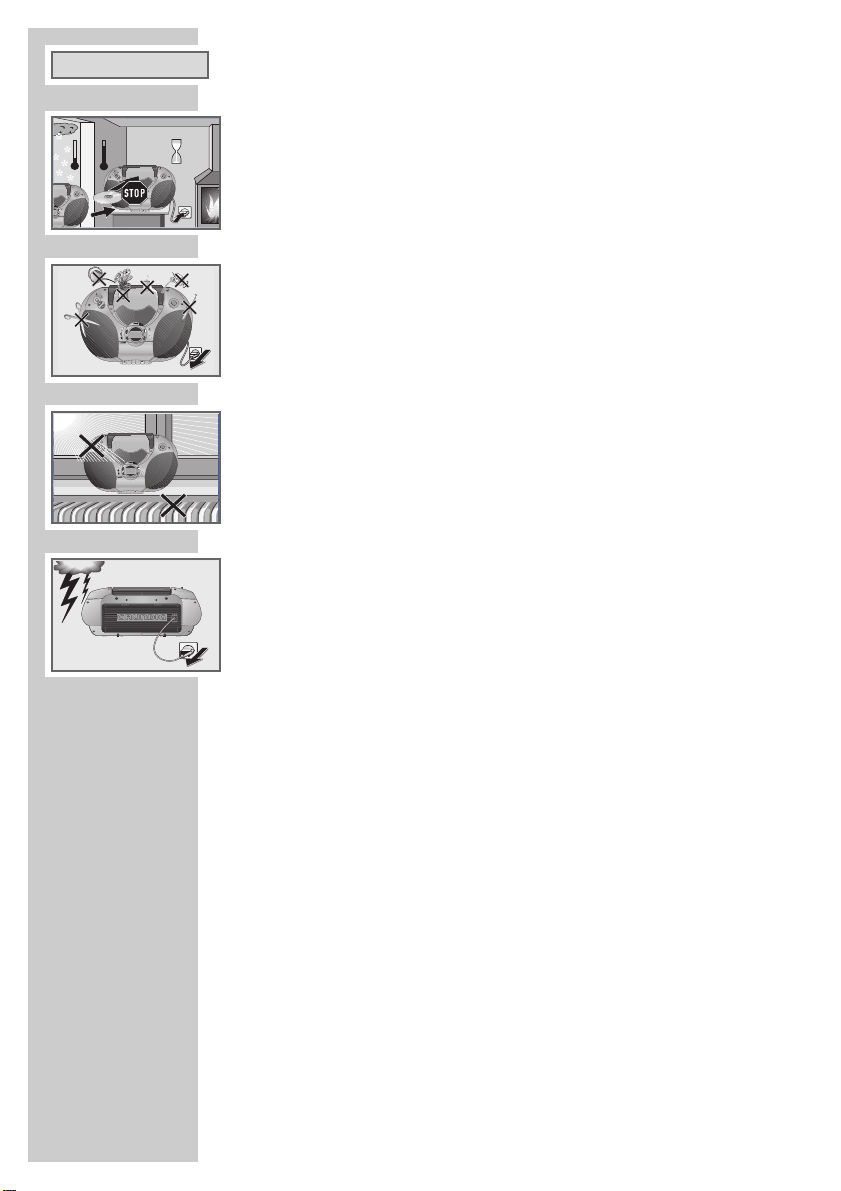
To ensure that this device provides you with long-term satisfaction and
enjoyment, please observe the following instructions:
This device is designed for the recording and playback of audio signals.
Any other use is expressly prohibited.
Protect the device, the CDs and cassettes from rain, moisture, sand and heat.
Do not leave it next to heaters or inside parked cars in the sun.
Do not insert any foreign bodies in the CD or tape compartments.
Bringing the device in from the cold can cause condensation on the CD lens,
which prevents it from playing. Allow the device to adapt to room
conditions.
The CD and tape units contain self-lubricating bearings, which must not be
oiled or greased.
Never open the device casing under any circumstances. The manufacturer
accepts no liability for damage resulting from improper handling.
Thunderstorms present a danger to all electrical devices. Even if the device is
switched off, it can be damaged by a lightning strike to the mains. Always
remove the mains plug during an electrical storm.
Do not use any cleaning agent, as this may damage the casing. Clean the
device with a clean, moist leather cloth.
Please note when deciding where to put the device that furniture surfaces are
covered by various types of lacquer and plastic, most of which contain
chemical additives. These may cause corrosion to the feet of the device, thus
resulting in stains on the surface of the furniture which can be difficult or
impossible to remove.
CARE AND SAFETY
______________________________
ENGLISH
°C
2h
°C
8
83344
.
.
!
!
+
3
3
e
DIGITAL SOUND CONTROL
CLOSE
STANDBY
ANTENNA
D
I
G
I
T
A
L
S
O
U
N
D
C
O
N
T
R
O
L
S
U
R
R
U
O
N
D
S
O
U
N
D
V
O
LU
M
E
CD
TAPE
RADIO
RR 770 CD
RADIO CASSETTE RECORDER WITH CD
1
BAND
REPEAT
MEM
RANDOM
TAPE DIRECTION
•
U
P
D
O
W
N
•
I
N
T
R
O
P
L
A
Y
/
P
A
U
S
E
S
T
O
P
R
-
S
K
I
P
F
-
S
K
I
P
PROG.
D
.S
.C
D
.S
.C
e
CLOSE
STANDBY
ANTENNA
D
I
G
I
T
A
L
S
O
U
N
D
C
O
N
T
R
O
L
0 CD
P
L
A
Y
/
P
A
U
S
E
S
T
O
P
PROG.
D
.S
.C
D
.S
.C
MEM
REPEAT
MEM
RANDOM
TAPE DIRECTION
REPEAT
RANDOM
TAPE DIRECTION
BAND
BAND
RADIO CASSETTE RECORDER WITH CD
P
U
•
3
3
•
N
W
O
D
I
N
T
DIGITAL SOUND CONTROL
RR 770 CD
RADIO CASSETTE RECORDER WITH CD
1
P
U
•
P
I
K
3
S
-
F
P
I
3
K
S
•
-
N
R
W
O
D
I
N
T
R
O
DIGITAL SOUND CONTROL
83344
8
RR 770 CD
1
+
P
I
K
S
-
F
P
I
K
S
-
R
R
O
83344
8
ANTENNA
T
I
A
I
G
D
L
S
O
U
D
D
.S
.S
.C
.C
+
S
T
O
STANDBY
P
E
S
U
A
PROG.
P
/
e
Y
A
L
P
CLOSE
!
!
.
.
ANTENNA
T
I
A
I
G
L
D
S
O
U
N
D
C
O
N
T
R
O
L
D.S.C
D.S.C
S
T
O
STANDBY
P
E
S
U
A
PROG.
P
/
e
Y
A
L
P
CLOSE
!
!
.
.
CD
TAPE
RADIO
D
N
U
O
S
D
N
O
U
R
R
U
S
VOLUME
! SERVICE !! SERVICE !! SERVICE !
CD
TAPE
RADIO
D
N
U
O
S
D
N
O
U
R
R
U
S
E
M
U
L
O
V
N
D
C
O
N
T
R
O
L
Page 5
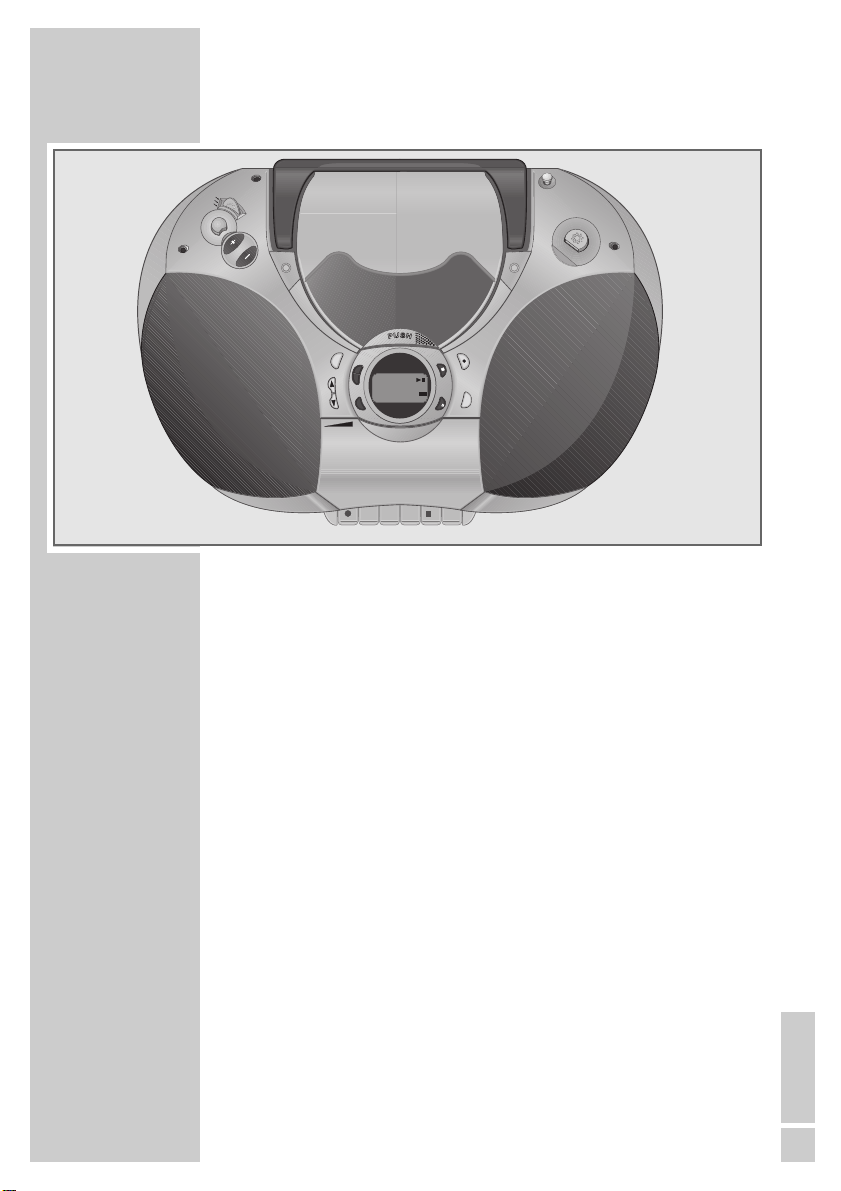
ENGLISH
19
OVERVIEW
____________________________________________
Controls
General
STANDBY Switches the device on and off. The indicator in the
STANDBY button lights up when the device is
switched off.
UU
Headphone jack, for connecting a headphone set
with a jack plug (ø 3.5 mm) on the left side of the
device.
CD TAPE Function switch for selecting
RADIO »CD«, »TAPE« or »RADIO« mode.
+ VOLUME – Adjusts the volume.
SURROUND Switches the surround sound effect on and off.
SOUND
D.S.C Switches on DIGITAL SOUND CONTROL and selects
one of the CLASSIC, ROCK or POP sound settings.
Radio unit
ANTENNA Telescopic antenna for FM reception.
BAND Band selector »FM«, »MW«, »LW«.
UP
ee/DOWNrr For tuning to radio stations.
MEM
qw For selecting preset stations.
PROG. For storing radio stations in the memory.
FM MODE For switching to MONO in case of poor reception
(on the back of the device).
-88:8.8
88
FM
MW
LW
5
MHz
kHz
dB
!
VOLUME
CHTRACK MEMORY
INTRO REPEAT RANDOM
CLASSIC ROCK POP TAPE
Illustration shows
the RR 770 CD
CD
TAPE
RADIO
D
N
U
O
S
D
N
O
U
R
R
U
S
VOLUME
RR 770 CD
RADIO CASSETTE RECORDER WITH CD
1
ANTENNA
I
T
G
A
I
D
L
S
O
U
N
D
C
O
N
T
R
O
L
D.S.C
D.S.C
+
P
BAND
U
•
REPEAT
MEM
RANDOM
TAPE DIRECTION
3
•
N
W
O
D
P
I
K
3
S
-
F
P
I
K
S
-
R
I
N
T
R
O
DIGITAL SOUND CONTROL
83344
8
S
T
O
STANDBY
P
E
S
U
A
PROG.
P
/
e
Y
A
L
P
CLOSE
!
!
.
.
Page 6
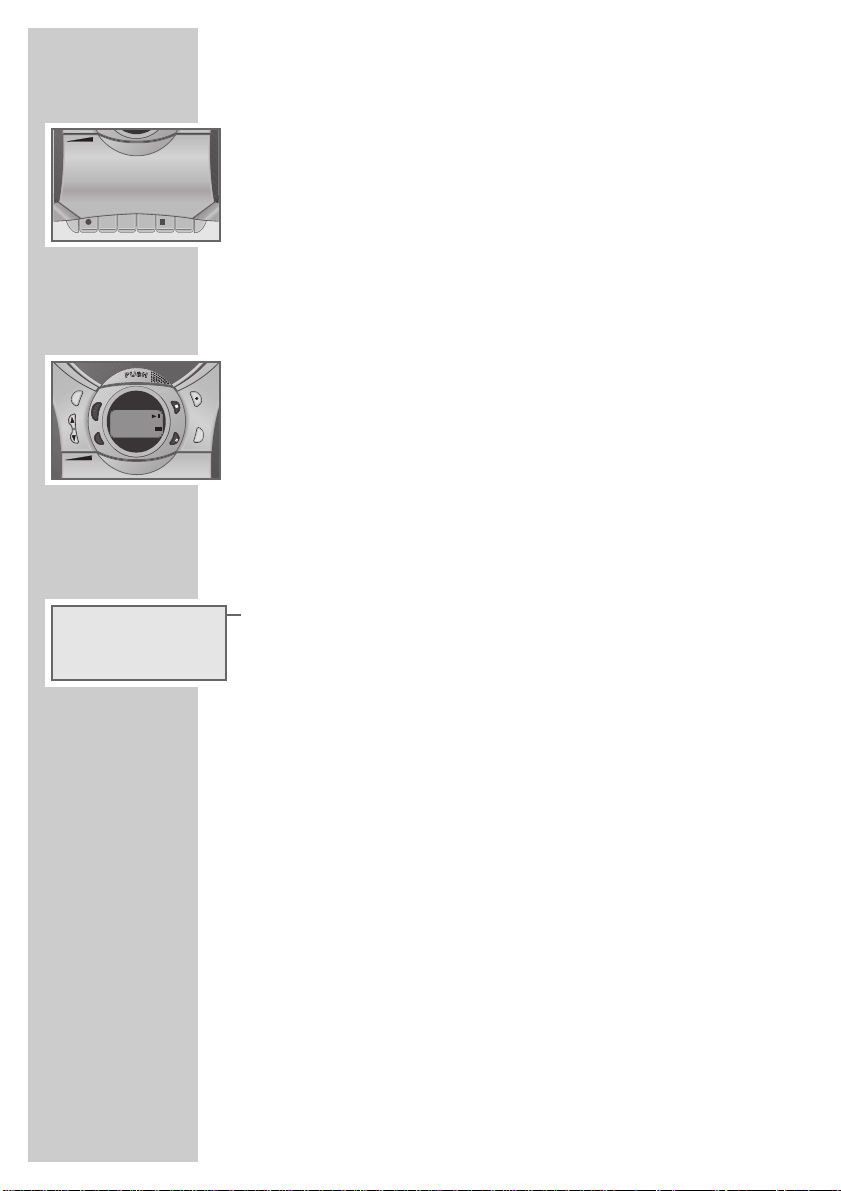
20
Tape unit
CLOSE Closes the tape compartment.
● Starts recording.
e
Starts playback.
rr Rewinds the tape to the beginning.
ee Fast forwards the tape to the end.
■/
.
Opens the cassette compartment and ends
playback/recording of the cassette.
II Pauses recording and playback.
CD unit
PUSH Opens and closes the CD compartment.
F-SKIP
ss
Press briefly to select the track.
R-SKIP
§
Hold down to search for a particular passage.
REPEAT
w Repeats one or all tracks.
RANDOM
q Selects tracks on the CD in random order.
INTRO Plays the introduction of each track.
PLAY/PAUSE
e
II Starts the playback of a CD or pauses CD playback.
STOP ■ Ends playback of the CD.
PROG. For selecting CD Program mode.
Display
CLASSIC ROCK Displays the selected digital sound effect.
POP
TAPE Cassette deck selected.
e
CD playback.
II CD pause.
INTRO INTRO function.
REPEAT Lights up when repeating all tracks, flashes when
repeating the current track.
RANDOM RANDOM function.
CH Displays the channel position number.
TRACK Displays the current CD track number.
MEMORY Programming preset station memory.
TRACK MEMORY Lights up during programming and playback of the
track memory.
! Receiving VHF stereo station.
OVERVIEW
____________________________________________
CLASSIC ROCK POP TAPE
INTRO REPEAT RANDOM
t$
CHTRACK MEMORY ! VOLUME
-888888 : .
■
dB
MHz
kHz
5
FM
MW
LW
TAPE DIRECTION
-88:8.8
88
FM
MW
LW
5
MHz
kHz
dB
!
VOLUME
CHTRACK MEMORY
INTRO REPEAT RANDOM
CLASSIC ROCK POP TAPE
-88:8.8
88
FM
MW
LW
5
MHz
kHz
dB
!
VOLUME
CHTRACK MEMORY
INTRO REPEAT RANDOM
CLASSIC ROCK POP TAPE
+
-88:8.8
88
FM
MW
LW
5
MHz
kHz
dB
!
VOLUME
CHTRACK MEMORY
INTRO REPEAT RANDOM
CLASSIC ROCK POP TAPE
REPEAT
MEM
RANDOM
TAPE DIRECTION
BAND
DIGITAL SOUND CONTROL
83344
8
P
U
•
P
I
K
3
S
-
F
P
3
I
K
S
•
-
N
R
W
O
D
I
N
T
R
O
CLOSE
!
!
.
.
S
T
O
STANDBY
P
E
S
U
A
P
/
e
Y
A
L
P
PROG.
CLOSE
Page 7

ENGLISH
21
VOLUME Volume setting (RR 770 CD only).
FM/MW/LW Displays the selected frequency band.
8888
Track number (CD) or preset station (radio).
8888::88..88
55
Playing time (CD) or station frequency (radio).
MHz/kHz The frequency of the current station in MHz (FM) or
kHz (MW/LW).
Remote control (RR 770 CD only)
PLAY/PAUSE eII Starts the playback of a CD and pauses the CD
when running.
STOP ■ Ends playback of the CD.
F.F./UP
ss
Press briefly to select the track.
REV./DOWN
§
Hold down to search for a particular passage.
l
VOLUME Adjusts the volume.
MEM
qw Select radio stations.
RANDOM
q Plays back the tracks on the CD in random order.
REPEAT
w Repeats one or all tracks (CD).
PROGRAM Stores radio stations; CD: programs track sequence.
DSC Digital Sound Control.
STANDBY
88
Switches the device on and off.
Note:
In battery mode the »STANDBY
88
« button can only be used to switch
off the device.
Inserting the batteries in the remote control
1 Open the battery compartment by pushing back and removing the lid.
2 When inserting the batteries (micro type, for example, AAA LR 03,
2 x1.5 V), observe the polarity marked on the base of the battery
compartment.
Note:
If the device no longer reacts properly to remote control commands, the
batteries may be flat. Always remove flat batteries. No liability is accepted for damage resulting from leaking batteries.
Environmental note:
Batteries, including those which are heavy metal-free, may not be
disposed of with household waste. Please dispose of used batteries in
and environmentally sound way, for example at public collection points.
Find out about the legal regulations which apply in your area.
OVERVIEW
____________________________________________
STOP
PLAYPAUSE PAUSE
e
F.F./UP
O
REV./DOWN
1
STANDBY
6
S
C
D
M
e
E
M
V
E
O
M
L
U
O
R
e
M
O
D
R
N
A
M
A
R
G
O
R
P
T
A
E
P
E
Page 8

22
Mains operation
Note:
Check if the mains voltage on the type plate (on the bottom of the
device) corresponds to your local mains supply.
The only way to disconnect the device from the mains supply is to pull
out the plug.
1 Plug the mains cable supplied into the »AC
~« socket on the device.
2 Insert the mains cable plug into the mains socket.
Battery operation
1 Unplug the mains cable from the device and open the battery
compartment by pressing the snap-catches and removing the lid.
2 Insert eight batteries (mono-cell type, R20, UM1 or D), observing the
polarity indicated on the bottom of the battery compartment.
Memory back-up batteries
In order to preserve saved settings while the device is switched off, two
additional back-up batteries must be inserted. Insert the batteries
(Alkaline LR 6, AA) into the battery compartment. This batteries must
always be inserted, regardless of the power supply (network or battery
operation).
Note:
Remove the batteries when they are flat or when you know that the
device will not be used for a long period of time. No liability is accepted
for damage resulting from leaking batteries. The batteries are switched
off during mains operation.
Environmental note:
Batteries, including those which are heavy metal-free, may not be
disposed of with household waste. Please dispose of used batteries in
and environmentally sound way, for example at public collection points.
Find out about the legal regulations which apply in your area.
POWER SUPPLY
___________________________________
FM MODE
MONO
STEREO
Page 9

ENGLISH
23
Important notes for users in the U.K.
Mains plug
This apparatus is fitted with an approved moulded 13 Amp plug. To change
a fuse in this type of plug proceed as follows:
1 Remove fuse cover and fuse.
2 Fix new fuse which should be a BS1362 5 Amp, A.S.T.A. or BSI
approved type.
3 Refit the fuse cover.
If the fitted plug is not suitable for your socket outlets, it should be cut off and
an appropriate plug fitted in its place.
If the mains plug contains a fuse, this should have a value of 5 Amp. If a
plug without a fuse is used, the fuse at the distribution board should not be
greater than 5 Amp.
Note:
The severed plug must be disposed to avoid a possible shock hazard
should it be inserted into a 13 Amp socket elsewhere.
How to connect plug
The wires in the mains lead are coloured with the following code: blue =
neutral (N), brown = live (L).
As these colours may not correspond with the colour markings identifying
the terminals in your plug, proceed as follows:
1 Connect the blue wire to the terminal marked N or coloured black.
2 Connect the brown wire to the terminal marked L or coloured red.
3 Do not connect either wire to the earth terminal in the plug, marked E
(or e) or coloured green (or green and yellow).
Before replacing the plug cover, make certain that the cord grip is clamped
over the sheath oft the lead – not simply over the two wires.
POWER SUPPLY
______________________________________
Page 10

24
Digital Sound Control
1 Press »DSC« several times to select the desired sound effect.
– Display: CLASSIC, ROCK or POP.
2 To quit this function press »DSC«until the display disappears.
Surround Sound
1 Select this function by pressing »SURROUND SOUND«.
– This enables you to improve the spatial sound effect for stereo per-
formances.
Adjusting the volume
1
Adjust the volume
using the »– VOLUME +« buttons.
– Display: e.g. VOLUME 40 (RR 770 CD only).
or
Using the »VOL« control (RR 740 CD).
Listening with headphones
1
Connect the headphones to the UUheadphone jack (ø 3.5 mm).
– This automatically switches off the loudspeakers.
Note:
Prolonged listening at loud volumes on headphones can damage your
hearing.
VOLUME/TONE
____________________________________
ROCK
24 I30 I :
Antennas
1
For FM (VHF) stations extend the telescopic antenna and tilt and turn it to
achieve the best reception
.
Note:
If the FM signal is too strong, it is advisable to push in the
telescopic
antenna.
In case of poor reception:
If your FM stereo reception is impaired by interference due to insufficient
signal strength, this can sometimes be rectified by setting the »FM
MODE« switch to »MONO«. The FM stereo symbol in the display
goes out and the FM station is played in MONO.
2
The radio has a built-in rod antenna for MW/LW reception
. Turn the de-
vice to point the antenna.
RADIO MODE
_______________________________________
TAPE
RADIO
N
U
O
S
D
N
O
U
R
R
U
S
TAPE
RADIO
D
N
U
O
S
D
N
O
U
R
R
U
S
CD
D
VOLUME
CD
VOL
ANTENNA
I
T
G
A
I
D
L
S
O
U
N
D
C
O
N
T
R
O
D.S.C
D.S.C
L
FM MODE
MONO
STEREO
Page 11

ENGLISH
25
Radio reception
1 Press »STANDBY« to switch on the device.
– The indicator in the »STANDBY« button goes out.
2 Set the » CD TAPE RADIO« switch to »RADIO«.
– The display shows the set frequency and waveband.
3 Select frequency band (FM, MW or LW) by pressing the»BAND«
button.
4 Press » UPss« and »§DOWN« to tune into the desired station.
– The display might show »98.1
5«; and »!« for an FM stereo station.
Press the buttons briefly for manual/incremental tuning, or hold one of
them down to start an automatic search.
5 To switch off the device, press »STANDBY«.
– The indicator in the »STANDBY« button lights up.
Storing radio stations
You can store up to 40 stations (20 x FM, 10 x MW and 10 x LW) as
presets.
1 Tune into the station by pressing »UPss« or »§DOWN« .
– Display: e.g. »00 101.4
5«.
2 Press » PROG.«.
– Display: »00 101.4
5« and MEMORY flashes.
3 Press » MEM
q« or »MEM w« to select the required station number.
– Display: e.g. »03 101.45«.
Note:
Select the number which you want to assign to the station within five
seconds, otherwise the function will be automatically ended without
storing the station.
With the RR 770 CD stations can also be selected and stored using the
remote control. To do this, use the»F.F./UP ss«, »REV./DOWN §«
and »MEM
qw« buttons.
4 Press »PROG.« to store the station to preset number 03.
– Display: e.g. »03 101.4
5«.
RADIO MODE
_________________________________________
!
981.
MHz
5
FM
CH ((( MEMORY ))) !
I0 I.400
MHz
5
FM
CH !
I0 I.403
MHz
5
FM
CH !
I0 I.403
MHz
5
FM
Page 12

26
General instructions for laser devices
You will find a symbol similar to the one shown here on the bottom of
the device.
CLASS 1 LASER PRODUCT means that the laser is designed in such a
way as to ensure that the maximum permissible emission value cannot
be exceeded under any circumstances.
If operation devices or methods other than those specified here are employed, this may lead to dangerous exposure to emissions.
Invisible laser radiation is emitted if the CD compartment is opened and
the safety locking mechanism is shorted. Do not expose yourself to this
radiation.
Only use music CDs which bear the logo shown on the left.
If the device is unable to scan CDs perfectly, use a standard commercial
cleaning CD to clean the laser optics. Other cleaning methods may
damage the laser optics.
Always keep the CD compartment closed to prevent dust from collecting
on the laser optics.
Do not attach adhesive labels to CDs.
Keep the surfaces of CDs clean.
Preparation
1 Press »STANDBY« to switch on the device.
– The indicator in the »STANDBY« button goes out.
2 Set the » CD TAPE RADIO« switch to »CD«.
– Display: »
no disC
«.
3 Press the »PUSH« button on the top of the device to open the CD
compartment.
4 Insert a CD in the compartment with its label facing upwards.
5 Close the lid of the CD compartment.
The CD player starts up and scans the index of the CD.
– The total number of tracks and the overall playing time appear in the
display.
CD MODE
______________________________________________
TRACK
dIsCno
TRACK
4358I3 :
LASER PRODUCT
CLASS 1
RADIO
U
O
S
D
N
O
U
R
R
U
CD
TAPE
D
N
S
VOLUME
Page 13

ENGLISH
27
CD playback
Note:
Never open the lid of the CD compartment when the CD player is
running.
1 Press » PLAY/PAUSE
e
II« to start playback.
– Display: e.g. »01 03:47«.
– Playback stops automatically at the end of the CD.
2 Press » PLAY/PAUSE
e
II« to interrupt playback.
– Display: » II«.
– Press »PLAY/PAUSE eII « again to resume playback.
3 End playback by pressing » STOP
■«.
Selecting a different track
1 During playback, keep pressing »ssF-SKIP« or »R-SKIP§« until
the number of the desired track appears in the display.
– Playback of the selected track starts automatically.
Repeating the current track
1 During playback, press »wREPEAT« twice.
– Display: »REPEAT« flashes and the track is repeated.
2 To end this function, press »
w REPEAT« once.
Repeating the whole CD
1 During playback, press »wREPEAT« once.
– Display: »REPEAT«, and the CD is repeated from the beginning.
2 To end this function, press »
w REPEAT« twice.
Note:
With the RR 770 CD, the current track and the whole CD can also be
repeated using the remote control. To do this, use the »
w REPEAT«
button.
Searching for a passage within a track
1 During playback, press »F-SKIPss« or »R-SKIP§« and hold it
down until you find the desired passage.
When you let go of the »F-SKIP ss« or »R-SKIP §« button, playback will begin at that point.
Note:
During the search the volume is reduced.
CD MODE
_____________________________________________
t
TRACK
03470 I :
$
TRACK
02 I306 :
TRACK
4358I3 :
((( REPEAT )))
TRACK
024305 :
-88:8.8
88
FM
MW
LW
5
MHz
kHz
dB
!
VOLUME
CHTRACK MEMORY
INTRO REPEAT RANDOM
CLASSIC ROCK POP TAPE
-88:8.8
88
FM
MW
LW
5
MHz
kHz
dB
!
VOLUME
CHTRACK MEMORY
INTRO REPEAT RANDOM
CLASSIC ROCK POP TAPE
-88:8.8
88
FM
MW
LW
5
MHz
kHz
dB
!
VOLUME
CHTRACK MEMORY
INTRO REPEAT RANDOM
CLASSIC ROCK POP TAPE
REPEAT
TRACK
040503 :
BAND
REPEAT
EM
RANDOM
TAPE DIRECTION
P
U
•
P
I
K
3
S
-
F
P
3
I
K
S
•
-
N
R
W
O
D
I
N
T
R
O
S
T
O
STANDBY
P
E
S
U
A
PROG.
P
/
e
Y
A
L
P
CLOSE
Page 14

28
Playing back tracks in random order
1 Press »RANDOM q« during playback.
– Display: »RANDOM«; the tracks on the CD are played back in
random order.
2 To end this function press »RANDOM
q« again.
– Display: »RANDOM« disappears.
Note:
You cannot select this function if the tracks are being played back in a
set sequence from the memory.
With the RR 770 CD you can select the random playback function using
the remote control. To do this, use the»RANDOM
q« button.
Playing the introductions of each track
1 Press »INTRO« when the CD is in the STOP position.
– The device plays short introductions of all tracks on the CD.
2 To play back the whole of the current track, press »INTRO« again.
Playing back tracks in a selected order - creating
a track memory
This function enables you to store up to 20 tracks on the current CD in a
certain order and then play them back in that sequence. The same track may
be stored more than once.
Selecting and storing tracks
1 Insert a CD in the CD compartment.
Note:
The device must be in the STOP position.
2 Press » PROG.«.
– Display: »TRACK MEMORY« flashes.
3 Select the desired track using the »ssF-SKIP« and »R-SKIP§«
buttons.
– Display: e.g. »04 P-01«.
4 Store the track by pressing » PROG.«.
– Display: e.g. »00 P-02«.
Note:
Repeat steps 3 and 4 to store the other tracks.
If you try to store more than 20 tracks, the track memory is deleted.
CD MODE
_____________________________________________
RANDOM
TRACK
032408 :
TRACK
4358I3 :
INTRO
t
TRACK
0006I0 :
((( TRACK MEMORY )))
P-0I04
((( TRACK MEMORY )))
P-0200
((( TRACK MEMORY )))
P-0200
((( TRACK MEMORY )))
P-0I00
Page 15

ENGLISH
29
Playing back the track memory
1 With the device in the STOP position, press »PROG.« once. The first
track in the memory is displayed.
2 Start playback of the track memory by pressing »PLAY/PAUSE
e
II«.
– The playback begins with the first track.
3 To end playback of the track memory press »STOP
■«.
Checking the track memory
1 With the device in the STOP position, press »PROG.« several times.
The display shows the track numbers in the sequence in which they are
stored.
2 Start the playback of the track memory by pressing » PLAY/PAUSE
e
II«.
Adding tracks
1 With the device in the STOP position, press »PROG.« several times,
until the display shows the first free memory position (Track 00).
2 Store the additional tracks (up to 20) as described under ”Selecting and
storing tracks”.
Replacing tracks
1 With the device in the STOP position, press »PROG.« several times,
until the display shows the track which you want to replace.
2 Select the track you want to replace it with by pressing the »ssF-
SKIP« and »R-SKIP§« buttons.
3 Press the » PROG.« button to store the track.
Deleting the track memory
1 Press »PROG.« when the CD is in the STOP position.
2 Press »
7
« to delete the track memory.
Note:
The track memory is also deleted if
– The CD compartment is opened
– The device is switched off using the »STANDBY« button
– The mains cable is unplugged or the batteries are removed from the
device.
Note:
With the RR 770 CD you can program the track memory using the
remote control. To do this, use the »PROGRAM« and »F.F./UP ss«
or »REV./DOWN §« buttons.
CD MODE
_____________________________________________
t
TRACK MEMORY
435805 :
Page 16

30
Preparation
1 Switch on the device and set the »CD TAPE RADIO« switch to
»TAPE«.
– Display: »TAPE«.
2 Open the cassette compartment by pressing »■/
.
«.
– The cassette compartment opens.
3 Insert a cassette in the compartment with the tape side facing
downwards and the full reel on the left.
4 Close the tape compartment by carefully pressing the »CLOSE« button
on the front.
Playback
1 Press »e« to start playback.
– Playback stops at the end of one side the tape.
2 Press» II« to interrupt playback.
Resume playback by pressing »I I« again.
3 To end playback press »■/.«.
4 To open the tape compartment, press »■/
.
« again and remove the
cassette.
Recording
Erase protection
Every new recording overwrites the existing recording on the tape.
You can protect your own tapes against accidental erasure by breaking the
safety tabs on the top of the cassette.
Pre-recorded commercial music cassettes are already protected against
accidental erasure.
If you want to record on a protected tape, cover the opening with adhesive
tape.
Note:
Only use NORMAL-type cassettes (IEC I) for recording.
CHROME (IEC II) or METAL (IEC IV) tapes are not suitable.
The volume setting and the position of the DSC switch do not affect the
recording level.
TAPE MODE
__________________________________________
TAPE DIRECTION
DIGITAL SOUND CONTROL
D
N
O
U
83344
8
CD
TAPE
RADIO
D
N
U
O
S
R
R
U
S
VOLUME
CLOSE
!
!
.
.
1
Page 17

ENGLISH
31
Recording from the radio
1 Put a cassette with the protection tabs intact in the cassette
compartment, and press the »ee« and »rr« buttons to find the
right position on the tape.
2 Set the » CD TAPE RADIO« switch to »RADIO« and tune in to the
desired radio station.
3 Press » ●« to start recording.
– The »
e
« button is automatically engaged.
– The device automatically stops recording at the end of the cassette.
4 To interrupt the recording press »II «.
Resume recording by pressing »I I «.
5 To break off recording, press »■/
.
«.
Recording from a CD
1 Put a cassette with the protection tabs intact in the cassette com-
partment, and press the »e e« and »rr « buttons to find the right
position on the tape.
2 Set the » CD TAPE RADIO« switch to »CD«.
3 To start recording in the middle of a track, start the CD playback as
usual.
4 As soon as you reach the desired passage, press » PLAY/PAUSE
e
II« and then »● « on the tape unit to start the recording.
CD Synchro recording
1 Put a cassette with the protection tabs intact in the cassette com-
partment, and press the »e e« and »rr « buttons to find the right
position on the tape.
2 Set the » CD TAPE RADIO« switch to »CD«.
3 Press »●« to start recording.
– The »
e
« button engages automatically and the CD playback is
started automatically from the beginning of the CD or the beginning
of the stored music program, if you first pressed »PROG.«.
– The device automatically stops recording at the end of the cassette.
Fast forward/rewinding the cassette
1 From the STOP position, press »ee« or » rr «.
– »ee« fast forwards to the end of the tape, »rr « rewinds to the
beginning of the tape.
2 Press » ■/
.
« when you reach the desired position on the tape.
TAPE MODE
___________________________________________
TAPE DIRECTION
-88:8.8
88
FM
MW
LW
5
MHz
kHz
dB
!
VOLUME
CHTRACK MEMORY
INTRO REPEAT RANDOM
CLASSIC ROCK POP TAPE
-88:8.8
88
FM
MW
LW
5
MHz
kHz
dB
!
VOLUME
CHTRACK MEMORY
INTRO REPEAT RANDOM
CLASSIC ROCK POP TAPE
+
-88:8.8
88
FM
MW
LW
5
MHz
kHz
dB
!
VOLUME
CHTRACK MEMORY
INTRO REPEAT RANDOM
CLASSIC ROCK POP TAPE
DIGITAL SOUND CONTROL
83344
8
CD
TAPE
RADIO
D
N
U
O
S
D
N
O
U
R
R
U
S
.
.
VOLUME
CLOSE
!
!
P
BAND
U
REPEAT
MEM
RANDOM
TAPE DIRECTION
•
P
I
K
3
S
-
F
P
3
I
K
S
•
-
N
R
W
O
D
I
N
T
R
O
S
T
O
STANDBY
P
E
S
U
A
P
/
e
Y
A
L
P
PROG.
CLOSE
Page 18

32
Cleaning the tape drive
To guarantee good recording and playback quality, clean the parts shown
(1, 2, 3) after every 50 hours of use, or once a month.
Open the tape compartment and moisten a cotton swab with alcohol or a
special head-cleaning fluid. Begin playback and clean the capstan idler (3).
Then pause playback and clean the capstan (2) and the magnetic heads (1).
Close the tape compartment. To clean the magnetic heads (1), you can also
play a cleaning tape.
Protect your cassettes from humidity, dust, heat and cold.
Do not store your tapes near devices with strong magnetic fields such as
television sets or stereo speakers.
After using a cassette, put it back in its protective case.
Technical data
This device is noise-suppressed according to the applicable EC directives.
This product fulfils the European directives 89/336/EEC, 73/23/EEC and
93/68/EEC.
This device conforms to the safety regulation DIN EN 60065 (VDE 0860)
and therefore the international safety regulation IEC 60065.
Never open the device casing. The manufacturer accepts no liability for
damage resulting from improper handling.
The type plate is located at the bottom of the device.
INFORMATION
_____________________________________
Technical and optical modifications reserved!
1 1 2 3
Voltage supply
Mains operation: ......... 230 V, 50/60Hz
Battery operation: ................... 8 x 1.5 V
(R20, UM1)
Remote control:
Micro type, e.g. AAA (RR 770 only),
LR 03, 2 x 1.5V
Back-up battery: 2 x 1.5 Volt (LR 06, AA)
Output:
DIN 45324, 10% THD
Music signal power: ........ 2 x 4500 mW
Sine wave power: ............ 2 x 2500 mW
Stereo headphone jack 3.5 mm ø
Radio
frequency bands
FM 87.5 ...108.0 MHz
MW 522 ... 1620 kHz
LW 146 ... 281 kHz
Antennas:
Telescopic antenna ...................... for FM
Ferrite rod antenna ............. for MW/LW
CD unit
Frequency response: .... 20 Hz ... 20 kHz
Noise voltage ratio: .................. ≥ 68 dB
Tape unit
Sound recording
medium: ..................... Compact cassette
according to DIN 45516
Track position: International quarter-track
Tape speed: ...................... 4.76 cm/sec.
Motor: ................................... DC motor
Frequency range: ........ 125 Hz ... 8 kHz
Noise
voltage ratio: ............................ ≥ 45 dB
Band speed
fluctuation: ............................. ≤0.35 %
Automatic:
Automatic recording level control
Dimensions and weight
W x H x D ........... 426 x 188 x 253 mm
Weight ...................................... 3.8 kg
Page 19

ENGLISH
33
If a fault occurs, first refer to this information before you take the device for
repair.
If you are unable to rectify the fault using the information given here, contact
your local dealer or service specialist.
Under no circumstances should you attempt to repair the radio recorder
yourself, as this would invalidate the guarantee.
TROUBLESHOOTING
________________________
PROBLEM
GENERAL
No sound
The radio recorder
does not respond
when you press the
buttons
The remote control
does not respond to
commands
RADIO
Poor radio reception
CASSETTE
Poor cassette
playback sound
quality
No cassette recording
CD
Playback won’t start
The CD player skips
tracks
POSSIBLE CAUSE
The volume setting is too low
The headphones are connected
The batteries are flat
The batteries are incorrectly
inserted
The mains cable is incorrectly
connected
Static electrical discharge
Flat battery
Weak radio antenna signal
Interference from electrical
devices such as televisions,
video recorders, computers,
neon lamps, thermostats or
motors.
Dust and dirt on magnetic
heads, capstans or idlers
Recording protection tab
has been broken off
The CD is damaged or dirty
The PROGRAM or RANDOM
function is selected
REMEDY
Turn up the volume
Unplug the headphones
Replace the batteries
Insert the batteries correctly
Connect the mains cable
properly
Switch off the radio
recorder, disconnect the
mains cable and plug it in
again after a few seconds
Replace the batteries
VHF (FM): tilt and turn
thetelescopic antenna;
AM (MW/LW): turn the
whole device
Keep the radio recorder
away from electrical
devices
Clean the magnetic heads,
capstan and idler
Close the opening with
adhesive tape
Replace or clean the CD
Switch off the PROGRAM
or RANDOM function
Page 20

SERVICE
____________________________________________
GRUNDIG customer service locations
GRUNDIG
Kundendienst Nord
Kolumbusstraße 14
D-22113 Hamburg
+49/40-7 33 31-0
GRUNDIG
Kundendienst West
Horbeller Straße 19
D-50858 Köln
+49/22 34-95 81-2 51
GRUNDIG
Kundendienst Mitte
Dudenstraße 45-53
D-68167 Mannheim
+49/6 21-33-76-70
GRUNDIG BELUX N.V.
Deltapark, Weihoek 3, Unit 3G
B-1930 Zaventem
+32/2-7 16 04 00
GRUNDIG UK LTD.
Elstree Way, Borehamwood,
Herts, WD6 1RX
GB Großbritannien/
Great Britain
+44/1 81-3 24 94 00
Technical Service
Unit 35, Woodside Park,
Wood Street
Rugby, Warwickshire, CV21 2NP
Großbritannien/
Great Britain
+44/1 78-8 57 00 88
GRUNDIG IRELAND LTD.
2 Waverley Office Park,
Old Naas Road
EIR Dublin 12
+3 53/1-4 50 97 17
GRUNDIG FRANCE S.A.
5 Boulevard Marcel Pourtout
F-92563 Rueil
Malmaison Cedex
+33/1-41 39 26 26
GRUNDIG
Kundendienst Süd
Beuthener Straße 65
D-90471 Nürnberg
+49/9 11-7 03-0
GRUNDIG SCHWEIZ AG
Steinacker Straße 28
CH-8302 Kloten
+41/1-8 15 81 11
GRUNDIG PORTUGUESA
Comércio de Artigos
Electrónicos, Lda.
Rua Bento de Jesus Caraça 17
P-1495 Cruz Quebrada,
Lisboa
+3 51/1-4 19 75 70
GRUNDIG ESPAÑA S.A.
Solsonés, 2 planta baja B3
Edificio Muntadas (Mas Blau)
E-08820 El Prat De
Llobregat (Barcelona)
+34/93-4 79 92 00
GRUNDIG NORGE A.S.
Glynitveien 25, Postboks 234
N-1401 Ski
+47/64 87 82 00
GRUNDIG DANMARK A/S
Lejrvej 19
DK-3500 Værløse
+45/44 48 68 22
GRUNDIG
Kundendienst Ost
Wittestraße 30e
D-13509 Berlin
+49/30-4 38 03-21
GRUNDIG OY
Luoteisrinne 5
SF-02271 Espoo
+3 58/9-8 04 39 00
GRUNDIG SVENSKA AB
Albygatan 109 d, Box 4050
S-17104 Solna
+46/8-6 29 85 30
GRUNDIG POLSKA SP.Z.O.O.
Ul. Czéstochowska 140
PL-62800 Kalisz
+48/62-7 66 77 70
GRUNDIG AUSTRIA
Ges.m.b.H.
Breitenfurter Straße 43-45
A-1120 Wien
+43/1-81 11 70
GRUNDIG NEDERLAND B.V.
Gebouw Amstelveste
Joan Muyskenweg 22
NL-1096 CJ Amsterdam
+31/20-5 68 15 68
GRUNDIG ITALIANA S.P.A.
Via G.B. Trener, 8
I-38100 Trento
+39/4 61-89 31 11
Page 21

Page 22

Grundig AG•Beuthener Str. 41 • D-90471 Nürnberg • http://www.grundig.com
72010 770 1500
 Loading...