

Page 1

K2 Edge Installation and Service
Manual
Document version: 4.0.2 - 4-11-2013
Page 2

Grass Valley Product Support .......................................................................................................... 3
1
2 Safety Summaries ............................................................................................................................ 4
3 About this document ....................................................................................................................... 16
4 Shipping kit contents ...................................................................................................................... 16
5 Credentials ..................................................................................................................................... 16
6 Site preparation .............................................................................................................................. 16
6.1 Physical Specifications............................................................................................................ 16
6.2 Environmental Requirements .................................................................................................. 16
6.3 Cable advice ........................................................................................................................... 16
7 K2 Edge Front Panel ...................................................................................................................... 17
8 K2 Edge Back Panel (connectors) ................................................................................................. 17
9 Indicators and status information ................................................................................................... 18
9.1 Power supply indicator ............................................................................................................ 18
9.2 IP Manager connection indicator ............................................................................................ 18
9.3 LAN connection indicator ........................................................................................................ 18
9.4 LEDs (hard disks) .................................................................................................................... 18
10 The IP Manager: introduction ..................................................................................................... 19
10.1 The LCD front panel ............................................................................................................ 19
10.2 Starting the IP Manager web interface ................................................................................ 20
11 Server installation and initial setup ............................................................................................. 21
11.1 Connecting the server to the LAN and connecting the IP Manager .................................... 21
11.2 Connecting the IOs .............................................................................................................. 21
11.3 Connecting the VGA-monitor (optional) .............................................................................. 21
11.4 Connecting blackburst, GPIO and LTC (optional) ............................................................... 21
11.5 Connecting the power cables and power on ....................................................................... 21
11.6 Configuring the IP Manager ................................................................................................ 22
11.7 Configuring the K2 Edge hostname and network settings .................................................. 22
11.8 Specifying the TX/MAM database IP-address .................................................................... 22
12 Channel Presets ......................................................................................................................... 23
12.1 Introduction .......................................................................................................................... 23
12.2 Configuring K2 Edge Channels and ports ........................................................................... 25
12.3 Time settings ....................................................................................................................... 26
13 Service Instructions .................................................................................................................... 27
13.1 Server Power ....................................................................................................................... 27
13.2 Replacing the front bezel ..................................................................................................... 28
13.3 Replacing a hard disk .......................................................................................................... 30
13.4 Replacing a redundant power supply module ..................................................................... 31
14 Appendix: The IP Manager ......................................................................................................... 32
14.1 Starting the IP Manager web interface ................................................................................ 32
14.2 The LCD front panel ............................................................................................................ 32
14.3 The IP Manager menu ......................................................................................................... 33
14.4 System configuration ........................................................................................................... 34
14.5 System monitoring ............................................................................................................... 35
14.6 System administration ......................................................................................................... 36
15 Appendix: time settings............................................................................................................... 37
16 Appendix: Changing an IP-address ............................................................................................ 42
17 Appendix: K2 Edge network ports .............................................................................................. 43
18 Appendix: K2 Edge IOs .............................................................................................................. 44
18.1 Tiles ..................................................................................................................................... 44
18.2 Bypass ................................................................................................................................. 44
18.3 Master and Slaves ............................................................................................................... 44
18.4 Genlock ............................................................................................................................... 44
19 Appendix: Supported input/output broadcast format combinations ............................................ 45
20 Appendix: GPIO and LTC pinning .............................................................................................. 46
21 Appendix: Yast ............................................................................................................................ 47
Copyright © Grass Valley USA, LLC. All rights reserved. This product may be covered by one or more
U.S. and foreign patents.
K2 Edge Installation and Service Manual - document version: 4.0.2 – Page 2
Page 3

For further information on the Grass Valley product take back system please
1 Grass Valley Product Support
Contact information: http://www.grassvalley.com/support/contact
U.S Technical Support: +1 800-547-4989 or +1 530 478 4148 or E-mail: Please use our online form
All other countries Technical Support: +800 80 80 20 20 or +33 1 48 25 20 20 or E-mail:
callcentre@grassvalley.com
FAQ: http://grassvalley.novosolutions.net/
Training: https://grassvalley.csod.com/LMS/catalog/Main.aspx?tab_page_id=-67&tab_id=6
END-OF-LIFE-RECYCLING-NOTICE
Grass Valley’s innovation and excellence in product design also extends to the programs we’ve
established to manage the recycling of our products. Grass Valley has developed a comprehensive
end-of-life product take back program for recycle or disposal of end-of-life products. Our program
meets the requirements of the European Union’s WEEE Directive, the United States Environmental
Protection Agency, and U.S. state and local agencies.
Grass Valley’s end-of-life product take back program assures proper disposal by use of Best Available
Technology. This program accepts any Grass Valley branded equipment. Upon request, a Certificate
of Recycling or a Certificate of Destruction, depending on the ultimate disposition of the product, can
be sent to the requester.
Grass Valley will be responsible for all costs associated with recycling and disposal, including freight.
However, you are responsible for the removal of the equipment from your facility and packing the
equipment to make it ready for pickup.
contact Grass Valley at + 800 80 80 20 20 or +33 1 48 25 20 20 from most
other countries. In the U.S. and Canada please call 800-547-8949, and ask to
be connected to the EH&S Department. Additional information concerning the
program can be found at: www.grassvalley.com/about/environmental-policy.
K2 Edge Installation and Service Manual - document version: 4.0.2 – Page 3
Page 4
WARNING: Any instructions in this manual that require opening the equipment cover or
WARNING: Warning statements identify conditions or practices that may result in
CAUTION: Caution statements identify conditions or practices that may result in damage to
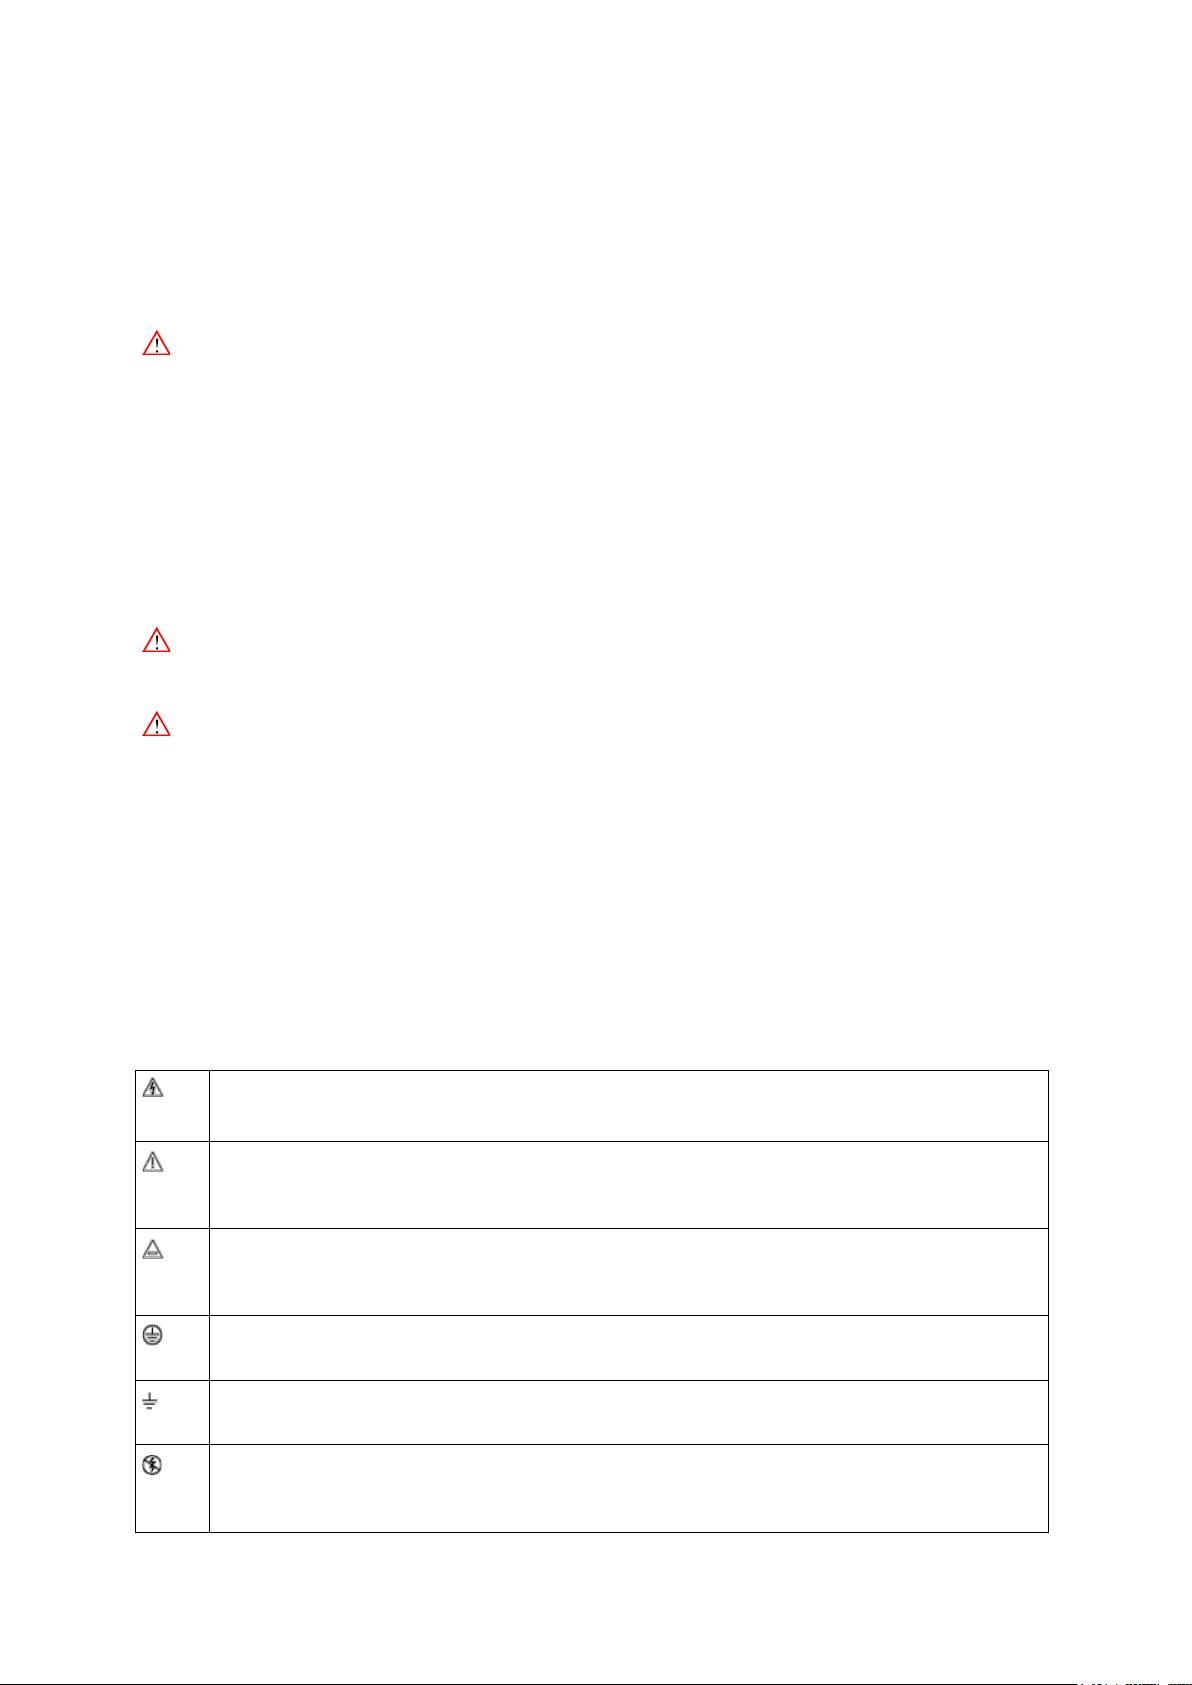
Indicates that dangerous high voltage is present within the equipment enclosure that may be
Indicates that user, operator or service technician should refer to product manual(s) for
This is a prompt to note fuse rating when replacing fuse(s). The fuse referenced in the text
Identifies a protective grounding terminal which must be connected to earth ground prior to
Identifies an external protective grounding terminal which may be connected to earth ground
Indicates that static sensitive components are present which may be damaged by electrostatic
2 Safety Summaries
Safety Summary
Read and follow the important safety information below, noting especially those instructions related to
risk of fire, electric shock or injury to persons. Additional specific warnings not listed here may be found
throughout the manual.
enclosure are for use by qualified service personnel only. To reduce the risk of electric
shock, do not perform any servicing other than that contained in the operating
instructions unless you are qualified to do so.
Safety terms and symbols
Terms in this manual
Safety-related statements may appear in this manual in the following form:
personal injury or loss of life.
equipment or other property, or which may cause equipment crucial to your business
environment to become temporarily non-operational.
Terms on the product
These terms may appear on the product:
DANGER — A personal injury hazard is immediately accessible as you read the marking.
WARNING — A personal injury hazard exists but is not immediately accessible as you read the
marking.
CAUTION — A hazard to property, product, and other equipment is present.
Symbols on the product
The following symbols may appear on the product:
of sufficient magnitude to constitute a risk of electric shock.
important operating, maintenance, or service instructions.
must be replaced with one having the ratings indicated.
making any other equipment connections.
as a supplement to an internal grounding terminal.
discharge. Use anti-static procedures, equipment and surfaces during servicing.
K2 Edge Installation and Service Manual - document version: 4.0.2 – Page 4
Page 5

Warnings
The following warning statements identify conditions or practices that can result in personal injury or
loss of life.
Dangerous voltage or current may be present — Disconnect power and remove battery (if applicable)
before removing protective panels, soldering, or replacing components.
Do not service alone — Do not internally service this product unless another person capable of
rendering first aid and resuscitation is present.
Remove jewelry — Prior to servicing, remove jewelry such as rings, watches, and other metallic
objects.
Avoid exposed circuitry — Do not touch exposed connections, components or circuitry when power is
present.
Use proper power cord — Use only the power cord supplied or specified for this product.
Ground product — Connect the grounding conductor of the power cord to earth ground.
Operate only with covers and enclosure panels in place — Do not operate this product when
covers or enclosure panels are removed.
Use correct fuse — Use only the fuse type and rating specified for this product.
Use only in dry environment — Do not operate in wet or damp conditions.
Use only in non-explosive environment — Do not operate this product in an explosive atmosphere.
High leakage current may be present — Earth connection of product is essential before connecting
power.
Dual power supplies may be present — Be certain to plug each power supply cord into a separate
branch circuit employing a separate service ground. Disconnect both power supply cords prior to
servicing.
Double pole neutral fusing — Disconnect mains power prior to servicing.
Use proper lift points — Do not use door latches to lift or move equipment.
Avoid mechanical hazards — Allow all rotating devices to come to a stop before servicing.
Cautions
The following caution statements identify conditions or practices that can result in damage to
equipment or other property
Use correct power source — Do not operate this product from a power source that applies more than
the voltage specified for the product.
K2 Edge Installation and Service Manual - document version: 4.0.2 – Page 5
Page 6

WARNUNG: Alle Anweisungen in diesem Handbuch, die das Abnehmen der
Use correct voltage setting — If this product lacks auto-ranging power supplies, before applying
power ensure that the each power supply is set to match the power source.
Provide proper ventilation — To prevent product overheating, provide equipment ventilation in
accordance with installation instructions.
Use anti-static procedures — Static sensitive components are present which may be damaged by
electrostatic discharge. Use anti-static procedures, equipment and surfaces during servicing.
Do not operate with suspected equipment failure — If you suspect product damage or equipment
failure, have the equipment inspected by qualified service personnel.
Ensure mains disconnect — If mains switch is not provided, the power cord(s) of this equipment
provide the means of disconnection. The socket outlet must be installed near the equipment and must
be easily accessible. Verify that all mains power is disconnected before installing or removing power
supplies and/or options.
Route cable properly — Route power cords and other cables so that they are not likely to be damaged.
Properly support heavy cable bundles to avoid connector damage.
Use correct power supply cords — Power cords for this equipment, if provided, meet all North
American electrical codes. Operation of this equipment at voltages exceeding 130 VAC requires power
supply cords which comply with NEMA
approval of the country of use.
Use correct replacement battery — This product may contain batteries. To reduce the risk of explosion,
check polarity and replace only with the same or equivalent type recommended by manufacturer.
Dispose of used batteries according to the manufacturer’s instructions.
Troubleshoot only to board level — Circuit boards in this product are densely populated with surface
mount technology (SMT) components and application specific integrated circuits (ASICS). As a result,
circuit board repair at the component level is very difficult in the field, if not impossible. For warranty
compliance, do not troubleshoot systems beyond the board level.
configurations.
International power cords, if provided, have the
Sicherheit – Überblick
Lesen und befolgen Sie die wichtigen Sicherheitsinformationen dieses Abschnitts. Beachten Sie
insbesondere die Anweisungen bezüglich
Brand-, Stromschlag- und Verletzungsgefahren. Weitere spezifische, hier nicht aufgeführte Warnungen
finden Sie im gesamten Handbuch.
Geräteabdeckung oder des Gerätegehäuses erfordern, dürfen nur von qualifiziertem
Servicepersonal ausgeführt werden. Um die Stromschlaggefahr zu verringern, führen
Sie keine Wartungsarbeiten außer den in den Bedienungsanleitungen genannten Arbeiten
aus, es sei denn, Sie besitzen die entsprechende Qualifikationen für diese Arbeiten.
K2 Edge Installation and Service Manual - document version: 4.0.2 – Page 6
Page 7
WARNUNG: Warnungen weisen auf Situationen oder Vorgehensweisen hin, die
VORSICHT: Vorsichtshinweise weisen auf Situationen oder Vorgehensweisen hin, die zu
Weist auf eine gefährliche Hochspannung im Gerätegehäuse hin, die stark genug sein kann,
Weist darauf hin, dass der Benutzer, Bediener oder Servicetechniker wichtige Bedienungs-,
Dies ist eine Aufforderung, beim Wechsel von Sicherungen auf deren Nennwert zu achten. Die
Weist auf eine Schutzerdungsklemme hin, die mit dem Erdungskontakt verbunden werden
Weist auf eine externe Schutzerdungsklemme hin, die als Ergänzung zu einem internen
Weist darauf hin, dass es statisch empfindliche Komponenten gibt, die durch eine
Sicherheit – Begriffe und Symbole
In diesem Handbuch verwendete Begriffe
Sicherheitsrelevante Hinweise können in diesem Handbuch in der folgenden Form auftauchen:
Verletzungs- oder Lebensgefahr bergen.
Schäden an Ausrüstungskomponenten oder anderen Gegenständen oder zum zeitweisen
Ausfall wichtiger Komponenten in der Arbeitsumgebung führen können.
Hinweise am Produkt
Die folgenden Hinweise können sich am Produkt befinden:
GEFAHR – Wenn Sie diesen Begriff lesen, besteht ein unmittelbares Verletzungsrisiko.
WARNUNG – Wenn Sie diesen Begriff lesen, besteht ein mittelbares Verletzungsrisiko.
VORSICHT – Es besteht ein Risiko für Objekte in der Umgebung, den Mixer selbst oder andere
Ausrüstungskomponenten.
Symbole am Produkt
Die folgenden Symbole können sich am Produkt befinden:
um eine Stromschlaggefahr darzustellen.
Wartungs- oder Serviceanweisungen in den Produkthandbüchern lesen sollte.
im Text angegebene Sicherung muss durch eine Sicherung ersetzt werden, die die
angegebenen Nennwerte besitzt.
muss, bevor weitere Ausrüstungskomponenten angeschlossen werden.
Erdungskontakt an die Erde angeschlossen werden kann.
elektrostatische Entladung beschädigt werden können. Verwenden Sie antistatische
Prozeduren, Ausrüstung und Oberflächen während der Wartung.
Warnungen
Die folgenden Warnungen weisen auf Bedingungen oder Vorgehensweisen hin, die Verletzungs- oder
Lebensgefahr bergen:
Gefährliche Spannungen oder Ströme – Schalten Sie den Strom ab, und entfernen Sie ggf. die Batterie,
bevor sie Schutzabdeckungen abnehmen, löten oder Komponenten austauschen.
Servicearbeiten nicht alleine ausführen – Führen Sie interne Servicearbeiten nur aus, wenn eine
weitere Person anwesend ist, die erste Hilfe leisten und Wiederbelebungsmaßnahmen einleiten kann.
Schmuck abnehmen – Legen Sie vor Servicearbeiten Schmuck wie Ringe, Uhren und andere
metallische Objekte ab.
K2 Edge Installation and Service Manual - document version: 4.0.2 – Page 7
Page 8

Keine offen liegenden Leiter berühren – Berühren Sie bei eingeschalteter Stromzufuhr keine offen
liegenden Leitungen, Komponenten oder Schaltungen.
Richtiges Netzkabel verwenden – Verwenden Sie nur das mitgelieferte Netzkabel oder ein Netzkabel,
das den Spezifikationen für dieses Produkt entspricht.
Gerät erden – Schließen Sie den Erdleiter des Netzkabels an den Erdungskontakt an.
Gerät nur mit angebrachten Abdeckungen und Gehäuseseiten betreiben – Schalten Sie dieses
Gerät nicht ein, wenn die Abdeckungen oder Gehäuseseiten entfernt wurden.
Richtige Sicherung verwenden – Verwenden Sie nur Sicherungen, deren Typ und Nennwert den
Spezifikationen für dieses Produkt entsprechen.
Gerät nur in trockener Umgebung verwenden – Betreiben Sie das Gerät nicht in nassen oder
feuchten Umgebungen.
Gerät nur verwenden, wenn keine Explosionsgefahr besteht – Verwenden Sie dieses Produkt nur
in Umgebungen, in denen keinerlei Explosionsgefahr besteht.
Hohe Kriechströme – Das Gerät muss vor dem Einschalten unbedingt geerdet werden.
Doppelte Spannungsversorgung kann vorhanden sein – Schließen Sie die beiden Anschlußkabel
an getrennte Stromkreise an. Vor Servicearbeiten sind beide Anschlußkabel vom Netz zu trennen.
Zweipolige, neutrale Sicherung – Schalten Sie den Netzstrom ab, bevor Sie mit den Servicearbeiten
beginnen.
Fassen Sie das Gerät beim Transport richtig an – Halten Sie das Gerät beim Transport nicht an
Türen oder anderen beweglichen Teilen fest.
Gefahr durch mechanische Teile – Warten Sie, bis der Lüfter vollständig zum Halt gekommen ist,
bevor Sie mit den Servicearbeiten beginnen.
Vorsicht
Die folgenden Vorsichtshinweise weisen auf Bedingungen oder Vorgehensweisen hin, die zu Schäden an
Ausrüstungskomponenten oder anderen Gegenständen führen können:
Gerät nicht öffnen – Durch das unbefugte Öffnen wird die Garantie ungültig.
Richtige Spannungsquelle verwenden – Betreiben Sie das Gerät nicht an einer Spannungsquelle,
die eine höhere Spannung liefert als in den Spezifikationen für dieses Produkt angegeben.
Gerät ausreichend belüften – Um eine Überhitzung des Geräts zu vermeiden, müssen die
Ausrüstungskomponenten entsprechend den Installationsanweisungen belüftet werden. Legen Sie
kein Papier unter das Gerät. Es könnte die Belüftung behindern. Platzieren Sie das Gerät auf einer
ebenen Oberfläche.
K2 Edge Installation and Service Manual - document version: 4.0.2 – Page 8
Page 9

Antistatische Vorkehrungen treffen – Es gibt statisch empfindliche Komponenten, die durch eine
elektrostatische Entladung beschädigt werden können. Verwenden Sie antistatische Prozeduren,
Ausrüstung und Oberflächen während der Wartung.
CF-Karte nicht mit einem PC verwenden – Die CF-Karte ist speziell formatiert. Die auf der CF-Karte
gespeicherte Software könnte gelöscht werden.
Gerät nicht bei eventuellem Ausrüstungsfehler betreiben – Wenn Sie einen Produktschaden oder
Ausrüstungsfehler vermuten, lassen Sie die Komponente von einem qualifizierten Servicetechniker
untersuchen.
Kabel richtig verlegen – Verlegen Sie Netzkabel und andere Kabel so, dass Sie nicht beschädigt
werden. Stützen Sie schwere Kabelbündel ordnungsgemäß ab, damit die Anschlüsse nicht beschädigt
werden.
Richtige Netzkabel verwenden – Wenn Netzkabel mitgeliefert wurden, erfüllen diese alle nationalen
elektrischen Normen. Der Betrieb dieses Geräts mit Spannungen über 130 V AC erfordert Netzkabel, die
NEMA-Konfigurationen entsprechen. Wenn internationale Netzkabel mitgeliefert wurden, sind diese für
das Verwendungsland zugelassen.
Richtige Ersatzbatterie verwenden – Dieses Gerät enthält eine Batterie. Um die Explosionsgefahr zu
verringern, prüfen Sie die Polarität und tauschen die Batterie nur gegen eine Batterie desselben Typs
oder eines gleichwertigen, vom Hersteller empfohlenen Typs aus. Entsorgen Sie gebrauchte Batterien
entsprechend den Anweisungen des Batterieherstellers.
Das Gerät enthält keine Teile, die vom Benutzer gewartet werden können. Wenden Sie sich bei
Problemen bitte an den nächsten Händler.
K2 Edge Installation and Service Manual - document version: 4.0.2 – Page 9
Page 10
VERTISSEMENT: Toutes les instructions présentes dans ce manuel qui concernent
AVERTISSEMENT: Les avertissements signalent des conditions ou des pratiques
MISE EN GARDE: Les mises en garde signalent des conditions ou des pratiques
Signale la présence d’une tension élevée et dangereuse dans le boîtier de l’équipement ;
Signale que l’utilisateur, l’opérateur ou le technicien de maintenance doit faire référence au(x)
Il s’agit d’une invite à prendre note du calibre du fusible lors du remplacement de ce dernier. Le
Identifie une borne de protection de mise à la masse qui doit être raccordée correctement
Identifie une borne de protection de mise à la masse qui peut être connectée en tant que
Signale la présence de composants sensibles à l’électricité statique et qui sont susceptibles
Consignes de sécurité
Il est recommandé de lire, de bien comprendre et surtout de respecter les informations relatives à la
sécurité qui sont exposées ci-après, notamment les consignes destinées à prévenir les risques
d’incendie, les décharges électriques et les blessures aux personnes. Les avertissements
complémentaires, qui ne sont pas nécessairement repris ci-dessous, mais présents dans toutes les
sections du manuel, sont également à prendre en considération.
l’ouverture des capots ou des logements de cet équipement sont destinées
exclusivement à des membres qualifiés du personnel de maintenance. Afin de diminuer
les risques de décharges électriques, ne procédez à aucune intervention d’entretien
autre que celles contenues dans le manuel de l’utilisateur, à moins que vous ne soyez
habilité pour le faire.
Consignes et symboles de sécurité
Termes utilisés dans ce manuel
Les consignes de sécurité présentées dans ce manuel peuvent apparaître sous les formes suivantes:
susceptibles d’occasionner des blessures graves, voire même fatales.
susceptibles d’occasionner un endommagement à l’équipement ou aux installations, ou
de rendre l’équipement temporairement non opérationnel, ce qui peut porter préjudice à
vos activités.
Signalétique apposée sur le produit
La signalétique suivante peut être apposée sur le produit :
DANGER — risque de danger imminent pour l’utilisateur.
AVERTISSEMENT — Risque de danger non imminent pour l’utilisateur.
MISE EN GARDE — Risque d’endommagement du produit, des installations ou des autres equipements.
Symboles apposés sur le produit
Les symboles suivants peut être apposés sur le produit:
cette tension peut être suffisante pour constituer un risque de décharge électrique.
manuel(s) pour prendre connaissance des instructions d’utilisation, de maintenance ou
d’entretien.
fusible auquel il est fait référence dans le texte doit être remplacé par un fusible du même
calibre.
avant de procéder au raccordement des autres équipements.
borne de mise à la masse supplémentaire.
d’être endommagés par une décharge électrostatique. Utilisez des procédures, des
équipements et des surfaces antistatiques durant les interventions d’entretien.
K2 Edge Installation and Service Manual - document version: 4.0.2 – Page 10
Page 11

Avertissements
Les avertissements suivants signalent des conditions ou des pratiques susceptibles d’occasionner des
blessures graves, voire même fatales:
Présence possible de tensions ou de courants dangereux — Mettez hors tension, débranchez et
retirez la pile (le cas échéant) avant de déposer les couvercles de protection, de défaire une soudure
ou de remplacer des composants.
Ne procédez pas seul à une intervention d’entretien — Ne réalisez pas une intervention d’entretien
interne sur ce produit si une personne n’est pas présente pour fournir les premiers soins en cas
d’accident.
Retirez tous vos bijoux — Avant de procéder à une intervention d’entretien, retirez tous vos bijoux,
notamment les bagues, la montre ou tout autre objet métallique.
Évitez tout contact avec les circuits exposés — Évitez tout contact avec les connexions, les
composants ou les circuits exposés s’ils sont sous tension.
Utilisez le cordon d’alimentation approprié — Utilisez exclusivement le cordon d’alimentation fourni
avec ce produit ou spécifié pour ce produit.
Raccordez le produit à la masse — Raccordez le conducteur de masse du cordon d’alimentation à
la borne de masse de la prise secteur.
Utilisez le produit lorsque les couvercles et les capots sont en place — N’utilisez pas ce produit
si les couvercles et les capots sont déposés.
Utilisez le bon fusible — Utilisez exclusivement un fusible du type et du calibre spécifiés pour ce
produit.
Utilisez ce produit exclusivement dans un environnement sec — N’utilisez pas ce produit dans un
environnement humide.
Utilisez ce produit exclusivement dans un environnement non explosible — N’utilisez pas ce
produit dans un environnement dont l’atmosphère est explosible.
Présence possible de courants de fuite — Un raccordement à la masse est indispensable avant la
mise sous tension.
Deux alimentations peuvent être présentes dans l’équipement — Assurez vous que chaque
cordon d’alimentation est raccordé à des circuits de terre séparés. Débranchez les deux cordons
d’alimentation avant toute intervention.
Fusion neutre bipolaire — Débranchez l’alimentation principale avant de procéder à une intervention
d’entretien.
Utilisez les points de levage appropriés — Ne pas utiliser les verrous de la porte pour lever ou
déplacer l’équipement.
K2 Edge Installation and Service Manual - document version: 4.0.2 – Page 11
Page 12

Évitez les dangers mécaniques — Laissez le ventilateur s’arrêter avant de procéder à une intervention
d’entretien.
Mises en garde
Les mises en garde suivantes signalent les conditions et les pratiques susceptibles d’occasionner des
endommagements à l’équipement et aux installations :
N’ouvrez pas l’appareil — Toute ouverture prohibée de l’appareil aura pour effet d’annuler la garantie.
Utilisez la source d’alimentation adéquate — Ne branchez pas ce produit à une source
d’alimentation qui utilise une tension supérieure à la tension nominale spécifiée pour ce produit.
Assurez une ventilation adéquate — Pour éviter toute surchauffe du produit, assurez une ventilation
de l’équipement conformément aux instructions d’installation. Ne déposez aucun document sous
l’appareil – ils peuvent gêner la ventilation. Placez l’appareil sur une surface plane.
Utilisez des procédures antistatiques - Les composants sensibles à l’électricité statique présents
dans l’équipement sont susceptibles d’être endommagés par une décharge électrostatique. Utilisez
des procédures, des équipements et des surfaces antistatiques durant les interventions d’entretien.
N’utilisez pas la carte CF avec un PC — La carte CF a été spécialement formatée. Le logiciel
enregistré sur la carte CF risque d’être effacé.
N’utilisez pas l’équipement si un dysfonctionnement est suspecté — Si vous suspectez un
dysfonctionnement du produit, faites inspecter celui-ci par un membre qualifié du personnel
d’entretien.
Acheminez les câbles correctement — Acheminez les câbles d’alimentation et les autres câbles de
manière à ce qu’ils ne risquent pas d’être endommagés. Supportez correctement les enroulements de
câbles afin de ne pas endommager les connecteurs.
Utilisez les cordons d’alimentation adéquats — Les cordons d’alimentation de cet équipement, s’ils
sont fournis, satisfont aux exigences de toutes les réglementations régionales. L’utilisation de cet
équipement à des tensions dépassant les 130 V en c.a. requiert des cordons d’alimentation qui
satisfont aux exigences des configurations NEMA. Les cordons internationaux, s’ils sont fournis, ont
reçu l’approbation du pays dans lequel l’équipement est utilisé.
Utilisez une pile de remplacement adéquate — Ce produit renferme une pile. Pour réduire le risque
d’explosion,
le fabricant. Mettez les piles usagées au rebut conformément aux instructions du fabricant des piles.
Cette unité ne contient aucune partie qui peut faire l’objet d’un entretien par l’utilisateur. Si un
problème survient, veuillez contacter votre distributeur local.
vérifiez
la polarité et ne remplacez la pile que par une pile du même type, recommandée par
K2 Edge Installation and Service Manual - document version: 4.0.2 – Page 12
Page 13

Standard
Designed/tested for compliance with:
ANSI/UL 60950-1
Safety of Information Technology Equipment, including
IEC 60950-1 with CB cert.
Safety of Information Technology Equipment, including
CAN/CSA C22.2 No. 60950-1
Safety of Information Technology Equipment, including
BS EN 60950-1
Safety of Information Technology Equipment, including
Certifications and compliances
Canadian certified power cords
Canadian approval includes the products and power cords appropriate for use in the North America
power network. All other power cords supplied are approved for the country of use.
FCC emission control
This equipment has been tested and found to comply with the limits for a Class A digital device,
pursuant to Part 15 of the FCC Rules. These limits are designed to provide reasonable protection
against harmful interference when the equipment is operated in a commercial environment. This
equipment generates, uses, and can radiate radio frequency energy and, if not installed and used in
accordance with the instruction manual, may cause harmful interference to radio communications.
Operation of this equipment in a residential area is likely to cause harmful interference in which case
the user will be required to correct the interference at his own expense. Changes or modifications not
expressly approved by Grass Valley can affect emission compliance and could void the user’s authority
to operate this equipment.
Canadian EMC Notice of Compliance
This digital apparatus does not exceed the Class A limits for radio noise emissions from digital
apparatus set out in the Radio Interference Regulations of the Canadian Department of
Communications.
Le présent appareil numérique n’émet pas de bruits radioélectriques dépassant les limites applicables
aux appareils numériques de la classe A préscrites dans le Règlement sur le brouillage radioélectrique
édicté par le ministère des Communications du Canada.
EN55013 1/2 Class A warning
This product has been evaluated for Electromagnetic Compatibility under the EN 55013-1/2 standards for
Emissions and Immunity and meets the requirements for E4 environment.
This product complies with Class A (E4 environment). In a domestic environment this product may
cause radio interference in which case the user may be required to take adequate measures.
FCC emission limits
This device complies with Part 15 of the FCC Rules. Operation is subject to the following two
conditions: (1) This device may not cause harmful interference, and (2) this device must accept any
interference received, including interference that may cause undesirable operation.
Safety certification
This product has been evaluated and meets the following Safety Certification Standards:
K2 Edge Installation and Service Manual - document version: 4.0.2 – Page 13
Electrical Business Equipment (Second edition 2007).
Electrical Business Equipment (Second edition, 2005).
Electrical Business Equipment (Second edition 2007).
Electrical Business Equipment 2006.
Page 14

ESD Protection
Electronics today are more susceptible to electrostatic discharge (ESD) damage than older equipment.
Damage to equipment can occur by ESD fields that are smaller than you can feel. Implementing the
information in this section will help you protect the investment that you have made in purchasing Grass
Valley equipment. This section contains Grass Valley’s recommended ESD guidelines that should be
followed when handling electrostatic discharge sensitive (ESDS) items. These minimal
recommendations are based on the information in the Sources of ESD and Risks area. The
information in Grounding Requirements for Personnel is provided to assist you in selecting an
appropriate grounding method.
Recommended ESD Guidelines
Follow these guidelines when handling Grass Valley equipment:
• Only trained personnel that are connected to a grounding system should handle ESDS items.
• Do not open any protective bag, box, or special shipping packaging until you have been
grounded.
NOTE: When a Personal Grounding strap is unavailable, as an absolute minimum,
touch a metal object that is touching the floor (for example, a table, frame, or rack) to
discharge any static energy before touching an ESDS item.
• Open the anti-static packaging by slitting any existing adhesive tapes. Do not tear the tapes
off.
• Remove the ESDS item by holding it by its edges or by a metal panel.
• Do not touch the components of an ESDS item unless it is absolutely necessary to configure
or repair the item.
• Keep the ESDS work area clear of all nonessential items such as coffee cups, pens, wrappers
and personal items as these items can discharge static. If you need to set an ESDS item
down, place it on an anti-static mat or on the anti-static packaging.
Sources of ESD and Risks
The following information identifies possible sources of electrostatic discharge and can be used to help
establish an ESD policy.
Personnel
One of the largest sources of static is personnel. The static can be released from a person’s clothing
and shoes.
Environment
The environment includes the humidity and floors in a work area. The humidity level must be controlled
and should not be allowed to fluctuate over a broad range. Relative humidity (RH) is a major part in
determining the level of static that is being generated. For example, at 10% - 20% RH a person walking
across a carpeted floor can develop 35kV; yet when the relative humidity is increased to 70% - 80%,
the person can only generate 1.5kV.
Static is generated as personnel move (or as equipment is moved) across a floor’s surface. Carpeted
and waxed vinyl floors contribute to static build up.
Work Surfaces
Painted or vinyl-covered tables, chairs, conveyor belts, racks, carts, anodized surfaces, plexiglass
covers, and shelving are all static generators.
K2 Edge Installation and Service Manual - document version: 4.0.2 – Page 14
Page 15

Personnel Grounding
Test Method
Required Limits
Wrist Strap System*
ANSI/ESD S1.1 (Section 5.11)
Flooring / Footwear System –
ANSI/ESD STM97.1
Flooring / Footwear System –
ANSI/ESD STM97.
ANSI/ESD STM97.2
< 100 V
Personnel Grounding
Test Method
Required Limits
Wrist Strap System*
ESD TR53 Wrist Strap Section
Flooring / Footwear System –
ESD TR53 Flooring Section and
Flooring / Footwear System –
ESD TR53 Flooring Section and
Equipment
Any equipment commonly found in an ESD work area, such as solder guns, heat guns, blowers, etc.,
should be grounded.
Materials
Plastic work holders, foam, plastic tote boxes, pens, packaging containers and other items commonly
found at workstations can generate static electricity.
Grounding Requirements for Personnel
The information in this section is provided to assist you in selecting a grounding method. This
information is taken from ANSI/ESD S20.20-2007 (Revision of ANSI/ESD S20.20-1999).
Product Qualification
Technical Requirement
Method 1
Method 2 (both required)
Product qualification is normally conducted during the initial selection of ESD control products and
materials. Any of the following methods can be used: product specification review, independent
laboratory evaluation, or internal laboratory evaluation.
Compliance Verification
Technical Requirement
1ANSI/ESD STM97.2
< 3.5 x 10⁷ ohm
< 3.5 x 10⁷ ohm
< 109 ohm
Method 1
Method 2 (both required)
* For situations where an ESD garment is used as part of the wrist strap grounding path, the total
system resistance, including the person, garment, and grounding cord, must be less than 3.5 x
7
ohm.
10
ESD TR53 Footwear Section
ESD TR53 Footwear Section
K2 Edge Installation and Service Manual - document version: 4.0.2 – Page 15
< 3.5 x 10⁷ ohm
< 3.5 x 10⁷ ohm
< 1.0 x 10⁹ ohm
Page 16

The IP Manager:
Password: proot123
Size (WxHxD)
436 x 44x620mm/17.2"x 1.7"x 24.4" (excl. connectors & front panel)
Operating environment
10˚C to 25˚C / 32˚F to 86˚F
Relative humidity
10% to 90% non-condensing
3 About this document
This document applies to the K2 Edge release 4.0.2. This manual describes following topics:
• server installation
• initial setup
• service instructions
The K2 Edge Smart Playout Center Commissioning Manual describes how to commission a
Channel.
4 Shipping kit contents
The shipping kit contains:
• K2 Edge server
• USB-stick with documentation
• If applicable: software dongle
• Licenses and warranties
5 Credentials
The default credentials for the K2 Edge are:
User: admin
Password: proot123
Accessing the system via command line:
User: admin
6 Site preparation
6.1 Physical Specifications
6.2 Environmental Requirements
CAUTION: Wait until the server has acclimatized to server room temperature and
humidity before power on.
6.3 Cable advice
For HD-environments: use CAT 6/ CAT 6e cables and compatible connectors.
K2 Edge Installation and Service Manual - document version: 4.0.2 – Page 16
Page 17

Connectors
IPM
IP Manager
M
Mouse (not connected)
KBD
Keyboard
USB
USB
COM
Serial COM
VGA
eth0-3
LTC
LTC
GPIo
GPIo (open collector)
AC
Power supplies
GL
Genlock/blackburst
7 K2 Edge Front Panel
K2 Edge front panel with LCD-panel (IP Manager).
8 K2 Edge Back Panel (connectors)
K2 Edge back panel.
IO1-IO8
VGA
eth0-3
SDI IOs.
Presets are defined for port configuration.
Bypass can be enabled on IO1 (in) and IO2 (out).
K2 Edge Installation and Service Manual - document version: 4.0.2 – Page 17
Page 18

green
ON
red
Failure
LED off
Standby
Left LED
yellow (blink)
System online
Right LED
green
Speed 100 Mbps
Left LED
green (blink)
System online
Right LED
green
Speed 100 Mbps
orange
Speed 1 Gbps
Top LED (activity)
green
Indicates read/write actions on the disk.
Bottom LED
green
Hard disk OK.
red (blink)
Hard disk not in RAID and probably broken.
orange (blink)
Hard disk will fail soon.
blue (blink)
No hard disk detected.
blue
Hard disk seems slower than usual.
green (pulse)
Hard disk is being added to the RAID (RAID rebuild).
9 Indicators and status information
9.1 Power supply indicator
9.2 IP Manager connection indicator
9.3 LAN connection indicator
9.4 LEDs (hard disks)
K2 Edge Installation and Service Manual - document version: 4.0.2 – Page 18
Page 19

10 The IP Manager: introduction
The IP Manager enables remote server management, monitoring and configuration of the K2 Edge.
The IP Manager is accessible via web, or via the LCD-panel on the front of the server. Two menus are
available:
• the K2 Edge-menu: this is the standard menu
• the IP Manager menu: also available when the system is unreachable (note that less options
are available in this menu)
If the system is unreachable, press the knob on the front of the K2 Edge for 3 seconds to switch from
the K2 Edge menu to the IP Manager menu.
Changing settings and executing commands via the IP Manager can interrupt a broadcast.
First configure the IP Manager as described in the next chapters to be able to configure the K2 Edge
via the web interface.
In the IP manager, to save the changes you made, select Set/OK.
Changes in Channel settings have to be activated after being set: select Set/OK, then Activate/The
changed settings to activate changes. Note that when changes are activated, the nexos processes
are restarted which will interrupt playout.
If activation is required, the Activate/The changed settings option is available. When working via the
front panel, you have to scroll to this option.
10.1 The LCD front panel
Use the rotary knob to operate the IP Manager via the front panel:
• Turn the rotary knob backwards and forwards to scroll through options.
• Press the rotary knob to select an item or confirm a selection.
• Selected items are marked by [], <>, an arrow, or are highlighted.
• Press the knob 3 seconds to return to the main menu.
• Or, to discard changes and return to the main menu from a sub menu, rotate the knob to the
• back/cancel/discard option, then press the knob.
K2 Edge with IP Manager LCD-panel and knob.
K2 Edge Installation and Service Manual - document version: 4.0.2 – Page 19
Page 20

10.2 Starting the IP Manager web interface
To access the IP Manager, enter the IP Manager's IP-address in a web browser and log in.
Example IP Manager menu. The system’s hostname is shown in the upper right corner and on the
web page’s tab. The highlighted menu item shows where you are in the navigation tree.
K2 Edge Installation and Service Manual - document version: 4.0.2 – Page 20
Page 21

Network cable LAN
Connect to eth0
Network cable for the IP Manager
Connect to IPM
VGA-monitor (console)
Connect to VGA
Keyboard (console)
Connect to KBD
Blackburst
Connect to GL
GPIo
Connect to GPIo [see the appendix for pinning]
LTC
Connect to LTC [see the appendix for pinning]
Power cables (redundant)
Connect the ACs
11 Server installation and initial setup
The steps for installation and network configuration of the K2 Edge nodes are:
1) Place the servers in the rack and connect cables and IOs.
2) Configure the IP Manager.
3) Configure the K2 Edge network settings via the IP Manager web interface.
4) Select a preset for Channel configuration.
5) If applicable, configure time settings.
6) If applicable, configure licenses.
11.1 Connecting the server to the LAN and connecting the IP Manager
Following cables must be connected:
11.2 Connecting the IOs
Note that presets are defined for port configuration [see chapter
IO1-IO8
12]. Bypass can be enabled on IO1 (in) and IO2 (out).
11.3 Connecting the VGA-monitor (optional)
11.4 Connecting blackburst, GPIO and LTC (optional)
11.5 Connecting the power cables and power on
K2 Edge automatically powers on when connected to a power source. To power on manually, press
the rotary knob. When powered on, the LCD panel illuminates.
K2 Edge Installation and Service Manual - document version: 4.0.2 – Page 21
Page 22

11.6 Configuring the IP Manager
After power on and startup, first configure the IP Manager via the K2 Edge's LCD-panel:
Go to Network configuration > IP-manager.
Specify:
• Use DHCP: On/Off
• IP-address: note that the IP Manager has its own IP-address.
• Netmask
• Gateway
• Nameserver
Select Set/OK to save changes.
You can now access the IP Manager via a web browser.
11.7 Configuring the K2 Edge hostname and network settings
Once you configured the IP Manager web interface, you can continue configuration of the K2 Edge via
the IP Manager web interface: enter the IP Manager's IP-address in a web browser and log in.
To specify a hostname:
Go to Network configuration > Hostname
Specify the K2 Edge hostname.
Click Set to save changes.
To configure the K2 Edge’s network settings:
Go to Network configuration > K2Edge.
Specify network settings for the K2 Edge server.
• Default port 0 is used:
Method: Auto, using DHCP/Manual or Manual
IP-Address
Netmask
The system’s MAC address is displayed.
Gateway
Nameserver
Click Set to save changes.
11.8 Specifying the TX/MAM database IP-address
Specify the TX/MAM servers’ virtual IP-address:
Go to Network configuration > TX/MAM server virtual IP.
Click Set to save changes.
K2 Edge Installation and Service Manual - document version: 4.0.2 – Page 22
Page 23

Single
Simulcast
Preview
Preset
HD or SD
- - hd1/hd2/sd1/sd2
HD
-
Preview
hdpr1/hdpr2
SD Preview
sdpr1/sdpr2
HD
SD - sim1
12 Channel Presets
12.1 Introduction
De K2 Edge contains 8 bidirectional SDI-ports. A number of presets have been defined for the K2
Edge. These presets can be selected via the IP Manager.
Possible Channel configurations on a single K2 Edge server:
Note that available options depend on licenses purchased.
Single Channel SD
• Preset 1
o Channel Single Inputs: IO1(SD),IO3(SD),IO5(SD),IO6(SD)
o Channel Single Outputs: IO2(SD),IO4(SD),IO7(SD), IO8(SD)
• Preset 2
o Channel Single Inputs: IO1(SD),IO3(SD),IO5(HD),IO6(HD)
o Channel Single Outputs: IO2(SD),IO4(SD),IO7(SD),IO8(SD)
Single Channel HD
• Preset 1
o Channel Single Inputs: IO1(HD),IO3(HD),IO5(HD),IO6(HD)
o Channel Single Outputs: IO2(HD),IO4(HD),IO7(HD),IO8(HD)
• Preset 2
o Channel Single Inputs: IO1(HD),IO3(HD),IO5(SD),IO6(SD)
o Channel Single Outputs: IO2(HD),IO4(HD),IO7(HD),IO8(HD)
Single Channel SD + Preview
• Preset 1
o Channel Single Inputs: IO1(SD), IO3(SD), IO4(SD)
o Channel Single Output: IO2(SD), IO5(SD), IO6(SD)
o Preview Channel Input: IO7(HD)
o Preview Channel Output: IO8(HD)
K2 Edge Installation and Service Manual - document version: 4.0.2 – Page 23
Page 24

• Preset 2
o Channel Single Inputs: IO1(SD), IO3(HD), IO4(HD)
o Channel Single Output: IO2(SD), IO5(SD), IO6(SD)
o Preview Channel Input: IO7(HD)
o Preview Channel Output: IO8(HD)
Single Channel HD + Preview
• Preset 1
o Channel Single Inputs: IO1(HD), IO3(HD), IO4(HD)
o Channel Single Output: IO2(HD), IO5(HD), IO6(HD)
o Preview Channel Input: IO7(HD)
o Preview Channel Output: IO8(HD)
• Preset 2
o Channel Single Inputs: IO1(HD), IO3(SD), IO4(SD)
o Channel Single Output: IO2(HD), IO5(HD), IO6(HD)
o Preview Channel Input: IO7(HD)
o Preview Channel Output: IO8(HD)
Simulcast
Preset 1
o Channel HD Inputs: IO1(HD), IO3(HD)
o Channel HD Output: IO2(HD), IO4(HD)
o Channel SD Input: IO5(SD), IO6(SD)
o Channel SD Output: IO7(SD), IO8(SD)
Customized Preset
Not covered in this manual.
K2 Edge Installation and Service Manual - document version: 4.0.2 – Page 24
Page 25

Channel configuration: what is configured where
K2 Edge
K2 Edge Channels and Ports.
Cobalt
The Cobalt Channel definition, used by the Cobalt processes.
TX/MAM
Asset Management.
Channel Composer
Channel Packs.
12.2 Configuring K2 Edge Channels and ports
This paragraph describes Channel and port configuration on the K2 Edge.
Further Channel configuration is described in the K2 Edge Smart Playout Center Commissioning
Manual.
User management for the Smart Playout Center applications.
Includes management of Folders, User Groups and more.
The Channel’s on-air design.
To configure K2 Edge Channels and ports:
In the IP manager, to save the changes you made, select Set/OK.
Changes in Channel settings have to be activated after being set: select Set/OK, then Activate/The
changed settings to activate changes. Note that when changes are activated, the nexos processes
are restarted which will interrupt playout.
If activation is required, the Activate/The changed settings option is available. When working via the
front panel, you have to scroll to this option.
Open the IP Manager via the web interface and log in.
To select a preset, in the IP Manager go to Channel Configuration > Channel layout.
Select one of the following presets:
o 1xSD (1) : single SD (with preset 1)
o 1xSD (2) : single SD (with preset 2)
o 1xHD (1) : single HD (with preset 1)
o 1xHD (2) : single HD (with preset 2)
o 1xSD+preview (1) : single SD + preview (preset 1)
o 1xSD+preview (2) : single SD + preview (preset 2)
o 1xHD+preview (1) : single HD + preview (preset 1)
o 1xHD+preview (2) : single HD + preview (preset 2)
o Simulcast
o Custom setup
Go to Channel Configuration > Region: select PAL or NTSC
Go to Channel Configuration > HD-format: for HD-channels, select 720p or 1080i
Go to Channel Configuration > Genlock: select Blackburst or Trilevel sync
K2 Edge Installation and Service Manual - document version: 4.0.2 – Page 25
Page 26

Go to Channel Configuration > Audio channels: specify audio groups per port
o SDIO1-9
Single audio group
Two audio groups
Three audio groups
Four audio groups
Go to Channel Configuration > SDI port misc
o SDIO1
VBI: Enabled/Disabled
HBI: Enabled/Disabled
o SDIO2-8
Key/Fill
Enable JIP channel: On/Off
Enable recording channel: On/Off (only visible when license)
Click Set to save changes, then Activate to activate changes.
12.3 Time settings
Go to System configuration > Time settings: set the system date and time.
o Current date: yyyy-mm-dd
o Current time: hh:mm
Click Set to save changes.
K2 Edge Installation and Service Manual - document version: 4.0.2 – Page 26
Page 27

13 Service Instructions
WARNING: When working with the server’s internal components, make sure to avoid
electrostatic discharge. Shutdown the K2 Edge via the IP Manager web interface or front
panel and remove the mains plug to avoid electric shock.
13.1 Server Power
13.1.1 Powering on the Server
K2 Edge automatically powers on when connected to a power source. To power on manually, press
the rotary knob on the front panel.
When powered on, the LCD panel illuminates. When system start has completed, color bars are
visible on the SDI (video) output screen.
13.1.2 Powering off the Server (shutdown)
To power off the K2 Edge:
Shutdown the K2 Edge via the IP Manager web interface or front panel.
When powered off, the LCD panel turns off.
In emergency cases following IP Manager options can be used:
• Forced power-off: forced hardware power down (no software halt, for emergency use only)
• Forced reset: forced hardware reset (no software halt, for emergency use only)
CAUTION: Always use the IP manager option Shutdown (includes halt) or halt the server
from the command line before power off to avoid data loss or corruption.
A forced power-off or reset can lead to data loss or corruption.
K2 Edge Installation and Service Manual - document version: 4.0.2 – Page 27
Page 28

CAUTION: To avoid electrostatic discharge, make sure that you are properly grounded.
13.2 Replacing the front bezel
You do not have to halt or power off the K2 Edge when replacing a single power supply.
Hard disks are hot swappable and redundant.
WARNING: Any instructions in this manual that require opening the equipment cover or
enclosure are for use by qualified service personnel only. To reduce the risk of electric
shock, do not perform any servicing other than that contained in the operating
instructions unless you are qualified to do so.
Unfasten the thumb screws from the unit.
Carefully slide out the bezel and disconnect the display cable. Pull the display cable from
the connector and not from the wire. A small flat screw driver can be used to push the
connector’s tabs out.
K2 Edge Installation and Service Manual - document version: 4.0.2 – Page 28
Page 29

Remove the bezel from the unit by lifting up the hinges on the side.
Remove the two hinges from the sides of the bezel by unfastening the screws.
Fasten the hinges to the new bezel (FRU 761051600) using a torque of 6 to 8 kgfcm (5.2
to 6.9 lbs).
Insert the front assembly replacement in the K2-Edge unit and reconnect the display
cable.
Make sure the bezel is flushed and aligned with the frame.
Fasten the thumb screws.
K2 Edge Installation and Service Manual - document version: 4.0.2 – Page 29
Page 30

CAUTION: To avoid electrostatic discharge, make sure that you are properly grounded.
Hard disks are hot swappable. You do not have to halt and shut down the K2 Edge when
HDD 1
HDD 3
HDD 5
HDD 0
HDD 2
HDD 4
13.3 Replacing a hard disk
The disk/HDD physical positions on the K2 Edge are:
To replace a hard disk:
Open the front panel.
Push the red button on front of the disk to the right.
You do not have to halt or power off the K2 Edge when replacing a single power supply.
Hard disks are hot swappable and redundant.
WARNING: Any instructions in this manual that require opening the equipment cover or
enclosure are for use by qualified service personnel only. To reduce the risk of electric
shock, do not perform any servicing other than that contained in the operating
instructions unless you are qualified to do so.
replacing a single disk.
Slide the disk out from its bay and remove from the server.
Slide the replacing hard disk into its bay. The hard drive automatically engages with its
connector.
Close the front panel.
To rebuild the disk, contact Support.
K2 Edge Installation and Service Manual - document version: 4.0.2 – Page 30
Page 31

13.4 Replacing a redundant power supply module
To replace a power supply:
Open the front panel.
Pull the level to the left and keep in this position while pulling the power supply forward to
Slide the replacing power supply in its bay and close the front panel.
CAUTION: To avoid electrostatic discharge, make sure that you are properly grounded.
You do not have to halt or power off the K2 Edge when replacing a single power supply.
Hard disks are hot swappable and redundant.
WARNING: Any instructions in this manual that require opening the equipment cover or
enclosure are for use by qualified service personnel only. To reduce the risk of electric
shock, do not perform any servicing other than that contained in the operating
instructions unless you are qualified to do so.
remove from the server.
K2 Edge Installation and Service Manual - document version: 4.0.2 – Page 31
Page 32

14 Appendix: The IP Manager Quick Reference
The IP Manager enables remote server management, monitoring and configuration. The IP Manager
is accessible via web, or via the LCD-panel on the front of the server. Two menus are available:
• the K2 Edge-menu: standard menu
• the IP Manager menu: also available when the system is unreachable (note that this menu
has less options)
If the system is unreachable, press the knob for 3 seconds to switch from the K2 Edge menu to the IP
Manager menu.
14.1 Starting the IP Manager web interface
To access the IP Manager, enter the IP Manager's IP-address in a web browser.
14.2 The LCD front panel
Use the rotary knob to operate the IP Manager via the front panel:
• Turn the rotary knob backwards and forwards to scroll through
options.
• Press the rotary knob to select an item or confirm a selection.
• Selected items are marked by [], <>, an arrow, or are highlighted.
• Press the knob 3 seconds to return to the main menu.
• Or, to discard changes and return to the main menu from a sub menu,
rotate the knob to the
• back/cancel/discard option, then press the knob.
In the IP manager, to save the changes you made, select Set/OK.
Changes in Channel settings have to be activated after being set: select Set/OK, then Activate/The
changed settings to activate changes. Note that when changes are activated, the nexos processes
are restarted which will interrupt playout.
If activation is required, the Activate/The changed settings option is available. When working via the
front panel, you have to scroll to this option.
Changing settings and executing commands via the IP Manager can interrupt a broadcast.
K2 Edge Installation and Service Manual - document version: 4.0.2 – Page 32
Page 33

14.3 The IP Manager menu
Example IP Manager menu. The system’s hostname is shown in the upper right corner and on the
web page’s tab. The highlighted menu item shows where you are in the navigation tree.
K2 Edge Installation and Service Manual - document version: 4.0.2 – Page 33
Page 34

14.4 System configuration
14.4.1 Network configuration
• Hostname: the K2 Edge hostname.
Click Set to save changes.
• IP-manager: specify network settings for the IP Manager. Note that the IP Manager has its own
IP-address.
• Use DHCP: On/Off
• IP-address
• Netmask
• Gateway
• Nameserver
Click Set to save changes.
• K2Edge: specify network settings for the K2 Edge server.
• Network port 0-3
Method: Auto, using DHCP/Manual or Manual
IP-Address
Netmask
The system’s MAC address is displayed.
Click Set to save changes.
• Gateway
• Nameserver
Click Set to save changes.
• TX/MAM server virtual IP: the TX/MAM servers’ virtual IP-address.
Click Set to save changes.
14.4.2 Channel configuration
• Video Bypass: enable (activate) or disable the bypass.
• Channel layout: select one of the following presets:
• 1xSD (1) : single SD (with preset 1)
• 1xSD (2) : single SD (with preset 2)
• 1xHD (1) : single HD (with preset 1)
• 1xHD (2) : single HD (with preset 2)
• 1xSD+preview (1) : single SD + preview (preset 1)
• 1xSD+preview (2) : single SD + preview (preset 2)
• 1xHD+preview (1) : single HD + preview (preset 1)
• 1xHD+preview (2) : single HD + preview (preset 2)
• Simulcast
• Custom setup
• Region: select PAL or NTSC
K2 Edge Installation and Service Manual - document version: 4.0.2 – Page 34
Page 35

• HD-format: for HD-channels, select 720p or 1080i
• Genlock: select Blackburst or Trilevel sync
• Audio channels: specify audio groups per port
• SDIO1-9:
Single audio group
Two audio groups
Three audio groups
Four audio groups
• SDI port misc
• SDIO1
VBI: Enabled/Disabled
HBI: Enabled/Disabled
• SDIO2-8
Key/Fill
• Enable JIP channel: On/Off
• Enable recording channel: On/Off (only visible when licensed)
14.4.3 Time settings
Set the system date and time.
• Current date: yyyy-mm-dd
• Current time: hh:mm
14.4.4 Licenses
Licenses are preconfigured.
14.5 System monitoring
• SNMP monitoring: not implemented yet
• System info:
• RAID 1-4: partition free space (K)
• Memory installed (MB)
• CPU usage (percentage)
• Non-running programs
• Serial number and system installer version
• PSU1-2 status
• GPU Temperature (Celsius)
• HD1-2 raid status
• HD1-2 SMART status
• HD1-2 temperature (Celsius)
• Fans (speed in rotations per minute)
K2 Edge Installation and Service Manual - document version: 4.0.2 – Page 35
Page 36

• UDP Monitoring: use this option to monitor Channel 0 (the single HD or SD Channel, or the HD
Channel in a simulcast setup) via IP. When enabled, a MPEG- transport stream with encoded
video, graphics, subtitles and audio (first stereo track) is sent over Ethernet using the UDPprotocol. A video player such as VLC is installed on a workstation to view output.
The UDP-monitoring option is described in more detail in the K2 Edge User Manual.
• Resolution: 320x240/ 240x180/ 160x120
• Aspect Ratio: 4:3/ 16:9
• Video Bitrate: in kbit/s
• Audio Enabled: On/Off
• Audio Bitrate: in kbit/s
• Ethernet Output: select On to enable monitoring and start streaming, Off to disable.
• IP-address: IP-address of the target workstation (can be a multicast address)
• IP-port: port the player will listen to. Default 4000
14.6 System administration
• Server start/stop
• Reboot
• shutdown
• Forced power off: only use when a shutdown is not possible.
• Forced reset: only use when a Reboot is not possible.
• Manage services
Services are:
• database
• dataserver
• encoderd
• firebird
• nexos
• playout_distri
• pt_guard
• schedulesync0
• sequencer0
Options for each service are:
• View the service’s version and status.
• Start the service.
• Stop the service.
• Restart the service.
Services are described in more detail in the Engineering manual.
K2 Edge Installation and Service Manual - document version: 4.0.2 – Page 36
Page 37

15 Appendix: time settings
Preferably a LTC-signal (Linear Timecode) is used to synchronize time codes. If this is not possible,
other options are:
• NTP sync (Network Time Protocol) to a NTP- server.
• Free running (system uses an internal clock)
Setting up NTP:
Edit /system/objects/code/setdate
• NTPSERVER: specify the NTP-server's IP-address
• ZONE: specify time zone [see options below], the ZONE-setting determines offset relative to
CET/GMT.
To test settings, from Linux command line enter:
/system/objects/code]# setdate -ntp [enter]
If settings are incorrect, an error message will be displayed.
To ensure that time is regularly synced, edit /etc/crontab. Remove the "#" in front of the line:
#00 * * * * root /system/objects/code/setdate -ntp >/dev/null 2>&1
Result:
00 * * * * root /system/objects/code/setdate -ntp >/dev/null 2>&1
K2 Edge Installation and Service Manual - document version: 4.0.2 – Page 37
Page 38

Example:
47 = seconds
Configuring time manually:
To set the date, log in via putty (ssh) as user root.
Go to the /system/objects/code folder:
...code]# cd /system/objects/code [enter]
Execute script setdate, use the –help option for an explanation:
...code]# ./setdate –help [enter]
...code]# ./setdate -m 07/29/08 11:37:47 [enter]
Explanation:
-m = manual
07 = month
29 = day of month
08 = year
11 = hours
37 = minutes
Requesting the NTP date and time:
To request the date from the NTP server configured in setdate:
...code]# ./setdate -ntp [enter]
ZONE options are listed on the next pages.
Notes:
• Options listed below are case sensitive.
• Insert a “/” sign behind continent names.
• Place ZONE names between quotes.
Example: “Europe/Amsterdam”
K2 Edge Installation and Service Manual - document version: 4.0.2 – Page 38
Page 39

CET
CST6CDT
Cuba
EET
EST
EST5EDT
Egypt
Eire
Factory
GB
GB-Eire
GMT
GMT+0
GMT-0
GMT0
Greenwich
HST
Hongkong
Iceland
Iran
Israel
Jamaica
Japan
Kwajalein
Libya
MET
MST
MST7MDT
NZ
NZ-CHAT
Navajo
PRC
PST8PDT
Poland
Portugal
ROK
Singapore
Turkey
UCT
UTC
Universal
W-SU
WET
Zulu
iso3166.tab
posixrules
zone.tab
Africa/
Abidjan
Accra
Addis_Ababa
Algiers
Asmara
Asmera
Bamako
Bangui
Banjul
Bissau
Blantyre
Brazzaville
Bujumbura
Cairo
Casablanca
Ceuta
Conakry
Dakar
Dar_es_Salaam
Djibouti
Douala
El_Aaiun
Freetown
Gaborone
Harare
Johannesburg
Kampala
Khartoum
Kigali
Kinshasa
Lagos
Libreville
Lome
Luanda
Lubumbashi
Lusaka
Malabo
Maputo
Maseru
Mbabane
Mogadishu
Monrovia
Nairobi
Ndjamena
Niamey
Nouakchott
Ouagadougou
Porto-Novo
Sao_Tome
Timbuktu
Tripoli
Tunis
Windhoek
America/
Adak
Anchorage
Anguilla
Antigua
Araguaina
Argentina
Aruba
Asuncion
Atikokan
Atka
Bahia
Barbados
Belem
Belize
Blanc-Sablon
Boa_Vista
Bogota
Boise
Buenos_Aires
Cambridge_Bay
Campo_Grande
Cancun
Caracas
Catamarca
Cayenne
Cayman
Chicago
Chihuahua
Coral_Harbour
Cordoba
Costa_Rica
Cuiaba
Curacao
Danmarkshavn
Dawson
Dawson_Creek
Denver
Detroit
Dominica
Edmonton
Eirunepe
El_Salvador
Ensenada
Fort_Wayne
Fortaleza
Glace_Bay
Godthab
Goose_Bay
Grand_Turk
Grenada
Guadeloupe
Guatemala
Guayaquil
Guyana
Halifax
Havana
Hermosillo
Indiana
Indianapolis
Inuvik
Iqaluit
Jamaica
Jujuy
Juneau
Kentucky
Knox_IN
La_Paz
Lima
Los_Angeles
Louisville
Maceio
Managua
Manaus
Martinique
Mazatlan
Mendoza
Menominee
Merida
Mexico_City
Miquelon
Moncton
Monterrey
Montevideo
Montreal
Montserrat
Nassau
New_York
Nipigon
Nome
Noronha
North_Dakota
Panama
Pangnirtung
Paramaribo
Phoenix
Port-au-Prince
Port_of_Spain
Porto_Acre
Porto_Velho
Puerto_Rico
Rainy_River
Rankin_Inlet
Recife
Regina
Rio_Branco
Rosario
Santiago
Santo_Domingo
Sao_Paulo
Scoresbysund
Shiprock
St_Johns
St_Kitts
St_Lucia
St_Thomas
St_Vincent
Swift_Current
Tegucigalpa
Thule
Thunder_Bay
Tijuana
Toronto
K2 Edge Installation and Service Manual - document version: 4.0.2 – Page 39
Page 40

Tortola
Vancouver
Virgin
Whitehorse
Winnipeg
Yakutat
Yellowknife
Antarctica/
Casey
Davis
DumontDUrville
Mawson
McMurdo
Palmer
Rothera
South_Pole
Syowa
Vostok
Arctic/
Longyearbyen
Asia/
Aden
Almaty
Amman
Anadyr
Aqtau
Aqtobe
Ashgabat
Ashkhabad
Baghdad
Bahrain
Baku
Bangkok
Beijing
Beirut
Bishkek
Brunei
Calcutta
Choibalsan
Chongqing
Chungking
Colombo
Dacca
Damascus
Dhaka
Dili
Dubai
Dushanbe
Gaza
Harbin
Hong_Kong
Hovd
Irkutsk
Istanbul
Jakarta
Jayapura
Jerusalem
Kabul
Kamchatka
Karachi
Kashgar
Katmandu
Krasnoyarsk
Kuala_Lumpur
Kuching
Kuwait
Macao
Macau
Magadan
Makassar
Manila
Muscat
Nicosia
Novosibirsk
Omsk
Oral
Phnom_Penh
Pontianak
Pyongyang
Qatar
Qyzylorda
Rangoon
Riyadh
Riyadh87
Riyadh88
Riyadh89
Saigon
Sakhalin
Samarkand
Seoul
Shanghai
Singapore
Taipei
Tashkent
Tbilisi
Tehran
Tel_Aviv
Thimbu
Thimphu
Tokyo
Ujung_Pandang
Ulaanbaatar
Ulan_Bator
Urumqi
Vientiane
Vladivostok
Yakutsk
Yekaterinburg
Yerevan
Atlantic/
Azores
Bermuda
Canary
Cape_Verde
Faeroe
Faroe
Jan_Mayen
Madeira
Reykjavik
South_Georgia
St_Helena
Stanley
Australia/
ACT
Adelaide
Brisbane
Broken_Hill
Canberra
Currie
Darwin
Eucla
Hobart
LHI
Lindeman
Lord_Howe
Melbourne
NSW
North
Perth
Queensland
South
Sydney
Tasmania
Victoria
West
Yancowinna
Brazil/
Acre
DeNoronha
East
West
Canada/
Atlantic
Central
East-Saskatchewan
Eastern
Mountain
Newfoundland
Pacific
Saskatchewan
Yukon
Chile/
Continental
EasterIsland
Etc/
GMT
GMT+0
GMT+1
GMT+10
GMT+11
GMT+12
GMT+2
GMT+3
GMT+4
GMT+5
GMT+6
GMT+7
GMT+8
GMT+9
GMT-0
GMT-1
GMT-10
GMT-11
GMT-12
GMT-13
GMT-14
GMT-2
GMT-3
GMT-4
GMT-5
GMT-6
GMT-7
GMT-8
GMT-9
GMT0
Greenwich
UCT
UTC
Universal
Zulu
Europe/
Amsterdam
Andorra
Athens
Belfast
Belgrade
Berlin
Bratislava
Brussels
Bucharest
Budapest
Chisinau
K2 Edge Installation and Service Manual - document version: 4.0.2 – Page 40
Page 41

Copenhagen
Dublin
Gibraltar
Guernsey
Helsinki
Isle_of_Man
Istanbul
Jersey
Kaliningrad
Kiev
Lisbon
Ljubljana
London
Luxembourg
Madrid
Malta
Mariehamn
Minsk
Monaco
Moscow
Nicosia
Oslo
Paris
Podgorica
Prague
Riga
Rome
Samara
San_Marino
Sarajevo
Simferopol
Skopje
Sofia
Stockholm
Tallinn
Tirane
Tiraspol
Uzhgorod
Vaduz
Vatican
Vienna
Vilnius
Volgograd
Warsaw
Zagreb
Zaporozhye
Zurich
Indian/
Antananarivo
Chagos
Christmas
Cocos
Comoro
Kerguelen
Mahe
Maldives
Mauritius
Mayotte
Reunion
Mexico/
BajaNorte
BajaSur
General
Mideast/
Riyadh87
Riyadh88
Riyadh89
Pacific/
Apia
Auckland
Chatham
Easter
Efate
Enderbury
Fakaofo
Fiji
Funafuti
Galapagos
Gambier
Guadalcanal
Guam
Honolulu
Johnston
Kiritimati
Kosrae
Kwajalein
Majuro
Marquesas
Midway
Nauru
Niue
Norfolk
Noumea
Pago_Pago
Palau
Pitcairn
Ponape
Port_Moresby
Rarotonga
Saipan
Samoa
Tahiti
Tarawa
Tongatapu
Truk
Wake
Wallis
Yap
US/
Alaska
Aleutian
Arizona
Central
East-Indiana
Eastern
Hawaii
Indiana-Starke
Michigan
Mountain
Pacific
Samoa
K2 Edge Installation and Service Manual - document version: 4.0.2 – Page 41
Page 42

10.250.51.51 MAIN-DB
project_options.serverip = "10.250.51.51"
ingest.assetHostIp = "10.250.51.51"
16 Appendix: Changing an IP-address
After changing the playout nodes’, TX/MAM or FTP-servers’ IP-address, following
adjustments need to be made:
After changing the IP-address of the playout nodes:
1. Change the IP-address in Cobalt Asset Manager Channel settings.
After changing the virtual IP-address of the TX/MAM-servers:
On standalone demo systems, the /system/txmam_fix_ip.sh script can be used.
1. On the K2Edge nodes, in /etc/hosts adjust MAIN-DB. Specify the virtual IP of the
TX/MAM servers.
Example:
You can also set the IP-address of the TX/MAM server via the IP Manager.
2. On both the TX/MAM servers, in /usr/local/apache2/application/configs/application.ini,
adjust project_options.serverip. Specify the virtual IP of the TX/MAM
servers.
Example:
3. On both the TX/MAM servers, in usr/local/apache2/application/configs/ingest.ini,
adjust ingest.assetHostIp. Specify the virtual IP of the TX/MAM servers.
Example:
After changing the IP-address of the FTP-server:
1. On both the TX/MAM servers, in /usr/local/apache2/application/configs/videoftp.ini,
adjust:
• videoFtp.host to the FTP-server IP
• videoFtp.user to FTP-server user
• videoFtp.password to FTP-server password
• videoFtp.path to FTP-server path
2. On the TX/MAM server (main and backup) in
/system/objects/cobassets/bin/transfer_ftp.xml, adjust the transfer metadata.
Transfer metadata can be set with the /system/objects/cobassets/bin/set.sh script.
K2 Edge Installation and Service Manual - document version: 4.0.2 – Page 42
Page 43

FTP
Default port 20 and 21
SSH/SCP
Default port 22
Cobalt database access
Default port 5020
Webbased interface
Default port 80 on IP manager network/IP
ptsockse
Default port 5000
nexos complex socket
Default port 5001
17 Appendix: K2 Edge network ports
K2 Edge Installation and Service Manual - document version: 4.0.2 – Page 43
Page 44

18 Appendix: K2 Edge IOs
18.1 Tiles
De K2 Edge contains 8 bidirectional SDI-ports. One video format can be configured per tile.
IO1 is always configured as input and IO2 as output to be able to use the bypass relay. A
number of presets have been defined for the K2 Edge. These presets are selected via the IP
Manager.
IOs and tiles.
18.2 Bypass
Ports IO1 (input) and IO2 (output) can be internally connected to bypass a Channel. When set
to bypass, the signal of the main Channel is ignored, and instead the feed received at IO1 is
made available at IO2. Bypass is enabled via the IP Manager.
18.3 Master and Slaves
To make a Channel's signal available on several SDI-outputs, one or more of the IO-ports can
be configured to become slave outputs. By default, the signal provided by a slave output is an
exact copy of the master output signal. A slave output uses the properties of the master
Output it refers to, and thus cannot introduce another broadcast format for the same Channel.
18.4 Genlock
If enabled, the SDI-output synchronizes to the frame rhythm of the genlock (blackburst) signal
connected to the blackburst BNC-socket on the back of the server. If disabled, or when no
genlock signal can be detected, the output will synchronize to an internal clock. Genlock can
only be set for master outputs.
K2 Edge Installation and Service Manual - document version: 4.0.2 – Page 44
Page 45

19 Appendix: Supported input/output broadcast
format combinations
IO-ports can be configured as SDI-inputs. The incoming signal can be made available to one
or more Channels, for example for coverage of live events. Inputs behave much like clips on
the K2Edge; they can be queued and started at any time. Inputs be can shared over multiple
Channels, and each Channel can handle several inputs simultaneously.
In Channel Composer, the Live Object is used to manage inputs.
At the moment there is no support for auto sensing the incoming signal’s format. The input
broadcast format does not have to be an exact match of the Channel/output format, but both
frame rate and interlaced/progressive mode must match.
Supported input/output broadcast format combinations are:
• PAL -> 1080@50i
• 1080@50i -> PAL
• NTSC -> 1080@59.94i
• 1080@59.94i -> NTSC
K2 Edge Installation and Service Manual - document version: 4.0.2 – Page 45
Page 46

LTC - DB9M
LTC_out
+ (positive) pin 2
LTC_out
- (negative) pin 4
LTC_out GND
GND ground) pin 1
LTC_in
+ (positive) pin 7
LTC_in
- (negative) pin 8
LTC_in GND
GND (ground) pin 9
GPIO - DB9M
GPI0 pin 1
GPI1 pin 2
GPI2 pin 3
GPI3 pin 4
GPI4 pin 5
GPI5 pin 6
GPI6 pin 7
GPI7 pin 8
GND pin 9
20 Appendix: GPIO and LTC pinning
GPIO is an open collector port.
K2 Edge Installation and Service Manual - document version: 4.0.2 – Page 46
Page 47

21 Appendix: Yast
You can also configure network settings using Yast. To start Yast:
Login on the K2 Edge as root. On the command line enter: yast [enter].
Use [TAB] to select [Next], then press [Enter].
The next screen opens.
K2 Edge Installation and Service Manual - document version: 4.0.2 – Page 47
Page 48

Example Yast screen.
Select the network card that is already configured (here Super Micro).
Select [Edit], then press [Enter].
The next screen opens.
K2 Edge Installation and Service Manual - document version: 4.0.2 – Page 48
Page 49

Example Yast screen.
Use [TAB] to navigate through and change applicable settings.
To change the hostname or name server, select [Hostname and Name Server],
then press [Enter].
To change the gateway, select [Routing], then press [Enter].
To save settings, select [Next]. To discard, select [Abort].
In the initial screen, select [Finish] to activate the settings.
The system can now be accessed with SSH, FTP, Cobalt, etcetera.
K2 Edge Installation and Service Manual - document version: 4.0.2 – Page 49
 Loading...