

Page 1

Grandstream Networks, Inc.
GXP2120/GXP2110/GXP2100/GXP1450
SIP Enterprise Phones
GXP2120/GXP2110/GXP2100/GXP1450 USER MANUAL
Page 2

GXP2120/GXP2110/GXP2100/GXP1450 User Manual
Index
GNU GPL INFORMATION .......................................................................... 5
CHANGE LOG ........................................................................................... 6
FIRMWARE VERSION 1.0.4.23 ............................................................................................................ 6
FIRMWARE VERSION 1.0.4.9 .............................................................................................................. 6
WELCOME ................................................................................................. 7
PRODUCT OVERVIEW .............................................................................. 8
FEATURE HIGHTLIGHTS ..................................................................................................................... 8
GXP2120/GXP2110/GXP2100/GXP1450 TECHNICAL SPECIFICATIONS ......................................... 9
INSTALLATION ........................................................................................ 12
EQUIPMENT PACKAGING ................................................................................................................. 12
CONNECTING YOUR PHONE ........................................................................................................... 12
GXP2120/GXP2110 EXTENSION MODULE....................................................................................... 13
SAFETY COMPLIANCES .................................................................................................................... 14
WARRANTY ......................................................................................................................................... 14
USING THE GXP2120/GXP2110/GXP2100/GXP1450 ............................. 15
GETTING FAMILAR WITH THE LCD .................................................................................................. 15
GETTING FAMILAR WITH THE KEYPAD ........................................................................................... 20
MAKING PHONE CALLS..................................................................................................................... 21
HANDSET, SPEAKER AND HEADSET MODE ........................................................................... 21
MUL TIPLE SIP ACCOUNTS AND LINES ..................................................................................... 21
COMPLETING CALLS.................................................................................................................. 22
MAKING CALLS USING IP ADDRESSES ................................................................................... 24
ANSWERING PHONE CALLS ............................................................................................................ 25
RECEIVING CALLS...................................................................................................................... 25
DO NOT DISTURB ....................................................................................................................... 25
DURING A PHONE CALL .................................................................................................................... 26
CALL WAITING/CALL HOLD ....................................................................................................... 26
MUTE ............................................................................................................................................ 26
CALL TRANSFER ........................................................................................................................ 26
5-WAY CONFERENCING ............................................................................................................ 27
FIRMWARE VERSION 1.0.4.23 GXP2120/GXP2110/GXP2100/GXP1450 USER MANUAL Page 2 of 69
Page 3

VOICE MESSAGES (MESSAGE WAITING INDICATOR) ........................................................... 29
SHARED CALL APPEARANCE (SCA) ........................................................................................ 29
CALL FEATURES ................................................................................................................................ 30
CUSTOMIZED LCD SCREEN & XML ................................................................................................. 31
CONFIGURATION GUIDE ........................................................................ 33
CONFIGURATION VIA KEYPAD ......................................................................................................... 33
CONFIGURATION VIA WEB BROWSER ........................................................................................... 37
DEFINITIONS ...................................................................................................................................... 37
STATUS PAGE DEFINITIONS ..................................................................................................... 38
ACCOUNT PAGE DEFINITIONS ................................................................................................. 38
SETTINGS/BASIC SETTINGS PAGE .......................................................................................... 46
SETTINGS/ADVANCED SETTINGS PAGE ................................................................................. 53
NAT SETTINGS ................................................................................................................................... 60
WEATHER UPDATE ............................................................................................................................ 61
PUBLIC MODE .................................................................................................................................... 62
EDITING CONTACTS AND CLICK-TO-DIAL ...................................................................................... 62
UPGRADING AND PROVISIONING ........................................................ 65
UPGRADE VIA KEYPAD MENU ......................................................................................................... 65
UPGRAGE VIA WEB GUI .................................................................................................................... 65
NO LOCAL TFTP/HTTP SERVERS .................................................................................................... 66
CONFIGURATION FILE DOWNLOAD ................................................................................................ 66
RESTORE FACTORY DEFAULT SETTINGS ........................................... 68
EXPERIENCING THE GXP2120/GXP2110/GXP2100/GXP1450 .............. 69
Table of Tables
GXP2120/GXP2110/GXP2100/GXP1450 User Manual
Table 1: GXP2120/GXP2110/GXP2100/GXP1450 FEATURES IN A GLANCE............................................ 8
Table 2: GXP2120/GXP2110/GXP2100/GXP1450 COMPARISON GUIDE ................................................. 9
Table 3: GXP2120/GXP2110/GXP2100/GXP1450 TECHNICAL SPECIFICATIONS ................................... 9
Table 4: GXP2120/GXP2110/GXP2100/GXP1450 EQUIPMENT PACKAGING ........................................ 12
Table 5: GXP2120/GXP2110/GXP2100/GXP1450 CONNECTORS .......................................................... 12
FIRMWARE VERSION 1.0.4.23 GXP2120/GXP2110/GXP2100/GXP1450 USER MANUAL Page 3 of 69
Page 4

Table 6: LCD DISPLAY DEFINITIONS ........................................................................................................ 15
Table 7: LCD ICONS ................................................................................................................................... 17
Table 8: KEYP AD DEFINITIONS ................................................................................................................ 20
Table 9: CALL FEATURES .......................................................................................................................... 30
Table 10: CONFIGURATION MENU ........................................................................................................... 33
Ta b le of Figures
GXP2120/GXP2110/GXP2100/GXP1450 User Manual
Figure 1: GXP2120/GXP2110 Extension Board Connection ...................................................................... 13
Figure 2: Keypad MENU Flow..................................................................................................................... 36
Figure 3: Web GUI - Contacts ..................................................................................................................... 63
Figure 4: Click-to-Dial .................................................................................................................................. 64
GUI Interface Examples
GXP2120/GXP2110/GXP2100/GXP1450 User Manual
http://www.grandstream.com/products/gxp_series/general/documents/gxp21xx_gui.zip
1. Screenshot of Configurat ion Login Pa ge
2. Screenshot of Status Page
3. Screenshot of Basic Setting Config urati on Pa ge
4. Screenshot of Advanced User Configuration Page
5. Screenshot of SIP Account Configuration Page
6. Screenshot of Saved Configuration Changes Page
7. Screenshot of Reboot Page
FIRMWARE VERSION 1.0.4.23 GXP2120/GXP2110/GXP2100/GXP1450 USER MANUAL Page 4 of 69
Page 5

GNU GPL INFORMATION
GXP2120/GXP2110/GXP2100/GXP1450 f irmware contains third-part y software licensed under the GNU
General Public License (G PL). Grandstream uses software under the specific terms of the GPL. Please
see the GNU General Public License (GPL) for the exact terms and conditions of the license.
Grandstream GNU GPL related source code can be downloaded from Grandstream web site from:
http://www.grandstream.com/support/faq/gnu_gpl.
FIRMWARE VERSION 1.0.4.23 GXP2120/GXP2110/GXP2100/GXP1450 USER MANUAL Page 5 of 69
Page 6

CHANGE LOG
This section documents significant changes from previous versions of user manuals for
GXP2120/GXP2110/GXP2100/GXP1450. On ly major ne w features or major doc ument updates are listed
here. Minor updates for corrections or editing are not documented here.
FIRMWARE VERSION 1.0.4.23
• Updated XML Application documentation link. [CUSTOMIZED LCD SCREEN & XML]
• Added "Use Privac y Heade r" and "Us e P-Preferred-Identity Header " options in web GUI. [ACCOUNT
PAGE DEFINITIONS]
• Added Date Display Format options in web GUI. [SETTINGS/BASIC SETTINGS PAGE]
• Added "Use Phonebook Key for LDAP Search" option in web GUI. [SETTINGS/ADVANCED
SETTINGS PAGE]
• Added customize city code information for weather update feature. [WEATHER UPDATE]
• Updated generic config file cfg.xml information. [CONFIGURATION FILE DOWNLOAD]
FIRMWARE VERSION 1.0.4.9
• Added instructions for connecting the phone. [CONNECTING YOUR PHONE]
• Updated Keypad MENU options and Keypad config ura tion flo w. [CONFIGURATION VIA KEYPAD]
• Added Line Key options Speed Dial, Dial DTMF, Call Return, Transfer, Voice Mail, Intercom, Call Park,
LDAP Search, and etc. [SETTINGS/BASIC SETTINGS PAGE]
• Added Multi Purpose Ke y options Voice Mail, Call Park, LDAP Search, and etc . [SETTINGS/BASIC
SETTINGS PAGE]
• Added IPv6 configuration options. [SETTINGS/BASIC SETTINGS PAGE]
• Added LDAP options information. [SETTINGS/ADVANCED SETTINGS PAGE]
• Added Public Mode information for hot desking feature. [PUBLIC MODE]
• Added NAT setting information. [NAT SETTINGS]
• Added Matching Incoming Caller ID function in Account Setting. [ACCOUNT PAGE DEFINITIONS]
• Added Editing Contacts and Click-to-Dial information. [EDITING CONTACTS AND CLICK-TO-DIAL]
• Added GNU GPL information. [GNU GPL INFORMATION]
• Added Change Log for this user manual. [CHANGE LOG]
• Merging GXP1450 User Manual content with GXP2120/GXP2110/GXP2100 User Manual.
FIRMWARE VERSION 1.0.4.23 GXP2120/GXP2110/GXP2100/GXP1450 USER MANUAL Page 6 of 69
Page 7

WELCOME
Thank you for purchas ing Grands tream G XP2120/GXP21 10/GXP210 0/GXP1450 SIP Enterprise Phones.
Your Grandstream GXP2120/GXP2110/GXP2100/GXP1450 Enterprise IP phone is feature-enriched,
sophisticated, yet simple to use. It delivers super ior HD audio quality, rich and le ading edge telephony
features, personalize d inform ation and customizable appl ication service, a utomated pro visioning for eas y
deployment, advanc ed security protecti on for privac y, and broad interoper ability with m ost 3rd party SIP
devices and leading SIP/NGN/IMS platform s .
The GXP2120/GXP2110/GXP2100/GXP1450 supports a broad range of codecs, security protection, PoE,
dual 10/100mbps Ethernet ports, along with customizable XML provisioning and application
features. Users can expect superior audio quality using the new high definition handset, hands-free
speakerphone, or headset. Also, it can support up to 5-way conferencing for
GXP2120/GXP2110/GXP2100 and 3-way conferencing for GXP1450, multi-languages and dual-color
LEDs. The GXP2120/GXP2110/GXP2110 also supports presence and Busy Lamp Field (BLF) in the Multi
Purpose Keys. It presents a large easy-to-read back lit graphical display along with multiple XML keys to
further enhance the user experience. Additionally, the GXP2120/2110 is expandable with one to two
expansion modules.
The GXP2120/GXP2110/GXP2100/GXP1450 is a perfect choice for enterprise users looking for a hig h
quality, feature rich multi-line IP phone w it h the best values.
Caution:
Changes or modifications to this product not expressly approved by Grandstream, or operation of this
product in any way other than as detailed by this User Manual, could void your manufacturer warranty.
Warning:
Please do not use a different power adap tor with the GXP2120/GXP2110/GXP2100/GXP1450 as it m ay
cause damage to the products and void the manufacturer warranty.
This document is s ubject to change without no tice. The latest electronic version of this user m anual is
available for download here:
http://www.grandstream.com/support
Reproduction or transm ittal of the entire or an y part, in any form or b y any means, electronic or print, f or
any purpose without the express written permission of Grandstream Networks, Inc. is not permitted.
FIRMWARE VERSION 1.0.4.23 GXP2120/GXP2110/GXP2100/GXP1450 USER MANUAL Page 7 of 69
Page 8
FEATURE HIGHTLIGHTS
Table 1: GXP2120/GXP2110/GXP2100/GXP1450 FEATURES IN A GLANCE
PRODUCT OVERVIEW
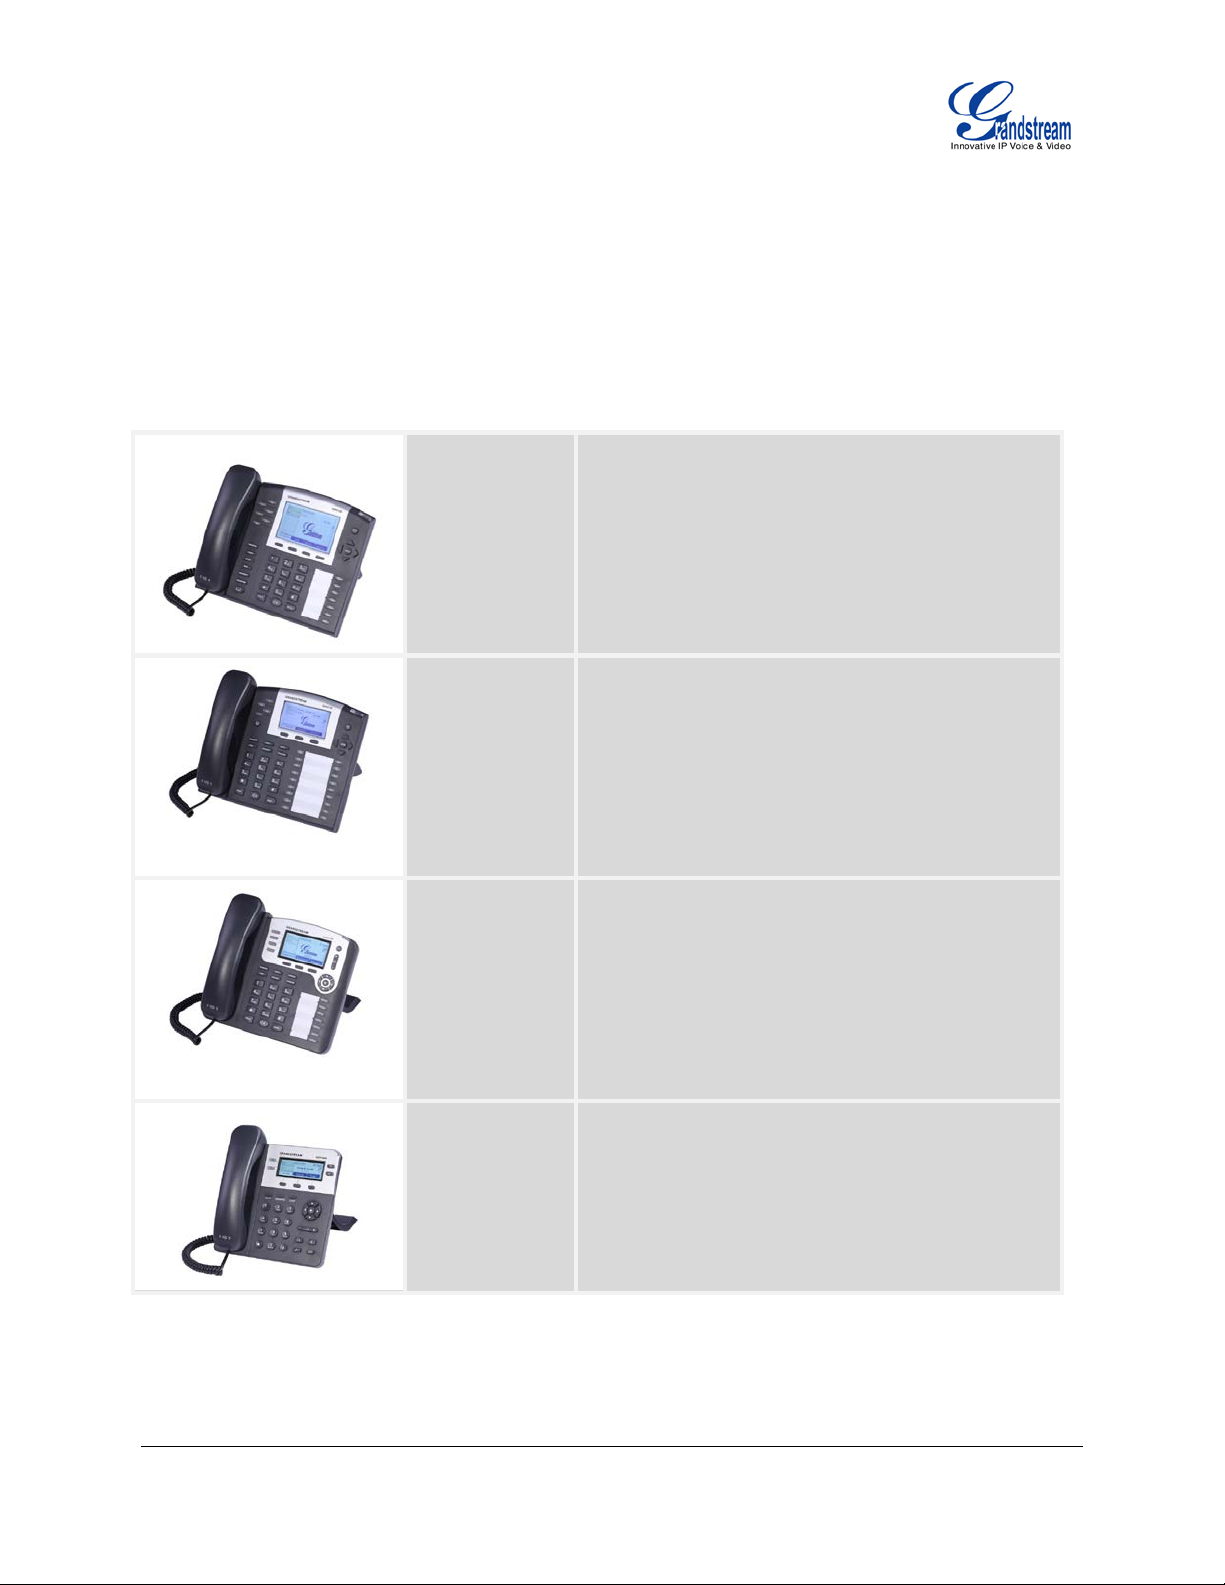
GXP2120 is an executive SIP phone. It features:
GXP2120
GXP2110
6 lines
7 programmable Multi Purpose Keys
4 XML programmable soft keys
GXP2110 is an executive SIP phone. It features:
4 lines
18 programmable Multi Purpose Keys
3 XML programmable soft keys
GXP2100 is an exec ut ive S IP phone. It features :
GXP2100
GXP1450
FIRMWARE VERSION 1.0.4.23 GXP2120/GXP2110/GXP2100/GXP1450 USER MANUAL Page 8 of 69
4 lines
7 programmable Multi Purpose Keys
3 XML programmable soft keys
GXP1450 is an executive SIP phone. It features:
2 lines
3 XML programmable soft keys
Page 9

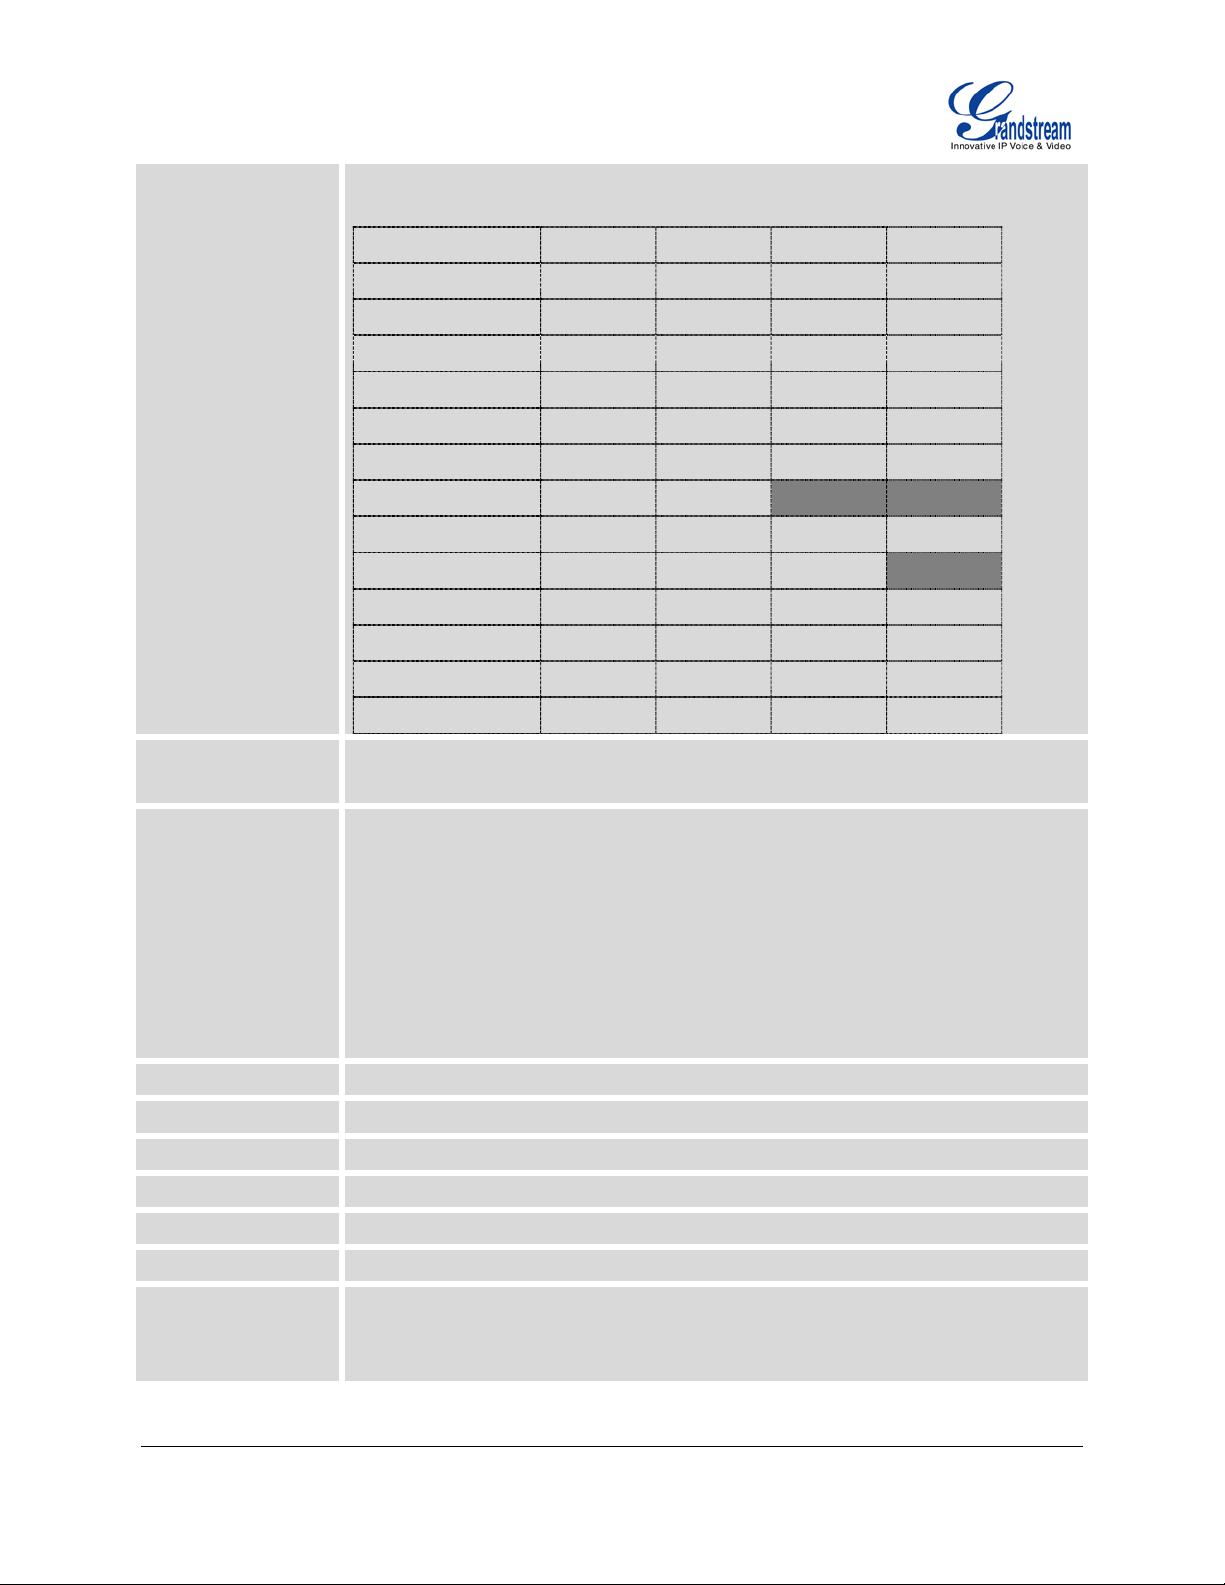
Table 2: GXP2120/GXP2110/GXP2100/GXP1450 COMPARISON GUIDE
up to 2 Expansion
up to 2 Expansion
Protocols and
, ICMP, DNS
Features GXP2120 GXP2110 GXP2100 GXP1450
LCD Display
Number of Lines
Programmable
320x160 pixel 240x120 pixel 180x90 pixel 180x60 pixel
6 4 4 2
7 18 7 N/A
Hard Keys
Programmable
4 3 3 3
Soft Keys
Extension Module
Yes,
Modules,
56 nodes each
Yes,
Modules,
56 nodes each
N/A N/A
GXP2120/GXP2110/GXP2100/GXP1450 TECHNICAL SPECIFICATIONS
Table 3: GXP2120/GXP2110/GXP2100/GXP1450 TECHNICAL SPECIFICATIONS
Standards
Network Interfaces
Graphic Display
FIRMWARE VERSION 1.0.4.23 GXP2120/GXP2110/GXP2100/GXP1450 USER MANUAL Page 9 of 69
SIP RFC3261, TCP/IP/UDP, RTP/RTCP, HTTP/HTTPS, ARP/RARP
(A record, SRV, N APTR), DHCP, PPPoE, TELNET, TFTP, NTP, STUN, SIMPLE,
TR-069, 802.1x, LLDP, IPv6, TLS, SRTP
SIP PUBLISH method (R FC3903), SIP Presence Package ( RFC3856, 3863) for
use of MPKs, SIP Dialog Package (RFC4235), SIP Message method (RFC3428)
Note:
MPKs are not applicable for GXP1450.
Dual switched 10/100Mbps port, integrated PoE
LCD size comparison:
GXP2120 GXP2110 GXP2100 GXP1450
320x160 pixel 240x120 pixel 180x90 pixel 180x60 pixel
Page 10
Feature Keys
sess based
Feature key comparison:
GXP2120 GXP2110 GXP2100 GXP1450
HOLD Yes Yes Yes Yes
SPEAKERPHONE Yes Yes Yes Yes
SEND Yes Yes Yes Yes
TRANSFER Yes Yes Yes Yes
CONF Yes Yes Yes Yes
MUTE Yes Yes Yes Yes
DND Yes Yes No No
HEADSET Yes Yes Yes Yes
INTERCOM Yes Yes Yes No
PHONEBOOK Yes Yes Yes Yes
MSG Yes Yes Yes Yes
MENU Yes Yes Yes Yes
NAVIGATION (4) Yes Yes Yes Yes
Voice Cod ec
Te leph ony Fe atures
HD Audio
Headset Jack
Base Stand
Wall Mountable
Expansion Module
QoS
Security
Support for G.723.1, G.729A/B, G.711u/a, G.726-32, G.722 (wide-band), iLBC,
in-band and out-of-band DTMF (in audio, RFC2833, SIP INFO)
Hold, transfer, forward, up to 5-wa y conf erenc e for GXP2120/GXP2 110/GXP2100,
up to 3-way conference for GXP1450, call park, pickup, shared-call-appearance
(SCA)/bridged-line-appearance (BLA), d o wnloa dab le p hone bo ok (XML, LDAP, up
to 2000 items f or GXP2120/GXP211 0/GXP2100, up to 500 item s for GXP1450),
call waiting, call log (up to 2000 records for GXP2120 /GXP2110/GXP2100, up to
500 records for GXP1450), XML customization of s creen, off-hook auto dial, auto
answer, click-to-dial, flexible dial p lan, hot desking, pe rsonalized mus ic ringtones,
server redundancy and fail-over
Yes, HD handset with support for wideband audio
2.5mm and RJ9 headset jack
Yes, 2-angle positio ns available
Yes
GXP2120/GXP2110 only
Layer 2 (802.1Q, 802.1p) and Layer 3 (ToS, DiffServ, MPLS) QoS
User and administrator level passwords, MD5 and MD5-
authentication, 256-bit AES encrypted configuration file, TLS, SRTP, 802.1x media
access control
FIRMWARE VERSION 1.0.4.23 GXP2120/GXP2110/GXP2100/GXP1450 USER MANUAL Page 10 of 69
Page 11

Multi-language
English, German, Italian, French, Spanish, Portuguese, Russian, Croatian,
Upgrade and
069 or
Temperature and
base stand,
Provisioning
Simplified Chinese, traditional Chinese, Korean, Japanese, and etc
Firmware upgrade via TFTP/HTTP/HTTPS, mass provisioning using TR-
AES encrypted XML configuration file
Power and Green
Energy Efficiency
Physical
Operating
Humidity
Package Content
Compliance
Universal power adapter:
Input: 100-240VAC 50-60Hz; Output: 5VDC, 800mA
Integrated Power-over-Ethernet (Built-in auto-sensing: Cisco and IEEE 802.3af
standard)
Max power consumption 2.5W (power adapter) or 3W (PoE)
GXP2120 GXP2110 GXP2100 GXP1450
Dimension 251mm(W)
x 202mm(L)
x 77mm(H)
Unit Weight
Package Weight
1.08KG 1.08KG 0.98KG 0.8KG
1.78KG 1.78KG 1.63KG 1.3KG
252mm (W)
x 210mm (L)
x 78mm (H)
222mm (W)
x 210mm (L)
x 93mm (H)
186mm (W)
x 210mm (L)
x 81mm (H)
32-104 oF / 0-40 oC, 10-90% (non-condensing)
GXP2120/GXP2110/GXP2100/GXP1450 phone, handset with cord,
wall mount spacers, universal power supply, network cable, quick start guide
FCC Part 15 (CFR 47) Class B; EN55022 Class B, EN55024, EN61000-3-2,
EN61000-3-3, EN60950-1; AS/NZS CISPR 22 Class B, AS/NZS CISPR 24, RoHS;
UL 60950 (power adapter)
FIRMWARE VERSION 1.0.4.23 GXP2120/GXP2110/GXP2100/GXP1450 USER MANUAL Page 11 of 69
Page 12

EQUIPMENT PACKAGING
Table 4: GXP2120/GXP2110/GXP2100/GXP1450 EQUIPMENT PACKAGING
INSTALLATION
Main Case
Handset
Phone Cord
Power Adaptor
Ethernet Cable
Phone Sta n d
Wall Mount Spacers
Quick Sta rt Guide
CONNECTING YOUR PHONE
Table 5: GXP2120/GXP2110/GXP2100/GXP1450 CONNECTORS
Handset Port
Headset Port
LAN Port
PC Port
RJ9 handset connector port
2.5mm and RJ9 headset connector port
10/100Mbps RJ-45 port connecting to Ethernet, int egrated PoE
10/100Mbps RJ-45 port for PC connection
Yes (1)
Yes (1)
Yes (1)
Yes (1)
Yes (1)
Yes (2)
Yes (2)
Yes (1)
EXT Port
Power Jack
To set up the GXP2120/GXP2110/GXP2100/GXP1450, follow the steps below:
1. Attach the phone stand or wall mount to the back of the phone where there are slots;
2. Connect the handset and main phone case with the phone cord;
3. Connect the LAN port of the phone to the RJ-45 sock et of a hub/switch or a router (LAN side of the
router) using the Ethernet cable;
4. Connect the 5V DC output plug to the power jack on the phone; plug the power adapter into an
electrical outlet. If PoE switch is used in step 3, this step could be skipped;
5. The LCD will display provision ing or f irm ware upgrade inform ation. Bef ore cont inuing, pl ease wait for
the date/time display to show up;
FIRMWARE VERSION 1.0.4.23 GXP2120/GXP2110/GXP2100/GXP1450 USER MANUAL Page 12 of 69
Extension module connection port for GXP2120/GXP2110
5V DC Power connector port
Page 13

6. Using the keypad configura tion m enu or pho ne's em bedded web serv er (Web GU I) by enter ing t he I P
address in web browser, you can further configure the phone.
GXP2120/GXP2110 EXTENSION MODULE
GXP2120/2110 supports two extension units, providing up to 112 additional programmable extensions.
Each GXP Extension unit h as 56 m ulti-purpos e ke ys, dua l color L EDs (r ed/green ) and supp ort BLF ( Bus y
Lamp Field) and Presence.
GXP2120/2110 Extension package contains:
• 1 GXP Extension unit
• 2 connection cables
GXP2120 with GXP Extension GXP Extension
Reverse side of connection with connection
plate
GXP2120/2110 has a special port on
the back
Figure 1: GXP2120/GXP2110 Extension Board Connection
Connect the first G X P EXT to the GXP2120/2110 using the connection cable f ound in th e GX P Extens ion
package. The first GXP EXT draws po wer directly from the phone. Con nect the second GXP Extension
unit using the connection plate and the connection cable. The GXP2120/2110 will automatically reboot and
power up the GXP Extens ions. Gr andstream recomm ends, thou gh not r equired, to use a s eparate po wer
supply with the second GXP EXT.
FIRMWARE VERSION 1.0.4.23 GXP2120/GXP2110/GXP2100/GXP1450 USER MANUAL Page 13 of 69
Page 14

Note:
• Should your system lose power, please unplug your devices and power up the GXP2120/2110 first.
• Extension for GXP2120/2110 is the same for GXP2020/2010 models. However, GXP2120/2110 uses a
different-shaped connector for the special port (as s hown above). Extension c ables will be included
with the extension board.
• Extension for GXP2120/2110 does not support hot-swap. Once connected, user should reboot the
phone to ensure the set up will work correctly.
• GXP2120/2110 can drive 2 extension modules. Independent power adapters are not needed for
extension modules.
SAFETY COMPLIANCES
The GXP2120/GXP2110/GXP2100/GXP1450 phone complies with FCC/CE and various safety standards.
The GXP2120/GXP2110/GXP2100/GXP1450 power adapter is com pliant with the UL stand ard. Use the
universal power adapter provided with the GXP2120/GXP2110/GXP2100/GXP1450 package only. The
manufacturer’s warranty does not cover damages to the phone caus ed b y unsupp or ted po wer ada pter s .
WARRANTY
If the GXP2120/GXP2110/GXP2100/GXP1450 phone was purchase d from a r eseller, please contact the
company where the p hone was purchase d for repl acem ent, repair or r efund. If t he phone was purchased
directly from Grandstream, contact the Grandstream Sales and Service Representative for a RMA (Return
Materials Authorizat ion) n u mber before the product is returned. Grandstream r es erves th e righ t to r emedy
warranty policy without prior notification.
Warning:
Use the power adapter provided with the phone. Do not use a different power adapter as this may damage
the phone. This type of damage is not covered under warranty.
FIRMWARE VERSION 1.0.4.23 GXP2120/GXP2110/GXP2100/GXP1450 USER MANUAL Page 14 of 69
Page 15

USING THE GXP2120/GXP2110/GXP2100/GXP1450
characters in
LINE STATUS
SOFTKEYS in Idle
GETTING FAMILAR WITH THE LCD
GXP2120/GXP2110/GXP2100/GXP1450 has a dynam ic and customizable screen. The screen displays
differently depending o n whether the phone is idle or in use (active). The following table describes the
items displayed on the GXP2120/GXP2110/GXP2100/GXP1450 idle screen.
Table 6: LCD DISPLAY DEFINITIONS
DATE AND TIME
LOGO
NETWORK STATUS
STATUS ICON
INDICATOR
Screen
Displays the current date and time. It c an be synchronized w ith Internet time
servers.
Displays company logo/name. This logo/name can be customized via xml screen
customization. The maximum size for logo name string is 26
English (approximately).
Shows the status of net work in the middle of the screen. It will ind icate whether
the network is down or starting.
Shows the status of the phone for registration status, call features and etc, using
icons as shown in the next table.
Displays the name of the account that is in use.
The softkeys are context s ensitive and will change depending on the status of
the phone. Typical functions assigned to softkeys are:
• SwitchSCR
Toggles between different idle screens: default idle screen, weather
information, stock information and currency information.
• ForwardAll
Unconditionally forwards the phone line (account 1) to another phone.
• MissedCalls
Shows up unanswered calls to this phone.
• Redial
Redials the last dialed number in idle screen when there is existed call log.
FIRMWARE VERSION 1.0.4.23 GXP2120/GXP2110/GXP2100/GXP1450 USER MANUAL Page 15 of 69
Page 16

SOFTKEYS in Call
Screen
Note:
If XML application is used for GXP2120/GXP2110/GXP2100, the softkey for
XML application will show up in the default idle screen as configured.
The softkeys are context sensitive and will change depending on the call status
of the phone.
• Redial
Redials the last dialed number after off hook when there is existed call log.
• Dial
Dials the call out after off hook and entering the number.
• Hold
Puts the current active call on hold.
• AnswerCall
Answers the incoming call when the pho ne is ringin g.
• RejectCall
Rejects the incoming call when the phone is ringing.
• EndCall
Ends the active call.
• Transfer
Transfer softkey will show up after pressing TRAN button and entering
transfer target number. Press Transfer softkey to do blind transfer.
• Split
In auto-attended transfer mode, after establishing the second call, press Split
to quit transfer and go back to normal talking status.
• ConfCall
Conferences the active calls.
• ReConf
Re-establish the conference among the calls on hold.
FIRMWARE VERSION 1.0.4.23 GXP2120/GXP2110/GXP2100/GXP1450 USER MANUAL Page 16 of 69
Page 17
SPECIAL
when integrated
SOFTKEYS
(Only for GXP2120/
GXP2110/GXP2100
with GXE5024/5028)
Call Parking: Please refer to GXE5024/5028 Online User Manual for more
information.
• CallPark
When the phone dials out, the Call Park s oftkey will display on screen. To
park the call, press the "Call Park" softkey and select MPK to park the call.
• PickUp
When the phone goes off-hook, the Call Pickup softkey will display on
screen. To pick up the parked call, press the "Call Pickup" softkey.
Call Queue: Please refer to GXE5024/5028 Online User Manual for more
information.
• SignIn
Press this button to sign in to the call queue. A gent will be prom pted in the
LCD display to select the call queue to j oin. Press ME NU button on k eypad
to select OK. Once the ag ent completely signs in, the agent will be brought
back to the main screen.
• SignOut
Press this button to sign out of the call queue. Press MENU button on
keypad to select OK. This will be displayed once the agent is signed in to the
call queue.
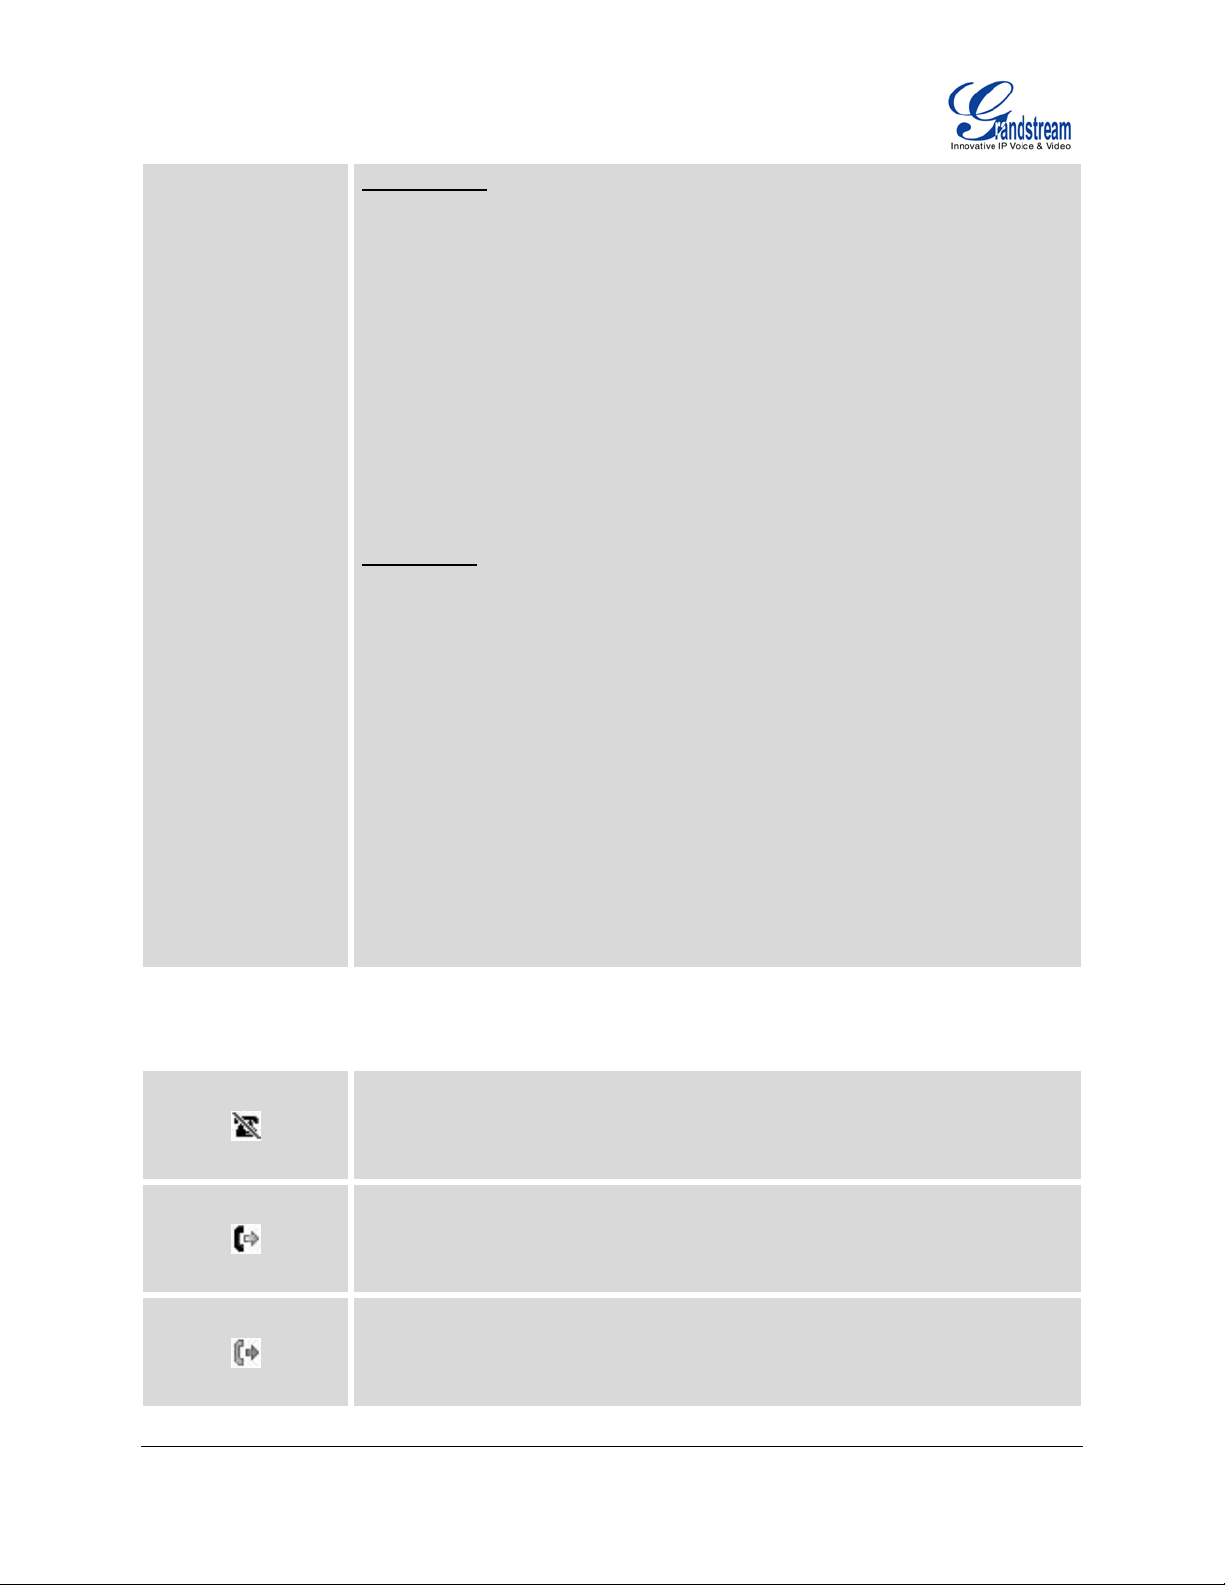
Table 7: LCD ICONS
DND Status.
OFF - Do Not Disturb disabled
ON - Do Not Disturb enabled
Call Forward All St a tus.
OFF - Call Forward All feature disabled
ON - Call Forward All feature enabled
Call Forward Busy Status.
OFF - Call Forward Busy feature disabled
ON - Call Forward Busy feature enabled
FIRMWARE VERSION 1.0.4.23 GXP2120/GXP2110/GXP2100/GXP1450 USER MANUAL Page 17 of 69
Page 18

Call Forward No Answer Status.
OFF - Call Forward No Answer feature disabled
ON - Call Forward No Answer feature enabled
Call Forward All and Call Forward No Answer Status.
OFF - Call Forward All and Call Forward No Answer feature disabled
ON - Call Forward All and Call Forward No Answer feature enabled
Keypad Status.
OFF - keypad is unlocked
ON - keypad is locked
Enter Keypad Unlock Password.
Voicemail Status.
OFF - No new voicemail
ON - New voicemail
Instant Message.
OFF - No new instant message
ON - New instant message
Voice Mail and Instant Message.
OFF - No new instant message or voicemail
ON - New instant message and voicemail
Network Status.
OFF - Network connection is up
ON - Network connection is down
Missed Call Status.
OFF - No missed call
ON - New missed call
Save Call Record Status.
OFF - No saving call record activity
ON - The phone is writing the call records into the flash at the moment
Waiting For Response.
Please wait for the phone to response before the keypad entry
Handset Status.
OFF - handset on hook
ON - handset off hook
FIRMWARE VERSION 1.0.4.23 GXP2120/GXP2110/GXP2100/GXP1450 USER MANUAL Page 18 of 69
Page 19

Speaker Status.
OFF - speaker off
ON - speaker on
Headset Status.
OFF - headset off
ON - headset on
Calling Out.
The phone is calling out
Calling In.
Phone is ringing with incoming call
Incoming Call.
The current call is an incoming call
Outgoing Call.
The current call is an outgoing call
Call Failed
Fail to establish call
SRTP Status.
OFF - SRTP is not used
ON - SRTP is used
MUTE Status.
OFF - No muted
ON - Muted
Call On Hold.
Call Active.
Conference Call.
Core Dump.
Core dump file can be downloaded from phone's Web GUI->Status page.
FIRMWARE VERSION 1.0.4.23 GXP2120/GXP2110/GXP2100/GXP1450 USER MANUAL Page 19 of 69
Page 20
GETTING FAMILAR WITH THE KEYPAD
The following table describes the buttons used on the GXP2120/GXP2110/GXP2100/GXP1450 keypad.
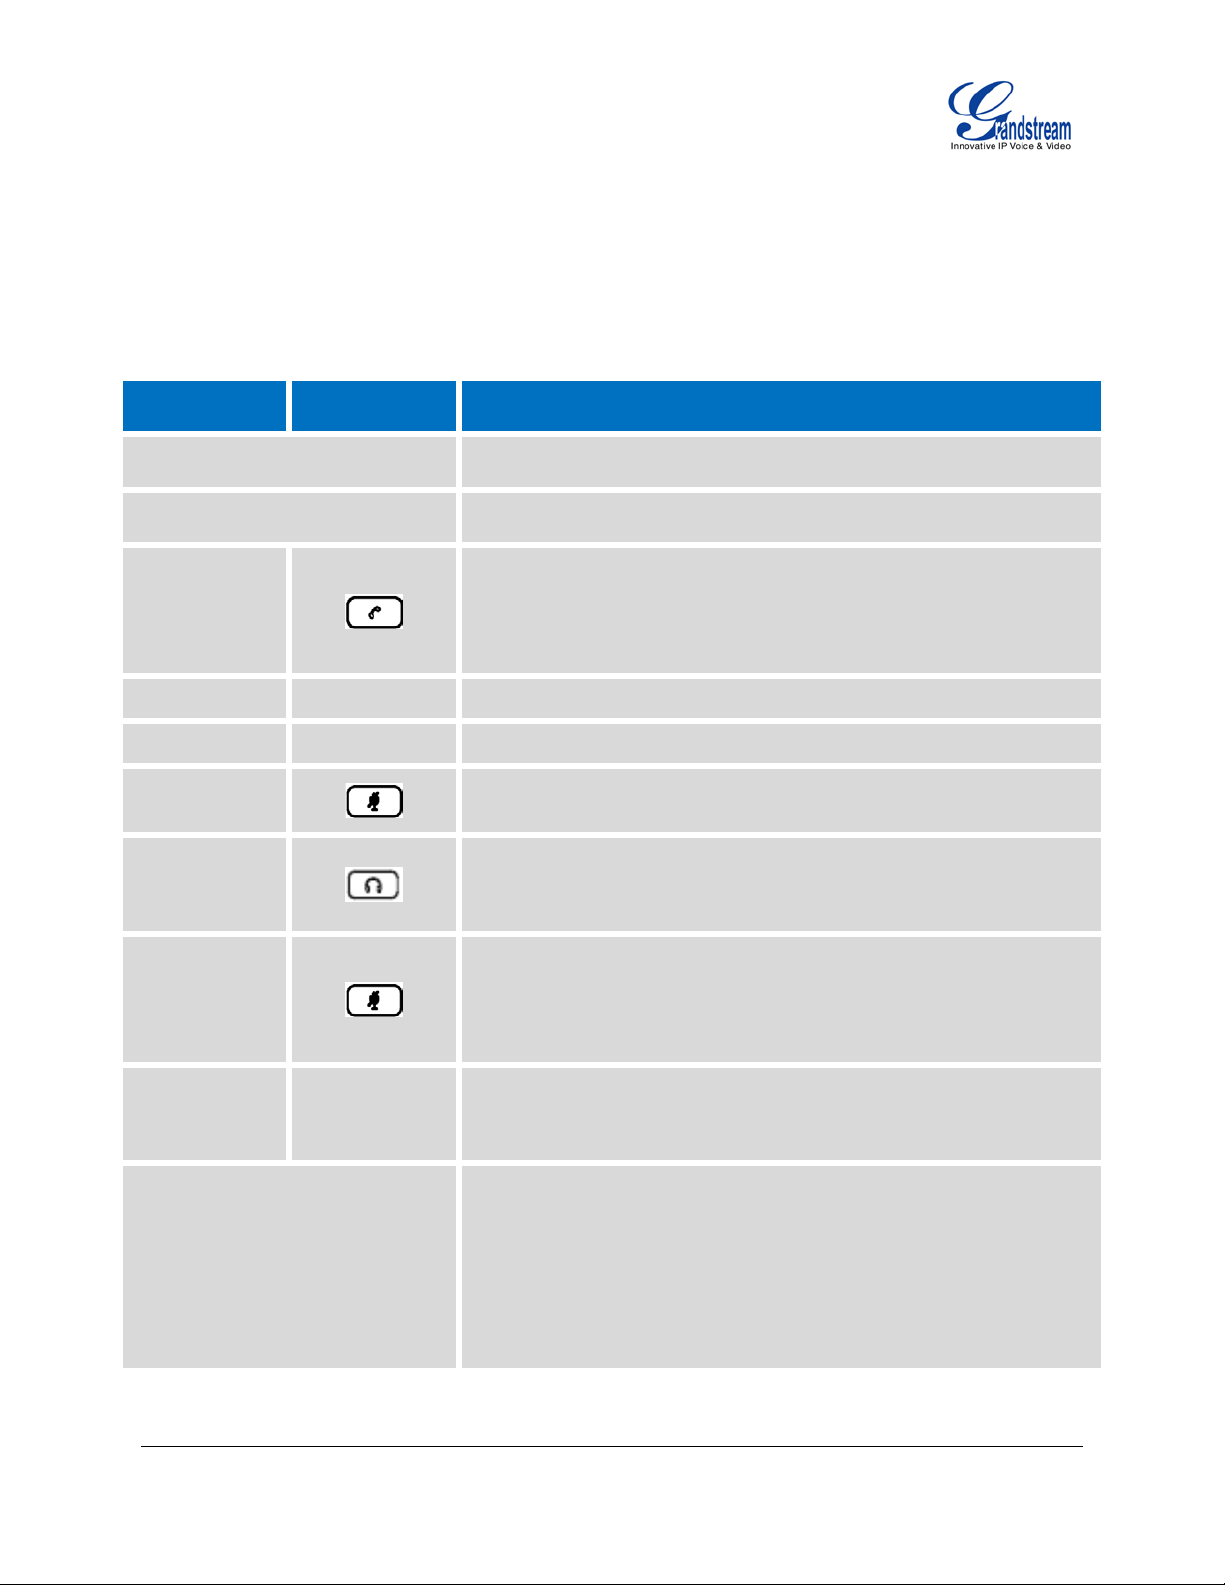
Table 8: KEYPAD DEFINITIONS
GXP21xx GXP1450 Definition
LINE KEYS
HOLD
SEND
TRANSFER TRANSFER
CONF CONF
MUTE
HEADSET
DND
Open or switch line.
Place active call on hold, or resume the call on hold.
Send/Redial.
• Send. Enter the digits and then press Send to dial out the
number;
• Redial. Redial when there is a previously dialed call.
Transfer an active call to another number.
Establish conference call with other parties.
Mute. Press to mute/unmute an active call.
Headset.
Do-Not-Disturb. Press to enable/disable DND feature.
For GXP2120/GXP2110, a dedicated DND button is available. For
GXP1450, MUTE button can be used as DND button when the phone
is in idle screen.
INTERCOM N/A
Paging/Intercom the configured Intercom User ID.
Navigation Keys/Menu.
• Press the 4 navigation keys to move up/down/left/right;
NAVIGATION KEYS/MENU
• Press the round button in the center to enter Keypad
Configuration MENU when phone is in idle;
The round button "MENU" can also be used as E NTER ke y when in
Keypad Configuration.
FIRMWARE VERSION 1.0.4.23 GXP2120/GXP2110/GXP2100/GXP1450 USER MANUAL Page 20 of 69
Page 21

PHONEBOOK/
CONTACT
Display phonebook list and options.
Volume (For GXP2100/GXP1450 only).
On GXP2100/GXP1450, press "-" or "+" to adjust the volume;
On GXP2120/GXP2110, when the phone is off hook, press UP or
DOWN button to adjust the volume.
0 - 9, *, #
Multi Purpose Keys
Standard p h o n e keypad.
Configure key mode and User ID to use the Multi Purpose key as
Speed Dial, BLF, Call Park and etc.
MAKING PHONE CALLS
HANDSET, SPEAKER AND HEADSET MODE
The GXP2120/GXP2110/GXP2100/GXP1450 allows us ers to switch am ong handset, s peaker or headse t
when making calls. Press the Hook Switch t o switch to handset; press the Headset button to s witch to
headset; or press the Speaker button
to switch to speaker.
MU LTI P LE SIP ACCOUNTS AND LINES
GXP2120 can support up to 6 independent SIP accounts; GXP2110/GXP2100 can support up to 4
independent SIP accounts; GXP1450 can support up to 2 independent accounts. Each account is capable
of independent SIP server, user and NAT settings. Each of the line b uttons is "virtually" m apped to an
individual SIP account. In off hook state, select an idle line and the dial tone will be heard.
To make a call, selec t the line you wish to use. The c orresponding LINE LED w ill light up in green. The
user can switch lines before dialing any number by pressing the LINE buttons.
For example: If 2 independent accounts are registered on GXP2120/GXP21 10/GXP2100/GXP1450, when
LINE 1 is pressed, the LINE 1 LED will light up in green. If LINE 2 is pressed, the LINE 2 LED will light up in
green and the subsequent call will be m ade through SI P account 2.
Incoming calls to a s pecif ic account wi ll attem pt to use its corr espondin g LINE if it is not in use. When the
"virtually" mapped line is in use, the phone will flash the other available LINE in red. A line is ACTIVE when
it is in use and the corresponding LED is red.
FIRMWARE VERSION 1.0.4.23 GXP2120/GXP2110/GXP2100/GXP1450 USER MANUAL Page 21 of 69
Page 22

COMPLETING CALLS
There are several ways to complete a call on GXP2120/GXP2110/GXP2100/GXP1450.
• On hook dialing. Enter the number when the phone is on hook and then send out.
When the phone is in idle, enter the number to be dialed out;
Ta ke handset off hook; or
Press Speaker button; or
Press Headset button with headset plugged in; or
Select an available LINE key;
The call will be dialed out.
• Off hook and dial. Off hook the phone, enter the number and send out.
Ta ke handset off hook; or
Press Speaker button; or
Press Headset button with headset plugged in; or
Press an available LINE key to activate speaker;
You shall hear dial tone after off hook;
Enter the number ;
Press SEND key or # to dial out.
• Redial. Redial the last dialed number.
Ta ke handset off hook; or
Press Speaker button; or
Press Headset button with headset plugged in; or
Press an available LINE key to activate speaker; or
When the phone is in idle;
Press SEND key, or the REDIAL softkey.
• Via Call History. Dial the number logged in phone's call history.
Press MENU button to bring up the main menu;
Enter C al l His tor y and select "Ans wered Ca lls", " Missed Ca lls", "Transfer red Calls " or "Forwarded
Calls";
Select the entry you would like to call using the navigation arrow keys;
Press SEND button to dial out.
• Via Phonebook. Dial the number from the phonebook.
Press MENU button to bring up the main menu;
FIRMWARE VERSION 1.0.4.23 GXP2120/GXP2110/GXP2100/GXP1450 USER MANUAL Page 22 of 69
Page 23

Select and enter Phonebook;
Select t he phonebook entry you would lik e to call usi ng the navigatio n arrow keys. Press MEN U
button to enter the entry detail;
Select option "Dial" using the navigation arrow keys and then press MENU button again to dial ou t.
• Speed Dial. Dial the number configured as Speed Dial on Line Key.
Go to phone's Web GUI->Basic Settings, configure the Line Key's Key Mode as Speed Dial. Select
the account to dial from , enter the Name and Us er ID (the number to be d ialed out) for the Line
Key. Click on "Update" at the bottom of the Web GUI page;
Off hook the phone, or directly press the Speed Dial key to dial out.
• Call Return. Dial the last answered call.
Go to phone's Web GUI->Basic Settings, configure the Line Key's Key Mode as Call Return.
Select the account to dial from, no Name or User ID has to be set on for Call Return;
Off hook the phone, or directly press the Call Return key to dial out.
• Via Page/Intercom.
Ta ke handset off hook; or
Press Speaker button; or
Press Headset button with headset plugged in; or
Press an available LINE key to activate speaker;
You shall hear dial tone after off hook;
Press MENU button to switch the call screen from "Dia lin g" t o "Paging";
Enter the number ;
Press SEND key or # to dial out.
Note:
• After entering the number, the phone waits for the No Key Entry Timeout (Default timeout is 4 seconds,
configurable via Web GUI) before dialing out. Press SEND or # key to override the No Key Entry
Timeout;
• If digits have been entered after handset is off hook, the SEND k ey will works as SEND instead of
REDIAL;
• By default, # can be used as SEND to dial the number out. Users could disable it by setting "User # as
Dial Key" to "No" from Web GUI->Account page;
• For Paging/Intercom, if the SIP Server/PBX supports the feature and has Paging/Intercom feature
code set up alread y, users might not necessaril y need toggle to paging m ode in th e call s creen of the
phone. Simply dial the feature code with extension as a normal call.
FIRMWARE VERSION 1.0.4.23 GXP2120/GXP2110/GXP2100/GXP1450 USER MANUAL Page 23 of 69
Page 24

MAKING CALLS USING IP ADDRESSES
Direct IP Call a llo ws t wo p hones to talk to e ach ot her in an ad-h oc f ashion withou t a SI P proxy. VoIP calls
can be made between two phones if:
• Both phones have public IP addresses; or
• Both phones are on the same LAN/VPN using private or public IP addresses; or
• Both phones can be conn ected throu gh a router us ing pub lic or privat e IP addresses (with necess ary
port forwarding or DMZ).
To make a direct IP call, please follow the steps below:
• Press MENU button to bring up main menu;
• Select "Direct IP Call" using the navigation arrow keys;
• Press MENU to enter the Direct IP Call mode;
• Input the 12-digit target IP address (Please see example below);
• Press the "More" softkey to make sure the softkey selection "IPv4" or "IPv6" is correctly selected
depending on your network environment;
• Press "OK" softkey to dial.
For example:
If the target IP address is 1 92.168.1 .60 and the p ort is 50 62 ( i.e., 192.16 8.1.60: 5062) , in put th e fol lowin g:
192*168*1*60#5062. The * key represents the d ot (.), the # key represents colon (:). Wait for about 4
seconds and the phone will initiate the call.
Quick IP Call Mode:
The GXP2120/GXP2110/GXP2100/GXP1450 a lso supports Quick IP Call mode. T his enables the phone
to make direct I P calls using only the last few digits (l ast octet) of the target phone's IP address. This is
possible only if both phones are under the same LAN/VPN. This simulates a PBX function using the
CMSA/CD without a SIP server. Controlled static IP usage is recommended.
To enable Quick IP Call Mode, go to phone's Web GUI->Advanc ed Setting page, set "Use Q uick IP Call
Mode" to "Yes ". C lic k on "U pdate" on the bottom of the W eb G UI page to take the c hange . To make Quick
IP Call, take the phone off hook f irst. T hen dial #xxx where x is 0-9 and x xx<25 5. Pr ess # or SEND an d a
direct IP call to aaa. bbb.c cc.X XX will be com pleted. "aaa. bbb.cc c" is from the loc al IP addres s re gard less
of subnet mask. The number #xx or #x are also valid. The leading 0 is not required (but it's OK).
FIRMWARE VERSION 1.0.4.23 GXP2120/GXP2110/GXP2100/GXP1450 USER MANUAL Page 24 of 69
Page 25

For example:
• 192.168.0.2 calling 192.168.0.3 -- dial #3 followed by # or “SEND”;
• 192.168.0.2 calling 192.168.0.23 -- dial #23 followed by # “SEND”;
• 192.168.0.2 calling 192.168.0.123 -- dial #123 followed by # “SEND”;
• 192.168.0.2: dial #3 and #03 and #003 results in the same call -- call 192.168.0.3.
Note:
• The # will represent colon ":" in direct IP call rather than SEND key as in normal phone call;
• If you have a SIP server configur ed, direc t IP call still work s. If you ar e using STUN, direc t IP call wil l
also use STUN;
• Configure the "User Random Port" to "No" when completing direct IP calls.
ANSWERING PHONE CALLS
RECEIVING CALLS
• Single incoming call. Phone rings with selected ring tone. The correspondi ng LINE key will flas h in
red. Answer call b y taking handset off hook , or us ing Speaker/Headset, or pr essing th e flashing LIN E
key;
• Multiple incoming calls. When another call comes in while having an active call, the phone will
produce a Call Waiting tone (stutter ton e). The other LINE ke y will flash in red. Ans wer the incoming
call by pressing the flashing LINE key. The current active call will be put on hold automatically.
DO NOT DISTURB
Do Not Disturb can be enable d/disabled by press ing the DND butto n on the phone when the phone is in
idle (For GXP2120/GXP2110 only. On GXP1450, press the MUTE button). Or users could set it from
phone's Menu following the steps below:
• Press the Menu button and select "Preference" using navigation keys;
• Press Menu button again to get into Preference options;
• Select "Do Not Disturb" and press Menu button;
• Use arrow keys to select and press Menu button to enable or disable "Do Not Disturb" feature.
When Do Not Disturb f eature is turned on, the DND icon will appear on the right s ide of the LCD. The
incoming call will not be accepted or the call will dir ectl y go into voic email.
FIRMWARE VERSION 1.0.4.23 GXP2120/GXP2110/GXP2100/GXP1450 USER MANUAL Page 25 of 69
Page 26

DURING A PHONE CALL
CALL WAITING/CALL HOLD
• Hold. Place a call on hold by pressing the HOLD button. The active LINE key will blink in green;
• Resume. Resume call by pressing the blinking LINE key;
• Multiple calls. Autom atically place active call on hol d or switch between calls by pr essing the LINE
key. Call waiting tone (stutter tone) will be audible on incoming call during the active call.
MUTE
During an active call, press the MUTE button to mute/unmute the microphone. The LCD will show "
Talking" or "MUTE" to indicate the mute status, with Mute icon displa yed on the screen.
CALL TRANSFER
GXP2120/GXP2110/GXP2100/GXP1450 supports Blind Transfer, Attended Transfer and Auto-Attended
Transfer.
• Blind Transfer.
During the first active call, press TRAN key and dial the number to transfer to;
Press SEND key or # to complete transfer of active call.
• Attended Transfer.
During the first active call, press LINE key. The first call will be put on hold;
Enter the number for the second call in the new line and establish the call;
Press TRAN key;
Press the other LIN E key which is on hold to transfer the call.
• Auto-Attended Transfer.
Set "Aut o-Attended Transfer" to "Yes" under Web GUI->Advanced Settings page. And then click
"Update" on the bottom of the page;
FIRMWARE VERSION 1.0.4.23 GXP2120/GXP2110/GXP2100/GXP1450 USER MANUAL Page 26 of 69
Page 27

Establish one call first;
During the call, press TRAN key. A new line will be brought up and the first call will be
automatically placed on hold;
Enter the number and press SEND key to establish the second call;
After the second call is established, press TRAN key again. The call w i ll be transferred;
If users press the SPLIT softkey before the call is transferred in the step above, the second call will
be resumed.
Note:
• T o transfer calls across SIP domains, SIP service providers must support transfer across SIP domains.
• In auto-attended transf er, use SEND key to dial out the second ca ll instead of us ing #, even when #
could be used as SEND in normal phone calls.
5-WAY CONFERENCING
GXP2120/GXP2110/GXP2100 can host up to 5-way conference call with other parties; GXP1450 can host
up to 3-way conference call with other parties.
• Initiate a conference call.
Establish ca lls wit h 2 or more parties respectively;
While 1 call is active, the other call will be put on hold with its LINE key blinking in green;
Press CONF key;
Press the desired LINE key on hold, the conference will be established;
Repeat the previous 2 steps for all the other parties to join the conference.
• Cancel Conference.
If after press the CONF key, the user decides not to conference, press Cancel softkey or the
current active LINE key;
This will resume the 2-way conversation with the current line.
• Split and Re-conference.
During the conference, pr ess HO LD key. The conference call will be split and th e calls wi ll be put
on hold separately with the LINE keys blinking in green;
FIRMWARE VERSION 1.0.4.23 GXP2120/GXP2110/GXP2100/GXP1450 USER MANUAL Page 27 of 69
Page 28

Select 1 LINE key and press to resume the 2-way conversation;
If users would lik e to re-establish conference ca ll, before 1 separate LINE is selec ted, press the
ReConf softkey right after the conference call is held/split;
• End Conference.
Press HOLD ke y to split the confer ence call. T he confer ence call will be ended with both ca lls on
hold; Or
Users could press the EndCall softkey or simply hang up the call to terminate the conference call.
GXP2120/GXP2110/GXP2100/GXP1450 supports Easy Conference Mode, which can be used combined
with the traditional way to establish the conference.
• Initiate a conference call.
Establish 1 call;
Press CONF key and a new line will be brought up using the same account;
Dial the number and press SEND key to establish the second call;
Press CONF key or press the ConfCall softkey to establish the conference.
• Join more parties in established conference call.
Establish conference call;
Press CONF key and a new line will be brought up using the same account;
Dial the number and press SEND key to establish the second call;
Press CONF key or press the ConfCall softkey to join the new party in the established conference.
• Split and Re-conference.
During the conference, press HOLD key. The conference call will be split and both calls will be put
on hold separately with 2 LINE keys blinking in green;
Select 1 LINE key and press to resume the 2-way conversation;
If users would like to re-establish conference ca ll, before 1 separate LINE is select ed, press the
ReConf softkey right after the conference call is split.
• Cancel Conference.
If users decides not to conference after establishing the second call, press EndCall softkey instead
of the ConfCall softkey/CONF key;
This will end the second call and the screen will show the first call on hold.
FIRMWARE VERSION 1.0.4.23 GXP2120/GXP2110/GXP2100/GXP1450 USER MANUAL Page 28 of 69
Page 29

• End Conference.
Press HOLD key to spl it the confer ence call. T he confer ence call will be ended with both ca lls on
hold; Or
Users could press the EndCall softkey or simply hang up the call to terminate the conference call.
Note:
• The party that starts the conference call has to remain in the conference for its entire duration, you can
put the party on mute but it mus t rem ain in the conversation. Also , this is not applicable when the
feature "Transfer on Conference Hangup" is turned on.
• The option "Disable Conference" has to be set to "No" to establish conference.
• When using Easy Conference Mode, use SEND k ey to dial out the second c all instead of using #,
even when # could be used as SEND in normal phone calls.
VOICE MESSAGES (MESSAGE WAITING INDICATOR)
A blinking red MWI (Message Waiting Ind icat or) on the to p r ight cor ner of th e phone indicates a m essage
is waiting. Dial into the voicemail box to retrieve t he message by entering the voice mail number of the
server or pressing the Voicemail button (Voice Mail User ID has to be properly configured as the voice mail
number under Web GUI ->Account page). An IVR will prom pt the user through the process of message
retrieval.
SHARED CALL APPEARANCE (SCA)
The GXP2120/GXP2110/GXP2100/GXP1450 phone supports shared call appearance by Broadsoft
standard. This feature allows members of the SCA group to shared SIP lines and provides status
monitoring (idle, ac tive, progressing, hold) of the s hared line. W hen there is an incoming call d esignated
for the SCA group, all of the mem bers of the group will be notifie d of an incom ing call and will be able to
answer the call from the phone with the SCA extension registered.
All the users that belong to the s ame SCA group will be notified by visual indicator when a user s ei zes t he
line and places an outgoing call, and all the users of this group will not be able to seize the line until the line
goes back to an idle state or when the cal l is pl aced on hold (with the excepti on of when multiple call
appearances are enabled on the server side).
In the middle of the conversation, there are two types of hold: Public Hold and Private Hold. When a
member of the group places the call on public hold, the other users of the SCA group will be notified of this
FIRMWARE VERSION 1.0.4.23 GXP2120/GXP2110/GXP2100/GXP1450 USER MANUAL Page 29 of 69
Page 30

by the red-flashing button and they will be abl e to resume the call from their phone by pressing the line
button. However, if this call is plac ed on private-ho ld, no other member of the SCA group will be able to
resume that call.
To enable shar ed c all ap pear ance, the user would n eed to re gister the s hared line accoun t on the phon e.
In addition, they would need to na vigate to “Settings”->”Basic Settings” on the web UI and set th e line to
"Shared Line". If the user requires more shared call appearances, the user can configure multiple line
buttons to be "shared line" buttons associated with the account.
CALL FEATURES
The GXP2120/GXP2110/GXP2100/GXP1450 supports traditional and advanced telephony features
including caller ID, caller ID with caller Name, call forward and etc.
Table 9: CALL FEATURES
Block Caller ID (for all subsequent calls)
*30
*31
*67
*82
*70
• Off hook the phone;
• Dial *30.
Send Caller ID (for all subsequent calls)
• Off hook the phone;
• Dial *31.
Block Caller ID (per call)
• Off hook the phone;
• Dial *67 and then enter the number to dial out.
Send Caller ID (per call)
• Off hook the phone;
• Dial *82 and then enter the number to dial out.
Disable Call Waiting (per Call)
• Off hook the phone;
• Dial *70 and then enter the number to dial out.
*71
Enable Call Waiting (per Call)
• Off hook the phone;
FIRMWARE VERSION 1.0.4.23 GXP2120/GXP2110/GXP2100/GXP1450 USER MANUAL Page 30 of 69
Page 31

• Dial *71 and then enter the number to dial out.
Unconditional Call Forward. To set up unconditional call forward:
*72
*73
*90
*91
• Off hook the phone;
• Dial *72 and then enter the number to forward the call;
• Press OK softkey or SEND key.
Cancel Unconditional Call Forward. To cancel the unconditional call forward:
• Off hook the phone;
• Dial *73;
• Hang up the call.
Busy Call Forward. To set up busy call forward:
• Off hook the phone;
• Dial *90 and then enter the number to forward the call;
• Press OK softkey or SEND key.
Cancel Busy Call Forward. To cancel the busy call forward:
• Off hook the phone;
• Dial *91;
• Hang up the call.
Delayed Call Forward. To set up delayed call forward:
*92
*93
• Off hook the phone;
• Dial *92 and then enter the number to forward the call;
• Press OK softkey or SEND key.
Cancel Delayed Call Forward. To cancel the delayed call forward:
• Off hook the phone;
• Dial *93;
• Hang up the call.
CUSTOMIZED LCD SCREEN & XML
The GXP2120/GXP2110/GXP2100/GXP1450 IP phone supports the following XML applications. Please
refer to the corresponding link for documentation and templates.
FIRMWARE VERSION 1.0.4.23 GXP2120/GXP2110/GXP2100/GXP1450 USER MANUAL Page 31 of 69
Page 32

• XML custom idle screen (customize idle screen logo, softkey layout, and etc.)
http://www.grandstream.com/products/gxp_series/general/documents/GXP21xx_14xx_XML_Screen_
Customization.zip
• XML downloadable phonebook
http://www.grandstream.com/products/gxp_series/general/documents/gxp_wp_xml_phonebook.pdf
• XML Application (For GXP21xx only)
http://www.grandstream.com/products/gxp_series/general/documents/xml_application_guide.zip
FIRMWARE VERSION 1.0.4.23 GXP2120/GXP2110/GXP2100/GXP1450 USER MANUAL Page 32 of 69
Page 33

CONFIGURATION GUIDE
status, software version
to enter the sub menu for IP setting information
options, displays LDAP directory by
The GXP2120/GXP2110/GXP2100/GXP1450 can be configured via two wa ys:
• LCD Configuration Menu using the phone's keypad;
• Web GUI embedded on the phone using PC's web browser.
CONFIGURATION VIA KEYPAD
To configure via the LCD configuration menu using phone's keypad, follow the instructions below:
• Enter MENU options. When the phone is in idle, press the round MENU button to enter the
configuration menu;
• Navigate in the menu options. Press the arrow keys up/down/left/right to navigate in the menu
options;
• Enter/Confirm selection. Press the round MENU button to enter the selected option;
• Exit. Press LEFT arrow key to exit to the previous menu;
• The phone automaticall y exits MENU mode with an in coming call, when the pho ne is off hook or the
MENU mode if left idle for more than 20 seconds.
The MENU options are listed in the following table.
Table 10: CONFIGURATION MENU
Call History
Status
Phone Book
LDAP Directory
FIRMWARE VERSION 1.0.4.23 GXP2120/GXP2110/GXP2100/GXP1450 USER MANUAL Page 33 of 69
Displays call logs for answered calls, dialed calls, missed calls,
transferred calls and forwarded calls.
Displays network status, account registration
number, MAC address, hardware versio n number, P/N number.
• Network status.
Press
(DHCP/Static IP/PPPoE), IPv4 address, IPv6 address, Subnet
Mask, Gateway and DNS server.
Displays phonebook. Users could ad d, edit, searc h and delet e contacts
here, or download phonebook XML to the phone.
Configures LDAP directory
Page 34

searching.
download the XML idle screen file
select Automatic for local language based on IP location if
Instant Messages
Direct IP Call
Preference
Displays received instant messages.
Makes direct IP call.
Preference sub menu includes the following options:
• Do Not Disturb
Enables/disables Do Not Disturb on the phone.
• Forward Call
Configures call forward feature on selected account, forward
type and number.
• Ring Tone
Configures different ring tones for incoming call.
• Ring Volume
Adjusts ring volume by pressing left/right arro w ke y.
• LCD Contrast
Adjusts LCD contrast by pressing left/right arrow key.
• LCD Brightness
Adjusts LCD brightness by pressing left/right arrow key.
Config
• Download SCR XML
Triggers the phone to
immediately. The XML idle screen server path and downlo ading
method need to be set up correctly in Web GUI->Advanced
Settings.
• Erase Custom SCR
Erases custom XML idle screen previously loaded on the phone.
After erasing it, the phone will show default idle screen.
• Display Language
Selects the language to be displayed on the phone. Users could
available.
• Time Settings
Configures date and time on the phone.
Config sub menu includes the following options:
• SIP
FIRMWARE VERSION 1.0.4.23 GXP2120/GXP2110/GXP2100/GXP1450 USER MANUAL Page 34 of 69
Page 35

Configures SIP Proxy, Outbound Proxy, SIP User ID, SIP Auth
Gateway, DNS
ID, SIP Password, SIP Transport and Audio information to
register SIP account on the phone.
• Upgrade
Configures firmware server and config server for upgrading and
provisioning the phone.
• Factory Reset
Resets the phone to factory default settings.
• Layer 2 QoS
Configures 802.1Q/VLAN T ag and priority value.
Factory Functions
Network
Call Features
Factory Functions sub menu includes the following options:
• Audio Loopback
Speak to the phone using speaker/handset/headset. If you can
hear your voice, your audio is working fine. Press Menu button
to exit audio loopback mode.
• Diagnostic Mode
All LEDs will light up. Press any key (except MENU key) on the
keypad to display the button name in the LCD. Lift and put back
the handset or press Menu button to exit diagnostic mode.
• Keyboard Diagnostic
Press all the available keys on the phone. The LCD will display
the name for the keys to be pressed to finish the keyboard
diagnostic mode.
Selects IP mode (DHCP/Static IP/PPPoE); Configures PPPoE account
ID and password; Configures IP address, Netmask,
Server 1 and DNS Server 2; Configures 802.1x mode.
Configures call for ward f eat ures f or Forward All, Forward Busy, Forward
No Answer and No Answer Timeout.
Voice Mails
Displays voicemail message information in the format below:
new messages/all messages (urgent messages/all urgent messages)
Reboot
Exit
Reboot the phone.
Exit from this menu.
The following picture shows the keypad MENU configuration flow.
FIRMWARE VERSION 1.0.4.23 GXP2120/GXP2110/GXP2100/GXP1450 USER MANUAL Page 35 of 69
Page 36

MENU
First Name
Back
Back
Back
Cancel
Back
Account X
Forward All
Answered Calls
Dialed Calls
Missed Calls
Transferred Calls
Forwarded Calls
Clear All
Back
Last Name
Number
Acct
Groups
Confirm Add
Cancel & Return
Call History
Status
Phone Book
LDAP
Directory
Instant
Messages
Direct IP Call
Preference
Config
Factory
Functions
Network
Call Features
Voice Mails
Reboot
Exit
Groups
New Entry
Search
Download Phonebook XML
Delete All Entries
Back
Search
LDAP Configuration
Back
Do Not Disturb
Forward Call
Ring Tone
Ring Volume
LCD Contrast
LCD Brightness
Download SCR XML
Erase Custom SCR
Display Language
Time Settin gs
SIP
Upgrade
Factory Reset
Layer 2 QoS
Audio Loopback
Diagnostic Mode
Keyboard Diagnostic
Back
IP Setting
PPPoE Settings
IP
Netmask
Gateway
DNS Server 1
DNS Server 2
802.1X
Back
Server Address
Port
Base
User Name
Password
LDAP Number Filter
LDAP Name Filter
LDAP Versi o n
...
Enable DND
Disable DND
Default Ring
Ring1
Ring2
Ring 3
Back
Account
SIP Proxy
Outbound Proxy
SIP User ID
SIP Aut h ID
SIP Password
SIP Transport
Audio
Save
Firmware Server
Config Server
Upgrade Via
Back
802.1Q/VLAN Tag
Priority value
Reset Vlan Config
Forward Busy
Forward No A nswer
No Answer Timeout
Figure 2: Keypad MENU Flow
FIRMWARE VERSION 1.0.4.23 GXP2120/GXP2110/GXP2100/GXP1450 USER MANUAL Page 36 of 69
Page 37

CONFIGURATION VIA WEB BROWSER
The GXP2120/GXP2110/GXP2100/GXP1450 embedded Web server responds to HTTP/HTTPS
GET/POST requests. Embedded HTML pages allow a user to configure the IP phone through a Web
browser such as Microsoft’s IE, Mozilla Firefox and Google Chrome.
To access the Web GUI:
1. Connect the computer to the same network as the phone;
2. Make sure the phone is turned on and shows its IP address. You may check the IP address by
pressing SwitchSCR softkey or go to MENU->Status;
3. Open a Web browser on your computer;
4. Enter the phone’s IP address in the address bar of the browser;
5. Enter the administrator’s login and password to access the Web Configuration Menu.
Note:
• The computer has to be connected to the same sub-network as the phone. This can be easily done by
connecting the computer to the same hub or switch as the phone connected to. In absence of a
hub/switch (or free ports on the hub/switch), please connect the computer directly to the PC port on the
back of the phone;
• If the phone is properl y connected to a working Internet con nection, the I P address of the phone will
display in MENU->Status. This address has the format: xxx.xxx.xxx.xxx, where xxx stands for a
number from 0-255. Users will need this num ber to access the W eb GUI. For exam ple, if the phone
has IP address 192.168.40.154, please enter “http://192.168.40.154” in the address bar of the
browser;
• The default login nam e for the administrator is "admin". The def ault administrator password is set to
"admin". The defaul t login name for the end user is "us er" while the default use r password is set to
"123".
• When changing an y setting s, alwa ys SUB MIT them b y press ing the UPDATE button on the bottom of
the page. After submitting the changes in all the Web GUI pages, reboot the phone to have the
changes take effect if necessary. All the options under Basic Setting and Account Setting, and most of
the options under Advanced Settings do not require reboot after submitting the changes. Under
Advanced Setting, the parameters on network configuration require reboot after update.
DEFINITIONS
This section describes the options in the phone's Web GUI. As mentioned, you can log in as an
administrator or an end user.
FIRMWARE VERSION 1.0.4.23 GXP2120/GXP2110/GXP2100/GXP1450 USER MANUAL Page 37 of 69
Page 38

• Status: Displays the Account status, Network status, and System Info of the phone;
• Account: To configure the SIP account;
• Basic Settings: To configure basic network settings, time settings, Line keys, and etc;
• Advanced Settings: To configure advanced network settin gs, upgra ding and pr o visioning, langua ge
settings, call features, and etc.
• Extension Boards: To configure the Multi Purpose Keys on the connected extension boards for
GXP2120/GXP2110.
STATUS PAGE DEFINITIONS
Global unique ID of device, in H EX format. The MAC address will be
MAC Address
used for provisioning a nd can be found on the label coming with origina l
box and on the label located on the back of the device.
IPv4 Address The IPv4 address obtained on the phone.
IPv6 Address The IPv6 address obtained on the phone.
Product Model Product model of the phone.
Part Number Product part number.
• boot: boot version number;
• core: core version number;
• base: base version number;
Software Version
• prog: program version number. This is the main firmware release
number, which is always used for identif ying the soft ware s ystem of
the phone;
• dsp: DSP version number.
System Up Time System up time since the last reboot.
Sys t e m T ime Current system time on the phone system.
Registered SIP account registration status.
PPPoE Link Up PPPoE connection status.
Service Status GUI and Phone service status: running or stopped.
Core Dump Core dump file that could be downloaded for troubleshooting purpose.
ACCOUNT PAGE DEFINITIONS
Account Active
This field indicates whether the account is active. The default setting is
"Yes".
Account Name The name associated with the SIP account.
FIRMWARE VERSION 1.0.4.23 GXP2120/GXP2110/GXP2100/GXP1450 USER MANUAL Page 38 of 69
Page 39

SIP Server
he phone for
This parameter controls how the Search Appliance looks up IP
modes: A Record, SRV,
be set to "User=Phone". Then a "User=Phone" parameter will be
The URL or IP address, an d port of the SIP server. T his is provided b y
your VoIP service provider (ITSP).
Secondary SIP Server
Outbound Proxy
SIP User ID
Authenticate ID
Authenticate Password
Name
The URL or IP addr ess, and port of the SIP server. This will be used
when the primary SIP server fails.
IP address or Domain name of the Primary Outbound Proxy, Media
Gateway, or Session Border Controller. It's used by t
Firewall or NAT penetration in different network environments. If a
symmetric NAT is detected, STUN will not work and ONLY an Outbound
Proxy can provide a solution.
User account information, provided by your VoIP service provider
(ITSP). It's usually in the form of digits similar to phone number or
actually a phone number.
SIP service subscriber 's Authenticate ID used for authent ication. It can
be identical to or different from the SIP User ID.
The account pass word required for the phone to authenticate with the
ITSP (SIP) server before the account can be registered. After it is saved,
this will appear as hidden for security purpose.
The SIP server subscriber' s name (optional) that will be used for Cal ler
ID display.
addresses for hostnames. There are four
NATPTR/SRV, Use Configured IP. The default setti ng is "A Record" . If
the user wishes to locate the ser ver by DNS SRV, the user may select
DNS Mode
"SRV" or "NAT PTR/SRV". If "Use Configured IP " is selected, p lease fill
in the three fields below:
• Primary IP: T he primary IP address wher e the phone sends DNS
query to;
• Backup IP 1;
• Backup IP 2.
If the phone h as a n assig ned PSTN te lephon e num ber , this f ield s hould
TEL URI
attached to the Request-Line and "TO" header in the SIP request to
indicate the E.164 n um ber. If set to "Ena ble", "T el:" will be us ed instea d
of "SIP:" in the SIP request. The default setting is "Disable".
SIP Registration
Unregister On Reboot
Selects whether or not the phone will send SIP Register mess ages to
the proxy/server. The default setting is "Yes".
If set to "Yes", the SIP user's registration information will be cleared
when the phone reboots. The SIP Contact header will contain "*" to
FIRMWARE VERSION 1.0.4.23 GXP2120/GXP2110/GXP2100/GXP1450 USER MANUAL Page 39 of 69
Page 40

Register Expiration
Specifies the time frequency (in seconds) that the phone sends
ce is behind a
the mechanism from No, STUN,
f it is configured to be
notify the server to unbind the connection. The default setting is "No".
Specifies the frequency (in minutes) in which the phone refreshes its
registration with the s pecifi ed registrar . The def ault value is 60 minut es.
The maximum value is 64800 minutes (about 45 days).
Reregister Before Expiration
re-registration request befo re the Register Ex piration. T he default value
is 0.
Local SIP Port
SIP Registration Failure Retry
Wait Time
Defines the local SIP p ort used to listen and t ransm it. The default v alue
is 5060 for Account 1 and 5062 for Account 2.
Specifies the interval to retry registration if the process is failed. The
default value is 20 seconds.
SIP T1 Timeout SIP T1 Timeout. The default setting is 0.5 seconds.
SIP T2 interval SIP T2 Interval. The default setting is 4 seconds.
SIP Transport
SIP URI Scheme when using
TLS
Use Actual Ephemeral Port in
Contact with TCP/TLS
Check Domain Certificates
Determines the net work protocol used f or the SIP transpor t. Users can
choose from TCP, UDP and TLS.
Specifies if "sip:" or "si ps:" will be used when TLS/TCP is sel ected for
SIP Transport. The default setting is "sips:".
Defines whether the actual ephem eral p ort in contact with TCP/T LS will
be used or not. This is used when TLS/TCP is selected for SIP Transfer.
The default setting is "No".
Defines whether the domain certificates will be checked or not when
TLS/TCP is used for SIP Transport. The default setting is "No".
Configures to rem ove outbound proxy from route. This is used for the
Remove OBP from route
SIP Extension to notify the SIP server that the devi
NAT/Firewall.
Validate Incoming Messages
Support SIP Instance ID
Defines whether the incoming messages will be validated or not. The
default setting is "No".
Defines whether SIP Insta n c e ID is s upported or not. The default setti ng
is "Yes".
This parameter configures whether the NAT traversal mechanism is
activated. Users could select
Keep-Alive, UPnP , Auto or VPN. If set t o "STUN" and STUN ser ver is
NA T T raversal
configured, the phone wil l route according to the STUN server. If NAT
type is Full Cone, Restrict ed Cone or Port-Restricted Cone, th e phone
will try to use pu blic IP add resses and port number in all the SIP&SD P
messages. The phone will send empty SDP packet to the SIP server
periodically to keep the NAT port open i
FIRMWARE VERSION 1.0.4.23 GXP2120/GXP2110/GXP2100/GXP1450 USER MANUAL Page 40 of 69
Page 41

SUBSCRIBE for MWI
the mechanism to transmit DTMF digits. There are 3
"Keep-Alive". Configure this to be "No" if an outbound proxy is used.
"STUN" cannot be used if the detected NAT is symmetric NAT.
When set to "Yes", a SUBSCR IBE for Message Waiting Indicatio n will
be sent periodically. The phone supports synchronized and
non-synchronized MWI. The default setting is "No".
SUBSCRIBE for Registration
When set to "Yes", a SUBSCRIBE for Registration will be sent out
periodically. The default setting is "No".
This feature is used f or Br o adsof t call f eat ur e synchronization. When it's
Feature Key Synchronization
enabled, DND and Call Forward features can be synchronized with
Broadsoft server. The default setting is "Disabled".
PUBLISH for Presence Enables Presence feature on the phone. The default setting is "No".
A SIP Extension to notify the SIP server that the phone is behind a
Proxy-Require
NAT/Firewall. Do not configure this parameter unless this feature is
supported on the SIP server.
Allows you to access voice messages by pressing the MESSAGE button
Voice Mail UserID
on the phone. This ID is usually the VM portal access number. For
example, in Asterisk server, 8500 could be used.
Specifies
Send DTMF
supported modes: in audio which means DTMF is combined in the audio
signal (not very reliable with low-bit-rate codecs), via RTP (RFC2833), or
via SIP INFO.
DTMF Payload Type
Configures the payload type for DTMF using RFC2833. The default
value is 101.
Early Dial
Selects wheth er or not to enable ear ly dial. If it's set to " Yes", the SIP
proxy must support 484 response. The default setting is "No".
Dial Plan Prefix Sets the prefix added to each dialed number.
A dial plan estab lishes the expected number and patt ern of digits for a
telephone number. T his parameter configures the allo wed dial plan for
the phone.
Dial Plan Rules:
Dial Plan
1. Accepted Digits: 1,2,3,4,5,6,7,8,9,0 , *, #, A,a,B,b,C,c,D,d;
2. Grammar: x - any digit from 0-9;
a) xx+ - at least 2 digit numbers
b) xx. - only 2 digit numbers
c) ^ - exclude
d) [3-5] - any digit of 3, 4, or 5
FIRMWARE VERSION 1.0.4.23 GXP2120/GXP2110/GXP2100/GXP1450 USER MANUAL Page 41 of 69
Page 42

e) [147] - any digit of 1, 4, or 7
llowed by any number between 2 and 9, followed by any 7 digit
9]x. |
allows dialing to local area code (617)
activate voice mail or other applications provided by their service
provider, the * should be predefined inside the dial plan feature. An
+ } which allows the user to dial * followed
f) <2=011> - replace digit 2 with 011 when dialing
g) | - the OR operand
• Example 1: {[369]11 | 1617xxxxxxx}
Allow 311, 611, and 911 or any 10 digit numbers with leading digits 1617;
• Example 2: {^1900x+ | <=1617>xxxxxxx}
Block any number of leading digits 1900 or add prefix 1617 for any
dialed 7 digit numbers;
• Example 3: {1xxx[2-9]xxxxxx | <2=011>x+}
Allows any number with leading digit 1 followed by a 3 digit number,
fo
number OR Allows any length of num bers with l eading di git 2, r eplaci ng
the 2 with 011 when dia led.
Example of a simple dial plan used in a Home/Office in the US:
{ ^1900x. | <=1617>[2-9]xxxxxx | 1[2-9]xx[2-9]xxxxxx | 011[2[3469]11 }
Explanation of example rule (reading from left to right):
• ^1900x. - prevents dialing any number started with 1900;
• <=1617>[2-9]xxxxxx -
numbers by dialing 7 numbers and 16 17 area code will be added
automatically;
• 1[2-9]xx[2-9]xxxxxx |- allows dialing to an y US/C ana da Number with
11 digits length;
• 011[2-9]x - allows international calls starting with 011;
• [3469]11 - allows dialin g special and emer gency numbers 311, 411,
611 and 911.
Note:
In some cases where the user wishes to dial strings such as *123 to
example dial plan will be: { *x
by any length of numbers.
BLF Call-pickup Prefix Configures the pref ix prepended to the BLF extension when t he phone
FIRMWARE VERSION 1.0.4.23 GXP2120/GXP2110/GXP2100/GXP1450 USER MANUAL Page 42 of 69
Page 43

picks up a call with BLF k ey. T he def au lt setti ng is **.
(Not applicable to
INVITE). If
GXP1450)
Delayed Call Forward Wait
Time
Enable Call Features
Call Log
Session Expiration
Min-SE
Defines the timeout (in seconds) before the call is forwarded on no
answer. The default value is 20 seconds.
When enabled, Do No D isturb, Call F orward and oth er call featur es will
be supported local ly provided IT SP support those features. The default
setting is "Yes". If set to "No", ForwardAll softkey will be hidden for
Account 1.
Configures Call Log s etting on th e phone. You can log all calls, only log
incoming/outgoing calls or disable call log. The default setting is "Log All
Calls".
The SIP Session Timer extension that enables SIP sessions to be
periodically "refreshed" via a SIP request (UPDATE, or rethere is no refresh v ia an UPDAT E or re-INVITE m essage, the ses sion
will be terminated once the s ession interv al expires. S ession Expir ation
is the time (in seconds) where the session is considered timed out,
provided no successf ul session refresh transaction occur s beforehand.
The default value is 180 seconds.
The minimum sess ion expiration (in seconds). The def ault value is 90
seconds.
Caller Request Timer
Callee Request Timer
If set to "Yes" and the r emote part y supports s ession timer s, the phone
will use a session timer when it makes outbound calls.
If set to "Yes" and the r emote part y supports ses sion timer s, the phone
will use a session timer when it receives inbound calls.
If Force Timer is set to "Yes", the phone will use the session timer even if
Force Timer
the remote party do es not support this f eature. If Force Timer is set to
"No", the phone will enable the session timer only when the remote party
supports this feature. To turn off the session timer, select "No".
UAC Specify Refresher
UAS Specify Refresher
As a Caller, select UAC to use the phone as the refresher; or select UAS
to use the Callee or proxy server as the refresher.
As a Callee, select UAC to use caller or proxy server as the refresher; or
select UAS to use the phone as the refresher.
The Session Timer can be r efreshed using the INVITE method or the
Force INVITE
UPDATE method. Select " Yes" to use t he INVIT E method to r efr esh the
session timer.
Enable 100rel
The use of the PRACK (Provis ional Acknowledgment) m ethod enables
reliability to SIP provisional responses (1xx series). This is very
FIRMWARE VERSION 1.0.4.23 GXP2120/GXP2110/GXP2100/GXP1450 USER MANUAL Page 43 of 69
Page 44

important in order to supp o r t PST N internetworking. To invok e a relia bl e
When the
To" header uses the transferred target's
provisional response, the 100rel tag is appended to the value of the
required header of the initial signaling messages.
Account Ring Tone
Matching Incoming Caller ID
Distinctive Ringtones
Allows users to configure the ringtone for the account. Users can choose
from different ringtones from the dropdown menu.
Specifies matching rules with number, pattern or Alert Info text. W hen
the incoming caller ID or Alert Inf o matc hes the ru le, the phone w ill ring
with selected distinctive ringtone. Matching rules:
• Specific caller ID number. For example, 8321123;
• A defined pattern with certain length using x and + to specify, where
x could be any digit from 0 to 9. Samples:
xx+ : at least 2-digit number;
xx : only 2-digit number;
[345]xx: 3-digit number with the leading digit of 3, 4 or 5;
[6-9]xx: 3-digit number with the leading digit from 6 to 9.
• Alert Info text
Users could configure the matching rule as certain text (e.g., priority)
and select the custom ring tone m apped to it. T he custom ring tone
will be used if the ph one r e c eives SI P INVITE with Alert-Inf o head er
in the following format:
Alert-Info: <http://127.0.0.1>; info=priority
Selects the distinctive ring tone for the matching rule.
incoming caller ID or Alert Info matches the rul e, the phone will ring with
the selected ring.
Ring Timeout
Line Seize Timeout
Send Anonymous
Anonymous Call Rejection
Auto Answer
Defines the tim eout (i n s econds) for the rings o n n o a ns wer. The default
setting is 60 seconds.
Defines the interval (in seconds) before the line can be seized when
Shared Line is used. The default value is 15 seconds.
If set to "Yes", the "From" header in outgoi ng INVITE m essages will be
set to anonymous, essentially blocking the Caller ID to be displayed.
If set to "Yes" , anonymous calls will be rej ected. The default setting is
"No".
If set to "Yes ", the phone will automatical l y turn o n the s peaker phone to
answer incoming calls after a short reminding beep.
If set to "Yes ", the phone will automatical l y turn o n the s peaker phone to
Allow Auto Answer by Call-Info
answer incoming ca lls after a short reminding beep, based on the SIP
info header sent from the server/proxy. The default setting is "No".
Refer-T o Use Target Contact If set to "Yes", the "Refer-
FIRMWARE VERSION 1.0.4.23 GXP2120/GXP2110/GXP2100/GXP1450 USER MANUAL Page 44 of 69
Page 45

Contact header information for attended transfer. The default setting is
if the
one, including G.711
"No".
Transfer on Conference
Hangup
Check SIP User ID for
incoming INVITE
Preferred Vocoder
SRTP Mode
Symmetric RTP
Silence Suppression
Defines whether or not the call is transferred to the other party
initiator of the conference hangs up. The default setting is "No".
If set to "Yes", SIP User ID will be checked in the Request URI of the
incoming INVITE. If it doesn't match the phone's SIP User ID, the call will
be rejected. The default setting is "No".
7 different vocoder t ypes are supported on the ph
U-law (PCMU), G.711 A-law (PCMA), G.723. 1, G.729A/B, G.722 ( wide
band), iLBC and G 72-32. U sers can conf igur e voc oder s in a preference
list that is included with the same preferenc e order in SDP m es s age.
Enables the SRTP m ode based on your select ion. T he defaul t setti ng is
"Disabled".
Defines whether symm etr ic RTP is s upported or not. T he def ault setting
is "No".
Controls the silence suppr es sion/VAD f eatur e of the a udio c odec G .723
and G.729. If set to "Yes" , when silenc e is detected, a small quantit y of
VAD packets (instead of audio p ack ets) will be sent du ring the per iod of
no talking. If set to "No", this featur e is disabled. The default set ting is
"No".
Configures the number of voice frames transmitted per packet. W hen
configuring this, it should be noted that the "ptime" value for the SDP will
Voice Frames Per TX
change with different configurations here. This value is related to the
codec used and the actual frames transmitted during the in payload call.
For end users, it is recommende d to us e th e def ault s e ttin g, as incor rec t
settings may influence the audio quality.
Defines the timeout (in seconds) for no key entr y. If no k ey is pressed
No Key Entry Timeout (s)
after the timeout, the digits will be sent out. The default value is 4
seconds.
Allows users to c onfigure the "#" k ey as the "Send " key. If set to "Ye s",
Use # as Dial Key
the "#" key will immediately dial out the input digits. In this case, this key
is essentially equ ivalent to the "Sen d" key. If set to "No", the "#" ke y is
included as part of the dialing string.
G723 Rate Selects encoding rate for G723 codec. The default value is 5.3kbps.
G.726-32 Packing Mode Selects "ITU" or "IETF" for G726-32 packing mode.
iLBC Frame Size Selects iLBC packet frame size. The default value is 30ms.
iLBC Payload Type Specif ies iL BC Pa yload t ype. T he def ault val ue is 97. The val id range is
FIRMWARE VERSION 1.0.4.23 GXP2120/GXP2110/GXP2100/GXP1450 USER MANUAL Page 45 of 69
Page 46

between 96 and 127.
(i.e., BLF1006). To monitor the entensions in the list, under Web
the Multi
way calling
etting is
level web GUI
Jitter Buffer Type
Jitter Buffer Length
Eventlist BLF URI
Conference URI
Use Privacy Header
Selects either Fixed or Adaptive based on network conditions. The
default setting is "Adaptive".
Selects Low, Medium , or High based on network conditions. The default
setting is "Medium".
Configures the eventlist BLF URI on the phone to monitor the extensions
in the list with Multi Purpose Key. If the server supports this feature,
users need to conf igure an eventlist BLF URI on th e service side first
(i.e., BLF1006@m yserver.com ) with a list of extens ion incl uded. On the
phone, in this "event list BLF URI" field, fill in the UR I with out t he domain
GUI->Basic Setting page, please select "eventlist BLF" in
Purpose Key key m ode, choose account, enter Name an d User ID of
each extension in the list. (Not applicable to GXP1450)
Configures the conference URI when using Broadsoft N-
feature.
Controls whether the Privacy Header will present in the SIP INVITE
message or not. The default set ting is "default", whic h is when "Huawei
IMS" special feature is on, the Privacy Header will not show in INVITE. If
set to "Yes", the Privac y Head er will always show in INVITE. If set to
"No", the Privacy Header will not show in INVITE.
Controls whether the P-Preferred-Identity Header will present in the SIP
INVITE message or not. T he default setting is "d efault", which is when
Use P-Preferred-Identity
Header
"Huawei IMS" special feature is on, the P-Preferred-Identity Header will
not show in INVIT E. If set t o "Yes", the P-Preferred-Identity Header will
always show in INVITE. If set to "No", the P-Preferred-Identit y Header
will not show in INVITE.
Different soft switch vendors have special requirements. Therefore users
may need select special features to meet these requirements. Users can
Special Feature
choose from Standard, Nortel MCS, Broads oft, CBCOM, RN K, Sylantro
or Huawei IMS depending on the server type. The default s
"Standard".
SETTINGS/BASIC SETTINGS PA G E
End User Password
Allows the administrator to set the password for user-
access. This field is case sensitive with a maximum length of 30
FIRMWARE VERSION 1.0.4.23 GXP2120/GXP2110/GXP2100/GXP1450 USER MANUAL Page 46 of 69
Page 47

characters.
. Users could select "DHCP", "Static IP" or
configured" or
Confirm Password Confirms the end user password field to be the same as above.
Internet Protocol Selects Prefer IPv4 or Prefer IPv6.
Allows users to conf ig ure th e appropriate network s ettings on the ph one
IPv4 Address Type
to obtain IPv4 address
"PPPoE". By default, it is set to "DHCP ".
DHCP Host name (Option 12)
DHCP Vendor Class ID
(Option 60)
Allow DHCP Option 120 to
override SIP Server
Specifies the name of the client. This field is optional but may be
required by some Internet Service Providers.
Used by clients and servers to exchange vendor class ID.
Enables DHCP Option 120 from loc al server to overri de the SIP Ser ver
on the phone. The default setting is "No".
PPPoE Account ID Enter the PPPoE account ID .
PPPoE Password Enter the PPPoE Password.
PPPoE Service Name Enter the PPPoE Service Name.
IPv4 Address Enter the IP address when static IP is used.
Subnet Mask Enter the Subnet Mask when static IP is used for IPv4.
Gateway Enter the Default Gateway when static IP is used for IPv4.
DNS Server 1 Enter the DNS Server 1 when static IP is used for IPv4.
DNS Server 2 Enter the DNS Server 2 when static IP is used for IPv4.
Preferred DNS Server Enter the Preferred DNS Server for IPv4.
Allows users to conf ig ure th e appropriate network settings on the phone
IPv6 Address Type
to obtain IPv6 address. Users could select "Auto-
"Statically configured" for the IPv6 address type.
Static IPv6 Address
IPv6 Prefix Length
IPv6 Prefix
Enter the static IPv6 address when Full Static is used in "Statically
configured" IPv6 address type.
Enter the IPv6 prefix length when Full Static is used in "Statically
configured" IPv6 address type.
Enter the IPv6 Prefix (64 bits ) when Prefix Static is us ed in "Statically
configured" IPv6 address type.
DNS Server 1 Enter the DNS Server 1 for IPv6.
DNS Server 2 Enter the DNS Server 2 for IPv6.
Preferred DNS server Enter the Preferred DNS Server for IPv6.
802.1x mode
Allows the user to enable/disable 802.1x mode on the phone. The
default value is disabled. To enable 802.1x mode, this field should be set
FIRMWARE VERSION 1.0.4.23 GXP2120/GXP2110/GXP2100/GXP1450 USER MANUAL Page 47 of 69
Page 48

to EAP-MD5.
example, if the phone is offhook and account 2 is
Identity Enter the Identity for the 802.1x mode.
MD5 Password Enter the MD5 Password for the 802.1x mode.
Specifies the HTT P proxy URL for the phone to sen d packets to. The
HTTP Proxy
proxy server will act as an intermediary to route the packets to the
destination.
Specifies the HTT PS proxy URL for the p hone to send pack ets to. The
HTTPS Proxy
proxy server will act as an intermediary to route the packets to the
destination.
Assigns a function to the c orrespond ing l ine k e y. The k e y mode options
are:
• Line
Regular line key to open u p a line and switch l ine. The Name and
UserID can be left blank.
• Share Line
Share line for Shared Line App earance feature. Select the Account
registered as Shared line for the line key. The Name and UserID can
be left blank.
• Speed Dial
Select the Account to dial from. And enter the Speed Dial number in
UserID field to be dialed.
• Busy Lamp Field (BLF)
Select the Account to monitor the BLF status. Enter the extension
Line Key X
number in UserID field to be monitored.
• Presence Watcher
This option has to be supported by a presence server and it is tied to
the "Do Not Disturb" status of the phone's extension.
• Eventlist BLF
This option is similar to the BLF option but in this case the PBX
collects the information from the phones and sends it out in one
single notify message. PBX server has to support this feature.
• Speed Dial via active account
Similar to Speed Dial but it will dial based on the current active
account. For
active, it will call the configured Speed Dial number using account 2.
• Dial DTMF
Enter a series of DT MF dig its in the Use rID f ield to be dia led during
the call. "Enable MPK Sending DTMF" (under Advanced Setting)
has to be set to "Yes" first.
FIRMWARE VERSION 1.0.4.23 GXP2120/GXP2110/GXP2100/GXP1450 USER MANUAL Page 48 of 69
Page 49

• Voice Mail
Select Account and enter the Voice Mail access number in the
UserID field.
• Call Return
The last answered calls can be d ialed out by using Call Retur n . The
Name and UserID f ield should be le ft blank . Also, th is option is not
binding to the account and the call will be returned based on the
account with the last answered call.
• Transfer
Select Account, and enter the number in the UserID field to be
transferred (blind transfer) during the call.
• Call Park
Select Account, an d enter the call park ex tensio n in th e U ser ID f ie ld
to park/pick up the call.
• Intercom
Select Account, and e nter the ext ension num ber in the UserI D field
to do the intercom.
• LDAP Search
This option is to narro w the LDAP search scope. Enter the LDAP
search base in the Name field. It could be the same or different from
the Base in LDAP configuration under Advanced Settings. The Base
in LDAP configuration will be used if the Name field is left blank.
Enter the LDAP Name/Number filter in the UserID field.
Assigns a function to the corresponding Multi Purpose Key (Not
applicable to GXP1450). The key mode options are:
• Speed Dial
Select the Account to dial from. And enter the Speed Dial number in
UserID field to be dialed.
• BLF (Busy Lamp Field)
This option has to be supported on the PBX and it indicates the
Multi Purpose Keys X
status of the extens ion. The three possib le states are idle (gree n),
busy (red), ringing (blinking red).
• Presence Watcher
This option has to be supported by a presence server and it is tied to
the "Do Not Disturb" status of the phone's extension.
• Eventlist BLF
This option is similar to the BLF option but in this case the PBX
collects the information from the phones and sends it out in one
single notify message. PBX server has to support this feature.
FIRMWARE VERSION 1.0.4.23 GXP2120/GXP2110/GXP2100/GXP1450 USER MANUAL Page 49 of 69
Page 50

• Speed Dial via active account
Similar to Speed Dial but it will dial based on the current active
account. For example, if the phone is offhook and account 2 is
active, it will call the configured Speed Dial number using account 2.
• Dial DTMF
Enter a series of DT MF dig its in the UserID f ield to be dialed durin g
the call. "Enable MPK Sending DTMF" (under Advanced Setting)
has to be set to "Yes" first.
• Voice Mail
Select Account and enter the Voice Mail access number in the
UserID field.
• Call Return
The last answered c al ls c a n be d ial ed out by using Call Return. The
Name and UserID f ield should be left blank. A lso, this option is not
binding to the account and the call will be returned based on the
account with the last answered call.
• Transfer
Select Account, and enter the number in the UserID field to be
transferred (blind transfer) during the call.
• Call Park
Select Account, an d enter the call park extens io n in th e Us erID f ie ld
to park/pick up the call.
• Intercom
Select Account, and e nter the ext ension num ber in the UserI D field
to do the intercom.
• LDAP Search
This option is to narro w the LDAP search scope. Enter the LDA P
search base in the Name field. It could be the same or different from
the Base in LDAP configuration under Advanced Settings. The Base
in LDAP configuration will be used if the Name field is left blank.
Enter the LDAP Name/Number filter in the UserID field.
Time Zone
Configures the date/tim e used on the phone accordin g to the specified
time zone.
This parameter allows the users to define their own time zone.
The syntax is: std offset dst [offset], start [/time], end [/time]
Self-Defined Time Zone
Default is set to: MTZ+6MDT+5,M4.1.0,M11.1.0
MTZ+6MDT+5
This indicates a time zone with 6 hours offset with 1 hour ahead which is
FIRMWARE VERSION 1.0.4.23 GXP2120/GXP2110/GXP2100/GXP1450 USER MANUAL Page 50 of 69
Page 51

Prime Meridian (A.K.A: International or Greenwich Meridian) and
The 3rd number indicates weekday: 0,1,2,..,6( for Sun, Mon,
Enable Weather Update
up the weather
information. The default setting is "Automatic" and the weather
U.S central time. If it is positive (+) if the local time zone is west of the
negative (-) if it is east.
M4.1.0,M11.1.0
The 1st number indicates Month: 1,2,3.., 12 (for Jan, Feb, .., Dec)
The 2nd number indicates the nth iteration of the weekday: (1st Sunday,
3rd Tuesday…)
Tues, ... ,Sat)
Therefore, this example is the DST which starts from the First Sunday of
April to the 1st Sunday of November.
Configures to enable or disable weather update on the phone. The
default setting is "Yes". If set to "No", the weather information screen will
not show.
Configures weather city code for the phone to look
City Code
information will be obtained based on the IP location of the phone if
available. Otherwise, specify the self-defined city code. For example,
USCA0638 is the city code for Los Ang eles, CA, U n ite d States.
Update Interval
Degree Unit
Specifies the weather update interval ( in minutes). The d efault value is
15 minutes.
Specifies the degree unit f or the weather information to displa y on the
phone.
Configures to enable or disable stock update on the phone (Not
Enable Stock Update
applicable to GXP14 50). The default setting is "Yes ". If set to "N o", the
stock information screen will not show.
Stock Code
Configures stock c ode for the phone to look up and display the s tock
information (Not applicable to GXP1450).
Configures to enable or disable currency update on the phone (Not
Enable Currency Update
applicable to GXP14 50). The default setting is "Yes ". If set to "N o", the
currency information screen will not show.
Currency Code
Configures currency code for the phone to look up and display the
currency information (Not applicable to GXP1450).
Configures the LCD backlight brig htness level ( from 0 to 8) f or phone's
LCD Backlight Brightness
idle status and active s tatu s. T he default v alue is 6 for active s tatus and
2 for idle status.
LCD Contrast Configures the LCD contrast level (from 0 to 20). The default value is 10.
FIRMWARE VERSION 1.0.4.23 GXP2120/GXP2110/GXP2100/GXP1450 USER MANUAL Page 51 of 69
Page 52

Date Display Format
on the LCD.
CD backlight will not be turned on when
Configures the date display format on the LCD. T he following formats
are supported:
• yyyy-mm-dd: 2012-07-02
• mm-dd-yyyy: 07-02-2012
• dd-mm-yyyy: 02-07-2012
• dddd, MMMM dd: Friday, October 12 (Not applicable to GXP1450)
• MMMM dd, dddd: October 12, Friday (Not applicable to GXP1450)
Time Display Format
Disable in-call DTMF Display
Disable Missed Call Backlight
Always Ring Speaker
Headset Key Mode
Configures the time dis play in 12-hour or 24-hour format
The default setting is in 12-hour format.
When it's set to "Yes", th e DTMF digits entered durin g the call will not
display. The default setting is "No".
When it's set to "Yes", the L
there is a new missed call. The default setting is "No".
Configures to enable or disable the speaker to ring when headset is
used on "Toggle Headset/Speaker" mode. If set to "Yes", when the
phone is in Headset "Toggle Headset/Speaker" mode, both headset and
speaker will ring on incoming call. The default setting is "No".
When headset is connected to the phone, users could use the
HEADSET button in "Default Mode" or "Toggle Headset/Speaker".
• Default Mode:
When the phone is in idle, press HEADSET button to off hook
the phone and making calls by using headset. Headset icon will
display on the left side of the screen in dialing/talking status.
W hen there is an incoming c all, pres s HE ADSET button to pick
up the call using headset.
When there is an active call using headset, press HEADSET
button to hang up the call.
When Speaker/Handset is being used in dialing/talking status,
press HEADSET button to switch to headset. Press it again to
hang up the call. Or press speaker/Handset to switch back to
the previous mode.
• Toggle Headst/Speaker:
When the phone is in idle, press HEADSET button to switch to
Headset mode. The headset icon will display on the left side of
the screen. In this mode, if pressing Speaker button or Line key
to off hook the phone, headset will be used.
When there is an active call, press HEADSET button to toggle
FIRMWARE VERSION 1.0.4.23 GXP2120/GXP2110/GXP2100/GXP1450 USER MANUAL Page 52 of 69
Page 53

between Headset and Speaker.
Defines the Layer 3 QoS parameter. This value is used for IP
Call History Flash Writing:
Write Timeout
Max Unsaved Log
Headset TX gain
Defines the interval (in seconds) to save the call history to phone's flash.
The default value is 300 seconds.
Defines the number of unsaved logs before written to phone's flash. The
default value is 200 entri es .
Configures the transmission gain of the headset. The default value is
0dB.
Headset RX gain Configures the receiving gain of the headset. The default value is 0dB.
Handset TX gain
Configures the transm ission gain of the hands et. The default va lue is 0
dB.
SETTINGS/ADVANCED SETTINGS PAGE
Allows users to change the admin password. The password field is
Admin Password
purposely hidden after clicking the Update but ton for security purpose.
This field is case sensitive with a maximum length of 30 characters.
Confirm Password Confirms the admin password field to be the same as above.
Layer 3 QoS
Precedence, Diff-Serv or MPLS. The default value is 12.
Layer 2 QoS 802.1Q/VLAN
Tag
Layer 2 QoS 802.1p Priority
Value
Local RTP Port
Use Random Port
Keep-alive Interval
Use NAT IP
Assigns the VLAN T ag of the L ayer 2 QoS packets . The d ef ault v al ue i s
0.
Assigns the priority value of the La yer2 QoS packet s. The def ault value
is 0.
This parameter def ines th e local RT P port used to listen an d transm it. It
is the base RTP port for c hanne l 0. When configured, channe l 0 w ill us e
this port _value f or RTP; channel 1 will use port_value+2 for RTP. L oc al
RTP port ranges from 1024 to 65400 and must be even. The default
value is 5004.
When set to "Yes ", this param eter will force ran dom generation of b oth
the local SIP and RT P ports. This is usually necessa ry when multiple
phones are behind the s ame f ull cone N AT. The def ault setting is "Yes"
(This parameter must be set to "No" for Direct IP Calling to work).
Specifies how often the phone sends a blank UDP packet to the SIP
server in order to k eep the "ping hole" on the NAT router to op en. The
default setting is 20 seconds.
The NAT IP addres s used in SIP/SDP messages. T his field is blank at
the default settings. It should ONLY be used if it's required by your ITSP.
FIRMWARE VERSION 1.0.4.23 GXP2120/GXP2110/GXP2100/GXP1450 USER MANUAL Page 53 of 69
Page 54

STUN Server
This is required for the phone to decrypt the encrypted XML
The IP address or D omain name of the STUN server. STUN resolutio n
results are displayed in the STATUS page of the Web GUI. Only
non-symmetric NAT routers work with STUN.
Firmware Upgrade and
Provisioning
Specifies how firm ware upgrading and provisionin g request to be sent:
Always Check for New Fir m ware, Check New Firm ware only when F/W
pre/suffix changes, Always Skip the Firmware Check.
The password for enc r ypti n g th e X ML c onf igura t ion file using OpenSSL .
XML Config File Password
configuration file.
HTTP/HTTPS User Name The user name for the HTTP/HTTPS server.
HTTP/HTTPS Password The password for the HTTP/HTTPS server.
Upgrade Via
Firmware Server Path
Config Server Path
Allows users to choose the firmware upgrade method: T FTP, HTTP or
HTTPS.
Defines the server path for the firmware server. It could be different from
the configuration server for provisioning.
Defines the server pa th for provisionin g. It could be different from the
firmware server for upgrading.
Enables your ITSP to lock firmware updates. If configured, only the
Firmware File Prefix
firmware with the matching encrypted prefix will be downloaded and
flashed into the phone.
Enables your ITSP to lock firmware updates. If configured, only the
Firmware File Postfix
firmware with the matching encrypted postfix will be downloaded and
flashed into the phone.
Enables your IT SP to lock conf iguration up dates. If conf igured, o nly the
Config File Prefix
configuration file with th e matc hing encrypted prefix will be downlo aded
and flashed into the phone.
Enables your IT SP to lock conf iguration up dates. If conf igured, onl y the
Config File Postfix
configuration file with the matching encrypted postfix will be downloaded
and flashed into the phone.
Allow DHCP Option 43 and
Option 66 Override Server
If DHCP option 66 is enabl ed on the L AN side, the TF TP server c an be
redirected. The default setting is "Yes".
Automatic Upgrade Enables automatic upgrade and provisioning. The default setting is "No".
Authenticate Conf File
Authenticates configuration file before acceptance. The default setting is
"No".
Enable TR-069 Enables TR-069. The default setting is "No".
ACS URL URL for TR-069 Auto Configuration Servers (ACS).
FIRMWARE VERSION 1.0.4.23 GXP2120/GXP2110/GXP2100/GXP1450 USER MANUAL Page 54 of 69
Page 55

TR-069 Username ACS username for TR-069.
for querying LDAP servers. Some
he field
TR-069 Password ACS password for TR-069.
Periodic Inform Enable
Periodic Inform Interval
Connection Request
Username
Connection Request Password The password for the ACS to connect to the phone.
Connection Request Port The port for the ACS to connect to the phone.
CPE SSL Certificate The Cert File for the phone to connect to the ACS via SSL.
CPE SSL Private Key The Cert Key for the phone to connect to the ACS via SSL.
Phonebook XML Download
Phonebook XML Server Path
Phonebook Download Interval
Enables periodic inf orm. If set to "Yes", device will send inform packets
to the ACS. The default setting is "No".
Sets up the periodic inform interval to send the inform packets to the
ACS.
The user name for the ACS to connect to the phone.
Configures to enable phonebook XML download. Users could select
HTTP/HTTPS/TFTP to download the phonebook file. The default setting
is "No".
Configures the server path to dow nload the phonebo ok XML. This field
could be IP address or URL, with up to 256 characters.
Configures the phonebook do wn load int er va l (i n minutes). If it's set t o 0 ,
the automatic download will be disabled. The default value is 0. The
valid range is 5 to 720 minutes.
Remove Manually-edited
Entries on Download
LDAP Directory: Server
Address
LDAP Directory: Port Configures the LDAP server port.
LDAP Directory: Base
LDAP Directory: User Name
LDAP Directory: Password
LDAP Number Filter Configures the filter used for number lookups.
FIRMWARE VERSION 1.0.4.23 GXP2120/GXP2110/GXP2100/GXP1450 USER MANUAL Page 55 of 69
If set to "Yes", when XML phon ebook is downloade d, the entries a dded
manually will be automatically removed. The default setting is "Yes".
Configures the IP address or DNS name of the LDAP server.
Configures the LDAP search base. This is th e location in the director y
where the search is requested to begin.
Example:
dc=grandstream, dc=com
ou=Boston, dc=grandstream, dc=com
Configures the bind "Username"
LDAP servers allo w anonym ous binds in whic h case t he setting ca n be
left blank.
Configures the bind "Password" for querying LDAP servers. T
can be left blank if the LDAP server allows anonymous binds.
Page 56

urns all records which has the
turns all the records with the
LDAP Name Filter
Examples:
(|(telephoneNumber=%)(Mobile=%) ret
"telephoneNumber" or "Mobile" field starting with the e ntered pr ef ix;
(&(telephoneNumber=%) (cn=*)) re
"telephoneNumber" field starting with the entered prefix and "cn" field
set.
Configures the filter used for name lookups.
Examples:
(|(cn=%)(sn=%)) returns all records which has the "cn" or "sn" field
starting with the entered prefix;
(!(sn=%)) returns all the records which do not have the "sn" field starting
with the entered prefix;
(&(cn=%) (telephoneNumber=*)) returns all the records with the "cn"
field starting with the entered prefix and "telephoneNumber" field set.
LDAP Version
LDAP Name Attributes
LDAP Number Attributes
LDAP Display Name
Selects the protocol version for the phone to send the bind requests.
The default setting is "Version 3".
Specify the "name" attributes of each r ecord which are returned in the
LDAP search result. This field allows the users to configure multiple
space separated name attributes.
Example:
gn
cn sn description
Specifies the "number" attributes of each recor d which are returned in
the LDAP search result. T his field allo ws the users to conf igure multip le
space separated number attributes.
Example:
telephoneNumber
telephoneNumber Mobile
Configures the entr y information t o be shown on p hone's LCD. Up to 3
fields can be displayed.
Example:
%cn %sn %telephoneNumber
Specifies the maxim um number of results to be returned by the LDAP
Max. Hits
server. If set to 0, server will return all search results. The default setting
is 50.
FIRMWARE VERSION 1.0.4.23 GXP2120/GXP2110/GXP2100/GXP1450 USER MANUAL Page 56 of 69
Page 57

Search Timeout
LDAP number searching when dialing and
Configures the display name when LDAP looks up the name for
Specifies the interval (in s econds) for the server to proces s the reques t
and client waits for server to return. The default setting is 30 seconds.
Sort Results
LDAP Lookup
Specifies whether the searching result is sorted or not. The default
setting is "No".
Configures to enable
receiving calls.
incoming call or outgo ing call. This field m ust be a subset of the LDAP
Lookup Display Name
Name Attributes.
Example:
gn
cn sn description
User Phonebook Key for LDAP
Search
If set to "Yes", the Phonebook Key will be used to bring up LDAP search.
The default setting is "No".
Configures to enable idle screen XML download. Users could select
Idle Screen XML Download
HTTP/HTTPS/TFTP to download the XML idle s creen file. The default
setting is "No".
Download Screen XML At
Bootup
If set to "Yes", the idle screen XML file will be downloaded when the
phone boots up. The default setting is "No".
User Custom Filename Specifies the custom file for the idle screen XML file to be downloaded.
Idle Screen XML Server Path
Configures the server path to download the idle screen XML f ile. This
field could be IP address or URL, with up to 256 characters.
Configures the server path to download the idle screen XML file (Not
XML Application Server Path
applicable to GXP14 50). T his field co uld be I P addres s or URL, with up
to 256 characters.
Specifies the softk ey nam e disp layed on the id le scr een f or the user s to
XML Application Softkey Label
enter XML application (N ot applicable to GXP1 450). Please make s ure
the label nam e does not ex ceed the sof tkey range on each model. The
default value is "XML Service".
Configures a User ID /extension to dial autom atically w hen the phon e is
Offhook Auto Dial
off hook. The phone will use the first account to dial out. The default
setting is "No".
Auto Recover From Abnormal
Syslog Server
Configures whether auto recover or not when the phone is running
abnormal. The default setting is "Yes".
The URL or IP address of the syslog server for the phone to send syslog
to.
Syslog Level Selects the level of logging for syslog. The default setting is None. There
FIRMWARE VERSION 1.0.4.23 GXP2120/GXP2110/GXP2100/GXP1450 USER MANUAL Page 57 of 69
Page 58

are 4 levels: DEBUG, INFO, WARNING AND ERROR.
is North American
standard. Users could adjust system ring tone frequencies and
Syslog messages are sent based on the following events:
• product model/version on boot up (INFO level);
• NAT related info (INFO level);
• sent or received SIP message (DEBUG level);
• SIP message summary (INFO level);
• inbound and outbound calls (INFO level);
• registration status change (INFO level);
• negotiated codec (INFO level);
• ethernet link up (INFO level);
• SLIC chip exception (WARNING and ERROR levels);
• memory exception (ERROR level).
Send SIP Log
NTP Server
Allow DHCP Option 42
Override NTP Server
Configures whether t he SI P log will be inc luded in th e syslog messages
or not. The default setting is "No".
Defines the URL or IP address of the NTP server. The phone may obtain
the date and time from the server.
Defines whether DH CP Option 42 should override N TP server or not.
When enabled, DHCP O ption 42 will overrid e the NTP server if it's set
up on the LAN. The default setting is "Yes".
Configures to turn on/off public mode for hot desking feature on the
phone. If set to "Yes", users would need fill in the SIP Server address for
account 1 as well. Then reboot the phone. When the phone boots up,
users will need enter SIP User ID and Password on the LCD to login and
Public Mode
use the phone.
Note:
When the phone is in publi c m ode login scr een, pr ess HOLD button will
have the IP address of the phone displayed.
SSL Certificate SSL Certificate used for SIP Transport in TLS/TCP.
SSL Private Key SSL Private key used for SIP Transport in TLS/TCP.
SSL Private Key Password SSL Private key password used for SIP Transport in TLS/TCP.
Configures system ring tone. The default value
System Ring Tone
cadences based on local telecom standard.
Call Progresses T ones:
Dial T one
Message Waiting
Ring Back Tone
Configures ring or tone frequencies based on parameters from local
telecom. The default value is North American standard. Frequencies
should be configured with known values to avoid uncomfortable high
pitch sounds.
FIRMWARE VERSION 1.0.4.23 GXP2120/GXP2110/GXP2100/GXP1450 USER MANUAL Page 58 of 69
Page 59

Call-Waiting T one
When set to "Yes", users can dial an IP address under the same
9 and XXX
make direct IP call to aaa.bbb.ccc.XXX where
. CONFIG, FACTORY FUNCTIONS and
Busy T one
Reorder Tone
Syntax: f1=val,f2=val[,c=on1/off1[-on2/off2[-on3/off3]]];
(Frequencies are in Hz and cadence on and off are in 10ms )
ON is the period of ringing (“On tim e” in ‘ms ’) while O FF is the period of
silence. In order to set a continuous ring, OFF should be zero. Otherwise
it will ring ON m s and a pause of O FF ms and then repeat the patt ern.
Up to three cadences are supported.
Configures the inter com extension num ber f or ac c ount 1 to d ia l out (Not
Intercom User ID
applicable to GXP1450). This User ID is mapped to the INTERCOM
button on the phone.
Disable Call-Waiting Disables the call waiting feature. The default setting is "No".
Disable Call-Waiting Tone
Disables the call waiting tone when call waiting is on. The default setting
is "No".
Disable Direct IP Calls Disables Direct IP Call. The default setting is "No".
LAN/VPN segment b y entering the last octet in the IP address. To dial
quick IP call, off hook the phone and dial #XXX (X is 0Use Quick IP-Call mode
<=255), phone will
aaa.bbb.ccc com es from the local IP addres s REGARDLESS of subnet
mask. #XX or #X are also valid so leading 0 is not required (but OK). No
SIP server is required to make quick IP call. The default setting is "No".
Disable Conference Disables the Conference function. The default setting is "No".
Enable MPK sending DTMF
Disable DND Button
Enables Multi Purpose Key to send DTMF during the call (Not applicab le
to GXP1450). The default setting is "No".
If set to "Yes", the DND button will not set the phone to DND. The default
setting is "No".
Disable Transfer Disables the Transfer function. The default setting is "No".
Auto-Attended Transfer
If set to "Yes", the phone will use attended transfer by default. The
default setting is "No".
In-call dial number on pressing
transfer key
Configures the number for the phone to dial as DTMF during the call
using TRAN button.
Configures the access control for the users to configure from keypad
Menu. There are three different options:
Configuration via Keypad Menu
• Unrestricted. All the options can be accessed in keypad Menu.
• Basic settings only. The CONFIG option will not display for users
to access in keypad Menu.
FIRMWARE VERSION 1.0.4.23 GXP2120/GXP2110/GXP2100/GXP1450 USER MANUAL Page 59 of 69
• Constraint Mode
Page 60

Enable STAR key Keypad
hook after the
a Telecom special
locking
NETWORK options will not display for users to access in keypad
menu.
If set to "Yes", the keypad can be lock ed by pressing and holding the
STAR * key for about 4 seconds. A lock icon will show indicating t he
keypad is locked. The default setting is "Yes".
Note:
When the keypad is locked, users would need press and hold the STAR
* key for about 4 sec onds again and then enter the pas sword to unloc k
it.
Password to lock/unlock
Offhook timeout
China T elecom Mode
Do Not Escape # as %23 in
SIP URI
Disable Telnet Disables Telnet access. The default setting is "No".
Display Language Selects display language on the phone.
Download Device
Configuration
Configures the password to loc k/unlock the k eypad. The password field
allows number with up to 32 characters.
If configured, when the phone is on hook, it will go off
timeout (in seconds). The default value is 30 seconds.
Enables/Disables China Telecom Mode to use Chin
features on the phone.
Specifies whether to replace # by %23 or not for some special situations.
The default setting is "No".
Click to download the device configuration file in .txt format.
NAT SETTINGS
If the devices are kept within a private network behind a firewall, we recommend using STUN Server. The
following settings are useful in the STUN Server scenario:
• STUN Server (under Advanced Settings page)
Enter a STUN Server IP (or FQDN) that you may have, or look up a free public STUN Server on the
internet and enter it on this field. If using Public IP, keep this field blank.
• Use Random Ports (under Advanced Settings page)
This setting depends on your network settings. When set to "Yes", it will force random generation of
both the local SIP and RTP ports. This is usually necessary when multiple GXPs are behind the
same NAT. If using a Public IP address, set this parameter to "No".
FIRMWARE VERSION 1.0.4.23 GXP2120/GXP2110/GXP2100/GXP1450 USER MANUAL Page 60 of 69
Page 61

• NAT Traversal (under Ac count Set ting page)
Default setting is "No". Enable the device to use NAT traversal when it is behind firewall on a private
network. Select Keep-Alive, Auto, STUN (with STUN server path configured too) or other option
according to the network setting.
WEATH ER UP DATE
To customize GXP2120/GXP2110/GXP2100/GXP1450 to display weather information for the preferred
city, users could go to web GUI->Settings->Basic Settings page a nd enter th e cit y code in the follo wing
options:
By default the Cit y Code is set to "Automatic", which allows the phone to obtain weather information
based on the IP location detected. To use "Self-Defined City Code" option, please follow the steps below
to obtain the correct city code:
• In a web browser, go to
• Enter the city name in the search field. For example, Boston, MA. And click on "SEARCH";
• The searching result will show in a new window with URL in the browser's address bar. For example,
http://www.weather.com/weather/right-now/Boston+MA+USMA0046
• In the above link, USMA0046 is the city code to be filled in "Self-Defined City Code" option.
Users could then further configure the "Update Interval" and "Degree Unit" for weather information
display.
www.weather.com;
FIRMWARE VERSION 1.0.4.23 GXP2120/GXP2110/GXP2100/GXP1450 USER MANUAL Page 61 of 69
Page 62

PUBLIC MODE
The GXP2120/GXP2110/GXP2100/GXP1450 supports hot desking using public mode. Under public mode,
users could login th e phone with the SIP acc ount User ID and password . P leas e f ollo w the s t eps be lo w to
configure the phone for public mode:
• Under Web GUI->Account 1 setting page, fill up the SIP server address for account 1. Click "Update"
on the bottom of the page;
• Under Web G UI->Advanc ed sett ing page , set P ublic Mode opt ion to "Yes". Click "Update" and reboot
the phone;
• When phone boots up, SIP User ID and Password to register to the configured SIP server in account 1
will be required. Enter the correct account information to log in to the phone. When entering the
account information, press softkey "123"/"abc" to toggle input method;
• In login page, pressing HOLD button on the phone will show phone's IP address;
• After using the phone, go to LCD MENU->LogOut to log off the public mode.
EDITING CONTACTS AND CLICK-TO-DIAL
From GXP2120/GXP2110/GXP2100/GXP1450 Web GUI, users could view cont acts , edit co ntacts, or dial
out with Clic k-to-Dial feature
shows all the added cont acts (manuall y or downloaded via X ML phonebook ). Here users c ould add new
contact, export phonebook XML, import phonebook XML, search contact, filter contacts by group, edit
selected contact, or dial the contact/number.
When clicking on the
to enter the number. Once Dial is clicked, the phone will go off hook and dial out the number from selected
account. Please see Figure 3 and Figure 4 in the following pages for more details.
Additionally, users c ould directly send the com mand for the phone to d ial out by specif ying the following
URL in PC's web browser, or in the field as required in other call modules.
http://ip_address/cgi-bin/api-make_call?phonenumber=1234&account=0&password=admin
In the above link, replace the fields with
• ip_address:
Phone's IP Address.
on the top of the W eb GUI. In the following figur e, the Contact page
icon on the t op m enu of th e W eb GUI, a ne w dia ling windo w will sho w for you
FIRMWARE VERSION 1.0.4.23 GXP2120/GXP2110/GXP2100/GXP1450 USER MANUAL Page 62 of 69
Page 63

• phonenumber=1234:
Click to
contacts.
from the
the contact
Click to select
group in the
Click to
search in
and dial from available
The number for the phone to dial out
• account=0:
The account index for the phone to make call. The index is 0 for account 1, 1 for account 2, 2 for
account 3, and etc.
• password=admin:
The admin login password of phone's Web GUI.
Click to input number
dropdown menu.
phonebook.
lines.
add new
FIRMWARE VERSION 1.0.4.23 GXP2120/GXP2110/GXP2100/GXP1450 USER MANUAL Page 63 of 69
Click to export
phonebook in
XML format.
Click to import
phonebook
XML file.
Figure 3: Web GUI - Contacts
Click to call
this contact
phone.
Click to edit this
contact.
Click to download
information in .vcf
format
Page 64

Figure 4: Click-to-Dial
SAVING THE CONFIGURATION CHANGES
After users m akes changes to the configura tion, press the Update button on the bottom of the W eb G UI
page. We recommend rebooting or powering cycle the IP phone after saving changes.
REBOOTING FROM REMOTE LOCATIO NS
Press the Reboot button on the bottom of the web GUI page to reboot the phone remotely. The web
browser will then dis play a reboot page with message "The d evice is rebooting no w...". Wait for about 1
minute to log in again.
FIRMWARE VERSION 1.0.4.23 GXP2120/GXP2110/GXP2100/GXP1450 USER MANUAL Page 64 of 69
Page 65

UPGRADING AND PROVISIONING
The GXP2120/GXP2110/GXP2100/GXP1450 can be upgraded via TFTP/HTTP/HTTPS by configuring the
URL/IP Address for the TFT P/HTTP/HTTPS server and select ing a download method. Conf igure a valid
URL for TFTP or HTTP; the server name can be FQDN or IP address.
Examples of valid URLs:
firmware.grandstream.com
fw.ipvideotalk.com/gs
There are two ways to setup a software upgrade server: The IVR Menu or the Web Configuration Interface.
UPGRADE VIA KEY PAD MENU
Follow the steps below to configure the upgrade server path via phone's keypad menu:
• Press MENU button and navigate using Up/Down arrow to select Config;
• In the Config options, select Upgrade;
• Enter the firmware server path and select upgrade method. The s erver path could be in IP address
format or FQDN format;
• Press the "OK" softkey. A reboot message window will be prompt;
• Reboot the phone to have the change take effect.
When upgrading starts, the screen will show upgrading progress. When done you will see the phone
restarts again. Please do not interrupt or power cycle the phone when the upgrading process is on.
UPGRAGE VIA WEB GUI
Open a web browser on PC and enter the IP addres s of the phone. Then, login with the administrator
username and password. Go to Settings->Ad vance d Settings page, enter the IP address or the FQDN for
the upgrade server in "Firmware Server Path" field and choose to upgrade via T FTP or HTTP/HTTPS.
Update the change by clicking the "Update" button. Then "Reboot" or power cycle the phone to update the
new firmware.
When upgrading starts, the screen will show upgrading progress. When done you will see the phone
restarts again. Please do not interrupt or power cycle the phone when the upgrading process is on.
FIRMWARE VERSION 1.0.4.23 GXP2120/GXP2110/GXP2100/GXP1450 USER MANUAL Page 65 of 69
Page 66

Firmware upgrades take ar ound 60 seconds in a controlled LAN or 5-10 minutes over th e Internet. We
recommend completing firmware upgrades in a controlled LAN environment whenever possible.
NO LOCAL TFTP/HTTP SERVERS
For users that would like to use remote upgrading without a local TFTP/HTTP server, Grandstream offers a
NAT-friendly HTTP server. This enables users to download the latest software upgrades for their phone via
this server. Please refer to the webpage:
http://www.grandstream.com/support/firmware.
Alternatively, users can download a f ree TFTP or HT TP server and c onduct a loc al firmware upgrad e. A
free windows version TFTP server is available for download from :
http://support.solarwinds.net/updates/New-customerFree.cfm
http://tftpd32.jounin.net/.
Instructions for local firmware upgrade via TFTP:
1. Unzip the firmware files and put all of them in the root directory of the TFTP server;
2. Connect the PC running the TFTP server and the phone to the same LAN segment;
3. Launch the TFTP server and go t o the File menu->Configure->Securit y to change the TFTP s erver's
default setting from "Receive Only" to "Transmit Only" for the firmware upgrade;
4. Start the TFTP server and configure the TFTP server in the phone’s web configuration interface;
5. Configure the Firmware Server Path to the IP address of the PC;
6. Update the changes and reboot the phone.
End users can also choose to download a free HTTP server from
Microsoft IIS web server.
Note:
When the phone boots up, it will send a TFTP or HTTP request to download the configuration file
"cfgxxxxxxxxxxxx" where "xxxxxxxxxxxx" is the MAC address of the phone. If it is a normal TFTP or HTTP
upgrade, the following messages “TFTP Error from [IP ADRESS] requesting cfg000b82023dd4 : File does
not exist. Configuration File Download” can be ignored in the TFTP/HTTP server log.
http://httpd.apache.org/ or use
CONFIGURATION FILE DOWNLOAD
Grandstream SIP Dev ices can be configured via the W eb Interface as well as via a Configur ation File
(binary or XML) thro ugh TFTP or HTTP/HT TPS. The "Config Ser ver Path" is the T FTP or HTTP/H TTPS
FIRMWARE VERSION 1.0.4.23 GXP2120/GXP2110/GXP2100/GXP1450 USER MANUAL Page 66 of 69
Page 67

server path for the configuration file. It needs to be set to a valid URL, either in FQDN or IP address format.
The "Config Server Path" can be the same or different from the "Firmware Server Path".
A configuration parameter is associated with each particular field in the web configuration page. A
parameter consists of a Capital letter P and 2 to 3 (Could be extended to 4 in the future) digit numeric
numbers. i.e., P2 is associated with the “Admin Password” in the Web GUI->Settings->Advanced Settings.
For a detailed parameter list, please refer to the corresponding firmware release configuration template.
When the GXP2xx/GXP1450 boots up or rebo ots, it wil l iss ue a req uest to do wnload a co nfigur atio n XML
file named "cfgxxxxxxxxxxxx.xml" followed by a file named "cfgxxxxxxxxxxxx", where "xxxxxxxxxxxx" is
the MAC address of the phone, i.e., "cfg000b8 20102ab.xm l" and "cfg000b82010 2ab". If the d ownload of
"cfgxxxxxxxxxxxx.xml" file is not successful, the provision program will download a generic cfg.xml file. The
configuration file name should be in lower case letters.
For more details on XML provisioning, please refer to:
http://www.grandstream.com/general/gs_provisioning_guide_public.pdf
FIRMWARE VERSION 1.0.4.23 GXP2120/GXP2110/GXP2100/GXP1450 USER MANUAL Page 67 of 69
Page 68

RESTORE FACTORY DEFAULT SETTINGS
Warning:
Restoring the Factory Default Settings will delete all configuration information on the phone. Please
backup or print all the settings before you restore to the factory default settings. Grandstream is not
responsible for restoring lost parameters and cannot connect your device to your VoIP service provider.
Please follow the instructions below to reset the phone:
• Press MENU button to bring up the keypad configuration menu;
• Select "Config" and enter;
• Select "Factory Reset";
• A warning window will pop out to make sure a reset is requested and confirmed;
• Press the "OK" softkey to confirm and the phone will reboot. To cancel the Reset, press Cancel
softkey instead.
FIRMWARE VERSION 1.0.4.23 GXP2120/GXP2110/GXP2100/GXP1450 USER MANUAL Page 68 of 69
Page 69

EXPERIENCING THE GXP2120/GXP2110/GXP2100/GXP1450
Please visit our website:
releases, additional features, FAQs, documentation and news on new products.
http://www.grandstream.com to receive the most up- to-date updates on firmware
We encourage you to browse our
for answers to your general questions. If you have purchased our products through a Grandstream
Certified Partner or Reseller, please contact them directly for immediate support.
Our technical support staff is trained and ready to answer all of your questions. Contact a technical support
member or
Thank you again for purchasing Grands tream IP phone, it will be sure to brin g convenience and color to
both your business and personal life.
submit a trouble ticket online to receive in-depth support.
product related doc umentation, FAQs and Use r and Developer F orum
FIRMWARE VERSION 1.0.4.23 GXP2120/GXP2110/GXP2100/GXP1450 USER MANUAL Page 69 of 69
 Loading...