

Graff 8093 Installation Instructions Manual
1
Dear Customer Estimado Cliente
Thank you for selecting our product. We are confident we can fully satisfy Muchas gracias por elegir nuestro producto. Estamos seguros que podemos
your expectations by offering you a wide range of technologically advanced
satisfacer completamente sus expectativas ofreciéndole una amplia variedad
products which directly result from our many years of experience in faucet
de productos tecnológicamente avanzados que resultan directamente de
and fitting production.
muchos años de experiencia en grifos y su producción apropiada.
ENGLISH
~
ESPANOL
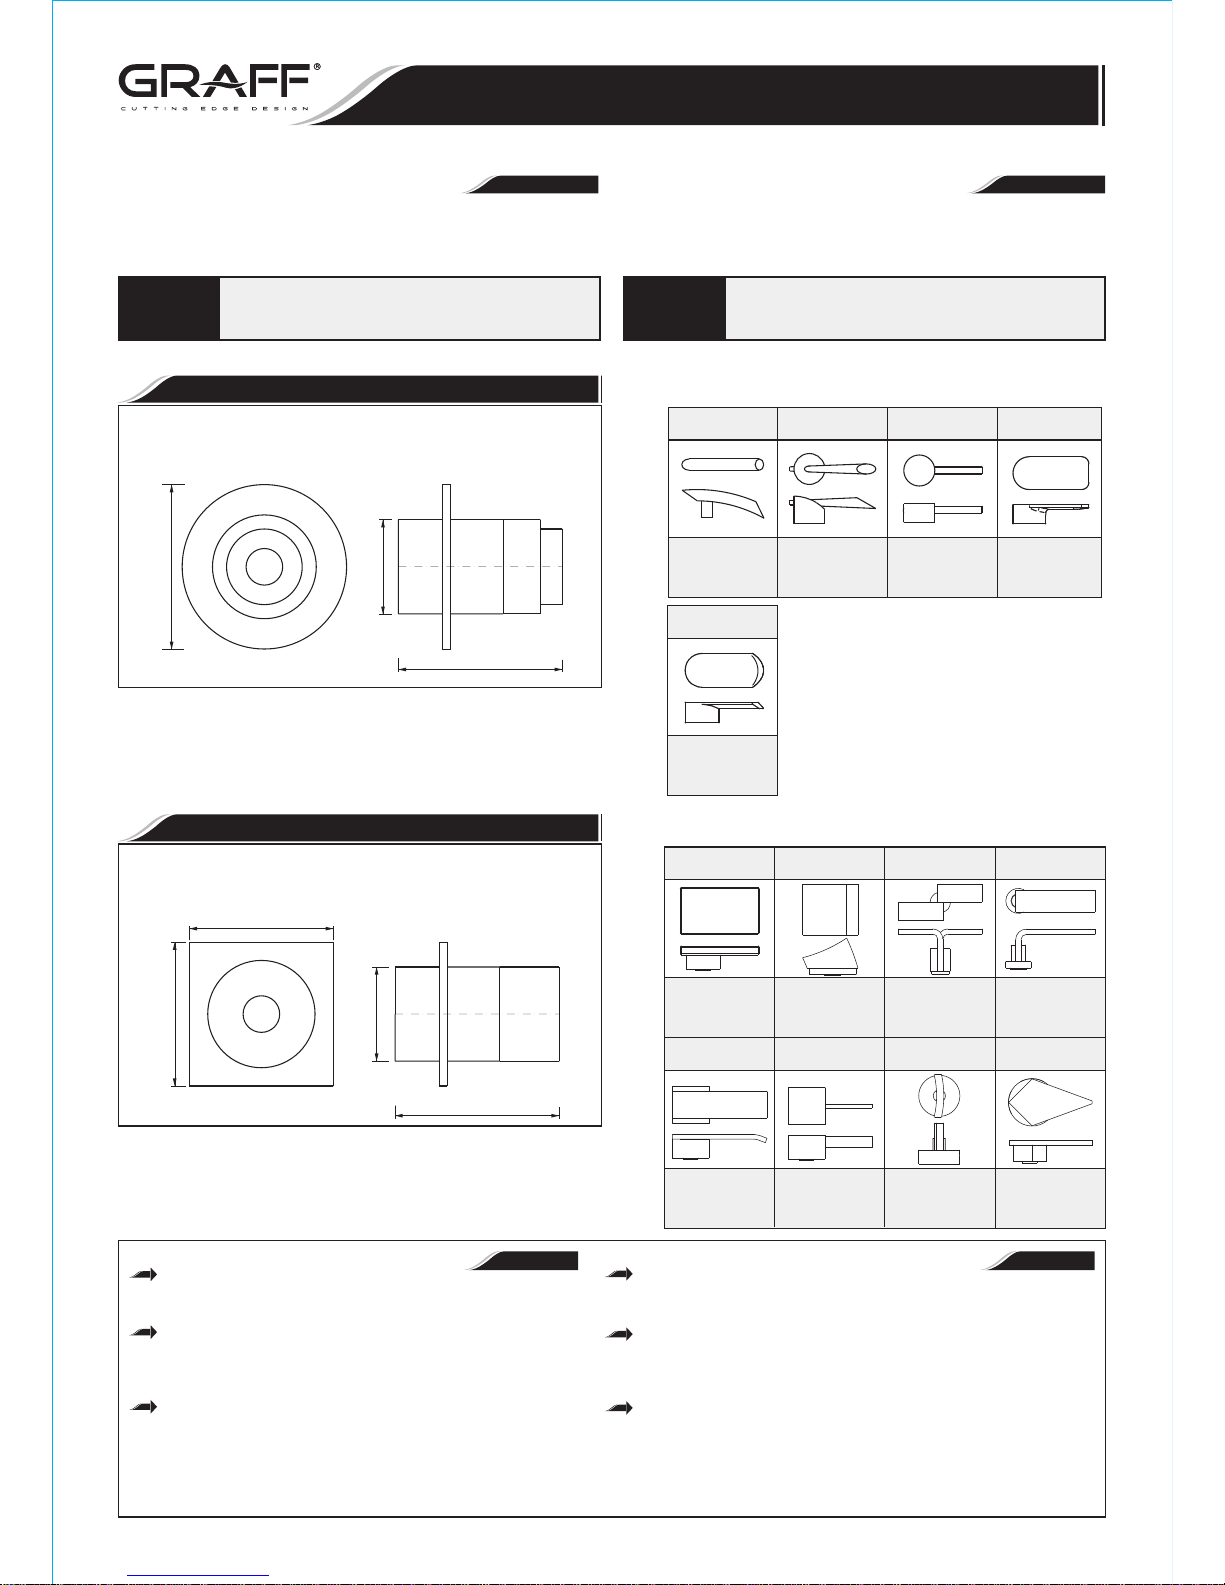
Ø1-13/16" (Ø46mm)
3-1/8" (80mm)
Ø3-1/8" (Ø80mm)
Ø Ø1-13/16" ( 46mm)
3-1/8" (80mm)
2-3/4" (70mm)
2-3/4" (70mm)
C10S
C9S
LM13S
Matching
IMMERSION Series
Va con
IMMERSION Series
LM14S
Matching
Va con
IMMERSION Series
IMMERSION Series
Matching
Va con
FONTAINE Series
FONTAINE Series
Matching
STRUCTURE Series
Va con SOLAR,
STRUCTURE Series
SOLAR,
LM38S
LM39S
C14S
Matching
QUBIC Series
Va con
QUBIC Series
Matching
QUBIC TRE Series
Va con
QUBIC TRE Series
Matching
SADE, LUNA Series
Va conTARGA,
SADE, LUNA Series
TARGA,
LM23S
Matching
STEALTH Series
Va con
STEALTH Series
Type of Handles use with 8095 Model:
Tipos de manecillas usadas con el modelo 8095:
Type of Handles use with 8093 Model:
Tipos de manecillas usadas con el modelo 8093:
LM25B
Matching
ATRIA Series
Va con
ATRIA Series
Matching
M.E., M.E.25 Series
Va con
M.E., M.E.25 Series
Matching
SENTO Series
Va con
SENTO Series
LM37S LM42SLM24S
Matching
TRANQUILITY Series
Va con
TRANQUILITY Series
Installation Instructions Instrucciones de Instalación
STOP/VOLUME CONTROL VALVES
VÁLVULAS REGULADORAS DE CIERRE
1/2" & 3/4" Stop Valve/Volume Control (Trim Only without Handle)
1/2" & 3/4" Stop Valve/Volume Control (Trim Only without Handle)
1/2" y 3/4" Válvula Reguladora de Cierre
(Sólo el Acabado de la Válvula sin el Manecilla)
1/2" y 3/4" Válvula Reguladora de Cierre
(Sólo el Acabado de la Válvula sin el Manecilla)
8093
Model
Modelo
8095
Model
Modelo
For care, use soft towel with soap and water only! Under no
circumstances should you use any chemicals.
ATTENTION!
ATENCIÓN!
Para el cuidado, utilice solamente una toalla suave con jabón
y aqua! Bajo ninguna circunstancia no use productos químicos.
For easy installation of your Para la instalación fácil de su válvula de la
GRAFF valve you will need: GRAFF usted necesitará:
to READ ALL the instructions completely before beginning, LEER TODAS las instrucciones completamente antes de comenzar,
to READ ALL the warnings, care and maintenance information. LEER TODA la información sobre las advertencias, cuidado y mantenimiento.
To complete the project, you should: Para terminar el proyecto, usted debe:
gather the tools and all the parts you will need, recolectar las herramientas y todas las piezas que usted necesitará,
prepare the mounting area, prepare el área para el montaje,
mount the stop/volume control valve, monte la válvula reguladora de cierre
finally test and flush the valve. finalmente pruebe y limpie la válvula con un chorro de agua
You should have the following tools: Usted debe tener las herramientas siguientes:
1/2" and 3/4” nominal fittings manguitos nominales 1/2" y 3/4"
wrenches llaves
thin-bladed knife or screwdriver cortaplumas o destornillador plano
hacksaw or tubing cutter sierra para metal o cortador de tubos
thread sealant obturador de la rosca
~
ESPANOL
ENGLISH
6
IOG 282 .10
Matching
Series
Va con
Series
LM45S
HASE
P
HASE
P
Rev. 3 January 2014

T3.1
T3.2
T1
T2
T2
T5
T5
T4.1
T4.2
For Model
Para el modelo 8095
8095
For Model
Para el modelo 8093
8093
Handle - see page 1
Manecilla - ver página 1
Handle - see page 1
Manecilla - ver página 1
1.1
2
Installation Instructions Instrucciones de Instalación
STOP/VOLUME CONTROL VALVES
VÁLVULAS REGULADORAS DE CIERRE
Product 8093 (with contemporary escutcheon) is intended
for use with product 8036 (thermostatic valve trim).
El producto 8093 (con el rosetón moderno) deben usarse
Product 8095 (with contemporary square escutcheon) is
con el producto 8036 (sólo el acabado de la válvula termostática).
intended for use with products 8041 & 8046 (thermostatic valve
El producto 8095 (con el cuadrado rosetón moderno)
trims).
deben usarse con los productos 8041 y 8046 (sólo los acabados
de las válvulas termostáticas).
~
ESPANOL
ENGLISH
PRODUCT SPECIFICATION DESCRIPCIÓN DEL PRODUCTO
T1
T2
T3.1
T3.2
T4.1
T4.2
T5
~
ESPANOL
ENGLISH
REJILLA
Q
ROSETÓN MODERNO
CUADRADO ROSETÓN MODERNO
CUBIERTA MODERNA DE VÁLVULA
CUBIERTA MODERNA DE VÁLVULA
MANECILLA
SLEEVE
O-RING SEAL
CONTEMPORARY ESCUTCHEON PLATE
CONTEMPORARY SQUARE ESCUTCHEON PLATE
CONTEMPORARY VALVE COVER
CONTEMPORARY VALVE COVER
HANDLE
T1
T2
T3.1
T3.2
T4.1
T4.2
T5
EMPA UETADURA DE ANILLO
WALL MIN
WALL MAX
A
R
MIN.1-3/8"-MAX.2-1/8"
(MIN.35mm-MAX.54mm)
R
T1 T3.1 T4.1 T5
MIN.1-3/8"-MAX.2-1/8"
(MIN.35mm-MAX.54mm)
2.1 2.2
After execution of the finished wall remove and discard the
plaster guard (A). Turn the sleeve (T1) onto valve body. Insert
the o-ring (T2) into the groove of the escutcheon plate (T3.1).
Al terminar el acabado de la pared sacar y remover el
Slide over the escutcheon plate (T3.1) on the sleeve (T1), next
protector del yaso (A). Fijar el casquillo (T1) en el cuerpo de la
screw on the valve cover (T4.1). Put on the lever (T5) on the
válvula. Colocar el anillo (o-ring) (T2) en la muesca del rosetón
valve stem. Affix the lever positioning it correctly.
(T3.1). Coloque el rosetón (T3.1) sobre la casquillo (T1) y
Type of handles used with particular trims are shown on page
enrosque la cubierta de la válvula (T4.1). Poner la manecilla (T5)
1.
en el vástago de la válvula. Fijar la manecilla en posición correcta.
Los tipos de llaves que cooperan con diferentes tipos de los
acabados de las válvulas están presentados en las página 1.
~
ESPANOL
ENGLISH
INSTALLATION INSTRUCTIONS INSTRUCCIONES DE INSTALACIÓN
See fig. 1.1, 2.1-2.2 Ver dis. 1.1, 2.1-2.2
6
IOG 282 .10
Rev. 3 January 2014
 Loading...