

Page 1
USER MANU AL
1
Page 2

Join the GoPro party at facebook.com/gopro to see
what other GoPro owners are capturing and sharing.
Share your footage and join the GoPro movement!
2
Page 3

TAB LE OF CON TE NT S
Accessories 4
Mounts + Accessories 5
HERO3 Features 6
Camera LCD Status Screen 8
Camera User Interface Flow Chart 9
So!ware Updates 10
Basics 10
Camera Modes 13
Camera Settings 20
Delete 30
Capture Settings 32
Set Up 40
Wireless Controls 49
Storage/SD Cards 51
System Requirements 52
Transferring Files 53
Playback 54
Battery Life 56
Important Warning Messages 58
Camera Assembly 59
Customer Support 65
3
Page 4
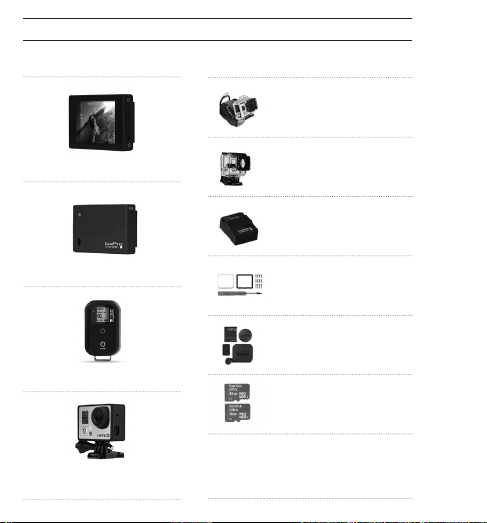
WEAR IT. MOUNT IT. LOVE IT.
PREMIUM ACCESSORIES
HERO3 ACCESSORIES
Wrist Housing
4
LCD Touch BacPac
Battery BacPac
Wi-Fi Remote
The Frame Mount
(HERO3 accessory)
™
™
More HERO3 accessories available at gopro.com.
Replacement Housing
Rechargeable Li-Ion Battery
Lens Replacement Kit
Caps + Doors
32GB/64GB microSD™
Page 5
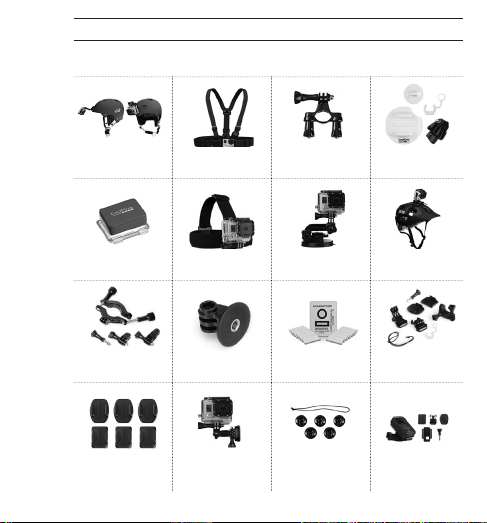
MOUNTS + ACCESSORIES
SEE MORE AT gopro.com
Helmet Front
Mount
Floaty Backdoor Head Strap Suction Cup Mount Vented Helmet
Roll Bar Mount Tripod Mount Anti-Fog Inserts Grab Bag of
Curved + Flat
Adhesive Mounts
Chest Mount
Harness
Side Mount Camera Tethers
Handlebar/Seatpost/
Pole Mount
Surfboard Mounts
Strap
Mounts
Wi-Fi Remote
Mounting Kit
5
Page 6

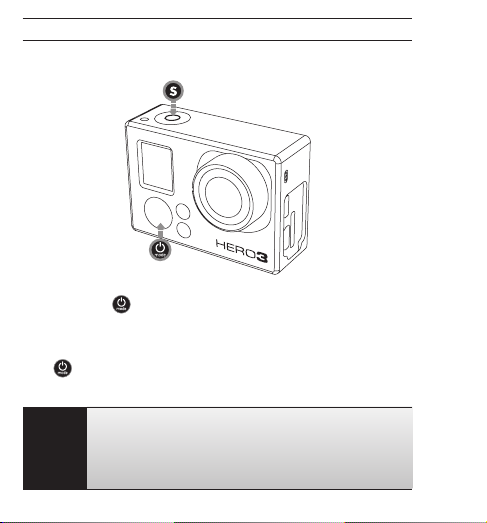
HERO3 FEATURES
1. Status Indicator Lights (Red)
2. SHUTTER/SELECT Button
3. LCD Status Screen
4. Wi-Fi Indica tor Ligh t (Blue
5. POWER/MODE Button
6
6. Micro HDMI Port
(Cable not included)
)
TM
7. microSD
8. mini-USB Port
Card Slot
(SD card not included)
(Supports Composite A/V
cable/3.5mm stereo mic adapter,
not included)
Page 7
7
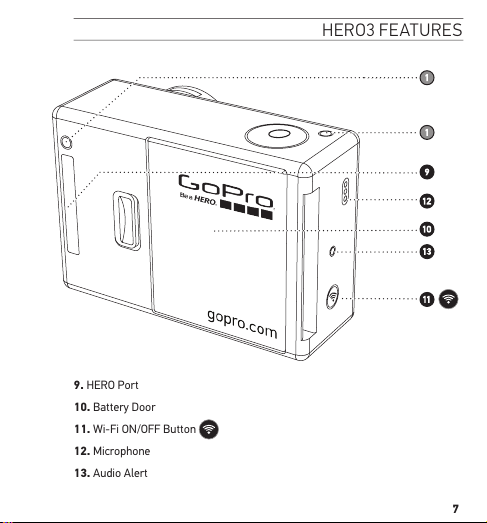
HERO3 FEATURES
9. HERO Port
10. Battery Door
11. Wi-Fi ON/OFF Button
12. Microphone
13. Audio Alert
Page 8
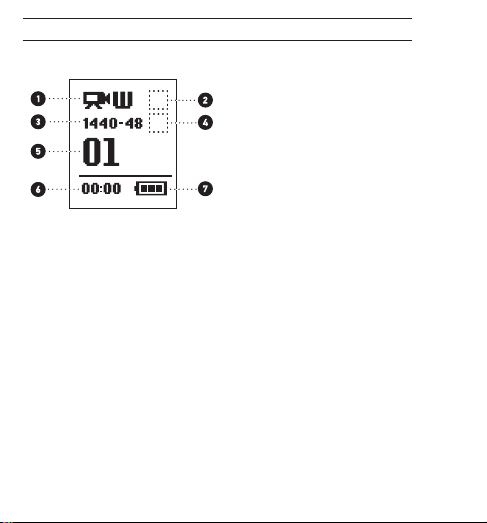
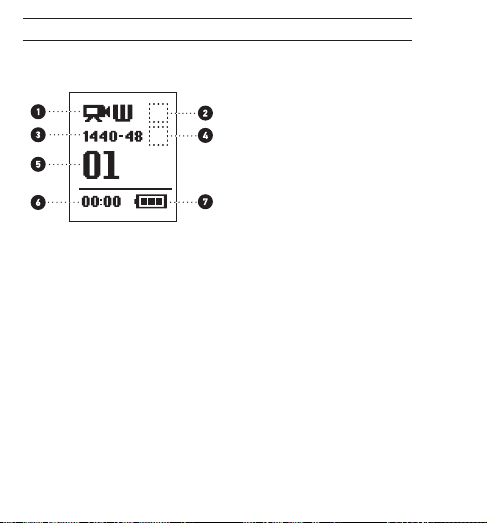
CAMERA LCD STATUS SCREEN
The LCD screen displays the following information about HERO3 modes and settings:
1. Camera Modes/FOV (Field of View)
2. Capture Setting Modes (not shown)
3. Resolution/FPS (Frames Per Second)
4. Time Interval Settings: (not shown)
5. Counter
6. Time/Storage/Files
7. Battery Life
Note: The icons displayed above will vary depending on what mode your camera is in.
8
Page 9
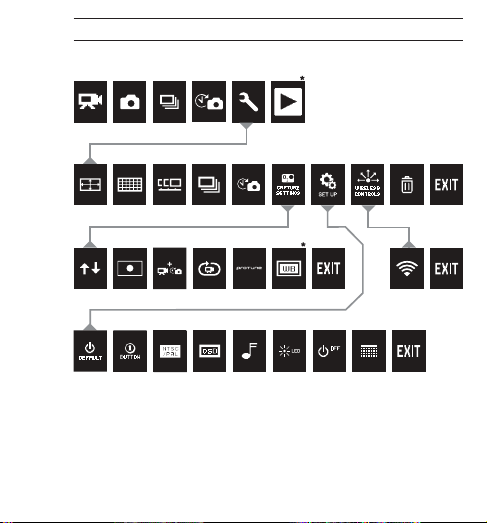
CAMERA USER INTERFACE FLOW CHART
MODES
CAMERA SETTINGS
CAPTURE SETTINGS WI-FI
SET UP
*Note: White Balance only appears in your camera display if Protune™ mode
is turned ON. Playback only appears if Playback is activated.
9
Page 10
SOFTWARE UPDATES
GoPro releases product updates through so!ware updates. Check
to see if any updates are available for your camera or other GoPro
products. Visit: gopro.com/update.
USING YOUR HERO3: BASICS
GETTING STARTED
Before using your HERO3 for the first time:
1. I nsert a microSD, microSDHC™ or microSDXC™ card into the card slot
with label facing forward, narrowest part of the card first. Speed Class
10 or higher cards are recommended. When using 0.5 second Time Lapse or
record ing v ideo in Protune mode, a Speed Class Rating 10 is required.
2. Place battery into the camera.
3. Charge battery. The included lithium-ion battery comes partially charged. To
charge, connect the included USB cable to camera and connect the other end
of the cable to a power source such as a computer, GoPro Wall Charger or
GoPro Auto Charger. No damage will occur to the camera or battery if used
prior to a full charge.
Status Indicator Lights when camera is OFF and
PRO
charging, show:
• Status Indicator Lights are ON when charging.
TIP:
• Status Indicator Lights are OFF when charging is complete.
"See BATTERY LIFE for more information.
"See PROTUNE for more information.
10
Page 11
USING YOUR HERO3: BASICS
CAMERA DEFAULT SETTINGS
The HERO3 Black Edition camera powers up with the following default settings:
Video Resolution 1440p48fps
Photo Resolution 12 Megapixels (MP)
Photo Burst 30 photos in 1 second
Time Lapse 0.5 seconds
Wi-Fi OFF
Want to chan ge yo ur VIDEO and PHOTO settings?
PRO
TIP:
"See SETTINGS menu to make changes.
11
Page 12
USING YOUR HERO3: BASICS
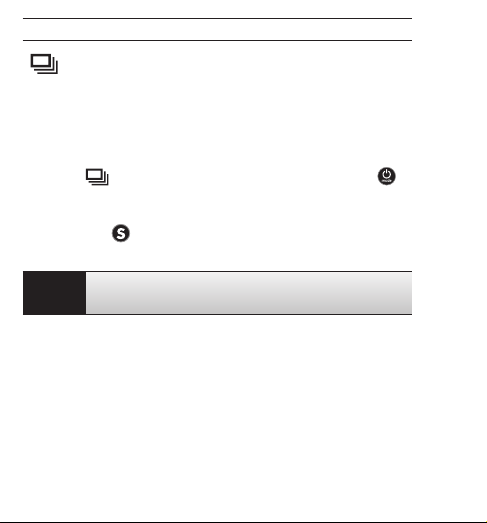
POWERING ON AND OFF
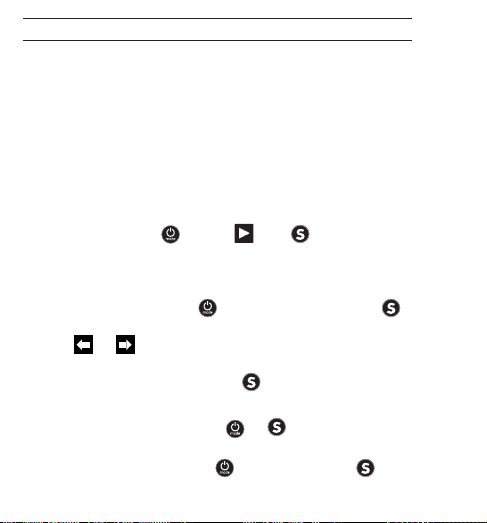
To power ON:
Press and release
the Sound Indicator emits three beeps.
To power OFF:
Press
several times and the Sound Indicator emits seven beeps.
PRO
TIP:
12
. The red Status Indicator Lights flash three times and
for two seconds, then release. The red Status Indicator Lights flash
Want to t urn your HE RO3 into a “on e-butto n” camer a that
auto matica lly star ts recor ding PHOTOS or VIDEOS once it
turn s ON? Set the c amera to ONE BUTTON mod e.
"See ONE BUTTON mo de for more i nformat ion.
Page 13
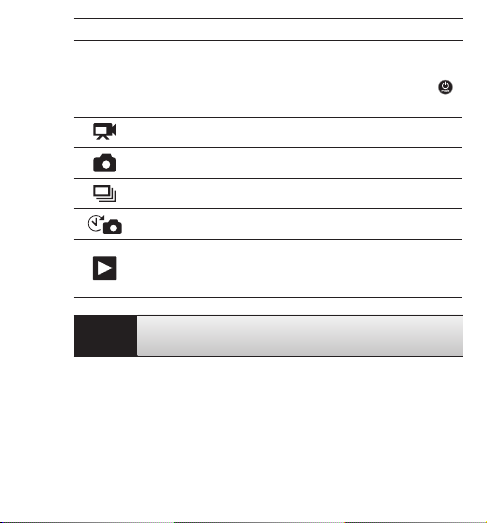
USING YOUR HERO3: CAMERA MODES
OVERVIEW
The HERO3 features several camera modes. To cycle through the modes, press .
The modes will appear in the following order:
VIDEO
PHOTO
PHOTO BURST
TIME LAPSE
PLAYBACK
PRO
Use PHOTO BURST to capture fast moving subjects.
TIP:
"See PLAYBACK for more information.
Recor d Video
Capt ure singl e Photo
Capt ure Burst p hotos
Capture Time Lapse photos
Appe ars only i f the came ra is plug ged into a T V/HDTV.
Playback allows yo u to play Photos and Videos on
a TV/HDT V (via opt ional Mic ro HDMI cabl e or A/V
comp osite cab le).
13
Page 14
USING YOUR HERO3: CAMERA MODES
VIDEO
To record Video, verify the camera is in Video mode. If the Video icon
your camera’s LCD screen
To start recording:
Press and release
Indicator Lights wil l flash w hile record ing.
To stop recording:
Press and release
camera emits three beeps to indicate recording has stopped.
The HERO3 automatically stops recording when the memory card is full or the
battery is out of power. Your video will be saved before the camera powers OFF.
"See VIDEO mode for instructions on how to change resolution settings.
14
is not showing, press repeatedly until it appears.
. The camera will emit one beep and the red Status
. The red Status Indicator Lights flash three times and the
on
Page 15
USING YOUR HERO3: CAMERA MODES
PHOTO
To capture a Photo, verify the camera is in Photo mode. If the Photo icon on
your camera’s LCD is not showing, press
To take a photo:
Press and release . The camera beeps two times and the red Status
Indicator Lights flash.
"See PHOTO modes for instructions on how to change resolution settings and
other PHOTO features.
repeatedly until it appears.
15
Page 16
USING YOUR HERO3: CAMERA MODES
PHOTO BURST
In Photo Burst mode your camera takes multiple photos in short time intervals—
3 photos/1 second, 5 photos/1 second, 10 photos/1 second, 10 photos/2 seconds, 30 photos/1 second, 30 photos/2 seconds or 30 photos/3 seconds.
To capture a Photo Burst series, verify the camera is in Photo Burst mode. If the
Photo Burst icon on your camera’s LCD screen is not showing, press
repeatedly until it appears.
To take a Photo Burst series:
Press and release
beeps multiple times.
PRO
TIP:
"See PHOTO BURST for instructions on how to change the interval settings.
16
. The red Status Indicator Lights flash and the camera
Sometimes 30 photos/1 second is too fast. Try a slower
PHOTO BURST setting to better match the action.
Page 17
USING YOUR HERO3: CAMERA MODES
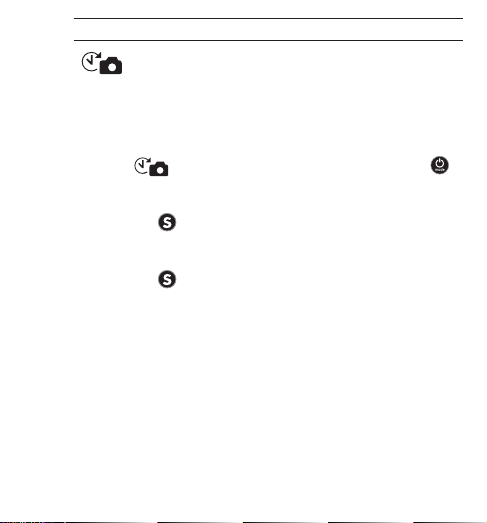
TIME LAPSE
Time Lapse mode captures a series of photos at 0.5, 1, 2, 5, 10, 30 or 60 second
intervals. When using the 0.5 seconds setting, an SD card with a Speed Class 10
Rating is required.
To c apt ure a Time Lapse series, verify the camera is in Time Lapse mode. If the
Time Lapse
repeatedly until it appears.
To take Time Lapse:
Press and release . The camera initiates countdown and the red Status Indicator
Lights flash each time a Photo is taken.
To stop Time Lapse:
Press and release . The red
camera emits three beeps to indicate that Time Lapse has stopped.
"See TIME LAPSE for instructions on how to change the interval settings.
icon is not showing on your camera’s LCD screen, press
Status
Indicator Lights flash three times and the
17
Page 18
USING YOUR HERO3: CAMERA MODES
SETTINGS
The Settings menu allows you to adjust a variety of camera settings including:
Video Resolution
Photo Resolution
Time Lapse
Photo Burst
Continuous Photo
• and more
"See SETTINGS menu to make changes, learn how to navigate menu options
and read more details on each setting.
18
Page 19

USING YOUR HERO3: CAMERA MODES
PLAYBACK
You can playback your GoPro Photos and Videos on a TV/HDTV or with the LCD
Touch BacPac (optional accessory). Playback appears as a camera mode when
camera is powered ON and plugged into a TV/HDTV.
"See PLAYBACK for more information on viewing your VIDEOS and PHOTOS.
19
Page 20
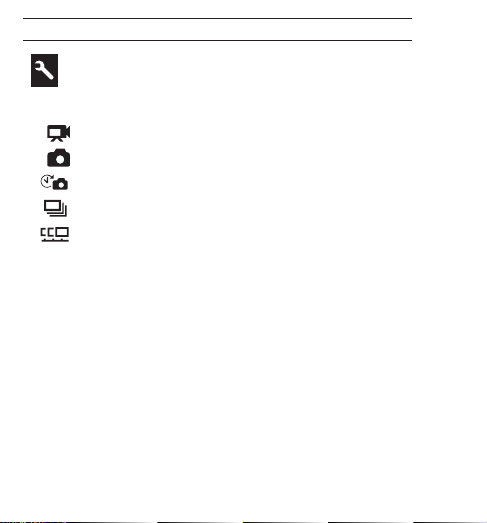
CAMERA SETTINGS
SETTINGS
To enter the Settings menu:
1. Ver ify th e camer a is i n the Settings menu. If the Setting
camera’s LCD screen is not showing, press
2. Press
3. Use
4. Press
5. To exit, hold down
20
to enter menu.
to cycle through the various Settings options.
to select desired option.
for two seconds or cycle through to and press .
PRO
If at any time you wish to exit from the SETTINGS menu, press
TIP:
and hold
for two seconds.
repeatedly until it appears.
icon on your
Page 21
CAMERA SETTINGS
VIDEO RESOLUTION/FPS/FOV MODES
You ca n cha nge Resolution, FPS and View Angle (F OV) for your HERO3
camera when using Video mode. This mode contains sub-level menu options.
Once in the Settings menu:
1. Press
2. Use
3. Press
4. Use
5. To change additional options, repeat step 4.
6. To exit, hold down
to enter .
to cycle through options.
to enter desired menu.
to cycle through each sub-menu option and to select.
press
for two seconds or cycle through to and
.
21
Page 22

CAMERA SETTINGS
The HERO3 Black Edition offers the following Video Capture modes:
Video
NTSC
PAL
std
Resolution
fps
4k /
4k Cin
2.7k /
2.7k Cin
fps
15 1212. 5 12No Yes Ultra Wide 3840x2160, 16:9
30 2425 24Yes* Ye s Ultra Wide 2704x1524, 16:9
Protune Field of View
Mode
(FOV)
Screen
Resolution
4096x2160, 17:9
2704x1440, 17:9
144 0p 4 8
1080p 60
960p 100 48100 48Yes Yes
720p 120 60100 50Yes Yes
WVGA 240 240 Yes No Ultra Wide 848x480, 16:9
*Medium and Narrow FOV will be available in an upcoming so!ware update. Note: 720p120 and
720p100 only support Ultra Wide and Narrow FOV.
Note: Protune mode is only possible in select Video resolutions.
48
30
24
48
30
24
Yes Yes Ultra Wide 1920x1440, 4:3
25
24
50
Yes Yes Ultra Wide
48
25
24
No
No
Medium
Narrow
Ultra Wide 1280x960, 4:3
Ultra Wide
Narrow*
1920x1080, 16:9
1280x720,16:9
22
Page 23

CAMERA SETTINGS
Video
Resolution
4k /
4k Cin
2.7k /
2.7k Cin
144 0p Recommended for body-mounted shots as larger viewing area and high frame
1080p 1080p60 is great for all shots as high resolution and frame rate yeild stunning
960p Use for body-mounted shots and when slow motion is desired. Provides large
720p Good for handheld shots and when slow motion is desired.
WVGA Good when super slow motion is desired and standard definition is acceptable.
Best Use
Stunning 8MP resolution video with professional low light performance. Pull
8MP stills from video. Recommended for tripod or fixed position shots.
16:9 / 17:9 resolution video downscales to provide stunning, cinema-quality
results for professional productions. Recommended for tripod or fixed
position shots.
rate yie ld the smo othest, mo st immers ive results for high a ction capt ure.
results. Tripod or fixed mounting for 1080p48 and 30fps and 1080p24 is ideal for
television and film productions.
viewing area and smooth results for high action capture.
Setting the PROTUNE mode to ON allows for high -quality capture,
PRO
neutral color and 24fps video for professional video production.
TIP:
"See PROTUNE for more information.
23
Page 24
CAMERA SETTINGS
The HERO3 can capture photos at 12MP, 7MP and 5MP resolutio ns. Any change
to photo resolution also affects photos captured in Photo, Photo Burst and
Time Lapse modes.
Photo
Resolution
12MP Wide (Default)
7MP Wide
7MP Medium
5MP Wide
24
PHOTO RESOLUTION MODES
Field of View
(FOV)
Page 25
CAMERA SETTINGS
CONTINUOUS PHOTO
Continuous Photo mode allows you to capture a series of Photos continuously
while holding down the
3 photos every 1 second
5 photos every 1 second
10 photos every 1 second
Note: Your camera will remain in the CONTINUOUS PHOTO mode until you
return it to the SINGLE photo capture setting option.
button.
25
Page 26
CAMERA SETTINGS
PHOTO BURST OPTIONS
Photo Burst mode captures series of Photos when
can be captured in the following rates:
3 photos in 1 second
5 photos in 1 second
10 photos in 1 second
10 photos in 2 seconds
30 photos in 1 second
30 photos in 2 seconds
30 photos in 3 seconds
Several time interval options are available for Time Lapse mode, including
0.5, 1, 2, 5, 10, 30 and 60 seconds.
26
(Default)
TIME LAPSE
is pressed. Photos
Page 27
CAMERA SETTINGS
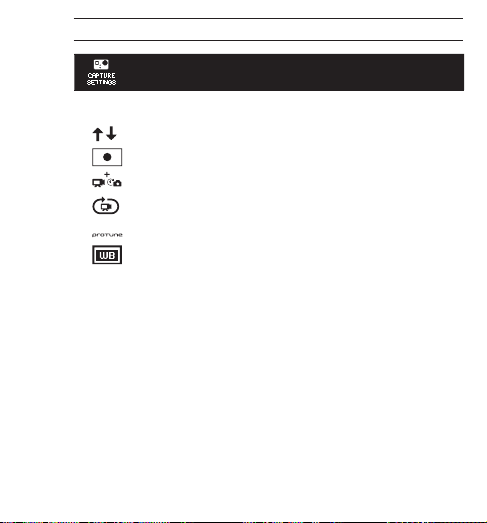
CAPTURE SETTINGS MENU
Capture Settings allows you to adjust the following advanced camera settings:
Camera Orientation
Spot Meter
Simultaneous Video and Photo
Looping Video
Protune
White Balance
"See CAPTURE SETTINGS section for a complete list of capture options.
27
Page 28

CAMERA SETTINGS
SET UP MENU
The Set Up menu allows you to adjust the following camera settings:
Default mode at Power Up
One Button Mode
NTSC/PAL
On Screen Display
Status Indicator Lights
Sound Indicator
Month/Day/Year/Time
"See SET UP menu section for a complete list of set up options.
28
Page 29
CAMERA SETTINGS
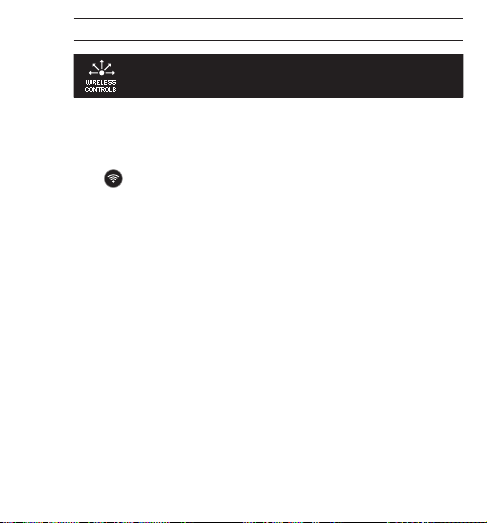
WIRELESS CONTROLS
The HERO3 camera’s built-in Wi-Fi allows you to connect to the Wi-Fi Remote
or smartphone/tablet via the GoPro App. When Wi-Fi is ON, your Wi-Fi
Status Indicator Light will blink blue.
To turn Wi-Fi ON/OFF:
to turn Wi-Fi ON/OFF. The most recently used Wi-Fi mode will be
Press
active when Wi-Fi is ON.
"See WIRELESS CONTROLS section for a complete list of wireless functions.
29
Page 30
CAMERA SETTINGS
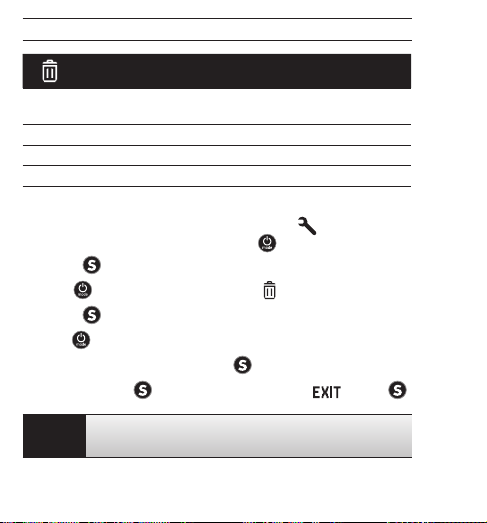
DELETE
Delete the last file or all files and format the memory card. During delete LAST or
ALL, the Status Indicator Lights blink until operation is complete.
CANCEL (Default)
LAST
ALL
To delete LAST or ALL:
icon
1. Ver ify th e came ra is in Settings mode. If the Settings
camera’s LCD screen
2. Press
3. Use
4. Press
5. Use
6. Select highlighted option by pressing
7. To exit, hold down
PRO
TIP:
30
is not showing, press repeatedly until it appears.
to enter Settings menu.
to cycle through Settings to locate .
to enter Delete.
to cycle through options.
for two seconds or cycle through to and press .
Use caution — by selecting ALL, the memory card will be
formatted, deleting every file on your SD card.
.
on your
Page 31

From the
PRO
TIP:
CAMERA SETTINGS
EXIT
screen, press to exit the Settings menu.
If at any time you wish to exit from the SETTINGS menu, press
and hold
for two seconds.
31
Page 32

CAPTURE SETTINGS
CAPTURE SETTINGS
To enter the Capture Settings menu:
1. Ver ify th e came ra is in Settings mode. If the Settings
camera’s LCD screen
2. Press
3. Use
4. Press
5. Use
6. Press
7. Some options have a sub-menu. Use
8. Press
9. To exit, hold down
press
32
is not showing, press repeatedly until it appears.
to enter .
to cycle through Settings to locate .
to enter Capture Settings.
to locate the desired option to change.
to select the desired option.
to select a highlighted option.
for two seconds or cycle through to and
.
icon
on your
to cycle through the sub-menus.
Page 33

CAPTURE SETTINGS
You c an cu st om iz e th e wa y yo ur H ER O3 c ame ra c ap tu res Vi deo and Photos in the
Capture Settings menus, such as Upside Down, Looping Video and White Balance.
UPSIDE DOWN
Mounting your HERO3 Upside Down but wish the files to appear upright when
viewing or editing? This setting eliminates the need to flip your Video o r Photos
a!er recording.
Camera right side up (Default)
Camera upside down
SPOT METER
Turn on Spot Meter when filming from within a dark space pointing the
camera into a brighter setting, such as filming the outdoors from within a car.
When Spot Meter is set to ON,
OFF (Default)
ON
appears in the LCD window.
33
Page 34

CAPTURE SETTINGS
SIMULTANEOUS VIDEO AND PHOTO
Simultaneous Video and Photo mode, allows you to simultaneously capture
both Videos and Photos. You can set the camera to take a Photo every 5
seconds, 10 seconds, 30 seconds or 60 seconds while you record Video.
To set your camera to Picture In Video Mode verify that a supported Video
resolution is selected and that Protune is turned OFF.
OFF
5 seconds
10 seconds
30 seconds
60 seconds
Note: You can capt ure
resolution settings: 1080p 24 fps, 1080p 30 fps, 720p 60fps or 1440p 24 fps.
PRO
TIP:
34
Simultaneous Video and Photo
You r r esu lti ng PHOTO size is determined by the VIDEO
dimensions you select.
Video Dimensions Megapixel
16:9 (1080p, 720p) 8MP
4:3 (1440p) 12MP
While capturing VIDEO you can manually take a PHOTO at any time by
simply pressing
.
in one of the following
Page 35

CAPTURE SETTINGS
LOOPING VIDEO
Looping Video mode allows you to record a continuously looping video that
overwrites itself until you press the
not available if Protune mode is turned ON.
Looping Video options inlcude:
OFF (Default)
Max video
5 min video
20 min video
60 min video
120 min video
PRO
TIP:
Note: Looping Video is not enabled when in Protune mode.
Camera records until memory card is full, then overwrites with a
new video.
Camera records for 5 minutes, then begins a new video,
progressively overwriting the previous 5 minute video.
Camera records for 20 minutes, then begins a new video,
progressively overwriting the previous 20 minute video.
Camera records for 60 minutes, then begins a new video,
progressively overwriting the previous 60 minute video.
Camera records for 120 minutes, then begins a new video,
progressively overwriting the previous 120 minute video.
Multiple chapter files are written to your memory card. This
allows for small segments of content to be overwritten during
loop recording. When viewing on a computer screen you will see
separate files for each time segment. Use video editing so!ware if
you wish to combine files into a longer video.
button to stop it. Looping Video is
35
Page 36

CAPTURE SETTINGS
PROTUNE
The HERO3 camera can record video in Protune mode. Protune is a video mode
that unlocks the camera’s full potential, yielding stunning image quality and
cinema-caliber video for professional productions. Content creators now have far
more flexibility and workflow efficiency than ever before.
PROTUNE KEY BENEFITS INCLUDE:
High-Quality Image Capture
Protune’s h ig h dat a rat e cap tu res im ag es wi th le ss c omp res si on , g iv ing c on ten t
creators higher quality for professional productions.
Neutral Color
Protune’s neutral color profile offers more flexibility during post-production color
correction. Protune’s log curve captures more detail in shadows and highlights.
Film/TV Frame Rate Standard
Record video in cinema-quality 24fps and easily intercut GoPro content with other
source media without the need to perform fps conversion.
Turning Protune ON affects several settings and features, such as Video
Resolution, fps, FOV and Simultaneous Video and Photo.
OFF (Default)
ON
36
Page 37

PROTUNE RESOLUTIONS (continued):
Protune is available in the following HERO3 Black Edition resolutions:
RESOLUTION FPS
4k / 4kCin 15/12.5,12
2k / 2kCin 30/25, 24
1440p 48, 30,25,24
1080p 60, 50, 48, 30, 25, 24
960p 100
720p 120, 100
COMPATIBILITY: Protune is compatible with professional color correction tools,
editing programs and GoPro CineForm Studio.
CAPTURE SETTINGS
37
Page 38

CAPTURE SETTINGS
WHITE BALANCE
White Balance adjusts the overall color tone of videos. White Balance will
only be available if Protune mode is turned ON. The default White Balance
setting is AUTO. When capturing in any White Balance setting other than
AUTO, you may need to color correct your video with an editing program to
achieve your desired color. Only use a non-AUTO White Balance setting if
you are an advanced user.
Consider manually setting WHITE BALANCE to the following settings
when operating in the following conditions:
Incandescent or sunrise/sunset lighting
PRO
Daylight or sunlit shooting
TIP:
Cool white fluorescent skylight lighting
Industry standard optimized color
Cam RAW (Camera RAW)
The HERO3 camera can record Video in Protune mode in Cam RAW. GoPro
Cam RAW mode yields a minimally processed data file direct from the image
sensor that allows for more precise adjustments to be made in post-process.
Working in this mode takes full advantage of the image sensor’s capabilities.
PRO
PROTUNE uses AUTO WHITE BALANCE and will override
TIP:
any non-AUTO WHITE BALANCE setting.
3838
3000K
5500K
6500K
Cam RAW
Page 39

EXIT
From the EXIT screen press
PRO
If at any time you wish to exit from the CAPTURE SETTINGS
TIP:
menu, press and hold
CAPTURE SETTINGS
to exit the Capture Settings menu.
for two seconds.
3939
Page 40

SET UP
SET UP
To enter the Set Up menu:
1. Ver ify th e came ra is in Settings mode. If the Settings
camera’s LCD screen
2. Press to enter .
3. Use to cycle through Settings to locate .
4. Press to enter Set Up.
5. Use to locate the desired option to change.
6. Press to select the desired option.
7. To exit, hold down
press
40
is not showing, press repeatedly until it appears.
.
for two seconds or cycle through to and
icon
on your
Page 41

SET UP
DEFAULT MODE AT POWER UP
You c an se t th e ca me ra ’s Default mode at power up to any of the following modes:
(factory default)
41
Page 42

SET UP
ONE BUTTON
With One Button mode selected, the camera automatically begins recording when
powering the camera ON. One Button mode can be configured to start in Video
or Time Lapse.
OFF (Default)
ON
To turn One Button mode ON:
icon
1. Ver ify th e came ra is in Settings mode. If the Settings
camera’s LCD screen
2. Press
3. Use
4. Press
5. Use
6. Press
7. Use
8. Press
9. To ex it, ho ld dow n
Next time you power your camera ON, it will begin recording in its Default
Power Up Mode. To stop recording, push and hold
42
is not showing, press repeatedly until it appears.
to enter menu.
to cycle through Settings to locate .
to enter Set Up.
to cycle through to locate .
to enter One Button menu.
to cycle through options.
to select a highlighted option.
for two seconds or cycle through to and press .
on your
for two seconds.
Page 43

SET UP
ONE BUTTON MODE (continued)
To e xit One Button mode:
1. Power camera ON.
2. Press and hold
3. Press
4. Use
5. Press
6. To exit, hold down
press
PRO
TIP:
Note: One Button mode is disabled when connected to Wi-Fi Remote or GoPro App.
until shows in the LCD window.
to enter.
to highlight OFF.
to select.
.
To stop the capture process (VIDEO or TIME LAPSE) when in
ONE BUTTON, press and hold
return to the ONE BUTTON menu where you can turn
ONE BUTTON mode OFF.
for two seconds or cycle through to and
for two seconds. You will
43
Page 44

SET UP
NTSC / PAL
The NTSC and PAL settings govern Video recording frame rate and playback
when viewing Video on a TV/HDTV. Select NTSC when viewing a TV/HDTV in
North America. Select PAL if viewing on a PAL TV/HDTV (most televisions
outside of North America) or if viewing on a PAL TV/HDTV in any region.
NTSC (Default) PAL
4k/15fps 4k/12.5fps
4k Cin/12fps 4k Cin/12fps
2k/30fps 2k/25fps
2k Cin/24fps 2k Cin/24fps
1440p/48fps 1440p/48fps
1440p/30fps 1440p/25fps
1080p/60fps 1080p/50fps
1080p/48fps 1080p/48fps
1080p/30fps 1080p/25fps
1080p/24fps 1080p/24fps
960p/100fps 960p/100fps
960p/48fps 960p/48fps
720p/120fps 720p/100fps
720p/60fps 720p/50fps
WVGA/240fps WVGA/240fps
44
Page 45

SET UP
ONSCREEN DISPLAY
To display or hide the recording icons and file information on Video or the
viewing screen during playback, turn Onscreen Display (OSD) OFF or ON.
OFF
ON (Default)
STATUS INDICATOR LIGHTS
Keep all four Status Indicator Lights active, only two active (front and back)
or turn OFF all lights.
4 (Default)
2
OFF
SOUND INDICATOR
You can adjust volume or turn OFF the Sound Indicator.
100% (Default)
70%
OFF
45
Page 46
SET UP
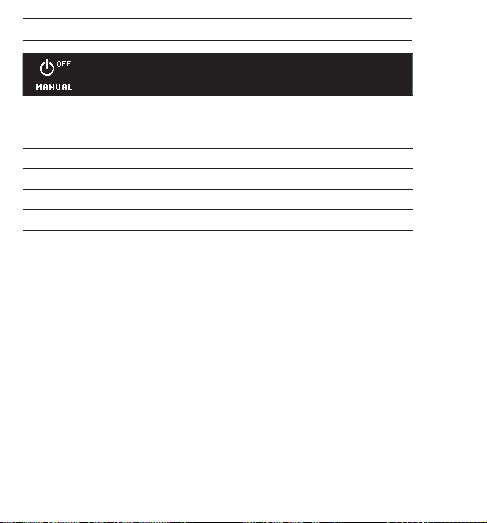
MANUAL POWER OFF
The HERO3 can be configured to automatically power OFF a!er a specific
period of inactivity (when no Videos or Photos are being taken and no
buttons have been pressed).
MANUAL (Default)
60
sec
120sec
300sec
46
Page 47

SET UP
MONTH / DAY / YEAR / TIME
Set the HERO3 clock to ensure Video and Photo files a re saved wit h the
correct date and time.
To change Month/Day/Year/Time:
1. Ver ify th e came ra is in Settings mode. If the Settings icon
camera’s LCD screen
2. Press
3. Use
4. Press
5. Use
6. Press
be highlighted.
7. Press
8. Use
9. Press
10. To advance to the next option, press
11. Repeat steps 7, 8 and 9 to make selections for day (DD), year (YY), hour
(HH) and minutes (MM).
12. To exit, hold down
press
Note: If the battery is removed from the camera for an extended period of time
Month/Day/Year/Time will need to be set again.
is not showing, press repeatedly until it appears.
to enter menu.
to cycle through Settings to locate .
to enter Set Up.
to locate .
to enter Month/Day/Year/Time sub-menu; Month (MM) will
to access the list of months (1 to 12).
to cycle through list until desired selection is highlighted.
to select.
.
for two seconds or cycle through to and
.
on your
47
Page 48

SET UP
EXIT
From the EXIT screen, press
PRO
If at any time you wish to exit from the SET UP menu, press
TIP:
and hold
48
to exit the Set Up menu.
for two seconds.
Page 49

WIRELESS CONTROLS
WIRELESS CONTROLS
The built-in Wi-Fi allows your HERO3 camera to connect to the Wi-Fi Remote
and smartphone/tablet via the GoPro App.
To turn Wi-Fi ON/OFF via the Wi-Fi button:
Press and hold
mode will be set to the most recently used mode.
USING HERO3 WITH THE WI-FI REMOTE
Connect your HERO3 with the Wi-Fi Remote to control your camera remotely.
The Wi-Fi Remote can control up to 50 cameras at a time at distances of up to
600’/180m in optimal conditions.
1. Power ON the HERO3 and turn Wi-Fi ON.
2. Press
3. Press to enter .
4. Use to cycle through to locate .
5. Press to enter Wireless Controls .
6. You will see .
7. Press again to enter the sub-menu.
8. Use to select Wi-Fi RC.
9. Press to select it.
10. Use to select CURRENT or NEW.
11. Press to select desired option.
until blue lights flash. When turning Wi-Fi ON the Wi-Fi
to cycle through to the Settings menu.
49
Page 50

WIRELESS CONTROLS
WIRELESS CONTROLS "CONTINUED#
On your Wi-Fi Remote:
1. Press
2. While holding
3. Once you see
4. A check
The Wi-Fi Remote’s LCD screen will now mirror the HERO3 LCD screen.
USING THE HERO3 WITH THE GOPRO APP
The GoPro App lets you control your camera remotely using a smartphone or
tablet. Features include full camera control of all settings, live video preview to
your smartphone or tablet for easy shot framing and more.
The GoPro App is available for free at the Apple App Store and is coming soon
to Google Play.
"See gopro.com for more information.
50
to turn ON the GoPro Wi-Fi Remote.
, press and release .
, you can release .
will a ppear once the Wi-Fi Rem ote and cam era have
succes sfully paired .
PRO
Before you hit
TIP:
viewing it on your smartphone or tablet’s screen.
, see what your HERO3 camera sees by
Page 51

STORAGE/MICROSD CARDS
The HERO3 camera is compatible with 2GB, 4GB, 8GB, 16GB, 32GB and 64GB
capacity microSD, microSDHC and microSDXC memory cards. While all speed class
ratings are compatible, GoPro requires using an SD card with Speed Class Rating
10 or higher speed when recording in Protune mode, or when using the 0.5 Time
Lapse setting. GoPro recommends using brand name memory cards for maximum
relia bility in hi gh-vib ration activ ities.
To insert SD card: To remove SD card:
1. Slide memory card into card slot
with label facing front of camera.
2. The card will click into place when
fully inserted.
Use care when handling memory cards. Avoid liquids, dust and
debris. As a precaution, turn off the camera before inserting or
PRO
removing the card. Check manufacturer guidelines regarding use
TIP:
in acceptable temperature ranges.
"See PROTUNE for more information.
1. Place fingernail against edge of
memory card and lightly press
further into camera.
2. Card will spring out far enough to
be removed.
51
Page 52

SYSTEM REQUIREMENTS
The HERO3 camera is compatible with Microso!® XP (Service Pack 2 or later)
and Mac OS X 10.4.11 or later.
WINDOWS MAC
Windows XP (Service Pack 2 or later)
or Vista
3.2GHz Pentium 4 or faster 2.0GHz Intel Core Duo or faster
DirectX 9.0c or later
Minimum 1GB of system RAM Minimum 1GB of system RAM
Video card with minimum 256MB
of RAM
Want to see your footage and stills on the big screen? Plug
PRO
your HERO3 directly into a TV/HDTV with GoPro’s Micro HDMI
TIP:
cable or USB cable (optional accessories).
52
Mac OS® X 10.4.11 or later
Video card with minimum 128MB
of RAM
Page 53

TRANSFERRING FILES
TO TRANSFER VIDEO AND PHOTO FILES TO A COMPUTER
On a PC:
1. Connect the camera to the computer using included USB cable.
2. Press
3. Double click “My Computer” and locate “Removable Disk”.
4. If “Removable Disk” is not showing, close “My Computer” folder and
5. Double click “Removable Disk” icon.
6. Double click “DCIM” folder icon.
7. Double click “100GOPRO” icon to view all Photo and Video files.
8. Copy/move files to the computer or external hard drive.
On a Mac:
1. Connect the camera to Mac using included USB cable.
2. Press
3. The Mac recognizes the camera as an external hard drive. Double click
4. Copy/move files to computer or external hard drive.
IMPORTANT TIP FOR MAC USERS: When deleting files from the memory card,
empty the trash before removing the memory card or unplugging the camera.
to turn ON the camera.
reopen it. The “Removable Disk” icon should appear.
to turn ON the camera.
icon for external drive to access files.
53
Page 54
PLAYBACK
TO VIEW VIDEOS AND PHOTOS
Videos and Photos can be v iewed on a T V/HD TV or the LCD Tou ch BacP ac
(opti onal acce ssory ).
PLAYBACK ON TV/HDTV
To browse Videos and Photos:
1. Plug the camera into a TV/HDTV with a Micro HDMI or a mini-USB to a
Composite Cable (optional accessories).
2. Turn camera ON.
3. On your camera press
4. HERO3 displays thumbnail previews of all Videos and Photos on the
SD card. Photo sets taken in Continuous Photo, Photo Burst and Time
Lapse display the first Photo in a series.
5. While in thumbnail preview use
to view.
and to navigate backward and forward to see more media
6. Use
files on your memory card.
7. Highlight desired file to view and press .
8. Depending on whether you are viewing Videos or Photos, different
control options will appear. Use the
Note: Photo Burst and Time Lapse files will display the first Photo in the series.
To v iew a ll Photos in a series, use
54
to cycle to . Press .
to cycle through thumbnails. Press
and buttons to navigate.
to select VIEW and press .
Page 55

PLAYBACK
PLAYBACK ON LCD TOUCH BACPAC
Playback using the LCD Touch BacPac follows a similar process/procedure as
described with a few slight variations.
"See the LCD Touch BacPac User Manual for more information.
55
Page 56

BAT TER Y LIFE
CHARGING BATTERY
The battery icon displayed in the camera’s LCD will blink when the battery drops below
10%. If recording is occurring when battery reaches 0%, the camera will save the file
and power OFF.
To charge the battery:
1. Connect the camera to a
computer or USB power supply
(such as the GoPro Wall Charger
or GoPro Auto Charger).
2. The red Status Indi cator Light
remai ns ON while the battery
is charging.
3. The red Status Indicator Light
will turn OFF when the b attery is
fully charged.
The battery will charge to 80% in one hour and 100% in two hours when using
GoPro’s 1000mAh USB- compatible Wall or Auto Ch arger. Other chargers may
charge at only half this rate.
No damage will occur to the camera or the battery if used together prior to full charge.
Spare batteries and additional charging accessories are available at gopro.com.
56
Page 57

BATTERY LIFE
USING THE CAMERA WHILE CHARGING
You ca n cha rg e t he ca me ra’s b att er y whi le re co rdi ng Video or taking Photos. Simply
plug the camera into a GoPro-specific auto, wall or phone charger to charge the
HERO3
camera while recording Video or Photos. It is best to use GoPro’s 1AMP
(1000mAh) Wall or Auto Charger for maximum charging performance while the
camera is in use. Performance of non-GoPro chargers cannot be guaranteed.
REMOVING THE BATTERY FROM THE CAMERA
The
HERO3
battery is designed to have a tight fit to maximize reliability in high-
vibration activities.
To remove the battery:
1. Remove the battery door by placing your thumb in the indentation in the
battery door (on the back of the camera) and sliding it to the le!.
2. Allow the door to pop out. Grasp the battery pull-tab and remove from the camera.
57
Page 58
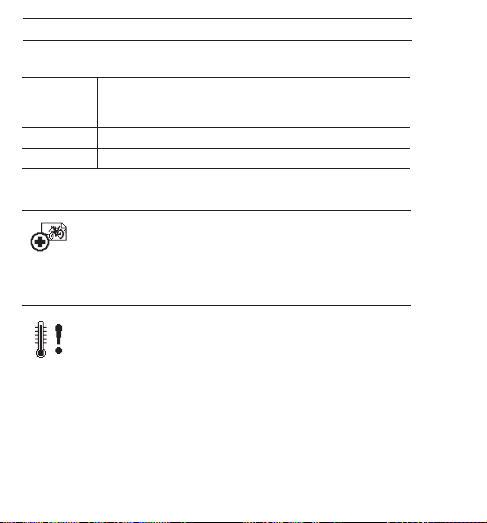
IMPORTANT WARNING MESSAGES
MICROSD CARD MESSAGES
NO SD
SD FULL Card is full. Delete files or swap card.
SD ERROR Camera unable to access card.
No card present. The camera requires a microSD, microSDHC
or microSDXC card to record Video or take Photos.
FILE REPAIR ICON ON THE LCD
If you see the File Repair icon on the LCD screen, your Video file
was corrupted during recording. Press any button and the camera
will repair the file.
TEMPERATURE WARNING ICON ON THE LCD
The Temperature Warning icon will appear on the LCD when the
camera has become too hot and needs to cool down. Simply let it sit
and cool before attempting to use it again. Your camera will not allow
itself to overheat —do not worry, no damage has occurred.
58
Page 59

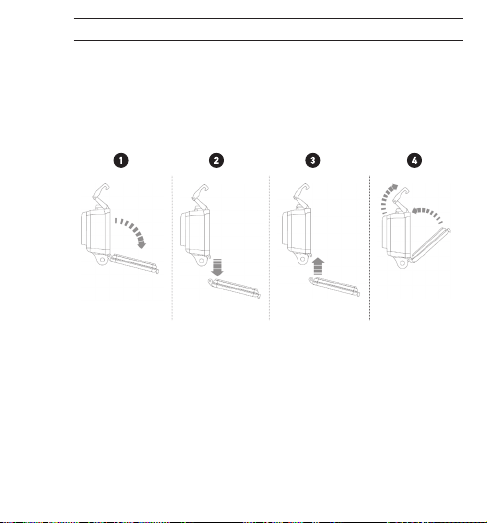
59
CAMERA ASSEMBLY
ASSEMBLING THE CAMERA
The
HERO3
camera housing is waterproof to 197’/60m and is constructed of
polycarbonate and stainless steel for ultimate durability.
The HERO3 has a new improved
latch closure that offers one hand open-and-close functionality and locking.
To place the HERO3 camera into the housing:
1. Place camera in housing.
2. Position the backdoor into place.
3. Lif t the latch arm into upright po sition allow ing the hin ged arm to
hang d ownward.
4. Hook grooved portion of hinged arm to grooved top of the backdoor.
5. Use one finger to push down the latch arm to snap into place.
To remove the HERO3 camera from the housing:
1. Grip the housing with le! hand.
2. Using right hand, place thumb to le! side of arrow and index finger just
below latch arm.
3. Pinch fingers together, sliding arrow to the right.
4. Use fin gertips to pull upward, allowing latch arm to swing to fully
upright position.
5. Li! hinged arm over the housing and remove the HERO3.
To close properly, be sure grooved sections of the latch arm and the backdoor
are hooked.
Page 60

CAMERA ASSEMBLY
The HERO3 housing comes with two types of backdoors—Skeleton and Standard.
Skeleton Backdoor Standard Backdoor
The Skeleton Backdoor (non-waterproof)
provides better sound quality by allowing
more sound to reach the camera’s
microphone. It also reduces wind noise
at speeds up to 100mph when mounted
on helmets, motorcycles, bikes and other
fast-moving vehicles. Use this backdoor
only when sand, excessive dirt/dust
and water damage is not a risk. This
backdoor is also recommended for use
inside vehicles.
Apply RAIN-X or a similar anti-beading solution to the housing lens
to prevent waterspots from forming when using your camera in rain
PRO
or water. When RAIN-X is not available, periodically licking your
TIP:
lens is a good backup solution.
Trust us, this works.
60
The Standard Backdoor makes the
housing waterproof to 197’/60m.
Use this door when you need to
protect the camera from water and
other environmental hazards.
Page 61
CAMERA ASSEMBLY
SWAPPING HOUSING DOORS
Your HERO3 camera housing comes with two types of backdoors—Standard and
Skeleton (non-waterproof).
To change backdoor:
1. Open the backdoor of the housing so that it is hanging downwards.
2. Pull downwards on the backdoor until it snaps free from the hinge.
3. Line up replacement backdoor into the hinge opening.
4. Push upwards on the backdoor until it clicks into place.
61
Page 62

CAMERA ASSEMBLY
PREVENTING WATER DAMAGE TO YOUR CAMERA
The rubber seal that lines the camera housing forms a waterproof barrier that
protects your
rubber seal clean; a single hair or grain of sand can cause a leak.
A!er every use in salt water you will need to rinse the outside of the housing
with non-salt water and dry. Not doing this can eventually cause corrosion of the
hinge pin and salt buildup in the seal, which can cause failure.
To clean the seal, rinse in fresh water and shake dry (drying with a cloth may
cause lint to compromise the seal). Re-install the seal into the grooves in the
backdoor of the housing.
WARNING: Failure to follow these steps each time you use your
result in leaks that may damage or destroy your camera. Your warranty does not
cover water damage resulting from user error.
62
HERO3
in wet and underwater conditions. Keep the camera housing’s
HERO3
can
Page 63

CAMERA ASSEMBLY
ATTACHING YOUR CAMERA TO MOUNTS
To attach your
thumb screw or hardware depending on the mount you are using. For more
information on mounts, visit gopro.com/support.
HERO3
camera to a mount, you will need an attachment buckle,
Attachment
Buckle
Thumb Screw Water housi ng Complete Unit
USING CURVED OR FLAT ADHESIVE MOUNTS
The curved and flat adhesive mounts make it easy to attach the camera to curved
and flat surfaces of helmets, vehicles and gear. With the attachment buckle the
assembled camera housing can be clicked ON/OFF the secured adhesive mounts.
Flat Adhesive Mount Curved Adhesive Mount
63
Page 64

CAMERA ASSEMBLY
ATTACHING ADHESIVE MOUNTS
Apply to clean surface only. Wax, oil, dirt or other debris will
PRO
reduce adhesion, which can result in a weak bond and risk of
TIPS:
losing camera should connection fail.
Attach mount in room temperature conditions. Mount’s
adhesive will not bond properly if applied in cold or damp
environments to cold or damp surfaces, or if the surface is not
room temperature.
Adhesive mounts should only be mounted to smooth surfaces;
porous or textured surfaces will not enable a proper bond.
When applying mount, firmly press into place and ensure full
contact over entire surface.
For best results, attach the mount 24 hours prior to use.
"See gopro.com/support for more information on mounts.
Locking Plug
Using the HERO3 in high impact sports such as surfing or skiing
where significant impact may occur? Use the special locking
plug which securely locks the attachment buckle fingers into
place--helping prevent accidental housing release from the mount.
The circular ring fits over the thumbscrew and acts as a leash to
prevent dropping or losing the locking plug.
64
Page 65

HANDLING INFORMATION FOR THE W I!FI REMOTE
CAUTION
Failure to follow these safety instructions could result in damage to the Wi-Fi Wi-Fi Remote
or other property.
HANDLING
The Wi-Fi Remote contains sensitive components. Do not drop, disassemble, open, crush,
bend, deform, puncture, shred, microwave, incinerate, paint or insert foreign objects into either
product. Do not use the Wi-Fi Remote if it has been damaged—for example, if the product is
cracked, punctured or damaged by water.
KEEPING THE WI-FI REMOTE’S LCD CLEAN
Clean LCD screen immediately if it comes into contact with any contaminants that may cause
stains, such as ink, dyes, makeup, dirt, food, oils and lotions. To clean the LCD, use a so!,
slightly damp, lint-free cloth. Avoid getting moisture in openings. Don’t use window cleaners,
household cleaners, aerosol sprays, solvents, alcohol, ammonia or abrasives to clean LCD.
WATER RESISTANCE
Do not submerge the Wi-Fi Remote in more than 10! / 3m of water. Do not attempt to dry the
Wi-Fi Remote with an external heat source, such as a microwave oven or hair dryer. Damage to
the Wi-Fi Remote caused by excessive water pressure is not covered under warranty.
USING CONNECTORS AND PORTS
Never force a connector into a port. Check for obstructions on the port. If the connector and
port don’t join with reasonable ease, they probably don’t match. Make sure that the connector
matches the port and that you have positioned the connector correctly in relation to the port.
KEEPING THE WI-FI REMOTE WITHIN ACCEPTABLE TEMPERATURES
The Wi-Fi Remote is designed to be operated in temperatures between 0° C and 40° C and
stored in temperatures between 0° C and 70° C. Extreme temperatures may temporarily
affect battery life, or affect the functionality of the Wi-Fi Remote. Avoid dramatic changes in
temperature or humidity when using the Wi-Fi Remote as condensation may form on or within
the product. When you’re using the Wi-Fi Remote or charging the battery, it is normal for the
product to get warm. The exterior of the product functions as a cooling surface that transfers
heat from inside the unit to the cooler air outside.
USE WITH OTHER ELECTRONIC DEVICES
Users of digital transceivers (avalanche beacons) should consult with their user manuals
regarding use of GoPro cameras and other GPS or electronic devices when engaged in the
65
Page 66

CUSTOMER SUPPORT
GoPro is dedicated to providing the best possible
service. To reach the GoPro Customer Support Team,
visit gopro.com/support.
66
Page 67

BENUTZERHANDBUCH
1
Page 68

Werden Sie Teil der GoPro-Gemeinde bei
facebook.com/gopro und sehen Sie, was
andere GoPro-Besitzer so alles aufnehmen und
veröffentlichen. Veröffentlichen Sie Ihre eigenen
Aufnahmen und machen Sie mit bei der
GoPro-Bewegung!
2
Page 69

INHALT
Zubehör 4
Befestigungen + Zubehör 5
Funktionen der HERO3 6
LCD-Statusanzeige 8
Flussdiagramm der Benutzeroberfläche 9
So!ware-Update 10
Grundlagen 10
Kameramodi 13
Kameraeinstellungen 20
Löschen 30
Aufnahmeeinstellungen 32
Einrichtung 40
Wireless-Steuerung 49
Speicher-/SD-Karten 51
Systemvoraussetzungen 52
Übertragen von Dateien 53
Wiedergabe 54
Akkulaufzeit 56
Wichtige Warnmeldungen 58
Zusammenbau der Kamera 59
Kundendienst 65
3
Page 70

WEAR IT. MOUNT IT. LOVE IT.
PREMIUM!ZUBEHÖR
LCD Touch BacPac
Battery BacPac
Wi-Fi Remote
Rahmenbefestigung
(HERO3-Zubehör)
4
HERO3!ZUBEHÖR
Handgelenkgehäuse
™
™
™
Weitere s HERO 3-Zube hör fin den S ie unt er gopro.com.
Ersatzgehäuse
Li-Ionen-Akku
Ersatzobjektive
Deckel + Rückenklappen
32GB/16GB microSD™
Page 71

BEFESTIGUNGEN + ZUBEHÖR
MEHR BEI gopro.com
Helm-
Frontbefestigung
Floaty-
Rückenklappe
Überrollbügel-
Befestigung
Geformte + flache
Klebebefestigung
Brust-Gurt-Berg
Kopfgurt
Stativbefestigung Anti-
Seitenbefestigung Kameraleinen
Lenker-/
Sattelstützen-/
Stockbefestigung
Saugnapfbefestigung
Beschlagseinsätze
Surfbrettbefestigungen
Gurt für belü!ete
Helme
Befestigungs-
sortiment
Montagekit für die
Wi-Fi Remote
5
Page 72

HERO3!FUNKTIONEN
1. Statusanzeigelämpchen (rot)
2. AUSLÖSE-/AUSWAHLKNOPF
3. LCD-Statusanzeige
4. Wi-Fi-Anzeigelämpchen (blau)
5. EINSCHALT-/MODUS-Schalter
6
6. Micro HDMI-Anschluss (Kabel
separat erhältlich)
TM
7. microSD
8. mini-USB-Anschluss
-Kartensteckplatz
(SD-Karte separat erhältlich)
(Unterstützt Composite A/C-Kabel/3,5
mm Stereomikrofonadapter, separat
erhältlich)
Page 73

7
HERO3!FUNKTIONEN
9. HERO-Anschluss
10. Akkudeckel
11. Wi-Fi EIN/AUS
12. Tonsignal
13. Mikrofon
Page 74
LCD!STAT US ANZEIG E
Der LCD-Bildschirm zeigt die folgenden Informationen über die Modi und
Einstellungen der HERO3:
1. Kameramodi/Bildwinkel (FOV)
2. Aufnahmeeinstellungsmodi (nicht gezeigt)
3. Auflösung/FPS (Bilder pro Sekunde)
4. Zeitintervalleinstellungen (nicht gezeigt)
5. Zähler
6. Zeit/Speicher/Dateien
7. Akkulaufzeit
Hinweis: Welche der oben dargestellten Symbole angezeigt werden, hängt davon ab,
in welchem Modus sich die Kamera befindet.
8
Page 75

FLUSSDIAGRAMM DER BENUT ZEROBERFLÄCHE
MODI
KAMERAEINSTELLUNGEN
AUFNAHMEEINSTELLUNGEN WI-FI
EINRICHTUNG
*Hinweis: Weißabgleich wird nur angezeigt, wenn der Protune™-Modus
eingeschaltet ist. Wiedergabe wird nur angezeigt, wenn der
Wiedergabemodus aktiviert ist.
9
Page 76

SOFTWARE!UPDATES
GoPro erweitert Kameramerkmale durch So#ware-Updates.
Sehen Sie nach, ob für Ihre Kamera oder andere GoPro-Produkte
Updates verfügbar sind. Besuchen Sie zu: gopro.com/update.
VERWENDUNG IHRER HERO3: GRUNDLAGEN
ERSTE SCHRITTE
Vor der ersten Verwendung Ihrer HERO3:
1. Stecken Sie eine microSD, microSDHC™ oder microSDXC™ Karte
mit dem Etikett und dem schmalen Kartenende nach vorne in den
Kartensteckplatz. Karten der Klasse 10 oder höher werden empfohlen. Bei
Verwendung des Zeitrafferintervalls 0,5 oder beim Aufnehmen von Video im
Protune-Modus ist eine Karte der Klasse 10 erforderlich.
2. Legen Sie den Akku in die Kamera ein.
3. Laden Sie den Akku. Der mitgelieferte Lithium-Ionen-Akku ist teilweise
geladen. Um den Akku zu laden, schließen Sie das USB-Kabel an der Kamera
an und verbinden Sie das andere Ende mit einer Stromquelle, z. B. einem
Computer, dem GoPro Netzladegerät oder dem GoPro Kfz-Ladegerät. Die
Kamera und der Akku werden nicht beschädigt, wenn sie verwendet werden,
bevor sie voll geladen sind.
Statusanzeig elämpchen, wenn die Kamera
ausgeschaltet ist und geladen wird:
PROFITIPP:
"Weitere Informationen finden Sie unter AKKULAUFZEIT.
"Weitere Informationen finden Sie unter PROTUNE.
10
• Beim Laden ist das Statusanzeigelämpchen
eingeschaltet.
• Wenn der Lad evorgang abgesc hlosse n ist, ist das
Statusanzeigelämpchen ausgeschaltet.
Page 77

VERWENDUNG IHRER HERO3: GRUNDL AGEN
STANDARDEINSTELLUNGEN DER KAMERA
Beim Einschalten hat di e HERO3 Black Edition Kamera die folgenden
Standardeinstellungen:
Videoauflösung 1440p48fps
Fotoauflösung 12 Megapixel (MP)
Foto Burst 30 fotos in 1 sekunde
Zeitrafferintervall 0.5 sekunde
Wi-Fi AUS
PROFITIPP:
Möchten Sie die Video- und Fotoeinstellungen ändern?
!EINSTELLUNSMENÜ können Sie die Einstellungen ändern.
11
Page 78

VERWENDUNG IHRER HERO3: GRUNDL AGEN
EIN! UND AUSSCHALTEN
So schalten Sie die Kamera EIN:
Drücken Sie einmal auf
dreimal und die Tonanzeige gibt drei Töne ab.
So schalten Sie die Kamera AUS:
Halten Sie zwei Sekunden lang gedrückt. Die roten Statusanzeigelämpchen
blinken mehrmals und die Tonanzeige gibt sieben Töne ab.
PROFITIPP:
12
. Die roten Statusanzeigelämpchen blinken
Soll d ie HERO3 sof ort beim E inscha lten auto matisc h mit
der Au fnahm e von Fotos und Videos b eginne n? Dann
stel len Sie die K amera in d en EINZELKNOPFMODUS.
! Weitere Informationen finden Sie unter
EINZELKNOPFMODUS.
Page 79

VERWENDUNG DER HERO3: G RUNDLAGEN
ÜBERBLICK
Die HERO3 ha t mehrere Kameramodi. Drücken S ie auf , um die Modi
durchzuschalten. Die Modi werden in der folgenden Reihenfolge angezeigt:
PROFITIPP:
VIDEO
FOTO
FOTO BURST
ZEITRAFFER
WIEDERGABE
Verwenden Sie FOTO BURST, um Motive in schneller
Bewegung aufzunehmen.
Vide o aufneh men
Ein Foto a ufneh men
Burs t-Fotos auf nehmen
Zeitrafferfotos aufnehmen
Wird nu r angeze igt, wenn d ie Kamer a an ein TV/HD TV
ange schlos sen ist. WIEDERGABE könne n Sie Fotos
und Videos auf ei nem TV/HDT V (über ei n optiona les
Micro -HDMI-Ka bel oder A /V Comp osite-Ka bel).
"Weitere Informationen finden Sie unter WIEDERGABE.
13
Page 80

VERWENDUNG IHRER HERO3: KAM ERAMODUS
VIDEO
Wenn Sie Vide o aufnehmen möchten, vergewissern Sie sich, dass sich die Kamera
im Videomo dus befindet. Wenn auf dem LCD-Bildschirm der Kamera kein
Videosy mbol
So starten Sie die Aufnahme:
Drücken Sie einmal auf
Statusanzeigelämpchen blin ken während der Aufnahme.
So halten Sie die Aufnahme an:
Drücken Sie einmal auf
dreimal und die Kamera gibt drei Töne ab, um anzuzeigen, dass die Aufnahme
angehalten wurde.
Die HERO3 hält die Aufnahme automatisch an, wenn die Speicherkarte voll
ist oder der Akku leer wird. Ihr Video wird gespeichert, bevor die Kamera
abgeschaltet wird.
!Eine Anleitung zum Ändern der Auflösungseinstellungen finden Sie unter VIDEO.
14
angezeigt wird, drücken Sie wiederholt auf , bis es erscheint.
. Die Kamera gi bt einen Ton a b und die roten
. Die roten Statusanzeigelämpchen blinken
Page 81

VERWENDUNG IHRER HERO3: KAM ERAMODUS
FOTO
Wenn Sie ei n Foto aufnehmen möchten, vergewissern Sie sich, dass sich die
Kamera im Fotomodus befindet. Wenn auf dem LCD-Bildschirm der Kamera kein
Fotosymbol
So nehmen Sie ein Foto auf:
Drücken Sie einmal auf
Anzeigelämpchen blinken.
! Eine Anleitung zum Ändern der Auflösungseinstellungen und anderer
Fotofunktionen finden Sie unter FOTO-Modi.
angezeigt wird, drücken Sie wiederholt auf , bis es erscheint.
. Die HERO3 gibt zwei Töne ab und die roten Status-
15
Page 82

VERWENDUNG IHRER HERO3: KAM ERAMODUS
FOTO BURST
Im Foto Burst-Modus nimmt die Kamera in kurzen Zeitintervallen mehrere Fotos auf—
3 fotos/1 sek, 5 fotos/1 sek, 10 fotos/1 sek, 10 fotos/2 seks, 30 fotos/1 sek,
30 fotos/2 seks or 30 fotos/3 seks.
Wenn Sie eine Foto Burst-Serie aufnehmen möchten, vergewissern Sie sich, dass
sich die Kamera im Modus Foto Burst befindet. Wenn auf dem LCD-Bildschirm der
Kamera kein Foto Burst-Symbol
auf , bis es erscheint.
So nehmen Sie eine Foto Burst-Serie auf:
Drücken Sie einmal auf
Kamera gibt drei Töne ab.
angezeigt wird, drücken Sie wiederholt
. Die roten Statusanzeigelämpchen blinken und die
PROFITIPP:
!Eine Anleitung zum Ändern der Intervalleinstellungen finden Sie unter FOTO BURST.
16
Manchmal sind 30 fotos/1 sekunde zu schnell. Versuchen
Sie es mit einer langsameren Burst-Einstellung, um die
Action besser zu erfassen.
Page 83

VERWENDUNG IHRER HERO3: KAM ERAMODUS
ZEITRAFFER
Im Zeitraffermodus wird eine Reihe von Fotos im Abstand von jeweils 0,5, 1, 2,
5, 10, 30 oder 60 sekunden aufgenommen. Bei Verwendung der Einstellung 0,5
Sekunden ist eine SD-Karte der Geschwindigkeitsklasse 10 erforderlich.
Wenn Sie ei ne Zeitraffer-Serie aufnehmen möchten, vergewissern Sie sich, dass
sich die Kamera im Zeitraffermodus befindet. Wenn auf dem LCD-Bildschirm der
Kamera kein Zeitraffersymbol
, bis es erscheint.
So machen Sie Zeitrafferaufnahmen:
Drücken Sie einmal auf . Die Kamera beginnt mit dem Countdown und die roten
Statusanzeigelämpchen blinken bei jedes Mal, wenn ein Foto aufgenommenn wird.
So halten Sie die Zeitrafferaufnahme an:
Drücken Sie einmal auf . Die roten Statusanzeigelämpchen blinken dreimal
und die Kamera gibt drei Töne ab, um anzuzeigen, dass die Zeitrafferaufnahme
angehalten wurde.
!Eine Anleitung zum Ändern der Intervalleinstellungen finden Sie unter ZEITRAFFER.
angezeigt wird, drücken Sie wiederholt auf
17
Page 84

VERWENDUNG IHRER HERO3: KAM ERAMODUS
SETTINGS
Im Einstellungsmenü können Sie ver schiedene Kameraeinstell ungen
festlegen, darunter:
Videoauflösung
Bildauflösung
Zeitraffer
Foto Burst
Kontinuierliche Fotoaufnahme
• und mehr
! Informationen über das Ändern von Einstellungen, die Navigation der
Menüoptionen und die einzelnen Einstellungen finden sie im Abschnitt
EINSTELLUNGSMENÜ.
18
Page 85

VERWENDUNG IHRER HERO3: KAM ERAMODUS
WIEDERGABE
Sie können GoPro-Fotos und -Video auf einem TV/HDTV oder mit dem optionalen
LCD Touc h B acP ac™ an zei gen . Wied ergabe wird als Kameramodus angezeigt,
wenn di e Kamera e ingeschal tet und an ein TV/H DTV anges chlossen ist.
! Weitere Informationen über das Anzeigen Ihrer Videos und Fotos finden Sie
unter WIEDERGABE.
19
Page 86

KA MERAEINSTELLUNGEN EINSTELLUNGEN
EINSTELLUNGEN
So öffnen Sie das Einstellungsmenü:
1. Verg ewisse rn Si e sich , das s sich die Kamera im Einstellungsmenü befindet.
Wenn auf de m LCD-B ildsc hirm d er Ka mera ke in Einstellungssymbol
angezeigt wird, drücken Sie wiederholt auf
2. Drücken Sie auf
3. Drücken Sie auf
durchzuschalten.
4. Drücken Sie auf
5. Zum Beenden halten Sie
durch und drücken Sie auf .
PRO
FITIPP:
20
, um das Menü zu öffnen .
, um die verschiedenen Einstellungsoptionen
, um die gewünschte Option zu wählen.
Wenn Sie zu irgend einer Zeit das EINSTELLUNGSMENÜ
verlass en möchte n, halten Sie
zwei Sekunden lang gedrückt oder schalten Sie bis
, bis es erscheint.
zwei Sekunden lang gedrückt.
Page 87

KA MERAEINSTELLUNGEN
VIDEOAUFLÖSUNG/FPS/BILDWINKEL
Wenn Sie de n Videomodus verwenden, können Sie die Auflösung, FPS und
den Bildwinkel (FOV) der HERO3-Kamera einstellen. Dieser Modus enthält
Untermenüoptionen.
So öffnen Sie das Einstellungsmenü:
1. Drücken Sie auf
2. Schalten Sie die Optionen mithilfe von
3. Drücken Sie auf
4. Schalten Sie mit
drücken Sie auf
5. Um weitere Optionen zu ändern, wiederholen Sie Schritt 4.
6. Zum Beenden halten Sie
bis
, um die Option zu öffnen .
durch.
, um das gewünschte Menü zu öffnen.
durch die einzelnen Untermenüoptionen und
, um eine zu wählen.
zwei Sekunden lang gedrückt oder schalten Sie
durch und drücken Sie auf .
21
Page 88

KA MERAEINST ELLUNGEN
Die HERO3 Black Edition bietet die folgenden Videoaufnahmemodi:
Videoauflösung NTSC
4k /
4k Cin
2.7k /
2.7k Cin
PAL
std
fps
fps
15 1212. 5 12Nein Ja Ultra Wide 3840x2160, 16:9
30 2425 24Ja* Ja Ultra Wide 2716x1524, 16:9
Modus
Protune Bildwinkel
(FOV)
Bildschirmauflösung
4096x2160, 17:9
2716x1440, 17:9
144 0p 4 8
1080p 60
960p 100 48100 48Ja Ja
720p 120 60120 50Ja Ja NoUltra Wide
WVGA 240 240 Ja Nein Ultra Wide 848x480, 16:9
*Nur 720/120 und 720/100 unterstützen Bildwinkel Ultra Wide and schmal.
Hinweis: Der Protune-Modus ist nur bei bestimmten Videoauflösungen möglich.
48
30
24
48
30
24
Ja Ja Ultra Wide 1920x1440, 4:3
25
24
50
Ja Ja Ultra Wide
48
25
24
Mittel
Schmal
Ultra Wide 1280x960, 4:3
Nein
Mittel*
Schmal*
1920x1080, 16:9
1280x720,16:9
22
Page 89

KA MERAEINST ELLUNGEN
Videoauflösung Bester Verwendungszweck
4k /
4k Cin
2.7k /
2.7k Cin
144 0p Empfohlen für Aufnahmen mit am Körper befestigter Kamera, weil der
1080p Eignet sich hervorragend für alle Aufnahmen, weil die hohe Auflösung und
960p Verwenden, wenn die Kamera am Körper befestigt ist und wenn Zeitlupe
720p Geeignet, wenn die Kamera in der Hand gehalten wird und wenn Zeitlupe
WVGA Geeignet für extreme Zeitlupe und wenn eine reguläre Definition ausreicht.
PROFITIPP:
Atemberaubende 8 MP Auflösung mit professioneller Qualität bei
schlechtem Licht. 8 MP Standbilder aus Video. Empfohlen für Stative oder
Aufnahmen von festen Postionen aus.
16:9 / 17:9 Auflösung wird herunterskaliert und liefert atemberaubende
Ergebnisse von Kinoqualität für die professionelle Produktion. Empfohlen
für Stative oder Aufnahmen von festen Postionen aus.
größere Bildbereich und die hohe Bildrate extrem gleichmäßige und
überaus beeindruckende Ergebnisse für Aufnahmen mit viel Action liefern.
Bildrate atemberaubende Ergebnisse liefern. Die Stativ- oder Festmontage
für 1080p48 und 30 fps und 1080p24 eignet sich ideal für die TV- und
Filmproduktion.
gewünscht ist. Bietet einen großen Bildbereich und gleichmäßige
Ergebnisse für Aufnahmen mit viel Action.
gewünscht ist.
Bei eingeschaltetem PROTUNE-Modus ist ein e hochwertige
Aufnahme, neut rale Farbe und eine Videobil drate von 24 fps für die
professionelle Vid eoproduktion möglich.
!Weitere Informationen finden Sie unter PROTUNE.
23
Page 90

KA MERAEINST ELLUNGEN
Die HERO3 kann Fotos mit einer Auflösung von 12 MP, 7 MP und 5 MP
aufnehmen. Jede Veränderung der Fotoauflösung wirkt sich auch auf Fotos
aus, die im Foto-, Foto Burst- und Zeitraffermodus aufgenommen werden.
Fotoauflösung
12MP Weitwinkel (Standard)
7MP Weitwinkel
7MP Mittel
5MP Weitwinkel
24
FOTOAUFLÖSUNGSMODI
Bildwinkel
(FOV)
Page 91

KA MERAEINST ELLUNGEN
KONTINUIERLICHE FOTOAUFNAHME
Im kontinuierlichen Fotomodus werden fortlaufend Fotos aufgenommen,
während Sie die
3 Fotos pro Sekunde
5 Fotos pro Sekunde
10 Fotos pro Sekunde
Hinweis: Die Kamera kehrt in den KONTINUIERLICHEN FOTOMODUS zurück,
-Taste gedrückt halten, bis Sie den Auslöser loslassen.
bis Sie sie in den EINZELFOTO-Aufnamemodus zurückstellen.
25
Page 92

KA MERAEINST ELLUNGEN
FOTO!BURST!MODUS
Im Foto Burst-Modus wir eine Reihe von Fotos aufgenommen, wenn
gedrückt wird. Die Fotos können mit den folgenden verschiedenen
Geschwindigkeiten aufgenommen werden:
3 Fotos in 1 Sekunde
5 Fotos in 1 Sekunde
10 Fotos in 1 Sekunde
10 Fotos in 2 Sekunde
30 Fotos in 1 Sekunde (Standard)
30
Fotos in 2 Sekunden
30
Fotos in 3 Sekunden
ZEITRAFFER
Für den Zeitraffermodus stehen mehrere Intervalloptionen zur Verfügung,
darunter 0.5, 1, 2, 5, 10, 30 und 60 Sekunden.
26
Page 93

KA MERAEINST ELLUNGEN
AUFNAHMEEINSTELLUNGSMENÜ
Mit den Aufnahmeeinstellungen können Sie die folgenden erweiterten
Kameraeinstellungen festlegen:
Kameraausrichtung
Punktmessung
Video und Foto Simultan
Videoschleife
Protune
Weißabgleich
! Eine vollständige Liste der Aufnahmeoptionen finden Sie im Abschnitt
AUFNAHMEEINSTELLUNGEN.
27
Page 94

KA MERAEINST ELLUNGEN
EINRICHTUNGSMENÜ
Im Einrichtungsmenü können Sie die folgenden Kameraeinstellungen
vornehmen:
Standardmodus beim Einschalten
Einzelknopfmodus
NTSC/PAL
Bildschirmanzeige
Statusanzeigelämpchen
Tonanzeige
Monat/Tag/Jahr/Uhrzeit
! Eine vollständige Liste der Einrichtungsoptionen finden Sie im Abschnitt
EINRICHTUNGSMENÜ.
28
Page 95

KA MERAEINST ELLUNGEN
WIRELESS!STEUERUNG
Die integrierte Wi-Fi-Funktion der HERO3 ermöglicht die Verbindung
der Kamera mit der Wi-Fi Remote oder Smartphones/Tablets über
die GoPro-App. Wenn Wi-Fi eingeschaltet ist, blinkt das blaue Wi-Fi-
Statusanzeigelämpchen.
So schalten Sie Wi-Fi EIN/AUS:
Halten Sie
Einschalten des Wi-Fi wird der zuletzt verwendete Wi-Fi-Modus verwendet.
" Eine vollständige Liste der Wireless-Funktionen finden Sie im Abschnitt
WIRELESS-STEUERUNG.
gedrückt, um das Wi-Fi ein- bzw. auszuschalten. Beim
29
Page 96

KA MERAEINSTELLUNGEN
LÖSC HEN
Die letzte oder alle Dateien Löschen und die Speicherkarte formatieren.
Bei der Löschoption LAST !Letzte" oder ALL !Alle" blinken die
Statusanzeigelämpchen, bis das Verfahren abgeschlossen ist.
CANCEL (Standard)
LAST !Letzte"
ALL !Alle"
So Löschen Sie die letzte oder alle Dateien:
1. Verg ewisse rn Sie sich , dass sich die K amera im Einstellungsmenü befindet.
Wenn auf de m LCD-B ildsch irm d er Kam era kei n Einstellungssymbol
angezeigt wird, drücken Sie wiederholt auf , bis es erscheint.
2. Drücken Sie auf
3. Schalten Sie die Einstellungen mithilfe von
4. Drücken Sie auf
5. Schalten Sie die Optionen mithilfe von
6. Wählen Sie die hervorgehobene Option, indem Sie auf
7. Zum Beenden halten Sie
durch und drücken Sie auf .
, um das Einstellungsmenü zu öffnen.
durch, bis Sie zu kommen.
, um das Löschen aufzurufen.
durch.
drücken.
zwei Sekunden lang gedrückt oder schalten Sie bis
PROFITIPP:
30
Vorsi cht: We nn Sie ALL wählen, wird die Speicherkarte
formatiert und alle Dateien werden von der SD-Karte gelöscht.
Page 97

BEENDEN
Drücken Sie auf dem Bildschirm
zu verlassen.
KA MERAEINST ELLUNGEN
auf , um das Einstellungsmenü
PROFITIPP:
Wenn Sie zu irgen deine r Zei t das EINSTELLUNGSMENÜ
verlass en möchte n, halte n Sie
zwei Sekunden lang gedrückt.
31
Page 98

AUFNA HM EEINSTELLUNGEN
AUFNAHMEEINSTELLUNGEN
So öffnen Sie das Aufnahmeeinstellungsmenü:
1. Vergewissern Sie sich, dass sich die Kamera im Einstellungsmenü befindet.
Wenn auf de m LCD-B ildsch irm d er Kam era kei n Ein stellu ngssym bol
angezeigt wird, drücken Sie wiederholt auf
2. Drücken Sie auf
3. Schalten Sie die Einstellungen mithilfe von
4. Drücken Sie auf
5. Gehen Sie mithilfe von
6. Drücken Sie auf
7. Schalten Sie mit
Sie auf
8. Drücken Sie auf
9. Zum Beenden halten Sie
durch und drücken Sie auf .
32
, um aufzurufen.
, um die Aufnahmeeinstellungen zu öffnen.
zu der Option, die geändert werden soll.
, um die gewünschte Option zu wählen.
durch die einzelnen Untermenüoptionen und drücken
, um eine zu wählen.
, um die gewünschte Option zu wählen.
zwei Sekunden lang gedrückt oder schalten Sie bis
, bis es erscheint.
durch, bis Sie zu kommen.
Page 99

AUFNA HM EEINSTELLUNGEN
Sie können festlegen, wie die HERO3-Kamera Video und Fotos aufnimmt.
Verwen den Si e daz u die Aufnahmeeinstellungen, wie Kopfüber, Videoschle ife
und Weißa bgleic h.
KOPFÜBER
Sie möchten die HERO3 Kopfüber montieren, möchten aber, dass die Dateien
beim Anzeigen oder Bearbeiten aufrecht angezeigt werden? Mit dieser
Einstellung vermeiden Sie, dass Videos oder Fotos nach der Aufnahme gedreht
werden mü ssen.
Kamera aufrecht (Standard)
Kamera auf den Kopf gestellt
PUNKTMESSUNG
Schalten Sie die Punktmessung ein, wenn Sie von einem dunklen Ort aus
aufnehmen und die Kamera auf eine hellere Szene richten, z. B. wenn Sie
Außenaufnahmen von einem Auto aus machen, und umgekehrt. Wenn diese
Option eingeschaltet ist, wird im LCD-Fenster
OFF (AUS Standard)
ON (EIN)
angezeigt.
33
Page 100

AUFNA HM EEINSTELLUNGEN
SIMULTANAUFNAHME VON VIDEO UND FOTO
Im Modus zur Simultanaufnahme von Video und Foto können Sie gleichzeitig Video s und Fotos
aufnehmen. Sie können die Kamera so einstellen, dass sie während der Videoaufnahme alle 5,
10, 30 oder 60 Sekunden ein Foto aufnimmt. Wenn Sie die Kamera in den Bild-in-Video-Modus
stellen möchten, vergewissern Sie sich, dass eine unterstützte Vidoeauflösu ng ausgewählt und
Protune ausgeschaltet ist.
OFF (AUS)
5 Sekunden
10 Sekunden
30 Sekunden
60 Sekunden
Hinweis: Mit den folgenden Auflösungen können Sie gleichzeitig Video und Fotos aufnehmen: 1080
p/24 fps, 1080 p/30 fps, 720 p/60fps oder 1440 p/24 fps.
Die resultierende Fotodateigröße hängt von den gewählten
Videoabmessungen ab.
Videoabm essungen Mega pixel
PROFITIPP:
34
16:9 (1080p, 720p) 8MP
4:3 (1440p) 12MP
Währen d d er Vid eoaufnahme können Sie jederzeit manuell ein Foto
aufnehmen, indem Sie einfach auf drücken.
 Loading...