

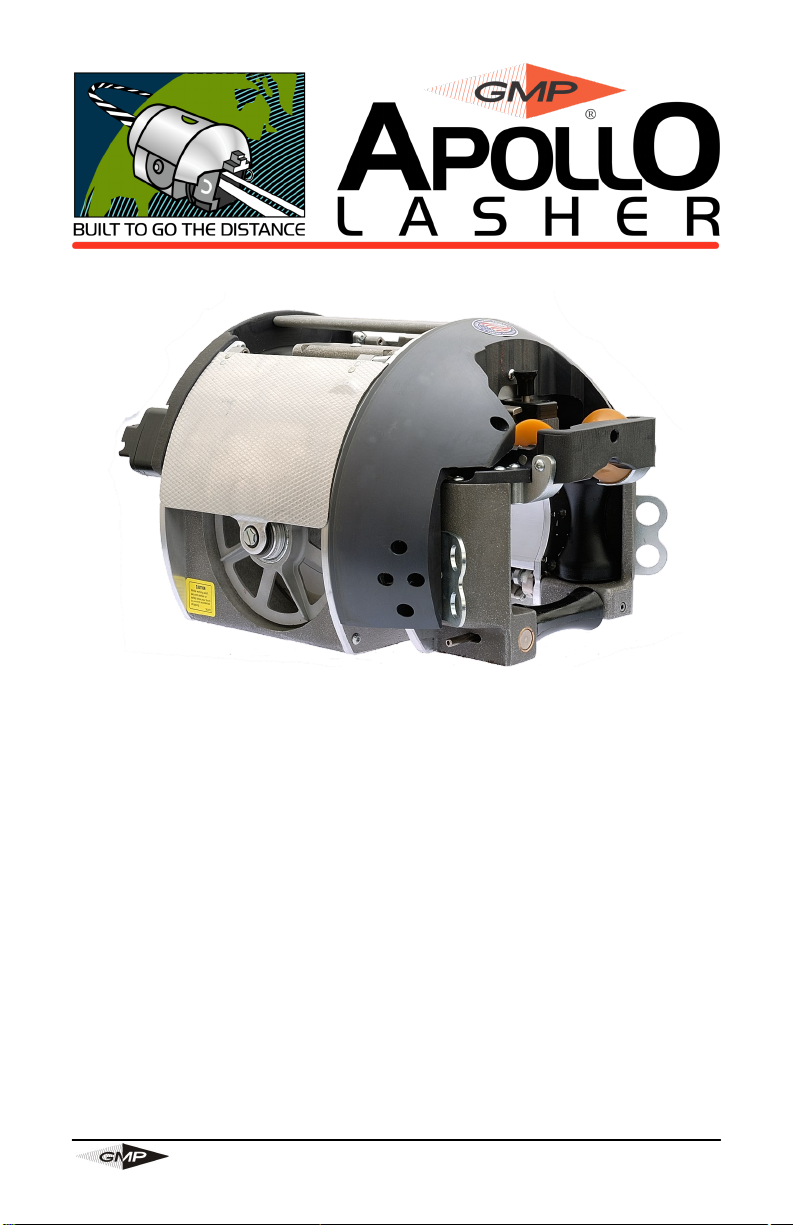
Apollo Cable Lasher
Operation and Maintenance
All rights reserved. No part of this publication may be copied, reproduced or
transmitted in any form whatsoever without the written permission of General
Machine Products Co., Inc.
General Machine Products Co., Inc. • 3111 Old Lincoln Hwy • Trevose, PA 19053 • USA
TEL: +1-215-357-5500 • FAX: +1-215-357-6216 • www.gmptools.com
U.S. Patents: 6,062,542 and 6,389,989
General Machine Products Co., Inc.
Manual P/N 30757 ver 2
AK 08-2013
1

Apollo Lasher
REVISION HISTORY:
Rev Date Details Author
01 Original issue Adspeak
02 07-2013
Revised format for clarity
A. Konschak
Removed repair parts
2

Table of Contents
1.0 General Page 3
2.0 Precautions Page 3
3.0 Description Page 4
4.0 Operating instructions Page 7
5.0 Troubleshooting Page 18
6.0 Maintenance Page 19
7.0 Options and other information Page 20
8.0 Layout Page 22
1.0 General
This manual covers the care, operation and maintenance of your GMP
Apollo cable lasher, which you can use to lash cables up to 3.5 in. (89
mm) dia. to suspension strand, or smaller cable sizes to an existing lashed cable and strand. The Apollo has the capability to lash up to a 4 in. (100 mm)
bundle of any assortment of innerduct, fiber, copper and coaxial cables as
well. The strand sizes range from .25 to .38 in. (6 to 10 mm) diameter, inclusive.
This machine is intended for use only by properly trained journeyed
lines-people or other craftspeople under the direct supervision and responsibility of those individuals.
As such, this manual’s scope is specifically limited to the machine’s functions,
and no attempt is made to describe the proper procedures for placing and lashing aerial cable plant.
We cannot be held liable for any direct or indirect consequences arising from
use of this product by any individuals not already properly trained in its use.
The following conventions will be used in the manual:
Warnings - must be followed to avoid bodily injury.
Cautions - must be followed to avoid damage to equipment
Notes - contain important information and useful tips on the operation of your
Apollo lasher.
2.0 Precautions
2.1 Observe the following precautions when operating the Apollo lasher.
Read all of the instructions and save them for later reference. Before beginning any cable work, first check the cable run you want to make in order
to find out what local conditions might be while you are lashing. Among the
factors you should look for are:
● vehicle and pedestrian safety
● conditions of poles, anchors, guys and strand
● proper bonding and grounding of strand and attachments
● obstructions such as trees, limbs, and drop wires
● clearances and separations on poles shared by other utilities
● clearances over roads, driveways, walkways and crossings
3

Apollo Lasher
Protect
points
Check your Apollo
make
semblies
properly maintained,
sary
In case your Apollo
to
overknow our
round.)
Use the
your
pair. And
strap
rear
the
Also, you
line or a
transferring
assembly
dropped.
than
Avoid
drop
Keep your
Protect
any
Avoid
3.0
3.1
The
●
●
● big
●
●
your work site with
to
warn
traffic and
lasher
sure it is in good
are
intact
and in good
risk to both you and the
lasher
our
Lasher Department
haul.
(In case you are c
Department
proper safety equipment!
climbing
securely attached
verti
lasher
that of the
abuse
your
your
other foreign matter.
placing
Description
General
following features make
parallel
lightweight
bundle capacity
constant tension
rotation section rotates
and
safety equipment
while you are aloft,
cal cable
on the side of a
should always raise
truck
as a
Doing this lets you
lasher.
lasher
pull
rollers
lift. Use the bridle
your
lasher around
tether
machine.
or
rough handling
in its
lasher
the Apollo on the
capability
advance signaling devices
pedestrians
first! Before
repair,
it
is set up to give you the
to
protective
from
in the
and all of the
might
property
ever
needs attention,
so it can get a
oncerned about downtime,
ALWAYS
to help
are set to their
bucket.
prevent damage
concentrate
unnecessary exposure
your Apollo
lashing wire
in a
of any
using
working order.
be
unsafe
and
Before
to
make certain
wear a
prevent
and lower the Apollo
of the Apollo
ground whenever possible.
single direction
you from
widest opening before placing
assembly
a pole or
on your own
case
when
4
at
strategic
obstructions
your
machine,
parts
and
If your
to use and pose an
personnel
you
professional repair and/or
fastest possible
working
safety
falling. Ensure
at pole
obstruction,
to the
machine
lashers
not in
to dirt, grit and
lasher
an
in the
area.
check
mechanical
machine
in your work
should forward
you
aloft,
inspect
it is in good
belt with a
lasher
transfers! When
use the
in case it
safety rather
and never
use.
outstanding
unneces-
should
safety
with a
is
area.
turna-
all
hand-
bridle
value:
to
as-
the
not
it
re-
is

Figure 2
Figure 3
The
machine weighs approximately
and
provides
exceptionally
Note: Please see
3.2 Cable
You can use the Apollo to lash a
ing
telephone
The Apollo has the
any
assortment
The strand sizes range
or
6 mm
3.3
Lashing wire
The Apollo
hold a
5.38
use
either
(365
m) of
dia.
(0,97
requirement, however,
an
outstanding strength/weight
long
service life.
figures 31, 32, 33,
capacities
and
fiberoptic
capability
of
innerduct,
through
of the
mm)
10
lasher
in.
.045
has two
(137
mm) dia. by
standard
in.
(1,14
annealed stainless
from .25 to .38 inch
mm.
magazines
wire coil
mm) dia. and
oiled wire is not
Look at your Apollo
ment.
You will see it
rotating section supported
-
tionary carriage:
cable
pass through
carriage
tion.
As you look at the
see it has cable and
front and rear
and an
the
The
variety
to
of
the
-
minum alloys, magnesium, carbon
neered
bearings or needle bearings
drive
Sintered metal
other mov
single
cables up to 3.5 in. (89 mm) in
to lash up to a 4 in.
fiber, copper and
1.81
sizes
steel wire.
during
gates, towing bracket
anti-backroll strand
front.
components
of
materials,
provide
46 lbs
and
cable of
for
in. (46 mm) high wire coil. You
specific
materials
and tool steel as well as
polymers.
shafts
recommended.
and
ing
(20.9 kgs.) without
ratio while
34.
almost
coaxial
diameter (6.6M,
loading lashing
in the
magazines: 1,200
1600
ft.
Wax-coated
lasher
consists
the
this
the
lashing opera-
carriage
strand rollers,
are
made
properties.
are
heat-treated alu
There are ball
rotating sections.
bearings
parts.
any type,
(100
mm)
cables as
(488
m) of
for a mo-
on a
strand
stationary
you
roller on
from
each
selected
engi-
are
used
providing
includ-
diameter
bundle of
well.
6M,
wire, each
.038
wire is not
of
a
sta
and
will
a
Some
on the
wire
an
.
10M)
can
can
ft.
in.
a
on
5

Apollo Lasher
Your lasher can use a single wire or two wires simultaneously (also known as
“double lashing”). Like other GMP lashing machines, the balance of the Apollo is not affected by the amount of wire loaded in either magazine.
Each magazine has two rollers for guiding and tensioning wire during lashing.
The wire tension is developed by the routing of lashing wire and not the tension on the spool. The wire coils mount on a reel attached to the rotating drum.
There is a non-adjustable tension on the reel to prevent overspinning. The
lashing wire exits the tensioning rollers and enters the drive mechanism.
3.4 Drive mechanism
The Apollo is driven by the lashing wire exiting the machine so the lasher can
be pulled from any direction. The lashing wire rotates drive wheels that are
interconnected by a shaft so either single lashing or double lashing will rotate
the lasher. A set of pinion gears drive a segmented ring gear and this configuration is the time-tested design found on other GMP lashers. The direct drive
design eliminates the possibility of slippage.
A one-way clutch in the drive wheel of the gearbox assembly enables the rotation section to rotate in a single direction while lashing. This configuration
allows the lashing wire to remain tensioned when forward motion of the lasher
has ceased. The rotation section of the lasher can be manually rotated in the
opposite direction by actuating the handle to de-clutch and disengage the drive
wheel.
3.5 Adjustable rear gate and cable lifter
The rear gate is adjustable by the use of a D shaft and locking collar. The rear
gate is easy and fast to use and the locking collar provides a positive lock to
keep the rear gate in place. To open the rear gate, push the button and the rear
gate rotates to its open position. When the rear gate is open, the rotating drum
will automatically lock in its detented position when the pin registers with the
receptacle in the rotating housing. The pin is retracted from the receptacle in
the rotating housing when the rear gate is closed.
3.6 Front gate
The front of the Apollo is designed to provide the maximum in cable protection. There are 4 rollers to help prevent cable damage regardless of cable orientation. The top roller has two one-way clutches that ensure the lasher only
moves in the forward direction, providing anti-backroll capability. The bottom
roller pivots out of the way for easy cable installation into the lashing machine,
and locks positively in place for the cable lashing operation. There are two sets
of towing eyes for the Apollo for pulling in any direction. The top set of holes
is most suited for parallel pulling and normal operation and the bottom set is
most suited for situations requiring more sideward or downward pull.
3.7 Bridle assembly
The Apollo lasher is supplied with a bridle assembly that resists rot. The 5 foot
long rope assembly is equipped with a forged snap hook at each end and a
floating forged steel ring between the snap hooks for the attachment of a suitable towing line. The bridle assembly also provides a safe and easy method to
tether the Apollo while moving it around a pole or obstruction.
6

4.0 Operating instructions
4.1 General
As mentioned at the beginning of this manual, you should never operate a
lasher unless you’ve been properly trained in advance or are being directed by
a properly trained linesperson who is responsible for your work. However,
you should find this section of the book helpful in outlining the correct sequence of steps to take in using your Apollo lasher.
4.2
Preparing a lashing
Figure 4
2. Do not cut all of the cable ties! Leave the cable tie
looped end of the
on
the
lashing
wire
3. Cut the looped end of the wire on the
coil.
This step will help in the
subse
quent steps.
wire
lashing
coil.
coil
The first step in any
a
tion is to
wire
coil. Note: It is
that the
properly to
operation.
1. If the
with
wire ties,
wire
tie
attached
the
lashing
coil (see
the
figure
cutting
step and help
plete
wire tie is
wire, and cut the
inside diameter
loading
of the coil onto the hub and
prepare
lashing
ensure
lashing
rotate
wire to the
4). This
of the wire
ensure
remaining
lashing oper-
the
lashing
important
wire is loaded
proper lasher
wire is
the
wrapped
head
to the looped
center
will
tie
in a later
that
the
removed.
attached
3 cable ties
of the wire
of
the
end
of
of
the
facilitate
com-
to
the
4.3
Install
The
proper installation
lashing.
preparation
the
prepared
Many of the
of the
lashing
wire
coil
of the wire coil is a
problems
wire
in
lashing
coil.
must
for
hassle-free
can be
traced
to
improper
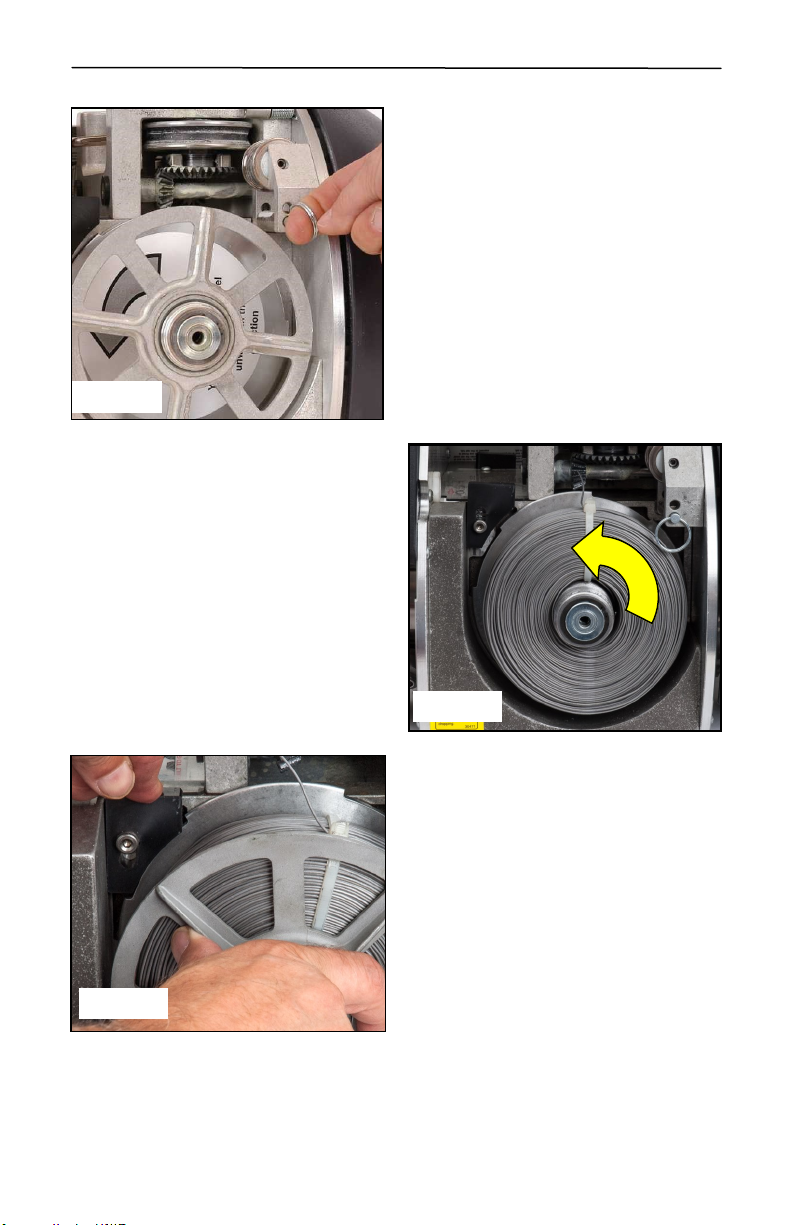
1. Open the cover with a
or
7/16
in.
socket
216C tool, or any tool
the
bugnut.
turn
(counter-clock wise)
fastener
cover
should
ing
wire
Turn
unseats.
open to
reel.
screw- driver
as
found
on the
used
to
the fastener
until the
The
spring loaded
expose
tighten
1/4
the
lash-
Figure 5
7
Apollo Lasher
Figure 6
3.
Depress
cutout
screw
reel cover
ing
onto the reel
that it spools out to the rear
of the lasher as shown by
arrow.
the reel
on rear
and
wire coil over
flange. Un-
remove
and
slide the
making sure
brake
the
into
the wire
lash-
hub and
2.
Verify that the
sion
roller is in the correct
position for
ing.
The
the
lower- most position
normal lashing wire tension,
including lashing
coaxial cables. The
should
position
wire
tension.
adjustable ten-
the type of
roller should
be in the
for
upper- most
higher lashing
broadband
lash-
be in
for
roller
Figure 8
Figure 7
4.
8
Install
and
onto the
against
important
the
against
vent
“snagging”
the wire reel cover
thread completely
reel
until snug
the wire coil.
to
reel
cover is tight
the wire
the
lashing
on
ensure
coil
wire
itself.
It
that
to
from
is
pre-

Figure 9
Make certain that the head or knot on
the cable tie is not pulled through the
coil and that the entire cable tie is removed, because portions of the cable
tie may cause snagging of the lashing
wire.
Note: As a check for proper cover tightness, at least 1 full thread on the hub
should be exposed after the wire reel
cover has been installed and tightened.
5. Hold on to the looped end of the
coil. Cut and remove the remaining cable tie and then continue to
snug the reel cover against the
wire coil ensuring a tight fit. The
reel brake can be depressed into
cutout on rear flange to hold the
reel stationary as you tighten the
reel cover.
Figure 10
Figure 11
7. Feed the wire behind the sec-
ond tension roller (top roller).
Pull the wire out from behind
the roller.
8. Pull up on the handle to de-
clutch and disengage the drive
wheel.
6. Make a hook with the end of
the lashing wire. Feed the
wire over the first tension
roller (bottom roller).
Figure 12
9

Apollo Lasher
Figure 13
10. Continue feeding wire until it
exits the drive wheel. The
wire exiting the drive wheel
must be below the wire entering the drive wheel.
9. Feed the wire into the drive
wheel from the rearward direction so the wire moves
around the drive wheel toward the front of the lasher.
Figure 14
Figure 15
11. Pull up on the handle to dis-
engage the drive wheel and
feed wire into the exit rollers
on the end of the machine.
Figure 16
10

12. Ensure the wire is captivated be-
tween the roller and the housing.
13. If more wire is needed, disengage
the drive wheel to pull out more
lashing wire. (See Figure 15)
Figure 17
14. Close the cover and using a screwdriver or 7/16 in. socket as found on the
216C tool, or any tool used to tighten the bugnut, tighten the fastener
(clockwise) 1/4 turn until the fastener seats and can’t be tightened further.
Ensure that the cover is secure to the hub.
4.4 Lashing to bare suspension strand
1. Check the lashing wire coils to ensure there is enough lashing wire for the
span, if the lashing wire wasn’t loaded recently.
Figure 18
Figure 19
2. Lower the rear gate to its lowest
position. Ensure that the rear gate
is open and the drum is locked in
position.
3. Set the rear vertical cable rollers to
their widest opening.
4. Open both the front and rear strand
locks by pulling up on the release
knob. There should be an audible
“click” when the locks travel from
the locked position to the open
position. (See Figure 18)
5. Open the front gate by actuating
the release lever towards the front
of the lashing machine. The roller
on the front gate will pivot 180
degrees and out of the way.
6. Attach a handline to the lasher
handle and raise the lasher to the
strand. Attach one of the lasher
bridle snap hooks to one of the
lasher towing eyes. Attach the other snap hook to the strand to serve
as a tether.
11

Apollo Lasher
7. Place the lasher on the strand and ensure that the strand is centered in the
grooves of both of the front and rear rollers.
Figure 20
10. Using the proper cable raising procedure for your application, lift the cable
or cables up to the strand, close the front gate and let the cable(s) rest on
the horizontal roller.
11. Adjust the position of the vertical rollers on the rear gate so that they bare-
ly touch the sides of the cable(s). This step will have to be done every time
the bundle size changes.
12. Close the rear gate until it locks in its detented position.
13. Raise the rear cable lifter by pushing up on the bottom of the lifter that
contacts the D shaft. The lock doesn’t have to be activated to raise the
cable lifter. If the rear cable lifter is too high, press the locking lever to
lower the rear cable lifter and try again.
8. Close the front strand locks by depress-
ing simultaneously on both hooks until audibly and visibly locked.
9. Close the rear strand locks by simulta-
neously depressing on both hooks until audibly and visibly locked. The lasher is now
secured to the strand.
14. Now the final steps. Pull up on the handle to de-clutch and disengage the drive
wheel to pull some lashing wire from the
lasher. Secure the lashing wire to the strand
by using a GMP D or E lashing wire clamp.
Attach the bridle assembly to the towing eyes
on the Apollo lasher and you are ready to
lash.
See section 4.6 for more information on terminating lashing wire.
Figure 21
12

4.5 Over-lashing procedure
Here is the proper way to overlash onto existing cable installations using the
Apollo lasher:
1. Check the lashing wire coils to ensure there is enough lashing wire for the
span.
2. Lower the rear gate to its lowest position by fully depressing the thumb latch
and sliding the roller down. Ensure that the rear gate is open and the drum is
locked in position.
3. Open both the front and rear strand
locks by pulling up on the release knob.
There should be an audible “click” when
the strand locks travel from the locked
position to the open position. The strand
locks aren’t used in the over-lashing procedure and should remain in the open
position.
Figure 22
Figure
23
6. Attach one of the snap hooks on the lasher bridle to one of the towing eyes.
Attach the other snap hook around the strand and existing cables to serve as a
tether.
7. Place the lasher on the strand and ensure that the strand is centered in the
grooves of both of the front and rear rollers.
8. Using the proper cable raising procedure for your application, lift up to the
strand the cable or cables you want to lash, close the front gate and let the cable(s) rest on the horizontal roller.
4. Open the front gate by actuating the
release lever towards the front of the lashing machine. The roller on the front gate
should pivot 180 degrees and out of the
way.
5. Attach a handline to the lasher handle
and raise the lasher to the strand.
13

Apollo Lasher
9. Raise the rear cable lifter by pushing up on the bottom of the lifter that
contacts the D shaft. The thumblatch doesn’t have to be activated to raise
the cable lifter.
10. Adjust the position of the vertical rollers so that they barely touch the
sides of the cable(s). This will have to be done as the bundle size changes.
See section 4.6 for more information on terminating lashing wire.
Figure 24
4.6 Lashing wire termination
4.6.1 General
A common cause of lashing wire failure is improper termination. The following steps outline the suggested method for proper lashing wire termination.
1. Lashing wire termination should be accomplished and cable supports in-
stalled as soon as practical after the cable is placed.
2. Measurement marks made in making terminations should be made on the
strand rather than on the cable sheath. Avoid scoring the cable sheath with
the lashing wire end when terminating lashing wire.
3. Cable guards should be used to prevent abrasion of the cable sheath where
the separation is less than 1/2 inch between the cable and suspension
clamps.
While the D lashing wire grip and D and E lashing wire clamps may be used
on strand sizes up to and including 7/16 in (11mm) (16M) or larger, the discussion on lashing wire termination will only cover the strand sizes of .25 to .38
in. diameter (6 to 10 mm) (6M, 6.6M and 10M), the only strand sizes compatible with the Apollo lasher.
11. Now the final steps. Pull up on the handle to de-clutch and disengage the drive
wheel to pull some lashing wire from the
lasher. Secure the lashing wire to the strand
by using a GMP D or E lashing wire clamp.
Attach the bridle assembly to the towing
eyes on the Apollo lasher and you are ready
to lash.
14

4.6.2 Lashing wire termination
1. Secure the lashing wire to the strand with a lashing wire grip before cutting
or otherwise releasing tension in the lashing wire. The lashing wire grip should
be placed far enough from where the supports, spacers and lashing wire clamps
are to be installed to avoid having to move the grip.
Note: The situation can exist where the .038 in. (0,97 mm) dia. lashing wire
may nest in the space between the wires of the 10M strand. Ensure that the D
lashing wire grip is securely contacting both the lashing wire and the strand to
prevent loss of tension in the lashing wire.
4.6.3 Lashing wire clamps
Clamping Nut
Shoulder
Threaded Stud
Grooved Plates 2nd Washer
1st Washer
Figure 25, D Lashing Wire Clamp
1. The D or E lashing wire clamp may be used with .038 (0,97 mm) and .045
(1,1 mm) dia. lashing wire on strand sizes of .25 to .38 in. (6 to 10 mm) diameter (6M, 6.6M and 10M).
2. The nuts of the clamp are tightened and loosened with the 7/16 in. end of a
216C tool or B ratchet wrench.
Form the end of the lashing wire
around the end of the clamp as shown
Figure 26, Terminating Lashing Wire
4.6.4 Terminating lashing wire using D or E lashing wire clamps
See figure 26 for steps 1, 3 and 4.
1. The lashing wire clamp should be located 2 inches outside of the first lashed
cable support or cable suspension clamp. The lashing wire should be wrapped
twice around the strand and then terminated on the cable lashing clamp.
15

Apollo Lasher
See figure 25 steps 2, 3, 5 and 6.
2. Terminate one lashing wire using a lashing wire clamp by placing the wire
below the stud and between the second washer and stud shoulder.
3. Remove any slack in the lashing wire by maintaining tension on the wire
and tapping the strand sharply. Form the wire over the stud and tighten the
nut. Cut the free end of the lashing wire off 1/4 in. (6 mm) beyond the end
of the clamp.
4. Form the end of the lashing wire 90 degrees around the end of the clamp
to minimize exposure of the free end of the lashing wire.
5. Terminate a second lashing wire (if used) with the D lashing wire clamp as
outlined above; however, temporarily clamp the first lashing wire using a
D lashing wire grip to maintain lashing wire tension.
6. Loosen the nut on the lashing wire clamp and terminate the second lashing
wire between the first and second washers. Tighten the nut to complete the
termination.
7. Remove the D lashing wire grip(s).
4.7 Moving your lasher around a pole
When you need to move your Apollo lasher around a pole or other obstruction,
follow these steps.
Figure 27
Warning: While aloft, ALWAYS wear a safety belt with a safety strap securely
attached to help prevent you from falling.
Caution: Ensure the rear vertical cable rollers are set to their widest opening
before placing the lasher on the side of a bucket.
16

1. Before doing anything, make sure you are working from a secure
!
See section 4.6 for more information on terminating lashing wire.
2. Clamp the lashing wire to the strand.
3. To pull a length of lashing wire from the Apollo lasher without rotating
the drum, actuate the de-clutch lever and pull out enough lashing wire
from your machine so you can terminate it with a clamp or continue lashing past the obstruction.
4. Attach one of the lasher bridle snap hooks to a lasher towing eye on the
front of the machine.
5. Now pass the bridle under the strand, past the obstruction and attach the
other snap hook to another lasher pulling eye.
Figure 28
perch where you can safely move your Apollo lasher without
overreaching. This is extremely important.
6. Open the front gate by actuating the
release lever towards the front of the
lashing machine. The roller on the front
gate will pivot 180 degrees and out of
the way.
7. Open the rear gate making sure it is
fully open in the detented position.
8. Open both the front and rear strand
locks by pulling up on the release knob.
There should be an audible “click” when
the locks travel from the locked position
to the open position.
Figure 29
17

Apollo Lasher
Figure 30
1. attach a secured handline to the lasher handle;
2. disconnect the lasher bridle only after completing step 1; and
3. carefully lower the lasher to the ground.
5.0 Troubleshooting
5.1 General
Most problems you encounter while operating your Apollo lasher have
simple solutions. Read through the section to find your problems, then
follow the recommended steps. If you can’t solve the problem, then call
the factory.
Problem: The lasher won’t rotate.
Is the rear gate closed?
If not, close the rear gate.
Is the lashing wire routed properly? Check Figure 14.
If not, reroute the wire properly.
Is the lashing wire snagged on a pulley?
If so, free wire and reroute the wire.
Is the lashing wire pulled through itself?
If so, remove wire until the wire reel is straightened out again.
Is the lashing wire of proper dimension? Is it .038 in. (.9 mm) diameter
or .045 in. (1 mm) diameter or is it larger?
If the wire diameter is incorrect, use the correct wire size.
Problem: The lashing wire is too tight or too loose.
Is the tensioning roller set at the correct position?
If not, move the roller to the correct position. (See Figure 6)
Problem: The rotation section needs to be rotated in the opposite direction
to clear a jam or remove a foreign object from the lasher.
The rotation section of the lasher can be manually rotated in the opposite
direction by actuating the handle to de-clutch and disengage the
drive wheel. The rotation section can be rotated bi-directionally as long
as the drive wheel is disengaged.
9. Carefully lift the lasher off the strand and
move it over to the strand on the other side of
the obstruction. If you accidentally drop the
lasher while making this transfer, the bridle
assembly will keep the lasher from falling to
the ground.
4.8 Removing the lasher from the strand
The procedure for taking your lasher off the
strand is basically the same as for moving it
around a pole, except that you should also:
18

6.0 Maintenance
6.1 General
It is easy to care for the Apollo and keep it in good operating condition, but to
make sure it stays in adjustment and operates properly, always follow these
simple precautions:
Never drop your lasher or expose it to any kind of abuse.
Keep your lasher in its protective case when not in use.
Protect your lasher from unnecessary exposure to dirt, grit and any other foreign matter.
Avoid placing the Apollo on the ground whenever possible.
6.2 Preventative maintenance
Lubricate the following points with a white lithium grease on a periodic basis:
D shaft and locking collar
rear vertical roller shaft and trunions
vertical rollers
front gate roller shaft
front gate spring
rear gate roller shaft
bevel gears
ring gear and pinion gears
needle bearings
strand lock shaft and springs
Caution: If your Apollo lasher doesn’t rotate freely, have it repaired at the
GMP facility.
6.3 Maintenance notes
The front and rear gates should swing freely without binding and securely latch
when closed. Likewise, the spring on the front and rear gates should keep them
open unless intentionally closed. The towing bracket is designed to be an integral part of the safety of the Apollo lasher when it is being transferred. So, inspect the towing bracket for cracks or other degradation. Check the screws to
ensure their tightness. Check the bridle assembly for wear or rope strand breakage. Verify proper functioning of the forged snap hooks. Check the loose ring
to make sure it isn’t bent or damaged. The tensioning rollers should rotate
freely without binding. The screws and nuts on your lasher should be checked
periodically for tightness. Check all of the rollers for signs of abnormal wear.
6.4 Scheduled maintenance
The Apollo should be returned to the factory every 10-12 months for an inspection and “tuneup.”
19

Apollo Lasher
7.0 Options and other miscellaneous information
7.1 General
The Apollo lasher has been designed to minimize the snag and catch points
and therefore requires no optional halo.
7.2 GMP lashing accessories
The following items will help to increase your productivity and bottom line.
Description
D lashing wire grip
D lashing wire clamp (100/pack)
E lashing wire clamp (100/pack)
lashing wire .045 430 SS 1200 ft/spool, 6 spools/ctn
lashing wire .045 302 SS 1200 ft/spool, 6 spools/ctn
lashing wire .038 302 SS 1600 ft/spool, 6 spools/ctn
polypropylene lashing tow rope 3/8 in. dia by 35 ft.
bridle assembly 5 ft.
216C tool
B ratchet wrench
7.3 Other available GMP products
Did you know that GMP is the world’s oldest and largest supplier of aerialtools and accessories? In fact, our selection and quality have always been second to none. We helped invent many of the aerial tools you use everyday, including aerial lashers like the C2, J2 and G, and a broad line of cable blocks
and rollers. And it doesn’t stop there. We provide tools and accessories for
almost every cabling function: aerial, underground, even in-building. Chances
are, if you are looking for a tool, we have it, and many more like it as well.
Contact us for our catalog that lists our complete selection of over 800 products. Questions? Comments? Call us! Fax us!
E-mail us at Info@GMPtools.com
Also, visit our web site at http://www.GMPtools.com
8.0 Repair/Replacement parts list
If the need for repair parts should arise please contact the factory for
genuine GMP replacement parts. Parts are also available online at
www.Craftworktools.com
Item
08605
07886
81460
71530
71533
71535
70190
05817
15439
07511
20

D Lashing Wire Grip
08605
E Lashing Wire Grip
81460
Poly Tow Rope
70190
D Lashing Wire Clamp
07886
Lashing Wire
Towing Bridle Assy
05817
216C Tool
15439
B Ratchet Wrench
07511
21

Apollo Lasher
LOWER
TENSION
ROLLER
SHAFT
REEL COVER
Fig. 31, Side View
EXIT ROLLER (LH)
REAR GUIDE
ROLLER
VERTICAL
ROLLER ASSY
REAR STRAND
RELEASE KNOB
LOWER REAR
ROLLER ASSY
Fig. 32, Rear View
22
EXIT ROLLER (RH)
LOWER SHAFT
SUPPORT ASSY

FRONT STRAND
RELEASE KNOB
Fig. 33, Front View
TOWING
BRACKET
LOWER FRONT
ROLLER
TOWING
BRACKET
FRONT ROLLER
W/O CLUTCH
TOWING
BRACKET
DOOR ASSY LH
REAR ROLLER
ASSY
DOOR ASSY RH
Fig. 34, Top View
23

Apollo Lasher
General Machine Products Co., Inc. • 3111 Old Lincoln Hwy
Trevose, PA 19053 • USA
TEL: +1-215-357-5500 • FAX: +1-215-357-6216 • www.gmptools.com
24
 Loading...