

GE LRXS4, LRXS8, LRXS6 Installation Manual

Installation Guide
LuminationTM LED Luminaire
(LRX Series - New Construction Frame)
BEFORE YOU BEGIN
Read these instructions completely and carefully.
WARNING/AVERTISSEMENT
RISK OF ELECTRIC SHOCK
• Turn power off before inspection, installation or removal.
• Properly ground electrical enclosure.
RISK OF FIRE
• Follow all NEC and local codes.
• Use only UL approved wire for input/output connections.
Minimum size 18 AWG or 14 AWG for continuous runs.
RISQUES DE DÉCHARGES ÉLECTRIQUES
• Coupez l’alimentation avant d’’inspecter, installer ou déplacer le luminaire.
• Assurez-vous de correctement mettre à la terre le boîtier d’alimentation électrique.
RISQUES D’INCENDIE
• Respectez tous les codes NEC et codes locaux.
• N’utilisez que des ls approuvés par UL pour les entrées/sorties de
connexion. Taille minimum 18 AWG ou 14 AWG pour les rangées continues.
NOTICE
Lamp Housings LRXS4, LRXS6, LRXS8 may be assembled with part FRAMExS. When Lamp Housings LRXS4, LRXS6, LRXS8 is assembled with Part
FRAMExS the final assembly complies with UL 1598 category IFAO recessed luminaire requirements. LRX products are suitable for wet location
covered ceiling only.
Les boîtiers de lampes LRXS4, LRXS6, LRXS8 peuvent être montés avec la pièce FRAMExS. Lorsque les boîtiers des lampes LRXS4, LRXS6, LRXS8
sont montés avec la pièce FRAMExS, le montage inal respecte les exigences des luminaires encastrés de la catégorie IFAO de la norme UL 1598.
LRX produits conviennent pour emplacement humide couverte au plafond uniquement.
Save These Instructions
Use only in the manner intended by the manufacturer. If you have any questions, contact the manufacturer.
Prepare Electrical Wiring
Electrical Requirements
• The LED luminaire must be connected
to the mains supply according to its
ratings on the product label.
Grounding Instructions
• The grounding and bonding of the overall system
shall be done in accordance to local electric code
of the country where the luminaire is installed.
1
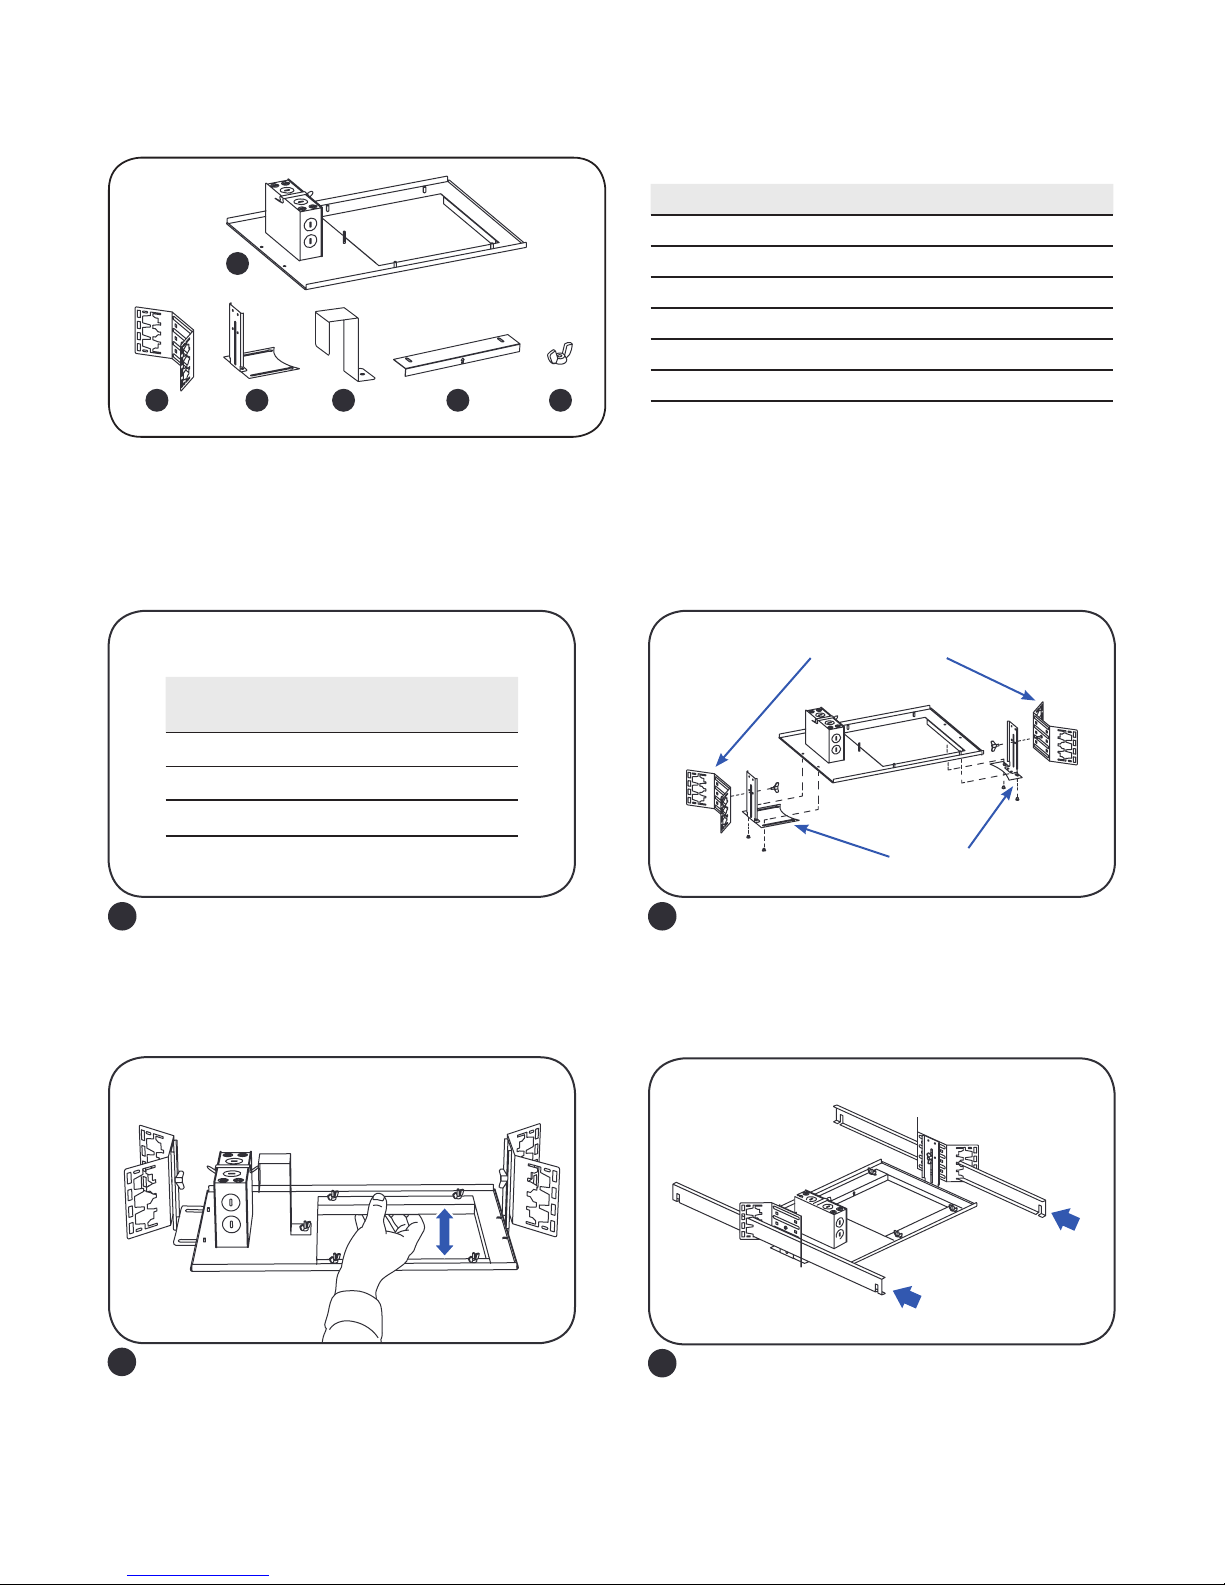
Components
1
2 3 4 5 6
Frame Installation
Fixture
Size Square Hole Size
LRXS4 4.9-5.2 inch x 4.9-5.2 inch
LRXS6 5.95-7.5 inch x 5.95-7.5 inch
LRXS8 7.95-9.5 inch x 7.95-9.5 inch
Provided Item Qty.
1 Frame (4-inch, 6-inch or 8-inch) 1
2 Mounting brackets 2
3 L-Bracket 2
4 U-Bracket 1
5 Adjustable Bracket 2
6 Wing nut 7
NOTE: Part 4 is only for LRX EMBB version
Mounting brackets
L-brackets
Cut the appropriate size hole into ceiling tile. Place side L-brackets on existing frame screws and
1 2
tighten with screwdriver on both sides of the frame.
Then attach mounting brackets to both L-brackets
with wing nuts (provided).
Adjust aperture
Adjust frame aperture size to be suitable for
3
xture, ensure the xture center installed. Then
tighten both mounting bracket wing nuts.
Slide hanger bars through adjustable mounting
4
brackets.
2
 Loading...