

Page 1
GEAppliances.corn
Safety Instructions ............. 2%
Operating Instructions
Features of Your Oven .............. 8, 9
Hicrowave Time and Auto
Features ......................... 10-12
Changing Power Level ............... 13
Microwave Terms .................... 13
MicrowaveSensorFeatures....... 14-16
Other Features.................... 17-19
CookingComplete Reminder........ 17
Resume............................. 17
Clock ................................ 17
Start/Pause ......................... 17
Clear/Off ............................ 17
Control Lock-Out .................... 17
Auto Nite Light ...................... 18
Beeper Volume ...................... 18
Display Language ................... 18
Display ON/OFF ..................... 28
Display Speed ....................... 18
Measures ........................... 19
More Time Message ................. 19
Surface Light ........................ 19
Timer ................................ 19
Turntable On/Off .................... 19
Vent Fan ............................ 19
Automatic Fan ...................... 19
Care and Cleaning
Inside .................................. 20
Outside ................................ 20
Stainless Steel ......................... 20
Replacing the Light Bulbs ............. 21
Vent Filters ............................ 21
Charcoal Filters ........................ 22
Troubleshooting Tips............. 2s
Things That Are Normal
With Your Microwave Oven ........ 24
Consumer Support
Consumer Support .......... Back Cover
Optional Kits ........................... 8
Warranty .............................. 27
CVM2750
®
U
Write the model and serial numbers here:
Model #
Serial #
Youcan find them on a labelwhen the
door isopen.
49-40723 06-14 GE
MFL06398609
Page 2
IMPORTANT SAFETY INSTRUCTIONS.
READ ALL INSTRUCTIONS BEFORE USING.
When using electrical appliances basic safety precautions should be followed, including the following:
A WARNING: roreducetheriskofburns,electricshock,fire,injurytopersons,orexposuretoexcessive
microwave energy:
PRECAUTIONS TO AVOID POSSIBLE EXPOSURE
TO EXCESSIVE MICROWAVE ENERGY
(ul Do Not Attempt to operate this oven with the [c/
door open since open-door operation can result
in harmful exposure to microwave energy. It
is important not to defeat or tamper with the
safety interlocks.
_J Do Not Place any object between the oven front
face and the door or allow soil or cleaner residue
to accumulate on sealing surfaces.
[] Read all instructions before using this appliance. When
using electrical appliances, basic safety precautions
should be followed, including the following:
[] Readand follow the specific precautions in the Precautions
to Avoid PossibleExposureto ExcessiveMicrowave Energy
section above.
[] Thisappliance must be grounded. Connectonly to a properly
grounded outlet. Seethe Grounding Instructions section on
page 6.
[] Thismicrowave oven is ULlistedfor installation over both
gas (lessthan 60,000BTU)and electric ranges.
[] Thisover-the-range oven is designed for use over ranges no
wider than 36". It may be installed over both gas and electric
cooking equipment.
[] Donot operate this appliance if it has a damaged power
cord or plug, if it isnot working properly, or if it has been
damaged or dropped. If the power cord is damaged, it must
be replaced byGeneral ElectricServiceoran authorized
serviceagent using a power cord available from General
Electric.
[] Installor locate this appliance only in accordance with the
provided installation instructions.
Do Not Operate the oven if it is damaged.
It is particularly important that the oven door
close properly and that there is no damage to
the:
(1) door (bent),
(2) hinges and latches (broken or loosened),
(3) door seals and sealing surfaces.
(dJ The Oven Should Not be adjusted or repaired
by anyone except properly qualified service
personnel.
[]
Toreduce the riskof fire in the oven cavity:
Do not overcook food. Carefully attend appliance when
paper, plastic or other combustible materials are placed
insidethe ovenwhile cooking.
Removewire twist-ties and metal handles from paper or
plastic containers before placing them in the oven.
Do not use the oven for storage purposes. Do not leave
paper products, cooking utensils or food in the oven when
not in use.
Do not pop popcorn in your microwave oven unless in a
special microwave popcorn accessory or unlessyou use
popcorn labeled for usein microwave ovens.
If materials insidethe oven ignite, keepthe oven door closed,
turn the oven off and disconnect the power cord, orshut
off power at the fuse or circuit breaker panel.If the door is
opened,the fire may spread.
Do not usethe SensorFeaturestwice in succession
on the same food portion. Iffood is undercooked after the
first countdown, useTIME COOKfor additional cooking time.
Do not usethe ovento dry newspaper.
2 SAVE THESE INSTRUCTIONS
Page 3
IMPORTANT SAFETYINSTRUCTIONS.
GEAppliances.com
Donot clean with metal scouring pads. Piecescan burn off
the pad and touch electrical parts involving risk of electric
shock.
Donot store any materials, other than our recommended
accessories,inthis oven when not in use.
Donot store this appliance outdoors. Donot usethis product
near water-for example,in a wet basement,
near a swimming pool, near asink or in similar locations.
Keeppower cord away from heated surfaces.
Donot immerse power cord orplug in water.
Donot block or cover any openings on the appliance.
Thismicrowave isnot approved or tested for marine use.
Usethis appliance only for its intended useasdescribed in
this manual.
, Donot use corrosivechemicals or vapors in this appliance.
, Thismicrowave oven isspecificallydesigned to heat,dry or
cook food, and isnot intended for laboratory or industrial use.
, Some products such as whole eggs and sealed containers-
for example, closedjars-are able to explode and should
not be heated inthis microwave oven. Suchuseof the
microwave oven could result in injury.
It is important to keepthe area clean where the door
sealsagainst the microwave. Useonly mild,non-abrasive
detergents applied with a clean sponge or soft cloth. Rinse
well.
, Thisappliance must only be serviced byqualified service
personnel.Contact nearest authorized service facilityfor
examination, repair or adjustment.
, Aswith any appliance, closesupervision isnecessarywhen
used bychildren.
, Do not store anything directly on top of the microwave oven
surfacewhen the microwave oven isin operation.
, Do not mount this appliance over a sink.
, Do not let the cord hang over edge of counter.
, Do not usepaper products in oven when appliance is
operated in any cooking mode except microwave only.
A WARNING!
ARCING
Ifyou see arcing, press the CLEAR/OFF button and correct the problem.
Arcing is themicrowave term for sparks in the oven.Arcing is
causedby.
, The metal shelf not installed correctly so it
touches the microwave wall.
, Metal or foil touching the sideof the oven.
, Turntable ring support not installed correctly.
, Foil not molded to food (upturned edges act
likeantennas).
, Metal, suchas twist-ties, poultry pins, or gold-rimmed dishes,
in the microwave.
, Recycledpaper towels containing small metal pieces being
used inthe microwave.
SAVE THESE INSTRUCTIONS 3
Page 4
IMPORTANT SAFETY INSTRUCTIONS.
READ ALL INSTRUCTIONS BEFORE USING.
A WARNING!
FOODS
Donot pop popcorn in your microwave oven unlessina
special microwave popcorn accessory
or unlessyou usepopcorn labeled for usein microwave
ovens.
Donot boileggs in (]microwave oven. Pressurewill build up
inside egg yolkand will cause itto burst, possiblyresulting in
injury.
Operating the microwave with no food insidefor more than a
minute or two may cause damage
to the oven and could start a fire. It increasesthe heat
around the magnetron and can shorten
the life of the oven.
, Foodswith unbroken outer "skin"such as potatoes, hot dogs,
sausages,tomatoes, apples,chicken livers andother giblets,
and egg yolks should be piercedto allow steam to escape
during cooking.
SUPERHEATED WATER
Liquids,suchas water, coffee,ortea, are ableto
be overheatedbeyond the boilingpoint without appearing to
be boiling.Visiblebubbling or boiling when thecontainer is
removed from the microwave oven isnot always present.THIS
COULDRESULTIN VERYHOTLIQUIDSSUDDENLYBOILING
OVERWHENTHECONTAINERISDISTURBEDORA SPOONOR
OTHERUTENSILISINSERTEDINTOTHELIQUID.
Toreduce the riskof injuryto persons:
- Donot overheat the liquid.
Foodscooked in liquids (suchas pasta)may
tend to boilmore rapidlythan foods containing lessmoisture.
Shouldthis occur, refer to the
Careand cleaning of the microwave oven section
for instructions on how to clean the insideof
the oven.
iiiiiiiiiiii_i_
Avoidheating baby food in glassjars, even with
the lid off. Make sureall infant food is thoroughly cooked. Stir
food to distribute the heat evenly.
Becareful to prevent scalding when warming formula. The
container may feel coolerthan the formula really is.Always
test the formula before feeding the baby.
iiiiiiiiiiii_i_
Don't defrost frozen beverages in narrow-necked bottles
(especiallycarbonated beverages).Evenif the container is
opened,pressure can build up.Thiscan causethe container
to burst, possiblyresulting in injury.
iiiiiiiiiiii_i_
Hot foods and steam can cause burns.Becareful when
opening any containers of hot food, including popcorn bags,
cooking pouches and boxes.To prevent possibleinjury, direct
steam away from hands and face.
iiiiiiiiiiii_i_
Donot overcook potatoes. Theycould dehydrate and catch
fire,causing damage to your oven.
iiiiiiiiiiii_i_
Cookmeat and poultry thoroughly-meat to at
least an INTERNALtemperature of 160°Fand poultry to at
least an INTERNALtemperature of 180°F.Cookingto these
temperatures usually protects against foodborne illness.
- Stirthe liquid both before and halfway through heating it.
- Donot usestraight-sided containers with narrow necks.
- After heating, allow the container to stand in the microwave
oven for ashort time before removing the container.
- Useextreme care when insertinga spoon or other utensil into
the container.
4 SAVE THESE INSTRUCTIONS
Page 5
GEAppliances.com
MICROWAVE-SAFE COOKWARE
Do not operate the oven in the microwave mode without the turntable and the turntable support seated and in place.
The turntable must be unrestricted so it can rotate.
Make sure all cookware used inyour microwave oven is suitable for microwaving. Most glass casseroles, cooking dishes,
measuring cups, custard cups, pottery or china dinnerware which does not have metallic trim or glaze with a metallic
sheen can be used. Some cookware is labeled "suitable for microwaving."
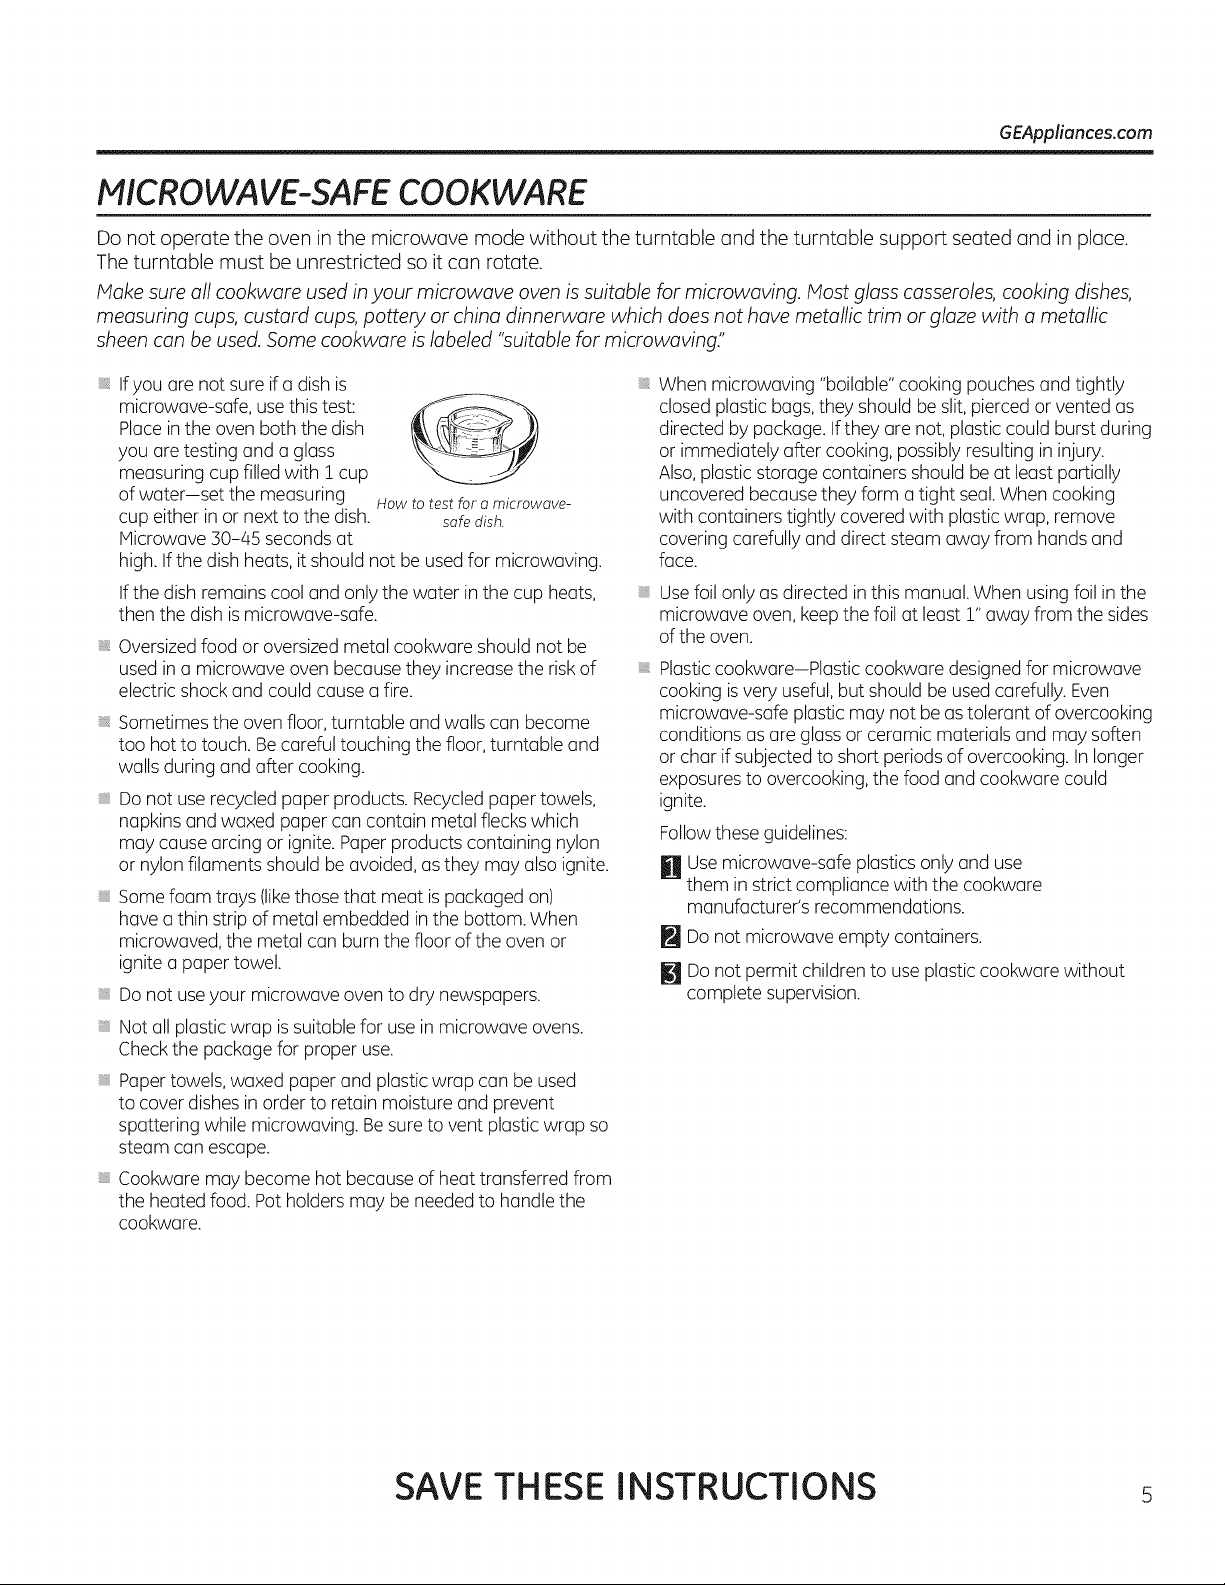
, Ifyou are not sure ifa dish is
microwave-safe, use this test:
Placein the oven both the dish
you are testing and a glass
measuring cup filled with I cup
of water-set the measuring
cup either inor next to the dish.
Microwave 30-45 seconds at
high. If the dish heats,it should not beused for microwaving.
Ifthe dish remains cool and only the water in the cup heats,
then the dish ismicrowave-safe.
, Oversizedfood or oversized metal cookware should not be
used in a microwave oven becausethey increase the riskof
electric shock and could cause a fire.
, Sometimes the oven floor, turntable and walls can become
too hot to touch. Becareful touching the floor, turntable and
walls during and after cooking.
, Do not userecycled paper products. Recycledpaper towels,
napkins and waxed paper can contain metal flecks which
may cause arcing or ignite. Paperproducts containing nylon
or nylon filaments should be avoided, as they may also ignite.
, Some foam trays (likethose that meat ispackaged on)
have a thin strip of metal embedded in the bottom. When
microwaved, the metal can burn the floor of the oven or
ignite a paper towel.
, Do not useyour microwave ovento dry newspapers.
, Not all plastic wrap issuitable for use in microwave ovens.
Checkthe packagefor proper use.
, Papertowels, waxed paper and plastic wrap can be used
to cover dishes inorder to retain moisture and prevent
spattering while microwaving. Be sureto vent plastic wrap so
steam can escape.
, Cookware may become hot because of heat transferred from
the heated food. Pot holdersmay be neededto handle the
cookware.
How to test for a microwave-
safe dish.
When microwaving "bailable" cooking pouches and tightly
closed plastic bags,they should be slit,pierced or vented as
directed by package. Ifthey are not,plastic could burst during
or immediately after cooking, possiblyresulting in injury.
Also,plastic storage containers should be at least partially
uncovered because they form a tight seal.When cooking
with containers tightly covered with plasticwrap, remove
covering carefully and direct steam away from hands and
face.
Usefoil only as directed in this manual. When using foil inthe
microwave oven, keepthe foil at least 1"away from the sides
of the oven.
Plasticcookware-Plastic cookware designedfor microwave
cooking isvery useful, but should be used carefully. Even
microwave-safe plastic may not beas tolerant of overcooking
conditions as are glassor ceramic materials and may soften
or char if subjected to short periods of overcooking. Inlonger
exposuresto overcooking,the food and cookware could
ignite.
Followtheseguidelines:
H Use microwave-safe plastics only and use
them in strict compliance with the cookware
manufacturer's recommendations.
Do not microwave empty containers,
[] Do not permit children to use plastic cookware without
complete supervision.
SAVE THESE INSTRUCTIONS s
Page 6
IMPORTANT SAFETY INFORMATION.
READ ALL INSTRUCTIONS BEFORE USING.
WARNING!
GROUNDING INSTRUCTIONS
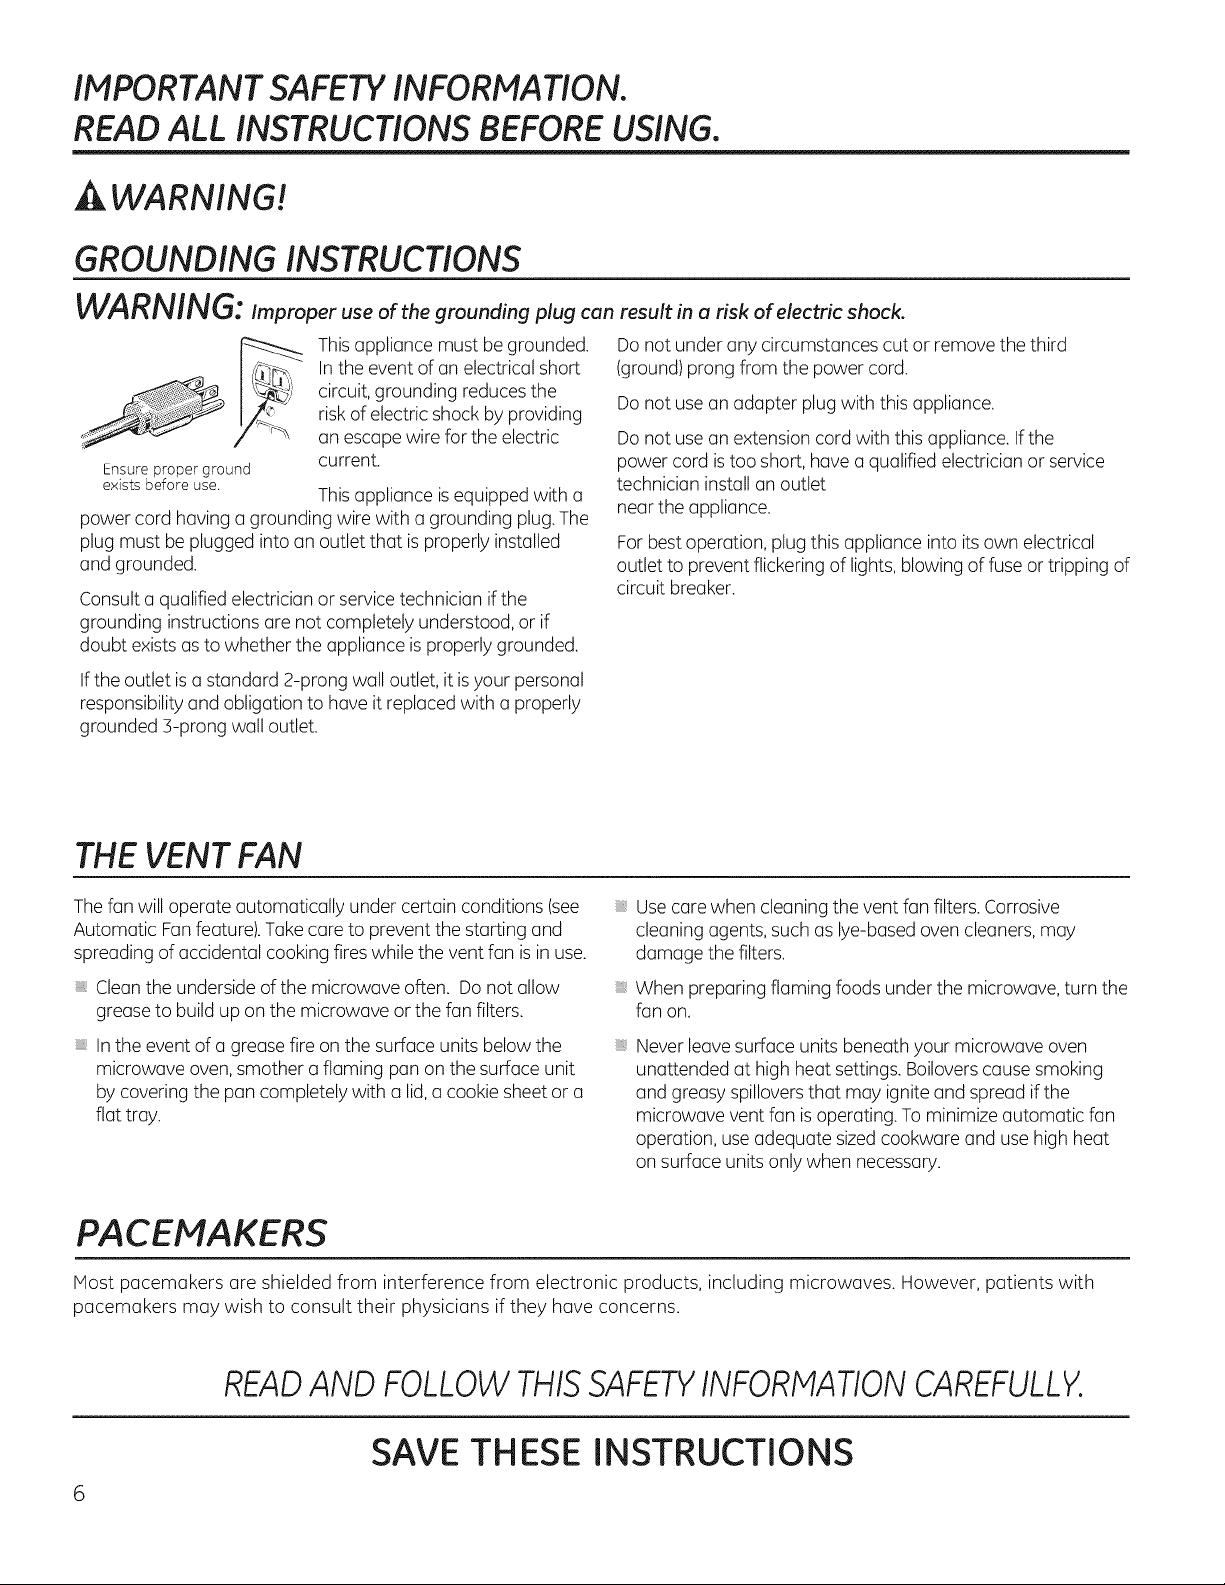
WARNING: Improper use of the grounding plug can
Thisappliance must be grounded.
Inthe event of an electrical short
circuit, grounding reducesthe
risk of electric shock by providing
an escape wire for the electric
Ensure proper ground
exists before use.
power cord having a grounding wire with a grounding plug.The
plug must be plugged into an outlet that is properly installed
and grounded.
Consulta qualified electrician or servicetechnician if the
grounding instructions are not completely understood, or if
doubt existsas to whether the appliance is properly grounded.
If the outlet is a standard 2-prong wall outlet, it isyour personal
responsibility and obligation to have it replaced with a properly
grounded 3-prong wall outlet.
current.
Thisappliance isequipped with a
THE VENT FAN
result in a risk of electric shock.
Do not under any circumstances cut or remove the third
(ground)prong from the power cord.
Do not use an adapter plug with this appliance.
Do not use an extension cord with this appliance. Ifthe
power cord istoo short, havea qualified electrician or service
technician install an outlet
near the appliance.
For bestoperation, plug this appliance into its own electrical
outlet to prevent flickering of lights,blowing of fuse or tripping of
circuit breaker.
Thefan will operate automatically under certain conditions (see
Automatic Fanfeature).Takecare to prevent the starting and
spreading of accidental cooking fireswhile the vent fan is in use.
Cleanthe underside of the microwave often. Do not allow
greaseto buildup on the microwave or the fan filters.
, In the event of a greasefire on the surface units below the
microwave oven,smother a flaming pan on the surface unit
by covering the pan completely with a lid,a cookie sheetor a
flat tray.
Usecare when cleaning the vent fan filters. Corrosive
cleaning agents,such as lye-based ovencleaners, may
damage the filters.
When preparing flaming foods under the microwave, turn the
fan on.
Never leavesurface units beneath your microwave oven
unattended at high heat settings. Boiloverscause smoking
and greasy spilloversthat may igniteand spread ifthe
microwave vent fan is operating.To minimize automatic fan
operation, use adequate sizedcookware and use high heat
on surface units only when necessary.
PACEMAKERS
Host pacemakers are shielded from interference from electronic products, including microwaves. However, patients with
pacemakers may wish to consult their physicians if they have concerns.
READAND FOLLOW THISSAFETYINFORHATION CAREFULLY.
SAVE THESE INSTRUCTIONS
Page 7

Notes. GEAppliances.com
Page 8
About the features of your oven.
Throughout this manual, features and appearance may vary from your model.
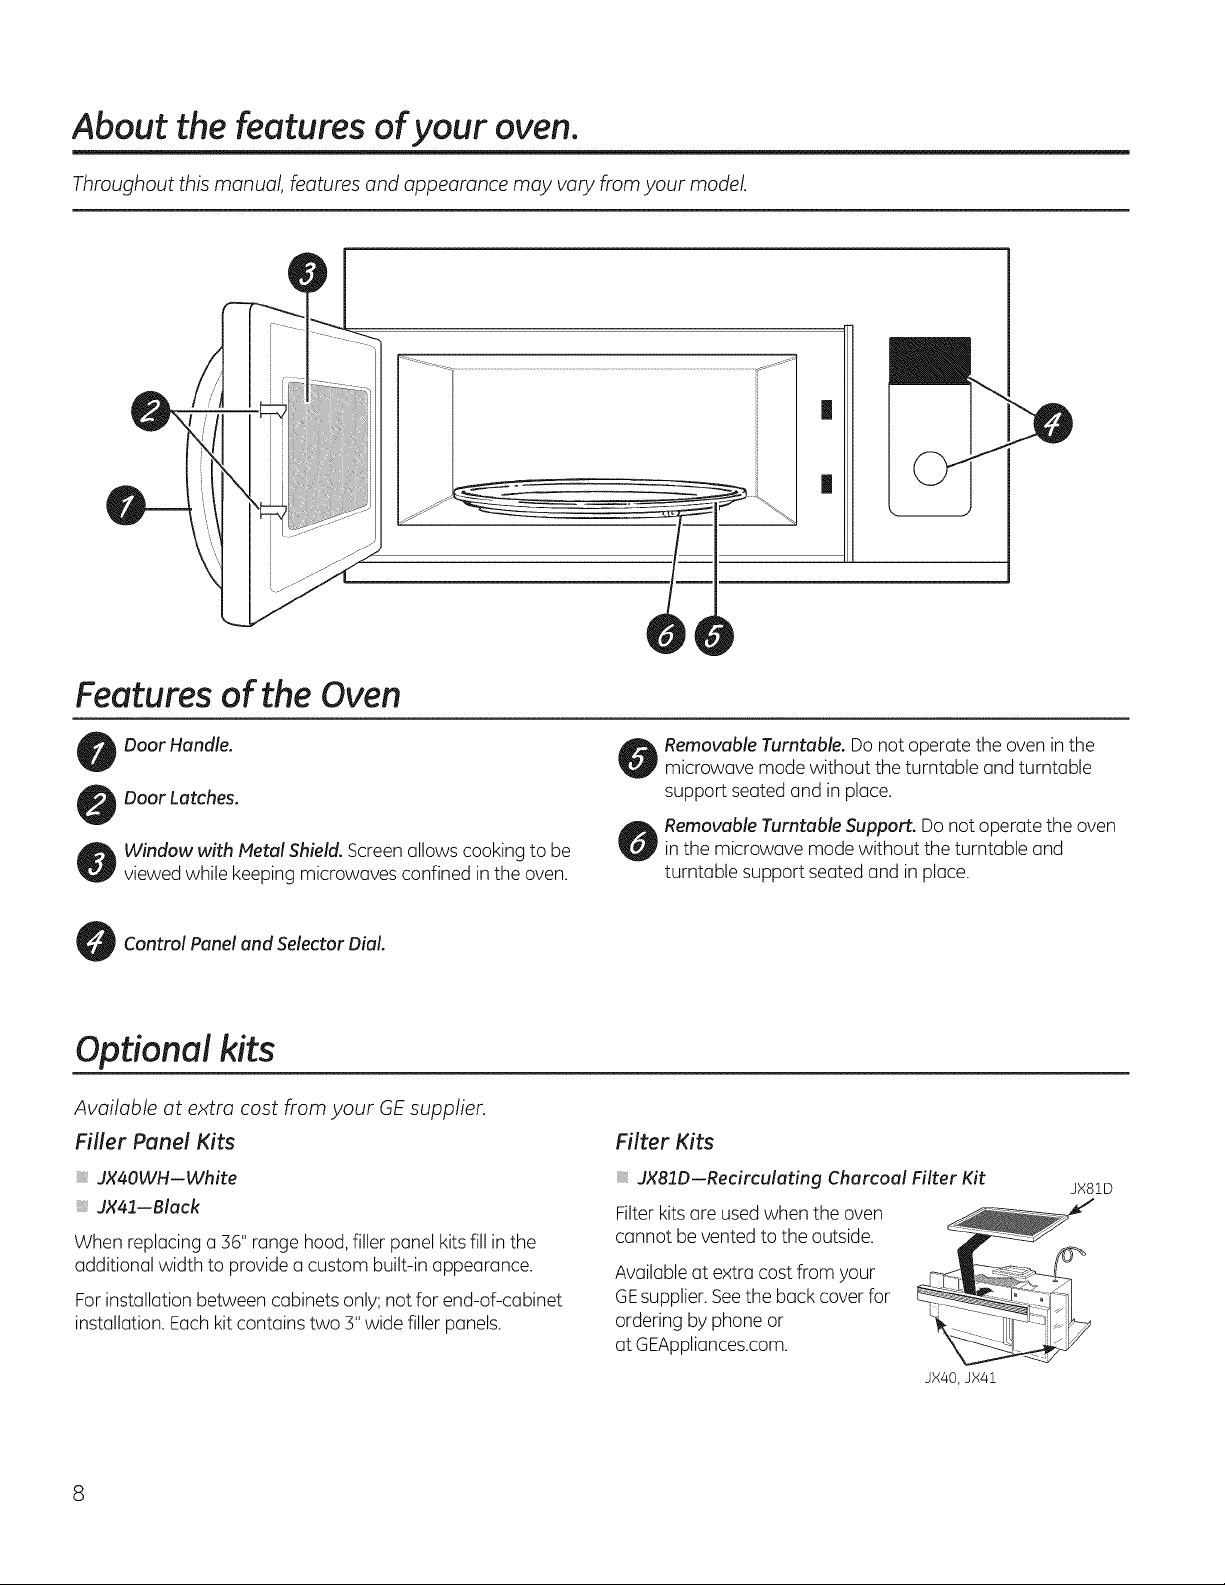
Features of the Oven
|
|
Door Handle.
Door Latches.
Window with Metal Shield. Screenallows cooking to be
viewed while keeping microwaves confined inthe oven.
Control Panel and Selector Dial.
Optional kits
Available at extra cost from your GEsupplier.
Filler Panel Kits
, JX4OWH--White
JX41--Black
When replacing a 36" range hood,filler panel kitsfill inthe
additional width to provide a custom built-in appearance.
Forinstallation between cabinets only; not for end-of-cabinet
installation. Eachkit contains two 3" wide filler panels.
Removable Turntable. Donot operate the oven in the
microwave mode without the turntable and turntable
support seated and in place.
Removable Turntable Support. Do not operate the oven
in the microwave mode without the turntable and
turntable support seated and in place.
Filter Kits
JX81D--Recirculating Charcoal Filter Kit
Filterkitsare usedwhen the oven
cannot be vented to the outside.
Availableat extra cost from your
GEsupplier.Seethe back coverfor
ordering by phone or
at GEAppliances.com.
JX40, JX41
JX81D
Page 9
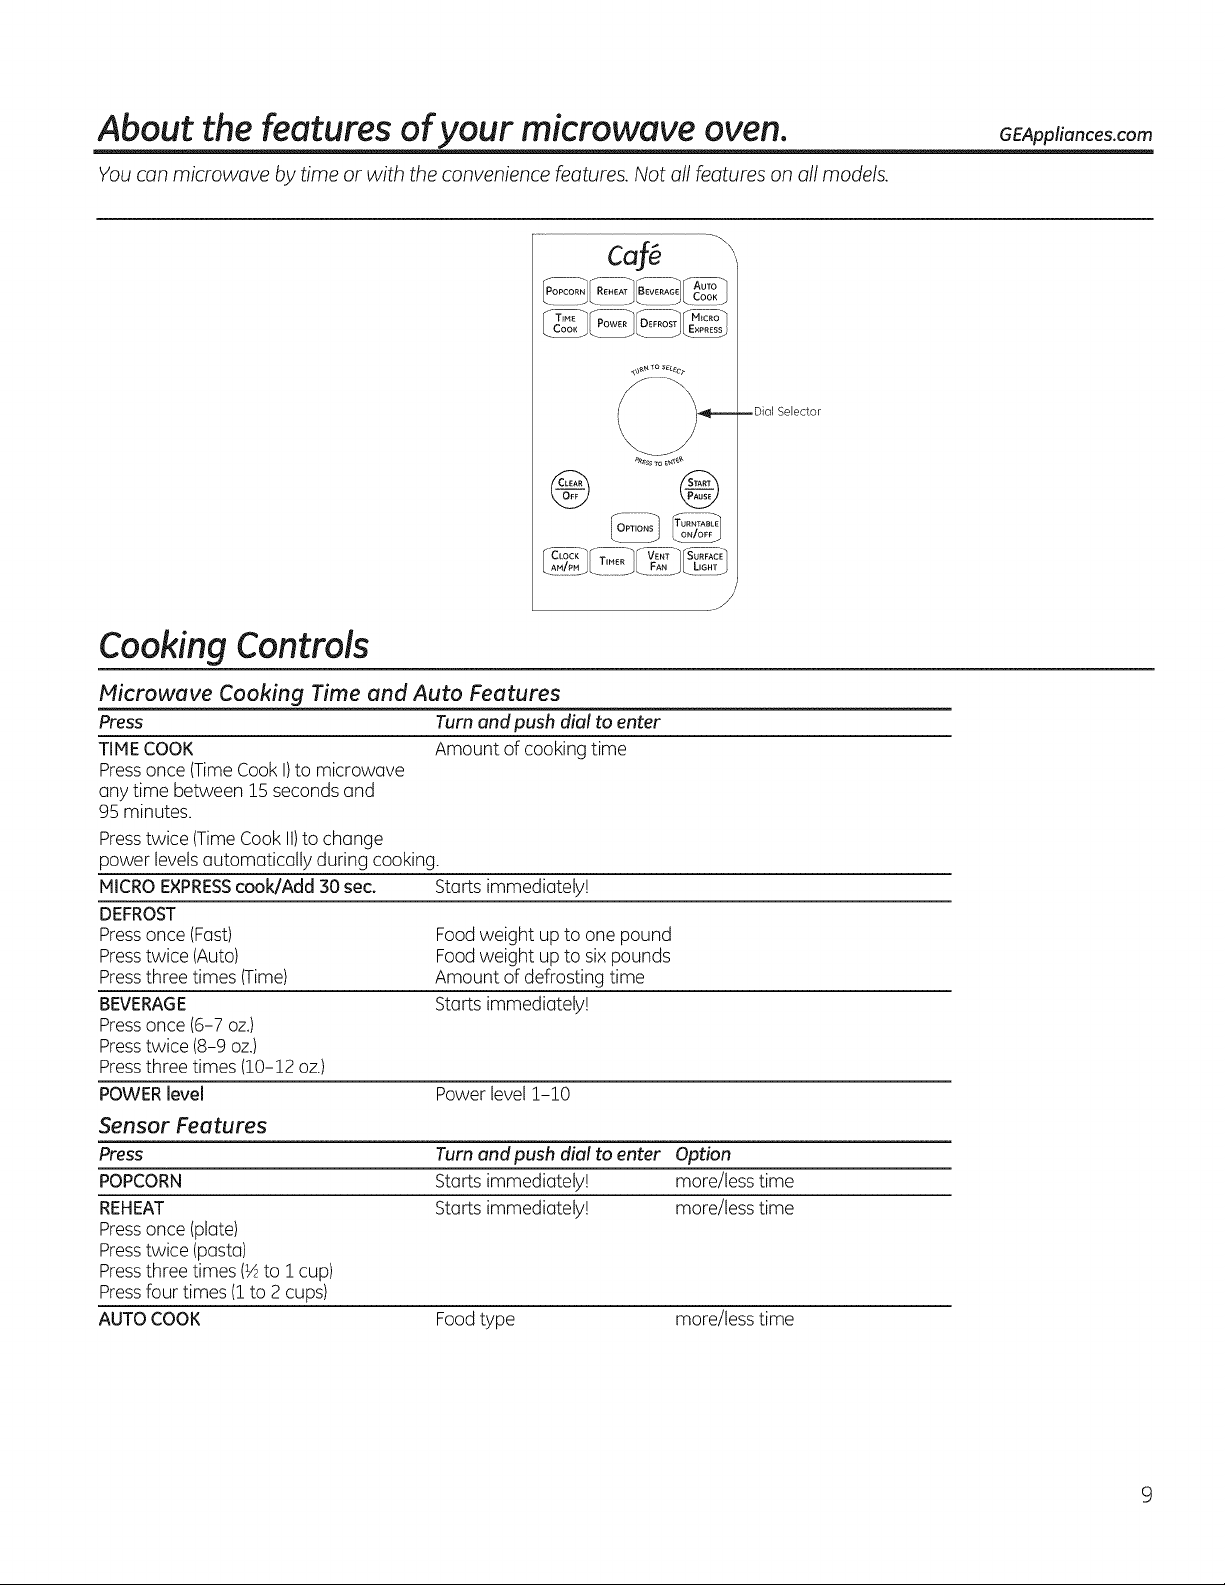
About the features of your microwave oven. GEAppliances.com
You can microwave by time or with the convenience features. Not all features on all models.
_ 3o sEt_ct
Cooking Controls
Microwave Cooking Time and Auto Features
Press Turn and push dial to enter
TIMECOOK Amount of cooking time
Press once (TimeCook I)to microwGve
Gnytime between !5 seconds Gnd
95 minutes.
Presstwice (TimeCook II)to change
power levelsautomatically during cooking.
MICROEXPRESScook/Add 30 sec. Starts immediately!
DEFROST
Pressonce (Fast) Foodweight up to one pound
Presstwice (Auto) Foodweight up to six pounds
Pressthree times (Time) Amount of defrosting time
BEVERAGE Starts immediately!
Pressonce (6-7 oz,)
Presstwice (8-9 oz.)
Pressthree times (10-12 oz.)
POWERlevel Powerlevel!-!0
Sensor Features
Press Turn and push dial to enter Option
POPCORN StGrts immediGtely! more/less time
REHEAT Starts immediately! more/less time
Pressonce (plate)
Presstwice (pasta)
Pressthree times (½to I cup)
Pressfour times (! to 2 cups)
AUTOCOOK
Foodtype
more/less time
Page 10
Available cooking options.
Microwave Cooking
Your oven usesmicrowave energy to cook by a set time or weight, or automatically by sensor.
Sensor microwave works bydetecting the increasing humidity releasedduring cooking.Theoven
automatically adjusts the cooking time to various types and amounts of food.
Cooking Method
Microwave energy
is distributed evenly
throughout the oven
for thorough, fast
cooking of food.
Heat Source
Microwave energy.
Heat Conduction
Heat produced
within food by
instant energy
penetration.
About the time and auto microwave features.
&,3V._ TO SEL#c?
_RESS TO _,N1_"
Using the Dial
You can make selectionson the oven by
turning the dial and pressing it to enter
the selection.
Time Cook
Time Cook I
Allows you to microwave for any time between
15 seconds and% minutes.
Pressingthe dial can also be used in place
of the START/PAUSEbutton for quicker
programming of the oven.
Time Cook II
Letsyou change power levels automatically
during cooking. Here'show to do it:
Benefits
Fast, high efficiency
cooking. Oven and
surroundings do
not get hot.
Easy clean-up.
10
@
Power level 10 (High)is automatically set,
but you maychange it for more flexibility.
_J_Pressthe TIMECOOKbutton.
[] Turn the dial to set the cook time and press
the dial to enter.
M Change power levelif you don't want full
power. (PressPOWER.Turnthe dial to
select.Pressthe dial to enter.)
Pressthe dial or the START/PAUSEbutton
to start cooking.
You may open the door during Time Cook
to check the food. Closethe door and press the
dial orSTART/PAUSEto resume cooking.
NOTE:You may change the cook time at any
time during cooking by turning the dial. You
may also change the power level by pressing
the POWER button.
In Pressthe TINE COOKbutton.
[] Turnthe dial to set the first cook time and
pressthe dial to enter.
Changethe power levelifyou don't want
full power. (PressPOWER.Turn the dial to
select. Pressthe dial to enter.)
Pressthe TIMECOOKbutton again.
_iJ Turnthe dial to set the second cook time
and press the dialto enter.
[] Changethe power levelifyou don't want
full power. (PressPOWER.Turn the dial to
select. Pressthe dial to enter.)
[] Pressthe dial or the START/PAUSEbutton
to start cooking.
At the end of Time Cook i, Time Cook IIcounts
down.
NOTE:You may change the cook time at any
time during cooking by turning the dial. You
may also change the power level by pressing
the POWER button.
Page 11
About the time and auto microwave features. GEAppliances.com
Micro Express Cook
Thisisa quick way to setand start cooking
in 50second blockseachtime the MICRO
EXPRESSbutton ispressed.Thecooktime
may be changedby turning the dial at any
time during cooking.
Time Defrost
Thepower levelwill automatically be set
at !0 and the oven will start immediately.
Thepower levelcan be changed as time is
counting down. Pressthe POWERbutton,
turn the dial and press to enter.
,_,_ Tosago "
@
Use TimeDefrost to defrost for aselected
length of time.
H Pressthe DEFROSTbutton three times.
Turnthe dialto selectthe time you want.
Pressthe dial to enter.
M Pressthe START/PAUSEbutton to start
defrosting.
Turnthe food over if the oven signals TURN
FOODOVER.
You maychange the defrost time at any time
during defrosting by turning the dial.
Power levelis automatically set at 3, but can be
changed. Youcan defrost small items quickly by
raising the power levelafter entering the time.
Power level 7 cuts the total defrosting time in
about half;power level 10 cuts the total time
to approximately 1/5. However,food will need
more frequent attention than usual.
A dullthumping noisemay be heard during
defrosting. Thisis normal when oven is not
operating at High power.
Defrosting Tips
, Foodsfrozen in paperor plastic can be
defrosted in the package.Closedpackages
should beslit,piercedor vented AFTER
food has partially defrosted. Plasticstorage
containers shouldbe partially uncovered.
Family-size,prepackaged frozen dinners can
be defrosted and microwaved. Ifthe food is
in a foil container, transfer it to a microwave-
safe dish.
, Foodsthat spoil easilyshould not be allowed
to sit out for more than one hour after
defrosting. Roomtemperature promotes the
growth of harmful bacteria.
Formore evendefrosting of larger foods,
such as roasts,use Auto Defrost Be sure
large meats are completely defrosted before
cooking.
, When defrosted, food should be cool but
softened in all areas.If stillslightly icy,return
to the microwave very briefly, or letit stand a
few minutes.
Beverage
TheBEVERAGEfeature heats beveragesfrom 6
to 12 ounces.
Pressonce for 6-7 oz.
Presstwice for 8-9 oz.
Pressthree times for 10-12 oz.
Drinksheatedwith the Beverage feature may be
veryhot. Removethe containerwith care.
11
Page 12
About the time and auto microwave features.
_ ToSEL_c_
'°RESS TO E _4"Ir_?"
©
Fast Defrost
Fast Defrost automatically sets the defrosting
times and power levelsto give evendefrosting
resultsfor meats,poultry and fish weighing up
to one pound.
Removemeat from package and place on
microwave-safe dish.
Pressthe DEFROSTbutton once.
Turn the dial to the food weight, usingthe
ConversionGuideat right. Forexample, dial
.5for .5pounds (8 oz.)Pressthe dial to
enter.
Press the START/PAUSE button to start
defrosting.
[] Turn the food over ifthe oven signals TURN
FOODOVER.
Removedefrosted meat or shield warm
areaswith small piecesof foil.
After defrosting, most meats needto stand 5
minutes to complete defrosting.
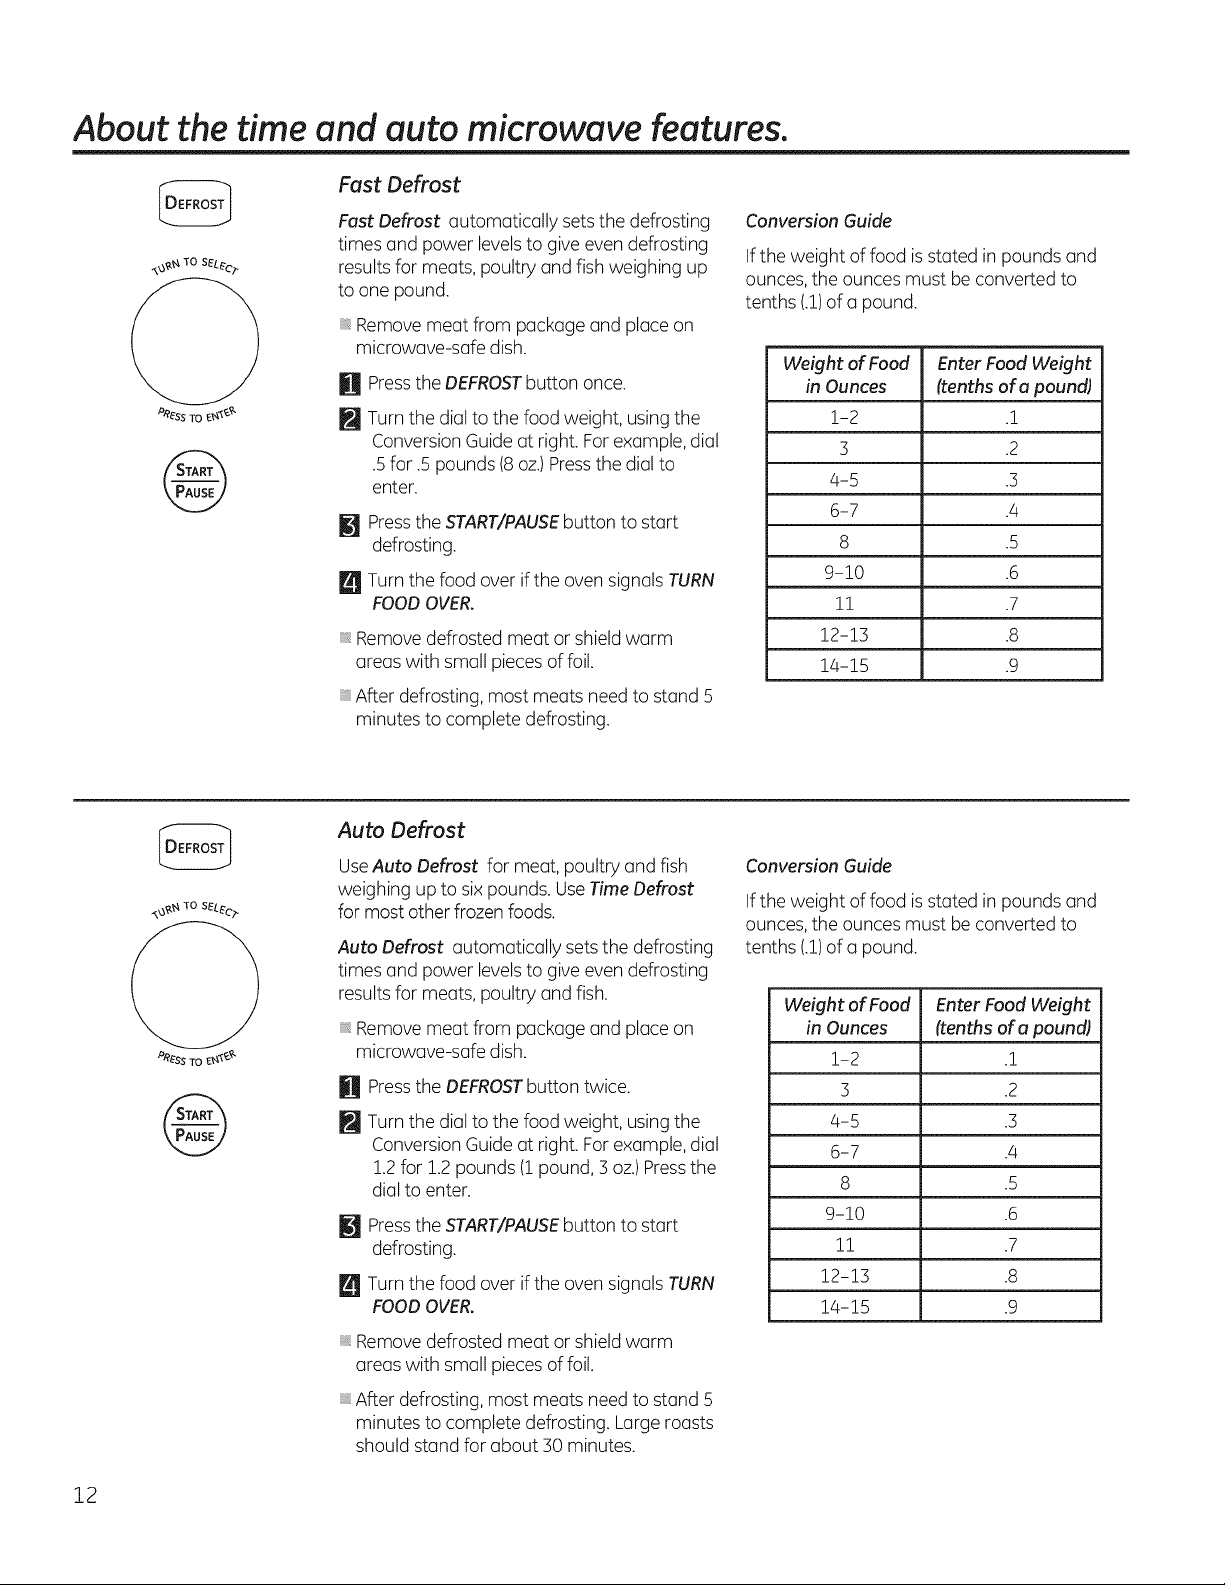
Conversion Guide
Ifthe weight of food isstated in pounds and
ounces,the ouncesmust be converted to
tenths (.1)of a pound.
Weight of Food Enter Food Weight
in Ounces (tenths of a pound)
1-2 .!
3 .2
415 .3
6-7 .4
8 .5
9-10 .6
11 .7
12-1:3 .8
14-15 .9
,,£,3&_ TO SEL_c_
@
PRESS TO E_'_r_?"
@
Auto Defrost
UseAuto Defrost for meat, poultry and fish
weighing up to six pounds. UseTimeDefrost
for most other frozenfoods.
Auto Defrost automatically setsthe defrosting
times and power levelsto give evendefrosting
resultsfor meats,poultry and fish.
Removemeat from package and place on
microwave-safe dish.
Pressthe DEFROSTbutton twice.
Turn the dial to the food weight, usingthe
ConversionGuideat right. Forexample, dial
1.2for 1.2pounds (1pound, 3 oz.)Pressthe
dial to enter.
M Pressthe START/PAUSEbutton to start
defrosting.
[] Turn the food over ifthe oven signals TURN
FOODOVER.
Removedefrosted meat or shield warm
areaswith small piecesof foil,
, After defrosting, most meats needto stand 5
minutes to complete defrosting. Large roasts
should stand for about 30 minutes.
Conversion Guide
Ifthe weight of food isstated in pounds and
ounces,the ouncesmust be converted to
tenths (.1)of a pound.
Weight of Food Enter Food Weight
in Ounces (tenths of a pound)
1-2 .!
3 .2
4-5 .3
6-7 .4
8 .5
9-10 .6
11 .7
12-1:3 .8
14-15 .9
12
Page 13
About changing the power level. GEAppliances.com
@
Thepower levelmay be entered or changed
immediately after entering the time for Time
Cook,Time Defrost or ExpressCook. The
power level may also be changed duringtime
countdown.
First,follow directions for Time Cook, Time
Defrost or Express Cook.
Pressthe POWER button.
!!t
Turnthe dialclockwise to increase and
counterclockwise to decrease the power
level.Pressthe dial to enter.
L_ Pressthe START/PAUSEbutton to start
cooking.
Variable power levelsadd flexibilityto
microwave cooking.Thepower levelson the
microwave oven can be compared to the
surface units on a range. Eachpower levelgives
you microwave energy a certain percent of the
time. Powerlevel 7 ismicrowave energy 70%
of the time. Power level3 is energy30% of the
time. Host cooking will be done on High (power
level 10)which givesyou 100% power. Power
level 10 willcook faster but food may need
more frequent stirring, rotating or turning over.
A lower setting will cook more evenly and need
lessstirring or rotating of the food. Somefoods
may have better flavor, texture or appearance
if one of the lower settings is used.Usea lower
power levelwhen cooking foods that have
a tendency to boil over,such as scalloped
potatoes.
Restperiods(when the microwave energy
cycles off)give time for the food to "equalize"
or transfer heat to the inside of the food. An
example of this isshown with power level 3-
the defrost cycle.If microwave energy did not
cycle off,the outside of the food would cook
before the insidewas defrosted.
Hereare some examplesof usesfor various
power levels.
High 10: Fish,bacon, vegetables, heating
liquids.
Ned-High 7".Gentle cooking of meat and
poultry; baking casseroles and reheating.
Nedium 5: Slowcooking and tenderizing for
stews and lesstender cuts of meat.
Low 2 or 3: Defrosting; simmering; delicate
sauces.
Warm 1: Keepingfood warm; softening butter.
Microwave terms.
Definition
Arcing Arcing isthe microwave term for sparksin the oven.Arcing iscaused by:
the metal shelf being installed incorrectly and touching the microwave walls.
metal or foiltouching the side of the oven.
foil that isnot molded to food (upturned edgesact likeantennas).
metal such astwist-ties, poultry pins,gold-rimmed dishes.
recycled paper towels containing small metal pieces.
the turntable ring support being installed incorrectly.
Covering Covershold in moisture, allow for more even heating and reduce cooking time. Venting plastic wrap or
covering with wax paperallows excesssteam to escape.
Shielding In a regular oven,you shieldchicken breasts or baked foods to prevent over-browning. When microwaving,
use small strips of foilto shieldthin parts, such asthe tips of wings and legs on poultry, which would
cook before larger parts.
standing Time When you cook with regular ovens,foods such as roastsor cakesare allowed to stand to finishcooking or
set.Standing time is especially important in microwave cooking. Notethat a microwaved cake is not
placed on a cooling rack.
Venting After covering a dish with plastic wrap, you vent the plastic wrap byturning back one corner so excess
steam can escape.
13
Page 14
About the sensor microwave features.
Humidity Sensor
What happens when using the Sensor Features:
TheSensorFeatures detect the increasing humidity releasedduring cooking.The oven
automatically adjusts the cooking time to various types and amounts of food.
Donot usethe SensorFeatures twice in successionon the same food portion-it may result in
severelyovercooked or burnt food. Iffood isundercooked after the countdown, use Time Cook for
additional cooking time.
NOTE:Sensorfeatureswill not operatewhen the oven ishot. Ifoneof the sensorcookingbuttons is
pressed when the temperature insidethe oven isgreater than 200°F,"OVENTOOHOTFORSENSOR
COOKING---USINGALTERNATEMETHOD"will bedisplayed.Theoven will automatically change
to cook by time (follow the directionsin the display)oronce the ovenis cool enough,the sensor
features will function normally.
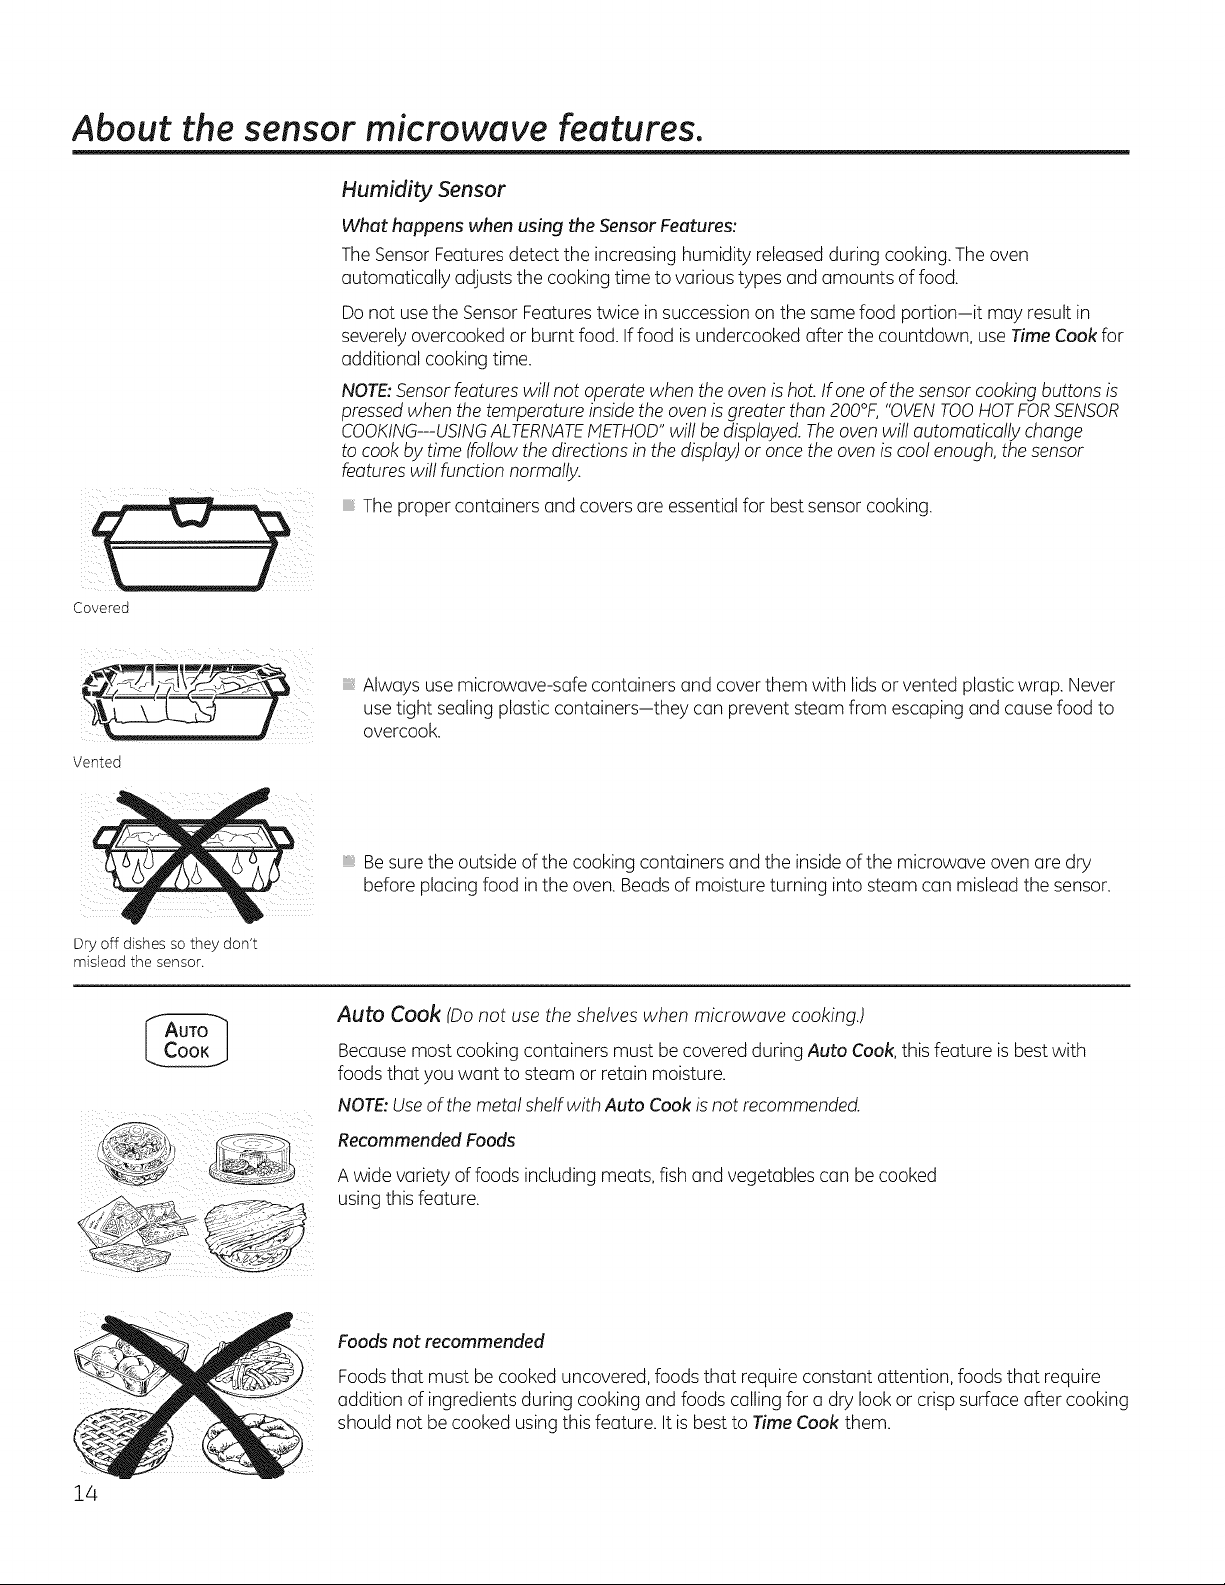
Theproper containers andcovers are essentialfor best sensor cooking.
Covered
Always usemicrowave-safe containers and cover them with lids orvented plasticwrap. Never
use tight sealing plastic containers-they can prevent steam from escaping and cause food to
overcook.
Vented
Dry off dishes so they don't
mislead the sensor.
Besurethe outside of the cooking containers and the insideof the microwave ovenare dry
before placing food inthe oven.Beads of moisture turning into steam can mislead the sensor.
Auto Cook (Donot use the shelves when microwave cooking.)
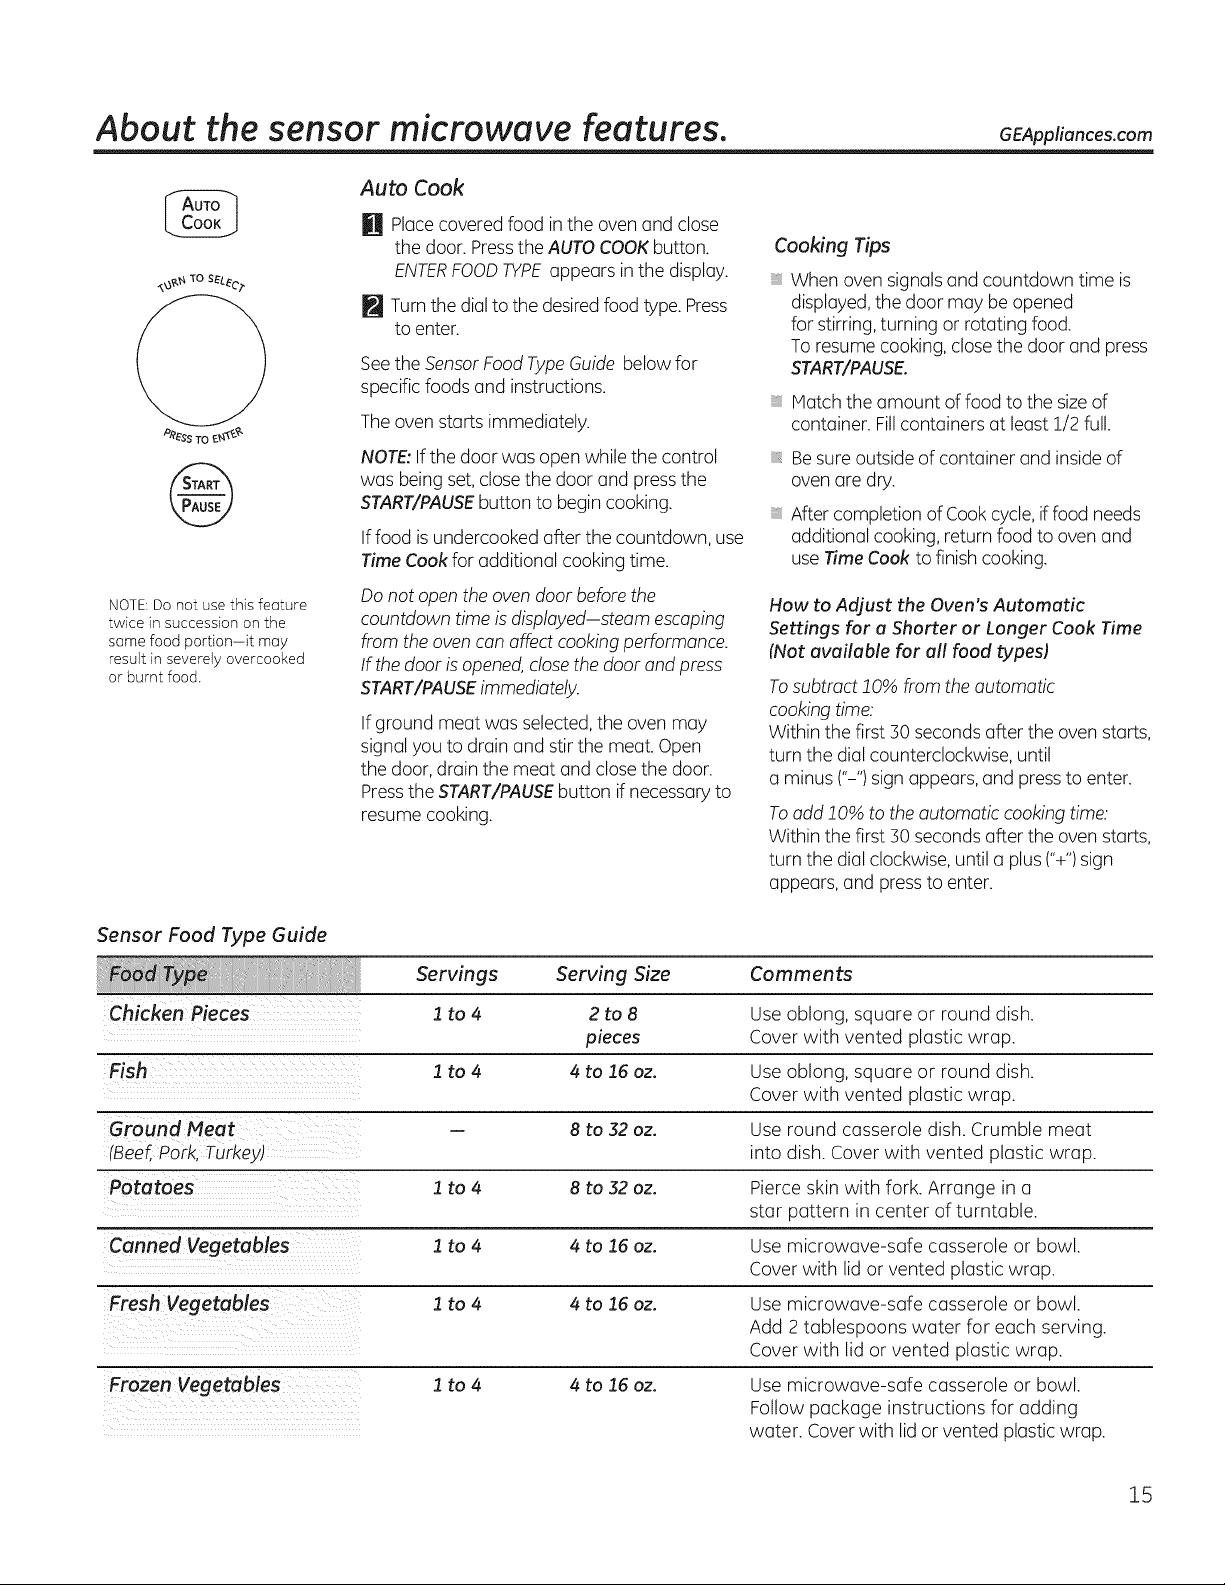
Becausemost cooking containers must be coveredduring Auto Cook,this feature isbest with
foods that you want to steam or retain moisture.
NOTE:Useof the metal shelf with Auto Cook isnot recommended.
Recommended Foods
A wide variety of foods including meats, fishand vegetables can be cooked
usingthis feature.
Foods not recommended
Foodsthat must be cooked uncovered, foodsthat require constant attention, foods that require
addition of ingredients during cooking and foods calling for a dry lookor crisp surface after cooking
should not be cooked using this feature. Itis bestto Time Cook them.
14
Page 15
About the sensor microwave features. GEAppliances.com
Auto Cook
H Placecovered food inthe ovenand close
P?_ss TO_-_I_£"
the door. Pressthe AUTOCOOKbutton.
ENTERFOODTYPEappears inthe display.
Turnthe dial to the desiredfood type. Press
to enter.
Seethe SensorFood TypeGuide below for
specific foods and instructions.
Theoven starts immediately.
NOTE:Ifthe doorwas open while the control
was being set,close the door and press the
START/PAUSEbutton to begin cooking.
If food isundercooked after the countdown, use
Time Cookfor additional cooking time.
Cooking Tips
When oven signals and countdown time is
displayed,the door may be opened
for stirring,turning or rotating food.
Toresume cooking, close the door and press
START/PAUSE
, Hatchthe amount of food to the sizeof
container. Fillcontainers atleast 1/2 full.
, Besureoutside of container and insideof
oven are dry.
, After completion of Cookcycle,iffood needs
additional cooking, return food to oven and
use TimeCook to finish cooking.
NOTE:Do not use this feature
twice in succession on the
some food portion-it may
result in severely overcooked
or burnt food.
Do not open the oven door before the
countdown time is displayed-steam escaping
from the oven can affect cooking performance.
Ifthe door is opened, close the door and press
START/PAUSEimmediately.
If ground meat was selected,the oven may
signalyou to drain and stir the meat. Open
the door, drain the meat and close the door.
Pressthe START/PAUSEbutton ifnecessary to
resume cooking.
Sensor Food Type Guide
Servings Serving Size
Chicken Pieces 1 to 4 2 to 8
pieces
Fish 1 to 4 4 to 15 oz.
Ground Meat - 8 to 32 oz.
(Beef,Pork,Turkey)
Potatoes 1 to 4 8 to 32 oz.
Canned Veg etables 1to 4 4 to 16 oz.
Fresh Vegetables :Lto 4 4 to 16 oz.
Frozen Vegetables 1 to 4 4 to 16 oz.
How to Adjust the Oven's Automatic
Settings for a Shorter or Longer Cook Time
(Not available for all food types)
To subtract !0% from the automatic
cooking time:
Within the first 30 seconds after the oven starts,
turn the dial counterclockwise, until
a minus ("-")sign appears, and press to enter.
To add !0% to the automatic cooking time:
Within the first 30 seconds after the oven starts,
turn the dialclockwise, until a plus ("+")sign
appears, and pressto enter.
Comments
Use oblong, square or round dish.
Cover with vented plastic wrap.
Use oblong, square or round dish.
Cover with vented plastic wrap.
Use round casserole dish. Crumble meat
into dish. Cover with vented plastic wrap.
Pierce skin with fork. Arrange in a
star pattern in center of turntable.
Use microwave-safe casserole or bowl.
Cover with lid or vented plastic wrap.
Use microwave-safe casserole or bowl.
Add 2 tablespoons water for each serving.
Cover with lid or vented plastic wrap.
Use microwave-safe casserole or bowl.
Follow package instructions for adding
water. Cover with lid or vented plastic wrap.
15
Page 16
About the sensor microwave features.
Popcorn
TousethePopcornfeature:
OPCORN_
Use only with prepackaged
microwave popcorn weighing
1.5to 3.5 ounces.
NOTE: Do not use this
feature twice in succession
on the same food portion--
it may result in severely
overcooked or burnt food.
H Followpackageinstructions,usingTimeCookif
thepackageislessthan1.5ouncesorlarger
than3.5ounces.Placethepackageofpopcorn
inthecenterofthe turntable.
[] PressthePOPCORNbutton.Theovenstarts
immediately.
tfyouopenthedoorwhilePOPCORNSENSOR
isdisplayed,onerrormessagewillappear.Closethe
door,pressCLEAR/OFFandbeginagain.
tffoodisundercookedafterthecountdown,useTime
Cookforadditionalcookingtime.
HowtoAdjusttheAutomaticPopcornSettingto
ProvideaShorterorLongerCookTime
tfyoufindthat thebrandof popcornyouuse
underpopsoroverpopsconsistently,youcanaddor
subtract20-30secondsto theautomaticpopping
time.
Tosubtracttime:
Withinthefirst30secondsaftertheovenstarts,turn
thedialcounterclockwise,untilaminus
('-")signappears,for 20secondslesscookingtime.
Presstoenter.Turnagain,untiltwominus("--') signs
appear,to reducecookingtimeanother10 seconds
foratotal of30seconds
lesstime.Presstoenter.
Toaddtime:
Withinthefirst30secondsaftertheovenstarts,turn
thedialclockwise,untilaplus('+")signappears,for
anextra20secondscookingtime.Presstoenter.
Turnagain,untiltwo plus('++')signsappear,to
addanother10secondsfora totalof 30seconds
additionaltime.Pressto enter.
REHEAT_
NOTE: Do not use this
feature twice in succession
on the same food portion--
it may result in severely
overcooked or burnt food.
Reheat
TheReheatfeaturereheatsservingsofpreviously
cookedfoodsoraplateof leftovers.
[] Placethecupofliquidor covered
foodintheoven.PressREHEATonce,twice,
threetimesorfourtimes.Theovenstarts
immediately.
Pressoncefora plateofleftovers.
Presstwicefor apasta.
Pressthreetimesfor 1/2to 1fullcup.
Pressfourtimesfor1to 2fullcups.
[] Theovensignalswhensteamis
sensedandthetime remainingbegins
countingdown.
Donotopentheovendooruntiltime
iscountingdown.if thedoorisopened,
closeitandpressSTART/PAUSEimmediately.
Afterremovingfoodfromtheoven,stir,ifpossible,
toevenoutthetemperature.Reheatedfoodsmay
havewidevariationsintemperature.Someareasof
foodmaybeextremelyhot.
tffoodisnot hotenoughafterthecountdownuse
TimeCookforadditionalreheatingtime.
SomeFoodsNotRecommendedfor Use
With Reheat
ttisbestto useTimeCookfor thesefoods:
Breadproducts.
Foodsthat mustbereheateduncovered.
Foodsthat needto bestirredorrotated.
Foodscallingforadrylookor crispsurfaceoffer
reheating.
HowtoAdjusttheOven'sAutomatic
SettingsforaShorterorLongerTime
Tosubtract10%fromtheautomatic
cookingtime:
Withinthefirst30secondsaftertheovenstarts,turn
thedialcounterclockwise,untilaminus('-")sign
appears,andpressto enter.
Toadd10%totheautomaticcookingtime:
Withinthefirst30secondsaftertheovenstarts,turn
thedialclockwise,untilaplus('+")signappears,and
presstoenter.
16
Page 17
About the other features. GEAppliances.com
Cooking Complete Reminder
Toremind you that you have food in the oven,
the oven will displayYOURFOODISREADYand
beep once aminute untilyou either open the
oven door or pressthe CLEAR/OFFbutton.
Resume
._,6_t_To SELEc_
@
P_ss TO_ lgg
Thecooking program just used stays in
memory for 5 minutes.After that you will need
to begin the program again. Toturn this option
off,seethe MoreTimeMessagesection.
H Ifyour food needs to cook a bit longer,you
can restart the oven by pressing the
START/PAUSEbutton or selector dial.
Clock
Press to enter the time of day or to check
the time of day while cooking.
H Press the CLOCK button.
Turn the dial to set hours. Press the dial to
enter.
_J Turn the dial to set minutes. Press the dial to
enter.
Stort/Pause
In addition to starting many functions, START/
PAUSEallowsyou to stop cooking without
opening the door or clearing the display.
RESUMECOOKINGwill bedisplayedand the
oven will restart immediately at 10% of the
original time.
[] Turn the dial to selectAMor PM.
Pressthe dial to enter.
Clear/Off
Press the CLEAR/OFFbutton to stop and cancel
cooking at any time.
Control Lock-Out
You may lockthe control panel to prevent the
oven from being accidentally started during
cleaning or being usedby children.
Tolock or unlock the controls, pressand
hold the CLEAR/OFFbutton for about three
seconds.When the control panel islocked,
CONTROLLOCKEDwill bedisplayedbriefly
anytime a button or dial is pressed.(Thecontrol
lock-out does not apply to the VENTFANand
SURFACELIGHT.)
17
Page 18
About the other features.
Auto Nite Light
4_9,t_ TO SGL#c2"
TheAuto Nite Light can be set to come on and
go off at desiredtimes.
[] Pressthe OPTIONSbutton and turn the dial
to selectAUTONITELIGHT.Pressthe dial
to enter.
Turnthe dialto selectSETTIMES.Pressthe
dial to enter.
Enterthe time of day for the light to come
N
on byturning the dial to select the hour,
minutes and AMor PH.Pressthe dial to
enter after each selection.
Beeper Volume
Thebeeper sound level can beadjusted.
H Pressthe OPTIONSbutton and turn the dial
to select BEEPERVOLUME.Pressthe dialto
enter.
Turnthe dialto select mute to loud.
Pressthe dial to enter.
NOTE:TheMUTEindicator will belit whenever
the beepervolume is setto mute.
Enterthe time of day for the lightto
go off byturning the dial to select the hour,
minutes and AMor PH.Pressthe dial to
enter after each selection.
NOTE:TheNITEindicator will be lit whenever the
nite light isset to operate.
Toreview the nite light settings,turn
the dial to selectREVIEWSETTINGSafter
selectingthe Auto Nite Light option. Pressthe
dial to enter.
Toclear the nite light settings,turn the
dial to selectCLEARSETTINGSafter selecting
the Auto Nite Light option. Pressthe dial
to enter.
Display Language
Thelanguage for the scrolling display can be
set to either Englishor Spanish.
[] Pressthe OPTIONSbutton and turn the dial
to select DISPLAYLANGUAGE.Pressthe
dial to enter.
p_ Turnthe dial to select ENGLISHorSPANISH.
Pressthe dial to enter.
18
4_£.._ TO SGL#c2 "
Display ON/OFF
Useto turn your clock display on or off.
[] Pressthe OPTIONSbutton and turn the dial
to select DISPLAYON/OFF. Pressthe dial
to enter.
N Turn the dial to selectON or OFF.Pressthe
dial to enter.
Display Speed
Thescroll speed of the display can bechanged.
_]_ Pressthe OPTlONSbutton and turn the dial
to select DISPLAYSPEED.Pressthe dial to
enter.
Turn the dial to select slowestto fastest.
Pressthe dial to enter.
Page 19
GEAppliunces.com
,_3g,,_ YO SEL6c_
C)
POESSTOE_"¢'f"
<,_?.t-_ TO SEL_ecI "
@
Measures
Measurements can beset to display in Default
(English)or metric.
Pressthe OPTIONSbutton and turn the dial
to select MEASURES.Pressthe dial to enter.
Turnthe dialto select DEFAULTor METRIC
and pressto enter.
Surface Light
PressSURFACELIGHTonce for bright light,
twice for the night light or a third time to turn
the light off.
Timer
TheTimer operates as u minute timer and can
be used at any time, evenwhen the oven is
operating.
H Pressthe TIMERbutton.
Turn the dial to select the minutes. Pressthe
dial to enter.
More Time Message
After cooking iscomplete, a message can be
displayed giving you the option to cook the food
longer at the same settings. Seethe Resume
section.
H Pressthe OPTIONSbutton and turn the dial
to select MORETIMEMESSAGE.Pressthe
dial to enter.
Turn the dial to select MESSAGE ON or OFF
and press to enter.
Tocancel, press the TIMERbutton.
When time isup, the oven will signal.
Toturn off the timer signal,pressTIMER.
NOTE:TheTIMERindicator will be lit while the
timer isoperating.
'_'_ss TO_td__"
&,3_,t_"[o SEL#c_"
VENTFAN
N Turn the dial to selectthe seconds. Pressthe
dial to enter
Pressthe dial or TIMERto start.
Turntable On/Off
Forbest cooking results,leavethe turntable on.
It can be turned off for large dishes.
Pressthe TURNTABLEON/OFFbutton.
Turnthe dialto select ONor OFF.
Pressthe dial to enter.
Vent Fan
Thevent fun removes steam and other vapors
from surface cooking.
PressVENTFANonce for high fun speed,
twice for medium fun speed,three times for low
fan speed or a fourth time to turn the fun off.
NOTE:TheFANindicatorwill belit while
the fan isoperating.
Sometimes the turntable can become too hot
to touch.
Becareful touching the turntable during and
after cooking.
Automatic Fan
An automatic fan feature protects the
microwave from too much heat risingfrom the
cooktop below it. Itautomatically turns on if it
sensestoo much heat.
If you have turned the fan on you mayfind that
you cannot turn itoff. The fan will automatically
turn off when the internal parts are cool. It
may stay on for 30 minutes or more after the
cooktop and microwave controls are turned off.
19
Page 20
Care and cleaning of the oven.
Helpful Hints
An occasional thorough wiping with a solution of baking soda and water keepsthe insidefresh.
Be sure the power is off before cleaning any part of this oven.
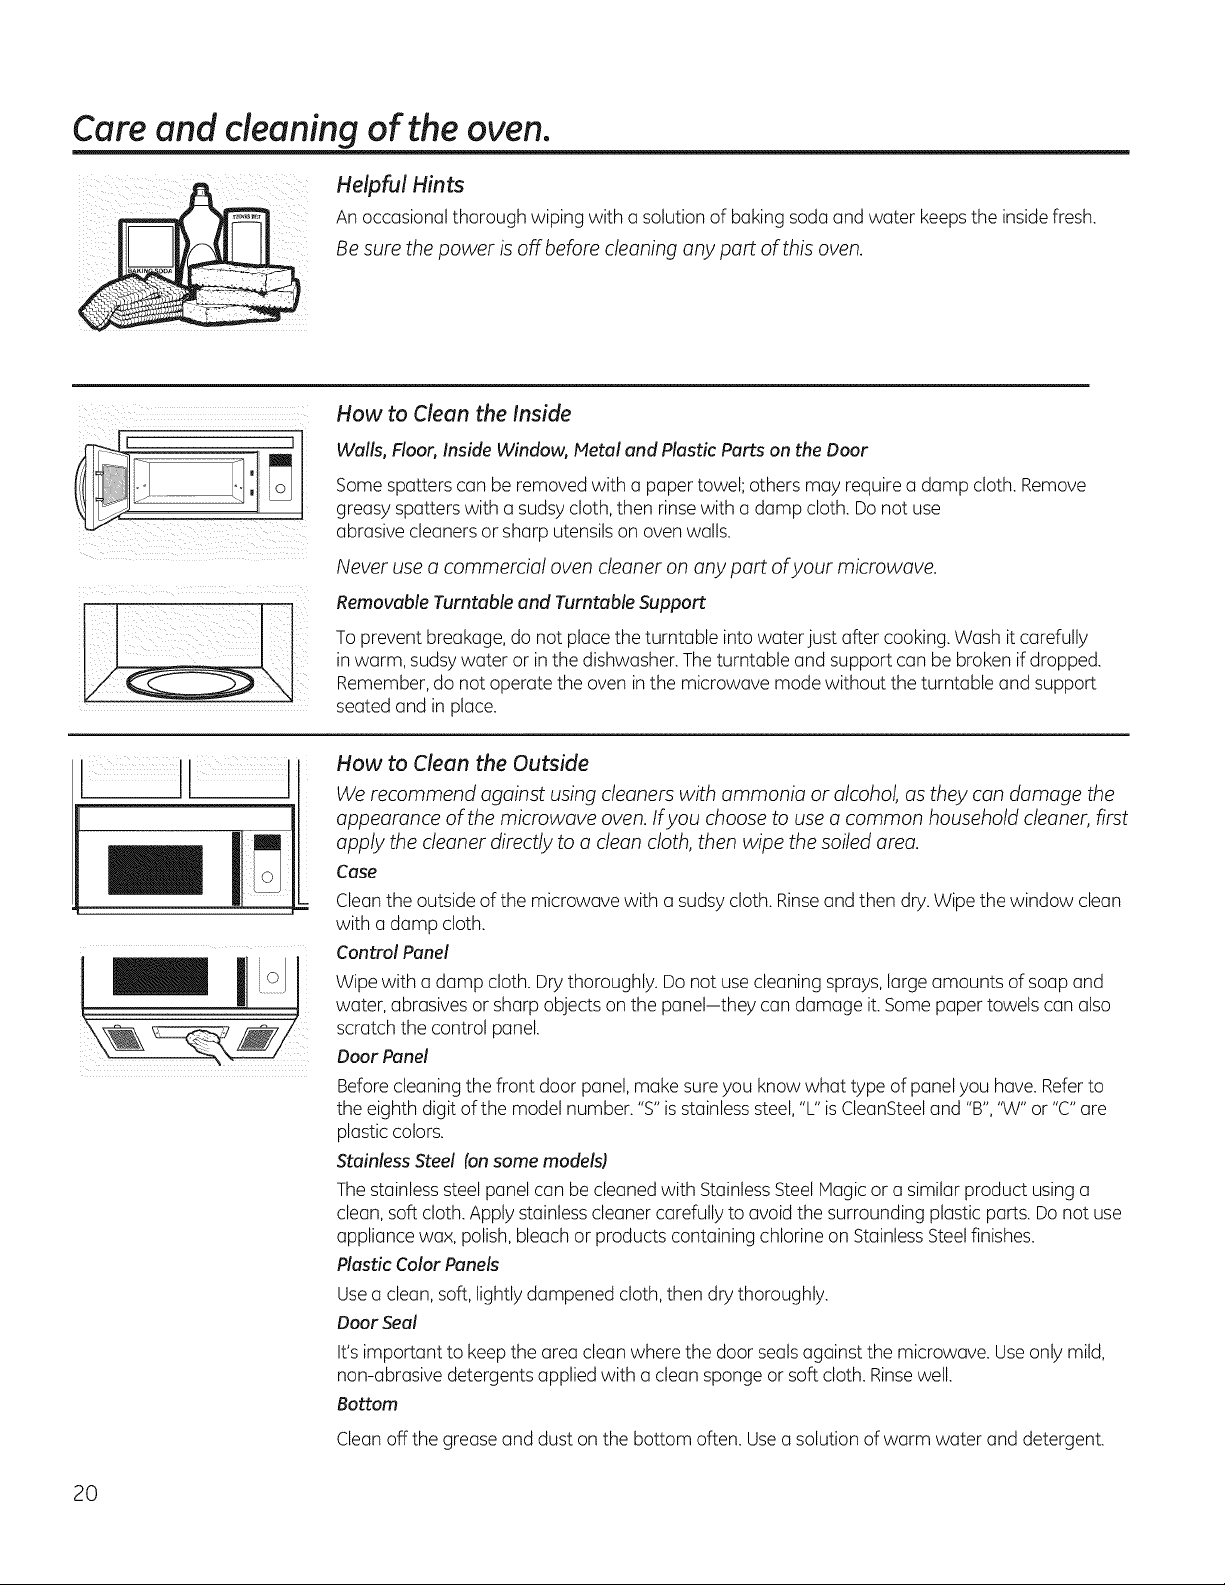
How to Clean the Inside
Walls, Floor, Inside Window, Metal and Plastic Parts on the Door
Somesputters can be removed with a paper towel; others may require a damp cloth. Remove
greasy spatters with a sudsycloth, then rinse with a damp cloth. Donot use
abrasive cleanersor sharp utensils on oven walls.
i ii i i i i iii
Never use a commercial oven cleaner on any part of your microwave.
Removable Turntable and Turntable Support
To prevent breakage, do not place the turntable into water just after cooking. Wash it carefully
in warm, sudsywater or in the dishwasher. Theturntable and support can be broken ifdropped.
Remember,do not operate the oven inthe microwave mode without the turntable and support
seated and inplace.
How to Clean the Outside
We recommend against using cleaners with ammonia or alcohol, as they can damage the
appearance of the microwave oven. Ifyou choose to use a common household cleaner, first
apply the cleaner directly to a cleon cloth, then wipe the soiled area.
Case
Cleanthe outside of the microwave with a sudsy cloth. Rinseand then dry.Wipe the window clean
with a damp cloth.
Control Panel
Wipewith a damp cloth. Drythoroughly. Do not usecleaning sprays,largeamounts of soap and
water, abrasives or sharp objects on the panel-they can damage it. Somepaper towels can also
scratch the control panel.
Door Panel
Beforecleaning the front door panel, make sureyou know what typeof panel you have. Referto
the eighth digit of the model number. "S"isstainless steel,"L" isCleanSteeland "B","W" or "C"are
plastic colors.
Stainless Steel (onsome models)
Thestainlesssteel panel can be cleaned with StainlessSteelMagic or a similar product usinga
clean, soft cloth.Apply stainlesscleaner carefully to avoid the surrounding plastic parts. Do not use
appliance wax, polish, bleach or products containing chlorine on StainlessSteelfinishes.
Plastic Color Panels
Usea clean, soft, lightlydampened cloth, then dry thoroughly.
Door Seal
It'simportant to keepthe area clean where the door seals against the microwave. Useonly mild,
non-abrasive detergents applied with a clean sponge or soft cloth. Rinsewell.
Bottom
20
Cleanoff the grease and dust on the bottom often. Usea solution of warm water and detergent.
Page 21

Replacing the light bulb. GEAppliances.com
Cooktop Light/Nite Light
Replace with a 220 volt, 40 watt (max.)
halogen bulb. Order WBO8XlO051 from your
GEsupplier.
Be surethe bulb iscool before removing.
Breakthe adhesive sealby gently
unscrewing the bulb.
Remove screw.
To replace the cooktop light/nite light,first
disconnect the power at the main fuse or
circuit breaker panel,or pull the plug.
N Removethe screw from the side of the light
compartment cover and lower the cover
until it stops.
About the exhaust feature.
Charcoal filter (on some models).
9
Vent Fan
The vent fan has two metal reusable vent filters.
Models that recirculate air back into the room
also usea charcoal filter.
o!
Reusable vent filters
(on all models).
Screw inthe new bulb,then raisethe light
cover and replacethe screw.Connect
electrical power to the oven.
Reusable Vent Filters
Themetal filterstrap greasereleased byfoods
on the cooktop. Theyalso prevent flames from
foods on the cooktop from damaging the inside
of the oven.
Removing and Cleaning the Filters
Toremove, slidethem to the rear using the
tabs. Pulldown and out.
To clean the vent filters,soak them and then
swish around in hot water and detergent. Don't
use ammonia or ammonia products because
they will darken the metal. Lightbrushing can
be usedto removeembedded dirt.
Forthis reason,the filters must always be in
place when the hood is used.Thevent filters
should be cleaned once a month, or as needed.
Rinse,shakeand letdry before replacing.
Toreplace, slidethe filters into the frame slots
on the back of each opening. Pressup and to
the front to lockinto place.
21
Page 22

About the exhaust feature.
Charcoal Filter
Remove 2 grille screws to remove
the grille.
Thecharcoal filter cannot be cleaned. It must
be replaced. OrderPart No. WBO2X10943from
your GEsupplier.
If the model isnot vented to the outside,the
air will be recirculated through u disposable
charcoal filter that helpsremove smoke and
odors.
To Remove the Charcoal Filter
Toremove the charcoal filter, first disconnect
power at the main fuse or circuit breaker, or pull
the plug. Removethe top grille by removing the
two screws that hold it in place.
You may need to open the cabinet doors to
remove the screws.
To Install the Charcoal Filter
Thecharcoal filter should be replaced when it is
noticeably dirty or discolored (usuallyafter 6 to
!2 months, depending on usage).See"Optional
Kits,"page 8,for more information.
Lift the filter at the bottom until it comes free of
the tabs. Slidethe filter down and out.
Toinstall a new charcoal filter, remove plastic
and other outer wrapping from the new filter.
Insertthe top of the filter up and into the
grooves on the inside of the top opening. Push
the bottom of the filter in until it restsin place
behind the tabs.
JIIIIIII IIIIIIIl!l!Jll
i__iii
22
Page 23

Before you call for service... GEAppliances.com
Troubleshooting Tips
Save time and money! Review the charts on the following
pages first and you may not need to call for service.
Possible Causes What To Do
Oven will not start A fuse inyour home may be • Replacefuseor reset circuit breaker.
blown or the circuit breaker
tripped.
Power surge. • Unplug the microwave oven, then plug it back in.
Plug not fully inserted into wall , Hake sure the 3-prong plug on the oven isfully inserted
outlet, into wall outlet.
Door not securely closed. , Open the door and close securely.
Control panel lighted, Door not securely closed. • Open the door and close securely.
yet oven will not start
START/PAUSEbutton not pressed * PressSTART/PAUSE
after entering cooking selection.
Another selection entered * PressCLEAR/OFF.
already in oven and CLEAR/OFF
button not pressed to cancel it.
Cooking time not entered after • Hake sure you have entered cooking time after pressing
pressing TIMECOOK. TIMECOOK.
CLEAR/OFFwas pressed • Resetcooking program and pressSTART/PAUSE.
accidentally.
Foodweight not entered after • Hake sureyou have entered food weight after selecting
selecting AUTO DEFROSTor AUTODEFROSTor FASTDEFROST.
FASTDEFROST.
Foodtype not entered after , Hake sure you have entered a food type.
pressing AUTOCOOK.
CONTROLLOCKED The control has been locked. , Pressand hold CLEAR/OFFfor about 3 seconds
appears on display to unlock the control.
Floor of the oven is warm
even when the oven has
not been used
The cooktop light islocated , This isnormal.
below the oven floor. When
light is on, the heat it produces
may make the oven floor get worm.
You hear an unusual
low-tone beep
Vent fan comes on
automatically
SENSORERRORappears
on the display
You hove tried to change
the power level when it is
not o Ilowed.
The vent fan automatically turns
on to protect the microwave if it
senses too much heat rising from
the cooktop below.
When using a Sensor feature,
the door was opened before
steam could be detected.
Steam was not detectedino
=Hany of the oven's features are preset and
cannot be changed.
, This isnormal.
, Do not open door until steam is sensedand time
isshown counting down on the display.
, UseTimeCook to heatfor more time.
maximum amount of time.
23
Page 24

Before you call for service...
Things That Are Normal With Your Microwave Oven
, Moisture on the oven door and walls while cooking. Wipe
the moisture off with a paper towel or soft cloth.
, Moisture between the oven door panels when cooking
certain foods. Moisture should dissipate shortly after
cooking isfinished.
, Steam or vapor escaping from around the door.
, Light reflection around door or outer case.
, Dimming oven light and change in the blower sound at
power levels other than high.
, Dull thumping sound while oven is operating.
FEDERAL COMMUNICATIONS COMHISSION
RADIO FREQUENCY INTERFERENCE STATEMENT (U.S.A. ONLY)
This equipment generates and uses ISIVlfrequency energy
and it not installed and used properly, that is in strict
accordance with the manufacturer's instructions, may
cause interference to radio and television reception. It has
been type tested and found to comply with limits for an
ISiVlEquipment pursuant to part 18 of FCCRules,which are
designed to provide reasonable protection against such
interference in a residential installation. However, there is
no guarantee that interference will not occur in a particular
installation. If this equipment does cause interference to
radio or television reception, which can be determined by
tuning the equipment off and on, the user is encouraged
to try to correct the interference by one or more of the
following:
The vent fan operating while the microwave is operating.
The vent fan will not go off nor can it be turned off until
the microwave is off.
TV-radio interference might be noticed while using the
microwave. Similar
to the interference caused by other small appliances, it
does not indicate a problem with the microwave. Plug
the microwave into a different electrical circuit, move the
radio or TV as far away from the microwave as possible or
check the position and signal of the TV/radio antenna.
, Reorient the receiving antenna of radio or television.
, Relocate the Microwave oven with respect to the receiver.
, Move the microwave oven away from the receiver.
, Plug the microwave oven into a different outlet so that
microwave oven and receiver are on different branch
circuits.
The manufacturer is not responsible for any radio or TV
interference cause by unauthorized modification to this
microwave oven. It is the responsibility of the user to
correct such interference.
24
Page 25

Notes. GEAppliances.com
25
Page 26

Notes.
26
Page 27

GE Microwave Oven Warranty.
All warranty service provided by our Factory Service Centers,
or an authorized Customer Care®technician. To schedule service,
on-line, 24 hours a day, visit us at GEAppliances.com, or coil 800.
GE.CARES(800.432.2737). Please have serial and model numbers
available when calling for service.
GE Will Replace:
One Year
From the dote ofthe
original purchase
Five Years
From the date ofthe
original purchase
, Service trips to your home to teach you how to use
the product.
, Improper installation, delivery or maintenance.
, Product not accessible to provide required service.
, Failure of the product or damage to the product if it is
abused, misused (for example, cavity arcing from wire
rack or metal/foil), or used for other than the intended
purpose or used commercially.
Anypart of the microwave oven which fails due to a defect in materials or workmanship.
During this limited one-year warranty, GEwill alsoprovide, free of charge, all labor and related
serviceto replacethe defective part.
Themagnetron tube, if the magnetron tube fails dueto a defect in materials or workmanship.
During this five-year limited warranty, you will be responsiblefor any labor or in-home
servicecosts.
Staple your receipt here.
Proof of the original purchase
date is needed to obtain service
under the warranty.
, Replacement of house fuses or resetting of circuit
breakers.
, Damage to the product caused by accident, fire, floods
or acts of God.
, Incidental or consequential damage caused by possible
defects with this appliance.
, Damage caused after delivery.
, Replacement of the cooktop light bulbs.
EXCLUSION OF IMPLIED WARRANTIES--Your sole and exclusive remedy is product repair as provided
in this Limited Warranty. Any implied warranties, including the implied warranties of
merchantability or fitness for a particular purpose, are limited to one year or the shortest period
allowed by law.
This warranty is extended to the original purchaser and any succeeding owner for products purchased for
home use within the USA. If the product is located in an area where service by a GEAuthorized Servicer is
not available, you may be responsible for a trip charge or you may be required to bring the product to an
Authorized GE Service Location for service. In Alaska, the warranty excludes the service calls to your home.
Some states do not allow the exclusion or limitation of incidental or consequential damages. This warranty
gives you specific legal rights, and you may also have other rights which vary from state to state. To know
what your legal rights are, consult your local or state consumer affairs office or your state's Attorney General.
Warrantor: General Electric Company. Louisville, KY 40225
27
Page 28

Consumer Support.
GEAppliances Website GEAppliances.com
Have a question or need assistancewith your appliance?Try the GEAppliancesWebsite 2/4hours aday,
any day of the year! Forgreater convenience and faster service,you can now download Owner's Manuals,
order parts,catalogs, or even schedule serviceon-line.You can also "AskOur Teamof Experts....
your questions, and so much more...
Schedule Service GEAppliances.com
Expert GErepair service is only one step away from your door. Get on-line and schedule your service at
your convenience any day of the year! Or call 800.GECARES (800.432.2737) during normal business hours.
RealLifeDesignStudio GEAppliances.com
GEsupports the Universal Designconcept-products, servicesand environments that can be used by
people of all ages,sizesand capabilities. We recognize the needto designfor a wide range of physical and
mental abilities and impairments. Fordetails of GE'sUniversalDesignapplications, including kitchen design
ideasfor peoplewith disabilities,checkout our Website today. Forthe hearing impaired, pleasecall 800.TDD.
GEAC(800.833.4322).
ExtendedWarranties
Purchase aGEextended warranty and learn about special discountsthat are available while your warranty
isstill ineffect. You can purchase it on-line anytime, or call 800.626.2224 during normal businesshours.
GEConsumer Home Serviceswill still bethere after your warranty expires.
Partsand Accessories
Individuals qualified to service their own appliances can have parts or accessoriessent directly to their homes
(VISA,MasterCard and Discovercards are accepted).Order on-line today, 24 hours every day or
by phone at 800.626.2002 during normal business hours.
Instructions contained in this manual cover procedures to be performed by any user. Other servicing
generally should be referred to qualified service personnel. Caution must be exercised, since improper
servicing may cause unsafe operation.
Contact Us
If you are not satisfied with the serviceyou receivefrom GE,contact us on our Website with all the details
including your phone number, or write to: General Manager, Customer Relations
GEAppliances,Appliance Park
Louisville,KY40225
GEAppliances.com
GEAppliances.com
GEAppliances.com
Register Your Appliance GEAppliances.com
Register your new appliance on-line--at your convenience! Timely product registration will allow for
enhanced communication and prompt service under the terms of your warranty, should the need arise.
You may also mail inthe pre-printed registration card included in the packing material.
Printed in Korea.
Page 29

GEAppliances.com
0
0
LLJ
LD
L..
€.J
Instrucciones de seguridad 2-7
Instrucciones de
Funcionamiento
Funciones de su homo ......... 8, 9
Opciones de cocci6n ............. 10
Funciones de tiempo
y automdtico ................. 12-14
Cambio de nivel de potencia ..... 15
Terminologia de microondas .... 16
Caracteristicas de
microondas por sensor ....... 17-21
Otras funciones .............. 22-25
SeSal de final de cocci6n ....... 22
RESUME (Continuar) ............ 22
Reloj ........................... 22
START/PAUSE(inicio/pausa) ....... 22
CLEAR/OFF
(borrar/apagado) ............... 22
Bloqueo del control ............. 23
Luz nocturna autom6tica ....... 23
Volumen de se_al de aviso ..... 23
Idioma de pantalla ............. 23
Pantalla ON/OFF
(encendida/apagada) ........... 24
Velocidad de pantalla .......... 24
Medidas ....................... 24
Mensaje "Mds tiempo". ......... 24
Luz de superficie ............... 24
Temporizador .................. 25
Activaci6n/Desactivaci6n del
dispositivo giratorio ............ 25
Ventilador extractor ............ 25
Extractor autom6tico ........... 25
Cuidado y Limpieza
Interior ........................... 26
Exterior .......................... 26
Acero inoxidable ................. 26
Reemplazo de bombillas .......... 27
Filtros del extractor ............... 28
Filtros de carb6n vegetal .......... 29
Resoluci6n de Problemas 3o, 31
Cosas normales de su homo
microondas ..................... 52
Ayuda al Cliente
Ayuda al Cliente .... cubierta trasera
Kits opcionales .................... 8
Garantia .......................... B5
CVPl1750
Anote uqui los n(lmeros de modelo
y de serie:
Modelo n_mero
N_mero de serie
Los encontrar6 en una etiqueta al abrir
la puerta.
49-40723 06-14 GE
MFL06398609
Page 30

INSTRUCCIONES IMPORTANTES DE SEGURIDAD.
LEA PRIMERO TODA LAS INSTRUCCIONES.
Cuando se usen aparatos eldctricos, siempre deben seguirse precauciones bdsicas de seguridad, incluyendo las
siguientes:
iPRECAUCION!
Parsuseguridad,la informaci6n contenidaen estemanualdebe seguirsepara minimizar el riesgodeincendio,
explosi6n,descargaeldctrica,exposici6na energia microondaso para evitar dahos a la propiedad,lesionespersonales
o pdrdida de vida.
PRECAUCIONES PARA EVITAR POSIBLE EXPOSICION
A UNA ERCESIVA ENERGIA DE MICROONDAS.
No Intente operar este horno con la puerta abierta ya
que esto podria resultar en una exposici6n a energia
microondas da_ina. Esimportante no cancelar ni
manipular de forma indebida losdispositivos de
seguridad.
No SitSe ning6n objeto entre la parte frontal del homo
y la puerta ni permita que seacumule suciedad o
residuoslimpios en lasgomas de cierre herm6tico.
Leatodas las instrucciones antes de utili-zar este
aparato. At utilizar aparatos e!_c-tricos, sedeben seguir
precaucionesb(i-sicasde seguridad, incluyendo las
si-guientes:
Leay obedezcalasprecaucionesespecificasen lasecci6n
dePRECAUCtONESPARAEVITARPOStBLEEXPOStCtONAUNA
ENERGiAEXCEStVADEHICROONDASdearriba.
Esteelectrodom@sticodebeestarconectadoatierra.Con@ctelo
s61oa unatoma decorrientecontoma detierra.Vealasecci6n
detNSTRUCCtONESDETOIA DETtERRAenlap@gina6.
iii:Estehornodemicroondasest6listadoparULparaserinstalado
sabreestufaselectricasy degasentangos.
Estehornopuedeinstalarseencimadelacocinay estadisehado
parasuusasabrecocinasencimerasnom_sanchasdeS6".
Puedeinstalarsesabreequiposparacocinardegasoel6ctricos.
iii:Nousaresteelectrodom6sticosielcabledecorrienteoel
enchufehansufridoalg0ndaho,sinofuncionacorrectamenteo
siha resultadodafiadoose hacafdo.Siel cabledecorrienteha
sidodafiado,debeserreemplazadoporelServicioReparaciones
deGeneralElectric(GEService)o unagente
dereparacionesautorizadoempleandouncabledecorrienteque
GeneralElectrictienea sudisposici6n.
iii:tnstaleocoloqueesteelectrodom6sticosiguiendos61olas
tnstruccionesdetnstalaci6nprovistas.
No Use el homo siest5 daflado. Esespecialmente
importante que la puerta del horno se cierre
correctamente y que no se dahe:
(1)la puerta (doblada),
(2)bisagras y pasadores(rotos o sueltos),
(5)sellosde la puerta y gomas de cierre herm6tico.
Elhomo no deberia ajustarse ni repararse por nadie
que no sea personal de servicioadecuadamente
calificado.
iii:Parareducirelriesgodeincendioenlaaperturadelhomo:
- Nococinedemasiadolacomida.Presteatenci6ncuidadosa
alelectrodom6sticocuandosecolocapapel,plasticouotto
materialcombustibleenelhomomientrasse cocina.
- Quitelascintasdecierreconmetaly lasasasmet61icasde
losrecipientesdepapelo pl6sticoantesdeintroducirlosen
elhomo.
- Noalmacenecosasenel homo.Nodejeproductosde papel,
utensiliosdecocinarni comidaenelhomomientrasno Io
est@usando.
- No hagarosetaso palomitasdemaizenel microondasanoser
queest6usandounaccesorioespecialparaprepararlaso que
est6empleandorosetaso palomitasdemaizqueindiquenser
v@lidasparaelusade hornosmicroondas.
- Siseincendiaraalg0nmaterialdentro,mantengalapuerta
delhomocerrada,apagueelhomoy desconecteelcablede
corrienteel6ctrica,o apaguelacorrienteenelfusibleo paneldel
diferencial.Siseabrelapuertaelfuegopodriaexpandirse.
- No utilicelascaracteristicasdeSensordosvecesconsecutivasen
la mismaporci6ndecomida.Sila comidanoseha cocinadopar
completodespu@sdelaprimeracuentaregresiva,uselafunci6n
TimeCookparatiempodecocci6nadicional.
- No useelhomoparasecarperi6dicos.
GUARDEESTASINSTRUCCIONES
2
Page 31

INSTRUCCIONES IMPORTANTES DE SEGURIDAD.
GEAppliances.com
Nouseestropajos o fregados met61icospara limpiar.
Podriancaer partes del estropajo ytocar elementos
el6ctricos que pudieran causar una descarga el6ctrica.
Noalmacene ning6n material, que no sea uno de los
accesorios que recomendamos, en este horno cuando
no est6 us6ndose.
Noalmacene este electrodom6stico al airelibre. Nouse
este producto cercadel agua-por ejemplo, en un s6tano
mojado, cerca de una alberca,cerca de un fregadero o en
lugares similares.
Mantenga elcable de corriente alejado de superficies
calientes.
Nosumerja el cablede corriente ni el enchufe en agua.
Nomonte este electrodom6stico sobre un fregadero.
Reviselasinstrucciones de limpieza de la superficie de
la puerta en la secci6n Cuidadoy limpieza del horno
microondas de este manual.
J
A iPRECAUCION!
Lasreparaciones de este electrodom6stico deberian ser
realizadas s61opor personalcualificado. P6ngase en
contacto con el centro de servicio autorizado m6s cercano
para su revisi6n,reparaci6n o ajuste.
Eluso de cualquier electrodom6stico por parte de nihos
deberia sersupervisado de cerca por un adulto.
, No almacene nada directamente encima de la superficie
del microondas cuando est6en operaci6n.
No monte este aparato arriba del fregadero.
Noalmacenematerialesqueno seannuestrosaccesorios
recomendadoseneste homocuando noseencuentreen uso.
No utilice productos de papel cuando el aparato seutiliza
en modos diferentes al microondas.
FORMACI6N DEARCO EL -CTRICO
Si ve que se forman amos eldctricos, presione el botdn CLEAR/OFF(borrar/apagado) y resuelva el
problema.
Arco eldctricoes Ioque,en laterminologia de los
microondas, describelas chispasen elhomo.
Elarco eldctfico seproduce cuando:
, Elestante met61icono est6 instalado correctamente
y toca la pared del microondas.
Hay unmetal o papel de aluminio tocando el lateral
del horno.
Elsoporte del aro giratorio no est6 instalado
correctamente
Elpapel de aluminio no est6 envolviendo bien la
comida (hay bordesdoblados hacia arriba que
act6an como antenas.)
Ha},algOnmetal, como cintas de cierre con metal,
pinchos de polio,o platos con decoraci6n de oro
dentro del microondas.
Seest6 usando papel toalla recicladoque contienen
pequehas porciones de metal en
el microondas.
GUARDE ESTASINSTRUCCIONES
Page 32

INSTRUCCIONES IMPORTANTES DE SEGURIDAD.
LEA PRIMERO TODAS LAS INSTRUCCIONES.
J
iPRECAUCION!
COMIDAS
Nohaga rosetas o palomitas de maiz en el
microondas a no ser que est6 usando un accesorio
especial para prepararlas o queest6 empleando
rosetas o palomitas de maiz que indiquen ser
vc_lidaspara el usode hornos microondas.
Nohierva huevos dentro de un homo microondas.
Segenerar(_presi6n dentro de la yema del huevo
que causar(_que explote pudiendo, posiblemente,
dahar a alguien.
Sise pone en marcha el microondas sin tenet
comida en su interior por mc_sde un minuto o dos
podr[an causarse dahos al homo y podr[a empezar
un fuego. Estohace aumentar la temperatura
alrededor del magnetr6n y puede reducir el per[odo
de vida 0tildel horno.
Deber[acortarse la "piel"externa de aquellos
alimentos que no la tengan rota como las papas,
salchichas,embutidos, tomates, manzanas, higados
de polioy dem6s menudillos de ayesy yemas de
huevos,para permitir la salida de vapor mientras se
cocinan.
AGUA SOBRECALENTADA
Liquidos,talescomo agua,card,o td,sepodrian
sobmcalentar mdsalld delpunto deebullici6n sin
parecerque estdn hirviendo.No siemprehabrd
burbujas o evidenciadeque el Ifquidoestdhirviendo
cuando seextme el envasecon elIfquido del
microondas. ESTOPODRIARESULTAREN LIQUIDOS
IVlUYCALIENTESDE REPENTECOMENZANDOA
HERVIRYA REBOSARSECUANDOELENVASEES
MOVIDO0 SI UNACUCHARAUOTROUTENSILIOSE
LEINTRODUCEALLIQUIDO.
Para reducir elriesgo de lesionespersonales:
- No sobrecaliente losliquidos.
- Mueva elIfquido tanto antes como a mediados del
tiempo de calentamiento.
- No useenvases de lados rectos con cuellos
estrechos.
Despu6sdel calentamiento, permita que el envase
permanezca en el microondas por un tiempo corto
antes de remover el envase.
Usecuidado extremo cuando inserte una cuchara u
otro utensilio en elenvase.
, Lascomidas cocinadas en liquidos (como la
pasta) puedentener cierta tendencia a hervir mas
r@pidamenteque los alimentos que contengan
menos humedad. Siestoocurre, revise lasecci6n
de Cuidado y limpieza delhomo microondas donde
encontrar6 instrucciones en cuanto a la limpieza del
interior del microondas.
, No caliente la comida del beb6 enjarras de cristal,
incluso siest@ndestapadas.Aseg0resede que
losalimentos delos niflos est6n bien cocinados.
Remueva la comida para distribuir el calor de forma
pareja.Tenga cuidado de que el niflo no se queme
al calentar laleche de f6rmula. Elcontenedor
puede parecer m@sfr[o de Ioque realmente est@la
f6rmula. Pruebesiempre laf6rmula antes de d@sela
al beb6.
, No descongele bebidas congeladas en botellas
de cuello estrecho (especialmente bebidas
carbonatadas.) Incluso con el contenedor abierto,
podrfa generarse un aumento de presi6n. Esto
puede causar que el contenedor explote, Iocual
podr[a producir daflos personales.
Losalimentos calientes y el vapor pueden causar
quemaduras. Tenga cuidado al abrir cualquier
contenedor con comida caliente,incluso bolsas
de rosetas o palomitas de maiz,bolsas o cajas de
cocinar. Para prevenir posiblesdahos personales,
mantenga el vapor alejado de susmanos y rostro.
, No cocine demasiado laspapas. Podrian
deshidratarse e incendiarse,causando daflos a su
horno.
, Cocine lacame y el polio por completo-la came
hasta que alcance una temperatura mfnima
INTERIORde 160°F,y el poliohasta una temperatura
INTERNAminima de ]_80°F.Cuandose cocinan
a estas temperaturas seevita la contracci6n de
enfermedades por intoxicaci6n.
4
GUARDEESTASINSTRUCCIONES
Page 33

GEAppliances.com
UTENSILiOS DE COCINA PARA MICROONDAS
No ponga en marcha el horno en el modo microondas sin que eldispositivo giratorio y el soporte del dispositivo
est6n encajados en su lugar. Eldispositivo giratorio debe estar suelto para que pueda girar.
AsegOresede quetodos los utensiliosdecocino que useen su homo seon optos pora microondos.Pueden usorse
Iomoyorio de los cozuelos,plotos pora cocinor, tozosde medir,tozos de flonesy botesde cristol,o los vojillos
de porcelono queno tienen decoracionesmetdlicoso bomices con brillometdlico.Algunos utensiliostienenIo
siguienteinscripci6n:"puede usarseen microondas."
Sino est6segurodeque
un platopuedausarseenel
microondas,hagaestaprueba:
Coloqueelplatoqueest@
probandoy unvasode medir
con237ml(1taza)deaguaenelC6mo probar si unenvase
homo- pongalatazade medir esseguroparausarseen
dentroo alladodelplato.Ponga unhomo de microondas
elmicroondasenmarcha,am_ximapotencia,durante
30-45segundos.Sielplato secalientanodeberiausarse
enelmicroondas.
Sielplatosemantienefrfoy s61osecalientalataza,
entoncesel platopuedeusarsedeformaseguraenel
microondas.
iii:Losalimentosoutensiliosdemetaldemasiadograndes
nodeberfanusarseen unhomode microondasyaque
aumentanelriesgodedescargael@ctricay podrfan
causarun incendio.
Aveceselsuelo,el platogiratorioo lasparedesdelhomo
puedenestardemasiadocalientesparatocarlas.Tenga
cuidadoaltocar elsuelo,el platogiratorioolasparedes
delhomodespu@sdecocinar.
Nouseproductosdepapelreciclado.Elpapeltoalla,las
servilletasy elpapeldecerarecicladospuedencontener
motasmet61icasquepodriancausarlaformaci6nde
arcosel@ctricoso incendiarse.Losproductosdepapelque
contengannil6nofilamentosdenil6ntampocodeberian
usarseyaquesepodrianincendiardeigualmodo.
Algunasbandejasde pl@stico(comoenlasquese
empaquetalacame)tienenunacintafinademetal
incrustadaenel plato.AIponerseenelmicroondas,el
metalpuedequemarelsuelodelhomo oincendiarun
papeltoalla.
Nousesuhomomicroondasparasecarperi6dicos.
Notodo filmpl_sticopuedeusarseenhornosmicroondas.
Reviseelusoadecuadodelpaquete.
Puedeusarsetoalladepapel,papelenceradoy film
pl6sticoparacubrirlosplatosy retenerla humedad,
asicomoparaprevenirsalpicaduras,cuandoseutiliza
elmicroondas.Aseg0resede proveerunaformade
ventilaci6nalfilm pl@sticoparaqueelvaporpuedasalir.
Podrfancalentarselosutensiliosporelcalortransferido
potlosalimentoscalientes.Puedenecesitarusar
manoplascecocinaparamanejarlosutensilios.
AIutilizarconelmicroondasbolsasdecocinar"que
puedanhervir",asfcomocualquierbolsade pl6stico
firmementecerrada,deber6ncortarse,perforarseo
proveercualquiertipodeventilaci6nseg0nindiqueel
paquete.Encasocontrario,elpl6sticopodrfaexplotar
mientrassecocinao despu@s,pudiendocausarda_os
fisicos.Adem6s,losrecipientesdepl6sticodeberfan
permanecer,almenos,parcialmentedestapadosya
quepuedensellarsefuertemente.Cuandococinecon
recipientesfirmementecubiertosconfilmpl6stico,retirela
cubiertaconcuidadoy mantengaelvaporalejadodesus
manosyrostro.
Usepapeldealuminios61odelaformadetalladaen
estemanual.Cuandousealuminiodentrode unhomo
microondas,mantengaelaluminio,al menos,a una
pulgadadedistanciadeloslateralesdelhomo.
Utensiliosde pl6stico-Losutensiliosdepl6sticodise_ados
parasuusoenmicroondassonmuypr6cticos,pero
debenusarseconcuidado,tnclusoaquellosutensilios
autorizadosparasu usoenmicroondaspodrfanno
sertan tolerantescomoelcristalolosmaterialesde
cer6micaencondicionedesobrecalentamientoy podrfan
ablandarseocarbonizarsealsometerlosa perfodos
cortosdesobrecalentamiento.Enexposicionesrods
largasasobrecalentamiento,lacomiday losutensilios
podrianincendiarse.
Sigaestasnormas:
H Usesolamentepl6sticosaptosparamicroondasy
0selossiguiendoestrictamentelasrecomendaciones
delfabricantedelosutensilios.
N Nointroduzcaen elmicroondasrecipientesvacios.
[] Nopermitaquelosni_osusenutensiliosdeplSstico
sincompletasupervisi6n.
GUARDEESTASINSTRUCCIONES s
Page 34

INFORNACiON IMPORTANTEDESEGURIDAD.
LEAPRIMEROTODA LASINSTRUCCIONES.
iADVERTENCIA!
INSTRUCCIONES DE TOMA DE TIERRA
ADVERTENCIA: El indebido de! enchufe de tierra puede resultur en riesgo de
descarga el_ctrica.
Esteelectrodom6stico
debe estar conectado a
tierra. Sise produjera un
cortocircuito, la toma de
tierra reduce el riesgo
Aseg0rese de que e×iste
una cone×i6n apropiada
a tierra antes del uso.
Esteelectrodom6stico est6 equipado con un cable de
corriente que dispone de un hilo para toma de tierra
con un enchufe con toma de tierra. Elenchufe debe
estar conectado a una toma de corriente que est6
debidamente instalada y con salida a tierra.
Consultecon un electricista cualificado o unt6cnico
de reparaciones si no entiende completamente las
instrucciones sobre la toma de tierra,o si tuviese
alguna duda sobre sisu aparato est6 debidamente
conectado a tierra.
de descarga el6ctrica
al proveer un cable de
escape para la corriente
el6ctrica.
Silatoma de corriente es un modelo est6ndar
de dos clavijas,es suresponsabilidad personaly su
obligaci6n el reemplazarla por una toma adecuada
para tres clavijascon conexi6n a tierra.
Bajoninguna circunstancia debe cortar o quitar la
tercera clavija (tierra)del cable decorriente.
Nouse un enchufe adaptador con este
electrodom6stico.
Nouse un cable extensor de corriente con
este electrodom6stico. Sielcable de corriente es
demasiado corto, haga que un electricista cualificado
o un t6cnico de reparaciones instalen una toma de
corriente cerca del electrodom6stico.
Paraun mejor funcionamiento, enchufe este
electrodom6stico en una toma de corriente exclusiva
para evitar parpadeos de luz,fusibles quemados o que
salte eldiferencial.
EL VENTILADOR EXTRACTOR
Elventilador se pondr6 en funcionamiento de forma
autom6tica bajo ciertas circunstancias (vet funci6n
de Ventilador Autom6tico). Prevenga el que empiece
algL_nfuego al cocinar y que se extienda mientras el
ventilador del respiradero est6 en marcha.
, Limpie a menudo la parte inferior del
microondas. No permita que se acumule grasa
en el microondas o en los filtros del ventilador.
, Si la grasa se incendiara en las unidades de
la cocina (fogones) bajo el homo microondas,
sofoque cualquier sart6n en llamas de la unidad
de cocina por completo con una tapa, una
bandeja de galletas o cualquier otra bandeja
plana.
, Tenga cuidado al limpiar los filtros del ventilador
extractor. Losproductos de limpieza corrosivos,
como los limpia-hornos a base de lejia, pueden
da_ar los filtros.
, Ponga en marcha el extractor cuando
est6 cocinando comidas con llama bajo el
microondas.
, Nunca deje las unidades de la cocina
(fogones) bajo su microondas sin atenci6n
cuando se est6 trabajando a altas temperaturas.
Cuando la comida entra en ebullici6n se generan
humos y se derraman grasas que pudieran
incendiarse y propagarse si el ventilador del
microondas est6 funcionando. Para minimizar
el funcionamiento del extractor autom6tico, use
utensilios de cocina de tamaho adecuado y use
el fuego r6pido en las unidades de la cocina
(fogones) s61ocuando sea necesario.
6
GUARDE ESTASINSTRUCCIONES
Page 35

GEAppliances.com
ADVERTENCIA
MARCA PASOS
La mayoria de Ioas marca pasos estdn protegidos contra la interferencia de aparatos electr6nicos,
incluyendo los microondas. Sin embargo, cuando tengan alguna duda, los pacientes con marca
pasos deben consutar con su m6dico.
FAVORDELEERYSEGUIRCUIDADOSAfVlENTEESTA
INFORtVlACIONDESEGURIDAD.
GUARDE ESTAS INSTRUCCIONES
Page 36

Las funciones de su homo.
Su modelo puede tener otras caractefisticas y apariencia que las ilustradas en este manual.
|
|
Funciones del homo
_radon
Enganches de puerta.
Ventana con escudo met61ico. La ventana
permite ver como se cocinan los alimentos y
evita que salgan microondas del homo.
Panel de control y dial selector.
Kits opcionales.
Disponibles en su distribuidor GE por un costo adicional.
Kits de panel de relleno
JX4OWH--Blanco
JX41--Negro
AIcambiar la tapa de una cocina encimera de 36"
los kits de paneles de relleno ocupan el espacio
adicional proveyendo un aspecto de montaje a
medida.
$61opara instalarse entre armarios, no pueden
instalarse al final de los armarios. Cada kit contiene
dos paneles de relleno de 3".
8
Dispositivo giratorio extraible No ponga en
marcha el horno en el modo microondas sinque
est6n la basey el soporte de la basecolocados
en su lugar.
Soporte del plato giratorio extraible. Elsoporte
del plato giratorio debeestar en su lugar cuando
seuse el horno.
Kits de filtros
JX81D--Kit de filtro de carb6n vegetal de
recirculaci6n
Los kits de filtros se usan
cuando el homo no
puede tener una salida
al exterior.
Loskits de filtros
estc]n disponibles a
un costo adicional en
su abastecedor GE.
Para pedir, Ilame a
GEo visite nuestro sitio
Web, GEAppliances.com
(consulte la pagina trasera).
JX40, JX41
JX81D
Page 37

Acerca de las funciones de su homo microondas. GEAppliances.com
Esposible que las funciones y apariencias vafien con relaci6n a su modelo a Io largo del manual.
caf
L_°°% _t, _.J -<'×PREs_,
raDial Selector
_ss TO _
@ @
Controles de cocci6n
Funciones de tiempo de cocci6n por microondas y autom6ticas
Presione Gire y apriete el dial para aceptar
TIMECOOK (cocci6n por tiempo) Cantidad de tiempo de cocci6n
Pulse una vez Time Cook I (Tiempo de cocci6n I)
para utilizar lafunci6n microondas en un intervalo
de tiempo de entre 15 segundos y 95 minutos.
Pulsedos veces TimeCook II(Tiempode cocci6n II)para cambiar los niveles de potencia
de forma autom6tica durante la cocci6n.
MICROEXPRESScocinar/Afiadir 30 seg. iEmpieza inmediatamente!
DEFROST(descongelar)
Pulseunavez (Rapido) Cantidad de tiempo de descongelaci6n
Pulsedos veces (Auto) Pesode alimentos hasta seis libras
Pulsetres veces (Tiempo) Pesodealimentos hasta una libra
BEVERAGE(bebida) i Empieza inmediatamente!
Presioneuna vez (6-7 oz.)
Presionedos veces (8-9 oz.)
Presionetres veces(10-12 oz.)
Nivel de POTENCIA Nivelde potencia 1-10
Funciones de sensor
Presione Girey apriete el dial para aceptar Opci6n
POPCORN(rosetas o palomitasde maiz) jEmpieza inmediatamente! M6s/menos tiempo
REHEAT(recalentar) jEmpieza inmediatamente! M6s/menos tiempo
Presioneuna vez (plato)
Presionedos veces (1/2 a una taza)
Presionetres veces(1 a 2 tazas)
AUTOCOOK(cocinarautom6ticamente) Tipo de alimentos 1-7 Mas/menos tiempo
Page 38

Opciones de cocci6n disponibles.
J
Cocci6n por microondas
Su homo usa energia de microondas para cocinar seg6n un periodo de tiempo
predeterminado, segOn el peso o de forma autom6tica por medio de un sensor.
" "" '"'i'l"l"/'i_]l'l_l"'l ..... lF!;!_
El microondas par sensor funciona detectando el incremento de humedad liberada durante
[
la cocci6n. Elhomo ajusta de forma autom6tica el tiempo de cocci6n a varios tipos y
cantidades de alimentos.
M#todo de Fuente de calor Conducci6n del Beneficios
cocci6n Energia calor R6pida, alta eficacia
La energia microondas. Color producido de cocci6n. El homo
microondas se dentro de la comida y sus alrededores
distribuye de forma pot penetraci6n no se calientan.
pareja en todo el instant6nea de
homo para que la energia.
comida se cocine
de forma rapida y
completa.
F6cil de limpiar.
10
Page 39

NO teS. GEAppliances.com
11
Page 40

Funciones de microondas por tiempo y autom6tico.
.£,6_,t¢TO SBL_c?
_O_ssTO E_1_R"
TJOESS TO E t_'%£'9"
@
C6mo usar el dial
Podr6 hacer seleccionesen el horno girando
el dialy presionando para ingresar la
selecci6n.
Time Cook (cocci6n par tiempo)
Time CookI (cocci6n par tiempo I)
Le permite usar el microondas par un per[ado
de entre !5 segundos y 95 minutos.
El Nivel de potencia 10 (ulto) (power level 10
[High])se selecciona de forma automatica
pero puede cambiarlo para mayor
flexibilidad.
H Presioneel bot6n TIMECOOK(cocciSn
par tiempo).
Gireeldial para ajustar el tiempo de
cocci6n y presione el dial para
seleccionar
Cambie elnivel de potencia si no quiere
que cocine atoda potencia.(Presione
POWER.Gireel dial para buscar. Presione
el dial para seleccionar.)
Lr_ Presioneeldial o el bot6n START/PAUSE
para empezar a cocinar.
Cuando useTime Cook puede abrir la puerta
para revisar la comida. Cierre lapuerta y
presione el dialo START/PAUSEpara seguir
cocinando.
NOTA: Eltiempo de cocci6n puede
cambiarse en cualquier momenta mientras
se cocina girando el dial. Usted puede
tambidn cambiar el nivel de energia
presionando el bot6n de energia POWER.
Ustedtambi6n puede presionar el dial
en vezde bot6n START/PAUSE para una
programaci6n mas rapida del horno.
Time CookII (cocci6n par tiempo II)
Lepermite cambiar los nivelesde potencia de
forma automc_ticamientras cocina.
Sehace de la siguiente forma:
H Presioneel bot6n TIMECOOK(cocci6n
par tiempo).
Gireeldial para ajustar el primer tiempo
de cocci6n y presioneel dial para
seleccionar.
M
Cambie elnivel de potencia si no quiere
que cocine atoda potencia. (Presione
POWER.Gireel dial para seleccionar.
Presioneel dial para seleccionar.)
Presioneel bot6n TIMECOOK(cocci6n
par tiempo) denuevo.
Gire el dial para ajustar el segundo
tiempo de cocci6n y presione eldial para
seleccionar.
Cambie elnivel de potencia si no quiere
8t
que cocine atoda potencia. (Presione
POWER.Gireel dial para seleccionar.
Presioneel dial para seleccionar.)
_j_ Presioneel el dial o el bot6n START/
PAUSEparaempezar a cocinar.
Cuando acaba Time Cook I, TimeCook II
empieza a funcionar.
NOTA:El tiempo de cocci6n puede
cambiarse en cualquier momenta mientras
se cocina girandoel dial. Usted puede
tambi@ cambiar el nivel de energio
presionando el bot6n de energia POWER.
_,3_t_ TO SEL_o.
12
J'_ss To _a1_'_"
Micro express cook
(cocci6n micro express)
Estaeslaforma rdpida de ajustary empezar
a cocinar en bloquesde50 segundoscada
vez quaseaprieta el bot6n MICROEXPRESS.
Eltiempo de cocci6npuede cambiarseen
cualquier momenta mientms secocina
girando el dial.
Elnivelde potencia estar@autom@icamente
seleccionado a 10y el homo empezar(_
inmediatamente.
Elnivelde potencia puede cambiarse
mientras eltiempo seva agotando. Presione
el bot6n POWERgire el dial y presi6nelo para
seleccionar.
Page 41

Descongelaci6n pot tiempo
GEAppliunces.com
._ To sEt,c;_
@
Use Time Defrost para descongelar par un
per[ado de tiempo seleccionado.
H Presioneel bot6n DEFROST(descongelar)
una vez.
[]
Gire el dial para seleccionar el tiempo que
desee. Presione el dial para seleccionar.
Presioneel bot6n START/PAUSEpara
empezar a descongelar.
D6lavuelta a lacomida siaparece el
m
mensaje TURNFOODOVER.
Puedevariar eltiempo de descongelaci6n en
cualquier momenta mientras se descongela
girando el dial.
Elnivel de potencia est6 preseleccionado
a 3, peropuede cambiarlo. Puede
descongelar art[culos pequeBosr@pidamente
elevando el nivel de potencia una vez
introducido eltiempo. Elnivelde potendu
7(power level 7)recorta el tiempo total
de descongelaci6n a la mitad; el nivelde
potencia 10 (power level 10)recorta el
tiempo total en,aproximadamente, una
tercera parte. Sinembargo, la comida
necesitar6 m6s atenci6n de Ionormal.
Durante la descongelaci6n podr[a oirse
un ruido de golpes sordo.Estoes normal
cuando el homo noestc_funcionando
en la potencia Hob (Alta).
Consejos de descongelaci6n
, La comidacongelada en papelo pl6stico
puede descongelarseen el paquete.Los
paquetes cerradosdeberian cortarse,
pincharse odeberfa proveersecualquier
tipo de ventilaci6n,DESPUI_Sde haber
descongelado lacomida parcialmente.
Losrecipientesde pldsticodeberfan dejarse
parcialmente destapados.
Lascomidas preempaquetadas
congeladas de tamaho familiar pueden
descongelarsey hacerseen el microondas.
Silacomida estc_en un contenedor de
aluminio, p6selaa un plato seguro para su
usa en microondas,
Lascomidas quese echan a perder
rc_pidamenteno deberian dejarse fuera
par un periodo de mc_sde una hora tras su
descongelaci6n. Latemperatura ambiente
promueve el crecimiento debacterias
da_inas.
Para ladescongelaci6n mc_sigualada
de alimentos mayores, coma asados,
useAuto Defrost. Aseg0resede que las
carnes grandes est@ncompletamente
descongeladas antes de cocinarlas.
Cuando est6 descongelada, la comida
deber[a estar fr[a pero blanda en todas
sus @eas.Sia6n est6 ligeramente helada,
devu6lvala al microondas par muy poco
tiempo, o d6jelafuera unos minutos.
Beveruge (bebidu)
Lafunci6n BEVERAGE(Bebidul calienta
bebidasde entre 6 y 12onzas.
Pulseuna vez para 6-7 oz.
Pulsedos veces para 8-9 oz.
Pulsetres veces para 10-12 oz.
Las bebidas calentadas con la funciGn
Beveroge pueden estar muy calientes. Saque
el recipiente con cuidado.
13
Page 42

Funciones de microondas por tiempoy autom6tico.
@
Descongelaci6n r6pida
Fast Defrost ajusta de forma automdtica
lostiempos dedescongelaci6n y los niveles
de potencia para producir resultadosde
descongelaci6n parejos para carnes,ayes
y pescado que pesen hasta una libra.
, Saque la came del paquete y col6quela en
un plato apto para microondas.
hlJ Presioneel bot6n DEFROST(descongelar)
tres veces,
Gireeldial hasta alcanzar el pesode la
m
comida usando la Tablade Conversi6na
la derecha. Potejemplo, ponga el dial a .5
para 0,Slibras (8onzas)Presioneel dial
para seleccionar.
Presioneel bot6n START/PAUSEpara
empezar a descongelar.
Delavuelta a lacomida siaparece el
mensaje TURNFOODOVER.
, Retirela carde descongelada o cubra las
dreas calientescon pequeBosrecortes de
papel de aluminio.
, Una vez descongeladas,la mayoria de
carnes necesitan Sminutos en reposo para
que acaben de descongelarse.
Tabla de conversi6n
Sielpeso de la comida secalcula en libras
y onzas,las onzasdeberdn convertirse a
d6cimas (.1)de libra.
Pesodelacomida
ell OI1ZaS
1-2
3
4-5
6-7
8
9-10
11
12-13
14-15
Introduzcaelpesodela
camida(d6dmasdelibra)
.1
.2
.3
.4
.5
.6
.7
.8
.9
_R_$STOE_'_l_'g
@
Auto Defrost (descongelaci6n
aubm6tica)
UseAuto Defrost para came, ayes y
pescados que pesenhasta seislibras. Use
Time Defrost para la mayoria del restode
comidas congeladas.
Auto Defrost ajusta de forma autom6tica
lostiempos dedescongelaci6n y los niveles
de potencia para producir resultadosde
descongelaci6n parejos para carnes,ayes
y pescado.
, Saque la came del paquete y col6quela en
un plato apto para microondas.
roll Presioneel bot6n DEFROST(descongelar)
dosveces.
Gireeldial hasta alcanzar el pesode la
m
comida usando la Tablade Conversi6na
la derecha. Potejemplo, ponga el dial a
1.2para 1,2 libras(1libra, 3 onzas.)
Presioneeldial para seleccionar.
Presioneel bot6n START/PAUSEpara
empezar a descongelar.
Delavuelta a lacomida siaparece el
mensaje TURNFOODOVER.
, Retirela came descongelada o cubra las
dreas calientescon pequeBosrecortes de
papel de aluminio.
, Una vez descongeladas,la mayoria de las
carnes necesitan Sminutos en reposo para
que acaben de descongelarse.Los asados
grandes deberian dejarse reposar por unos
30 minutos.
Tabla de conversi6n
Sielpeso de la comida secalcula en libras
y onzas,las onzasdeberan convertirse a
d6cimas (.1)de libra.
Pesodelacomida
enonzas
1-2
3
4-5
6-7
8
9-10
ii
12-13
14-15
Introduzcaelpesodela
:omida(d6cimasdelibra)
.!
.2
.3
.4
.5
.6
.7
.8
I .9
14
Page 43

C6mo cambiar el nive! de potencia. GEApplionces.com
@
I_fCESSTO rcN'_¢"_
©
Elnivel de potencia puede introducirse o
cambiarse de forma inmediata tras introducir
el tiempo de cocci6n (TimeCook-J,eltiempo
de descongelaci6n (TimeOefrostLo Express
Cook.Elnivelde potencia tambi6n puede
cambiarse durante la cuenta atrc_s.
H
Primero,siga las instrucciones para el
tiempo de cocci6n (TimeCook),el tiempo
de descongelaci6n (TimeDefrost), o
ExpressCook,
m
Presione el bot6n POWER.
Gireeldial, en el sentido de las agujas del
reloj,para aumentar yen el sentido
contrario para disminuir la potencia.
Presioneel dial para seleccionar.
L_ presioneel bot6n START/PAUSEpara
empezar a cocinar.
Losnivelesde potencia variables afladen
flexibilidad a la cocina con microondas. Los
nivelesde potencia del homo microondas
pueden compararse con las unidades de
la encimera (fogones)en una cocina.Cada
nivelde potencia leproporciona energ[a
microondas durante cierto porcentaje del
tiempo. Nivelde potencia 7 (power level 7)
esenerg[a microondas al 70% del tiempo.
Nivel depotencia 3 (powerlevel 3)esenerg[a
a130% deltiempo. Normalmente se cocinar(_
en Alto (nivelde potencia 10)(High,power
level 10)que proporciona una potencia del
100%.Power level 10 lepermitir6 cocinar
m6s rcipido,pero la comida, posiblemente,
necesitar(_quela agite, gireo d6 la vuelta
m6s a menudo.
Losperbdos de descanso (cuando seacaba
el ciclode la energ[a microondas)le dan
tiempo a la comida a"igualarse" o transferir
el calor a su interior.Semuestra un ejemplo
de esto con el ciclo de descongelaci6n--
power level ;3Sila energ[a microondas no
funcionara en ciclos,la parte externa de la
comida se cocinar[a antes de que elinterior
sedescongelara.
Estosson algunos ejemplosde aplicaciones
pare diferentesnivelesde potencia:
Alta 10".Pescado,bacon, verduras, calentar
I[quidos.
Nedia olta 7".Cocci6nsuave de came y ayes,
sirve para cocinar guisosy para recalentar.
Nedia 5: Cocina lentay tierna para estofados
o guisosy para partes menos tiernas de
carne.
Baja 2 o3: Paradescongelar, cocer a "fuego"
lento, para salsasdelicadas.
A/go caliente 1:Hantener la comida caliente,
ablandar la mantequilla.
Un nivelinferior cocinard la comida de forma
m6s pareja y nonecesitard que la agite,gire
o d_ la vuelta tanto. Algunas comidas pueden
tenet mejor sabot,textura o aspecto sise
usa un nivelinferior. Useun nivelde potencia
inferior cuando est_ cocinando comidas que
tengan tendencia a hervir,como las papas
gratinadas.
15
Page 44

Terminologia de microondas.
Definici6n
Arco el#ctfico
Cubierto Lascubiertas mantienen la humedad dentro, permitiendo un calentamiento mc_spare]o y reduciendo el
Resguardar En unhomo convencional, setapan oresguardan laspechugas de polio o las comidas horneadas para
...... paces finas,como las puntas de las alasen lasayes, que podrian cocinarse antes que laspartes mayores.
Tiempo de Cuando cocina en hornos regulares, lascomidas como los asados o pastelesse dejan reposar para
reposo queacaben decocinarse o seasienten. Eltiempo de reposo es especialmente importante al cocinar con
Elarco eldctricoesIo que,en laterminologia de losmicroondas, describelaschispasen el homo.Elarco
elddrico se produce cuando:
el estante de metal se ha instalado de forma incorrecta y estc_tocando lasparedes del microondas.
hay un metal o papel dealuminio tocando el lateral del horno.
hay papel de aluminio no estc_envolviendo bien la comida (hay bordes doblados hacia arriba que
act_an como antenas).
_ hay alg_n metal, como cintas de cierre con metal, pinchos de polio,o platos con decoraci6n de oro.
hay papel toalla reciclado que contiene pequeBaspiezasde metal.
i el soporte del aro del plato giratorio estd instalado incorrectamente.
tiempo de cocci6n. Cuando seagujerea el envoltorio de pldstico o se cubre con papel de cera se permite la
salida del vapor.
que no sedoren demasiado. AIusar el microondas, usepequehas cintas de papel dealuminio para cubrir
microondas. Tenga encuenta que un pastel cocido en homo microondas no secoloca en un estante
de enfriamiento.
Abfir Una vezque haya cubierto un plato con film plastico, debera abrir un orificio desplegando una
respiraderos esquina para que pueda escapar el vapor.
16
Page 45

Caracter&ticas de microondas por sensor. GEAppliances.com
Sensor de humedad
Ou_ sucede cuando usa las funciones de sensores:
Lasfunciones de Sensordetectun la mayor humedad liberada durunte la cocci6n.
Elhomo ajusta autom6ticamente el tiempo de cocci6n a los diferentes tiposy cantidades de
comida.
No utilice lasfunciones de Sensordos vecesconsecutivas en lu misma porci6n de comidu.
Puederesultar en que losalimentos secocinen en excesoo se quemen. Sila comida no seha
cocinudo por completo despu6sde lu cuentu regresivu,uselu funci6n Time Cook puru tiempo
de cocci6n adicional.
NOTA:las funcionesde sensorno estardn disponiblescuando el homo estd caliente.Sisepulsa
uno delos botonesde cocinar pot sensorcuando la temperature dentro delhomo essuperior
a los200°F,aparecerdel mensaje "OVENTOOHOTFORSENSORCOOKING.USINGALTERNATE
METHOD"(Homo demasiadocalientepare cocinarpor sensor.Seestd utilizando otto mdtodo).
Elhomo cambiard automdticamente a la funci6n "cookby time"(cocinarpot tiempo) (sigalas
indicacionesde la pantalla) o,una vezque elhomo estdIosuficientemente frfo,las funciones del
sensor seejecutardn deforma normal
Esesencial usar losrecipientes y lastapas apropiados para cocinar por sensorde forma
6ptima.
Agujereado
_i_ _//_iii _i_ i/ /_ !! _ii_i_ii! ii
iiii _i_i i i IIIIIIIIIIIIIIUI_ )_ i _iii
Cubierto
Seque los platos para que no
enga_en a] sensor.
, Usesiempre recipientesaptos para microondas y cObraloscon tapas o film de pl6stico
agujereado. No usenunca recipientescerrados por completo-pueden hacer que el vapor
no salga y causar que la comida se cocine demasiado.
AsegOreseque tanto elexterior de los recipientes como el interior del homo microondas
est6n secosantes de poner la comida en el horno. Lasacumulaciones
de humedad que seconvierten en vapor pueden engaflar al sensor.
17
Page 46

Caracter&ticas de microondas per sensor.
Auto Cook (cocinar autom_ticamente) (no utilizer los estantes cuando cocina per
microondas)
Dado que lu muyor[u de losrecipientes deben estar cubiertos durante Auto Cook,
esta funci6n trabaja meier con comidas que quiera hacer al vapor o en las que quiera
mantener la humedad.
NOTA: No se recomienda el use del estante de metal con Auto Cook.
Comidas recomendadas
Conesta funci6n sepueden cocinar una gran variedad de comidas incluyendo carnes,
._;i_,_ _ pescadoy vegetales.
Comidas no recomendadas
No deber[an cocinarse usando esta funci6n aquellas comidas que deban cocinarse
descubiertas,aquellas que requieran atenci6n constante, aquellas que requieran ahadir
ingredientes durante su cocci6n y comidas que deban tenet apariencia secao con una
superficie crujiente. Esmejor cocinar todas estasusando Time Cook.
_,.57-._TO SEL_,¢Z
_r_EssTo _t_1'¢_-
@
NOTA: No utilice esta fund6n
dos veces consecutivas en
la misma porci6n de comida.
Puede resultar en que los
alimentos se cocinen en
e×ceso o se quemen.
18
Auto Cook (cocinar autom(_ticamente)
(no utilizer los estantes cuando cocina per
microondas)
H Pongalacomida cubierta en el horno y
cierre la puerta. Pulseelbot6n AUTO
COOK(cocci6n autom4tica). Aparece en
pantalla ENTERFOODTYPE(introduzca el
tipo de comida).
[] Gireel dialaltipo de comida deseado.
Presionepara seleccionar
VeTlaTablede Tiposde Comitiescon Sensor
de m6s abajo para tipos espedficos de
comidas e instrucciones.
Elhomo empieza a funcionar
inmediatamente.
NOTA:Sila puerta se abre mientras seest@
seleccionando el control, ci@relay presioneel
bot6n START/PAUSEpara empezar a cocinar.
Silacomida no se ha cocinado par completo
despu6s dela cuenta regresiva, usela
funci6n Time Cook para tiempo de cocci6n
adicional.
No abra la puerta del homo antes de que
el tiempo de cuenta atrds aparezca en
la pantalla-el vapor que seescape del
homo puede afectar la cocci6n.Sise abre
la puerta,cidrrelay presioneSTART/PAUSE
inmediatamente.
Siselecciona came picada (ground meat),el
homo puede que leindique que leextraiga
el I[quidoy la remueva.Abra la puerta, seque
la came y cierrela puerta. Presioneelbot6n
START/PAUSE,sifuera necesario,para seguir
con la cocci6n.
Consejos de cocci6n
,Cuando el homo hace una seBaly aparece
el tiempo hacia atr6s, la puerta puede
abrirse para remover, girar o dar la vuelta
ala comida. Cierre lapuerta y presione
START/PAUSEpara seguir cocinando.
,Ajuste la cantidad decomida al tamaho
del recipiente. Llenelos recipientespar Io
menos hasta la mitad.
,AsegOresede que la parte exterior del
recipiente y el interior del homo est6n
secos.
,Una vezcompletado el ciclode Cocci6n,si
la comida necesitacocersem6s,vu61vala
a poner enel homo y useTime Cookpara
acabar de cocinarla.
C6mo ajustar la configuraci6n
autom_tica del horno para un tiempo
de cocci6n m_s carte o m_s largo
(no disponible para redes los tipos de
alimentos)
Pare rester el !0% del tiempo de cocci6n
automdtico:
Enlosprimeros 30 segundos tras el homo
comienza a funcionar, gire el dial en el
sentido contrario de lasagujas del reloj hasta
que aparezca un signo menos ("-")
y pulse pare introducir la selecci6n.
Pare agregar el !0% al tiempo de cocci6n
automdtico:
Dentro delos primeros 30 segundos tras el
horno comienza a funcionar, gire el dial en
el sentidode las agujas del reloj hasta que
aparezca un signo m6s ("+")y pulse para
introducir la selecci6n.
Page 47

GEAppliances.com
Tabla de tipos de comidas con sensor
Raciones Tamaflos delos raciones Comentarios
Piezas de polio 1 a 4 2 a 8 Use un plato ovalado, cuadrado o redondo.
piezas Cubra con envoltura plastica ventilada.
Pescado I a 4 4 a 16oz. Use un plato ovalado, cuadrado o redondo.
CSbralo con un film plastico agujereado.
Came picada - 8 a 32 oz. Use plato de guisos redondo. Reparta la came
(Ternera, Puerto. PavoJ en el plato. CSbralo con un papel de cera o un
film plastico agujereado.
Papas 1 a 4, 8 a 32 oz. Rompa la piel con un tenedor. Arr6glelas en un
patr6n en forma de estrella al centro del plato
giratorio.
Vegetales enlatados 1 a 4 4 a 16 oz. Use cazuela de guisos para microondas, taz6n
o bol. CSbralo con una tapa o un film plastico
agu]ereado.
Vegetales frescos 1a 4 4 a 16 oz. Use cazuela de guisos para microondas, taz6n
o bol. Ahacla dos cucharadas de agua pot carla
raci6n. CSbralo con una tapa o un film plastico
agu]ereado.
Vegetales congelados 1 a 4 4 a 16 oz. Use cazuela de guisos para microondas, taz6n
o bol. Siga las instrucciones clel paquete en
cuanto al agua a ahaclir. CSbralo con una tapa o
un film plastico agu]ereado.
19
Page 48

Caracteristicas de microondas por sensor.
OPCORN_
Use s61ocon palomitas o
rosetas preempaquetadas
para microondas que pesen
de 1,5 a S,Sonzas.
NOTA: No utilice esta funci6n
dos veces consecutivas en la
misma porci6n de comida.
Puede resultar en que los
alimentos se cocinen en
exceso o se quemen.
Popcorn (rosetas o palomitas de
maiz)
Para usar lafunci6n Popcorn:
BII Siga las indicacionesdel paquete, use
Time Cooksi el paquete pesa menos de
1,Sonzas o esmayor de 3,Sonzas.SitOe
el paquete de rosetasen el centro del
plato giratorio.
[] Presioneelbot6n POPCORNunao dos
veces. Elhomo empieza a funcionar
inmediatamente.
Siabre la puerta mientras aparece en
pantalla POPCORNSENSOR(sensorde
palomitas),aparecer@un mensaje de
error.Cierrela puerta, pulseCLEAR/OFF
(borrar/desactivar)y comience de nuevo.
Silacomida no se ha cocinado por completo
despu6sde la cuenta regresiva,use la
funci6n "rimeCook para tiempo de cocci6n
adicional.
C6mo ajustar la configuraci6n automStica
para palomitas de maiz para un mayor o
menor tiempo de cocci6n
Siseda cuenta de queen la bolsade la
marca de palomitas que usa queda mucho
maiz sin reventar o Io cuecedemasiado,
puede ahadir o substraer 20-30 segundos al
tiempo autom@ico de cocci6n.
Pare sustmertiempo:
Antesde que acaben los primeros 30
segundos desdeque elhomo sepone en
funcionamiento, gire eldial en el sentido
contrario alas agujas del relojpara 20
segundos (-)menos de tiempo de cocci6n.
Pulsepara introducir la selecci6n.Girede
nuevo, hastaque aparezcan dossignos
menos ('--"),para reducir el tiempo de cocci6n
en otros 10 segundos hastauna cantidad de
reducci6n detiempo de 30 segundos.Pulse
para introducir la selecci6n.
Pare ahadirtiempo:
Antes deque acaben los primeros 30
segundos desde queel homo se pone en
funcionamiento, gire el dial en el sentido
de las agujas del reloj20 segundos (+)m@s
al tiempo decocci6n. Pulsepara introducir
la selecci6n.Girede nuevo,hasta que
aparezcan dos signos m6s("++"),para a_adir
otros 10 segundos,hasta un total de 30
segundos detiempo adicional. Pulsepara
introducir la selecci6n.
20
Page 49

GEAppliances.com
NOTA: No utilice esta fund6n
dos veces consecutivas en
la misma porci6n de comida.
Puede resultar en que los
alimentos se cocinen en
exceso o se quemen.
Reheat (recalentafl
La funci6n de recalentar (Reheat) vuelve a
calentar raciones decomidas previamente
cocinadas o un plato de sabras.
H Coloque lataza de Ifquidoo comida
cubierta en el homo. PulseREHEAT
(recalentud una, dos,tres o cuatro veces.
Elhomo empieza a funcionar
autom6ticamente.
Presione una vez para un plato de sabras.
Pulse dos veces para pasta.
Presione tres veces para cantidades de
!/2 a i taza Ilena.
Pulsecuatro veces para entre 1y 2
tazas Ilenas.
Elhomo da una se_alcuando advierte
que hayvapory empieza a mostrarse
hacia atr6s el tiempo que queda.
No abra la puerta del homo hasta que el
tiempo en el homo aparezca en cuenta
atr6s. Siseabre la puerta, ci@relay presione
START/PAUSEinmediatamente.
Unavez que haya retirado la comida del
homo, remudvala,si esposible,pare igualar
la temperature. Lascomidas recalentadas
pueden tenetgrandes diferencias de
temperature. Algunas dreaspueden ester
extremadamente calientes.
Sila comida no est6 suficientemente caliente
despu6s de la cuenta regresiva,use Time
Cook tiempo adicional para recalentar.
No est4 recomendado el uso de reheat pare
algunus comidas
Esmejor usar Time Cook en estoscasos:
, Productosde pan.
,Comidas que deben recalentarse sin cubrir.
, Alimentos que necesiten removerse o
rotarse.
Comidas que necesitentener un aspecto
seco o una superficiecrujiente tras ser
recalentados.
C6mo ajustar la configuraci6n
autom_tica del homo pare un mayor o
menor tiempo de cocci6n
Pare sustraer un !0% del tiempo de
coccian automdtico:
Antes de que acaben los primeros 30
segundos desde que el homo sepone en
funcionamiento, gire el dial en elsentido
contrario alas agujas del relojy presi6nelo
para seleccionar
Pare ahadir un !0% del tiempo de coccian
automdtico:
Antes de que acaben los primeros 30
segundos desde que el homo sepone en
funcionamiento, gire el dial en elsentido
de lasagujas del relojy presi6nelopara
seleccionar.
21
Page 50

Las otras funciones.
Serial de final de cocci6n
Para recordarle que tiene comida en el pitido cada minuto hasta que abra la puerta
homo, aparecer6 el mensaje YOURFOOD del homo o presione el bot6n CLEAR/OFF.
IS READY(Sucomida est6 lista)y sonar6 un
Resume(Continuad
Elprograma de cocci6n que acaba de utilizar
permanece en memoria durante 5 minutos.
Trasesto,es necesarioque inicieel programa
de nuevo.Para desactivar esta funci6n,
consulte la secci6n Hensaje "Hds tiempo".
Relo]
Presionepara introducir la hora del d[a o
para revisar la hora de dia mientras cocina.
U Presioneelbot6n CLOCK(reloj).
H Sinecesita cocinar losalimentos un poco
m6s, puede reiniciar el homo pulsando el
bot6n START/PAUSE(Inicio/Pausa)o el
dial selector.
RESUMECOOKING (Continuar cocci6n)
[]
aparecer6 en pantalla y el homo se
reiniciar6 inmediatamente al !0%
del tiempo original.
_! Gireel dial para seleccionar AMo PM.
Presioneel dial para seleccionar.
_RrZSSTO_'_'_"
@
@
N Gireel dial para configurar las horas.
Presioneel dial para seleccionar.
[] Gireel dial para configurar los minutos.
Presioneel dial para seleccionar.
Start/Pause finicio / pausa)
Adem6s de poner en marcha muchas
funciones, START/PAUSEle permite parar la
cocci6n sintenet que abrir la puerta o borrar
Ioque haya en pantalla.
Clear/Off (borrar/apagado)
Presioneel bot6n CLEAR/OFF para parar y
cancelar la cocci6n en cualquier momento.
22
Page 51

GEAppliances.com
Bloqueo del control
Puede bloquear el panel de control
para evitar que enciendan el homo
accidentalmente durante la limpieza o
paraque no Io utilicen los nihos.
Luz nocturne eutom_tica
[OPS,ON ]
_ To S_L_¢_
PRE$S TO F-_"_g_"
LGluz nocturne autom_tica puede
configururse pare que seencienda y se
apague u horus determinudus.
U Presioneel bot6n OPTIONSy gire el
dial pure seleccionurAUTONITELIGHT.
Presioneel dial pure seleccionar.
[] Gireel dial peru seleccionurSETTIMES.
Presioneeldial pure seleccionar.
_--_lntroduzculahera del dig para que la luz
seencienda girundo el dial pare
seleccionar la hera, minutes y AM o plvl.
Presioneel dial pure seleccionarcada
cambio que quiera realizar.
Para bloquear y desbloqueur los controles,
apriete y mantenga el bot6n CLEAR/OFF
durante un periodo de tres segundos. Con
el panel de control bloqueado aparecer6
brevemente el mensuje CONTROLLOCKED
cada vez que se apriete un bot6n o el dial.
[] Introduzca la hora del dia para que la luz
seapague girando el dial para
seleccionar la hora, minutos y AM o PM.
Presioneel dial para seleccionar cada
cambio que quiera realizar.
NOTA:El indicador NITE(noche) se
encenderd cuando la luz denoche se haya
fijado para operar.
Para revisarla configuraci6n de la luz
nocturna, gire el dial para seleccionar
REVIEWSETTINGSdespuGsdeseleccionar la
opci6n Auto Nite Light. Presioneeldial para
seleccionar.
Para borrar la configuraci6n de la luz
nocturna, gire el dial para seleccionar
CLEARSETTINGS despuGsde seleccionar la
opci6n Auto Nite Light. Presioneeldial para
seleccionar.
()
PRESSTO EN1_"
Volumen de serial de aviso
J
Elvolumen de la seBalde arise puede
ajustarse.
H Presioneel bot6n OPTIONSy gire el
dial para seleccionarBEEPERVOLUME.
Presioneel dial para seleccionar.
[] Gireel dial para seleccionardesde mudo
a alto. Presioneel dial para seleccionar.
NOTA:Elindicador MUTE(silencioso)se
encenderdcuando el volumen sehaya fijado
en silencioso.
Idioma de pantalla
Elidioma del menO de pantalla puede
configurarse para InglGsy Espahol.
_j_ Presioneel bot6n OPTIONSy gire el dial
para seleccionar DISPLAYLANGUAGE.
Presioneel dial para seleccionar.
[] Gireel dial para seleccionarENGLISH
o SPANISH. Presioneeldial para
seleccionar.
23
Page 52

Las otras funciones.
_,_._ TO S_L_¢7"
_R_ssTO_-_I_"
_gs_ TOSELect
_ss To _ lg_"
Pantalla ON/OFF (encendida/
apagadaJ
0selo para apagar o encender lapantalla del
reloj.
H Presioneel bot6n OPTIONSy gire el
dial para seleccionarDISPLAVON/OFF.
Presioneeldial para seleccionar.
Gireeldial para seleccionar ON o OFF.
Presioneel dial para seleccionar.
Medidas
Pueden configurarse las medidas para que
aparezcan de laforma por defecto (inglesa)o
m6trica.
U Pulseel bot6n OPTIONS(Opciones)y gire
el dial para seleccionar MEASURES
(Medidas).Pulseel dial para introducir la
selecci6n.
Gireeldial para seleccionar DEFAULT
(Preestablecido)oMETRIC(M@rico)y
pulse para introducir la selecci6n.
Velocidad de pantalla
Lavelocidaddel men0 de pantalla puede
cambiarse.
_lJ Presione el bot6n OPTIONSy gire el
dial para seleccionar DISPLAY SPEED.
Presione el dial para seleccionar.
Gireeldial para seleccionar desde el m@s
lento al m@srapido. Presioneeldial para
seleccionar.
Mensaje "Mhs tiempo"
Unavezque secomplete la cocci6n, puede
mostrarse un mensaje que le ofrezca la
opci6n de cocinar la comida durante mc_s
tiempo utilizando la misma configuraci6n.
Consultela secci6n Continuar.
N
Pulseel bot6n OPTIONS(Opciones)y gire
el dial para seleccionar MORETIME
MESSAGE(Mensaje"M@stiempo"). Pulse
el dial para introducir la selecci6n.
m
Gireeldial para seleccionar MESSAGE
ON (IVlensajeactivado) o MESSAGEOFF
(Mensajedesactivado)y pulsepara
introducir la selecci6n.
Luz de superficie
PresioneSURFACELIGHTuna vez para una
iluminaci6n fuerte, dosveces para la luz
nocturna o una tercera vez para apagarla.
24
Page 53

Temporizador
GEAppliances.com
,1_g,NTOSEL_c1"
P'_ss TO_-'41_g
_RESS TO E_1_'_
ElTimer (temporizador) funciona como
temporizador de minutos y se puede usar en
cualquier momento, incluso cuando el homo
estd en marcha.
N Presioneelbot6n TIMER.
[] Gireel dial para configurar los minutos.
Presioneel dial para seleccionar.
[] Gireel dial para configurar los segundos.
Presioneel dial para seleccionar.
Lr_Jpresioneel dial o TIMERpara empezar.
Dispositivo giratorio activado/
desactivado
Para obtener mejores resultados de cocci6n,
deje eldispositivo giratorio activado. Puede
desactivarse siva a cocinar platos grandes.
U Pulseel bot6n TURNTABLEON/OFF
(Dispositivogiratorio activado/
desactivado).
[] Gireel dial para seleccionarON (Activado)
u OFF(Desactivado).Pulseeldial para
introducir la selecci6n.
Para cancelar, presione el bot6n TIMER.
Cuando seacabe el tiempo, el horno
dara una sehal.Paraapagar la se_aldel
temporizador, presione TIMER.
NOTA:Elindicador del temporizador se
encenderdmientras el temporizador estden
marcha.
Endeterminadas ocasiones el dispositivo
giratorio puede calentarse demasiado como
para tocarlo.
Tengacuidado altocarlo durante la cocci6n
o posteriormente a ella.
VENTFAN
Ventilador extractor
Elextractor aspira elvapor de agua y otros
vapores de la encimera de la cocina.
PulseVENTFAN(Ventiladorextractor) una
vez para alta velocidad de ventilaci6n, dos
vecespara velocidad media, tres veces
para velocidad baja y una cuarta vez para
desactivar el ventilador.
NOTA:Elindicador del extractor estard
prendido mientms el extractor estdopemndo.
Extractor autom6tico
Elextractor automatico protege al homo
microondas del calor excesivo quesurge de la
estufa debajo de 6ste.Seenciende deforma
autom@tica si percibe demasiado calor.
Si ha encendido el extractor, es posible que
sienta que no Io puede apagar. Elextractor
se apagarc_automcXicamente cuando las
partes internas se hayan enfriado. Puede
permanecer encendido hasta por :SOminutos
o mc_sdespu6s de que los controles de la
estufa y del microondas sehayan apagado.
25
Page 54

Cuidado y limpieza del horno.
Consejos pr6cticos
Para mantener elinterior fresco p6sele un paho con una soluci6n de agua y bicarbonato
s6dico de cuando en cuando.
AsegOresede queestdapagado fenoff]antes delimpiar cualquierparte deestehomo.
C6mo limpiar el interior
Paredes, suelo, ventana interior y piezas de pl6stico de la puerta
Algunassalpicaduras pueden limpiarse con un papel toalla, otras pueden necesitar un paso
h0medo. Quitelas salpicaduras con un paBo enjabonado y aclare con un paBo h0medo. No
use limpiadores abrasivos ni utensilios afilados en las paredes del homo.
Nunca use un limpiador comercial de homo en ninguna parte del microondas.
Base giratoria extraible y soporte de base giratoria
para que no se rompa, no ponga el plato giratorio en agua justo despu@sde cocinar.
Limpielocon cuidado en agua tibia con jab6n o en el lavavajillas. El plato giratorio y
i
el soporte pueden romperse si se caen. Recuerde no hacer funcionar el homo en el
modo microondas sin el dispositivo giratorio y el soporte colocados en su lugar.
C6mo limpiar el exterior
No recomendamos el uso de limpiadorescon amoniaco o alcohol,ya que pueden daBar
el aspecto del homo microondas. Siopta pot usar un limpiador casero, primero aplique el
limpiador directamente en un paho limpio, luego limpie el@ea sucia.
Lo caja
Limpie la parte externa del homo de microondas con un paBo humedecido con agua
jabonosa. Enju@guelay luego s6quela. Pc_seleun paho humedecido limpio a la ventana para
limpiarla.
Elpanel decontrol
P@seleun paBo humedecido para limpiar. Sequecompletamente. No useesprays limpiadores,
grandes cantidades de detergente y agua, abrasivos u objetosfilosos sobre el panel,ya que Io
podria dahar. Algunastoallas de papel podrian tambi6n dahar el panel de control.
Panel de puerta
Antes delimpiar el panelde puerta frontal, aseg0resede que sabe qu_ tipo de panel tiene.
Consulteel octavo dfgito del nOmerode modelo. "S"es acero inoxidable,"L"es CleanSteely "B",
"W" o'%"son colores plc_sticos.
Acero inoxidable (en algunos modelosl
Elpanel de acero inoxidable puede limpiarse con StainlessSteel Magico un producto similar,
utilizando un paho suavey limpio.Apliqueel limpiador de superficiesde acero inoxidable
cuidadosamente para evitar tocar las piezasde plBstico querodean al acero. Noutilice cera,
pulimento, lejia ni productos que contengan clorina en acabados en
acero inoxidable.
26
Page 55

Panelespl6sticos de color
Utilice un paBosuave, limpio y ligeramente humedecido y, a continuaci6n, seque
bien toda la zona.
Los sellos dela puerto
Esimportante mantener el @ea donde la puerta se sellacon el homo de microondas limpia.
Solamente usedetergentes no abrasivos suaves aplicadoscon una esponja limpia
o con un paho suave. Enjuaguebien.
El rondo
Limpie la grasa y elimine el polvo del fondo a menudo. Use unasoluci6n de agua cdlida
y detergente.
Cambio de bombillas.
GEAppliances.com
Quite el tomillo, M
Luz de encimera/luz nocturna
C6mbiela por una bombilla hal6gena de
120voltios, 20watt (max).Pida WB36X10213
de su suministrador GE.
Paracambiar laluz de encimera/luz
nocturna, primero desconecte la corriente
del fusible principal odel panel de
diferencial o estiredel enchufe.
[] Quite eltornillo del lateral de la cubierta
del compartimiento de la bombilla y baje
la cubierta hasta
que pare.
Aseg@eseque la bombilla est6fr[a antes
de retirarla. Rompa el selloadhesivo
desenroscando con cuidado la bombilla.
[] Enrosque lanueva bombilla, luego
levante la cubierta y vuelva a poner el
tornillo. Conecteel homo a la corriente
el6ctrica.
27
Page 56

La funci6n de extractor.
Filtro de carb6n vegetal
(en algunos modelos)
Filtros de extractor reutilizables
(entodos los modelos).
Ventilador extractor
Elventilador extractor tiene dos filtros de
metal reutilizables.
Los modelos que hacen recircular el aire
de nuevo a la habitaci6n usan un filtro de
carb6n vegetal
Filtros de extractor reutilizables
Losfiltros metc_licosatrapan la grasa
liberada por la comida en la cocina encimera.
Tambi6n evitan que lasllamas
de la cocina encimera puedan da_ar en
interior del homo.
C6mo quitar y limpiar los filtros
Para quitarlos, usando las lengOetas,
desl[celos hacia atras. Estire hacia abajo y
afuera.
Para limpiar losfiltros del extractor,
empc_pelosy pc_selosde un lado a otro en
agua con detergente. No use amoniaco
ni productos que Iocontengan ya que
oscurecer[an elmetal. Sepueden cepillar
ligeramente para quitar suciedad pegada.
Porestaraz6n, losfiltros deben estar
siempre en su lugar cuando seest6 usando
la campana, Losfiltros del extractor deben
limpiarse una vezal mes o segOnsea
necesario.
Acl@elos,sacOdalosy d6jelossecar antes de
volverlosa poner.
Para volver a colocarlas, deslicelos filtros
en losmarcos por la parte trasera de cada
apertura. Presionehacia arriba y hacia la
parte frontal para ajustarlos en su lugar.
28
Page 57

Filtros de carb6n vegetal
El filtro de carb6n vegetal no puede
limpiarse. Debe cambiarse pot otro.
Pida el recambio No. WBO2X10943 de su
suministrador GE.
Sielmodelo no realiza la extracci6n al
exterior,el aire recircular(_a trav6s de un filtro
de carb6n vegetal no reutilizableque ayuda a
quitar olores y humos.
GEAppliances.com
Elfiltro de carb6n vegetal deber[acambiarse
cuando est@visiblemente sucio o descolorido
(normalmente tr@s6 o 12 meses,segSnel
uso).Consulte"Kits opcionales"en la pagina 8
para obtener mas informaci6n.
/t .... 9--,
If 1
m
Retire la parrilla superior quitando
los dos tornillos que Josujetan.
C6mo quitar el filtro de carb6n vegetal
Para quitar el filtro de carb6n vegetal,
primero desconecte la corriente del fusible
principal o del panel de diferencial o estire del
enchufe. Retire la parrilla superior quitando
los dos tornillos que Io sujetan.
Puedeser que necesite abrir las puertas del
armario para quitar lostornillos.
C6mo instalar el filtro de carb6n vegetal
Para instalar un nuevo filtro de carb6n
vegetal, retire el pl6stico y cualquier otto
envoltorio del nuevo filtro.
Introduzca la parte superior del filtro hacia
arriba y dentro delos huecos enla parte
interior de la apertura superior. Apriete la
parte inferior del filtro hacia dentro hasta que
secoloque tras las pestahas.
Levanteelfiltro de la parte inferior hasta
que selibere de las pestaBas.Desliceel filtro
hacia abajo y hacia fuera.
,11111111 IIIIllll]!Jll
i ii
29
Page 58

Antes de/lamar al serviciode reparaciones...
Resoluci6n de Problemas
iAhorre tiempo y dinero! Revise los tobias en los pdginas
siguientes y tal vez no necesite Ilamar al servicio de reparaci6n.
Posibles causas 9u6 hacer
Elhomo no sepone en Puede que se haya fundido * Cambie elfusible o reconecte el diferenciak
marcha un fusible de sucasa o que haya
Elpanel de control est6 La puerta no esth cerrada del todo.* Abra la puerta y ci6rrela por completo.
encendido pero elhomo
no se pone en marcha No se presion6 el bot6n * PresioneSTART/PAUSE
saltadoel diferencial.
Apag6n de corriente. * Desenchufeel homo microondas de la corriente y
vu61valoa enchufar.
El enchufe noesth completamente * Aseg@esedeque el enchufe de 3 clavi]asdel homo est6
insertado en la toma de corriente completamente insertado en la toma de corriente de la
de la pared, pared.
La puerto no esth cerrada del todo.* Abra la puerta y ci6rrela por completo.
START/PAUSEtras seleccionar
el moda de cacd6n.
Ya seha realizado otra selecci6n * PresioneCLEAR/OFF.
en el homo y no se presion6
CLEAR/OFFpara cancelada.
Nose introdujo un tiempo • Aseghresede introducir un tiempo de cocci6n tras
de cocci6n tras apretar TiME COOK. presionar TiMECOOK.
Sepresion6 CLEAR/OFFsin querer. * Vuelvaa programar la cocci6n y presione START/PAUSE.
No se Jntrodujo el pesotras • Aseg@esede introducir el peso de la comida tras
seleccionar AUTO DEFROST seleccionarAUTODEFROSTo FASTDEFROST.
o FASTDEFROST.
No se introdujo el tipo de * Aseg_resedeentrar un tipo de comida.
comida tras apretar AUTOCOOK.
CONTROLBLOQUEADO El control ha sido bloqueado. * Presioney mantenga CLEAR/OFFdurante 3 segundos
para _CONTROLLOCKED) desbloquear el control.
aparece en lapantalla
Elsuelo del homo est6 La luzde la encimera est6 * Estoesnormal.
templado incluso cuando situada bajo el suelo del homo.
elhomo no seha usado Cuando la luz esth puesta,
el color que produce puede
calentar el suelo del homo.
Seescuchaun pitido
con un tono inusualmente
bajo
Ha intentado cambiar el nivel
nivel de potencia cuando no
estaba permitido.
* Muchas de lasfunciones del homo estdn
preseleccionadasy no pueden cambiarse.
30
Page 59

Elextractor del homo
se enciende
autom#ticamente
GEAppliances.com
Posibles causas Ou6 hacer
El extractor se enciende • Esto es normal.
autom6ticamente pare proteger
el microondas si perdbe que hay
demasiado calor en la estufa debajo
de _ste.
Aparece en la pantalla
SENSORERROR
(Errorde sensofl
Seabri6 la puerta mientras se • Noabra la puerta hastaque se perciba elvapor y
utilizaba la funci6n de sensor antes aparezca en pantalla lacuenta de tiempo regresiva.
antes de que pudiera detectarse
el vapor.
El vapor no se detect6 en la
cantidad de tiempo m6xima.
UtiliceTime Cook (Tiempodecocci6n) para calentar
durante mas tiempo.
31
Page 60

Antes de llamar al serviciode reparaciones...
Cosas normales de su horno microondas
Humedad en la puerta y paredesdel horno al cocinar. Frote
la humedad con una toallita de papel o un paho suave.
Humedad entre lospaneles de las puertas del homo al
cocinar determinados alimentos. La humedad se disipard
poco despu6s determinar de cocinar.
Elvapor se escapa por la puerta.
Unaluzde reflexi6n alrededor de la puerta o en la periferia
de la caja delhorno.
Laluzdel homo se debilita y el sonido del soplador cambia
cuando se usan nivelesde potencia diferentes al alto.
Unsonido sordo de golpe cuando el homo de microondas
esta en operaci6n.
DECLARACION DE LA COMISION FEDERAL DE COMUNICACIONES (FCCJ
SOBRE INTERFERENCIA DE FRECUENCIAS RADIALES (S6LO EN EE.UU.)
Esteequipo genera y usa energia de frecuencia ISM
y si no es instalado y usado de forma adecuada,
en cumplimiento estricto con las instrucciones del
fabricante, se podrc_nocasionar interferencias en
la recepci6n de radio y televisi6n. Se realiz6 una
evaluaci6n por tipo y se encontr6 en cumplimiento
con los limites de un equipo ISM,de acuerdo con la
parte 18 de las Reglas FCC,que fueron dise_adas
para brindar una protecci6n razonable contra
dichas interferencias en una instalaci6n residencial.
Sin embargo, no se garantiza que no se presenten
interferencias en una instalaci6n en particular. Si
el equipo provoca interferencias en la recepci6n
de radio o televisi6n, Ioque se puede determinar
encendiendo y apagando elequipo, se aconseja al
Elventilador opera mientras el horno de microondas
estc_operando. Elventilador no se apagar@ni se puede
apagar hasta que el homo de microondas se apague.
iiiiiiiiiiii_i_
Sepuede notar una interferencia de televisi6ny radio
mientras se usa elhomo de microondas. Similara la
interferencia casada por otros electrodom6sticos, Iocual
no indica un problema. Conecte el homo de microondas
en un tomacorriente de un circuito diferente, mueva la
televisi6no el radio tan lejosdel horno de microondas
como sea posible o inspeccione la posici6n de laantena
de latelevisi6n o el radio.
Reoriente la antena receptora de radio o televisi6n.
i Reubique el horno microondas con respecto al
receptor.
Aleje el homo microondas del receptor.
Enchufe el homo microondas en un tomacorriente
diferente, de modo que el homo microondas
y el receptor est6n en diferentes circuitos de
empalmes.
Elfabricante no es responsable de cualquier
interferencia de radio o TV ocasionada por una
modificaci6n no autorizada sobre este homo
microondas. Esresponsabilidad del usuario corregir
dicha interferencia.
usuario que intente corregir la interferencia a trav6s
de una o m6s de las siguientes medidas:
32
Page 61

Notas. GEAppliances.com
33
Page 62

Notas.
34
Page 63

Garan6a de Homo Nicroondas GE.
Todos los servicios de garantia los proporcionan nuestros Centros
de Reparaci6n de Fdbrica o nuestros t@cnicos Customer Care ®
autorizados. Pare concertar una cita de reparaci6n, en Iinea,
24 horas al d[a, visite GEAppliances.com, o llama a1800.GE.CARES
(800.432.2737). Cuando llama pare solicitor servicio, par favor
tango a mane el nOmero de serie y el nOmero de modelo.
GE reemplazar6:
Un aria Cualquier recambio del homo microondas que falle debido a un defecto en sus materiales o en
Desde la fecha de la su fabricaci6n. Durante esta garantia limitada de un aria, GE proporcionar_, sin costa adicional,
compra original mane de obra y servicio relacionado para reemplazar las partes defectuosas.
Cinco arias El magnetr6n, el tuba magnetr6n fallase debido a un defecto en sus muteriales o en su
Desde la fech u de Ic fabricaci6n. Durante estos cinco arias adicionales de garanffa limitada, usted sere responsable
compra original de cualquier costa de mane de obra o servicio a domicilio.
, viajes de repamd6n a su hogar para enseffarle c6mo
usar el producto.
, Instalaci6n o entrega inapropiada, o mantenimiento
impropio.
, Producto na accesible pare focilitar el servicio requerido.
, Folios del pmducto si hay abuse, mel usa (par ejemplo,
chispas dentro de homo microondas del estante
met6lico/papel de aiuminio), o usa pare atros prop6sitos
que los propuestos, o si se usa can fines comercioies.
, Reemplazo de fusibles de su hogar o reajuste de los
diferencioles.
, Daffo al pmducto causado par accidente, fuego,
inundaciones o actos de Dies.
, Daffo incidental o consecuencial a su propiedad causado
par posibies defectos con el operate.
, Causer defies despu_s de Io entrege.
Grape aqui su recibo. Se
requiere facilitar prueba de la
fecha de compra original para
obtener un servicio bajo la
garantia.
Reemplazo de bombillas de la luz de la estufa.
EXCLUSION DE GARANT[AS IPIPLiCITAS--Su _nico y exclusive derecho es la reparaci6n del producto,
tal y coma se indica en esta Garan6a limitada. Cualquier garantia implicita, incluyendo las garantias
implicitas de comerciabilidad o adecuaci6n para un fin determinado, est6n limitadas a un aria o el
periodo de tiempo m6s breve permitido par la lay.
Esta garantia se extiende al comprador original y cualquier comprador posterior de productos comprados pare
usa residencial dentro de Estados Unidos. 5i el producto estd situado en undrea qua no dispone de servicio
par porte de un proveedor de servicio autorizado de GE, podria tenet qua hacerse cargo de los castes de envio
o bien podria solicitdrsele qua Ileve el producto a una centre de servicio de GE autorizado pare realizer la
reparaci6n. En Alaska, la garantia excluye el costa de envio o los visitas de servicio a su case.
Algunos estados no permiten la exclusi6n o limitaci6n de dahos incidentales o consecuenciales. Esta garantia
le proporciona detaches legales espedficos, y puede tenet otros derechos qua pueden verier de un estado a
otto. Para conocer los detaches legales de su estado, consulte con su oficina local de asuntos del consumidor o
al procurador general de su estado.
Garantizador: General Electric Company. Louisville, KY 40225
35
Page 64

Ayuda a! diente.
Pdgino Web de GEAppliances GEAppliances.com
_Tienealguna pregunta sabre suelectrodom6stico? iPruebela p6gina Web de GEAppliances 24hams al d[a,
cualquier d[a del aho! Par(]mayor convenienciay servicio m(_sr(_pido,ya puede descargar los Manualesde los
Propietarios,pedir piezas oincluso hacer una cita en I[neapar(] que vengan a realizaruna reparaci6n. Tambi6n
puede "AskOurTeam of ExpertsTM "(Preguntur u nuestro equipo de expertos)
sabre cuulquier cuesti6n y mucho mds...
Solicite unu reporoci6n GEAppliances.com
Elservicio de expertos GEest6 a tan s61oun paso de su puerta, iEntre en I[nea y solicite su reparaci6n cuando
levenga bien 24 horas al d[a cualquier d[a del aho! O Ilame al 800.GE.CARES(800.452.2737) durante horas
normales de oficina.
RedLifeDesignStudio
(EstudiodedisehopardIovidored)
GEupoyu el concepto de Dise_o Universul-productos, serviciosy umbientes que pueden usur gente de todus
lusedudes, tumu_os y cupucidudes. Reconocemoslu necesidud de disehur puru unu grun gumu de hubilidudes
y dificultudes fisicusy mentules. Purum(_sdetullescobre lus uplicuciones de GEDise_oUniversal,incluyendo
ideas de dise_o para la cocina para personas con discapacidades, mire nuestra p6gina Web hay mismo. Para
personas con dificultades auditivas, favor de Ilamar al 800.TDD.GEAC(800.833.4322).
G EAp_pliances.com
Gorontios ompliodos GEAppliances.com
Compre una garant[a ampliada y obtenga detalles sabre descuentos especiales disponibles mientras su garant[a
est6 a0n activa. Puede comprarla en I[nea en cualquier momenta, o Ilamar al (800.626.222/4)durante horas
normales de oficina. GE Consumer Home Services estar6 a0n ah[ cuando su garant[a termine.
Piezos y occesorios GEAppliances.com
Aquellos individuos con la calificaci6n necesaria para reparar sus propios electrodom6sticos pueden
pedir que se les manden las piezas o accesorios directamente a sus hogares (aceptamos las tarjetas
VISA,MasterCard y Discover). Haga su pedido en I[nea hay, 2/4horas cada d[a o Ilamar par tel6fono
a1800.626.2002 durante horas normales de oficina.
Lasinstrucciones descritas en este manual cubren los procedimientos a seguir par cualquier usuario.Cualquier
otra reparaci6n deber[a,par regla general, referirsea personal calificado autorizado. Debeejercerse precauci6n
ya que lasreparaciones incorrectas pueden causar condiciones de funcionamiento inseguras.
P6ngose en contocto con nosotros GEAppliances.com
Sino est6 satisfecho con el servicio que recibe de GE,p6ngase en contacto con nosotros en nuestra pdgina
Web indicando todos los detalles as[ coma su n0mero de tel6fono o escr[banos a:
General Manager,Customer Relations
GEAppliances,Appliance Park
Louisville,KY40225
Registre su e/ectrodom_stico GEAppliances.com
iRegistre su nuevo electrodom_stico en linea--cuando usted prefiem! Elregistrar su producto a tiempo le
proporcionar6, si surgiera la necesidad, una mejor comunicaci6n y un servicio mds r6pido bajo los t6rminos de
su garant[a, mambi6n puede enviar su tarjeta de registro pre-impresa que se incluye en el material de embalaje
o recorte y use elformulario de este Manual del Propietario.
Impreso en Corea
 Loading...