

Page 1
Magnetic
Window Alarm
Indoor Use Only
• 120dB alarm saunds when
magnetic cantact is braken
Awarning
Risk of personal injury
• Prolonged exposure to
alarm siren may cause
permanent hearing loss
• On-aff switch activates and deactivates alarm
• Law-battery indicatar light
1
Battery
Compartment
th
on the leftside of the unit. Replace the batteries if the red
light does not illuminate. Average battery life for typical
usage is up to 6 months.
1. Access the battery compartment by removing the
[
three screws on the back of the unit and separating the
front and back halves of the alarm.
• On/Off switch and law battery push buttan
hidden in campartment
• Indicatar far armed/disarmed status
• Easy ta install - na wiring necessary
GAP BETWEEN ALARM AND MAGNETIC SENSOR
Alarm is activated when switched ON and gap
between alarm and magnetic sensor is
greater than 0.5".
BATTERY TESTAND INSTALLATION
The GE Magnetic Window Alarm requires (4) LR44
y
Switch
□
Low
BATTERY INSTALLATION
The door stop alarm requires one 9V battery. When the
Battery
Indicator
Metal Contact
Plate (Cover)
[
2. Insert (4) LR44 button batteries noting polarity.
3. Replace back of the alarm and secure with screws.
IMPORTANT! Remove batteries before storing the Alarm
for extended periods. Batteries corrode over time and
may cause permanent damage to the unit. Do not mix
different battery types or new and used batteries.
Depleted batteries should be disposed of properly.
OPERATION OF ALARM, LIGHT
1. To activate siren, hold alarm in one hand and pull on
cord with the other, pulling metal pin out of alarm body.
button batteries (included). Average battery life for
typical usage is up to one year.
1. Slide cover off the battery
compartment located on
the front of the main unit.
2. Push the'Battery Test'
push-button in the battery
compartment. If the green
light illuminates, the battery
is still good. If it fails to illuminate, replace all
batteries.
3. Insert (4) LR44 button batteries noting polarity.
Magnetic
Sensor
Siren
On/Off
Indicator
Battery Test
Light
Battery
Compartment
Low-Battery Indicator illuminates, batteries need replacing,
1. Toggle On/Off switch to the 'OFF' position to prevent
unintentional triggering.
2. Remove screw on the bottom of the door stop and
battery compartment cover.
3. Fit 9V battery to the connecting leaf, making sure the
terminal polarities are correct.
4. Replace cover.
IMPORTANT: Remove batteries before storing the
Alarm for extended periods. Batteries corrode over
time and may cause permanent damage to the unit.
Depleted batteries should be removed from the unit
2. To stop the siren, reinsert the metal pin back into the
alarm body.
3. To use light, press and hold button on left side of unit.
90 DAY LIMITED WARRANTY: Jasco Products Company warrants
this product to be free from manufacturing defects for a period of
ninety days from the original date of cansumer purchase. This
warranty is limited to the repair or replacement cf this prcduct only
and does not extend to consequential or incidental damage to other
products that may be used with this unit. This warranty is in lieu of
all other warranties express or implied. Some states do not allow
limitations on how long an implied warranty lasts ar permit the
exclusion or limitation of incidental or consequential damages, so
the above limitations may not apply to you. This warranty gives yau
4. Replace battery compartment cover.
IMPORTANT: Remove batteries before storing the
Alarm for extended periods. Batteries corrode over
time and may cause permanent damage to the unit.
Different types of batteries or new and used
batteries should not be mixed. Depleted batteries
should be removed and disposed of properly.
INSTALLATION
Using the douWe si'Bed a'BFiesive tape provided”
mount the alarm and magnetic sensor on window,
and disposed of properly.
TESTING THE ALARM
1. Toggle the On/Off switch to 'ON'.
2. Quickly but firmly tap down and release the metal on
the cover unit. A quick siren chirp indicates proper
operation. NOTE: A cloth can be used to cover the alarm
to reduce risk of hearing damage.
3. Toggle the On/Off switch to 'OFF'.
specific rights, and yau may also have ather rights which vary fram
state to state. If unit should prove defective within the warranty
period, return prepaid with dated proaf of purchase to:
Jasco Products Company
311 N.W. 122nd
Oklahoma City, OK. 73114
door, or cabinet to be protected, placing one of the
units on the part of the fixture that opens (window)
and the other unit on the stationary part of the
fixture (frame). Mount so that when the window, door
or cabinet is closed, the gap between the alarm and
sensor is no more than 0.5" (preferably less).
OPERATION
1. To arm the unit, slide cover off the battery
compartment located on the front of the main unit.
Toggle ON/OFF switch to the ON position. The
window on the housing will become red. Replace
battery compartment cover. Whenever the protected
window, door or cabinet is opened (causing the alarm
to be separated from the magnetic sensor by more
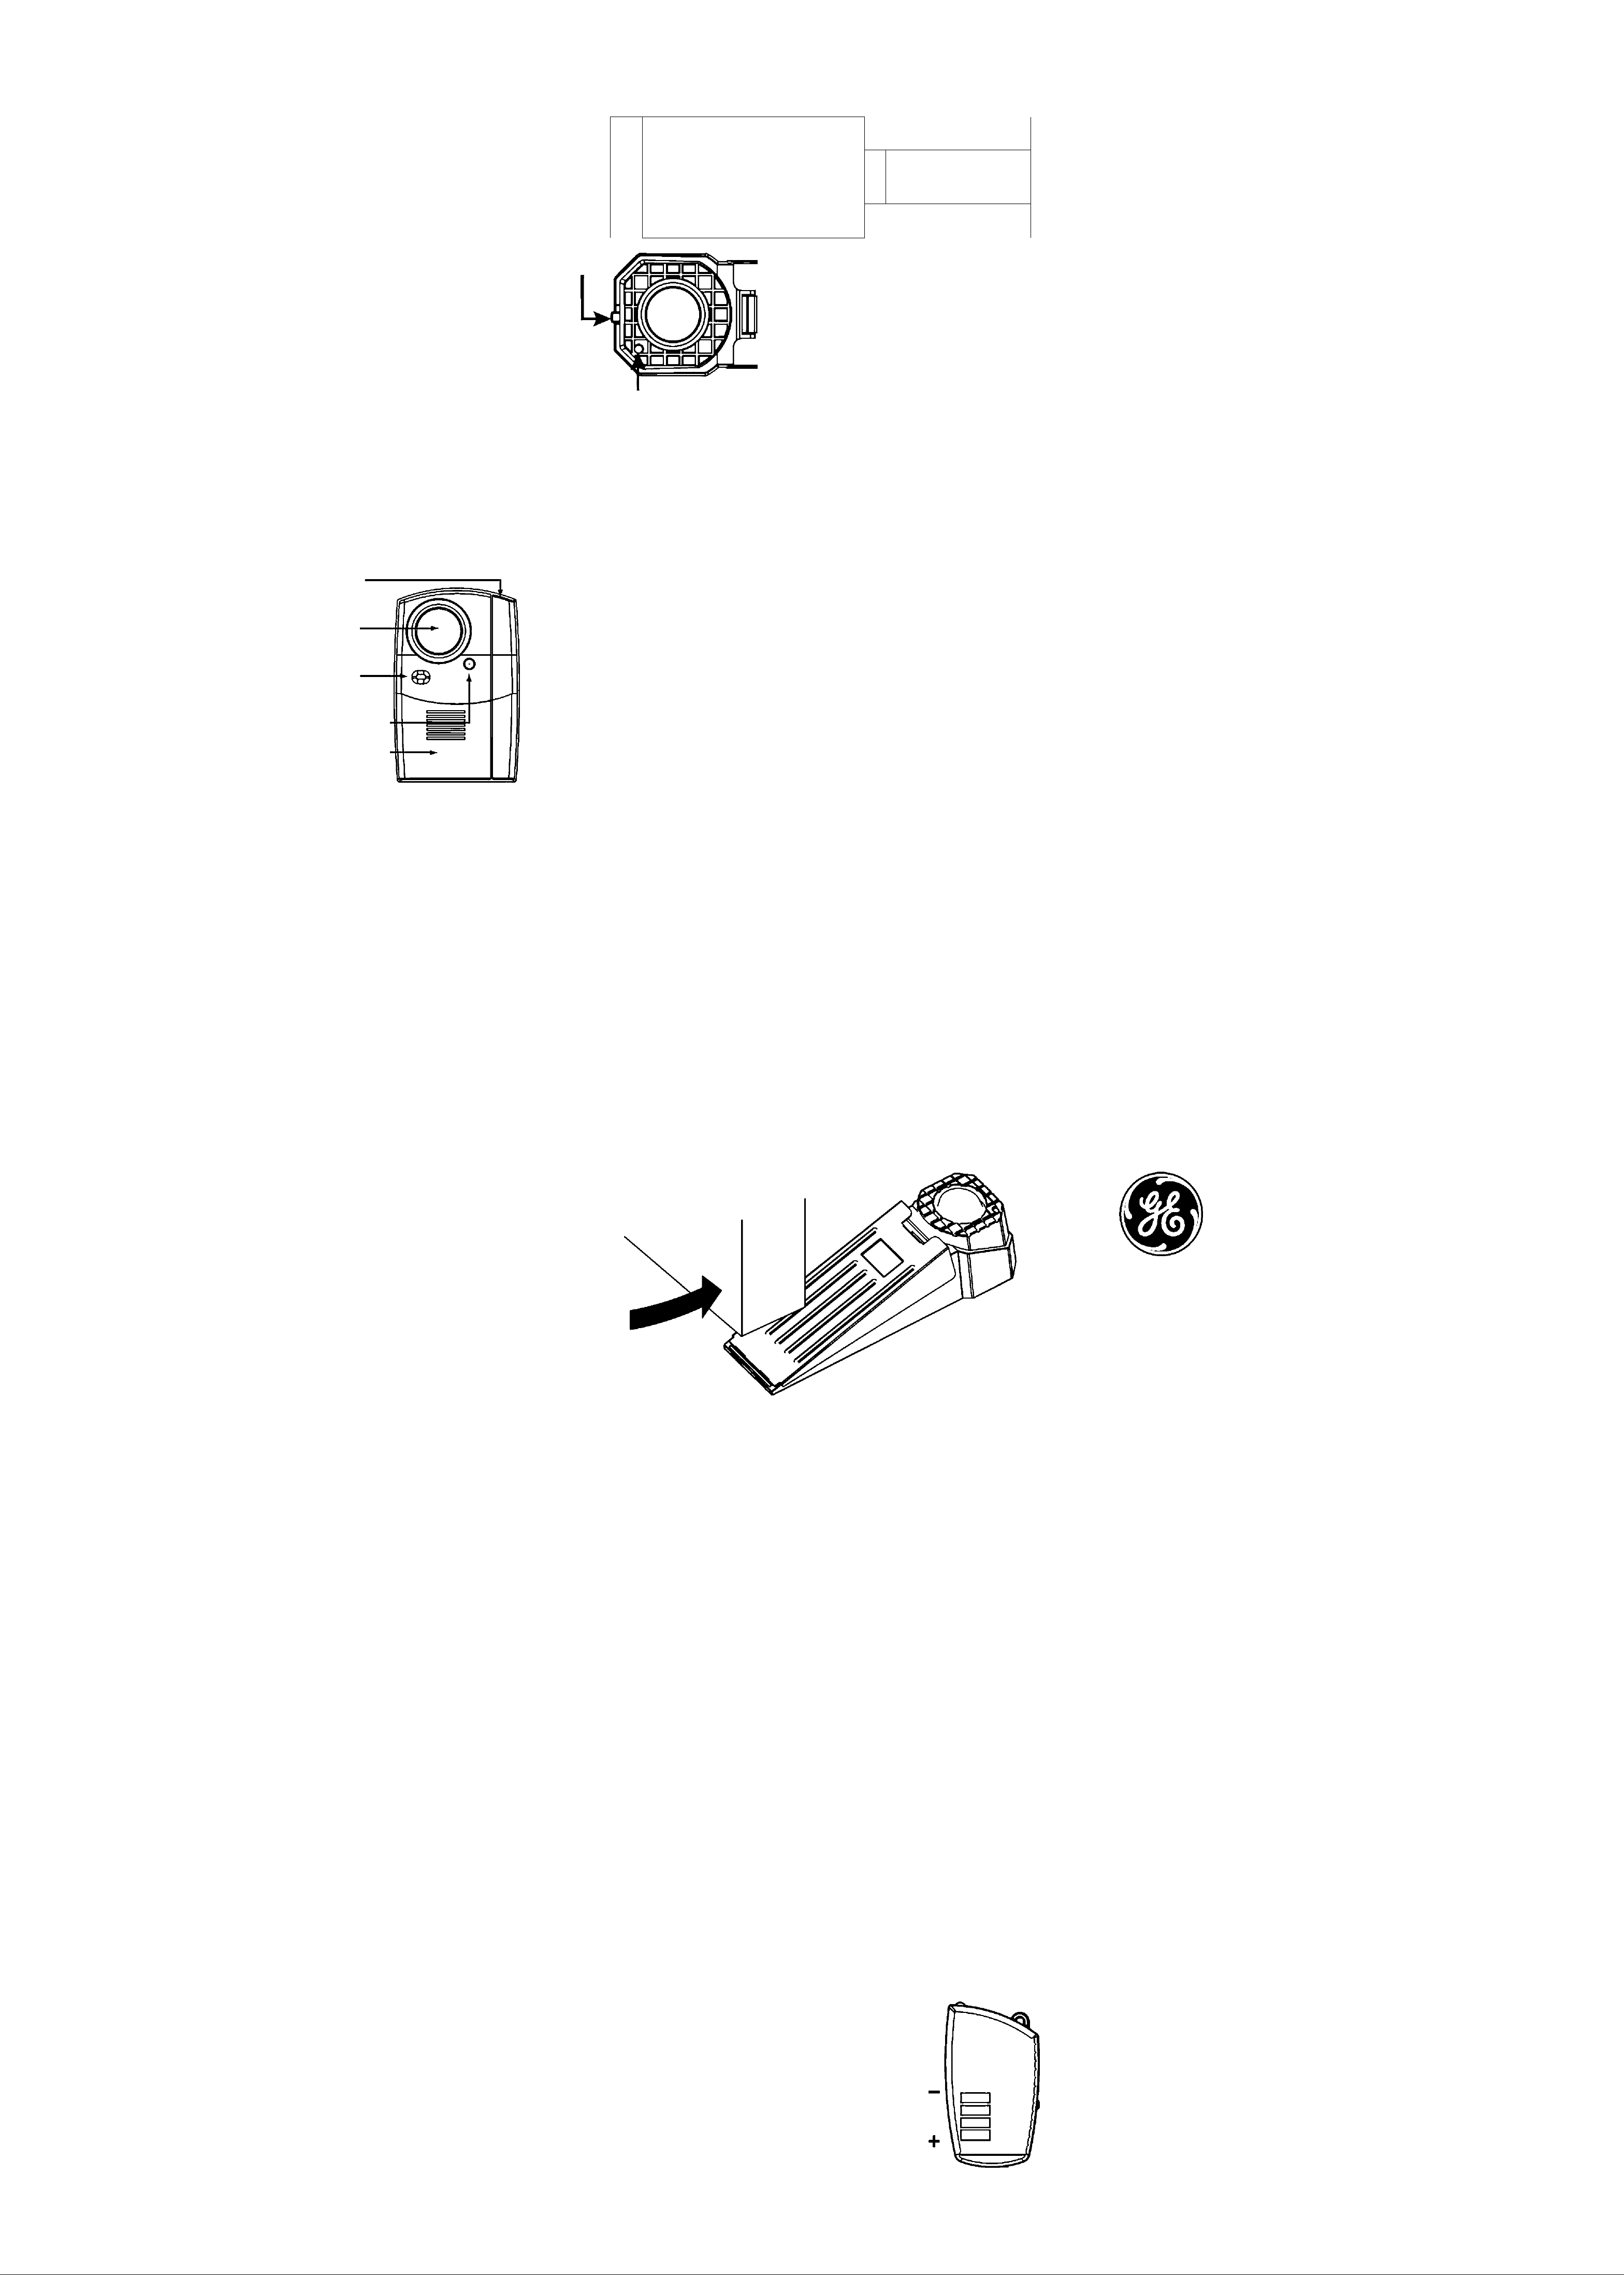
INSTALLATION: Insert door wedge at the base of the door
as shown in the diagram, with the pointed edge under the
door gap. The alarm is properly installed if the alarm
sounds and the metal contact plate is depressed when
the door is opened. Make sure the non-skid pads on the
bottom of the alarm are in firm contact with the floor.
45216-2 3/31/06
User's Manual
Instrucciones
Easy to Install
Portable
than 0.5"), the alarm siren will sound continuously
until disarmed.
2. To disarm the unit, slide cover off the battery
compartment. Toggle ON/OFF switch to OFF Position.
Make sure the window, door or cabinet is closed
before rearming.
NOTE: To test, a cloth can be used to cover the alarm
to reduce risk of hearing damage.
CARE AND MAINTENANCE
To clean the unit housing, use a soft cloth slightly
dampened with water and wipe dry. Do not use
OPERATION
1. Toggle the On/Off switch to 'ON' to activate alarm.
2. Toggle the On/Off switch to 'OFF' to deactivate alarm.
CARE AND MAINTENANCE To dean the unit housing,
use a soft cloth slightly dampened with water and wipe
dry. Do not use chemical agents as this may damage
and discolor the unit.
Personal
Awarning
Security Alarm
• 120dB alarm saunds when pin
is remaved
Risk of personal injury
• Prolonged exposure to
alarm siren may cause
permanent hearing loss
Security Kit
Equipo Portátil de Seguridad
fácil de instalar
DO NOT USE IN WET LOCATIONS
NO EMPLEE ESTOS PRODUCTOS
EN LUGARES MOJADOS
chemical agents as this may damage and discolor
the unit.
Awarning
Pressure Activated
Risk of personal injury
• Prolonged exposure to
Door Stop Alarm
alarm siren may cause
Indoor Use Only
• Great travel alarm -
hatel raams, apartments
• 120dB alarm saunds when alarm is activated
permanent hearing loss
• Handy security alarm and light
gaes everywhere with yau
BAHERY INSTALLATION
Before using your Personal Key Chain
Alarm, remove the insulation tape
between the alarm housing and the
battery compartment. The Alarm requires (4) LR44
batteries (included). Test the batteries by the pushbutton
@ is a trademark of the General Electric
Company and is used under license to Jasco
Products Company LLC, 311 N.W. 122nd
Street, Oklahoma City, OK 73114.
www.jascoproducts.com
 Loading...