

Page 1
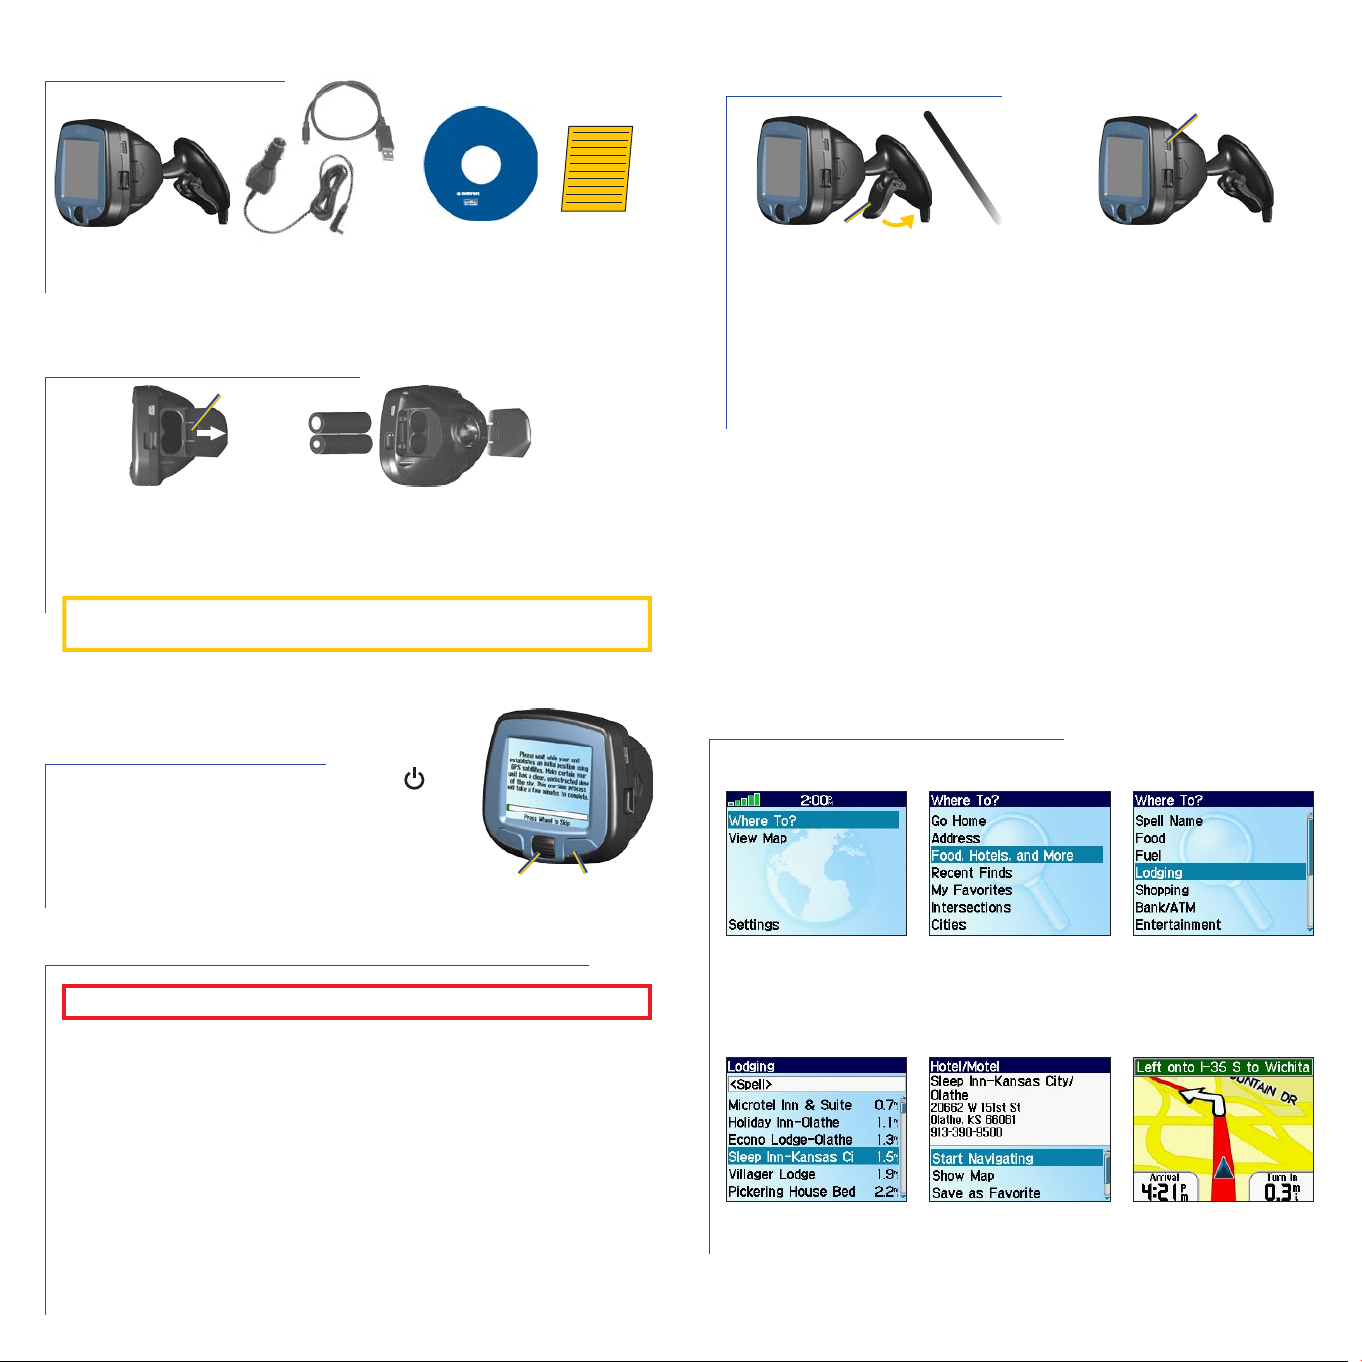
Getting Started
Mount the i2/i3
➍
Windshield
USB port
i2/i3 and mount
Insert Batteries
➊
Tab
1. Press down on the tab and pull to remove the battery door.
2. Insert two AA batteries.
3. Press down on the battery door as you slide it back into place.
Keep batteries installed in your i2/i3 so it can find satellites quickly.
Do not mix different types of batteries or old and new batteries.
Set Up the i2/i3
➋
Press and hold the Power button
turn on the i2/i3. Follow the instructions
on the screen to set up the i2/i3. Roll
the Wheel up and down to highlight
options. Press in to select options.
USB cable
Vehicle adapter cable
Setup
DVD-ROM
to
Unlock sheet
PowerWheel
Lever
1. Place the suction cup mount on your windshield with the lever
pulled toward you, as shown above.
2. Press the lever toward the windshield.
3. Plug one end of the vehicle adapter into the USB port on the
i2/i3. Plug the other end into a receptacle in your vehicle.
WARNING: For use in vehicles, it is the sole responsibility of the owner/operator of a vehicle with the i2/i3 installed
to place and secure the device so it will not interfere with the vehicle operating controls and safety devices, obstruct the
driver’s view of driving conditions, or cause personal injury in the event of an accident.
NOTICE TO DRIVERS IN CALIFORNIA AND MINNESOTA: State law prohibits drivers in California and
Minnesota from using suction mounts on their windshields while operating motor vehicles. Other Garmin dashboard or
friction mounting options should be used. Garmin does not take any responsibility for any fines, penalties, or damages that
may be incurred as a result of disregarding this notice. (See California Vehicle Code Section 26708(a); Minnesota Statutes
2005, Section 169.71)
Find a Place and Go!
➊
➋
➌
Install Software and Load Maps
➌
Do not connect your i2/i3 to your computer until you are told to do so!
1. Insert the Setup DVD-ROM into your computer’s DVD-ROM
drive.
If the welcome screen does not automatically appear, click
Start and then Run on your personal computer. Type the
letter of your DVD-ROM drive followed by setup.exe (example:
D:\setup.exe). Then press Enter.
2. Follow the instructions on the screen to install software and
load maps to your i2/i3.
3. When MapInstall opens, click the map to select the regions you
want to load to your i2/i3. Selected maps are shaded pink.
NOTE: Keep your Unlock sheet in a safe place for future reference.
Select Where To?
➍
Select a destination.
Tip: To narrow your search, select the <Spell> field and enter letters in the name of
the place.
Select Food, Hotels,
and More.
➎
Select Start Navigating.
Select a category.
➏
Enjoy the route!
Page 2
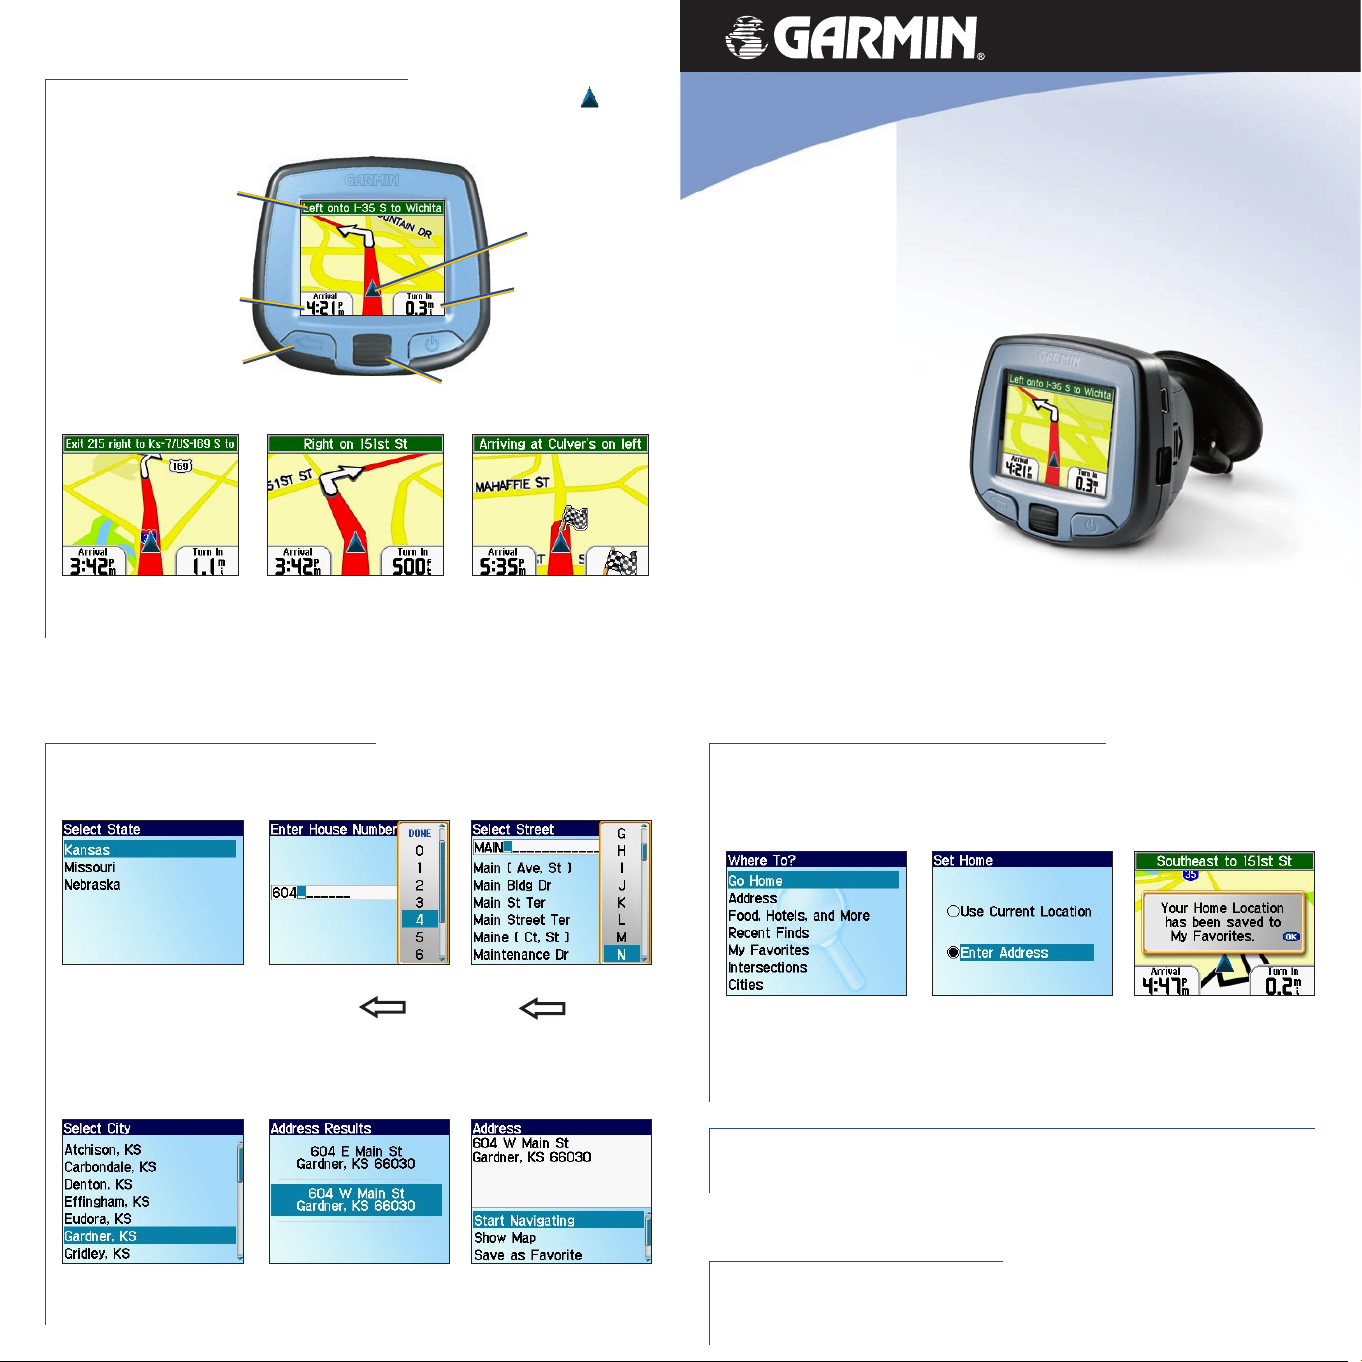
Following Your Route
Follow the route to your destination using the map. The position icon shows
your current location.
®
Text directions
Your position
Time you will arrive at
your destination
Press to return to
main page
Your route is marked
with a red line.
March 2006 190-00613-01 Rev. C Printed in Taiwan
Follow the arrows as
you take turns.
Roll to zoom in
Distance to the
next turn
and out
A checkered flag marks
your destination.
Finding an Address
Select Where To? > Address to begin.
➊
➋
➌
StreetPilot
i2/i3
Set up and go!
StreetPilot i3 shown
Setting a Home Location
You can set a Home location for the place you return to most often. Then,
select Where To? > Go Home to go Home.
➊
➋
➌
Select a state.
➍
If necessary, select
a city.
Enter the house number.
Then press .
➎
Select the correct
address.
Enter the street name.
Press and select
the correct street from
the list.
➏
Select Start
Navigating.
From the main page,
select Where To? > Go
Home.
Select an option.
Press the Wheel to
acknowledge the
message.
Adjusting Volume, Brightness, and Contrast
From the main page, select Settings. Then select Set Volume or Set
Brightness. Roll the Wheel up or down to change the setting. If you have an
i2, press the Power button at any time to adjust the contrast of the screen.
More Information
For more information about your i2/i3, refer to the Owner’s Manual located
on the Setup DVD-ROM. You can also view it online at http://www.garmin.
com/products/spi3 or spi2. Click the Manuals link and then select Download.
 Loading...