

Garmin ACTIONLASER 1600 User Manual

®
EPSON
ActionLaser™1600
Read This First

This booklet is to help you set up your printer and begin printing
quickly. It also gives you instructions for routine maintenance. If you
need detailed information on printer use or if you have problems
printing, see your Reference Guide.
HP, LaserJet, and
General Notice: Other product names used herein are for identification purposes only and
may be trademarks of their respective companies.
The Energy Star emblem does not represent EPA
Copyright © 1993 by Epson America, Inc., Torrance, California.
HPGL/Z
are registered trademarks of Hewlett-Packard Company.
endorsement of any product or service.
Contents
1 Unpacking..
2
Installing the imaging cartridge
3
Loading paper
4
Attaching the power cord
5 Testing the printer
6 Connecting the printer to the computer
7 Testing the computer-to-printer connection
8 Setting up your software
Using Energy Wisely
Replacing the Imaging Cartridge
Feed Jam
Paper Jam
...............................
...............................
...........................
.................
...........................
....................
........................
............
.........
....................
........................
.................
1
1
4
6
7
8
11
12
16
17
20
21
. . .
313
11
Unpacking
1.
Remove the accessories and printer from the shipping carton.
2.
Set the printer on a flat, stable surface. Leave adequate room
to provide sufficient ventilation. Allow enough room above
the printer to be able to fully open its cover.
3.
Take the packaging off the printer and the other items and
store for future use.
Note:
The printer weighs about about 10 kg (22 lb) and should be lifted with
cure.
2
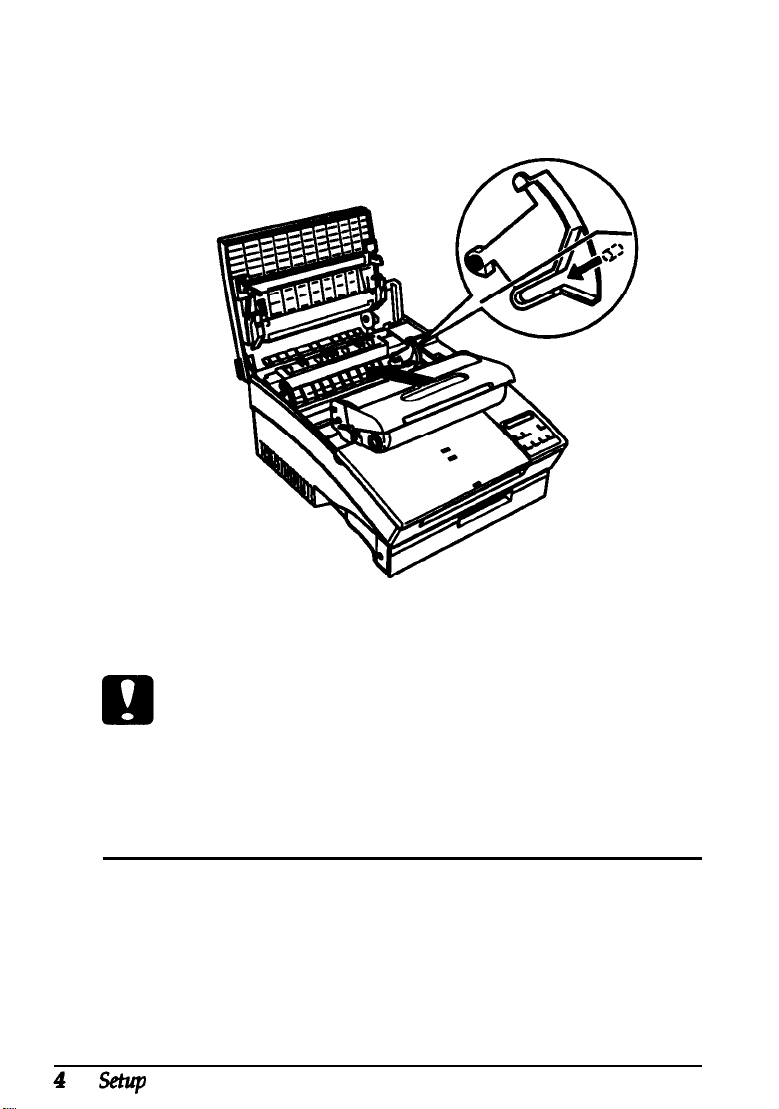
Installing the imaging cartridge
Caution:
P
e
Do not turn the imaging curtridge upside down.
P
Do not expose the imaging cartridge to light any longer
than necessary.
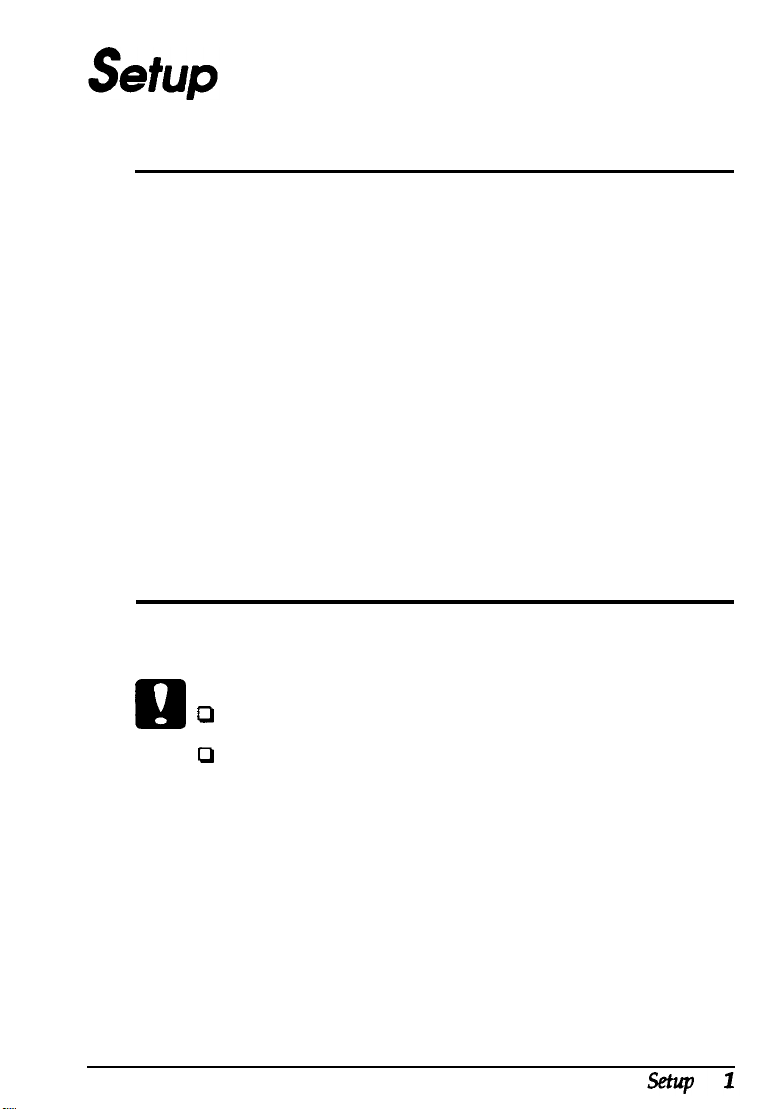
1.
Open the printer cover by pressing the latch on the left
toward you.
2.
While holding the imaging cartridge horizontally, gently
shake it a few times to distribute the toner evenly.
3.
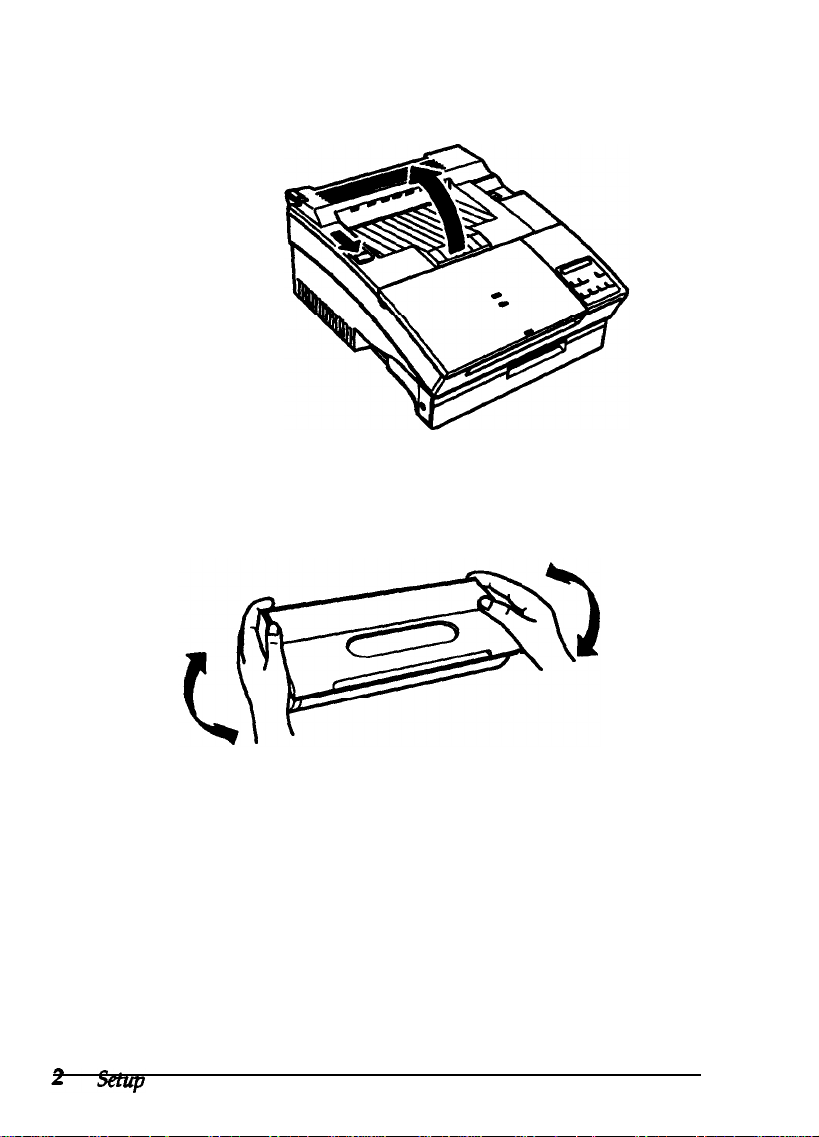
Set the imaging cartridge on a clean, flat surface Firmly grip
the tab on the left side of the cartridge. Pull the clear seal all
the way out with firm, even pressure, as shown.
4.
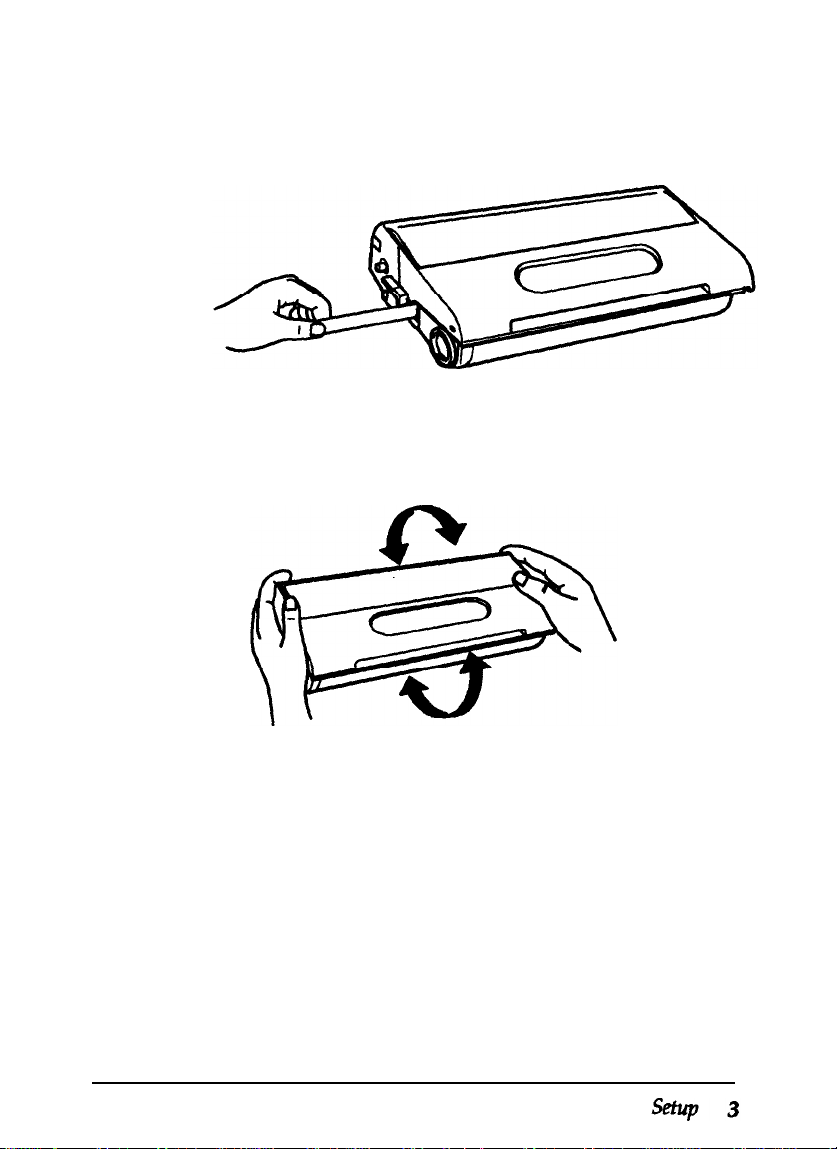
Hold the imaging cartridge and gently shake it from front to
back.
5.
Insert the cartridge into the printer by placing the pins on
each side of the cartridge into the grooves inside the
printer. Slide it gently into the opening until it stops.
6. Gently press down on the printer cover until it clicks shut.
Caution:
Whenever you ship or transport the printer, first remove the
imaging cartridge and place it in a plastic bag. Seal the bag to
prevent the fine toner particles from spilling into the printer or
onto your clothing.
Loading paper
3
1.
Fan a stack of letter-size paper and even up the edges.
2. Open the paper cover located on the top front of the printer.
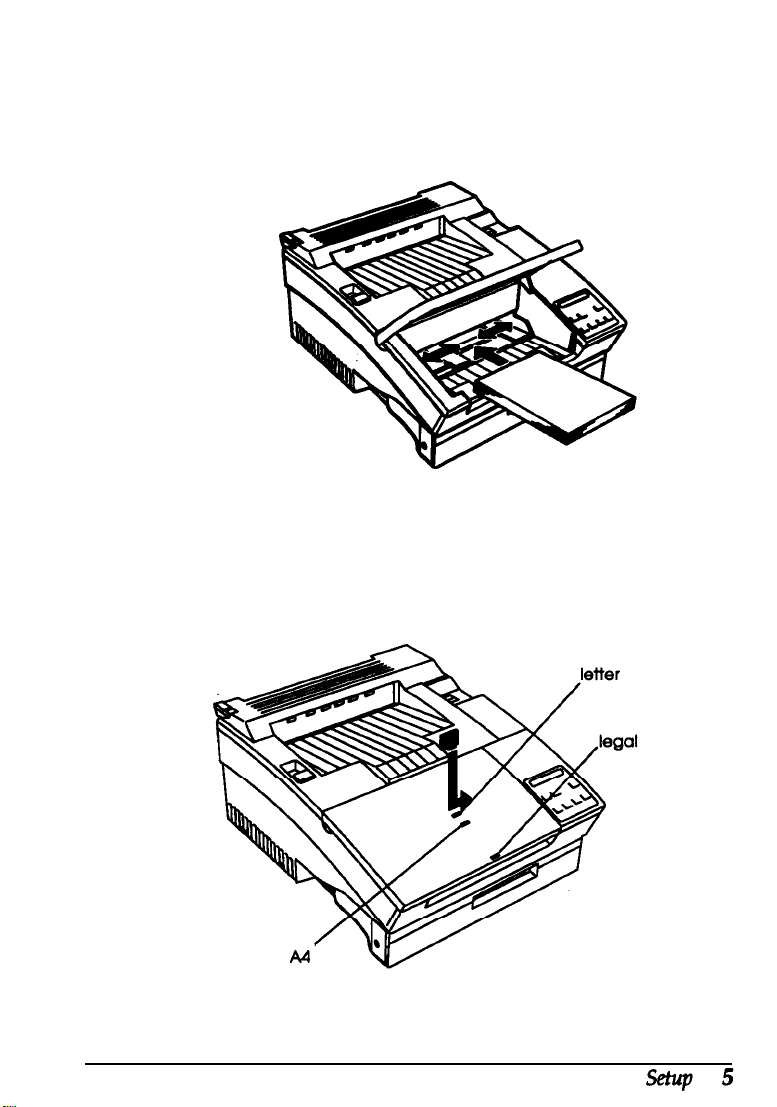
3. Adjust the paper guides inside the paper tray to match the
size of the paper. Load a stack of paper (up to 150 sheets)
into the paper tray. Make sure the paper guides do not
press the paper too tightly.
4. Close the paper cover.
5. Install the paper stopper into the slot on top of the paper
cover to match the size of the paper in the tray.
 Loading...