


AVCS GYRO
NSTRUCTION MANUAL
I
YAW-AXIS STABILIZER FOR MODEL HELICOPTER
(RATE GYRO)
2
Thank you for buying a GY611 AVCS gyro.
Before using your new gyro, please read this manual thoroughly and use the
gyro properly and safely. After reading this manual, store it in a safe place.
FOREWORD
The GY611 gyro is an AVCS (Angular Vector Control System) rate gyro de
veloped for model helicopter competition.
[GY611 Features]
· Super narrow pulse (760μs) drive system substantially improves servo re
sponse. An S9256 digital servo is used.
· Microcomputer high-speed arithmetic processing substantially improves
gyro response.
· High resolution 12-bit A/D accurately converts the sensor output to a digi
tal signal.
· Newest SMM (Silicon Micro Machine) and low-back aeroform case im
prove vibration resistance and neutral characteristic.
· Amp mounts an LCD that allows accurate data setting.
[S9256]
· Special servo for the GY611. Compatible with super narrow pulse (760μs)
drive.
· High response realized. (0.06 sec/60˚)
· Alumite case w/heat sink effectively cools the motor heat.
-
-
-
-
Always use the special S9256 servo with the GY611.
·The GY611 cannot operate with servos other than the super narrow pulse
(760μs) servo. The servo may be destroyed.
Warning: This product contains a chemical known to cause cancer and birth defects
or other reproductive harm.
· No part of this manual may be reproduced in any form without prior permission.
· The contents of this manual are subject to change without prior notice.
· This manual has been carefully written. Please write to Futaba if you feel that any
corrections or clarifications should be made.

3
ABLE OF CONTENTS
T
FOR SAFETY
· Meaning of Special Markings ---------------------------- 4
· Mounting/Operating Precautions ------------------------ 4
· Fuselage Maintenance Precautions ---------------------- 6
· S9256 Usage Precautions --------------------------------- 7
BEFORE USE
· Set Contents ------------------------------------------------ 8
· AVCS Gyro -------------------------------------------------
DATA SETTING
· Name and Function of Each Part -----------------------12
· LCD Display and Edit Keys ----------------------------- 13
· Function Map ---------------------------------------------- 14
· GY611 Functions Setting --------------------------------
· Remote Gain Function ----------------------------------- 21
· Initialization ----------------------------------------------- 30
INSTALLATION AND ADJUSTMENT
· Installing to Fuselage ------------------------------------- 32
· Flight Adjustments ----------------------------------------
9
15
37
REFERENCE
· Specifications ---------------------------------------------- 40
· Definition of Abbreviations ------------------------------
· GY611 Parameters Sheet --------------------------------
41
42
4
F
OR SAFETY
OR SAFETY
F
To ensure safe use, observe the following precautions.
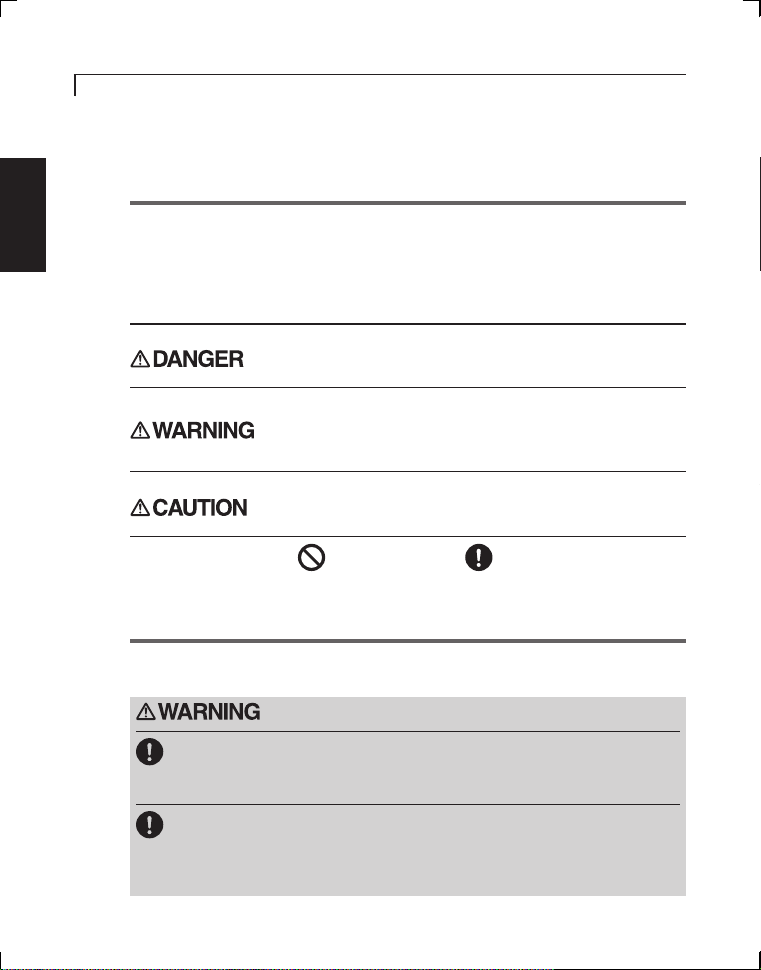
Meaning of Special Markings
Pay special attention to the safety at the parts of this manual that are
indicated by the following marks.
Mark Meaning
Procedures which may lead to a dangerous condition and
cause death or serious injury to the user if not carried out
properly.
Procedures which may lead to a dangerous condition or
cause death or serious injury to the user if not carried out
properly, or procedures where the probability of superficial
injury or physical damage is high.
Procedures where the possibility of serious injury to the user
is small, but there is a danger of injury, or physical damage,
if not carried out properly.
Symbol: ; Prohibited ; Mandatory
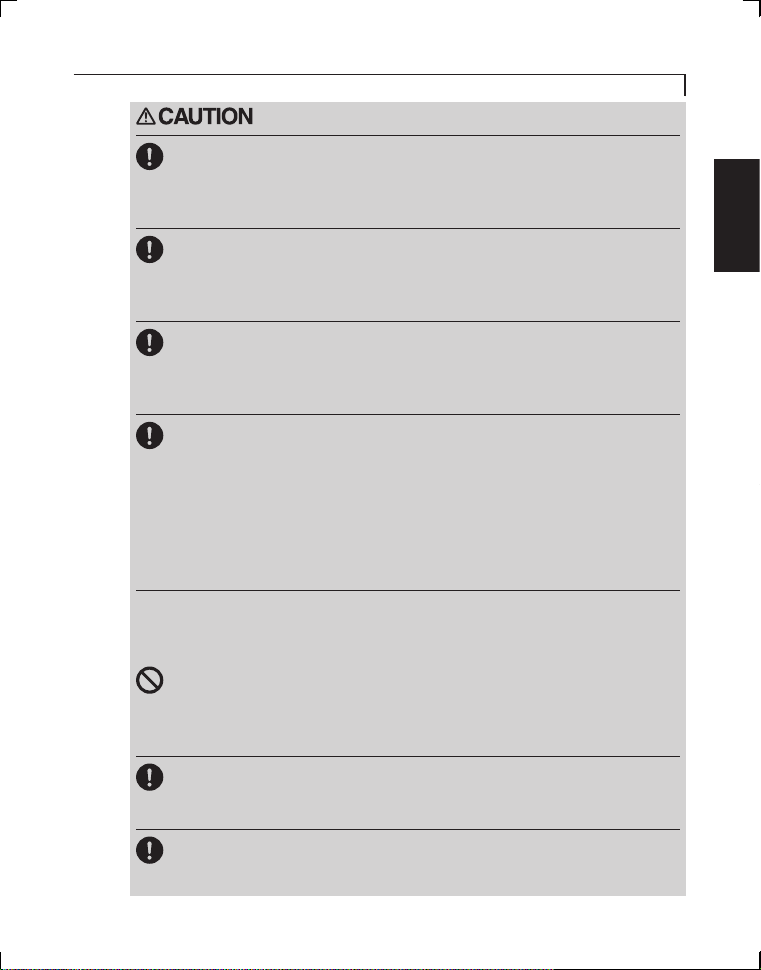
Mounting/Operating Precautions
Insert the connectors fully and firmly.
·If a connector works loose due to vibration during flight, control may be
lost and result in a dangerous situation.
Always use the GY611 with a PCM proportional system.
·Using the GY611 with an FM proportional system, when noise enters,
the wrong neutral position may be memorized.
5
F
OR SAFETY
Always use the accessory sensor tape to install the sensor
to the fuselage.
· This is necessary to securely fasten the sensor to the fuselage so that operation of
the gyro does not transmit unwanted fuselage vibrations directly to the sensor.
When mounting the sensor, provide a little surplus so that
the sensor connection cables are not too taut.
· If the sensor cables are too taut, the gyro will not display its full performance. If the
sensor peels, control will be lost and result in a dangerous situation.
Mount the sensor and control amp so that metals or other
conductive objects do not touch these cases.
· The GY611 uses a conductive resin case to reduce electromagnetic interference. Because the surface of the case is conductive, metal objects may cause a short circuit.
Mount the sensor and servo at least 2cm apart.
When using a GV-1 governor, mount the sensor and GV-1
amp at least 5cm apart.
When using the GY611 with a motor-driven helicopter,
mount the sensor and drive motor at least 10cm apart.
· Noise from the servo motor, GV-1 amp and drive motor may cause the performance of an erroneously operated gyro to drop.
Precautions When Turning on the Power Switch
During initialization, the message --Hello-- appears on the GY611
LCD screen.
Do not move the helicopter until this message disappears
(in about 3 seconds).
Also, do not move the transmitter rudder stick from the
neutral position during this period.
Always check the direction of operation of the servos.
·If you attempt to fly the model when a servo operates in the wrong direction, the
fuselage will spin in a fixed direction and enter an extremely dangerous state.
When the rudder neutral position was changed by the link-
age, the rudder neutral position in the AVCS mode must
always be re-read before use.
6
F
OR SAFETY
· Re-reading method:
Turn on the transmitter in the AVCS mode, then turn on the gyro . Or quickly switch (interval of within 1 second) the remote gain channel switch between the AVCS mode and
Normal mode at least three times and switch the AVCS side with the transmitter in the
ON state. This memorizes the new rudder position inside the GY611.
Avoid sudden temperature changes.
·Sudden temperature changes will cause the neutral position to change. For example,
in the winter, do not fly immediately after removing the model from inside a heated car
and in the summer, do not fly immediately after removing the model from inside an air
conditioned car. Allow the model to stand for about 10 minutes and turn on the power
after the temperature inside the gyro has stabilized. Also, if the gyro is exposed to direct
sunlight or is mounted near the engine, the temperature may change suddenly. Take suitable measures so that the gyro is not exposed to direct sunlight, etc.
Check the remaining receiver/gyro/servo nicd battery op-
erating time during the adjustment stage and decide how
many flights are remaining.
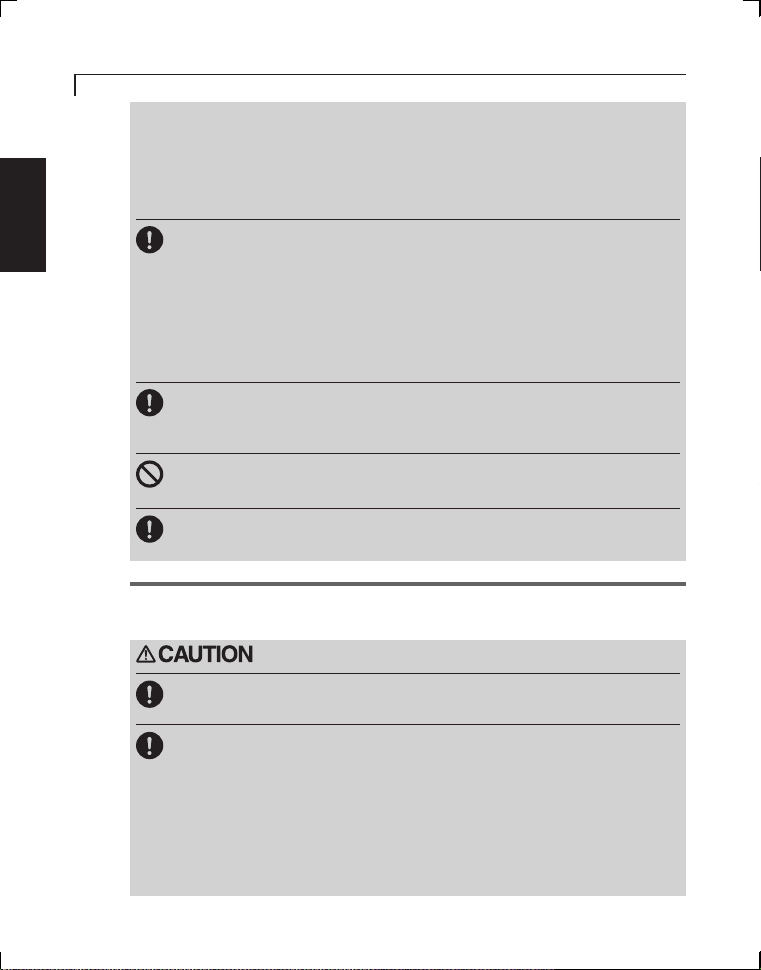
Never use the transmitter rudder trim in the AVCS mode.
·When the rudder is trimmed during flight, the neutral position will change.
When using the GY611 in the AVCS mode, set revolution
mixing to OFF.
Fuselage Maintenance Precautions
Use a tale rotor drive tube or other part with a high torsion
performance for the tail drive.
Take the strength of the tail into account during inspection
and adjustment.
· The amount of improvement of gyro performance has a considerable effect
on the fuselage vibration level or the size, type, linkage method, looseness,
etc. of the tail rotor.
Since a higher gain than usual can be used then the tail rotor is more effec
tive, the load on the tail is also greater.
-
7
F
OR SAFETY
Always perform proper maintenance for ultimate perfor-
mance.
· The rigidity of the fuselage tail has a large effect on gyro performance.
Make the fuselage vibration as small as possible.
·Fuselage vibration has an adverse affect on gyro operation.
S9256 Usage Precautions
Do not use the S9256 with applications other than the
GY611 gyro.
· The S9256 is designed to be used with the GY611 only, and will not operate
in other applications. Trouble may also occur.
Immediately after flight, do not touch the S9256 case.
·The heat sink section of the case is extremely hot, and may cause burns.
When mounting in the fuselage, install the S9256 so that it
does not touch the servo case and metal parts of the heli
copter frame.
· The middle case has an aluminum heat sink construction, and will generate
a large amount of noise if touched. In this case, it will become impossible to
receive and is extremely dangerous.
· Current Drain:
The S9256 is designed to be used with the GY611 gyro only, especially to
operate at high speed. Therefore, the servo starts, a correspondingly large
current flows and the current drain is, therefore, large. Constantly pay attention to the remaining capacity of the Nicd battery and decide the number of
safe flights. Always pay attention to the following points:
· Always use an Nicd battery. A dry cell battery will not display the spspecified
performance.
· When using the S9256 in a system with a battery fail safe function, the cutoff voltage is set to a high value. Shortening of the flight time due to this
must be included in calculation.
· Install the servo so that it does not get caught on the push rod or does not
loosen even when operated over its full travel. If unreasonable force is applied, the current drain will increase tremendously and shorten the life of the
servo and accelerate battery consumption.
-
8
B
EFORE USE
EFORE USE
B
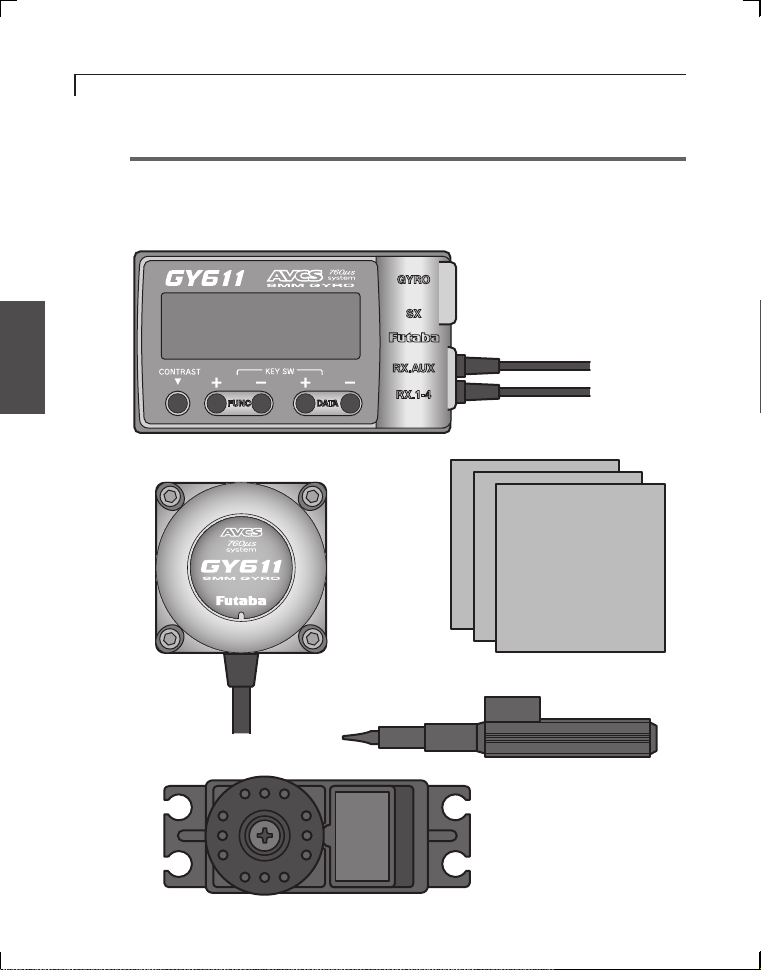
Set Contents
After unpacking the GY611 set, first check if the following parts are
provided:
GY611 sensor (x1)
GY611 control amp
(x1)
Sensor tape (x3)
Mini screwdriver (x1)
S9256 servo (x1)
(Only a set w/servo)
9
B
EFORE USE
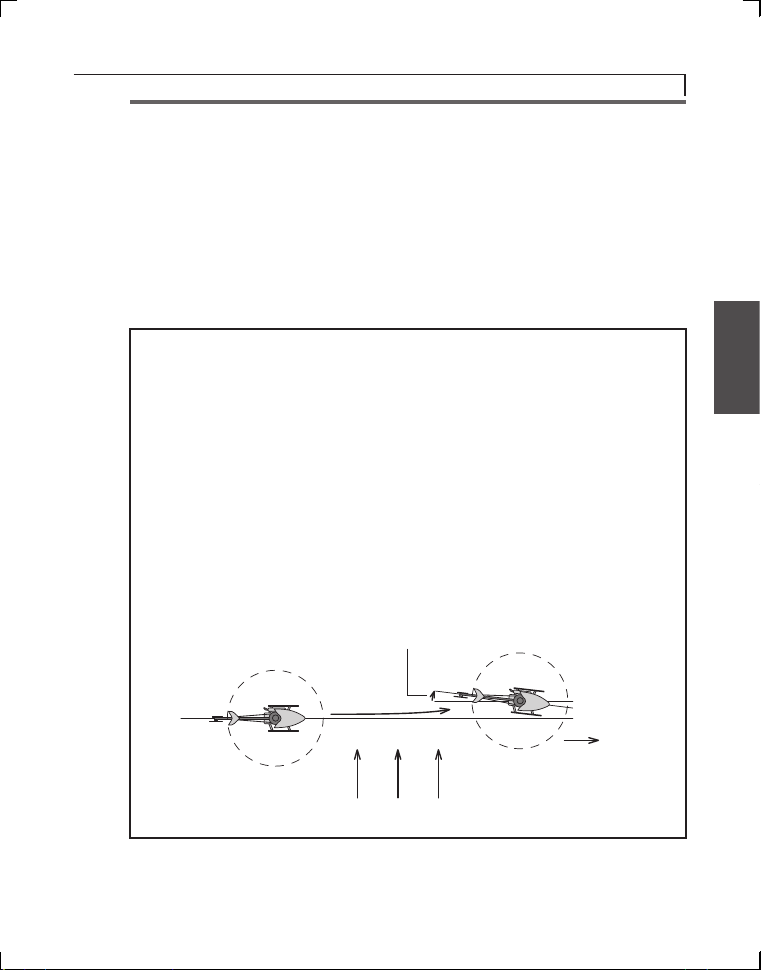
• Drifting stop
Forward
Side wind
AVCS Gyro
Differences Between AVCS Gyro and Conventional Gyro
Compared to a convention gyro, the AVCS gyro has a substantially
improved tail control capacity. Gyro operation also differs from that
of conventional systems in a number of ways.
The following sequentially describes the conventional gyro and the
AVCS gyro.
Conventional gyro
The conventional gyro detects movement of the helicopter's tail and controls
the rudder servo so that movement of the tail stops.
Now, consider hovering when the helicopter is exposed to a side wind, the
tail drifts. When the tail drifts, the gyro detects the tail rotation angular veloc
ity and operates the servo in the direction that stops the tail from moving.
Drifting of the tail is stopped by control from the gyro. When the tail stops
drifting, the control amount from the gyro becomes zero. Since the helicopter is always exposed to side wind, even in this state, the tail starts to drift
again. When the tail drifts, the gyro tries to stop it again. The "drifting stop"
operation is repeated and the tail continues to drift in the wind direction in
this manner. The higher the gyro sensitivity, the smaller the amount of this
drift. However, if the sensitivity is high, hunting will occur and, therefore, the
sensitivity amp has a limit.
-
10
B
EFORE USE
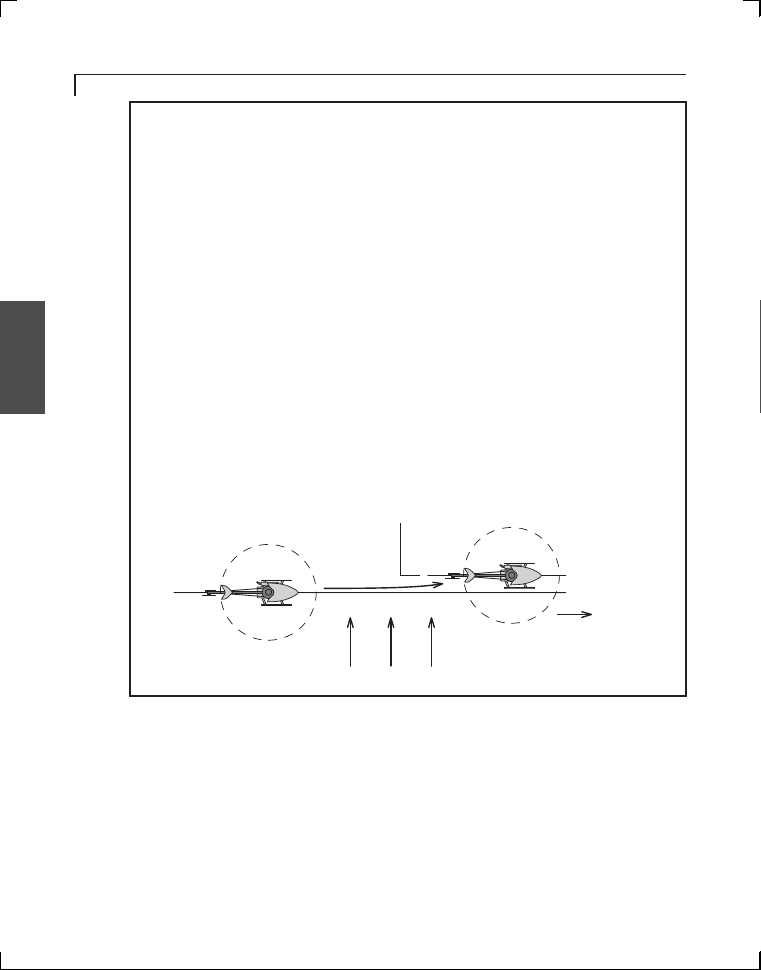
• The tail remains extremely stable.
Forward
Side wind
AVCS gyro
This following describes how the AVCS system works when the helicopter
is exposed to a side wind while hovering, the same as the preceding item.
When the helicopter is exposed to a side wind, the tail begins to drift. The
gyro controls the servo so that the movement of the tail stops, the same as
a conventional gyro. At the same time, a sensor is controlled so that the tail
is rotated in the opposite direction (returns to the original position). In short,
the conventional gyro performs an operation known as "drifting stop", but
the AVCS system performs an operation that "stops drifting and returns to
original position". The "return to original position" operation added to the
AVCS system improves rudder trim operation. In other words, the gyro can
automatically trim the rudder against side winds. This also applies to reverse
flight. When a helicopter is flying in the forward and reverse directions, the
rudder trim is changed to advance, but with the AVCS system, this trim
change is performed automatically and instantaneously so that the tail remains extremely stable even during high-speed reverse flight.
The AVCS system requires a high-precision angular velocity sensor. The
GY611 realizes a high-precision angular velocity detection function and ex
tremely small output drift by using a new type of gyro sensor. This minimizes
rudder neutral position drift during flight and eliminates the need to trim the
rudder during flight.
-
Differences in rudder control method
The following describes the differences between conventional gyro
and AVCS gyro rudder control.
The conventional gyro sends the rudder control signals from the
transmitter to the rudder servo and starts to move the tail. When the
tail moves, the gyro detects this movement and generates a signal to
stop it. If the tail continues to move even in this state, a rudder con
-

11
B
EFORE USE
trol signal larger than the signal from the gyro must be applied from
the transmitter. That is, the difference between the rudder control sig
nal from the transmitter and the control signal that attempts to stop
this from the gyro becomes the actual amount of movement of the
tail. Ordinarily, the rudder control signal is amplified several times
over by the gyro amp and is balanced with the gyro control signal so
that the transmitter can be used at the normal steering angle.
The AVCS system uses a different rudder control method. As de
scribed in the preceding section, it has additional functions that "at
tempt to return movement by external force to the original position"
and that generate an angular velocity proportional to the rudder con
trol signal. That is, it functionally controls the speed of rotation of
the tail. The original AVCS (Angular Vector Control System) came
from this.
· In the AVCS mode, when the transmitter rudder stick is moved when the helicopter was stopped, the rudder servo controls operation until the tail reaches
the specified rotational speed.
· Trim deviation of the rudder control signal also becomes a signal that causes
the tail to turn so that even a little trim deviation causes the tail to move.
Therefore, the rudder trim is made the same in all flight states and must
match the neutral reference signal at the gyro. The method of reading the
rudder neutral signal at the gyro will be described separately.
· Since the rudder mixing signals from the transmitter also become a tail rota
tion signal, all the rudder mixing functions must be disabled.
· In the AVCS mode, the gyro automatically trims the rudder so that linkage
changes cannot be verified. Initially, the GY611 trims the rudder by flying in
the Normal mode to take the rudder linkage neutral position. This centers the
linkage. At this time, this rudder neutral reference point is read to the GY611.
Giving the gyro the rudder neutral reference signal and performing
tail operation by referring to this signal in the AVCS mode in this
way is how the AVCS system differs from the conventional system.
-
-
-
-
-
12
D
ATA SETTING
ATA SETTING
D
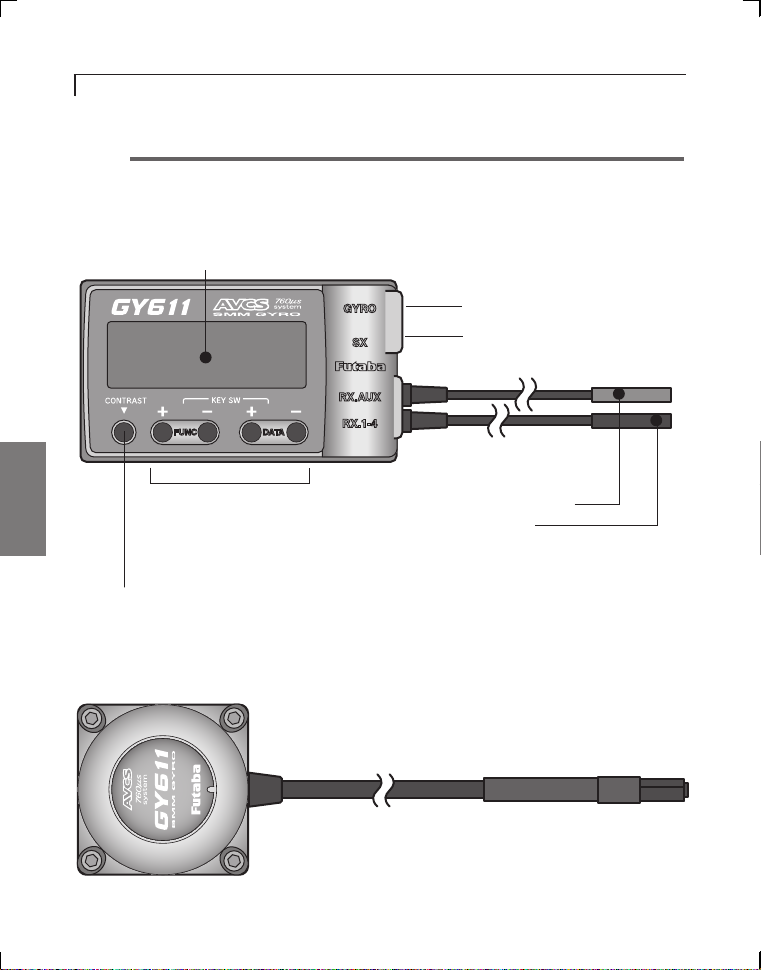
Name and Function of Each Part
GY611 control amp
LCD display
· Displays the set data. (8 characters x 1 line)
(Input/output terminals)
Gyro sensor input
Rudder servo output
· Use d when s et ti ng data.
Edit keys
Operated by pushing with
the accessory mini screwdriver.
LCD contrast trimmer
· Allows adjustment of the contrast so that the LCD display is easiest to see.
It is adjusted with the accessory mini screwdriver.
GY611 gyro sensor
· Stick to the body using the accessory
sensor tape.
(Receiver connectors)
Remote gain input
Rudder input
· To control amp

13
D
ATA SETTING
LCD Display and Edit Keys
LCD display
· Set data disp lay and o perat io n
status monitoring are possible.
Edit keys
Setup screen call
· The setup screens can be sequenti a lly call e d w i th t h e F U NC+ or
FUNC- key. For the order in which
the setup screens are called, see
the function map.
Data setting
· Pe rf o r m dat a se tti n g with th e
DATA+ or DATA- key. When setting
a value, the data is increased when
the DATA+ key is pressed and is
decreased when the DATA- key is
pressed. The mode can also be selected using either the DATA+ or the
DATA- key.

14
D
ATA SETTING
FUNC (-) key
Function Map
Normal screen display
(P15)
FUNC (+) key
Gyro Reverse
(P16)
Gyro Gain Adjustment
(P16)
Rudder Control Gain
(P17)
Control Delay I
(P17)
Control Delay D
(P17)
Gain Tracking
(P18)
Power ON
Power on screen display
(P15)
Operation Mode Setting
(P18)
Flight Mode
(P19)
AVCS sense
(P20)
Linkage Limit Setting
(P20)

15
D
ATA SETTING
GY611 Functions Setting
Power on screen display
When the gyro power is turned on after the transmitter power was
turned on, -Hello- blinks for about three seconds to initialize the
data inside the gyro. During this period, do not move the transmitter
rudder stick or the helicopter. If the transmitter rudder stick or the
helicopter is moved by mistake, the rudder neutral data will not be
correctly read.
Normal screen display
· Actual gain (sensitivity)
display
· Operation mode display
N : NOR mode
A : AVCS mode
: Neutral offset
· Power supply voltage display
· During rudder neutral reset operation,
**** is displayed.
· During rudder servo reset operation by
rudder stick, ---- is displayed.
Low battery alarm
When the power supply voltage drops to 3.8V or less, LOW
Batt is displayed. When this message is displayed, immedi
ately stop use and recharge the Nicd battery.
-

16
D
ATA SETTING
Gyro Reverse
Initial value: NOR
Sets the gyro operation direction. NOR or REV can be selected.
Set so that when the helicopter is banked right, left correction rud
der is applied and when the helicopter is banked left, right correction
rudder is applied.
Gyro Gain Adjustment
Initial value: 100%
Adjusts the gyro gain. Setting range is 0 to 120%.
Two-point (G:1, G:2) gain adjustment is possible. When A is dis
played, the gyro is in the AVC mode and when N is displayed, the
gyro is in the NOR mode in accordance with the operation mode set
ting.
-
-
-

17
D
ATA SETTING
Rudder Control Gain
Initial value : ACG: 120%, NCG: 130%
Adjusts the rudder stick operation gain. Setting range is 10% to
250%.
AVCS and NOR mode gain can be set independently. In the AVCS
mode, ACG is displayed and in the NOR mode, NCG is displayed.
The display automatically changes to A or B according to the direc
tion of the rudder stick and the gain of each direction can be set. This
function is used when tracking rudder operation gain between the
AVCS and NOR modes.
Control Delay I
Initial value : 0%
Sets the delay when the rudder stick was pushed operated. Setting
range is 0 to 100%. Rudder stick left and right can be set separately.
-
Control Delay D
Initial value : 0%
Sets the delay when the rudder stick was returned. Setting range is 0
to 100%. Rudder stick left and right can be set separately.

18
D
ATA SETTING
Gain Tracking
Initial value : +0%
Adjusts left and right tail braking tracking. Setting range is -20% to
+20%.
For example, when there is a sense of hunting when stopping left pir
ouette or the helicopter drifts when stopping right pirouette, shift Trk
in the + direction. In the opposite case, shift Trk in the - direction.
Operation Mode Setting
Initial : CMT
Sets the gyro operation mode. Settings are NOR, AVC, and CMT. In
the NOR mode, both G1 and G2 operate in the AVCS mode. In the
CMT mode, G1 operates in the AVCS mode and G2 operates in the
NOR mode. In the NOR mode, the GY611 operates the same as an
ordinary gyro. In the AVC mode, the GY611 always operates in the
AVCS mode. In the CM mode, the GY611 can be used in both the
AVCS and NOR modes.
-

19
D
ATA SETTING
Flight mode
Initial value : F3C
Switches the flight mode. Settings are F3C or 3D.
The F3C mode emphasizes tail suppression and stop. The 3D mode
slightly sacrifices tail suppression and stop, but lets you control pir
ouette speed completely proportional with the rudder stick operation
amount and is suitable for 3D flight.
<3D mode steering angle setting>
· During 3D mode setting, the transmitter rudder steering angle is set to 100%
and approximately 500º/second high pirouette speed. Therefore, initially set
the transmitter rudder steering angle to a low value so that the tail can be
safely controlled. (About 70%)
The pirouette speed is proportional to the rudder steering amount without re
gard to the gyro sensitivity.
-
-

20
D
ATA SETTING
AVCS Sense
Initial value : 100%
Adjusts the rudder control characteristic in the AVCS mode. Setting
range is 50 to 150%.
Check the rudder operation feeling and stopping characteristic and
adjust. When the flight mode (page 19) is the 3D mode, this value
becomes the pirouette standard value.
Linkage Limit Setting
Initial value : 100%
Sets the rudder servo travel limit.
Operate the rudder stick and adjust the rudder servo travel limit by
pressing the +/- key so that the servo moves to the maximum linkage
position. Use the same procedure to set both the left and right limits.
When setting, move the servo substantially so that the rudder angle
automatically becomes 200% and limit setting is easy. A or B is dis
played for the right and left directions.
-
Note: When this screen is displayed, the GY611 does not operate as a gyro.
To check operation, return to the initial screen, etc.

21
D
ATA SETTING
(Remote Gain Function)
Transmitter
Gain/Mode Selection
• CH5 switch
• Idle-Up switch (T9Csuper)
• Flight condition (T14MZ, T9Z)
Gain Settings
• End Point (ATV) function
• Gyro mixing
(T14MZ/T9Z/T9Csuper)
Mode Settings
• Normal mode (NOR)
• AVCS mode (AVC)
• Selectable mode (CMT)
Gain Settings
• Gyro Gain Adjustment
GY611
Receiver
Remote Gain Channel (CH5, etc)
Remote Gain Function
The remote gain function lets operator perform AVCS mode and
Normal mode sensitivity adjustment and operation mode switching
from the transmitter. The channel used here is called the "remote gain
channel".

22
D
ATA SETTING
When Using a T9Z World Champion Model Transmitter
Gyro Sense Mixing
The Gyro Sense Mixing (GYR) function lets operator perform two-point gain
adjustment at each condition. Set the sensitivity at all conditions.
[GY611 Settings]
Select the gyro operation mode at the GY611 Mode screen. (AVC, NOR, or
CMT)
[Transmitter Settings]
ATV function:
Adjust bo th the RATE A and RATE B rates to 100% at the transmitter
5ch(GYR) ATV function setup screen.
Gyro Sense Mixing function:
1. Select the Dual Mode (DUO) at the transmitter Gyro Sense Mixing setup
screen.
2. Set the GAIN1 and GAIN2 gains.
(The following page shows a setting example in the CMT mode.)
[Sensitivity Display]
The gain display indicates the actual gain at the GY611 normal screen display. The following shows the relationship between transmitter and gyro setting .
[Relationship between transmitter and gyro setting]
Transmitter settings:
(GAIN1/GAIN2)
0% - 50% - 100%
GY611 mode
settings:
NOR:
AVC:
CMT:
Actual gain: 100% - 0% - 100%
Normal mode
AVCS mode
Normal mode AVCS mode
(G2) (G1)

23
D
ATA SETTING
85%
15%
GAIN1
setting
GAIN2
setting
70%
30%
AVCS side
Normal side
70% 40%
GYRO SENSE
01 . MODEL-01. NORML HEL PCM 0: 23: 17
DUAL : MODE
: GAIN 1
: GAIN 2
0 20 40 60 80 100
END
85 %
15 %
[Setting Example]
Adjust the gyro gain at the Gyro Sense Mixing setup screen at each condition.
The following shows a setting example in the CMT mode.
Select the Dual Mode (DUO).
Se n siti v ity ra t e : Cho o se the G AIN1 o r
GAIN2 by the CH5 switch.
Use the following values as the sensitivity setting standard:
CH5 switch
Hovering Flight
Actual gain:
The GY611 sensitivity is 0% at 50%. When set over 50%, the GY611 oper
ates in the AVCS mode and when set under 50%, the GY611 operates in the
Normal mode. When setting is changed 1%, the gyro sensitivity is changed
2%.
-

24
D
ATA SETTING
When Using a T14MZ Transmitter Gyro Mixing
The Gyro Mixing (Gyro) function lets operator perform three-point gain adjustment at each condition. Set the sensitivity at all conditions.
[GY611 Settings]
Select the gyro operation mode at the GY611 Mode screen. (AVC, NOR, or
CMT)
[Transmitter Settings]
End Point (ATV) function:
Adjust the both travels to 100% at the transmitter 3ch(Gyro) End Point function setup screen. (H-4 Swash: Sensitivity setting is assigned to 7ch.)
Gyro Mixing function:
1. Activate the function at the transmitter Gyro Mixing setup screen.
(If two or three rates are activated, select the selector switch.)
2. Set the type of gyro to GY.
3. Select the desired mode (AVCS or Nor) and adjust the gyro sensitivity by
rate.
(The following page shows a setting example in the CMT mode.)
[Sensitivity Display]
The gain display indicates the actual gain at the GY611 normal screen display. The following shows the relationship between transmitter and gyro setting .
[Relationship between transmitter and gyro setting]
Transmitter settings:
Nor AVCS
100% - 0% - 100%
GY611 mode
settings:
NOR:
AVC:
CMT:
Actual gain: 100% - 0% - 100%
Normal mode
AVCS mode
Normal mode AVCS mode

25
D
ATA SETTING
70%
70%
Rate1
setting
Rate2
setting
40%
40%
AVCS side
Normal side
70% 40%
[Setting Example]
Adjust the gyro gain at the Gyro Mixing setup screen at each condition.
The following shows a setting example in the CMT mode.
Activate the function.
Select the d esired mode (AVCS or
Nor) and adjust the gyro sensitivity.
Set the type of gyro to GY.
Select the selector switch.
Use the following values as the sensitivity setting standard:
Selector
switch
Hovering Flight
Actual gain:

26
D
ATA SETTING
When Using a T9Csuper Transmitter
The Gyro Mixing (GYRO SENS) function lets operator perform a gain adjustment at each condition switch position.
[GY611 Settings]
Select the gyro operation mode at the GY611 Mode screen. (AVC, NOR, or
CMT)
[Transmitter Settings]
Gyro Mixing function:
1. Activate the function at the transmitter Gyro Mixing (GYRO SENS) setup
screen.
2. Select the condition switch (Cond.) for the sensitivity selection.
3. Set the NORM, IDL1, IDL2, IDL3, and HOLD gains.
(The following page shows a setting example in the CMT mode.)
[Sensitivity Display]
The gain display indicates the actual gain at the GY611 normal screen display. The following shows the relationship between transmitter and gyro setting.
[Relationship between transmitter and gyro setting]
Transmitter settings:
NOR AVC
100% - 0% - 100%
GY611 mode
settings:
NOR:
AVC:
CMT:
Actual gain: 100% - 0% - 100%
Normal mode
AVCS mode
Normal mode AVCS mode

27
D
ATA SETTING
[Setting Example]
Adjust the gyro gain at the Gyro Mixing (GYRO SENS) setup screen.
The following shows a setting example in the CMT mode.
Activate the function.
Use the following values as the sensitivity setting standard:
· Hovering: 70% (AVC or NOR mode)
· Flight: 40% (AVC or NOR mode)
Set the type of gyro to GY.
Set the selector switch to
Cond.
Sele c t the desired mode (AVC
o r N O R) a n d
adju st the gyro
sensitivity.

28
D
ATA SETTING
When Using a Transmitter End Point (ATV) Function
The End Point (ATV) function lets operator perform a gain adjustment at
each selector switch position.
[GY611 Settings]
Select the gyro operation mode at the GY611 Mode screen. (AVC, NOR, or
CMT)
[Transmitter Settings]
End Poin (ATV) function:
Set the rates at the transmitter remote gain channel (CH5, etc.) End Point
(ATV) function.
[Sensitivity Display]
The gain display indicates the actual gain at the GY611 normal screen display. The following shows the relationship between transmitter and gyro setting.
[Relationship between transmitter and gyro setting]
Transmitter settings:
End Point (ATV) rates
Switch Switch
Forward side Front side
90% - 0% - 90%
GY611 mode
settings:
NOR:
AVC:
CMT:
Actual gain: 100% - 0% - 100%
Normal mode
AVCS mode
Normal mode AVCS mode
(G2) (G1)

29
D
ATA SETTING
When Using a GY611 Gyro Gain Adjustment Function
[Transmitter Settings]
Adjust both the End Point (ATV) rates to 90% at the transmitter remote gain
channel (CH5, etc.) End Point (ATV) function.
[GY611 Settings]
Operation Mode Setting function:
Select the gyro operation mode at the GY611 Mode screen. (AVC, NOR, or
CMT)
Gyro Gain Adjustment function:
Set the G:1 and G:2 gains at the GY611 G:x screen.
[Relationship between transmitter and gyro setting]
Transmitter settings:
End Point (ATV) rates
Switch Switch
Forward side Front side
90% (Fixed) 90% (Fixed)
GY611 mode
settings:
GY611 adjusting
range: 100% - 0% - 100%
NOR:
AVC:
CMT:
Normal mode
AVCS mode
Normal mode AVCS mode
(G2) (G1)

30
D
ATA SETTING
Initialization
AVCS mode operation is based on the rudder neutral data stored in
the GY611. When using the GY611 for the first time, or when the
internal reference data and the transmitter neutral position differed
when the transmitter neutral trim was adjusted, etc., the rudder neu
tral data must be read again.
[At power ON]
When the power switch is turned on, the GY611 automatically obtains the reference signal for AVCS function correction and initializes
itself.
· When the power was turned on in the Normal mode, the rudder neutral position already memorized in the GY611 is not updated.
· When the power was turned on in the AVCS mode, the rudder signal at that
point is memorized and updated.
Precautions When Turning on the Power
Switch
During initialization, the message ˝-Hello-˝ appears on
the GY611 LCD screen.
-
Do not move the helicopter until this message
disappears (in about 3 seconds).
Also, do not move the transmitter rudder stick
from the neutral position during this period.

31
D
ATA SETTING
[During use]
When the rudder was re-trimmed in the Normal mode and the new
trim position also affects the AVCS mode, the rudder trim neutral po
sition must be memorized in the GY611.
Re-reading method
In this case, quickly switch (interval of within 1 second) the transmitter remote gain switch between the
Normal and AVCS sides at least three times and switch
the AVCS side at the neutral trim position set in the
Normal mode. This memorizes the new rudder neutral
position in the GY611.
When the transmitter has a function that allows trim
setting for each flight condition, such as the T9Z and
T14MZ, the AVCS mode trim position is fixed and
this operation is unnecessary.
Never use the transmitter rudder trim in the
AVCS mode.
·
When the rudder is trimmed during flight, the neutral position will change.
When using the GY611 in the AVCS mode, set
revolution mixing to OFF.
W h e n th e ru d d e r neu t r al po si t i o n was
changed by the linkage, the rudder neutral
position in the AVCS mode must always be reread before use.
-

32
I
NSTALLATION AND ADJUSTMENT
NSTALLATION AND
I
Install and adjust the GY611 as described below.
· When making GY611 adjustments, always
use the accessory miniature screwdriver
and do not apply excessive force.
DJUSTMENT
A
Installing to Fuselage
1
Installing sensor and amp
GY611 sensor
Frame gyro bed
Install the GY611 sensor to the fuselage using the accessory sensor
tape. Also routinely check the sensor tape and replace the tape if it is
saturated with oil or partially peeled.
* Oil on the sensor bottom and the part installed to the frame can be wiped off
with cleaner, etc.
Sensor installation precautions
· Always use the accessory sensor tape to install the sensor. Install the
sensor to the center of the sensor tape.
· Depending on the vibration from the helicopter, the sponge may tear
near the corners of the sensor tape. If the helicopter is flown in this
state, vibrations will not be sufficiently absorbed and the sensor may
fall off. Before flight, always check the sensor installation state. If the
sponge is torn, replace it.
· Install the sensor so that the bottom of the gyro is perpendicular
to the main rot o r s h aft axia l
direction. Offset of this axis will
also react in the roll and pitch
directions.
Installing control amp
· When installing the control amp, after the end of sensitivity adjustment, vibration-proof the amp by wrapping it in sponge, the same as
the receiver.

33
I
NSTALLATION AND ADJUSTMENT
2
Connections
Connect the GY611, receiver
and servo as shown below.
· Conne ct t he sens o r t o th e
amp sensor input ("GYRO").
· Connect the rudder servo
· Con nect th e amp rudde r
input ("RX,1-4") input con
nector to the receiver rudder channel.
Always use the special S9256 servo with the GY611.
·The GY611 cannot operate with servos other than the super
narrow pulse (760μs) servo. The servo may be destroyed.
Black Red
-
To receiver
· Connect the amp remote
I n s e r t th e co n -
nectors fully and
firmly.
· If a connector works loose
du e t o v i bra tio n d u rin g
flight, control may be lost
and result in a dangerous
situation.
(S9256 only)
to th e a mp ser vo out put
("SX").
gain input ("RX,AUX") con
nector to the receiver sensitivity setting channel.
-
3
Gyro operation mode selection
When using the gyro only in the NOR mode,
select NOR. When using the gyro only in the
AVCS mode, select AVCS. When using the
gyro in both the AVCS and NOR modes, select
CMT.

34
I
NSTALLATION AND ADJUSTMENT
* However, when using the gyro in the CMT mode, since the AVCS and NOR
mode gain must be set during hovering and in flight, a transmitter with a gyro
mixing function (T14MZ, T9Zwc series, T9Csuper series, etc.) is necessary.
· For a description of transmitter setting, see the remote gain function (p21).
4
Rudder servo linkage check
Make the initial linkage connections in the NOR mode. In this case,
make adjustments mechanically and make minimum trimmer adjustments at the transmitter.
In the NOR mode, make the following linkage checks:
· In the rudder neutral position, connect the linkage at the position at
which the servo horn and control wire are perpendicular.
Perpendicular
Control wire
Set the servo horn length based on
the helicopter manufacturer's instruc
tions.
Move the rudder stick to the right and left and check the direction of
operation of the tail rotor. If the tail rotor turns in the wrong direc
tion, reverse the direction with the transmitter reverse function.
-
-
5
Gyro operation direction check
If the rudder servo moves to the left when the nose of the helicopter
moves to the right, the gyro direction is correct.
If the rudder servo moves to the right, switch
the direction using the GDir screen.
If you try to fly the helicopter while the gyro direction is incorrect,
when the rotor rotates clockwise, the helicopter nose will yaw to the
left and cause an extremely dangerous situation.

35
I
NSTALLATION AND ADJUSTMENT
6
Limit setting
Move the rudder stick to the left and right and
perform adjustment at the Lmt screen so that
the servo operation angle becomes the maxi
mum value at which the servo horn does not
strike the linkage.
* When flying, the servo horn does not move beyond this set angle,
thus protecting the linkage. However, if the limit setting is too low,
gyro performance will be effected.
* In this mode, only the stick operates; the gyro does not operate.
7
Gyro gain setting (tentative setting)
The initial gain of the GY611 is 100% for
both G1 and G2. When setting the gain from
the transmitter, leave it at the 100% reference
gain.
Make the following value the gain setting criteria. A setting example
when a T14MZ series transmitter was used is described below. When
using another transmitter, see "Remote gain function" on page 21.
(T14MZ transmitter setting)
· Call the transmitter Gyro setting screen.
· Adjust the gain when hovering to 80% at the AVCS side and the normal side on the transmitter screen.
· Set the gain in flight to 60% for the AVCS and NOR mode, respectively, on the transmitter screen.
· At this time, the GY611 gain display becomes 80% for hovering and
60% for flight.
When using a transmitter without a gyro gain switching function,
connect the gain setting connector to an idle channel and set the
GY611 G1 and G2 gains using this gain setting screen. Gain can be
trimmed by means of the transmitter End Point (ATV) function.

36
I
NSTALLATION AND ADJUSTMENT
8
Transmitter setting check
Checks the transmitter setting in the ACVS mode. Check that the
transmitter is not set so that the neutral position has shifted.
(Transmitter setting)
· Set all rudder mixings to INH.
· Set all hovering and flight rudder trims to the same position.
· Set rudder End Point (ATV) to 100% under all conditions.
· Also set the T14MZ or T9Z condition delay function to INH.
If the normal screen operation mode display is ˝A˝ under all usage
conditions, neutral offset is OK. If ˝
operating the rudder trimmer for that flight condition.
9
Rudder neutral position check
In the AVCS mode, the rudder servo neutral position is unknown.
Check the neutral position by switching the GY611 to the NOR
mode, or by moving the rudder stick to the left and right at least three
times at high speed and immediately returning the stick to the neutral
position. This temporarily resets the rudder servo.
˝ is displayed, display ˝A˝ by

37
I
NSTALLATION AND ADJUSTMENT
Flight Adjustments
1
In the AVCS mode, turn on the transmitter power, then turn on the
gyro and receiver power. This reads the rudder neutral signal at the
GY611.
· Never move the helicopter or rudder stick during the approximately three seconds that the -Hello- display blinks.
2
Hover in the Normal mode and adjust the rudder neutral position.
· In the AVCS mode, the rudder neutral position is automatically set, and linkage changes cannot be verified. First, perform rudder neutral adjustment in
the Normal mode.
· Move the transmitter trim lever and reset the neutral position. When the rud
der servo neutral position has changed considerably, readjust the linkage.
3
When the transmitter rudder trim was adjusted, the rudder neutral
data must be read to the GY611. Therefore, always perform the fol
lowing operations:
· Switch the transmitter sensitivity switch quickly (internal of within 1 second)
between AVCS and Normal at least three times. "****" is displayed on the
LCD screen to show that data is being memorized. During this operation,
never move the transmitter rudder stick from the neutral position for at least 1
second immediately after switching the switch in the state in which the model
is on the ground. Memorization and updating is executed only when the sensitivity switch is in the AVCS mode position.
-
-
4
Set the sensitivity to the position at which hunting does not occur
during hovering and flight.
· When the helicopter tail hunts, set the gyro sensitivity to a lower value. When
adjusting the gyro sensitivity, increase and decrease the sensitivity gradually
while checking.
· When the sensitivity is low even when the gyro sensitivity is 100%, make the
rudder servo horn position longer. The sensitivity can be increased (up to
120%) at the GY611 gyro gain adjustment screen, or by increasing the End

38
I
NSTALLATION AND ADJUSTMENT
Point (ATV) amount of the transmitter sensitivity setting channel. The actual
sensitivity can be checked on the GY611 normal screen display.
5
Adjust the hovering and flight rudder effect using the transmitter's
D/R or AFR function.
· Do not adjust with the End Point (ATV) function. If the End Point (ATV) function is used, trimming may change.
(If necessary)
6
When you sense a difference in the rudder effect between the AVCS
and Normal modes, adjust using the GY611 rudder control gain.
· Adjustment method
When the rudder effect in the AVCS is different from the rudder effect
in the Normal mode after adjustment was performed using the transmitter's D/R or AFR function, adjust the difference using the NCGx
parameter.
7
Adjust the left and right pirouette stopping state by control delay and
tracking.
· Adjustment using the delay function of the T14MZ and T9Z transmitter is also possible. Since the gyro gain also has a large effect on the
stopping state, make this adjustment after adjusting the sensitivity.

39
I
NSTALLATION AND ADJUSTMENT
8
Adjust the rudder operation feel using the GY611 AVCS sense in the
AVCS mode. (Steering angle, neutral suppression, and pirouette stop
ping)
9
When you want to use rudder mixing in the Normal mode, set the
transmitter so that rudder mixing is applied only during Normal
mode operation. Never use rudder mixing in the AVCS mode.
-

40
R
EFERENCE
EFERENCE
R
Specifications
* Specifications are subject to change without prior notice.
GY611 Ratings
Yaw-axis stabilizer for helicopter (rate gyro)
Display device: 8-character dot matrix liquid crystal display
Operating voltage range: DC 3.8V to 6.0V
Current drain: 70mA (@5.0V, including sensor)
Dimensions: 57 x 32 x 15mm (amp), 30 x 30 x 18mm (sensor)
Weight: 34g (amp) + 30g (sensor)
S9256 Ratings
Dimensions: 40 x 20 x 36.6mm
Weight: 57g
Speed: 0.06sec/60º (at 4.8V)
Torque: 3.4kg·cm (at 4.8V)

41
R
EFERENCE
Definition of Abbreviations
The following defines the abbreviations and symbols used in this
manual in alphabetical order. The function names are given on the
description pages.
3D 3D mode. p19
A
ACGA/B Rudder control gain (AVCS)
p17
AFR AFR function.
ATV ATV function. Steering
angle adjustment function.
AVC AVCS mode.
AVCS AVCS system. AVCS
mode.
AVS AVCS sense. p20
C
CMT Normal/AVC switching
mode.
D
D1DA Control delay. p17
D1IA Control delay. p17
D/R Dual rate function.
DUO T9Z dual gain control
mode.
E
End Point Steering angle adjustment
function.
F
F3C F3C mode. p19
Fmod Flight mode. p19
G
G:1A/N Gyro gain 1 side. p16
G:2A/N Gyro gain 2 side. p16
GDir Gyro reverse. p16
Gyro T14MZ gyro sense mixing.
GYRO SENS(E) T9C, T9Z gyro
sense mixing.
H
Hello Power on screen display.
High High side.
I
IDLE Transmitter power OFF
state.
INH Use inhibited state.
L
LCD Liquid crystal display
screen.
LmtA/B Linkage limit setting. p20
Low Low side.
LOW BAT Low battery error display.
M
Mode Operation mode setting.
p18
N
NCGA/B Rudder control gain (Nor-
mal) p17
NOR Normal mode. Normal
side.
R
REV Reverse side.
T
Trk Gain tracking. p18

42
R
EFERENCE
Parameter
GDir
Gyro Reverse
G:xx
Gyro Gain Adjustment
ACGx,NCGx
Rudder Control Gain
D1Ix
Control Delay I
D1Dx
Control Delay D
GY611 Parameters Sheet
* Copy and use.
Helicopter:
Date:
Initial Set
value value Remarks
NOR NOR/REV
G:1 100% 0-120%
G:2 100% 0-120%
ACGA 120% 10-250%
ACGB 120% 10-250%
NCGA 130% 10-250%
NCGB 130% 10-250%
D1IA 0% 0-100%
D1IB 0% 0-100%
D1DA 0% 0-100%
D1DB 0% 0-100%
Trk
Gain Tracking
Mode
Operation Mode Setting
Fmod
Flight Mode
AVS
AVCS Sense
Lmtx
Linkage Limit Setting
+0% -20-+20%
CMT CMT/NOR/AVC
F3C F3C/3D
100% 50-150%
LmtA 100%
LmtB 100%

43
R
EFERENCE
Makuhari Techno Garden Bldg., B6F 1-3 Nakase, Mihama-ku, Chiba 261-8555, Japan
Phone: (043) 296-5119 Facsimile: (043) 296-5124
FUTABA CORPORATION
©FUTABA CORPORATION 2005, 6
 Loading...