

Page 1
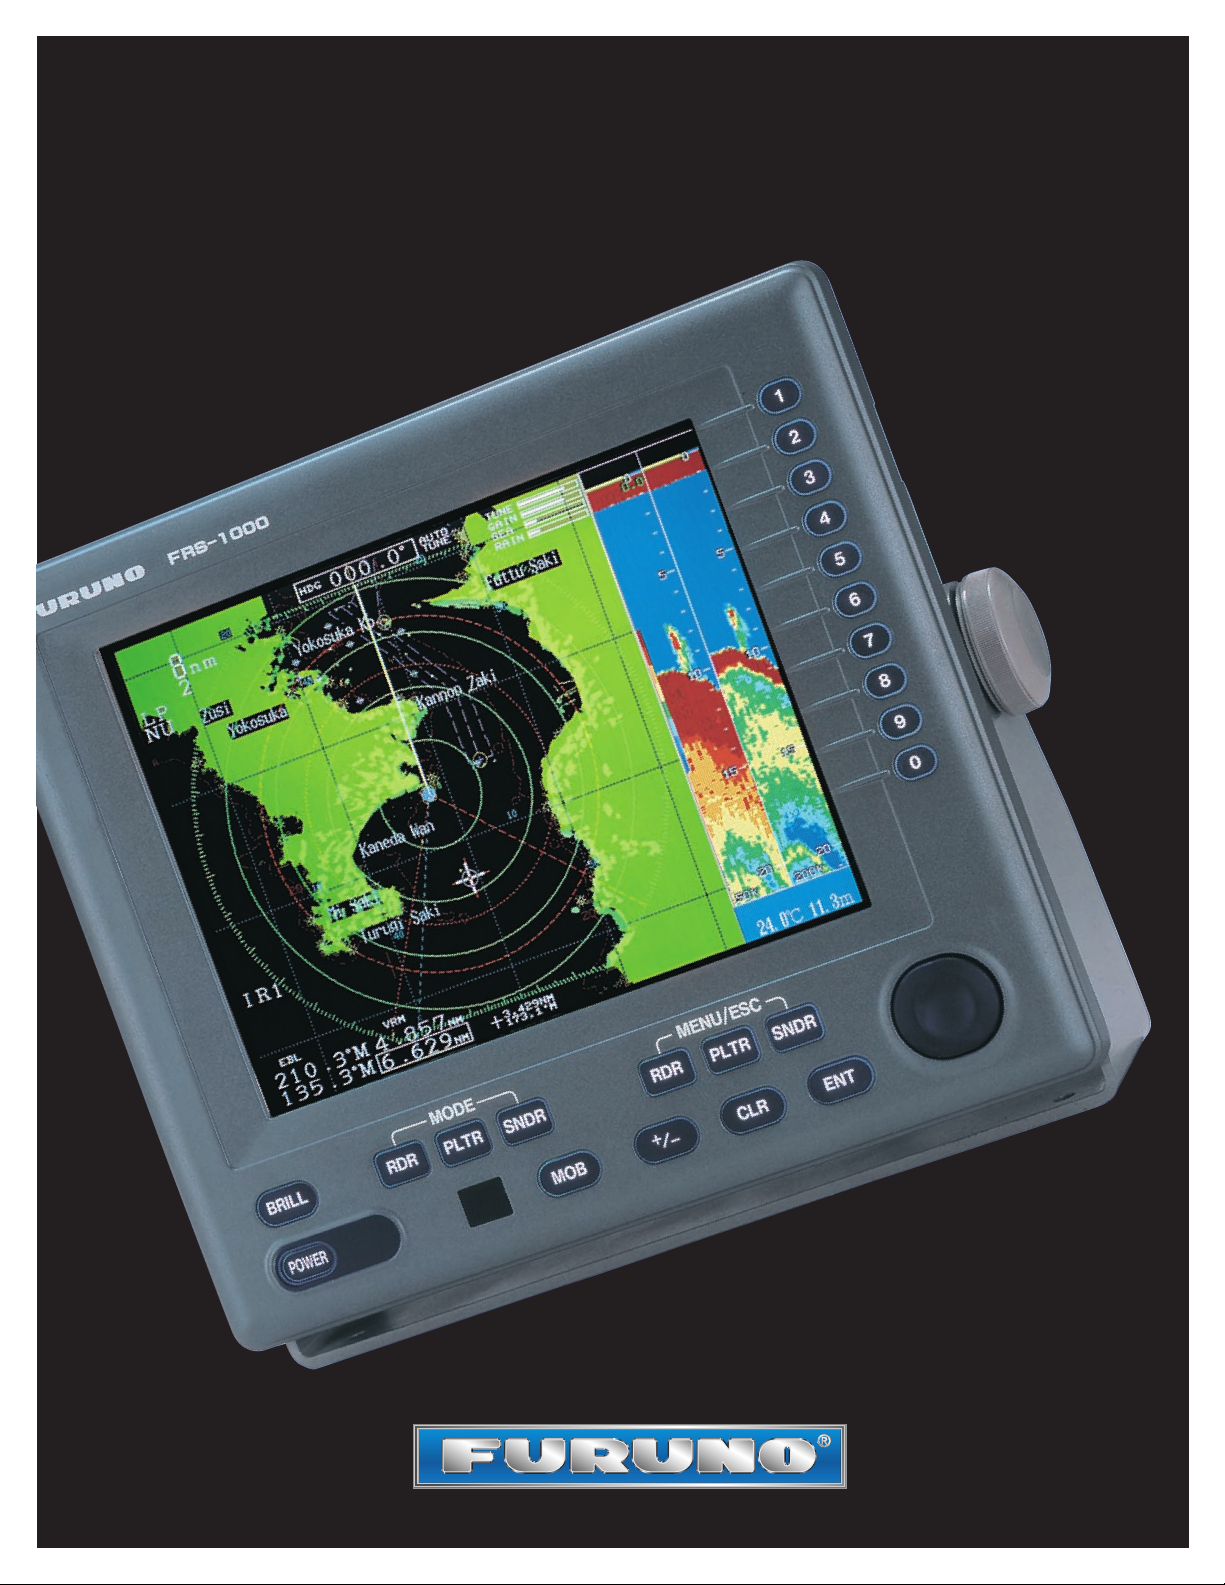
FRS1000 RADAR/PLOTTER/SOUNDER
QUICK OPERATION GUIDE
(USING THE REMOTE CONTROL)
Page 2

BBAASSIICC OOPPEERRAATTIIOONN
OOFF FFRRSS11000000
PPOOWWEERRIINNGG UUPP YYOOUURR FFRRSS11000000
1. Press the [POWER] key on the display
2. Allow 30 seconds for the self test to complete.
AADDJJUUSSTTIINNGG BBRRIILLLLIIAANNCCEE
1. Press the [BRILL] key on the display to activate
the brilliance menu
2. Press the [BRILL] key again to increase or
decrease the intensity of the display.
AADDJJUUSSTTIINNGG BBAACCKKGGRROOUUNNDD CCOOLLOORR
1. Press the [BRILL] key on the display to activate
the brilliance menu
2. Press the [+/-] key or [1] - [4] key on the display
to scroll through background choices.
Note: Keypad numbers 1-4 allow you to select
from 3 preset color palettes or a custom palette.
The custom palette allows you to individually
choose colors for target video, plotter
background, etc. in their respective menus.
SSEELLEECCTTIINNGG DDIISSPPLLAAYY MMOODDEESS
The FRS1000 allows you to operate up to three (3)
modes simultaneously or any combination thereof.
NOTE: At least one mode MUST be selected at all
times. Each time an individual mode key is
pressed, it acts as a toggle switch and turns the
respective display mode on or off.
1. Radar Display - Press the [RDR] mode key to
activate or deactivate the radar display
2. Plotter Display - Press the [PLTR] mode key to
activate or deactivate the plotter display
3. Sounder Display - Press the [SNDR] mode key
to activate or deactivate the sounder display
4. To activate multiple display modes at once,
press each desired display mode key. To deactivate a mode, simply press that display mode
key again to deactivate it. NOTE: At least one
display mode MUST be selected at all times.
See figures at right for all possible display modes.
UUSSIINNGG MMEENNUU//EESSCC KKEEYYSS
The individual menu keys allow you to change
parameters that are specific to a mode, e.g.
Radar/Sounder. Each time the individual menu/Esc
keys are pressed, they act as toggle switches,
which will turn their respective menu on or off. Only
one menu can be active at a time.
1. Press the [RDR] menu key once to bring up the
Radar menu
2. Press the [RDR] menu key again to return to the
original display mode you were in before pressing the menu key
3. Repeat this process for the [PLTR] and [SNDR]
menu keys.
NOTE: When you enter into a specific menu
(i.e. radar, plotter or sounder) the FRS1000 will
change to that mode with the respective menu
on the side. When you are finished using the
menu, you must press that last menu button
again to return to the originally selected display
mode, or press (Esc) button on remote control.
Radar [RDR] Mode
Plotter [PLTR] Mode
Sounder [SNDR] Mode Radar & Sounder Modes
Radar & Plotter Modes Plotter & Sounder Modes
Radar, Plotter & Sounder Modes
Page 3
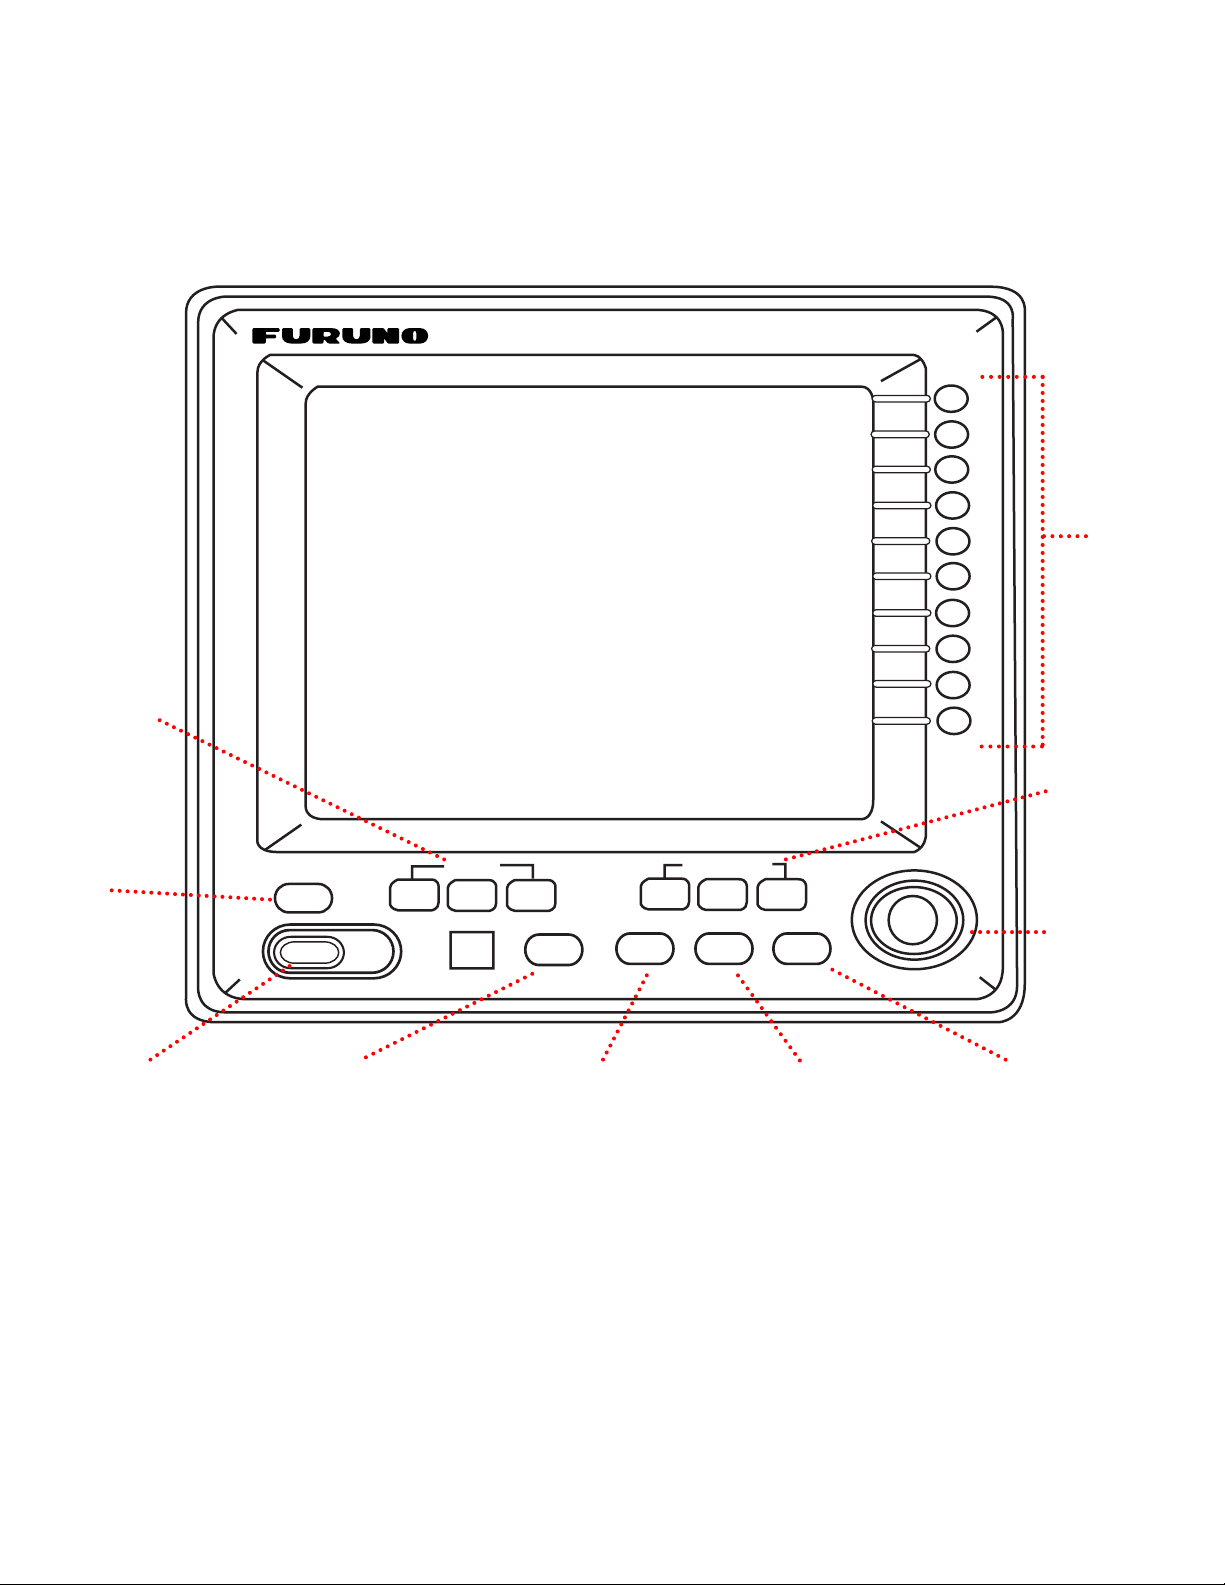
GGEETTTTIINNGG FFAAMMIILLIIAARR WWIITTHH TTHHEE DDIISSPPLLAAYY
Numeric
Keys
Open/close
respective
menu
Omnipad Shifts cursor,
VRM, EBL
and selects
items on
menus
Selects a
display mode
Adjusts
display
brilliance
Turns power on/off Marks man over
board position and
event positions
Enters plus, minus
and switches
co-ordinate
Silences buzzer;
temporarily erases
heading line, north
marker; erases
marks, waypoints
Confirms operation
FRS-1000
1
2
3
BRILL
POWER
RDR
PLTR SNDR
MOB
MENU/ESCMODE
RDR
PLTR SNDR
+/- CLR ENT
4
5
6
7
8
9
0
Page 4

RADAR BUTTON
Used to toggle between
stand-by and transmit.
GGEETTTTIINNGG FFAAMMIILLIIAARR WWIITTHH TTHHEE RREEMMOOTTEE
PLOTTER BUTTONS
MOB - Press once to store
an event. Later you can
GOTO these events,
which will be sorted from
newest to oldest. Hold
MOB for 5 seconds to
enable MOB mode. (See
page 3-8 in op. manual.)
MARK - used to set a
mark on the chart using
either ship position or
cursor position. (See page
3-6 in op. manual.)
GOTO - used to go to
cursor position, event,
waypoint or route. (See
page 3-12 in op. manual.)
WPT - used to open waypoint menu. (See page 3-9
in op. manual.)
RADAR & PLOTTER
BUTTON
Used to zoom in and out
of range scales.
NUMERIC KEYPAD
Used to enter numbers
and select menus for all
modes.
CURSOR CONTROLS
Arrow keys used to move
the cursor up, down, left
and right.
ENTER & ESCAPE
[ENT] - used as an
ENTER key in all modes
to confirm information
being selected or entered.
[ESC] - used as an
ESCAPE key in all modes
to exit from menu screen
to originally selected mode
display.
DISPLAY BUTTON
Used to change display
orientation to Heads up,
North up, Course up, or
True Motion for Radar and
Plotter.
RADAR BUTTON
Used to acquire ARPA
targets.
RADAR SEA CLUTTER
STC - used to suppress
sea clutter.
RADAR GAIN
GAIN - used to adjust the
Radar’s gain.
MODE KEYS
MODE keys are used to
toggle on & off the radar,
plotter and sounder displays.
MENU KEYS
MENU keys are used to
toggle on & off the radar,
plotter and sounder menus.
SOUNDER GAIN
GAIN - used to adjust the
gain. 50/200 may be
independently adjusted.
SOUNDER RANGE
RANGE - used to adjust
the sounder’s range.
ST-BY
TX
PLTR
MOB
MARK
GOTO
WPT
▼
▼
RDR
RDR
+
SNDR
IN
COMN
1
4
7
+/-
▼
2
5
8
0
ENT
ESC
▼
MODE
PLTR
MENU
PLTR SNDR
SNDR
FRS-1000
ZOOM
OUT
CLR
DISP
Hu/Nu/Cu/TM
ARPA
ACQ
RDR
3
6
9
GAIN
▼
▼
▼
RANGE
▼
GAIN
▼
▼
STC
▼
▼
Page 5

SSEELLEECCTTIINNGG TTHHEE RRAADDAARR DDIISSPPLLAAYY
1. Press the [RDR] MODE key to turn Radar on
2. Press the [RDR] MODE key again if you want
to turn the Radar display off.
RRAADDAARR OOPPEERRAATTIIOONN
FRS-1000
▼
▼
▼
▼
▼
▼
▼
▼
▼
▼
▼
▼
ST-BY
TX
ZOOM
IN
OUT
PLTR
MOB
MARK
GOTO
WPT
COMN
1
2
3
4
5
6
7
8
9
+/-
0
CLR
ENT
+
MODE
DISP
Hu/Nu/Cu/TM
RDR
PLTR
SNDR
MENU
ARPA
RDR
PLTR SNDR
ACQ
SNDR
RDR
GAIN
RANGE
GAIN
STC
ESC
TTRRAANNSSMMIITTTTIINNGG
1. Press the [ST-BY/TX] key to transmit
2. Press the [ST-BY/TX} key again if you want to
return to stand-by mode.
AADDJJUUSSTTIINNGG GGAAIINN
1. Press or hold down the Radar GAIN [▲] key to
increase gain or the Radar GAIN [▼] key to
decrease gain
2. Observe the gain level indicator in the upper
right corner of the display along with the Radar
presentation to optimize your Radar’s gain
setting. Adjust for maximum targets with slight
background noise or “speckle”.
SSEELLEECCTTIINNGG AA RRAANNGGEE SSCCAALLEE
1. Press the ZOOM [IN] key to decrease the
Radar range scale and the ZOOM [OUT] key to
increase the Radar range scale
2. You can see the currently selected range scale
by checking the indicator in the upper left corner of the display.
SSUUPPPPRREESSSSIINNGG SSEEAA CCLLUUTTTTEERR
1. Press the Radar STC [▲] key to increase sea
clutter suppression and the Radar GAIN [▼]
key to decrease sea clutter
2. You can see the amount you are increasing and
decreasing on the A/C SEA Level Indicator Bar
in the upper right corner of the display. The A/C
Sea Level indicator bar shows the amount of
A/C Clutter suppression being used.
Level Indicator Bars
Range scale indicator
For a complete and detailed description of all the Radar
functions, please refer to the FRS1000 Operations Guide.
Toggles between
stand-by and
transmit.
Decreases the Radar
range scale.
Increases the Radar
range scale.
Toggles the Radar
display on and off.
Increases or
decreases the
Radar’s Gain.
Increases or
decreases the
Radar’s Sea Clutter.
Moves the
Radar cursor.
Page 6

SSEELLEECCTTIINNGG TTHHEE PPLLOOTTTTEERR DDIISSPPLLAAYY
1. Press the [PLTR] MODE key to turn the
Plotter on
2. Press the [PLTR] MODE key again if you want
to turn the Plotter display off.
PPLLOOTTTTEERR OOPPEERRAATTIIOONN
FRS-1000
▼
▼
▼
▼
▼
▼
▼
▼
▼
▼
▼
▼
ST-BY
TX
ZOOM
IN
OUT
PLTR
MOB
MARK
GOTO
WPT
COMN
1
2
3
4
5
6
7
8
9
+/-
0
CLR
ENT
+
MODE
DISP
Hu/Nu/Cu/TM
RDR
PLTR
SNDR
MENU
ARPA
RDR
PLTR SNDR
ACQ
SNDR
RDR
GAIN
RANGE
GAIN
STC
ESC
SSEELLEECCTTIINNGG TTHHEE RRAANNGGEE
1. Press the ZOOM [IN] key to decrease the
Plotter range scale and the ZOOM [OUT] key
to increase the Plotter range scale.
Increases and
decreases the chart
range scale.
Toggles the Plotter
display on and off.
Moves Plotter
cursor in direction
arrow is indicating.
Escapes the Plotter
menu and brings
you back to the
display mode.
Confirms entry.
Creates Man Over
Board Mark.
Activates mark menu
allowing you to
assign a mark.
Activates goto menu
allowing you set a
course.
Activates waypoint
menu allowing you to
create a waypoint.
MMAANN OOVVEERR BBOOAARRDD
1. Press and hold the [MOB] key until confirmation
appears to enable the MOB mode. The MOB
position will appear as a large “M” waypoint.
EENNTTEERRIINNGG MMAARRKKSS
1. Use the cursor [▲▼] keys to move to your
desired mark coordinates
2. Press the [MARK] key to place a mark at the
cursor position. To place a mark at current ships
position, turn off the cursor by pressing the +/key. (See page 3-7 in op. manual to change
mark color and shape.)
SSTTOORREE AANN EEVVEENNTT
1. Press the [MOB] key momentarily to save the
current ship position as an event. These events
are saved to memory and can be returned to
via the GOTO L/L position method.
RREEGGIISSTTEERRIINNGG WWAAYYPPOOIINNTTSS
SSEETTTTIINNGG//CCAANNCCEELLIINNGG DDEESSTTIINNAATTIIOONN
1. Press the [GOTO] key to set your destination
waypoint by cursor, event, L/L position,
waypoint number or route number
2. Current destination waypoint may also be
cancelled in this menu.
1. Press the [WPT] key to access the waypoint
menu
2. When menu appears, you may enter waypoints
by using the cursor, saved event, own ships
position or via direct entry on the waypoint list.
(See page 3-9 in the op. manual)
Page 7

SSEELLEECCTTIINNGG TTHHEE SSOOUUNNDDEERR DDIISSPPLLAAYY
1. Press the [SNDR] MODE key to turn Sounder on
2. Press the [SNDR] MODE key again if you want
to turn the Sounder display off.
SSOOUUNNDDEERR OOPPEERRAATTIIOONN
FRS-1000
▼
▼
▼
▼
▼
▼
▼
▼
▼
▼
▼
▼
ST-BY
TX
ZOOM
IN
OUT
PLTR
MOB
MARK
GOTO
WPT
COMN
1
2
3
4
5
6
7
8
9
+/-
0
CLR
ENT
+
MODE
DISP
Hu/Nu/Cu/TM
RDR
PLTR
SNDR
MENU
ARPA
RDR
PLTR SNDR
ACQ
SNDR
RDR
GAIN
RANGE
GAIN
STC
ESC
CCHHAANNGGIINNGG SSOOUUNNDDIINNGG RRAANNGGEE
1. Press the Sounder RANGE [▲] key to increase
range or the Sounder RANGE [▼] key to
decrease range.
AADDJJUUSSTTIINNGG GGAAIINN
1. Press or hold down the Sounder GAIN [▲] key
to increase gain or the Sounder GAIN [▼] key
to decrease gain. Move the cursor control up
or down to select either the 200 kHz gain
adjustment or the 50 kHz gain adjustment.
Depth
Water Temperature
For a complete and detailed description of all the Radar
functions, please refer to the FRS1000 Operations Guide.
Toggles the Sounder
display on or off.
Increases or
decreases the
Sounder’s Gain.
Increases or
decreases the
Sounder’s Range.
Page 8

Furuno USA, Inc. • 4400 NW Pacific Rim Blvd. • Camas, WA 98607-9408
Tel: (360) 834-9300 • Fax: (360) 834-9400 • www.Furuno.com
 Loading...