

Page 1
A
10 Feet Extension Kit-FHP10X60LS-Mounting Manual
1
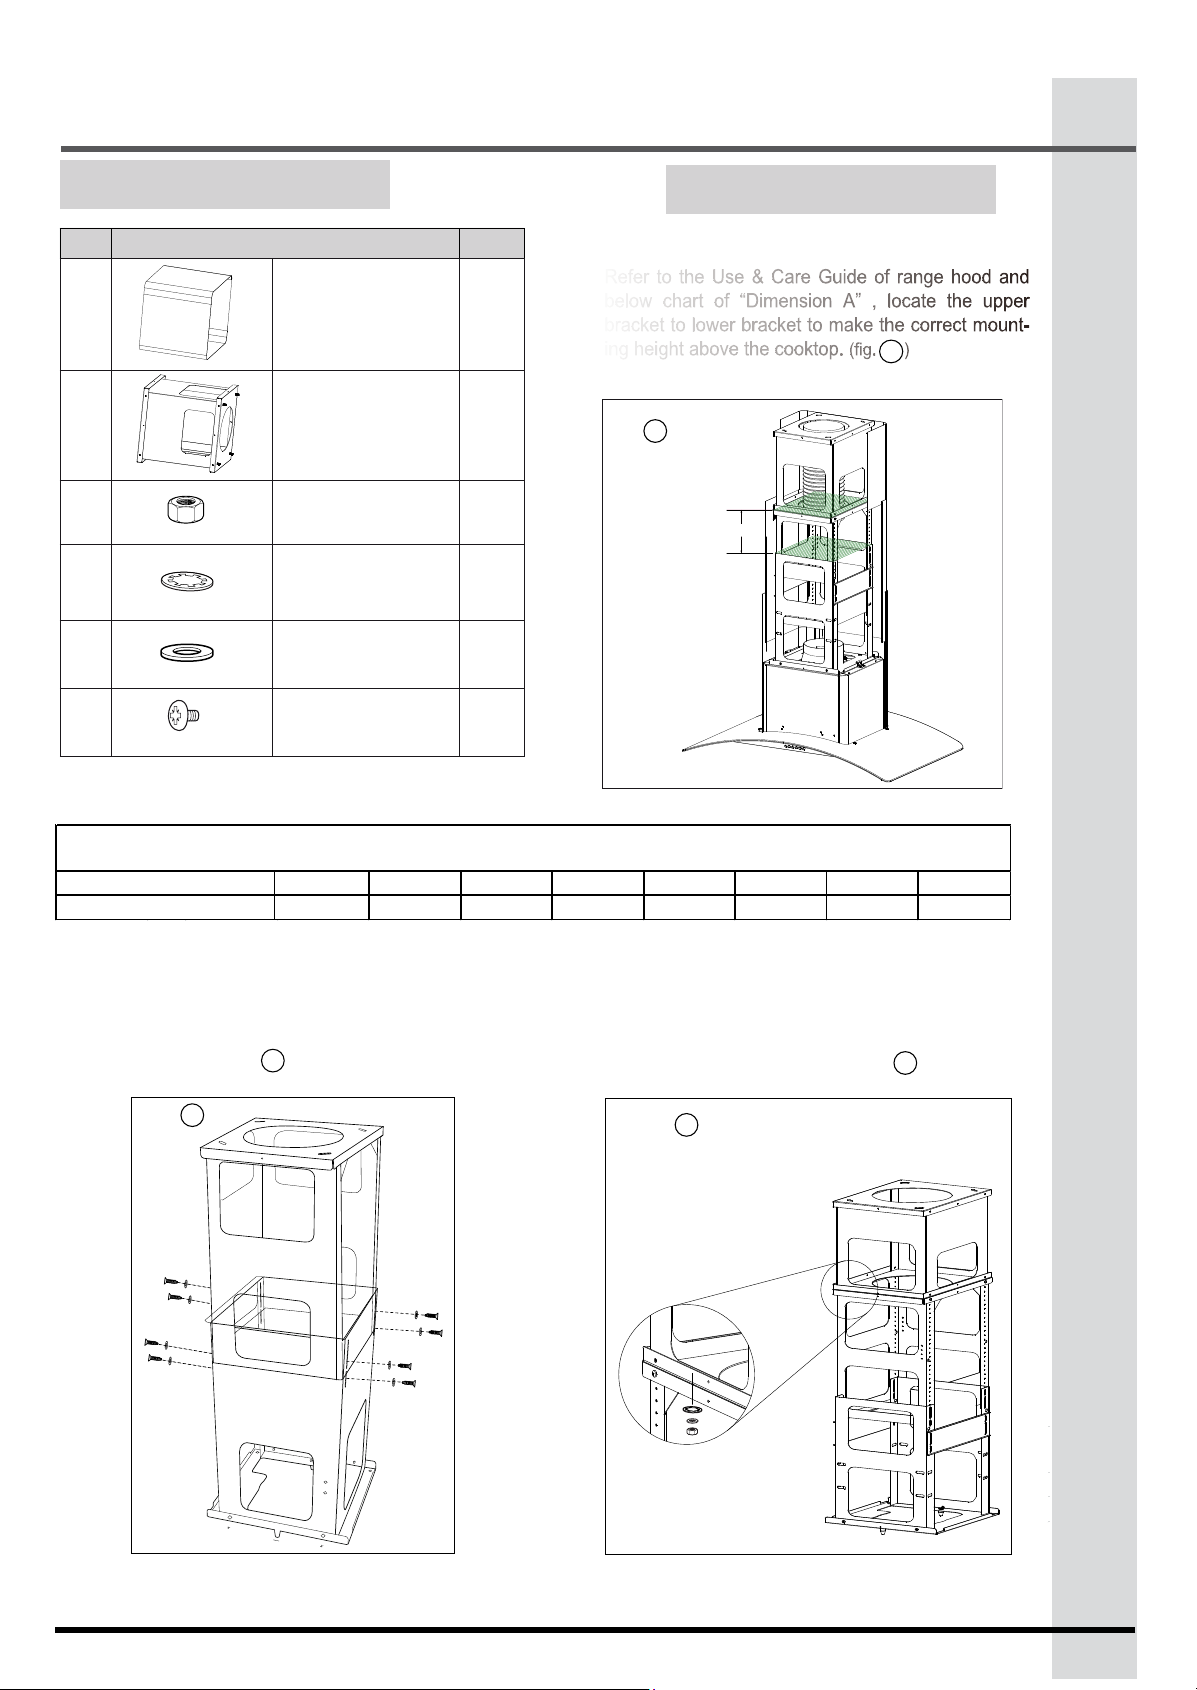
Parts supplied
No. Part Qty.
1
2
3
Extension chimney
Extension bracket
M15/64” x 3/16”
nut
Span washer
4
(dia. 7/16” x
11/32” x 1/64”)
5
6
Washer (dia. 1/2”
x 1/4” x 3/64”)
Short screw
1/8" x 15/32"
1
1
4
4
4
2
Installing the hood
Step 1:
•
Refer to the Use & Care Guide of range hood and
below chart of “Dimension A” , locate the upper
bracket to lower bracket to make the correct mounting height above the cooktop.
fig.
1
Top of upper bracket
Top of lower bracket
Dimension A
(fig. )
1
Desired range hood distance above a 36” high cook top
10 Feet Ceiling height
Mounting height
29
" "
13-25/32
30
* *
12-25/32
"
"
*
11-25/32
"
31
*: Recommended mounting height
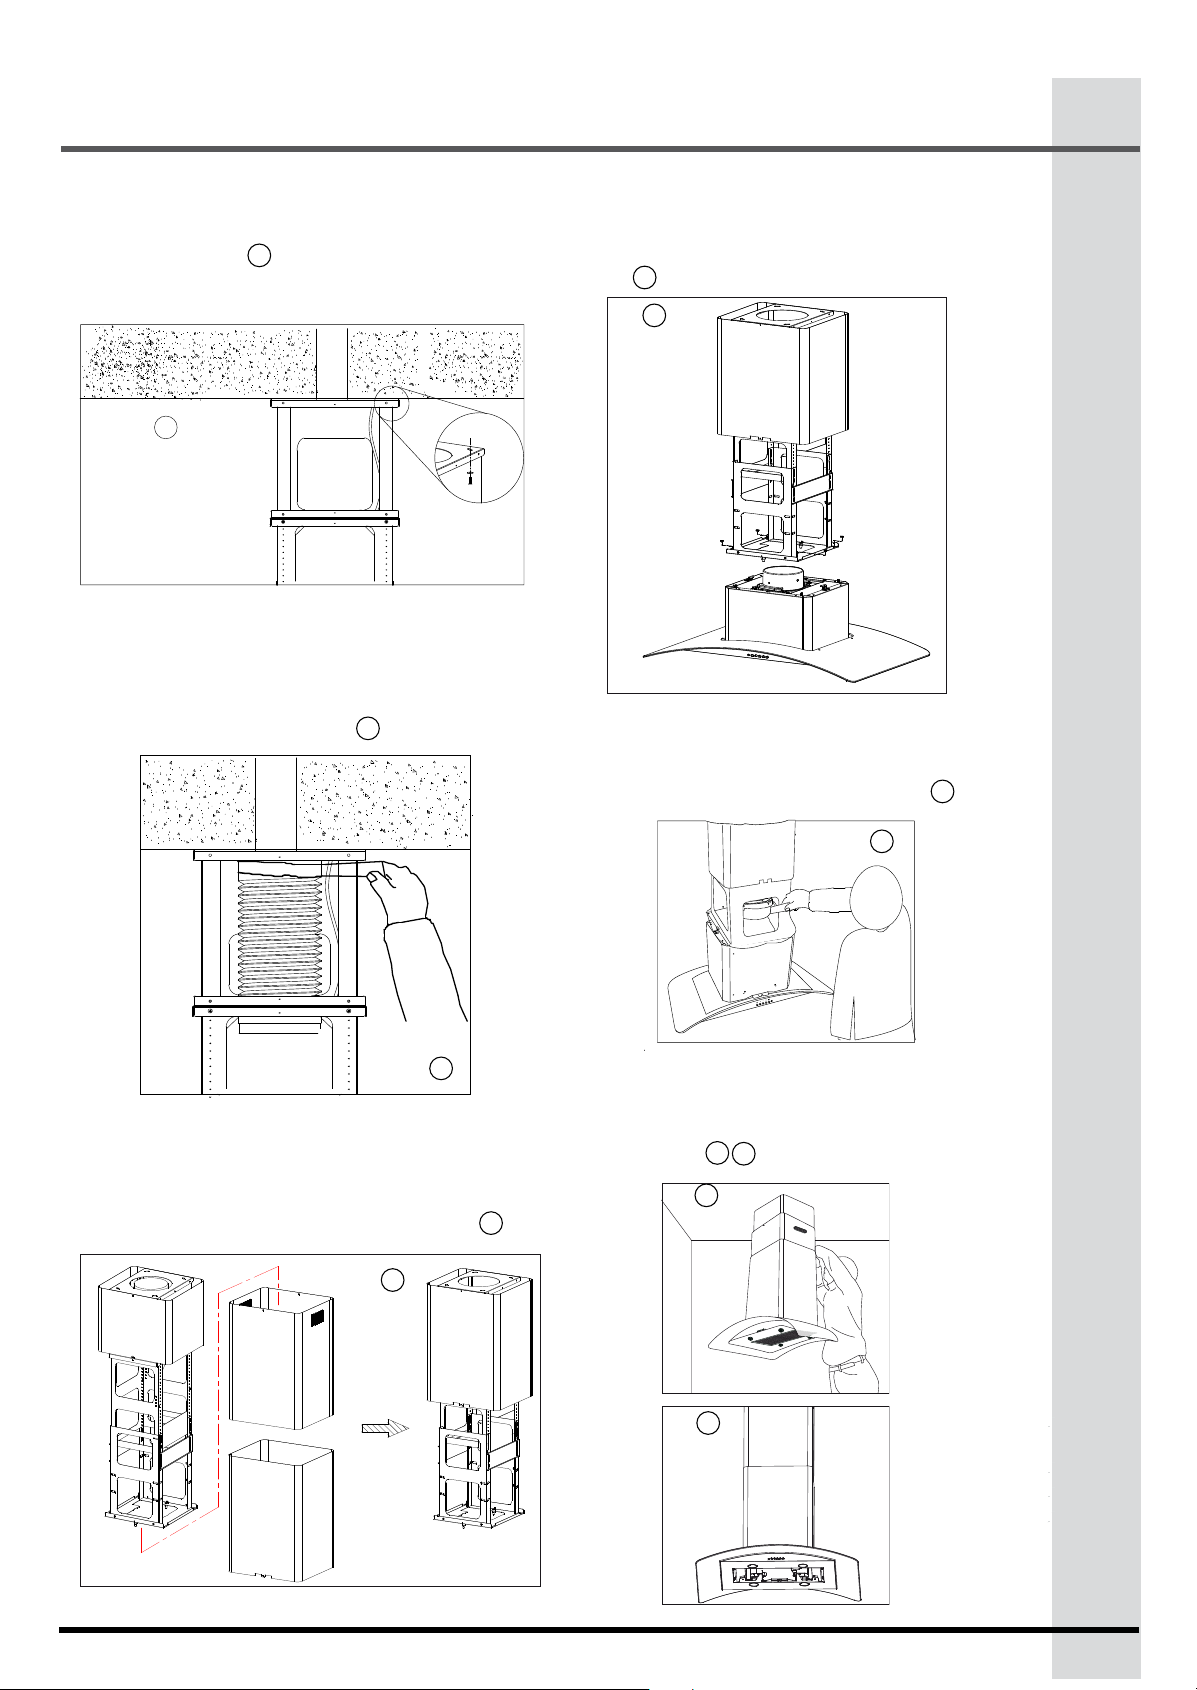
Step 2:
•
Mount upper and lower bracket by securing 8
short screws and washers (19 and 12 in
Care Guide
fig.
fig.
).
2
(fig. )
2
Use &
"
10-25/32
32
33
"
*
"
"
9-25/32
"
34
"
8-25/32
"
35
"
7-29/32
"
6-25/32
Step 3:
•
Mount the Extension bracket (2) on the bracket
assembly (Upper and lower bracket) with 4 sets
of nuts (4) and washers (3).
fig.
3
(fig. )
3
36
"
"
316902470 June 2011
Page 2
2
Step 4:
•
Mount the bracket assembly to the ceiling with 4
sets of long screws and washers (10 ,11 in
(
fig.
Care Guide ).
)
4
Make sure the power cable for the range hood is
routed inside the bracket.
fig.
4
Step 5:
•
Attach the exhaust duct. In the example below,
round metal duct furnace pipe has been used.
Add the duct tape to the metal duct furnace pipe
to insure a tight connection.
(fig. )
5
Use &
Step 7:
•
Push the range hood onto the lower bracket. And
fix them with 4 sets of nuts , span washers and
washers (13,14 and 15 in the
(fig. )
7
fig.
7
Use & Care Guide.)
Step 8:
•
Connect the power cord
Connect the duct pipe to the collar
•
(fig. )
8
fig.
5
Step 6:
•
Fix the extension chimney on extension bracket
Place the lower and upper chimney on the bracket
•
assembly, and hold it up with screwdriver
fig.
6
(fig. )
fig.
8
Step 9:
•
Pull down the lower chimney
Fix the upper and lower chimney with 4 short
•
(fig. )
fig.
9
10
9
screws
6
fig.
10
 Loading...