


LAUNDRY CENTER DRYER OPERATING INSTRUCTIONS
AUTOMATIC |
COOL |
|
100 |
TIMED DRY |
START |
TEMPERATURE |
|
|
DOWN |
|
90 |
|
|||
|
LESS DRY |
|
|
|
|
|
WHITES/ |
|
|
|
|
80 |
|
KNITS/DELICATES |
|
|
|
|
|
|
REGULAR |
||
|
|
|
|
|
|
LOW HEAT |
|
|
|
|
|
|
|
HIGH HEAT |
|
|
|
|
|
|
|
|
|
MORE DRY |
|
|
70 |
|
|
|
|
|
|
|
|
|
|
|
|
|
COOL |
|
|
|
|
|
|
|
DOWN |
|
|
60 |
|
|
|
|
10 |
|
|
|
|
|
|
|
|
|
50 |
|
|
|
|
|
20 |
30 |
40 |
|
|
|
|
|
|
|
|
|
|
||
|
|
|
|
|
|
|
|
Before Operating Your Laundry Center
Read your laundry center Owner's Guide. It has important safety and warranty information. It also has many suggestions for obtaining the best drying results.


 To reduce the risk of fire, electric shock, or injury to persons, read the IMPORTANT SAFETY INSTRUCTIONS in your laundry center Owner's Guide before operating this appliance.
7.Start dryer. Push the Push to Start button for 2 seconds, or turn Turn to Start knob to ON, hold for 2 seconds and release.
8.A signal will sound when the cycle ends.
9.Remove items immediately and hang or fold. 10. Clean lint screen after every load.
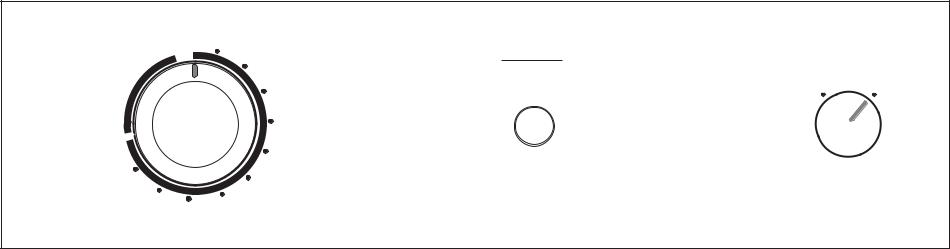
Cycle Selection
Turn cycle selector clockwise to desired cycle and setting.
Each cycle ends with a cool down period. The heat automatically turns off and the load continues to tumble for 5-10 minutes. This reduces wrinkling and makes items easier to handle during unloading.
Drying time varies depending on size and dampness of load, weight and fabric type. Room temperature and humidity, type of installation and electrical voltage or gas pressure can also affect drying time.
Operating Steps
1.Prepare items for drying.
2.Check that lint screen is clean and in place.
3.Load the dryer. If desired, add a dryer fabric softener sheet.
4.Close the dryer door.
5.Set Temperature control.
6.Turn cycle selector clockwise to desired setting.
Temperature Selection
Always follow directions on fabric care labels.
The WHITES/REGULAR-HIGH HEAT and DELICATEs-
LOW HEAT temperature settings may be used with any cycle setting.
Cool Down setting tumbles the load without heat. Use
Cool Down to freshen clothing, pillows or blankets, or to dust draperies.


 To avoid fire hazard, do not use heat to dry items containing feathers or down, foam rubber, plastics, or similarly textured, rubber-like materials. Use the Cool Down setting only.
Auto Dry Cycle
This cycle is best for regular and permanent press items that can be tumble dried.
Drying time is determined automatically at the temperature selection of your choice. This cycle is best for items of similar fabric, weight and construction.
•For items requiring more drying time, set cycle selector on MORE DRY.
•For items requiring less drying time, set cycle selector on LESS DRY.
Time Dry Cycle
This cycle provides up to 100 minutes of drying time at the temperature selection of your choice.
P/N 134808700 (0610)
AUTOMATIC |
COOL |
|
100 |
TIMED DRY |
START |
TEMPERATURE |
|
|
DOWN |
|
90 |
|
|||
|
LESS DRY |
|
|
|
|
|
WHITES/ |
|
|
|
|
80 |
|
KNITS/DELICATES |
|
|
|
|
|
|
REGULAR |
||
|
|
|
|
|
|
LOW HEAT |
|
|
|
|
|
|
|
HIGH HEAT |
|
|
|
|
|
|
|
|
|
MORE DRY |
|
|
70 |
|
|
|
|
|
|
|
|
|
|
|
|
|
COOL |
|
|
|
|
|
|
|
DOWN |
|
|
60 |
|
|
|
|
10 |
|
|
|
|
|
|
|
|
|
50 |
|
|
|
|
|
20 |
30 |
40 |
|
|
|
|
|
|
|
|
|
|
||
|
|
|
|
|
|
|
|
General Drying Guide
This is only a general guide. For best results, follow label directions on specific items to be dried.
Fabric Type |
Select Cycle |
Temperatures |
|
|
|
Mixed Cottons and Linens |
Timed Dry |
High Heat |
|
|
|
Permanent Press |
Auto Dry |
High Heat |
|
|
|
Knits, Delicates, All Synthetics |
Auto Dry |
Low Heat |
|
|
|
Plastic, Rubber Items, |
|
Cool Down |
Dewrinkling and Air Out |
Timed Dry |
No Heat |
|
|
|
Energy Saving Tips
•Keep the lint screen clean and exhaust the dryer correctly.
•Sort laundry properly and select proper temperature and cycle settings. Choose an automatic dry cycle whenever possible for accurate drying time.
•Dry only full loads. Single items and small loads usually take longer to dry.
•Avoid overloading, adding wet items to a partially dry load, and overdrying.
•Dry one load after another to take advantage of a warm dryer.
•Opening the door needlessly causes warm air to escape, which prolongs drying time.
•If possible, use the dryer on low humidity days.
•Install the dryer in an area where the room temperature is at least 45°F (7°C).
P/N 134808700 (0610)

LAUNDRY CENTER WASHER OPERATING INSTRUCTIONS
|
|
|
LOAD SIZE |
KNITS & |
|
15 |
8 |
REGULAR |
||
|
|
|
|
|
|
|
|
|
12 |
|
|
COLD |
|
|
|
|
DELICATES SPIN |
OFF |
|
4 |
(WHITES) |
|
|
|
MEDIUM |
|
RINSE |
|
|
|
||
HOT |
COLD |
WARM |
SMALL |
LARGE |
|
|
|
|
||
|
|
LARGE |
|
|
|
|
|
|||
COLD |
|
COLD |
(LOW) |
|
(FULL, SUPER) |
|
|
|
|
|
|
|
|
|
|
RESET * |
|
|
|
|
RINSE |
|
|
|
|
|
|
|
|
|
|
|
|
|
|
|
|
|
START |
|
|
|
SPIN |
|
|
|
|
|
|
|
|
|
|
|
|
|
|
|
|
|
OFF |
|
|
|
|
|
|
|
|
|
|
|
|
|
OFF |
|
|
|
|
* Some Models |
SPIN |
|
|
12 |
PERM PRESS |
||
|
|
|
RINSE |
|
|
|||||
|
|
|
|
|
4 8 |
(COLORS) |
||||
|
|
|
|
|
|
|
|
|
||
Before Operating Your Washer
Read your Laundry Center Owner's Guide.
It has important safety and warranty information. It also has many suggestions for best washing results.

 To reduce the risk of fire, electric shock, or injury to persons, read the IMPORTANT SAFETY INSTRUCTIONS in your Laundry Center Owner's Guide before operating this appliance.
Operating Steps
Read Washing Procedures in your Owner's Guide. It explains these operating steps in detail.
1.Sort laundry into loads that can be washed together.
2.Prepare items for washing.
3.Pretreat stains and heavy soil.
4.Add the measured amount of detergent to wash tub before adding the laundry load.
Printed in U.S.A.
5.If desired, add liquid bleach to bleach dispenser. DO NOT pour bleach directly onto the load.
6.If desired, add liquid fabric softener to the rinse water. DO NOT pour fabric softener directly onto the wash load.
7.Add laundry load loosely to wash tub. The dry load should not be higher than top of agitator vanes. For best results, DO NOT overload.
8.Select the wash cycle and settings according to type, size, and soil level of each load.
9.Close lid and pull out cycle selector knob to start washer. The washer will fill with water but will not agitate or spin wiht the lid open.
To stop the washer, push in the Cycle Selector knob. To change a cycle, push in the Cycle Selector knob and turn it clockwise to the desired setting. Pull out the knob to restart the washer.
10.Remove items at end of cycle. Wait about 2-3 minutes for safety lid lock to release.
Cycle Selection
Push in and turn the Cycle Selector knob clockwise to the desired cycle. For the best results, follow the washing instructions on the fabric care labels
The Whites, Colors and Delicates cycles progress through wash agitation, drain and spin with spray rinse, rinse agitation, and a final spin.
Whites Cycle
This cycle provides up to 15 minutes of normal agitation and a fast spin for most fabrics.
Colors Cycle
This cycle provides up to 12 minutes of normal agitation and a fast spin for cottons and blends with a no-iron finish. A cool down spray rinse helps reduce wrinkling.
P/N 134808700 (0610)
 Loading...