

FoodSaver V420/Mini Plus Quick Start Manual

Tips for Successful Vacuum Packaging
For more usage tips and safety information, please refer to the FoodSaver Reference Guide or visit our website at www.foodsaver .com.
General Tips
Removing Air from a Bag
If appliance lid is locked, press Open/Cancel
Button
(B) to open lid.
Sealing a Bag
Make sure you’ve placed the bag in the proper place.
When making a bag from a roll, make sure end of cut
piece is on Sealing Strip
(G), not over rubber gasket
(F) or in Vacuum Channel (E).
Prevent moisture or liquid from being pulled into
the Vacuum Channel or trapped in the seal. Either
pre-freeze moist foods such as raw meat for 1-2
hours before vacuum packaging, or place a folded
paper towel between food and end of bag to absorb
excess liquids. Just be sure to leave at least 3 inches
between paper towel and end of bag so that bag
seals properly with paper towel inside.
Make sure you give appliance time to cool down.
Wait at least 20 seconds between seals. Under very
heavy usage, appliance will shut off automatically to
prevent overheating. If it does, wait 20 minutes to
allow appliance to cool off.
Make sure you’ve placed the bag in the proper
place. When vacuuming packaging, make sure open
end of bag is inside Vacuum Channel
(E).
Check for wrinkles in the bag along the Sealing
Strip. Wrinkles in seal may cause leakage and allow
air to come back into bag. Check for wrinkles in bag
along Sealing Strip
(G) before closing lid and vacuum
packaging. If you find wrinkles after sealing bag,
simply cut bag open and vacuum package again.
If motor runs for more than 30 seconds without
stopping, you may need to adjust bag and try again.
If you are making initial seal on a piece of bag material
with two open ends, make sure bag is placed on
Sealing Strip, not on rubber gasket
(F). If you are
vacuum packaging with a bag, make sure open end is
placed down inside Vacuum Channel and make sure
Accessory Hose
(D) is not attached. If you are vacuum
packaging with an accessory, check Accessory Hose in
appliance lid and in accessory to ensure a tight fit.
Copyright © 2004 Tilia, Inc. All rights reserved. This material may not be reproduced or redistributed in any fashion without the express written consent of Tilia, Inc.
FoodSaver and the Freshness Shield logo are trademarks or registered trademarks of Tilia Int’l, Inc. in the United States and other countries. All other trademarks
are property of their respective owners. Tilia, Inc. and Tilia Int’l, Inc. are Jarden companies.This product is protected by one or more of the following Patents:
U.S. RE 34,929; 4,660,355; 4,941,310; 5,655,357; 6,058,998; 6,256,968; Canada 1,315,746; and their equivalent international patents.
First Printing: 6/2004 Item # T180-00210-000 (06/04)
QS.420_Mini Plus.qxd 1/9/07 9:48 AM Page 4
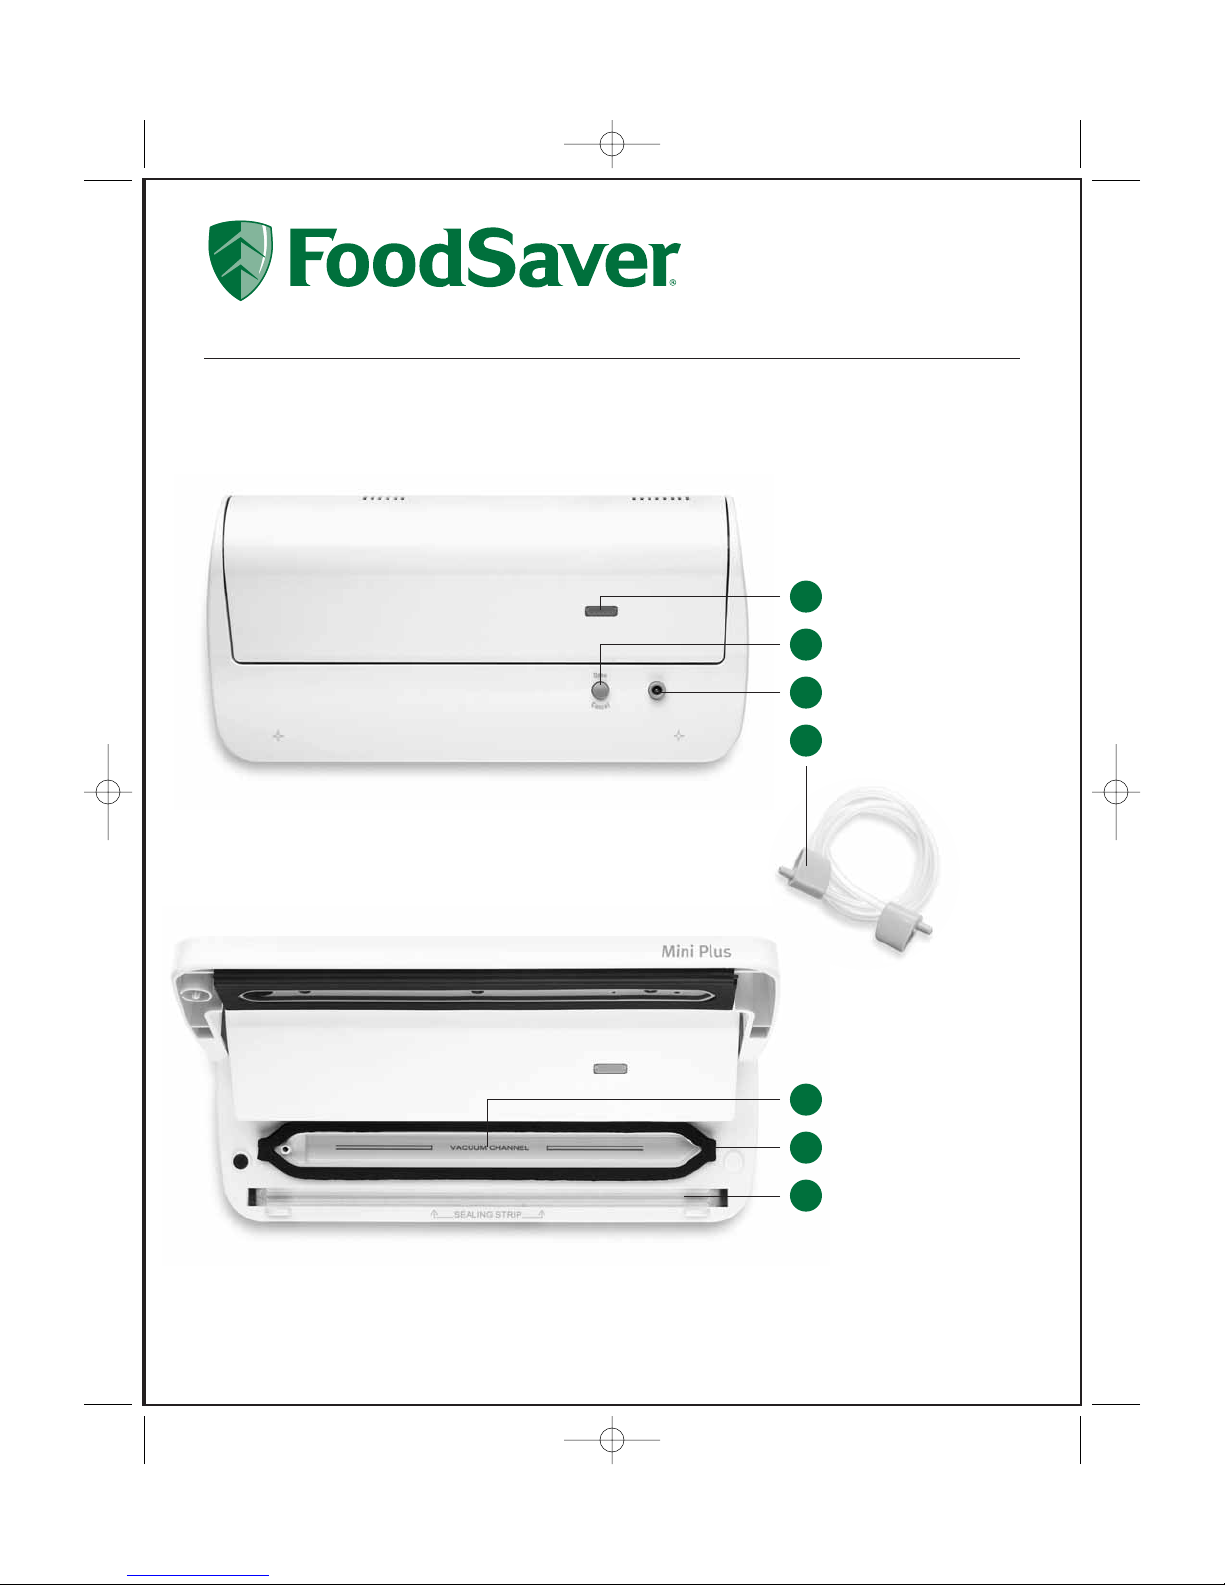
Features
For important safety information and helpful tips, please refer to the FoodSaver Reference Guide
included in your kit. Questions? Visit us at www.foodsa v er.com or call 1-800-777-5452 (U.S.) or
1-877-804-5383 (Canada). Get tips on vacuum packaging and order FoodSaver accessories.
QuickStart
V420/ Mini Plus
Shown Mini Plus; V420 operates in the same manner.
Indicator Light
Open/Cancel Button
Accessory Port
Accessory Hose
D
C
B
A
Vacuum Channel
Rubber Gasket
Sealing Strip
G
F
E
Features of Your FoodSaver Appliance
Note: This appliance is a compact design that sa ves counter space.
It can be used with pint-size and quart-size FoodSaver Bags, and 6-inch
and 8-inch FoodSaver Rolls, plus any FoodSaver accessory.
QS.420_Mini Plus.qxd 1/9/07 9:48 AM Page 1
 Loading...