

Page 1

®
Fluke 433/434
Three Phase Power Quality Analyzer
Users Manual
EN
August 2004
© 2004 Fluke Corporation, All rights reserved. Printed in the Netherlands
All product names are trademarks of their respective companies.
Page 2

Page 3

Table of Contents
Chapter Title Page
General Aspects.............................................................................................. 1-1
Introduction........................................................................................................1-1
Limited Warranty & Limitation of Liability......................................................1-2
Declaration of Conformity.................................................................................1-3
Shipment Note ...................................................................................................1-4
Contacting a Service Center...............................................................................1-5
Safety Information: Read First...........................................................................1-5
About This Manual .......................................................................................... 2-1
Introduction........................................................................................................2-1
Users Manual Contents......................................................................................2-1
Features Of Fluke 433/434.............................................................................. 3-1
Introduction........................................................................................................3-1
General Measurements ......................................................................................3-1
Measuring modes to investigate details .............................................................3-2
Basic Operations and Menu Navigation ....................................................... 4-1
Introduction........................................................................................................4-1
Tilt Stand and Hang Strap..................................................................................4-1
Powering the Analyzer.......................................................................................4-2
Display Brightness.............................................................................................4-3
Locking the keyboard ........................................................................................4-3
Menu Navigation ...............................................................................................4-4
Display Contrast ................................................................................................4-4
Reset to Factory Defaults...................................................................................4-4
Display Information......................................................................................... 5-1
Introduction........................................................................................................5-1
Phase Colors ......................................................................................................5-2
i
Page 4

Fluke 433/434
Users Manual
Screen Types......................................................................................................5-2
Screen information common for all screen types...............................................5-2
Input Connections........................................................................................... 6-1
Introduction........................................................................................................6-1
Input Connections ..............................................................................................6-1
Scope Waveform and Phasor ........................................................................ 7-1
Introduction........................................................................................................7-1
Scope Waveform................................................................................................7-1
Scope Phasor......................................................................................................7-2
Tips and Hints....................................................................................................7-2
Volts/Amps/Hertz ............................................................................................ 8-1
Introduction........................................................................................................8-1
Table ..................................................................................................................8-1
Trend..................................................................................................................8-2
Tips and Hints....................................................................................................8-3
Dips & Swells................................................................................................... 9-1
Introduction........................................................................................................9-1
Trend..................................................................................................................9-3
Events Tables.....................................................................................................9-4
Tips and Hints....................................................................................................9-5
Harmonics........................................................................................................ 10-1
Introduction........................................................................................................10-1
Bar Graph Screen...............................................................................................10-1
Table ..................................................................................................................10-3
Trend..................................................................................................................10-3
Tips and Hints....................................................................................................10-4
Power & Energy............................................................................................... 11-1
Introduction........................................................................................................11-1
Table ..................................................................................................................11-1
Trend..................................................................................................................11-3
Tips and Hints....................................................................................................11-4
Flicker 12-1
Introduction........................................................................................................12-1
Table ..................................................................................................................12-1
Trend..................................................................................................................12-3
Tips and Hints....................................................................................................12-4
Unbalance ........................................................................................................ 13-1
Introduction........................................................................................................13-1
Table ..................................................................................................................13-1
Trend..................................................................................................................13-2
Phasor ................................................................................................................13-3
Tips and Hints....................................................................................................13-3
ii
Page 5

Contents (continued)
Transients ........................................................................................................ 14-1
Introduction........................................................................................................14-1
Waveform Display.............................................................................................14-1
Tips and Hints....................................................................................................14-3
Inrush Currents ............................................................................................... 15-1
Introduction........................................................................................................15-1
Inrush Trend Display .........................................................................................15-1
Tips and Hints....................................................................................................15-4
Power Quality Monitoring............................................................................... 16-1
Introduction........................................................................................................16-1
Power Quality Main Screen ...............................................................................16-4
Events Table ......................................................................................................16-5
Trend Display ....................................................................................................16-6
Bar Graph Screen...............................................................................................16-7
Cursor and Zoom ............................................................................................ 17-1
Introduction........................................................................................................17-1
Cursor on Waveform Displays...........................................................................17-1
Cursor on Trend Displays ..................................................................................17-2
From Events Table to Trend Display with Cursor On. ......................................17-3
Cursor on Bar graph Displays............................................................................17-4
Setting up the Analyzer .................................................................................. 18-1
Introduction........................................................................................................18-1
General Settings.................................................................................................18-3
FUNCTION PREFerences.................................................................................18-7
USER PREFerences...........................................................................................18-11
Limits Adjustments............................................................................................18-13
Using Memory, Printer, and PC ..................................................................... 19-1
Introduction........................................................................................................19-1
Using memory....................................................................................................19-1
Use of Printer and PC ........................................................................................19-3
Tips and Maintenance..................................................................................... 20-1
Introduction........................................................................................................20-1
Cleaning the Analyzer and its Accessories ........................................................20-1
Storing the Analyzer ..........................................................................................20-1
Keeping the Battery in Good Condition ............................................................20-1
Installation of Options in Fluke 433 ..................................................................20-1
Parts and Accessories.........................................................................................20-2
Troubleshooting.................................................................................................20-3
Specifications.................................................................................................. 21-1
Introduction........................................................................................................21-1
Electrical Measurements....................................................................................21-2
Trend Recording ................................................................................................21-11
Wiring Combinations.........................................................................................21-12
Display...............................................................................................................21-13
iii
Page 6

Fluke 433/434
Users Manual
Memory..............................................................................................................21-13
Printers and Interface .........................................................................................21-14
Power Supply and Battery Charger....................................................................21-14
Mechanical.........................................................................................................21-15
Environmental....................................................................................................21-15
Electro Magnetic Compatibility (EMC) ............................................................21-16
Safety .................................................................................................................21-16
iv
Page 7

Introduction
This chapter informs you about a number of general and important aspects concerning the
Fluke 433/434 Three Phase Power Quality Analyzer (hereafter referred to as ‘Analyzer’).
This concerns:
• Warranty and Liability Conditions.
• Declaration of Conformity.
• Shipment Note: Survey of items that should be included in your Analyzer Kit.
• Contacting a Service Center.
• Safety Information: Read First!
Chapter 1
General Aspects
1-1
Page 8

Fluke 433/434
Users Manual
Limited Warranty & Limitation of Liability
Each Fluke product is warranted to be free from defects in material and workmanship
under normal use and service. The warranty period is three years for the Analyzer and
one year for its accessories. The warranty period begins on the date of shipment. Parts,
product repairs and services are warranted for 90 days. This warranty extends only to the
original buyer or end-user customer of a Fluke authorized reseller, and does not apply to
fuses, disposable batteries or to any product which, in Fluke's opinion, has been misused,
altered, neglected or damaged by accident or abnormal conditions of operation or
handling. Fluke warrants that software will operate substantially in accordance with its
functional specifications for 90 days and that it has been properly recorded on nondefective media. Fluke does not warrant that software will be error free or operate
without interruption.
Fluke authorized resellers shall extend this warranty on new and unused products to enduser customers only but have no authority to extend a greater or different warranty on
behalf of Fluke. Warranty support is available if product is purchased through a Fluke
authorized sales outlet or Buyer has paid the applicable international price. Fluke reserves
the right to invoice Buyer for importation costs of repair/replacement parts when product
purchased in one country is submitted for repair in another country.
Fluke's warranty obligation is limited, at Fluke's option, to refund of the purchase price,
free of charge repair, or replacement of a defective product which is returned to a Fluke
authorized service center within the warranty period.
To obtain warranty service, contact your nearest Fluke authorized service center or send
the product, with a description of the difficulty, postage and insurance prepaid (FOB
Destination), to the nearest Fluke authorized service center. Fluke assumes no risk for
damage in transit. Following warranty repair, the product will be returned to Buyer,
transportation prepaid (FOB Destination). If Fluke determines that the failure was caused
by misuse, alteration, accident or abnormal condition of operation or handling, Fluke
will provide an estimate of repair costs and obtain authorization before commencing the
work. Following repair, the product will be returned to the Buyer transportation prepaid
and the Buyer will be billed for the repair and return transportation charges (FOB
Shipping Point).
THIS WARRANTY IS BUYER'S SOLE AND EXCLUSIVE REMEDY AND IS IN
LIEU OF ALL OTHER WARRANTIES, EXPRESS OR IMPLIED, INCLUDING BUT
NOT LIMITED TO ANY IMPLIED WARRANTY OF MERCHANTABILITY OR
FITNESS FOR A PARTICULAR PURPOSE. FLUKE SHALL NOT BE LIABLE FOR
ANY SPECIAL, INDIRECT, INCIDENTAL OR CONSEQUENTIAL DAMAGES OR
LOSSES, INCLUDING LOSS OF DATA, WHETHER ARISING FROM BREACH OF
WARRANTY OR BASED ON CONTRACT, TORT, RELIANCE OR ANY OTHER
THEORY.
Since some countries or states do not allow limitation of the term of an implied warranty,
or exclusion or limitation of incidental or consequential damages, the limitations and
exclusions of this warranty may not apply to every buyer. If any provision of this
Warranty is held invalid or unenforceable by a court of competent jurisdiction, such
holding will not affect the validity or enforceability of any other provision.
1-2
Fluke Corporation, P.O. Box 9090, Everett, WA 98206-9090 USA, or
Fluke Industrial B.V., P.O. Box 90, 7600 AB, Almelo, The Netherlands
Page 9

General Aspects
Declaration of Conformity 1
Declaration of Conformity
Declaration of Conformity
for
Fluke 433/434
Three Phase Power Quality Analyzers
Manufacturer
Fluke Industrial B.V.
Lelyweg 1
7602 EA Almelo
The Netherlands
Statement of Conformity
Based on test results using appropriate standards,
the product is in conformity with
Electromagnetic Compatibility Directive 89/336/EEC
Low Voltage Directive 73/23/EEC
Sample tests
Standards used:
EN 61010-1 2nd edition
Safety Requirements for Electrical Equipment for Measurement, Control,
and Laboratory Use
EN 61326 – 2002
Electrical equipment for
Measurement Control and Laboratory use
EMC requirements
The tests have been performed in a typical configuration.
This Conformity is indicated by the symbol
, i.e. “Conformité Européenne”.
1-3
Page 10

Fluke 433/434
Users Manual
Shipment Note
The following items are included in your Analyzer Kit:
Note:
When new, the Analyzer’s rechargeable NiMH battery is not charged.
Refer to Chapter 4 – Powering the Analyzer.
7
F
1
F
2
F
3
F
4
F
5
1
8
9
2
10
3
4
(5x)
11
5
(5x)
Fluke 434
12
1-4
6
(4x)
13
Figure 1-1. Contents of Analyzer Kit
Page 11

General Aspects
Contacting a Service Center 1
# Description
1 Power Quality Analyzer
2 Decal Set for Input Sockets
3 Hang Strap
4 Alligator Clips. Set of 5
5 Test Leads, 2.5 m. Set of 5
6 AC Current Clamps 400 A (1 mV/A) and 40 A (10 mV/A) switcheable. Set of 4
7 Battery Charger / Power Adapter
8 Line Plug Adapter (country dependent)
9 Getting Started Manual
10 CD ROM with Users Manual and Getting Started Manual (multi-language)
11 Hard Case
12 CD ROM with FlukeView® Software for Windows®, standard for Fluke 434. Optional for Fluke 433
13 Optical Cable for USB, standard for Fluke 434. Optional for Fluke 433
Contacting a Service Center
To locate a Fluke authorized service center, visit us on the World Wide Web at:
www.fluke.com
or call Fluke using any of the phone numbers listed below:
+1-888-993-5853 in the U.S. and Canada
+31-40-2675200 in Europe
+1-425-446-5500 from other countries
Safety Information: Read First
The Fluke 433/434 Three Phase Power Quality Analyzer complies with:
• ANSI/ISA S82.01-1994.
• EN/IEC61010-1 2
Cat IV, Pollution Degree 2.
• CAN/CSA-C22.2 No.61010-1-04 (including approval).
Use the Analyzer and its accessories only as specified in the Users Manual. Otherwise,
the protection provided by the Analyzer and its accessories might be impaired.
nd
edition 1000 V Measurement Category III, 600 V Measurement
A Warning identifies conditions and actions that pose hazard(s) to the user.
A Caution identifies conditions and actions that may damage the Analyzer.
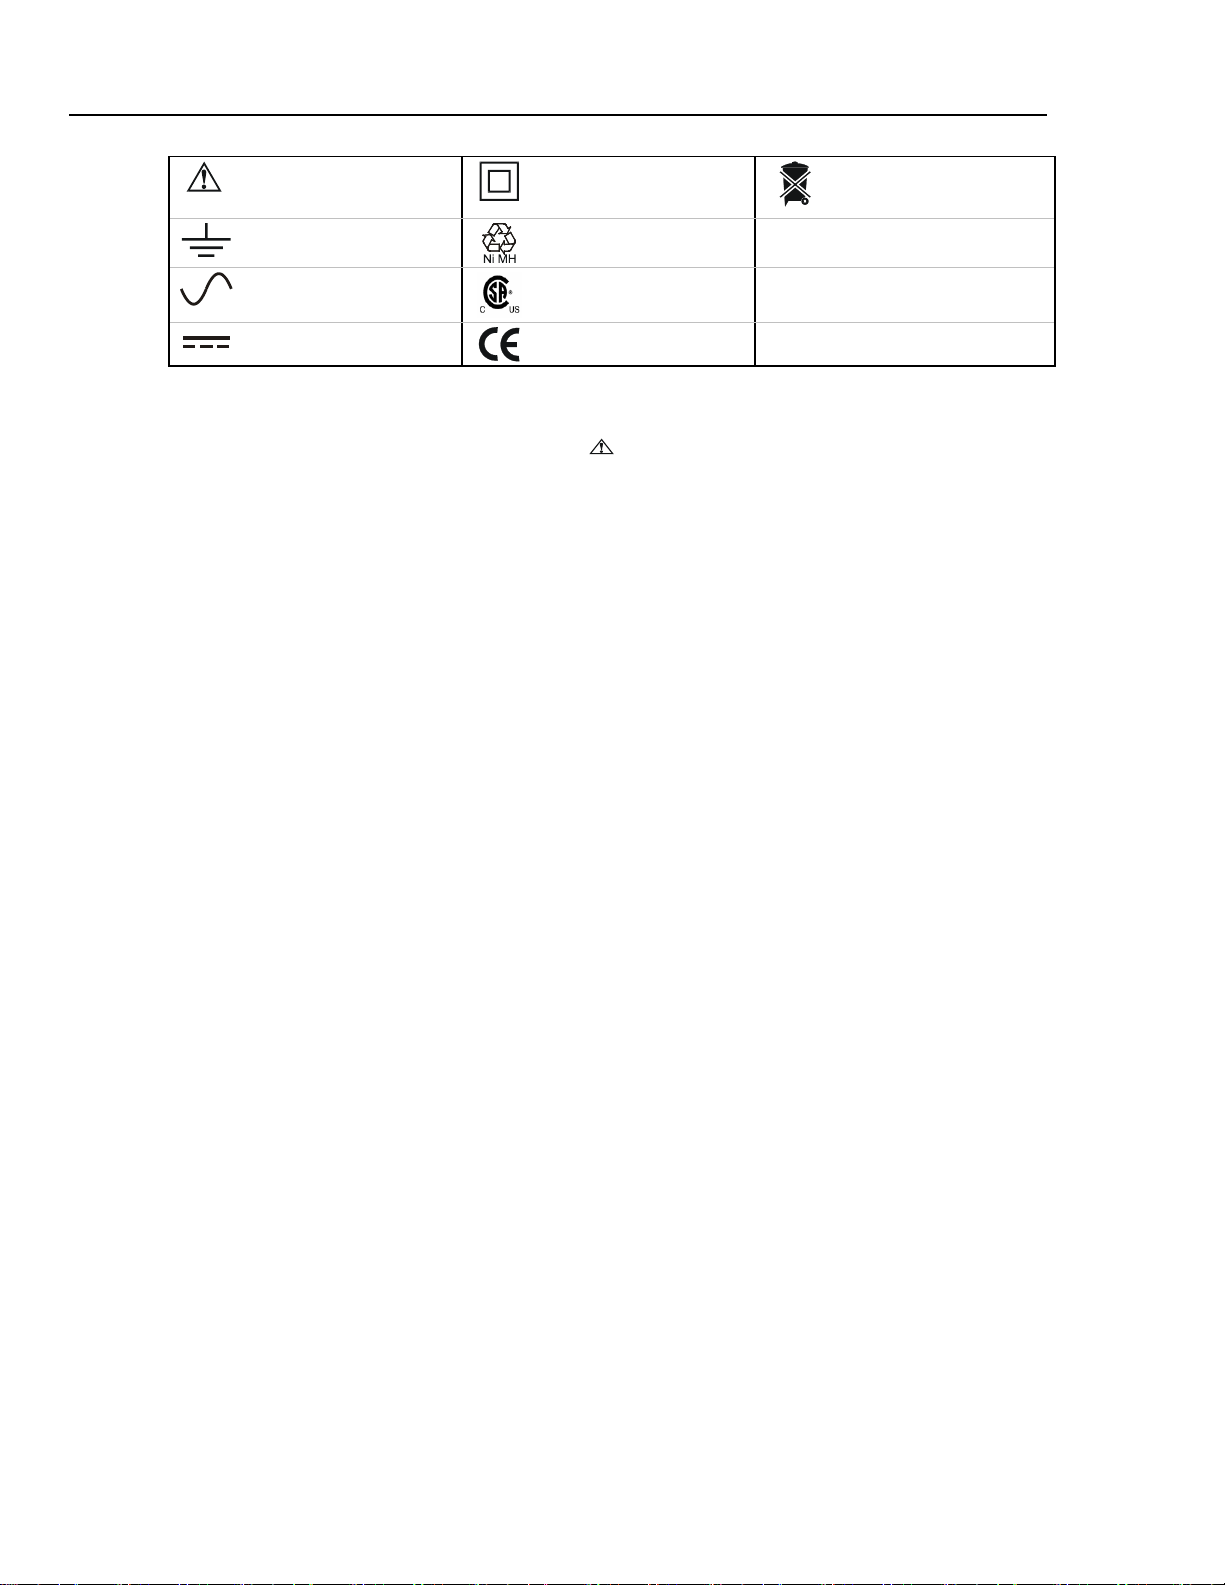
The following international symbols are used on the Analyzer and in this manual:
1-5
Page 12
Fluke 433/434
Users Manual
See explanation in
manual
Earth
Alternating Current
Direct Current
Double Insulation
(Protection Class)
Recycling information
Safety Approval
Conformité Européenne
Disposal information
Warning
To avoid electrical shock or fire:
• Review the entire manual before use of the Analyzer and its
accessories.
• Avoid working alone.
• Do not operate the Analyzer around explosive gas or vapor.
• Use only insulated current probes, test leads and adapters as
supplied with the Analyzer, or indicated as suitable for the
Fluke 433/434 Analyzer.
• Before use, inspect the Analyzer, voltage probes, test leads
and accessories for mechanical damage and replace when
damaged. Look for cracks or missing plastic. Pay special
attention to the insulation surrounding the connectors.
• Remove all probes, test leads and accessories that are not in
use.
• Always connect the Battery Charger / Power Adapter first to
the AC outlet before connecting it to the Analyzer.
• Use the ground input only to ground the Analyzer and do not
apply any voltage.
• Do not apply input voltages above the rating of the instrument.
• Do not apply voltages in excess of the marked ratings of the
voltage probes or current clamps.
• Do not use exposed metal BNC or banana plug connectors.
• Do not insert metal objects into connectors.
• Use only the power supply, Model BC430 (Battery Charger /
Power Adapter).
• Before use check that the selected/indicated voltage range on
the BC430 matches the local line power voltage and frequency
(refer to figure below). If necessary set the slider switch of the
BC430 to the correct voltage.
• For the BC430 use only AC line plug adapters or AC line cords
that comply with local safety regulations.
1-6
Page 13

General Aspects
Safety Information: Read First 1
Slider switch on BC430 Battery Charger / Power Adapter to select line power voltage:
115V 230V
Max. Input Voltage at Voltage Banana Inputs to Ground:
Input A (L1), B (L2), C (L3), N to Ground: 1000 V Cat III, 600 V Cat IV.
Max. Voltage at Current BNC Inputs (See marking):
Input A (L1), B (L2), C (L3), N to Ground: 42 V peak.
Voltage ratings are given as “working voltage”. They should be read as V ac rms
(50-60 Hz) for AC sinewave applications and as V dc for DC applications.
Measurement Category IV refers to the overhead or underground utility service of an
installation. Cat III refers to distribution level and fixed installation circuits inside a
building.
If Safety Features are Impaired
If the Analyzer is used in a manner not specified by the manufacturer, the protection
provided by the Analyzer may be impaired.
Before use, inspect the test leads for mechanical damage and replace damaged test leads!
If the Analyzer or its accessories appear to be impaired or not functioning properly, do
not use it and send it in for repair.
Note
To accommodate connection to various line power sockets, the BC430
Battery Charger / Power Adapter is equipped with a male plug that must be
connected to a line plug adapter appropriate for local use. Since the
Charger is isolated, you can use line plug adapters with or without a
protective ground terminal.
The 230 V rating of the BC430 is not for use in North America. A line plug
adapter complying with the applicable National Requirements may be
provided to alter the blade configurations for a specific country.
1-7
Page 14

Fluke 433/434
Users Manual
1-8 2-1
Page 15

Introduction
This Users Manual gives full and comprehensive information on how to use the Fluke
433 and 434 Three Phase Power Quality Analyzers effectively and in a safe manner.
Read it carefully to learn about safe use of the Analyzer and its accessories and to take
full advantage of all measuring modes.
The Analyzer is also supplied with a printed Getting Started Guide which provides basic
information and can be used as a quick reference.
Users Manual Contents
• Introduction: Title, Table of Contents.
• Chapter 1. General Aspects: Warranty and Liability, Declaration of Conformity,
Shipment Note, Contacting a Service Center, Safety information.
• Chapter 2. Overview of manual contents.
Chapter 2
About This Manual
• Chapter 3. Summary of measuring modes and how to use them in a logical order.
• Chapter 4. Basic operations: Tilt Stand and Hang Strap, Powering, Display
adjustment, Keyboard Locking, Reset, Menu Navigation.
• Chapter 5. Display information: Screen types, General Screen Information, Screen
Symbols.
• Chapter 6. Input Connections: Use of voltage and current probes.
• Chapter 7 ... 16. Explanation of measuring functions with tips & hints:
- Scope Waveform & Phasor (7),
- Volts/Amps/Hertz (8),
- Dips & Swells (9),
- Harmonics (10),
- Power & Energy (11),
- Flicker (12),
- Unbalance (13),
- Transients (14),
- Inrush Currents (15),
- Power Quality Monitoring (16).
• Chapter 17. Cursor and Zoom: how to investigate measurement details.
Page 16

Fluke 433/434
Users Manual
• Chapter 18. Setting up the Analyzer: a comprehensive explanation of adjustments to
customize measurements.
• Chapter 19. Using Memory, printer and PC: how to save, recall and delete
screenshots and data formats. How to make hard copies of measurement results and
setup of communication with PC.
• Chapter 20. Tips and Maintenance: Cleaning, Storage, Batteries, Replaceable parts,
Troubleshooting.
• Chapter 21. Specifications: Electrical, Mechanical, and Safety characteristics.
• Index.
2-2
Page 17

Features Of Fluke 433/434
Introduction
The Analyzer offers an extensive and powerful set of measurements to check power
distribution systems. Some give a general impression of power system performance.
Others are used to investigate specific details. This chapter gives an overview on how to
perform measurements in a logical order.
The measuring modes are described in detail in Chapter 7 to 16. Each measuring mode is
explained in a separate chapter.
Fluke 434 has additional features such as Interharmonics, Transients, Energy
Usage, extra memory to store Screens and Data, FlukeView software, and an optical
isolated interface cable. In Fluke 433 these functions can be installed optionally. If
not installed, they are shown in the menus in grey color.
General Measurements
To check if voltage leads and current clamps are connected correctly, use Scope
Waveform and Scope Phasor. The clamps are marked with an arrow to facilitate proper
signal polarity. Chapter 6 Input Connections explains how to make connections.
Chapter 3
To get a general impression of the quality of a power system use MONITOR. The
MONITOR key displays a screen with Bar Graphs that show quality aspects of the phase
voltages. A Bar Graph changes from green to red if the related aspect does not meet the
limits. Six different sets of limits can be chosen: a number of them are user
programmable. One of these sets are the limits according to the EN50160 norm. For each
quality aspect submenus with detailed information are attainable via the function keys F1
... F5.
Numerical data is shown by Volts/Amps/Hertz. For this press the MENU key. Then
select Volts/Amps/Hertz and press F5 – OK to display a table with the present values of
voltages (rms and peak), currents (rms and peak), frequency and Crest Factors per phase.
Press F5 – TREND so display the course over time of these values.
3-1
Page 18

Fluke 433/434
Users Manual
Measuring modes to investigate details
Phase voltages. Should be close to the nominal value. Voltage waveforms must be a sine
wave that is smooth and free from distortion. Use Scope Waveform to check the
waveform shape. Use Dips & Swells to record sudden voltage changes. Use Transients
mode to capture voltage anomalies.
Phase currents. Use Volts/Amps/Hertz and Dips & Swells to check current/voltage
relations. Use Inrush Current to record sudden current increases like motor inrush.
Crest Factor. A CF of 1.8 or higher means high waveform distortion. Use Scope
Waveform to see waveform distortion. Use Harmonics mode to identify harmonics and
THD (Total Harmonic Distortion).
Harmonics. Use Harmonics mode to check for voltage and current harmonics and THD
per phase. Use Trend to record harmonics over time.
Flicker. Use Flicker to check short and long term voltage flicker and related data per
phase. Use Trend to record these values over time.
Dips & Swells. Use Dips & Swells to record sudden voltage changes as short as half a
cycle.
Frequency. Should be close to nominal value. Frequency is normally very stable. Select
Volts/Amps/Hertz to display frequency. The course of frequency over time is recorded in
the Trend screen.
Unbalance. Each phase voltage should not differ more than 1 % from the average of the
three. Current unbalance should not exceed 10 %. Use Scope Phasor or Unbalance mode
to investigate unbalances.
3-2
Page 19

Chapter 4
Basic Operations and Menu Navigation
Introduction
This chapter deals with a number of general aspects of the Analyzer’s operation:
• Tilt Stand and Hang Strap
• Powering the Analyzer
• Display Brightness
• Locking the keyboard
• Menu navigation
• Display Contrast
• Reset to Factory Defaults
Tilt Stand and Hang Strap
The Analyzer has a tilt stand that allows viewing the screen at an angle when placed on a
flat surface. With the tilt stand folded out, the optical RS-232 port can be accessed at the
right side of the Analyzer as shown in the figure.
Figure 4-1. Tilt stand and location of RS-232 interface
4-1
Page 20

Fluke 433/434
Users Manual
A hang strap is supplied with the Analyzer. The figure below shows how to attach the
strap correctly to the Analyzer.
Figure 4-2. Fixing the hang strap
Powering the Analyzer
The Analyzer has a built-in rechargeable NiMH battery that can power it for more than 6
hours when fully charged. When powered by the battery, the battery condition symbol in
the screen header indicates the charge condition. This symbol ranges from fully charged
to empty:
When empty allow the batteries to fully charge with the Battery Charger/Power Adapter
model BC430. A full charge takes about 4 hours with the Analyzer turned off. When
turned-on charging takes much longer.
No damage will occur if the charger is connected for long periods, e.g. over the weekend.
The Analyzer automatically switches to trickle charging. At delivery the battery may be
empty and it is recommended to charge it before use.
Concerning the use of the Battery Charger/Power Adapter bear the following in mind:
• Use only the supplied Battery Charger/Power Adapter model BC430.
• Before use check that the BC430 voltage and frequency match the local line power
range.
If necessary set the slider switch of BC430 to the correct voltage.
• Connect the Battery Charger to the ac outlet.
.
4-2
• Connect the battery charger to the POWER ADAPTER input on the top side of the
Analyzer.
• To avoid overheating of the battery during charging, do not exceed the allowable
ambient temperature as given in the specifications.
Page 21
Basic Operations and Menu Navigation
Caution
To prevent decrease of battery capacity, charge it at least twice
a year.
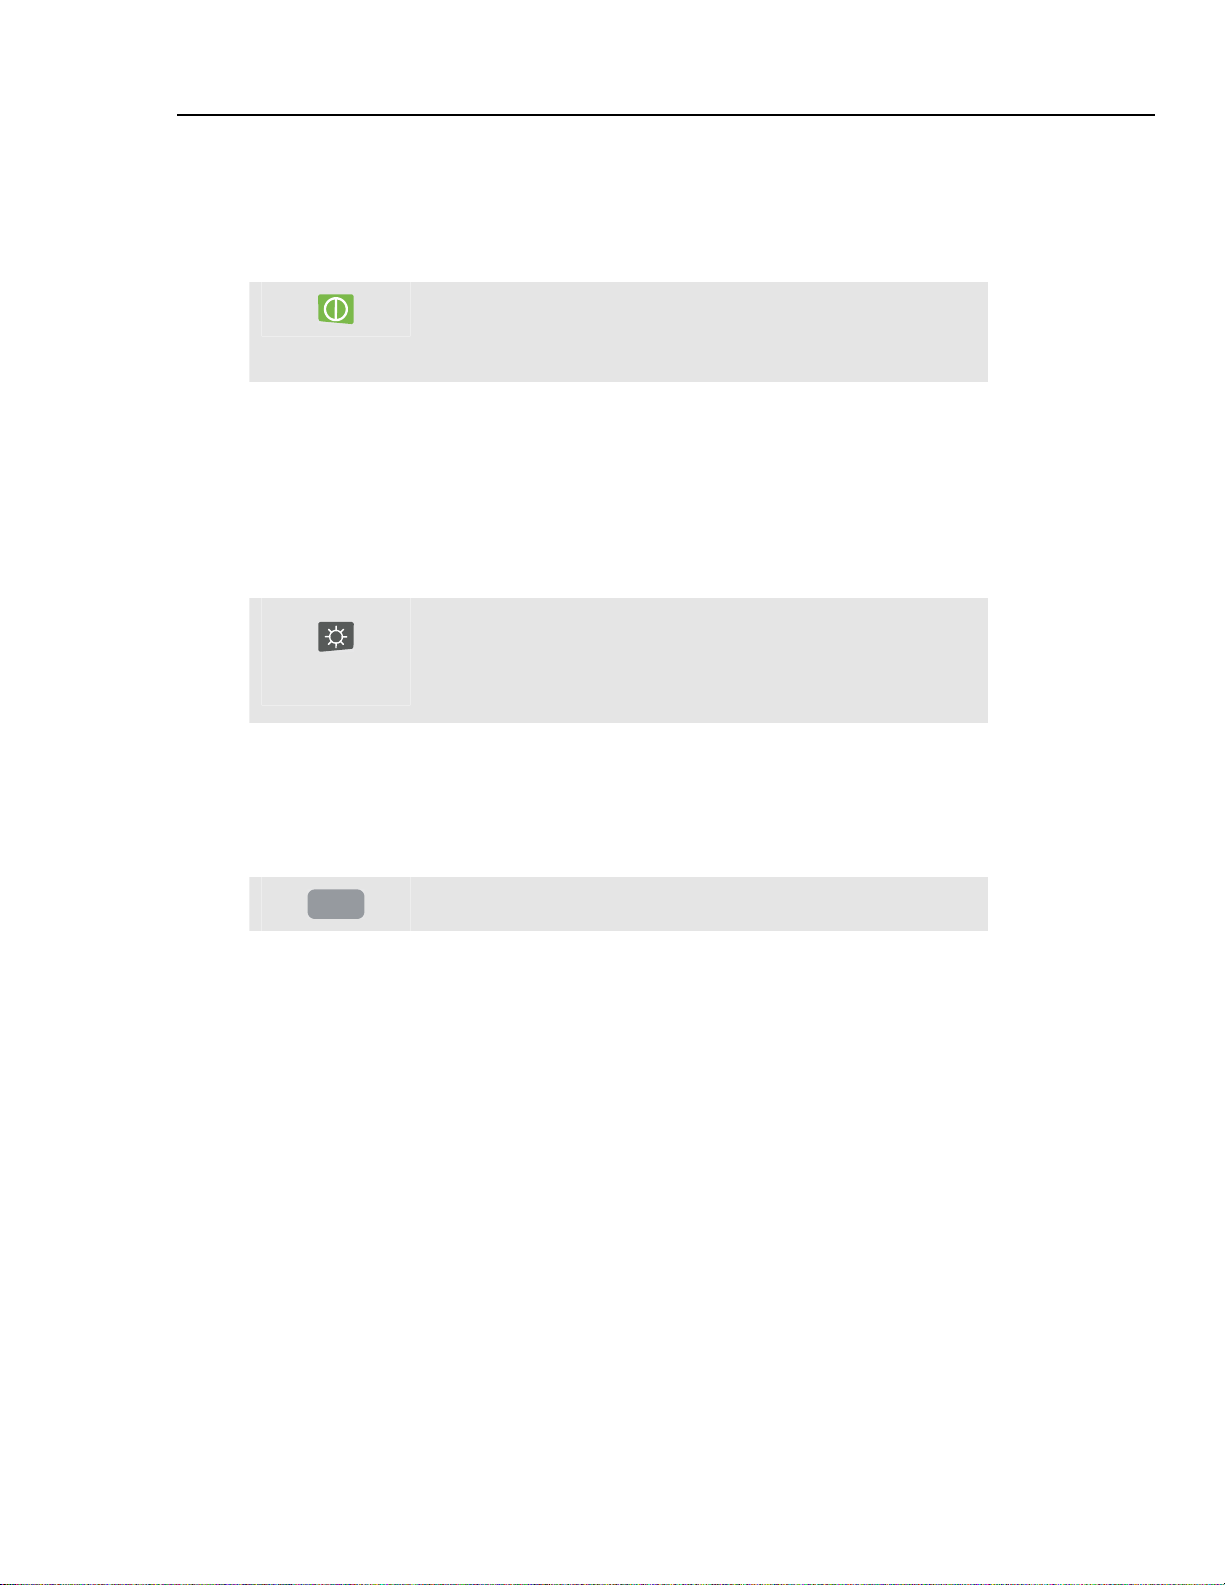
Power On/Off:
Display Brightness 4
To save battery power, the Analyzer display turns off automatically when no keys are
operated during a certain time. This time is adjustable.
When a key is operated, the display turns on again.
For the adjustment of Auto-off time see Chapter 18, USER PREFerences.
Press to power up or down with the last setup configuration.
The welcome screen shows what Analyzer settings are
currently in use. At power on a single beep can be heard.
Display Brightness
Press repeatedly to dim/brighten the backlight.
Keep pressed during 5 seconds for extra brightness for
better visibility in strong sunlight.
Low brightness saves battery power.
Locking the keyboard
The keyboard can be locked to prevent unwanted operation during unattended
measurements:
ENTER
Press for 5 seconds to lock or unlock the keyboard.
4-3
Page 22
Fluke 433/434
Users Manual
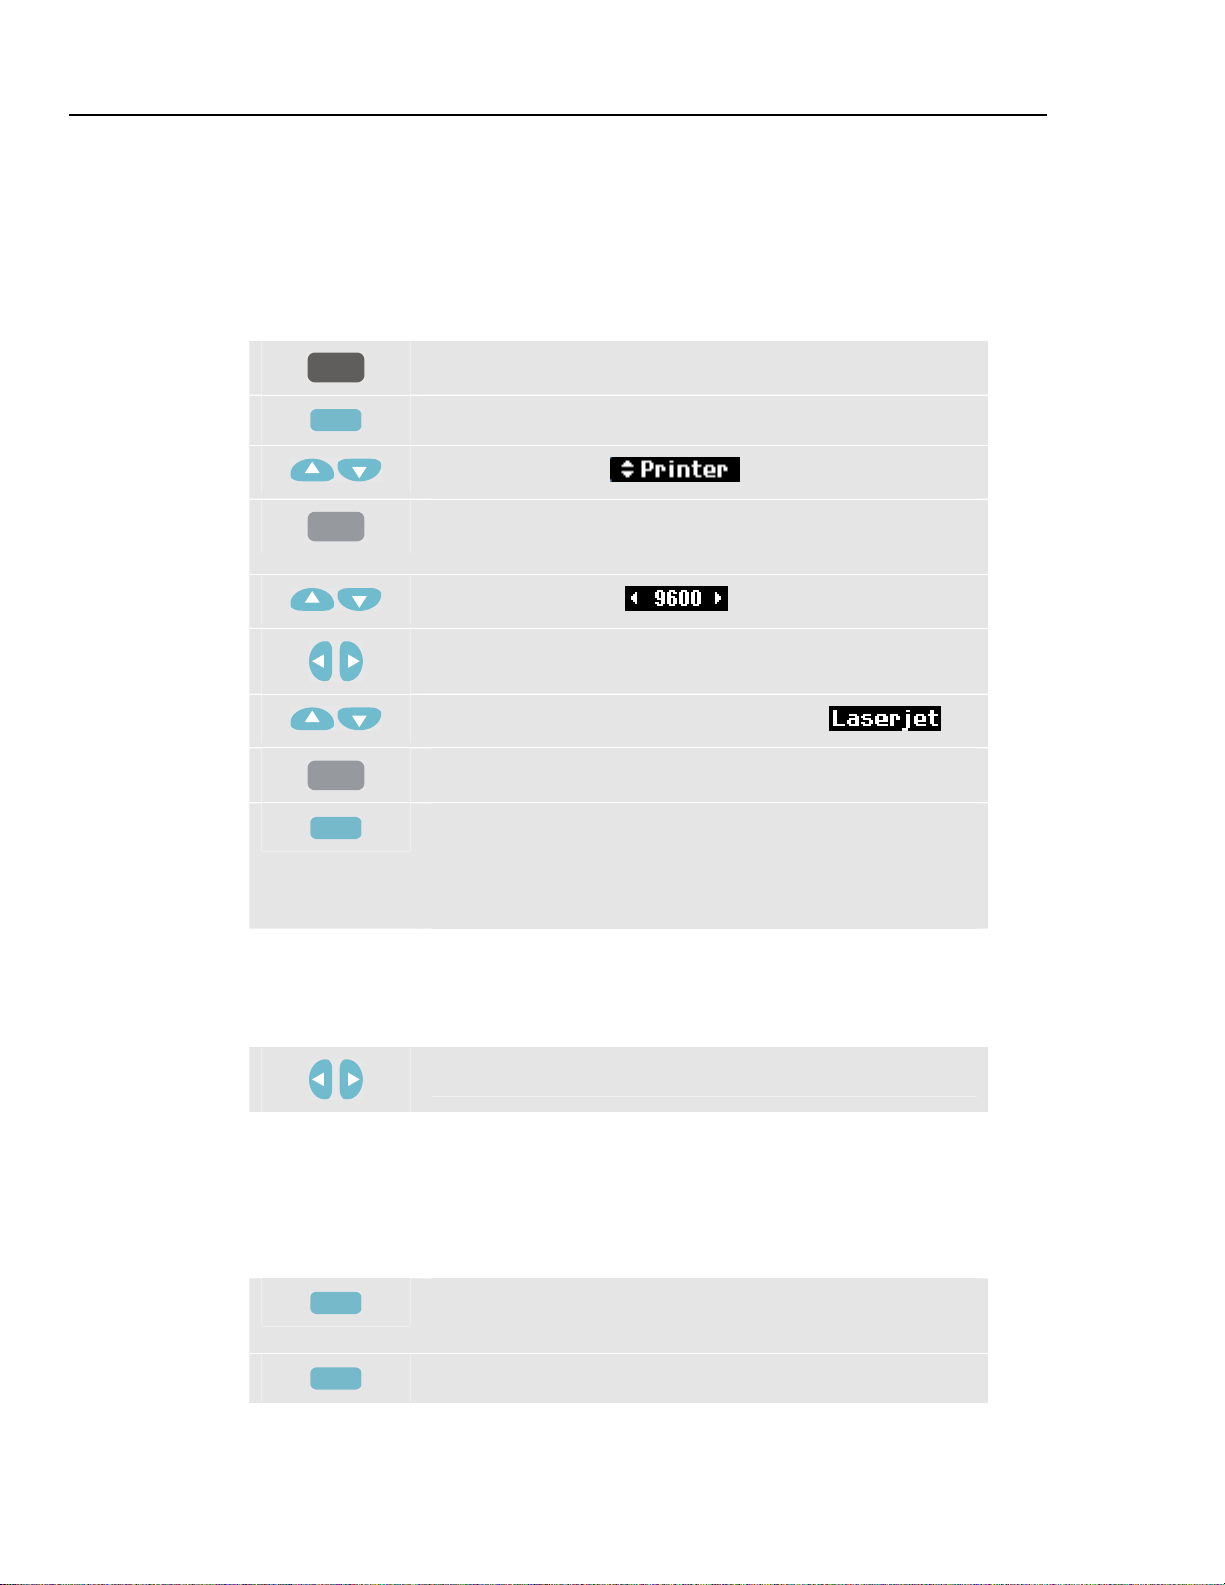
Menu Navigation
Most of the Analyzer functions are menu operated. Arrow keys are used to navigate
through menus. The Function keys F1 ... F5 and the ENTER key are used to make
selections. Active Function key selections are highlighted with a black background.
How to use the menus is illustrated in the example below on how to adjust the Analyzer
for use with a certain printer type.
SETUP
ENTER
ENTER
F4
The SETUP menu pops up.
Submenu SETUP USER PREF appears.
Highlight Printer: .
The PRINTER submenu appears. In this menu you can
adjust printer type and baudrate.
Highlight baudrate: .
Adjust the required transmission speed.
Highlight the Printer type you want to use: .
F5
Press to confirm the selection.
Press to return to the next higher menu SETUP USER
PREF. This menu is the starting point for many adjustments
such as Display Contrast Adjustment and Reset to Factory
Defaults.
4-4
Display Contrast
Use submenu SETUP USER PREF as a starting point. How to get there is explained
above under Menu Navigation:
Adjust the Display Contrast to your personal taste.
Reset to Factory Defaults
Proceed as follows to reset the Analyzer to factory default settings. Bear in mind that
recorded data and adjustments will be lost.
Use submenu SETUP USER PREF as a starting point. How to get there is explained
above under Menu Navigation:
F1
F5
Press to start the reset to default settings. Because of the risk
of unwanted erasure of data, a confirm menu pops up.
Press to confirm the reset.
Page 23
Introduction
A
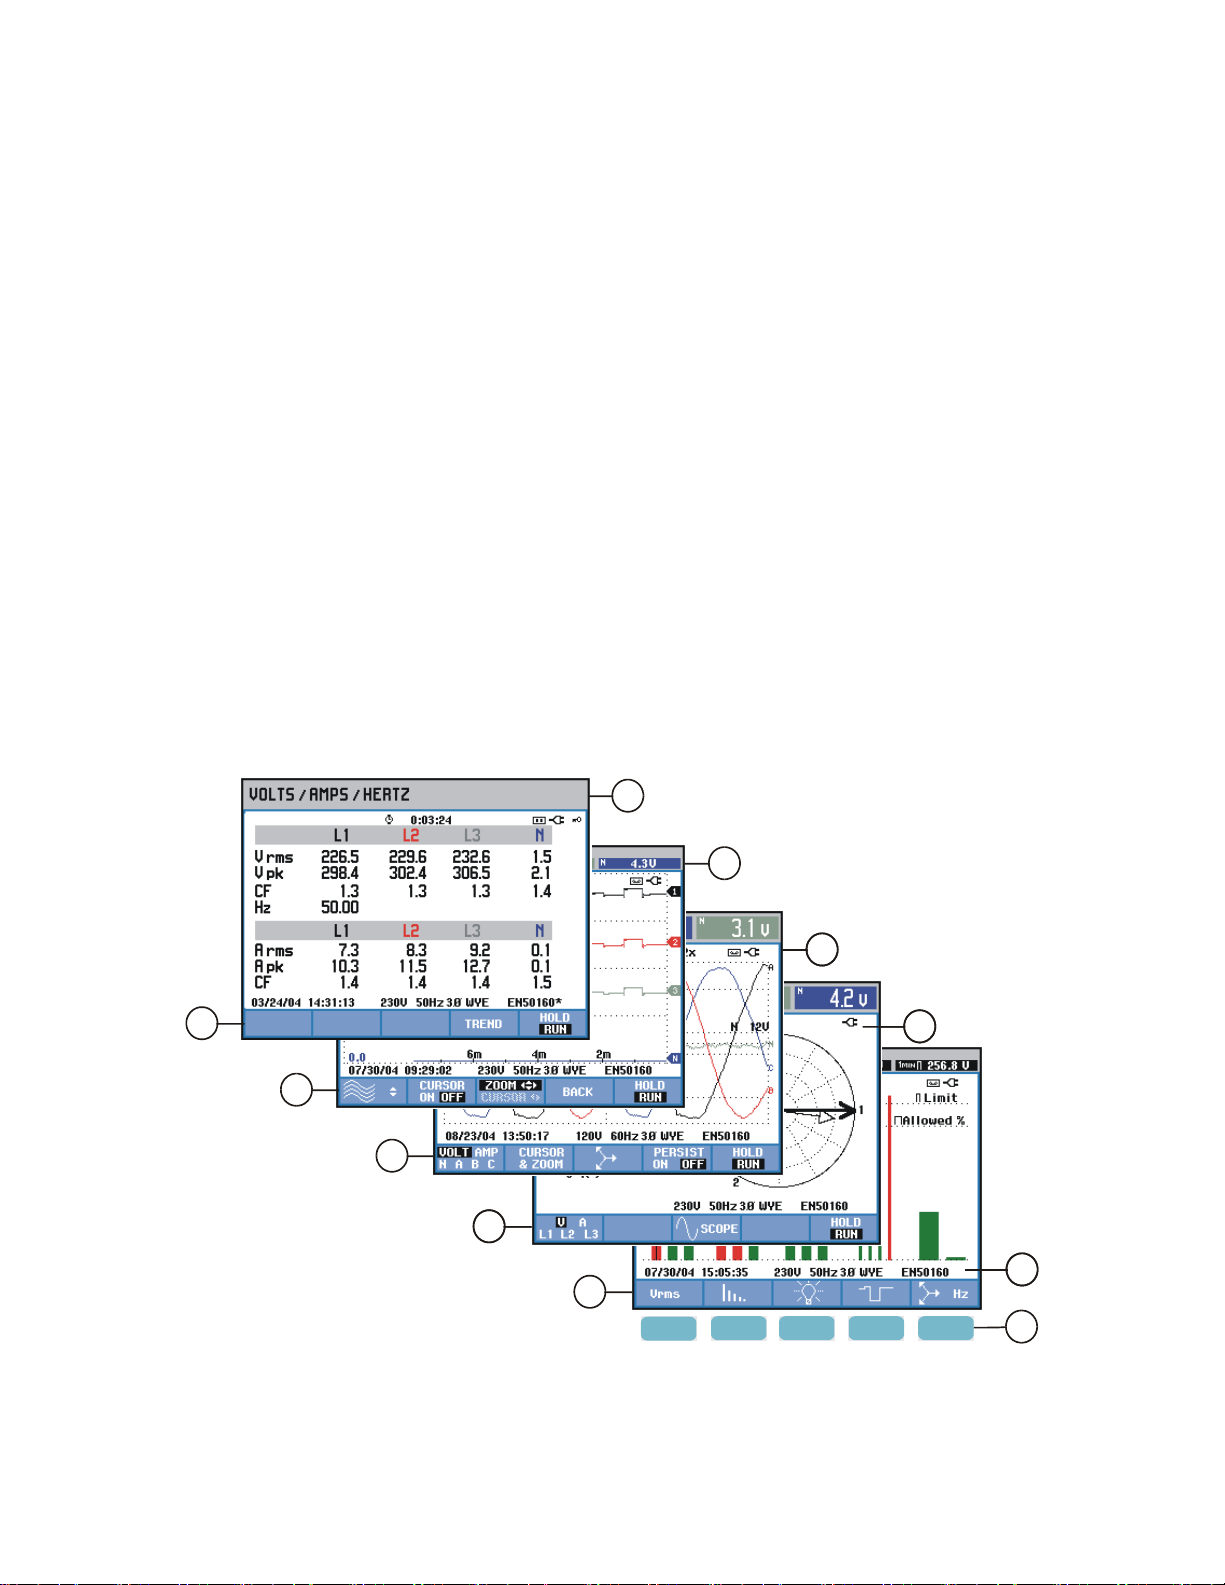
The Analyzer uses five different screen types to present measuring results in the most
effective way. The features these screens have in common are explained in this chapter.
Details that are specific for a certain measuring mode are presented in the chapter
explaining that mode. The figure below gives an overview of the screen types 1 .. 5;
common features are explained under A ... F.
Chapter 5
Display Information
B
C
1
2
3
44
5
F1
Figure 5-1. Survey of Display Types
5-1
F2 F3 F4 F5
D
E
F
Page 24

Fluke 433/434
Users Manual
Phase Colors
Screen Types
Measuring results belonging to different phases are presented with individual colors. If
for a certain phase voltage and current are displayed simultaneously, the voltage color has
a dark tone and the current has a light tone. The set of phase colors can be chosen via the
SETUP key and function key F4 – USER PREF. For detailed information see Chapter 18.
Below you will find a brief description of each screen type and its purpose. The
measuring mode it is used for is given as well as the manual chapter with detailed
information. Bear in mind that the amount of screen information depends on the number
of phases and the wiring configuration. Refer to Figure 5-1, item 1 ... 5.
Table screen: gives an instantaneous overview of a big number of
1
important numerical measuring values. Used for: Volts/Amps/Hertz
(Chapter 8), Dips & Swells (Chapter 9), Harmonics (Chapter 10),
Power & Energy (Chapter 11), Flicker (Chapter 12), Unbalance
(Chapter 13), and Power Quality Monitoring (Chapter 16).
Trend screen: this type of screen is related to a table screen. Trend
2
shows the course over time of measuring values from the table. After
selection of a measuring mode, the Analyzer starts recording all
readings in the table. Used for: Volts/Amps/Hertz (Chapter 8), Dips &
Swells (Chapter 9), Power & Energy (Chapter 11), Flicker (Chapter
12), and Inrush Currents (Chapter 15).
Waveform screen: shows voltage and current waveforms as displayed
3
on an oscilloscope. Channel A (L1) is reference channel and 2 complete
cycles starting at 0 volt are displayed. The nominal voltage and
frequency determine the measuring grid size. Used for: Scope
Waveform (Chapter 7) and Transients (Chapter 14).
Phasor screen: shows the phase relation between voltages and currents
4
in a vector diagram. The vector of reference channel A (L1) points to
the positive horizontal direction. The A (L1) amplitude is also reference
for the measuring grid size. Used for: Scope Phasor (Chapter 7) and
Unbalance (Chapter 13).
Bar Graph screen: shows the density of each measuring parameter as a
5
percentage by means of a Bar Graph. Used for: Harmonics (Chapter 10)
and Power Quality Monitor (Chapter 16).
Screen information common for all screen types
Refer to Figure 5-1, item A ... F.
A
Measuring mode: the active measuring mode is shown in the screen
header.
Measuring values: main numerical measuring values. Background
B
colors differ per phase and for voltage or current. If Cursor is on, the
values at the Cursor are shown.
5-2
Page 25
Display Information
Screen information common for all screen types 5
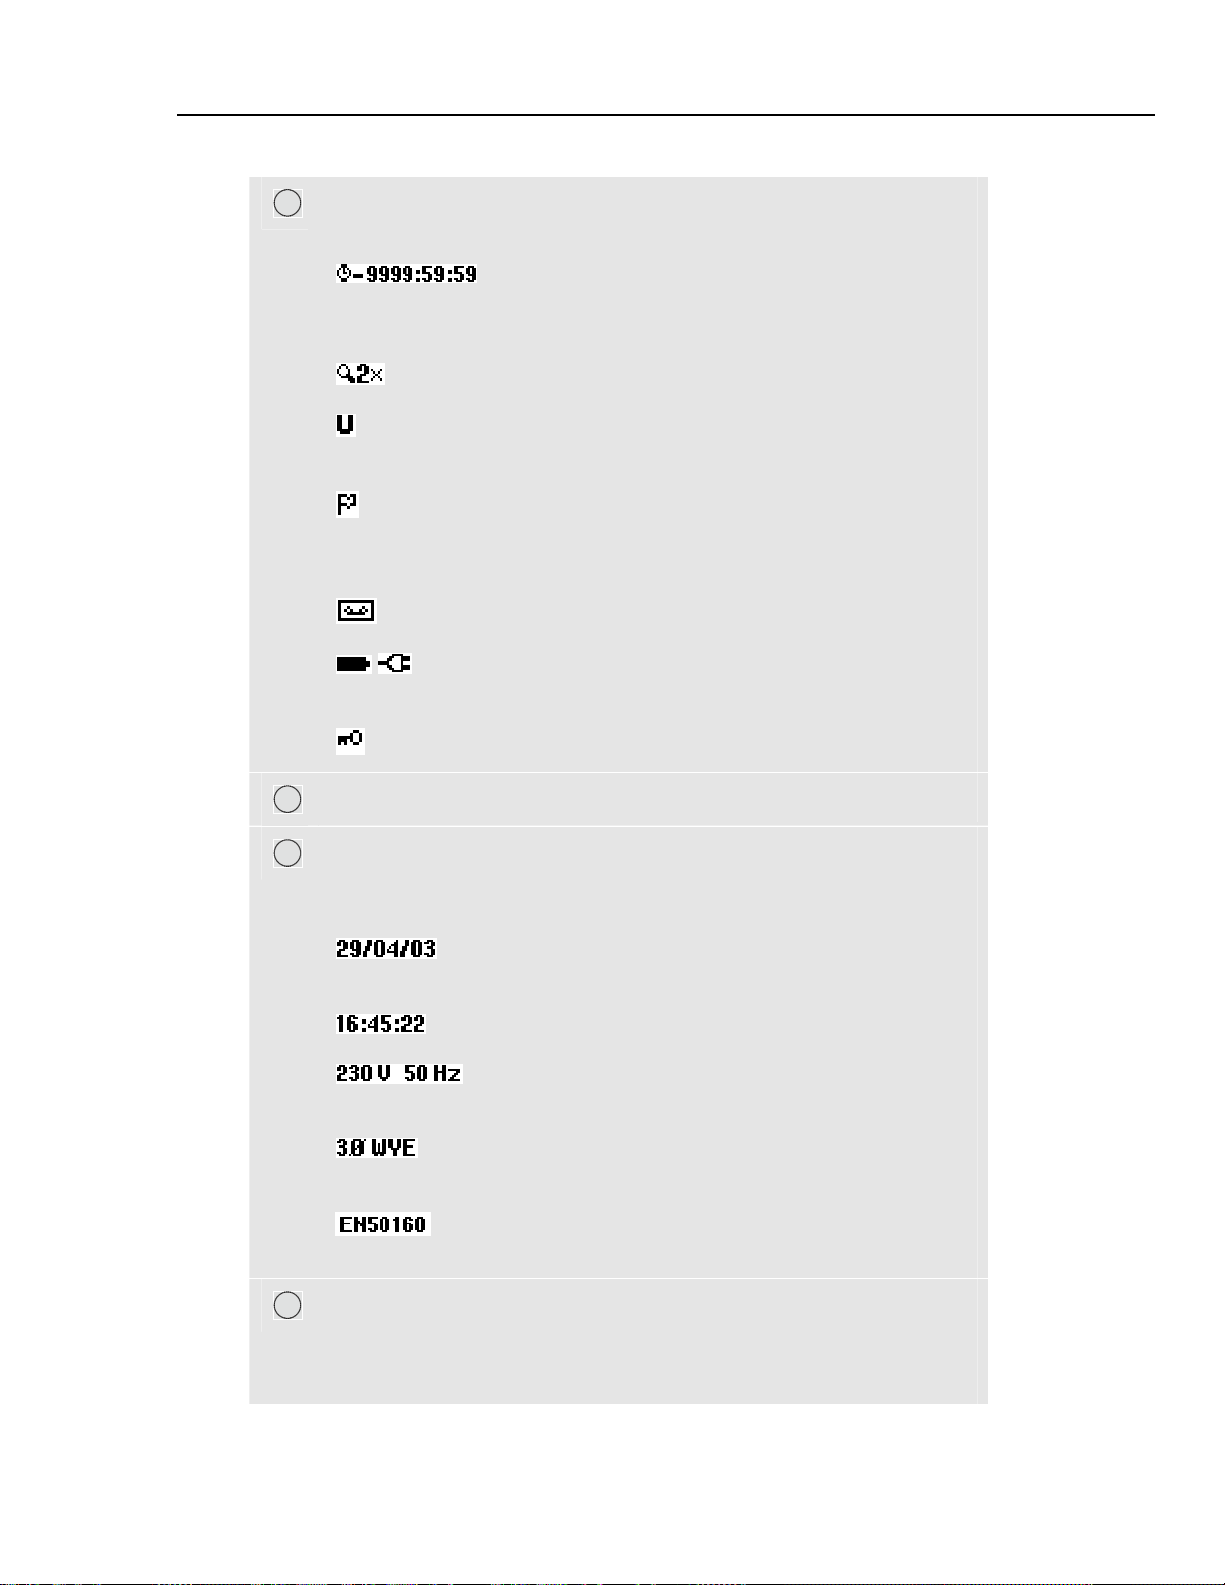
Status indicators. The following symbols may appear on the screen to
C
show the state of Analyzer and measurements:
Time that a measurement has been going on. Format:
hours, minutes, seconds. When waiting for a timed start, time counts
down with prefix -.
Horizontal ZOOM on.
Measurement may be unstable. E.g. applicable for frequency
readout during absence of voltage at reference phase A (L1).
Indicates according to IEC61000-4-30 flagging convention that a
dip, swell or interruption has occurred during the displayed aggregation
interval. Indicates that an aggregated value may not be reliable.
Recording of measurement data is on.
Battery/Line power indication. During battery operation the
battery charge condition is displayed.
Keyboard locked. Press ENTER 5 seconds to unlock/unlock.
Main area with measuring data: features are explained under 1 ... 5.
D
Status line: following information appears on the screen. How to adjust
E
these items is explained in Chapter 18 – General Settings. Following
information is given:
Date of Analyzer’s real time clock. Date format may be
month-day-year or day-month-year.
Time of day or cursor time.
Nominal line voltage and frequency: are a reference for
the measurements.
Number of phases and wiring configuration for the
measurement.
Name of the limits used for the power quality MONITOR,
dips, swells, interruptions, rapid voltage changes.
Softkey text area: softkey functions that can be selected with F1 ... F5
F
are indicated in white. Functions currently not available are indicated in
gray. Active Function key selections are highlighted with a black
background.
5-3
Page 26

Fluke 433/434
Users Manual
5-4 6-1
Page 27

Introduction
This chapter explains how to make connection to the power distribution system under test
and how to adjust the Analyzer settings.
Check that the Analyzer setup meets the characteristics of the system under test and the
accessories that are used. This concerns:
• wiring configuration
• nominal frequency
• nominal voltage
• properties of voltage leads and current clamps
The actual setup is shown in the welcome screen that appears after power up. To change
the setup, refer to Chapter 18.
Chapter 6
Input Connections
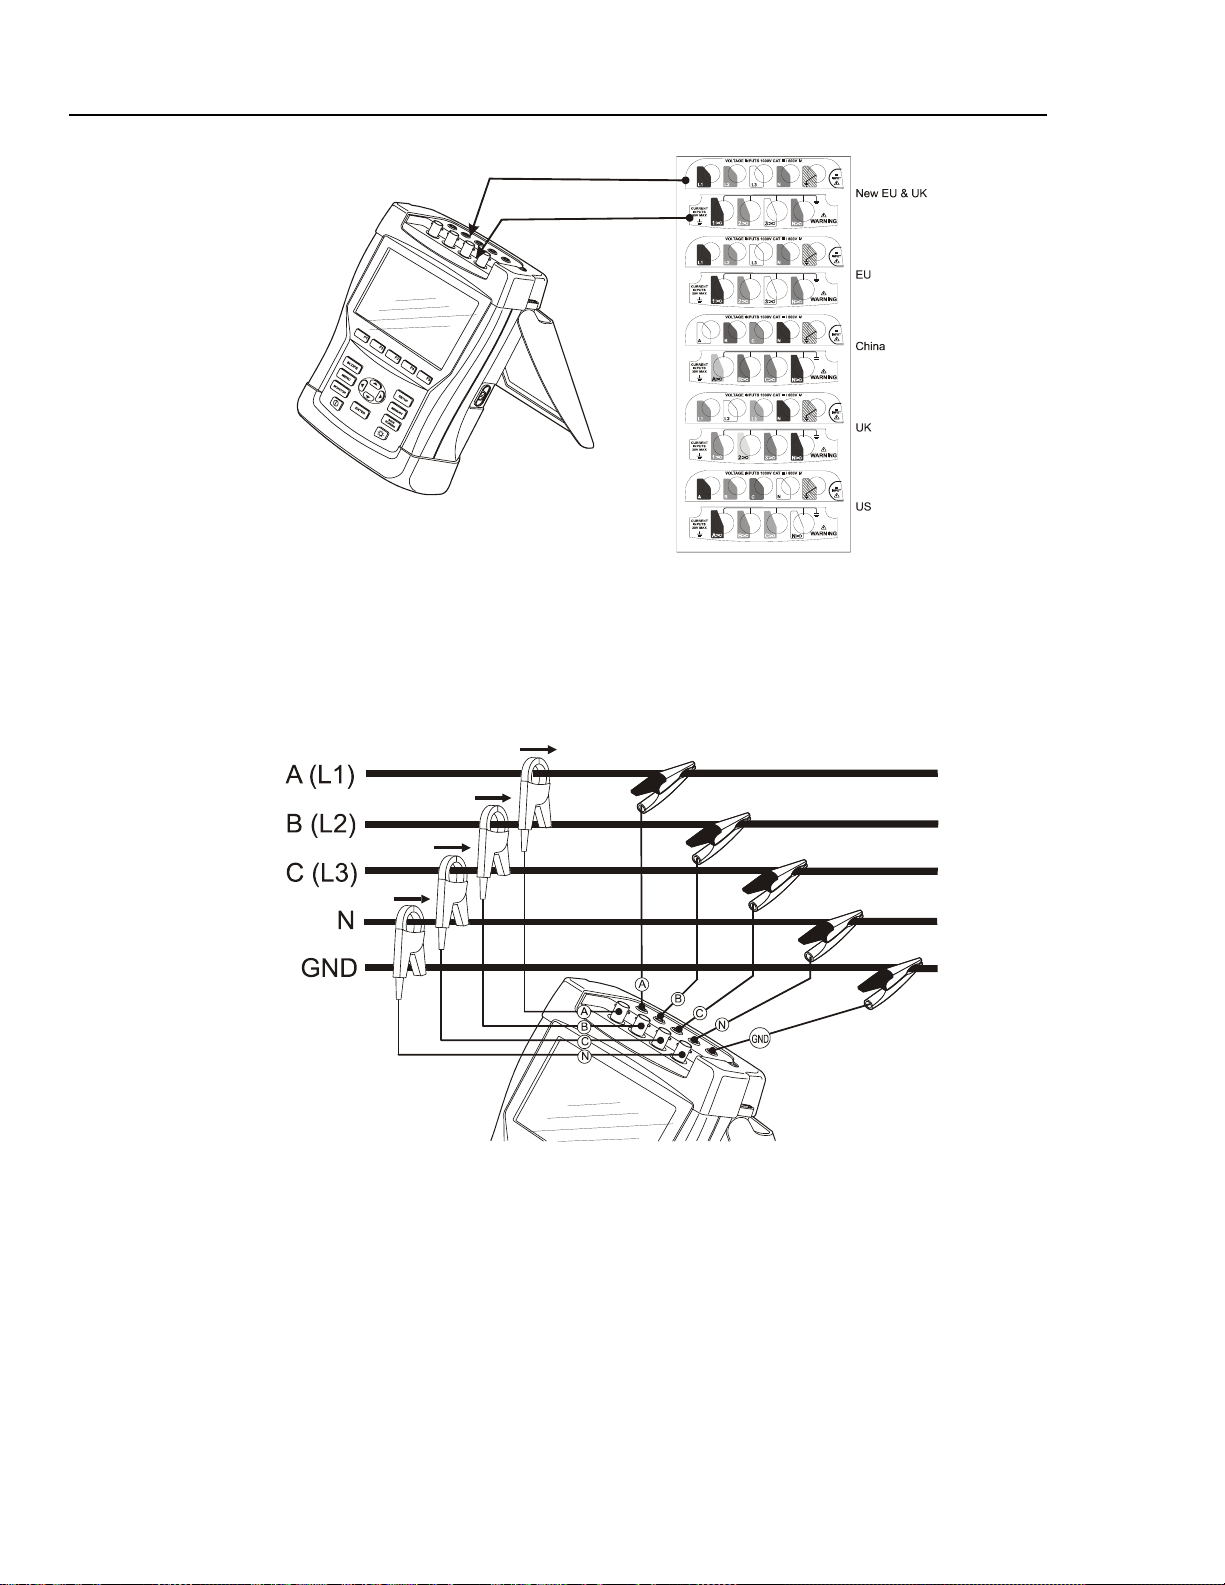
Input Connections
The Analyzer has 4 BNC-inputs for current clamps and 5 banana-inputs for voltages.
Self-adhesive decals are supplied corresponding to wiring color codes used in the USA,
Continental Europe, the UK, and China. Stick the decals that fit to your local wiring
codes around the current and voltage inputs as shown in Figure 6-1.
Page 28
Fluke 433/434
Users Manual
Figure 6-1. Mounting the decals for voltage and current inputs
De-energize power systems before making connections whenever possible. Avoid
working alone and work according to the warnings listed in Chapter 1, Safety
Information.
For a 3-phase system make the connections as shown in Figure 6-2.
Figure 6-2. Connection of Analyzer to 3-phase distribution system
First put the current clamps around the conductors of phase A (L1), B (L2), C (L3), and
N(eutral). The clamps are marked with an arrow indicating the correct signal polarity.
Next make the voltage connections: start with Ground and then in succession N, A (L1),
B (L2), and C (L3). For correct measuring results, always connect the Ground input.
Always double-check the connections. Make sure that current clamps are secured and
completely closed around the conductors.
6-2
For single phase measurements, use current input A (L1) and the voltage inputs Ground,
N(eutral), and phase A (L1).
A (L1) is the reference phase for all measurements.
Page 29
Input Connections
Input Connections 6
Before making any measurements, set the Analyzer up for the line voltage, frequency,
and wiring configuration of the power system you want to measure. This is explained in
Chapter 18, General Settings.
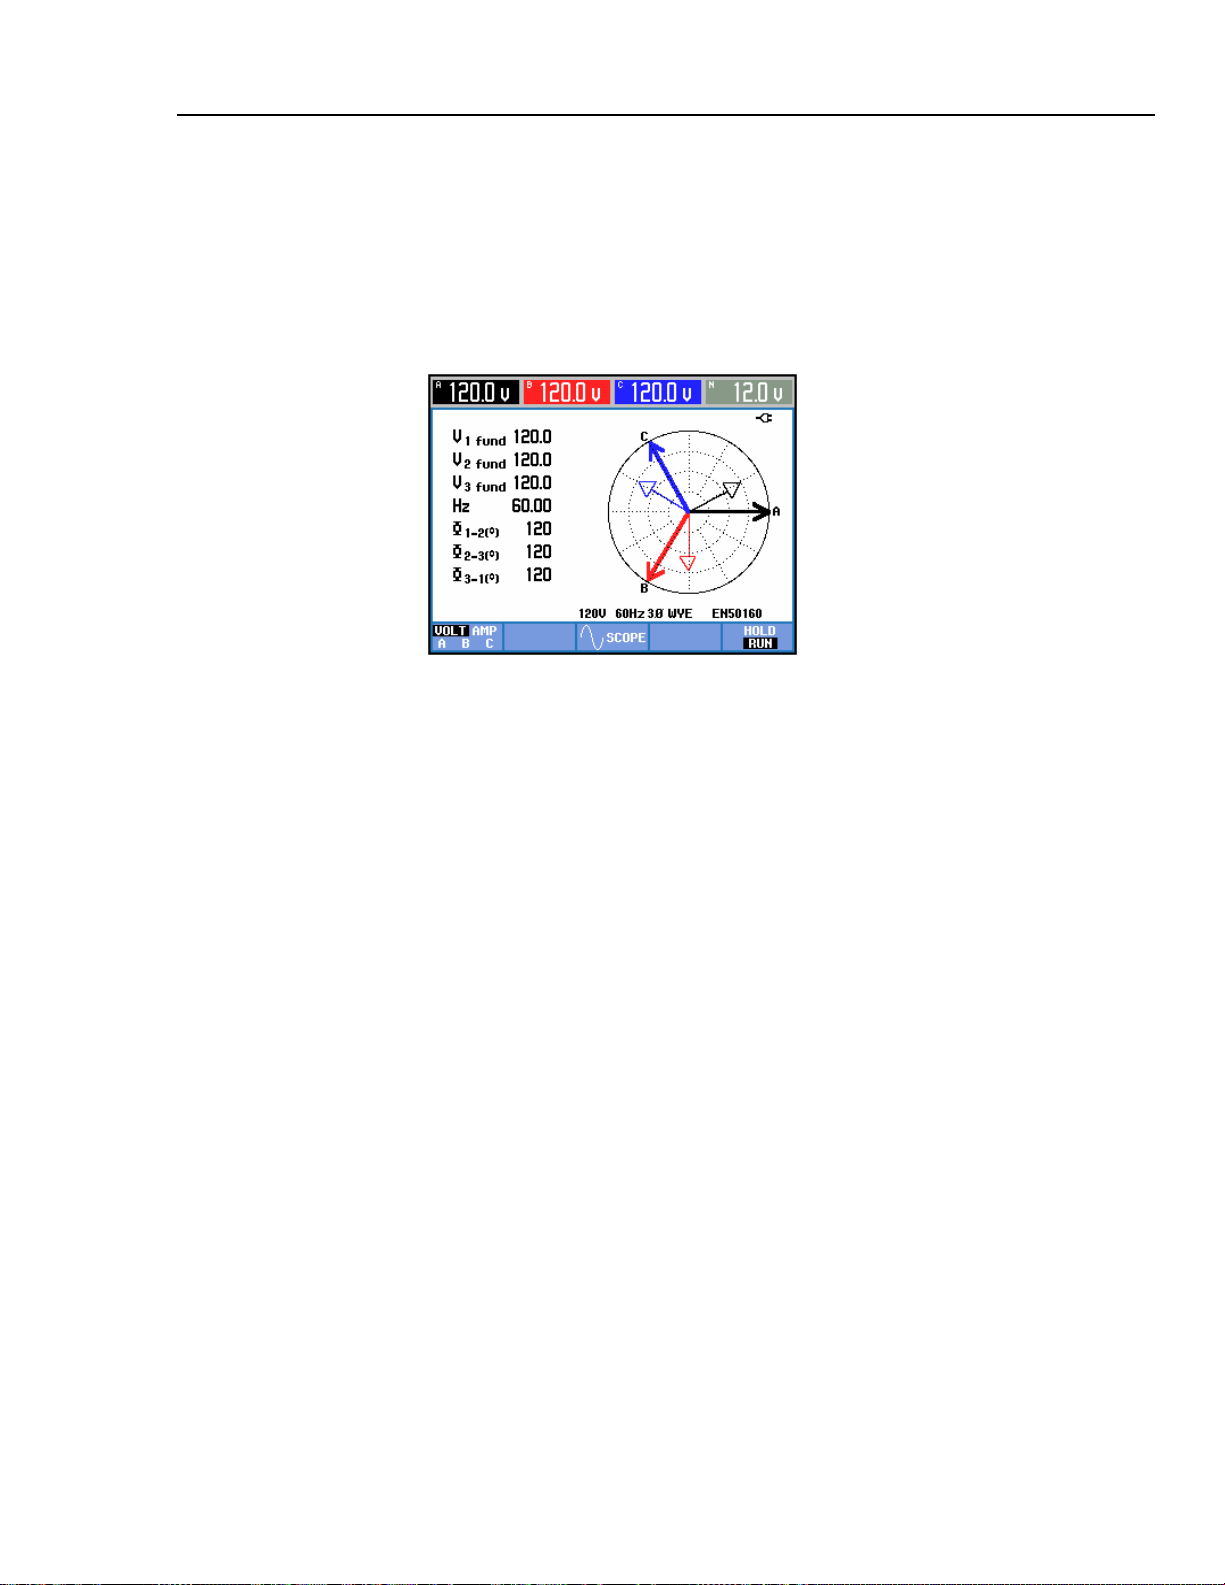
Scope Waveform and Phasor display are useful to check if voltage leads and current
clamps are connected correctly. In the vector diagram the phase voltages and currents A
(L1), B (L2), and C (L3) should appear in sequence when observing them in clockwise
direction as shown in the example in Figure 6-3.
Figure 6-3. Vector diagram for correctly connected Analyzer
6-3
Page 30

Fluke 433/434
Users Manual
6-4
Page 31

Introduction
Scope mode shows voltages and currents in the power system under test by means of
waveforms or vector diagram. Also numerical values are shown such as phase voltages,
phase currents, frequency, and phase angles between voltages and currents.
Scope Waveform
To access the Scope Waveform screen:
Chapter 7
Scope Waveform and Phasor
c
The Scope Waveform screen offers an oscilloscope style of display of voltage and/or
current waveforms with a fast update rate. The screen header shows the related rms
voltage/current values (12 or 10 cycle rms acc. to IEC61000-4-30). As a default 2
waveform periods are displayed. Channel A (L1) is the reference channel and 2 complete
cycles starting at 0 volt are displayed.
Available function keys:
SCOPE
F1
F2
F3
Selection of waveform set to be displayed: V displays all
voltages, A displays all currents. A (L1), B (L2), C (L3), N
(neutral) give simultaneous display of phase voltage and
current for the selected phase.
Access to submenu for Cursor and Zoom operation.
Access to the Phasor screen. For description see below.
7-1
Page 32

Fluke 433/434
Users Manual
F4
F5
Cursor. When the Cursor is on, the waveform values at the Cursor are displayed in the
screen header. Positioning the Cursor across the left or right screen end brings the next
screen out of a maximum of 6 within viewing area.
Zoom. Allows you to expand or shrink the display vertically and horizontally to view
details or to see the complete graph within the screen area. Zoom and Cursor are operated
by the arrow keys and are explained in Chapter 17.
Offset and Span of waveforms are preadjusted for a good display in almost all cases. This
is based upon Nominal Voltage (Vnom) and Current range (A Range).
If desired, you can change them. The adjustment menu is reached via the SETUP key and
function key F3 - FUNCTION PREF. See Chapter 18, FUNCTION PREFerences.
Scope Phasor
To access the Phasor screen:
d
F3
PERSISTence ON memorizes all waveform variations on
screen.
Switch between HOLD and RUN of screen update.
The Phasor screen displays the phase relation between voltages and currents in a vector
diagram. The vector of reference channel A (L1) points in the positive horizontal
direction. Additional numerical values are fundamental phase voltage, frequency, and
phase angles. The screen header shows rms voltage and/or current values.
Available function keys:
F1
F3
F5
Tips and Hints
Scope Waveform gives a clear view of current and voltage waveform shapes. Voltage
waveforms in particular should be smooth and sinusoidal. If you see voltage distortion, it
is a good idea to check the harmonics display. The rms voltages and frequency should be
close to their nominal values.
Waveform and Phasor display are also useful to check if voltage leads and current clamps
are connected correctly. In the vector diagram the phase voltages and currents L1 (A), L2
(B), and L3 (C) should appear in sequence when observing them in clockwise direction.
Selection of additional data to be displayed: all voltages, all
currents, or voltage and current phase by phase.
Return to the Scope Waveform.
Switch between HOLD and RUN of screen update.
7-2
Page 33

Introduction
Volts/Amps/Hertz displays a table with important numerical measuring values. The
related Trend screen shows the changes over time of all values in the table.
Table
To access the VOLTS/AMPS/HERTZ Table screen:
Chapter 8
Volts/Amps/Hertz
c
MENU
d
ENTER
The table gives an overview of voltages and currents in all phases. Also frequency and
Crest Factors are shown. The Crest Factor CF indicates the amount of distortion: a CF of
1 means no distortion and higher than 1.8 means high distortion. Use this screen to get a
first impression of power system performance before examining the system in detail with
other measuring modes. The number of columns in the table depends on the power
system configuration.
The figures in the table are present values that may update constantly. Changes in these
values over time are recorded as soon as the measurement is turned on. The recording is
visible in the Trend screen.
8-1
Page 34

Fluke 433/434
Users Manual
Available function keys:
F4
Access to the Trend screen. For description see below.
Trend
To access the VOLTS/AMPS/HERTZ Trend screen:
All values in the table are recorded, but the Trends from each row in the table are
displayed one at a time. Press Function key F1 to assign the up/down arrow keys to row
selection.
The traces build up from the right side. Readings in the header correspond to the most
recent values plotted on the right.
Available function keys:
e
F5
Switch between HOLD and RUN of screen update.
Switching from HOLD to RUN invokes a menu to select
immediate (NOW) or TIMED start time which allows you
to define start and duration of the measurement.
F4
F1
Assign up/down arrow keys to select a row from the table
for Trend display.
8-2
F2
F3
F4
F5
Cursor on/off.
Assign the arrow keys to Cursor or Zoom operation.
Return to table screen.
Switch between HOLD and RUN of screen update.
Switching from HOLD to RUN invokes a menu to select
immediate (NOW) or TIMED start time which allows you
to define start and duration of the measurement.
Cursor. When the Cursor is on, the Trend values at the Cursor are displayed in the screen
header. Moving the Cursor off the left or right side of the screen brings the next of six
screens into the viewing area.
Zoom. Allows you to expand or shrink the display vertically or horizontally to view
details or to fit a complete graph within the screen area. Zoom and Cursor are operated by
the arrow keys and explained in Chapter 17.
Offset and Span of the Trends are preset for a good display in most cases, but they are
adjustable. The adjustment menu is reached via the SETUP key and function key F3 FUNCTION PREF. See Chapter 18, FUNCTION PREFerences.
Page 35

Volts/Amps/Hertz
Tips and Hints 8
Tips and Hints
Voltage and frequency should be close to the nominal values of for example 120 V, 230
V, 480 V, 60 Hz, or 50 Hz.
The voltages and currents in the table can e.g. be used to check if power applied to a 3phase induction motor is in balance. Voltage unbalance causes high unbalanced currents
in stator windings resulting in overheating and reduced motor life. Each of the phase
voltages should not differ more than 1 % from the average of the three. Current
unbalance should not exceed 10 %. In case of too high unbalance, use other measuring
modes to further analyze the power system.
A Crest Factor close to 2.0 indicates high distortion. CF = 2.0 can e.g. be found if you
measure the current drawn by rectifiers that only conduct at the sine wave top.
8-3
Page 36

Fluke 433/434
Users Manual
8-4 9-1
Page 37

Introduction
Dips & Swells records Dips, Interruptions, Rapid Voltage Changes, and Swells.
Dips (Sags) and Swells are fast deviations from the normal voltage. Magnitude may be
ten up to hundreds of volts. Duration may vary from a half cycle to a few seconds as
defined in EN61000-4-30. The Analyzer allows you to choose nominal or sliding
reference voltage. A sliding reference voltage uses measured values filtered with a 1minute time constant.
During a dip the voltage drops; during a swell the voltage rises. In three phase systems a
dip begins when the voltage on one or more phases drops below the dip threshold and
ends when all phases are equal to or above the dip threshold plus hysteresis. The trigger
conditions for dips and swells are threshold and hysteresis. Dips and swells are
characterized by duration, magnitude, and time of occurrence. Figure 9-1 and 9-2 explain
this.
Chapter 9
Dips & Swells
Figure 9-1. Characteristics of a voltage dip
Page 38

Fluke 433/434
Users Manual
Figure 9-2. Characteristics of a voltage swell
During an Interruption the voltage sinks well below its nominal value. In three phase
systems an interruption begins when the voltage on all phases are below threshold and
ends when one phase is equal to or above the interruption threshold plus hysteresis. The
trigger conditions for interruptions are threshold and hysteresis. Interruptions are
characterized by duration, magnitude and time of occurrence. Figure 9-3 explains this.
INTERRUPTION-INT-
NOMINAL
VOLTAGE
HYSTERESIS
THRESHOLD
duration
time
0 VOLT
Figure 9-3. Characteristics of a voltage interruption
magnitude
Rapid voltage changes are quick transitions of the RMS voltage between two steadystates. Rapid voltage changes are captured based on steady voltage tolerance, steady time,
minimum step detected, and minimum rate (%/s). Figure 9-4 explains this.
9-2
Page 39

Dips & Swells
RAPID VOLTAGE CHANGE - CHG-
VOLTAGE
TOLERANCE
VOLTAGE
STEP
VOLTAGE
TOLERANCE
STEADY TIME
VOLTAGE STEP
TRANSITION TIME
Trend 9
In addition to the voltage, current is also recorded. This allows you to see cause and
effect of deviations. Function key F4 – EVENTS accesses event tables where voltage
events are listed in sequence.
Trend
To access to the Dips & Swells Trend screen:
c
d
STEADY TIME
Figure 9-4. Characteristics of a rapid voltage change
MENU
TIME
TRANSITION
TIME
e
ENTER
For the main screen all configured voltage and current channels are recorded to allow
viewing of cause and effect of deviations. Not all channels are displayed simultaneously.
Press function key F1 to assign the arrow keys to select the set of trends to be displayed.
9-3
Page 40

Fluke 433/434
Users Manual
The screen builds up from the right side of the screen and the corresponding values are
displayed in the screen header.
Available function keys:
F1
Assign up/down arrow keys to select the voltage or current
channels to be displayed.
F2
F3
F4
F5
Cursor on/off.
Assign the arrow keys to Cursor or Zoom operation.
Access to Events tables.
Switch between HOLD and RUN of screen update.
Switching from HOLD to RUN invokes a menu to select
immediate (NOW) or TIMED start time which allows you
to define start and duration of the measurement.
Cursor. When the Cursor is on, the Trend values at the Cursor are displayed in the screen
header. Moving the Cursor off the left or right side of the screen brings the next of six
screens into the viewing area.
Zoom. Allows you to expand or shrink the display vertically or horizontally to view
details or to fit a complete graph within the screen area. Zoom and Cursor are operated by
the arrow keys and are explained in Chapter 17.
Offset and Span of the Trends are preset for a good display in most cases. This is based
upon Nominal Voltage (Vnom) and Current range (A range). If desired, you can adjust
Offset and Span. The adjustment menu is reached via the SETUP key and function key
F3 - FUNCTION PREF. See Chapter 18, FUNCTION PREFerences.
Event criteria such as threshold, hysteresis and others are preset, but they may be
adjusted. The adjustment menu is reached via the SETUP key and limits setup. See
Chapter 18, Limits Adjustments.
Events Tables
To access the Dips & Swells Events Tables:
f
The Events table lists all threshold crossings of phase voltages. Thresholds according to
international standards or user-definable thresholds can be used. Threshold adjustment is
reached via the SETUP key and Limits. For detailed information see Chapter 18, Limits
Adjustments.
In Normal mode major event characteristics are listed: start time, duration, and voltage
magnitude. Detail shows details of threshold crossings per phase.
F4
9-4
Page 41

Dips & Swells
Tips and Hints 9
The following Abbreviations and Symbols are used in the tables:
Abbreviation Description Symbol Description
CHG Rapid Voltage Change Rising voltage edge
DIP Voltage Dip Falling voltage edge
INT Voltage Interruption
SWL Voltage Swell
Available function keys:
F3
Switch between NORMAL and DETAILED event table.
F4
F5
Tips and Hints
The occurrence of Dips (Sags) and Swells may indicate a weak power distribution
system. In such a system voltage will change considerably when a big motor or a welding
machine is switched on or off. This may cause lights to flicker or even show visible
dimming. It may cause reset and loss of data in computer systems and process controllers.
By monitoring the voltage and current trend at the power service entrance, you can find
out if the cause of the voltage dip is inside or outside the building. The cause is inside the
building (downstream) when voltage drops while current rises; it is outside (upstream)
when both voltage and current drop.
Return to Trend screen.
Access Trend screen with Cursor on and positioned on the
highlighted event.
This event can be selected with the up/down arrow keys
9-5
Page 42

Fluke 433/434
Users Manual
9-6 10-1
Page 43

Introduction
Harmonics measures and records harmonics and interharmonics (Fluke 434) up to the
th
. Related data such as DC components, THD (Total Harmonic Distortion), and K-
50
factor are measured. Harmonics are periodic distortions of voltage, current, or power
sinewaves. A waveform can be considered as a combination of various sinewaves with
different frequencies and magnitudes. The contribution of each of these components to
the full signal is measured. Readings can be given as a percentage of the fundamental, or
as a percentage of all harmonics combined. Results may be viewed in a Bar Graph
display, a table, or a Trend display. Harmonics are often caused by non-linear loads such
as DC power supplies in computers, TV’s and adjustable speed motor drives. Harmonics
can cause transformers, conductors, and motors to overheat.
Bar Graph Screen
To access to the Harmonics Bar Graph screen:
Chapter 10
Harmonics
c
d
MENU
Page 44

Fluke 433/434
Users Manual
e
ENTER
The Bar Graph display shows the percentage contribution of each of the components
related to the full signal. A signal without distortion should show a 1
fundamental) at 100 % while the others are at zero: in practice this will not occur because
there always is a certain amount of distortion resulting in higher harmonics.
A pure sinewave becomes distorted when higher frequency components are added to it.
Distortion is represented by the THD percentage. The display can also show the
percentage of the DC component and the K-factor. The K-factor is a number that
quantifies potential losses in transformers due to harmonic currents. Higher order
harmonics influence the K-factor more than low order harmonics.
The table below shows the number of Bar Graphs displayed simultaneously in one
screen:
Harmonics Harmonics & Interharmonics
All phase display 1 ... 12 1 ... 6
st
harmonic (= the
Single phase display 1 ... 50 1 ... 25
The left/right arrow keys are used to position the Cursor on a particular bar. The screen
header will show for that bar phase identifier, harmonic number, frequency, and phase
angle. If not all bars are shown on the screen, you can bring the next set within the
viewing area by moving the Cursor off the left or right end of the screen. The up/down
arrow keys are used for vertical zoom: 100 %, 50 %, 20 %, 10 %, or 5 % at full scale can
be selected. Using the SETUP key and function key F3 - FUNCTION PREF you can
choose harmonics display as a percentage of the fundamental voltage (%f) or the total of
harmonic voltages (%r). For detailed information see Chapter 18, FUNCTION
PREFerences.
Available function keys:
F1
Selection of harmonics type: Voltage, Current, or Real
Power (Watt). Power harmonics can have positive and
negative polarity.
F2
Selection of waveform set to be used: A (L1), B (L2), C
(L3), N (neutral) or ALL
F3
F4
Access the table screen.
Interharmonics display on/off (Fluke 434 only).
10-2
F5
Switch between HOLD and RUN of screen update.
Switching from HOLD to RUN invokes a menu to select
immediate (NOW) or TIMED start time which allows you
to define start and duration of the measurement.
Page 45

Harmonics
Table10
Table
To access the Harmonics Table screen:
f
The table display shows 8 measurements per phase. Using the SETUP key and function
key F3 - FUNCTION PREF you can choose the table contents. For detailed information
see Chapter 18, FUNCTION PREFerences.
Available function keys:
F3
F3
Return to Bar Graph screen.
Trend
To access the Harmonics Trend screen:
Trend shows how harmonics vary over time: Cursor and Zoom can be used to investigate
details. All values in the table are recorded, but the Trends from each row in the table are
displayed one at a time. Press function key F1 to assign the arrow keys to row selection.
Using the SETUP key and function key F3 - FUNCTION PREF you can choose
harmonics display as a percentage of fundamental voltage (%f) or of the total of
harmonic voltages (%r, total Vrms). Also the table contents can be selected in this menu.
For detailed information see Chapter 18, FUNCTION PREFerences.
g
F4
F5
Access the Trend screen. For description see below.
Switch between HOLD and RUN of screen update.
Switching from HOLD to RUN invokes a menu to select
immediate (NOW) or TIMED start time which allows you
to define start and duration of the measurement.
F4
Available function keys:
F1
Assign up/down arrow keys to select a row from the table
for Trend display.
F2
Cursor on/off.
10-3
Page 46

Fluke 433/434
Users Manual
F3
F4
F5
Assign arrow keys to Cursor or vertical Zoom operation.
Return to table screen.
Switch between HOLD and RUN of screen update.
Switching from HOLD to RUN invokes a menu to select
immediate (NOW) or TIMED start time which allows you
to define start and duration of the measurement.
Tips and Hints
The harmonic number indicates the harmonic frequency: the first harmonic is the
fundamental frequency (60 or 50 Hz), the second harmonic is the component with two
times the fundamental frequency (120 or 100 Hz), and so on. The harmonics sequence
can be positive (+), zero (0), or negative (-). The table below gives an overview.
Order 1st 2nd 3rd 4th 5th 6th
Frequency
60 Hz
50 Hz
Sequence + - 0 + - 0
Order 7th 8th 9th 10th 11th ...
Frequency
420 Hz
350 Hz
120 Hz
100 Hz
480 Hz
400 Hz
180 Hz
150 Hz
540 Hz
450 Hz
240 Hz
200 Hz
600 Hz
500 Hz
300 Hz
250 Hz
660 Hz
550 Hz
360 Hz
300 Hz
...
Sequence + - 0 + -
Positive sequence harmonics try to make a motor run faster than the fundamental;
negative sequence harmonics try to make the motor run slower than the fundamental. In
both cases the motor looses torque and heats up. Harmonics can also cause transformers
to overheat. Even harmonics disappear if waveforms are symmetrical, i.e. as equally
positive and negative.
Zero sequence current harmonics add in Neutral conductors. This can cause overheating
of these conductors.
Distortion. Current distortion is to be expected in a system with non-linear loads like DC
power supplies. When the current distortion starts to cause voltage distortion (THD) of
more than 5 %, this signals a potential problem.
K-factor: this is an indication of the amount of harmonic currents and can help in
selecting transformers. Use the K-factor along with KVA to select a replacement
transformer to handle non-linear, harmonics-rich loads.
...
10-4
Page 47

Introduction
Power & Energy displays a table with all important power parameters. The related Trend
screen shows the changes over time of all measuring values in the table.
Fluke 434 can also display energy usage and offers verification of energy meters with a
pulse contact. For power calculations you can choose Fundamental or Full.
FUNDamental considers voltage and current only at the fundamental frequency (60 or 50
Hz) for power calculations; FULL uses the full frequency spectrum (True rms voltage
and current). Selection is made using the SETUP key and function key F3 - FUNCTION
PREF. For detailed information see Chapter 18, FUNCTION PREFerences.
Table
To access the Power & Energy table screen:
Chapter 11
Power & Energy
c
d
11-1
MENU
Page 48

Fluke 433/434
Users Manual
e
ENTER
The table displays power data for each phase and in total: real or active power (kW),
apparent power (kVA, the product of rms voltage and current), reactive power (kVAR,
the reactive component of apparent power caused by phase shift between AC current and
voltage in inductors and capacitors), power factor (PF, the ratio of real power to apparent
power for the total rms including harmonics), displacement power factor (DPF or cos ϕ,
the ratio of real power to apparent power for fundamental), and the 12 or 10 cycle rms
values of current and voltage.
Symbols indicate if a load is capacitive (
) or inductive ( ).
A popup table with energy usage by phase and in total can be activated on the Fluke 434
by pressing the F3 – ENERGY softkey. The table shows real energy (kWh), apparent
energy (kVAh), and reactive energy (kVARh) The energy measurement starts when
Power & Energy is started. The readout can be reset with function key F5.
By a using TIMED start of the measurement, the Fluke 434 can be used to measure
energy usage during a predefined period of time. TIMED start can be adjusted when
switching from HOLD to RUN with function key F5. Temporarily Close ENERGY to
make function key F5 available for HOLD/RUN operation.
Pulse count mode counts pulses like those available at the pulse output of certain types of
energy meters. This can be used to as a quick test for revenue meter error. The pulse
output is measured by means of an Optical Isolated Trigger Probe that is connected
between the pulse output and the Analyzer’s optical RS-232 interface. Figure 11-1 shows
the measuring setup. The energy usage (kWh) per pulse must be set in advance. The
adjustment menu is reached via the SETUP key and function key F3 – FUNCTION
PREF. See Chapter 18, FUNCTION PREFerences.
11-2
Figure 11-1. Verification of an energy meter with pulse output
Page 49

Power & Energy
Trend11
To access the Energy popup table:
f
F3
Available function keys:
F2
Pulse count mode on/off.
Trend
To access the Power & Energy Trend screen:
g
F3
F4
F5
Switch Energy screen on/off.
Access Trend screen. For description see below.
Switch between HOLD and RUN of screen update.
Switching from HOLD to RUN invokes a menu to select
immediate (NOW) or TIMED start time which allows you
to define start and duration of the measurement.
If Energy is displayed, the readout can be reset with F5.
F4
The figures in the table are instantaneous values that update constantly. Changes in these
values over time are recorded whenever the measurement is active. All values in the table
are recorded, but the Trends from each row in the table are displayed one at a time. Press
function key F1 to assign the arrow keys to row selection.
The traces build up from the right side. The readings in the header correspond to the most
recent measurements plotted on the right.
In addition to TIMED start of energy usage measurement, the Analyzer can measure
average power during an adjustable time window. Electricity suppliers often bill
industrial customers upon the highest average energy usage during a specified time
window. For this demand interval a period of 15 minutes is common.
For any setting besides OFF horizontal scaling of the trend is fixed so that each data point
corresponds with Max, Min, and Average usage during the interval. The demand interval
can be adjusted between 1 ... 60 minutes or to OFF. The adjustment menu is reached via
the SETUP key and function key F3 – FUNCTION PREF. See Chapter 18, FUNCTION
11-3
Page 50

Fluke 433/434
Users Manual
PREFerences. With the demand interval set to OFF the Trend functions as usual with
automatic horizontal scaling.
Available function keys:
F1
Assign up/down arrow keys to select a row from the table
for Trend display. The selected row is displayed in the
screen header.
F2
F3
F4
F5
Cursor. When the Cursor is on, the Trend values at the Cursor are displayed in the screen
header. Moving the Cursor off the left or right side of the screen brings the next of six
screens into the viewing area.
Zoom. Allows you to expand or shrink the display vertically or horizontally to view
details or to fit a complete graph within the screen area. Zoom and Cursor are operated by
the arrow keys and explained in Chapter 17.
Offset and Span are preset for a good display in most cases. This is based upon Nominal
Voltage (Vnom) and Current range (A range). If desired, you can adjust Offset and Span.
The adjustment menu is reached via the SETUP key and function key F3 - FUNCTION
PREF. See Chapter 18, FUNCTION PREFerences.
Tips and Hints
Power mode can be used to record apparent power (kVA) of a transformer over several
hours. Look at the Trend and find out if there are times that the transformer is overloaded.
You can transfer loads to other transformers, stagger the timing of loads, or if necessary
replace the transformer with a larger one.
Cursor on/off.
Assign the arrow keys to Cursor or Zoom operation.
Return to table screen.
Switch between HOLD and RUN of screen update.
Switching from HOLD to RUN invokes a menu to select
immediate (NOW) or TIMED start time which allows you
to define start and duration of the measurement.
11-4
Interpretation of Power Factor when measured at a device:
• PF = 0 to 1: not all supplied power is consumed, a certain amount of reactive power
is present. Current leads (capacitive load) or lags (inductive load).
• PF = 1: all supplied power is consumed by the device. Voltage and current are in
phase.
• PF = -1: device generates power. Current and voltage are in phase.
• PF = -1 to 0: device is generating power. Current leads or lags.
If you see negative power or power factor readings and you are connected to a load,
check to make sure the arrows on your current clamps are pointing towards the load.
Reactive power (VAR) is most often due to inductive loads such as motors, inductors,
and transformers. Installation of correction capacitors can correct for inductive VAR’s.
Be sure to check with a qualified engineer before adding PF-correction capacitors,
especially if you measure current harmonics in your system.
Page 51

Introduction
Flicker quantifies the luminance fluctuation of lamps caused by supply voltage variations.
The algorithm behind the measurement meets EN61000-4-15 and is based on a
perceptual model of the human eye / brain sensory system. The Analyzer converts
duration and magnitude of voltage variations into an ‘annoyance factor’ caused by the
resulting flicker of a 60 W lamp. A high flicker reading means that most people would
find the luminance changes irritating. The voltage variation can be relatively small. The
measurement is optimized to lamps powered by 120 V / 60 Hz or 230 V / 60 Hz. Flicker
is characterized per phase by the parameters shown in a table. The related Trend screen
shows the changes in all measuring values in the table.
After you have switched to Flicker, a settling time of about 10 seconds will
pass before the measurement is started. During this time the U (Unstable)
symbol shows in the screen header. Moreover the timer counts down from –
10 seconds. Flicker measurement has no unstable period when used with a
timed start.
Chapter 12
Flicker
Note
Table
To access the Flicker table screen:
c
12-1
MENU
Page 52

Fluke 433/434
Users Manual
d
e
ENTER
Flicker is characterized by: short term severity Pst (measured over 1 min for fast
feedback), short term severity Pst (measured over 10 min) and a long term severity Plt
(measured over 2 hours). This data and also the related D-parameters Dc, Dmax, and TD
(acc. to EN61000-3-3) are displayed in the table.
A popup table can be switched on to show the peak values of the D-parameters that
occurred during the measurement. You can reset the stored D-parameters to zero with
Function key F5.
To access the popup table with peak D-parameters:
f
F2
Pst and Plt are parameters showing flicker over a certain period of time. Momentary
flicker is shown in the PF5 submenu and is reached via Function key F3. Flicker PF5 is
displayed as a fast Trend plot.
Available function keys (popup table must be off):
F2
F3
F4
F5
Activate the popup screen with maximum D-parameters.
Access PF5 Trend screen.
Access Trend screen. For description see below.
Switch between HOLD and RUN of screen update.
Switching from HOLD to RUN invokes a menu to select
immediate (NOW) or TIMED start time which allows you
to define start and duration of the measurement.
12-2
Page 53

Flicker
Trend12
Trend
To access Flicker Trend screen:
g
The parameters in the table update over time. They are recorded whenever the
measurement is on. Trend displays the changes in these values over time. All values in
the table are recorded, but the Trends from each row in the table are displayed one at a
time. Press function key F1 to assign the arrow keys to row selection. The Trend display
may consist of 6 screens.
PF5 displays a fast Trend plot in one screen and is reached via a menu to define expected
measurement duration and Immediate or Timed measurement start. Two vertical marker
lines are used to indicate a Pst period on the PF5 trend.
F4
Available function keys:
F1
Assign up/down arrow keys to select a row from the table
for Trend display. The selected row is displayed in the
screen header.
F2
F3
F4
F5
Cursor on/off.
Assign the arrow keys to Cursor or Zoom operation.
Return to table screen.
Switch between HOLD and RUN of screen update.
Switching from HOLD to RUN invokes a menu to select
immediate (NOW) or TIMED start time which allows you
to define start and duration of the measurement.
Cursor. When the Cursor is on, the Trend values at the Cursor are displayed in the screen
header. Moving the Cursor off the left or right side of the screen brings the next of six
screens (not applicable for the PF5 trend) into the viewing area.
Zoom. Allows you to expand or shrink the display vertically or horizontally to view
details or to fit a complete graph within the screen area. Zoom and Cursor are operated by
the arrow keys and explained in Chapter 17.
Offset and Span are preset for a good display in most cases, but they are adjustable. Dparameter settings are also adjustable. The adjustment menu is reached via the SETUP
key and function key F3 - FUNCTION PREF. See Chapter 18, FUNCTION
PREFerences.
12-3
Page 54

Fluke 433/434
Users Manual
Tips and Hints
Use the PF5 flicker trend and half-cycle voltage or current trends to find the source of
flicker. Press function key F1 to assign the arrow keys to selection of flicker, voltage, and
current trends.
The 10 min (Pst) uses a longer measuring period to eliminate the influence of random
voltage variations. It is also long enough to detect interference from a single source with
a long working cycle such as electrical household appliances, and heat pumps.
A measuring period of 2 hours (Plt) is useful when there may be more than one
interference source with irregular working cycles and for equipment such as welding
machines, and rolling mills.
12-4
Page 55

Introduction
Unbalance displays phase relations between voltages and currents. Measuring results are
based upon the fundamental frequency component (60 or 50 Hz). In a 3-phase power
system, the phase shift between voltages and between currents should be close to 120°.
Unbalance mode offers a measurement table, a related Trend display, and a Phasor
display.
Table
To access the Unbalance table screen:
Chapter 13
Unbalance
c
d
e
MENU
ENTER
13-1
Page 56

Fluke 433/434
Users Manual
The table screen shows all relevant numerical values: negative voltage unbalance
percentage, zero sequence voltage unbalance percentage (in 4-wire systems), negative
current unbalance percentage, zero sequence current unbalance percentage (in 4-wire
systems), fundamental phase voltage, frequency, fundamental phase current, angle
between phase-neutral voltages relative to the reference phase A/L1 and angles between
voltage and current for each phase. The number of readings depends on the selected
wiring configuration.
Available function keys:
F3
Access Phasor screen. For description see below.
Trend
To access the Unbalance trend screen:
The figures in the table are instantaneous values that update constantly. Changes in these
values over time are recorded whenever the measurement is active. All values in the table
are recorded, but the Trends from each row in the table are displayed one at a time. Press
function key F1 to assign the arrow keys to row selection. The Trend display may consist
of 6 screens.
f
F4
F5
Access Trend screen. For description see below.
Switch between HOLD and RUN of screen update.
Switching from HOLD to RUN invokes a menu to select
immediate (NOW) or TIMED start time which allows you
to define start and duration of the measurement.
F4
13-2
Available function keys:
F1
Assign up/down arrow keys to select a row from the table
for Trend display. The selected row is displayed in the
screen header.
F2
F3
F4
F5
Cursor on/off.
Assign the arrow keys to Cursor or Zoom operation.
Return to table screen.
Switch between HOLD and RUN of screen update.
Switching from HOLD to RUN invokes a menu to select
immediate (NOW) or TIMED start time which allows you
to define start and duration of the measurement.
Page 57

Unbalance
Phasor13
Cursor. When the Cursor is on, the Trend values at the Cursor are displayed in the screen
header. Moving the Cursor off the left or right side of the screen brings the next of six
screens into the viewing area.
Zoom. Allows you to expand or shrink the display vertically or horizontally to view
details or to fit a complete graph within the screen area. Zoom and Cursor are operated by
the arrow keys and explained in Chapter 17.
Offset and Span are preset for a good display in most cases, but they are adjustable. The
adjustment menu is reached via the SETUP key and function key F3 - FUNCTION
PREF. See Chapter 18, FUNCTION PREFerences.
Phasor
To access the Unbalance Phasor screen:
g
F3
Shows the phase relation between voltages and currents in a vector diagram divided in 30
degree sections. The vector of the reference channel A (L1) points to the positive
horizontal direction. A similar vector diagram is displayed under Scope Phasor.
Additional numerical values are given: negative voltage or current unbalance percentage,
zero sequence voltage or current unbalance percentage, fundamental phase voltage or
current, frequency, phase angles. With function key F1 you can choose readings of all
phase voltages, all phase currents, or voltage and current in one phase.
Available function keys:
F1
Selection of signals to be displayed: V displays all voltages,
A displays all currents. A (L1), B (L2), C (L3), N (neutral)
give simultaneous display of phase voltage and current.
F3
F4
F5
Return to table screen.
Access to trend screen.
Switch between HOLD and RUN of screen update.
Switching from HOLD to RUN invokes a menu to select
immediate (NOW) or TIMED start time which allows you
to define start and duration of the measurement.
Tips and Hints
The voltages and currents in the table can e.g. be used to check if power applied to a 3phase induction motor is in balance. Voltage unbalance causes high unbalanced currents
in stator windings resulting in overheating and reduced motor life. Each of the phase
voltages should not differ more than 1 % from the average of the three. Current
13-3
Page 58

Fluke 433/434
Users Manual
unbalance should not exceed 10 %. In case of too high unbalance, use other measuring
modes to further analyze the power system.
Each phase voltage or current can be split-up into three components: positive sequence,
negative sequence, and zero sequence.
The positive sequence component is the normal component such as present in balanced 3phase systems. The negative sequence component results from unbalanced phase-tophase currents and voltages. This component for instance causes a ‘braking’ effect in 3phase motors: this will result in overheating and life reduction.
Zero sequence components may appear in an unbalanced load in 4 wire power systems
and represent the current in the N (Neutral) wire. Unbalance exceeding 2 % is considered
as too high.
13-4
Page 59

Introduction
The Fluke 434 Analyzer can capture waveforms at high-resolution during a variety of
disturbances. The Analyzer will give a snapshot of the voltage and current waveforms at
the precise time of the disturbance. This allows you to see the waveforms during dips,
swells, interruptions, current swells and transients.
Transients are fast spikes on the voltage (or current) waveform. Transients can have so
much energy that sensitive electronic equipment can be affected or even damaged. The
Transients screen looks similar to that of Scope Waveform, but its vertical span is
enlarged to make voltage spikes visible that are superimposed on the 60 or 50 Hz
sinewave. A waveform is captured each time that the voltage (or rms current) exceeds
adjustable limits. A maximum of 40 events can be captured. The sample rate is 200 kS/s.
Waveform Display
To access the Transients Waveform screen:
Chapter 14
Transients
c
d
14-1
MENU
Page 60

Fluke 433/434
Users Manual
e
f
ENTER
F3
g
F5
In the Start menu you can choose a trigger event or a combination of trigger events,
transients (Volt) and current (AMP) trigger level, and Immediate or Timed start of the
measurement.
The Analyzer may be set up to capture waveforms each time it sees: Voltage Transient,
Voltage Swell, Voltage Dip, Voltage Interruption, or Current swell. Dips (sags) and
swells are fast deviations from the nominal voltage. Duration is between one cycle to a
few seconds. During a dip the voltage sinks, and during a swell the voltage rises. During
an interruption the voltage falls to only a few percent of its nominal value. A current
swell is a current increase from one cycle to several seconds in duration.
Trigger criteria such as threshold and hysteresis are adjustable. These criteria are also
used for Power Quality Monitor: Adjustment is reached via the SETUP key, ‘limits’
selection, and then Function key F3 - EDIT. How to proceed is explained in Chapter 18
Setup.
Cursor and Zoom can be used to investigate details of captured waveforms. Via the
SETUP key and function key F3 - FUNCTION PREFerence you can adjust the limits
associated with each type of trigger event. For detailed information see Chapter 18,
FUNCTION PREFerences.
Available function keys:
F1
Selection of waveform set to be displayed: V displays all
voltages, A displays all currents. A (L1), B (L2), C (L3), N
(neutral) give simultaneous display of phase voltage and
current.
14-2
F2
Access submenu for Cursor and Zoom operation.
Page 61

Transients
Tips and Hints14
F3
F4
F5
Tips and Hints
Disturbances such as transients in a power distribution system can cause malfunctions in
many types of equipment. For example, computers may reset and equipment subjected to
repeated transients can eventually fail. Events occur intermittently, making it necessary to
monitor the system for a period of time to find them. Look for voltage transients when
electronic power supplies are failing repeatedly or if computers reset spontaneously.
Assign up/down arrow keys to browse through all captured
screens.
Persistence on memorizes all waveform variations.
Switch between HOLD and RUN of screen update.
Switching from HOLD to RUN invokes a menu to select
immediate (NOW) or TIMED start time which allows you
to define start and duration of the measurement.
14-3
Page 62

Fluke 433/434
Users Manual
14-4 15-1
Page 63

Introduction
Inrush Currents can be captured by Fluke 434. Inrush Currents are surge currents that
occur when a large, or low-impedance load comes on line. Normally the current will
stabilize after some time when the load has reached normal working condition. For
example the start-up current in induction motors can be ten times the normal working
current. Inrush is a ‘single shot’ mode that records current and voltage Trends after a
current event (the trigger) has occurred. An event occurs when the current waveform
exceeds adjustable limits. The display builds up from the right of the screen. Pretrigger
information allows you to see what occurred in advance of the inrush.
Inrush Trend Display
To access the Inrush Trend screen:
Chapter 15
Inrush Currents
c
d
MENU
Page 64

Fluke 433/434
Users Manual
e
ENTER
f
F3
Use the arrow keys in the Start menu to adjust the trigger limits: expected inrush time,
maximum current, nominal current, threshold, and hysteresis. The maximum current
determines the vertical height of the current display windows. Threshold is the current
level that triggers the trend capture. The inrush time is the time between trigger and the
time that the current falls to the value indicated by Hysteresis and is indicated on the
trend display between two vertical markers. The screen header displays the rms of all rms
values during the inrush time. If the Cursor is on, the rms measuring values at the Cursor
are displayed.
15-2
Page 65

Inrush Currents
MAXIMUM AMPS
DURATION
THRESHOLD
(= TRIGGER)
pretrigger
}
HYSTERESIS
zero
Inrush Trend Display15
inrush time
rms during inrush
Figure 15-1. Inrush characteristics and relation with start menu
t
1
12.3 A
2
12.3 A
3
1.5 A
35 s
Use Cursor and Zoom to investigate details of the recorded Trends. Selection of channels
to be displayed is done with the up/down arrow keys. Press function key F1 to assign the
arrow keys to this.
Via the SETUP key and function key F3 - FUNCTION PREF you can set up the default
values of the trigger limits (expected inrush time, maximum current, nominal current,
threshold, hysteresis) and Offset and Span of the Trend display. For detailed information
see Chapter 18, FUNCTION PREFerences.
Available function keys:
F1
Assign up/down arrow keys to select a set of trends for
display.
F2
Cursor on/off.
F3
F5
Assign arrow keys to Cursor or Zoom operation.
Switch between HOLD and RUN of screen update.
Switching from HOLD to RUN invokes a menu to select
immediate (NOW) or TIMED start time which allows you
to define start and duration of the measurement.
15-3
Page 66

Fluke 433/434
Users Manual
Tips and Hints
Check the peak currents and their duration. Use the Cursor for readout of momentary
values. Check if fuses, circuit breakers, and conductors in the power distribution system
can withstand the inrush current during this period. Check also if phase voltages stay
stable enough.
High peak currents can cause circuit breakers to trip unexpectedly. Measuring Inrush
Current can help in setting trip levels. Since the Analyzer simultaneously captures Inrush
Current and Voltage Trends you can use this measurement to check voltage stability as
large loads come on line.
15-4
Page 67

Introduction
Power Quality Monitoring or System Monitor displays a Bar graph screen. This screen
shows whether important Power Quality parameters meet requirements. Parameters
include:
1. RMS voltages
2. Harmonics
3. Flicker
4. Dips/Interruptions/Rapid Voltage Changes/Swells
5. Unbalance/Frequency.
Figure 16-1 shows the screen and its properties.
Chapter 16
Power Quality Monitoring
16-1
Page 68

Fluke 433/434
Users Manual
ALL PHASES
PER PHASE
A / L1
B / L2
C / L3
A / L1
B / L2
C / L3
A / L1
B / L2
C / L3
DIPS
INTERRUPTIONS
RAPID VOLTAGE CHANGES
SWEELS
UNBALANCE
FREQUENCY
1
Figure 16-1. Power Quality Monitor Main Screen
23
4
5
The length of a bar increases if the related parameter is further away from its nominal
value. The bar turns from green to red if an allowed tolerance requirement is violated.
Use the left/right arrow keys to position the cursor on a particular bar and measuring data
belonging to that bar is displayed in the screen header.
Power Quality Monitoring is usually done during a long observation period. The function
is entered via the MONITOR key and a start menu to define immediate or timed start of
the measurement. Minimum duration of the measurement is 2 hours. An usual measuring
period is 1 week.
The Power Quality parameters RMS voltages, Harmonics, and Flicker have a bar for each
phase. From left to right these three bars are related to the phases A (L1), B (L2), and C
(L3).
The parameters Dips/Interruptions/Rapid Voltage Changes/Swells and
Balance/Frequency have a single bar for each parameter representing performance across
three phases.
Most of the Bar Graphs have a wide base indicating adjustable time related limits (for
instance 95 % of time within limit) and a narrow top indicating a fixed 100 % limit. If
one of both limits is violated, the related bar changes from green to red. Dotted horizontal
lines on the display indicate the 100% limit and the adjustable limit.
The meaning of the bar graphs with a wide base and a narrow top is explained below. By
way of example this is done for the RMS voltage. This voltage for instance has a nominal
value of 120 V with a tolerance of + and – 15% (tolerance range between 102 … 138 V).
The momentary RMS voltage is constantly monitored by the Analyzer. It calculates an
16-2
Page 69

Power Quality Monitoring
Introduction16
average from these measuring values across 10-minute observation periods. The 10minute averages are compared against the tolerance range (in this example 102 ... 138 V).
The 100 % limit means that the 10-minute averages must always (i.e. 100 % of time or
with 100 % probability) be within range. The bar graph will turn to red if a 10-minute
average crosses the tolerance range.
The adjustable limit of for instance 95 % (i.e. 95 % probability) means that 95 % of the
10-minute averages must be within tolerance. The 95 % limit is less stringent than the
100 % limit. Therefore the related tolerance range usually is tighter. For 120 V this for
instance can be + or – 10 % (a tolerance range between 108 ... 132 V).
The bars for Dips/Interruptions/Rapid Voltage Changes/Swells are narrow and indicate
the number of limits violations that occurred during the observation period. The allowed
number is adjustable (for instance to 20 Dips/week). The bar turns to red if the adjusted
limit is violated.
You can use a pre-defined set of limits or define your own. An example of a pre-defined
set is that according to the EN50160 standard. A maximum of 6 sets can be chosen: 2
factory installed sets, 2 sets only definable by the administrator via FlukeView SW43W
software, and 2 sets that can be changed on the Analyzer. Selection and definition of
limits is accessible via the SETUP key, ‘limits’ selection and then Function key F3 –
EDIT.
The table below gives a survey of the aspects of Power Quality Monitoring:
Parameter Available Bar Graphs Limits Averaging Interval
V rms 3, one for each phase Probability 100 %: upper
& lower limit
Probability x %: upper &
lower limit
Harmonics 3, one for each phase Probability 100 %: upper
limit
Probability x %: upper
limit
Flicker 3, one for each phase Probability 100 %: upper
limit
Probability x %: upper
limit
Dips/Interruptions/Rapid
Voltage Changes/Swells
Unbalance 1, covering all 3 phases Probability 100 %: upper
4, one for each
parameter covering all 3
phases
allowed number of
events per week
limit
Probability x %: upper
limit
10 minutes
10 minutes
2 Hrs.
½ cycle rms based
10 minutes
Frequency 1, covering all 3 phases
Measured on Reference
Voltage Input A/L1
* Probability 100 %:
upper & lower limit
Probability x %:
upper & lower limit
10 sec.
16-3
Page 70

Fluke 433/434
Users Manual
Power Quality Main Screen
To access the Power Quality Main screen:
c
MONITOR
d
F5
Power Quality Monitoring is reached via the MONITOR key and a menu for Immediate
or Timed start. With the left/right arrow keys you can position the Cursor on a particular
Bar Graph. Measuring data belonging to the bar is shown in the screen header.
Detailed measurement data is available under the Function keys:
F1
RMS voltage: events table, trends.
F2
F3
F4
Harmonics: bar graphs, events table, trends.
Flicker: events table, trends.
Dips, Interruptions, Rapid voltage changes, and Swells:
events table, trends.
F5
Unbalance and Frequency: events table, trends.
The measurement data available under the Function keys is explained in the following
sections. Data is presented in the formats Events Table, Trend Display, and Bar Graph
Screen.
16-4
Page 71

Power Quality Monitoring
Events Table16
Events Table
Figure 16-2. Events Table
The events table shows the events that occurred during the measurement with date/time
of start, phase, and duration. The amount of information in the table can be selected with
the Function keys F2 and F3:
• Selected gives a table with events as selected: Only V rms, Harmonics, Flicker,
Dips/Interruptions/Rapid Voltage Changes/Swells, or Unbalance/Frequency.
All gives a table with all events. This allows you to see cause and effect of events.
• Normal lists the major event characteristics: start date/time, duration, event type, and
magnitude.
Detail gives information on threshold crossings for each phase of an event.
The following Abbreviations and Symbols are used in the tables:
Abbreviation Meaning Symbol Meaning
CHG Rapid Voltage Change High value of 100 % limit
has been violated
DIP Voltage Dip Low value of 100 % limit
has been violated
INT Voltage Interruption High value of x % limit
has been violated
SWL Voltage Swell Low value of x % limit
has been violated
Hx Number of the harmonic
that violated its limits
Unbalance event
Available function keys:
F2
F3
Switch between Selected events or All events.
Switch between Normal and Detailed events table.
F4
Access to Trend screen. Two ways to access Trend are
explained below.
F5
Return to next higher menu.
16-5
Page 72

Fluke 433/434
Users Manual
Two ways to access Trend:
1. Use the up/down arrow keys to highlight an event in the table. To access Trend press
the ENTER key. The Cursor is on, in the mid of screen and located on the selected
event. Zoom is set to 4.
2. Press Function key F4 to view the Trend part showing the most recent measuring
values. Cursor and Zoom can be switched on afterwards when required.
Measurement specific features:
• V rms events: an event is recorded each time that a 10 minute aggregated RMS value
violates its limits.
• Harmonics events: an event is recorded each time a 10 minute aggregated harmonic
or THD violates its limit.
• Flicker events: an event is recorded each time Plt (long term severity) violates its
limit.
• Dips/Interruptions/Rapid Voltage Changes/Swells events: an event is recorded each
time one of the items violates its limits.
• Unbalance, Frequency events: an event is recorded each time that a 10 minute
aggregated RMS value violates its limits.
Trend Display
The Trend screen shows the changes over time of values in the table. Zoom and Cursor
are available to examine Trend details. Zoom and Cursor are operated by the arrow keys
and explained in Chapter 17.
Available function keys:
F1
F2
Figure 16-3. Trend Display
Assign up/down arrow keys to select a set of Trends for
display. The selected set is shown in the screen header.
Cursor on/off.
16-6
F3
F5
Assign the arrow keys to Cursor or Zoom operation.
Return to events table.
Page 73

Power Quality Monitoring
Bar Graph Screen16
Bar Graph Screen
Figure 16-4. Bar Graph Screen
The main system monitor display shows the worst harmonic for each of the three phases.
Function key F2 brings up a screen with Bar Graphs showing the percentage of time each
phase spent within limits for 25 harmonics and Total Harmonic Distortion (THD). Each
Bar Graph has a wide base (representing an adjustable limit of e.g. 95 %) and a narrow
top (representing the limit of 100 %). A Bar Graph changes from green to red if the limits
for that harmonic are violated.
Cursor: with the left/right arrow keys you can position the Cursor on a particular Bar
Graph and measuring data belonging to that bar is shown in the screen header.
Available function keys:
F1
Selection of Bar Graphs belonging to phase A (L1), B (L2),
or C (L3).
F2
F4
F5
Access to events table.
Access to Trend screen.
Return to main menu.
16-7
Page 74

Fluke 433/434
Users Manual
16-8 17-1
Page 75

Introduction
This chapter explains how to use Cursor and Zoom to display and investigate details of
Waveform, Trend, and Bar Graph displays. Cursor and Zoom have a certain amount of
interaction and are both operated by the arrow keys.
The Cursor is a vertical line that can be positioned on a point on a Waveform, Trend, or
Bar Graph. The measured values at that point are displayed in the screen header.
Zoom allows you to stretch and shrink the graph to get a better view of details.
Horizontal Zoom is available for Waveform and Trend.
Cursor on Waveform Displays
As an example the Scope Waveform display is used. Cursor and Zoom for the Transients
screen function in the same way.
Figure 17.1 shows the Scope Waveform display with Cursor and Zoom switched off. The
screen header shows the RMS values of the displayed waveforms.
Chapter 17
Cursor and Zoom
Figure 17-1. Waveform display, no cursor
Figure 17-2. Waveform display, cursor on
Page 76

Fluke 433/434
Users Manual
Figure 17-3. Waveform display with cursor and zoom on
Press Function key F2 to obtain a subset with keys to control Cursor and Zoom:
• Press F3 to switch the Cursor on. Use the left/right arrow keys to move the Cursor
horizontally along the waveforms. The value of the waveforms at the Cursor is
displayed in the screen header as shown in Figure 17.2.
• Press F4 to assign the arrow keys to Zoom operation as shown in Figure 17.3. The
left/right arrow keys can be used now to stretch or shrink the waveforms horizontally.
The up/down arrow keys do this in vertical direction. If the Cursor is on, horizontal
zoom operates symmetrically around the Cursor. When off, horizontal zoom operates
around the screen center. Vertical zoom operates around the screen center.
• Press F4 again to assign the arrow keys to Cursor operation.
• With F2 you can return to the previous menu.
Cursor on Trend Displays
As an example the Volts/Amps/Hertz Trend display is used. Cursor and Zoom for other
Trend displays function in the same way.
Figure 17.4 shows the Trend screen with Cursor and Zoom switched off. The screen
header displays RMS values of the Trends at the right screen side. This is the screen side
with the most recent measuring values.
Figure 17-4. Trend display, no cursor
17-2
Figure 17-5. Trend display, cursor on
Page 77

Cursor and Zoom
Figure 17-6. Trend display with cursor and zoom on
From Events Table to Trend Display with Cursor On.17
The Function keys F1, F2, and F3 and the arrow keys are used to operate Cursor and
Zoom:
• Operate F2 to switch the Cursor on. Use the left/right arrow keys to move the Cursor
horizontally along the trends. The value of the trends at the Cursor is displayed in the
screen header as shown in Figure 17.5. Observe that the screen update stops now
(recording of data continues!). Trend can record a maximum of six screens of which
one is displayed at a time. Positioning the Cursor across the left or right screen end
brings the next screen within the viewing area.
• Press F3 to assign the arrow keys to Zoom operation. The left/right arrow keys can be
used now to stretch and shrink the trends horizontally as shown in figure 17.6. The
up/down arrow keys do this in vertical direction. If the Cursor is on, horizontal zoom
operates symmetrically around the Cursor; when off horizontal zoom operates from
the right screen side. Vertical zoom operates around the screen center.
• Press F1 to assign the arrow keys to select the Trend line(s) to be displayed.
• Press F3 again to assign the arrow keys to Cursor operation.
From Events Table to Trend Display with Cursor On.
Within an events table, you can highlight a certain event with the up/down arrow keys.
Next press the ENTER key. As a result a Trend display is shown with the Cursor on and
positioned on the highlighted event. The steps in this process are shown below.
The example below shows the transition from Dips & Swells events table to trend display
with cursor on:
c
Use the arrow keys to highlight an event of
interest.
17-3
Page 78

Fluke 433/434
Users Manual
d
F5
Press F5 to obtain trend display with the cursor
on and positioned on the highlighted event in the
table.
Cursor on Bar graph Displays
As an example the Three-phase Voltage Harmonics display as shown in Figure 17.7 is
used. Cursor and Zoom for other Bar Graph displays function identically.
Figure 17-7. Cursor on bar graphs
On Bar Graph displays the Cursor is always on. Cursor and Zoom are operated with the
arrow keys:
• Use the left/right arrow keys to position the Cursor on a certain bar. The header
shows relevant measuring data belonging to the bar. In certain cases there are more
bars available than can be displayed in one screen. In the figure for instance 17
harmonics out of a total of 51 are displayed. Positioning the Cursor across the left or
right screen end brings the next screen within the viewing area.
• Use the up/down arrow keys to stretch (or shrink) the Bar Graphs vertically.
17-4
Page 79

Chapter 18
Setting up the Analyzer
Introduction
The SETUP key accesses menus to view and change Analyzer settings. At delivery the
Analyzer is adjusted to settings that match your local situation and the supplied
accessories. The table below gives an overview:
Setting Preset Value
Nominal Voltage 120 V or 230 V
Nominal Frequency 60 Hz or 50 Hz
Displacement Power Factor DPF or Cos φ
Phase Identification A,B,C or L1,L2,L3
Phase Colors A/L1-B/L2-C/L3-N-Ground Black-Red-Blue-Gray-Green or
Black-Red-Gray-Blue-Green/Yellow or
Red-Yellow-Blue-Black-Green/Yellow or
Black-Black-Black-Blue-Green/Yellow
Date Format Month/Day/Year or Day/Month/Year
If desired the settings in the table can be changed by the user.
Also other settings such as offset and span of trend and waveform displays are set to
Factory Default values. This will give good readings in almost all situations and allows
you to start measurements almost immediately.
At power-on a welcome screen is displayed that shows settings currently in use. Check if
Date and Time of the system clock are correct. Also the wiring Configuration must match
the configuration of the power system to be checked. The wiring Configuration is
available under Function key F1.
If necessary adjust Date, Time, and Config. How to do this is explained in section
‘General Settings’. The welcome screen is shown in the Figure below.
18-1
Page 80

Fluke 433/434
Users Manual
Figure 18-1. Welcome screen at power-on
The Settings are grouped in four functional sections and are explained accordingly in four
sections of this manual chapter:
• General Settings: Date, Time, wiring Configuration, nominal Voltage, nominal
Frequency, current and voltage probe type, information language, survey and
installation of options.
• FUNCTION PREFerences: adjustment of Offset and Span of Trend and Waveform
displays, contents of harmonics table and harmonics settings, power settings, flicker
D-parameter settings, Inrush defaults, and Transient settings. Function key F4 in
these menus gives a reset to factory default settings. Default settings usually give a
good display.
• USER PREFerences: adjustment of Phase Identification and Colors, Printer and RS-
232 settings, Auto shut-off, definition of User name (as shown in entry screen), and
display contrast. Many menus have a function key for reset to factory default settings.
• Limits Settings: for save, recall, and definition of the limits for power quality
monitoring.
The figure below shows the entry menu present under the SETUP key.
Entering the Setup menu:
c
SETUP
Menu navigation and selections:
Selection of the item to be adjusted.
ENTER
Press to access the selected settings menu.
18-2
To select (up/down) and adjust (left/right) items in a settings
menu.
F5
Confirm the selection and return to previous menu.
Page 81

Setting up the Analyzer
General Settings18
General Settings
To access the General Settings menus:
1.
SETUPSETUP
ENTER
F4
1
2
3
4
5
6
7
8
F1 F2 F3 F4 F5
109 11 12
13
2.
3.
4.
The actual settings are shown in the SETUP entry screen. Use the key operations
described above to change an item.
Read below how to make adjustments:
User name/address: see section USER PREFerences.
1
Date: Use the up/down arrow keys to adjust the date and its
2
representation MM/DD/YY (Month/Day/Year) or DD/MM/YY
(Day/Month/Year). Press ENTER to confirm the selection and Function
key F5 – OK to return to the previous menu.
Time: Use the up/down arrow keys to select Hours (24 hour system),
3
Minutes, Seconds and the left/right arrow keys to adjust each item.
Press Function key F5 – OK to confirm.
Config: selection of 4 wiring configurations. Function key F1 – MORE
4
accesses the next menu with 4 other configurations. Press Function key
F5 – OK to confirm and to enter a screen showing how to connect the
Analyzer to the power system. When ready press Function key F5 to
return to the SETUP entry screen.
Vnom: adjustment of Nominal Voltage. Use the arrow keys to select
5
100 V, 120 V, 230 V, 400 V or any desired value. Press Function key
F5 – OK to confirm.
18-3
Page 82

Fluke 433/434
Users Manual
Freq: adjustment of Nominal Frequency. Use the up/down arrow keys
6
to select 60 or 50 Hz. Press Function key F5 – OK to confirm.
Limits: see section Limits Settings.
7
Clamp, A range, V scale: adjustment of the Analyzer to the
8
characteristics of current clamps and voltage leads. The default
selection is valid for the accessories as supplied with the Analyzer. The
supplied voltage leads are 1:1 types; when using attenuating leads or a
voltage transformer you must adapt the voltage scale accordingly (e.g.
10:1 for 10 times attenuation). There are separate selection tables for
the Phases and Neutral: Function key F3 is used for selection.
F1 – LANGUAGE: use the up/down arrow keys to select the desired
9
information language. Press Function key F5 – OK to confirm.
F2 – VERSION & CAL: access to a read-only menu showing Model
10
Number, Serial Number, Calibration Number, Calibration Date, and a
survey of installed Options. The submenu under F1 is used to activate
options. Chapter 20 Tips and Maintenance explains how to do this.
F3 – FUNCTION PREF.: see section FUNCTION PREFerence.
11
F4 – USER PREF.: see section USER PREFerence.
12
F5 – BACK: return to last active measuring mode.
13
18-4
Page 83

Setting up the Analyzer
General Settings18
Below you will find a step-by-step example on how to change wiring configuration to 3phase Wye IT (IT = Interrupted Terra = Interrupted Ground).
c
d
e
SETUP
The active configuration is indicated behind
Config. Config is highlighted indicating that this
item can be adjusted when you press the ENTER
key. The belonging configuration symbol is
shown on the right side of the screen.
ENTER
The screen shows 4 wiring configurations; 3phase Wye IT configuration is not among them.
Press F1 to access a second screen with 4 other
configurations.
F1
The second screen incorporates 3-phase Wye IT
(3φ IT) configuration.
f
Use the arrow keys to highlight 3φ IT. Press F5 to
confirm the selection.
18-5
Page 84

Fluke 433/434
Users Manual
g
F5
An information screen shows up that informs you
on how to connect the Analyzer to the power
system under test. When done press F5.
h
F5
Return to Setup entry screen. The new
configuration is indicated behind Config. and the
belonging configuration symbol is shown on the
right side of the screen.
18-6
Page 85

Setting up the Analyzer
FUNCTION PREFerences18
FUNCTION PREFerences
To access the FUNCTION PREFerences menus:
1.
SETUPSETUP
F3
1
2
3
4
2.
3.
ENTER
10
5
6
7
8
9
F1 F3 F4
11 12 13
FUNCTION PREFerences allows you to customize data presentation of measuring
functions. This concerns for instance Offset and Span of Trend and Waveform displays.
The table below gives a survey adjustable items for each function. A measuring function
stays active while you adjust its settings. This allows you to directly judge the result of
the adjustment.
Some items have separate adjustments for Phase and Neutral. Function key F3 is used to
switch Phase and Neutral adjustments.
For each measuring function a set of default settings is available giving good data
presentation under most circumstances. Press F4 – DEFAULT to restore this set.
18-7
Page 86

Fluke 433/434
Users Manual
Measuring Function/
Screen Type
1. Scope Waveform Volt, Amp (separate for Phase
2. Volts/Amps/Hertz Trend Volt (Peak), Amp (Peak), CF,
3. Dips & Swells Trend
4. Harmonics Table Harmonics to be displayed, THD,
Trend Harmonics, THD, DC Offset + Span
5. Power & Energy Trend W, VA, VAR, PF, DPF/cosΦ,
Demand Interval, kWh/pulse,
6. Flicker Trend Pst, Plt, Dc, Dmax, Td<%, PF5 Offset + Span
Function D-parameter Settings Steady time, Steady Tolerance,
7. Unbalance Trend Unbal V, Unbal A, V, A, Hz, ΦV-V,
8. Transients Waveform V, A (separate for Phase and
Function Trigger conditions V/A level + type of trigger
9. Inrush Trend A, V(separate for Phase and
Function Trigger conditions Current characteristics
10. Monitor Trend Vrms V, A (separate for Phase and
Trend Harmonic Number Offset + Span
Flicker Trend Pst, Plt Offset + Span
Unbalance Trend Percentage Offset + Span
Frequency Trend Hz Offset + Span
Measuring Data to be adjusted Settings Type
Range
and Neutral)
Offset + Span
(separate for Phase and Neutral),
Hz
Volt, Amp (separate for Phase
and Neutral)
DC, V, A, W, V&A, %r (of rms) /
%f (of fundamental)
Vrms, Arms (separate for Phase
and Neutral)
DPF/cos ϕ, FULL/FUNDamental
ΦV-A (separate for Phase and
Neutral)
Neutral)
Neutral)
Neutral)
(2 screens)
Offset + Span
Harmonic order
Offset + Span
(2 screens)
To customize measurements
Threshold
Offset + Span (2 screens)
Span
Offset + Span
(2 screens)
Offset + Span
18-8
Available function keys:
F1 - DEMO mode: the input sensitivities are increased to 2 V for use
11
with a demo generator. The generator is capable to generate 3-phase
voltages and currents with various interference types.
F4 - ALL DEFAULT: resets all settings in this menu to factory default.
12
F5 - BACK: return to SETUP entry menu.
13
Page 87

Setting up the Analyzer
FUNCTION PREFerences18
The example below shows stepwise how to adjust offset and span of a Volts/Amps/Hertz
trend after a voltage change has occurred.
c
d
e
Trends are outside their window.
SETUP
Press SETUP to access setup entry screen.
F3
Press function key F3 to access select function
screen.
f
Select Volts/Amps/Hertz with the up/down arrow
keys.
g
ENTER
Press the ENTER key to access trend scaling.
18-9
Page 88

Fluke 433/434
Users Manual
h
i
j
Use the left/right arrow keys to decrease the
Voltage offset.
Use the up/down arrow keys to select Volt span
adjustment. Use the left/right arrow keys to
increase the Voltage span.
F5
Press function key F5 three times to return to the
Volts/Amps/Hertz trend screen with new offset
and span. The trends are inside their window
now.
18-10
Page 89

Setting up the Analyzer
USER PREFerences18
USER PREFerences
To access the USER PREFerences menus:
1.
SETUPSETUP
F4
3.
ENTER
F1 F3 F4
6 7 8 9
F2
USER PREFerences allows you to customize Phase Identification and Colors, Printer and
RS-232 settings, Auto shut-off, definition of User name/address (as shown in entry
screen), and display contrast. Many menus have a function key to reset to factory default
settings.
Read below how to make adjustments:
Phase Identification: Use the up/down arrow keys to select A, B, C or
1
L1, L2, L3. Press Function key F5 – OK to confirm.
18-11
Page 90

Fluke 433/434
Users Manual
Phase Colors: use the function keys F1 ... F4 to choose colors as used in
2
the USA, EU, UK, or according to IEC. Or define your own set of
colors: use the up/down arrow keys to select a phase and use the
left/right arrow keys to select a color. Press function key F5 – OK to
confirm.
Printer: Use the arrow keys to select and adjust baudrate for use with a
3
printer. Use the up/down arrow keys to select the printer type. Press
function key F5 – OK to confirm.
RS-232: Use the left/right arrow keys to adjust communication baudrate
4
(for communication with a PC).
Battery save/Auto-OFF: Use the up/down arrow keys to select the time
5
after which the Display switches off when no keys are operated.
F1 – FACTORY DEFAULTS: resets all settings in this menu to factory
6
default.
F2 – USER ID: access to a menu to define 3 lines with user
7
programmable text (e.g. the owner’s name and address). This text
appears in the power-on and SETUP entry screens. Use Function key
F3 to insert spaces. Press function key F5 – OK to confirm.
F3 – CONTRAST: Use left/right arrow keys to adjust the display
8
contrast.
F5 – BACK: return to SETUP entry menu.
9
18-12
Page 91

Setting up the Analyzer
Limits Adjustments18
Limits Adjustments
To navigate the Limits Setup menus:
SETUPSETUP
1.
2.
1.
2.
3.
ENTER
1
1.
2.
0...9
A...Z
F1 F3 F4 F5
F2
5
32
6
7
1.
F5
2.
F5
4
1.
2.
F5
1.
3.
2.
F5
F1
F2
18-13
Page 92

Fluke 433/434
Users Manual
Limits Adjustments is used to save, recall, and define sets of limits for:
• Power Quality Monitoring.
• Dips/Interruptions/Rapid Voltage Changes/Swells.
Read below how to do this:
Adjust Monitor Limits is the entry menu. It shows the main settings of
1
the active set of limits: name, creation date, and a summary of limits
data.
If required, use the arrow keys to define a name for a set of limits that
you want to save.
Recall Monitor Limits menu is used to recall a set of power quality
2
limits. A maximum of six sets can be recalled:
- Default 1 and 2 are factory installed read-only sets: one of them is the
set of limits according to the EN50160 standard.
- Admin 1 and 2 are sets definable by an administrator by means of PCsoftware: for the user these sets are read-only.
- User 1 and 2 can be defined and saved by the user.
Use the up/down arrow keys to select a set of limits you want to recall.
Then press Function key F5 to recall and to use them.
Press Function key F1 to leave the menu without further actions.
Edit Monitor Limits menu is used to modify limits. Setups are grouped
3
per power quality item in separate submenus for voltage, harmonics,
flicker, etc.
Use the up/down arrow keys to select an item to be adjusted. Then press
the ENTER key F5 to enter the adjustment submenu. All adjustment
items are listed in the table below.
Use the arrow keys to select and edit limits.
4
Press Function key F5 to confirm selections and return to the Edit
Limits menu. Use Function keys F1 – PREVious or F2 – NEXT to
move directly to an adjacent submenu. When ready with editing the
limits, Press Function key F5 – OK twice to return to the Adjust
Monitor Limits menu. Arrow keys can be used here to define a name
for the new set of limits. Then press Function key F2 – SAVE to enter
the Save Monitor Limits menu.
Save Monitor Limits menu is used to save sets of limits in User 1 or 2.
5
Use the up/down arrow keys to select User 1 or User 2. When available
save the set of limits in an empty location; saving into a location
already filled will overwrite the existing set. Press Function key F5 –
SAVE to do the save action. Press F1 – CANCEL to return to the
Adjust Monitor Limits menu without saving limits. In this menu you
can also define a name for a set of limits to be saved.
18-14
Page 93

Setting up the Analyzer
View Monitor Limits menu. This menu has the same structure as the
6
Limits Adjustments18
Edit Monitor Limits menu and can be used to view limits without the
risk of changing them.
Press Function key F5 – BACK to return to the SETUP entry menu.
7
Setup of Monitor Limits, a survey of adjustments.
Limits Adjustments
Voltage 2 Probability percentages (100 % and adjustable):
each with adjustable upper and lower limit.
Harmonics For each harmonic 2 Probability percentages (100
% and adjustable): each with adjustable upper limit.
Flicker Weighing curve (lamp type). 2 Probability
percentages (100 % and adjustable): adjustable
percentage with adjustable upper limit.
Dips (*) Reference voltage (Nominal or Sliding). Threshold,
hysteresis, allowed number of dips/week.
Swells (*) Reference voltage (Nominal or Sliding). Threshold,
hysteresis, allowed number of swells/week.
Interruptions (*) Threshold, hysteresis, allowed number of
interruptions/week. Reference voltage is Nominal.
Rapid Voltage Changes (*) Voltage tolerance, Steady time, Minimum step,
Minimum rate (V/s), allowed number of
events/week.
Unbalance For each harmonic 2 Probability percentages (100
% and adjustable): adjustable percentage with
adjustable upper limit.
Frequency 2 Probability percentages (100 % and adjustable):
each with adjustable upper and lower limit.
(*): setups that are also valid for measuring mode Dips & Swells. Events per week is used for Monitor only.
18-15
Page 94

Fluke 433/434
Users Manual
18-16 19-1
Page 95

Introduction
This chapter explains how to save screens and data into the Analyzer’s memory and how
to view, rename and delete them.
The second part of the chapter explains how to setup the Analyzer for communication
with a PC, laptop, and printer.
Note: the Analyzer also has memories to store setups. How to change, save, and recall
setups is explained in Chapter 17 Setup.
Using memory
The Analyzer has two ways of storing measuring results into memory:
1. A copy of the current screen can be stored. A maximum of 50 screenshots can be
saved in Fluke 434 and 25 in Fluke 433. Symbol for screenshots:
Chapter 19
Using Memory, Printer, and PC
2. The complete dataset belonging to the current measurement can be saved. A dataset
includes all data belonging to the measurement. This allows you to view and analyze
all screens belonging to the measurement, and to use Cursor and Zoom. A maximum
of 10 datasets can be saved in Fluke 434 and 5 in Fluke 433. Symbol for datasets:
Making a Screenshot
SAVE
SCREEN
Making a screenshot is a quick and easy way to store measuring results. However post
processing is not possible. A screenshot is saved each time you press this button. A
screenshot is saved as a file with date and time when saved. This occurs via a menu to
define a name for the file to be saved.
Name definition is done with the arrow keys: the up/down keys for character selection
and the left/right keys for character position. Spaces are inserted with Function key F3.
How to recall, print, and delete screenshots and how to rename them is explained in the
next section ‘Memory Operations’.
Press this key to make a screenshot.
Page 96

Fluke 433/434
Users Manual
Memory Operations
The MEMORY button accesses menus to save, recall, view, delete and print datasets and
screenshots. When you press the MEMORY button, the current measurement screen is
frozen.
c
MEMORY
Available function keys (in the sequence they are normally used):
F3
SAVE. All data belonging to the measurement is saved in
memory. This occurs via a menu to define a name for the
file to be saved. Name definition is done with the arrow
keys: the up/down keys for character selection and the
left/right keys for character position. Spaces are inserted
with Function key F3. Date and time of the save action are
derived from Analyzer’s real time clock.
F4
PRINT. Press to print the current screen. Section ‘Using
Printer and PC’ explains the Analyzer setup.
F5
BACK. Press to resume the measurement.
F1
RECALL / DELETE. Accesses the submenu to view,
delete, rename files and to use datasets. The submenu is
shown in the figure below: it lists all screen shots and data
sets in the sequence of date and time. The type column
indicates screen shots with a small symbol ( )and datasets
with a larger symbol ( ). You can use the up/down arrow
keys to highlight a particular to be viewed.
Recalling and deleting Screenshots and Datasets:
d
F1
19-2
Page 97

Using Memory, Printer, and PC
Use of Printer and PC19
Available function keys for recall and delete:
F1
Return to main menu.
F2
Access to the menu where you can view the highlighted
screen shots and data sets. Use the Function keys PREVious
or NEXT to view other files. Files are grouped in sequence
of date and time. For data sets the entry screen is shown.
Complete data within a data set becomes available for
investigation after you have pressed USE.
F3
F4
To delete the file highlighted with the up/down arrow keys.
To rename the file highlighted with the up/down arrow
keys. Renaming occurs via a menu to define a new name.
Name definition is done with the arrow keys: the up/down
keys for character selection and the left/right keys for
character position. Spaces are inserted with Function key
F3. The selection is confirmed with Function key F5.
F5
Is only available for datasets to view their complete
contents.
Use of Printer and PC
The Analyzer is equipped with an optical RS-232 interface for communication with a PC
or printer. To make the connection with the USB port of modern PC’s an optical interface
cable model OC4USB is supplied with Fluke 434. With the FlukeView software as
supplied with Fluke 434 you can upload waveform data and screenshots in bitmap format
to your PC or laptop. The information supplied with FlukeView software informs you
about its features. The interface connection is located at the right Analyzer side and
attainable if the tilt stand is folded out. For Fluke 433 the interface cable and FlukeView
software can be ordered as an option.
Figure 19-1. Location of optical interface
When started, FlukeView software scans the PC ports to find the connected Analyzer. It
is not necessary to adjust baudrate of PC and Analyzer.
For other applications communication baudrate can be adjusted as follows: press the
SETUP key, then Function key F4 – USER PREFerence, and then select RS-232 using
19-3
Page 98

Fluke 433/434
Users Manual
the up/down arrow keys and ENTER. Then adjust the baudrate with the left/right arrow
keys and leave the menu with F5 - BACK. Baudrate and COM port number in FlukeView
must be adjusted correctly.
F
1
F
2
F
3
F
4
F
5
Figure 19-2. Analyzer and laptop PC
For correct communication with a printer it is necessary that baudrate and printer type of
Analyzer match with the hard copy device. The Analyzer baudrate and printer type are
adjustable as follows: press the SETUP key, then Function key F4 – USER PREFerence,
and then select Printer using the up/down arrow keys and ENTER. Then adjust the
baudrate with the left/right arrow keys, adjust the printer type with the up/down arrow
keys and confirm with ENTER. Leave the menu with F5 - BACK.
The figure below shows a typical setup with printer DPU-414 and printer adapter cable
PAC91. This setup requires an Analyzer baudrate of 9600 baud.
Figure 19-3. Analyzer, printer DPU-414, and printer adapter cable PAC91
Note
The Analyzer is adjustable to different baudrates for PC and printer.
19-4
Page 99

Tips and Maintenance
Introduction
This chapter covers basic maintenance procedures that can be performed by the user. For
complete service, disassembly, repair, and calibration information, see the Service
Manual. You will find the part number of the Service Manual in section ‘Parts and
Accessories’ in this chapter.
Cleaning the Analyzer and its Accessories
Clean the Analyzer and accessories with a damp cloth and a mild soap. Do not use
abrasives, solvents, or alcohol. These may damage the text.
Additional to this it is recommended to open the jaws of the Current Clamp and to wipe
the magnetic pole pieces with a lightly oiled cloth. This in order to avoid rust or corrosion
to form on the magnetic poles.
Chapter 20
Storing the Analyzer
Before storing the Analyzer for an extended period of time, fully charge the NiMH
battery.
Keeping the Battery in Good Condition
When the Analyzer is powered by the battery, the battery condition symbol in the screen
header informs you about the charge condition. This symbol ranges from fully charged to
empty:
To keep the battery in optimal condition, you must let it discharge fully and then charge
it. A full charge takes 4 hours with the Analyzer turned off. Repeat this at least twice a
year.
Installation of Options in Fluke 433
The Advanced Functions Interharmonics, Transients, Energy Usage, Inrush Currents, and
extra memory as available in Fluke 434, can be activated in an existing Fluke 433.
Activation can be done by the user done via a pin-code that is unique for the serial
number of your Analyzer. The code is supplied by Fluke. Contact your Fluke sales
representative for details on how to obtain your pin-code.
20-1
Page 100

Fluke 433/434
Users Manual
Proceed as follows to activate the Advanced Functions:
• Press the SETUP key to enter the SETUP entry menu.
• Press Function key F2 to enter the VERSION & CALIBRATION menu. This read-
only menu indicates the options already activated. Also the date of the last instrument
calibration is indicated in the menu.
• Press Function key F1 to enter the INSTALL OPTION menu.
• Enter the pin-code with the arrow keys: use left/right keys to select the position and
the up/down keys to define the number.
• Press ENTER to confirm the selection and to activate the option. The menu now will
show INSTALLED behind the option just activated.
For your Fluke 433 you can also order an Upgrade Kit. The kit includes access to install
the Advanced Functions and also FlukeView software and an optical interface cable.
Note:
The VERSION & CALIBRATION menu indicates the last calibration date.
For this Analyzer a calibration interval of 1 year is recommended. Contact
your authorized Fluke Service Center if the calibration interval has been
expired.
Parts and Accessories
Standard Accessories.
The following tables list the user-replaceable parts. For additional optional accessories,
see the ScopeMeter Accessories brochure.To order replacement parts or additional
accessories, contact your nearest Fluke Service Center.
Item Ordering Code
Battery Charger / Power Adapter BC430
Test Lead Set 2.5 m incl. Alligator Clips (5 pieces). TLS430
AC Current Clamp Set (4 pieces): 400 A (1 mV/A) and 40 A (10 mV/A)
switcheable.
Set with Color Coding Clips for Test Leads 0040 244 00071
Decal Set for Input Sockets, Colored 0040 241 00411
Decal Set for Input Sockets, Black & White 0040 241 00401
Optical Cable for USB OC4USB
Hard Case C430
Hang Strap 946769
i400s
20-2
CD-ROM with Users Manuals and Getting Started Manuals (multi-language) 0040 247 00021
Getting Started Manual (printed versions):
- English, French, Spanish, Portuguese
- English
- English, French, German, Spanish, Italian
- English, Russian, Japanese, Chinese, Korean
4822 872 30755
4822 872 30756
4822 872 30757
4822 872 30758
 Loading...