

Page 1
IMPORTANT - READ ME
BEFORE ASSEMBLING THE
DISPENSER!!
Installing the Canisters on
Turntables.
This information can also be found in the instruction manual.
12 & 16 Canister
It is important that the canisters and remote bracket assemblies
are assembled and installed correctly. Please refer to the
information below when installing the canisters on the turntable.
Please note that this procedure is used for all canister sizes, although only
1.75L (22X) canisters are shown here. Other canister assemblies will vary in size and
appearance; however the procedure remains the same. Connecting tubes are
sized specifically for each canister and turntable size – please do not mix
between different models.
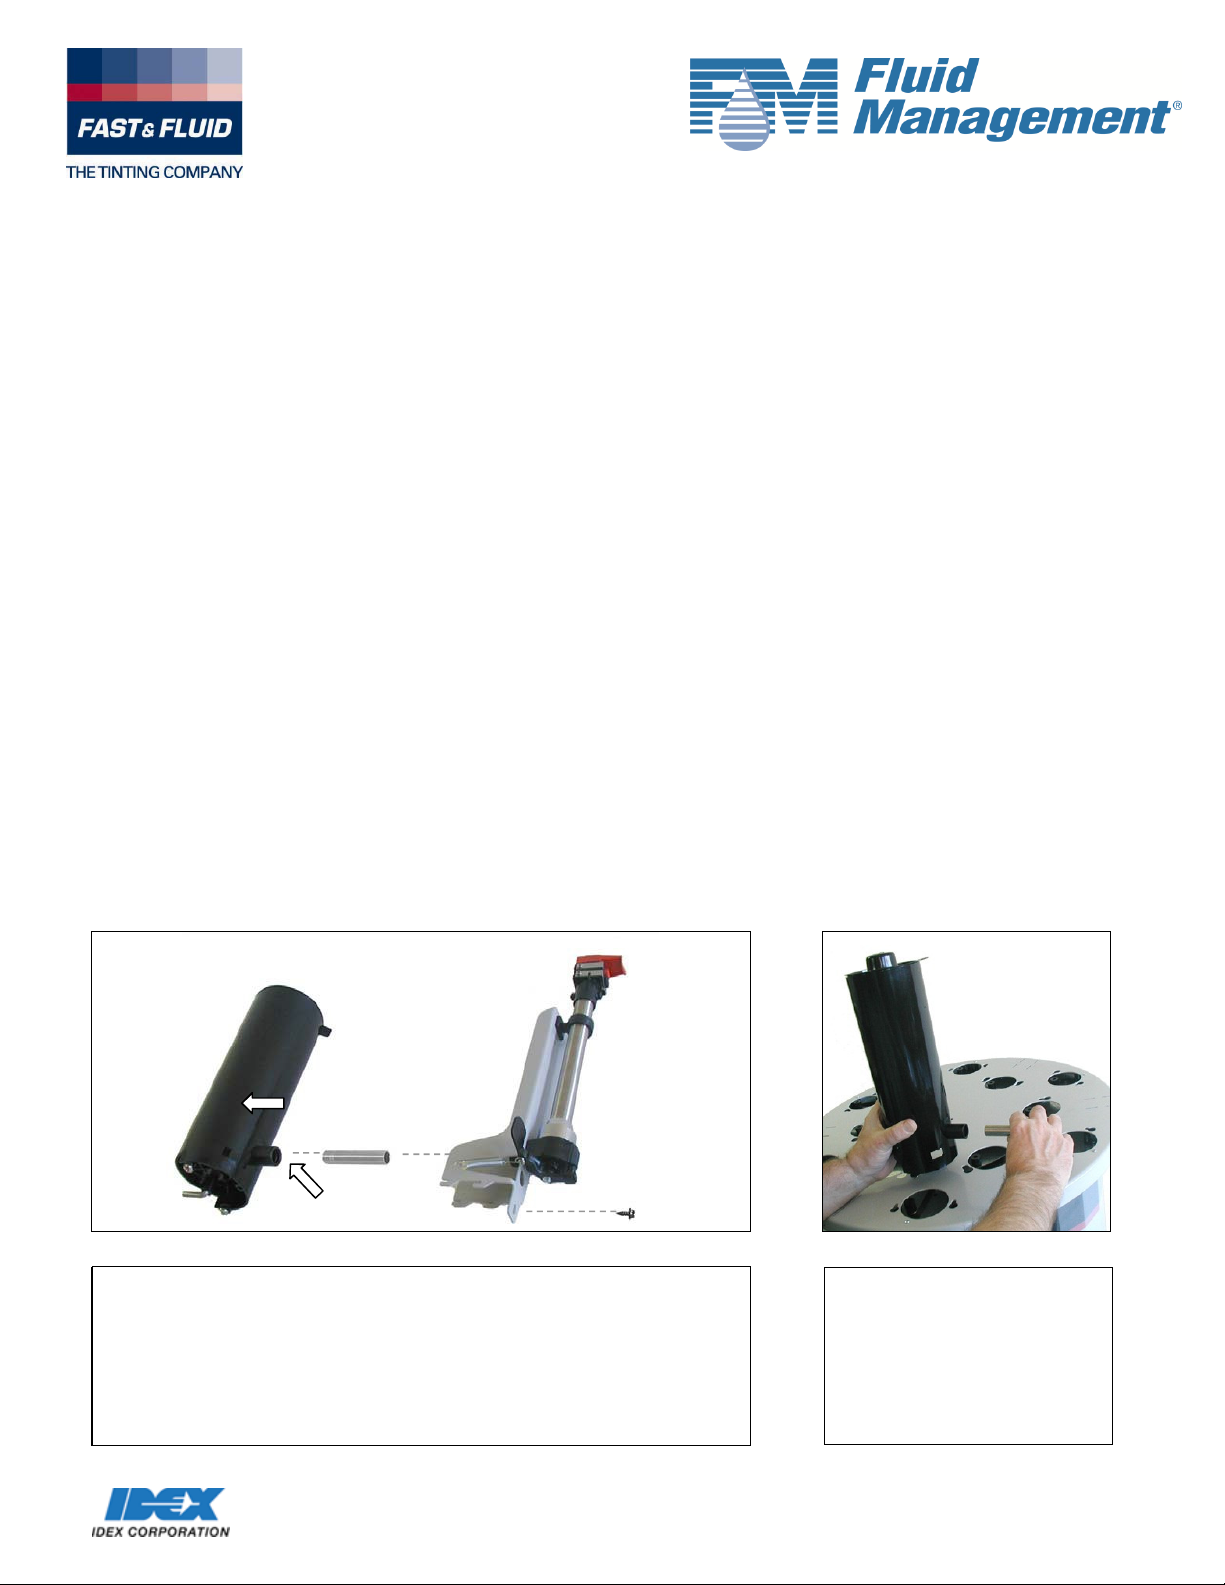
Step 1 Prepare and install the inner ring of canisters. (applicable on
25PD & 53PD 16 canister turntables)
A
D
>
C
(1) Select the parts used in an inner
canister assembly:
(A) canister with bush (B) at base
(C) connecting tube
(D) remote bracket and pump
assembly
(E) washer collar self-tapping screw
BLENDORAMA SERIES II – V1.1 (36608)-U.S. (10-08-2012) PAGE 1 OF 2
2) Firmly push the
connecting tube into
the bush. Note: either
end of the tube can be
inserted. Indication
marks are for internal
use only.
Page 2
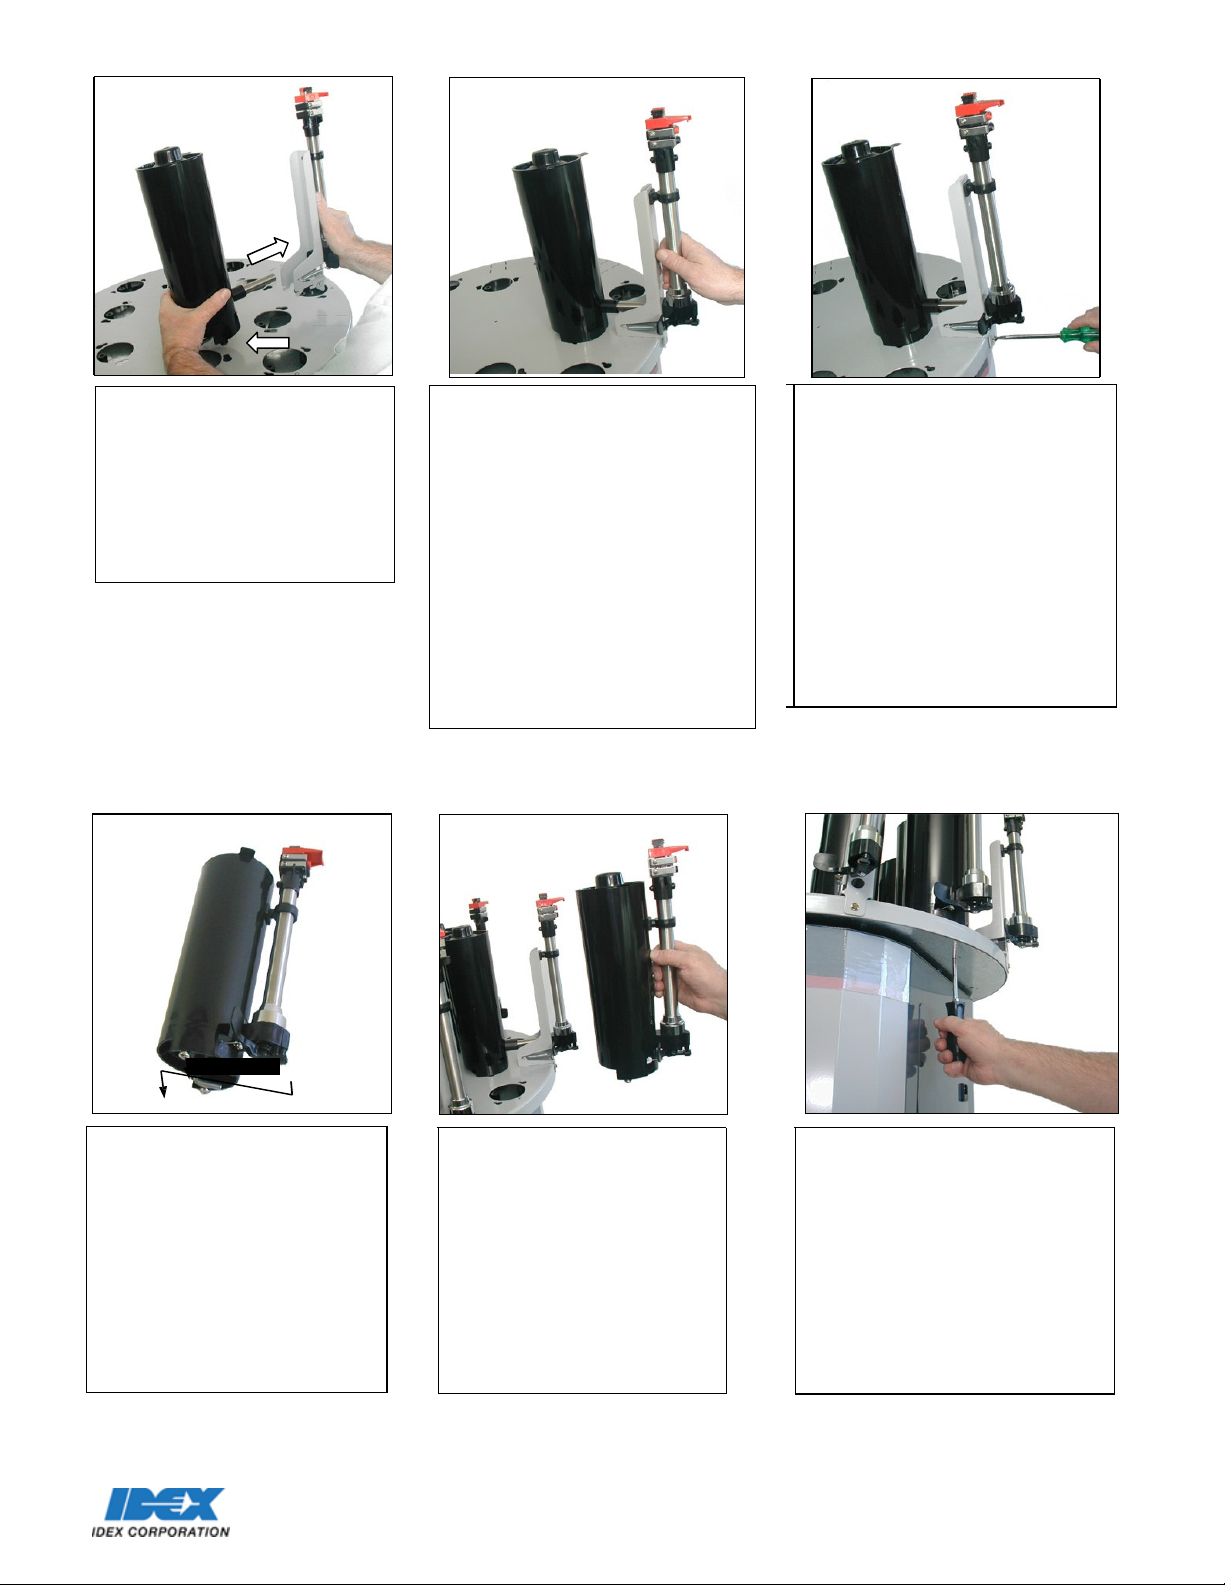
(3) Firmly push the
canister and
connecting tube into
the remote bracket and
pump assembly
(4) Fit this assembly to
the turntable. Canister
screws (already fitted to
the canister) fit into the
inner ring location
keyholes and the
bracket fits
slots simultaneously. Push
firmly into position. If
the bracket face is not
firm against the turntable
edge, then the extension
tube is not correctly
fitted.
remote
into the 4
5) Secure the inner ring
canister assembly in
position with the washer
collar self- tapping
screw (provided) using
either a standard
screwdriver or a
socket head (1/4” or
7mm).
(6) Repeat (2) to (5) for
all other inner ring
canister assemblies.
Step 2 Prepare and install the outer ring of canisters. (applicable on
all CW models and both 25PD & 53PD 12 canister turntables)
(1) Select the outer
ring canister assembly.
(2) Fit the canister
screws into the outer
ring of keyhole slots
on the turntable.
Push firmly into
position.
(3) Locate the 2 guide
holes directly below
each canister and fasten
the screws (already
located in canister)
with a Philips (No. 2)
screwdriver.
(4) Repeat steps (2)
(3) for all other outer
ring canister assemblies
&
BLENDORAMA SERIES II – V1.1 (36608)-U.S. (10-08-2012) PAGE 2 OF 2
 Loading...