


HEAT PUMP CLOTHES DRYER
DH9060P2 & DH9060PG2 models
USER GUIDE
NZ AU


CONTENTS
Safety and warnings 5
Control panel 9
WiFi connection 12
Dry cycles 13
Dry preparation 14
Getting started quickly 17
Drying cycle options 19
Customising a dry cycle 22
Caring for your dryer 24
Before you call for service 31
Fault codes 33
Troubleshooting 34
Manufacturer’s warranty 40
Customer care 42
Registration
To register your product visit our website: fisherpaykel.com/register
3


SAFETY AND WARNINGS
WARNING!
Electric Shock Hazard
Failure to follow this advice may result in
electric shock or death.
• If you are using an extension cord or a portable
electrical outlet device (eg multi-socket outlet
box), ensure that it is positioned so that it does
not come into contact with water or moisture.
WARNING!
Fire Hazard
• Only dry fabrics that have been washed
with water.
• Do not use heat to dry articles containing foam
rubber or similarly textured rubber–like materials,
dry on ‘Time Dry’.
• Never stop a tumble clothes dryer before the end
of the drying cycleunless all items are removed
and spread out in order to dissipate the heat.
• A clothes dryer produces combustible lint;
the lint filter must be cleaned before each
drying cycle.
• Failure to follow the warnings outlined in these
user instructions can cause a fire hazard.
• Failure to follow these instructions can result in
death or personal injury.
5

SAFETY AND WARNINGS
READ AND SAVE THIS GUIDE
When using this appliance, follow basic precautions, including thefollowing:
General
z
The appliance must not be supplied through an external switching device, such as a
timer, or connected to a circuit that is regularly switched on and off by a utility.
z
We do not recommend the use of extension cords or portable electrical outlet devices
for safety reasons.
z
Do not touch or operate the machine with wet hands or with bare-feet.
z
A damaged power cord must be replaced by a Fisher & Paykel trained and supported
service technician, its service agent or similarly qualified persons in order to avoid
a hazard. The appliance must not be operated until it is repaired, as there is risk of
electric shock.
z
Do not operate this machine if it has been damaged during transport. Contact your
Fisher&Paykel dealer or Fisher & Paykel trained and supported service technician.
z
This dryer has been designed for domestic use only, not for commercial applications,
such as massage/beauty clinics where there may be increased lint accumulation or
flammable materials in the atmosphere or load.
z
The tumble dryer is intended only for drying textile material washed in water.
z
Undergarments that contain metal reinforcements should not be placed in the dryer.
Damage to the dryer can result if the metal reinforcements come loose during drying. If
you wish to dry these items use a drying rack or place in a garment bag.
z
Check and remove all objects from pockets, eg lighters and matches.
z
Never dry rubber articles, or any plastic items or film, eg plastic lined
tablecloths andbaby bibs.
z
Clothes should go through the cool down/airing phase in the final part of the cycle.
This ensures items are left at a temperature where they will not be damaged. Ifforany
reason the dryer is stopped before the cycle has finished, dry clothes should be
removed immediately and not left in the dryer. Clothes should be quickly spread out
flat to cool so heat can dissipate, not left bunched up, eg in a clothes basket.
z
Do not operate this product without the lint filter in place or allow lint to accumulate in
or around the dryer.
z
This dryer is not intended for use by persons (including children) with reduced physical,
sensory or mental capabilities, or lack of experience and knowledge, unless given
supervision or instruction concerning the use of the dryer by a person responsible
for their safety.
z
Children should be supervised to ensure they do not play with the dryer.
z
Unplug the machine from the power supply when it is not in use.
z
Do not swing on or put weight on the door.
z
In the event of a power outage your dryer will resume automatically when
power is restored.
z
Never attempt to repair the dryer yourself.
z
Do not install the dryer behind a lockable door, sliding door, or behind a door where
the hinge is on the opposite side to that of the dryer in such a way that the full opening
of the door is inhibited. Ensure the dryer door can always be opened fully.
z
The only user-removable parts of the dryer are the filters and drying rack. No other
parts are designed to be removed by anyone other than aFisher & Paykel trained and
supported service technician.
z
For problems that cannot be solved from information in this user guide, turn off and
unplug your dryer and contact a Fisher & Paykel trained and supported service technician.
6

SAFETY AND WARNINGS
z
Exhaust air must not be discharged into a flue which is used for exhausting fumes from
appliances burning gas or other fuels.
z
Do not overload your dryer beyond its rated capacity:
MODEL MAXIMUM CAPACITY (KG)
DH9060P2 9
DH9060PG2 9
*Capacity refers to the maximum dry weight of items the dryer can dry at any one time
z
Never put dripping wet clothes in or on top of the dryer as excess water may cause an
electrical hazard.
z
Do not under any circumstances dry an electric blanket or any other electrical, plastic
or rubber items in your dryer, unless the care label specifically states it is safe to do so.
Never dry these items at high temperatures.
z
Do not dry curtains in your dryer. Sunlight makes them brittle and they may
disintegrate during drying.
z
Do not use the water collected in the water tank for drinking or food processing.
z
Never run the dryer without the water tank in place.
z
If the water tank becomes full, the tumble dryer will pause drying and will sound an
alarm. You must empty the water tank before the dryer can continue drying. Empty the
tank, replace it back in the housing then press to resume the cycle.
Lint
z
Accumulated lint in the dryer can become a fire hazard; it also reduces the efficiency of
the dryer by causing longer drying times and increased power consumption.
z
Clean the lint filter before every load.
z
Ensure the area around the dryer is clear of lint.
z
At regular intervals have the interior of the dryer cleaned of any accumulated lint.
This must be done by a Fisher & Paykel trained and supported service technician.
This must be done when the dryer installation is changed from free standing.
z
If the lint filter becomes damaged, contact your Fisher & Paykel trained and supported
service technician to arrange getting a new filter. Do not operate your dryer with a
damaged lint filter or without the filter in place, as this will cause damage to your dryer.
Spontaneous combustion
To reduce the risk of fire in a tumble dryer the following should be observed:
z
Items that have been spotted or soaked with vegetable oil or cooking oil are a fire
hazard and should not be placed in a tumble dryer.
z
Oil-affected items can ignite spontaneously, especially when exposed to heat sources
such as a tumble dryer. The items become warm causing an oxidation reaction in the
oil. This oxidation creates heat. If the heat cannot escape the items can become hot
enough to catch fire. Piling, stacking or storing oil-affected items can prevent heat from
escaping creating a fire hazard.
z
If it is unavoidable that fabrics that contain vegetable oil, cooking oil or have been
contaminated by hair care products be placed in a tumble dryer, they should first be
washed in hot water with extra detergent — this will reduce, but not eliminate the fire
hazard. The cool down cycle of the dryer should be used to reduce the temperature
ofthese items. They should not be removed from the tumble dryer and piled or
stacked while hot.
7

SAFETY AND WARNINGS
z
Items that have previously been cleaned in, washed in, soaked in or spotted with
flammable liquids or solids, eg petrol/gasoline, kerosene, dry cleaning solvents,
vegetable or cooking oil, acetone, denatured alcohol, some brands of spot removers,
turpentine, waxes and wax removers or other flammable or explosive substances should
not be placed in a tumble dryer.
z
Do not dry unwashed items in the tumble dryer.
z
The dryer is not to be used if industrial chemicals have been used for cleaning.
z
Fabric Softeners or similar products should not be used in a tumble dryer to
eliminate the effects of static electricity, unless this practice is specifically
recommended by the manufacturer of the fabric softener product.
z
Rubber backed articles, foam rubber (latex foam), clothes or pillows fitted with
foam rubber pads, fibreglass, shoes containing rubber, shower caps, babies waterproof
napkin covers and waterproof textiles should not be dried in the dryer. These materials
can when heated produce fire by spontaneous combustion.
z
When using STREAM REFRESH on unwashed clothing ensure there are no flammable
substances on them.
Disposal
z
Extreme care must be taken when disposing of your old appliance to avoid hazards.
z
When disposing of the dryer, it is recommended that the door is removed to avoid
children getting trapped inside, and that the electrical cable is cut off close to the dryer.
8

CONTROL PANEL
1 5
2
3 6 7 8 9
4
!0
!2!1
1 POWER Press to turn the dryer ON/OFF.
2 Keylock Press and hold to disable all buttons on the display panel, except
POWER button. This prevents accidental button presses.
3 SmartTouch™
control dial
4 Digital display
screen
Rotate to select your desired drying cycle.
z
The icon illuminates to indicate the selected drying cycle.
Shows the following:
z
TIME TO GO – the remaining time in the cycle that is
currently running.
z
Delayed start time of dry cycle.
z
Notifications if an error is detected or a warning is necessary.
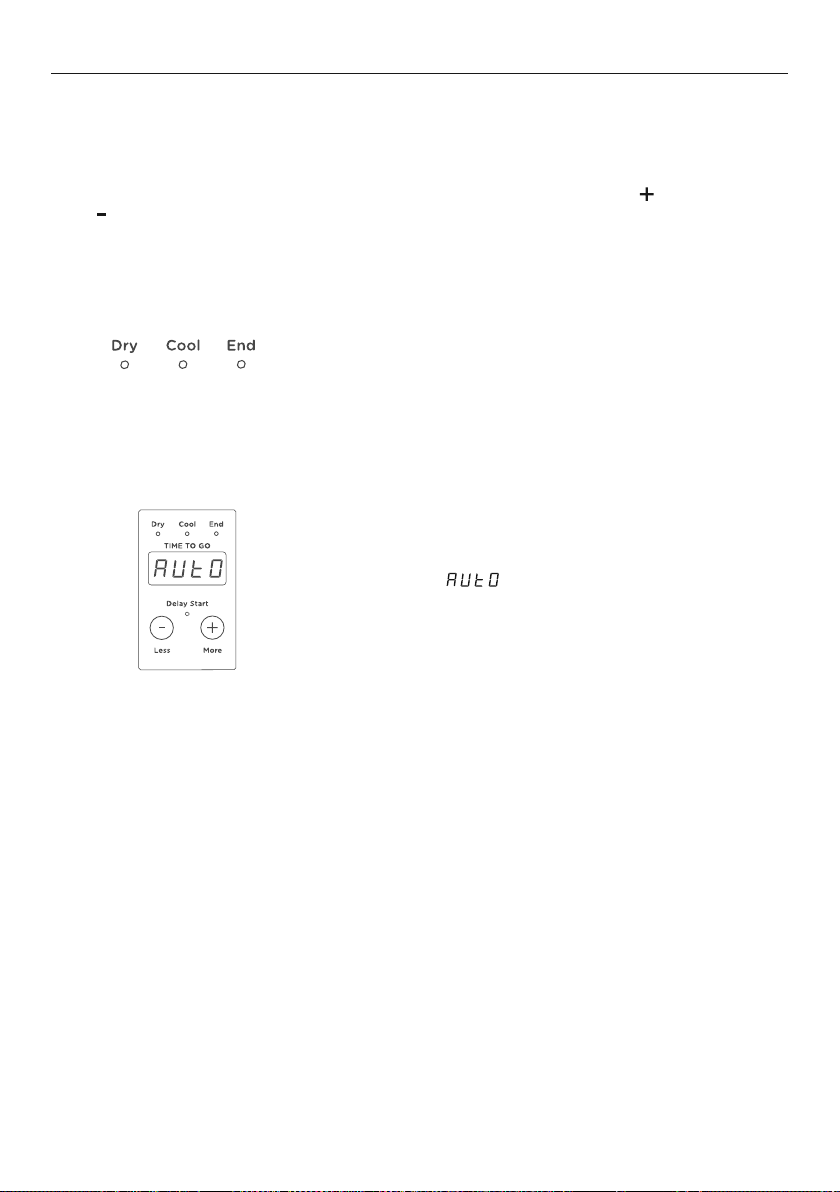
5 Progress lights The progress lights indicate what part of the cycle the dryer has
reached (
DRY, COOL or END). All three lights are on at the start of
the cycle. The light for the current part of the cycle flashes, and
each one goes out as the cycle progresses.
6 Delay Start
Less/More
Press
MORE to increase andLESS to decrease the delay
start time.
7 Dryness Level Allows you to select the level of dryness for your load.
8 Wrinkle Free Allows you to select a
WRINKLE FREE option for your cycle.
9 Signal This button has two functions:
z
Alert you that the dryer has finished.
z
Alert you to remove items once your load reaches the
damp dry stage.
!0 Water Tank,
Condenser,
Lint Filter
The lights will flash when the dryer is switched on as a
remindertoempty the water filter, or clean the condenser and
lintfilter. The warning light will also flash on and off during the
cycle if the filtersbecome blocked.
!1 WIFI
The LED beside
illuminates when functionality is activated.
!2 START/PAUSE Press to start or pause the selected drying cycle.
9
CONTROL PANEL
Timed cycles
When a timed cycle is selected the machine dries for the selected time regardless
ofthelevel of moisture in the load. It is important to check the items throughout thetimed
programmes to avoidover drying. Timed cycles include
Timed programmes of 10 to 150 minutes can be selected using the
LESS buttons.
Airing/Cool down
When the dryer has sensed that the load is dry it
will automatically go into an airing or cool down
cycle. DuringCOOL the drum tumbles and cool air
is blown throughthe clothes. This cools the load to
reduce creasing ifthe clothes are left in the dryer.
Time to go
Your dryer displays approximately how many
minutes the cycle you are running has remaining if
you have chosen one of the TIME DRY cycles. Ifyou
have chosen an automatic cycle (ie not TIME DRY)
the word will appear on the screen until it
reaches the cool down phase, atwhich time the
dryer will display how long the cycle has left to go.
A number of factors can influence the overall cycle
time, eg the fabric type of garments, load size, the
wetness of the load, environmental conditions etc.
TIME DRY, RACK DRY and WOOL.
MORE and
10

CONTROL PANEL
Keylock
Keylock can be used to lock the buttons on your dryer when not in use. This will avoid
accidental button pushes.
To turn Keylock
1
If Keylock is
ON and the dryer is turned OFF:
1
ON or OFF:
Press for two seconds.
When activated, the
If a button is pressed while KEYLOCK is
activated, the KEYLOCK button will flash.
To turn your dryer on:
Press
POWER , then press and hold the
KEYLOCK two seconds. This will activate the
control panel. Dry cycles and options can now
be selected.
button is illuminated.
2
To stop or power OFF your dryer at any time:
Press
POWER .
11
WIFI CONNECTION
Your appliance can be connected to your home wireless network and operated remotely
using the app.
Getting started
z
Ensure your home WiFi network is turned on.
z
You will be given step by step guidance on both your appliance and mobile device.
z
It may take up to 15 minutes to connect your appliance.
On your mobile device:
1 Download the app from www.fisherpaykel.com/connect
2 Register and create an account.
3 Add your appliance and set up the WiFi connection.
4 Follow the prompts in the app to complete the setup.
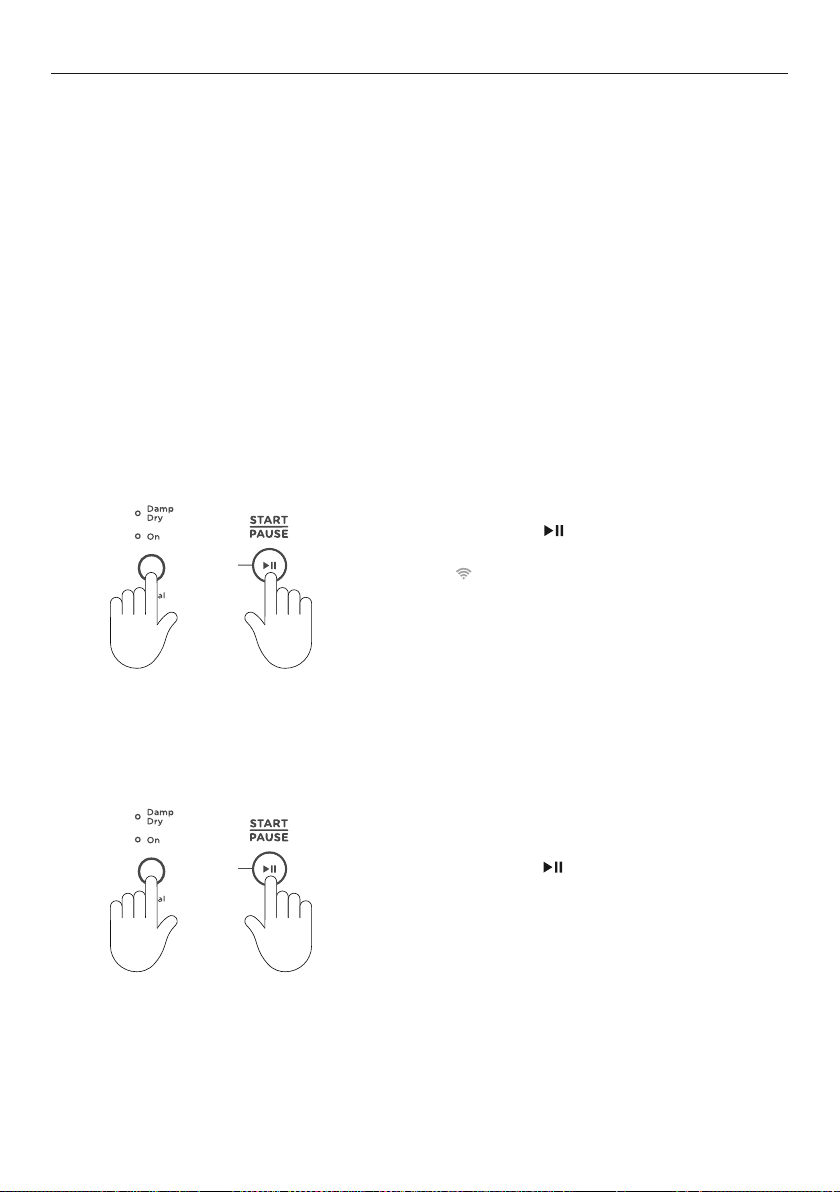
Connecting to your home WiFi
+
Press and hold
and SIGNAL buttons
simultaneously for three seconds.
The
LED will flash continuously until a
stable connection is achieved.
Once connected, the LED stops flashing and
will remain illuminated.
Turning off your home WiFi
+
Press and hold
and SIGNAL buttons
simultaneously for three seconds to
disconnect the WiFi and switch off the LED.
To reconnect to your home WiFi, repeat the steps in ‘Connecting to your home WiFi’.
12
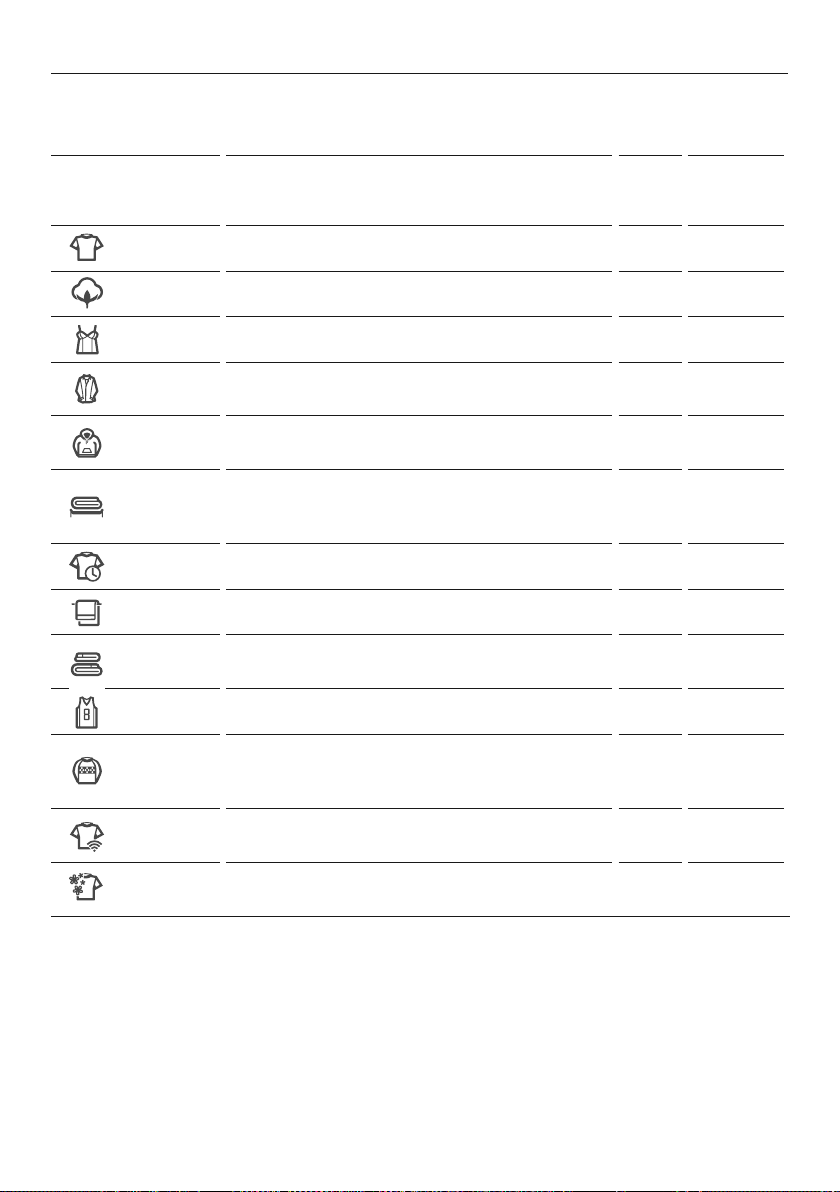
DRY CYCLES
Your dryer has a number of dry cycles, selecting the most appropriate cycle for each load
will help ensure you get the best drying result.
CYCLE DESIGNED FOR
MAX
LOAD
(KG)
DEFAULT
DRYNESS
LEVEL*
Everyday
Cottons**
Delicates
Easy Iron
Heavy
Rack Dry
Time Dry
Towels
Sheets
Sports
Wool
Extra Care
Freshen
Auto sensing cycle for mixed loads. 9 Dry
Auto sensing cycle for cotton clothes. 9 Dry
Auto sensing cycle for delicate garments. 4 Dry
Auto sensing cycle that leave garments ready to iron
with the WRINKLE FREE option automatically selected.
A longer, auto sensing cycle for durable garments. 9
Timed cycle for use with the drying rack, with
options from 30 to 150 minutes for items that cannot
be tumbled.
Timed cycle with options from 30 to 150 minutes. 9 n/a
Auto sensing cycle for drying bath and beach towels. 6 Dry
Auto sensing cycle with reversing to reduce tangling
for large bedding items.
Auto sensing cycle designed for sports garments. 4 Dry
Timed cycle for use with drying rack, with options from
30 to 150 minutes for washable woolen items that
cannot be tumbled.
Auto sensing cycle for ultra delicate and heat
sensitive garments.
A 15 minute cycle with a burst of heat to refresh
dry items.
4 Damp/Dry
Dry/
Extra Dry
3 n/a
4 Dry
3 n/a
1 Dry
2 n/a
*Dryness level is only an option on automatic sensing cycles. On TIME DRY and the RACK DRY
cycle, drynesswillvary depending on the load and its initial moisture content.
COTTONS cycle and DRY dryness level is the recommended cycle for everyday cotton items.
**
13

DRY PREPARATION
Sorting
Sort your garments before placing them into the dryer. Sortintoloads of similar items,
and loads that will likely take similar times to dry. Heavier items (egtowels, and flannelette
sheets) are best dried separately from lightweight items (egsynthetics, polyester-cotton
sheets and shirts). This prevents thepossibility of some items becoming over-dried whilst
others are still damp. Itwillalso help to extend the lifeofyour clothing and linen.
Care labels on garments provide valuable information about the fabric type and
howthegarment should be dried. Always follow the advice on the garment labels.
Onlydryitems in this dryer that have a care label stating tumble drying is suitable.
Drying your clothes as soon as you remove them from the washer will decrease thechance
of wrinkles forming, and dye transfer from coloured items to white items fromoccurring.
Separate coloured items from white/light items where possible, especially when new. Colour
run may be an issue, especially if you intend to delay the start of the drying cycle.
SPECIFIC
ITEM/DRYING
REQUIREMENTS
Towels Towels Towels produce a lot of lint and are best dried on
Sheets, pillowcases, duvet/
doona covers
Bulky items –
doonas,duvets, sleeping
bags, jackets
Business shirts, trousers,
other creasables
Woolens, silks Wool Designed for items that could be damaged ifthey are
Delicates,
fine fabrics
Jeans Heavy Turn jeans inside out to help maintain their
Shoes, hats, soft toys or
other odd shapeditems
SUGGESTED
CYCLE AND
COMMENTS
OPTIONS
their own.
Sheets Ensure duvet/doona cover openings are buttoned/
domed before placing inthe dryer.
Sheets Dry only one bulky item at a time and place a
knotted towel into the dryer at the same time to
ensure thebulky item moves aroundevenly.
Easy Iron
Delicate or
Rack Dry
Rack Dry Check on the item regularly throughout the drying
WRINKLE FREE is automatically selected to help
minimise creasing once the drying cycle has finished.
tumbled, eg woolens. Use the drying rack.
You can further reduce the dryness level to damp or
RACK DRY for verydelicate items.
use
appearance. Dry separately from other items.
cycle. Ensure the rack has been correctly fitted.
14
 Loading...