


CONTENTS
Astro Built -In oven pg 2-3
First use, The special talents of Astro
All about the clock pg 4
Setting the clock, Using the timer, Using automatic cooking with the clock
Temperature control pg 5
For single and double built-in ovens
Oven cooking options pg 6-7
8 cooking options
Which cooking option for what? pg 8
Shelf positions, oven racks & trays pg 9-10
Oven temperature guide pg 10
Grilling pg 11-13
Tips for successful grilling & grilling guides
Baking pg 14-17
Tips for successful baking & baking guide
Roasting pg 18-19
Tips for successful roasting & roasting guide
Cleaning pg 20-21
Self cleaning liners, flood lights, fat filter, oven runners, oven door & outside
Safety & warnings pg 22
Warranty Information pg 23
Customer care pg 24-25
It is important that the User Guide should be retained with the appliance for future reference.
Should the appliance be sold or transferred to another owner, always ensure that the User Guide is left with the appliance
in order that the new owner can familiarise themselves with the appliance and the relevant warnings.
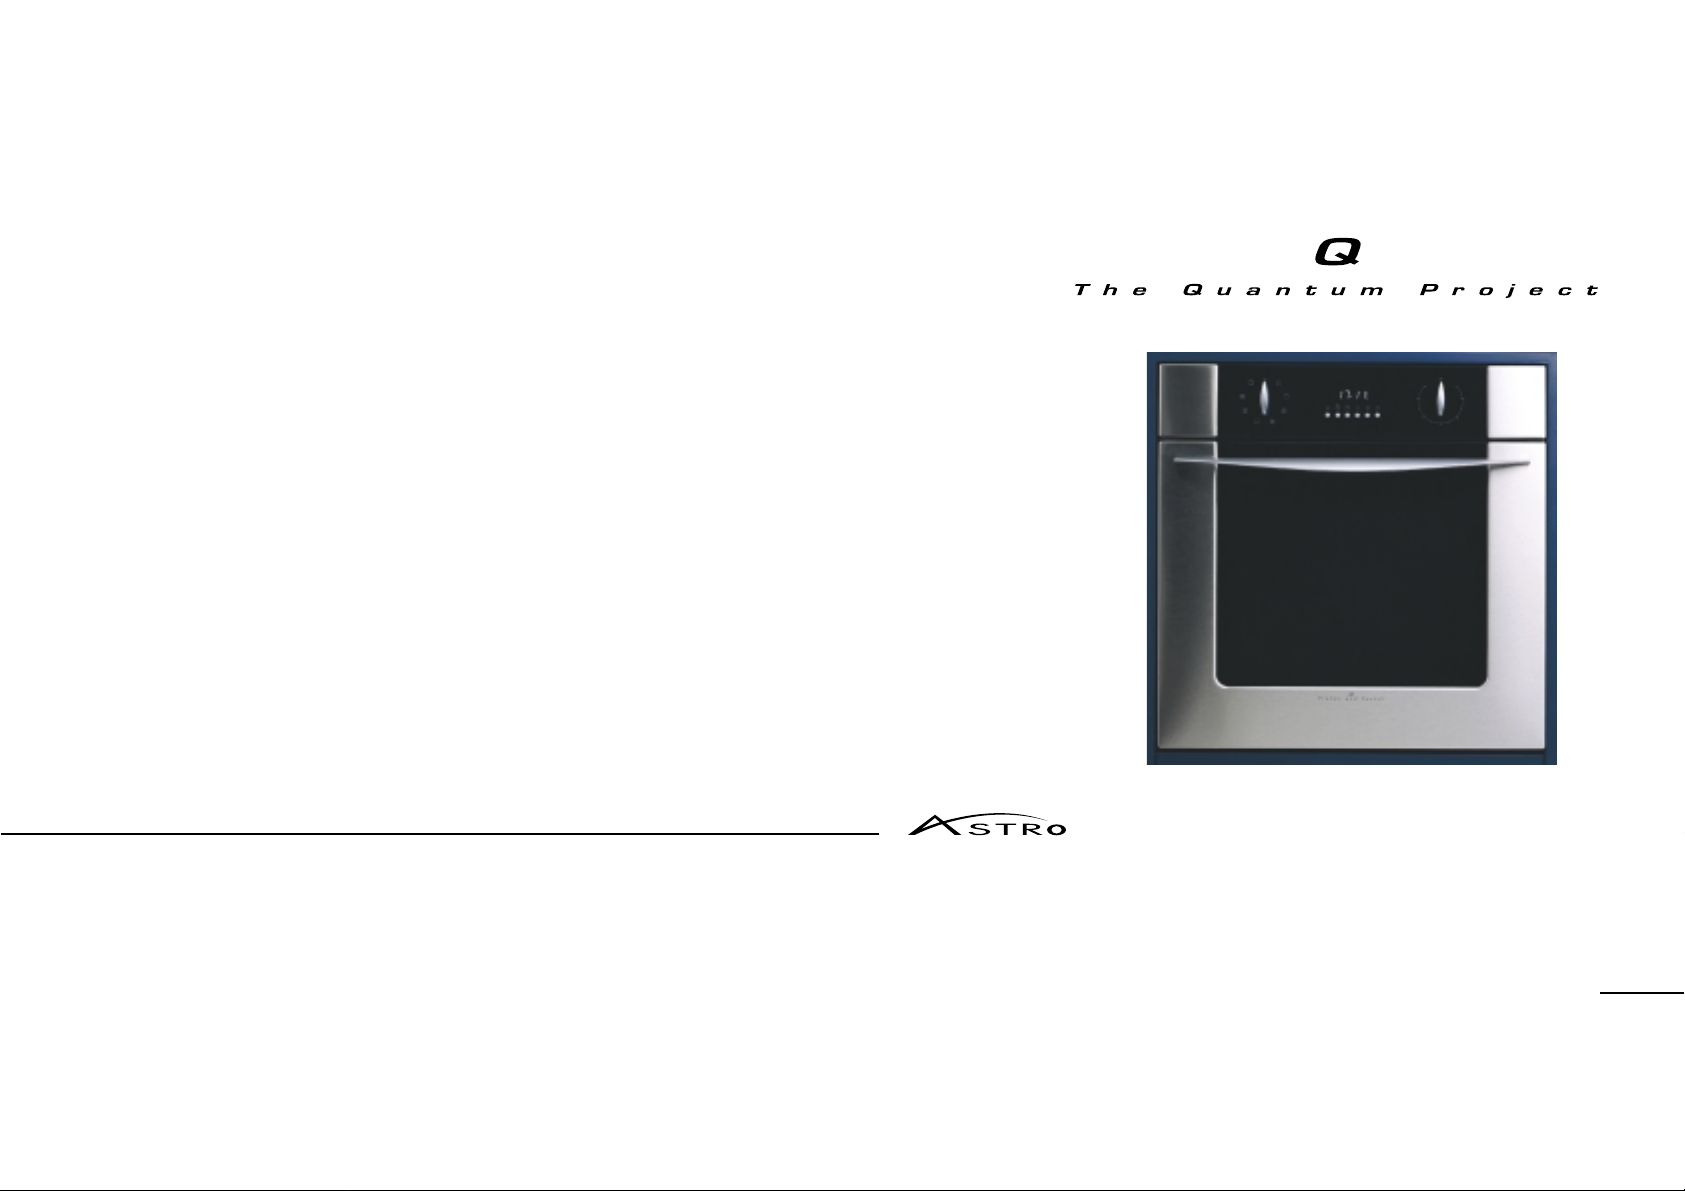
USER GUIDE
BUILT-IN OVEN
1

BUILT-IN OVEN
Now that your new Astro oven is installed and ready to use, you will want to know everything about it to ensure excellent results right from the start.
This booklet will introduce you to the features and special talents of Astro. It also includes a comprehensive cooking guide and a number of easy food
ideas and recipes. We recommend you read the whole book before you start using your oven, for the sake of safety as well as success.
CHROME & FLINT GREY INTERIORCAST METAL TEMPERATURE CONTROLLER
FIRST USE
Check that the clock is set correctly as on page 4. Remove accessories and condition the oven by running at Fan Bake, 200°C for 1 hour before
using it. There will be a distinctive smell, this is perfectly normal but make sure your kitchen is well ventilated during the conditioning period.
You can season your Pizza Stone at the same time by wiping the surface with a damp cloth and putting it in the oven while conditioning.
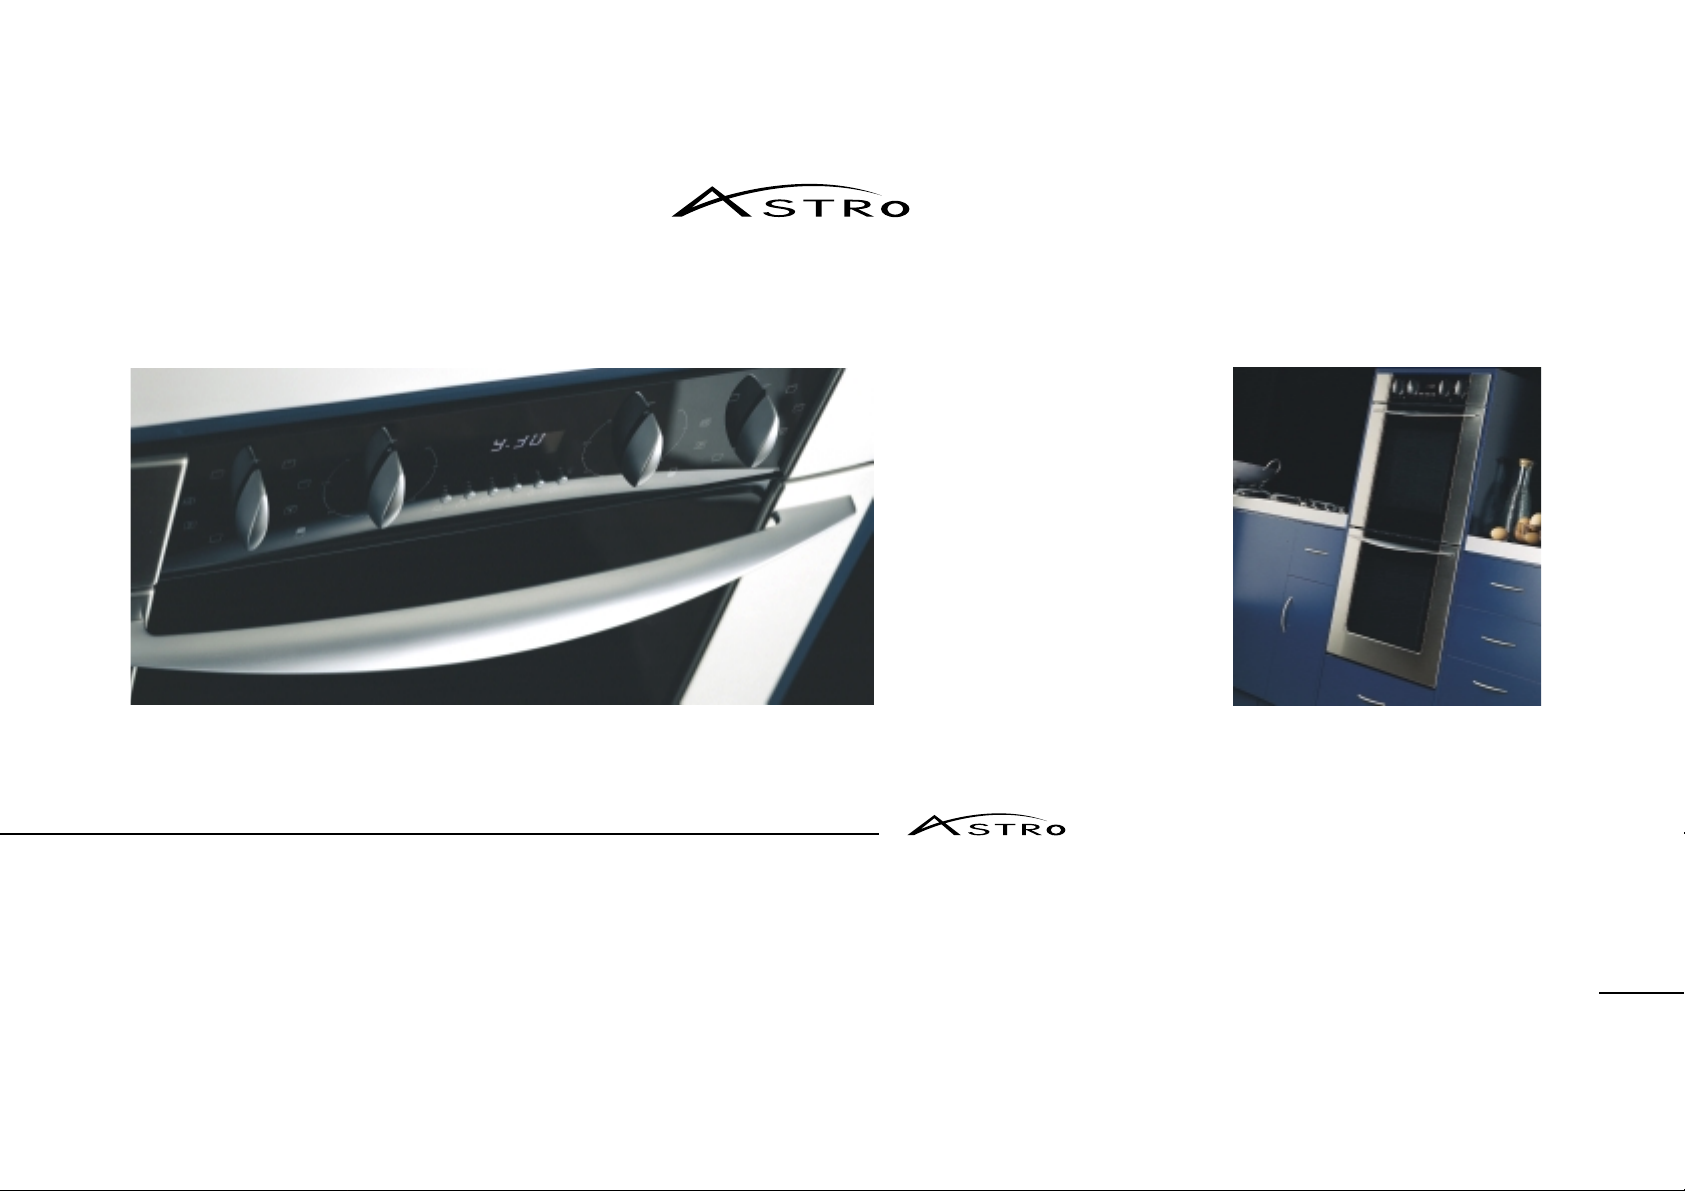
THE SPECIAL TALENTS OF
A choice of eight cooking options for consistently better results. Fully automatic, so you can put your mind to other things.
Most interior surfaces are self cleaning. A comprehensive range of accessories are included to make cooking easier.
The Astro double oven allows you to achieve more at the same time, while the Astro Compact oven is fully featured in a smaller size.
CAST METAL HANDLE & ELECTRONIC CLOCK ASTRO E2 DOUBLE OVEN
INSPIRATION
Roast whole bulbs of garlic drizzled with olive oil.
When cooked, squeeze pulp over slices of brushetta
and garnish with your favourite herb.
3
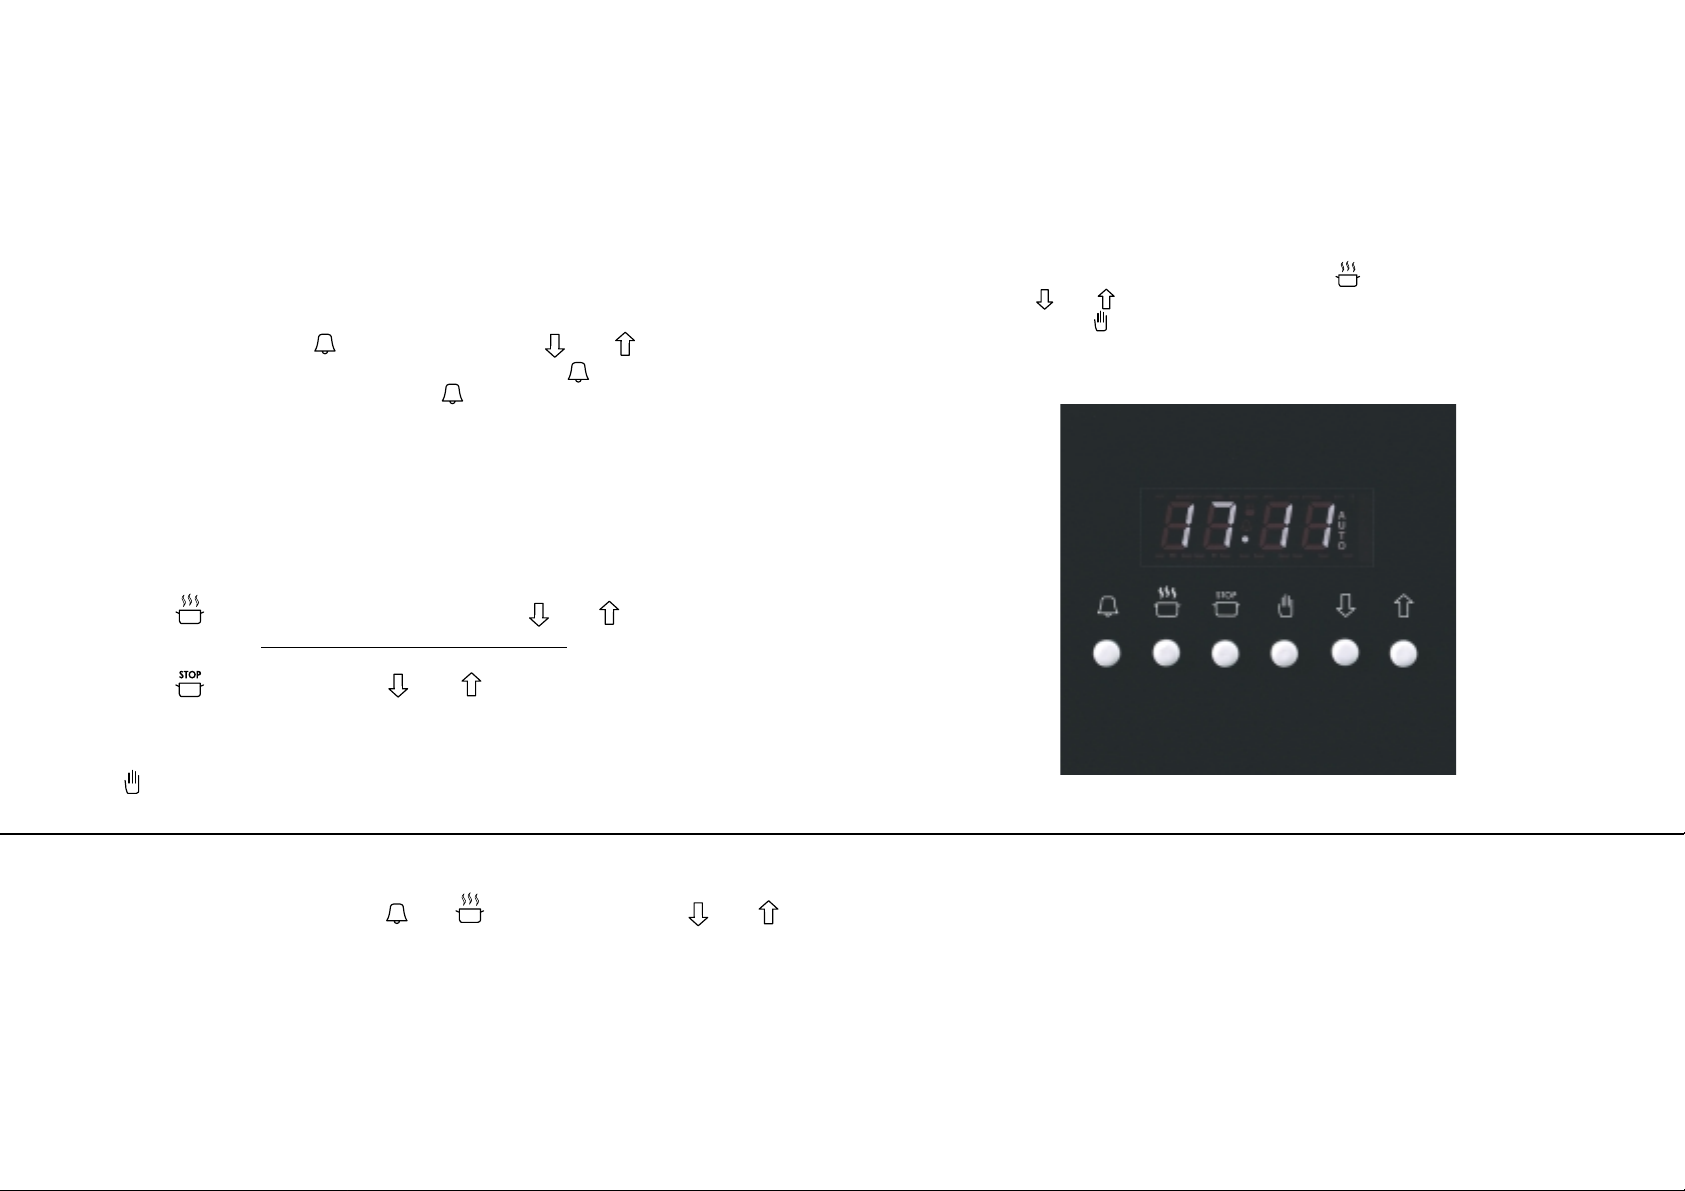
ALL ABOUT THE CLOCK
Using the timer
The timer can be used at any time, even when the oven is not in use.
If the oven is in use, the timer will not turn it off.
To set the timer, press the button briefly, then the and buttons to get the time
you want. The clock will show the time of the day with the symbol in the display.
Check the remaining time by pressing the button.
When the time is up, the timer will beep. If the oven is on it will not turn off.
When beeping, to turn the timer off, press any clock button.
Using automatic cooking (For Single and Upper Ovens only).
Check that the clock shows the correct time.
Choose the cooking option and temperature that you want.
The oven indicator neon will glow, and the oven will come on.
Press the button, 0.00 will show, then use the and buttons to set the time
you want to cook for. You do not have to set a start time.
Press the button then use the and buttons to set the time you want the oven
to turn off. The oven is now set for automatic cooking. Note: The cooling fan will remain on.
If there is any time to wait before the cooking starts, the time of day and ‘Auto’ are shown in
the clock display. At the end of cooking make sure the oven is returned to manual by pressing
the button.
To cancel automatic cooking, press the button and then press
the and buttons to return the time to 0.00. ‘Auto’ will flash.
Press the button and turn the Temperature and Function to Off.
CLOCK
To set the clock, press and hold the and buttons and press the and buttons
until the clock shows the correct time.
AUTOMATIC COOKING - SAFE FOOD HANDLING WARNING:
Food should be left in the oven as short a time as possible
before and after cooking. This is to avoid contamination by
organisms which may cause potential food poisoning.
Particular care should be taken during warmer weather.
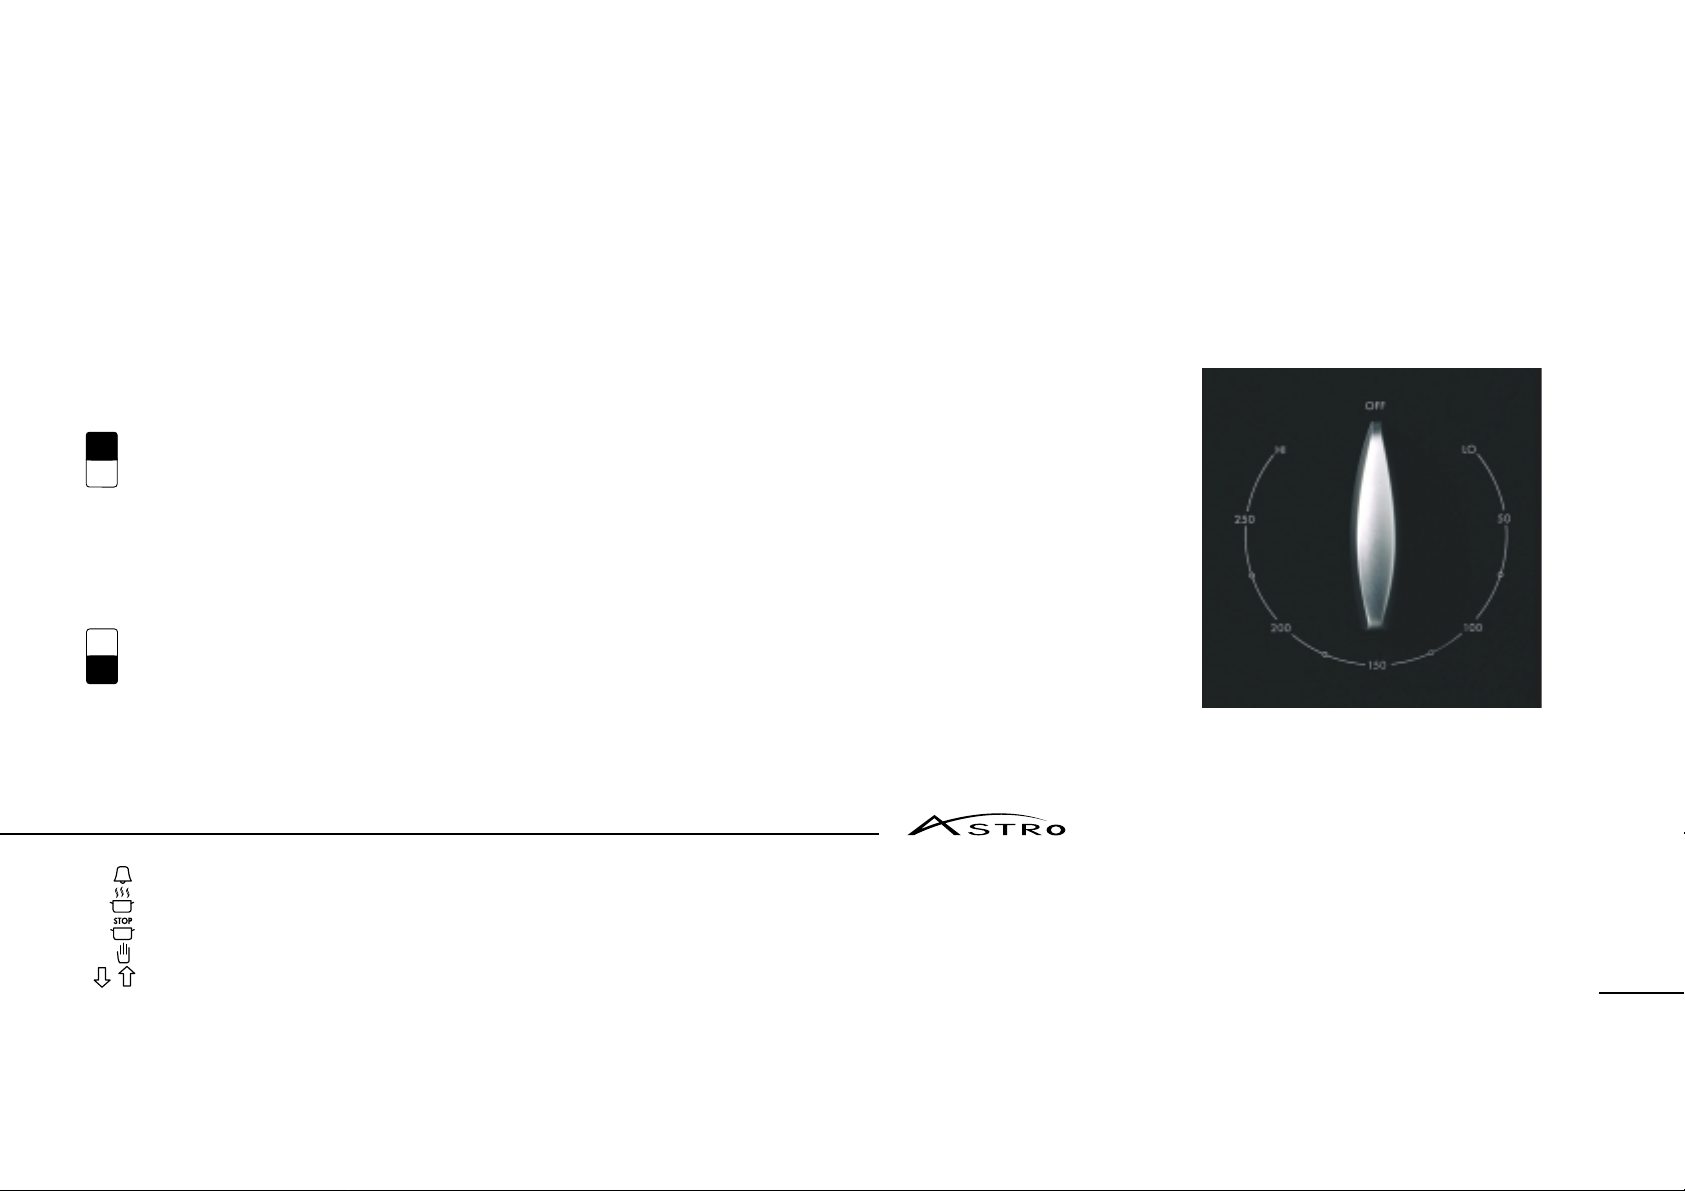
TEMPERATURE CONTROL
Single built-in oven
To turn the oven on, simply select the required cooking option.
Then select the temperature you want with the temperature control.
The oven flood lights will come on automatically while the oven is in use.
The oven indicator neon will glow until the oven has reached the set temperature.
Double built-in oven
UPPER OVEN
To turn the upper oven on, simply select the required cooking option from the left hand
side of the control panel. Then select the temperature you want with the temperature
control also from the left hand side of the control panel. The oven flood lights will come
on automatically while the upper oven is in use. The oven indicator neon will glow until
the upper oven has reached the set temperature.
LOWER OVEN
To turn the lower oven on, simply select the required cooking option from the right
hand side of the control panel. Then select the temperature you want with the
temperature control also from the right hand side of the control panel. The oven
flood lights will come on automatically while the lower oven is in use. The oven indicator
neon will glow until the lower oven has reached the set temperature. The lower oven
cannot be set for automatic cooking. If the upper oven is cold when you are cooking in
the lower oven, there may be condensation on the door of the upper oven.
Timer Allows a time to be set. This will not turn the oven off at the end of the time.
Cook Time Allows a time to be set for automatic cooking or auto stop cooking.
The oven will automatically turn off at the end of the set time.
Stop Time Enables a time at which automatic cooking finishes to be set.
Manual Sign Returns the oven to manual mode when automatic cooking is completed.
Down and Up Arrows Used for changing times in the selected mode.
INSPIRATION
Fan Bake rectangles of ready rolled puff pastry.
When cold split and fill with berries and liqueur flavoured whipped cream. Dust lightly with icing sugar.
5

COOKING OPTIONS
Your Astro oven has 8 cooking options. On the oven control panel each option is represented by a symbol.
Traditional method of cooking, most suitable for food that requires long cooking or cooking at a
low temperature e.g. fruit cakes. The oven should be preheated first and is best for single trays.
The fan forces hot air from an element around the fan throughout the oven. This is good for cooking several
dishes or trays at one time, as you don’t have to worry about food being too close to the elements and
burning. It is really good for more than one tray of baking and for casseroles or oven meals.
A fan at the back of the oven circulates hot air from the top and lower
elements. Fan Bake tends to brown food more quickly so you may need to lower
the temperature. It is good for crisping foods e.g. pastry products and slices.
Uses heat from the lower element only. The oven needs to be preheated on Bake or Fan Bake.
Use Classic Bake for quiches, slices, anything you want browner on the bottom than top.
BAKE
Top & lower heating element.
FAN FORCED
Fan plus fan element.
FAN BAKE
Fan plus top & lower elements.
CLASSIC BAKE
Lower element.

ECO GRILL
Top inner element.
Uses the inner area of the top element. Use for single servings or small pieces of food.
DEFROST
Fan only.
GRILL
Top inner & outer elements.
FAN GRILL
Fan plus top elements.
Defrost circulates air from the fan without heat, to prevent food from drying out or starting
to cook. Thawed food should be removed from the oven and refrigerated until needed.
Multi trays may be defrosted.
Grill cooks a large area of food using the two top elements. For best results leave the door
open at first stop position. Grilled vegetables are quick and have a wonderful flavour.
The fan circulates the heat from the top elements. This is excellent for foods that
would normally be fried. Large cuts of meat cooked on Fan Grill give a result similar to
using a rotisserie. Dishes such as lasagne and moussaka can also be Fan Grilled.
INSPIRATION
Grill large slices of fruit e.g. bananas, mango,
peaches. Sprinkle with brown sugar, drizzle with
brandy and serve with ice cream.
7

WHICH COOKING OPTION FOR WHAT?
This chart will help you to match your cooking requirements to the most appropriate option. Note: Recommended method Alternative method
FOOD
Baked Products Biscuits - single tray
- 2 to 3 trays
Slices
Butter Cake
Fruit Cake
Sponge
Meringues
Scones
Muffins
Pastry & Pies Filo Parcels
Lemon Meringue Pie
Quiche
Meats Beef - Roast
- Steak
Lamb - Roast
- Rack
Pork - Roast
Poultry Chicken - Whole
- Pieces
Savoury Dishes Casseroles
Lasagne
Complete Oven Meals & Reheating
BAKE FAN FORCED FAN BAKE CLASSIC BAKE GRILL FAN GRILL
INSPIRATION
A delicious fruit crumble can be made by combining flour, sugar, butter, coconut and sunflower seeds. Sprinkle over
sliced apples and rhubarb flavoured with lemon juice and raw sugar. Fan Bake at 180°C for approximately 30 minutes.

SHELF POSITIONS, OVEN RACKS & TRAYS
Your Astro built-in oven is supplied with
2 racks 1 grill rack 1 shallow tray
1 glass tray 1 deep tray 1 fat filter
Note: Double Ovens have two sets, one for each oven space for the whole unit.
Only 1 Pizza Stone & Paddle is supplied.
Shelf positions
Shelf positions are numbered from the top down. The top positions are for grilling.
We do not recommend cooking on the bottom of the oven.
Racks
The racks can be used during all cooking options to support trays, baking dishes,
roasting pans and cake tins.
Grill rack
The grill rack fits inside the deep tray, so they can be placed in the oven together.
When using Eco Grill place food on grill rack in the middle where the runners are
further apart.
Continued next page.
INTERIOR SHOWING RACK POSITIONS
INSPIRATION
Try tossing some boiled, sliced potatoes in oil then
place in a dish, sprinkle with parmesan and grill until
brown.
9

OVEN TEMPERATURE GUIDE
Shallow tray
The shallow tray is a baking tray for biscuits and baked dishes. It can also be used to
support dishes for multi-level cooking.
Glass tray
The multipurpose glass tray is made from toughened glass to withstand high
temperatures. It is suitable for roasting and grilling, and can also be used as a
serving dish. The rim on the tray makes it easy to handle. The glass tray will not
distort or corrode, and it won’t shatter into small pieces if knocked.
Fat filter
The fat filter protects the fan against fat build up. The filter should be in place when
the fan options are being used for roasting.
Warning: Do not use fat filter when cooking baked products with the fan option.
Installing the fat filter
To install, hold the fat filter by the handle, insert the two tabs into the oval holes in
the fan cover, ensuring the filter covers the opening completely.
Important: The fat filter should be cleaned after every use. If the fat filter is not
cleaned, the filter will block and shorten the life of the fan element.
Celcius (°C) Fahrenheit (°F) Gas Mark
110 225
130 250
140 275 1
150 300 2
170 325 3
180 350 4
190 375 5
200 400 6
220 425 7
230 450 8
240 475 9
Use this chart as a guide when converting temperatures.
1
/
4
1
/
2
INSPIRATION
Make crostini by toasting thin slices of french loaf dabbed with olive oil. When cold spread with a selection of: tapenade,
feta & roast capsicum; cream cheese, peppery salami & peach chutney; blue cheese, whole walnuts & rocket.

GRILLING
Your Astro oven gives a choice of Grill, Eco Grill or Fan Grill. For many meats grilling is considered to be a healthier alternative to frying.
Recently, grilling has also become a popular way to cook vegetables. Where approriate food should be at room temperature before being grilled.
Tips for successful grilling
Grill
Preheat grill for 5 minutes before using. Leave the oven door open at
the first stop position so the grill element does not cycle on and off. For
Full Grill place food on the grill rack and sit in the deep tray. Slot into
the upper runners near the top of the oven (see Grilling Guide for most
appropriate shelf). Grill one shelf at a time.
When using Eco Grill place food on rack in deep tray in the middle where
the runners are further apart. When grilling the higher in the oven
food is placed the faster it will cook and brown. Food will cook and
brown faster set at HI or 250° and we recommend you grill at such
temperatures. Lower temperatures can be used for grilling if desired.
Warning: Accessible parts may become hot when the grill
is in use. Children should be kept away.
Fan Grill
The oven does not need to be preheated and grilling is carried out
with the door closed.
The upper elements cycle on and off and the hot air is circulated by
the oven fan. The thermostat maintains the desired temperature.
Place food on the grill rack in the deep tray.
Slot the tray into a shelf position near the middle or lower part of the
oven (see Grilling Guide for most appropriate shelf).
Fan Grill is suitable for foods that you would normally pan fry, barbeque
or rotisserie, and for larger cuts of meat.
INSPIRATION
Marinate lamb cutlets in oil, balsamic vinegar and
fresh thyme. Grill to medium rare and cover with a
mixture of pureed basil, grated parmesan, brioche
crumbs and a little olive oil. Place under grill to cook.
11

GRILLING GUIDE
GRILL FAN GRILL
FOOD Shelf Temp °C Time (min) Shelf Temp °C Time (min)
Beef Steak - Rare 4 Hi 8-10
- Medium 5 Hi 10-15
- Well Done 5 Hi 15-20
Hamburgers - Well Done 5 Hi 12-15 5 180-200 15-25
Meatballs - Well Done 5 Hi 12-15 5 180-200 15-25
Lamb Chops - Medium 5 Hi 15-20 4 180-200 15-20
- Well Done 5 Hi 20-25 4 190-200 20-25
Rack - Medium 6 190-200 25-35
Pork Chops - Well Done 4 Hi 15-20 5 180-200 20-30
Ham Steaks - Well Done 5 Hi 15-20 5 180-200 15-20
Bacon 3 Hi 4-6 4 180-200 10-15
Sausages 4 250-Hi 10-15 5 180-200 15-25
Chicken Pieces - Well Done 5 180-200 15-20
Whole - Well Done 7 175 30-35
Fish Fillets, Thick 4 180-200 8-12
Fillets, Thin 4 180-200 6-10
Toast 1-6 Slices - Medium 1 Hi 2-3
1-2 Slices - Medium 1 Hi 2-3
The chart above refers to full sized oven shelf positions, numbered from the top down. The above temperatures and
times are a guide only and you may need to increase or decrease them depending on your preferences. When cooking
large cuts of meat times and temperatures are based on 30 minutes per 500g/1 lb.
per 500g
INSPIRATION
Stuff pesto under the skin of boneless chicken breasts and bake in a hot oven
on an oven tray sprayed or brushed with olive oil.

GRILLING GUIDE - FAN GRILL
FOOD Shelf Temp °C Time (min)
Family Fruit Crumbles 5 150-160 20-25
Favourites Macaroni Cheese 5 175-180 20-30
Lasagne 5 150-160 25-30
Moussaka 5 150-160 30-35
Cannelloni 5 150-160 25-30
Vegetables 5 175-200 20-30
Snacks Cheese Rolls 4 175 5-8
Nacho’s 4 175 10-15
This chart refers to full sized oven shelf positions, numbered from the top down. The above
temperatures and times are a guide only and you may need to increase or decrease depending
on your preferences. When cooking large cuts of meat times and temperatures are based on
30 minutes per 500g/1 lb.
FAN GRILL SET UP
Compact Oven
The compact oven can be used in the same way as a full sized oven because it is fully featured.
As the oven is smaller, use shelves 1 & 2 for grilling, and shelves 3 & 4 for baking.
Food may need to be cooked at a lower temperature or for a shorter time.
INSPIRATION
Top freshly fried thick slices of aubergine with a
generous slice of mozzarella cheese. Melt under a
hot grill and drizzle with olive oil. Great for lunch with
a salad and crusty bread.
13

BAKING
When it comes to baking, your Astro oven gives you an outstanding choice of
options (refer to Cooking Options on pages 6 & 7).
Tips for successful baking
Set your oven to pre-heat while you prepare, many baked items don’t like to
be kept waiting for the oven.
Use baking paper to line cake tins and biscuit trays and you’ll eliminate the
need for greasing.
Read your recipe right through and assemble the ingredients on the bench
before you start, you’ll save yourself a lot of panics.
You may find temperatures on Fan Bake need to be lowered.
Warning: Do not use fat filter when cooking baked products or fan
functions.
Some foods are best cooked on particular functions. For example rich fruit
cakes and single cakes are best cooked on Bake without fan.
A single tray of baking works best using bake, however if 2 or more trays
are cooked on Bake they will need to be interchanged during cooking to
ensure an evenly cooked product.
Fan Bake is great for pastry products such as bacon and egg and apple
pies as pastry crisps up well. You should always centre baking tins on trays.
Multi shelf cooking can be used with Fan Forced and Fan Bake. When
cooking 2 trays on Fan Bake cooking times may be longer and you may
need to remove some foods from the oven at different times.
Fan Forced is well suited to batch baking up to 3 trays at a time for
products like biscuits, scones and meringues.
Refer to the Baking Guide for suggested times, temperature and shelf
positions.
For best results we recommend you bake using the trays supplied with
your oven.
INSPIRATION
Gourmet pizzas are easy - Try caramelised onion,blue cheese, red Thai curry paste and
shredded chicken (add a garnish of yoghurt before serving), basil pesto with feta &
tomato.

BAKING GUIDE
BAKE FAN FORCED FAN BAKE
FOOD Shelf Temp °C Time (min) Shelf Temp °C Time (min) Shelf Temp °C Time (min)
Baked Products Biscuits 6 170-180 10-20 5&7 170-180 8-15 5&6 160-175 8-15
Slices 7 170-180 20-30 6 170-190 20-30 7 150-175 20-30
Shortbread 6 150-160 25-35 6 150-160 20-30 6 140-150 20-30
Cake Butter/Choc 8 150-175 55-75 8 150-170 55-75 8 150-160 55-75
Fruit Rich 8 135-150 4-6hrs 7 130-150 4-6hrs 8 125-150 4-6hrs
Sponge 7 170-190 20-40 7 170-190 25-35 7 160-175 20-30
Victoria Sandwich Cake 7 170-190 20-40 4,6&8 150 20-35 7 170-190 20-30
Small Cakes 6 170-190 20-30 4,6&7 175 18-20 6 170-190 20-25
Muffins 6 200-220 15-20 6 200-220 20-30 6 190-210 15-20
Meringues 7 110-130 50-70 4,6&7 100 2hrs30min 6 105-120 50-70
Scones 6 215-230 10-15 4,6&7 200 10-12 6 200-215 10-15
Bread/Rolls 7 190-220 10-40 7 180-210 10-40 7 175-200 10-40
Pizza 8 225-250 15-20 6&7 225-250 15-20 6&8 200-230 15-20
Quickbread 8 150-180 45-60 8 150-180 45-60 8 150-175 45-60
Apple Pie 6 190-200 25-35 4,7&8 175-200 25-30 6&7 180-200 25-30
Custard Tart 7 210/160 30-50 7 210/160 30-50 7 190/150 30-50
SUGGESTED COOKING FUNCTION
The chart above refers to full sized oven positions, numbered from the top down.
For the compact oven, use shelves 3 & 4 for baking (refer to page 13).
The chart will help you select the best times,
temperatures and shelf positions to use for various
foods. Remember that it is only a guide - recipes vary,
so small adjustments may be necessary.
15

BAKING GUIDE
BAKE FAN FORCED FAN BAKE
FOOD Shelf Temp °C Time (min) Shelf Temp °C Time (min) Shelf Temp °C Time (min)
Pastry Filo 7 175-190 30-35 7 160-180 30-35 7 150-160 25-30
Flaky/Puff 6 225-250 10-20 6 210-225 10-20 6 200-220 10-20
Quiche 7 200-220 20-30 7 190-210 20-30 7 180-200 20-30
Bacon & Egg Pie 7 180-190 30-50 7 170-190 30-50 7 170-180 30-50
Lemon Meringue Pie 7 170-180 15-20 7 170-180 10-20 7 165-175 10-20
Family Favourites Lasagne 7 170-180 25-35 7 150-160 25-35 7 150-160 25-35
Meatloaf 7 175-190 50-60 7 175-190 45-50 7 170-180 40-55
Chicken Pieces 6 175-180 45-50 7 170-180 45-50 7 155-170 45-50
Chicken Casserole 7 175-190 50-65 7 170-180 45-60 7 150-165 45-60
Complete Oven Meal* 7&5 175 100-110
Automatic Cooking of
Complete Oven Meals 3,7&8 150 90-100
Vegetables Baked 6 150-200 45-90 6 150-175 45-90 6 150-175 45-90
Roasted 6 175-200 45-90 6 175-200 45-90 6 175-200 45-90
SUGGESTED COOKING FUNCTION *Complete Oven Meal Example: 1.5kg roast lamb, 800g potatoes, 400-500g
root vegetables & fruit pie. Note: depending on the size of the meat and weight
of vegetables, cooking times will vary.
The chart above refers to full sized oven shelf positions, numbered from the top down
For the compact oven, use shelves 3 & 4 for baking (refer to page 13).
When cooking large cuts of meat, times and temperatures are based on 30 minutes
per 500g/1lb.
The chart will help you select the best times, temperatures and shelf positions to use for various foods.
Remember that it is only a guide - recipes vary, so small adjustments may be necessary.

Macadamia Nut Brownies
Filling
125g butter
150g dark cooking chocolate
2C brown sugar (lightly packed)
1
/
2C cocoa
3 eggs (lightly beaten)
1t vanilla essence
1t coffee powder
1
/
1
2C flour
1t baking powder
1
/
2C chopped macadamia nuts
Select Fan Bake and 175°C.
Melt butter and chocolate (microwave on medium for 3-4 minutes, stirring after 2 minutes).
Mix well, add sugar, cocoa, eggs and macadamia nuts. Fold in sifted flour and baking powder.
Fan Bake in slice pan 28cm x 19cm for 20-25 minutes, shelf 7.
INSPIRATION
Roast pieces of beetroot & pumpkin until tender.
When cool, fold in chopped spinach, crumbled feta
and sprinkle with Italian parsley.
17

ROASTING
Your Astro oven is equipped to handle a variety of roasts - from a succulent leg
of lamb to the trimmed Christmas turkey (refer to Cooking Options on pages
6 & 7).
Tips for successful roasting
A large piece of meat requires fewer minutes per 500g/1lb than a smaller piece.
Roasting times will be affected by the shape and size of the meat being roasted.
Meat with a bone will cook more quickly than a rolled roast.
Don’t add water to your roast, as this has a steaming effect.
For perfect results, use a meat probe or meat thermometer.
The internal temperature of the meat will continue to rise during standing, so allow
for this in your calculations (this is particularly important if you want a rare or
medium rare roast).
It’s a good idea to let all roast meats stand for 10-15 minutes before carving - the
juices will be less likely to run out when you carve.
Warning: Do not place aluminum foil or dishes with reflective qualities on the
oven bottom as this will cause a heat build up which will result in
irreversible damage to the enamel.
Roasted Peppers Stuffed with Mushrooms
2 large red peppers
2 large yellow peppers
Filling
2 T olive oil 2 T olive oil
1 large onion, finely chopped 50g mushrooms, sliced thickly
2 cloves garlic, crushed 50g pinenuts
400g can tomatoes 1 T fresh basil, roughly torn
2 T tomato paste 50g pitted black olives
1 t sugar 50g shredded parmesan cheese
salt and ground black pepper
To roast the peppers, halve lengthways and deseed.
Place cut side down on a baking tray at 200°C for 15 minutes.
Make the filling by gently frying the onion and garlic in the oil
until softened and lightly coloured. Add tomatoes, tomato paste and
seasonings; cook uncovered 15-20 minutes until the mixture is thick.
Sauté mushrooms in second measure of oil until soft.
Add mushrooms, pinenuts, basil and olives to tomato mixture.
Place peppers in ovenproof dish and fill with tomato mixture sprinkle with
Parmesan cheese. Bake for 15-20 minutes until heated through.
INSPIRATION
Lemon and garlic leg of lamb is a quick and tasty roast. Peel and slice cloves of garlic. Make knife holes
in the meat to push the clove pieces into and drizzle with lemon juice. For best results, prepare in the
morning and leave to marinate in the fridge. Roast the lamb on Fan Grill at 180°C for 90 minutes.

ROASTING GUIDE
FOOD Temp °C Time (min) Internal Temp °C
Beef - Rare 160-170 30-35 60-65
- Medium 160-170 35-45 65-75
- Well Done 160-170 45-60 75-80
Mutton - Well Done 160-170 45-60 80-85
Hogget/Lamb - Medium 160-170 30-40 79-82
- Well Done 160-170 45-60 82-85
Pork - Well Done 180-185 40-45 78
Chicken - Well Done 160-180 60-90
Venison* - Rare 220 3.5
Turkey - Well Done 150-170 3-5
* Brown prior to roasting in an oiled frypan on high heat.
Roasting can be achieved with a range of cooking options,
Fan Bake, Fan Forced, Bake and Fan Grill can all be used for roasting each having
unique results. Meats roasted on Fan Grill cook and brown in a rotisserie style. Radiant heat sears the
outside surface while the inside remains tender and juicy.
Fan Forced is perfect for roasting when you also need to cook several other dishes simultaneously as
tray position is not as crucial as other functions. Use Fan Bake for cooking 1-2 trays, it tends to brown
and cook faster than Bake. Bake is the traditional method of roasting, cook 1 tray at a time.
The above temperatures and times are a guide only and you may need to increase or decrease
depending on your preferences and which cooking option you use. When cooking large cuts of meat
times and temperatures are based on 30 minutes per 500g/1 lb.
per cm thickness 65-70
1
/
hours 67-71
2
INSPIRATION
Cook smoked salmon, mix with cooked pasta spirals
and a curry sauce. Place in single serve dishes,
topped with breadcrumbs, dill and coriander, grill until
golden.
19

CLEANING
Cleaning Flood Lights
With the oven turned off at the wall, clean oven lights using household detergents
or an ammonia based cleaner (e.g. Handy Andy). Specialised oven cleaners may also
be used (follow manufacturers instructions). The glass covers can be removed for
cleaning or to allow bulb replacement. Always replace the cover before using the oven.
Warning: Ensure that the appliance is switched off at the wall before replacing the
oven lamp to avoid the possibility of electric shock.
Self Cleaning Liners
To reduce manual oven cleaning, your Astro oven has catalytic self-cleaning liners fitted
to the side walls and back of the oven. The liners are coated with a special enamel,
which is porous and contains oxidising catalysts. At normal cooking temperatures, the
grease and dirt that comes into contact with the liners is absorbed by the enamel and
broken down by the oxidising catalysts. The cleaning action is enhanced by a higher
temperature, so from time to time it may be necessary to run the oven at Fan Grill,
200°C for 1 to 1
been carried out. The oven roof is also self-cleaning. Heat from the upper elements
break down any grease and dirt which may be deposited. Warning: Do not use
detergent, abrasives or oven cleaners on catalytic self-cleaning liners.
1
/
hours if needed. Do this on a regular basis if a lot of cooking has
2
Cleaning Oven Runners
Clean oven runners using household detergents or an ammonia based
cleaner (e.g. Handy Andy). Specialised oven cleaners may also be used (follow
manufacturers instructions).
The wire side runners may be removed to make cleaning easier. To remove the
runners gently push the runner underneath the stud down and lift the runners up
and towards the centre of the oven. The prongs at the top will slide out.
To replace the runners, place top prongs into small slots at top of oven cavity,
lower runners and gently push wire underneath stud.
Warning: Do not lower runners until prongs are fully inserted.
Cleaning the Fat Filter
The fat filter should be cleaned after every use. If the fat filter is not cleaned the
filter will block and shorten the life of the fan element. For normal soiling, place
in a dishwasher on normal wash. If the fat filter is very dirty, place in a saucepan
with either 2 tablespoons of washing powder, or 1 tablespoon of dishwasher
powder. Bring to the boil and leave to soak for at least 30 minutes. Rinse the
filter in clean water and dry.
To refit the fat filter, hold the filter by the handle, insert the two tabs into the oval
holes in the fan cover, ensuring the filter covers the opening completely.
IMPORTANT
Please keep the following rules in mind when you’re cleaning your Astro Oven. Please read the cleaning instructions and the Safety & Warnings on page 22
before you start. Ensure the appliance is switched Off and cool to touch before cleaning. Be careful of sharp edges. Warning: Do not place aluminium foil or
dishes with reflective qualities on the oven bottom as this will cause a heat build up which will result in irreversible damage to the enamel.

Cleaning the Oven Door
Clean the inside of the oven door while it’s still warm using household detergents or an
ammonia based cleaner (e.g. Handy Andy). Specialised oven cleaners may also be used (follow
manufacturers instructions) or a razor blade scraper, handled carefully.
To make cleaning easier, you can remove the oven door. Open the door fully, lift the clips back
towards you onto the hooks, raise door slightly, (holding on both sides near the handle and
making sure that the clips stay on the hooks), lift the door out.
To put door back on, place upper hinge arm in upper slot and lower hinge arm in lower slot.
Push the hinges in as far as they will go. Lower door gently - the clips should release from
the hooks. Raise the door slightly and ensure the clips are released from the hooks. Close
the door.
Cleaning the Outside
Wipe the oven’s outside surfaces frequently using warm water and a household detergent or a
spray-on wipe-off cleaner. Do not use abrasive cleaners.
21

SAFETY & WARNINGS
Your Astro oven has been carefully designed to operate safely during normal cooking
procedures.
Please keep the following rules in mind when you’re using this appliance
Warning: During use this appliance becomes hot. Care should be taken to avoid
touching heating elements inside the oven.
Warning: Do not stand or place heavy objects on the door.
Warning: Do not place aluminium foil or dishes with reflective qualities on the
oven bottom as this will cause a heat build up which will result in irreversible
damage to the enamel.
AUTOMATIC COOKING - SAFE FOOD HANDLING
WARNING:
after cooking. This is to avoid contamination by organisms which may cause potential
food poisoning. Particular care should be taken during warmer weather.
Food should be left in the oven as short a time as possible before and
Electrical supply cord
If the electrical supply cord is damaged, it must only be replaced by an authorised
person. This appliance should be connected to a circuit which incorporates an
isolating switch, providing full disconnection from the power supply.
Warning: This appliance should be connected to a circuit, which incorporates
an isolating switch providing full disconnection from the power supply.
A cavity ventilation fan is included in built-in ovens. This will come on whenever the
oven is in use. It will blow air out above the door.
When the oven is turned off, the cavity ventilation fan may stay on until the
oven cools down.
Caution: If the air flow above the door does not start when the function
is selected or stops during the cooking cycle, turn off the oven
and call an Authorized service person. If an over temperature
situation does occur, the oven is fitted with an automatic resetting
over temperature thermostat which will turn the elements, function
fan and lights off.
WARNING
Household appliances are not intended to be played with by children. Children, or persons with a disability which limits
their ability to use the appliance, should have a responsible person to instruct them in its use. The instructor should be
satisfied that they can use the appliance without danger to themselves or their surroundings.

ISER PAEL ANUACTURERS AANT
When you purchase any new Fisher & Paykel whiteware Product you automatically receive a
2 year Manufacturer's Warranty covering parts and labour for servicing within New Zealand
and Australia.
ISER PAEL UNDERTAES TO
Repair or, at its option, replace without cost to the owner either for material or labour any
part of the Product, the serial number of which appears on the Product, which is found to be
defective within TWO YEARS of the date of purchase.
This warranty DOES NOT cover
A. Service calls to which are not related to any defect in the Product. The cost of a service
call will be charged if the problem is not found to be a Product fault. For example:
1. Correct the installation of the product.
2. Instruct you how to use the product.
3. Replace house fuses or correct house wiring or plumbing.
4. Correcting fault(s) caused by the user.
B. Defects caused by factors other than:
1. Normal domestic use or
2. Use in accordance with the Product’s User Guide.
C. Defects to the Product caused by accident, neglect, misuse or Act of God.
D. The cost of repairs carried out by non-authorised repairers or the cost of correcting such
unauthorised repairs.
E. Normal recommended maintenance as set out in the Product’s User Guide.
F. Repairs when the appliance has been dismantled, repaired or serviced by other than a
Fisher & Paykel AUTHORISED CUSTOMER SERVICE CENTRE or the selling dealer.
G. Pick up and delivery.
H. Transportation or travelling costs involved in the repair when the product is installed
outside the Fisher & Paykel AUTHORISED CUSTOMER SERVICE CENTRE'S normal
service area.
PRODUCT DETAILS
FISHER & PAYKEL LTD
Model/Serial No.
Date of Purchase
Purchaser
Dealer
Suburb
Town
Country
This warranty applies only to product purchased in
New Zealand and Australia.
SERVICE UNDER THIS MANUFACTURER’S WARRANTY MUST BE PROVIDED BY FISHER & PAYKEL.
SUCH SERVICE SHALL BE PROVIDED DURING NORMAL BUSINESS HOURS.
THIS WARRANTY CERTIFICATE SHOULD BE SHOWN WHEN MAKING ANY CLAIM.
Note: This Warranty is an extra benefit and does not affect your legal rights.
Please keep this User Guide in a safe place.
Do not return to Fisher & Paykel.
23

CUSTOMER CARE
Before you call for service or assistance ...
Check the things you can do yourself. Refer to your User Guide and check...
1. Your product is correctly installed
2. You are familiar with its normal operation
If after checking these points you still need assistance, please refer to the following...
In New Zealand if you need assistance ...*
Call your Fisher & Paykel retailer who is trained to provide information on your
product, or if we can be of any further help, please contact our Customer Care
Centre,
Toll Free: 0800 FP CARE or 0800 37 2273
Email: Customer.Care@fp.co.nz
Fax: (09) 273 0656
Postal Address: PO Box 14-917, Panmure, Auckland.
If you need service ...*
Fisher & Paykel has a network of independent Fisher & Paykel AUTHORISED
SERVICE CENTRES whose fully trained technicians can carry out any service
necessary on your product. Your dealer or our Customer Care Centre can
recommend an AUTHORISED SERVICE CENTRE in your area.
In Australia if you need assistance ...*
Call the Fisher & Paykel CUSTOMER CARE CENTRE and talk to one of our
Customer Care Consultants.
Toll Free: 1300 650 590 from anywhere within Australia
Email: Customer.Care@fp.com.au
Phone: (07) 3826 9100
Fax: (07) 3826 9298
Postal Address: PO Box 798 Cleveland, QLD 4163.
If you need service ...*
Fisher & Paykel Australia Pty Ltd has a network of independent Fisher & Paykel
AUTHORISED SERVICE CENTRES whose fully trained technicians can carry out
any service necessary on your product. Your State Office or our Customer
Care Centre can recommend an AUTHORISED SERVICE CENTRE in your area.
*IF CA R RITE
Please provide, name and address, model number, serial number, date of purchase and a complete description of the
problem. This information is needed to provide a better response to your request for assistance.

In the United Kingdom (GB) if you need
assistance ...*
Call the Fisher & Paykel Help Line and talk to one of
our Customer Care Consultants.
Phone: (01) 926 626700
Fax: (01) 926 626701
Postal Address: Fisher & Paykel Appliances Ltd,
Broxell Close, Wedgenock Industrial Estate,
Warwick, CV34 6QV.
In Ireland (IE) if you need assistance ...*
Call the Fisher & Paykel Help Line and talk to one of
our Customer Care Consultants.
Phone: (01) 626 5711 4917
Fax: (01) 626 7863 3251
Postal Address: C & F Quadrant,
Quadrant House, Chapelizod, Dublin 20.
25

Copyright Reserved Fisher & Paykel 2000.
The product specifications in this booklet apply to the specific products and models described at the date of issue. Under our policy of continuous product improvement,
these specifications may change at any time. You should therefore check with your Dealer to ensure this booklet correctly describes the product currently available.
New Zealand Customer Care Centre, toll free - 0800 37 2273 Australian Customer Care Centre, Priority - 1300 650 590
Date of issue: May 2001 0800 FP CARE Part No. 541024 D
www.fisherpaykel.com
 Loading...