

Page 1
H2b
H2i
su pp o r t@ f i n ge r t ec . c o m
H2b
Quick Start Guide
Page 2
• H2b
Reset
N
u
m
L
o
c
k
Ho
m
e
P
gU
p
P
g
D
n
D
e
l
E
n
t
e
r
In
s
E
n
d
B
a
c
k
s
p
a
c
e
7
/
-
+
4
1
0
8
5
2
9
6
3
.
H2i
su pp o r t@ f i n ge r t ec . c o m
H2b
ENGLI SH
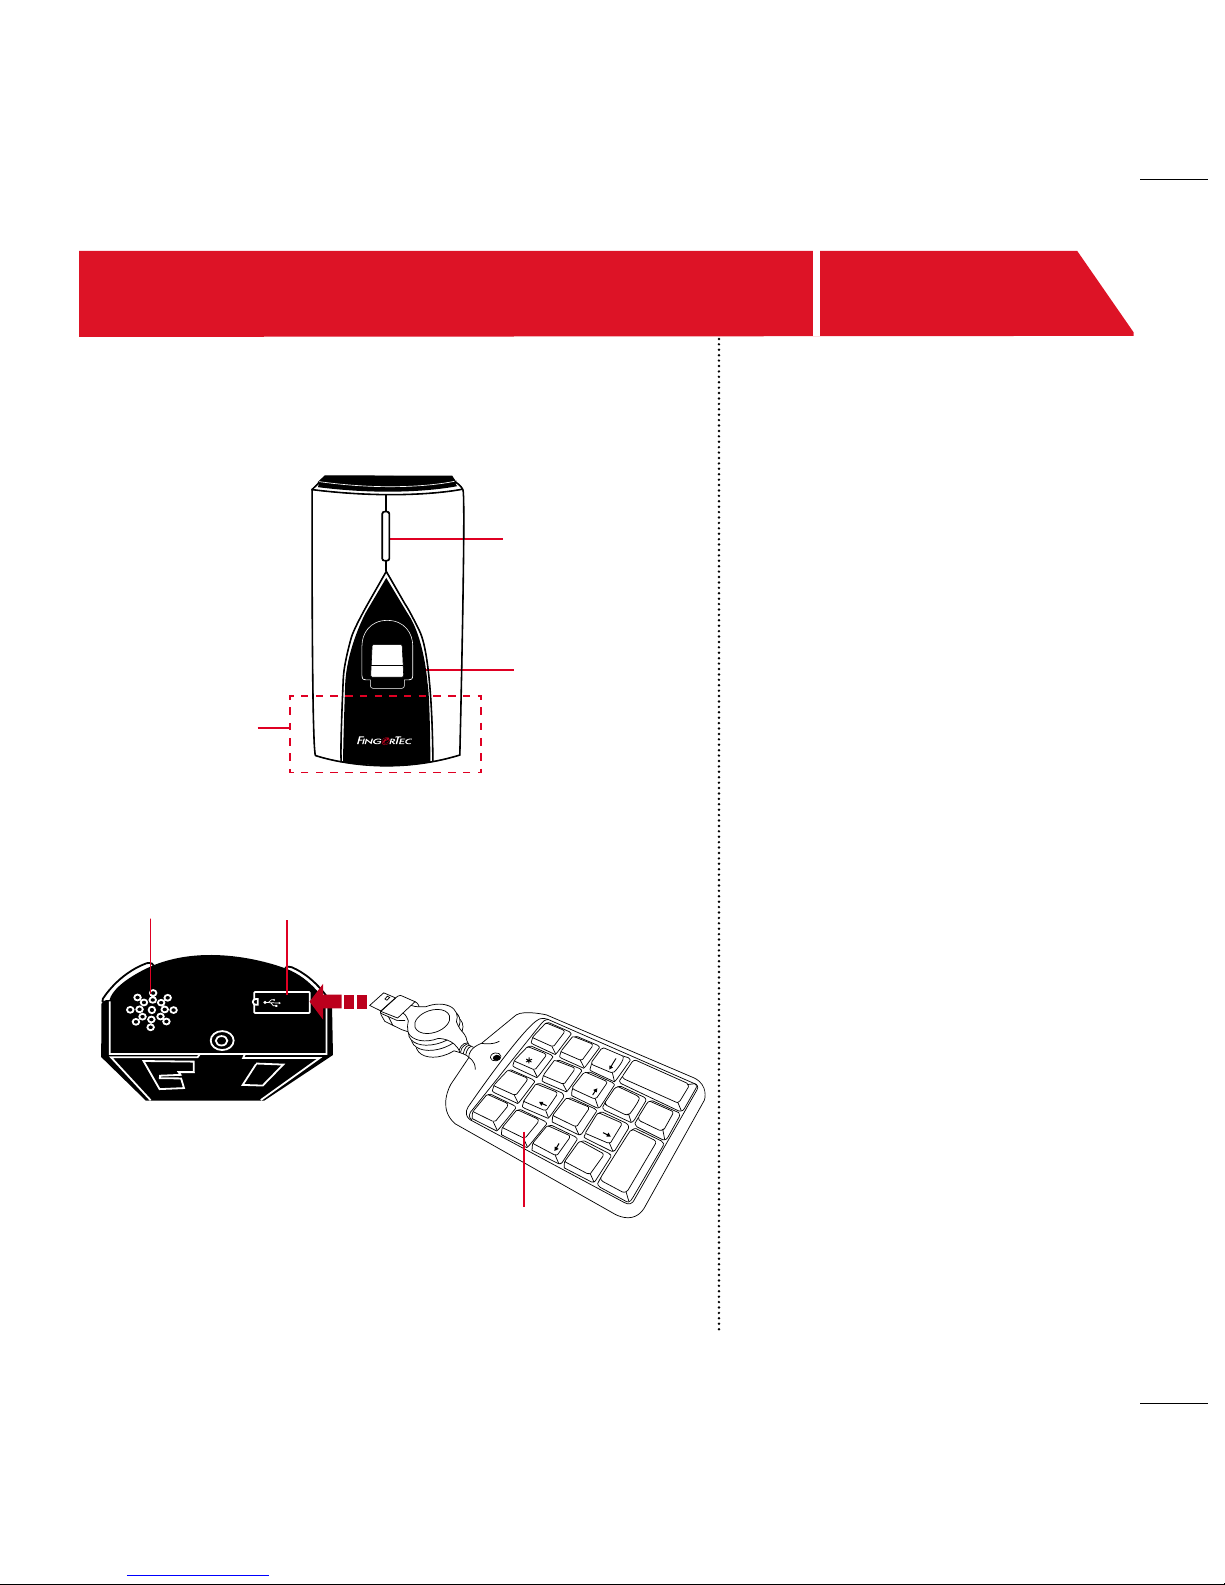
Terminal Overview
L.E.D Display
RFID Card
Induction
Area
Quick Start Guide
The Quick Start Guide is intended to provide the user with simple instructions on how to setup
the terminal date/time and communication as well as to perform
fingerprint and card enrollment
and verification. For more details
on other topics of terminal management, refer to the terminal’s
hardware user manual.
Fingerprint
Sensor
USB Port &
Reset button
Speaker
Keypad
Page 3

1
3
5
4
2
Enrolling Fingerprints
1. Wave the administrator card. When the
voice guide “Register user. Please press
your finger or wave your card” is emit-
ted, place your finger on the terminal.
Repeat 2 more times, according to the
voice guide.
Setting the Date and Time
The date and time settings for H2b has
to be set via the software. Refer to the H2b
hardware manual for instructions.
Enrolling Cards
1. Wave the administrator card. When the
voice guide “Register user. Please press
your finger or wave your card” is emit-
ted, wave the card at the induction
area on the terminal.
2. The terminal will read the card and an
-
nounce the User ID.
3. The message
“Registration is successful. Register, please press your finger
or place your card”. Repeat enrollment
Communication Settings
The communication settings must be
done via the software , or by using the
numeric keyboard that comes with the
terminal. Refer to the H2b hardware manual
for further instructions.
Enrolling the Administrator
Card
1. Turn on the terminal. The green light
will be blinking fast, and the instruc
tions “Please register administrator
card” will be heard.
2. Wave the selected card at the termi
nal. The terminal will beep once with a
voice guide “Registration is successful” ,
and return to verification mode.
2. The voice guide will then announce the
User ID, and emit the message “Registra-
tion is successful. Register, please press
your finger or place your card” .
3. Repeat enrollment with another finger
print or card for the same user, or wave
the administrator card to end the process.
Page 4
1
2
3
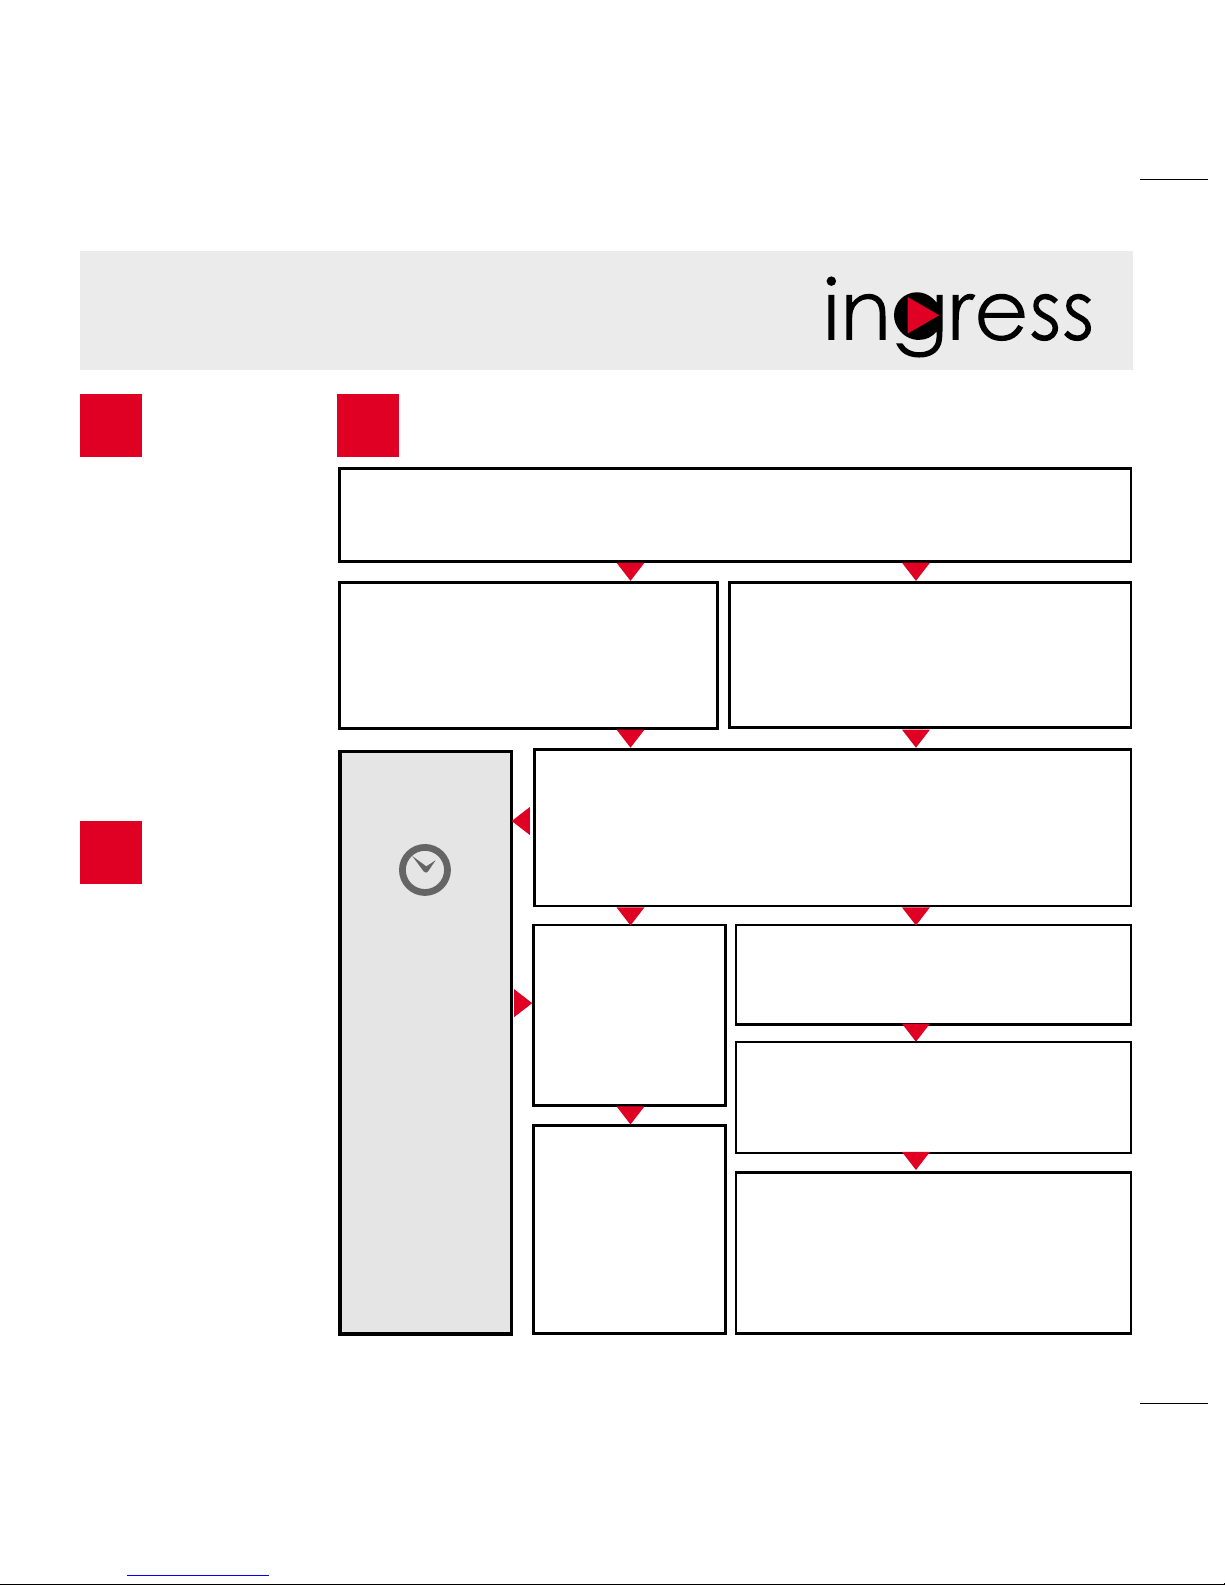
Software Roadmap
Installation
The FingerTec
Ingress software
installer is available
in a DVD that comes
with all FingerTec
terminals. Complete
the installation.
Online Activation
Use the terminal’s
serial number to
activate your
software online.
Contact your local
reseller or support@
fingertec.com
if you require offline
software activation.
System Overview
Real Time
Monitoring
In/Out
Records
Monitor
transactions
that occur in
the terminals
in a real-time
manner.
User’s Management
Add, delete, edit and manage user information and transaction logs.
Download attendance and In/
Out movement records from terminals
Retrieve the transaction logs and access reports stored in the
terminals into the server. In/Out movement records are only
available for FingerTec access control models.
Access Control Setup
Set up access restrictions and
door lock settings for each group
and user.
Attendance Calculation Setup (Optional)
Attendance rules and calculation
formulas must be determined out to
generate correct attendance reports.
Viewing In /
Out records
Review access
records and
monitor staff
movement.
Check and edit attendance records
Review the records and edit / insert /
check for missing records.
Generating access
control reports
Generate
professional and
presentable access
control / security
reports.
Generating attendance reports
Generate professional and presentable
reports for analysis.
Export attendance records for
payroll or 3rd party software
Integrate the attendance records
retrieved from FingerTec terminals to a
relevant 3rd party software.
Page 5

All complete hardware and software user guides are available in the FingerTec DVD and
downloadable online at http://user.fingertec.com
© 2017 Timetec Computing Sdn Bhd. All rights reserved • 052017
 Loading...