

Page 1
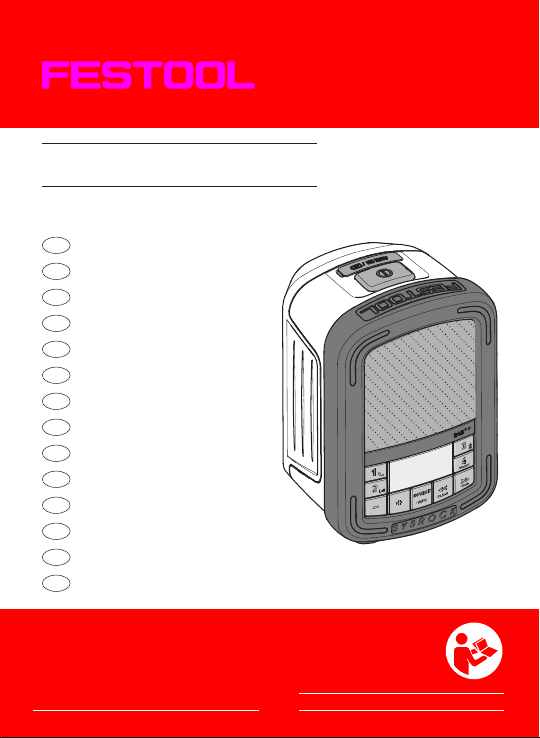
SYSROCK BR 10 DAB+
D
Betriebsanleitung
GB
Instruction manual
F
Manual d‘instruction
E
Manual de instrucciones
I
Istruzioni per l‘uso
NL
Gebruiksaanwijzing
S
Arbetsråd
FIN
Työohjeita
DK
Arbejdshenvisninger
N
Arbeidshenvisninger
709406_002/ 11.2016/ KLEN/ EX
P
Instruções de serviço
RUS
Производственные указания
CZ
Pracovní pokyny
PL
Wskazówki obsługi
www.festool.com
Festool GmbH
Wertstraße 20
D-73240 Wendlingen
www.festool.com/REACh
Page 2
1-2
1-1
1-3
1-4
1-5
1-6
1-10
1-7
1-8
1-9
d e
DAB
14:15
c
b
FM
AUX
Radio(FM/DAB)
Bluetooth
AUX
a
f
g
h
k j i
Page 3
2B
2A
1
2
2-1
2
PRESS
1
Page 4
D BR 10 DAB+
Originalbetriebsanleitung
Die angegebenen Abbildungen befinden sich am Anfang der Betriebsanleitung.
1Symbole
Symbol Bedeutung
Warnung vor allgemeiner
Gefahr
Warnung vor Stromschlag
Betriebsanleitung,
Sicherheitshinweise
lesen!
Nicht in den Hausmüll
geben.
Nicht Kippen!
Nicht bei voller Lautstärke betreiben!
2 Sicherheitshinweise
1. Lesen Sie diese Anweisungen.
2. Bewahren Sie diese Anleitung
auf.
4
3. Beachten Sie alle Warnungen.
4. Befolgen Sie alle Anweisungen.
5. Verwenden Sie dieses Gerät nicht
in der Nähe von Wasser.
6. Reinigen Sie dieses Gerät nur mit
einem trockenen Tuch.
7. Nicht in der Nähe von Wärmequellen wie Heizkörpern, Wärmespeichern, Öfen oder anderen
Geräten (einschließlich Verstärkern), die Wärme erzeugen können, aufstellen.
8. Schützen Sie die Kabel und den
Netzadapter vor mechanischen
Belastungen (Einklemmen, u.ä.),
insbesondere am Stecker und der
Steckdose und dem Anschluss,
an dem das Kabel aus dem
Netzadapter heraustritt.
9. Verwenden Sie nur vom Hersteller angegebene Zusatzgeräte/Zubehör.
10. Verwenden Sie nur
Ständer, Stative, oder
Halter, die vom Hersteller angegeben
oder mit dem Gerät verkauft werden. Wenn ein Kabel benutzt wird,
seien Sie vorsichtig beim Bewegen des Kabels/Gerätes, um Verletzungen durch Umkippen zu
vermeiden.
Page 5

11. Ziehen Sie den Netzstecker während eines Gewitters oder bei
Nichtverwendung über einen längeren Zeitraum.
12. Überlassen Sie alle Wartungsarbeiten qualifiziertem Servicepersonal. Eine Wartung ist
notwendig, wenn das Gerät in irgendeiner Weise beschädigt wurde, wie zum Beispiel, wenn der
Netzadapter beschädigt ist, Flüssigkeit verschüttet wurde, das
Gerät Regen oder Feuchtigkeit
ausgesetzt wurde, nicht normal
funktioniert oder heruntergefallen ist.
13. Zur Vermeidung von Feuer und
Stromschlag setzen Sie das Gerät
nicht Regen oder Feuchtigkeit
aus.
14. Die Kennzeichnung von Stromschlaggefahr und entsprechende
grafische Symbole sind gegebenenfalls auf der Unterseite des
Gerätes angegeben.
15. Das Gerät darf nicht mit Flüssigkeiten benetzt oder bespritzt
werden. Es dürfen keine mit Flüssigkeiten gefüllten Gegenstände,
auf das Gerät gestellt werden.
16. Der Netzadapter sollte in der
Nähe des Radios und leicht zugänglich eingesteckt werden. Um
BR 10 DAB+ D
im Notfall das Radio vom Strom
zu trennen, Netzadapter aus der
Steckdose ziehen.
17. Wenn der Netzadapter bzw. Gerätestecker zum Ausschalten verwendet werden soll, muss dieser
frei zugänglich bleiben.
18. Den Akkupack nicht erhöhten
Temperaturen, wie z.B. Sonne,
Feuer oder ähnliches aussetzen.
Für weitere Informationen die Sicherheitshinweise des Akkupacks lesen.
19. Um mögliche Hörschäden zu vermeiden, stellen Sie das
Radio nicht über längeren Zeitraum auf erhöhte Lautstärke.
VORSICHT:
Zur Vermeidung von
Stromschlag, keine anderen Reparaturarbeiten verrichten, als die in dieser Betriebsanleitung beschrieben,
außer Sie sind dazu ausgebildet.
WARNUNG! Die Garantie erlischt,
wenn Sie das Radio-Gehäuse öffnen
oder andere Veränderungen an dem
Radio vornehmen!
5
Page 6

D BR 10 DAB+
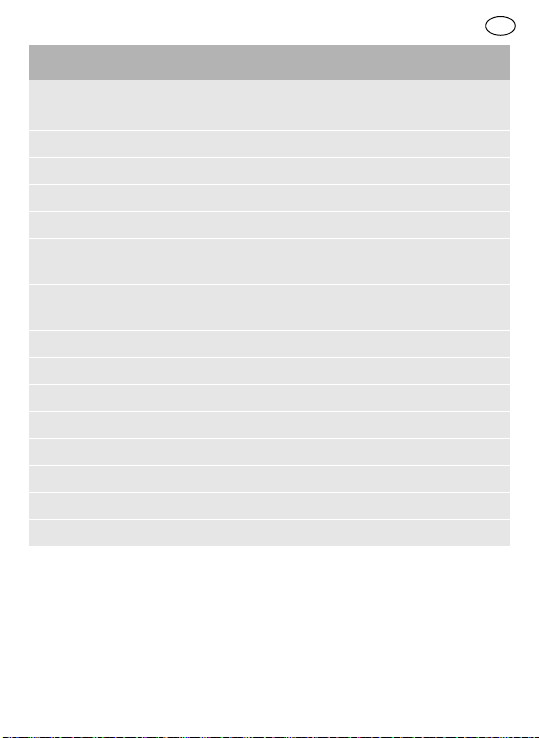
3 Technische Daten
Radio SYS ROCK BR 10 DAB+
Spannungsversorgung Netzadapter Ausgang: DC 19V/1.2A
zentraler positiver Pin
Akkupack 10.8 -18V
empfohlen: 18V
Frequenzbereich FM (UKW) 87.50 - 108 MHz
DAB 174.928 - 239.200 MHz
Bluetooth
Schaltkreis Lautsprecher 2.5" 8 Ω x1
Erlaubter Temperaturbereich -10 °C bis +45 °C
Abmessungen (B x H x
T)
Gewicht (ohne externen Akkupack) 0.7 kg
®
Version 4.1 EDR konform
Profile HFP, A2DP, AVRCP Profile
Umwandlungsleis-
tung max.
Umwandlungsbe-
reich max.
+4dBm Klasse 2 Ausgangs-
leistung
10 m (abhängig von Einsatz-
bedingungen)
Unterstützter codec SBC/ACC
Ausgangsleistung 19V:10W 3%THD
Eingangspol 3.5 mm Dia. (AUX IN)
USB-Anschluss 5V/1.2A
100 x 150 x 105 mm
6
Page 7

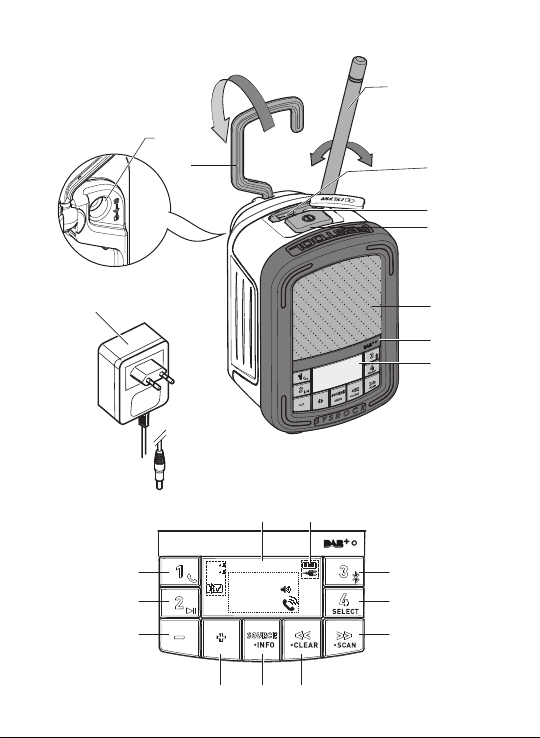
4 Geräteelemente
Radio - SysRock
[1-1]
Aufschiebbarer Deckel mit
Befestigungsbügel
[1-2]
Eingang für Netzadapter
[1-3]
Antenne
[1-4]
USB-Anschluss
[1-5]
AUX-Eingang (AUX-IN)
[1-6]
Ein/Aus-Taste
[1-7]
Lautsprecher
[1-8]
Eingebautes Mikrofon
[1-9]
Display
[1-10]
Netzadapter
[2-1]
Stativgewinde-Buchse UNC 1/
4"-20
Menütasten und Display
[a]
Lautstärkeregelung, leiser
[b]
Senderspeicher 2
Bluetooth Modus: Wiedergabe/
Pause
[c]
Senderspeicher 1
Bluetooth Modus: Anruftaste
[d]
Uhrzeit (verfügbar mit DAB und
FM RDS-CT)
[e]
Akkupackstatus-Anzeige
BR 10 DAB+ D
[f]
Senderspeicher 3
Bluetooth Modus: Koppeln
[g]
Senderspeicher 4
Auswahl-/Bestätigungstaste
(SELECT)
[h]
DAB/FM Modus: Sendersuchlauf - aufwärts
Bluetooth Modus: nächster
Titel
DAB Modus: Sendersuche
(SCAN)
[i]
DAB/FM Modus: Sendersuchlauf - abwärts
Bluetooth Modus: vorheriger
Titel
DAB Modus: Löschtaste
(CLEAR)
[j]
Quelle (SOURCE)
DAB Modus: Infotaste (INFO)
[k]
Lautstärkeregelung, lauter
5 Inbetriebnahme
5.1 Mit Netzadapter benutzen
Netzadapter
Eingang
dose stecken.
WICHTIG:
Der Netzadapter dient dazu das Ra-
dio mit der Steckdose zu verbinden.
Der Netzadapter des Radios muss
[1-2]
[1-10]
in
und Steck-
7
Page 8
D BR 10 DAB+
während des Gebrauchs frei zugänglich bleiben, damit das Radio ausgeschaltet werden kann. Der Netzadapter sollte nach Gebrauch aus der
Steckdose entfernt werden.
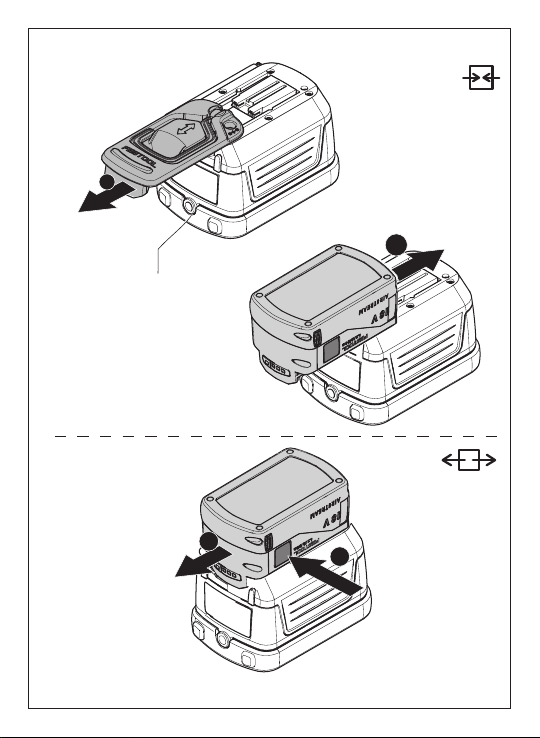
5.2 Mit externem Festool Akkupack benutzen [2A] + [2B]
Das Gerät kann mit jedem Festool
Akkupack der Baureihe BP, BPC und
BPS betrieben werden.
VORSICHT
immer vollständig ein. Wenn nicht,
kann der Akkupack aus der Akkuschnittstelle herausfallen und Sie
oder umstehende Personen verletzen.
VORSICHT
nicht mit Gewalt ein. Wenn der Akkupack nicht einfach eingeschoben
werden kann und einrastet, ist er
nicht korrekt aufgesetzt.
VORSICHT
tung empfehlen wir einen
Akkupack
5.3 Ein-/Ausschalten
Setzen Sie den Akkupack
Setzen Sie den Akkupack
Für eine optimale Leis-
zu verwenden.
Zum Einschalten: Ein/Aus-Taste
[1-6]
drücken.
18V Li-Ion
Das Radio ist betriebsbereit.
Zum Ausschalten: Ein/Aus-Taste
[1-6]
drücken.
5.4 Lautstärke einstellen
Lautstärkeregelung
[k]
wünschte Lautstärke einzustellen.
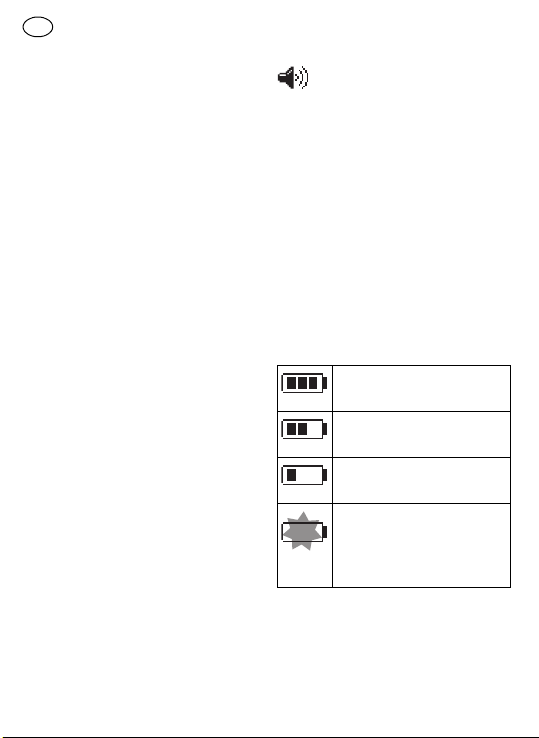
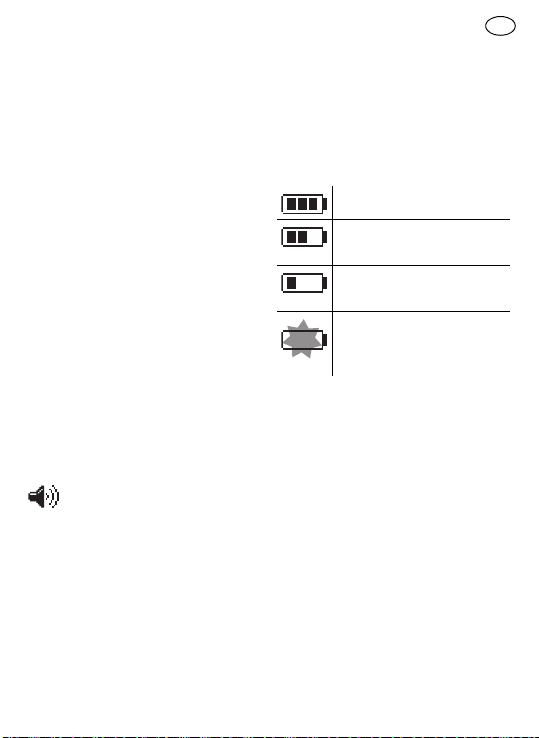
5.5 Akkupack-Status prüfen
Um den aktuellen Akkupack-Status
anzuzeigen, Ein/Aus-Taste
cken, um das Radio einzuschalten.
Die Akkupack-Statusanzeige
zeigt den aktuellen Akkupack-Status
(nur mit Li-Ion Akkupack).
5.6 Radio verwenden - DAB
drücken, um die ge-
Für eine optimale Musikqualität
in Verbindung mit einem externen Abspielgerät, Lautstärke
am externen Abspielgerät auf
maximal 70% einstellen.
Akkupack ist vollständig
geladen
Akkupack ist teilweise
geladen
Schwacher Akkupackstatus – laden empfohlen
Akkupack kann jederzeit
vollständig entladen sein,
sofort Akkupack austauschen
Antenne
[1-3]
ausrichten.
Ein/Aus-Taste
das Radio einzuschalten.
[1-6]
[a]
und
[1-6]
drü-
[e]
drücken, um
8
Page 9

Quelle (SOURCE)
der DAB Modus ausgewählt ist.
[j]
drücken bis
Wenn das Radio zum ersten Mal benutzt wird, startet es einen automatischen DAB-Sendersuchlauf (Full
Scan). Wenn das Radio bereits benutzt wurde, wird der zuletzt verwendete Sender ausgewählt.
Werden neue Sender während des
Sendersuchlaufs ermittelt, erhöht
sich die Anzahl der Sender und die
neuen Sender werden zur Senderliste hinzugefügt. Ein Balken auf dem
Display zeigt den Fortschritt des Sendersuchlaufs an.
Wenn der Sendersuchlauf abgeschlossen ist, wird der erste Sender
ausgewählt (in alphanumerischer
Reihenfolge 0…9…A…Z).
Das Display zeigt <No stations found>
an, wenn keine Sender gefunden
wurden.
Sind keine Signale vorhanden, Standort des Radios verändern, z.B. in
Fensternähe stellen, um einen besseren Empfang zu erhalten.
Sender auswählen - DAB
Ein/Aus-Taste
das Radio einzuschalten.
Quelle (SOURCE)
der DAB Modus ausgewählt ist.
Das Display zeigt den aktuell gewählten Radiosender.
[1-6]
drücken, um
[j]
drücken bis
BR 10 DAB+ D
Sendersuchlauf
um die Liste der verfügbaren Sender zu durchsuchen.
Auswahl-/Bestätigungstaste
(SELECT)
wünschten Sender auszuwählen.
Eventuell zeigt das Display
<Connecting…> an, während das
Radio den neuen Sender sucht.
Gewünschte Lautstärke mit der
Lautstärkeregelung
stellen.
HINWEIS:
te Sender nicht gefunden wird,
Standort des Radios verändern,
um einen besseren Empfang zu
erhalten.
Sekundärdienste - DAB
Bestimmte Radiosender bieten ein
oder mehrere Sekundärdienste an.
Falls ein Radiosender einen Sekundärdienst anbietet, erscheint auf dem
Display diese Information unter dem
Sendernamen.
[i], [h]
drücken,
[g]
drücken, um den ge-
[a], [k]
Falls der ausgewähl-
ein-
Die meisten Sekundärdienste werden
nicht ständig gesendet. Falls der
ausgewählte Dienst nicht verfügbar
ist, sendet das Radio den Primärdienst.
Display Modus - DAB
Im DAB Modus verfügt das Radio
über mehrere Display-Funktionen:
9
Page 10
D BR 10 DAB+
Infotaste (INFO)
kunden drücken und halten bis
<DAB Info> auf dem Display erscheint. Dann Sendersuchlauf
[h]
drücken und loslassen, um die
verschiedenen Anzeige-Modi zu
sehen.
a. Signalstärke
b. Prog r a m m t y p
c. Multiplexname
d. Frequenz Zeigt die aktuelle
10
[j]
mehr als 2 Se-
Zeigt die Signalstärke des Radioempfangs an. Ein
freies, nicht ausgefülltes Rechteck,
gibt einen minimalen Signalpegel an,
der für einen zufriedenstellenden Empfang erforderlich ist.
Zeigt das Genre oder
den Stil der Musik
an, z. B. Pop, Klassik, Nachrichten
usw.
Zeigt den Multiplexnamen des aktuellen Senders an.
Frequenz an.
e. Bitrate /
Audio-Typ
[i]
,
f. Datum Zeigt das aktuelle
g. DL Plus
Informationen
h. Scrollbarer Text
(DLS)
Neue Sender finden - DAB
Im Laufe der Zeit können neue Sender verfügbar sein. Um neue Sender
zu finden:
Ein/Aus-Taste
das Radio einzuschalten.
Quelle (SOURCE)
der DAB Modus ausgewählt ist.
Zeigt die digitale
Bitrate und den
Audiotyp für die
aktuell eingestellten DAB Sender an.
Datum an.
Einige Stationen
können zusätzlich zu
den regulären Informationen andere
programmbezogene
Informationen für
das Display bereitstellen. Falls keine
Zusatzinformationen vorhanden sind,
erscheint die Nachricht <no DL+info>.
Zeigt verschiedene
Informationen an, z.
B. Künstlername/
Liedname, Telefonnummer, usw.
[1-6]
drücken, um
[j]
drücken bis
Page 11

Um die kompletten DAB-Frequenzen vollständig zu durchsuchen,
Sendersuche (SCAN)
und mehr als 2 Sekunden halten.
Werden neue Sender gefunden, erhöht sich die Anzahl der Sender
und die neuen Sender werden zur
Senderliste hinzugefügt. Ein Balken auf dem Display zeigt den Fortschritt der Sendersuche an.
Sender bereinigen - DAB
Wenn Sie Ihren Standort wechseln,
sind einige der aufgeführten Sender
möglicherweise nicht mehr verfügbar. Auch übertragen manche DAB
Dienste unregelmäßig oder wechseln
den Standort oder die Frequenz. Sender, die nicht gefunden werden oder
die für lange Zeit nicht empfangen
wurden, werden in der Senderliste
durch ein Fragezeichen markiert. Die
Bereinigungsfunktion (CLEAR)
löscht die markierten DAB Sender
von der Senderliste.
Ein/Aus-Taste
das Radio einzuschalten.
Quelle (SOURCE)
der DAB Modus ausgewählt ist.
Löschtaste (CLEAR)
und mehr als 2 Sekunden halten
bis <DAB> auf dem Display erscheint.
[1-6]
drücken, um
[j]
drücken bis
[h]
drücken
[i]
drücken
[i]
BR 10 DAB+ D
Sendersuchlauf
und loslassen, um <Clear> oder
<Back> auszuwählen. Falls Sie die
Bereinigungsfunktion nicht ausführen wollen, wählen Sie <Back>
aus und drücken Sie die Auswahl-/
Bestätigungstaste (SELECT)
um die Einstellung zu bestätigen.
Um die Bereinigungsfunktion auszuführen, wählen Sie <Clear>, und
drücken Sie die Auswahl-/Bestätigungstaste (SELECT)
den Einstellungen zu gelangen.
Drücken Sie die Sendersuchlauftasten
<NO> auszuwählen. Bestätigen Sie
<YES> durch Drücken der Auswahl-/Bestätigungstaste (SELECT)
[g]
. Die Bereinigungsfunktion startet anschließend. Falls Sie die Bereinigungsfunktion nicht ausführen wollen, wählen Sie <NO> und
bestätigen Sie mit der Auswahl-/
Bestätigungstaste (SELECT)
Einstellung.
HINWEIS:
ortwechsel sollte auch eine Su-
che nach neuen Sendern durch-
geführt werden (siehe Abschnitt
'Neue Sender finden').
[i], [h]
[i], [h]
, um <YES> oder
Nach einem Stand-
drücken
[g]
, um zu
[g]
[g]
die
,
11
Page 12

D BR 10 DAB+
5.7 Radio verwenden - FM (UKW)
Antenne
[1-3]
ausrichten.
Quelle (SOURCE)
rücken bis FM Modus
ausgewählt ist.
Automatische Sendersuche FM
(UKW)
Sendersuchlauf
und halten (~2s) um die automatische Sendersuche zu starten.
[i], [h]
[j]
drücken
Die Sendersuche wird automatisch
beendet, wenn ein Sender mit ausreichender Signalstärke gefunden wurde.
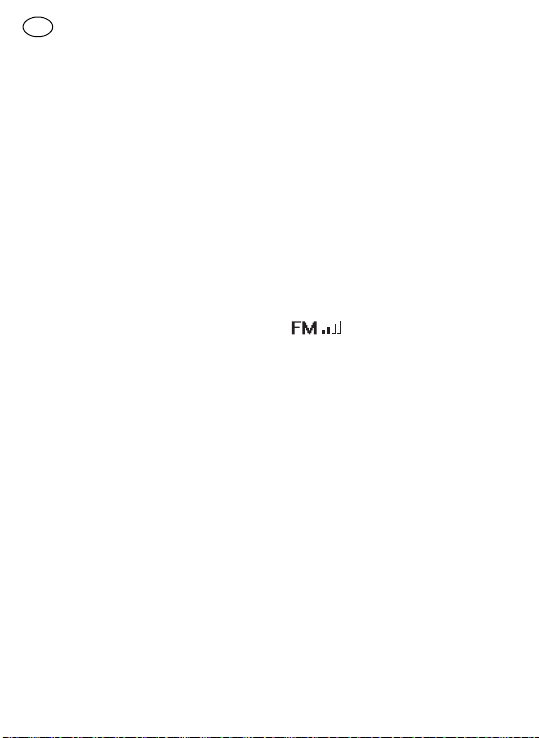
Das Display zeigt die Frequenz an.
Wenn die Signalstärke stark genug
ist und RDS-Informationen verfügbar
sind, zeigt das Display den Sendername, den Radio-Text und die Uhrzeit
an.
Andere Sender finden
Sendersuchlauf
beschrieben drücken.
[i], [h]
wie oben
Am Ende des Frequenzbandes
springt der Suchlauf zum gegenüberliegenden Anfang des Frequenzbandes.
Bei schlechtem Empfang, Antenne neu ausrichten.
Manuelle Sendersuche - FM (UKW)
Sendersuchlauf
bis zur Erreichen der gewünschten
Frequenz drücken.
[i], [h]
mehrmals
Die Frequenzschritte betragen
0,1 MHz.
5.8 Senderspeicher verwenden
Beliebte DAB/FM Radiosender können im Senderspeicher gespeichert
werden. Es stehen jeweils vier Senderspeicher zur Verfügung. Sie können in jedem Modus verwendet werden.
Ein/Aus-Taste
das Radio einzuschalten.
Senderspeicher
[g]
drücken und halten (~2s), bis
auf dem Display <Saved> angezeigt
wird.
[1-6]
drücken, um
[b], [c], [f]
oder
Unter dem gewählten Senderspeicher wird der Sender gespeichert.
Das Display zeigt die Senderspeicher-Nummer P1 bis P4.
Für weitere Senderspeicher diesen
Schritt wiederholen. Auf die gleiche
Weise können die Senderspeicher
mit einem neuen Sender überschrieben werden.
12
Page 13
Senderspeicher aufrufen
Den gewünschten Senderspeicher
[b], [c], [f]
zum gespeicherten Sender zu gelangen.
5.9 Uhrzeit - automatisch aktuali-
Das Radio aktualisiert die Uhrzeit
mithilfe des DAB oder FM RDS-CT Signals automatisch. Nach einem
Stromausfall aktualisiert das Radio
die Urzeit beim nächsten Einschalten.
Wenn Sie die Uhrzeit über die FM
RDS Funktion empfangen (Radio
Data System), synchronisiert das Radio die Uhrzeit und zeigt diese im Display
wählt ist, der RDS-Informationen mit
CT-Signalen zur Verfügung stellt. Bei
ausreichender Signalstärke, wird die
Uhrzeit innerhalb von ein bis zwei Minuten aktualisiert. Die Radio-Uhrzeit
ist die nächsten 24 Stunden aktuell,
wenn das Radio mit RDS-CT synchronisiert wird.
oder
[g]
drücken um
siert
HINWEIS:
Signal empfängt, positionieren
Sie es an einer anderen Stelle.
[d]
Wenn kein RDS-Signal empfangen wird, wird die Uhrzeit nicht
angezeigt.
Falls das Radio kein
an, wenn ein Sender ausge-
[d]
BR 10 DAB+ D
5.10 Musik hören via Bluetooth
Streaming
Das SysRock und das Bluetooth Gerät müssen miteinander gekoppelt
werden, um Musik über das Bluetooth Gerät wiederzugeben. Durch diese
“Kopplung” können sich zwei Geräte
gegenseitig erkennen.
Erste Verbindung des Bluetooth Gerätes
Source/Quelle
Bluetooth Modus auszuwählen.
[j]
drücken, um den
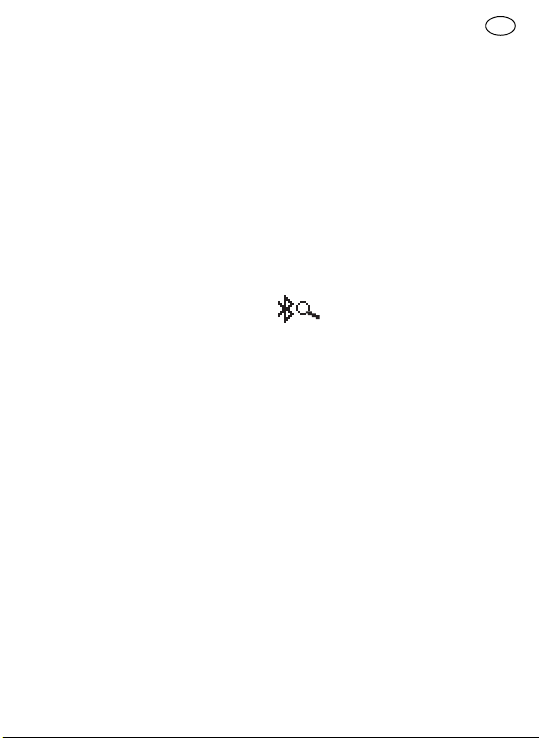
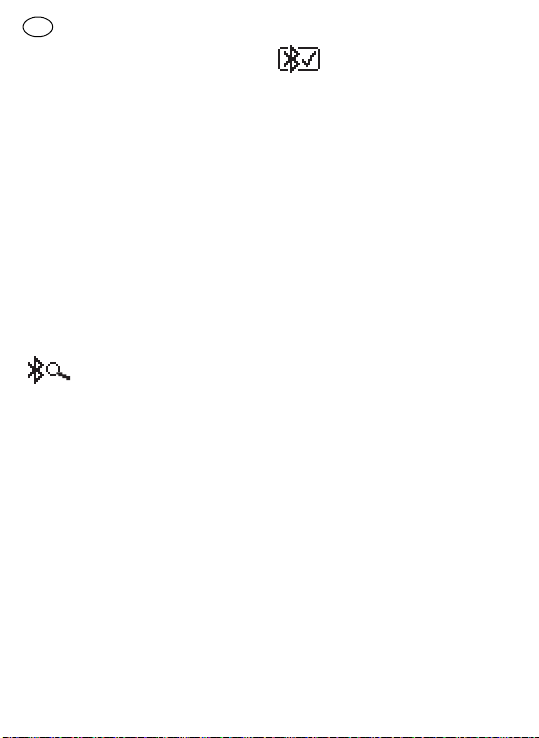
Das Bluetooth Symbol blinkt
auf dem Display und zeigt an,
dass das SysRock erkannt
werden kann.
Bluetooth auf dem Bluetooth Gerät
aktivieren, wie es in der Betriebsanleitung des Bluetooth Gerätes
erklärt ist.
Bluetooth Geräteliste anzeigen
und das Gerät <SysRock DAB>
auswählen. Bei einigen Mobiltelefonen (die mit älteren Versionen
als BT2.1 Bluetooth standard) ausgestattet sind, muss ein Passwort
("0000") eingegeben werden.
13
Page 14

D BR 10 DAB+
Wenn die Bluetooth Verbindung aktiv ist, wird das
Bluetooth Symbol mit einem
Haken daneben angezeigt. Jegliche
Musik kann nun auf dem Bluetooth
Gerät ausgewählt und wiedergegeben werden.
HINWEIS:
– Wenn zwei Bluetooth Geräte erst-
malig gekoppelt werden sollen
und gleichzeitig die Verbindung
zum SysRock suchen, wird auf
beiden Geräten das SysRock zur
Verbindung angezeigt. Nach der
Verbindung mit einem Gerät wird
das SysRock nicht mehr in der
Verbindungsliste des anderen
Gerätes angezeigt.
– Wenn sich das Bluetooth Gerät
außerhalb der Reichweite befindet, wird die Verbindung zum SysRock zeitweise unterbrochen.
Das SysRock wird die Verbindung
automatisch aktivieren, sobald
das Bluetooth Gerät wieder in
Reichweite ist. In dem Zeitraum
der Unterbrechung kann kein anderes Bluetooth Gerät mit dem
SysRock gekoppelt werden.
–Wenn <SysRock DAB> in der Ge-
räteliste des Bluetooth Gerätes
erscheint, aber eine Verbindung
nicht möglich ist: Gerät von der
Liste löschen und die Verbindung
14
des Bluetooth Gerätes mit dem
SysRock erneut, wie oben beschrieben, ausführen.
– Die wirksame Reichweite zwi-
schen dem SysRock und dem
Bluetooth Gerät beträgt circa
10 Meter (30 Fuss). Jegliches
Hindernis zwischen SysRock und
Bluetooth Gerät kann die Reichweite vermindern.
– Die Bluetooth Konnektivitätsleis-
tung kann je nach angeschlossem Bluetooth Gerät variieren.
Bitte beachten Sie die Bluetooth
Funktionen des zu gekoppelten
Gerätes vor dem Anschluss an
das SysRock. Möglicherweise
werden nicht alle Funktionen auf
einigen gekoppelten Bluetooth
Geräten unterstützt.
Audio-Dateien in Bluetooth Modus
wiedergeben
Wenn das SysRock erfolgreich mit
dem gewählten Bluetooth Gerät gekoppelt ist, kann die Musik mit den
Bedienfunktionen des gekoppelten
Bluetooth Gerätes wiedergegeben
werden.
Sobald die Wiedergabe startet, gewünschte Lautstärke an der Lautstärkeregelung
Rock oder an dem Bluetooth Gerät
einstellen.
[a], [k]
am Sys-
Page 15

Wiedergabe/Pause und Titelwechsel an den Bedienelementen des
gekoppelten Bluetooth Gerätes
auswählen. Oder mit den Tasten
am SysRock: Wiedergabe/Pause
[b]
, nächster Titel
[i]
.
Titel
[h]
, vorheriger
Die aktuell wiedergegebene Titelinformation (z.B. Titelname/ Interpret)
wird als durchlaufender Text unten
auf dem Display angezeigt.
HINWEIS:
– Nicht alle Anwendungen und Ge-
räte reagieren auf diese Steuerelemente.
– Einige Mobiltelefone trennen sich
vorübergehend vom SysRock,
wenn Anrufe ein- oder ausgehen.
Einige Mobilfelefone schalten auf
stumm, wenn Kurzmitteilungen,
E-Mails oder ähnliches eingehen.
Ein solches Verhalten ist eine
Funktion des gekoppelten Bluetooth Gerätes und zeigt keine Störung des SysRocks an.
Von bereits gekoppelten Geräten
wiedergeben
Dieses SysRock kann bis zu acht gekoppelte Geräte speichern. Wenn der
Speicher diese Anzahl übersteigt,
wird das früheste Gerät überschrieben. Wenn das Bluetooth Gerät bereits mit dem SysRock gekoppelt war,
BR 10 DAB+ D
speichert das SysRock dieses Bluetooth Gerät und versucht sich mit
dem Gerät, das zuletzt angeschlossen war zu koppeln. Wenn das zuletzt
gekoppelte Bluetooth Gerät nicht
verfügbar ist, versucht sich das SysRock mit dem vorletzten Gerät zu
koppeln, und so weiter.
Speicher der gekoppelten Bluetooth
Geräte löschen
Um den Bluetooth Geräte-Speicher im SysRock zu löschen: Speichertaste 4
bis <BT-Reset> auf dem Display
angezeigt wird. Das SysRock
schaltet automatisch aus, nachdem der Speicher gelöscht wurde.
Gekoppeltes Bluetooth Gerät trennen
Quelle (SOURCE)
einen anderen Modus als Bluetooth Modus auswählen.
Alternativ, Koppeln
s) um die Verbindung zu trennen.
Oder Bluetooth-Verbindung auf
dem Bluetooth-Gerät beenden.
[g]
drücken und halten
[j]
drücken und
[f]
drücken (~2
Wenn das Bluetooth Gerät im Bluetooth Modus getrennt wird, beginnt
das Bluetooth Symbol auf dem Display erneut zu blinken und zeigt an,
dass das SysRock wieder für eine
neue Verbindung verfügbar ist.
15
Page 16

D BR 10 DAB+
Freisprecheinrichtung verwenden
Dieses SysRock kann als
Freisprecheinrichtung für
ein Mobiltelefon verwendet
werden. Wenn Musik über das SysRock wiedergegeben wird und am
Mobiltelefon ein Anruf eingeht, wird
die Musik automatisch unterbrochen,
damit Sie den Anruf beantworten
können.
Wenn während der Wiedergabe von
Musik über das SysRock ein Anruf
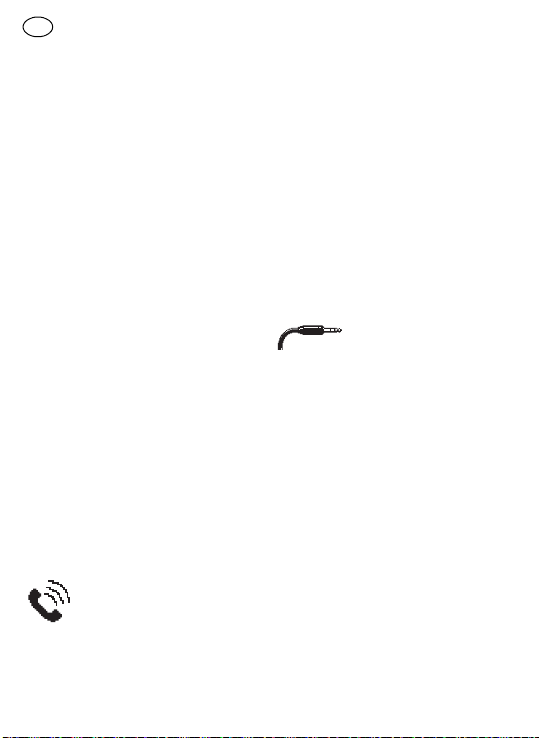
eingeht, kurz die Anruftaste
drücken, um den Anruf zu beantworten.
In Richtung des internen Mikrofones
[1-8]
sprechen.
Achtung: eine sehr hohe Lautstärke am SysRock kann die
Soundqualität beeinträchtigen.
Anruftaste
sen um den Anruf zu beenden.
5.11 AUX-Eingang (AUX-IN)
Ein 3,5 mm AUX-Eingang
oberen Teil des SysRock angebracht
und ermöglicht die Wiedergabe eines
Audio-Signals von einem externen
Audio-Gerät, wie z.B. einem MP3oder CD-Player.
Am AUX-Eingang
oder Mono Audio-Quelle (wie MP3oder CD-Player) anschließen.
[c]
drücken und loslas-
[1-5]
[c]
[1-5]
ist am
eine Stereo
Source/Quelle
AUX-Modus zu wählen.
Lautstärke am MP3- oder CDPlayer (max. 70%) einstellen, um
ein ausreichendes Signal sicherzustellen, anschließend die Lautstärke am SysRock für komfortables
Hören anpassen.
Verwenden Sie niemals den
AUX-Eingang im Regen oder in
feuchten Bedingungen um zu
verhindern, dass Feuchtigkeit
in das SysRock eindringt. Halten Sie gerade bei solchen Bedingungen die Gummiabdeckung auf der Rückseite fest
geschlossen.
5.12 Smartphone am USB-Anschluss laden
Ihr Radio verfügt über einen USB-Anschluss zum Aufladen eines Smartphones oder von ähnlichen Geräten.
Die Ladezeit kann unterschiedlich
lang sein und in einigen Fällen auch
mehr Zeit als das Laden mit der Ladestadion des Smartphoneherstellers benötigen. Das Radio kann das
Smartphone oder ähnliche Geräte laden, wenn es eingeschaltet und im
DAB/FM Radiomodus, Bluetooth Modus oder AUX Modus ist.
[j]
drücken um den
16
Page 17
Smartphone mit dem USB-Anschluss
[1-4]
verbinden.
Das Smartphone beginnt zu laden.
Nach dem Aufladen, das USB-Ladekabel entfernen.
HINWEIS:
biltelefonen (z. B.) oder anderen
Geräten während des Hörens
von DAB/FM-Sendern kann die
Klangqualität beeinträchtigen.
VORSICHT
– Die Ladefunktion des SysRock-
DAB funktioniert bei manchen
USB-Geräten nicht.
– USB-Kabel nach dem Laden oder
wenn es nicht benutzt wird, entfernen.
– USB-Anschluss nicht mit der
Steckdose verbinden. Andernfalls
besteht Feuergefahr. Der USBAnschluss dient nur zum Laden
von Niederspannungsgeräten
(5V/ 1A).
– Keinen Nagel, Draht usw. in den
USB-Anschluss stecken. Andernfalls kann ein Kurzschluss zu einem Defekt führen.
– USB-Anschluss des Radios nicht
mit dem USB-Anschluss des
Computers verbinden, da dies einen Schaden an den Geräten verursachen kann.
oben auf dem Radio
Das Laden von Mo-
BR 10 DAB+ D
– USB-Anschluss niemals bei Re-
gen oder Feuchtigkeit verwenden, um Eindringen von
Feuchtigkeit in das Radio zu verhindern.
– Verschließen Sie den USB-An-
schluss nach Gebrauch wieder
mit der Schutzkappe, um Verschmutzung zu vermeiden.
5.13 Aufstellmöglichkeiten
Befestigungsbügel [1-1]
Der aufschiebbare Befestigungsbügel ermöglicht das Aufhängen des
Gerätes an einem Gerüst oder ähnlichem.
Der Befestigungsbügel muss
zum Betrieb mit einem externen Festool Akkupack abgenommen werden
Stativ
An der Stativgewinde-Buchse
kann ein Standard-Fotostativgewinde
UNC 1/4"-20 aufgeschraubt werden.
[2A]
.
[2-1]
6 Wartung und Pflege
Kundendienst und Reparatur
nur durch Hersteller
oder durch Servicewerkstätten: Nächstgelegene
Adresse unter:
www.festool.com/service
17
Page 18
D BR 10 DAB+
EKAT
4
Nur original Festool Er-
5
satzteile verwenden! Be-
3
2
1
stell-Nr. unter:
www.festool.com/service
– Um Schäden zu verhindern, Dis-
play
[1-9]
und Lautsprecher
[1-7]
am Radio mit einem weichen, trockenen Tuch reinigen. Keine Lösungsmittel verwenden.
– Kontakte am SysRock und am Ak-
kupack sauber halten.
7 Umwelt
Gerät nicht in
den Hausmüll
werfen!
Geräte,
Zubehör und
Verpackungen
einer umweltge-
verwertung zuführen. Geltende nationale Vorschriften beachten.
Nur EU:
Gemäß Europäischer Richtlinie über Elektro- und ElektronikAltgeräte und Umsetzung in nationales Recht müssen verbrauchte Elektrowerkzeuge getrennt gesammelt
und einer umweltgerechten Wiederverwertung zugeführt werden.
Informationen zur REACh:
www.festool.com/reach
rechten Wieder-
Festool behält sich das Recht vor, die
Spezifikationen ohne vorherige Ankündigung zu ändern.
®
"Die Bluetooth
" Wortmarke und Logos sind eingetragene Warenzeichen der Bluetooth SIG, Inc. und jede
Verwendung dieser Marken durch die
Festool GmbH erfolgt unter Lizenz.
18
Page 19
Original operating manual
The specified illustrations appear at
the beginning of the Operating Instructions.
1Symbols
Symbol Significance
Warning of general danger
Risk of electric shock
Read operating instructions and safety notices!
Do not dispose of as
domestic waste.
Do not tip over!
Do not listen at high volume levels!
2 Safety instructions
1. Read these instructions.
2. Keep these instructions.
BR 10 DAB+ GB
3. Heed all warnings.
4. Follow all instructions.
5. Do not use this device near water.
6. Clean only with dry cloth.
7. Do not install near any heat
sources such as radiators, heat
registers, stoves, or other device
(including amplifiers) that produce heat.
8. Protect the cables and switching
adapter from being walked on or
pinched particularly the plugs,
convenience receptacles, and the
point where the cable exits from
the switching adapter.
9. Only use attachments/accesso-
ries specified by the manufacturer.
10. Use only with stands,
tripods, or brackets
specified by the manufacturer, or sold with
the device. When a cable is used,
use caution when moving the cable/device combination to avoid
injury from tip-over.
11. Unplug the switching adapter and
device during lightning storms or
when the device is not in use for
longer periods of time.
12. Leave all maintenance to quali-
fied service personnel. Maintenance is required when the device
19
Page 20
GB BR 10 DAB+
has been damaged in any way,
such as switching adapter is
damaged, liquid has been spilled,
the device has been exposed to
rain or moisture, does not operate normally, or fell down.
13. To Reduce the Risk of Fire or
Electric Shock, Do not Expose
This Appliance To Rain or Moisture.
14. The Shock Hazard Marking and
Associated Graphical Symbol is
provided at the bottom of the device if necessary.
15. The device shall not be exposed to
dripping or splashing. No objects
filled with liquids may be placed
on the device.
16. The switching adapter should not
be removed far from the radio,
and remain easily accessible so
that during an emergency, the
power source can be easily removed.
connect device, the disconnected
device shall remain readily operable.
18. The battery pack shall not be exposed to excessive heat such as
direct sunlight, fire etc.
For more information read the
safety instructions provided with
your battery pack.
19. To prevent possible
hearing loss, do not
listen at high volume
levels for extended periods of time periods.
CAUTION:
To reduce the risk of electric shock, do not perform any maintenance other than that detailed in
the operating instructions unless you
are qualified to do so.
WARNING! Warranty becomes void
once the radio housing has been
opened or any modifications or alterations to the radio have been
made!
17. Where the MAINS plug or an appliance coupler is used as the dis-
3Technical data
Radio SYS ROCK BR 10 DAB+
Power requirements switching adapter Output: DC 19V/1.2A center
pin positive
20
Page 21
BR 10 DAB+ GB
Radio SYS ROCK BR 10 DAB+
battery pack 10.8 -18V
recommended: 18V
Frequency coverage FM 87.50 - 108 MHz
DAB 174.928 - 239.200 MHz
Bluetooth
®
version 4.1 EDR compliant
profiles HFP, A2DP, AVRCP profiles
transition power
+4dBm Class 2 output power
max.
transition range
max.
10 m (varies according to
usage conditions)
Supported codec SBC/ACC
Circuit feature Loudspeaker 2.5" 8 Ω x1
Output power 19V:10W 3%THD
Input terminal 3.5 mm dia. (AUX IN)
USB socket 5V/1.2A
Permitted operating temperature range -10 °C to +45 °C
Dimension (W x H x D) 100 x 150 x 105 mm
Weight (without external battery pack) 0.7 kg
4 Machine features
Radio - SysRock
[1-1]
Folding attachment handle
[1-2]
Connecting socket for switching adapter
[1-3]
Antenna
[1-4]
USB socket
[1-5]
Auxiliary input (AUX-IN)
[1-6]
Power button
[1-7]
Speaker
21
Page 22
GB BR 10 DAB+
[1-8]
Built-in microphone
[1-9]
Display
[1-10]
Switching adapter
[2-1]
Threaded socket for tripod
UNC 1/4"-20
Menu buttons and display
[a]
Volume control -
[b]
Preset button 2
Bluetooth mode: Play and
pause
[c]
Preset button 1
Bluetooth mode: Call button
[d]
Clock time (available from DAB
and FM RDS-CT)
[e]
Battery status indicator
[f]
Preset button 3
Bluetooth mode: Pair button
[g]
Preset button 4
SELECT button
[h]
DAB/FM mode: Tuning control up
Bluetooth mode: next track
DAB Modus: scan button
[i]
DAB/FM mode: Tuning control down
Bluetooth mode: previous track
DAB mode: clear button
[j]
Source button
DAB mode: info button
[k]
Volume control +
5Commissioning
5.1 Operating with switching
adapter
Plug in switching adapter
[1-10]
in connecting
[1-2]
outlet.
socket
IMPORTANT:
The switching adapter is used as the
means of connecting the radio to the
power supply. The switching adapter
used for the radio must remain accessible during normal use in order
to disconnect the radio from the power supply completely, the switching
adapter should be removed from the
power supply outlet completely.
5.2 Operating with external Festool battery pack [2A] + [2B]
The device can operate with any Festool battery pack from the BP, BPC or
BPS series. When connected to the
external Festool battery pack, the de-
and power
22
Page 23
vice only consumes power from this
battery pack.
CAUTION
pack completely. If not, it may accidentally fall out of the battery bay,
causing injury to you or someone
around you.
CAUTION
tery pack. If the battery pack does not
slide in smoothly and does not engage, it is not being inserted correctly.
CAUTION
we recommend connecting to an 18V
Li-Ion battery pack.
5.3 Switch on/off
Always attach the battery
Do not force attach the bat-
For optimal performance,
To switch on: Press the power but-
[1-6]
.
ton
The radio is ready for operation.
To switch off: Press the power but-
[1-6]
.
ton
5.4 Volume control
Press the volume control
and
[k]
to adjust the desired
volume.
For a better sound quality using
an external device, adjust the
volume on the external device
to maximum 70%.
[a]
BR 10 DAB+ GB
5.5 Checking battery status
To check the current battery level,
press the power button
switch on the radio. The battery status indicator
battery level (only with Li-Ion battery
pack).
5.6 Operating your radio - DAB
Straighten up the antenna
Press the Power button
switch on your radio.
Press the source button
the DAB mode is selected.
[e]
will show the current
Battery is fully charged
Battery is partially
charged
Battery low - charging
required
battery critical - alternative power source
required immediately.
[1-6]
[1-3].
[1-6]
[j]
to
to
until
If this is the first time the radio is
used, a quick scan of Band III DAB
channels will be carried out. If the radio has been used before, the last
used station will be selected.
23
Page 24

GB BR 10 DAB+
During the scanning process, as new
stations are detected, the station
counter will increase and stations
will be added to the list. The display
shows a bar graph indicating the
progress of the scan.
When the scanning is completed, the
first station (in numeric-alpha order
0…9…A…Z) will be selected.
If the station list is still empty after
the scan, your radio will display <No
stations found>.
If no signals are found, it may be necessary to relocate your radio to a position giving better reception.
Selecting a station - DAB
Press the Power button
switch on your radio.
Press the source button
the DAB mode is selected. The display will show the name of the radio station currently selected.
Press the Tuning control
scroll through the list of available
stations.
Press the Select button
lect the station. The display may
show <Connecting…> while your
radio finds the new station.
Adjust the Volume control
to the required setting.
[1-6]
[j]
[i], [h]
[g]
to se-
[a], [k]
to
until
to
NOTE:
If after selecting a station, the station is not found it
may be necessary to relocate
your radio to a position giving
better reception.
Secondary service - DAB
Certain radio stations have one or
more secondary services associated
with them. If a station has a secondary service associated with it, the display will show this information under
the station name.
Most secondary services do not
broadcast continually and if the selected service is not available, the radio will re-tune to the associated primary service.
Display mode - DAB
Your radio has a range of display options when in DAB mode:
Press and hold the Info button
more than 2 seconds until <DAB Info> is shown on the display and
then press and release the Tuning
control
[i], [h]
various modes.
to cycle through the
[j]
24
Page 25
a. Signal
strength
b. Program
type
c. Multiplex
name
d. Frequency
e. Bit rate /
audio type
f. Date Displays the current
Displays the signal
strength of radio
reception. The clear
unfilled rectangle
indicates minimum
signal level required
for satisfactory
reception.
Displays type of station being listened to
e.g. Pop, Classic,
News etc.
Displays name of
multiplex to which
current station
belongs.
Displays current frequency.
Displays the digital
bit rate and the
audio type for the
currently tuned DAB
station.
date.
BR 10 DAB+ GB
g. DL Plus
Information
h. Scrolling
text (DLS)
Finding new stations - DAB
As time passes new stations may become available. To find new stations
proceed as follows:
Press the Power button
switch on your radio.
Press the source button
the DAB mode is selected.
To carry out a full scan of the entire
DAB Band III frequencies press and
hold the Tuning control
than 2 seconds. As new stations
are found, the station counter on
the display will increase and stations will be added to the list. The
bar graph indicates the progress of
the scan.
Some stations may
provide other programme related
information for the
display in addition to
the regular text. If
none is available, a
message <no
DL+info> is displayed.
Displays scrolling
text messages such
as artist/track
name, phone in
number, etc.
[1-6]
[j]
until
[h]
more
to
25
Page 26
GB BR 10 DAB+
Clear stations (Prune function)- DAB
If you move to a different part of the
country, some of the stations which
were listed may no longer be available. Also from time to time, some
DAB services may stop broadcasting,
or may change location or frequency.
Stations which cannot be found, or
which have not been received for a
very long time are shown in the station list with a question mark. The
Prune stations function (Clear)
delete the marked DAB stations from
your station list.
Press the Power button
switch on your radio.
Press the source button
the DAB mode is selected.
Press and hold Clear button
more than 2 seconds until <DAB> is
shown on the display.
Press and release the Tuning con-
[i], [h]
trol
<Back>. If you do not wish to enter
the Prune function select <Back>,
and press and release the Select
button
To enter the Prune function select
<Clear>, and press and release the
Select button
ting. Press and release the Tuning
control
<NO>. To activate the Prune func-
26
to select <Clear> or
[g]
to confirm the setting.
[g]
to enter the set-
[i], [h]
to select <YES> or
[i]
[1-6]
[j]
until
will
to
tion select <YES> and press the Select button
ting. If you do not wish to prune
stations, select <NO> and then
press Select button
the setting.
5.7 Operating your radio - FM
Straighten up the antenna
FM auto-tune
[i]
Press and hold (~2 sec.) the Tuning
control
tune.
[g]
to confirm the set-
[g]
to confirm
NOTE:
If you have moved your
radio to a different part of the
country you should also carry
out a search for new stations
(please see the section 'Finding
new stations').
Press the source but-
ton
[j]
until the FM mode
is selected.
[i], [h]
to carry out an auto-
Your radio will stop scanning when it
finds a station of sufficient strength.
The display will show the frequency
of the signal found. If the signal is
strong enough and there is RDS data
present, the radio may display the
station name, radio text and clock
time.
Finding other stations
Press the Tuning control
before.
[1-3].
[i], [h]
as
Page 27

When the end of the waveband is
reached, your radio will restart tuning from the opposite end of the
waveband.
If you find that FM reception is
poor, try repositioning the antenna.
Manual tuning -FM
Press the Tuning control
tune to a station.
[i], [h]
to
The frequency will change in steps of
0.1 MHz.
5.8 Using preset stations in DAB/
FM mode
You may store your preferred DAB/
FM radio stations to the preset stations. There are four memory presets
each for DAB and FM radio. They are
used in the same way for each operating mode.
Press the Power button
switch on your radio.
Press and hold (~2 sec.) the Preset
[b], [c], [f]
button
display show <Saved>.
or
[1-6]
[g]
until the
to
The station will be accessible via the
chosen preset button. The preset
number P1 to P4 will be shown in the
display.
Repeat this procedure as required for
the remaining presets. Stations
stored in preset memories may be
BR 10 DAB+ GB
overwritten by retracing the steps
above.
Recalling preset stations in DAB/FM
mode
Press the required Preset button
[b], [c], [f]
tion stored in preset memory.
5.9 Clock time - automatically up-
Your radio will normally update the
clock time
the DAB or FM RDS-CT signal.
After a power failure the radio will
then set its clock the next time that
you turn on the radio in DAB or FM
mode.
When you set the clock time using the
FM RDS (Radio Data System) function, your radio will synchronize and
display clock time
tunes to a radio station using RDS
with CT signals. If the station has sufficient signal strength the clock will
automatically synchronize within one
or two minutes. The radio clock time
will be valid for 24 hours each time
the radio time is synchronized with
RDS CT.
or
[g]
to tune to the sta-
dating the clock
[d]
automatically using
NOTE:
If no signal is found you
should either position the radio
or its aerial so that a signal can
be received.
[d]
whenever it
27
Page 28
GB BR 10 DAB+
If no RDS-signal is received, the
clock time is not shown.
5.10 Listening to music via Bluetooth streaming
You need to pair your Bluetooth devi ce with your SysR ock b efore you c an
auto-link to play/stream Bluetooth
music through your SysRock. Pairing
creates a "bond" so two devices will
recognize each other and establish a
link that enables data transfer.
Pairing your Bluetooth device for the
first time
Press the Source button
lect the Bluetooth mode.
[j]
to se-
The Bluetooth status icon
flashes to show the SysRock
is discoverable.
Activate Bluetooth on your mobile
device according to the device's
user manual to link up to the SysRock.
Locate the Bluetooth device list
and select <SysRock DAB>. Some
mobile devices (which are
equipped with bluetooth interfaces
older than the BT2.1 standard.), require entering the pass code
“0000”.
Once the connection is established, the Bluetooth
icon will cease flashing and
display a check mark next to it. Simply select and play any music from
your source device.
NOTE:
– If two Bluetooth devices, which
are not yet paired to the SysRock
both simultaeneously search for
your SysRock, it will show its
availability on both devices. However, if one device establishes a
connection with the SysRock first,
then the other Bluetooth device
won't find it on its list.
– If you take your source device out
of range, the connection will be
temporarily lost. Your SysRock
will automatically reconnect, if
the source device is brought back
in range. Be aware that while the
connection is lost, no other Bluetooth device can pair or link with
your SysRock.
– If <SysRock DAB> shows in your
Bluetooth device’s list but your
device cannot connect with it,
please delete the item from your
list and pai r up the d evice with t he
SysRock again following the steps
described previously.
28
Page 29

– The effective operation range be-
tween the system and the paired
device is approximately 10 meters
(30 feet). Any obstacle between
the system and the device can reduce the operational range.
– Bluetooth connectivity perfor-
mance may vary depending on the
connected Bluetooth devices.
Please review the Bluetooth capabilities of your device before
connecting to your SysRock.
Some features may not be supported on your Bluetooth device.
Playing audio files in Bluetooth
mode
As soon as your SysRock is successfully connected with the chosen Bluetooth device, you can start to play
your music using the controls on your
connected Bluetooth device.
Once the SysRock plays adjust the
volume to the desired level using
the Volume control
ther your SysRock or your connected Bluetooth device.
Use the controls on your device to
play/pause and navigate tracks. Alternatively, control the playback
using Play/Pause
[h]
, Previous track buttons
the SysRock.
[a], [k]
[b]
, Next track
on ei-
[i]
on
BR 10 DAB+ GB
The currently-played track information (i.e. the track name /the artist
name) will be displayed as scrolling
text at the bottom of display.
NOTE:
– Some player applications or de-
vices may not respond to all of
these controls.
– Some mobile phones may tempo-
rarily disconnect from your SysRock when you make or receive
calls. Some devices may temporarily mute their Bluetooth audio
streaming when they receive text
messages, emails or for other
reasons unrelated to audio
streaming. Such behaviour is a
function of the connected device
and does not indicate a fault with
your SysRock.
Playing previously-paired devices
This unit can save up to 8 sets of
paired devices. When the amount is
exceeded, the earliest device will be
over written. If your Bluetooth device
has already been paired with the SysRock previously, the unit will recognize your Bluetooth device and will
automatically attempt to reconnect
with the device it was last connected
with. If the last connected device is
not available, the SysRock will try to
29
Page 30
GB BR 10 DAB+
connect to the second last device, and
so forth.
Deleting Bluetooth device pairings
To delete all Bluetooth device pairings, press and hold the Preset 4
button
[g]
on the display. The SysRock will
turn off automatically after the
memory is cleared.
Disconnecting your Bluetooth device
Press the Source button
lect any mode other than Bluetooth
mode.
Alternatively, press (~2 sec.) the
Bluetooth pair button
nect the link.
You can also turn off Bluetooth on
your Bluetooth device to disable
the connection.
until <BT-Reset> shows
[j]
to se-
[f]
to discon-
If you disconnect the Bluetooth device when you are in Bluetooth mode,
the Bluetooth icon will then start to
flash, indicating Bluetooth is available again for pairing.
Using your hands-free call feature
Your unit can be used as a
hands-free accessory for
your phone. When music is
playing through your SysRock and
you receive a call on your phone it can
pause the music automatically to allow you to answer your phone.
If you receive a call while playing
music through your SysRock, press
and release the Call button
answer your phone call.
Speak in direction of the built-in
microphone
Press and release the Call button
[c]
5.11 Auxiliary input (AUX-IN)
top panel of your SysRock to permit
an audio signal to be fed into the unit
from an external audio device such as
an MP3 or CD player.
Connect a stereo or mono audio
source (for example MP3 or CD
player) to the Auxiliary input
Press the Source button
lect the Aux mode.
Adjust the Volume control on your
MP3 or CD player (max. 80%) to ensure an adequate signal and then
adjust the volume on the SysRock
for comfortable listening.
[1-8]
.
Note that a very high volume
setting may decrease sound
quality.
to end the phone call.
A 3.5 mm Auxiliary input
[1-5]
is provided on the
[j]
[c]
to
[1-5]
to se-
.
30
Page 31

Never use the Aux-In socket in
rainy or moist conditions to prevent moist from entering the
SysRock. Make sure that the
rubber cover on top fits thightly
when operating in a moist environment.
5.12 USB socket for smartphone
charging
Your radio has a USB socket which is
intended only for charging a smartphone or similar devices. Charge
time may vary and in some cases may
take longer to charge than when using the manufacturers charging unit
supplied with the smartphone. The
radio can charge the smartphone or
similar devices when the radio is in
power on mode and in DAB/FM radio
mode, Bluetooth mode or AUX mode.
Connect your smartphone to the
USB charging socket
top of your radio.
Your smartphone will begin to
charge.
Once your smartphone has fully
charged remove the USB cable.
NOTE:
Charging mobile phones
(for example) or other devices
may affect the listening quality
while listening to the DAB/FM
stations.
[1-4]
on the
BR 10 DAB+ GB
CAUTION
– The charger may not supply pow-
er to some USB devices.
– When not using or after charging,
remove the USB cable.
– Do not connect power source to
USB port. Otherwise there is a
risk of fire. The USB port is only
intended for charging lower voltage device.
– Do not insert a nail, wire, etc. into
the USB power supply port. Otherwise a circuit short may cause
smoke and fire.
– Do not connect this USB socket
with your PC USB port, as it is
highly possible that it may cause
breakdown of the units.
– Never use the USB socket in
rainy or moist conditions to prevent moisture from entering the
radio.
– Close the USB socket after use
with the protective cap to prevent
contamination.
5.13 Setup options
Attachment handle [1-1]
The folding attachment handle allows
you to hang the device from scaffolding or similar structures.
If you decide to power the device
with an external Festool battery
pack, the attachment handle
31
Page 32

GB BR 10 DAB+
must be detached beforehand
[2A]
.
Tripod
A standard photographic tripod with
UNC 1/4"-20 thread can be attached
to the threaded tripod socket [2-1].
6 Service and maintenance
Customer service and repair
only by manufacturer
or service workshops:
Find your nearest address
online at www.festool.com/service
EKAT
4
Always use original Fes-
5
tool spare parts! Order no.
3
2
1
at: www.festool.com/service
–Always clean the display
and speaker grill
[1-7]
[1-9]
on the
SysRock using a soft, dry cloth to
prevent any damage. Do not use
solvents.
– Keep the contacts on the SysRock
and battery pack clean.
7 Environment
Do not dispose of the device in household waste!
Recycle devices, accesso-
serve applicable national regulations.
ries and packaging. Ob-
EU only:
In accordance with European Directive on waste electrical and
electronic equipment and implementation in national law, used electric
power tools must be collected separately and handed in for environmentally friendly recycling.
Information on REACh:
www.fes-
tool.com/reach
The company reserves the right to
amend the specification without notice.
®
"The Bluetooth
" word mark and logos are registered trademarks
owned by Bluetooth SIG, Inc. and any
use of such marks by Festool GmbH
is under license.
32
Page 33

Notice d'utilisation d'origine
Les illustrations indiquées se
trouvent en début de notice d'utilisation.
1Symboles
Symbole Signification
Avertissement de danger
Avertissement contre le
risque d'électrocution
Notice d'utilisation, lire
les consignes de
sécurité !
Ne pas jeter l'appareil
avec les ordures ménagères.
Ne pas incliner !
Ne pas faire fonctionner à
plein volume !
2 Consignes de sécurité
1. Lisez ces instructions.
2. Conservez ces instructions.
BR 10 DAB+ F
3. Respectez tous les avertisse-
ments.
4. Suivez toutes les instructions.
5. N'utilisez pas cet appareil à proxi-
mité d'eau.
6. Nettoyez cet appareil uniquement
avec un chiffon sec.
7. Ne pas installer à proximité d'une
source de chaleur comme les radiateurs, les accumulateurs de
chaleur, les poêles ou autres appareils (y compris les amplificateurs) pouvant générer de la
chaleur.
8. Protégez le câble et l'adaptateur
secteur contre toute contrainte
mécanique (pincement, etc.), en
particulier au niveau du connecteur et de la prise et le raccord
sur lequel le câble sort de l'adaptateur secteur.
9. Utilisez uniquement les périphé-
riques/accessoires spécifiés par
le fabricant.
10. Utilisez uniquement
des bâtis, trépieds ou
supports spécifiés par
le fabricant ou vendus
avec l'appareil. En cas d'utilisation d'un câble, faites attention en
déplaçant le câble/l'appareil afin
d'éviter les blessures en cas de
chute.
33
Page 34

F BR 10 DAB+
11. En cas d'orage ou de non utilisation prolongée, débranchez la
fiche secteur.
12. Confiez toutes les opérations
d'entretien à du personnel qualifié. Une réparation est nécessaire
lorsque l'appareil a été endommagé d'une façon quelconque,
comme par exemple lorsque
l'adaptateur secteur est endommagé, du liquide a été renversé,
l'appareil a été exposé à la pluie
ou à l'humidité, ne fonctionne pas
normalement ou est tombé.
13. Pour éviter tout incendie ou choc
électrique, n'exposez pas l'appareil à la pluie ou à l'humidité.
14. Le marquage du risque de choc
électrique et les icônes correspondants sont présents le cas
échéant au bas de l'appareil.
15. L'appareil ne doit pas être mouillé ou exposé à des éclaboussures.
Aucun objet rempli de liquide ne
doit être posé sur l'appareil.
16. L'adaptateur secteur doit être
branché à proximité de la radio et
être facilement accessible. Pour
débrancher la radio du courant en
cas de panne, retirer l'adaptateur
secteur de la prise.
17. Si l'adaptateur secteur ou la prise
de l'appareil doit être utilisée
pour la mise hors service, celui/
celle-ci doit rester accessible.
18. Ne pas exposer la batterie à des
températures élevées, comme le
soleil, le feu ou autre.
Pour plus d'informations, lire les
consignes de sé curité de la ba tterie.
19. Afin d'éviter d'éventuelles lésions auditives, ne laissez pas la
radio à un volume sonore élevé pendant une durée
prolongée.
ATTENTION :
Pour éviter les chocs
électriques, ne réaliser aucune autre
opération de réparation que celles
décrites dans la présente notice
d'utilisation, à moins d'y être formé.
AVERTISSEMENT ! La garantie est
annulée si vous ouvrez le boîtier de
la radio ou si vous entreprenez
d'autres modifications sur la radio !
34
Page 35

BR 10 DAB+ F
3 Caractéristiques techniques
Radio SYS ROCK BR 10 DAB+
Alimentation Adaptateur secteur Sortie : DC 19V/1,2 A
Borne positive centrale
Batterie 10,8 -18 V
recommandé : 18 V
Plage de fréquence FM (UKW) 87.50 - 108 MHz
DAB 174.928 - 239.200 MHz
Bluetooth
Circuit Haut-parleur 2.5" 8 Ω x1
Plage de température admissible de -10 °C à +45 °C
Dimensions (l x h x p) 100 x 150 x 105 mm
Poids (sans batterie externe) 0.7 kg
®
Version conforme 4.1 EDR
Profils Profils HFP, A2DP, AVRCP
Rendement de
conversion max.
Plage de conversion
max.
Codec pris en
+4dBm classe 2 Puissance
de sortie
10 m (selon les conditions de
fonctionnement)
SBC/ACC
charge
Puissance de sortie 19V :10W 3%THD
Pôle d'entrée 3,5 mm dia. (AUX IN)
Prise USB 5V/1,2A
35
Page 36

F BR 10 DAB+
4 Composants de l’appa-
reil
Radio - SysRock
[1-1]
Poignée de fixation rabattable
[1-2]
Entrée pour adaptateur secteur
[1-3]
Antenne
[1-4]
Prise USB
[1-5]
Prise AUX (AUX-IN)
[1-6]
Interrupteur marche/arrêt
[1-7]
Haut-parleur
[1-8]
Microphone intégré
[1-9]
Affichage
[1-10]
Adaptateur réseau
[2-1]
Prise filetage trépied UNC 1/
4"-20
Touches de menu et écran
[a]
Réglage du volume, plus faible
[b]
Présélection de station 2
Mode Bluetooth : lecture/pause
[c]
Présélection de station 1
Mode Bluetooth : touche
d'appel
[d]
Heure (disponible avec DAB et
FM RDS-CT)
[e]
Affichage du niveau de charge
de la batterie
[f]
Présélection de station 3
Mode Bluetooth : connexion
[g]
Présélection de station 4
Touche de sélection/confirma-
tion (SELECT)
[h]
Mode DAB/FM : recherche
automatique - en amont
Mode Bluetooth : piste suivante
Mode DAB : recherche de sta-
tions (SCAN)
[i]
Mode DAB/FM : recherche
automatique - en aval
Mode Bluetooth : piste précédente
Mode DAB : touche de suppression (CLEAR)
[j]
Source (SOURCE)
Mode DAB : touche info (INFO)
[k]
Réglage du volume, plus élevé
5 Mise en service
5.1 Utilisation avec adaptateur
secteur
Brancher l'adaptateur
[1-10]
[1-2]
dans l'ar-
et la prise.
secteur
rivée
36
Page 37

IMPORTANT :
L'adaptateur secteur sert à relier la
radio à la prise. L'adaptateur secteur
de la radio doit être librement accessible pendant l'utilisation pour pouvoir déconnecter la radio. L'adaptateur secteur doit être retiré de la
prise après l'utilisation.
5.2 Utilisation avec batterie externe Festool [2A] + [2B]
L'appareil peut être utilisé avec toute
batterie Festool des séries BP, BPC
et BPS.
ATTENTION
terie entièrement. Sinon, la batterie
peut tomber de l'interface et vous
blesser ou blesser toute autre personne à proximité.
ATTENTION
mise en place de la batterie. Si la batterie n'est pas facile à insérer et à encliqueter, c'est qu'elle est mal installée.
ATTENTION
optimale, nous recommandons d'utiliser une
5.3 Marche/Arrêt
Pour allumer : appuyer sur l'interrupteur marche/arrêt
Insérez toujours la bat-
Ne forcez pas lors de la
Pour une performance
batterie 18V Li-Ion
.
[1-6]
.
La radio est prête à fonctionner.
Pour éteindre : appuyer sur l'interrupteur marche/arrêt
[1-6]
.
BR 10 DAB+ F
5.4 Réglage du volume
Appuyer sur le réglage du volume
[a]
et
[k]
volume souhaité.
Pour une qualité de musique optimale avec le lecteur
externe, régler le volume sur
l'appareil externe à un maximum de 70 %.
5.5 Vérification du niveau de
charge de la batterie
Pour afficher l'état actuel de la batterie, appuyer sur l'interrupteur
marche/arrêt
radio. L'indicateur de l'état de la batterie
[e]
affiche l'état actuel de la
batterie (uniquement avec batterie
Li-Ion).
La batterie est chargée
entièrement
La batterie est chargée
partiellement
Niveau de batterie faible rechargement recommandé
La batterie peut être
déchargée entièrement à
tout moment, remplacer
immédiatement la batterie
pour régler le
[1-6]
pour allumer la
37
Page 38

F BR 10 DAB+
5.6 Utiliser la radio - DAB
Ajuster l'antenne
Appuyez sur l'interrupteur
marche/arrêt
radio.
Appuyer sur Source (SOURCE)
jusqu'à ce que le mode DAB soit
sélectionné.
[1-3]
[1-6]
pour allumer la
.
[j]
Lors de la première utilisation de la
radio, elle démarre une recherche
automatique DAB (Full Scan). Si la
radio a déjà été utilisée, la dernière
station utilisée est sélectionnée.
Si de nouvelles stations sont trouvées
pendant la recherche, le nombre des
stations augmente et les nouvelles
stations sont ajoutées à la liste. Une
barre sur l'écran indique le niveau de
l'avancement de la recherche.
Une fois que la recherche est terminée, la première radio est sélectionnée (dans l'ordre alphanumérique
0…9…A…Z).
L'écran affiche <No stations found>
quand aucune radio n'a été trouvée.
S'il n'y a aucun signal, modifier l'emplacement de la radio, par ex. la
mettre à proximité de la fenêtre pour
bénéficier d'une meilleure réception.
Sélectionner la station - DAB
Appuyez sur l'interrupteur
marche/arrêt
radio.
38
[1-6]
pour allumer la
Appuyer sur Source (SOURCE)
jusqu'à ce que le mode DAB soit
sélectionné. L'écran affiche la station radio sélectionnée actuellement.
Appuyer sur la recherche
pour chercher la liste des stations
disponibles.
Appuyer sur la touche de sélection/
confirmation (SELECT)
lectionner la station souhaitée.
Éventuellement l'écran affiche
<Connecting…> tandis que la radio
cherche la nouvelle station.
Régler le volume souhaité avec le
réglage du volume
REMARQUE :
tionnée n'est pas trouvée, modifier l'emplacement de la radio
pour bénéficier d'une meilleure
réception.
Services secondaires- DAB
Certaines stations radio offrent un ou
plusieurs services secondaires. Si
une station radio propose un service
secondaire, cette information s'affiche sur l'écran sous le nom de la radio.
si la station sélec-
[g]
[a], [k]
[i], [h]
pour sé-
.
La plupart des services secondaires
ne sont pas constamment envoyés. Si
le service sélectionné n'est pas disponible, la radio diffuse le service primaire.
[j]
Page 39

Mode écran - DAB
En mode DAB la radio dispose de plusieurs fonctions d'écran :
Appuyer sur la touche info (INFO)
[j]
plus de 2 secondes et maintenir
jusqu'à ce que <DAB Info> apparaisse sur l'écran. Puis appuyer
sur recherche
[i], [h]
et relâcher
pour voir les différents modes d'affichage.
a. Puissance de
signal
Indique la puissance du signal de la
réception radio. Un
carré vide, non rempli indique le niveau
de signal minimum
qui est requis pour
une réception satisfaisante.
b. Type de
programme
Affiche le genre ou
le style de musique,
par ex. pop, classique, informations,
etc.
c. Nom multiplex
Affiche le nom multiplex de la station
actuelle.
d. Fréquence
Affiche la fréquence
actuelle.
BR 10 DAB+ F
e. Débit
binaire /
type audio
Affiche le débit
binaire et le type
audio des stations
DAB actuellement
réglées.
f. Date Affiche la date
actuelle.
g. Informations DL
Plus
Quelques radios
peuvent mettre à
disposition d'autres
informations relatives au programme
sur l'écran, en plus
des informations
courantes. Si
aucune information
supplémentaire
n'est en présence, le
message <no
DL+info> s'affiche.
h. Texte de
défilement
(DLS)
Affiche différentes
informations, par ex.
nom de l'artiste /
nom de la chanson,
numéro de téléphone, etc.
Trouver de nouvelles stations - DAB
De nouvelles stations sont disponibles au fil du temps. Comment
trouver de nouvelles stations :
39
Page 40

F BR 10 DAB+
Appuyez sur l'interrupteur
marche/arrêt
radio.
Appuyer sur Source (SOURCE)
jusqu'à ce que le mode DAB soit
sélectionné.
Pour chercher entièrement toutes
les fréquences DAB, appuyer sur
recherche de stations (SCAN)
maintenir pendant plus de 2 secondes. Si de nouvelles stations
sont trouvées, le nombre des stations augmente et les nouvelles
stations sont ajoutées à la liste.
Une barre sur l'écran indique le niveau de l'avancement de la recherche.
Nettoyer les radios - DAB
Si vous changez d'emplacement,
quelques-unes des stations mentionnées ne sont éventuellement plus
disponibles. Certains services DAB
retransmettent irrégulièrement ou
changent d'emplacement ou de fréquence. Les stations qui ne sont pas
trouvées ou qui n'ont pas été écoutées pendant un certain temps sont
marquées dans la liste des radios
d'un point d'interrogation. La fonction de nettoyage (CLEAR)
les radios DAB marquées de la liste
des radios.
[1-6]
pour allumer la
[i]
[h]
efface
Appuyez sur l'interrupteur
marche/arrêt
radio.
[j]
Appuyer sur Source (SOURCE)
jusqu'à ce que le mode DAB soit
sélectionné.
Appuyer sur la touche de suppression (CLEAR)
et
plus de 2 secondes jusqu'à ce que
<DAB> apparaisse sur l'écran.
Appuyer sur recherche de stations
[i], [h]
ner <Clear> ou <Back>. Si vous ne
souhaitez pas exécuter la fonction
de nettoyage, sélectionner <Back>
et appuyer sur la touche de sélection/de confirmation (SELECT)
[g]
pour confirmer le réglage.
Pour réaliser la fonction de nettoyage, sélectionner <Clear> et appuyer sur la touche de sélection/de
confirmation (SELECT)
tourner aux réglages. Appuyer sur
les touches de recherche de stations
<YES> ou <NO>. Confirmer <YES>
en appuyant sur la touche de sélection/de confirmation (SELECT)
[g]
. La fonction de nettoyage démarre ensuite. Si vous ne souhaitez pas exécuter la fonction de net-
[1-6]
[i]
et la maintenir
et relâcher pour sélection-
[i], [h]
pour sélectionner
pour allumer la
[g]
pour re-
[j]
40
Page 41

toyage, sélectionner <NO> et
confirmer le réglage avec la touche
de sélection/de confirmation (SELECT)
[g]
.
REMARQUE :
ment de lieu, réaliser également une recherche de nouvelles radios (voir paragraphe
'Trouver nouvelles stations').
5.7 Utilisation de la radio - FM
(UKW)
Ajuster l'antenne
lectionné.
Recherche de station automatique
FM (UKW)
Appuyer et maintenir enfoncé (~2s)
Recherche automatique
pour lancer la recherche automatique.
après un change-
[1-3]
.
Appuyer sur Source
(SOURCE)
que le mode FM soit sé-
[j]
jusqu'à ce
[i], [h]
La recherche se termine automatiquement lorsqu'une station avec une
puissance de signal suffisante est
trouvée.
L'écran indique la fréquence. Si la
puissance du signal est suffisante et
si les informations RDS sont disponibles, l'écran indique le nom de la
station, le texte de la radio et l'heure.
BR 10 DAB+ F
Recherche d'autres stations
Appuyer sur Recherche automatique
[i], [h]
dessus.
comme indiqué ci-
À la fin de la bande de fréquences, la
recherche automatique revient au
début de la bande de fréquences.
En cas de mauvaise réception,
réajuster l'antenne.
Recherche de station manuelle - FM
(UKW)
Appuyer plusieurs fois sur Recherche automatique
jusqu'à atteindre la fréquence souhaitée.
[i], [h]
Les pas de fréquence font 0,1 MHz.
5.8 Utilisation de la présélection
de stations
Les stations radio préférées DAB/FM
peuvent être mémorisées dans la
présélection de stations. Quatre présélections de stations sont disponibles. Elles peuvent être utilisées
dans chaque mode.
Appuyez sur l'interrupteur
marche/arrêt
radio.
Appuyer et maintenir enfoncé (~2s)
la présélection de stations
[f]
ou
dique <Saved>.
[1-6]
pour allumer la
[g]
jusqu'à ce que l'écran in-
[b], [c]
,
41
Page 42

F BR 10 DAB+
La station est mémorisée sous la
présélection souhaitée. L'écran indique le numéro de présélection de
P1 à P4.
Répéter ces étapes pour les autres
présélections. De la même façon, les
présélections peuvent être écrasées
par de nouvelles stations.
Appel d'une présélection
Appuyer sur la présélection sou-
[b], [c], [f]
haitée
der à la station mémorisée.
5.9 Heure actualisée automatiquement
La radio actualise l'heure
matiquement à l'aide du signal DAB
ou FM RDS-CT. Après une panne de
courant, la radio actualise l'heure à
la prochaine mise en marche.
REMARQUE :
çoit pas de signal, la placer à un
autre endroit.
Si vous recevez l'heure via la fonction
FM RDS (Radio Data System), la radio
synchronise l'heure et l'indique sur
l'écran
[d]
lectionnée qui met les informations
RDS avec signaux CT à disposition.
En cas de puissance de signal suffisante, l'heure est actualisée en une à
ou
[g]
pour accé-
[d]
auto-
si la radio ne re-
lorsqu'une station est sé-
deux minutes. L'heure de la radio est
mise à jour les 24 heures suivantes
lorsque la radio est synchronisée
avec RDS-CT.
En l'absence de signal RDS,
l'heure n'est pas affichée.
5.10 Écoute de musique par flux
Bluetooth
Le SysRock et l'équipement Bluetooth doivent être connectés pour restituer de la musique via l'équipement
Bluetooth. Deux appareils peuvent
être détectés par cette "liaison".
Première connexion de l'appareil
Bluetooth
Appuyer sur Source
tionner le mode Bluetooth.
[j]
pour sélec-
L'icône Bluetooth clignote
sur l'écran et indique que le
SysRock peut être détecté.
Activer le Bluetooth sur l'appareil
Bluetooth comme expliqué dans la
notice d'utilisation de l'appareil
Bluetooth.
Afficher la liste des appareils Bluetooth et sélectionner l'appareil
<SysRock DAB>. Avec certains téléphones mobiles (qui disposent de
versions plus anciennes que BT2.1
Bluetooth standard), il convient de
saisir un mot de passe ("0000").
42
Page 43

Si la connexion Bluetooth
est active, l'icône Bluetooth
apparaît coché sur le côté.
Toute la musique peut maintenant
être sélectionnée et restituée sur
l'appareil Bluetooth.
REMARQUE :
– Lorsque deux appareils Bluetoo-
th doivent être connectés pour la
première fois et recherchent la
connexion au SysRock en même
temps, le SysRock est affiché
pour la connexion sur les deux
appareils. Après la liaison avec un
appareil, le SysRock n'est plus affiché dans la liste de connexion de
l'autre appareil.
– Si l'appareil Bluetooth se trouve
en dehors de la portée, la
connexion au SysRock est interrompue par intermittence. Le
SysRock active automatiquement
la connexion dès que l'appareil
Bluetooth est à nouveau à sa portée. Pendant l'interruption, aucun
autre appareil Bluetooth ne peut
être connecté au SysRock.
– Si <SysRock DAB> apparaît dans
la liste d'appareils de l'appareil
Bluetooth, mais qu'une
connexion est impossible : supprimer l'appareil de la liste et rétablir la connexion de l'appareil
BR 10 DAB+ F
Bluetooth avec le SysRock
comme décrit ci-dessus.
– La portée effective entre le Sys-
Rock et l'appareil Bluetooth est
d'environ 10 mètres (30 pieds). Le
moindre obstacle entre SysRock
et l'appareil Bluetooth peut réduire la portée.
– La performance de la conn ectivité
Bluetooth peut varier en fonction
de l'appareil Bluetooth connecté.
Veuillez prendre en compte les
fonctions Bluetooth de l'appareil
connecté avant la connexion au
SysRock. Il est possible que certaines fonctions ne soient pas
prises en charge sur les appareils
Bluetooth connectés.
Lecture des fichiers audio en mode
Bluetooth
En cas de connexion réussie entre le
SysRock et l'appareil Bluetooth sélectionné, la musique peut être lue à
l'aide des fonctions de l'appareil
Bluetooth.
Lorsque la lecture démarre, régler
le volume souhaité sur le réglage
du volume
sur l'appareil Bluetooth.
[a], [k]
sur SysRock ou
43
Page 44

F BR 10 DAB+
Sélectionner Lecture/pause et
Piste suivante sur les commandes
de l'appareil Bluetooth connecté.
Ou avec les touches sur le SysRock
: Lecture/pause
[h]
, Piste précédente
[b]
, Piste suivante
[i]
.
Les informations sur la piste en
cours de lecture (par ex. nom de la
piste/interprète) s'affichent sous la
forme de texte défilant en bas sur
l'écran.
REMARQUE :
– Toutes les applications et tous les
appareils ne répondent pas à ces
commandes.
– Certains téléphones mobiles se
déconnectent temporairement du
SysRock lors de la réception ou
de l'émission d'appels. Certains
téléphones mobiles passent en
muet lors de la réception de SMS,
e-mails ou autres. Cela fait partie
du fonctionnement de l'appareil
Bluetooth connecté et n'indique
pas une panne du SysRock.
Lecture d'appareils déjà connectés
Ce SysRock peut mémoriser jusqu'à
huit appareils connectés. Si la mémoire dépasse ce nombre, l'appareil
le plus ancien est écrasé. Si l'appareil Bluetooth a déjà été connecté au
SysRock, le SysRock mémorise cet
appareil Bluetooth et cherche à se
connecter au dernier appareil
connecté. Si le dernier appareil Bluetooth associé n'est pas disponible, le
SysRock cherche à se connecter à
l'avant-dernier appareil, et ainsi de
suite.
Effacement de la mémoire des appareils Bluetooth connectés
Pour effacer la mémoire des appareils Bluetooth dans le SysRock :
appuyer et maintenir enfoncée la
touche mémoire 4
que <BT Reset> apparaisse sur
l'écran. Le SysRock s'éteint automatiquement après que la mémoire ait été effacée.
Déconnexion d'un appareil Bluetooth connecté
Appuyer sur Source (SOURCE)
et sélectionner un autre mode que
le mode Bluetooth.
Sinon, appuyer sur Connecter
(~2 s) pour interrompre la
connexion.
Ou terminer la connexion Bluetooth sur l'appareil Bluetooth.
[g]
jusqu'à ce
[j]
[f]
44
Page 45

Si l'appareil Bluetooth est déconnecté en mode Bluetooth, l'icône Bluetooth recommence à clignoter sur
l'écran et indique que le SysRock est
à nouveau disponible pour une nouvelle connexion.
Utilisation du kit mains libres
Ce SysRock peut être utilisé
comme kit mains libres pour
un téléphone mobile.
Lorsque de la musique est lue via le
SysRock et que vous recevez un appel
sur le téléphone mobile, la musique
s'arrête automatiquement afin que
vous puissiez répondre à l'appel.
En cas de réception d'appel pendant la lecture de musique via le
SysRock, appuyer brièvement sur
la touche d'appel
pondre.
Parler en direction du microphone
interne
[1-8]
Attention : un volume très élevé
sur le SysRock peut affecter la
qualité du son.
Appuyer sur la touche d'appel
et relâcher pour mettre fin à l'appel.
[c]
pour ré-
.
[c]
BR 10 DAB+ F
5.11 Prise AUX (AUX-IN)
Une prise AUX 3,5 mm
sente sur le dessus du SysRock et
permet la lecture d'un signal audio
d'un appareil audio externe, comme
par ex. un lecteur MP3 ou CD.
Sur la prise AUX
une source audio stéréo ou mono
(comme un lecteur MP3 ou CD).
Appuyer sur Source
tionner le mode AUX.
Régler le volume sur le lecteur
MP3 ou CD (max. 70%) afin de garantir un signal suffisant, ajuster
ensuite le volume sur le SysRock
pour une écoute confortable.
N'utilisez jamais la prise AUX
en cas de pluie ou dans des
conditions humides afin d'éviter
que l'humidité ne s'infiltre dans
le SysRock. Dans de telles
conditions, maintenez bien fermée la protection en caoutchouc sur l'arrière.
5.12 Charger le smartphone sur la
prise USB
Votre radio dispose d'une prise USB
pour recharger un smartphone ou
des appareils semblables. La durée
du chargement peut être plus longue
et dans quelques cas, demander plus
de temps que le chargement avec la
station de chargement du fabricant
[1-5]
[1-5]
, connecter
[j]
pour sélec-
est pré-
45
Page 46

F BR 10 DAB+
de smartphone. La radio peut recharger le smartphone ou des appareils
semblables quand elle est branchée
et qu'elle est en mode radio DAB/FM,
mode Bluetooth ou mode AUX.
Connecter le smartphone avec la
prise USB
dio.
Le smartphone commence à recharger.
Après le chargement, retirer le
câble de charge USB.
ATTENTION
–La fonction de chargement du
– Retirer le câble USB après le
– Ne pas connecter la prise USB
– Ne pas introduire de clou, de fil de
[1-4]
en haut sur la ra-
REMARQUE :
téléphones mobiles (par ex.) ou
d'autres appareils peut affecter
la qualité du son pendant
l'écoute de radios DAB/FM.
SysRock-DAB ne fonctionne pas
pour certains périphériques USB.
chargement ou s'il n'est pas utilisé.
avec la prise électrique. Dans le
cas contraire, risque d'incendie.
La prise USB sert uniquement à
charger des appareils basse tension (5V/ 1A).
fer etc. dans la prise USB. Dans le
le chargement de
cas contraire, un court-circuit
peut entraîner un défaut.
– Ne pas relier la prise USB de la
radio à la prise USB de l'ordinateur étant donné que cela peut
provoquer un dommage sur les
appareils.
– Ne jamais utiliser la prise USB en
cas de pluie ou d'humidité pour
éviter toute pénétration d'humidité dans la radio.
– Refermer le raccordement USB
avec le capuchon de protection
après utilisation pour éviter toute
salissure.
5.13 Positionnements possibles
Poignée de fixation [1-1]
La poignée de fixation rabattable permet d'accrocher l'appareil à un échafaudage, par exemple.
La poignée de fixation doit être
retirée pour une utilisation avec
une batterie Festool externe
[2A]
.
Trépied
Un filetage standard de trépied d'appareil photo UNC 1/4"-20 peut être
vissé à la prise de filetage de trépied
[2-1]
.
46
Page 47

6 Entretien et mainte-
nance
Seuls le fabricant et un
atelier agréé sont habilités à effectuer
des réparations ou interventions
en S.A.V
. L'adresse du
prestataire le plus proche est disponible sur : www.festool.com/service
EKAT
4
Utilisez uniquement des
5
pièces de rechange Fes-
3
2
1
tool d'origine ! Vous trouverez les réf. sur le site
www.festool.com/service
– Pour éviter les dommages, net-
toyer l'écran
parleurs
[1-9]
[1-7]
sur la radio avec
et les haut-
un chiffon doux et sec. Ne pas utiliser de solvant.
– Maintenir les contacts sur le Sys-
Rock et la batterie propres.
7 Environnement
Ne pas jeter
l'appareil avec
les ordures
ménagères !
miner l'appareil,
les accessoires
et les emballages de façon compatible avec l'environnement. Respecter les prescriptions nationales en vigueur.
Éli-
BR 10 DAB+ F
Uniquement UE :
d'après la directive
européenne relative aux appareils
électriques et électroniques usagés
et sa transposition en droit national,
les outils électriques usagés doivent
être collectés à part et recyclés de
manière écologique, par les filières
de recyclage type DEEE.
Informations à propos de REACh :
www.festool.com/reach
Festool se réserve le droit de modifier les spécifications sans préavis.
La marque verbale et les logos
"Bluetooth
®"
sont des marques déposées de la Bluetooth SIG, Inc. et
toute utilisation de ces marques par
la Festool GmbH se fait sous licence.
47
Page 48

E BR 10 DAB+
Manual de instrucciones ori-
ginal
Las figuras indicadas se encuentran
al principio del manual de instrucciones.
1Símbolos
Símbolo Significado
Aviso de peligro general
Peligro de electrocución
¡Leer el manual de instrucciones y las indicaciones de seguridad!
No depositar en la basura
doméstica.
¡No inclinar!
¡No utilizar al volumen
máximo!
2 Indicaciones de seguri-
dad
1. Lea estas instrucciones.
2. Guarde estas instrucciones.
3. Tenga en cuenta todas las adver-
tencias.
4. Siga todas las indicaciones.
5. No utilice este dispositivo cerca
del agua.
6. Limpie este dispositivo solo con
un paño seco.
7. No instalar cerca de fuentes de
calor como radiadores, acumuladores de calor, hornos u otras
máquinas (incluidos amplificadores) que puedan generar calor.
8. Proteja el cable y el adaptador de
red frente a cargas mecánicas
(aplastamiento y similares), especialmente en las zonas del conector, del enchufe y de la
conexión por la que sale el cable
del adaptador de red.
9. Utilice exclusivamente acceso-
rios recomendados por el fabricante.
10. Utilice únicamente
soportes o trípodes
indicados por el fabricante o que se vendan
con el dispositivo. Si se utiliza un
cable, tenga cuidado al mover el
cable/el dispositivo para evitar
que vuelque y provoque lesiones.
11. Extraiga el enchufe cuando haya
tormenta o si no se va a utilizar
48
Page 49

durante un largo período de tiempo.
12. Encomiende los trabajos de mantenimiento a personal del servicio
técnico cualificado. El mantenimiento es necesario cuando el
dispositivo se haya dañado de alguna forma, por ejemplo, si hay
daños en el adaptador de red, se
ha vertido algún líquido o el dispositivo ha estado bajo la lluvia o
algún otro líquido, no funciona
con normalidad o se ha caído.
13. Para evitar incendios o descargas
eléctricas, impida que caiga lluvia
o líquidos sobre el dispositivo.
14. La identificación de peligro de
descarga eléctrica y los símbolos
gráficos correspondientes se indican en la parte inferior del dispositivo si procede.
15. No debe humedecerse ni pulverizarse el dispositivo con líquidos.
No deben colocarse sobre el dispositivo objetos que contengan líquidos.
16. El adaptador de red debe enchufarse cerca de la radio y en un lugar de fácil acceso. Para
desconectar la radio de la corriente en caso de emergencia,
extraer el adaptador de red del
enchufe.
BR 10 DAB+ E
17. Si se va a utilizar el adaptador de
red o el enchufe del dispositivo
para desconectarlo, este debe ser
totalmente accesible.
18. No someter la batería a altas
temperaturas, p. ej., a radiación
solar, fuego o similares.
Lea las indicaciones de seguridad
de la batería para encontrar más
información.
19. Para evitar eventuales
daños en el oído, no
utilice la radio durante
períodos largos con el
volumen al máximo.
ATE NCI ÓN :
Para evitar recibir una
descarga eléctrica, no realizar trabajos de reparación distintos de los
descritos en este manual de instrucciones, a menos que haya recibido la
formación pertinente.
ADVERTENCIA. La garantía se extinguirá si abre la carcasa de la radio o
la modifica de cualquier otra forma.
49
Page 50

E BR 10 DAB+
3Datos técnicos
Radio SYS ROCK BR 10 DAB+
Suministro de tensión Adaptador de red Salida: CC 19 V/1,2 A
Ter mina l positivo central
Batería 10,8-18 V
Recomendada: 18 V
Gama de frecuencias FM (VHF) 87,50-108 MHz
DAB 174.928-239.200 MHz
Bluetooth
Circuito Altavoz 1 ud. de 2,5" y 8 Ω
Rango de temperatura permitido -10 °C a +45 °C
Dimensiones (An x Al x
P)
Peso (sin batería externa) 0.7 kg
®
Versión Conforme con 4.1 EDR
Perfiles Perfiles HFP, A2DP, AVRCP
Máx. eficacia de
conversión
Máx. intervalo de
conversión
+4 dBm potencia de salida
clase 2
10 m (en función de las con-
diciones de uso)
Códec compatible SBC/ACC
Potencia de salida 19 V : 10 W 3 % THD
Ter min al d e en tra da 3,5 mm diám. (AUX IN)
Conexión USB 5V/1,2A
100 x 150 x 105 mm
50
Page 51

4Componentes
Radio - SysRock
[1-1]
Estribo de sujeción deslizable
[1-2]
Entrada para adaptador de
red
[1-3]
Antena
[1-4]
Conexión USB
[1-5]
Entrada AUX (AUX-IN)
[1-6]
Tecla de encendido/apagado
[1-7]
Altavoz
[1-8]
Micrófono integrado
[1-9]
Pantalla
[1-10]
Adaptador de red
[2-1]
Casquillo con rosca UNC 1/4"20 para trípode
Teclas de menú y pantalla
[a]
Regulación del volumen, más
bajo
[b]
Memoria de emisoras 2
Modo Bluetooth: reproducción/
pausa
[c]
Memoria de emisoras 1
Modo Bluetooth: tecla de lla-
mada
[d]
Hora (disponible con DAB y FM
RDS-CT)
BR 10 DAB+ E
[e]
Indicador de estado de la batería
[f]
Memoria de emisoras 3
Modo Bluetooth: acoplamiento
[g]
Memoria de emisoras 4
Tecla de selección/confirma-
ción (SELECT)
[h]
Modo DAB/FM: búsqueda de
emisoras ascendente
Modo Bluetooth: título
siguiente
Modo DAB: búsqueda de emisoras (SCAN)
[i]
Modo DAB/FM: búsqueda de
emisoras descendente
Modo Bluetooth: título anterior
Modo DAB: tecla de borrar
(CLEAR)
[j]
Origen (SOURCE)
Modo DAB: tecla de informa-
ción (INFO)
[k]
Regulación del volumen, más
alto
51
Page 52

E BR 10 DAB+
5 Puesta en servicio
5.1 Utilización con adaptador de
red
Introducir el adaptador
[1-10]
de red
[1-2]
da
IMPORTANTE:
El adaptador de red sirve para conectar la radio con el enchufe. El adapta-
dor de red de la radio debe ser accesible durante el uso para poder apagar la radio. Después del uso, el
adaptador de red debe retirarse del
enchufe.
5.2 Utilización con una batería ex-
terna de Festool [2A] + [2B]
El dispositivo puede utilizarse con todas las baterías Festool de las series
BP, BPC y BPS.
ATE NC IÓN
siempre por completo. En caso contrario, la batería puede caerse del
compartimento y herirle a usted o a
personas que estén cerca.
ATE NC IÓN
con brusquedad. Si no es posible introducir y encajar la batería con facilidad, la colocación no es correcta.
ATE NC IÓN
miento se recomienda utilizar una
batería de litio de 18 V
Introduzca la batería
No introduzca la batería
Para un óptimo rendi-
en la entra-
y en el enchufe.
.
5.3 Conexión y desconexión
Encendido: pulsar la tecla de encendido/apagado
[1-6]
.
La radio está operativa.
Apagado: pulsar la tecla de encendido/apagado
5.4 Ajuste del volumen
Para alcanzar una óptima calidad de la música al conectar un
reproductor externo, ajustar el
volumen de ese reproductor
como máximo al 70 %.
5.5 Comprobación del estado de
la batería
Para mostrar el estado actual de la
batería, pulsar la tecla de encendido/
apagado
dio. El indicador de estado de la bate-
[e]
muestra su estado actual (solo
ría
con baterías de litio).
[1-6]
.
Pulsar las teclas de regulación del volumen
para ajustar el volumen deseado.
[1-6]
para encender la ra-
[a]
y
[k]
52
Page 53

Batería completamente
cargada
Batería parcialmente cargada
Carga baja de la batería:
se recomienda cargar
La batería puede descargarse por completo en
cualquier momento, cambiarla inmediatamente
5.6 Utilización de la radio: DAB
Orientar la antena
Pulsar la tecla de encendido/apa-
[1-6]
gado
Pulsar la tecla origen (SOURCE)
hasta que esté seleccionado el
modo DAB.
[1-3]
.
para encender la radio.
[j]
Cuando se utiliza la radio por primera
vez, se inicia una búsqueda automática de emisoras DAB (Full Scan). Si la
radio ya se ha utilizado, se selecciona
la última emisora utilizada.
Si se detectan nuevas emisoras durante la búsqueda, aumenta el número de emisoras y se añaden las
nuevas a la lista de emisoras. Mediante una barra en la pantalla se
muestra el progreso de la búsqueda.
Una vez finalizada la búsqueda, se
selecciona la primera emisora (en
orden alfanumérico 0…9…A…Z).
BR 10 DAB+ E
La pantalla muestra <No stations
found> si no se ha encontrado ninguna emisora.
Si no hay ninguna señal disponible,
cambiar la radio de sitio, por ejemplo,
colocarla cerca de una ventana para
que haya mejor recepción.
Selección de una emisora: DAB
Pulsar la tecla de encendido/apa-
[1-6]
gado
Pulsar la tecla origen (SOURCE)
hasta que esté seleccionado el
modo DAB. La pantalla muestra la
emisora seleccionada actualmente.
Pulsar las teclas de búsqueda de
emisoras
lista de emisoras disponibles.
Pulsar la tecla de selección/confirmación (SELECT)
cionar la emisora deseada. La pantalla mostrará <Connecting…>
mientras la radio busca la emisora
nueva.
Ajustar el volumen deseado con las
teclas de regulación del volumen
[a], [k]
para encender la radio.
[i], [h]
para buscar en la
[g]
para selec-
.
NOTA:
Si no se encuentra la
emisora seleccionada, cambiar
la radio de sitio para que haya
mejor recepción.
[j]
53
Page 54

E BR 10 DAB+
Servicios secundarios: DAB
Algunas emisoras de radio ofrecen
uno o varios servicios secundarios. Si
una emisora ofrece un servicio secundario, esta información aparecerá
en la pantalla debajo del nombre de
la emisora.
La mayoría de los servicios secundarios no se emiten constantemente. Si
no estuviera disponible el servicio seleccionado, la radio emitirá el servicio primario.
Modo de visualización: DAB
En el modo DAB, la radio cuenta con
varias funciones de visualización:
Mantener pulsada la tecla de información (INFO)
segundos, hasta que aparezca
<DAB Info> en la pantalla. A continuación, pulsar las teclas de búsqueda de emisoras
las para ver los diferentes modos
de visualización.
a. Intensidad de la
señal
[j]
durante más de 2
[i], [h]
y soltar-
Muestra la intensidad de la señal de
recepción de la
radio. Un rectángulo vacío indica que
hay el nivel de señal
mínimo requerido
para una recepción
satisfactoria.
b. Tipo de
programa
c. Nombre
multiplex
d. Frecuencia
e. Velocidad
de bits/tipo
de audio
f. Fecha Muestra la fecha
g. Información DL Plus
Muestra el género o
el estilo de música,
p. ej., pop, clásica,
noticias, etc.
Muestra el nombre
multiplex de la emisora actual.
Muestra la frecuencia actual.
Muestra la velocidad de bits digital y
el tipo de audio para
la emisora DAB
seleccionada actualmente.
actual.
Algunas emisoras
pueden proporcionar, aparte de la
información habitual, información
adicional relativa a
los programas para
la pantalla. Si no
existe ninguna información adicional, se
muestra el mensaje
<no DL+info>.
54
Page 55

h. Texto
navegable
(DLS)
Búsqueda de emisoras nuevas: DAB
En el transcurso del tiempo puede
haber disponibles emisoras nuevas.
Para buscar emisoras nuevas:
Pulsar la tecla de encendido/apagado
Pulsar la tecla origen (SOURCE)
hasta que esté seleccionado el
modo DAB.
Para realizar una búsqueda completa en las frecuencias DAB, pulsar la tecla de búsqueda de emisoras (SCAN)
da durante más de 2 segundos. Si
se encuentran nuevas emisoras,
aumenta el número de emisoras y
se añaden las nuevas a la lista de
emisoras. Mediante una barra en
la pantalla se muestra el progreso
de la búsqueda.
Borrado de emisoras: DAB
Si cambia de ubicación, es posible
que algunas de las emisoras mostradas ya no estén disponibles. Además,
algunos servicios DAB solo emiten de
forma irregular o cambian la ubica-
Muestra diversas
informaciones, p. ej.,
nombre del artista/
de la canción,
número de teléfono,
etc.
[1-6]
para encender la radio.
[h]
y mantenerla pulsa-
BR 10 DAB+ E
ción o la frecuencia. Las emisoras
que no se encuentran o que no se han
recibido desde hace mucho tiempo se
marcan en la lista de emisoras con
un signo de interrogación. La función
de borrado (CLEAR)
soras DAB marcadas de la lista de
emisoras.
Pulsar la tecla de encendido/apa-
[1-6]
gado
Pulsar la tecla origen (SOURCE)
hasta que esté seleccionado el
modo DAB.
[j]
Mantener pulsada la tecla de borrar (CLEAR)
segundos, hasta que aparezca
<DAB> en la pantalla.
Pulsar y soltar las teclas de búsqueda de emisoras
leccionar <Clear> o <Back>. Si no
desea ejecutar la función de borrado, seleccione <Back> y pulse la
tecla de selección/confirmación
(SELECT)
ajuste.
Para ejecutar la función de borrado, seleccione <Clear> y pulse la
tecla de selección/confirmación
(SELECT)
ajustes. Pulse las teclas de búsqueda de emisoras
leccionar <YES> o <NO>. Confirme
<YES> pulsando la tecla de selec-
[i]
borra las emi-
para encender la radio.
[i]
durante más de 2
[i], [h]
[g]
para confirmar el
[g]
para acceder a los
[i], [h]
[j]
para se-
para se-
55
Page 56

E BR 10 DAB+
ción/confirmación (SELECT)
función de borrado se iniciará a
continuación. Si no desea ejecutar
la función de borrado, seleccione
<NO> y confirme el aj uste con la tecla de selección/confirmación (SELECT)
[g]
.
NOTA:
Tras un cambio de ubicación, también es conveniente
realizar una búsqueda de emisoras nuevas (véase el apartado
“Búsqueda de emisoras nuevas”).
5.7 Utilización de la radio: FM
(VHS)
Orientar la antena
Búsqueda automática de emisoras
FM (VHS)
Mantener pulsada alguna de las
teclas de búsqueda de emisoras
[i], [h]
(~2 s) para iniciar la búsque-
da automática de emisoras.
[1-3]
Pulsar la tecla origen
(SOURCE)
esté seleccionado el
modo FM.
.
[j]
hasta que
[g]
. La
La búsqueda de emisoras finaliza automáticamente cuando se encuentra
una emisora cuya señal tiene suficiente fuerza.
56
En la pantalla se muestra la frecuencia. Cuando la señal es suficientemente fuerte y hay disponibles datos
RDS, en la pantalla se muestra el
nombre de la emisora, el radiotexto y
la hora.
Búsqueda de otras emisoras
Pulsar las teclas de búsqueda de
emisoras
crito anteriormente.
[i], [h]
según se ha des-
Al final de la banda de frecuencias, la
búsqueda salta al comienzo opuesto
de la banda.
Si la recepción es mala, volver a
orientar la antena.
Búsqueda manual de emisoras: FM
(VHS)
Pulsar varias veces las teclas de
búsqueda de emisoras
ta alcanzar la frecuencia deseada.
[i], [h]
has-
La frecuencia avanza en intervalos de
0,1 MHz.
5.8 Utilización de la memoria de
emisoras
Las emisoras DAB/FM favoritas pueden guardarse en la memoria de
emisoras. La radio dispone de cuatro
posiciones de memorización en cada
modo. Pueden utilizarse en todos los
modos.
Pulsar la tecla de encendido/apagado
[1-6]
para encender la radio.
Page 57

Pulsar alguna de las teclas de posición
[b], [c], [f]
la pulsada (~2 s) hasta que se
muestre <Saved> en la pantalla.
o
[g]
y mantener-
La emisora se guarda en la posición
seleccionada. En la pantalla se
muestra el número de posición P1 a
P4.
Para utilizar el resto de posiciones,
seguir este mismo paso. De la misma
forma, puede guardarse una nueva
emisora sobre otra guardada anteriormente.
Acceso a la memoria de emisoras
Pulsar la posición deseada
[f]
o
[g]
para acceder a la emisora
memorizada.
5.9 Hora: actualización automática
La radio actualiza la hora
máticamente mediante la señal DAB
o FM RDS-CT. Después de una interrupción del suministro eléctrico, la
radio actualiza la hora la próxima vez
que se enciende.
NOTA:
Si la radio no recibe se-
ñal, póngala en otro sitio.
Si recibe la hora mediante la función
FM RDS (Radio Data System), la radio
sincroniza la hora y la muestra en la
pantalla
[d]
emisora que ofrece datos RDS con
si se ha seleccionado una
[b], [c]
[d]
auto-
BR 10 DAB+ E
señales CT. Si la señal tiene la intensidad suficiente, la hora se actualiza
en uno o dos minutos. Si la radio está
sincronizada con RDS-CT, la hora de
la radio estará actualizada durante
las 24 horas siguientes.
Si no se recibe una señal RDS,
no se muestra la hora.
5.10 Música mediante transmisión
por Bluetooth
La SysRock y el dispositivo Bluetooth
deben acoplarse entre sí para poder
reproducir música mediante el dispositivo Bluetoot h. Esta «unión» hace
que ambos dispositivos se reconoz-
,
can entre sí.
Primera conexión del dispositivo
Bluetooth
Pulsar la tecla Source/origen
para seleccionar el modo Bluetooth.
El símbolo de Bluetooth parpadea en la pantalla e indica
que puede detectarse la Sys-
Rock.
Activar el Bluetooth en el dispositivo Bluetooth tal como se explica en
el manual de instrucciones del dispositivo.
[j]
57
Page 58

E BR 10 DAB+
Visualizar la lista de dispositivos
Bluetooth y seleccionar el dispositivo <SysRock DAB>. En algunos
teléfonos móviles, equipados con
versiones de Bluetooth anteriores
a la BT2.1, debe introducirse una
contraseña (“0000”).
Una vez que se ha activado
la conexión Bluetooth, se
muestra el símbolo de Bluetooth con una marca de verificación.
Ahora puede seleccionarse cualquier
música con el dispositivo Bluetooth y
reproducirse.
NOTA:
– Cuando se desea acoplar dos dis-
positivos Bluetooth por primera
vez y los dos buscan la conexión
con SysRock al mismo tiempo, en
ambos dispositivos se muestra la
conexión disponible a SysRock.
Una vez que se ha conectado a un
dispositivo, SysRock no vuelve a
mostrarse en la lista de conexiones del otro.
– Si el dispositivo Bluetooth se en-
cuentra fuera de alcance, se interrumpe temporalmente la
conexión con SysRock. SysRock
activa automáticamente la conexión cuando el dispositivo Bluetooth vuelve a estar al alcance. En
el tiempo que dura la interrupción, ningún otro dispositivo
58
Bluetooth puede acoplarse con la
SysRock.
– Si en la lista del dispositivo Blue-
tooth se muestra <SysRock DAB>
pero no es posible realizar la conexión: borrar el dispositivo de la
lista y volver a conectar el dispositivo con la SysRock, tal como se
ha descrito anteriormente.
– El alcance efectivo entre la Sys-
Rock y el dispositivo Bluetooth es
de aproximadamente 10 metros
(30 pies). Cualquier obstáculo entre la SysRock y el dispositivo
Bluetooth puede reducir este alcance.
– La conectividad Bluetooth puede
variar en función del dispositivo
conectado. Tenga en cuenta las
funciones Bluetooth del dispositivo que va a acoplar antes de conectarlo a la SysRock. Es posible
que no todas las funciones sean
compatibles en algunos dispositivos Bluetooth conectados.
Reproducción de archivos de audio
en modo Bluetooth
Si la SysRock está correctamente
acoplada con el dispositivo Bluetooth
seleccionado, es posible reproducir
la música con las funciones del dispositivo acoplado.
Page 59

Tan pronto comienza la reproducción, puede ajustarse el volumen
deseado mediante las teclas de regulación de volumen
SysRock o mediante el dispositivo
Bluetooth.
Seleccionar Reproducción/Pausa y
Cambio de título en los elementos
de mando del dispositivo Bluetooth
acoplado. O bien con las teclas de
la SysRock: Reproducción/Pausa
[b]
, Título siguiente
[i]
.
terior
[a], [k]
[h]
, Título an-
de la
La información del tema que se está
reproduciendo (p. ej. título/intérprete) se muestra como texto continuo
en la parte inferior de la pantalla.
NOTA:
– No todas las aplicaciones ni dis-
positivos reaccionan a estos elementos de control.
– Algunos teléfonos móviles se
desconectan temporalmente de
la SysRock cuando entran o salen
llamadas. Algunos teléfonos móviles detienen la reproducción
cuando entran SMS, correos
electrónicos o similares. Este
comportamiento es una función
del dispositivo Bluetooth acoplado y no indica ningún problema en
la SysRock.
BR 10 DAB+ E
Reproducción desde dispositivos ya
acoplados
Esta SysRock puede guardar hasta
ocho dispositivos acoplados. Cuando
la memoria sobrepasa este número,
se sobrescribe el primer dispositivo
acoplado. Si el dispositivo Bluetooth
ya estaba acoplado a la SysRock, la
radio guarda este dispositivo e intenta acoplarse al último dispositivo con
el que estaba conectada. Si el último
dispositivo Bluetooth acoplado no
está disponible, la SysRock intenta
acoplarse al penúltimo dispositivo
acoplado, y así sucesivamente.
Borrado de la memoria de dispositivos Bluetooth acoplados
Para borrar la memoria de dispositivos Bluetooth en la SysRock:
mantener pulsada la tecla de memoria 4
[g]
<BT-Reset> en la pantalla. La SysRock se apaga automáticamente
una vez que se ha borrado la memoria.
Desacoplamiento del dispositivo
Bluetooth acoplado
Pulsar la tecla origen (SOURCE)
para seleccionar otro modo que no
sea Bluetooth.
hasta que se muestre
[j]
59
Page 60

E BR 10 DAB+
Como alternativa, pulsar la tecla
de acoplamiento
nalizar la conexión.
O finalizar la conexión Bluetooth
en el dispositivo Bluetooth.
[f]
(~2 s) para fi-
Si se desacopla el dispositivo Bluetooth estando en modo Bluetooth, el
símbolo Bluetooth comienza a parpadear de nuevo en la pantalla e indica
que la SysRock vuelve a estar disponible para su conexión.
Utilización del dispositivo de manos
libres
Esta SysRock puede utilizarse como dispositivo de ma-
nos libres para teléfonos
móviles. Si se está reproduciendo
música mediante la SysRock y entra
una llamada en el teléfono móvil, se
interrumpe automáticamente la música para que pueda atender la llamada.
Si durante la reproducción de música mediante la SysRock entra
una llamada, pulsar brevemente la
tecla de llamada
la.
Hablar en la dirección del micrófono interno
Atención: Un volumen muy alto
en la SysRock puede afectar negativamente a la calidad del sonido.
60
[1-8]
[c]
para atender-
.
Pulsar y soltar la tecla de llamada
[c]
para finalizar la llamada.
5.11 Entrada AUX (AUX-IN)
En la parte superior de la SysRock
existe una entrada AUX de 3,5 mm
que permite la transmisión de una
5]
señal de audio desde un dispositivo
de audio externo, como p. ej. un reproductor de MP3 o de CD.
Conectar una fuente de audio estéreo o mono (como un reproductor
de MP3 o de CD) en la entrada AUX
[1-5]
.
Pulsar la tecla Source/origen
para seleccionar el modo AUX.
Ajustar el volumen en el reproductor de MP3 o de CD (máx. 70 %)
para garantizar una señal suficiente y, a continuación, adaptar el volumen en la SysRock para escuchar cómodamente.
No utilice la entrada AUX bajo la
lluvia o en condiciones de humedad para evitar que esta penetre en la SysRock. Si se dan
estas condiciones, mantenga
bien cerrada la cubierta de
goma de la parte trasera.
[1-
[j]
Page 61

5.12 Carga del smartphone en la
conexión USB
La radio tiene una conexión USB para
cargar un smartphone o dispositivos
similares. El tiempo de recarga puede variar y, en algunos casos, puede
necesitarse más tiempo que si se utiliza el cargador del fabricante del
smartphone. La radio puede cargar
el smartphone o dispositivos similares si está encendida y en el modo de
radio DAB/FM, el modo Bluetooth o
el modo AUX.
Conectar el smartphone en la conexión USB
te superior de la radio.
El smartphone comienza a cargarse.
Una vez cargado, retirar el cable de
carga USB.
ATENCIÓN
– La función de carga de la Sys-
Rock-DAB no funciona en algunos dispositivos USB.
– Retirar el cable USB después de
la carga o si no está utilizando.
– No conectar la conexión USB con
el enchufe, ya que existe peligro
[1-4]
situada en la par-
NOTA:
Cargar teléfonos móviles
u otros dispositivos mientras se
escuchan emisoras DAB/FM
puede perjudicar la calidad del
sonido.
BR 10 DAB+ E
de incendio. La conexión USB sirve exclusivamente para cargar
dispositivos de baja tensión (5 V/
1A).
– No insertar clavos, alambres ni
similares en la conexión USB, ya
que podría producirse un cortocircuito y un fallo del dispositivo.
–No conectar la conexión USB de
la radio a la conexión USB del ordenador, ya que puede causar daños en los dispositivos.
– No utilizar nunca la conexión USB
bajo la lluvia u otros líquidos a fin
de evitar que penetre humedad
en la radio.
– Después de utilizar la conexión
USB, vuelva a taparla con la caperuza protectora para evitar que se
ensucie.
5.13 Opciones de emplazamiento
Estribo de sujeción [1-1]
El estribo de sujeción deslizable permite colgar la herramienta en andamios o puntos similares.
Para el funcionamiento con una
batería externa de Festool es
necesario retirar el estribo de
[2A]
sujeción
Tríp ode
El casquillo con rosca del trípode
admite una rosca UNC 1/4"-20 es-
1]
tándar para trípode de fotografía.
.
[2-
61
Page 62

E BR 10 DAB+
6 Mantenimiento y cuidado
El
servicio de atención al
cliente y reparaciones
solo está disponible por
parte del fabricante o los
talleres de reparación.
Encuentre la dirección más próxima a
usted en: www.festool.com/service
EKAT
4
Utilice únicamente piezas
5
de recambio Festool origi-
3
2
1
nales. Referencia en:
www.festool.com/service
– Para evitar daños, limpiar la pan-
[1-9]
talla
y el altavoz
[1-7]
de la
radio con un paño suave y seco.
No utilizar disolventes.
– Mantener limpios los contactos
de la SysRock y de la batería.
7 Medio ambiente
No desechar con
la basura do-
Reci-
méstica.
clar las herramientas, accesorios y embalajes
tuosa con el medio ambiente. Respetar las disposiciones nacionales vigentes.
de forma respe-
Solo UE:
según la Directiva europea
sobre herramientas eléctricos y electrónicos usados y su transposición a
la legislación nacional, las herramientas eléctricas usadas deben recogerse por separado y reciclarse de
forma respetuosa con el medio ambiente.
Información sobre REACh:
www.festool.com/reach
Festool se reserva el derecho de modificar las especificaciones sin previo
aviso.
La marca denominativa y el logotipo
de Bluetooth
®
son marcas registradas de Bluetooth SIG, Inc. Por lo tanto, todo uso que Festool GmbH haga
de dicha marca está sujeto a un contrato de licencia.
62
Page 63

Istruzioni per l'uso originali
Le figure indicate nel testo si trovano
all'inizio delle istruzioni per l'uso.
1Simboli
Simbolo Significato
Avvertenza di pericolo
generico
Avvertenza sulle scariche
elettriche
Leggere le istruzioni
d'uso e le avvertenze di
sicurezza.
Non smaltire tra i rifiuti
domestici.
Non ribaltare.
Non utilizzare al massimo
volume.
2 Avvertenze per la sicu-
rezza
1. Leggere le presenti indicazioni.
2. Conservare le presenti istruzioni.
BR 10 DAB+ I
3. Attenersi a tutti gli avvisi.
4. Seguire tutte le indicazioni.
5. Non utilizzare il presente appa-
recchio in prossimità di acqua.
6. Pulire il presente apparecchio
esclusivamente con un panno
asciutto.
7. Non sistemare l'apparecchio in
prossimità di fonti di calore, quali
ad es. corpi radianti, accumulatori di calore, forni o altri apparecchi (inclusi amplificatori) che
possano generare calore.
8. Proteggere i cavi e l'adattatore di
rete dalle sollecitazioni meccaniche (inceppamenti e simili), in
particolare sul connettore, sulla
presa di corrente e sul collegamento da cui fuoriesce il cavo
dell'adattatore di rete.
9. Utilizzare esclusivamente appa-
recchi supplementari ed accessori di tipo indicato dal produttore.
10. Utilizzare esclusiva-
mente supporti, treppiedi o sostegni di tipo
indicato dal produttore, o che siano stati acquistati assieme all'apparecchio. Qualora si
utilizzi un cavo, procedere con
cautela qualora occorra spostare
il cavo stesso o l'apparecchio, al
63
Page 64

I BR 10 DAB+
fine di evitare lesioni causate da
ribaltamenti.
11. Estrarre il connettore di rete in
caso di temporali, o qualora non
si utilizzi l'apparecchio per un periodo prolungato.
12. Per qualsiasi intervento di manutenzione, rivolgersi a personale di
servizio qualificato. Un intervento
di manutenzione sarà necessario
nel caso il dispositivo abbia subito
danni di qualsiasi origine, ad
esempio, in caso di danni
all'adattatore di rete, versamenti
di liquidi, esposizione del dispositivo a pioggia o umidità, oppure di
funzionamento anomalo o caduta
del dispositivo stesso.
13. Al fine di evitare rischi d'incendio
e di folgorazione, non esporre
l'apparecchio alla pioggia o
all'umidità.
14. L'indicazione di rischio di folgorazione e i relativi simboli grafici
sono riportati sul lato inferiore
del dispositivo.
15. Non umettare l'apparecchio con
liquidi, né applicarne a spruzzo.
Non posizionare sull'apparecchio
oggetti contenenti liquidi.
16. L'adattatore di rete andrà innestato in un punto prossimo alla
radio ed agevolmente accessibile.
Per scollegare la radio dall'alimentazione in caso di emergenza, estrarre l'adattatore di rete
dalla presa di corrente.
17. Qualora occorra utilizzare l'adattatore di rete o il connettore
dell'apparecchio per spegnere
l'apparecchio stesso, tali elementi dovranno restare liberamente
accessibili.
18. Non esporre la batteria a temperature elevate, ad es. causate da
irradiazione solare, presenza di
fuoco o simili.
Per ulteriori informazioni, leggere le avvertenze di sicurezza della
batteria.
19. Al fine di evitare danni
all'udito, non regolare
la radio ad alto volume
per lunghi periodi.
CAUTELA:
Al fine di evitare rischi di
folgorazione, non effettuare alcun intervento di riparazione che non sia
descritto nelle presenti istruzioni
d'uso, salvo nel caso in cui si disponga di preparazione specifica.
ATTENZIONE! La garanzia decadrà
qualora l'alloggiamento della radio
venga aperto o siano state apportate
altre modifiche alla radio stessa.
64
Page 65

BR 10 DAB+ I
3 Dati tecnici
Radio SYS ROCK BR 10 DAB+
Alimentazione elettrica
Gamma di frequenza FM (onde ultracorte) 87.50 - 108 MHz
Bluetooth
®
Circuito altoparlanti 2.5" 8 Ω x1
Campo di temperatura consentito Da -10 °C a +45 °C
Dimensioni (L x H x P) 100 x 150 x 105 mm
Peso (senza batteria esterna) 0.7 kg
Adattatore di rete Uscita: DC 19V/1.2A
Pin positivo centrale
Batteria 10.8 -18 V
Consigliata: 18 V
DAB 174.928 - 239.200 MHz
Versione 4.1, conforme a EDR
Profili Profili HFP, A2DP, AVRCP
Potenza di conver-
sione max.
Campo di conver-
sione max.
+4dBm classe 2 potenza in
uscita
10 m (in base alle condizioni
di utilizzo)
Codec supportato SBC/ACC
Potenza in uscita 19V:10W 3%THD
Polo d'ingresso Diam. 3,5 mm (AUX IN)
Collegamento USB 5V/1.2A
65
Page 66

I BR 10 DAB+
4 Elementi dell'utensile
Radio - SysRock
[1-1]
Staffa di fissaggio scorrevole
[1-2]
Ingresso per adattatore di rete
[1-3]
Antenna
[1-4]
Collegamento USB
[1-5]
Ingresso AUX (AUX-IN)
[1-6]
Pulsante On/Off
[1-7]
Altoparlanti
[1-8]
Microfono integrato
[1-9]
Display
[1-10]
Adattatore di rete
[2-1]
Boccola per filettatura treppiede UNC 1/4"-20
Tasti di menu e display
[a]
Regolazione volume, riduzione
[b]
Posizione di memoria stazione
2
Modalità Bluetooth: Riproduzione/Pausa
[c]
Posizione di memoria stazione
1
Modalità Bluetooth: tasto di
chiamata
[d]
Ora (disponibile con DAB e FM
RDS-CT)
66
[e]
Indicatore di carica della batteria
[f]
Posizione di memoria stazione
3
Modalità Bluetooth: pairing
[g]
Posizione di memoria stazione
4
Tasto di selezione/conferma
(SELECT)
[h]
Modalità DAB/FM: tasti di
ricerca stazioni - avanti
Modalità Bluetooth: titolo successivo
Modalità DAB: ricerca stazioni
(SCAN)
[i]
Modalità DAB/FM: tasti di
ricerca stazioni - indietro
Modalità Bluetooth: titolo precedente
Modalità DAB: tasto canc
(CLEAR)
[j]
Sorgente (SOURCE)
Modalità DAB: tasto info (INFO)
[k]
Regolazione volume, aumento
5 Messa in funzione
Page 67

5.1 Utilizzo con adattatore di rete
Innestare l'adattatore di
rete
[1-10]
rente .
IMPORTANTE:
L'adattatore di rete serve a collegare
la radio con la presa.Durante l'utiliz-
zo l'adattatore di rete della radio deve
rimanere accessibile affinché la radio
possa venire spenta. L'adattatore di
rete dovrebbe essere staccato dalla
presa dopo l'uso.
5.2 Utilizzo con batteria Festool
L'apparecchio è utilizzabile con qualsiasi batteria Festool delle serie BP,
BPC e BPS.
CAUTELA
pre per intero: in caso contrario, la
batteria potrebbe cadere dalla relativa interfaccia, con rischio di lesioni
per l'utente o per le persone circostanti.
CAUTELA
esercitando forza: se la batteria non
può introdurre agevolmente e scatta,
non è sistemata correttamente.
CAUTELA
ottimale, si consiglia di utilizzare una
batteria al litio da 18 V
[1-2]
esterna [2A] + [2B]
Introdurre la batteria sem-
Non introdurre la batteria
Per ottenere una potenza
nell'ingresso
e nella presa di cor-
.
BR 10 DAB+ I
5.3 Accensione/spegnimento
Per accendere: premere il pulsante On/Off
[1-6]
.
La radio sarà ora pronta al funzionamento.
Per spegnere: premere il pulsante
[1-6]
On/Off
5.4 Regolazione del volume
5.5 Verifica del livello di carica
Per visualizzare il livello attuale di
carica della batteria, premere il pulsante On/Off
radio. L'indicatore di carica della batteria
di carica della batteria (solo con batteria al litio).
.
Premere i tasti di regolazione
[a]
e
[k]
volume
il volume sul valore desiderato.
Per ottenere un'ottimale qualità
di riproduzione musicale utilizzando l'apparecchio unitamente ad un lettore esterno, regolare il volume su quest'ultimo non
oltre il 70%.
della batteria
[1-6]
[e]
visualizzerà il livello attuale
per regolare
per accendere la
67
Page 68

I BR 10 DAB+
Batteria completamente
carica
Batteria parzialmente
carica
La batteria si sta scaricando: si consiglia di ricaricarla
La batteria sta per scaricarsi completamente e va
immediatamente sostituita
5.6 Utilizzo della radio - DAB
Orientare l'antenna
Premere il pulsante on/off
per accendere la radio.
Premere il tasto Sorgente (SOURCE)
[j]
finché non viene selezionata
la modalità DAB.
[1-3]
.
[1-6]
Se si utilizza la radio per la prima volta, si avvia una ricerca automatica
delle stazioni DAB (Full Scan). Se la
radio è già stata utilizzata, viene selezionata l'ultima stazione impostata.
Se durante la ricerca delle stazioni
vengono rilevate nuove stazioni, il
loro numero cresce e le nuove stazioni vengono aggiunte all'elenco. Una
barra sul display mostra l'avanzamento della ricerca.
Una volta che la ricerca delle stazioni
è conclusa, viene selezionata la prima stazione (in sequenza alfanumerica 0…9…A…Z).
Sul display compare <No stations
found> se non sono state trovate stazioni.
Se non ci sono segnali disponibili,
cambiare la posizione della radio, ad
es. portarla vicino ad una finestra,
per migliorare la ricezione.
Selezione delle stazioni - DAB
Premere il pulsante on/off
per accendere la radio.
Premere il tasto Sorgente (SOURCE)
[j]
finché non viene selezionata
la modalità DAB. Sul display compare la stazione radio attualmente
selezionata.
Premere la ricerca delle stazioni
[i], [h]
per cercare nell'elenco del-
le stazioni disponibili.
Premere il tasto di selezione/conferma (SELECT)
re la stazione desiderata. Eventualmente sul display compare
<Connecting…> mentre la radio
cerca la nuova stazione.
Impostare il volume desiderato con
la relativa regolazione
[g]
per seleziona-
[a], [k]
[1-6]
.
68
Page 69

AVVERTENZA:
desiderata non viene trovata,
cambiare la posizione della radio per ottenere una miglior ricezione.
Servizi secondari - DAB
Determinate stazioni radio offrono
uno o più servizi secondari. Se una
stazione radio offre un servizio secondario, sul display compare questa
informazione sotto al nome della stazione.
Se la stazione
La maggior parte dei servizi secondari non viene inviata continuamente.Se il servizio selezionato non è disponibile, la radio invia il servizio primario.
Modalità display - DAB
In modalità DAB, Ia radio dispone di
più funzioni display:
Tasto info (INFO)
più di 2 secondi e tenerlo premuto
finché sul display non compare
<DAB Info>. Quindi premere il tasto
di ricerca delle stazioni
lasciarlo per vedere le diverse modalità di visualizzazione.
[j]
premere per
[i], [h]
e ri-
BR 10 DAB+ I
a. Intensità
del segnale
b. Tipo di
programma
c. Nome
multiplo
d. Frequenza
e. Bitrate /
tipo di audio
f. Data Indica la data
Indica l'intensità del
segnale della ricezione radio. Un rettangolo libero, non
riempito, indica un
livello di segnale
minimo necessario
per una ricezione
soddisfacente.
Indica il genere o lo
stile di musica, ad
es. pop. classica,
notizie ecc.
Indica il nome multiplex della stazione
attuale.
Indica la frequenza
attuale.
Indica il bitrate digitale e il tipo di audio
per la stazione DAB
impostati in quel
momento.
attuale.
69
Page 70

I BR 10 DAB+
g. Informazioni DL
Plus
h. Testo
scorrevole
(DLS)
Ricerca di nuove stazioni - DAB
Col tempo possono essere disponibili
nuove stazioni. Per trovare nuove stazioni:
Premere il pulsante on/off
per accendere la radio.
Premere il tasto Sorgente (SOURCE)
la modalità DAB.
Per cercare in tute le frequenze
DAB premere il tasto di ricerca delle stazioni (SCAN)
premuto per più di 2 secondi. Se
Alcune stazioni,
oltre alle informazioni regolari, possono mettere a
disposizione sul
display altre informazioni riferite ai
programmi.Se non
sono disponibili
informazioni supplementari, compare il
messaggio <no
DL+info>.
Indica diverse informazioni, ad es.
nome dell'artista /
titolo della canzone /
numero di telefono
ecc.
[j]
finché non viene selezionata
[h]
e tenerlo
[1-6]
vengono rilevate nuove stazioni, il
loro numero cresce e le nuove stazioni vengono aggiunte all'elenco.
Una barra sul display mostra
l'avanzamento della ricerca.
Pulizia delle stazioni - DAB
Se si cambia la posizione, alcune delle stazioni indicate potrebbero non
essere più disponibili. Inoltre alcuni
servizi DAB trasmettono irregolarmente o cambiano canale o frequenza.Le stazioni che non vengono trovate o che non vengono ricevute per
molto tempo, sono evidenziate
nell'elenco delle stazioni con un punto interrogativo.La funzione di pulizia
[i]
(CLEAR)
denziate dall'elenco.
cancella le stazioni evi-
Premere il pulsante on/off
per accendere la radio.
Premere il tasto Sorgente (SOUR-
[j]
finché non viene selezionata
CE)
la modalità DAB.
Premere il tasto canc (CLEAR)
tenerlo premuto per più di 2 secondi finché sul display non compare
<DAB>.
Premere il tasto di ricerca stazioni
[i], [h]
e rilasciarlo per selezionare
<Clear> o <Back>. Se non si desidera eseguire la funzione di pulizia,
selezionare <Back> e premere il
tasto di selezione/conferma (SE-
[1-6]
[i]
e
70
Page 71

LECT)
[g]
stazione.
Per eseguire la funzione di pulizia,
selezionare <Clear>, e premere il
tasto di selezione/conferma (SELECT)
stazioni. Premere i tasti della ricerca stazioni
nare <YES> o <NO>. Confermare
<YES> premendo il tasto di selezione/conferma (SELECT)
zione di pulizia viene avviata. Se
non si desidera eseguire la funzione di pulizia, selezionare <NO> e
confermare l'impostazione con il
tasto di selezione/conferma (SELECT) )
5.7 Utilizzo della radio - FM (onde
Orientare l'antenna
zionata la modalità FM.
Ricerca stazioni automatica - FM
(onde ultracorte)
Premere i tasti di ricerca stazioni
[i], [h]
per confermare l'impo-
[g]
per passare alle impo-
[i], [h]
per selezio-
[g]
. La fun-
[g]
.
AVVERTENZA:
biato posizione, si dovrebbe
eseguire anche una ricerca di
nuove stazioni (v. capitolo "Trovare nuove stazioni").
ultracorte)
e mantenerli premuti (~ 2
dopo aver cam-
[1-3]
.
Premere il tasto Source (SOURCE)
quando non sarà sele-
[j]
sino a
BR 10 DAB+ I
sec) per avviare la ricerca stazioni
automatica.
La ricerca stazioni verrà automaticamente terminata non appena verrà
individuata una stazione dall'adeguata intensità di segnale.
Il display visualizzerà la frequenza
della stazione. Se l'intensità di segnale è adeguata e sono disponibili
informazioni RSD, il display visualizzerà il nome della stazione, il testo
della radio e l'ora.
Trovare altre stazioni
Premere i tasti di ricerca stazioni
[i], [h]
come descritto in preceden-
za.
Al termine della banda di frequenze,
la ricerca passerà automaticamente
all'estremità opposta della banda.
In caso di cattiva ricezione, riorientare l'antenna.
Ricerca stazioni manuale - FM (onde
ultracorte)
Premere ripetutamente i tasti di ricerca stazioni
giungere la frequenza desiderata.
[i], [h]
sino a rag-
Gli step di frequenza sono di 0,1 MHz.
5.8 Utilizzo della memoria stazioni
Le stazioni radio preferite DAB/FM si
possono salvare nell'apposita memoria. Sono disponibili quattro memoria
71
Page 72

I BR 10 DAB+
stazione. Possono essere modificate
in qualsiasi modalità.
Premere il pulsante on/off
per accendere la radio.
Premere i tasti di memoria stazio-
[b], [c], [f]
ne
muti (~ 2 sec) sino a quando il display non visualizzerà <Saved>
(salvato).
o
[g]
e tenerli pre-
[1-6]
La stazione verrà memorizzata nella
posizione di memoria stazione selezionata. Il display visualizzerà i numeri di memoria stazione da P1 a P4.
Per ulteriori posizioni di memoria
stazioni, ripetere questo passaggio.
Nello stesso modo, sarà possibile sovrascrivere le posizioni di memoria
stazioni con nuove stazioni.
Richiamo della memoria stazioni
Premere il tasto di memoria stazione desiderato:
[g]
, per accedere alla stazione
re
memorizzata.
5.9 Ora - aggiornata automaticamente
La radio aggiorna l'ora
camente mediante il DBA o il segnale
RDS-CT. Dopo un'interruzione della
corrente, la radio aggiorna l'ora
all'accensione successiva.
[b], [c], [f]
[d]
automati-
oppu-
AVVER TENZA:
riceve segnale, posizionatela in
un altro posto.
Se ricevete il segnale tramite la funzione FM RDS (Radio Data System), la
radio sincronizzerà l'ora e la visualizzerà sul display
zione sarà selezionata e saranno disponibili le informazioni RDS con segnali CT. Se l'intensità di segnale è
adeguata, l'ora verrà aggiornata entro due minuti. L'ora della radio resterà aggiornata per le successive 24
ore, se la radio verrà sincronizzata
all'RDS-CT.
Se il segnale RDS non verrà ricevuto, l'ora non verrà visualizzata.
5.10 Ascolto di musica via streaming Bluetooth
Per poter riprodurre musica tramite
il dispositivo Bluetooth, occorrerà
che la SysRock e il dispositivo Bluetooth siano abbinati tramite pairing.
Si tratta di un “legame” che consente
a due apparecchi di riconoscersi reciprocamente.
Prima connessione del dispositivo
Bluetooth
Premere il tasto Source/Sorgente
[j]
per selezionare la modalità
Bluetooth.
se la radio non
[d]
, quando una sta-
72
Page 73

Il simbolo del Bluetooth lampeggerà sul display, indicando che la SysRock può essere
riconosciuta.
A questo punto, andrà attivata la
funzionalità Bluetooth nell'apposito dispositivo, come indicato nelle
relative istruzioni d'uso.
Visualizzare l'elenco dispositivi
Bluetooth e selezionare il dispositivo <SysRock DAB>. Per alcuni
cellulari (con versioni precedenti
alla BT2.1 Bluetooth standard) occorrerà inserire una password
("0000").
Quando la connessione
Bluetooth sarà stata attiva-
ta, il simbolo del Bluetooth
verrà visualizzato con una spunta accanto. Ora, sul dispositivo Bluetooth
sarà possibile selezionare e riprodurre la musica che si preferisce.
AVVERTENZA:
– Qualora due dispositivi Bluetooth
debbano eseguire il primo pairing
reciproco e, al contempo, ricercare la connessione alla SysRock, la
SysRock verrà visualizzata su entrambi i dispositivi, al fine di stabilire la connessione. Stabilita la
connessione con un apparecchio,
la SysRock non verrà più visualizzata nell'elenco di connessione
BR 10 DAB+ I
dell'altro dispositivo.
– Qualora il dispositivo Bluetooth si
trovi fuori portata, la connessione
alla SysRock verrà temporaneamente interrotta. La SysRock riattiverà automaticamente la
connessione non appena il dispositivo Bluetooth si troverà nuovamente entro la portata. Durante il
periodo di interruzione, nessun
altro dispositivo Bluetooth si potrà abbinare tramite pairing alla
SysRock.
– Se la <SysRock DAB> verrà visua-
lizzata nell'elenco dispositivi del
dispositivo Bluetooth, ma la connessione non sarà possibile, occorrerà cancellare il dispositivo
dall'elenco e ritentare la connessione fra il dispositivo Bluetooth e
la SysRock, come descritto in
precedenza.
– La portata attiva fra la SysRock e
il dispositivo Bluetooth è di circa
10 metri (30 piedi). Tenere presente che eventuali ostacoli fra la
SysRock e il dispositivo Bluetooth
potrebbero ridurre la portata.
– Il grado di connettività Bluetooth
può variare in base al dispositivo
Bluetooth connesso. Prima di
collegarlo alla SysRock, tenere
presenti le funzionalità Bluetooth
del dispositivo abbinato tramite
73
Page 74

I BR 10 DAB+
pairing. Alcuni dispositivi abbinati
tramite pairing potrebbero non
supportare tutte le funzionalità.
Riproduzione di file audio in modalità Bluetooth
Una volta riuscito il pairing fra la
SysRock e il dispositivo Bluetooth selezionato, sarà possibile riprodurre
musica, mediante le funzioni di comando del dispositivo abbinato tramite pairing.
All'inizio della riproduzione, regolare il volume sul valore desiderato, utilizzando gli appositi tasti
[k]
della SysRock o del dispositivo
Bluetooth.
Selezionare le opzioni Riproduzione/Pausa e Cambio titolo sugli elementi di comando del dispositivo
abbinato tramite pairing. In alternativa, utilizzare i tasti della
SysRock: Riproduzione/Pausa
titolo successivo
dente
[i]
[h]
.
, titolo prece-
[a]
[b]
Le informazioni sul titolo in riproduzione (ad es. Nome titolo / Autore)
verranno visualizzate come testo
scorrevole nella parte bassa del display.
AVVERTENZA:
– Non tutte le applicazioni e non
tutti i dispositivi reagiscono a
questi elementi di comando.
– Alcuni cellulari si scollegheranno
temporaneamente dalla SysRock
nel caso di chiamate in ingresso o
in uscita; alcuni cellulari passeranno in modalità silenziosa, nel
caso arrivino SMS, e-mail o simili. Eventuali comportamenti simili
sono legati al funzionamento del
dispositivo abbinato tramite pairing e non costituiscono un'anomalia della SysRock.
Riproduzione da dispositivi già abbinati tramite pairing
,
Il presente modello di SysRock può
memorizzare fino ad otto dispositivi
abbinati tramite pairing. Se la memoria supererà tale numero, il dispositivo memorizzato per primo verrà sovrascritto. Se il dispositivo Bluetooth
è già stato abbinato tramite pairing
alla SysRock, quest'ultima memoriz-
,
zerà tale dispositivo e tenterà di eseguire il pairing con il dispositivo che
si sia collegato per ultimo. Se l'ultimo
dispositivo Bluetooth abbinato tramite pairing non è disponibile, la
SysRock tenterà di eseguire il pairing
con il dispositivo collegato per penultimo e così via.
74
Page 75

Cancellazione della memoria dei dispositivi abbinati tramite pairing
Per cancellare la memoria dei dispositivi Bluetooth nella SysRock,
premere il pulsante della posizione
di memoria 4
muto sino a quando il display non
visualizzerà <BT-Reset> (Reset
Bluetooth). Una volta cancellata la
memoria, la SysRock si spegnerà
automaticamente.
Scollegamento del dispositivo Bluetooth abbinato tramite pairing
Premere il tasto Source (SOURCE)
[j]
e selezionare una modalità di-
versa da quella Bluetooth.
In alternativa, premere il tasto di
pairing
connessione.
O terminare la connessione Bluetooth sul dispositivo Bluetooth.
[g]
e mantenerlo pre-
[f]
(~2 s), per terminare la
Se il dispositivo Bluetooth verrà scollegato in modalità Bluetooth, il simbolo del Bluetooth sul display riprenderà a lampeggiare e indicherà che la
SysRock sia nuovamente rilevabile
per una nuova connessione.
Utilizzo di un apparecchio viva voce
Il presente modello di
SysRock è utilizzabile come
apparecchio viva voce per
cellulare. Se la SysRock sta riprodu-
BR 10 DAB+ I
cendo musica e il cellulare riceve una
chiamata, la musica verrà automaticamente interrotta, per consentire
all'utente di rispondere alla chiamata.
Se si riceve una chiamata mentre
la SysRock sta riproducendo musica, premere brevemente il tasto di
chiamata
Dirigere la voce verso il microfono
interno
Premere il tasto di chiamata
rilasciarlo per terminare la chiamata.
5.11 Ingresso AUX (AUX-IN)
Sulla parte superiore della SysRock è
presente un ingresso AUX
3,5 mm, che consente la riproduzione
di un segnale audio da un apparecchio audio esterno, quale ad es. un
lettore MP3 o per CD.
Collegare all'ingresso AUX
una sorgente audio, stereo o mono,
quale ad es. un lettore MP3 o per
CD.
Premere il tasto Source/Sorgente
[j]
AUX.
[c]
per rispondere.
[1-8]
.
Attenzione: utilizzare la
SysRock con un volume molto
elevato può compromettere la
qualità dell'audio.
[c]
[1-5]
da
[1-5]
per selezionare la modalità
e
75
Page 76

I BR 10 DAB+
Regolare il volume sul lettore MP3
o per CD (max. 70%) in modo da garantire un segnale adeguato, dopodiché adattare il volume sulla
SysRock, per un ascolto confortevole.
Non utilizzare in alcun caso l'ingresso AUX sotto la pioggia o in
condizioni di umidità, per evitare infiltrazioni di umidità nella
SysRock. Soprattutto in tali
condizioni, mantenere saldamente chiusa la copertura in
gomma sul lato posteriore.
5.12 Come attivare la carica dello
smartphone da USB
La radio dispone di una porta USB
per ricaricare uno smartphone o dispositivi simili. Il tempo di ricarica
può variare ed in alcuni casi può durare più del caricamento con la stazione di ricarica del produttore dello
smartphone. La radio può ricaricare
lo smartphone o dispositivi simili, se
è accesa ed in modalità DAB/FM Radiomodus, Bluetooth o AUX.
Collegare lo smartphone con la
porta USB
sulla radio.
Lo smartphone inizia a caricare.
A ricarica terminata, rimuovere il
cavo di ricarica USB.
[1-4]
che si trova in alto
AVVERTENZA: se si ricarica un
cellulare (es.) o altri dispositivi
durante l'ascolto di stazioni
DAB/FM, la qualità del suono ne
può risentire.
PRUDENZA
– La funzione di ricarica del
SysRock-DAB non funziona in alcuni dispositivi USB.
– Rimuovere il cavo USB al termine
della ricarica o se non viene utilizzato.
– Non collegare la porta USB con
una presa,sussiste pericolo d'incendio.La porta USB serve solo
per ricaricare dispositivi a bassa
tensione (5V/ 1A).
– Non inserire aghi, filo ecc. nella
porta USB. Diversamente un cortocircuito può causare un danno.
– Non collegare la porta USB della
radio con il collegamento USB del
computer, in quanto potrebbe
danneggiare i dispositivi.
– Mai utilizzare la porta USB in caso
di pioggia o umidità per evitare
che dell'umidità penetri nella radio.
– Dopo l'uso richiudere la porta
USB con il suo cappuccio protettivo per proteggerla dalla polvere.
76
Page 77

5.13 Possibilità d'installazione
Staffa di fissaggio [1-1]
La staffa di fissaggio scorrevole consente di appendere l'apparecchio ad
un'impalcatura o ad una struttura simile.
La staffa di fissaggio andrà rimossa per l'utilizzo con una
batteria esterna Festool
[2A]
.
Treppiede
Sull'attacco per treppiede filettato
[2-1]
è possibile avvitare un treppiede filettato standard per fotocamera
UNC 1/4"-20.
6 Manutenzione e cura
Servizio e riparazione
solo da parte del costruttore o delle officine di servizio autorizzate. Le offici-
te sul sito: www.festool.com/service
EKAT
– Al fine di evitare danni, pulire il di-
– Mantenere puliti i contatti della
ne più vicine sono riporta-
4
Utilizzare solo ricambi
5
originali Festool! Cod.
3
2
1
prodotto sul sito: www.festool.com/service
splay
[1-9]
e gli altoparlanti
della radio con un panno morbido
ed asciutto; non utilizzare detergenti.
SysRock e della batteria.
[1-7]
BR 10 DAB+ I
7Ambiente
Non gettare
l'apparecchio
tra i rifiuti domestici!
Smaltire gli app arecchi,
gli accessori e gli
modo eco-compatibile. Attenersi alle
disposizioni di legge nazionali in vigore.
Solo UE:
secondo la direttiva europea
/CE sui vecchi dispositivi elettrici ed
elettronici e la sua applicazione in
ambito nazionale, gli elettroutensili
usati devono essere raccolti separatamente e riciclati in modo eco-compatibile.
Informazioni su REACh:
www.festool.com/reach
Festool si riserva il diritto di modificare le specifiche senza preavviso.
Il marchio denominativo Bluetooth
ed i loghi sono marchi registrati della
Bluetooth SIG, Inc. ed ogni utilizzo di
questi marchi da parte di Festool
GmbH è vincolato da licenza.
imballaggi in
®
77
Page 78

NL BR 10 DAB+
Originele gebruiksaanwijzing
De vermelde afbeeldingen staan in
het begin van de gebruiksaanwijzing.
1Symbolen
Symbool Betekenis
Waarschuwing voor algemeen gevaar
Waarschuwing voor elektrische schok
Lees de gebruiksaanwijzing en veiligheidsvoorschriften!
Niet met het huisvuil
meegeven.
Niet kantelen!
Niet op volle geluidssterkte gebruiken!
2 Veiligheidsvoorschriften
1. Lees deze instructies.
2. Bewaar deze handleiding.
3. Neem alle waarschuwingen in
acht.
4. Volg alle instructies op.
5. Gebruik dit apparaat niet nabij
water.
6. Reinig dit apparaat alleen met
een droge doek.
7. Niet in de nabijheid opstellen van
warmtebronnen zoals radiatoren,
warmteaccumulatoren, kachels
of andere apparaten (inclusief
versterkers) die warmte kunnen
opwekken.
8. Bescherm de kabels en de licht-
netadapter tegen mechanische
belastingen (inklemmen, etc.)
vooral bij de stekker en het stopcontact en bij de aansluiting waar
de kabel uit de lichtnetadapter
steekt.
9. Gebruik alleen door de fabrikant
aanbevolen externe apparatuur/
accessoires.
10. Gebruik alleen stan-
daards, statieven of
bevestigingen die door
de fabrikant aanbevolen of bij het apparaat geleverd
worden. Als een kabel wordt gebruikt, wees dan voorzichtig bij
het bewegen van de kabel/het apparaat om verwondingen door
omvallen te vermijden.
78
Page 79

11. Ontkoppel de netstekker tijdens
onweer of als het apparaat langere tijd niet wordt gebruikt.
12. Laat onderhouds- en reparatiewerkzaamheden door gekwalificeerde servicetechnici uitvoeren.
Een reparatie is noodzakelijk als
het apparaat op enigerlei wijze
werd beschadigd, bijv. als de
lichtnetadapter beschadigd is,
vloeistof werd gemorst, het apparaat werd blootgesteld aan regen
of vochtigheid, niet normaal
werkt of is gevallen.
13. Om vuur en elektrische schokken
te vermijden, mag het apparaat
niet aan regen of vochtigheid
worden blootgesteld.
14. De aanduiding van het gevaar van
een elektrische schok en de corresponderende grafische symbolen staan op de onderkant van het
apparaat.
15. Het apparaat mag niet met vloeistoffen worden bevochtigd of bespoten. Er mogen geen met
vloeistoffen gevulde voorwerpen
op het apparaat worden gezet.
16. De lichtnetadapter moet in de nabijheid van de radio en goed toegankelijk worden aangesloten.
Om in geval van nood de radio van
BR 10 DAB+ NL
het lichtnet te scheiden, moet de
lichtnetadapter uit het stopcontact worden getrokken.
17. Als de lichtnetadapter of apparaatstekker wordt gebruikt om uit
te schakelen, moet deze vrij toegankelijk blijven.
18. Het accupack niet blootstellen
aan hoge temperaturen door zonlicht, vuur of iets dergelijks.
Lees voor meer informatie de veiligheidsinstructies van het accupack.
19. Om schade aan het
gehoor te vermijden,
mag de radio niet gedurende langere tijd
op een hoge geluidssterkte worden gebruikt.
PAS OP:
Om een elektrische schok te
vermijden, mogen er geen andere
dan in de gebruiksaanwijzing vermelde reparatiewerkzaamheden worden
verricht, tenzij u hiervoor bent opgeleid.
WAARSCHUWING! De garantie vervalt als u de radiobehuizing opent of
andere wijzigingen aan de radio uitvoert!
79
Page 80

NL BR 10 DAB+
3 Technische gegevens
Radio SYS ROCK BR 10 DAB+
Elektrische voeding Netadapter Uitgang: DC 19V/1.2A
centrale positieve pen
Accupack 10.8 -18V
aanbevolen: 18V
Frequentiebereik FM (UKW) 87.50 - 108 MHz
DAB 174.928 - 239.200 MHz
Bluetooth
Schakeling Luidspreker 2.5" 8 Ω x1
Toegestaan temperatuurbereik -10 °C tot +45 °C
Afmetingen (B x D x H) 100 x 150 x 105 mm
Gewicht (zonder externe accupack) 0.7 kg
®
Versie 4.1 EDR conform
Profielen HFP, A2DP, AVRCP profielen
Omvormvermogen
max.
+4dBm klasse 2 uitgangsver-
mogen
Omvormbereik max. 10 m (afhankelijk van de
gebruiksomstandigheden)
Ondersteunde codec SBC/ACC
Uitgangsvermogen 19V:10W 3%THD
Ingangspool 3.5 mm dia. (AUX IN)
USB-aansluiting 5V/1.2A
80
Page 81

4 Toestelelementen
Radio - SysRock
[1-1]
Opschuifbare bevestigingsbeugel
[1-2]
Ingang voor lichtnetadapter
[1-3]
Antenne
[1-4]
USB-aansluiting
[1-5]
AUX-ingang (AUX-IN)
[1-6]
Aan-/uit-toets
[1-7]
Luidspreker
[1-8]
Ingebouwde microfoon
[1-9]
Display
[1-10]
Lichtnetadapter
[2-1]
Statiefschroefdraad-bus UNC
1/4"-20
Menutoetsen en display
[a]
Geluidssterkteregeling, zachter
[b]
Zendergeheugen 2
Bluetooth modus: weergave/
pauze
[c]
Zendergeheugen 1
Bluetooth modus: beltoets
[d]
Tijd (beschikbaar met DAB en
FM RDS-CT)
[e]
Accupack-statusindicator
BR 10 DAB+ NL
[f]
Zendergeheugen 3
Bluetooth modus: koppelen
[g]
Zendergeheugen 4
Keuze-/bevestigingstoets
(SELECT)
[h]
DAB/FM-modus: zenderzoekloop - oplopend
Bluetooth-modus: volgende
titel
DAB-modus: zoeken naar zenders (SCAN)
[i]
DAB/FM-modus: zenderzoekloop - aflopend
Bluetooth-modus: vorige titel
DAB-modus: wistoets (CLEAR)
[j]
Bron (SOURCE)
DAB-modus: infotoets (INFO)
[k]
Geluidssterkteregeling, luider
5 Inwerkingstelling
5.1 Met lichtnetadapter gebrui-
ken
Lichtnetadapter
ingang
tact steken.
BELANGRIJK:
De lichtnetadapter wordt gebruikt
om de radio op een stopcontact aan
te sluiten. De lichtnetadapter van de
radio moet tijdens het gebruik vrij
[1-2]
[1-10]
en stopcon-
in
81
Page 82

NL BR 10 DAB+
toegankelijk blijven zodat de radio
uitgeschakeld kan worden. De lichtnetadapter moet na gebruik uit het
stopcontact worden verwijderd.
5.2 Met extern Festool-accupack
gebruiken[2A] + [2B]
Het apparaat kan met elk Festool-accupack uit de serie BP, BPC en BPS
worden gebruikt.
PAS OP
Klik het accupack altijd geheel op zijn plaats vast. Als dit niet
goed gebeurt, kan het accupack uit
de accuhouder vallen en u of omstanders verwonden.
PAS OP
Klik het accupack niet met
geweld vast. Als het accupack niet
eenvoudig ingeschoven kan worden
en vastklikt, is het niet correct geplaatst.
PAS OP
Voor optimale prestaties ra-
den wij aan om een
te gebruiken.
cupack
5.3 In-/Uitschakelen
Inschakelen: aan-/uit-toets
indrukken.
18V Li-ion ac-
[1-6]
De radio is gereed voor gebruik.
Uitschakelen: aan-/uit-toets
indrukken.
[1-6]
5.4 Geluidssterkteregeling instellen
Geluidssterkteregeling
[k]
indrukken om de gewens-
te geluidssterkte in te stellen.
Voor een optimale muziekkwaliteit in combinatie met
een extern afspeelapparaat de
geluidssterkte op het externe
afspeelapparaat op maximaal
70% instellen.
5.5 Accupack-status controleren
Om de actuele accupack-status weer
te geven, aan-/uit-toets
ken om de radio in te schakelen. De
accupack-statusindicator
de actuele accupack-status (alleen
met Li-ion accupack).
Accupack is volledig opgeladen
Accupack is gedeeltelijk
opgeladen
Zwakke accupack-status
– opladen wordt aanbevolen
Het accupack kan op elk
moment geheel ontladen
zijn. In dat geval het
accupack onmiddellijk
vervangen
[1-6]
indruk-
[e]
toont
[a]
en
82
Page 83

5.6 Radio luisteren - DAB
Antenne
[1-3]
uitrichten.
Aan-/uit-toets
de radio in te schakelen.
Bron (SOURCE)
DAB-modus is geselecteerd.
[1-6]
indrukken om
[j]
indrukken tot de
Als de radio voor de eerste keer
wordt gebruikt, start deze een automatische DAB-zenderzoekloop (Full
Scan). Als de radio al werd gebruikt,
wordt de laatst beluisterde zender
geselecteerd.
Als tijdens de zenderzoekloop nieuwe
zenders worden ontvangen, wordt het
aantal zenders verhoogd en worden
de nieuwe zenders aan de zenderlijst
toegevoegd. Een balk op het display
geeft de voortgang van de zenderzoekloop aan.
Als de zenderzoekloop beëindigd is,
wordt de eerste zender geselecteerd
(in alfanumerieke volgorde
0…9…A…Z).
Het display geeft <No stations found>
weer als er geen zenders werden gevonden.
Als er geen signalen worden ontvangen, de plaats van de radio veranderen, bijv. in de buurt van een venster
om een betere ontvangst te krijgen.
Zenders selecteren - DAB
Aan-/uit-toets
de radio in te schakelen.
[1-6]
indrukken om
BR 10 DAB+ NL
Bron (SOURCE)
DAB-modus is geselecteerd.Het
display geeft de actueel geselecteerde radiozender weer.
Zenderzoekloop
om de lijst met beschikbare zenders te doorzoeken.
Selectie-/bevestigingstoets (SELECT)
wenste zender te selecteren. Eventueel geeft het display <Connecting…> weer terwijl de radio de
nieuwe zender zoekt.
Gewenst volume met de volumeregeling
OPMERKING:
lecteerde zender niet wordt gevonden, de plaats van de radio
veranderen om een betere ontvangst te krijgen.
Secundaire diensten - DAB
Bepaalde radiozenders bieden een of
meer secundaire diensten aan. Indien een radiozender een secundaire
dienst aanbiedt, verschijnt deze informatie op het display onder de zendernaam.
[j]
indrukken tot de
[i], [h]
indrukken
[g]
indrukken om de ge-
[a], [k]
instellen.
Indien de gese-
De meeste secundaire diensten worden niet continu uitgezonden. Indien
de geselecteerde dienst niet beschikbaar is, zendt de radio de primaire
dienst.
83
Page 84

NL BR 10 DAB+
Displaymodus - DAB
In de DAB-modus beschikt de radio
over meerdere displayfuncties:
Infotoets (INFO)
conden ingedrukt houden tot <DAB
Info> op het display verschijnt. Vervolgens zenderzoekloop
drukken en loslaten om de verschillende weergavemodi te zien.
a. Signaalsterkte
b. Programmatype
c. Multiplexnaam
d. Frequentie
[j]
langer dan 2 se-
[i], [h]
in-
Geeft de signaalsterkte weer van de
radio-ontvangst.
Een vrije, nietgevulde rechthoek
geeft een minimaal
signaalniveau aan
dat voor een behoorlijke ontvangst
noodzakelijk is.
Geeft het genre of de
muziekstijl weer,
bijv. pop, klassiek,
nieuwsberichten,
etc.
Geeft de multiplexnaam van de actuele zender weer.
Geeft de actuele frequentie weer.
e. Bitrate /
audiotype
f. Datum Geeft de actuele
g. DL Plusinformatie
h. Scrollbare tekst
(DLS)
Nieuwe zenders zoeken - DAB
Na verloop van tijd kunnen er nieuwe
zenders beschikbaar zijn. Om nieuwe
zenders te vinden:
Aan-/uit-toets
de radio in te schakelen.
Bron (SOURCE)
DAB-modus is geselecteerd.
Geeft de digitale
bitrate en het audiotype voor de actueel
ingestelde DAB-zender weer.
datum weer.
Sommige stations
kunnen naast de
reguliere informatie
andere programmagerelateerde informatie voor het
display beschikbaar
stellen. Indien er
geen extra informatie beschikbaar is,
verschijnt de melding <no DL+info>.
Geeft diverse informatie weer, bijv.
artiest / titel, telefoonnummer, etc.
[1-6]
indrukken om
[j]
indrukken tot de
84
Page 85

Om de complete DAB-frequenties
volledig te doorzoeken, zenderzoekloop (SCAN)
ger dan 2 seconden ingedrukt houden. Als er nieuwe zenders worden
gevonden, wordt het aantal zenders verhoogd en worden de nieuwe zenders aan de zenderlijst toegevoegd. Een balk op het display
geeft de voortgang van de zenderzoekloop aan.
Zenders opschonen - DAB
Als u van locatie verandert, worden
sommige zenders mogelijk niet meer
ontvangen. Ook worden sommige
DAB-diensten onregelmatig doorgegeven of wisselen van locatie of wijzigen hun frequentie. Zenders die niet
gevonden worden of die gedurende
lange tijd niet ontvangen werden,
worden in de zenderlijst met een
vraagteken gemarkeerd. De opschoonfunctie (CLEAR)
de gemarkeerde DAB-zenders uit de
zenderlijst.
Aan-/uit-toets
de radio in te schakelen.
Bron (SOURCE)
DAB-modus is geselecteerd.
Wistoets (CLEAR)
seconden ingedrukt houden tot
<DAB> op het display verschijnt.
[h]
indrukken en lan-
[i]
verwijdert
[1-6]
indrukken om
[j]
indrukken tot de
[i]
langer dan 2
BR 10 DAB+ NL
Zenderzoekloop
en loslaten om <Clear> of <Back>
te selecteren. Indien u de opschoonfunctie niet wilt uitvoeren,
kiest u <Back> en drukt u op de selectie-/bevestigingstoets (SELECT)
[g]
vestigen.
Als u de opschoonfunctie wilt uitvoeren, kiest u <Clear> en drukt u
op de selectie-/bevestigingstoets
(SELECT)
gen te gaan.Druk op de zenderzoeklooptoetsen
<NO> te selecteren. Bevestig
<YES> door indrukken van de selectie-/bevestigingstoets (SELECT)
wordt vervolgens gestart. Indien u
de opschoonfunctie niet wilt uitvoeren, kiest u <NO> en bevestigt u
met de selectie-/bevestigingstoets
(SELECT)
OPMERKING:
ring van locatie moet er ook
naar nieuwe zenders gezocht
worden (zie paragraaf 'Nieuwe
zenders zoeken').
5.7 Radio luisteren - FM (UKW)
Antenne
[i], [h]
indrukken
om de instelling te be-
[g]
om naar de instellin-
[i], [h]
om <YES> of
[g]
. De opschoonfunctie
[g]
de instelling.
Na een verande-
[1-3]
uitrichten.
Bron (SOURCE)
drukken tot FM-modus
is geselecteerd.
[j]
in-
85
Page 86

NL BR 10 DAB+
Automatisch zoeken naar zenders
FM (UKW)
Zenderzoekloop
houden (~2 s) om het automatisch
zoeken naar zenders te starten.
[i], [h]
ingedrukt
Het zoeken naar zenders wordt automatisch beëindigd als een zender
met voldoende signaalsterkte wordt
gevonden.
Het display geeft de frequentie weer.
Als het signaal sterk genoeg is en
RDS-informatie beschikbaar is, geeft
het display de zendernaam, radiotekst en tijd aan.
Andere zenders zoeken
Zenderzoekloop
boven beschreven indrukken.
[i], [h]
zoals hier-
Aan het einde van de frequentieband
springt de zoekloop over naar het tegenoverliggende begin van de frequentieband.
Bij slechte ontvangst de antenne opnieuw uitrichten.
Handmatig zoeken naar zenders FM (UKW)
Zenderzoekloop
keren indrukken tot de gewenste
frequentie is bereikt.
[i], [h]
meerdere
De frequentiestappen bedragen
0,1 MHz.
5.8 Zendergeheugen gebruiken
Populaire DAB/FM-radiozenders
kunnen in het zendergeheugen worden opgeslagen. Er staan vier zendergeheugens ter beschikking.Deze
kunnen in elke modus worden gebruikt.
Aan-/uit-toets
de radio in te schakelen.
Zendergeheugen
ingedrukt houden (~2 s) tot op het
display <Saved> wordt weergegeven.
[1-6]
indrukken om
[b], [c], [f]
of
[g]
De zender wordt onder het geselecteerde zendergeheugen opgeslagen.
Het display geef het zendergeheugennummer P1 tot P4 weer.
Voor andere zendergeheugens deze
stap herhalen. Op dezelfde manier
kunnen de zendergeheugens met
een nieuwe zender worden overschreven.
Zendergeheugen oproepen
Het gewenste zendergeheugen
[c], [f]
of
[g]
opgeslagen zender te gaan.
5.9 Tijd - automatisch geactuali-
De radio actualiseert de tijd
behulp van het DAB- of FM RDS-CTsignaal automatisch. Na een stroomstoring actualiseert de radio de tijd
indrukken om naar de
seerd
[d]
[b]
met
,
86
Page 87

als de radio weer wordt ingeschakeld.
OPMERKING:
signaal ontvangt, moet u deze
op een andere plaats opstellen.
Als u de tijd via de FM RDS-functie
ontvangt (Radio Data System), syn-
chroniseert de radio de tijd en geeft
deze in het display
zender is geselecteerd die RDS-informatie met CT-signalen ter beschikking stelt. Bij voldoende signaalsterkte wordt de tijd binnen een
tot twee minuten geactualiseerd. De
radiotijd is de volgende 24 uur actueel als de radio met RDS-CT wordt
gesynchroniseerd.
Als er geen RDS-signaal wordt
ontvangen, wordt de tijd niet
weergegeven.
5.10 Muziek luisteren via Blue-
tooth streaming
Het SysRock- en Bluetooth apparaat
moeten aan elkaar gekoppeld worden om muziek via het Bluetooth apparaat te kunnen weergeven. Door
deze “verbinding” kunnen twee apparaten elkaar herkennen.
Eerste verbinding van het Bluetooth-apparaat
Source/bron
Bluetooth-modus te selecteren.
Als de radio geen
[d]
weer als een
[j]
indrukken om de
BR 10 DAB+ NL
Het Bluetooth-symbool knippert op het display en laat
zien dat de SysRock herkend
kan worden.
Bluetooth op het Bluetooth-apparaat activeren zoals dit in de gebruiksaanwijzing van het Bluetooth-apparaat wordt uitgelegd.
Bluetooth-apparaatlijst weergeven
en het apparaat <SysRock DAB>
selecteren. Bij sommige mobiele
telefoons (die met oudere versies
als BT2.1 Bluetooth standaard) zijn
uitgerust, moet een wachtwoord
("0000") worden ingevoerd.
Als de Bluetooth-verbinding
actief is, wordt het Blue-
tooth-symbool met een
vinkje ernaast weergegeven. Alle
muziek kan nu op het Bluetooth-apparaat geselecteerd en weergegeven
worden.
OPMERKING:
– Als twee Bluetooth-apparaten
voor het eerst gekoppeld moeten
worden en gelijktijdig de verbinding met de SysRock zoeken,
wordt op beide apparaten de SysRock voor de verbinding weergegeven. Na de verbinding met een
apparaat wordt de SysRock niet
meer op de verbindingslijst van
het andere apparaat getoond.
87
Page 88

NL BR 10 DAB+
– Als het Bluetooth-apparaat zich
buiten de reikwijdte bevindt,
wordt de verbinding met de SysRock tijdelijk onderbroken. De
SysRock zal de verbinding automatisch activeren zodra het Bluetooth-apparaat weer in reikwijdte
is. Gedurende de onderbreking
kan geen ander Bluetooth-apparaat aan de SysRock worden gekoppeld.
– Als <SysRock DAB> op de appa-
raatlijst van het Bluetooth-apparaat verschijnt, maar er geen
verbinding mogelijk is: apparaat
uit de lijst wissen en de verbinding van het Bluetooth-apparaat
met de SysRock opnieuw, zoals
hierboven beschreven, uitvoeren.
– De effectieve reikwijdte tussen de
SysRock en het Bluetooth-apparaat bedraagt circa 10 meter. Elk
obstakel tussen SysRock en Bluetooth-apparaat kan de reikwijdte verminderen.
– Het Bluetooth-connectiviteitsver-
mogen kan afhankelijk van het
aangesloten Bluetooth-apparaat
variëren. Let op de Bluetoothfuncties van het gekoppelde apparaat vóór de aansluiting op de
SysRock. Mogelijk worden niet
alle functies op sommige gekop-
pelde Bluetooth-apparaten ondersteund.
Audiobestanden in Bluetooth Bluetooth modus weergeven
Als de SysRock met succes aan het
gekozen Bluetooth apparaat gekoppeld is, kan de muziek met de bedieningsfuncties van het gekoppelde
Bluetooth apparaat worden weergegeven.
Zodra de weergave start de gewenste geluidssterkte via de geluidssterkteregeling
SysRock of op het Bluetooth apparaat instellen.
Weergave/pauze en titelwijziging
via de bedieningselementen van
het gekoppelde Bluetooth apparaat selecteren. Of met de toetsen
op de SysRock: weergave/pauze
[b]
, volgende titel
[i]
.
[a], [k]
[h]
, vorige titel
op de
De actueel weergegeven titelinformatie (bijv. titelnaam / artiest) wordt
als doorlopende tekst onder op het
display weergegeven.
OPMERKING:
– Niet alle toepassingen en appara-
ten reageren op deze besturingselementen.
– Sommige mobiele telefoons wor-
den tijdelijk van de SysRock ge-
88
Page 89

scheiden bij in- of uitgaande
telefoongesprekken.Bij sommige
mobiele telefoons wordt het geluid uitgeschakeld als er korte
mededelingen, e-mails of iet dergelijks worden ontvangen. Een
dergelijk gedrag is een functie
van het gekoppelde Bluetooth apparaat en is geen storing van de
SysRock.
Van reeds gekoppelde apparaten
weergeven
Deze SysRock kan maximaal acht gekoppelde apparaten opslaan. Als dit
aantal het geheugen overschrijdt,
wordt het eerste apparaat overschreven. Als het Bluetooth apparaat al
aan de SysRock was gekoppeld, slaat
de SysRock dit Bluetooth apparaat op
en probeert te koppelen aan het apparaat dat als laatste aangesloten
was. Als het als laatste gekoppelde
Bluetooth apparaat niet beschikbaar
is, probeert de SysRock aan het voorlaatste apparaat te koppelen, enzovoorts.
Geheugen van de gekoppelde Bluetooth-apparaten wissen
Om het Bluetooth-apparaatgeheugen in de SysRock te wissen: opslagtoets 4
tot <BT-Reset> op het display
[g]
ingedrukt houden
BR 10 DAB+ NL
wordt weergegeven. De SysRock
schakelt automatisch uit nadat het
geheugen is gewist.
Gekoppeld Bluetooth-apparaat
scheiden
Bron (SOURCE)
een andere modus dan Bluetoothmodus selecteren.
Als alternatief, koppelen
drukken (~2 s) om de verbinding te
onderbreken.
Of Bluetooth-verbinding op het
Bluetooth-apparaat beëindigen.
[j]
indrukken en
[f]
in-
Als het Bluetooth-apparaat in de Bluetooth-modus wordt gescheiden, begint het Bluetooth-symbool op het
display opnieuw te knipperen en
geeft aan dat de SysRock weer beschikbaar is voor een nieuwe verbinding.
Handsfreevoorziening gebruiken
Deze SysRock kan als
handsfreevoorziening voor
een mobiele telefoon worden
gebruikt. Als muziek via de SysRock
wordt weergegeven en op de mobiele
telefoon een oproep wordt ontvangen, wordt de muziek automatisch
onderbroken zodat u de oproep kunt
beantwoorden.
89
Page 90

NL BR 10 DAB+
Als tijdens de weergave van muziek
via de SysRock een oproep wordt
ontvangen kort de oproeptoets
indrukken om de oproep te beantwoorden.
In de richting van de interne micro-
[1-8]
foon
Oproeptoets
laten om het gesprek te beëindigen.
5.11 AUX-ingang (AUX-IN)
Een 3.5 mm AUX-ingang
het bovenste deel van de SysRock
aangebracht en hiermee kan een audiosignaal van een extern audioapparaat zoals een MP3- of cd-speler
worden weergegeven.
Op de AUX-ingang
reo- of mono-audiobron (zoals
MP3- of cd-speler) aansluiten.
Source/bron
AUX-modus te selecteren.
Geluidssterkte op de MP3- of cdspeler (max. 70%) instellen om een
voldoende signaal te realiseren,
vervolgens de geluidssterkte op de
SysRock op een comfortabel luisterniveau instellen.
spreken.
Let op: door een zeer hoge geluidssterkte op de SysRock kan
de geluidskwaliteit slechter
worden.
[c]
indrukken en los-
[1-5]
[j]
indrukken om de
[1-5]
een ste-
[c]
is aan
Gebruik de AUX-ingang nooit
als het regent of in vochtige omstandigheden om te voorkomen
dat vocht in de SysRock binnendringt. Houd met name bij dergelijke omstandigheden de rubberen afdekking op de achterzijde stevig gesloten.
5.12 Smartphone op de USB-aan-
sluiting laden
Uw radio beschikt over een USB-aansluiting voor het opladen van een
smartphone of vergelijkbare apparaten. De oplaadtijd kan uiteenlopen en
in sommige gevallen ook meer tijd
nodig hebben dan met het oplaadstation van de smartphonefabrikant. De
radio kan de smartphone of vergelijkbare apparaten laden als deze ingeschakeld en in de DAB/FM-radiomodus, Bluetooth-modus of AUX-modus
is.
Smartphone met de USB-aansluiting
[1-4]
den.
De smartphone begint op te laden.
Na het opladen de USB-oplaadkabel verwijderen.
boven op de radio verbin-
OPMERKING:
mobiele telefoons (bijv. ) of andere apparaten tijdens het luis-
Het opladen van
90
Page 91

teren naar DAB/FM-zenders
EKAT
1
2
3
5
4
kan de geluidskwaliteit beïnvloeden.
VOORZICHTIG
– De oplaadfunctie van de SysRock-
DAB functioneert niet bij sommige USB-apparaten.
– USB-kabel verwijderen na het op-
laden of als deze niet wordt gebruikt.
– USB-aansluiting niet met het
stopcontact verbinden. Anders
kan er brand ontstaan. De USBaansluiting dient alleen voor het
opladen van apparaten met
laagspanningsapparaten (5V/ 1A).
– Geen spijker, draad etc. in de
USB-aansluiting steken. Anders
kan een kortsluiting tot een defect leiden.
– USB-aansluiting van de radio niet
met de USB-aansluiting van de
computer verbinden, omdat deze
schade aan de apparaten kan veroorzaken.
– USB-aansluiting nooit bij regen of
vochtigheid gebruiken om te
voorkomen dat er vocht in de radio binnendringt.
– Sluit de USB-aansluiting na ge-
bruik weer af met het beschermkapje om verontreiniging te
voorkomen.
BR 10 DAB+ NL
5.13 Plaatsingsmogelijkheden
Bevestigingsbeugel [1-1]
Met de opschuifbare bevestigingsbeugel kan het apparaat aan een
steiger of iets dergelijks worden opgehangen.
De bevestigingsbeugel moet
worden verwijderd voor gebruik
met een extern Festool-accupack
[2A]
.
Statief
In de statiefschroefdraad-bus
[2-1]
kan een standaard fotostatiefschroefdraad UNC 1/4"-20 worden
vastgeschroefd.
6 Onderhoud en verzor-
ging
Klantenservice en repa-
alleen door produ-
ratie
cent of servicewerkplaatsen: Dichtstbijzijnde
adressen via:
www.festool.com/service
Alleen originele Festoolreserveonderdelen gebruiken! Bestelnr. via:
www.festool.com/service
– Om schade te voorkomen display
[1-9]
en luidspreker
radio met een zachte, droge doek
[1-7]
op de
91
Page 92

NL BR 10 DAB+
reinigen. Geen oplosmiddelen gebruiken.
– Contacten op de SysRock en op
het accupack schoonhouden.
7 Speciale gevaarom-
schrijving voor het milieu
Geef het apparaat niet met het
huisvuil mee!
Voer de apparaten, accessoires
en verpakkingen
delijke wijze af! Neem de geldende
nationale voorschriften in acht.
Alleen EU:
richtlijn inzake gebruikte elektrische
en elektronische apparaten en de
vertaling hiervan in de nationale wetgeving dienen oude elektroapparaten
gescheiden te worden ingezameld en
op milieuvriendelijke wijze te worden
afgevoerd.
Informatie voor REACh:
www.festool.com/reach
Festool behoudt zich het recht voor
om de specificaties zonder voorafgaande kennisgeving te wijzigen.
op milieuvrien-
Volgens de Europese
Het Bluetooth
go's zijn geregistreerde handelsmerken van Bluetooth SIG, Inc. en elk gebruik van deze merken door Festool
GmbH vindt onder licentie plaats.
®
merkbeeld en de lo-
92
Page 93

Originalbruksanvisning
De angivna bilderna finns i början av
bruksanvisningen.
1Symboler
Symbol Betydelse
Varning för allmän risk!
Varning för elstötar
Läs bruksanvisningen
och säkerhetsanvisningarna!
Kasta inte i produkten i
hushållssoporna.
Får ej vältas!
Får ej användas på full
ljudvolym!
2 Säkerhetsanvisningar
1. Läs dessa anvisningar.
2. Förvara anvisningarna så att du
vet var du har dem.
BR 10 DAB+ S
3. Observera alla varningar.
4. Följ alla anvisningar.
5. Använd inte produkten i närheten
av vatten.
6. Produkten får endast rengöras
med en torr trasa.
7. Placera inte produkten i närheten
av värmekällor som värmeelement, värmeackumulatorer, kaminer eller andra apparater
(inklusive förstärkare) som alstrar värme.
8. Skydda sladdarna och nätadaptern mot mekanisk belastning
(från att klämmas etc.), i synnerhet vid stickkontakten, eluttaget
och anslutningen där kabeln
kommer ut ur nätadaptern.
9. Använd bara de extrautrustningar/tillbehör som anges av tillverkaren.
10. Använd bara de konsoler, stativ eller hållare som anges av
tillverkaren eller som
kan köpas tillsammans med produkten. Om sladden används, ska
man vara försiktig när man flyttar
sladden/produkten för att undvika skador om produkten välter.
93
Page 94

S BR 10 DAB+
11. Dra ur nätkontakten vid åska och
om produkten inte används under
en längre tid.
12. Överlåt allt underhållsarbete till
kvalificerad servicepersonal.
Service krävs om produkten på
något vis skulle skadas, exempelvis om nätadaptern är skadad,
vätska spillts på produkten, om
produkten utsatts för regn eller
fukt, inte fungerar normalt eller
har fallit.
13. För att förebygga brand och elstötar ska man inte utsätta produkten för regn eller fukt.
14. Märkningen för risk för elstötar
och motsvarande symboler finns
eventuellt på undersidan av produkten.
15. Produkten får inte stänkas ner eller besprutas med vätska. Föremål som innehåller vätska får
inte ställas på produkten.
16. Nätadaptern ska anslutas i närheten av radion och vara lätt åtkomlig. Om man i nödfall behöver
koppla från strömmen till radion
ska man dra ut kontakten ur eluttaget.
17. Om nätadaptern resp. kontakten
ska användas för att koppla från
radion måste adaptern/kontakten
vara lätt åtkomlig.
18. Uts ätt inte batteri et för höga temperaturer, som exempelvis värme
från solljus, eld eller liknande.
För mer information, läs batteriets säkerhetsanvisningar.
19. För att undvika möjliga hörselskador ska
man inte ha radion inställd på hög ljudnivå
under längre tid.
VARNING
För att undvika risk för elstötar, ska inga reparationer förutom
de som beskrivs i denna bruksanvisning göras om du inte är korrekt utbildad för att utföra dem.
VARNING! Garantin upphör att gälla
om du öppnar radions hölje eller
modifierar radion på annat sätt!
3Tekniska data
Radio SYSROCK BR 10 DAB+
Spänningsförsörjning Nätadapter Utgång: DC 19 V/1,2 A
Centralt positivt stift
94
Page 95

BR 10 DAB+ S
Radio SYSROCK BR 10 DAB+
Batteri 10,8–18 V
rekommenderas: 18 V
Frekvensområde FM (UKV) 87,50–108 MHz
DAB 174,928–239,200 MHz
Bluetooth
®
Version 4.1 EDR
Profiler HFP, A2DP, AVRCP
Omvandlingseffekt
max
Omvandlingsom-
råde max
+4 dBm klass 2 utgångsef-
fekt
10 m (beroende på arbetsför-
hållanden)
Stödjer kodek SBC/ACC
Kopplingskrets Högtalare 2,5" 8 Ω x1
Utgångseffekt 19 V:10 W 3 %THD
Ingång 3,5 mm diam. (AUX IN)
USB-anslutning 5 V/1,2A
Tillåtet temperaturområde -10 °C till +45 °C
Mått (B x H x D) 100 x 150 x 105 mm
Vikt (utan externt batteri) 0.7 kg
4 Maskindelar
Radio - SysRock
[1-1]
Påskjutbar fästbygel
[1-2]
Ingång för nätadapter
[1-3]
Antenn
[1-4]
USB-anslutning
[1-5]
AUX-ingång (AUX-IN)
[1-6]
Knapp Till/Från
[1-7]
Högtalare
[1-8]
Inbyggd mikrofon
95
Page 96

S BR 10 DAB+
[1-9]
Display
[1-10]
Nätadapter
[2-1]
Stativgängbussning UNC 1/4"20
Menyknappar och display
[a]
Volymreglering, lägre
[b]
Minnesplats 2
Bluetooth läge: uppspelning/
paus
[c]
Minnesplats 1
Bluetooth läge: uppringningsk-
napp
[d]
Klockslag (med DAB och FM
RDS-CT)
[e]
Indikering för batteristatus
[f]
Minnesplats 3
Bluetooth läge: koppla
[g]
Minnesplats 4
Knapp Välj/Bekräfta (SELECT)
[h]
DAB-/FM-läge: kanalsökning –
uppåt
Bluetooth-läge: nästa spår
DAB-läge: kanalsökning
(SCAN)
[i]
DAB-/FM-läge: kanalsökning –
nedåt
Bluetooth-läge: föregående
spår
DAB-läge: knapp Radera
(CLEAR)
[j]
Källa (SOURCE)
DAB-läge: knapp Info (INFO)
[k]
Volymreglering, högre
5Driftstart
5.1 Använda med nätadapter
Stick i nätadaptern
i ingången
10]
eluttaget.
OBS!
Nätadaptern används för att ansluta
radion till eluttaget. Radions näta-
dapter måste vara lätt åtkomlig när
radion används, så att den kan stängas av. Låt inte nätadaptern sitta kvar i
eluttaget när den inte används.
5.2 Använda med externt Festool-
batteri [2A] + [2B]
Radion kan användas med alla
Festools batterier i serierna BP, BPC
och BPS.
VARNING
Sätt alltid i batteriet helt.
Om inte, kan batteriet ramla ur batterifästet och skada dig eller personer i
närheten.
[1-2]
[1-
och
96
Page 97

VARNING
Försök inte sätta i batteriet
med våld. Om batteripaket inte lätt
kan skjutas in och hakar fast är det
inte korrekt monterat.
VARNING
För bästa möjliga effekt rekommenderar vi att ett
används.
batteri
5.3 Start/avstängning
Koppla till radion genom att trycka
på knappen Till/Från
18 V Li-jon-
[1-6]
.
Radion är klar att använda.
Stäng av radion med knappen Till/
[1-6]
Från
5.4 Ställa in volymnivå
5.5 Kontrollera batteripakets sta-
För att se aktuell batteristatus trycker man på knappen Till/Från
att koppla till radion. Statusindikeringen
dast med Li-jonbatterier).
.
Tryck på volymregleringen
och
[k]
för att ställa in önskad
ljudvolym.
För bästa möjliga musikkvalitet i kombination med en
extern ljudkälla, ska ljudnivån
ställas in på max 70 % på den
externa ljudkällan.
tus
[e]
visar batteriets status (en-
[1-6]
[a]
för
BR 10 DAB+ S
Batteriet är fulladdat
Batteriet är delvis laddat
Låg batteristatus – laddning rekommenderas
Batteriet kan när som
helst laddas ur helt, byt
genast batteri
5.6 Använda radion - DAB
Justera antennen
Tryck på knappen Till/Från
för att koppla till radion.
Tryck på Källa (SOURCE)
DAB-läget har valts.
[1-3]
.
[1-6]
[j]
tills
Om radion används för första gången
startar den automatiskt en DAB-kanalsökning (Full Scan). Om radion
har använts tidigare väljs den kanal
som senast användes.
Om nya kanaler hittas under sökningen ökar antalet kanaler och de
nya kanalerna läggs till i listan. En
stapel på displayen visar hur kanalsökningen fortskrider.
När kanalsökningen har avslutats
väljs den första kanalen (i alfanumerisk ordning 0…9…A…Z).
Displayen visar <No stations found>
om inga kanaler har hittats.
97
Page 98

S BR 10 DAB+
Om radion inte tar emot några signaler, ställ den någon annanstans, till
exempel nära ett fönster, för att få
bättre mottagning.
Välja kanal - DAB
Tryck på knappen Till/Från
för att koppla till radion.
Tryck på Källa (SOURCE)
DAB-läget har valts.Displayen visar den kanal som är vald för tillfället.
Tryck på kanalsökningsknapparna
[i], [h]
för att söka i listan över till-
gängliga kanaler.
Tryck på knappen Välj/Bekräfta
(SELECT)
kanal. Displayen visar eventuellt
<Connecting…> medan radion söker efter den nya kanalen.
Ställ in volymen med volymknapparna
Sekundärtjänster - DAB
Vissa radiokanaler erbjuder en eller
flera sekundärtjänster. Om en radiokanal erbjuder en sekundärtjänst visas det under kanalnamnet på displayen.
[g]
för att välja önskad
[a], [k]
.
OBS!
Om den valda kanalen inte
hittas, ställ radion på en annan
plats med bättre mottagning.
[j]
[1-6]
tills
De flesta sekundärtjänster sänds inte
kontinuerligt. Om den valda tjänsten
inte är tillgänglig sänder radion primärtjänsten.
Displayläge - DAB
I DAB-läget har radion flera displayfunktioner:
Tryck på Info-knappen (INFO)
mer än 2 sekunder och håll kvar
den tills <DAB Info> visas på displayen. Tryck på kanalsökningsknapparna
se de olika visningslägena.
a. Signalstyrka
b. Programtyp
c. Multiplexnamn
d. Frekvens Visar den aktuella
[i], [h]
och släpp för att
Visar radiomottagningens signalstyrka. En ej ifylld
rektangel visar den
minimala signalnivån som krävs för
tillräcklig mottagning.
Visar genre eller
musikstil, t.ex. pop,
klassiskt, nyheter
osv.
Visar den aktuella
kanalens multiplexnamn.
frekvensen.
[j]
i
98
Page 99

e. Bithastighet/ljudformat
f. Datum Visar aktuellt
g. DL Plusinformation
h. Bläddringsbar
text (DLS)
Hitta nya kanaler - DAB
Med tiden kan nya kanaler bli tillgängliga. Hitta nya kanaler så här:
Tryck på knappen Till/Från
för att koppla till radion.
Tryck på Källa (SOURCE)
DAB-läget har valts.
För att söka igenom alla DAB-frekvenser helt, tryck på kanalsökningen (SCAN)
tryckt i mer än 2 sekunder. Om nya
Visar digital bithastighet och ljudformat för den aktuella
DAB-kanalen.
datum.
Vissa stationer kan
förutom den vanliga
informationen även
visa annan programrelaterad information på displayen.
Om ingen extrainformation finns
visas <no DL+info>.
Visar diverse information, t.ex. artist/
låttitel, telefonnummer, osv.
[1-6]
[j]
tills
[h]
och håll den in-
BR 10 DAB+ S
kanaler hittas ökar antalet kanaler,
och de nya kanalerna läggs till i listan. En stapel på displayen visar
hur kanalsökningen fortskrider.
Radera kanaler - DAB
Om du förflyttar dig mellan platser är
vissa kanaler kanske inte tillgängliga
längre. Vissa DAB-tjänster kan också
ha oregelbundna sändningar eller
byta plats eller frekvens. Kanaler
som inte hittas eller inte har tagits
emot på länge markeras med ett frågetecken i kanallistan. Raderingsfunktionen (CLEAR)
markerade DAB-kanalerna ur listan.
Tryck på knappen Till/Från
för att koppla till radion.
Tryck på Källa (SOURCE)
DAB-läget har valts.
Tryck på knappen Radera (CLEAR)
[i]
och håll den intryckt i mer än 2
sekunder tills <DAB> visas på displayen.
Tryck på kanalsökningsknapparna
[i], [h]
och släpp för att välja <Clear> eller <Back>. Om du inte vill radera väljer du <Back> och trycker
på knappen Välj/Bekräfta (SELECT)
[g]
för att bekräfta inställningen.
För att radera väljer du <Clear> och
tycker på knappen Välj/Bekräfta
(SELECT)
ställningarna. Tryck på kanalsök-
[i]
raderar de
[g]
för att komma till in-
[j]
[1-6]
tills
99
Page 100

S BR 10 DAB+
ningsknapparna
<YES> eller <NO>. Bekräfta <YES>
genom att trycka på knappen Välj/
Bekräfta (SELECT)
tar raderingen. Om du inte vill radera kanalerna väljer du <NO> och
bekräftar inställningen med knappen Välj/Bekräfta (SELECT)
OBS!
även söka efter nya kanaler (se
avsnittet 'Hitta nya kanaler').
5.7 Använda radion - FM (UKV)
Justera antennen
Automatisk sökning efter kanaler
FM (UKV)
Tryck på knapparna för kanalsökning
[i], [h]
(~2 sek.) för att starta den automatiska kanalsökningen.
[i], [h]
för att välja
[g]
. Sedan star-
[g]
.
På nya platser bör man
[1-3]
.
Tryck på Källa (SOUR-
[j]
tills FM-läget har
CE)
valts.
och håll dem intryckta
Kanalsökningen avslutas automatiskt när en kanal med tillräckligt god
signalstyrka hittas.
Frekvensen visas på displayen. Om
kanalens signal är tillräckligt stark
och det finns RDS-information, visar
displayen radiokanalens namn, radiokanalens text och klockslag.
Hitta andra kanaler
Tryck på knapparna för kanalsökning
[i], [h]
ovan.
, enligt beskrivningen
I slutet av frekvensbandet går sökningen över till början av det motliggande frekvensbandet.
Om mottagningen är dålig ska
man rikta om antennen.
Manuell kanalsökning - FM (UKV)
Tryck flera gånger på knapparna
[i], [h]
tills önskad frekvens nås.
Frekvensstegen är 0,1 MHz.
5.8 Använda minnesplatser
Man kan spara sina favoritkanaler för
både DAB och FM på minnesplatser.
Upp till fyra minnesplatser kan användas.De kan användas i alla lägen.
Tryck på knappen Till/Från
för att koppla till radion.
Tryck på knappen för minnesplats
[b], [c], [f]
nedtryckt (~2 sek.) tills <Saved> visas på displayen.
eller
[g]
[1-6]
och håll den
Kanalen sparas på den valda minnesplatsen. Displayen visar minnesplatsnummer P1 till P4.
För ytterligare minnesplatser upprepar man dessa steg. På samma sätt
kan man skriva över minnesplatserna med nya kanaler.
100
 Loading...