

Page 1

Original instructions 03
EN
Übersetzung der Originalbetriebsanleitung 07
DE
Vertaling van de oorspronkelijke gebruiksaanwijzing
NL
Traduction de la notice originale 18
FR
Traducción del manual original 23
ES
Traduzione delle istruzioni originali 27
IT
Originalios instrukcijos vertimas 32
LT
Instrukciju tulkojums no oriģinālvalodas 37
LV
WWW.FERM.COM
OTM1006
13
Page 2
1 4
1
4
Fig. A
12
23
5
10
7
8
11
7
8
97
8
Fig. B
2
Page 3
MULTITOOL
OTM1006
Thank you for buying this Ferm product.
By doing so you now have an excellent product,
delivered by one of Europe’s leading suppliers.
All products delivered to you by Ferm are
manufactured according to the highest standards
of performance and safety. As part of our
philosophy we also provide an excellent customer
service, backed by our comprehensive warranty.
We hope you will enjoy using this product for many
years to come.
SAFETY WARNINGS
EN
Do not throw the batter y into fire
Do not throw the batter y into water
Do not dispose of the product in
unsuitable containers.
Separate collection for Li-ion battery.
The product is in accordance with the
applicable safety standards in the
European directives.
WARNING
Read the enclosed safety warnings,
the additional safety warnings and the
instructions.
Failure to follow the safety warnings and
the instructions may result in electric
shock, fire and/or serious injury.
Keep the safety warnings and the
instructions for future reference.
The following symbols are used in the user manual
or on the product:
Read the user manual.
Denotes risk of personal injury, loss of
life or damage to the tool in case of nonobservance of the instructions in this
manual.
Risk of electric shock
Do not use in rain
Indoor use only
Class II machine - Double insulation You don’t need any earthed plug.
Max temperature 400C
Additional safety warnings for multitools
Contact with or inhalation of dust coming
free during use (e.g. lead-painted
surfaces, wood and metal) can endanger
your health and the health of bystanders.
Always wear appropriate protective
equipment, such as a dust mask.
• Do not work materials containing asbestos.
Asbestos is considered carcinogenic.
• Do not work metal with a magnesium content
of more than 80%.
• Be very careful when working painted
surfaces.
• Do not use accessories which are not
specifically designed and recommended by
the manufacturer. Risk of personal injury.
• Inspect the machine and the accessories before
each use. Do not use accessories which are
bent, cracked, or otherwise damaged. If the
machine or one of the accessories is dropped,
inspect the machine or the accessory for
damage. If necessary, replace the accessory.
• Only use accessories that are recommended
by the manufacturer.
• Only use accessories that are suitable for the
application.
• Only use accessories with the correct
dimensions.
• Do not use accessories that require liquid
coolants. Risk of electric shock.
• Make sure that the accessories are properly
mounted. Do not use adapters or other aids
to mount accessories with another spindle
diameter.
3
Page 4
EN
• Make sure that the maximum speed for the
accessory is larger than or the same as the
maximum speed of the machine. Refer to the
rating plate on the machine.
• Let the machine run at no load in a safe area
after mounting the accessories. If the machine
vibrates strongly, immediately switch off the
machine, remove the mains plug from the
mains, and try to solve the problem.
• Make sure that the workpiece is properly
supported or fixed.
• Wear safety goggles. Wear hearing protection.
Wear a dust mask. If necessary, use other
protective means, such as safety gloves,
safety shoes, etc. Risk of personal injury.
• Keep bystanders away from the work area.
Make sure that all persons in the work area
wear protective equipment. Risk of personal
injury.
• Keep the mains cable away from the rotating
accessory. If the mains cable touches the
rotating accessory, your hands or arms may
come in contact with the accessory. Risk of
personal injury.
• Hold power tool by insulated gripping
surfaces, when performing an operation
where the cutting accessory may contact
hidden wiring. Cutting accessory contacting
a “live” wire may make exposed metal parts
of the power tool “live” and could give the
operator an electric shock.
• Do not use the machine while carrying it at
your side. Risk of personal injury.
• Do not use the machine near flammable
materials. Risk of fire.
• Beware that the accessory continues to
rotate for a short period after switching off
the machine. Do not attempt to bring the
accessory to a standstill yourself.
• Never put the machine down on a table or a
workbench before it has been switched off.
• Regularly clean the ventilation slots. Risk of
electric shock.
Battery tool use and care
b) Use power tools only with specifically
designated battery packs.
Use of any other battery packs may create a
risk of injury and fire.
c) When battery pack is not in use, keep it
away from other metal objects, like paper
clips, coins, keys, nails, screws or other
small metal objects, that can make a
connection from one terminal to another.
Shorting the batter y terminals together may
cause burns or a fire.
d) Under abusive conditions, liquid may be
ejected from the battery; avoid contact.
If contact accidentally occurs, flush with
water. If liquid contacts eyes, additionally
seek medical help.
Liquid ejected from the battery may cause
irritation or burns.
Service
a) Have your power tool serviced by a
qualified repair person using only identical
replacement parts.
This will ensure that the safety of the power
tool is maintained.
For the charger
Intended use
Charge only CDA1094 type rechargeable battery
packs. Other types of batteries may burst causing
personal injury and damage.
a) The appliance is not to be used by
persons (including children) with reduced
physical, sensory or mental capabilities,
or lack of experience and knowledge,
unless they have been given supervision
or instruction
b) Children being supervised not to play with
the appliance
c) Do not recharging non-rechargeable
batteries!
d) During charging, batteries must be placed
in the well ventilated area!
a) Recharge only with the charger specified
by the manufacturer.
A charger that is suitable for one type of
battery pack may create a risk of fire when
used with another battery pack.
4
Electrical safety
Always check that the voltage of the
power supply corresponds to the voltage
on the rating plate.
• Do not use the machine if the mains cable or
the mains plug is damaged.
Page 5
• Only use extension cables that are suitable for
the power rating of the machine with a minimum
thickness of 1.5 mm
2
. If you use a extension
cable reel, always fully unroll the cable.
EN
The battery must be charged before firstuse.
Removing the battery from the machine
• Push the battery unlock buttons and pull the
battery out of the machine
Technical data
Charger CDA1095
Input of charger 100-240V~ 50/60Hz 15W
Output of charger 13,5V d.c. 400mA
Rechargeable battery 12 V Li-ion 1.5 Ah
Battery charging time 3-5 hours
No-load speed 5,000 - 18,000 min
Weight 0.7 kg
-1
Noise and vibration
Sound pressure (Lpa) 94 dB(A)
Acoustic power (Lwa) 105 dB(A)
Uncertainty (K) 3 dB(A)
Vibration 11.240 m/s
Uncertainty (K) 1.5 m/s
2
2
Vibration level
The vibration emission level stated in this instruction
manual has been measured in accordance with
a standardised test given in EN 60745; it may be
used to compare one tool with another and as a
preliminary assessment of exposure to vibration
when using the tool for the applications mentioned
- using the tool for different applications, or with
different or poorly maintainted accessories,
may significantly increase the exposure level
- the times when the tool is switched off or when
it is running but not actually doing the job, may
significantly reduce the exposure level
Protect yourself against the effects of vibration by
maintaining the tool and its accessories, keeping
your hands warm, and organizing your work
patterns
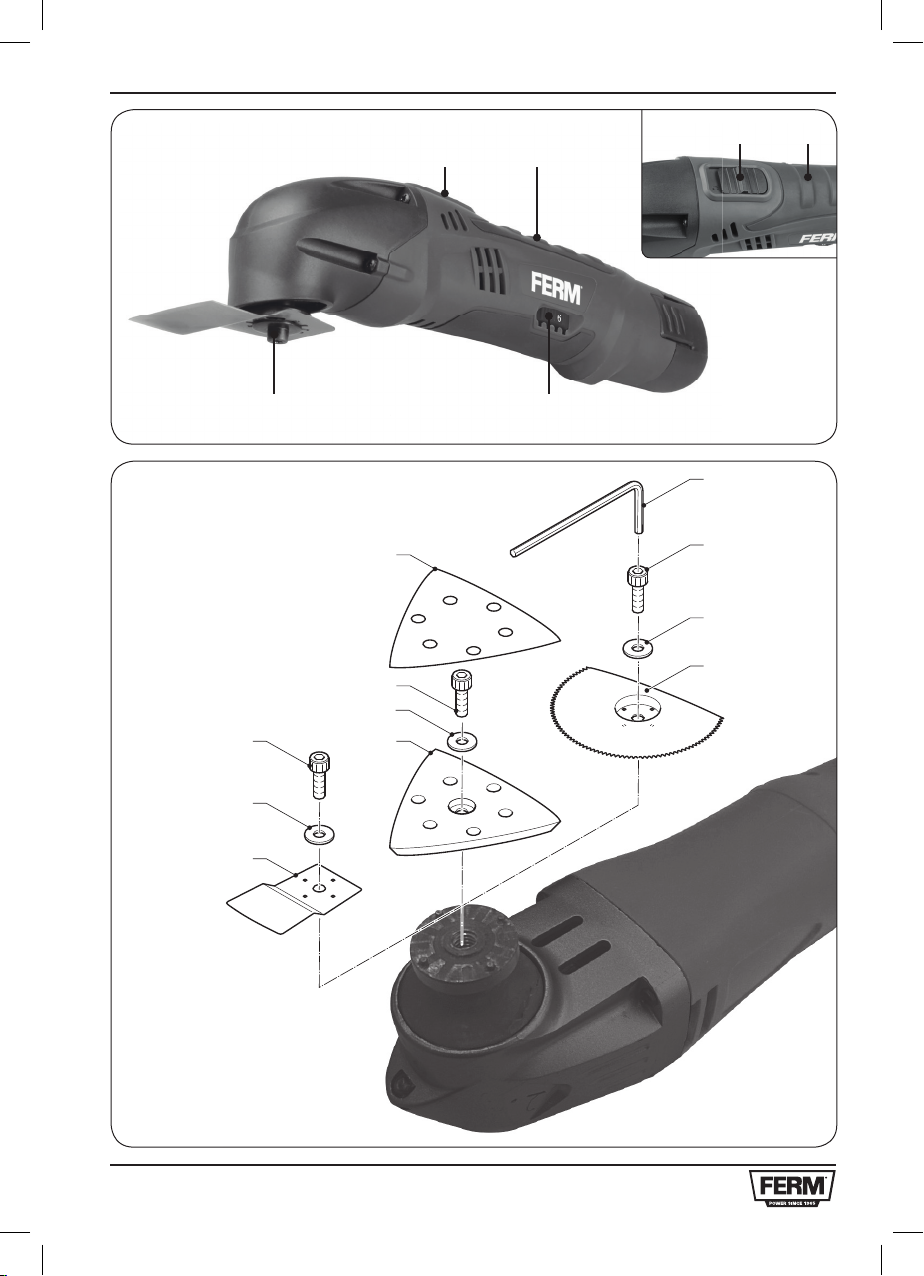
DESCRIPTION (FIG. A)
Your multitool has been designed for light sanding,
sawing and scraping applications.
1. On/off switch
2. Speed adjustment wheel
3. Mounting point for accessories
4. Grip
ASSEMBLY
Before assembly, always switch off the
machine
Inserting the battery into the machine
Ensure that the exterior of the battery is clean and
dry before connecting to the charger or machine.
• Insert the battery (2) into the base of the
machine
• Push the battery further forward until it clicks
into place.
Charging the battery (with the charger)
• Plug the charger plug into an electrical outlet
and wait for a while. The LED indicator will
lighten up and show the charging status.
LED Charger status
Red Battery charging in progress
Green Battery charging finished, battery fully charged
• Fully charging the 1.5Ah battery may take up
to 240 minutes.
• After the battery is fully charged remove the
charger plug from the outlet and remove the
battery from the charger.
When the machine is not being used
over a longer period of time it is best to
store
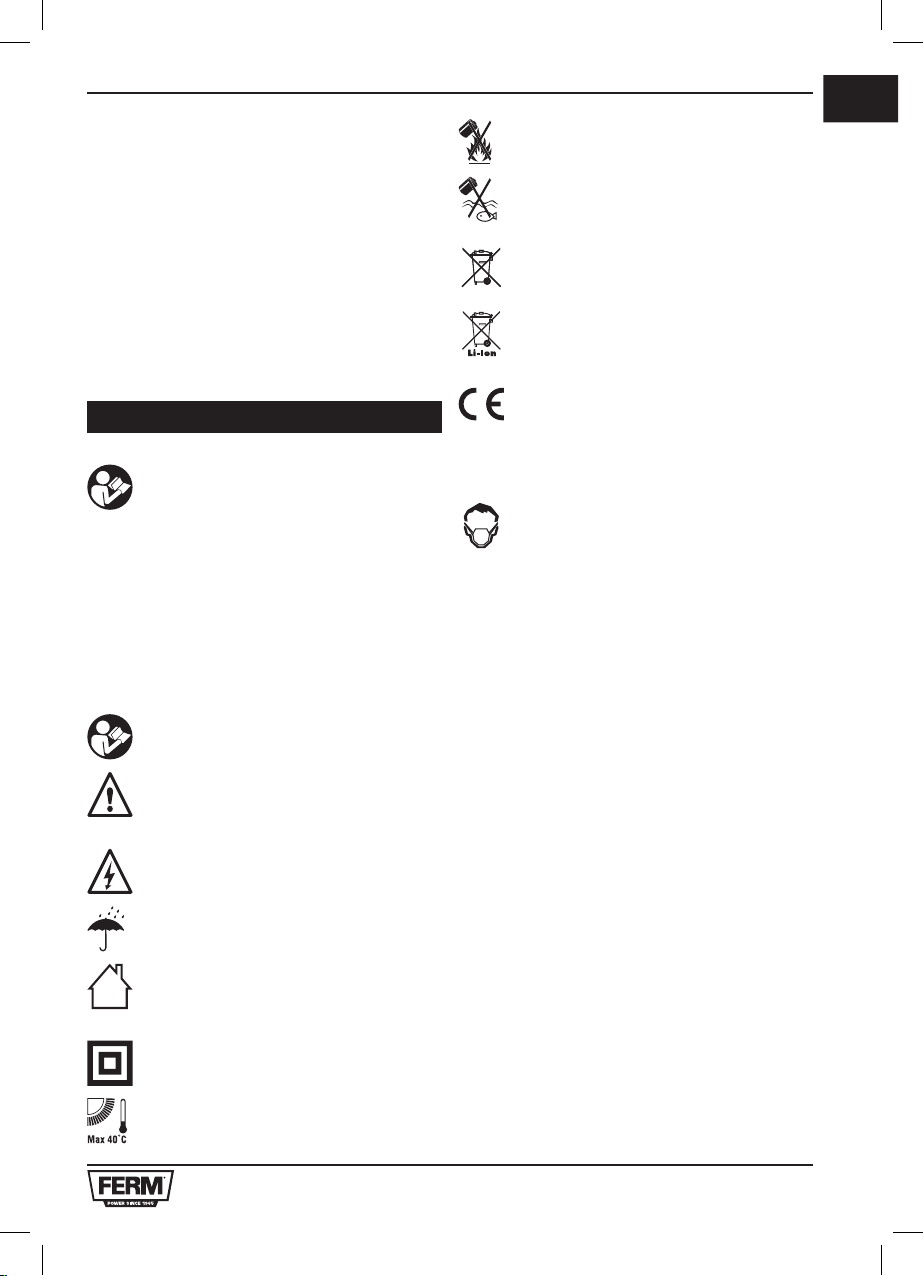
Mounting and removing the sanding pad and
the sanding paper (fig. B)
The sanding pad and the sanding paper must be
used for sanding applications.
Mounting
• Place the machine on a table with the mounting
point (3) facing upwards.
• Loosen the Allen screw (7) using the Allen key
(5).
• Mount the sanding pad (9) to the mounting point
(3).
• Tighten the Allen screw (7) using the Allen key
(5).
• Mount sanding paper (10) with the required
grain size onto the sanding pad (9). Make sure
that the perforation in the sanding paper (10)
corresponds with the perforation on the sanding
pad (9).
- Use coarse sanding paper (grain 50) for
sanding rough, uneven surfaces.
5
Page 6
EN
- Use medium sanding paper (grain 80) for
removing the remaining scratches from the
coarse sanding paper.
- Use fine sanding paper (grain 120) for
finishing surfaces.
Removing
• Place the machine on a table with the mounting
point (3) facing upwards.
• Remove the sanding paper (10) from the
sanding pad (9).
• Loosen the Allen screw (7) using the Allen key
(5).
• Remove the sanding pad (9) from the mounting
point (3).
• Tighten the Allen screw (7) using the Allen key
(5).
Mounting and removing the saw blade (fig. B)
The saw blade must be used for sawing applications.
• Loosen the Allen screw (7) using the Allen key
(5).
• Remove the spacer (8).
• Mount the scraping knife (12) to the mounting
point (3).
• Mount the spacer (8).
• Tighten the Allen screw (7) using the Allen key
(5).
Removing
• Place the machine on a table with the mounting
point (3) facing upwards.
• Loosen the Allen screw (7) using the Allen key
(5).
• Remove the spacer (8).
• Remove the scraping knife (12) from the
mounting point (3).
• Mount the spacer (8).
• Tighten the Allen screw (7) using the Allen key
(5).
Mounting
• Place the machine on a table with the mounting
point (3) facing upwards.
• Loosen the Allen screw (7) using the Allen key
(5).
• Remove the spacer (8).
• Mount the saw blade (11) to the mounting point
(3).
• Mount the spacer (8).
• Tighten the Allen screw (7) using the Allen key
(5).
Removing
• Place the machine on a table with the mounting
point (3) facing upwards.
• Loosen the Allen screw (7) using the Allen key
(5).
• Remove the spacer (8).
• Remove the saw blade (11) from the mounting
point (3).
• Mount the spacer (8).
• Tighten the Allen screw (7) using the Allen key
(5).
Mounting and removing the scraping knife
(fig. B)
The scraping knife must be used for scraping
applications.
Mounting
• Place the machine on a table with the mounting
point (3) facing upwards.
USE
Switching on and off (fig. A)
• To switch on the machine, slide the on/off
switch (1) to the front.
• To switch off the machine, slide the on/off
switch (1) to the rear.
Setting the speed (fig. A)
The speed adjustment wheel is used for setting
the speed. The speed adjustment wheel can be
set to 6 positions.
The ideal speed depends on the application and
on the material to be worked.
Do not set the speed during use.
• Turn the speed adjustment wheel (2) to the
required position.
Hints for optimum use
• Clamp the workpiece. Use a clamping device
for small workpieces.
• Draw a line to define the direction in which to
guide the accessory.
• Firmly hold the machine by the grip.
• Switch on the machine.
• Wait until the machine has reached full speed.
• Place the accessory on the workpiece.
• Slowly move the machine along the pre-drawn
line, firmly pressing the accessory against the
workpiece.
6
Page 7
• Do not apply too much pressure on the machine.
Let the machine do the work.
• Switch off the machine and wait for the
machine to come to a complete standstill
before putting the machine down.
CLEANING AND
MAINTENANCE
Before assembly, always switch off the
machine
• Regularly clean the housing with a soft cloth.
• Keep the ventilation slots free from dust and
dirt. If necessary, use a soft, moist cloth to
remove dust and dirt from the ventilation slots.
Replacing the accessories (fig. B)
Worn or damaged accessories must be replaced
immediately.
Only use sharp and undamaged
accessories.
• To remove the accessory, proceed as
described in the corresponding section.
• To mount the accessory, proceed as described
in the corresponding section.
WARRANTY
Consult the enclosed warranty terms.
MULTITOOL
DE
OTM1006
Vielen Dank für den Kauf dieses Ferm Produkts.
Hiermit haben Sie ein ausgezeichnetes Produkt
erworben, dass von einem der führenden
Lieferanten Europas geliefert wird.
Alle von Ferm an Sie gelieferten Produkte
sind nach den höchsten Standards von
Leistung und Sicherheit gefertigt. Teil unserer
Firmenphilosophie ist es auch, Ihnen einen
ausgezeichneten Kundendienst anbieten zu
können, der von unserer umfassenden Garantie
unterstützt wird. Wir hoffen, dass Sie viele Jahre
Freude an diesem Produkt haben.
SICHERHEITSHINWEISE
ACHTUNG
Lesen Sie die beiliegenden Sicherheitsanweisungen, die zusätzlichen
Sicherheitsanweisungen sowie die
Bedienungsanleitung.
Das Nichtbeachten der Sicherheitsanweisungen und der Bedienungsanleitung kann zu einem Stromschlag,
Feuer und/oder schweren Verletzungen
führen.
Bewahren Sie die Sicherheitsanweisungen und die Bedienungsanleitung zur künftigen Bezugnahme
auf.
ENVIRONMENT
Disposal
The product, the accessories, and the
packaging must be sor ted for
environmentally friendly recycling.
Only for EC countries
Do not dispose of power tools into domestic waste.
According to the European Guideline 2012/19/
EU for Waste Electrical and Electronic Equipment
and its implementation into national right, power
tools that are no longer usable must be collected
separately and disposed of in an environmentally
friendly way.
The product and the user manual are subject to
change. Specifications can be changed without
further notice.
Folgende Symbole werden im Benutzerhandbuch
oder auf dem Produkt verwendet:
Benutzerhandbuch/
Bedienungsanleitung lesen.
Lebens- und Verletzungsgefahr und
Gefahr von Beschädigungen am
Werkzeug/Gerät bei Nichteinhaltung der
Anweisungen in dieser Bedienungsanleitung.
Gefahr eines Stromschlags.
Nicht im Regen benutzen.
Nur zur Benutzung in Innenräumen.
7
Page 8
DE
Werkzeug/Gerät der Schutzklasse II schutzisoliert - kein Schutzkontaktanschluss erforderlich.
Höchsttemperatur 40°C.
Batterien/Akkus nicht in of fene Feuer
werfen.
Batterien/Akkus nicht ins Wasser
werfen.
Produkt vorschriftsmäßig entsorgen,
nicht über den Hausmüll.
Der Li- Ionen-Akku muss separat der
Wertstoffsammlung zugeführt werden.
Das Produk t entspricht den geltenden
Sicherheitsnormen der europäischen
Richtlinien.
Zusätzliche Sicherheitshinweise für Multitools
Der Kontakt oder das Einatmen von
Staub, der beim Gebrauch frei wird (z.B.
mit bleihaltiger Farbe lackierte
Oberflächen, Holz und Metall) kann Ihre
eigene Gesundheit sowie die Gesundheit
Anderer gefährden.
• Bearbeiten Sie keine asbesthaltigen Materialien.
Asbest wird als krebserregend eingestuft.
• Bearbeiten Sie kein Metall mit einem
Magnesiumanteil von mehr als 80%.
• Gehen Sie beim Bearbeiten von lackierten
Oberflächen äußerst vorsichtig vor.
• Verwenden Sie kein Zubehör, das nicht speziell
vom Hersteller konstruiert und empfohlen
wurde. Gefahr von Personenverletzungen.
• Überprüfen Sie die Maschine und ihr Zubehör
vor jedem Gebrauch. Verwenden Sie kein
verbogenes, gerissenes oder anderweitig
beschädigtes Zubehör. Wird die Maschine
oder ein Zubehörteil fallen gelassen,
überprüfen Sie die Maschine bzw. das
Zubehör auf Beschädigung. Erneuern Sie das
Zubehör ggf.
• Verwenden Sie nur vom Hersteller
empfohlenes Zubehör.
• Verwenden Sie nur für den Einsatz geeignetes
Zubehör.
• Verwenden Sie nur Zubehör mit den richtigen
Maßen.
• Verwenden Sie kein Zubehör, bei dem flüssige
Kühlmittel erforderlich sind. Gefahr eines
Stromschlags.
• Vergewissern Sie sich, dass das Zubehör
richtig angebracht ist. Verwenden Sie keine
Adapter oder andere Hilfsmittel, um Zubehör
mit einem anderen Spindeldurchmesser
anzubringen.
• Vergewissern Sie sich, dass die maximale
Geschwindigkeit des Zubehörs der maximalen
Geschwindigkeit der Maschine entspricht bzw.
diese überschreitet. Siehe Typenschild an der
Maschine.
• Lassen Sie die Maschine nach dem Anbringen
des Zubehörs in einem sicheren Bereich
im Leerlauf laufen. Vibriert die Maschine
stark, schalten Sie sie sofort aus, ziehen
Sie den Netzstecker aus der Steckdose und
versuchen Sie, das Problem zu beheben.
• Vergewissern Sie sich, dass das Werkstück
richtig gestützt bzw. fixiert ist.
• Tragen Sie eine Schutzbrille. Tragen Sie einen
Gehörschutz. Tragen Sie eine Staubmaske.
Verwenden Sie ggf. weitere Schutzmittel
wie beispielsweise Schutzhandschuhe,
Sicherheitsschuhe, usw. Gefahr von
Personenverletzungen.
• Halten Sie Unbeteiligte vom Arbeitsbereich
fern. Vergewissern Sie sich, dass sämtliche
Personen im Arbeitsbereich Schutzausrüstung
tragen. Gefahr von Personenverletzungen.
• Halten Sie das Netzkabel von dem sich
drehenden Zubehör fern. Berührt das Netzkabel
das sich drehende Zubehör, können Ihre
Hände oder Arme damit in Kontakt geraten.
Gefahr von Personenverletzungen.
• Halten Sie das Elektrowerkzeug an den
isolierten Griffflächen, wenn Arbeiten
durchgeführt werden, bei denen
das Schneidewerkzeug versteckte
Leitungen berühren könnte. Der Kontakt
des Schneidewerkzeugs mit einer
spannungsführenden Leitung kann auch
metallene Geräteteile unter Spannung setzen
und zu einem elektrischen Schlag führen.
• Verwenden Sie die Maschine nicht, während
Sie sie an Ihrer Seite tragen. Gefahr von
Personenverletzungen.
8
Page 9
• Verwenden Sie die Maschine nicht in
der Nähe von brennbaren Materialien.
Brandgefahr.
• Seien Sie sich darüber im Klaren, dass das
Zubehör nach dem Abschalten der Maschine
noch etwas nachläuft. Versuchen Sie
nicht, das Zubehör selbst zum Stillstand zu
bekommen.
• Legen Sie die Maschine niemals auf einem
Tisch oder einer Werkbank ab, bevor sie nicht
abgeschaltet wurde.
• Reinigen Sie regelmäßig die
Belüftungsschlitze. Gefahr eines
Stromschlags.
Verwendung und Pflege des Akkuwerkzeugs
a) Nur mit dem vom Hersteller angegebenen
Ladegerät laden.
Ein Ladegerät, das für eine bestimmte Sorte
Akku geeignet ist, kann bei Verwendung
anderer Akkus eine Brandgefahr auslösen.
b) Elektrowerkzeuge nur mit den speziell
dafür vorgesehenen Akkus verwenden.
Die Verwendung anderer Akkus kann zu
Verletzungs- und Brandgefahr führen.
c) Wenn der Akku nicht verwendet wird,
muss er von anderen Metallgegenständen
wie Büroklammern, Münzen, Schlüsseln,
Nägeln, Schrauben oder anderen kleinen
Metallgegenständen getrennt gelagert
werden, die eine Verbindung zwischen den
Polen herstellen könnten.
Ein Kurzschließen der beiden Akkupole kann
zu Verbrennungen oder Bränden führen.
d) Bei unsachgemäßer Verwendung
kann Flüssigkeit aus dem Akku
austreten. Berührung vermeiden.
Bei unbeabsichtigtem Kontakt sofort
mit Wasser spülen. Bei Kontakt der
Flüssigkeit mit den Augen zusätzlich einen
Arzt aufsuchen.
Austretende Akkuflüssigkeit kann zu
Hautreizungen oder Verbrennungen führen.
Für das Ladegerät
Verwendungszweck
Nur für das Laden von wiederaufladbaren LiIonen-Akkus des CDA1094. Andere Arten von
Akkus können platzen und zu Verletzungen und
Schäden führen.
a) Das Gerät darf nicht von Personen
(einschließlich Kindern) mit eingeschränkten körperlichen, sensorischen bzw.
geistigen Fähigkeiten, mangelnder
Erfahrung bzw. fehlendem Wissen
verwendet werden, wenn diese nicht
beaufsichtigt werden oder eine
Einweisung erhalten haben
b) Kinder sollten beaufsichtigt werden, um
sicherzustellen, dass sie nicht mit dem
Gerät spielen.
c) Nicht wiederaufladbare Batterien dürfen
nicht aufgeladen werden!
d) Während des Ladens müssen sich die
Akkus in einem gut belüfteten Raum
befinden!
Elektrische Sicherheit
Achten Sie stets darauf, dass die
Spannung der Stromversorgung mit der
Spannung auf dem Typenschild
übereinstimmt.
• Verwenden Sie die Maschine nicht, wenn das
Netzkabel oder der Netzstecker beschädigt
ist.
• Verwenden Sie nur Verlängerungskabel, die
für die Leistungsaufnahme der Maschine
geeignet sind und eine Mindestaderstärke von
1,5 mm2 haben. Falls Sie eine Kabeltrommel
verwenden, rollen Sie das Kabel immer
vollständig ab.
TECHNISCHE DATEN
Ladegerät CDA1095
Eingang des Ladegeräts 100-240 V ~ 50/60 Hz 15W
Ausgang des Ladegeräts 13,5V d.c. 400mA
Wiederaufladbarer Akku 12 V Li-Ionen, 1,5 Ah
Akkuladezeit 3-5 Stunde
Leerlaufgeschwindigkeit 5.000 - 18.000 min
Gewicht 0,7 kg
DE
-1
Wartung
a) Lassen Sie Ihre Elektrowerkzeuge durch
einen qualifizierten Reparaturtechniker
ausschließlich mit identischen Ersatzteilen
warten. So lässt sich eine gleich bleibende
Sicherheit des Elektrowerkzeugs
gewährleisten.
LÄRM UND VIBRATIONEN
Schalldruck (Lpa) 94 dB(A)
Schallleistung (Lwa) 105 dB(A)
Unsicherheitsfaktor (K) 3 dB(A)
Vibrationen 11,240 m/s
Unsicherheitsfaktor (K) 1,5 m/s
2
2
9
Page 10
DE
Vibrationsstufe
Die im dieser Bedienungsanleitung angegebene
Vibrationsemissionsstufe wurde mit einem
standardisierten Test gemäß EN 60745
gemessen; Sie kann verwendet werden, um ein
Werkzeug mit einem anderen zu vergleichen und
als vorläufige Beurteilung der Vibrationsexposition
bei Verwendung des Werkzeugs für die
angegebenen Anwendungszwecke
- die Verwendung des Werkzeugs für andere
Anwendungen oder mit anderem oder
schlecht gewartetem Zubehör kann die
Expositionsstufe erheblich erhöhen
- Zeiten, zu denen das Werkzeug ausgeschaltet
ist, oder wenn es läuft aber eigentlich nicht
eingesetzt wird, können die Expositionsstufe
erheblich verringern
Schützen Sie sich vor den Auswirkungen der
Vibration durch Wartung des Werkzeugs und
des Zubehörs, halten Sie Ihre Hände warm und
organisieren Sie Ihren Arbeitsablauf
BESCHREIBUNG (ABB. A)
Ihr Multitool wurde für leichte Schleifarbeiten,
zum Sägen und Schaben konstruiert.
1. Ein-/Aus-Schalter
2. Geschwindigkeitseinstellrad
3. Befestigungspunkt für Zubehör
4. Griff
MONTAGE
Vor der Montage immer erst die
Maschine ausschalten
Der Akku muss vor der erstmaligen Benutzung
aufgeladen werden.
Entfernen des Akkus aus der Maschine
• Drücken Sie auf die Batterielösetasten und
ziehen Sie den Akku aus der Maschine
Einsetzen des Akkus in die Maschine
Stellen Sie sicher, dass das Äußere des Akkus
sauber und trocken ist, bevor Sie den Akku mit
dem Ladegerät oder dem Gerät verbinden.
• Setzen Sie den Akku (2) in das Unterteil der
Maschine ein
• Schieben Sie den Akku nach vorne, bis er
einrastet.
Laden des Akkus (über das Ladegerät)
• Stecken Sie den Netzstecker des Ladegeräts
in eine Steckdose, und warten Sie einen
Moment. Die LED-Anzeigen leuchten auf und
zeigen den Ladezustand an.
LED Status Ladegerät
Rot Akku wird geladen
Grün Laden des Akkus abgeschlossen, Akku
vollständig aufgeladen
• Das vollständige Laden des 1,5Ah-Akkus
kann bis zu 240 Minuten dauern.
• Ziehen Sie nach dem vollständigen Laden des
Akkus den Stecker des Ladegeräts aus der
Netzsteckdose, und entnehmen Sie den Akku
aus dem Ladegerät.
Wenn das Werkzeug für einen längeren
Zeitraum nicht verwendet wird, sollte das
Werkzeug möglichst mit einem voll
aufgeladenen Akku aufbewahr t werden.
Anbringen und Entfernen des Schleiftellers
und des Schleifpapiers (Abb. B)
Für Schleifarbeiten müssen der Schleifteller und
das Schleifpapier verwendet werden.
Anbringen
• Legen Sie die Maschine mit dem
Befestigungspunkt (3) nach oben weisend auf
einen Tisch.
• Lösen Sie die Inbusschraube (7) mit dem
Inbusschlüssel (5).
• Bringen Sie den Schleifteller (9) am
Befestigungspunkt (3) an.
• Ziehen Sie die Inbusschraube (7) mit dem
Inbusschlüssel (5) an.
• Bringen Sie das Schleifpapier (10) mit der
erforderlichen Körnung auf dem Schleifteller (9)
an. Vergewissern Sie sich, dass die Perforation
im Schleifpapier (10) mit der Perforation auf
dem Schleifteller (9) übereinstimmt.
10
Page 11
- Verwenden Sie grobes Schleifpapier
(Körnung 50), um raue unebene
Oberflächen zu schleifen.
- Verwenden Sie mittleres Schleifpapier
(Körnung 80), um die verbliebenen
Kratzer vom groben Schleifpapier zu
beseitigen.
- Verwenden Sie feines
Schleifpapier (Körnung 120), um die
Oberflächenbearbeitung abzuschließen.
Entfernen
• Legen Sie die Maschine mit dem
Befestigungspunkt (3) nach oben weisend auf
einen Tisch.
• Entfernen Sie das Schleifpapier (10) vom
Schleifteller (9).
• Lösen Sie die Inbusschraube (7) mit dem
Inbusschlüssel (5).
• Entfernen Sie den Schleifteller (9) vom
Befestigungspunkt (3).
• Ziehen Sie die Inbusschraube (7) mit dem
Inbusschlüssel (5) an.
Anbringen und Entfernen des Sägeblatts
(Abb. B)
Für Sägeeinsätze muss das Sägeblatt verwendet
werden.
Anbringen
• Legen Sie die Maschine mit dem
Befestigungspunkt (3) nach oben weisend auf
einen Tisch.
• Lösen Sie die Inbusschraube (7) mit dem
Inbusschlüssel (5).
• Entfernen Sie das Abstandsstück (8).
• Bringen Sie das Sägeblatt (11) am
Befestigungspunkt (3) an.
• Bringen Sie das Abstandsstück (8) an.
• Ziehen Sie die Inbusschraube (7) mit dem
Inbusschlüssel (5) an.
DE
• Ziehen Sie die Inbusschraube (7) mit dem
Inbusschlüssel (5) an.
Anbringen und Entfernen des Schabers
(Abb. B)
Für Schabeinsätze muss der Schaber verwendet
werden.
Anbringen
• Legen Sie die Maschine mit dem
Befestigungspunkt (3) nach oben weisend auf
einen Tisch.
• Lösen Sie die Inbusschraube (7) mit dem
Inbusschlüssel (5).
• Entfernen Sie das Abstandsstück (8).
• Bringen Sie den Schaber (12) am
Befestigungspunkt (3) an.
• Bringen Sie das Abstandsstück (8) an.
• Ziehen Sie die Inbusschraube (7) mit dem
Inbusschlüssel (5) an.
Entfernen
• Legen Sie die Maschine mit dem
Befestigungspunkt (3) nach oben weisend auf
einen Tisch.
• Lösen Sie die Inbusschraube (7) mit dem
Inbusschlüssel (5).
• Entfernen Sie das Abstandsstück (8).
• Entfernen Sie den Schaber (12) vom
Befestigungspunkt (3).
• Bringen Sie das Abstandsstück (8) an.
• Ziehen Sie die Inbusschraube (7) mit dem
Inbusschlüssel (5) an.
GEBRAUCH
Ein- und Ausschalten (Abb. A)
• Um die Maschine einzuschalten, schieben Sie
den Ein-/Aus-Schalter (1) nach vorne.
• Um die Maschine auszuschalten, schieben
Sie den Ein-/Aus-Schalter (1) nach hinten.
Entfernen
• Legen Sie die Maschine mit dem
Befestigungspunkt (3) nach oben weisend auf
einen Tisch.
• Lösen Sie die Inbusschraube (7) mit dem
Inbusschlüssel (5).
• Entfernen Sie das Abstandsstück (8).
• Entfernen Sie das Sägeblatt (11) vom
Befestigungspunkt (3).
• Bringen Sie das Abstandsstück (8) an.
Einstellung der Geschwindigkeit (Abb. A)
Das Geschwindigkeitseinstellrad wird zur
Einstellung der Geschwindigkeit verwendet.
Das Geschwindigkeitseinstellrad kann auf
6 Positionen eingestellt werden. Die ideale
Geschwindigkeit hängt vom Einsatz sowie von
dem zu bearbeitenden Material ab.
Stellen Sie die Geschwindigkeit nicht
während des Gebrauchs ein.
11
Page 12
DE
• Drehen Sie das Geschwindigkeitseinstellrad
(2) auf die erforderliche Position.
Ratschläge für optimale Arbeitsergebnisse
• Spannen Sie das Werkstück ein.
Verwenden Sie für kleine Werkstücke eine
Spannvorrichtung.
• Zeichnen Sie eine Linie, um die Richtung
vorzugeben, in der das Zubehör geführt wird.
• Halten Sie die Maschine sicher am Griff fest.
• Schalten Sie die Maschine ein.
• Warten Sie, bis die Maschine ihre volle
Geschwindigkeit erreicht hat.
• Setzen Sie das Zubehör auf das Werkstück.
• Bewegen Sie die Maschine langsam die
vorgezeichnete Linie entlang, wobei Sie das
Zubehör fest gegen das Werkstück drücken.
• Üben Sie nicht zu viel Druck auf die Maschine
aus. Lassen Sie die Maschine die Arbeit
verrichten.
• Schalten Sie die Maschine aus und warten
Sie, bis sie vollkommen zum Stillstand
gekommen ist, bevor Sie sie ablegen.
REINIGUNG UND WARTUNG
Vor der Montage immer erst die
Maschine ausschalten
GARANTIE
Schlagen Sie in den beigefügten
Garantiebedingungen nach.
UMWELT
Entsorgung
Das Produkt, sein Zubehör sowie die
Verpackung müssen für ein
umweltfreundliches Recycling getrennt
entsorgt werden.
Nur für EG-Länder
Entsorgen Sie Elektrowerkzeuge nicht über
den Hausmüll. Entsprechend der Europäischen
Richtlinie 2012/19/EU für Elektro- und
Elektronikschrott sowie der Einführung in das
nationale Recht müssen Elektrowerkzeuge, die
nicht mehr im Gebrauch sind, getrennt gesammelt
und umweltfreundlich entsorgt werden.
Das Produkt und das Benutzerhandbuch können
geändert werden. Die technischen Daten können
ohne Vorankündigung geändert werden.
• Reinigen Sie das Gehäuse regelmäßig mit
einem weichen Lappen.
• Halten Sie die Belüftungsschlitze staub- und
schmutzfrei. Verwenden Sie gegebenenfalls
einen weichen feuchten Lappen, um den Staub
und Schmutz aus den Belüftungsschlitzen zu
entfernen.
Erneuerung des Zubehörs (Abb. B)
Verschlissenes oder beschädigtes Zubehör muss
unverzüglich erneuert werden.
Verwenden Sie ausschließlich scharfes
und unbeschädigtes Zubehör.
• Um das Zubehör zu entfernen, gehen Sie wie
im entsprechenden Abschnitt beschrieben vor.
• Um das Zubehör anzubringen, gehen Sie wie
im entsprechenden Abschnitt beschrieben vor.
12
Page 13

MULTITOOL
OTM1006
Hartelijk dank voor de aanschaf van dit Ferm
product. Hiermee heeft u een uitstekend product
aangeschaft van één van de toonaangevende
Europese distributeurs. Alle Ferm producten
worden gefabriceerd volgens de hoogste
prestatie- en veiligheidsnormen.
Deel van onze filosofie is de uitstekende klantenservice die wordt ondersteund door onze
uitgebreide garantie. Wij hopen dat u vele jaren naar
tevredenheid gebruik zult maken van dit product.
VEILIGHEIDSVOORSCHRIFTEN
WAARSCHUWING
Lees de bijgesloten
veiligheidsvoorschriften, de
aanvullende veiligheidsvoorschriften
en de instructies.
Het niet in acht nemen van de
veiligheidsvoorschriften en de instructies kan
leiden tot elektrische schok, brand en/of ernstig
letsel.
Bewaar de veiligheidsvoorschriften en de
instructies voor toekomstig gebruik.
De volgende symbolen worden gebruikt in de
gebruikershandleiding of op het product:
Lees de gebruikershandleiding.
Gevaar voor lichamelijk letsel, overlijden
of schade aan de machine wanneer de
instructies in deze handleiding niet
worden opgevolgd.
Gevaar voor elektrische schokken
Niet gebruiken in regen
Alleen binnenshuis gebruiken
Klasse II apparaat - Dubbel geïsoleerd Een geaarde stekker is niet noodzakelijk.
Max. temperatuur 400C
NL
Accu niet verbranden
Accu niet in het water gooien
Werp het product niet weg in
ongeschikte containers.
Aparte inzameling van Li-ion-accu’s.
Het product is in overeenstemming met
de van toepassing zijnde
veiligheidsnormen in de Europese
richtlijnen.
Aanvullende veiligheidsvoorschriften voor
multitools
Het aanraken of inademen van tijdens
gebruik vrijkomende stof (bijv. met
loodhoudende verf bewerkte
oppervlakken, hout en metaal) kan
schade toebrengen aan uw gezondheid
en de gezondheid van omstanders.
Draag altijd geschikte beschermende
uitrusting, zoals een stofmasker.
• Bewerk geen materialen die asbest
bevatten. Asbest wordt als kankerverwekkend
beschouwd.
• Bewerk geen metaal met een
magnesiumgehalte van meer dan 80%.
• Wees uiterst voorzichting bij het bewerken van
geverfde oppervlakken.
• Gebruik geen accessoires die niet specifiek
zijn ontworpen en aanbevolen door de fabrikant.
Gevaar voor persoonlijk letsel.
• Controleer de machine en de accessoires
voor ieder gebruik. Gebruik geen accessoires
die verbogen, vervormd of op andere wijze
beschadigd zijn. Indien u de machine of een
van de accessoires laat vallen, controleer dan
de machine of het accessoire op beschadiging.
Vervang indien nodig het accessoire.
• Gebruik uitsluitend accessoires die worden
aanbevolen door de fabrikant.
• Gebruik uitsluitend accessoires die geschikt
zijn voor de toepassing.
• Gebruik uitsluitend accessoires met de juiste
afmetingen.
13
Page 14

NL
• Gebruik geen accessoires die koelvloeistoffen
vereisen. Gevaar voor elektrische schok.
• Zorg ervoor dat de accessoires juist zijn
gemonteerd. Gebruik geen adapters of andere
hulpmiddelen om accessoires met een andere
asdiameter te monteren.
• Zorg ervoor dat de maximale snelheid van
het accessoire groter is dan of gelijk is aan de
maximale snelheid van de machine. Zie het
typeplaatje op de machine.
• Laat na het monteren van de accessoires de
machine onbelast draaien op een veilige plek.
Indien de machine sterk vibreert, schakel
dan onmiddellijk de machine uit, verwijder de
netstekker uit het stopcontact en probeer het
probleem te verhelpen.
• Zorg ervoor dat het werkstuk correct wordt
ondersteund of vastgezet.
• Draag een veiligheidsbril. Draag gehoorbescherming. Draag een stofmasker. Gebruik
indien nodig andere beschermingsmiddelen,
zoals veiligheidshandschoenen, veiligheidsschoenen, etc. Gevaar voor persoonlijk letsel.
• Houd omstanders uit de buurt van het
werkgebied. Zorg ervoor dat alle personen
in het werkgebied beschermende uitrusting
dragen. Gevaar voor persoonlijk letsel.
• Houd het netsnoer uit de buurt van het
draaiende accessoire. Indien het netsnoer het
draaiende accessoire raakt, kunnen uw handen
of armen in contact komen met het accessoire.
Gevaar voor persoonlijk letsel.
• Houd het elektrische gereedschap vast
aan de geïsoleerde oppervlakken wanneer
u werkzaamheden uitvoert waardoor het
accessoire in contact kan komen met
verborgen bedrading. Accessoires die
bedrading onder spanning raken kunnen
het gereedschap onder stroom zetten en de
gebruiker een elektrische schok geven.
• Gebruik de machine niet terwijl u deze naast u
draagt. Gevaar voor persoonlijk letsel.
• Gebruik de machine niet in de buurt van
brandbare materialen. Brandgevaar.
• Wees erop bedacht dat het accessoire na
het uitschakelen van de machine nog korte
tijd blijft doordraaien. Probeer niet zelf het
accessoire tot stilstand te brengen.
• Plaats de machine nooit op een tafel of een
werkbank voordat deze uitgeschakeld is.
• Reinig regelmatig de ventilatieopeningen.
Gevaar voor elektrische schok.
Gebruik en onderhoud accugereedschap
a) Uitsluitend herladen met de door de
fabrikant opgegeven acculader.
Een acculader die voor een bepaald type
accupack geschikt is kan brandgevaar
opleveren wanneer deze wordt gebruikt met
een ander accupack.
b) Gebruik powertools uitsluitend met
speciaal daarvoor bestemde accupacks.
Het gebruik van andere accupacks kan
gevaar voor letsel en brand opleveren.
c) Houd, wanneer u het accupack niet
gebruikt, dit uit de buurt van andere
metalen voorwerpen, zoals paperclips,
muntstukken, sleutels, spijkers, schroeven
of andere kleine metalen voorwerpen, die
voor verbinding kunnen zorgen tussen de
twee accupolen.
Kortsluiting tussen de accupolen kan
brandplekken of brand veroorzaken.
d) Bij onjuist gebruik kan er vloeistof uit de
accu komen; vermijd het contact hiermee.
Spoel de plek met water in het geval dat
u toch per ongeluk ermee in aanraking
komt. Roep tevens medische hulp in
wanneer de vloeistof in contact komt met
uw ogen. Vloeistof uit de accu kan irritatie of
brandwonden veroorzaken.
Service
a) Laat de powertools onderhouden door
een erkende reparateur die uitsluitend
gebruik maakt van identieke vervangingsonderdelen.
Dit zorgt ervoor dat de veiligheid van de
powertool intact blijft.
Ten aanzien van de acculader
Bedoeld gebruik
Laad uitsluitend herlaadbare accupacks van het
type CDA1094. Andere typen accu’s kunnen
exploderen, wat lichamelijk letsel en schade kan
veroorzaken.
a) Het apparaat dient niet te worden gebruikt
door personen (inclusief kinderen) met
verminderde fysieke, zintuiglijke of
mentale functies of personen zonder enige
ervaring en kennis, tenzij zij onder toezicht
staan of zijn geïnstrueerd
14
Page 15
b) Laat kinderen onder toezicht niet met het
apparaat spelen
c) Laad niet-herlaadbare accu’s niet opnieuw
op!
d) Plaats de accu’s tijdens het opladen in een
goed geventileerde ruimte!
Elektrische veiligheid
Controleer altijd of de spanning van de
stroomtoevoer overeenkomt met de
spanning op het typeplaatje.
• Gebruik de machine niet indien het netsnoer
of de netstekker zijn beschadigd.
• Gebruik uitsluitend verlengkabels die geschikt
zijn voor het vermogen van de machine met
een minimale dikte van 1,5 mm2. Indien u een
verlengkabelhaspel gebruikt, rol dan altijd de
kabel volledig uit.
NL
Bescherm uzelf tegen de gevolgen van trilling door
de machine en de accessoires te onderhouden,
uw handen warm te houden en uw werkwijze te
organiseren
BESCHRIJVING (FIG. A)
Uw multitool is ontworpen voor lichte schuur-,
zaag- en schraapwerkzaamheden.
1. Aan/uit-schakelaar
2. Instelwiel toerental
3. Montagepunt voor accessoires
4. Handgreep
ASSEMBLAGE
Schakel de machine altijd uit voordat u
accessoires plaatst
TECHNISCHE GEGEVENS
Acculader CDA1095
Ingang van acculader 100-240 V~ 50/60 Hz 15W
Uitgang van acculader 13,5V d.c. 400mA
Herlaadbare accu 12 V Li-ion 1,5 Ah
Laadtijd accu 3-5 uur
Toerental onbelast 5.000 - 18.000 min
Gewicht 0,7 kg
GELUID EN VIBRATIE
Geluidsdruk (Lpa) 94 dB(A)
Geluidsvermogen (Lwa) 105 dB(A)
Onzekerheid (K) 3 dB(A)
Vibratie 11,240 m/s
Onzekerheid (K) 1,5 m/s
Trillingsniveau
Het trillingsemissieniveau, dat in deze
gebruiksaanwijzing wordt vermeld, is gemeten in
overeenstemming met een gestandaardiseerde
test volgens EN 60745; deze mag worden gebruikt
om twee machines met elkaar te vergelijken en
als voorlopige beoordeling van de blootstelling
aan trilling bij gebruik van de machine voor de
vermelde toepassingen
- gebruik van de machine voor andere
toepassingen, of met andere of slecht
onderhouden accessoires, kan het
blootstellingsniveau aanzienlijk verhogen
- wanneer de machine is uitgeschakeld of
wanneer deze loopt maar geen werk verricht,
kan dit het blootstellingsniveau aanzienlijk
reduceren
De accu moet voor het eerste gebruik
worden opgeladen.
De accu uit de machine verwijderen
• Duw op de ontgrendelingsknoppen en trek de
accu uit de machine
-1
De accu in de machine plaatsen
Zorg ervoor dat de behuizing van de accu schoon
en droog is voordat u deze in de lader of machine
plaatst.
• Plaats de accu (2) in de onderkant van de
machine
2
• Duw de accu verder naar binnen totdat deze
2
vastklikt.
De accu laden (met de acculader)
• Steek de stekker van de acculader in
een stopcontact en wacht even. Het
ledcontrolelampje gaat branden en toont de
status van de lader.
Led Status van acculader
Rood Bezig met opladen van accu
Groen Opladen van de accu is beëindigd, de accu is
volledig opgeladen
• Het kan tot 240 minuten duren voordat de
1,5Ah accu volledig is opgeladen.
• Verwijder, als de accu volledig is opgeladen,
de stekker van de acculader uit het
stopcontact en haal de accu uit de acculader.
15
Page 16

NL
Wanneer deze machine gedurende een
langere tijd niet wordt gebruikt, is het
raadzaam de accu te bewaren in
opgeladen toestand.
Monteren en verwijderen van de schuurzool en
het schuurpapier (fig. B)
De schuurzool en het schuurpapier moeten
worden gebruikt voor schuurwerkzaamheden.
Monteren
• Plaats de machine op een tafel met het
montagepunt (3) naar boven gericht.
• Draai de inbusschroef (7) los met behulp van
de inbussleutel (5).
•
Monteer de schuurzool (9) op het montagepunt (3).
• Draai de inbusschroef (7) vast met behulp van
de inbussleutel (5).
• Monteer schuurpapier (10) met de gewenste
korrelgrootte op de schuurzool (9). Zorg
ervoor dat de perforatie in het schuurpapier
(10) overeenkomt met de perforatie op de
schuurzool (9).
- Gebruik grof schuurpapier (korrel 50) voor
het schuren van ruwe, ongelijkmatige
oppervlakken.
- Gebruik medium schuurpapier (korrel
80) voor het verwijderen van de krassen
die zijn overgebleven van het grove
schuurpapier.
- Gebruik fijn schuurpapier (korrel 120) voor
het afwerken van oppervlakken.
Verwijderen
• Plaats de machine op een tafel met het
montagepunt (3) naar boven gericht.
• Verwijder het schuurpapier (10) van de
schuurzool (9).
• Draai de inbusschroef (7) los met behulp van
de inbussleutel (5).
• Verwijder de schuurzool (9) van het
montagepunt (3).
• Draai de inbusschroef (7) vast met behulp van
de inbussleutel (5).
Monteren en verwijderen van het zaagblad
(fig. B)
Het zaagblad moet worden gebruikt voor
zaagwerkzaamheden.
Monteren
• Plaats de machine op een tafel met het
montagepunt (3) naar boven gericht.
• Draai de inbusschroef (7) los met behulp van
de inbussleutel (5).
• Verwijder de afstandsring (8).
•
Monteer het zaagblad (11) op het montagepunt (3).
• Monteer de afstandsring (8).
• Draai de inbusschroef (7) vast met behulp van
de inbussleutel (5).
Verwijderen
• Plaats de machine op een tafel met het
montagepunt (3) naar boven gericht.
• Draai de inbusschroef (7) los met behulp van
de inbussleutel (5).
• Verwijder de afstandsring (8).
• Verwijder het zaagblad (11) van het
montagepunt (3).
• Monteer de afstandsring (8).
• Draai de inbusschroef (7) vast met behulp van
de inbussleutel (5).
Monteren en verwijderen van het schraapmes
(fig. B)
Het schraapmes moet worden gebruikt voor
schraapwerkzaamheden.
Monteren
• Plaats de machine op een tafel met het
montagepunt (3) naar boven gericht.
• Draai de inbusschroef (7) los met behulp van
de inbussleutel (5).
• Verwijder de afstandsring (8).
• Monteer het schraapmes (12) op het
montagepunt (3).
• Monteer de afstandsring (8).
• Draai de inbusschroef (7) vast met behulp van
de inbussleutel (5).
Verwijderen
• Plaats de machine op een tafel met het
montagepunt (3) naar boven gericht.
• Draai de inbusschroef (7) los met behulp van
de inbussleutel (5).
• Verwijder de afstandsring (8).
• Verwijder het schraapmes (12) van het
montagepunt (3).
• Monteer de afstandsring (8).
• Draai de inbusschroef (7) vast met behulp van
de inbussleutel (5).
16
Page 17

GEBRUIK
In- en uitschakelen (fig. A)
• Om de machine in te schakelen, schuift u de
aan/uit-schakelaar (1) naar voren.
• Om de machine in te schakelen, schuift u de
aan/uit-schakelaar (1) naar achteren.
Instellen van de snelheid (fig. A)
Het instelwiel voor het toerental wordt gebruikt
voor het instellen van de snelheid. Het instelwiel
voor het toerental kan in 6 posities worden
ingesteld. De ideale snelheid is afhankelijk van de
toepassing en van het te bewerken materiaal.
Stel de snelheid niet in tijdens gebruik.
NL
Vervangen van de accessoires (fig. B)
Versleten of beschadigde accessoires moeten
onmiddellijk worden vervangen.
Gebruik uitsluitend scherpe en
onbeschadigde accessoires.
• Ga voor het verwijderen van het
accessoire te werk zoals beschreven in het
corresponderende gedeelte.
• Ga voor het monteren van het accessoire te
werk zoals beschreven in het corresponderende
gedeelte.
GARANTIE
Raadpleeg de bijgesloten garantiebepalingen.
• Draai het instelwiel voor het toerental (2) naar
de gewenste positie.
Aanwijzingen voor optimaal gebruik
• Klem het werkstuk vast. Gebruik een
kleminrichting voor kleine werkstukken.
• Teken een lijn om de richting te bepalen
waarin het accessoire moet worden geleid.
• Houd de machine stevig vast bij de handgreep.
• Schakel de machine in.
• Wacht totdat de machine volledig op snelheid is.
• Plaats het accessoire op het werkstuk.
• Beweeg de machine langs de vooraf
getekende lijn, waarbij het accessoire stevig
tegen het werkstuk wordt gedrukt.
• Oefen niet te veel druk uit op de machine. Laat
de machine het werk doen.
• Schakel de machine uit en wacht totdat de
machine volledig tot stilstand is gekomen
voordat u de machine wegzet.
REINIGING EN ONDERHOUD
Schakel de machine altijd uit voordat u
accessoires plaatst
• Reinig regelmatig de behuizing met een
zachte doek.
• Houd de ventilatieopeningen vrij van stof en
vuil. Gebruik indien nodig een zachte, vochtige
doek om stof en vuil uit de ventilatieopeningen
te verwijderen.
MILIEU
Afdanking
Het product, de accessoires en de
verpakking moeten worden gesor teerd
voor milieuvriendelijke recycling.
Uitsluitend voor EG-landen
Werp elektrisch gereedschap niet weg bij het
huisvuil. Volgens de Europese Richtlijn 2012/19/
EU voor Afgedankte Elektrische en Elektronische
Apparatuur en de implementatie ervan in nationaal
recht moet niet langer te gebruiken elektrisch
gereedschap gescheiden worden verzameld en
op een milieuvriendelijke wijze worden verwerkt.
Het product en de gebruikershandleiding zijn
onderhevig aan wijzigingen. Specificaties kunnen
zonder opgaaf van redenen worden gewijzigd.
17
Page 18

FR
MULTI-OUTIL
OTM1006
Merci pour votre achat de ce produit Ferm.
Vous disposez maintenant d’un excellent produit,
proposé par l’un des principaux fabricants
européens. Tous les produits que vous fournit
Ferm sont fabriqués selon les normes les plus
exigeantes en matière de performances et
de sécurité. Complété par notre garantie très
complète, l’excellence de notre service clientèle
forme également partie intégrante de notre
philosophie. Nous espérons que vous profiterez
longtemps de ce produit.
AVERTISSEMENTS DE
SÉCURITÉ
AVERTISSEMENT
Consultez les avertissements de
sécurité, les avertissements de
sécurité additionnels ainsi que les
instructions fournis ici.
Le non respect des avertissements de
sécurité et des instructions peut
occasionner une électrocution, un
incendie ou des blessures graves.
Conservez les avertissements de
sécurité et les instructions pour
référence future.
Les symboles suivants sont utilisés dans le
manuel d’utilisation ou apposés sur le produit :
Machine de classe II - Double isolation Vous n’avez pas besoin de prise avec
mise à la terre.
Température max. 40 0C
Ne jetez pas la batterie au feu
Ne jetez pas la batterie dans de l’eau
Ne jetez pas le produit dans des
conteneurs qui ne sont pas prévus à cet
effet.
La batterie Li- ion fait l’objet d’une
collecte séparée.
Le produit est conforme aux normes de
sécurité en vigueur spécifiées dans les
directives européennes.
Avertissements de sécurité supplémentaires
pour les multi-outils
Le contact ou l’inhalation de poussière
libérée pendant l’utilisation (par ex.
surfaces peintes, bois ou métal) peut
constituer un danger pour votre santé et
celle des personnes à proximité. Por tez
toujours l’équipement de protection
approprié, ainsi un masque antipoussière.
18
Lisez le manuel d’utilisation.
Signale un risque de blessures, un
danger mor tel ou un risque
d’endommagement de l’outil en cas de
non-respect des instructions de ce
manuel.
Risque de décharge électrique
Ne pas utiliser sous la pluie
Utilisation en intérieur uniquement
• Ne travaillez pas sur des matériaux contenant
de l’amiante. L’amiante est considéré comme
carcinogène.
• Ne travaillez pas sur un métal présentant un
contenu en magnésium supérieur à 80%.
• Faites très attention en travaillant sur des
surfaces peintes.
• Utilisez uniquement les accessoires
spécifiquement conçus et recommandés par le
fabricant. Risque de blessures.
• Inspectez la machine et les accessoires avant
chaque usage. N’utilisez pas d’accessoires
courbés, fissurés ou autrement endommagés.
En cas de chute de la machine ou d’un
accessoire, vérifiez l’absence de dégâts. Si
nécessaire, remplacez l’accessoire.
Page 19

• Utilisez uniquement les accessoires
recommandés par le fabricant.
• Utilisez uniquement les accessoires adaptés à
l’application.
• Utilisez uniquement des accessoires aux
dimensions correctes.
• N’utilisez aucun accessoire nécessitant
un liquide de refroidissement. Risque
d’électrocution.
• Assurez-vous que les accessoires sont
correctement montés. N’utilisez pas d’adaptateur
ou d’autres dispositifs pour monter des
accessoires d’un diamètre d’axe différent.
• Assurez-vous que la vitesse maximum de
l’accessoires est supérieure ou égale à celle
de la machine. Reportez-vous à la plaque
d’identification de la machine.
• Une fois les accessoires en place, laissez la
machine tourner sans charge dans une zone
sécurisée. En cas de fortes vibrations de
la machine, mettez-la immédiatement hors
tension, débranchez la fiche de la prise secteur
et essayez de résoudre le problème.
• Assurez-vous que la pièce à ouvrer est
correctement soutenue ou fixée.
• Portez des lunettes de protection. Portez une
protection auditive. Portez un masque antipoussière. Si nécessaire, utilisez d’autres
équipements de protection : gants de sécurité,
chaussures de sécurité, etc. Risque de
blessures.
• Maintenez les passants à l’écart de la zone de
travail. Assurez-vous que quiconque pénètre
dans la zone de travail porte un équipement de
protection. Risque de blessures.
• Écartez le câble d’alimentation de l’accessoire
en rotation. Si le cordon secteur touche
l’accessoire en rotation, vos mains ou vos bras
peuvent entrer en contact avec l’accessoire.
Risque de blessures.
• Tenez l’outil par ses surfaces de préhension
isolées si vous effectuez une opération lors de
laquelle l’accessoire de coupe pourrait entrer
en contact avec des fils cachés sous tension.
Tout contact d’un accessoire de coupe avec
un fil sous tension peut mettre les parties
métalliques exposées de l’outil sous tension et
provoquer un choc électrique à l’utilisateur.
• N’utilisez pas la machine en la tenant à vos
côtés. Risque de blessures.
• N’utilisez pas la machine à proximité de
matériaux inflammables. Risque d’incendie.
• Après avoir débranché la machine, l’accessoire
continue à tourner pendant quelque temps.
FR
N’essayez jamais d’immobiliser vous-même
l’accessoire.
• Ne posez jamais la machine sur une table ou
un établi sans l’avoir mise hors tension.
• Nettoyez régulièrement les orifices d’aération.
Risque d’électrocution.
Utilisation et entretien de la batterie de l’outil
a) Rechargez uniquement avec le chargeur
spécifié par le fabricant.
Un chargeur qui convient à un type de
batterie peut entraîner un risque d’incendie
lorsqu’il est utilisé avec une autre batterie.
b) Utilisez toujours les outils électriques
uniquement avec les batteries spécifiées.
L’utilisation d’une autre batterie peut
entraîner un risque de blessures et
d’incendie.
c) Lorsque la batterie n’est pas utilisée,
veuillez la tenir à l’écart d’objets
métalliques tels que trombones, pièces de
monnaie, clés, clous, vis et autres petits
objets métalliques susceptibles d’établir
une connexion entre les deux bornes.
Court-circuiter les bornes de la batterie peut
provoquer des brûlures ou un incendie.
d) Dans des conditions anormales
d’utilisation, un liquide peut sortir de la
batterie. Évitez tout contact. En cas de
contact accidentel, rincez abondamment
à l’eau. Si le liquide entre en contact
avec les yeux, consultez également un
médecin.
Le liquide qui sort de la batterie peut
provoquer des irritations ou des brûlures.
Entretien
a) L’entretien de votre outil électrique
doit être confié à un réparateur qualifié
qui utilise uniquement des pièces de
rechange identiques aux pièces d’origine.
Cela permet d’assurer la sécurité de l’outil
électrique.
Pour le chargeur
Utilisation prévue
Chargez uniquement à l’aide de la batterie
CDA1094. Tout autre type de batterie est
susceptible d’éclater et de provoquer des
blessures et des dommages matériels.
19
Page 20

FR
a) L’appareil n’est pas destiné à être
utilisé par des personnes (notamment
des enfants) souffrant de déficiences
physiques, sensorielles ou mentales, ou
par des personnes inexpérimentées ou
non formées. Toute utilisation doit se
faire sous la surveillance d’une personne
responsable et avec les instructions
appropriées.
b) Même sous surveillance, les enfants ne
doivent pas jouer avec l’appareil.
c) Ne rechargez pas les batteries non
rechargeables!
d) Veuillez effectuer la recharge des batteries
dans un endroit bien ventilé!
Sécurité électrique
Vérifiez si la tension d’alimentation
électrique correspond bien à celle
de la plaque signalétique.
• N’utilisez pas la machine si le câble secteur ou
la fiche secteur est endommagé.
• Utilisez uniquement des rallonges adaptées à
la puissance nominale de la machine et d’une
section minimum de 1,5 mm2. Si vous utilisez
une bobine de rallonge, déroulez toujours
complètement le câble.
- l’utilisation de l’outil dans d’autres applications,
ou avec des accessoires différents ou mal
entretenus, peut considérablement augmenter
le niveau d’exposition
- la mise hors tension de l’outil et sa nonutilisation pendant qu’il est allumé peuvent
considérablement réduire le niveau
d’exposition
Protégez-vous contre les effets des vibrations
par un entretien correct de l’outil et de ses
accessoires, en gardant vos mains chaudes et en
structurant vos schémas de travail
DESCRIPTION (FIG. A)
Votre multi-outil a été conçu pour les applications
légères de ponçage, de sciage et de décapage.
1. Bouton de marche/arrêt
2. Molette de réglage de vitesse
3. Point de montage des accessoires
4. Poignée
MONTAGE
Avant l‘assemblage, éteignez toujours la
machine
DONNÉES TECHNIQUES
Chargeur CDA1095
Entrée du chargeur 100-240 V~ 50/60 Hz 15W
Sortie du chargeur 13,5V d.c. 400mA
Batterie rechargeable 12 V Li-ion 1,5 Ah
Temps de charge de la batterie 3-5 heur
Vitesse à vide 5.000 - 18.000 min
Poids 0,7 kg
La batterie doit être chargée avant la première
utilisation.
Retrait de la batterie de la machine
• Poussez les boutons de déverrouillage de la
batterie et tirez la batterie hors de la machine
-1
Insertion de la batterie dans la machine
Assurez-vous que l‘extérieur de la batterie est
BRUIT ET VIBRATION
Pression acoustique (Lpa) 94 dB(A)
Puissance acoustique (Lwa) 105 dB(A)
Incertitude (K) 3 dB(A)
Vibration 11,240 m/s
Incertitude (K) 1,5 m/s
propre et sec avant de la raccorder au chargeur ou
à la machine.
• Insérez la batterie (2) dans la base de la
machine
• Poussez la batterie vers l‘avant jusqu‘à ce
2
qu‘elle s‘enclenche en place.
2
Recharge de la batterie (avec le chargeur)
Niveau de vibrations
Le niveau de vibrations émises indiqué en ce
manuel d’instruction a été mesuré conformément
• Branchez la fiche du chargeur dans une prise
électrique et patientez. L’indicateur à LED
s’allume et indique l’état du chargeur.
à l’essai normalisé de la norme EN 60745; il peut
être utilisé pour comparer plusieurs outils et pour
réaliser une évaluation préliminaire de l’exposition
aux vibrations lors de l’utilisation de l’outil pour les
applications mentionnées
LED État du chargeur
Rouge Batterie en cours de charge
Vert Charge de la batterie terminée, batterie
complètement chargée
20
Page 21

• Il faut compter jusqu’à 240 minutes pour
recharger complètement la batterie 1,5Ah.
• Lorsque la batterie est entièrement chargée,
débranchez le chargeur de la prise secteur et
retirez la batterie du chargeur.
Quand la machine n’est pas utilisée
pendant une période prolongée, il est
préférable d’entreposer la batterie
rechargée.
Montage et retrait du patin de ponçage et du
papier de ponçage (fig. B)
Le patin de ponçage et le papier de ponçage
doivent être utilisés pour les applications de
ponçage.
Montage
• Placez la machine sur une table, le point de
montage (3) tourné vers le haut.
• Desserrez la vis Allen (7) avec la clé Allen (5).
• Montez le patin de ponçage (9) sur le point de
montage (3).
• Serrez la vis Allen (7) avec la clé Allen (5).
• Placez le papier de ponçage (10) présentant
le grain adapté sur le patin de ponçage (9).
Assurez-vous que les perforations du papier
de ponçage (10) correspondent à celles du
patin de ponçage (9).
- Utilisez un papier de ponçage grossier
(grain 50) pour poncer les surfaces
inégales et irrégulières.
- Utilisez un papier de ponçage moyen
(grain 80) pour retirer les éraflures
laissées par le papier de ponçage
grossier.
- Utilisez un papier de ponçage fin (grain
120) pour la finition des surfaces.
Retrait
• Placez la machine sur une table, le point de
montage (3) tourné vers le haut.
• Retirez le papier de ponçage (10) du patin de
ponçage (9).
• Desserrez la vis Allen (7) avec la clé Allen (5).
• Retirez le patin de ponçage (9) du point de
montage (3).
• Serrez la vis Allen (7) avec la clé Allen (5).
FR
Montage
• Placez la machine sur une table, le point de
montage (3) tourné vers le haut.
• Desserrez la vis Allen (7) avec la clé Allen (5).
• Enlevez la pièce d’écartement (8)
• Montez la lame de scie (11) sur le point de
montage (3).
• Montez la pièce d’écartement (8)
• Serrez la vis Allen (7) avec la clé Allen (5).
Retrait
• Placez la machine sur une table, le point de
montage (3) tourné vers le haut.
• Desserrez la vis Allen (7) avec la clé Allen (5).
• Enlevez la pièce d’écartement (8)
• Retirez la lame de scie (11) du point de
montage (3).
• Montez la pièce d’écartement (8)
• Serrez la vis Allen (7) avec la clé Allen (5).
Montage et retrait du couteau de décapage
(fig. B)
Le couteau de décapage doit être utilisé pour
les applications de décapage.
Montage
• Placez la machine sur une table, le point de
montage (3) tourné vers le haut.
• Desserrez la vis Allen (7) avec la clé Allen (5).
• Enlevez la pièce d’écartement (8)
• Montez le couteau de décapage (12) sur le
point de montage (3).
• Montez la pièce d’écartement (8)
• Serrez la vis Allen (7) avec la clé Allen (5).
Retrait
• Placez la machine sur une table, le point de
montage (3) tourné vers le haut.
• Desserrez la vis Allen (7) avec la clé Allen (5).
• Enlevez la pièce d’écartement (8)
• Retirez le couteau de décapage (12) du point
de montage (3).
• Montez la pièce d’écartement (8)
• Serrez la vis Allen (7) avec la clé Allen (5).
UTILISATION
Montage et retrait de la lame de scie (fig. B)
La lame de scie doit être utilisée pour les
applications de sciage.
Mise en marche et arrêt (fig. A)
• Pour mettre la machine en marche, avancez
le bouton marche/arrêt (1).
• Pour arrêter la machine, reculez l’interrupteur
marche/arrêt (1).
21
Page 22

FR
Réglage de la vitesse (fig. A)
La molette de réglage de vitesse sert à ajuster
la vitesse. La molette de réglage de vitesse peut
adopter 6 positions. La vitesse idéale dépends de
l’application et du matériau ouvré.
Ne réglez pas la vitesse pendant
l’utilisation.
• Pour retirer l’accessoire, procédez selon les
indications de la section correspondante.
• Pour monter l’accessoire, procédez selon les
indications de la section correspondante.
GARANTIE
Consultez les termes de la garantie fournis.
• Sélectionnez la vitesse souhaitée au moyen
de la molette de réglage de vitesse (2).
Conseils pour une utilisation optimale
• Serrez la pièce à ouvrer. Utilisez un appareil
de serrage pour les petites pièces.
• Tirez une ligne définissant la direction de
guidage de l’accessoire.
• Tenez fermement la machine par la poignée.
• Mettez la machine en marche.
• Attendez que la machine atteigne son régime
maximum.
• Placez l’accessoire sur la pièce à ouvrer.
• Déplacez lentement la machine le long de
la ligne tracée en appuyant l’accessoire
fermement contre la pièce à ouvrer.
• N’exercez pas de pression excessive sur la
machine. Laissez la machine faire le travail.
• Éteignez la machine et attendez son
immobilisation totale avant de la reposer.
NETTOYAGE ET
MAINTENANCE
Avant l‘assemblage, éteignez toujours la
machine
• Nettoyez régulièrement le boîtier à l’aide d’un
chiffon doux.
• Débarrassez les fentes de ventilation de toute
salissure et poussière. Si nécessaire, utilisez
un chiffon doux et humide pour retirer la salissure
et la poussière des fentes de ventilation.
ENVIRONNEMENT
Mise au rebut
Le produit, les accessoires et l’emballage
doivent être triés pour assurer un
recyclage écologique.
Uniquement pour les pays CE
Ne jetez pas les outils électriques avec les déchets
domestiques. Selon la directive européenne
2012/19/EU « Déchets d’équipements électriques
et électroniques » et sa mise en œuvre dans le
droit national, les outils électriques hors d’usage
doivent être collectés séparément et mis au rebut
de manière écologique.
Le produit et le manuel d’utilisation sont sujets
à modifications. Les spécifications peuvent
changer sans autre préavis.
Changement d’accessoire (fig. B)
Les accessoires usés ou endommagés doivent
être immédiatement remplacés.
Utilisez uniquement des accessoires
aiguisés et en bon état.
22
Page 23

MULTIHERRAMIENTA
OTM1006
Gracias por comprar este producto Ferm.
Al hacerlo ha adquirido un excelente producto,
suministrado por uno de los proveedores líderes
en Europa.
Todos los productos suministrados por Ferm se
fabrican de conformidad con las normas más
elevadas de rendimiento y seguridad. Como parte
de nuestra filosofía también proporcionamos
un excelente servicio de atención al cliente,
respaldado por nuestra completa garantía.
Esperamos que disfrute utilizando este producto
durante muchos años.
ADVERTENCIAS DE
SEGURIDAD
Lea las advertencias de seguridad, las
advertencias de seguridad
adicionales y las instrucciones
adjuntas. Si no respeta las advertencias de
seguridad y las instrucciones, pueden
ocasionarse descargas eléctricas, incendios y/o
lesiones graves. Guarde las advertencias de
seguridad y las instrucciones para su futura
consulta.
En el manual de usuario y en el producto se
emplean los siguientes símbolos:
Lea el manual de usuario.
Denota riesgo de lesiones personales,
pérdida de vida o daños a la herramienta
en caso de incumplimiento de las
instrucciones del presente manual.
Riesgo de choque eléctrico
No use bajo la lluvia
Use solo en interiores
Máquina de clase II - Doble aislamiento No necesita enchufe con puesta a tierra.
ES
Temperatura máx. 40° C
No arroje la batería al fuego
No arroje la batería al agua
No tire el producto en contenedores no
apropiados.
Recogida selectiva de la batería de
iones de litio.
El producto es conforme a las normas de
seguridad aplicables según las directivas
europeas.
Advertencias de seguridad adicionales
para multiherramientas
El contacto o la inhalación del polvo
liberado durante el uso (p. ej. super ficies
con pintura con plomo, madera y metal)
puede poner en peligro su salud y la de
las personas a su alrededor. Lleve
siempre los equipos de protección
adecuados, como una máscara antipolvo.
• No trabaje con materiales que contengan
amianto. El amianto se considera
cancerígeno.
• No trabaje metal con un contenido de
magnesio superior al 80%.
• Tenga mucho cuidado al trabajar superficies
pintadas.
• No utilice accesorios que no hayan sido
específicamente diseñados y recomendados
por el fabricante. Riesgo de lesiones
personales.
• Inspeccione la máquina y los accesorios antes
de cada uso. No utilice accesorios que estén
doblados, agrietados o dañados de algún otro
modo. Si la máquina o uno de los accesorios
se cae, inspeccione la máquina o el accesorio
para comprobar si hay daños. En caso
necesario, sustituya el accesorio.
• Utilice únicamente accesorios recomendados
por el fabricante.
• Utilice únicamente accesorios que sean
adecuados para la aplicación.
• Utilice únicamente accesorios con las
dimensiones correctas.
23
Page 24

ES
• No utilice accesorios que requieran
refrigerantes líquidos. Riesgo de descarga
eléctrica.
• Asegúrese de que los accesorios estén
correctamente montados. No utilice
adaptadores ni otras ayudas para montar
accesorios con un diámetro de eje diferente.
• Asegúrese de que la velocidad máxima del
accesorio sea mayor o igual que la velocidad
máxima de la máquina. Consulte la placa de
características de la máquina.
• Deje que la máquina funcione sin carga
en una zona segura tras el montaje de los
accesorios. Si la máquina vibra mucho,
apáguela inmediatamente, saque el enchufe
de la toma e intente solucionar el problema.
• Asegúrese de que la pieza de trabajo esté
debidamente apoyada o fijada.
• Lleve gafas de seguridad. Lleve protección
auditiva. Lleve una máscara antipolvo. En
caso necesario, utilice otros medios de
protección, como guantes de seguridad,
calzado de seguridad, etc. Riesgo de lesiones
personales.
• Mantenga a los transeúntes alejados de la
zona de trabajo. Asegúrese de que todas las
personas en la zona de trabajo lleven equipos
de protección. Riesgo de lesiones personales.
• Mantenga el cable eléctrico alejado del
accesorio giratorio. Si el cable eléctrico toca
el accesorio giratorio, las manos o los brazos
podrían entrar en contacto con el accesorio.
Riesgo de lesiones personales.
• Aferre la herramienta eléctrica por las
superficies de agarre aisladas cuando realice
alguna operación en la que el accesorio
de corte pueda entrar en contacto con
cables ocultos. Si el accesorio de corte
entra en contacto con un cable con tensión,
puede exponer las partes metálicas de
la herramienta a tensión y ocasionar una
descarga eléctrica al operador.
• No utilice la máquina cuando la lleve a su
lado. Riesgo de lesiones personales.
• No utilice la máquina cerca de materiales
inflamables. Riesgo de incendio.
• Tenga en cuenta que después de apagar
la máquina, el accesorio continúa girando
durante un corto periodo de tiempo. Nunca
intente hacer que se detenga el accesorio.
• Nunca ponga la máquina sobre una mesa o
un banco de trabajo sin haberla desconectado
previamente.
• Limpie periódicamente las ranuras de
ventilación. Riesgo de descarga eléctrica.
Seguridad eléctrica
Compruebe siempre que la tensión del
suministro eléctrico corresponda con la
tensión de la placa de características.
• No utilice la máquina si el cable o el enchufe
eléctrico han sufrido daños.
• Utilice únicamente cables alargadores que
sean adecuados para la potencia nominal de
la máquina con un grosor mínimo de 1,5 mm2.
Si utiliza un cable alargador en rollo, desenrolle
totalmente el cable.
DATOS TÉCNICOS
Cargador CDA1095
Entrada del cargador 100-240 V~ 50/60 Hz 15W
Salida del cargador 13,5V d.c. 400mA
Batería recargable 12 V Iones de litio 1.5 Ah
Tiempo de carga de la batería 3-5 hora
Velocidad sin carga 5.000 - 18.000 min
Peso 0,7 kg
RUIDO Y VIBRACIÓN
Presión acústica (Lpa) 94 dB(A)
Potencia acústica (Lwa) 105 dB(A)
Incertidumbre (K) 3 dB(A)
Vibración 11,240 m/s
Incertidumbre (K) 1,5 m/s
Nivel de vibración
El nivel de emisión de vibraciones indicado en
este manual de instrucciones ha sido medido
según una prueba estándar proporcionada en
EN 60745; puede utilizarse para comparar una
herramienta con otra y como valoración preliminar
de la exposición a las vibraciones al utilizar la
herramienta con las aplicaciones mencionadas
- al utilizarla para distintas aplicaciones o con
accesorios diferentes o con un mantenimiento
defi ciente, podría aumentar de forma notable
el nivel de exposición
- en las ocasiones en que se apaga la
herramienta o cuando está funcionando
pero no está realizando ningún trabajo, se
podría reducir el nivel de exposición de forma
importante
Protéjase contra los efectos de la vibración
realizando el mantenimiento de la herramienta y
sus accesorios, manteniendo sus manos calientes
y organizando sus patrones de trabajo
-1
2
2
24
Page 25

ESCRIPCIÓN (FIG. A)
La multiherramienta se ha diseñado para
aplicaciones ligeras de lijado, serrado y decapado.
1. Interruptor de encendido/apagado
2. Rueda de ajuste de velocidad
3. Punto de montaje para accesorios
4. Empuñadura
MONTAJE
Antes de montarla, apague siempre la
máquina
Debe cargarse la batería antes de usar por
primera vez la herramienta.
Sacar la batería de la máquina
• Apriete los botones de desbloqueo de la
batería y tírela hacia fuera de la máquina
Inserte la batería en la máquina
Asegúrese de que la parte exterior de la batería
esté limpia y seca antes de conectarla al
cargador o a la máquina.
• Inserte la batería (2) en la base de la máquina
• Empuje un poco más la batería hasta oír el
clic cuando encaja en su lugar.
Carga de la batería (con el cargador)
• Enchufe el enchufe del cargador en una
toma de corriente eléctrica y espere un poco.
Los indicadores de LED se encenderán y
mostrarán el estado del cargador.
LED Estado del cargador
Rojo Carga de la batería en curso
Verde Ha finalizado la carga de la batería, batería
totalmente cargada
• La carga completa de la batería de 1.5Ah
puede llevar hasta 240 minutos.
• Después de que la batería esté totalmente
cargada, desenchufe el enchufe del cargador
de la toma de corriente y extraiga la batería
del cargador.
Cuando la máquina no se utilizará por un
largo periodo de tiempo, es conveniente
guardar la batería cargada.
ES
Montaje y retirada de la almohadilla de lijado y
el papel de lija (fig. B)
La almohadilla de lijado y el papel de lija deben
utilizarse para aplicaciones de lijado.
Montaje
• Coloque la máquina sobre una mesa con el
punto de montaje (3) orientado hacia arriba.
• Afloje el tornillo Allen (7) con la llave Allen (5).
• Monte la almohadilla de lijado (9) en el punto
de montaje (3).
• Apriete el tornillo Allen (7) con la llave Allen (5).
• Monte el papel de lija (10) del tamaño de
grano deseado en el almohadilla de lijado (9).
Asegúrese de que la perforación en el papel
de lija (10) corresponda con la perforación en
la almohadilla de lijado (9).
- Utilice papel de lija grueso (grano 50) para
lijar superficies rugosas e irregulares.
- Utilice papel de lija medio (grano 80) para
quitar los arañazos que deja el papel de
lija grueso.
- Utilice papel de lija fino (grano 120) para
acabar las superficies.
Retirada
• Coloque la máquina sobre una mesa con el
punto de montaje (3) orientado hacia arriba.
• Retire el papel de lija (10) de la almohadilla de
lijado (9).
• Afloje el tornillo Allen (7) con la llave Allen (5).
• Retire la almohadilla de lijado (9) del punto de
montaje (3).
• Apriete el tornillo Allen (7) con la llave Allen (5).
Montaje y retirada de la hoja de sierra (fig. B)
La hoja de sierra debe utilizarse para aplicaciones
de serrado.
Montaje
• Coloque la máquina sobre una mesa con el
punto de montaje (3) orientado hacia arriba.
• Afloje el tornillo Allen (7) con la llave Allen (5).
• Retire el espaciador (8).
• Monte la hoja de sierra (11) en el punto de
montaje (3).
• Monte el espaciador (8).
• Apriete el tornillo Allen (7) con la llave Allen (5).
25
Page 26

ES
Retirada
• Coloque la máquina sobre una mesa con el
punto de montaje (3) orientado hacia arriba.
• Afloje el tornillo Allen (7) con la llave Allen (5).
• Retire el espaciador (8).
• Retire la hoja de sierra (11) del punto de
montaje (3).
• Monte el espaciador (8).
• Apriete el tornillo Allen (7) con la llave Allen (5).
Montaje y retirada de la cuchilla de decapado
(fig. B)
La cuchilla de decapado debe utilizarse para
aplicaciones de decapado.
Montaje
• Coloque la máquina sobre una mesa con el
punto de montaje (3) orientado hacia arriba.
• Afloje el tornillo Allen (7) con la llave Allen (5).
• Retire el espaciador (8).
• Monte la cuchilla de decapado (12) en el
punto de montaje (3).
• Monte el espaciador (8).
• Apriete el tornillo Allen (7) con la llave Allen (5).
Retirada
• Coloque la máquina sobre una mesa con el
punto de montaje (3) orientado hacia arriba.
• Afloje el tornillo Allen (7) con la llave Allen (5).
• Retire el espaciador (8).
• Retire la cuchilla de decapado (12) del punto
de montaje (3).
• Monte el espaciador (8).
• Apriete el tornillo Allen (7) con la llave Allen (5).
USO
Encendido y apagado (fig. A)
• Para encender la máquina, deslice el interruptor
de encendido/apagado (1) hacia delante.
• Para apagar la máquina, deslice el interruptor
de encendido/apagado (1) hacia atrás.
Ajuste de la velocidad (fig. A)
La rueda de ajuste de velocidad se utiliza para
ajustar la velocidad. La rueda de ajuste de
velocidad puede situarse en 6 posiciones.
La velocidad ideal depende de la aplicación
y del material que va a trabajarse.
No ajuste la velocidad durante el uso.
• Gire la rueda de ajuste de velocidad (2) a la
posición deseada.
Consejos para un uso óptimo
• Fije la pieza de trabajo. Utilice un dispositivo
de fijación para piezas de trabajo pequeñas.
• Trace una línea para definir la dirección en la
que guiar el accesorio.
• Sujete la máquina firmemente por la
empuñadura.
• Encienda la máquina.
• Espere hasta que la máquina alcance la
máxima velocidad.
• Coloque el accesorio sobre la pieza de trabajo.
• Mueva lentamente la máquina por la línea
pretrazada, presionando firmemente el
accesorio contra la pieza de trabajo.
• No aplique demasiada presión sobre la
máquina. Deje que la máquina haga el
trabajo.
• Apague la máquina y espere que ésta se
detenga completamente antes de dejarla.
LIMPIEZA Y MANTENIMIENTO
Antes de montarla, apague siempre la
máquina
• Limpie la carcasa periódicamente con un
paño suave.
• Mantenga las ranuras de ventilación libres de
polvo y suciedad. En caso necesario, utilice
un paño suave humedecido para eliminar
el polvo y la suciedad de las ranuras de
ventilación.
Sustitución de los accesorios (fig. B)
Los accesorios desgastados o dañados deben
sustituirse de inmediato.
Utilice sólo accesorios afilados y sin
daños.
• Para retirar el accesorio, proceda como se
describe en la sección correspondiente.
• Para montar el accesorio, proceda como se
describe en la sección correspondiente.
26
Page 27

GARANTÍA
Consulte las condiciones de la garantía adjunta.
MEDIO AMBIENTE
Desechado
El producto, los accesorios y el embalaje
deben clasificarse para un reciclaje
respetuoso con el medio ambiente.
Sólo para países CE
No deseche las herramientas eléctricas con los
residuos domésticos. De conformidad con
la Directiva Europea 2012/19/EU sobre residuos
de aparatos eléctricos y electrónicos
y su implementación en el derecho nacional, las
herramientas eléctricas que dejen de funcionar
deben recogerse por separado y desecharse
de forma respetuosa con el medio ambiente.
El producto y el manual de usuario están
sujetos a cambios. Las especificaciones pueden
modificarse sin previo aviso.
ELETTROUTENSILE MULTIUSO
IT
OTM1006
Grazie per aver acquistato questo prodotto Ferm.
Con questo acquisto lei è entrato in possesso di un
prodotto di qualità eccellente, distribuito da uno dei
principali fornitori in Europa. Tutti i prodotti distribuiti
da Ferm sono realizzati in conformità con i più rigidi
standard in materia di sicurezza e prestazioni.
È nostra filosofia offrire al cliente un servizio di
assistenza di eccellente livello, supportato da una
garanzia completa.Ci auguriamo che apprezzerà
l’uso di questo prodotto per molti anni a venire.
AVVISI DI SICUREZZA
Leggere le avvertenze di sicurezza
contenute nel presente manuale, le
avvertenze di sicurezza aggiuntive e
le istruzioni. La mancata osservanza delle
avvertenze di sicurezza e delle istruzioni potrebbe
causare scosse elettriche, incendi e/o lesioni
gravi. Conservare le avvertenze di sicurezza e
le istruzioni per una futura consultazione.
I simboli riportati di seguito vengono utilizzati
all’interno del manuale per l’utente oppure sono
indicati sul prodotto:
Leggere il manuale per l’utente.
Denota il rischio di lesioni personali,
morte o danni all’utensile in caso di
mancata osservanza delle istruzioni
contenute nel presente manuale.
Rischio di scosse elettriche
Non esporre alla pioggia
Solo per uso interno
Apparecchio di Classe II - Doppio
isolamento - Non è necessario il
collegamento a terra.
Temperatura massima 40° C
27
Page 28

IT
Non gettare la batteria nel fuoco
Non gettare la batteria nell’acqua
Non smaltire il prodotto in contenitori non
idonei.
Raccolta differenziata per la batteria agli
ioni di litio.
Il prodotto è conforme alle norme di
sicurezza vigenti ai sensi delle direttive
europee.
Avvisi di sicurezza aggiuntivi per
elettroutensili multiuso
Il contatto o l’inalazione delle polveri
prodotte durante l’uso (es.: super fici
trattate con vernici al piombo, legno e
metallo) possono risultare nocivi per la
salute dell’utente e degli astanti nelle
vicinanze. Indossare sempre adeguati
accessori protettivi, come ad esempio
una maschera antipolvere.
• Non operare su materiali contenenti amianto.
L’amianto è una sostanza considerata
cancerogena.
• Non lavorare metalli con contenuto di magnesio
superiore all’80%.
• Porre estrema attenzione nel lavorare su
superfici verniciate.
• Non utilizzare accessori non specificatamente
progettati e raccomandati dal fabbricante.
Pericolo di lesioni personali.
• Prima di ogni uso, ispezionare l’elettroutensile
e gli accessori. Non utilizzare accessori
deformati, spezzati o altrimenti danneggiati.
In caso di caduta dell’elettroutensile o di uno
degli accessori, controllare accuratamente che
non mostrino segni di danni. Se necessario,
sostituire l’accessorio.
• Utilizzare esclusivamente accessori
raccomandati dal fabbricante.
• Utilizzare esclusivamente accessori adeguati
all’applicazione.
• Utilizzare esclusivamente accessori della
corretta dimensione.
• Non utilizzare accessori che richiedono
refrigeranti liquidi. Pericolo di scosse elettriche.
• Assicurarsi che gli accessori siano montati
correttamente. Non utilizzare adattatori o altri
elementi ausiliari per montare accessori con
diverso diametro dell’alberino.
• Verificare che la massima velocità
dell’accessorio sia superiore o uguale alla
massima velocità dell’elettroutensile. Consultare
la targhetta nominale dell’elettroutensile.
• Azionare l’elettroutensile in assenza di
carico in un’area sicura dopo il montaggio
degli accessori. Se l’elettroutensile vibra
eccessivamente, spegnerlo immediatamente,
disconnettere la spina di alimentazione dalla
rete elettrica e tentare di risolvere il problema.
• Verificare che il pezzo in lavorazione sia
sostenuto o fissato correttamente.
• Indossare occhiali di protezione. Indossare
protezioni per l’udito. Indossare una mascherina
anti-polvere. Se necessario, utilizzare accessori
protettivi, come guanti di sicurezza, scarpe
di sicurezza, ecc. Pericolo di lesioni personali.
• Mantenere gli astanti a sufficiente distanza
dall’area di lavoro. Assicurarsi che tutte le
persone presenti nell’area di lavoro indossino
accessori protettivi. Pericolo di lesioni personali.
• Mantenere il cavo di alimentazione a distanza
dall’accessorio rotante. Qualora il cavo di
alimentazione toccasse l’accessorio rotante, le
mani o le braccia potrebbero entrare in contatto
con l’accessorio stesso. Pericolo di lesioni
personali.
• Quando si eseguono operazioni in cui
l’accessorio da taglio può entrare in contatto
con fili elettrici nascosti, tenerlo esclusivamente
dalle impugnature, che sono isolate. Gli
accessori da taglio che vengono a contatto con
un cavo sotto tensione trasmettono la corrente
elettrica anche alle parti metalliche esposte
dell’elettroutensile con il pericolo di provocare la
folgorazione dell’operatore.
• Non utilizzare l’elettroutensile mentre viene
trasportato al proprio fianco. Pericolo di lesioni
personali.
• Non utilizzare l’elettroutensile in prossimità di
materiali infiammabili. Pericolo d’incendio.
• Porre attenzione poiché l’accessorio continuerà
a ruotare per un breve periodo dopo lo
spegnimento dell’elettroutensile. Non tentare
di arrestare manualmente la rotazione
dell’accessorio.
• Non porre mai l’elettroutensile su un tavolo o un
banco da lavoro senza averlo precedentemente
spento.
28
Page 29

• Pulire regolarmente le feritoie di ventilazione.
Pericolo di scosse elettriche.
Uso e manutenzione dell’utensile a batteria
a) Ricaricare l’utensile esclusivamente con il
caricabatterie specificato dal costruttore.
Un caricabatterie adatto a un determinato
tipo di batteria può compor tare il rischio
di incendio se utilizzato con una batteria
diversa.
b) Gli elettroutensili devono essere usati
esclusivamente con i tipi di batterie
specificatamente indicati.
L’uso di batterie di tipi diversi può comportare
il rischio di lesioni e di incendio.
c) Quando la batteria non viene utilizzata,
tenerla lontano da oggetti metallici, come
fermagli, monete, chiavi, chiodi, viti o altri
piccoli oggetti di metallo, che potrebbero
provocare un contatto dei morsetti.
Il corto circuito dei morsetti della batteria può
dare origine a ustioni o incendi.
d) In condizioni di impiego non corretto,
si potrebbe verificare la fuoriuscita del
liquido dalla batteria; evitarne il contatto.
In caso di contatto, sciacquare con
abbondante acqua. Se il liquido viene a
contatto con gli occhi, consultare anche
un medico.
Il liquido fuoriuscito dalla batteria può
causare irritazione o ustioni.
Assistenza
a) L’assistenza per l’elettroutensile deve
essere prestata da un tecnico qualificato
che utilizzi soltanto ricambi originali.
In questo modo viene garantita la sicurezza
dell’elettroutensile.
Caricabatterie
Uso previsto
Utilizzare esclusivamente batterie ricaricabili
agli ioni di litio CDA1094. Batterie di tipi
diversi potrebbero esplodere provocando
lesioni personali e danni.
a) L’apparecchio non deve essere usato da
persone con capacità fisiche, sensoriali o
mentali ridotte (bambini inclusi) o che non
hanno alcuna esperienza o conoscenza
dell’apparecchio, a meno che non siano
sorvegliate o siano state istruite sull’uso
del prodotto.
b) Accertarsi che i bambini non giochino con
il caricabatterie.
c) Non ricaricare batterie non ricaricabili!
d) Mentre il caricabatteria è in funzione
sistemarlo in un luogo ben ventilato!
Sicurezza elettrica
Controllare sempre che la tensione di
alimentazione corrisponda alla tensione
indicata sulla targhetta delle
caratteristiche.
• Non utilizzare l’elettroutensile quando il cavo o
la spina di alimentazione sono danneggiati.
• Utilizzare esclusivamente cavi di
prolunga idonei per la potenza nominale
dell’elettroutensile, con conduttori di sezione
minima di 1,5 mm2. Quando si utilizza un cavo
di prolunga con avvolgicavo, svolgere sempre
completamente il cavo.
DATI TECNICI
Caricabatterie CDA1095
Ingresso caricabatterie 100-240 V~ 50/60 Hz 15W
Uscita caricabatterie 13,5V d.c. 400mA
Batteria ricaricabile 12 V Li-Ion 1,5 Ah
Tempo di carica batteria 3-5 ore
Velocità a vuoto 5.000 - 18.000 min
Peso 0,7 kg
RUMOROSITÀ E VIBRAZIONI
Pressione sonora (Lpa) 94 dB(A)
Potenza acustica (Lwa) 105 dB(A)
Incertezza (K) 3 dB(A)
ibrazione 11,240 m/s
Incertezza (K) 1,5 m/s
Livello delle vibrazioni
Il livello di emissione delle vibrazioni indicato
sul retro di questo manuale di istruzioni è stato
misurato in conformità a un test standardizzato
stabilito dalla norma EN 60745; questo
valore può essere utilizzato per mettere a
confronto un l’utensile con un altro o come
valutazione preliminare di esposizione alla
vibrazione quando si impiega l’utensile per le
applicazioni menzionate
- se si utilizza l’utensile per applicazioni diverse,
oppure con accessori differenti o in scarse
condizioni, il livello di esposizione potrebbe
aumentare notevolmente
IT
-1
2
2
29
Page 30

IT
- i momenti in cui l’utensile è spento oppure
è in funzione ma non viene effettivamente
utilizzato per il lavoro, possono contribuire a
ridurre il livello di esposizione
Proteggersi dagli effetti della vibrazione
effettuando la manutenzione dell’utensile e dei
relativi accessori, mantenendo le mani calde e
organizzando i metodi di lavoro
DESCRIZIONE (FIG. A)
L’elettroutensile multiuso è stato progettato per
applicazioni leggere di levigatura, segatura
e raschiatura.
1. Interruttore on/off
2. Selettore di regolazione della velocità
3. Punto di montaggio per gli accessori
4. Impugnatura
MONTAGGIO
Prima del montaggio, spegnere sempre
la macchina
Prima del primo utilizzo la batteria deve essere
caricata.
Rimozione della batteria dalla macchina
• Premere i pulsanti di sblocco della batteria ed
estrarre la batteria dalla macchina
Inserimento della batteria nella macchina
Assicurarsi che l‘esterno della batteria sia pulito e
ascutto prima del collegamento al caricabatteria o
alla macchina.
• Inserire la batteria (2) nella base della
macchina
• Spingere la batteria in avanti fino a quando
non scatta in posizione.
Carica della batteria (con il caricabatterie)
• Collegare la spina del caricabatterie a una
presa elettrica e attendere un momento.
L’indicatore a LED si illumina e mostra lo stato
di carica della batteria.
LED Stato caricabatterie
Rosso In carica
Verde Carica terminata, batteria completamente
carica
• Per caricare completamente la batteria da
1,5Ah possono essere necessari fino a 240
minuti.
• Una volta caricata la batteria, rimuovere la
spina del caricabatterie dalla presa di corrente
e rimuovere la batteria dal caricabatterie.
Se si prevede che l’elettroutensile non
verrà usato per molto tempo si consiglia
di conser vare le batterie cariche.
Montaggio e rimozione della piastra levigatrice
e della carta abrasiva (fig. B)
La piastra levigatrice e la carta abrasiva devono
essere utilizzate per applicazioni di levigatura.
Montaggio
• Collocare l’elettroutensile su un piano con il
punto di montaggio (3) rivolto verso l’alto.
• Utilizzando la chiave a brugola (5) allentare la
vite a brugola (7).
• Montare la piastra levigatrice (9) sul punto di
montaggio (3).
• Utilizzando la chiave a brugola (5) serrare la
vite a brugola (7).
• Montare la carta abrasiva (10) con grana della
corretta misura sulla piastra levigatrice (9).
Verificare che i fori presenti sulla carta abrasiva
(10) corrispondano ai fori sulla piastra levigatrice
(9).
- Per levigare superfici scabre e irregolari
utilizzare carta abrasiva a grana grossa
(grana 50).
- Utilizzare carta abrasiva media (grana 80)
per rimuovere le scalfitture lasciate dalla
carta abrasiva a grana media.
- Per rifinire le superfici utilizzare carta
abrasiva a grana fine (grana 120).
Rimozione
• Collocare l’elettroutensile su un piano con il
punto di montaggio (3) rivolto verso l’alto.
• Rimuovere la carta abrasiva (10) dalla piastra
levigatrice (9).
• Utilizzando la chiave a brugola (5) allentare la
vite a brugola (7).
• Rimuovere la piastra levigatrice (9) dal punto
di montaggio (3).
• Utilizzando la chiave a brugola (5) serrare la
vite a brugola (7).
30
Page 31

Montaggio e rimozione della lama della sega
(fig. B)
La lama della sega deve essere utilizzata per
applicazioni di segatura.
Montaggio
• Collocare l’elettroutensile su un piano con il
punto di montaggio (3) rivolto verso l’alto.
• Utilizzando la chiave a brugola (5) allentare la
vite a brugola (7).
• Rimuovere il distanziatore (8).
• Montare la lama della sega (11) sul punto di
montaggio (3).
• Montare il distanziatore (8).
• Utilizzando la chiave a brugola (5) serrare la
vite a brugola (7).
Rimozione
• Collocare l’elettroutensile su un piano con il
punto di montaggio (3) rivolto verso l’alto.
• Utilizzando la chiave a brugola (5) allentare la
vite a brugola (7).
• Rimuovere il distanziatore (8).
• Rimuovere la lama della sega (11) dal punto di
montaggio (3).
• Montare il distanziatore (8).
• Utilizzando la chiave a brugola (5) serrare la
vite a brugola (7).
Montaggio e rimozione del coltello per
raschiare (fig. B)
Il coltello per raschiare deve essere utilizzato per
applicazioni di raschiatura.
Montaggio
• Collocare l’elettroutensile su un piano con il
punto di montaggio (3) rivolto verso l’alto.
• Utilizzando la chiave a brugola (5) allentare la
vite a brugola (7).
• Rimuovere il distanziatore (8).
• Montare il coltello per raschiare (12) sul punto
di montaggio (3).
• Montare il distanziatore (8).
• Utilizzando la chiave a brugola (5) serrare la
vite a brugola (7).
Rimozione
• Collocare l’elettroutensile su un piano con il
punto di montaggio (3) rivolto verso l’alto.
• Utilizzando la chiave a brugola (5) allentare la
vite a brugola (7).
• Rimuovere il distanziatore (8).
• Rimuovere il coltello per raschiare (12) dal
punto di montaggio (3).
IT
• Montare il distanziatore (8).
• Utilizzando la chiave a brugola (5) serrare la
vite a brugola (7).
USO
Accensione e spegnimento (fig. A)
• Per accendere l’elettroutensile, far scorrere in
avanti l’interruttore on/off (1).
• Per spegnere l’elettroutensile, far scorrere
indietro l’interruttore on/off (1).
Impostazione della velocità (fig. A)
Il selettore di regolazione della velocità consente
di impostare la velocità. Il selettore di regolazione
della velocità è impostabile su 6 posizioni.
La velocità ottimale dipende dal tipo
di applicazione e dal materiale da lavorare.
Non impostare la velocità durante l’uso.
• Ruotare il selettore di regolazione della
velocità (2) nella posizione desiderata.
Suggerimenti per un uso ottimale
• Bloccare il pezzo in lavorazione. Utilizzare un
dispositivo di bloccaggio per eseguire tagli su
piccoli pezzi.
• Tracciare una linea per definire la direzione in
cui muovere l’accessorio.
• Tenere saldamente l’elettroutensile mediante
l’impugnatura.
• Accendere l’elettroutensile.
• Attendere finché l’elettroutensile non ha
raggiunto la massima velocità.
• Posizionare l’accessorio sul pezzo in
lavorazione.
• Muovere lentamente l’elettroutensile lungo la
linea tracciata precedentemente, premendo
saldamente l’accessorio contro il pezzo in
lavorazione.
• Non esercitare una pressione eccessiva
sull’elettroutensile. Lasciare che
l’elettroutensile effettui il lavoro.
• Prima di appoggiare l’elettroutensile, spegnerlo
e attendere che si arresti completamente.
31
Page 32

LT
PULIZIA E MANUTENZIONE
Prima del montaggio, spegnere sempre
la macchina
• Pulire regolarmente l’involucro con un panno
morbido.
• Mantenere le feritoie di ventilazione pulite e
libere da polvere e sporco. Se necessario,
utilizzare un panno morbido inumidito per
rimuovere polvere e sporco dalle feritoie di
ventilazione.
Sostituzione degli accessori (fig. B)
Gli accessori usurati o danneggiati devono essere
sostituiti immediatamente.
DAUGIAFUNKCIS ĮRANKIS
OTM1006
Ačiū, kad įsigijote šį „Ferm“ gaminį.
Dabar turite puikų gaminį,, kurį pateikia vieni
svarbiausių Europos tiekėjų.
Visi „Ferm“ tiekiami gaminiai yra pagaminti pagal
aukščiausius veikimo ir saugos standartus. Be
to, mes užtikriname puikų techninį aptarnavimą,
pagrįstą mūsų visapuse garantija.
tikimės, kad šis įrankis puikiai tarnaus jums ilgus
metus.
ĮSPĖJIMAI DĖL SAUGOS
Utilizzare esclusivamente accessori
affilati e non danneggiati.
• Per rimuovere gli accessori, procedere come
descritto nella sezione corrispondente.
• Per montare gli accessori, procedere come
descritto nella sezione corrispondente.
GARANZIA
Consultare i termini e le condizioni della garanzia
allegata.
AMBIENTE
Smaltimento
Il prodotto, gli accessori e l’imballaggio
devono essere raccolti separatamente
per un riciclaggio ecocompatibile.
Soltanto per paesi CE.
Non smaltire gli elettroutensili nei contenitori per
rifiuti domestici. Ai sensi della Direttiva 2012/19/
EU del Parlamento europeo in materia di Rifiuti da
apparecchiature elettriche ed elettroniche e della
relativa attuazione nell’ambito della legislazione
nazionale, gli elettroutensili inutilizzabili devono
essere raccolti separatamente e smaltiti in modo
ecocompatibile.
Questo prodotto ed il presente manuale utente
sono soggetti a modifiche. Le specifiche possono
essere modificate senza preavviso.
ĮSPĖJIMAS
Perskaitykite pateiktus įspėjimus dėl
saugos, papildomas saugos taisykles
bei nurodymus.
Jei bus nesilaikoma toliau pateiktų įspėjimų dėl
saugos ir nurodymų, gali kilti elektros smūgio,
gaisro ir (arba) sunkaus sužeidimo pavojus.
Išsaugokite saugos taisykles ir naudojimo
instrukciją ateičiai.
Šioje naudojimo instrukcijoje l arba ant įrenginio
naudojami simboliai:
Perskaitykite naudojimo instrukciją.
Reiškia susižeidimo pavojų, pavojų
gyvybei arba žalos įrankiui pavojų, jei
nebus laikomasi šiame vadove paveik tų
nurodymų.
Elektros smūgio pavojus
Nenaudokite lietui lyjant
Naudokite tik patalpose
II klasės prietaisas – dviguba izoliacija –
nereikia jokio įžeminto kištuko.
Maks. temperatūra 400C
32
Page 33

Nemeskite akumuliatoriaus į ugnį
Nemeskite akumuliatoriaus į vandenį
Neišmeskite šio prietaiso į netinkamus
konteinerius.
Atiduokite ličio jonų akumuliatorių į
atskirą atliekų surinkimo punktą.
Šis gaminys atitinka galiojančius
Europos direkty vų standartus.
Papildomi įspėjimai dėl daugiafunkcių
įrankių naudojimo saugos
Prisilietus arba įkvėpus naudojimo metu
kylančių dulkių (pvz. Nuo švino dažais
dažytų paviršių, medienos ir metalo), gali
kilti pavojus Jūsų arba šalia esančių
asmenų sveikatai.
Visada dėvėkite tinkamas apsaugos
priemones , pavyzdžiui nuo dulkių
apsaugančią kaukę.
• Neapdirbkite medžiagų, kurių sudėtyje yra
asbesto.
Asbestas yra kancerogeninė medžiaga.
• Neapdirbkite metalų, kuriuose yra daugiau nei
80% magnio.
• Būkite labai atsargūs, apdirbdami dažytus
paviršius.
• Nenaudokite priedų, kurių specialiai nesukūrė
ir nerekomendavo gamintojas. Pavojus
susižeisti.
• Prieš kiekvieną naudojimą patikrinkite įrankį ir
priedus. Nenaudokite įtrūkusių, nuskilusių ar
kitaip apgadintų priedų. Jei įrankis arba
vienas iš priedų būtų numestas, patikrinkite
įrankį arba priedą, ar jie nebuvo sugadinti. Jei
reikia, pakeiskite priedą.
• Naudokite tik gamintojo rekomenduojamus
priedus.
• Naudokite tik konkrečiam darbui tinkamus
priedus.
• Naudokite tik tinkamų dydžių priedus.
• Nenaudokite priedų, kuriuos reikėtų aušinti
skystomis aušinimo medžiagomis. Elektros
smūgio pavojus.
• Būtinai patikrinkite, ar priedai yra tinkamai
sumontuoti. Nenaudokite adapterių ar kitų
pagalbinių priemonių priedams montuoti ant
kitokio skersmens veleno.
• Įsitikinkite, ar maksimalus priedo sukimosi
greitis yra didesnis arba toks pat, kaip ir
maksimalus įrankio greitis. Žr. įrankio
techninių duomenų plokštelę.
• Sumontavę priedus, leiskite įrankiui paveikti
be apkrovos saugioje vietoje. Jei įrankis
smarkiai vibruoja, tuoj pat išjunkite įrankį,
atjunkite jį nuo elektros tinklo ir pabandykite
pašalinti problemą.
• Būtinai tinkamai paremkite ruošinį arba
įtvirtinkite jį spaustuvais.
• Dėvėkite apsauginius darbo akinius.
Naudokite klausos apsaugos priemones.
Dėvėkite apsauginę kaukę. Jei reikia,
naudokite kitas apsaugines priemones,
pavyzdžiui apsaugines pirštines, apsauginius
batus ir pan. Pavojus susižaloti.
• Neleiskite į darbo vietą pašalinių asmenų.
Užtikrinkite, kad visi darbo vietoje esantys
asmenys dėvėtų apsaugines priemones.
Pavojus susižeisti.
• Laikykite maitinimo kabelį atokiai nuo
besisukančio priedo. Jei maitinimo kabelis
prisilies prie besisukančio priedo, Jūs delnais
arba rankomis galite prisiliesti prie priedo.
Pavojus susižeisti.
• Atlikdami darbus, kurių metu pjovimo dalys
gali paliesti paslėptus laidus, laikykite elektrinį
įrankį tik už izoliuotų. laikymui skirtų paviršių.
Pjovimo daliai prisilietus prie „gyvo“ laido,
neizoliuotos metalinės elektrinio įrankio dalys
gali sukelti elektros smūgį ir nutrenkti operatorių.
• Nenaudokite įrankio, jei nešate jį prispaudę
prie savo šono. Pavojus susižeisti.
• Nenaudokite įrankio ten, kur šalia yra degių
medžiagų. Gaisro pavojus.
• Būkite atsargūs, nes išjungus įrankį priedas
dar kurį laiką sukasi. Nebandykite patys
stabdyti priedo.
• Niekada nedėkite įrankio ant stalo arba
darbastalio, kol jis neišjungtas.
• Reguliariai valykite ventiliacijos angas.
Elektros smūgio pavojus.
LT
33
Page 34

LT
Akumuliatorinių įrankių naudojimas
ir priežiūra
a) Įkraukite naudodami tik gamintojo
nurodytą kroviklį.
Vieno tipo akumuliatoriui tinkantis kroviklis,
naudojamas kitam akumuliatoriui krauti, gali
kelti gaisro pavojų.
b) Elektrinius įrankius naudokite tik su
specialiai jiems skirtais akumuliatoriais.
Naudojant kitos rūšies akumuliatorius, galima
susižaloti arba sukelti gaisrą.
c) Kai akumuliatorius nėra naudojamas,
laikykite jį toliau nuo kitų metalinių daiktų,
pavyzdžiui, popieriaus sąvaržėlių, monetų,
raktų, vinių, varžtų ir kitų mažų metalinių
daiktų, dėl kurių gali kilti trumpasis
jungimas tarp kontaktų.
Sulietę akumuliatoriaus gnybtus galite
nusideginti arba patirti gaisrą.
d) Netinkamai naudojant, iš akumuliatoriaus
gali ištekėti skysčio; venkite sąlyčio su juo.
Jei sąlytis atsitiktinai įvyko, gausiai
nuplaukite vandeniu. Jeigu skysčio
patektų į akis, kreipkitės pagalbos į
medikus.
Iš baterijos ištekėjęs skystis gali sudirginti
arba nudeginti odą.
Techninė priežiūra
a) Šį elektrinį įrankį privalo techniškai
prižiūrėti kvalifikuotas specialistas,
naudodamas originalias keičiamąsias
dalis.
Taip užtikri nsite saugų elektros įrankio darb ą.
Numatytoji kroviklio paskirtis
Kraukite tik CDA1094 tipo įkraunamus
akumuliatorius. Kitų tipų akumuliatoriai gali
sprogti, sužeisti jus ir pridaryti nuostolių.
a) Šio prietaiso nerekomenduojama naudoti
asmenims (įskaitant vaikus), turintiems
fizinių, jutimo ar psichinių negalių arba
neturintiems pakankamai patirties ir žinių,
kaip naudotis šiuo prietaisu, nebent juos
prižiūrėtų arba su šio prietaiso naudojimu
supažindintų už jų saugą atsakingas
asmuo.
b) Prižiūrėkite vaikus ir neleiskite jiems
nežaisti su šiuo prietaisu
c) Nekraukite vienkartinių baterijų!
d) Kraunant akumuliatorių, akumuliatorių
reikia padėti gerai vėdinamoje vietoje!
Elektros sauga
Visuomet patikrinkite, ar elektros tinklo
įtampa atitinka kategorijos plokštelėje
nurodytą įtampą.
• Nenaudokite prietaiso, jeigu maitinimo kabelis
arba kištukas yra pažeistas!
• Naudokite tik tokius ilginamuosius kabelius,
kurie atitinka prietaiso kategorijos plokštelėje
nurodytus parametrus ir yra mažiausiai
1,5 mm2 storio. Jei naudosite ant būgno
suvyniotą ilginamąjį kabelį, jį visada iki galo
išvyniokite.
Techniniai duomenys
Kroviklis CDA1095
Kroviklio maitinimas 100-240V~ 50/60Hz 15W
Kroviklio galia 13,5V d.c. 400mA
įkraunamas akumuliatorius 12 V Li-ion 1.5 Ah
Akumuliatoriaus įkrovimo trukmė 3-5 valandos
Greitis be apkrovos 5,000 - 18,000 min
Svoris 0.7 kg
Triukšmas ir vibracija
Garso slėgis (Lpa) 94 dB(A)
Akustinė galia (Lwa) 105 dB(A)
Paklaida (K) 3 dB(A)
Vibracija 11.240 m/s
Paklaida (K) 1.5 m/s
Vibracijos lygis
Šioje naudojimo instrukcijoje nurodytas vibracijos
lygis nustatytas atsižvelgiant į standartinį bandymo
metodą, pateiktą EN 60745; jį galima naudoti
palyginimui su kitais įrankiais ir preliminariam
vibracijos poveikio įvertinimui naudojant įrankį
minėtiems darbams atlikti
– naudojant įrankį kitokiems darbams arba
naudojant su kitokiais arba prastai techniškai
prižiūrėtais priedais, poveikio lygis gali ženkliai
padidėti
– kai įrankis yra išjungtas arba kai jis veikia, bet
faktiškai nėra naudojamas, poveikio lygis gali
ženkliai sumažėti
Apsisaugokite nuo vibracijos poveikio, techniškai
prižiūrėdami įrankį ir jo priedus, laikydami rankas
šiltai, planuodami darbus.
-1
2
2
34
Page 35

APRAŠAS (A PAV.)
Šis daugiafunkcis įrankis skirtas lengviems
šlifavimo, pjovimo ir grandymo darbams.
1. Įjungimo / išjungimo jungiklis
2. Greičio reguliavimo ratukas
3. Priedų montavimo taškas
4. Rankena
MONTAVIMAS
Prieš pradėdami montuoti, visada
išjunkite įrenginį.
Prieš naudojant pirmą kartą, akumuliatorių
privaloma įkrauti.
Akumuliatoriaus išėmimas iš įrankio
• Paspauskite akumuliatoriaus atlaisvinimo
mygtukus ir ištraukite akumuliatorių iš įrankio
Akumuliatoriaus įdėjimas į įrankį
Prieš prijungdami akumuliatorių prie kroviklio
arba prieš įdėdami jį į įrankį, įsitikinkite, ar
akumuliatoriaus išorinis paviršius yra švarus.
• Įstumkite akumuliatorių (2) į įrankio pagrindą.
• Stumkite akumuliatorių pirmyn, kol jis
spragtelėdamas užsifiksuos.
Akumuliatoriaus krovimas (naudojant kroviklį)
• Įkiškite kroviklio kištuką į elektros tinklo lizdą ir
šiek tiek palaukite. Užsidegs diodinis
indikatorius, rodantis įkrovimo būseną.
Diodinio Kroviklio būsena
Raudonas Vyksta akumuliatoriaus įkrovimas
Žalias Akumuliatoriaus įkrovimas baigtas,
akumuliatorius visiškai įkrautas
• 1,5 Ah akumuliatoriui įkrauti gali prireikti iki
240 minučių.
• Krovimui pasibaigus, ištraukite kroviklį
iš maitinimo lizdo ir išimkite akumuliatorių iš
kroviklio.
Jeigu įrankis nebus naudojamas ilgą
laiko tarpą, akumuliatorių reikėtų laikyti
visiškai įkrautą.
Šlifavimo pagrindo ir šlifavimo popieriaus
uždėkite ir nuėmimas (B pav.)
Atliekant šlifavimo darbus privaloma naudoti
šlifavimo pagrindą ir šlifavimo popierių.
Montavimas
• Padėkite prietaisą ant stalo montavimo tašku (3)
aukštyn.
•
Pateiktu šešiakampiu raktu (5) atsukite varžtą (7).
• Montavimo taške (3) sumontuokite šlifavimo
pagrindą (9)
• Šešiakampiu veržliarakčiu (5) tvirtai užveržkite
disko fiksavimo atsukite varžtą (7).
• Ant šlifavimo pagrindo (9) pritvirtinkite tinkamo
grūdėtumo šlifavimo popierių (10). Įsitikinkite, ar
šlifavimo popieriuje (10) esančios skylės atitinka
šlifavimo pagrindo (9) skyles.
– Grubiam nelygių paviršių šlifavimui
naudokite šiurkštų (50 grūdėtumo) popierių.
–
Įbrėžimams, likusiems po grubaus šlifavimo
šiurkščiu šlifavimo popieriumi, pašalinti
naudokite vidutinio šiurkštumo šlifavimo
popierių (80 grūdėtumo).
– Galutinei paviršių apdailai švelniausią
(120 grūdėtumo) šlifavimo popierių.
Nuėmimas
• Padėkite prietaisą ant stalo apsauginiu gaubtu
(3) aukštyn.
• Nuimkite šlifavimo popierių (10) nuo šlifavimo
pagrindo (9).
• Šešiakampiu veržliarakčiu (5) atsukite
šešiakampį varžtą (7).
• Nuimkite šlifavimo pagrindą (9) nuo montavimo
taško (3).
• Šešiakampiu veržliarakčiu (5) užveržkite
šešiakampį varžtą (7).
Pjovimo disko montavimas ir nuėmimas
(B pav.)
Atliekant pjovimo darbus, privaloma naudoti
pjovimo diską.
Montavimas
• Padėkite prietaisą ant stalo montavimo tašku (3)
aukštyn.
• Šešiakampiu veržliarakčiu (5) atsukite
šešiakampį varžtą (7).
• Išimkite tarpiklį (8).
• Montavimo taške (3) sumontuokite pjovimo
diską (11).
• Sumontuokite tarpiklį (8).
• Šešiakampiu veržliarakčiu (5) užveržkite
šešiakampį varžtą (7).
LT
35
Page 36

LT
Nuėmimas
• Padėkite prietaisą ant stalo montavimo tašku (3)
aukštyn.
• Šešiakampiu veržliarakčiu (5) atsukite
šešiakampį varžtą (7).
• Išimkite tarpiklį (8).
• Nuimkite pjovimo diską (11) nuo montavimo
taško (3).
• Sumontuokite tarpiklį (8).
• Šešiakampiu veržliarakčiu (5) užveržkite
šešiakampį varžtą (7).
Grandymo peilio montavimas ir nuėmimas
(B pav.)
Atliekant grandymo darbus, privaloma naudoti
grandymo peilį.
Montavimas
• Padėkite prietaisą ant stalo montavimo tašku (3)
aukštyn.
• Šešiakampiu veržliarakčiu (5) atsukite
šešiakampį varžtą (7).
• Išimkite tarpiklį (8).
• Montavimo taške (3) sumontuokite grandymo
peilį (12).
• Sumontuokite tarpiklį (8).
• Šešiakampiu veržliarakčiu (5) užveržkite
šešiakampį varžtą (7).
Nuėmimas
• Padėkite prietaisą ant stalo apsauginiu gaubtu
(3) aukštyn.
• Šešiakampiu veržliarakčiu (5) atsukite
šešiakampį varžtą (7).
• Išimkite tarpiklį (8).
• Nuimkite grandymo peilį (12) nuo montavimo
taško (3).
• Sumontuokite tarpiklį (8).
• Šešiakampiu veržliarakčiu (5) užveržkite
šešiakampį varžtą (7).
NAUDOJIMAS
Įjungimas ir išjungimas (A pav.)
• Norėdami įrankį įjungti, pastumkite įjungimo /
išjungimo jungiklį (1) į priekį.
• Norėdami įrankį išjungti, patraukite įjungimo /
išjungimo jungiklį (1) atgal.
Greičio nustatymas (A pav.)
Greitis reguliuojamas greičio reguliavimo ratuku.
Greičio reguliavimo ratuką galima nustatyti į
6 padėtis.
Idealus greitis priklauso nuo atliekamo darbo ir
apdirbamos medžiagos.
Nekeiskite greičio įrankio naudojimo
metu.
• Pasukite greičio reguliavimo ratuką (2)
į norimą padėtį.
Patarimai, kaip optimaliai naudotis įrankiu
• Įtvirtinkite ruošinį spaustuvais. Mažus
ruošinius įtvirtinkite spaustuvais.
• Nubrėžkite liniją, kad žinotumėte, kokia
kryptimi kreipti priedą.
• Tvirtai laikykite įrankį už rankenos.
• Įjunkite įrankį.
• Palaukite, kol prietaisas ims veikti visu greičiu.
• Dėkite priedą ant ruošinio.
• Lėtai stumkite įrankį išilgai nubrėžtos linijos,
tvirtai įrėmę priedą į ruošinį.
• Per daug nespauskite įrankio.
Leiskite įrankiui pačiam atlikti darbą.
• Prieš padėdami įrankį į vietą, visada jį išjunkite
ir palaukite, kol diskas visiškai sustos.
VALYMAS IR PRIEŽIŪRA
Prieš pradėdami montuoti, visada
išjunkite įrankį.
•
Reguliariai valykite korpusą minkštu skudurėliu.
• Valykite ventiliacijos angas, kad jose nebūtų
dulkių ir purvo. Jei reikia, nuvalykite dulkes
ir purvą nuo ventiliacijos angų minkšta drėgna
šluoste.
Priedų keitimas (B pav.)
Nusidėvėjusius arba pažeistus priedus privaloma
tuoj pat pakeisti naujais.
Naudokite tik aštrius ir neapgadintus
priedus.
• Norėdami nuimti priedą, atlikite nurodymus,
aprašytus atitinkamame skyriuje.
• Norėdami sumontuoti priedą, atlikite
nurodymus, aprašytus atitinkamame skyriuje.
GARANTIJA
Perskaitykite pateiktas garantijos sąlygas.
36
Page 37

APLINKOSAUGA
Išmetimas
DAUDZFUNKCIONĀLS
LV
INSTRUMENTS
OTM1006
Gaminį, priedus ir pakavimo medžiagas
privaloma rūšiuoti, kad jos būtų
perdirbtos ir vėl panaudotos tausojant
gamtą.
Taikoma tik EB šalims
Neišmeskite elektrinių įrankių kartu su įprastomis
buitinėmis atliekomis.
Atsižvelgiant į ES Direktyvą 2012/19/ES
dėl elektrinių ir elektroninių įrenginių bei jos
įgyvendinimą pagal nacionalinius teisės aktus, visi
elektriniai įrankiai privalo būti surenkami atskirai
nuo buitinių atliekų bei perdirbami tokiu būdu, kad
nebūtų daroma žala aplinkai.
Gaminys ir naudojimo instrukcija gali būti keičiami.
Techniniai duomenys gali būti keičiami ne
išankstinio įspėjimo.
Pateicamies, ka iegādājāties šo Ferm
izstrādājumu.
Tādējādi jums tagad ir lielisks izstrādājums,
ko izgatavojis viens no Eiropas vadošajiem
ražotājiem.
Visi izstrādājumi, ko ražojis Ferm, ir izgatavoti
atbilstoši visaugstākajiem veiktspējas un drošības
standartiem. Mūsu filozofijas pamatā ir arī izcils
klientu apkalpošanas serviss, kas ietilpst mūsu
daudzpusīgajā garantijā.
Mēs ceram, ka šo izstrādājumu ar prieku lietosiet
gadiem ilgi.
DROŠĪBAS BRĪDINĀJUMI
BRĪDINĀJUMS
Izlasiet šeit pievienotos drošības
brīdinājumus, papildu drošības
brīdinājumus un norādījumus.
Ja netiek ievēroti drošības brīdinājumi un
norādījumi, var gūt elektriskās strāvas triecienu,
izraisīt ugunsgrēku un/vai gūt smagus
ievainojumus.
Saglabājiet drošības brīdinājumus un
norādījumus turpmākām uzziņām.
Šajā lietošanas rokasgrāmatā vai uz instrumenta
tiek lietoti šādi apzīmējumi:
Izlasiet lietošanas rokasgrāmatu.
Apzīmē ievainojuma, nāves vai
instrumenta bojājuma risku, ja netiek
ievēroti šajā rokasgr āmatā sniegtie
norādījumi.
Elektriskās strāvas trieciena risks.
Nepakļaujiet lietus iedarbībai
Lietošanai tikai telpās
37
Page 38

LV
II kategorijas instruments; dubulta
izolācija; nav jālieto sazemēta
kontaktdakša.
Maks. temperatūra 40 °C
Akumulatoru nedrīkst mest ugunī
Akumulatoru nedrīkst iegremdēt ūdenī
Nododot izstrādājumu atkritumos,
neievietojiet to nepiemērotās tvertnēs.
Litija jonu akumulatoru dalīta savākšana.
Izstrādājums atbilst spēkā esošiem
Eiropas direktīvu drošības standartiem.
Papildu drošības norādījumi
daudzfunkcionāliem instrumentiem
Nonākšana saskarē ar putekļiem, kas
rodas ekspluatācijas laikā (piemēram,
no virsmām, kas krāsotas ar svinu
saturošu krāsu, koku un metālu) vai to
ieelpošana var apdraudēt jūsu un
klātesošo cilvēku veselību. Vienmēr
nēsājiet piemērotu aizsargaprīkojumu,
piemēram, putekļu masku.
• Nestrādājiet ar materiālu, kas satur azbestu.
Azbests tiek uzskatīts par kancerogēnu.
• Nestrādājiet ar metālu, kuram magnija saturs
pārsniedz 80 %.
• Ļoti uzmanieties, strādājot ar krāsotām
virsmām.
• Lietojiet tikai šī instrumenta ražotāja īpaši
izgatavotos un ieteiktos piederumus.
Ievainojuma risks.
• Pirms katras lietošanas reizes pārbaudiet
instrumentu un piederumus. Nelietojiet
salocījusies, ieplaisājušus vai kā citādi
bojātus piederumus. Ja instrumentu vai
kādu no piederumiem gadās nomest zemē,
pārbaudiet, vai instrumentam vai piederumam
nav parādījušies bojājumi. Ja nepieciešams,
nomainiet piederumu.
• Izmantojiet tikai tos piederumus, ko ieteicis
ražotājs.
• Izmantojiet tikai tos piederumus, kas piemēroti
paredzētajam pielietojumam.
• Izmantojiet tikai pareizā izmēra piederumus.
• Nelietojiet tādus piederumus, kam vajadzīgi
dzesēšanas šķidrumi. Elektriskās strāvas
trieciena risks.
• Pārliecinieties, lai piederumi būtu pareizi
uzstādīti. Neizmantojiet pārejas vai citus
paņēmienus, lai uzstādītu piederumus ar
atšķirīgu diametru.
• Pārliecinieties, vai piederuma maksimālais
ātrums ir lielāks vai tāds pats kā instrumenta
maksimālais ātrums. Apskatieties instrumenta
kategorijas plāksnītē.
• Pēc piederumu uzstādīšanas padarbiniet
instrumentu drošā vietā bez slodzes. Ja
instruments stipri vibrē, nekavējoties to
izslēdziet, atvienojiet kontaktdakšu no rozetes
un mēģiniet atrisināt problēmu.
• Pārliecinieties, vai sagatave ir kārtīgi atbalstīta
vai nostiprināta.
• Valkājiet aizsargbrilles. Valkājiet ausu
aizsargus.
Valkājiet putekļu masku. Ja nepieciešams,
valkājiet citus aizsarglīdzekļus, piemēram,
aizsargcimdus, aizsargapavus utt.
Ievainojuma risks.
• Neļaujiet nepiederošām personām atrasties
darba zonā.
Pārliecinieties, vai visas darba zonā esošās
personas valkā aizsargaprīkojumu.
Ievainojuma risks.
• Turiet strāvas kabeli atstatu no rotējošā
piederuma. Ja strāvas kabelis pieskaras
rotējošajam piederumam, jūsu rokas var
nonākt saskarē ar šo piederumu. Ievainojuma
risks.
• Veicot darbu, turiet elektroinstrumentu pie
izolētajām satveršanas virsmām, ja grieznis
varētu saskarties ar apslēptu elektroinstalāciju.
Ja grieznis saskaras ar vadiem, kuros ir
strāva, visas instrumenta ārējās metāla
virsmas nokļūst „zem sprieguma” un rada
elektriskās strāvas trieciena risku.
• Elektroinstrumentu nedrīkst darbināt, kad to
pārnēsājat pie sāniem. Ievainojuma risks.
• Ar instrumentu nedrīkst strādāt uzliesmojošu
materiālu tuvumā. Ugunsgrēka risks.
• Atcerieties, ka pēc instrumenta izslēgšanas
piederums īsu brīdi vēl griežas. Nemēģiniet
pats apturēt piederumu.
38
Page 39

• Instrumentu nedrīkst novietot uz galda vai
darbagalda, pirms tas nav izslēgts.
• Regulāri tīriet ventilācijas atveres. Elektriskās
strāvas trieciena risks.
Akumulatora ekspluatācija un apkope
a) Uzlādējiet tikai ar ražotāja noteikto
lādētāju.
Ja ar lādētāju, kas paredzēts vienam
akumulatora veidam, tiek lādēts cita veida
akumulators, var izcelties ugunsgrēks.
LV
garīgām spējām, vai tādas, kam nav
pieredzes un zināšanu, izņemot, ja viņas
tiek uzraudzītas vai saņēmušas
norādījumus
b) Bērni jāpieskata, lai viņi nerotaļātos ar
ierīci.
c) Neuzlādējiet akumulatorus, ko nav
paredzēts uzlādēt!
d) Uzlādēšanas laikā akumulatoru jānovieto
labi vēdināmā vietā!
Elektrodrošība
b) Lietojiet elektroinstrumentus tikai ar
paredzētajiem akumulatoriem.
Ja izmantojat citus akumulatorus, var rasties
ievainojuma un ugunsgrēka risks.
c) Kamēr akumulators netiek izmantots,
glabājiet to drošā attālumā no metāla
priekšmetiem, piemēram, papīra
saspraudēm, monētām, atslēgām,
naglām, skrūvēm vai līdzīgiem maziem
metāla priekšmetiem, kuri var savienot
abas spailes.
Saskaroties akumulatora spailēm, rodas
īssavienojums, kas var izraisīt apdegumus vai
ugunsgrēku.
d) Nepareizas lietošanas gadījumā šķidrums
var iztecēt no akumulatora —
nepieskarieties tam.
Ja jūs nejauši pieskārāties šķidrumam,
noskalojiet saskarsmes vietu ar ūdeni.
Ja šķidrums nokļūst acīs, meklējiet arī
medicīnisku palīdzību.
Šķidrums, kas iztecējis no akumulatora, var
izraisīt kairinājumu vai apdegumus.
Serviss
a) Uzticiet sava elektroinstrumenta
apkalpošanu kvalificētam
remontstrādniekam, lietojot tikai
identiskas rezerves daļas.
Tādējādi tiek saglabāta elektroinstrumenta
drošība.
Lādētāja paredzētais pielietojums
Uzlādējiet tikai CDA1094 tipa atkārtoti
uzlādējamos akumulatorus. Cita veida akumulatori
var eksplodēt, izraisot ievainojumus un sabojājot
instrumentu.
a) Ierīci nedrīkst lietot personas (tai skaitā
bērni) ar apgrūtinātām fiziskām, maņu vai
Pārbaudiet, vai barošanas avota
spriegums atbilst kategorijas plāksnītē
norādītajam spriegumam.
• Nelietojiet instrumentu, ja strāvas kabelis vai
kontaktdakša ir bojāti.
• Izmantojiet tikai tādus pagarinātājvadus, kas
ir piemēroti instrumenta nominālajai jaudai, un
tiem jābūt vismaz ar 1,5 mm2 šķērsgriezumu.
Ja izmantojat pagarinātājvada spoli, vienmēr
pilnībā atritiniet vadu.
Tehniskie dati
Lādētājs CDA1095
Lādētāja ieejas strāva 100-240V~ 50/60Hz 15W
Lādētāja izejas strāva 13,5V d.c. 400mA
Atkārtoti uzlādējams akumulators 12 V Li-ion 1.5 Ah
Akumulatora uzlādes laiks 3-5 stundas
Ātrums bez slodzes 5,000 - 18,000 min
Svars 0.7 kg
Troksnis un vibrācija
Skaņas spiediens (Lpa) 94 dB(A)
Skaņas jauda (Lwa) 105 dB(A)
Nenoteiktība (K) 3 dB(A)
Vibrācija 11.240 m/s
Nenoteiktība (K) 1.5 m/s
Vibrācijas līmenis
Šajā lietošanas rokasgrāmatā norādītā vibrāciju
emisijas vērtība ir izmērīta saskaņā ar standarta
pārbaudes metodi, kas norādīta EN 60745; to
var izmantot viena instrumenta salīdzināšanai
ar citu un tam, lai iepriekš novērtētu vibrācijas
iedarbību, ja instrumentu lieto iepriekš minēto
darbu veikšanai:
- vibrācijas iedarbība var būt ievērojami lielāka,
ja instrumentu lieto citu darbu veikšanai, ja
tam uzstāda citus piederumus vai ja
uzstādītajiem piederumiem nav veikta
pietiekami laba apkope;
-1
2
2
39
Page 40

LV
- vibrācijas iedarbība var būt ievērojami mazāka
laikā, kad instruments ir izslēgts vai darbojas
tukšgaitā, faktiski neveicot darbu.
Ja instruments netiek ilglaicīgi
ekspluatēts, ieteicams glabāt
akumulatoru uzlādētā stāvoklī
Pasargājiet sevi no vibrācijas iedarbības, veicot
instrumenta un piederumu apkopi, rūpējoties, lai
rokas būtu siltas, un organizējot darba gaitu
APRAKSTS (A ATT.)
Jūsu daudzfunkcionālais instruments paredzēts
vieglai slīpēšanai, zāģēšanai un nokasīšanai.
1. Ieslēgšanas/izslēgšanas slēdzis
2. Ātruma regulēšanas ripa
3. Piederumu uzstādīšanas vieta
4. Rokturis
SALIKŠANA
Pirms salikšanas instrumentu vienmēr
izslēdziet
Akumulators ir jāuzlādē, pirms to lieto pirmoreiz.
Akumulatora izņemšana no instrumenta
• Pabīdiet akumulatora atbloķēšanas pogas un
izvelciet akumulatoru no instrumenta.
Akumulatora ievietošana instrumentā
Pirms akumulatora pievienošanas lādētājam vai
ievietošanas instrumentā pārbaudiet, vai tā ārējā
virsma ir tīra un sausa.
• Ievietojiet akumulatoru (2) instrumenta
pamatnē.
• Spiediet akumulatoru dziļāk iekšā, līdz tas
nofiksējas vietā.
Akumulatora uzlādēšana (ar lādētāju)
• Pievienojiet lādētāju elektrības kontaktligzdai
un brīdi nogaidiet. Iedegas LED
indikatorlampiņa, parādot uzlādes statusu.
LED lādētāja statuss
Sarkans akumulators notiek lādēšana
Zaļš akumulators uzlādēšana pabeigta,
akumulators pilnībā uzlādēts
Slīpēšanas paliktņa un smilšpapīra
uzstādīšana un noņemšana (B att.)
Slīpēšanas paliktni un smilšpapīru izmanto
slīpēšanai.
Uzstādīšana
• Novietojiet instrumentu uz galda tā, lai
uzstādīšanas vieta (3) būtu vērsta augšup.
• Ar seškanšu atslēgas (5) palīdzību atlaidiet
skrūvi (7).
• Slīpēšanas paliktni (9) uzstādiet uzstādīšanas
vietā (3).
• Ar seškanšu atslēgas (5) palīdzību pievelciet
skrūvi (7).
• Vajadzīgās graudainības smilšpapīru (10)
uzlieciet uz slīpēšanas paliktņa (9).
Pārliecinieties, vai smilšpapīra (10) perforācija
sakrīt ar slīpēšanas paliktņa (9) perforāciju.
- Raupju un nelīdzenu virsmu slīpēšanai
izmantojiet rupjgraudainu smilšpapīru
(ar graudainību 50).
-
Lai nogludinātu rupjgraudainā smilšpapīra
atstātos skrāpējumus, izmantojiet vidējas
graudainības smilšpapīru
(ar graudainību 80).
- Virsmu gludapstrādei izmantojiet
smalkgraudainu smilšpapīru
(ar graudainību 120).
Noņemšana
• Novietojiet instrumentu uz galda tā, lai
uzstādīšanas vieta (3) būtu vērsta augšup.
• Noņemiet smilšpapīru (10) no slīpēšanas
paliktņa (9).
• Ar seškanšu atslēgas (5) palīdzību atlaidiet
skrūvi (7).
• Noņemiet smilšpapīru (9) no uzstādīšanas
vietas (3).
• Ar seškanšu atslēgas (5) palīdzību pievelciet
skrūvi (7).
Zāģa asmens uzstādīšana un noņemšana
(B att.)
Zāģa asmeni izmanto zāģēšanai.
• 1,5 Ah akumulators pilnīga uzlāde var ilgt līdz
240 minūtēm.
• Kad akumulators ir pilnībā uzlādēts, atvienojiet
lādētāju no barošanas avota kontaktligzdas un
izņemiet akumulatoru no lādētāja.
40
Uzstādīšana
• Novietojiet instrumentu uz galda tā, lai
uzstādīšanas vieta (3) būtu vērsta augšup.
• Ar seškanšu atslēgas (5) palīdzību atlaidiet
skrūvi (7).
Page 41

• Noņemiet paplāksni (8).
•
Zāģa asmeni (11) uzstādiet uzstādīšanas vietā (3).
• Uzlieciet paplāksni (8).
• Ar seškanšu atslēgas (5) palīdzību pievelciet
skrūvi (7).
Noņemšana
• Novietojiet instrumentu uz galda tā, lai
uzstādīšanas vieta (3) būtu vērsta augšup.
• Ar seškanšu atslēgas (5) palīdzību atlaidiet
skrūvi (7).
• Noņemiet paplāksni (8).
• Noņemiet zāģa asmeni (11) no uzstādīšanas
vietas (3).
• Uzlieciet paplāksni (8).
• Ar seškanšu atslēgas (5) palīdzību pievelciet
skrūvi (7).
Skrāpējamā naža uzstādīšana un noņemšana
(B att.)
Skrāpējamo nazi izmanto skrāpēšanai.
Uzstādīšana
• Novietojiet instrumentu uz galda tā, lai
uzstādīšanas vieta (3) būtu vērsta augšup.
• Ar seškanšu atslēgas (5) palīdzību atlaidiet
skrūvi (7).
• Noņemiet paplāksni (8).
• Skrāpējamo nazi (12) uzstādiet uzstādīšanas
vietā (3).
• Uzlieciet paplāksni (8).
• Ar seškanšu atslēgas (5) palīdzību pievelciet
skrūvi (7).
LV
Ātruma iestatīšana (A att.)
Ātruma regulēšana izmanto ātruma regulēšanas
ripu. Ātruma regulēšanas ripu var iestatīt 6
pozīcijās.
Ideālais ātrums atkarīgs no pielietojuma veida un
no apstrādājamā materiāla.
Ātrumu nedrīkst iestatīt, kad instruments
darbojas.
• Iestatiet ātruma regulēšanas ripu (2) vēlamajā
pozīcijā.
Padomi, kā labāk strādāt ar instrumentu
• Iespīlējiet sagatavi. Mazas sagataves
nostipriniet ar iespīlētāju.
• Uzvelciet līniju, lai redzētu virzienu, kurp virzīt
piederumu.
• Instrumentu cieši turiet aiz roktura.
• Ieslēdziet instrumentu.
• Nogaidiet, līdz instruments darbojas pilnā
ātrumā.
• Novietojiet piederumu uz sagataves.
• Lēnām virziet instrumentu pa uzzīmēto līniju,
cieši piespiežot piederumu pie sagataves.
• Nespiediet instrumentu pārāk spēcīgi.
Ļaujiet instrumentam darboties savā gaitā.
• Izslēdziet instrumentu un nogaidiet, līdz tas
pilnībā pārstāj darboties, un tikai tad nolieciet
instrumentu nost.
TĪRĪŠANA UN APKOPE
Noņemšana
• Novietojiet instrumentu uz galda tā, lai
uzstādīšanas vieta (3) būtu vērsta augšup.
• Ar seškanšu atslēgas (5) palīdzību atlaidiet
skrūvi (7).
• Noņemiet paplāksni (8).
• Noņemiet skrāpējamo nazi (12) no uzstādīšanas
vietas (3).
• Uzlieciet paplāksni (8).
• Ar seškanšu atslēgas (5) palīdzību pievelciet
skrūvi (7).
EKSPLUATĀCIJA
Ieslēgšana un izslēgšana (A att.)
• Lai instrumentu ieslēgtu, pabīdiet uz priekšu
ieslēgšanas/izslēgšanas slēdzi (1).
• Lai instrumentu izslēgtu, ieslēgšanas/
izslēgšanas slēdzi (1) pabīdiet uz atpakaļ.
Pirms salikšanas instrumentu vienmēr
izslēdziet
• Korpusu regulāri notīriet ar mīkstu drāniņu.
• Uzturiet ventilācijas atveres bez putekļiem
un netīrumiem. Ja nepieciešams, putekļu
un netīrumu iztīrīšanai no ventilācijas atverēm
izmantojiet mīkstu mitru drāniņu.
Piederumu nomaiņa (B att.)
Nodilušus vai bojātus piederumus jānomaina
nekavējoties.
Izmantojiet tikai asus un nebojātus
piederumus.
• Lai noņemtu piederumu, rīkojieties, kā
norādīts attiecīgajā sadaļā.
• Lai uzstādītu piederumu, rīkojieties, kā
norādīts attiecīgajā sadaļā.
41
Page 42

GARANTIJA
Ieskatieties pievienotajos garantijas noteikumos.
VIDE
Izmešana
Izstrādājums, piederumi un iepakojums
jāšķiro, lai tas nonāktu otrreizējā
pārstrādē videi draudzīgā veidā.
Tikai ES valstīm
Neizmetiet elektroinstrumentus sadzīves
atkritumos.
Saskaņā ar Eiropas Direktīvu 2012/19/ES par
elektrisko un elektronisko iekārtu atkritumiem un,
īstenojot to saskaņā ar valsts tiesību aktiem, visi
elektroinstrumenti, kas vairāk nav lietojami, jāsavāc
atsevišķi un jāpārstrādā videi nekaitīgā veidā.
Izstrādājums var tikt pārveidots un lietošanas
rokasgrāmatā var tikt izdarīti grozījumi. Tehniskie
dati var tikt mainīti bez iepriekšēja brīdinājuma.
42
Page 43

43
Page 44

Exploded view
44
Page 45

Spare parts list
Position Description No.
101382 screw + washer 1,2
101383 Spindle + fork complete 3, 5..9
101384 Motor complete 10..16
101385 Switch + knob 17, 18
101386 Speed control 19
CDA1094 Battery 12V 1.5Ah
CDA1095 Charger
45
Page 46

46
Page 47

DECLARATION OF CONFORMITY
OTM1006 - MULTITOOL
(EN) We declare under our sole responsibility that this product is in conformity with
directive 2011/65/EU of the European parliament and of the council of 8 June on the
restriction of the use of certain hazardous substances in electrical and electronic
equipment is in conformity and accordance with the following standards and
regulations:
(DE) Der Hersteller erklärt eigenverantwortlich, dass dieses Produkt der Direktive
2011/65/EU des Europäischen Parlaments und des Rats vom 8. Juni 2011 über die
Einschränkung der Anwendung von bestimmten gefährlichen Stoffen in elektrischen
und elektronischen Geräten entspricht. den folgenden Standards und Vorschriften
entspricht:
(NL) Wij verklaren onder onze volledige verantwoordelijk heid dat dit product voldoet aan
de conform Richtlijn 2011/65/EU van het Europees Parlement en de Raad van 8 juni
2011 betreffende beperking van het gebruik van bepaalde gevaarlijke stoffen in
elektrische en elektronische apparatuur en in overeenstem ming is met de volgende
standaarden en reguleringen:
(FR) Nous déclarons sous notre seule responsabilité que ce produit est conforme aux
standards et directives suivants: est conforme à la Directive 2011/65/EU du
Parlement Européen et du Conseil du 8 juin 2011 concernant la limitation d’usage de
certaines substances dangereuses dans l’équipement électrique et électronique.
(ES) Declaramos bajo nuestra exclusiva responsabilidad que este producto cumple con
las siguientes normas y estándares de funcionamiento: se encuentra conforme con
la Directiva 2011/65/UE del Parlamento Europeo y del Consejo de 8 de junio de 2011
sobre la restricción del uso de determinadas sustancias peligrosas en los equipos
eléctricos y electrónicos.
(PT) Declaramos por nossa total responsabilida-de que este produto está em
conformidade e cumpre as normas e regulamentações que se seguem: está em
conformidade com a Directiva 2011/65/EU do Parlamento Europeu e com o
Conselho de 8 de Junho de 2011 no que respeita à restrição de utilização de
determinadas substâncias perigosas existentes em equipamento eléctrico e
electrónico.
(IT) Dichiariamo, sotto la nostra responsabilità, che questo prodotto è conforme alle
normative e ai regolamenti seguenti: è conforme alla Direttiva 2011/65/UE del
Parlamento Europeo e del Consiglio dell’8 giugno 2011 sulla limitazione dell’uso di
determinate sostanze pericolose nelle apparecchiature elettriche ed elettroniche.
(SV) Vi garanterar på eget ansvar att denna produkt upp fyller och följer följande
standarder och bestämmelser: uppfyller direktiv 2011/65/EU från Europeiska
parlamentet och EG-rådet från den 8 juni 2011 om begränsningen av användning av
farliga substanser i elektrisk och elektronisk utrustning.
(FI) Vakuutamme yksinomaan omalla vastuullamme, että tämä tuote täyttää seuraavat
standardit ja säädökset: täyttää Euroopan parlamentin ja neuvoston 8. kesäkuuta
2011 päivätyn direktiivin 2011/65/EU vaatimukset koskien vaarallisten aineiden
käytön rajoitusta sähkö- ja elektronisissa laitteissa.
(NO) Vi erklærer under vårt eget ansvar at dette produktet er i samsvar med følgende
standarder og regler: er i samsvar med EU-direktivet 2011/65/EU fra Europaparlamentet og Europa-rådet, pr. 8 juni 2011, om begrensning i bruken av visse
farlige stoffer i elektrisk og elektronisk utstyr.
(DA) Vi erklærer under eget ansvar, at dette produkt er i overensstemmelse med følgende
standarder og bestemmelser: er i overensstemmelse med direktiv 2011/65/EU fra
Europa-Parlamentet og Rådet af 8. juni 2011 om begrænsning af anvendelsen af
visse farlige stoffer i elektrisk og elektronisk udstyr.
(HU) Felelősségünk teljes tudatában kijelentjük, hogy ez a termék teljes mértékben
megfelel az alábbi szabványoknak és előírásoknak: je v souladu se směrnicí
2011/65/EU Evropského parlamentu a Rady EU ze dne 8. června 2011, která se týká
omezení použití určitých nebezpečných látek v elektrických a elektronických
zařízeních.
(CS) Na naši vlastní zodpovědnost prohlašujeme, že je tento výrobek v souladu s
následujícími standardy a normami: Je v súlade s normou 2011/65/EÚ Európskeho
parlamentu a Rady z 8. júna 2011 týkajúcej sa obmedzenia používania určitých
nebezpečných látok v elektrickom a elektronickom vybavení.
(SK) Vyhlasujeme na našu výhradnú zodpovednosť, že tento výrobok je v zhode a súlade
s nasledujúcimi normami a predpismi: Je v súlade s normou 2011/65/EÚ Európske
ho parlamentu a Rady z 8. júna 2011 týkajúcej sa obmedzenia používania určitých
nebezpečných látok v elektrickom a elektronickom vybavení.
(SL) S polno odgovornostjo izjavljamo, da je ta izdelek v skladu in da odgovarja nasledn
jim standardom terpredpisom: je v skladu z direktivo 2011/65/EU Evropskega parla-
menta in Sveta z dne 8. junij 2011 o omejevanju uporabe določenih nevarnih snovi v
električni in elektronski opremi.
(PL) Deklarujemy na własną odpowiedzialność, że ten produkt spełnia wymogi zawarte w
następujących normach i przepisach: jest zgodny z Dyrektywą 2011/65/UE Parla
mentu Europejskiego i Rady z dnia 8 czerwca 2011 r. w sprawie ograniczenia stosowania niektórych niebezpiecznych substancji w sprzęcie elektrycznym i elektronicznym.
(LT) Prisiimdami visą atsakomybę deklaruojame, kad šis gaminys atitinka žemiau
paminėtus standartus arba nuostatus: atitinka 2011 m. birželio 8 d. Europos
Parlamento ir Tarybos direktyvą 2011/65/EB dėl tam tikrų pavojingų medžiagų
naudojimo elektros ir elektroninėje įrangoje apribojimo.
(LV) Ir atbilstoša Eiropas Parlamenta un Padomes 2011. gada 8. jūnija Direktīvai
2011/65/ES par dažu bīstamu vielu izmantošanas ierobežošanu elektriskās un
elektroniskās iekārtās.
(ET) Apgalvojam ar visu atbildību, ka šis produkts ir saskaņā un atbilst sekojošiem stand
artiem un nolikumiem: ir atbilstoša Eiropas Parlamenta un Padomes 2011. gada 8.
jūnija Direktīvai 2011/65/ES par dažu bīstamu vielu izmantošanas ierobežošanu
elektriskās un elektroniskās iekārtās.
(RO) Declarăm prin aceasta cu răspunderea deplină că produsul acesta este în
conformitate cu următoarele standarde sau directive: este în conformitate cu
Directiva 2011/65/UE a Parlamentului European şi a Consiliului din 8 iunie 2011 cu
privire la interzicerea utilizării anumitor substanţe periculoase la echipamentele
electrice şi electronice.
(HR) Izjavljujemo pod vlastitom odgovornoĻśu da je strojem ukladan sa slijedeśim
standardima ili standardiziranim dokumentima i u skladu sa odredbama: usklađeno s
Direktivom 2011/65/EU europskog parlamenta i vijeća izdanom 8. lipnja 2011. o
ograničenju korištenja određenih opasnih tvari u električnoj i elektroničkoj opremi.
(SRL) Pod punom odgovornošću izjavljujemo da je usaglašen sa sledećim standardima ili
normama: usaglašen sa direktivom 2011/65/EU Evropskog parlamenta i Saveta od
8.juna.2011. godine za restrikciju upotrebe određenih opasnih materija u električnoj i
elektronskoj opremi.
(RU) Под свою ответственность заявляем, что данное изделие соответствует
следующим стандартам и нормам: соответствует требованиям Директивы
2011/65/EU Европейского парламента и совета от 8 июня 2011 г. по
ограничению использования определенных опасных веществ в электрическом
и электронном оборудовании
(UK) На свою власну відповідальність заявляємо, що дане обладнання відповідає
наступним стандартам і нормативам: задовольняє вимоги Директиви 2011/65/
ЄС Європейського Парламенту та Ради від 8 червня 2011 року на обмеження
використання деяких небезпечних речовин в електричному та електронному
обладнанні.
(EL) Δηλώνουμε υπεύθυνα ότι το προϊόν αυτό συμφωνεί και τηρεί τους παρακάτω
κανονισμούς και πρότυπα: συμμορφώνεται με την Οδηγία 2011/65/ΕΕ του Ευρωπαϊκού
Κοινοβουλίου και του Συμβουλίου της 8ης Ιουνίου 2011 για τον περιορισμό της χρήσης
ορισμένων επικίνδυνων ουσιών σε ηλεκτρικό και ηλεκτρονικό εξοπλισμό.
(AR) نعلن على مسئوليتنا وحدنا أن هذا المنتج يتوافق مع المعايير والتوجيهات التالية:
(TR) Tek sorumlusu biz olarak bu ürünün aşağıdaki standart ve yönergelere uygun olduğunu
beyan ederiz.
(МК) Изјавуваме со наша целосна одговорност дека производот е во согласност со
Смерницата 2011/65/EU на Европскиот парламент и е во согласност според Советот
од 9 јуни за ограничување на користење на одредени опасни супстанции во
електричната и електронската опрема според следните стандарди и регулативи:
-
-
-
-
EN 55014-1, EN 55014-2, EN 60745-1, EN 60745-2-4, EN 61000-3-2,
EN 61000-3-3, EN 60335-1, EN 60335-2-29
2006/42/EC, 2014/30/EU, 2014/35/EU, 2012/19/EU, 2011/65/EU
Zwolle, 01-02-2018 H.G.F. Rosberg
CEO Ferm B.V.
Ferm BV • Lingenstraat 6 • 8028 PM • Zwolle The Netherlands
47
Page 48

1802-19
WWW.FERM.COM ©2018 FERM B.V.
 Loading...