


User manual
Ariva @Link 100
English

WARNING !!!
Supported network features as internet radio (Shoutcast, Jamendo) Youtube,
YouPorn, Picasa, Flickr, etc depend on your network connection speed and
quality and the server settings (limitations, bandwidth, location) which you are
accessing.
Playback of copy protected content, damaged files, etc. may fail or be
incorrect. Video files with a resolution higher than 1920x1080i, 1280x720p or
with a video bitrate over 30Mbps may not play properly.
Ferguson satellite receivers support recording to external hard disk drives
(HDDs) and flash memories (pen drives). The correct operation of the
recording function depends on the type of connected memory! You must read
the following limitations.
REMEMBER:
1. In order to use an external USB memory, the memory must support the USB
2.0 standard. To ensure stable recording and playback, you must use a
memory with a recording speed of 20.0 MB/s or faster. Slower hard disk
drives and flash memories may not function properly, have problems with
recording (image jitter), or do not function at all!!!
2. Only memory with one basic EXT2, EXT3 or FAT32 partition (we recommend
using the FAT32 format) will function properly. If your hard disk is not
formatted in EXT2, EXT3 or FAT32, format the disk on your computer before
connecting it to the receiver.
3. Highly fragmented or used memories may also not operate smoothly or
correctly.
CAUTION
1. Under no circumstances should you disconnect the USB device from the
receiver during recording or playback. Disconnecting during operation may
cause damage to the receiver and/or flash memory, and to the recorded data.
2. Do not touch the working receiver (and in particular the USB connector) with
wet hands. Risk of electric shock and permanent damage to the receiver!
2

Table of contents
SAFETY MEASURES...........................................................................................................................................5
DOWNLOADABLE SOFTWARE.............................................................................................................................5
ABOUT THE INSTRUCTION MANUAL....................................................................................................................6
MARKINGS AND SIGNS APPLIED TO THE RECEIVER.............................................................................................. 6
BASIC INFORMATION ABOUT THE RECEIVER........................................................................................................7
1. Main features..........................................................................................................................................7
2. Contents of box.......................................................................................................................................7
3. Important instructions concerning handling of the receiver............................................................................7
4. Remote control........................................................................................................................................8
4.1 Installation of batteries.....................................................................................................................10
5. Front panel............................................................................................................................................ 10
6. Rear panel.............................................................................................................................................11
7. Connecting the satellite antenna...............................................................................................................11
8. Connecting an antenna system with a positioner........................................................................................12
9. Connecting the satellite receiver............................................................................................................... 13
9.1 Connecting to the TV via HDMI cable (recommended)...........................................................................13
9.2 Connecting to the TV via Component (YPbPr) cable ............................................................................. 14
9.3 Connecting an audio system..............................................................................................................14
9.4 Connecting external memory.............................................................................................................14
9.5 Connecting another receiver..............................................................................................................15
9.6 Connecting to the local network (LAN)................................................................................................15
FIRST STEPS..................................................................................................................................................16
INFORMATION ABOUT THE USER MENU............................................................................................................. 16
Powering On/Off............................................................................................................................................. 16
10. First installation.........................................................................................................................................17
10.1 Operating the menu............................................................................................................................ 17
10.1 Language selection.............................................................................................................................17
10.2 Satellite search...................................................................................................................................17
11. DAILY USAGE............................................................................................................................................ 18
11.1 Volume control...................................................................................................................................18
11.2 Changing channels..............................................................................................................................18
11.3 Channel lists .....................................................................................................................................18
11.4 User lists ..........................................................................................................................................18
11.5 Zoom mode.......................................................................................................................................18
11.6 Information bar.................................................................................................................................. 18
11.7 Screen resolution................................................................................................................................ 19
11.8 Audio channel.....................................................................................................................................19
11.9 Audio language...................................................................................................................................19
11.10 Freeze mode....................................................................................................................................19
11.11 Teletext...........................................................................................................................................19
11.12 Edit channels, event list..................................................................................................................... 19
11.13 Photos/Picasa/Flickr radio soundtrack..................................................................................................20
11.14 Jump time........................................................................................................................................20
11.15 Multifeed..........................................................................................................................................20
11.16 Subtitle language..............................................................................................................................20
11.17 Edit/search window........................................................................................................................... 20
12. Program guide..........................................................................................................................................21
13. RECORDING.............................................................................................................................................21
13.1 Recording guide..................................................................................................................................21
13.2 Instant recording................................................................................................................................22
13.3 Timeshift recording............................................................................................................................. 22
13.4 Timer recording .................................................................................................................................22
14. MENU.......................................................................................................................................................23
14.1 Operating the menu ........................................................................................................................... 23
15. INSTALLATION.......................................................................................................................................... 23
15.1 Antenna.............................................................................................................................................23
15.2 Satellite search...................................................................................................................................23
15.3 Edit satellite.......................................................................................................................................23
15.4 Fastscan............................................................................................................................................ 24
15.5 Transponder search............................................................................................................................. 24
15.6 DiSEqC/USALS-Multi search.................................................................................................................24
15.7 Edit PID............................................................................................................................................. 24
15.8 DiSEqC 1.2........................................................................................................................................24
15.9 USB update........................................................................................................................................25
15.10 Network update................................................................................................................................ 25
15.11 Factory reset....................................................................................................................................25
16. SETTINGS................................................................................................................................................25
16.1 Network connection.............................................................................................................................25
16.2 ARIVA share.......................................................................................................................................25
3

16.3 Television...........................................................................................................................................26
16.4 Software version.................................................................................................................................26
16.5 Card reader........................................................................................................................................26
17. USER.................................................................................................................................................. 26
17.1 Menu & audio language.......................................................................................................................26
17.2 Time & date....................................................................................................................................... 26
17.3 PIN code............................................................................................................................................26
17.4 Menu & channel lock...........................................................................................................................26
17.5 Multimedia.........................................................................................................................................26
18. CREATE & EDIT ........................................................................................................................................27
18.1 Edit channel.......................................................................................................................................27
18.2 Edit user lists.....................................................................................................................................27
18.3 Delete satellite & transponder...............................................................................................................27
18.4 Export/Import data............................................................................................................................. 27
18.5 Ariva-i............................................................................................................................................... 28
Channel editor...................................................................................................................................... 28
USB file browser...................................................................................................................................28
19. ARIVA MEDIA............................................................................................................................................29
19.1 Operating the menu ........................................................................................................................... 29
19.2 Media guide.......................................................................................................................................29
19.3 Recordings & movies...........................................................................................................................29
19.4 Music................................................................................................................................................30
19.5 Photos...............................................................................................................................................30
19.6 File Browser.......................................................................................................................................30
19.7 Shoutcast.......................................................................................................................................... 30
19.8 Jamendo............................................................................................................................................31
19.9 Flickr & Google Picassa........................................................................................................................ 31
19.10 Musicbox..........................................................................................................................................31
20. ARIVA WEB...............................................................................................................................................32
20.1 Operating the menu ........................................................................................................................... 32
20.2 Ferguson news................................................................................................................................... 32
20.3 RSS..................................................................................................................................................32
20.4 Twitter...............................................................................................................................................32
20.5 Weather............................................................................................................................................ 32
20.6 Advertising........................................................................................................................................32
20.7 World Time........................................................................................................................................ 32
21. ARIVA TV.................................................................................................................................................33
21.1 Operating the menu .......................................................................................................................... 33
21.2 YouTube & XXX (YouPorn).................................................................................................................... 33
21.3 Ariva net............................................................................................................................................33
21.4 Download guide.................................................................................................................................. 33
21.5 Moviebox ..........................................................................................................................................34
21.6 ARIVA net.......................................................................................................................................... 34
21.7 VLC Media Player ............................................................................................................................... 34
Operating the menu .............................................................................................................................34
Playlist ................................................................................................................................................34
Open media..........................................................................................................................................34
Stream output ..................................................................................................................................... 35
Streaming Internet TV........................................................................................................................... 35
P2P Programs....................................................................................................................................... 35
P2P Settings for VLC Player....................................................................................................................35
ATTACHMENT A - GLOSSARY OF TERMS.............................................................................................................36
SPECIFICATION..............................................................................................................................................37
4
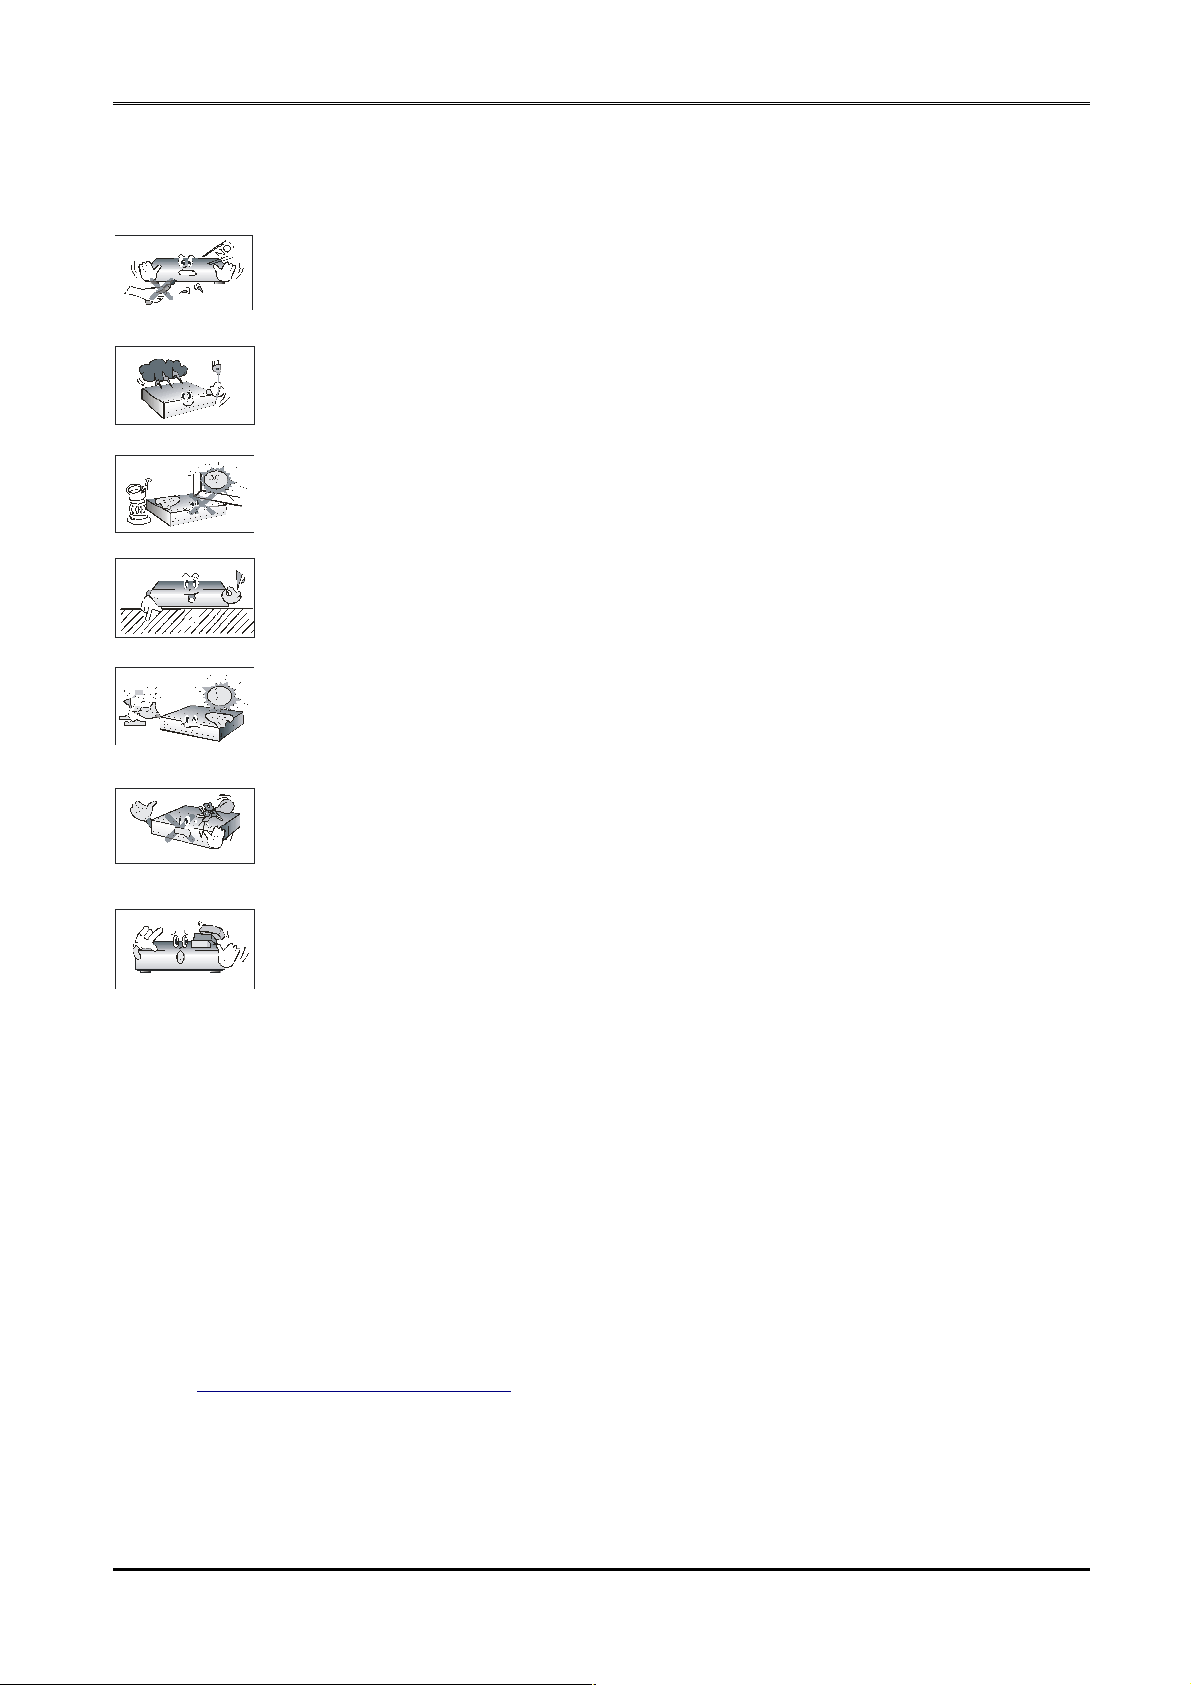
SAFETY MEASURES
We request that you read the instruction manual and recommendations set forward therein.
Also remember to correctly position the satellite antenna!
In order to avoid an electric shock, never open the housing. Damage to the
warranty seal shall void the warranty.
Disconnect the receiver from the mains during thunderstorms or when it is not to
be used for an extended period of time. Please remember that the warranty does
not cover damage to the equipment caused by a lightning strike.
Do not expose the receiver to direct sunlight. Place it away from sources of heat
and humidity. Do not cover ventilation ducts, in order to ensure the correct
circulation of air.
Place the receiver horizontally on a flat, even and stable surface.
If you move the receiver from a room that is warm to one that is cold (or vice
versa), wait at min. 1 hour before connecting it to the mains. Otherwise,
problems may arise.
The receiver should be placed away from vases, bottles, aquariums and other
water containers in order to avoid damage. Do not touch the mains plug with your
bare hands.
Do not place any objects on the housing of the receiver. This may cause
overheating and reception problems.
Before commencing maintenance or installation work, disconnect the receiver from the mains.
Do not clean the receiver with alcohol or liquids containing ammonia. If necessary, clean it with
a soft, lint-free cloth wetted with a gentle solution of water and soap.
• Do not connect any cables when the mains plug is in the socket.
• Check the condition of your cables. Damaged cables may cause a fire.
• Please disconnect the receiver from the mains before connecting any cables.
DOWNLOADABLE SOFTWARE
Ferguson has taken every effort to provide users with software updates in order to ensure that
the parameters of the satellite television receiver are up to date. Ferguson reserves itself the
right to amend, change or modify the software used in the satellite television receiver as it shall
choose and without prior notification. The latest version of the software is available on the
website http://www.ferguson-digital.eu
5

ABOUT THE INSTRUCTION MANUAL
Ferguson has made every effort to provide the most current information about its products.
Ferguson does not grant any guarantee as to the contents of the present instruction manual and
disclaims any implied guarantees concerning market value or suitability for specific purposes.
The information contained herein is an instruction intended to enable the correct usage and
maintenance of the receiver.
Ferguson reserves itself the right to introduce amendments, changes or translations of the
instruction manual without prior notification thereof. For this reason, we recommend you
regularly visit our website in order to obtain the latest information.
MARKINGS AND SIGNS APPLIED TO THE RECEIVER
Digital signal transmission logo.
This logo informs that the receiver conforms to the Digital Video Broadcasting
standards.
Risk of electric shock - do not open.
This notice warns the user not to open the receiver housing. The housing may be
opened solely by authorized service technicians.
CE logo.
The logo informs that the receiver conforms to the terms and conditions of
Directive 2004/108/EC concerning observance by Member States of provisions
regulating electromagnetic compatibility, and to the terms and conditions of
Directives 2006/95/EC concerning observance by Member States of provisions
regulating low voltage electricity and safety with relation to the handling and
operation of electrical equipment.
Double insulation logo.
This logo informs that the receiver is an electrically safe device, provided that it is
used in accordance with the recommendations set forward in the chapter
concerning safety.
Take an active part in protecting the natural environment!
• Your receiver is made from materials that can be processed or recycled.
• At the end of its service life, take this unit to a designated collection point.
6

BASIC INFORMATION ABOUT THE RECEIVER
1. Main features
✔ Reception of high definition channels
✔ Upscaling of PAL signals to 720p or 1080i resolution
✔ 20 programmable timers
✔ Separate favorite, TV and Radio channels list
✔ Quick channel search function (Quick Find)
✔ Teletext and subtitle display
✔ DiSEqC 1.0, 1.1 and DiSEqC 1.2, USALS
✔ MPEG-2, MPEG-4, MPEG-4 AVC/H.264 standards
✔ Compatible with DVB-S and DVB-S2 systems
✔ Card reader for pay-per-view television
2. Contents of box
Unpack the receiver and check whether all of the following elements are present
✔ 1 x remote control unit
✔ 1 x instruction manual
✔ 1 x hybrid satellite receiver
✔ 1 x HDMI cable
3. Important instructions concerning handling of the receiver
The screen menu (OSD) simplifies operation of the receiver and has made it possible to reduce
the number of keys on the remote control. All of the functions are displayed on the screen and
may be controlled by means of a small number of keys. Common functions have been
connected in one "MENU". The selected function is colored. Depending on the selected option,
various "function keys" are displayed: red, yellow, green, blue and white in the form of graphics
and descriptions. The colors represent various functions in individual "Menus". The selected
function is activated by pressing a key on the remote control unit. The so-called function keys
are active only when in the appropriate field there is information about it. The user interface
makes it possible to navigate within a menu and between functions in a number of different
ways. Certain keys on the remote control allow direct access to functions. The keys are multifunctional, i.e. their functions depend on previously activated elements.
NOTE:
Please keep in mind that new software may change the functionality of the receiver.
Photographs and descriptions included in the instruction manual are for informational
purposes only. If you should notice an error, please report it - we shall make every
effort to have it rectified.
7
4. Remote control
STAND-BY
Switch between operation and
Stand-by/deep Stand-by mode and
to boot.
VOL+/VOL-
Adjust the audio volume.
CH UP/DOWN
Change channels (next/previous).
ARIVA TV Enter/exit ARIVA TV.
ARIVA WEB
Enter/exit ARIVA web.
EDIT & LIST
Enter/exit the edit menu.
EJECT
Eject the USB memory.
ARIVA MEDIA
Enter/exit ARIVA media.
These coloured keys have
different functions as displayed in
the menus.
UP/DOWN
TV : Change channels (next/previous).
MENU: Navigate in the menus.
LEFT/RIGHT
TV : Adjust the audio volume.
MENU: Navigate in the menus and select options.
OK
TV : Enter the list mode.
MENU: Select options.
PAGE UP/DOWN
Scroll a page or list up and down. To scroll continuously hold
the key.
8

MUTE
Turn the sound on/off.
TV/RADIO
Change between TV and Radio mode.
LAST
Return to the previous channel.
NUMERIC KEYS
TV : Enter a channel number directly.
MENU: Enter values.
USER
INFO
EPG
TEXT
ZOOM
FREEZE
MENU
EXIT
RESO
LANG
FEED
SUBT
AUDIO
Enter/exit and edit user lists.
Enter/exit information about the program, movie/recording.
Enter/exit the program guide.
Enter/exit Teletext.
Enter/exit the zoom mode.
Pause a live program.
Enter/exit the menu and save changes in menus.
Exit all menu modes.
Change the screen resolution.
Select audio languages and encode the text for movie subtitles.
Select a Multifeed.
Select subtitle languages for programs and display the subtitle for movies.
Select audio channels.
RECORDING
Record a program and select the duration.
PLAY
Start playback.
PAUSE
Start the Timeshift recording. Pause playback.
STOP
Stop playback.
SLOW MOTION
Playback in slow motion. Each time you press this key the
speed will increase (10%, 30%, 50%).
REWIND
FORWARD
Each time you press this key the rewind/ forward speed will
increase (2, 4, 8).
JUMP
Jump back or forward during playback.
9
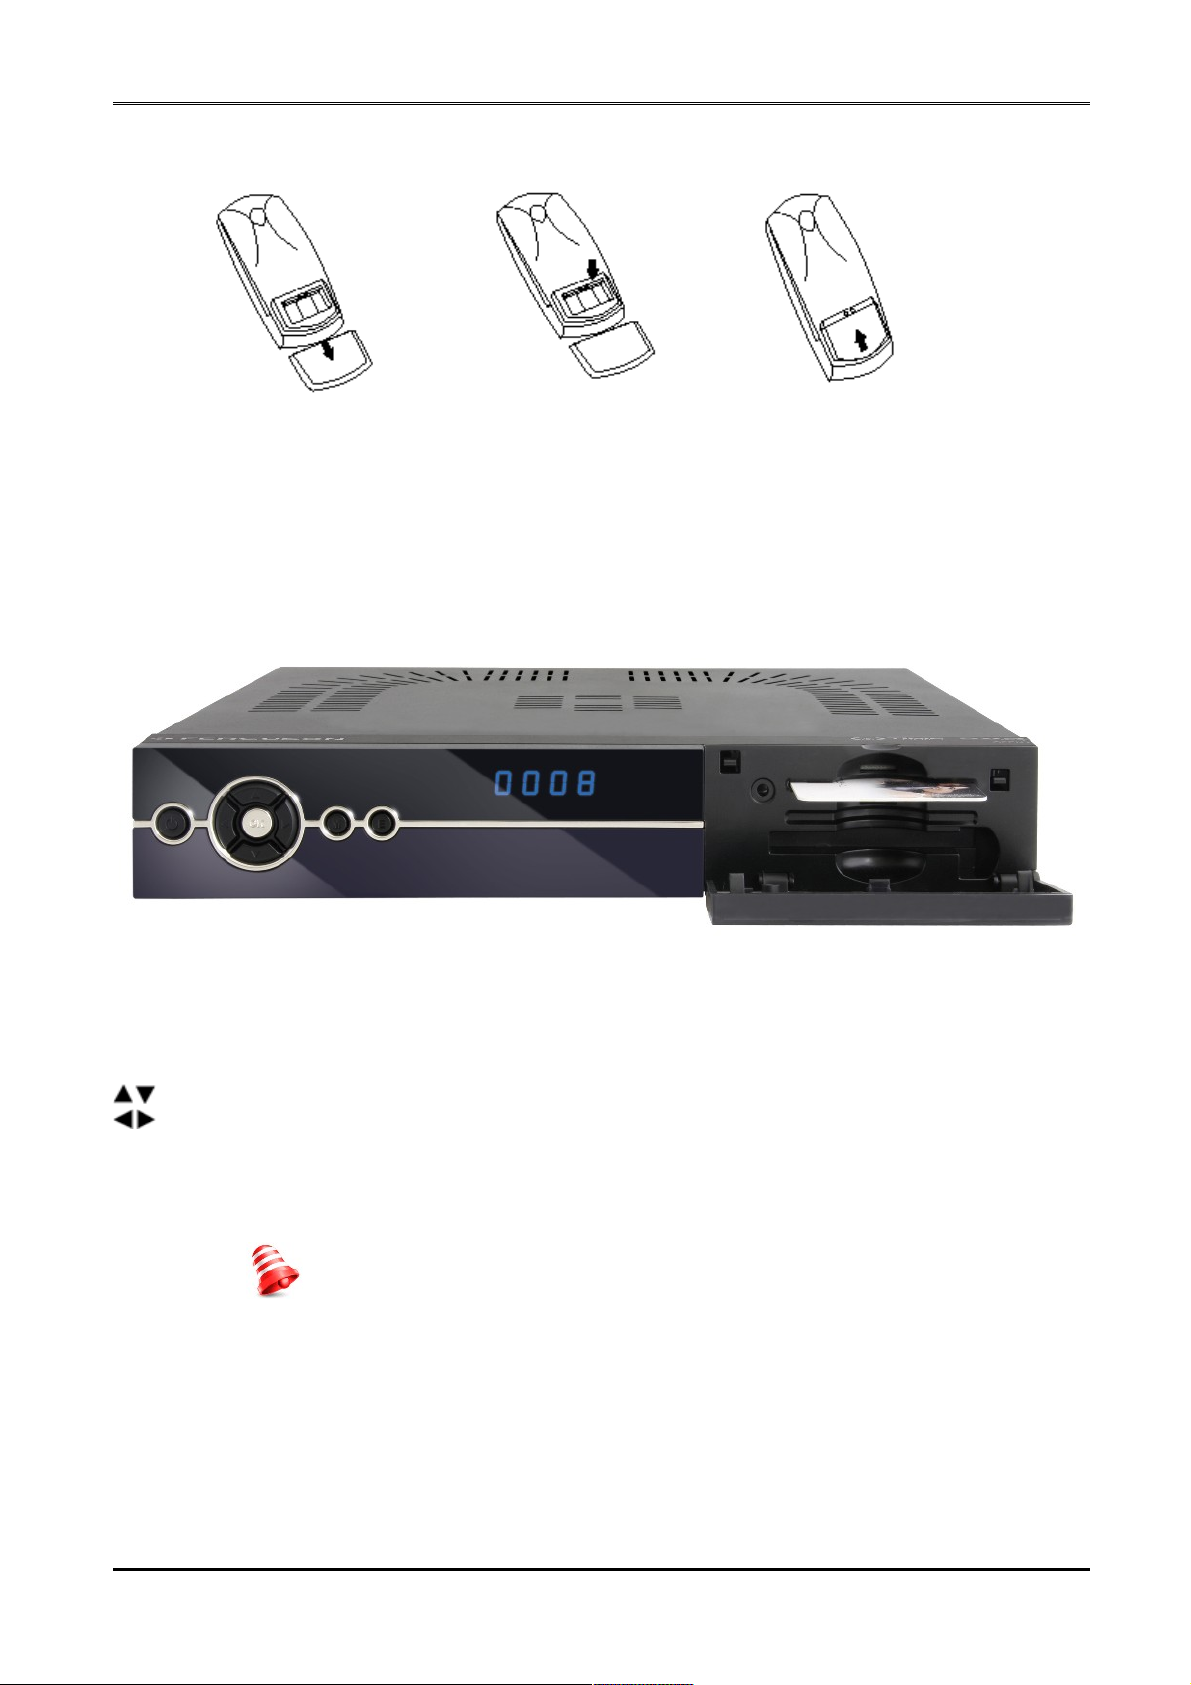
4.1 Installation of batteries
Remove the cover of the battery compartment on the rear panel of the remote control unit;
slide it downwards and put it aside. Insert two AAA (R03) batteries into the compartment,
observing the indicated polarity. Do not mix old and new batteries, or batteries of
different types. Replace the battery compartment cover. Slide it upwards until it locks in place.
5. Front panel
POWER: Press power key one time to power off the receiver. Press again to reboot the
receiver. To switch the receiver to Stand-by is only possible with the Stand-by key
on the remote control.
: Switches to the next/previous channel, moves the cursor up/down in the menu.
: Moves the cursor left/right in the menu.
MENU: To enter the menu for the general settings.
EXIT: To exit the menu or an menu option.
LED: Displays the channel number & functions, in Stand-by the time.
CA: Socket for a subscriber's card.
Always insert the card with the chip facing up!!!
10
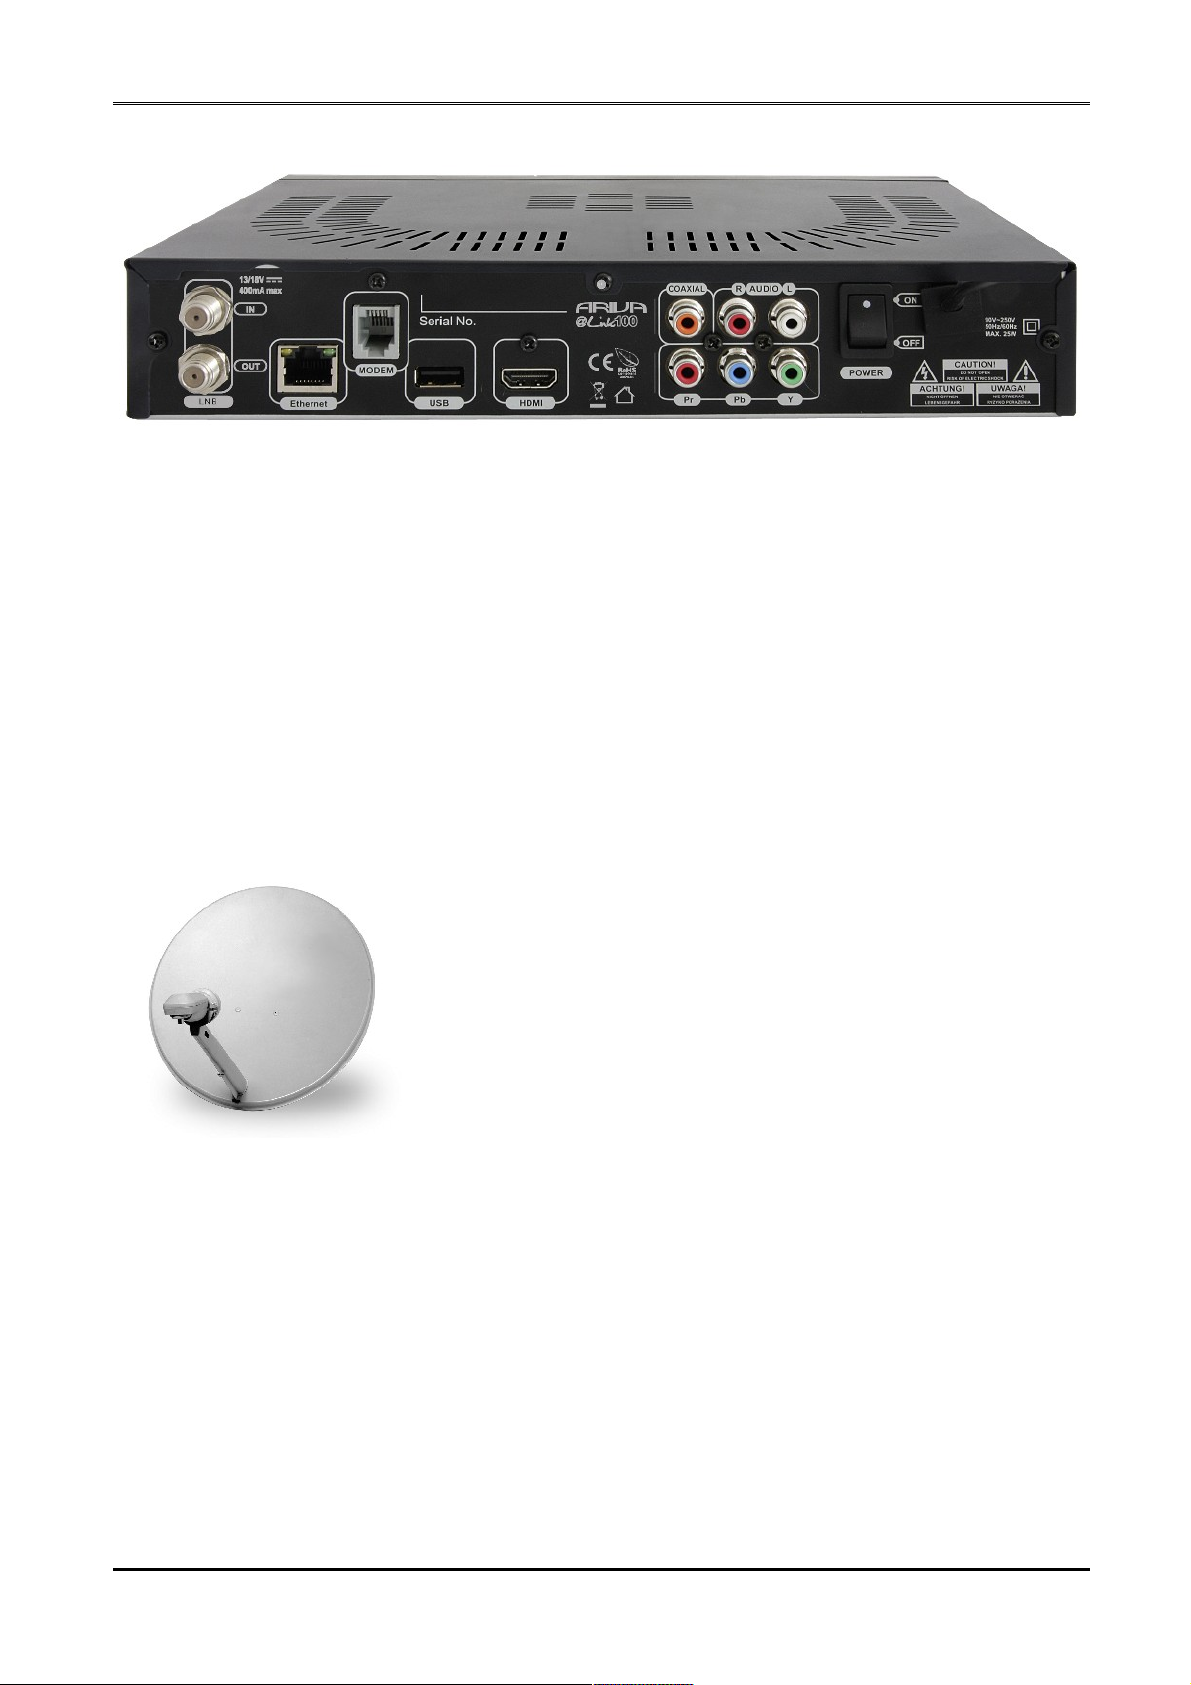
6. Rear panel
LNB IN: Input of the antenna cable from the converter (LNB).
LOOP OUT: Output of the signal from the LNB to another satellite receiver.
ETHERNET: 10/100Mbit RJ-45 Port for home network/Internet.
HDMI: Digital Video/Audio output for high definition TV's.
USB: USB 2.0 host connector.
COAXIAL: Digital coaxial audio output (RCA).
COMPONENT: Component video output 3 x RCA (YPbPr).
AUDIO (L/R): Analogue stereo audio output (2 x RCA).
MODEM: RJ-11 port.
ON/OFF: Power on/off switch.
7. Connecting the satellite antenna
In order to check the correctness of connection of external equipment, for example a satellite
antenna or converter, read the installation manual or hire a professional technician!
Good reception is conditional on the precise placement of the
antenna. Even the best antenna will cause reception problems if it
is incorrectly adjusted. Even slight placement errors may render
reception impossible or considerably impair image/sound quality.
Before installation make sure that the location is suitable. The
proper direction may be initially determined by making a
comparison with other antennas. There should be no objects
directly in front of the antenna, for these may block the signal from
reaching the bowl! Once you select an optimal location for the
antenna, fix and adjust it initially, and then proceed to a precise
adjustment. Each antenna is fitted with regulating screws that
make it possible to correct its vertical and horizontal placement.
Adjusting is somewhat more difficult in the case of digital tuners. You cannot perform
adjustments on the basis of the image, because this appears with a certain delay. What is more,
the indicators available in the settings menu also act with a delay, and therefore adjustment
may take considerable time and be very imprecise. An antenna signal meter will be
indispensable for setting up the antenna. The meter must be connected to the antenna cable
between the converter and the receiver. This will confirm the presence of a voltage that
switches the converter from the tuner and show the signal strength for individual satellites. We
strongly recommend hiring a professional technician!
11

8. Connecting an antenna system with a positioner
USALS type positioners manufactured by Stab will guarantee the correct operation of your
Ferguson receiver. In order to connect an antenna system to a USALS positioner, you should
connect the positioner out to the LNB IN of the Ferguson receiver. The role of the positioner
installed between the mast and the antenna is to turn the bowl in such a way as to ensure that
it is directed to various satellite positions. The positioner is built in such a way that its axis of
revolution is parallel to the direction towards the North Star. For this reason, its mounting is
frequently termed the Polar mount. In consequence, when the satellite changes position, it is
not necessary to adjust the azimuth and elevation independently. The antenna revolves only in
one axis. Using the introduced scale, the motor inclines in such a way as to ensure the
appropriate placement of the axis of revolution. The angle of inclination corresponds to the
latitude of the location where the antenna is installed. As in the case of a fixed antenna, the
angle of elevation of the bowl must first be set. For this purpose, use is made of a satellite
located as close as possible to the south of your location. Ideally, the position of the satellite
should not differ from that of the said direction by more than 5°. In other words, you should use
the satellite position closest to the longitude of the point of installation. For example, if your
longitude is 73° W, you should search for a satellite located at a position between 68° and 78°
W.
The USALS function considerably simplifies configuration of the antenna. The Ferguson receiver
requires that you enter the geographical coordinates of the antenna in order to automatically
calculate the angle of revolution of the motor for individual satellites. The receiver activates the
positioner automatically and turns the antenna to the selected satellite. When a signal is locked
on, you should precisely adjust the antenna's elevation and azimuth settings in order to
optimise signal reception. When correcting the azimuth, the entire antenna assembly and
positioner revolve with respect to the mast. If initially the antenna was not directed precisely
south, you can correct this now. When you have finished with the first satellite, all other
satellites will be remembered automatically, provided that you have introduced their satellite
position values correctly.
Without the USALS function, programming of the system is much more difficult. To this end you
should use the DiSEqC 1.2 function, which turns the antenna to the selected satellite in a nearly
identical manner. Since, however, it does not take into consideration the local geographical
coordinates, the movement is effected on the basis of the prime meridian and the equator.
Therefore it is necessary to introduce corrections separately for each satellite. Due to these
difficulties, manufacturers of DiSEqC 1.2 positioners frequently provide useful software on their
websites, using which you can easily calculate the location of the satellite.
12

9. Connecting the satellite receiver
The following illustrations show cable connections for a television and other devices connected
to the receiver. If you require any assistance in connecting individual devices, contact your local
technician. Before connecting or altering connections, disconnect the receiver from the mains !!!
9.1 Connecting to the TV via HDMI cable (recommended)
1. Connect the antenna to the LNB IN socket of the receiver.
2. Connect the HDMI to the receiver out and the television in.
Connection by means of an HDMI cable allows you to obtain the highest image quality.
If you have an amplifier with an HDMI out and in, which supports audio over HDMI,
connect the devices by two HDMI cables. As in the following figure: one cable to the
amplifier, and the other from the amplifier to the television set.
13

9.2 Connecting to the TV via Component (YPbPr) cable
1. Connect the antenna to the LNB IN socket of the receiver.
2. Connect the video and audio with five cinch cables to the television set.
Three cables, colored green, blue and red, are used for the component signal. The two
remaining cables, red and white, are used to connect audio (right and left channel).
9.3 Connecting an audio system
1. Digital sound (including surround sound, if transmitted) may be obtained through the
optical (SPDIF) socket. The following figure presents the SPDIF connection.
2. Stereo sound may be obtained by connecting cinch cables (white and red) for the left and
right channels.
9.4 Connecting external memory
1. The receiver supports all types of hard disk drives in housings that are equipped with an
independent power supply. The sole condition is that the hard disk has to have a single
basic partition that is formatted in FAT32 (recommended), EXT2, EXT3.
2. We recommend that you regularly archive data on your PC computer. A large number of
files with recordings may slow down the operation of the receiver (slow loading of the file
list).
Your receiver has one USB 2.0 host port to connect memory devices (memory stick, external
hard disk) formatted in FAT32, EXT2, EXT3, NTFS.
14

For USB memory devices formatted in NTFS your receiver can only playback files
(movies, MP3s, pictures). Recording is not possible.
9.5 Connecting another receiver
Another receiver may be connected through the LNB OUT socket. Please keep in mind, however,
that only one receiver may be used at any one time! Permanent damage may result if both are
turned on simultaneously.
9.6 Connecting to the local network (LAN)
PSTN Modem: RJ11 connector – The receiver has a built-in modem to connect to an analog
PSTN telephone line. Modem enables two-way communication in order to gain access to the
Internet and has the function of interactive exchanges. Connect your receiver to the network
with a Telephone cable.
Ethernet: RJ45 connector - Connect your receiver to the network with an Ethernet cable.
To operate all features of your receiver connect your receiver to your network via a
Router which is connected to the Internet. If you cannot connect to your network or if
‘ Connection failed!’ is displayed for network features check again the address and the
network connection and try again.
15

FIRST STEPS
1. Insert the plug of the receiver and other additional devices to a wall socket.
2. Select AV signal source of your television set.
3. The satellite receiver is supplied with reinstalled television channels. In order to watch other,
i.e. non-default channels, you should use the channel search function.
Check all of the connections, i.e. antenna cables, audio and video signal cables, before
connecting the receiver to the mains!
INFORMATION ABOUT THE USER MENU
The user interface allows you to use numerous settings and receiver functions. Some keys on
the remote control unit enable direct access to functions of the receiver. Certain keys have been
described, for example EPG, MENU, OK, or colored keys for ease of usage. Other keys are
multi-functional and their operation depends on the type of device selected by the user.
Hereunder we have presented a brief description of how to use certain receiver functions
available through the user menu.
1. The up/down keys on the remote control are used to move the cursor up and down on the
menu.
2. The left/right keys on the remote control are used to move the cursor left and right, and to
switch options.
3. The OK key is used to enter submenus.
4. The EXIT key is used to exit menus or functions.
5. When operating a submenu, confirm your selection with the OK key.
Powering On/Off
Power ON/Booting
Connect the power cord of your receiver to a mains socket. Turn On the mains switch on the
rear panel to start the booting.
Stand-by
Press the STAND-BY key to switch between Stand-by and operation mode. Timer recordings
will record in this mode.
Deep Stand-by
Hold the STAND-BY key pressed for 3 seconds to switch to the Deep Stand-by
mode. To switch again to operation mode, press the STAND-BY key again.
Timer recordings will not record in this mode.
16

10. First installation
After you turned on your receiver for the first time or after a factory reset, the
installation wizard will start automatically.
10.1 Operating the menu
Select an option with the p/q, t/u keys.
Enter an option with the OK key.
10.1 Language selection
Menu language Select the menu language.
Audio language Select the standard audio language for programs.
Press MENU key to save the selection and to continue to the satellite search.
10.2 Satellite search
Satellite Select a satellite.
Transponder Select a transponder.
LNB
Select the LNB frequency.
22Khz
Select On or Off.
DiSEqC
Select the DiSEqC (A, B, C, D)/Mini A, B port for the selected satellite.
DiSEqC 1.1
Select the DiSEqC port (1-16) for the selected satellite.
LNB Power
Select the LNB power.
Search
Press (blue) key to start the search.
Search options
All/FTA/NIT/FAST SCAN Select an option to start the search.
DiSEqC/USALS Select this Option to search all satellites (DiSEqC switch) at
one time.
NOTE
Press EXIT key to install an Unicable/SCD/DiSEqC 1.2/USALS
system.
17

11. DAILY USAGE
11.1 Volume control
Volume Press VOL+/VOL- or t/u keys (while watching a program) to adjust the
volume.
Mute Press MUTE key to turn the sound On and Off.
11.2 Changing channels
Change Press CH. UP/DOWN, p/q keys or enter the channel number with the 0-9
numeric keys to change channels.
Back
Press LAST key to return to the previous channel.
11.3 Channel lists
Press OK key to display all satellite/user lists and sort options.
Operation
Select columns with the t/u keys and select a sort option or channel
with the p/q/OK keys.
Search
channel
To search a channel name, enter first the channel list and enter the
channel name with the numeric keys.
You can search for a search term with max. 7 letters.
The search term is displayed in the 1st column at the bottom.
Press (red) key to delete a letter.
11.4 User lists
Press USER key to display the 10 user lists.
List
Select a column with the t/u keys and select an option or channel with the
p/q/OK keys.
Rename
Select a list and press (yellow) key to rename.
Edit
Press (red) key to edit.
11.5 Zoom mode
Press ZOOM key to enlarge a part of the screen.
Move the Zoom window with the p/q, t/u keys to the part of the screen to enlarge.
11.6 Information bar
Press INFO key to display the channel number & name, list name, time.
The current and next program information, if available, will be displayed. If detail
information is available, press INFO key again to display them.
is displayed for programs in High Definition.
is displayed, if subtitle languages are available.
is displayed, if Teletext is available.
is displayed, if Multifeeds are available.
is displayed for locked channels.
is displayed for pay TV channels.
18

is displayed for programs in Dolby Digital.
displays the audio channels (mono, stereo).
SIGNAL displays the signal quality and strength.
11.7 Screen resolution
Press RESO key to change the screen resolution.
TV
Change the screen resolution (1080i-50Hz/60Hz, 720p-50/60Hz, 576p-50Hz,
480p-60Hz) as the TV system (50Hz=PAL, 60Hz= NTSC).
Select the resolution with the p/q/OK keys.
If the TV is connected with a scart cable, select Scart-PAL (PAL TV) or
Scart-NTSC (NTSC TV).
Movies & VLC streams.
Full Screen.
Cinema (Wide Screen).
Original.
Low Screen for low resolution movies.
IPTV Screen for IPTV streams.
11.8 Audio channel
Press AUDIO key to select an audio channel (stereo, mono left/right).
Stereo.
Left/right channel (Mono).
11.9 Audio language
TV
Press LANG key to select an audio language, if available. Select a language
with the p/q/OK keys.
Movies
Press LANG key to select the matching subtitle text code to display all letters
correctly.
Select the text code from the list with the p/q/OK keys.
11.10 Freeze mode
Press FREEZE key to pause a live program.
11.11 Teletext
Press TEXT key to display Teletext, if available. Operate the menu with the 0-9
numeric and coloured ( ) keys.
11.12 Edit channels, event list
Press (green) key to display detail information about the channel.
Lock Select On to lock the channel.
Save Press MENU key to save the changes.
Delete Press (red) key to delete the channel.
19

Event list Press (blue) key to display the event list for all recordings and
reservations. Select an event with the p/q keys. Press (red) key to
delete an event, press (green) key to delete all events.
11.13 Photos/Picasa/Flickr radio soundtrack
Enter ARIVA media in radio mode to view Photos, Picasa and Flickr with radio as
soundtrack.
11.14 Jump time
Press the Jump keys to jump from a movie position backwards or forwards. Select the
jump time (1-10 min.) with the p/q keys.
11.15 Multifeed
Some programs offer a variety of perspectives i.e. for sport events, these are called
Multifeeds. Press FEED key to display Multifeeds for a program, if available. Select a
feed with the p/q/OK keys.
11.16 Subtitle language
TV
Press SUBT key to select subtitle languages, if available for a current
program or recordings. Select a language with the p/q/OK keys.
Movies
Supported formats: SRT, SMI, SUB.
Press SUBT key to display subtitles. Press this key again to deactivate
subtitles.
If the subtitle and movie are asynchronous, synchronize the subtitle time.
Press the t/u keys and adjust the time from -5 seconds to +5 seconds in
0.1 second steps.
NOTE
To display movie subtitles, the subtitle and menu language must be the
same and the movie file and subtitle file must have the same title.
11.17 Edit/search window
Select the edit/search window to rename (user lists, channels, recordings), to insert
(address, password, username) and to enter a search term.
Letter Select a letter with the p/q/OK keys.
Delete
Press (red) key to delete a letter.
A/a/…
Press (green) key to change between capital/lower case letters and to
display special letters for a language.
Save
Press (yellow) key to save.
Cancel
Press (blue) key to cancel.
20

12. Program guide
Press EPG key to display the electronic program guide for current, next and scheduled
programs.
Now/next schedule.
Select a channel with the p/q keys to display the now/next schedule.
Enter the now/next schedule with the t/u keys.
Press OK key to change to the program.
Press OK key again to watch it in full screen.
Press INFO key to display detail information, if available.
Week schedule.
Select a program with the p/q, t/u keys.
Press the OK or INFO key to display detail information, if available.
Reserve
Press (red) key to reserve programs (TV or Radio) to change to this
program at the scheduled time.
Mode Select an option (once, daily, weekly, daily (Mon-Fri)).
Date
Enter the date with the 0-9 numeric keys for programs without EPG
schedule.
Begin
Enter the start time with the 0-9 numeric keys for programs without EPG
schedule.
Press MENU key to save the event.
Record Press (green) key to set the timer for recordings.
Week
Press (yellow) key to switch between the now/next and week
schedule of the selected channel.
Event list
Press (blue) key to display the event list for all recordings and
reservations. 20 Timer events (recordings and reservations) can be
programmed.
Delete Select an event with the p/q keys. Press (red) key to delete.
Delete all Press (green) key to delete all events.
13. RECORDING
13.1 Recording guide
USB memory
To record programs an USB memory 2.0 must be connected formatted in FAT32,
EXT2, EXT3.
To format an USB memory larger than 32GB with your windows PC in FAT32, download
the Fat32Formatter program from the internet to your PC.
To record HD programs the USB memory must have a minimum writing speed of 20
Mbps. It is recommended to record HD channels to a USB hard disk.
NOTE
Ensure that there is enough free memory before recording. The recording will
not start, if there is not enough free memory.
Do not disconnect the USB memory from the receiver during recording or
playback as this could cause damage to the receiver and/or USB memory.
Highly fragmented or used memory may also not operate properly.
Recording to an USB memory formatted in NTFS is not possible.
USB Eject
Press the key to eject all connected USB memories. Always use this option before
disconnecting an USB memory.
This function allows you to safely remove an USB memory connected to your receiver to
prevent loss of data.
21

Channel change
You can watch channels while recording one program of the same frequency. If the
recorded channel is not scrambled (FTA) you can select any other channel to watch. If
the recorded channel is scrambled, you can only select and watch not scrambled
channels.
Press CH UP/DOWN keys to change channels.
Press OK key to display the channels you can change to and select a channel with the
p/q/OK keys.
Stand-by
Press STAND-BY key during a recording to switch the receiver to Stand-by mode after
the recording is finished.
For timer recordings, the receiver will switch to operation mode and start recording at
the specific time. After the recording is finished, the receiver will switch back to Standby mode (after 1 minute).
Timer 20 Timer events (recordings and reservations) can be programmed.
TV/Radio
Record TV and radio programs.
Playback
Enter Recordings (ARIVA media) to playback recordings.
13.2 Instant recording
Recording Press RECORDING key to start the recording.
Recording list
Press EXIT, STOP or INFO keys to display the recording list.
Duration
The duration as set in Multimedia (User menu) is displayed.
Press the t/u keys to change the duration (max. 240 min.) in 10 min.
steps.
Stop Press OK key to stop a recording.
13.3 Timeshift recording
Timeshift enables you to record and playback a program you are watching, while it is
still being broadcasted.
Start
Press PAUSE key to start the Timeshift recording and to pause the
program.
Press PLAY key to start the playback.
Stop
The recording stops, if you change to another channel, or if you press
STOP key.
Playback
Press the REWIND/FORWARD/SLOW MOTION/JUMP keys to
playback the recorded part.
File The Timeshift recording is stored in the TimeShift (tms) file in
Recordings.
13.4 Timer recording
Press EPG key to program a timer.
Select a channel or program and press (green) key.
Mode Select an option (once, daily, weekly, daily (Mon-Fri)).
Date
Enter the date with the 0-9 numeric keys for programs without EPG
schedule.
Begin
Enter the start time with the 0-9 numeric keys for programs without EPG
schedule.
Duration Select the duration (min. 10 min., max. 240 min.) for a recording.
Press MENU key to save the event.
22

14. MENU
14.1 Operating the menu
Menu
Select an option with the p/q, t/u keys.
Enter an option with the OK key.
Values
Change values with the t/u keys.
Insert values with the 0-9 numeric keys.
Enter the edit window.
15. INSTALLATION
15.1 Antenna
Select the Antenna type.
Fixed Select this option for a fixed antenna.
DiSEqC 1.2 Select this option for a DiSEqC 1.2 motor.
USALS
Select this option for an USALS motor. Enter the longitude
(East/West) and latitude (North/South) of your location.
Unicable/SCD
Select this option for a Single Cable Distribution Antenna to deliver
broadcast over a single cable to multiple users.
Select the user Band B1-B8.
Select the Band frequency.
Press MENU key to save.
15.2 Satellite search
Satellite Select a satellite.
Transponder Select a transponder.
LNB Select the LNB frequency.
22Khz Select On or Off.
DiSEqC
Select the DiSEqC (A, B, C, D)/Mini A, B port for the selected
satellite.
DiSEqC 1.1 Select the DiSEqC port (1-16) for the selected satellite.
Satellite position
This option is activated, if you selected Unicable/SCD antenna in
the Antenna menu. Select the position.
P1: User band B1, B2, B3, B4
P2: User band B5, B6, B7, B8
LNB Power Select the LNB power.
Search
Press (blue) key to start the search.
Search options
All/FTA/NIT/FAST SCAN Select an option to start the search.
Transponder Select this option to add, edit or search transponders.
DiSEqC/USALS Select this option to search all installed satellites
(DiSEqC, DiSEqC 1.2 & USALS) at one time.
PID Select this option to edit PIDs.
15.3 Edit satellite
Satellite
Select a satellite. If a satellite is missing, select a user define satellite
(Others) and enter the name.
Edit Press the (red) key to enter a new name or to rename a satellite.
Position Enter the position.
23

15.4 Fastscan
Satellite Select a satellite.
Search Select a fast scan search option.
Channel list
Select to add the searched channels to the channel list (end) or to
replace the searched channels.
Search
Press (blue) key to start the search.
15.5 Transponder search
Satellite Select a satellite.
Frequency Select the frequency or insert a new one.
Symbol rate Insert the symbol rate.
Polarization Select the polarization (horizontal/vertical).
DVB Select the transmission (DVB-S/DVB-S2).
Modulation Select the modulation for DVB-S2 (QPSK/8PSK).
FEC Select the FEC value for DVB-S2. For DVB-S select auto.
Pilot Select the Pilot function for DVB-S2.
Search
Press (blue) key to start the search.
Search options Select an option (FTA/NIT/Transponder) to start the search.
Edit
Press (red) key to edit a transponder.
Save Press MENU key to save the edited/new transponder.
15.6 DiSEqC/USALS-Multi search
Satellite Select the installed satellites (DiSEqC switch, DiSEqC 1.2 motor/USALS
motor) with the p/q/OK keys.
Search
Press (blue) key to search all selected satellites at one time.
15.7 Edit PID
Satellite Select a satellite.
Transponder Select a transponder.
Channel Rename/name the channel.
Video PID Enter the Video PID.
Audio PID Enter the Audio PID.
PCR PID Enter the PCR PID.
Save Press MENU key to save the changes.
15.8 DiSEqC 1.2
Satellite Select a satellite.
Transponder Select a transponder.
Go to position Press OK key to move the motor to the stored position.
Move Press the t/u (West/East) keys to move the motor to the desired
position/limits.
Steps Select the motor steps (1-127).
Move in steps Press the t/u(West/East) keys to move the motor in the selected
steps.
Save position Save the selected satellite position.
Save limits & options
East/West limit Select this option to save the limits.
Delete Select this option to delete the stored limits.
Recalculate Select this option to recalculate the positions of the satellites based
on one satellite position and to re-adjust them.
Go to center Select this option to move the motor to the center.
Save Press MENU key to save the Motor settings and enter the Satellite
search menu to start the search.
Search
Press (blue) key to search all selected satellites at one time.
24

15.9 USB update
Download
Download from www.ferguson-digital.eu the latest system software to
your PC and transfer the file to an USB memory.
USB Connect the USB memory to your receiver.
NOTE It is only possible to update via an USB memory formatted in FAT32.
Start Enter this menu option to start the update.
Reboot
After an update the set will automatically shutdown. Reboot the set after
the shutdown.
15.10 Network update
Update your receiver with the latest system software via the Internet.
Network update Select Network update to start the network update.
Reboot
After an update the set will automatically shutdown. Reboot the
set after the shutdown.
15.11 Factory reset
Reset all channel data to the receiver factory settings. All stored channels, lists and
settings will be deleted.
NOTE: It is recommended to make a factory reset after you updated your set via
network or USB. Before you make a factory reset, export all data to the USB memory
with the export data function (chapter 18.4) and import them again after the factory
reset. In case the data cannot be imported, setup your set again.
16. SETTINGS
16.1 Network connection
During booting your receiver will connect automatically to the network.
Auto To connect automatically by DHCP.
Manual To connect manually with a static IP address.
IP Enter the fixed IP address.
Subnet mask Enter the subnet mask address. In general it is 255.255.255.0.
Gateway Enter the router’s IP address.
DNS Server
Enter the DNS Server’s IP address. In general it is the router’s IP
address. You can enter 2 DNS Server IP addresses.
Press MENU key to connect.
Modem To connect with your telephone line.
Phone number Enter the phone number to dial in.
Press MENU key to connect.
16.2 ARIVA share
Stream movies, MP3s, photos (only supported formats) from your PC Shared
Documents Folder to the receiver in your local network.
Enter ARIVA share (Settings menu) to connect.
Windows Select the PC Windows system (XP/Vista/Windows7).
PC IP address
Enter the IP address of your PC. If required enter a
Username/Password.
PC Folder name
Select the name of the Shared documents folder.
XP: Shared/SharedDocs.
Vista: Public.
Windows 7: Users.
Press MENU key to connect.
In case a connection cannot be established check your PC settings.
Enter the shared documents folder settings and activate the option: share this folder
in the network.
25

Enter the LAN (Local area network) settings and activate the option: File and Printer
Sharing for Microsoft Networks.
Check the shared documents folder names (XP-Shared/SharedDocs, Vista-Public,
Windows 7-Users). If the folder name is different, create a new shared folder with
the required name and activate the options to share the folder in the network.
16.3 Television
Screen format Select the screen format (Auto, Pan & Scan, 4:3/Letterbox).
Menu transparency Select the transparency (50%-100%).
Information bar
Select the automatic display time of the information bar for TV,
movies, recordings. If you select Off, the information bar will
not be displayed.
Dolby Digital Select On to output dolby digital audio via S/PDIF.
16.4 Software version
The receiver software, hardware version and the date of the last update are displayed.
Press OK key to check if a new software update is available.
16.5 Card reader
View information about the inserted subscriber’s card.
17. USER
17.1 Menu & audio language
Menu language Select the menu language.
Audio language Select the standard audio language for programs.
17.2 Time & date
Mode Select an option (auto/manual).
Date Enter the date manually.
Time Enter the time manually.
UTC Select your local zone.
Summer Time Select the option (On/Off).
Sleep time Set the time to turn off your receiver automatically.
Wake up time Set the time to turn on your receiver automatically.
17.3 PIN code
PIN The 4 digit PIN code is initially set to 0000.
Change Enter the New PIN code twice for confirmation and the Current PIN code
to change the PIN code.
NOTE Contact your local dealer, if you forgot your PIN code.
17.4 Menu & channel lock
Menu lock Select On to block the access to the MENU.
Channel lock Select On to lock channels.
17.5 Multimedia
Recording duration Select the preset recording duration (max. 240 min.).
Timeshift duration Select the preset Timeshift recording duration (max 180
min.).
Jump time Select the preset jump time (max 10 min.).
EXT 2 formatting Format the USB memory in EXT2 format.
26

18. CREATE & EDIT
18.1 Edit channel
Delete Press (red) key delete a channel.
Lock/unlock Press (green) key to lock/unlock a channel.
Move
Press (yellow) key to move the position of a channel or multiple
channels at once.
Press (yellow) key to select a channel or multiple channels.
Press p/q keys to select the new position.
Press (red) key to move the channel/channels.
Press OK key to preview a channel.
Rename Press (blue) key to rename a channel.
List Select a channel list with the t/u keys.
Channel
Enter the channel number.
Press OK key to preview a channel.
18.2 Edit user lists
Edit the 10 user lists.
List Move between columns with the t/u keys and select an option or channel
with the p/q/OK keys.
Rename
Select a list and press (yellow) key to rename the user list.
Edit
Select a list and press (red) key to edit.
Select a list option (1st column) to display (2nd column).
Select a channels and press OK key to copy the channel to the user list
(3rd column).
Enter the list and press OK key to delete a channel from the user list.
Press (red) key to watch a channel.
18.3 Delete satellite & transponder
Select a satellite or transponder to delete.
18.4 Export/Import data
Save your settings to an USB memory and export/import them i.e. after a factory reset.
Stored settings: All SAT/TP data and antenna settings (LNB, DiSEqC, Motor, etc.), all
channel lists (Satellite/User lists), all settings from the Settings and User menu.
Export data:
Select this option to export the data with the option to rename the file.
Import data:
Select this option to import the data.
27

18.5 Ariva-i
Ariva–i is an interface to connect your receiver via
network with your PC.
• Edit satellite & user lists from your PC.
• Browse the directories of the connected USB
memories to copy & delete files.
• Stream live channels from your receiver to your
PC (coming soon).
•
Enter the ariva–i menu to operate the ariva–i
program from your PC. Download the ariva–i program
from http://www.ferguson-digital.eu/ to your PC and
unzip the file.
Channel editor
Connect Open File - Connect to STB. Enter the IP address of the receiver.
Import data Import the data directly from your receiver via the ariva–i menu.
Export the data to a USB memory and import/copy the file to your PC
(open File - Import data).
Select channels Press CTRL key to select a channel/channels in a list.
Edit sat lists Right-click the mouse over a Satellite, transponder, channel to edit.
Edit user lists Copy: To copy channels to a User list select the channels and click on the
<< icon.
Delete: To delete channels click on the X icon.
Move channel
position
Select a channel in a list and press CTRL key and use the UP/DOWN
keyboard keys to move the channel position.
Channel number
display
Open Edit - Channel number display to change the displayed number of
channels in a list and enter the channel numbers (min. 10, max. 30
channels).
Export data Open File - Update STB to export the data from the PC to your receiver
via the ariva–i menu.
Open File - Export data to export the file to a USB memory and
import/copy the file to your receiver.
USB file browser
Connect Open Edit - File Brower. Enter the IP address of the receiver.
PC Browse the directories of your PC.
Disk Browse the directories of the USB memories connected to your receiver.
>> / << Copy files between your PC and USB memory.
Delete Select a file and right click with the mouse to delete.
28

19. ARIVA MEDIA
19.1 Operating the menu
Select a menu option with the t/u keys.
Select an option file/folder with the p/q/OK keys.
Press (blue) key to change between ARIVA share and connected USB memory.
Browse the directory of the USB memory (Storage 1).
Browse the directory of the shard documents folder of the connected PC.
Enter ARIVA share (Settings menu) to connect to your PC.
NOTE
To enter ARIVA media an USB memory must be connected or the receiver
must be connected via the network with the PC.
19.2 Media guide
Status
Displays the memory status (USB/PC).
Preset folders
ariva_records Recordings are saved in this folder.
download Downloaded files are saved in this folder.
youtube YouTube videos & thumbnails are saved in this folder.
youporn YouPorn videos & thumbnails are saved in this folder.
thumbnail Thumbnails from the photo menu are saved in this folder.
jamendo Jamendo Top 100 MP3s & thumbnails are saved in this folder.
NOTE
For USB memory devices formatted in NTFS your receiver can only
playback files (movies, MP3s, pictures).
A file cannot start playback, if the file name has more than 55 letters
or too many punctuation. In this case, shorten the file name.
Delete from time to time files which you are not using anymore in the
preset folders, i.e. YouTube, YouPorn, Jamendo, thumbnail images.
19.3 Recordings & movies
Recording format Trp.
Movie formats
MPEG-4 recordings (.trp), DivX/Xvid (.avi, .divx), FLV (.flv), PAL
(50Hz) VOB (.vob), PAL (50Hz) MPEG-2 (.mpg, .m2v, .ts, .trp).
Playback
Preview Select a movie or recording and press OK key.
Full screen Select a movie or recording and press OK key twice or PLAY key.
Press STOP key to stop.
Details Press INFO key to display the title, present & total playtime.
Edit movies/recordings & folders
Sort Press (green) key to sort (A-Z/Z-A, Date).
Delete Press (red) key to delete.
Lock Press (yellow) key to lock/unlock a folder or a recording.
Edit Press INFO key to enter the file browser.
NOTE
For YouTube videos and some video files rewind/forward,
Jump, slow motion does not work.
Playback of TRP recordings
To play SD or HD TRP (.trp) files recorded by other devices, select the matching codecs.
Video Codec Select between SD and HD Recordings.
Audio Codec Select between MPEG, AC3 and DDPLUS (Dolby Digital Plus).
NOTE Your set will reboot, if you selected the wrong video codec.
29

19.4 Music
Format MP3.
Playback Select a song and press OK key. Press STOP key to stop.
Playlist
Press PLAY key to playback the songs of a folders.
Press JUMP keys to select the previous/next song.
Press STOP key to stop.
Soundtrack Enter Photo Menu, Flickr, Picasa with MP3 songs as soundtrack.
Edit MP3 & folders
Sort Press (green) key to sort (A-Z/Z-A, Date).
Delete Press (red) key to delete.
Edit Press INFO key to enter the file browser.
19.5 Photos
Format JPG.
Full screen
List
Select a photo and press OK key to preview the photo. Press OK key
again to view the photo in full screen.
Thumbnails Select a photo and press OK key to view the photo in full screen.
Select the next/previous photo with the t/u keys.
Thumbnails/
list
Press (yellow) key to change between thumbnails and list
mode.
Slideshow Press PLAY key to start the slideshow of a folder. Press STOP/EXIT
keys to stop.
Edit Photos & folders
Sort Press (green) key to sort (A-Z/Z-A, Date).
Delete Press (red) key to delete.
Edit Press INFO key to enter the file browser.
19.6 File Browser
Edit files (recordings, movies, MP3s, Photos).
New folder
Press (yellow) key to create a new folder in the selected directory.
Delete
Press (blue) key to delete.
Copy
Press key to copy a file.
Move Press INFO key to move a file from one folder to another.
Rename Press EPG key to rename a file.
Sort Press USER key to sort (A-Z/Z-A, Date)
NOTE Unlock a locked recording or movie to copy/move it. Add new folders for
recordings or move/copy recordings only in the ariva_records directory.
19.7 Shoutcast
Shoutcast Stream more than 25.000 Internet radio stations.
Streaming Select a station and press OK key. Press STOP key to stop.
List
Press (red) key to display the genre. Select a genre and press OK
key.
Search
Press (yellow) key to search for a radio station.
Sort
Press (green) key to sort (A-Z/Z-A).
Userlist
Press INFO key to display the user list. You can save up to 4000
favorite radio stations in the user list.
Add/delete
Press (blue) key to add or delete a favorite station from the user
list.
Soundtrack Enter Photo Menu, Flickr, Picasa with Shoutcast as soundtrack.
30

19.8 Jamendo
Jamendo Stream more than 1.700 Jamendo Internet radio stations.
Streaming Select a station and press OK key. Press STOP key to stop.
Sort
Press (red) key to sort (A-Z/Z-A).
Soundtrack
Enter Photo Menu, Flickr, Picasa with Jamendo stations as
soundtrack.
Play & download MP3s from the Jamendo Top 100 chart.
Jamendo Press (yellow) key to enter the Jamendo Top 100 MP3 chart.
MP3 Select a Song and press OK key to start the download.
After the song is downloaded it will start to play.
Press STOP key to stop.
19.9 Flickr & Google Picassa
Photos View photos from Flickr & Google Picasa.
Search Press (red) key.
Enter the search term.
Press (yellow) key to save and to start the search.
List Select a photo with the p/q keys.
Press OK key for full screen mode and press EXIT key to abort.
Scroll pages with the PAGE p/q keys.
Picasa
Select the next and previous photo of an album in full screen mode with the
t/u keys.
19.10 Musicbox
Play & download MP3s from the Jamendo Top 100 chart.
Jamendo
Press (yellow) key to enter the Jamendo Top 100 MP3 chart.
MP3 Select a Song and press OK key to start the download.
After the song is downloaded it will start to play.
Press STOP key to stop.
31

20. ARIVA WEB
20.1 Operating the menu
Select an option with the t/u, p/q / OK keys.
Scroll pages with the p/q and PAGE p/q keys.
To enter ARIVA web your receiver must be connected with the internet.
20.2 Ferguson news
Information about latest updates and other news are displayed.
20.3 RSS
Integrated RSS news feeds in multiple languages are displayed.
20.4 Twitter
Twitter Display and send Twitter tweets.
Search Press OK key to display the search window.
Enter the search term.
Press (yellow) key to start the search.
Write Press (blue) key to write a tweet.
Press (red) key to enter your username.
Press (green) key to enter your password.
Press (yellow) key to write a message of 140 characters or fewer.
Press OK key to send the message.
NOTE You need a twitter account to send messages. To set up an account enter
www.twitter.com.
20.5 Weather
Weather forecasts for regions, countries (7 days) and cities (4 days) are displayed.
20.6 Advertising
Advertising, if available, is displayed.
20.7 World Time
The current time for cities in different time zones is displayed.
32

21. ARIVA TV
21.1 Operating the menu
Select an option with the t/u keys and OK key to enter.
Select an option, file/folder with the p/q/OK keys.
Enter a value with the the 0-9 numeric keys.
NOTE To enter ARIVA TV an USB memory must be connected.
21.2 YouTube & XXX (YouPorn)
Playback YouTube & YouPorn videos.
List
Press (green) key to display the categories and time periods.
Select the time period.
Scroll pages with the PAGE p/q keys.
Search
Press (red) key.
Enter the search term.
Press (yellow) key to save and to start the search.
Playback
Preview Select a video and press OK key.
Full screen Press PLAY key or OK key twice.
Press STOP key to stop.
Details Press INFO key to display the title, present & total playtime.
NOTE No audio is available for YouTube Videos, if your TV does not support an
audio sample rate of 22Khz via HDMI. In this case, connect the set via
Components video and audio L/R to output video and audio.
21.3 Ariva net
ARIVA net
Share movies, MP3s, photos (only supported formats) with your family
and friends in your network or via the internet between your receiver and
PC/FTP servers.
moviebox Play & download movies from the internet, if available.
NOTE
A download of a file with ARIVA net cannot start, if the file name has
more than 55 letters or too many punctuations. In this case, shorten the
filename.
FTP
Press OK key to enter the IP address of the FTP server and if required
the Username/Password.
Press MENU key to connect.
Directory Browse the directory with the p/q/OK keys.
Download Press OK key.
PC To have access to a PC install a FTP server program on the PC.
21.4 Download guide
Download Select a file and press OK key.
Stop Press OK key again to stop.
Continue
Press OK key again to continue the download from the already
downloaded part.
Status 100% is displayed when the download is complete.
Delete Press (red) key to delete.
Playback Press PLAY key to start playback during download. Press STOP key to
stop.
Pause Press PAUSE key to pause.
Details Press INFO key to display the title, present & total playtime.
Screen Press RESO key to change the screen format of a movie.
33

NOTE
Play & download of a movie depends on your internet connection. Start
playback after you downloaded more than 20%. If you have a slow
connection, start playback after you downloaded more than 50%.
21.5 Moviebox
Movies Press OK key to display the available movies for download.
21.6 ARIVA net
FTP
Press OK key to enter the IP address of the FTP server and if required
the Username/Password.
Press MENU key to connect.
Directory Browse the directory with the p/q/OK keys.
Download Press OK key.
PC To have access to a PC install a FTP server program on the PC.
21.7 VLC Media Player
Stream video/audio from a PC in your network or via the internet with VLC Media player
(http://www.videolan.org).
Stream movies, i.e. movie formats which are not supported by your receiver or which
cannot be played back.
Stream Webcams & TV cards, Internet TV & PSP.
Operating the menu
IP Enter the IP address of the PC to connect.
Playlist
Select a movie/stream and press OK key to start streaming.
Activate the VLC Web interface to display the playlist.
Streaming
Press PAUSE key to pause and PLAY key to resume streaming.
Press STOP key to stop.
Screen Press RESO key to change the screen format.
Playlist
Activate the VLC Web interface to display the playlist with your receiver.
View → Add interface → Web Interface
Open media
VLC
Activate VLC Media player on your PC.
Open the streaming option: Media → Streaming
Streaming
Disc
Select the Disc type and options (title, chapter, etc.).
To select a title and chapter, play the DVD with VLC and enter
Playback option to view the title and chapter no..
File Select a movie file.
Capture Device Select the capture device & options.
Network Select the network protocol of the TV internet stream.
Select Stream after the selection is made.
34

Stream output
Source
The selected source is displayed.
Select next.
Destinations
Destinations
Select UDP from the list.
Select Add and enter the IP address of your receiver (open the port
1234 of your firewall).
Display locally Select this option, if you stream in a local network.
Transcoding options
Activate Select Activate Transcoding.
Profile
Select Video – MPEG-2 + MPGA (TS) from the list.
Click on the settings icon to display the Form window.
Form
Encapsulation Select MPEG TS.
Video codec
Select MPEG-2 as Codec.
A bitrate of 2048 Kb/s is recommended.
Select a Frame Rate of 25 fps.
Audio codec Select the audio codec and bitrate.
Select Save.
Options - Generated stream output string
Insert the Video and Audio PID {pid-video=100,pid-audio=101} after mux=ts
Select Stream to complete the setting. Add DVDs and IPTV streams the same way. You
can select and add only one file, DVD or IPTV stream to the playlist. It is not possible to
add multiple files to the playlist.
Streaming Internet TV
Stream Internet TV with VLC Media Player from your PC to your receiver.
P2P Programs
P2P
To stream channels from TVants, Sopcast, TVU install these P2P programs to
your PC.
VLC
The P2P program must be running the complete time on your PC to stream
with VLC to your receiver.
Tips
Enter www.myp2p.eu to find download links for the P2P programs, tips & tricks
and streaming schedules (i.e. sport events).
P2P Settings for VLC Player
P2P
Activate the P2P program.
Select a channel.
VLC After that activate VLC Player and open the Streaming option and enter
Network.
VLC settings
Protocol
Enter the Protocol for the URL location.
For Sopcast, TV Ants and TVU it is HTTP.
Address
TVants
Right click over the streaming channel of TVants and select properties.
Enter the asf location of the stream i.e. http://localhost:16900/1.asf
TVU Enter http://localhost:8901
Sopcast
Enter http://localhost:8902/tv.asf. The end port can change to 8912 or
8922.
Others Enter the URL location.
Continue to set the stream output chapter and activate the VLC Web interface to
stream channels to your receiver.
35

ATTACHMENT A - GLOSSARY OF TERMS
CA - Conditional Access – a coding system
used in order to protect transmitted data
against unauthorised access. Access to
protected channels is available only to
subscribers.
CAM - Conditional Access Module – an
electronic device, usually fitted with card
slots, that allows access to coded pay-perview channels on a receiver equipped with a
CI socket.
CI - Common Interface – CI sockets of
digital receivers are used for the installation of
CAM conditional access modules, and thus
allow you to view coded pay-per-view
channels through these modules.
DVB-S the Digital Video Broadcasting
standard that defines modulation and error
correction in satellite transmissions. In DVB-S,
both the MCPC and SCPC modes can be used
by the operator to transmit channels. MPEG-2
is used as the transport stream.
EPG - Electronic Programme Guide – a
service that displays detailed information
about current and future programmes on the
television screen.
FTA - Free-to-air – uuencoded radio and
television channels that may be received on
any television set.
LNB - low-noise block converter – a
converter - it converts satellite signals, and
then sends them to the tuner through a
coaxial cable. The basic parameters are: gain,
noise factor and power consumption.
MCPC - multiple channels per carrier –
more than one signal (channel) is transmitted
on a given frequency (transponder). All of
these channels comprise a single data stream,
which is transmitted on one frequency
following modulation.
Monoblock – a device that comprises two
converters and a DiSEqC switch in a single
housing, which receives signals from two
satellites on similar orbits.
Pay-TV – Pay-per-view digital television, to
which only subscribers have access. The
service is provided by satellite, cable, over the
ground or through the network.
SCPC - Single channel per carrier – only one
signal (channel) is transmitted over a given
frequency (transponder).
STB - Set-top box – an electronic device
connected to the television set, which
processes the signal received from the
ground-based, cable or network satellite
antenna. It enables the playback of video and
sound.
TP - Transponder – a type of wireless
communication device (transmitter), which
automatically receives, modulates,
strengthens and responds to a signal coming
in real time over a specific frequency. The
term is derived from the words "transmitter"
and "responder". Usually, each transponder
transmits numerous compressed digital
channels.
DiSEqC - (Digital Satellite Equipment
Control) a communication protocol, used
between a satellite receiver and equipment
such as switches or positioners, which
supports switching between television signal
sources and antenna control.
USALS – (Universal Satellites Automatic
Location System) – a communication
protocol used between satellite receivers and
positioners, which makes it possible to control
the positioner through the receiver. Used in
connection with the DiSEqC 1.2 protocol.

SPECIFICATION
Transport stream A/V Decoding
Aspect Ratio 16:9, 4:3, Letterbox
Video Resolution 576i, 576p, 720p, 1080i
Profile Level MPEG-2 MP@ML, MP@HL, MPEG-4 H.264/AVC HP@L4
Frame Rate 50Hz PAL
Audio Decoding MPEG-1 Layer 1, 2, MP3 & Dolby AC3/AC3+
Teletext VBI support
Tuner
Demodulation QPSK, 8PSK
Frequency 950-2150 MHz
Symbol Rate DVB-S QPSK: 2- 45Ms/s, DVB-S2 8PSK/QPSK: 10-30Ms/s
DiSEqC Control 1.0, 1.2, USALS
Conditional Access Interface
Smart Card 1 Slot
Power Supply
Input Voltage 90-250V AC, 50/60Hz
Power Consumption Max. 25W
Stand-by Mode Max. 1W
Type Switching Mode Power Supply
Physical Specification
Dimension (w x h x d) 260 x 45 x 210 (mm)
Weight ~ 1.5 kg
Operating Temperature 0°C ~ 45°C
Storage Temperature -10°C ~ 60°C
Display & Control
4 Digit Blue LED Display
IR Remote Control
Operating System
Linux Kernel 2.6
A/V & Data In/Out
USB 2.0 USB Host Connector
HDMI Digital Video/Audio Output
Component Y/Pb/Pr Video Output (RCA)
S/PDIF Coaxial Output (RCA)
Ethernet RJ-45 10/100 Base-T
Audio Audio L/R Output (RCA)
PSTN Modem RJ-11 (Analog)
Supported Formats
Photo JPEG
Video AVI, VOB, FLV, MPEG2 TS/TRP, MPEG 1/2
Subtitle SMI, SRT, SUB
GNU & Trademarks
This receiver contains source codes licensed and distributed under the open source license, the GNU General Public
License. Dolby and the double-D symbol are trademarks of Dolby Laboratories.
37
 Loading...