

Page 1

XFLY.STREAMER – Version 1.01 – User Manual
EVS Broadcast Equipment – Jan 2013
Issue 1.2
I
Page 2

Issue 1.2
XFLY.STREAMER – Version 1.01 – User Manual
EVS Broadcast Equipment – Jan 2013
II
Copyright
EVS Broadcast Equipment – Copyright ©2005-2013. All rights reserved.
Disclaimer
The information in this manual is furnished for informational use only and subject to
change without notice. While every effort has been made to ensure that the information
contained in this user manual is accurate, up-to-date and reliable, EVS cannot be held
responsible for inaccuracies or errors that may appear in this publication.
Improvement Requests
Your comments will help us improve the quality of the user documentation. Do not
hesitate to send improvement requests, or report any error or inaccuracy on this user
manual by sending an E-mail to doc@evs.tv.
Regional Contacts
The address and phone number of the EVS headquarters are usually mentioned in the
Help>About menu in the user interface.
You will find the fill list of addresses and phone numbers of local offices either at the end
of this user manual (for manuals on hardware products) or on the EVS website on the
following page: http://www.evs.tv/contacts
User Manuals on EVS website
The latest version of the user manual, if any and other user manual on EVS products can
be found on the EVS download center, on the following webpage:
http://www.evs.tv/downloadcenter
Page 3

XFLY.STREAMER – Version 1.01 – User Manual
EVS Broadcast Equipment – Jan 2013
Issue 1.2
III
Table of Contents
TABLE OF CONTENTS .................................................................................................... III
WHAT’S NEW? ............................................................................................................ IV
1. OVERVIEW ................................ ............................................................................ 5
1.1 Hardware & Software Requirements ................................................................ ........... 6
1.1.1 Minimal Requirement .............................................................................................................. 6
1.1.2 Network Architecture Description ........................................................................................... 6
2. INSTALLATION ....................................................................................................... 7
3. CONFIGURATION AND REMOTE SYSTEMS .............................................................. 14
3.1 Remote Systems ....................................................................................................... 15
4. LICENSE CODE .................................................................................................... 16
5. USER INTERFACE ................................................................................................ 17
5.1 Storage & Processing Device Selection .................................................................... 18
5.2 Server List ................................................................................................................. 19
5.3 Channels Area .......................................................................................................... 20
5.4 Status & Commands Area ......................................................................................... 21
5.4.1 Start with Timecode Defined in the Past ..............................................................................22
5.5 Settings ..................................................................................................................... 23
5.5.1 Wrappers' Selection ..............................................................................................................23
5.5.2 Destination Selection ............................................................................................................25
5.5.3 Auto Filename Definition ......................................................................................................26
5.5.4 Maximum Duration Setting ...................................................................................................26
5.6 The About Window .................................................................................................... 27
6. HOW TO RECORD STREAMS ................................................................................. 28
7. HOW TO RETRY THE STREAMING JOBS ONE BY ONE .............................................. 31
8. HOW TO MODIFY THE BACKUP FILENAME FORMAT STRING ..................................... 32
Page 4

Issue 1.2
XFLY.STREAMER – Version 1.01 – User Manual
EVS Broadcast Equipment – Jan 2013
IV
Section
Description
5.2
CamLabel information is available in the Channel area
CAM Label will refresh every two minutes to get the latest
information on the server.
5.4.1
Start recording with Timecode defined in the past
5.5.1
Wrappers’ selection / Avid MediaFiles folders
7
Retry of streaming jobs one by one
What’s New?
The following table describes the sections updated to reflect the new and modified
features on 1.01 (compared to 1.0).
In the user manual, the icon has been added on left margin to highlight information
on new and updated features.
Click the section number (or the description) in the table to jump directly to the
corresponding section.
Page 5

XFLY.STREAMER – Version 1.1 – User Manual
Network Broadcast Equipment – Nov 2012
Issue 1.1D
1. Overview
XFly Streamer is an interface software dedicated to the backup of streams from one or
several EVS video servers (XT [2], XT [2] +, XT [3], XS, XTnano). XFly Streamer
manages the backup and transfer of all streams selected by the operator.
This manual describes the configuration interface, which is easy to use and
straightforward.
XFly Streamer acts as a user interface for the background running XTAccess file transfer
application. XFly Streamer sends its commands to XTAccess using the XML jobs files.
Please refer to the XTAccess documentation for detailed instructions about this
application.
Page 6
Issue 1.2
XFLY.STREAMER – Version 1.01 – User Manual
EVS Broadcast Equipment – Jan 2013
6
100BT PC LAN (MTPC Network)
1.1 Hardware & Software Requirements
1.1.1 Minimal Requirement
The guidelines for the minimum software and hardware requirement are:
OS: Windows 7 Pro
Software: Framework .NET 4.0
Motherboard I5 660 - 3.3 GHz dual core
DRAM 4GB (1GB shared with graphic card)
Graphic: Chipset Intel G965 Express or equivalent dedicated graphic card
(Nvidia/AMD)
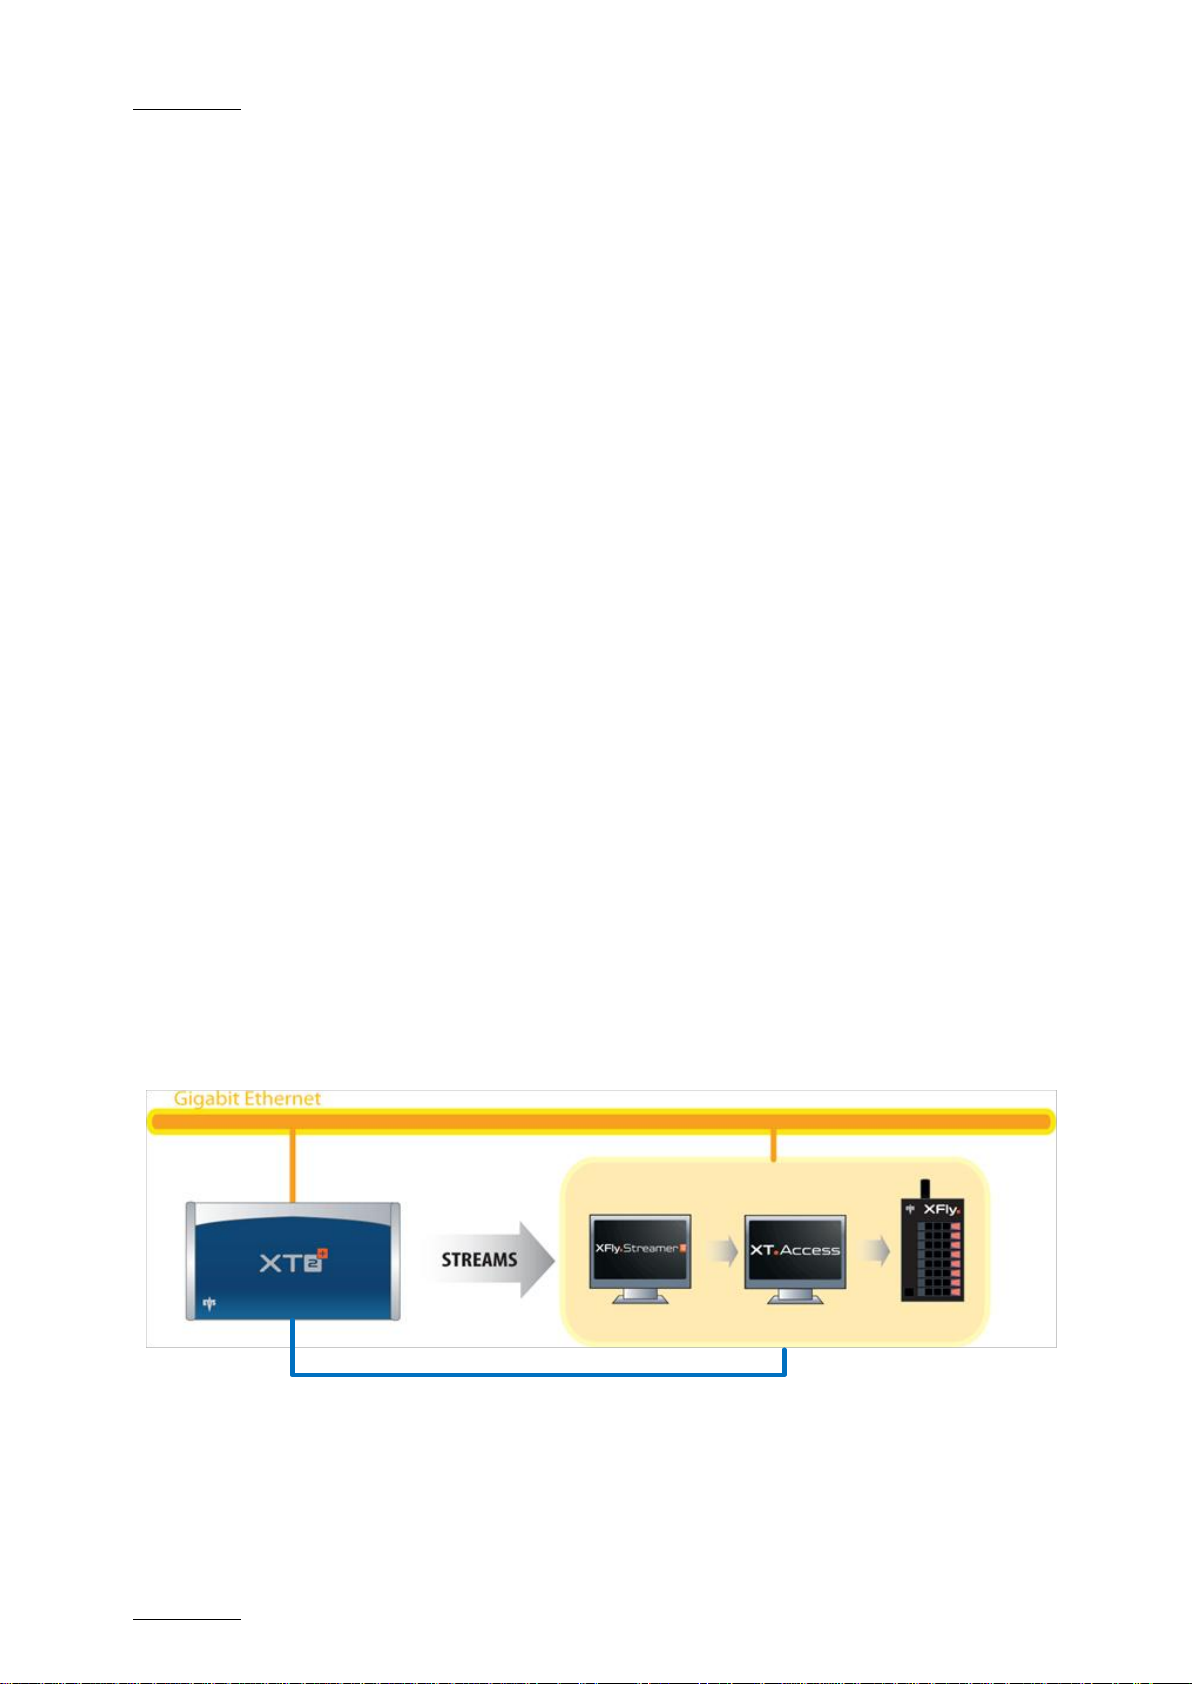
1.1.2 Network Architecture Description
XFly Streamer can be installed on the same computer as an XTAccess application. The
streams to be archived are located on one or several servers and storage units
connected to the same network. Two networks are used for the various communication
and the transfer of files as illustrated. Physically, these networks can be one and the
same or separate for the sake of performance:
The MTPC network is used to detect XT [3], XT [2], and XT [2] +, XS and
XTnano servers, to identify them, and to transfer the list of REC channels to be
backed up.
The HCTX network is used to transfer the streams data between the XFly
Streamer and XTAccess computer, the XT [3], XT [2], XT [2] +, XS and XTnano
servers and the storage unit.
Page 7
XFLY.STREAMER – Version 1.01 – User Manual
EVS Broadcast Equipment – Jan 2013
Issue 1.2
7
Important:
XTAccess is restricted to file transfer with wrapping when required but cannot
perform any format transcoding.
2. Installation
The XFly Streamer user interface application is, preferably, installed on the same
computer as the XTAccess file transfer application. The XTAccess application is
dedicated to XFly Streamer and we recommend not to be used by any other application.
XFly Streamer is able to communicate only with one single XTAccess application at a
time, but it manages the backup of streams from multiple XTnano, XT [3], XT [2], XT [2],
and/or XS servers.
As only one XTAccess application is used, only one XML Unit is defined by default for the
communication between the XFly Streamer and XTAccess applications. XFly Streamer
creates xml files corresponding to the backup of streams and grabs jobs requested by the
operator and drops these files in the XML Unit folder. XTAccess regularly pools this folder
and executes any available job described as an xml file.
To install XFly Streamer, proceed as follows:
1. Run XFly Streamer installer and then follow the steps of the Setup wizard.
Page 8
Issue 1.2
XFLY.STREAMER – Version 1.01 – User Manual
EVS Broadcast Equipment – Jan 2013
8
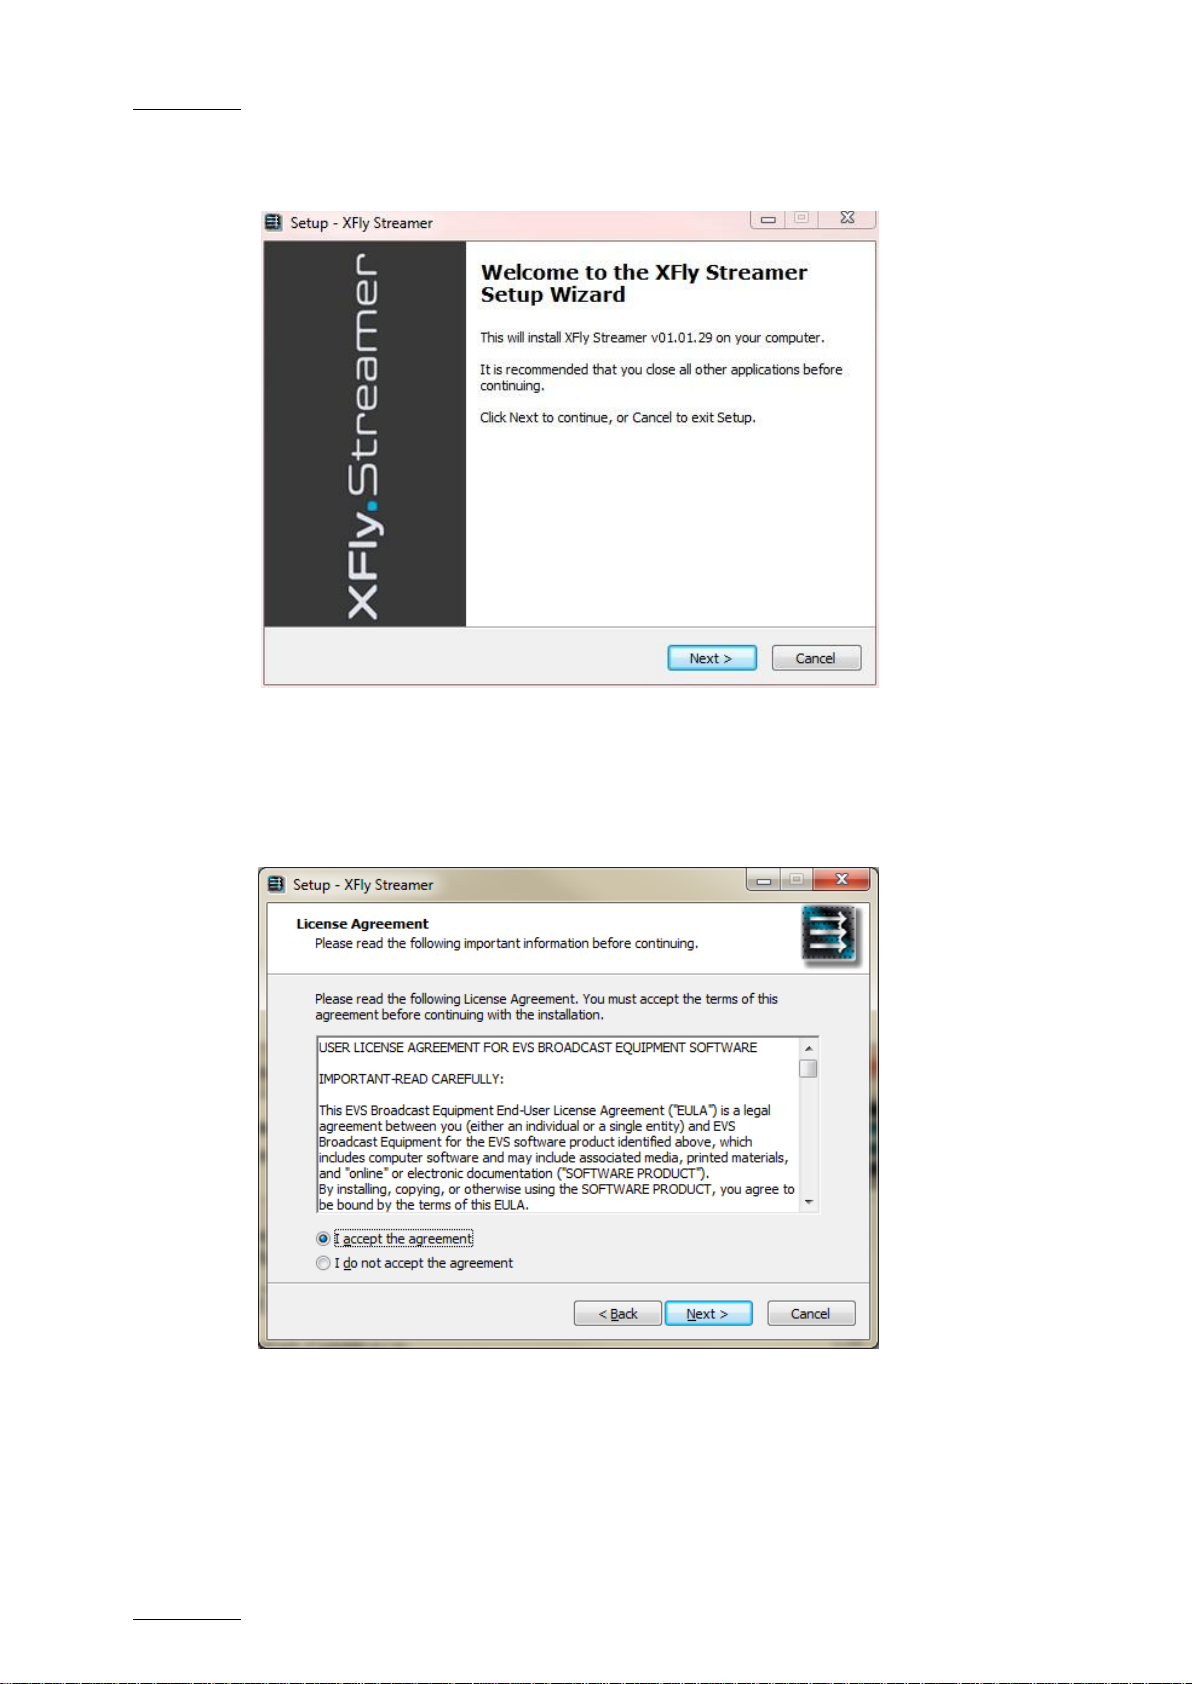
2. Click Next to continue.
3. Select I accept the agreement and then click Next.
Page 9
XFLY.STREAMER – Version 1.01 – User Manual
EVS Broadcast Equipment – Jan 2013
Issue 1.2
9
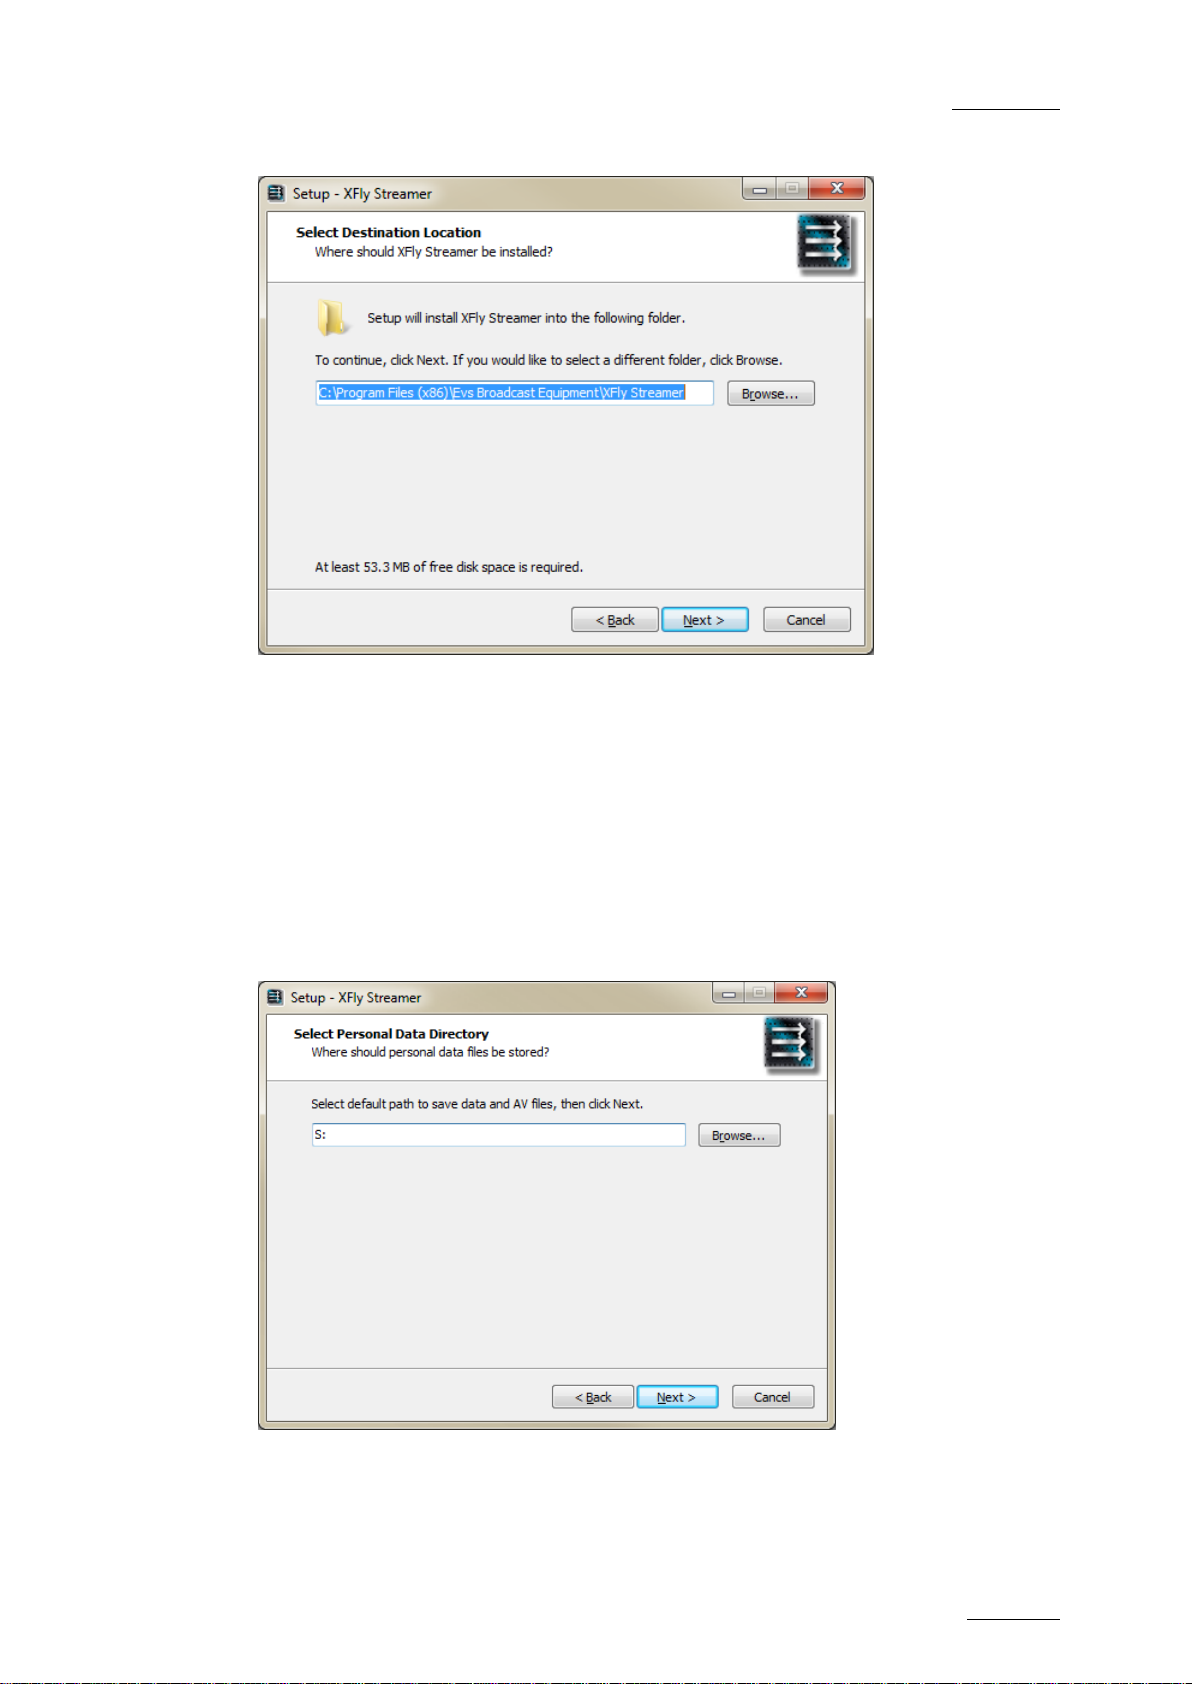
4. Select the destination and then click Next.
5. Select the destination to save the AV files and data, and then click Next.
Page 10
Issue 1.2
XFLY.STREAMER – Version 1.01 – User Manual
EVS Broadcast Equipment – Jan 2013
10
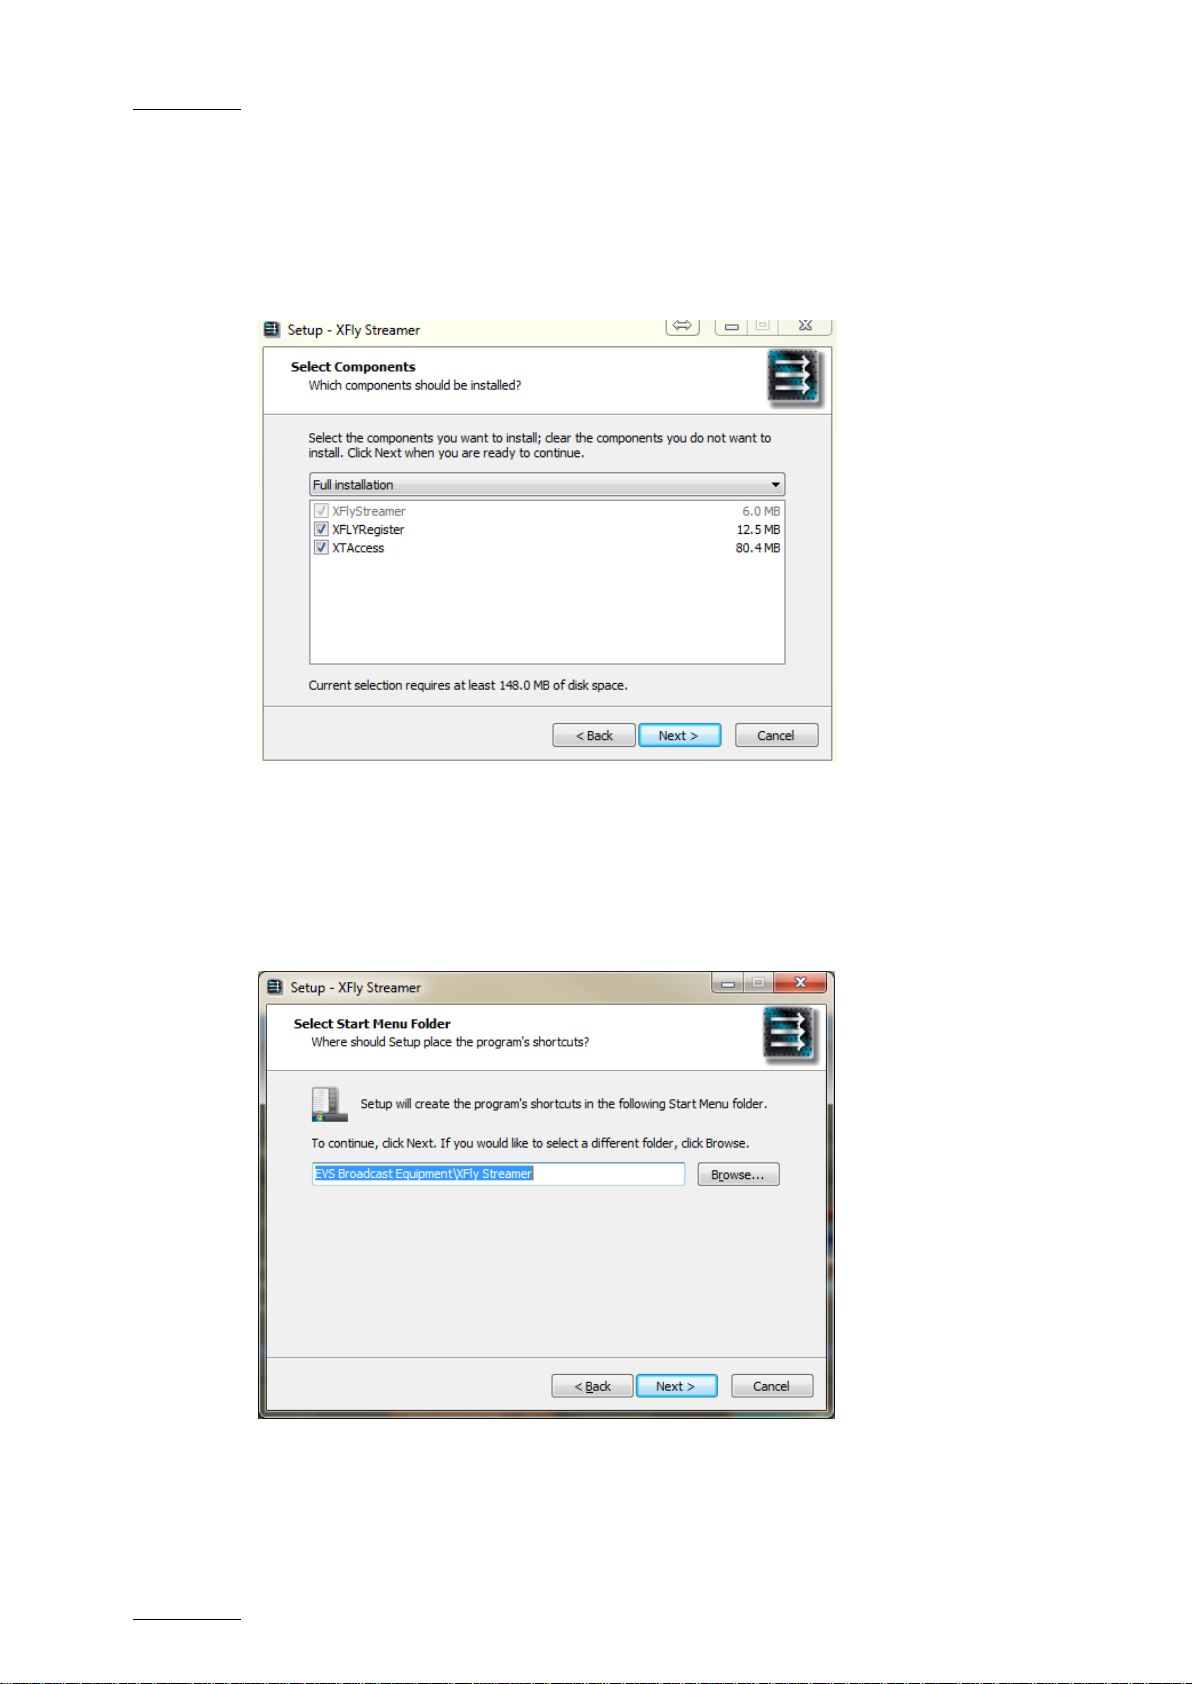
6. Select the components to install, and then click Next.
The XFly Streamer setup launches:
the XFly Streamer and components installation
the XFLYRegister (detection of XFly box via Bonjour protocol)
and the XTAccess installation even if already installed
7. Select the Start Menu folder in which the Application shortcuts are saved, and then
click Next.
\
Page 11

XFLY.STREAMER – Version 1.01 – User Manual
EVS Broadcast Equipment – Jan 2013
Issue 1.2
11
8. Validate the Desktop icon creation and then click Next.
9. All components and related tasks/options are ready to be installed. Click Install to
start the installation.
Page 12

Issue 1.2
XFLY.STREAMER – Version 1.01 – User Manual
EVS Broadcast Equipment – Jan 2013
12
10. All files are extracted and then installed in Silent mode.
The installation process continues with the BONJOUR services installation, with the
.NET Framework 4, the XFLY registration to Bonjour protocol, and then with
XTAccess installation.
The different XTAccess components if required for the XFly Streamer use are
installed:
Install VCRedist: If you install XTAccess for the first time on this workstation,
you need to install Microsoft Visual C++ Redistributable application by selecting
“Install VCRedist”.
Install XSecure Manager: This option will install the EVS License software (EVS
Licenses XSecure codes are necessary for the transcoding jobs and rendering of
playlists).
Install XTAccess Encoders: This option is required to operate XFly Streamer.
Install XTGateway: This option is not required to operate XFly Streamer but it is
installed with the full installation package.
XTAccess Inscription to the EVS SNMP and Install EVS SNMP Agent: These
options validate the inscription to the EVS SNMP Agent.
Page 13
XFLY.STREAMER – Version 1.01 – User Manual
EVS Broadcast Equipment – Jan 2013
Issue 1.2
13
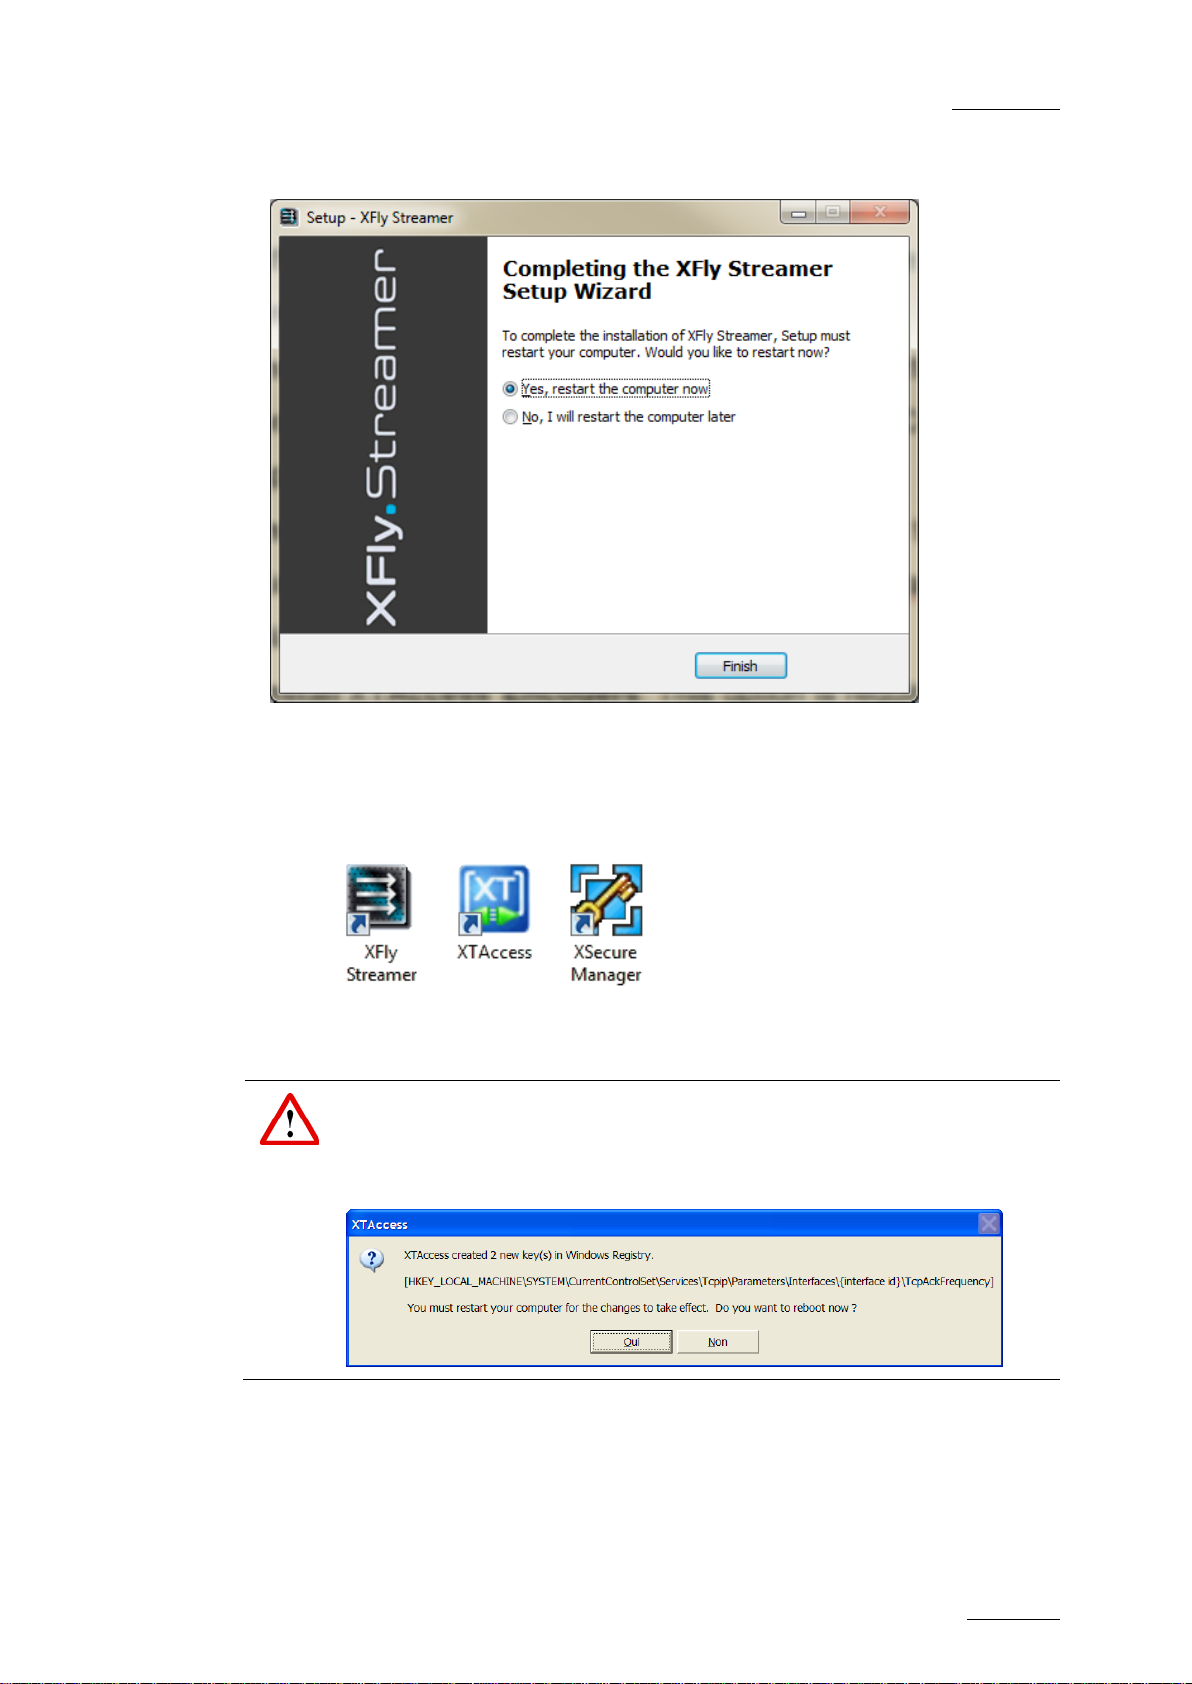
Important
At first start of XTAccess, the application modifies or adds the
TcpAckFrequency in the registry. This key allows having better performances
for backup. XTAccess needs to be re-started a second time.
11. The XFly Streamer software installation is successfully completed. Click Finish to
restart the computer.
Thanks to the installation 3 new shortcuts are added to your desktop:
XTAccess is automatically launched at start-up and minimized in the task bar.
Page 14

Issue 1.2
XFLY.STREAMER – Version 1.01 – User Manual
EVS Broadcast Equipment – Jan 2013
14
3. Configuration and Remote
Systems
The installer sets up automatically all software and components therefore no additional
setting is required prior to operate the XFly Streamer.
The following REG keys of the local XTACCESS have been modified during the
installation process:
Global parameters:
[HKEY_CURRENT_USER\Software\EVS Broadcast Equipment\XTAccess]
“Max Running jobs”= dword:00000012 means up to 12 simultaneous recordings
“Max XML jobs”= dword:00000012 means up to 12 simultaneous jobs
For streaming and grab (thumbnails): a XML default folder is created
[HKEY_CURRENT_USER\Software\EVS Broadcast Equipment\XTAccess\Scan00]
"XML Root Path"="C:\\XFLY_Streamer_XML\\"
"Scan Autostart"=dword:00000001
The following folders are automatically created and shared with full priorities options:
\\grab and \ima folders to collect the images needed to display the thumbnails. These
folders are in Hidden mode.
\\xfly_streamer\AV_files folder to collect the Audio/Video files
The local XTAccess software and its XFLY_Streamer_XML unit are automatically
launched and started at start-up. Therefore the XFly Streamer is ready to operate.
Page 15
XFLY.STREAMER – Version 1.01 – User Manual
EVS Broadcast Equipment – Jan 2013
Issue 1.2
15
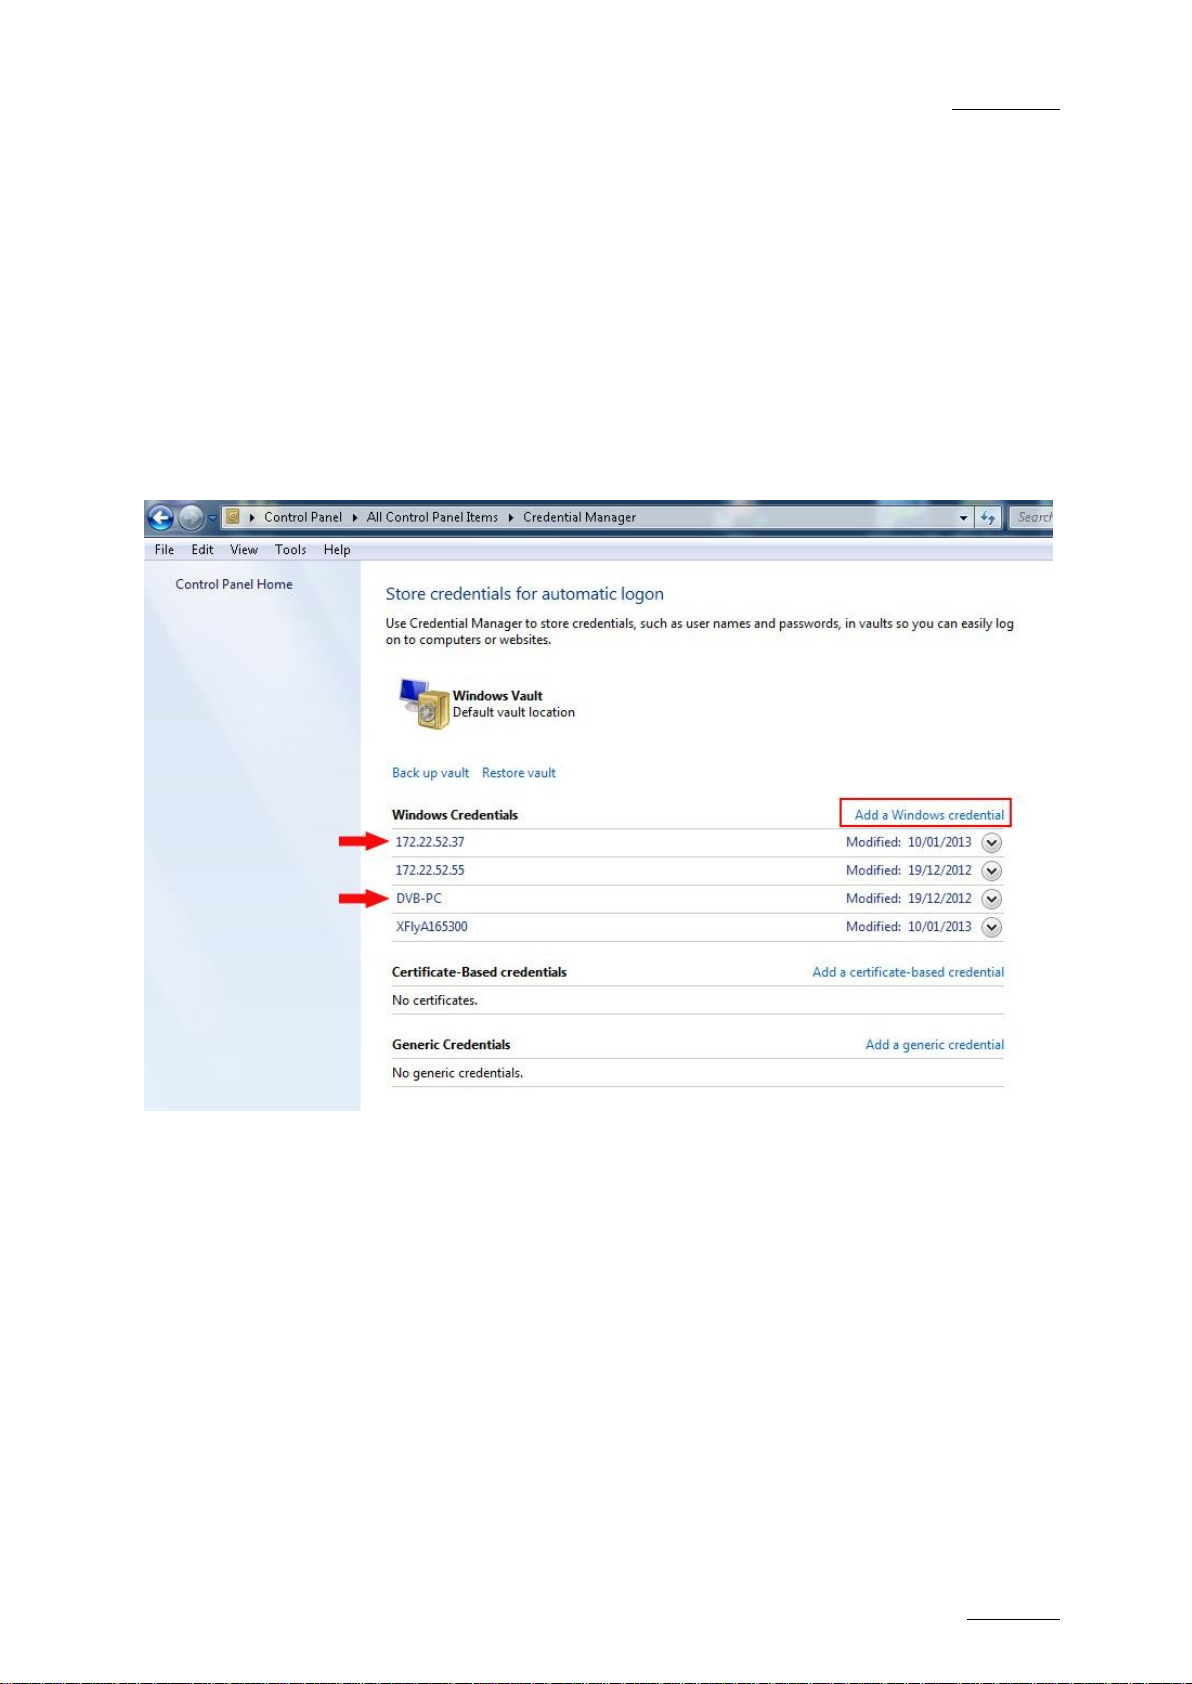
3.1 Remote Systems
In order to work properly with XTAccess installed on non-local system, you have to set
the REG keys and to create and shared the folders as described in previous paragraph.
In order to log on to remote computers, you have to define the Windows credentials.
Select Control Panel > UserAccounts and Family Safety > User Accounts > Manage your
credentials.
Select " Add Windows Credentials " to select new computer. For each system, 2
Credentials definition are required: one for the IP address, the other for the Machine
Name.
Page 16

Issue 1.2
XFLY.STREAMER – Version 1.01 – User Manual
EVS Broadcast Equipment – Jan 2013
16
Important Note
Modifying NIC configuration, for example: Port teaming will invalidate your
software license. Please contact EVS support to generate a new KEY
according to your new configuration.
4. License Code
XSecure manager must be used when you need to install a new license code, or extend
the validity of a temporary license code.
XSecure can be started by double-clicking on the XSecure Manager shortcut icon
automatically created on your desktop.
In the XSecure application, fill in the Customer information and then click on the
REQUEST button in the lower left corner of the window. This will generate an XML file
that you must send to EVS. Select the location where you would like to save that file, and
click on the SAVE button, then send this file to your support contact at EVS, specifying
which new license codes or license code extensions you require.
In return you will receive another XML file containing the license codes or code
extensions that you have requested. Copy that XML file in a directory that is visible by the
computer where XSecure is installed (using a USB key for instance, or your LAN
network), and click on the IMPORT KEY FILE button in XSecure window. The license
codes will be automatically imported, and a dialog box confirms how many license codes
have been successfully imported.
Page 17

XFLY.STREAMER – Version 1.01 – User Manual
EVS Broadcast Equipment – Jan 2013
Issue 1.2
17
Area
Description
1.
Storage &
Processing
Devices Selection
From this area, the operator can selected the
storage device to store the AV files and also the
processing device i.e. the XTAccess to process
the different tasks for grabbing thumbnails and for
recording streams
2.
Servers List
This area displays the list of all servers detected
on the network.
3.
Settings
The settings area gives access to the selection of
file format, folders to save the AV files, auto
naming function and the maximum duration for
recording.
4.
Channels Pane
This area shows the server Recorder channels
which are selected in the servers’ list.
5.
Commands &
Status
This area displays the Timecode reference and
duration, the status and the 2 main commands to
start and stop the recordings.
Note:
On the top left of the window, the caption bar mentions the Application
name and the version number. There is no menu bar.
1
2
3
4
5
5. User Interface
The XFly Streamer user interface consists of five main areas. They are highlighted on the
following screenshot and described in the table below:
Page 18
Issue 1.2
XFLY.STREAMER – Version 1.01 – User Manual
EVS Broadcast Equipment – Jan 2013
18
Note
The local device is displayed on the top of the list with bold letters.
Note
The local XTAccess is always displayed on the top of the list with bold letters.
Remaining Capacity
Total Capacity
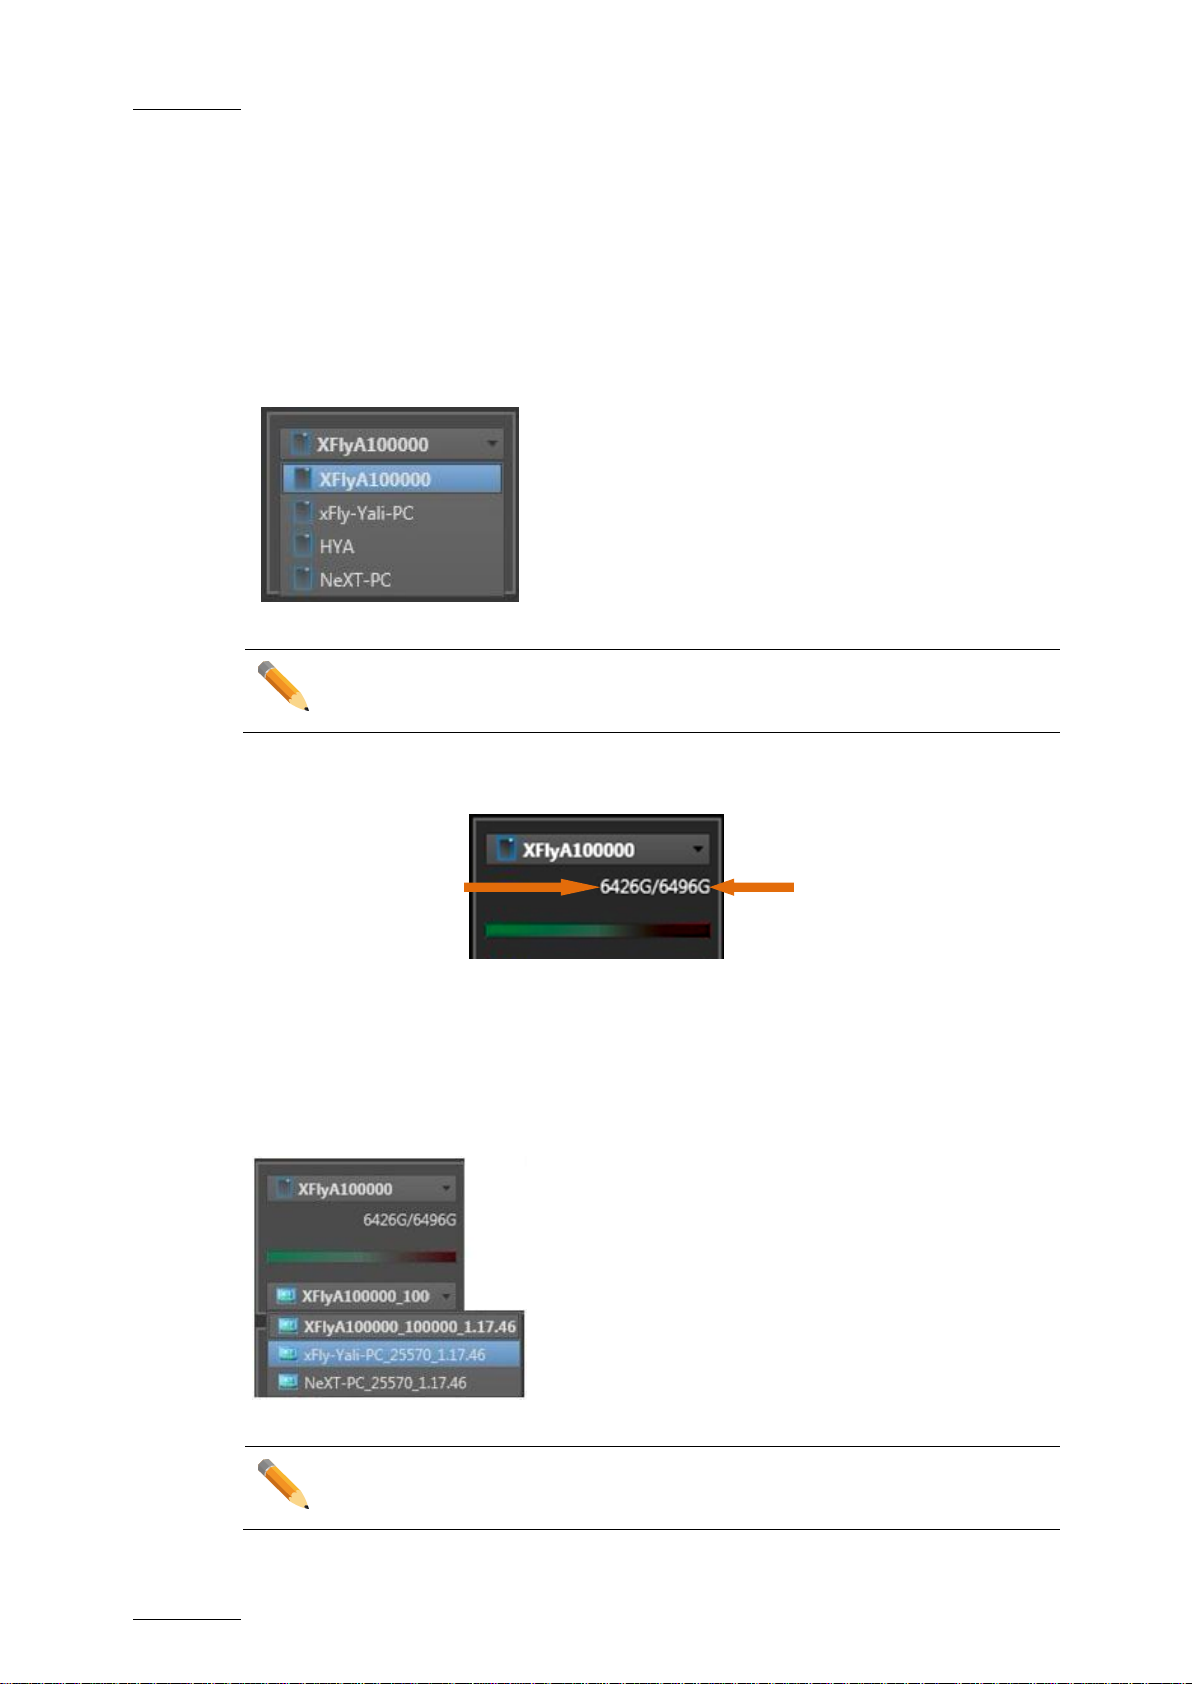
5.1 Storage & Processing Device Selection
Thanks to BONJOUR protocol, at start-up, XFLY systems are detected and listed in a
drop-down list.
Clicking on the arrow on the right will display all systems detected. In the dropdown list,
XFly is identified as Machine_Name + EVS_SN.
Once a system is selected its capacity information and a related diagram are updated:
The second drop-down list lists all XTAccess detected on the local network via BONJOUR
protocol.
Clicking on the arrow on the right will display all processing devices detected. In the dropdown list, XTAccess is identified as Machine_Name+EVS_SN+version number.
Page 19

XFLY.STREAMER – Version 1.01 – User Manual
EVS Broadcast Equipment – Jan 2013
Issue 1.2
19
Note
The server list displays only the servers configured with record channels, and
will only display the record channels.
5.2 Server List
Filters
This pane displays the four families of EVS video servers which can be seen by Xfly
Streamer: XT series, XS, XTnano and XSnano. Select one or several server types you
want to display in the servers' list.
Select servers and then channels
This pane displays a list of all available servers found on the network after a discovery
process. This list is based on the selection made in the Filters pane.
This list is updated regularly and automatically by new discovery processes.
Once the list is displayed, select all servers by clicking on the left arrow, then check the
boxes of the channel on which you want to perform a backup.
CAM Label information, if defined, will be refreshed every two minutes to get the latest
information from the server.
Page 20
Issue 1.2
XFLY.STREAMER – Version 1.01 – User Manual
EVS Broadcast Equipment – Jan 2013
20
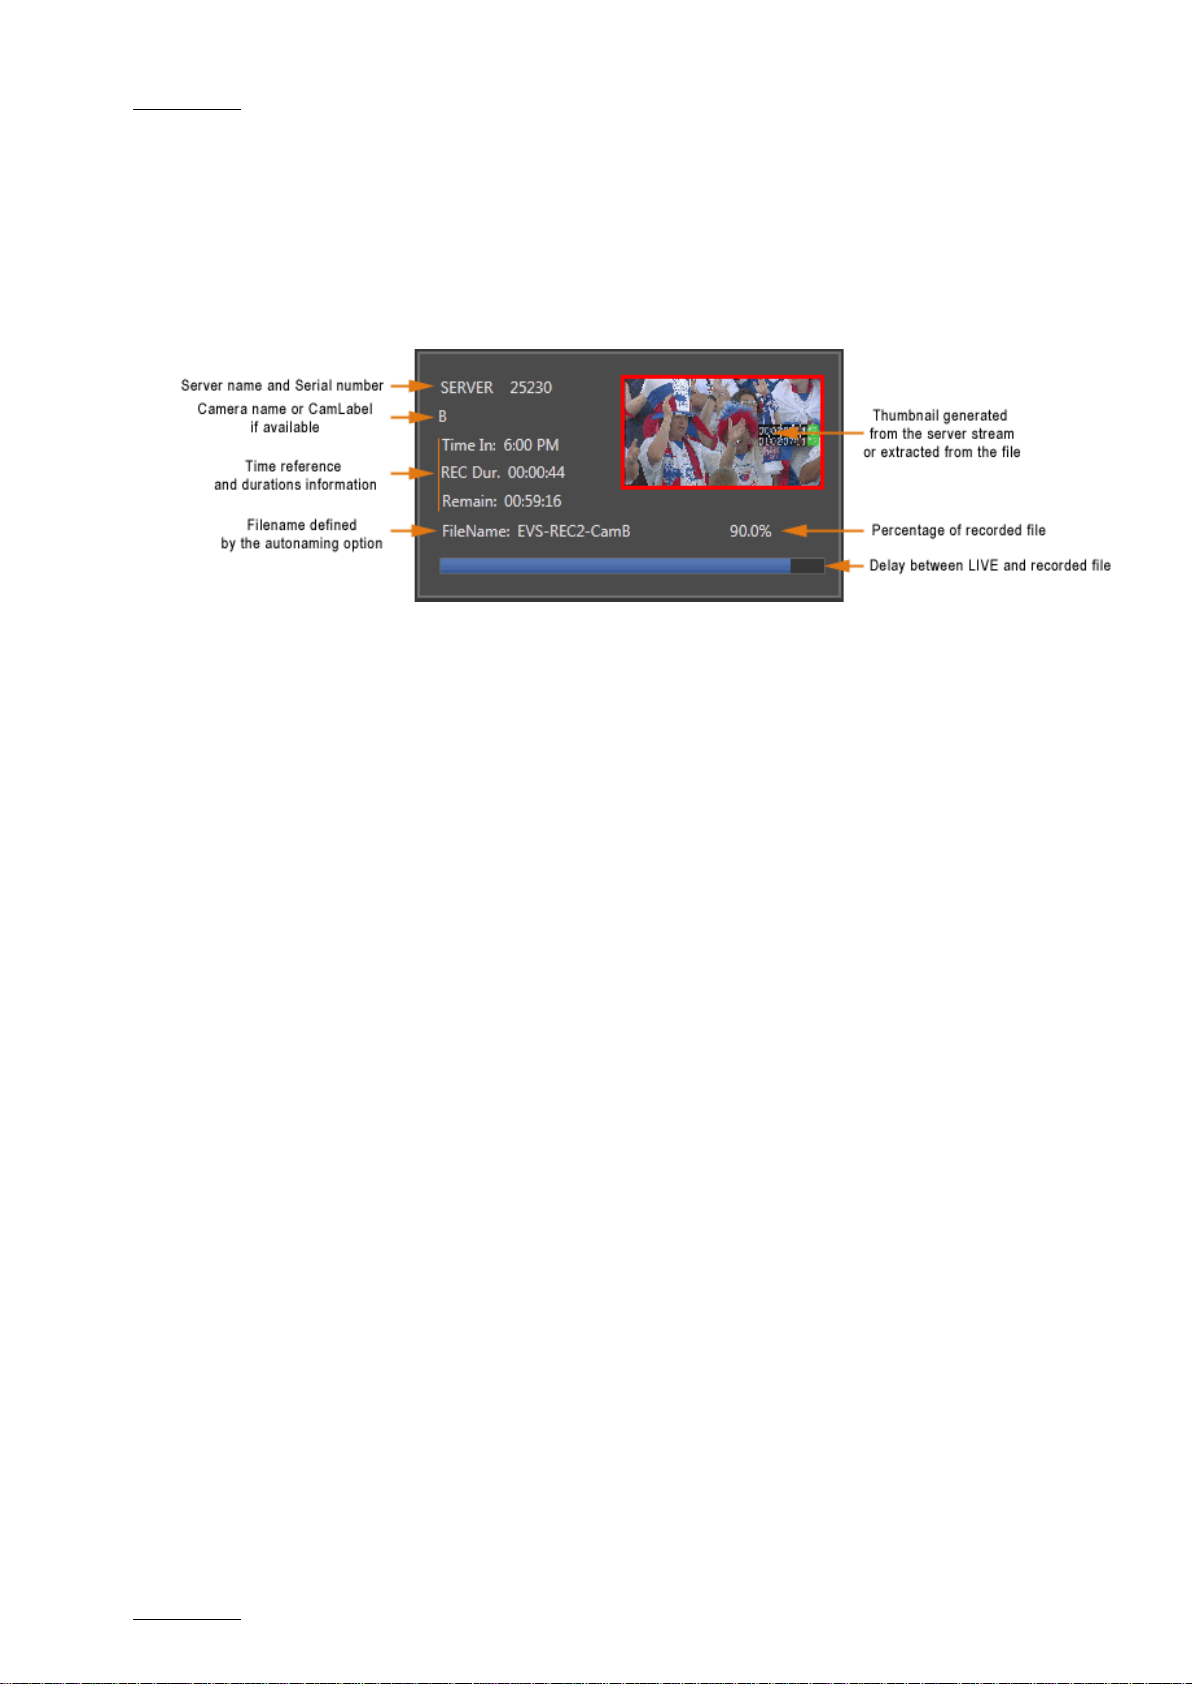
5.3 Channels Area
The channel area is filled with all selected channels into the server list.
Each channels' field displays the same information:
Page 21

XFLY.STREAMER – Version 1.01 – User Manual
EVS Broadcast Equipment – Jan 2013
Issue 1.2
21
Area
Description
Server TC
This area will display the Timecode reference from the
first server selected in the servers' list. This area is not
editable.
TC IN
The TC IN field is editable. Click into the TC IN field and
enters manually a TC value.
The TC IN value must exist in the material of the selected
server. This means that only TC “in the past” can be
entered in the TC IN field.
TC OUT
The TC OUT field is editable. Click into the TC OUT field
and enters manually a TC value.
The TC OUT value must be higher than the TC IN value.
E/E
When clicks in the TC IN field and enters manually a TC
value. When clicks E/E button will clear the TC IN and TC
OUT fields.
When pressing REC updates the Maximum duration
value. The E/E button remains on the screen but is
disabled.
Duration
This area displays the duration requested according to
the TC IN/OUT values or if TC OUT not defined,
according to the maximum duration setting.
Record button
Starts the backup of the recoding trains on all selected
channels. The backup record starts instantly.
The Record button lights red when the recording is in
progress.
Stop button
Stops the backup of the record trains on all selected
channels. The backup record will be stopped when the
user clicks the Stop button. As the backup files need to
close properly, it can however take some time before the
job is finalized. During this time, the message
"Finalizing..." will be displayed in the status area.
The button lights blue when the recording is in progress
and then the Stop command is enabled
Status
The Status area displays all the information related to the
operations and the error messages.
5.4 Status & Commands Area
Page 22

Issue 1.2
XFLY.STREAMER – Version 1.01 – User Manual
EVS Broadcast Equipment – Jan 2013
22
Note
XFLY. Streamer checks the validity of Timecode values manually entered by
user. If a wrong value is entered, the TC field is cleared.
5.4.1 Start with Timecode Defined in the Past
Clicks in the TC IN field and enters manually a TC value.
The E/E button (to return to current TC) appears
Pressing REC start all recordings from this TC IN value.
The Duration field is updated with the Maximum duration value.
The maximum duration parameter is still up to 300 minutes. When entering the TC out
value, the XFLY. Streamer checks if the maximum value is not reached.
At any time the user can enter a TC OUT value and press ENTER on the keyboard to
validate the new value. The Duration field is updated with the exact duration.
Or pressing the STOP button updates the boxes with TC OUT information and the exact
duration information:
The TC IN, TC OUT and Duration information remains on the screen until the jobs are all
finalized. Then the Timecode area is cleared.
Page 23

XFLY.STREAMER – Version 1.01 – User Manual
EVS Broadcast Equipment – Jan 2013
Issue 1.2
23
Important
XTAccess is restricted to file transfer with wrapping when required but cannot
perform any format transcoding.
The available wrappers are:
EVS MXF
OP1a MXFXDCAM
QuickTime Movie
QuickTime Reference
Avid MXF OPAtom
DV-DIF
OP1a MXF SMPTE
Wave(Audio only)
5.5 Settings
All settings defined in that section are memorized. This means that at next start of the
application all settings defined by the user will be restored.
5.5.1 Wrappers' Selection
Clicking on the arrow on the right will display the list of available wrappers:
Page 24

Issue 1.2
XFLY.STREAMER – Version 1.01 – User Manual
EVS Broadcast Equipment – Jan 2013
24
Click Option to gain access to more options for the wrapper selection:
For generating EVS XMLmetadata select the first option. This EVS metadata file can be
generated with all wrappers.
For generating FCP XML metadata select the second option. This FCP metadata file can
be generated only when QT Movie and QT Reference wrappers are selected and is set
by default.
An additional parameter: <QTLocalPath>\\\Volumes</Local Path> is required to be
compatible with MAC OS. This information will be embedded in the resulting XML file.
For generating AVID AAF metadata select the second option. This AAF metadata file
can be generated only when AVID MXF OPAtom wrapper is selected.
An additional parameter is available to create the structure of Avid Media Files folders.
Selecting this parameter will create (and share) /Avid MediaFiles/MXF/1 folders on your
local drive (drive S: for XFLY device). All new Avid MXF OPAtom files will be saved to
these folders/sub-folders.
Page 25

XFLY.STREAMER – Version 1.01 – User Manual
EVS Broadcast Equipment – Jan 2013
Issue 1.2
25
Limitation
The files can be saved to 'shared' folders only.
5.5.2 Destination Selection
This field specifies the path where the AV files will be saved for all channels.
To modify the path, the user can type directly the new path (UNC format) into the
Destination field or can click Browse to open the following Windows Standard dialog box:
Page 26

Issue 1.2
XFLY.STREAMER – Version 1.01 – User Manual
EVS Broadcast Equipment – Jan 2013
26
5.5.3 Auto Filename Definition
The filename is user-defined and can be modified as desired.
A direct access to the Prefix field allows the user to set a different name to each
recording for example: Take01, Take02.
Click Edit to gain access to more options for the Autonaming function:
The user can reset the default filename by clicking the Reset button.
5.5.4 Maximum Duration Setting
In case a stream is a backup with endless command, the application will stop the backup
when the maximum duration defined in this field has been reached.
The default value is 300 minutes and the value can be set from 1 to 300 minutes.
Page 27
XFLY.STREAMER – Version 1.01 – User Manual
EVS Broadcast Equipment – Jan 2013
Issue 1.2
27
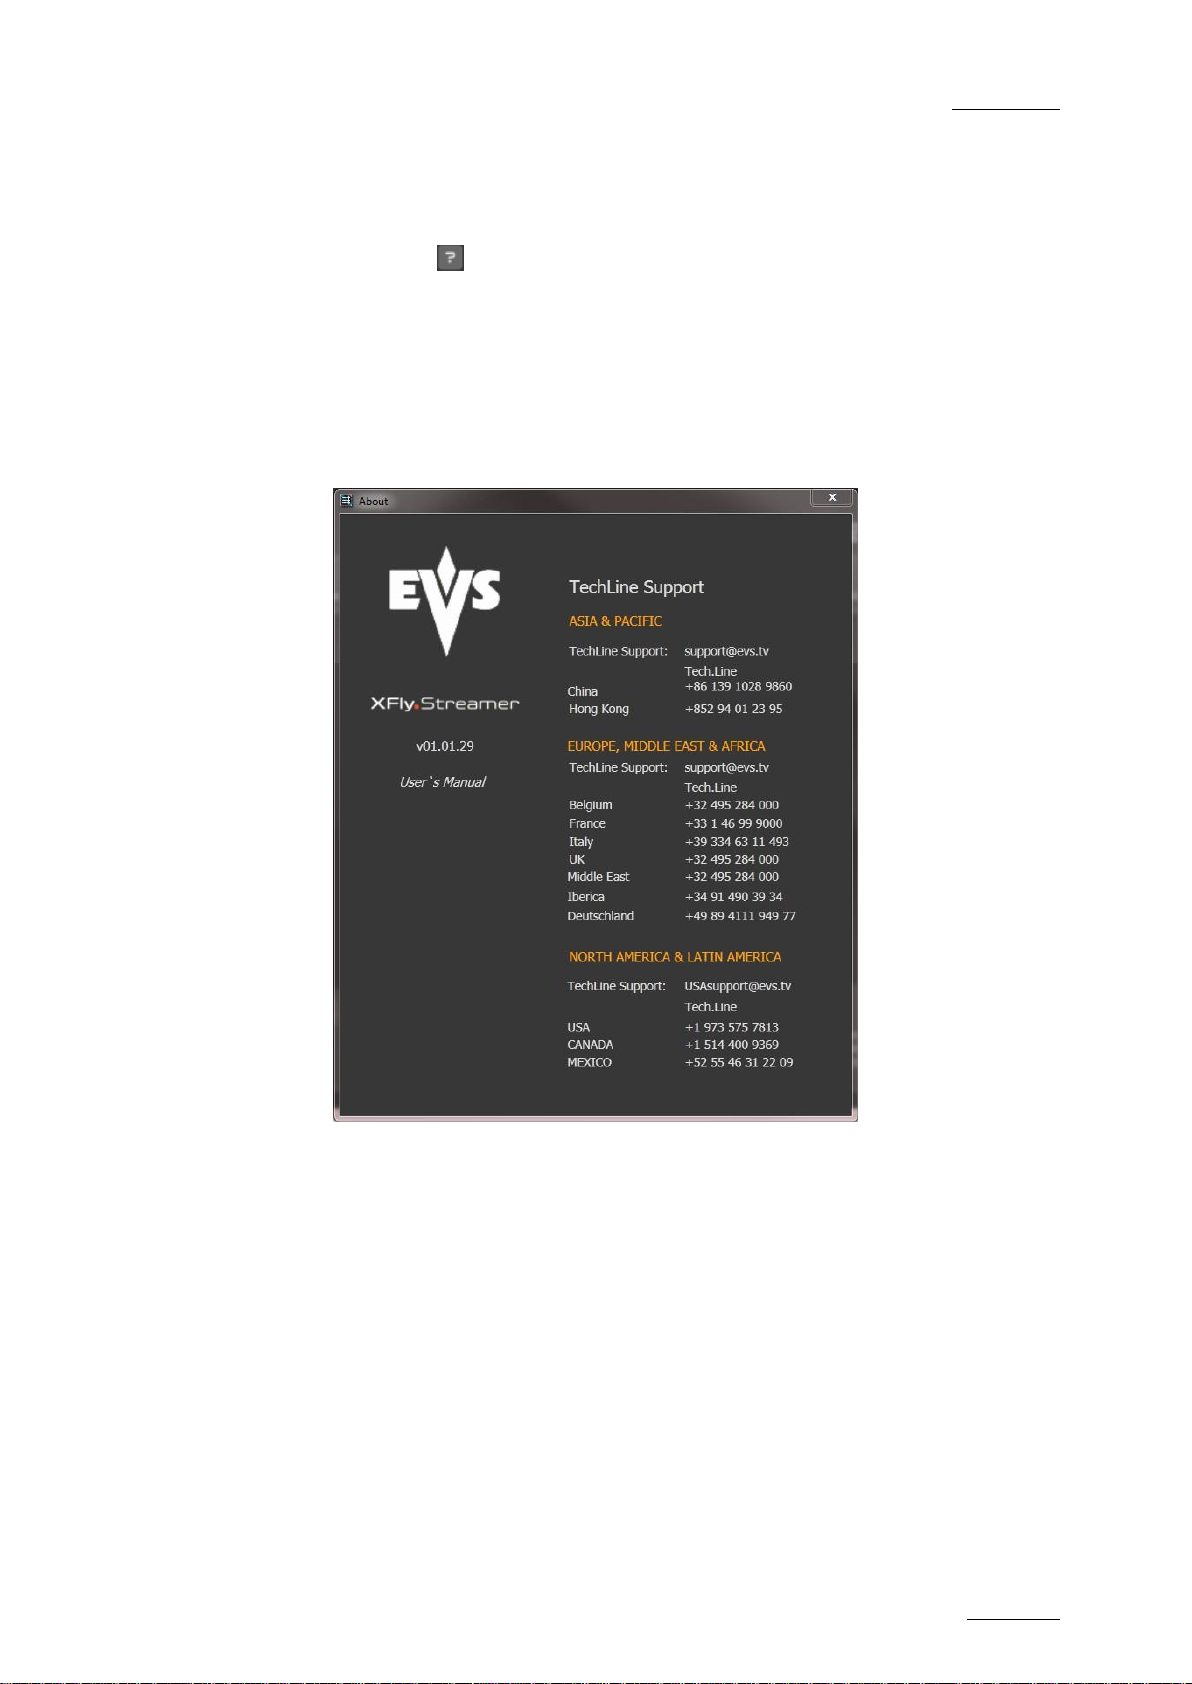
5.6 The About Window
Clicking on the icon opens the about window:
This window displays the following items:
The XFly Streamer application version.
A link to this User Manual in digital format.
A list of EVS technical support mails and phones if you need further assistance
with this product.
Page 28

Issue 1.2
XFLY.STREAMER – Version 1.01 – User Manual
EVS Broadcast Equipment – Jan 2013
28
6. How to Record Streams
To start the recording, proceed as follow:
1. The local XTAccess and its related XML unit is already started and minimized in the
task bar.
2. Click this shortcut to launch the XFLY. Streamer software. The screen will always
appear as follows:
Page 29

XFLY.STREAMER – Version 1.01 – User Manual
EVS Broadcast Equipment – Jan 2013
Issue 1.2
29
3. Select the XFLY hardware and the processing device i.e. XTAccess from the two
drop- down list in the upper left corner. The local system and software if present
always appear at the top of the list.
4. Then set a server type to display the servers list:
5. Into the server list, click the arrow to display the list of available channels:
The selected channel is now displayed in the channel area with thumbnails generation
to preview the channel:
6. Repeat step 5 to select all channels desired.
7. Check and if necessary modify the wrapper selected, the path to save the file, the
format string for automatic filenaming and/or the maximum duration.
Page 30

Issue 1.2
XFLY.STREAMER – Version 1.01 – User Manual
EVS Broadcast Equipment – Jan 2013
30
Note
As the backup files need to close properly, it can however take some time
before all jobs are finalized.
8. Then click REC command to start the recording:
The REC command lights red and red frame is displayed around each channel. All
selections and settings are disabled during the recording.
9. Click STOP command to stop the recording.
Page 31

XFLY.STREAMER – Version 1.01 – User Manual
EVS Broadcast Equipment – Jan 2013
Issue 1.2
31
7. How to Retry the Streaming
Jobs One by One
When job(s) failed, a retry command is available in the channel area.
The user has the possibility to retry the job without stopping or re-starting the other jobs in
progress.
The RETRY button is only available for the job(s) failed in its channel area.
And the Retry command is only available for streaming jobs.
Page 32

Issue 1.2
XFLY.STREAMER – Version 1.01 – User Manual
EVS Broadcast Equipment – Jan 2013
32
8. How to modify the Backup
Filename Format String
To modify this default format string, proceed as follows:
1. Click on the EDIT button into the Auto Filename area, the autonaming window
appears:
2. To add a generic text (i.e.: WC 2012_Match03...) in the Prefix string or into the
Filename field, simple type the text in the field.
3. In the Filename field, delete/modify the default items
4. To add information, select into the Available Items from drop-down list:
5. Clicking the Append button to add the selected item at the end of the Filename string.
Page 33

XFLY.STREAMER – Version 1.01 – User Manual
EVS Broadcast Equipment – Jan 2013
Issue 1.2
33
6. If necessary, modify the position of the available items as desired with the CUT
(CTRL-C) and PASTE (CTRL-V) commands.
7. Repeat step 4 to 6 for any new information you want to add in the Filenames string.
 Loading...