

Page 1
User’s Manual
Version 3.1 - December 2010
ENG File Import and Dynamic Reviewing
Page 2

Xedio Dispatcher – Version 3.1
I
EVS Broadcast Equipment – December 2010
COPYRIGHT
EVS Broadcast Equipment – Copyright © 2010. All rights reserve d.
DISCLAIMER
The information in this manual is furnished for informational use only and subject
to change without notice. While every effort has been made to ensure that the
information contained in this user manual is accurate, up-to-date and reliable,
EVS Broadcast Equipment cannot be held responsible for inaccuracies or errors
that may appear in this publication.
IMPROVEMENT REQUESTS
Your comments will help us improve the quality of the user documentation. Do not
hesitate to send improvement requests, or report any error or inaccuracy on this
user manual by e-mail to doc@evs.tv
User’s Manual
Issue 3.1.B
.
REGIONAL CONTACTS
You will find the full list of addresses and phone numbers of local offices either at
the end of this user manual (for manuals on hardware products) or on the EVS
website on the following page: http://www.evs.tv /contacts
USER MANUALS ON EVS WEBSITE
The latest version of the user manual, if any, and other user manuals on EVS
products can be found on the EVS download center, on the following webpage:
http://www.evs.tv/downl oadcenter
Page 3

Issue 3.1.B Xedio Dispatcher – Version 3.1 – User’s Manual
EVS Broadcast Equipment – December 2010
II
Page 4

Xedio Dispatcher – Version 3.1
EVS Broadcast Equipment – December 2010
User’s Manual
Issue 3.1.B
Table of Contents
TABLE OF CONTENTS ................................................................................................... III
WHAT’S NEW ON XEDIO DISPATCHER V3.1? .............................................................. V
1. INTRODUCTION ....................................................................................................... 1
1.1 PRODUCT DESCRIPTION .......................................................................................................... 1
1.2 SUPPORTED FORMATS AND CODECS .................................................................................... 1
2. INSTALLATION ........................................................................................................ 4
2.1 PREREQUISITES ........................................................................................................................ 4
2.2 HARDWARE AND SOFTWARE REQUIREMENTS ..................................................................... 4
2.3 LICENSES ................................................................................................................................... 5
2.3.1 License Codes Required ......................................................................................................... 5
2.3.2 Requesting and Importing the License Keys ........................................................................... 5
2.4 INSTALLATION PROCEDURE .................................................................................................... 6
3. CONFIGURATION AND CUSTOMIZATION ............................................................ 8
3.1 EXPORT TARGET PROFILES .................................................................................................... 8
3.1.1 Definition ................................................................................................................................. 8
3.1.2 Creating your Own Export Target Profile ................................................................................ 8
3.2 KEYWORD GRIDS .................................................................................................................... 12
3.3 CONFIGURATION PARAMETERS............................................................................................ 13
3.3.1 Parameter Profiles ................................................................................................................ 13
3.3.2 How to Edit a Parameter Profile ............................................................................................ 18
4. USER INTERFACE ................................................................................................. 19
4.1 STARTING XEDIO DISPATCHER ............................................................................................. 19
4.2 OVERVIEW ................................................................................................................................ 19
4.3 MENU BAR ................................................................................................................................ 21
4.4 SOURCE DEVICE AREA ........................................................................................................... 22
4.4.1 Introduction ........................................................................................................................... 22
4.4.2 General Description .............................................................................................................. 22
4.5 WORKSPACE AREA ................................................................................................................. 23
4.5.1 Introduction ........................................................................................................................... 23
4.5.2 View Modes in the Workspace .............................................................................................. 23
4.5.3 Thumbnail View in the Workspace Area ............................................................................... 24
4.5.4 Clip Player View in the Workspace Area ............................................................................... 25
4.5.5 Storyboard Player View in the Workspace Area .................................................................... 27
4.6 TOOLS AREA ............................................................................................................................ 29
4.6.1 Accessing the Tabs in the Tools Area ................................................................................... 29
4.6.2 Logger ................................................................................................................................... 29
4.6.3 Export Tool ............................................................................................................................ 31
4.7 STORYBOARD AREA ............................................................................................................... 33
4.7.1 Overview ............................................................................................................................... 33
4.8 CLIP PLAYER AND STORYBOARD PLAYER .......................................................................... 33
4.8.1 Overview ............................................................................................................................... 33
III
Page 5

Issue 3.1.B Xedio Dispatcher – Version 3.1 – User’s Manual
EVS Broadcast Equipment – December 2010
4.8.2 How to Load a Clip in the Clip Player .................................................................................... 34
4.8.3 How to Load a Storyboard in the Storyboard Player ............................................................. 35
4.8.4 Video Display ........................................................................................................................ 36
4.8.5 Player Track Selection Buttons ............................................................................................. 37
4.8.6 Jog & Media Bars .................................................................................................................. 38
4.8.7 Transport Commands in the Clip Player ............................................................................... 40
4.8.8 Transport Commands in the Storyboard Player .................................................................... 42
4.8.9 Clip Creation Fields ............................................................................................................... 44
4.8.10 Log Buttons ........................................................................................................................... 46
4.8.11 Audio Track Monitoring Buttons ............................................................................................ 46
4.8.12 Audio Guide Track Record Button ......................................................................................... 46
5. OPERATION ........................................................................................................... 47
5.1 GENERAL WORKING PROCESS ............................................................................................. 47
5.2 MANAGING THE STORYBOARDS ........................................................................................... 47
5.2.1 How to Create an Empty Storyboard ..................................................................................... 47
5.2.2 Other Possible Actions on Storyboards ................................................................................. 48
5.3 SELECTING RELEVANT MEDIA ............................................................................................... 49
5.3.1 Opening the Source Clips in the Thumbnail View ................................................................. 49
5.3.2 Loading a Source Clip in the Clip Player ............................................................................... 49
5.4 ADDING CLIPS OR SUB-CLIPS TO THE STORYBOARD ........................................................ 50
5.4.1 How to Add a Sub-Clip to the Storyboard ............................................................................. 50
5.4.2 How to Add Source Clips to the Storyboard .......................................................................... 51
5.4.3 How to Replace a Clip in the Storyboard .............................................................................. 51
5.4.4 How to Modify the Storyboard Clip Boundaries ..................................................................... 51
5.5 ADDING LOGS TO A CLIP ........................................................................................................ 52
5.5.1 Introduction ........................................................................................................................... 52
5.5.2 How to Add a Log to a Clip ................................................................................................... 52
5.5.3 Log and Metadata Display .................................................................................................... 53
5.5.4 Other Possible Actions on Logs ............................................................................................ 54
5.6 RECORDING AN AUDIO GUIDE TRACK .................................................................................. 55
5.6.1 Introduction ........................................................................................................................... 55
5.6.2 How to Record an Audio Guide Track ................................................................................... 55
5.7 CHECKING THE STORYBOARD .............................................................................................. 56
5.7.1 Introduction ........................................................................................................................... 56
5.7.2 How to Load a Storyboard in the Storyboard Player ............................................................. 56
5.8 EXPORTING THE STORYBOARD ............................................................................................ 57
5.8.1 Introduction ........................................................................................................................... 57
5.8.2 How to Export a Storyboard .................................................................................................. 57
5.8.3 Exporting Clips and Sub-Clips .............................................................................................. 59
5.8.4 Result of Export Job .............................................................................................................. 59
5.8.5 Other Possible Actions on Export Jobs ................................................................................. 59
GLOSSARY ..................................................................................................................... 61
INDEX .............................................................................................................................. 63
IV
Page 6

Xedio Dispatcher – Version 3.1
–
V
EVS Broadcast Equipment – December 2010
The following table describes the sections updated to reflect the new and modified
features on Xedio Dis patcher from Xedio Suite 3.1 (com pared to Xedio Suite 3.0).
In the user manual, the icon has been added on left margin to highlight
information on new and updated features.
Click the section number (or the description) in the table to jump directly to the
corresponding section.
Section Description
1.1 - 1.2 New source support: XDCAM Ex, Panasonic P2 AVC Intra
User’s Manual
What’s New on Xedio
Dispatcher V3.1?
50 & 100
Issue 3.1.B
New export/transcoding form at support:
• Proxy: H.264 AVC TS
• SD: H.264 AVC (MP4, TS), MXF OP1A SMPTE
(DVCPRO50)
• HD: MXF OP1A SMPTE (Avid DNxHD®, DVCPROHD )
4.4 Device area:
XDCAM EX files area supported.
4.5.4 - 4.5.5 - 4.8.5 Workspace – Clip Player View and Storyboard Player
view:
Audio meters show the values defined for the different
levels under Parameter Profiles.
4.6.2 - 5.5.2 Tools area – Logger tab:
The list of available keyword gr ids is accessed by clicking
within the Keyword Grid Selection field, instead of
clicking on an arrow.
4.5.3 - 5.4.2 - 5.8.3 Information has been added to give direction for copying
several source clip(s) at once to the storyboard or to the
export list.
5.4.3 Storyboard:
A new section has been added to explain the replacement
(overwrite) of a storyboard eleme nt.
Page 7

Page 8

Xedio Dispatcher – Version 3.1
1
EVS Broadcast Equipment – December 2010
User’s Manual
1. Introduction
1.1 PRODUCT DESCRIPTION
Xedio Dispatcher is a software product used for importing A/V files, rough-cutting
and exporting rough-cuts to multiple destinations and formats.
Xedio Dispatcher automati cally detects connected devices (such as P2, XDCAM or
XDCAM EX devices), and instantly displays their contents. This allows immediate
browsing of the media directly on the device, which speeds up the shoot selection,
sub-clipping and/or fast rough-cut editing. Shoots, sub-clips and edits can also be
instantly logged.
Once selected or created, the sub-clips and consolidated storyboards can be
easily transferred from the device itself to any EVS video server (for example:
XT[2]+, XS), media serv er (for example: SAN, XStore), or an y type of storage.
Issue 3.1.B
Simultaneous transfers to multiple destinations in multiple formats are supported
thanks to Xedio on-th e-fly SD/HD rewrapping & transcoding capabilities.
1.2 SUPPORTED FORMATS AND CODECS
The following tables provide information on the currently supported source and
target codecs in SD and HD.
SD VIDEO CODECS
Supported standards
Supported codecs
for source files
• PAL
• NTSC
• Sony XDCAM hi-res
(DV25, IMX-D10 30/40/50)
• Sony XDCAM proxy
• Panasonic P 2 hi-res
(DVCPRO25, DVCPRO50)
• Panasonic P 2 proxy
Supported codecs
for export
• Long GOP M PEG
(MPEG1, MPEG2)
• Sony XDCAM hi-res
(IMX-D10 30/40/50)
• Panasonic P 2 hi-res
(DV25, DVCPRO25, DVCPRO50)
Page 9

Issue 3.1.B Xedio Dispatcher – Version 3.1 – User’s Manual
•
EVS Broadcast Equipment – December 2010
AVI
(DV25, DVCPRO25, DVCPRO50)
• QuickTime
(DV, DVCPRO25, DVCPRO50, IMX-D10
30/40/50, MJPEG)
• Raw DV
(DV, DVCPRO25, DVCPRO50)
• EVS
(DVCPRO50, MJPEG, IMX-D10 30/40/50 and
Supermotion)
• PCM
(wav audio files)
• WM9
• H.264 AVC
(MP4, TS)
HD VIDEO CODECS
Supported standards
Supported codecs
for source files
Supported codecs
for export
• MXF OP1A SMPTE (DVCPRO50)
• 1080i 50/59.94Hz
• Sony XDCAM HD
(422, 420)
• Sony XDCAM proxy
• Sony XDCAM Ex
• Panasonic P2 high-res
(AVC Intra 50/100, DVCPRO100)
• Panasonic P 2 proxy
• EVS
(MJPEG & proxy, Avid DNxHD®)
• QuickTime
(DVCPRO100, Avid DNxHD®)
• XDCAM HD
(422, 420)
• Panasonic P 2 HD
(AVC Intra 50/100, DVCPRO100)
• H.264 AVC
(MP4, TS)
2
Page 10

Xedio Dispatcher – Version 3.1
•
3
EVS Broadcast Equipment – December 2010
REQUIREMENTS RELATED TO SOURCE FILES
The source files must meet the following requirements:
• All video and audio source files (SD or HD) must include maximum 8 audio
channels at 48 KHz, in stereo pairs (dual mono is not s upported).
• HD editing is limited to (less than) 120 Mbps codecs and should be performed
using SAS storage or external disk arrays.
User’s Manual
Issue 3.1.B
Long GOP M PEG-2
(TS, PS)
• MXF OP1A SMPTE (Avid DNxHD®,
DVCPROHD)
Page 11

Issue 3.1.B Xedio Dispatcher – Version 3.1 – User’s Manual
EVS Broadcast Equipment – December 2010
2. Installation
2.1 PREREQUISITES
Here is the list of p rerequisites to the installation of Xedio Dispatcher:
• Hardware requirements must be met
• Software requirements must be met
• The XSecure application needs to be installed on the workstation with all the
required license codes
• Xedio Dispatcher has to be installed with administrator rights.
• It is recommended to close all other applications before starting the Xedio
Dispatcher installation, especially all EVS applications.
• XDCAM and/or P2 drivers must be installed on the Xedio Dispatcher computer.
2.2 HARDWARE AND SOFTWARE
REQUIREMENTS
HARDWARE REQUIREMENTS
Xedio Dispatcher can be installed on a single laptop or desktop computer.
The browser and player of Xedio Dispatcher use the CPU resources of the Xedio
Dispatcher workstation to decode the A/V material, depending on the source and
the target codecs.
The guidelines for the hardware minimum requirements are:
• CPU: Core Duo 2.33GHz processor (or equivalent)
• RAM: 3GB
• Display Resolution: minimum 1280x1024
• Gfx Card: no specific needs (“stan dard” PC Gfx card)
Options:
• USB 2.0, IEEE 1394 (Firewire) and/or PCIe interface(s) depending on the
device you want to connect to Xedio Dispatcher machine (FTP access not
supported).
• For Audio monitoring and/or Audio Guide Track: Digigram Audio Board or any
other Audio Board.
4
Page 12

Xedio Dispatcher – Version 3.1
5
EVS Broadcast Equipment – December 2010
User’s Manual
SOFTWARE REQUIREMENTS
Xedio Dispatcher has to be installed on a computer running Windows XP Pro SP3
32 bits.
2.3 LICENSES
2.3.1 LICENSE CODES REQUIRED
The XSecure application needs to be installed on the workstation. All the following
license codes (known as Xedio Dispatcher full option) must be requested to allow
the use of Xedio Dispatcher, except the Audio Guide Track and RTProf Wizard
which are optional.
License Code Description
Base Package 10 Base Package for Xedio Dispatcher
Issue 3.1.B
P2 Source 20 Access to A/V content on P2 support
XDCAM Source 30 Access to A/V content on XDCAM support
Storyboarding 40 Access to the Storyboarding (rough cut) module of
Xedio Dispatcher
Audio Guide
Track
Export 50 Access to the Export Module of Xedio Dispatcher
RTProf Wizard 51 Allows the creation of a new export target profile
Logger 60 Access to the Logging (IPD Logs) module of Xedio
Transcoding 70 Access to the transcoding option for the export
41 Allows the creation of an Audio Guide Track over a
storyboard
(RTProf generator)
Dispatcher
module. If not present, only smart rendering is
allowed.
2.3.2 REQUESTING AND IMPORTING THE LICENSE KEYS
In the XSecure Manager application installed on the Xedio Dispatcher workstation,
you need to click the Request button to generate an XML file. Email this XML file
to the EVS support and ask for the Impor t Key file.
Once you have received the Import Key file, you need to select and import the file
via the Import Key File button in XSecure Manager.
Page 13
Issue 3.1.B Xedio Dispatcher – Version 3.1 – User’s Manual
EVS Broadcast Equipment – December 2010
2.4 INSTALLATION PROCEDURE
A Setup wizard guides you through the installation of Xedio Dispatcher.
To install Xedio Dispatcher, proceed as follows:
1. Copy the installation file
FullXedioDispatcher_3.01.xx.exe locally.
This is the full installer file, which you need to use for a first installation. Use
the
XedioDispatcher_3.01.xx.exe for upgrades.
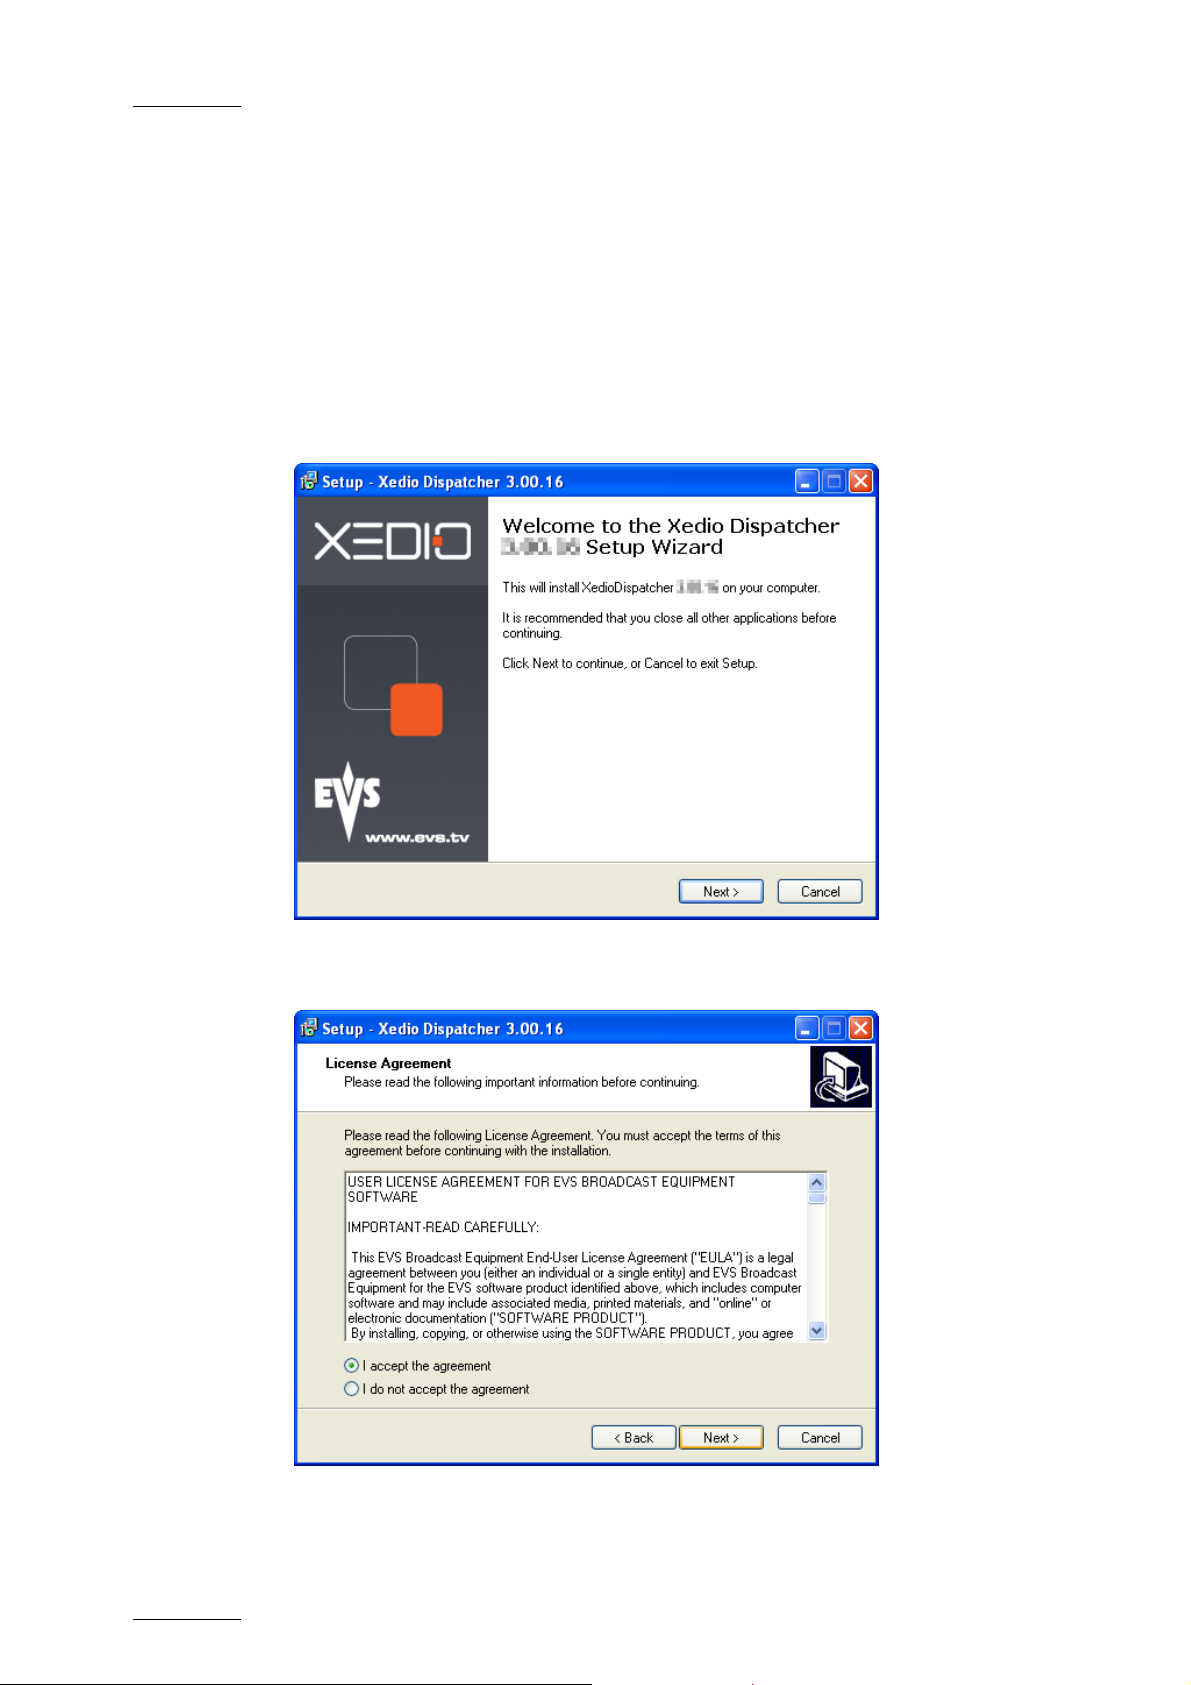
2. Double-click on the installation file to launch the installation wizard
3. Click Next on the Welcome window.
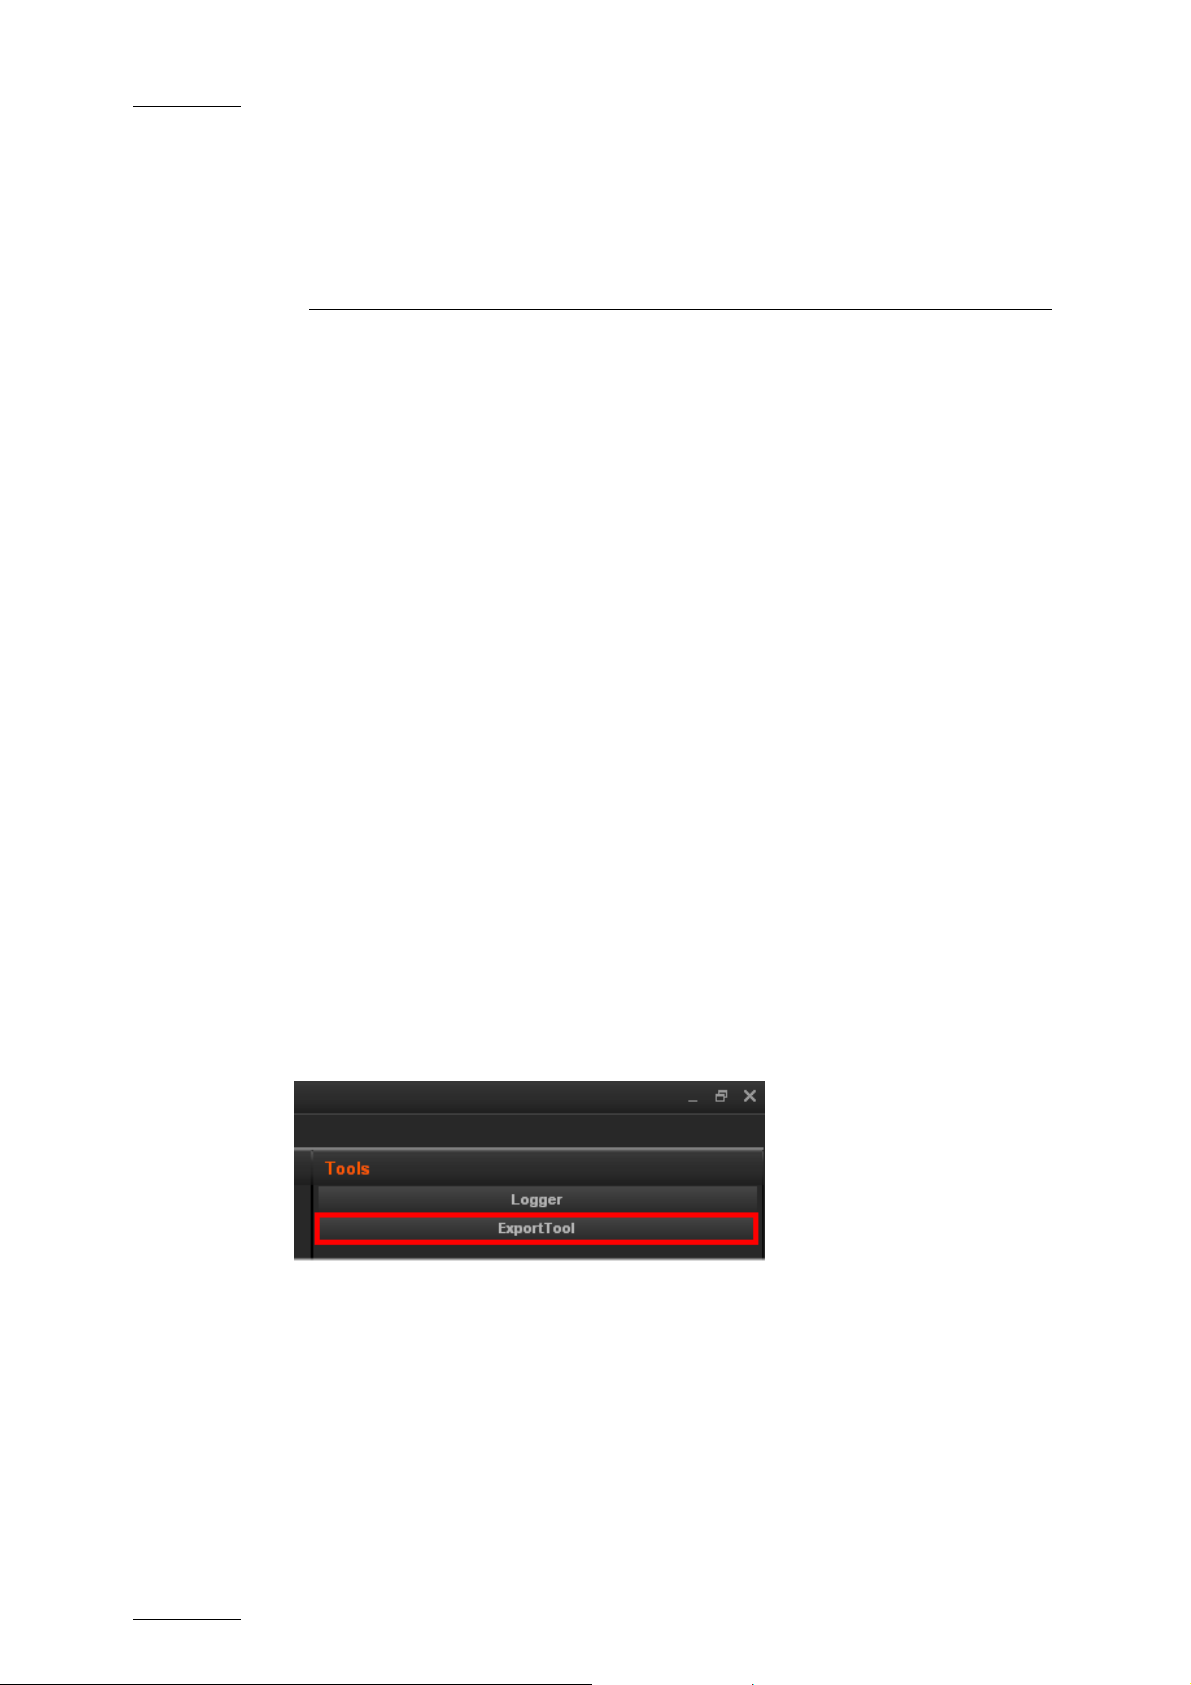
4. Read the License agreement, click the I accept the agreement option and
click Next.
5. Click Install on the Ready to Install window.
6
Page 14

Xedio Dispatcher – Version 3.1
7
EVS Broadcast Equipment – December 2010
When the application is install ed, you need to restart the computer.
The Xedio Dispatcher installer will then perform some final installation steps
before you can launch the applica tion.
User’s Manual
Issue 3.1.B
Page 15
Issue 3.1.B Xedio Dispatcher – Version 3.1 – User’s Manual
EVS Broadcast Equipment – December 2010
3. Configuration and
Customization
3.1 EXPORT TARGET PROFILES
3.1.1 DEFINITION
An Export Target Profile (also called ‘RTProf’) is an .xml file that contains the
definition for rendering the storyboard created in Xedio Dispatcher into a single
file on a given destination or a clip on a given EVS server.
The Export Target Profile mainly includes the definition of the destinations, and of
the codecs in which the file or clip nee d to the generated.
The Export Target Profiles available in Xedio Dispatcher are stored in:
C:\XedioDispatcherMS\Profiles\RTProf.
The Export Target Profiles can be defined and customized to your needs by the
EVS Project Manager. However, you can also create your own Export Target
profiles using the Target Wizard.
3.1.2 CREATING YOUR OWN EXPORT TARGET PROFILE
You can create an Export Target profile from the Export Tool in Xedio Dispatcher,
by means of the Target wizard. This operation is explained in this chapter since it
should be performed as you configure your application.
To create an Export Target Profile in Xedio Dispatcher, proceed as follows:
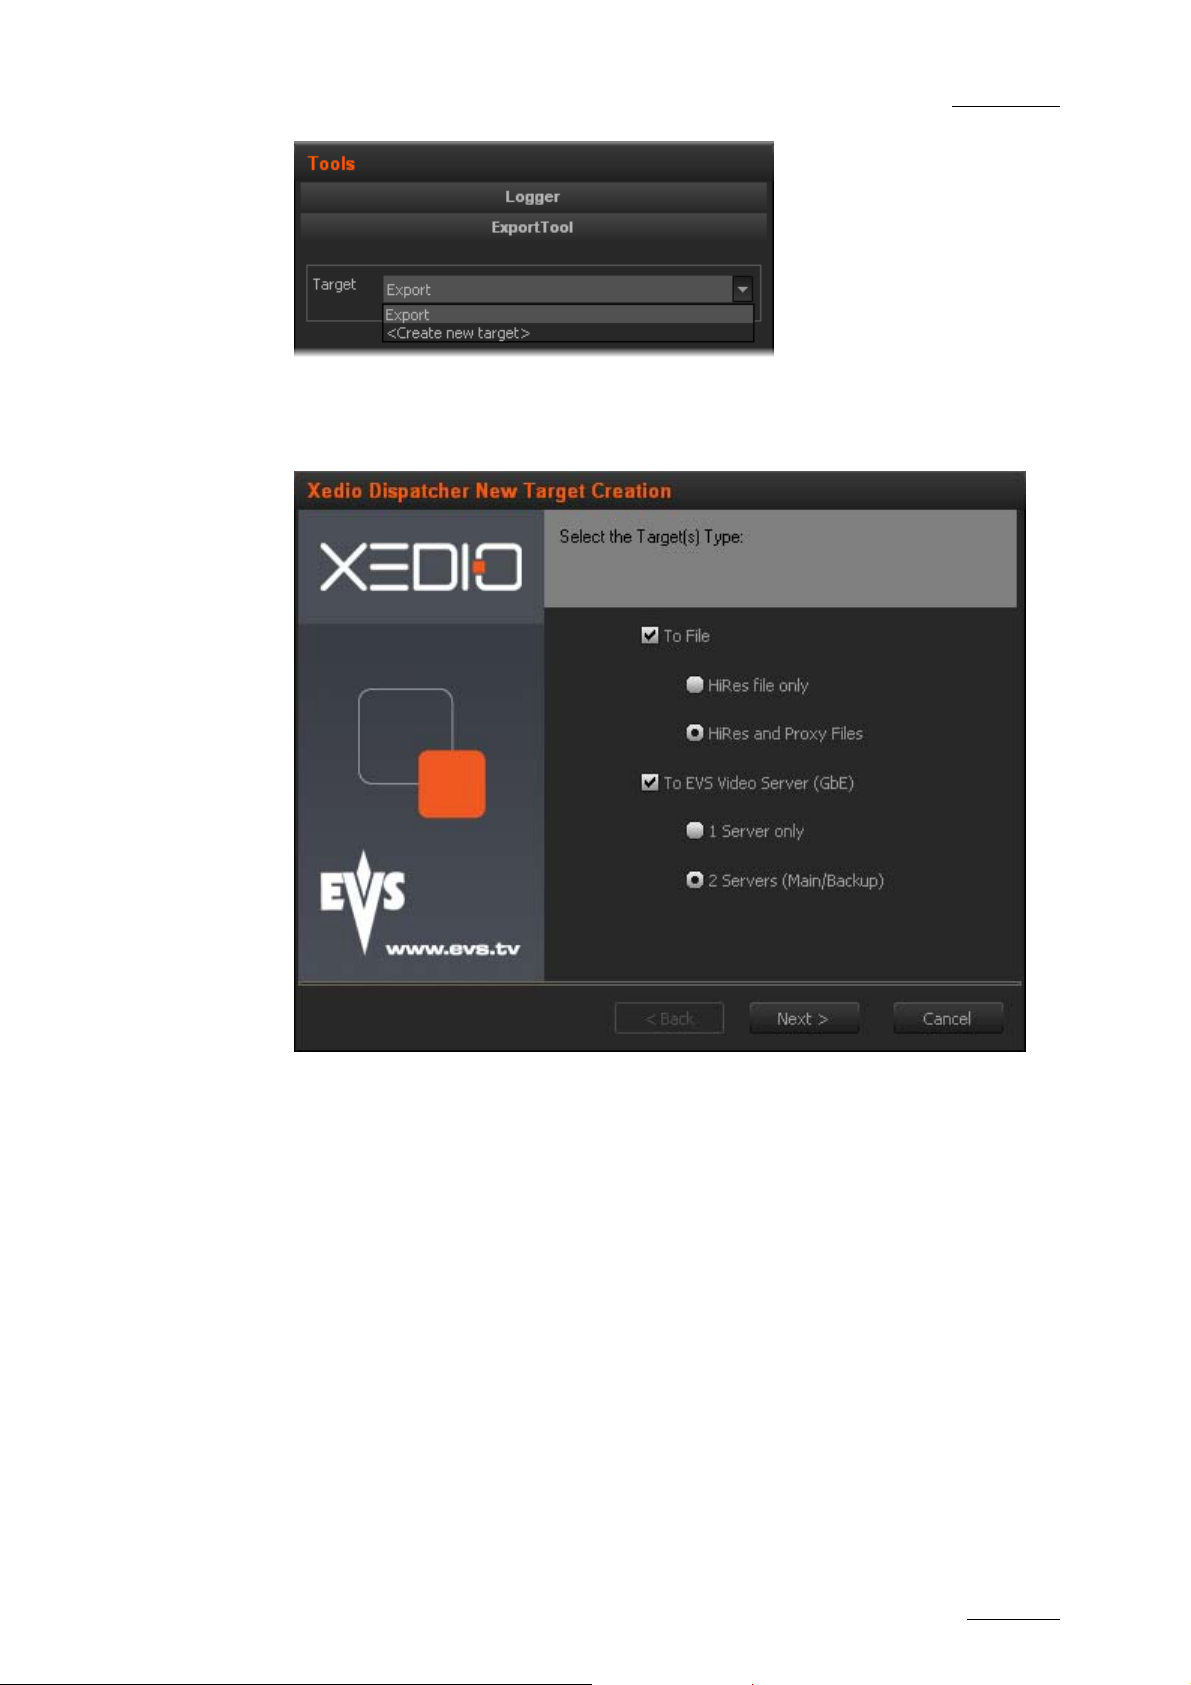
1. In Xedio Dispatch er, click the ExportTool tab in the Tools area:
2. In the Target field, click the down arrow and select <Create new target> from
the drop-down list.
8
Page 16
Xedio Dispatcher – Version 3.1
9
EVS Broadcast Equipment – December 2010
User’s Manual
Issue 3.1.B
The Target wizard opens .
3. In the Target Type dialog box, select the types of targets you want to
generate, either files store d on the network, or clips on EVS servers:
Click Next
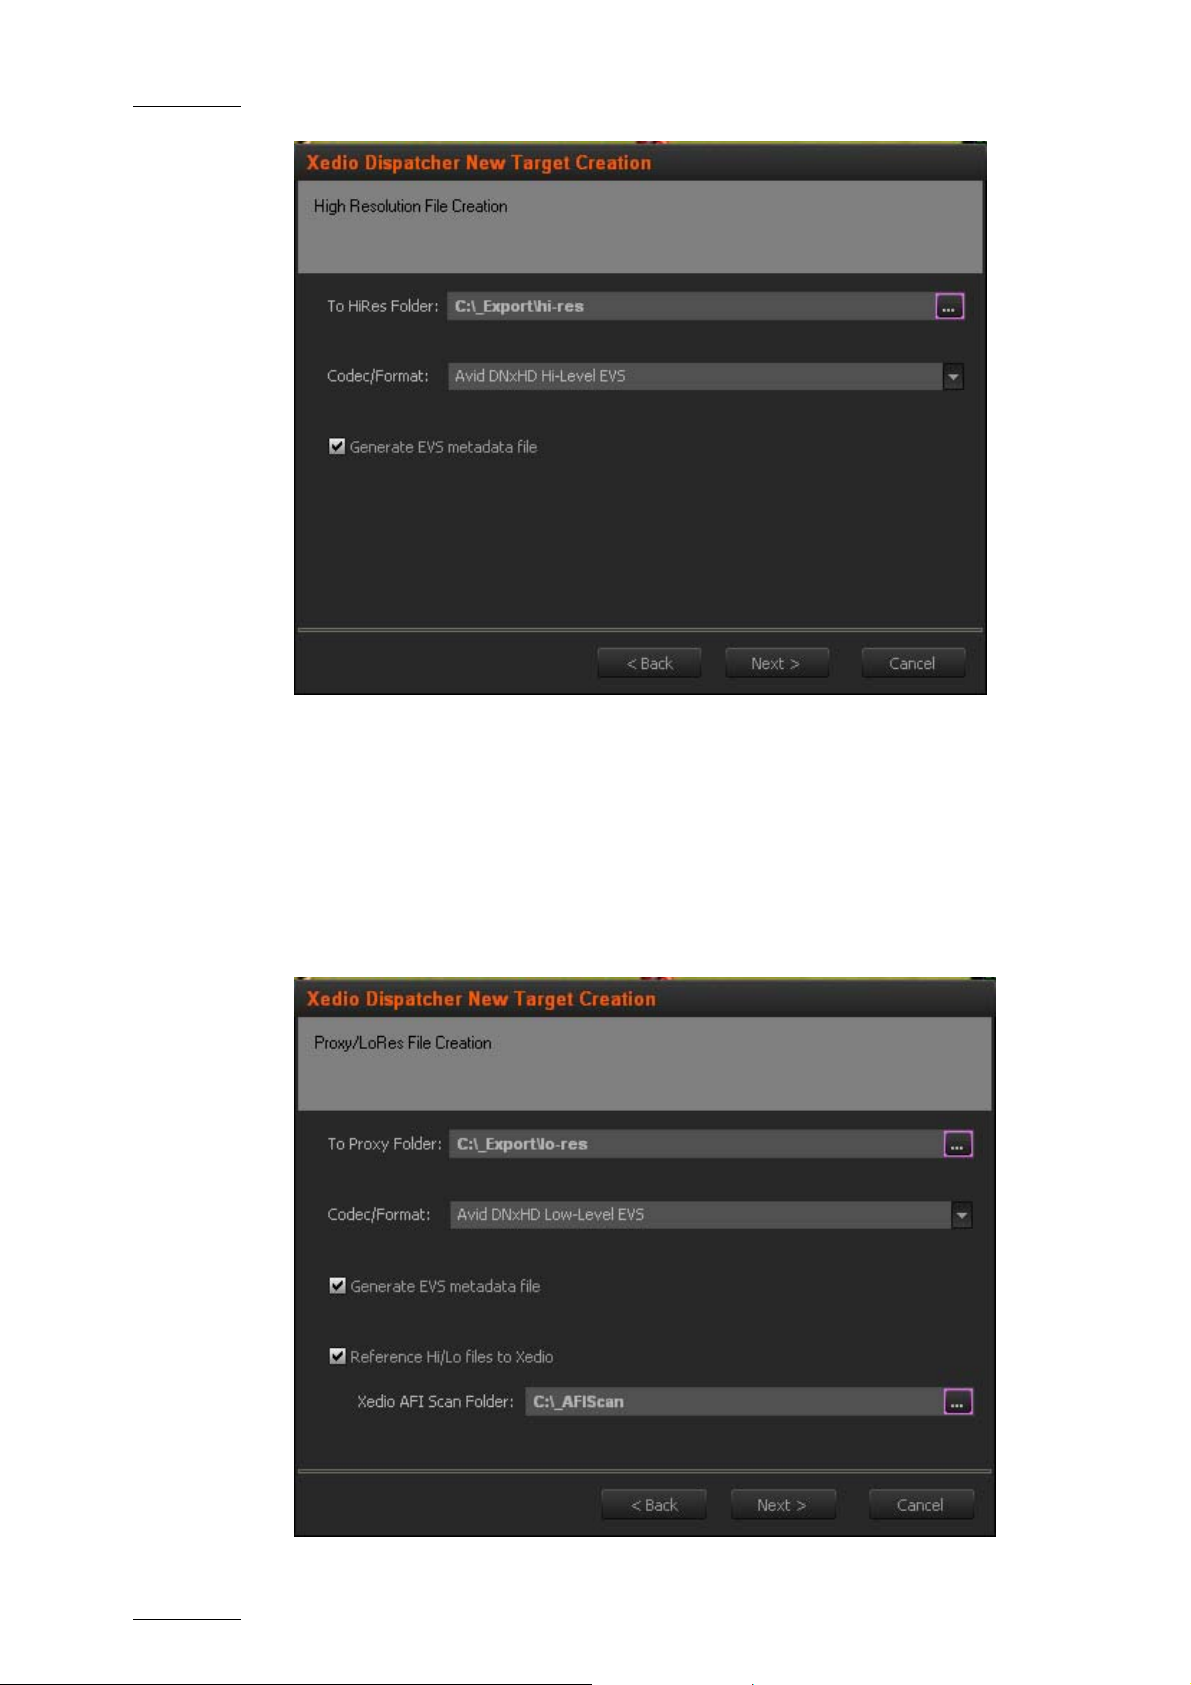
4. If you have asked to generate hi-res files, the High Resolution File Creation
dialog box will be displayed.
Specify the folder where the high resolution files will be stored, as well as the
codec and format to be used to generate these files.
If you want to generat e an EVS metadata file (XML file), that will contain the
file definition, select the Generate EVS metadata file option. This metadata
file will be stored in the same folder as the media f ile.
Page 17
Issue 3.1.B Xedio Dispatcher – Version 3.1 – User’s Manual
EVS Broadcast Equipment – December 2010
Click Next
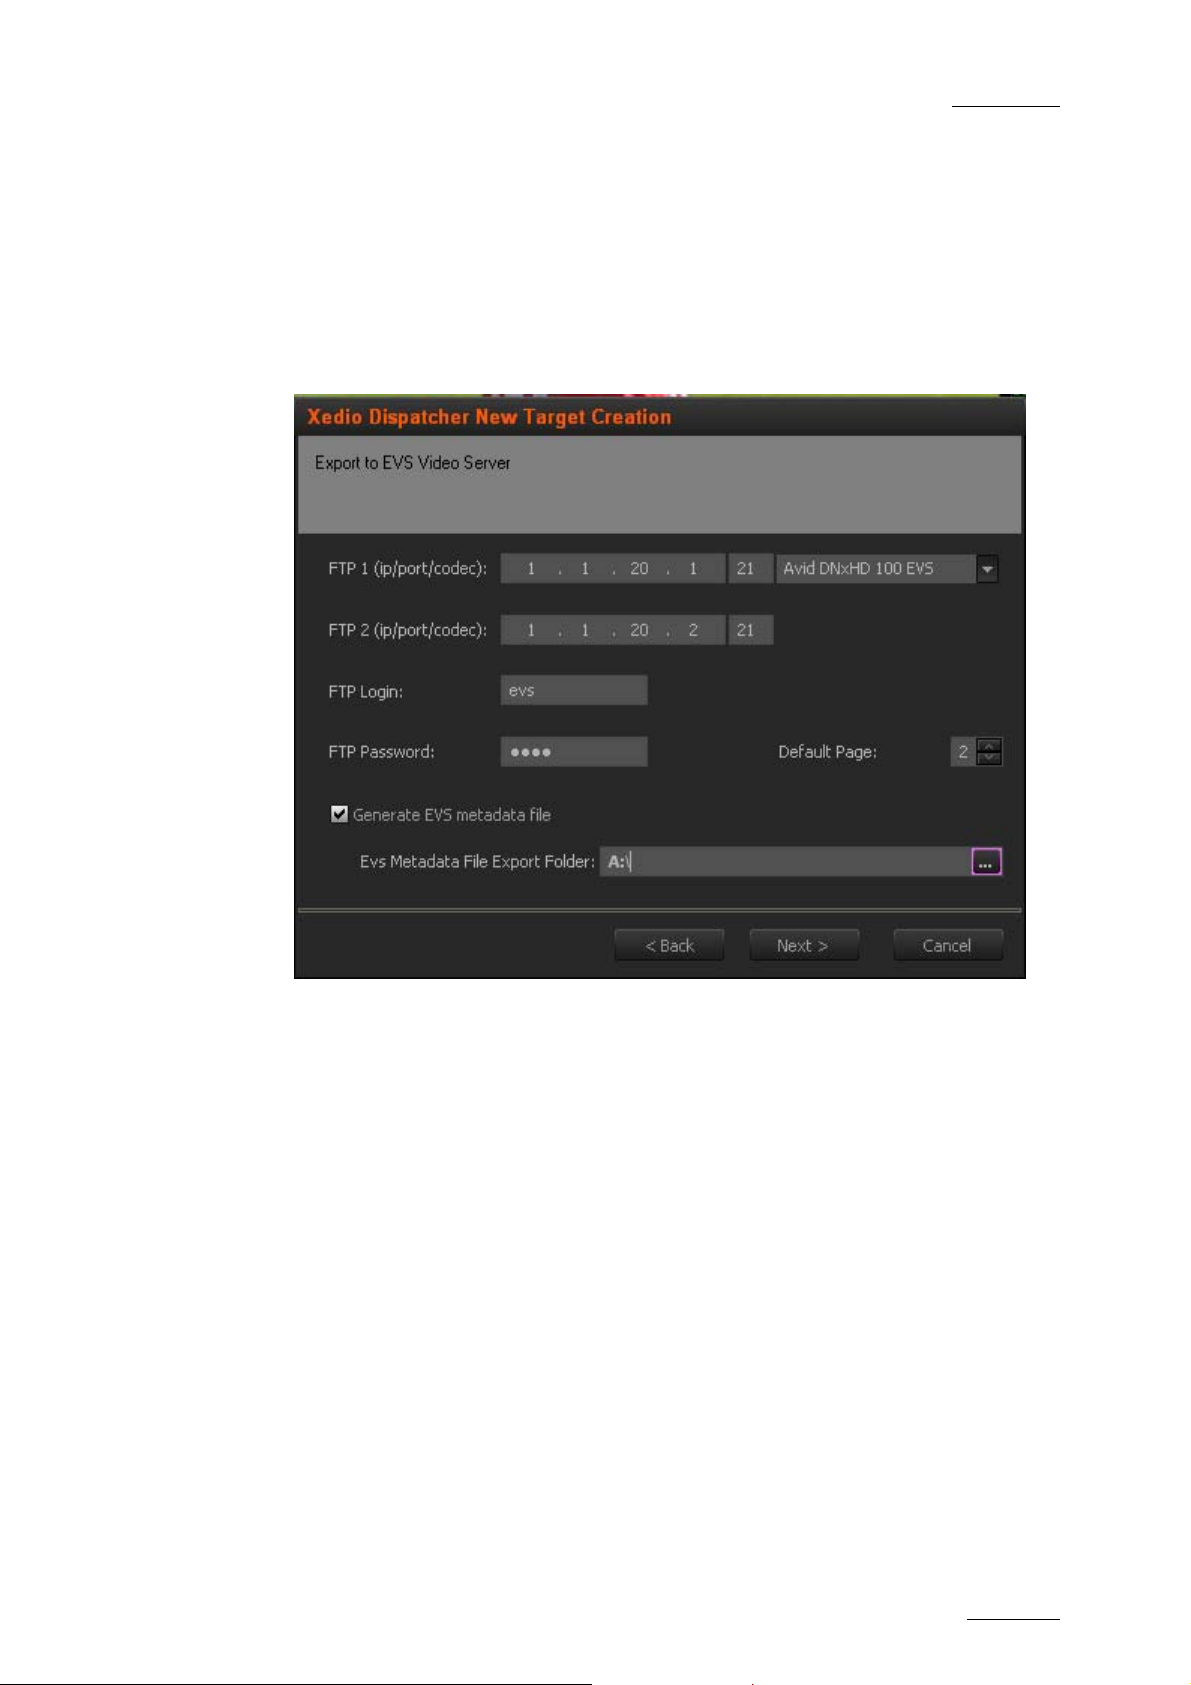
5. If you have asked to generate lo-res files, the Proxy/LoRes File Creation
dialog box will be displayed.
Specify the same information for the low resolution files as for the high-
resolution file.
If you want the AutoFileImporter application (AFI) to scan the generated files
and reference them in the Xedio database, select the Reference Hi/Lo files to
Xedio option and specify the fold er that AFI will have to scan to find the jobs
to perform.
10
Page 18
Xedio Dispatcher – Version 3.1
11
EVS Broadcast Equipment – December 2010
Click Next
6. If you have asked to generate clips, the Export to EVS Video Server dialog
displays.
Specify both IP addresses of the EVS video server, the codec used on the
server, the FTP login an d password, the default page o n which the generated
clip will be stored.
If you want to generate an EVS metadata file (XML file), that will contain the
file definition, select the Generate EVS metadata file option, and specify the
folder where the file should be stored.
User’s Manual
Issue 3.1.B
Click Next
7. If you have asked to use a second EVS server as backup, the Export to 2
nd
EVS Video Server dialog displays. Provide the same information as for the
main EVS server.
Click Next.
8. The Export Logsheet File displays.
Xedio Dispatcher can generate a log sheet (XML file) that will contain the log
information available in the clip, sub-clip or storyboard exported. To this end,
select the Generate EVS metadata file option and specify the folder where to
import this log sheet.
Click Next.
9. In the next dialog box, specify the name for the Target Profile you have
defined. This is the name that will be displayed in the Target field of the
Export Tool in Xedio Dispatcher.
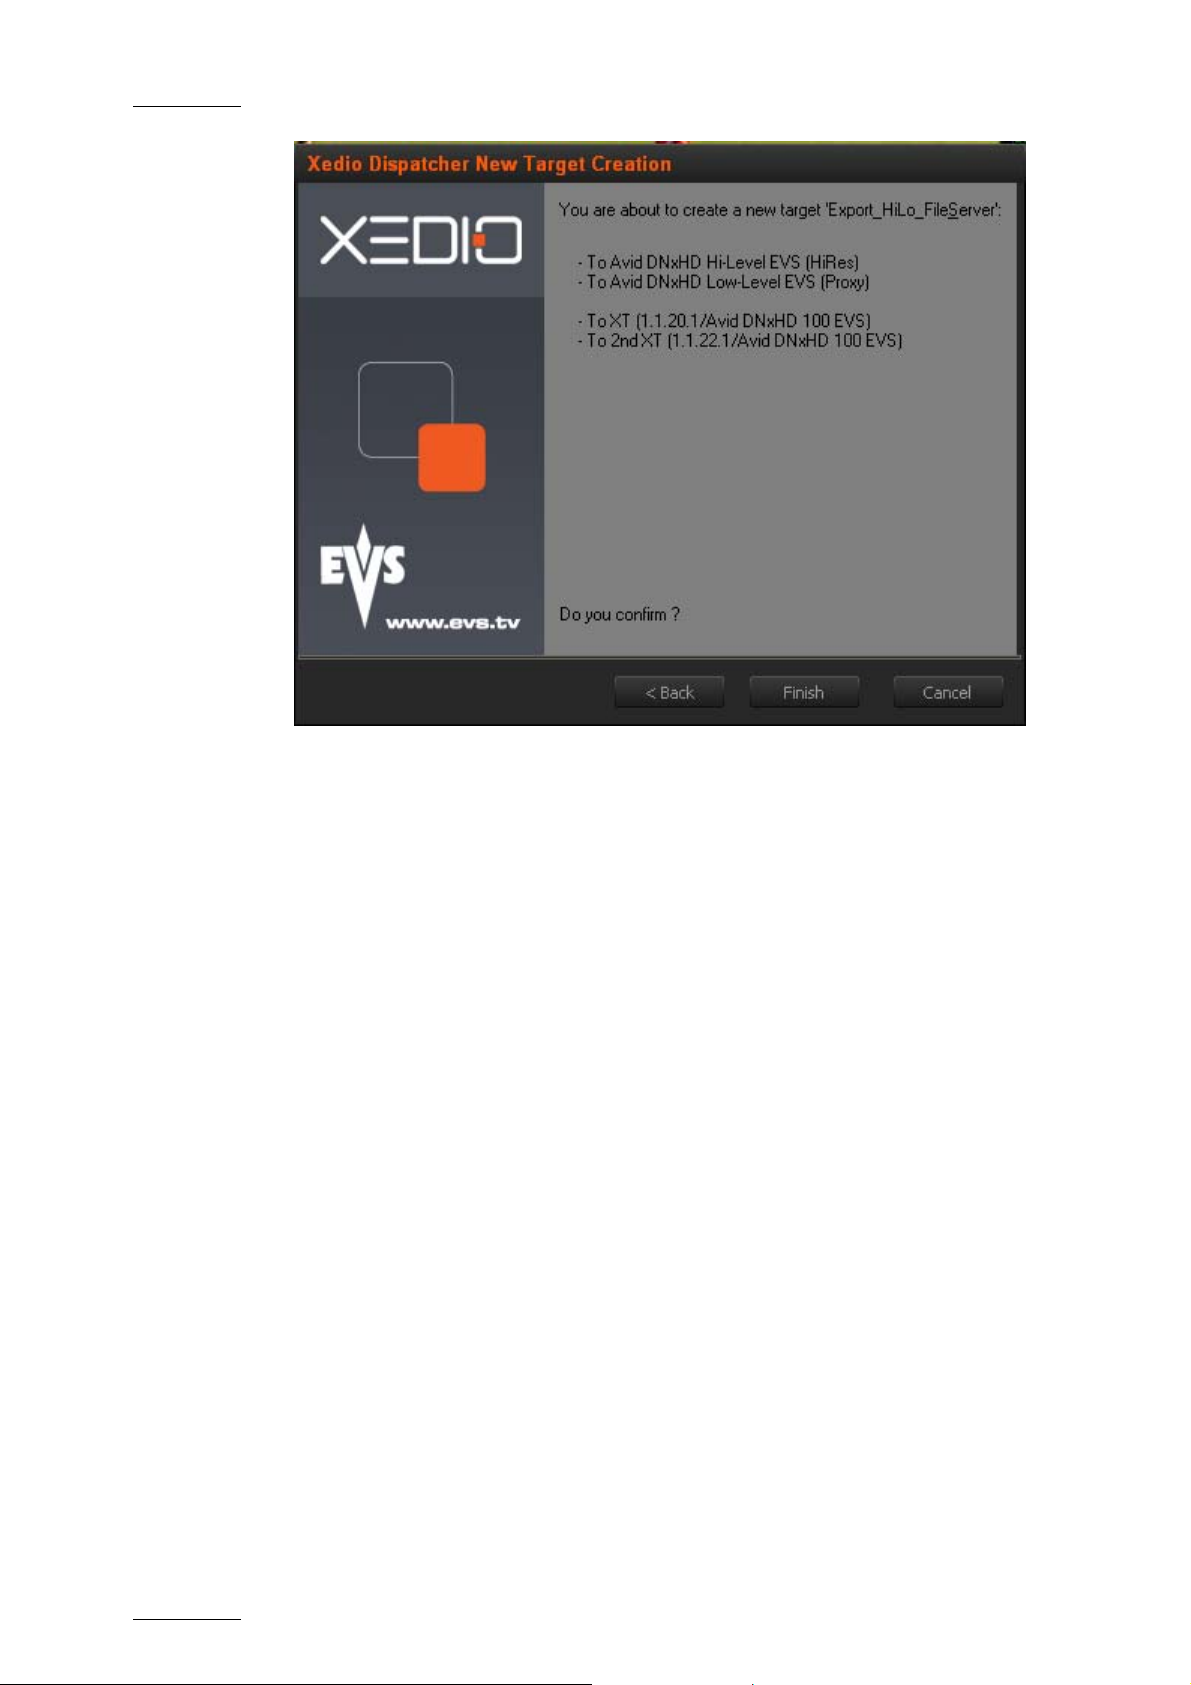
10. The last dialog box provides an overview on the target profile definition. You
can still go back to a previous dialog box, and modify the target profile
definition.
Page 19
Issue 3.1.B Xedio Dispatcher – Version 3.1 – User’s Manual
EVS Broadcast Equipment – December 2010
Click Finish to confirm the Target Profile Definition.
The target profile you have created is now available for use in the Target field
of the Export Tool in X edio Dispatcher.
3.2 KEYWORD GRIDS
The keywords grids used in Xedio Dispatcher are stored as .xml files in
C:\Program Files\EVS Broadcast Equipment\XedioDispatcher\Keyword
Grids\*.xml.
Drop the requested keyword grid files in the folder specified above and the name
of the file will be displayed as the keyword grid name in the Logger tool of Xedio
Dispatcher. The grid is directly available in Xedio Dispatcher.
They are compatible with IPDi rector.
12
Page 20

Xedio Dispatcher – Version 3.1
13
EVS Broadcast Equipment – December 2010
User’s Manual
3.3 CONFIGURATION PARAMETERS
3.3.1 PARAMETER PROFILES
You can access the parameter profiles in Xedio Dispatcher, via the menu
Parameters > Parameter Profiles.
The parameters that are not described below are not used in the current version of
Xedio Dispatcher.
GENERAL
General
Issue 3.1.B
Label Type Default
Value
Default video
aspect ratio
Default video
standard
GrabStillFrameFolder
GrabStillFramePrefix
Video Ratio 16/9 Video Ratio used in thumbnail
Video
Standard
String C:\ Location where grab image operations
String Grab Prefix of the resulting grab image file
HD
1080i
@50
Description
generation and during rendering
operations
Possible values: 4/3 or 16/9
Video supported by the Dispatcher in
the current session (You cannot mixed
PAL and NTSC). This param eter is also
used during rendering to upscale or not
the media
Possible values: PAL SD, NTSC drop
SD, HD 1080i @50, HD 1080i @59,94.
save files.
Audio
Label Type Description
Default Input
Audio Track
Assignment
Default
Rendering
Audio Track
Assignment
Audio Track
Assignment
Audio Track
Assignment
Defines the default audio channel assignment for
the imported media files (other than server clips
and encoder ingests).
Defines the default audio channel assignment for
rendered files.
Page 21

Issue 3.1.B Xedio Dispatcher – Version 3.1 – User’s Manual
EVS Broadcast Equipment – December 2010
Vumeter
Label Type Default
Description
Value
Bottom level of
Vumeter
Numeric -30 Audio level difference (in dB)
compared the 0 level (audio leve l of
the source media) and corresponding
to the bottom of the green zone in
the audio meters
Saturation level of
Vumeter
Numeric -9 Audio level difference (in dB)
compared to the 0 lev el (audio level
of the source media) and
corresponding to the bottom of the
red zone in the audio meters
Top level of Vumeter Numeric 0 Audio level (in dB) of the source
media and corresponding to the top
of the red zone in the audio meters
Warning level of
Vumeter
Numeric -13 Warning audio level used in
Dispatcher players
This value corresponds to th e
beginning of the yellow area in the
vu-meter.
XEDIO DISPATCHER
General
Label Type Default
Value
External Cue Point –
Color Grey
Ranking 0 Color
External Cue Point –
Ranking * Color
External Cue Point –
Ranking ** Color
External Cue Point –
Ranking *** Color
Color Custom
Color
Color Custom
Color
Color
Custom
Color
Description
Color used, in the media bar of
the Player, for representing a
log with the default ranking
assigned
Color used, in the media bar of
the Player, for representing a
log with a ranking * assigned
Color used, in the media bar of
the Player, for representing a
log with a ranking ** assigned
Color used, in the media bar of
the Player, for representing a
log with a ranking *** assigned
ThumbnailWidth Numeric 150 Width used for new thumbnails
(Height is found according to the
4/3 ratio)
14
Page 22

Xedio Dispatcher – Version 3.1
15
EVS Broadcast Equipment – December 2010
Db Maintenance
User’s Manual
Issue 3.1.B
Label Type Default
Description
Value
BackupFilename String XedioDispat
cherBackup
BackupFolder String C:\Program
File\EVS
Backup prefix name of the Xedio
Dispatcher DB
Location where the backup
operations save backup files
Broadcast
Equipment\X
edioDispatc
her\Backup
CheckDB Boolean T (True) Checks DB during maintenance
operation
DaysBeforeDBMainte
nance
Numeric 30 Delay between two DB
maintenances
GenerateBackup Boolean F (False) Generates Xedio Dispatcher DB
backup during maintenance
operation
PurgeBackupFiles Boolean F Purges previous Xedio
Dispatcher DB backup during
maintenance operation
PurgeBackupHistory Boolean F Purges history from Xedio
Dispatcher DB backup during
maintenance operation
ReorganizeIndex Boolean T Re-indexes table from Xedio
Dispatcher DB during
maintenance operation
ShrinkDB Boolean T Shrinks Xedio Dispatcher DB
during maintenance operat ion
DeviceFilter
Label Type Default
Description
Value
AllowCDRom Boolean T Allows scanning CDRoms to find
media. This parameter needs to
be active (T) for XDCAM disk
access.
AllowFixedDrive B oolean T Allows scanning l ocal hard disks
to find media
AllowRamDisk Boolean F Allows scanning Ram disks to
find media
Page 23

Issue 3.1.B Xedio Dispatcher – Version 3.1 – User’s Manual
EVS Broadcast Equipment – December 2010
Label Type Default
Description
Value
AllowRemoteDrive Numeric F Allow scanning network drives to
find media
AllowRemovableDrive Boolean T Allow scanning USB drives to
find media
DaysBeforeMediaPur
ge
DelayBetweenVolum
eCheck
Numeric 30 Delay between two unused
media purge
Numeric 5 Time in seconds between
automatic rescan on r emovable
disk if there is a c hange
MaxDepth Numeric 3 Number of dir ectory levels
checked when scanning for
media.
Logger
Label Type Default Value Description
KeywordGridFolder String C:\Program Files\EVS
Broadcast
Equipment\XedioDispatc
Folder where Xedio
Dispatcher looks for
Keyword grids.
her\Keyword Grid\
Media List
Label Type Default
Description
Value
MaxResultSelSize Numeric 1000 Maximum number of media displayed
in the thumbnail area
Player
Label Type Default
Description
Value
BrowsingIntervalA
ccuracy
Numeric 1000 Interval (in msec) in which the
browsing (using the nowline) tri es to
be frame accurate (high impact on
bandwidth)
EnableDeinterlac
eMenu
Boolean F When working in HiRes, enable the
deinterlace menu when right clicking
over player
JogAudioThreshol
dHI
Real Value 2.0 Maximum playing speed, in hi-res,
above which the audio will no longer
be audible
16
Page 24

Xedio Dispatcher – Version 3.1
17
EVS Broadcast Equipment – December 2010
User’s Manual
Issue 3.1.B
Label Type Default
Description
Value
JogAudioThreshol
dLO
Real Value 4.0 Maximum playing speed, in lo-res,
above which the audio will no longer
be audible.
JogRangeHI Real Value 1.0 Jog Range in HiRes (from -1.0 to
1.0)
JogRangeLO Real Value 2.0 Jog Range in LoRes (from -2.0 to
2.0)
PrevNextX Fields 20 Cursor moves from the current
position when using m ultiple-field
moves.
ShiftSpeedMax Numeric 10 Speed rate for super fast forward
and rewind, when you use the CTRL
key in combination with the forward
and rewind buttons.
SpeedMax Numeric 3 Speed rate for fast forward & rewind
Storyboard
Label Type Default
Description
Value
AllowAudioGuideTra
ck
Boolean T Enables the Audio Guide Track
feature. If this parame ter is
active and if the required
license key is installe d in
XSecure, the Audio Guide Track
button will be available
in the Storyboard player .
AudioGuideTrackOut
put
AudioGuideTrackPre
Roll
Stereo ST3 Stereo output for Audio Guide
Track
Numeric 3000 Countdown in milliseconds
before starting the record
process
AutomaticSaveTime Numeric 10 Delay (in seconds) between two
storyboard saves
Page 25

Issue 3.1.B Xedio Dispatcher – Version 3.1 – User’s Manual
Workspace
EVS Broadcast Equipment – December 2010
Label Type Default
Value
AllowMatchFrame Boolean F Allows the Match Frame feature
Description
(toggle from edit to media): If
this is active, the Match Frame
button is available in the
Storyboard Player
3.3.2 HOW TO EDIT A PARAMETER PROFILE
To edit the paramete rs values of a profile, proceed as follows:
1. In the Application Selection area, select the application in which a
parameter profile should be edited.
2. Select the profile in the Profile Selection area.
3. In the Parameters area, edit the desired parameters in the Variant Values
column
• by selectin g or clearing the box corresponding to a parameter (ch eck box)
• by adding the required value (field to enter a value)
• by selecting the required value (option list)
The default values can be changed by editing the <default> profile.
4. Click the Save button to save the selected profile.
A dialogue box will show a successful update.
18
Page 26

Xedio Dispatcher – Version 3.1
19
EVS Broadcast Equipment – December 2010
User’s Manual
4. User Interface
4.1 STARTING XEDIO DISPATCHER
To start Xedio Dispatcher, select the Xedio Dispatcher application via the menu
Start > All Programs > EVS Broadcast Equipment > Xedio Dispatcher > Xedio
Dispatcher OR double-click the Xedio Dispa tcher shortcut on the desktop:
4.2 OVERVIEW
Issue 3.1.B
The Xedio Dispatcher user interface consists of four areas, besides the Menu bar.
They are highlighted on the following screenshot and shortly described in the table
below:
Page 27

Issue 3.1.B Xedio Dispatcher – Version 3.1 – User’s Manual
Area Description
Source Device This area displays the plugged-in devices and the media that
has been automatically detected on the devices.
See also the section 4.4 ‘Source Device Area’, on page 22.
Workspace This is the working area where you mainly perform the following
actions:
EVS Broadcast Equipment – December 2010
• Loading, playing and editing the source clips to create sub-
clips that will be added to a storybo ard.
• Loading and playing the final storyboard to check it before
export.
See also the section 4.5 ‘Workspace Area’, on page 23.
Tools This area contains several horizontal tabs that provide the
following tools:
• Logger tool: It allows the display of keyword grids from
which you can select the keywords and ranking to associate
to a log.
• Export tool: It allows the export of clips, sub-clips or
storyboards based on the settings defined in a selected
target profile.
See also the section 4.6 ‘Tools area’, on page 29.
Storyboard This is the area where you create and manage your
storyboards. It displays:
• The story boards as individual tabs.
• The thumbnails of the clips included in the open storyboard.
See also the section 4.7 ‘Storyboard area’, on pag e 33.
20
Page 28

Xedio Dispatcher – Version 3.1
21
EVS Broadcast Equipment – December 2010
User’s Manual
4.3 MENU BAR
The Menu bar gives acce ss to the following commands:
Menu item Description
File
Exit Closes Xedio Dispatcher
View
Status Bar Displays/hides the status bar at the bottom of the window
Help
About Provides information on the application version, the support
phone number, etc.
Issue 3.1.B
Parameters
Parameter
Profiles
Keyboard
Profiles
Maintenance
Database
Cleanup
Opens the Parameter Profil es window where you can modify the
various parameters of Xedio Dispatcher.
For more information on the parameters, refer to the section
3.3 ‘Configuration Parameters’, on page 13.
Opens the Keyboard Profiles window where you can customize
the keyboard shortcuts.
To modify a keyboard, double-click the keyboard shortcut in the
Variant Keyboard Function column, type the requested
keyboard shortcut, and pres s OK.
Opens the Database Cleanup window where you can clean all
DB tables, delete thumbnails, and audio guide track in a single
operation.
To clean the Xedio Dispatcher database, select the check box
in the Cleanup Operations zone and click Start.
To leave the window without cleaning the database, click
simply OK.
Page 29

Issue 3.1.B Xedio Dispatcher – Version 3.1 – User’s Manual
EVS Broadcast Equipment – December 2010
4.4 SOURCE DEVICE AREA
4.4.1 INTRODUCTION
When you open Xedio Dispatcher, the application automatically detects the
plugged-in SD or HD devices (P2, XDCAM or XDCAM EX supports), and searches
for media present on these supports.
4.4.2 GENERAL DESCRIPTION
The Source Device area displays:
• the identified devices as the root branches of
an expandable tree view.
• the detected media below the device on
which it is stored. The path where the media
is located is specified.
The check-boxes are used to specify the media
to be displayed in the Thumbnail view of the
Workspace. See also 5.3 ‘Selecting Relevant
Media’, on page 49.
22
Page 30

Xedio Dispatcher – Version 3.1
23
EVS Broadcast Equipment – December 2010
User’s Manual
4.5 WORKSPACE AREA
4.5.1 INTRODUCTION
In the Workspace area, you will list, browse and edit the media using one of the
three possible views.
The user interface elements in the Workspace area differ depending on the view
mode.
4.5.2 VIEW MODES IN THE WORKSPACE
You can select the requested view by clicking one of the view buttons at the
bottom of the Workspace area:
View Description
Issue 3.1.B
The Thumbnail view shows the thumbnails
Thumbnail view
Clip Player view The Clip Player view allows playing source clips.
Storyboard Player view
corresponding to the various source clips of the
media selected in the Source Device area.
The Storyboard Player view allows playing the
final storyboards, as well as recording audio
guide tracks.
Page 31

Issue 3.1.B Xedio Dispatcher – Version 3.1 – User’s Manual
EVS Broadcast Equipment – December 2010
4.5.3 THUMBNAIL VIEW IN THE WORKSPACE AREA
PURPOSE
You will work in this view to select the source clips you want to use to create
storyboard elements.
OVERVIEW
The Thumbnail view shows the thumbnails corresponding to the various source
clips of the media selected in the Source Device area:
For each clip, the following metadata is displayed:
• the clip name (above the thumbn ail)
• the TC IN, TC OUT, and duration of the clip in the source media (below the
thumbnail)
Double-clicking a thumbn ail opens the corresponding clip in the Clip Player view.
SELECTING TECHNIQUES
Several source clips can be selected to move them at once to a storyboard or to
on export list. You can select them thanks to the usual commands:
• Press CTRL + click on the items for a selection of multiple non-contiguous
items.
• Press SHIFT + click on the first and last item for a selection of multiple
contiguous items.
• Press CTRL + A to select all the items from the thumbnail view. In this case,
press the CTRL key while dragging the clips.
24
Page 32

Xedio Dispatcher – Version 3.1
25
EVS Broadcast Equipment – December 2010
User’s Manual
4.5.4 CLIP PLAYER VIEW IN THE WORKSPACE AREA
PURPOSE
You will work in this view to perform the following actions:
• Playing the source clips displayed in the thumbnail view or corresponding to a
storyboard element.
• Preparing sub-clips to be added to the storyboard.
OVERVIEW
The Clip Player view mainly consists of a media player and associated commands,
and is similar to the players used in the Xedio suite:
Issue 3.1.B
Page 33

Issue 3.1.B Xedio Dispatcher – Version 3.1 – User’s Manual
EVS Broadcast Equipment – December 2010
The following table provides a short description on the various areas highlighted
in the Clip Player view. You will find more detailed information on the Clip Player
in the section 4.8 ‘Clip Player and Storyboard Player’, on page 33:
User Interface
Element
Video Display &
Audio Meters
Track Selection
buttons
Jog and Media
bar
Description See also …
It displays the media loaded on the Player.
Parameters related to the display are available
Section 4.8.4
(p.36)
via a contextual menu.
The audio meters show the levels of the various
audio tracks of the clip that is being played.
The Track Selection buttons (little camera and
triangle buttons) allow you to select the video
Section 4.8.5
(p.37)
and audio channels you want to include in the
clip/sub-clip you will place into the storyboard.
The radio buttons displayed next to audio
channel buttons allow you to select which audio
track you want to monitor when you play the
loaded clip in the Clip Player.
The jog bar allows you to move within the
media at a variable speed.
Section 4.8.6
(p.38)
The Media bar represents the clip currently
loaded on the Player:
Editing and
Transport
commands/fields
View Mode
buttons
• If the source clip is loaded on the Player
from the thumbnail view, the IN and OUT
points initially displayed are the ones of the
source clip.
• If the source clip of a storyboard element is
loaded on the Player, the IN and OUT points
initially displayed are the ones of the
storyboard element.
The editing and transport buttons mainly allow
you to perform the following actions:
• Browse in and play the source clip loaded on
the player.
• Mark the IN and OUT points of the storyboard
element before you place it into the
storyboard.
• Navigate between the logs created on the
clip loaded in the player.
These buttons allow you to change the View
mode in the Workspace.
Section 4.8.7
(p.40)
Section 4.8.9
(p.44)
Section
4.8.10 (p.46).
Section 4.5.2
(p.23).
Next/Previous
Clip buttons
These buttons allow you to move to the next or
previous clip available in the Thumbnail view.
26
Page 34

Xedio Dispatcher – Version 3.1
27
EVS Broadcast Equipment – December 2010
User’s Manual
4.5.5 STORYBOARD PLAYER VIEW IN THE WORKSPACE AREA
PURPOSE
You will work in this view to perform the following actions:
• Play a storyboard to see the final result before exporting it.
• Add an audio guide track over the storyboard.
OVERVIEW
Video Display
& Audio Meters
Issue 3.1.B
Audio Track Monitoring
Radio Buttons
Jog & Media Bars
Transport commands
Go To Match Frame
Button
View Mode Buttons
Audio Guide Track
Record Button
Next/Previous
Storyboard Buttons
Page 35

Issue 3.1.B Xedio Dispatcher – Version 3.1 – User’s Manual
EVS Broadcast Equipment – December 2010
The following table provides a short description on the various areas highlighted
in the Storyboard Player view. You will find more detailed information in the
section 4.8 ‘Clip Player and Storyboard Player’, on page 33:
User Interface
Description See also the
Element
Video Display &
Audio Meters
It displays the video material loaded on the
Player. Parameters related to the display
are available via a contextual menu.
The audio meters show the levels of the
various audio tracks of the clip that is being
played.
Audio Track
Monitoring buttons
Allow the selection of the audio track you
want to monitor.
Jog and Media bar Allows moving within the storyboard at a
variable speed.
The Media bar represents the whole
storyboard currently loaded on the Player.
For more information on the job and media
bars, refer to the section 4.8.6 ‘Jog &
Media Bars’, on page 38.
Transport commands Allow you to do the fo llowing actions:
• Browse in and play the loaded
storyboard.
…
Section 4.8.4
(p.36)
Section 4.8.6
(p.38)
Section 4.8.8
(p.42)
• Navigate among the logs displayed on
the loaded storyboard.
Audio Guide Track
Record button
Allows you to add voice-over on the
storyboard.
View Mode buttons Allow changing the View mode in the
Workspace.
Next/Previous
Storyboard buttons
Go to Match Frame
button
Allow moving to the next or previous
storyboard available in the Storyboard area.
Allows loading the so urce clip of the loaded
storyboard element and position on the
current frame.
Section 5.6
(p.55)
Section 4.5.2
(p. 23)
28
Page 36

Xedio Dispatcher – Version 3.1
29
EVS Broadcast Equipment – December 2010
User’s Manual
4.6 TOOLS AREA
4.6.1 ACCESSING THE TABS IN THE TOOLS AREA
The Tools area contains several tabs that are organized horizontally. Click the
Tools tab to expand the Tools area.
4.6.2 LOGGER
INTRODUCTION
The Logger is the panel from which you will select the keyword grids you want to
use when you create logs. You will also select keywords, and ranking you want to
associate to a log in the Logger tab.
When you open Xedio Dispatcher, the application checks for keyword grids stored
as .xml files in
Equipment\XedioDispatcher\Keyword Grids
automatically loaded and available in the Logger tab.
C:\Program Files\EVS Broadcast
. The detected grids are
Issue 3.1.B
OVERVIEW
Page 37

Issue 3.1.B Xedio Dispatcher – Version 3.1 – User’s Manual
EVS Broadcast Equipment – December 2010
The following table provides a short description on the various areas highlighted
in the Logger tab. You will find more detailed information in the section 5.5
‘Adding Logs to a Clip’, o n page 52:
User Interface Element Description
Keyword Grid Selection field Field from which you can select the keyword grid
you want to use.
Keyword Grid Once the keyword grid has been selected, it
opens in the Keyword Grid area. If the keywords
cannot be displayed in one page, the pages are
displayed as tabs.
Clicking on a keyword in the grid will directly
create a log at the nowline position on the clip
loaded in the player, and associate the selected
keyword to the log. The log is symbolized by a
marker on the media bar.
Ranking buttons Buttons that allows you to assign a ranking to the
log, in order to highlight important moments in the
clip.
The log will have a different color depending on
the ranking assigned.
Delete Log button Button that allows you to delete the log on which
you are positioned in the loaded clip, with all
related keywords and rankin g information.
30
Page 38

Xedio Dispatcher – Version 3.1
31
EVS Broadcast Equipment – December 2010
User’s Manual
4.6.3 EXPORT TOOL
INTRODUCTION
The Export Tool is the panel where:
• you select the target profile you want to use during the export process.
• you create a new target using the Target wizard
• you prepare and execute the export of storyboards, but also source clips, or
sub-clips.
The target profile is the definition of the destinations and codecs that will be used
to export the selected storyboards. You select the target profile in the Target
field. Each target profile is defined in an .xml file that has to be stored in
C:\XedioDispatcherMS\Profiles\RTProf.
OVERVIEW
Issue 3.1.B
Page 39

Issue 3.1.B Xedio Dispatcher – Version 3.1 – User’s Manual
EVS Broadcast Equipment – December 2010
The following table provides a short description on the various areas highlighted
in the Export Tool tab. You will find more detailed information in the section 5.8
‘Exporting the Storyboard’, on page 57:
User Interface Element Description
Target Selection field Drop-down field from which you can select the
target profile you want to use or create a new one.
List of export jobs
List of storyboards that have been added to the
export list in the current session, whether they have
already been exported or not.
To add a storyboard into the export list, drag it into
the list of export jobs.
When the storyboard has not been exported yet, the
progress bar shows 0 and the background is light
grey:
When the storyboard has been successfully
exported, the progress bar displays ‘OK’ and the
background is green:
When the storyboard has not been successfully
exported, the progress bar displays an error
message and the background is blu e:
32
Start button Starts the export process for the storyboards that
are in the list and ha ve not been exported yet.
Cancel button Cancels the export process. Already finalized
exports will not be c anceled.
Clear List button Clears the export list. The application asks you to
confirm this action.
It does not clear the output of export jobs stored on
the various destination folders.
Page 40

Xedio Dispatcher – Version 3.1
33
EVS Broadcast Equipment – December 2010
User’s Manual
4.7 STORYBOARD AREA
4.7.1 OVERVIEW
In the Storyboard area, you can see all storyboards you have created in Xedio
Dispatcher. Each storyboard is displayed as a tab named according to the
storyboard name.
When you click the tab corresponding to a storyboard, the storyboard opens: the
tab name becomes underlined, and the storyboard clips are displayed as
thumbnails in the tab.
Issue 3.1.B
You can play the storyboard in the Storyboard Player view. For more information,
refer to the section 5.7 ‘Checking the Storyboard’, on page 56.
Other actions on the storyboard are managed via the contextual menus, from the
Workspace area, Export tool or Logger tool.
4.8 CLIP PLAYER AND STORYBOARD
PLAYER
4.8.1 OVERVIEW
This section describes in details the elements of the user interface specific to the
Clip Player available in the Workspace area. The Clip Player is accessible via the
Clip Player button .
The Storyboard player shares many user interface elements with the Clip Player.
For this reason, the section will also deal with the elements which are common to
both players, and specific to the Storyboard Player. The Storyboard Player is
accessible via the Storyboard Player button .
Besides the video display, the following fields and buttons, will be described in
this section.
Page 41

Issue 3.1.B Xedio Dispatcher – Version 3.1 – User’s Manual
EVS Broadcast Equipment – December 2010
TRANSPORT AND EDITING ZONES IN THE CLIP PLAYER
TRANSPORT ZONES IN THE STORYBOARD PLAYER
4.8.2 HOW TO LOAD A CLIP IN THE CLIP PLAYER
When you load a clip in the Clip Player, the Clip Player becomes automatically
active, and the Clip Player button is selected :
• To load a source clip from the Thumbnail view, double-click on it and the clip
will display in the Clip Player.
The clip boundaries d isplayed are the ones of the sou rce clip.
• To load the source clip on which a storyboard clip is based, double-click the
storyboard clip in the storyboard and the clip will display in the Clip Player.
The clip boundaries d isplayed are the ones of the sto ryboard clip.
34
Page 42

Xedio Dispatcher – Version 3.1
35
EVS Broadcast Equipment – December 2010
User’s Manual
Issue 3.1.B
4.8.3 HOW TO LOAD A STORYBOARD IN THE STORYBOARD PLAYER
To load a storyboard in the Storyboard Player, proceed as follows:
1. Click the Storyboard Player button to open the Storyboard Player.
2. Drag the tab of the re quested storyboard to the Storyboard Play er:
The storyboard is open in the Storyboard player. In play mode, the frame
around the storyboard clip will turn black when the corresponding clip is being
played:
Page 43

Issue 3.1.B Xedio Dispatcher – Version 3.1 – User’s Manual
EVS Broadcast Equipment – December 2010
4.8.4 VIDEO DISPLAY
The video display is common to the Clip Player and Storyboard Player.
ADJUSTING THE PLAYER VIDEO DISPLAY
You can adjust the Player video display via a contextual menu. You call the
contextual menu by right-clicking the Video Display zone on the Player area.
It gives the following display options for the video:
Field Description
Show Timecode This option offers different choices to display timecode on
the player window.
• none – do es not display any timecode
• intra TC – displ ays the original timecode of the media
• start TC - displays a counter starting with 0 at the first
frame of the media
• both (Intra TC – Start TC) – displays both the counter
and original timecode
Aspect Ratio Offers a choice of aspect ratios for the display either Auto,
4:3 or 16:9.
This is also possible to use the following shortcuts:
• + to toggle between 4:3 and 16:9
• + to reset the display to ‘Auto’
Show Safe Areas Displays a safe area cage on the window to determine
which areas of the picture will be seen and allow for
checking the size of graphics within the media for safe
display.
Best Quality Optimizes the image size to provide the best quality when
media is played.
Maximize Maximizes the image size to fill the display area.
Grab Image Grabs the current imag e, either in low resolution or in high
resolution. The default folder (c:\) where the grab is stored
is defined via the menu Parameters > Parameters Profiles:
General, General tab: GrabStillFrameFolder parameter.
MAKING THE PLAYER AREA FULL SCREEN
To view the Player area as a full-screen image, press F9 on the keyboard.
Press again F9 to revert to the normal display.
36
Page 44

Xedio Dispatcher – Version 3.1
37
EVS Broadcast Equipment – December 2010
User’s Manual
4.8.5 PLAYER TRACK SELECTION BUTTONS
All the available audio sources from a media are displayed below the Video
Display Clip Player. The Track Selection buttons are specific to the Clip Player.
OVERVIEW OF THE TRACK SELECTION
When you create a sub-clip, you need to select the video and requested audio
tracks using the buttons underne ath the Video Display zone:
Issue 3.1.B
VIDEO AND AUDIO SELECTION
The channel selection (camera and triangle buttons) allows you to select the video
and audio channels you want to include in the clip/sub-clip you will add to the
storyboard.
Clicking on the Video button will remove the video from the Player window and
disable it so that the clip made has no video: The displayed button will turn to
white.
Clicking on the left or right triangle of an audio stereo track will disable
respectively the left or right channel of the corresponding audio track: The
displayed button will turn to white.
The table summarizes how the buttons look like depending on the selection:
Enabled Disabled
Video
Audio
AUDIO MONITORING SELECTION
The radio buttons displayed between each pair of stereo audio channel buttons
allow you to select which audio track you want to monitor when you play the
loaded clip in the Clip Player.
Page 45

Issue 3.1.B Xedio Dispatcher – Version 3.1 – User’s Manual
Audio meters located on the right side of the Video Display represent the
monitored track.
Db values are displayed on each side. They correspond to the values defined in
Parameters > Parameter Profiles > General > Vumeter for the top level, the
saturation level, the warning level and the bottom level. Values for 0, -2, -4, -8
and -16 are shown as well if they do not overwrite the database values.
EVS Broadcast Equipment – December 2010
EXAMPLES
If a sub-clip has to be created without audio for the channels 1 and 2, disable the
2 buttons of those channels:
Clicking on the left audio button will remove the left audio component from the
source so that the clip made has no left audio channel. In this case, the right
channel will be output on the left and right.
Clicking in addition on the right audio button will remove the right audio
component so that the clip made has no right audio channel.
4.8.6 JOG & MEDIA BARS
The Jog and Media bars, as well as the nowline, mark IN and mark OUT points are
common both to the Clip Player and Storyboard Player.
JOG
Dragging the jog bar allows you to move within the media at a variable speed
depending on:
• the position of the speed indicator
• the speed range covered by the jog area. The default range is set from -200%
to +200%. This is set via the menu Parameters > Parameters Profiles: Media
Dispatcher > Default profile > Player tab: JogRangeHI and JogRangeLO
parameters.
Audio can be heard when using the jo g.
MEDIA BAR
The top area on the bar represents the media, or a portion of it, currently loaded
on the Player. The mark IN, mark OUT and nowline are displayed on this top area
38
Page 46

Xedio Dispatcher – Version 3.1
39
EVS Broadcast Equipment – December 2010
(See the section ‘Nowline, Mark IN and Mark OUT’, on page 39).
The middle area includes a dark grey zone. This zone shows the portion of the
media out of the whole media included in the top area and the position in the
whole media:
• When a media has just been loaded, the top area represents the whole media:
The dark grey area covers the whole space in the middle area.
• If you position the mouse on the middle area and rotate the mouse wheel up or
down, you respectively enl arge or reduce the dark grey area, hence increasing
or reducing the portion of the media included in the top area.
• If you click on the dark grey area and drag it, you shift the portion of media
included in the top area.
• When a mark IN and mark OUT are defined, double-clicking on the dark grey
area will toggle the portion covered by the top area from the entire media
length to the clip le ngth (portion between mark IN and mark OUT).
User’s Manual
Issue 3.1.B
NOWLINE, MARK IN AND MARK OUT
In the Clip Player, the (mark) IN, (mark) OUT points, and the nowline will be used
in the media bar for transport and editing actions. In the Storyboard, only the
nowline is relevant.
Display
An IN point, or mark IN point is shown as a green line on the media.
An OUT point, or mark OUT point is show n as a red line on the media.
The nowline, that is to say the current position within the media, is shown as a
blue line on the media bar. To place the nowline at a given position, simply click
at the requested position on the media bar.
IN and OUT Points
When the source clip is loaded from the Thumbnail view into the Clip Player, the
IN point and OUT point correspo nd to the source clip boundaries.
When the source clip is loaded from the Storyboard view into the Clip Player, the
IN point and OUT point correspo nd to the storyboard clip boundaries.
Page 47

Issue 3.1.B Xedio Dispatcher – Version 3.1 – User’s Manual
EVS Broadcast Equipment – December 2010
Mark IN and Mark OUT Points
In the Clip Player, click at the requested position on the media bar and click the
Mark IN button to add the mark IN of a sub-clip.
In the Clip Player, click at the requested position on the media bar and click the
Mark OUT button to add the mark OUT of a sub-clip.
Moving Points
To move the position of the mark IN, mark OUT or nowline, click on them with the
mouse and drag them to the desired position.
Nowline Outside Media Bar
When the media is being played, the nowline moves along the top area of the
media bar. If the portion of the top area covers only a part of the media, the
nowline may disappear. In this case, a red indicator, on the left side or on the
right side of the Media bar will be displayed. A click on the vertical indicator (on
the left or right side) will re-cen tre the top area to the nowline.
4.8.7 TRANSPORT COMMANDS IN THE CLIP PLAYER
The following table shows an overview on the various transport control fields in
the Clip Player. The table lists the most used commands when they can only be
accessed via a shortcut key.
Note:
The user can customize the keyboard shortcuts via the menu
Parameters > Keyboard Profiles. See also the section 4.3 ‘Menu Bar’,
on page 21.
Field/Button Keyboard
Shortcut
(space bar)
Function Name and Description
Play/Stop
Start/stops the preview (video and/or audio) of a
clip or rush.
The button changes to a Stop icon when the
media is being played.
-
Go to IN
Moves from the current position to the Mark IN
point.
40
Page 48

Xedio Dispatcher – Version 3.1
41
EVS Broadcast Equipment – December 2010
User’s Manual
Issue 3.1.B
Field/Button Keyboard
Shortcut
-
- Fast Forward (with modified speed)
+
Function Name and Description
Go to OUT
Moves from the current position to the Mark OUT
point.
Fast Forward
Plays the media forwar d at a preset fast speed.
The button changes to a Stop icon when the
media is being played forward.
Changes the preset speed to hig her speed value.
The speeds are set in the menu Parameters >
Parameters Profiles: Media Dispatcher> Default
profile > Player tab: ShiftSpeedMax parameter.
Fast Rewind
Plays the media backward at a preset fast speed.
The icon changes to a Stop icon when the media
is being played backward.
Fast Rewind (with modified speed)
+
Changes the preset speed to hig her speed value.
The speeds are set in the menu Parameters >
Parameters Profiles: Media Dispatcher> Default
profile > Player tab: ShiftSpeedMax parameter.
or
Go to Prev. Frame
Moves 1 frame before the current position in
Pause mode.
or
Go to Next Frame
Moves 1 frame after th e current position in Pause
mode.
Page 49

Issue 3.1.B Xedio Dispatcher – Version 3.1 – User’s Manual
EVS Broadcast Equipment – December 2010
Field/Button Keyboard
Shortcut
-
or
-
or
Function Name and Description
Previous 10 Frames
Moves 10 frames before the current position in
Pause mode.
+
Next 10 Frames
Moves 10 frames after the current position in
Pause mode.
+
-
Playing a clip from mar k IN to mark OUT
Playing a clip in loop from mark IN to mark OUT
+
TC OUT of the loaded clip.
Duration from the IN point to the OUT point:
• If the clip is loaded from the thumbnail view, it
displays the duration of the source clip.
• If the clip is loaded from the storyboard, it
displays the duration of the storyboard clip.
4.8.8 TRANSPORT COMMANDS IN THE STORYBOARD PLAYER
The following table shows an overview on the various transport control fields in
the Storyboard Player. The table lists the most used commands when they can
only be accessed via a shortcut key .
42
Page 50

Xedio Dispatcher – Version 3.1
43
EVS Broadcast Equipment – December 2010
User’s Manual
Issue 3.1.B
Note:
The user can define the keyboard shortcuts in Xedio Manager to
perform transport control commands. The keys mentioned below are the
default settings.
Field/Button Keyboard
Shortcut
(space bar)
- Fast Forward (with modified speed)
+
Function Name and Description
Play/Stop
Start/stops playing the storyboard.
The button changes to a Stop icon when the
media is being played.
Fast Forward
Plays the media forwar d at a preset fast speed.
The button changes to a Stop icon when the
media is being played forward.
Changes the preset speed to hig her speed value.
The speeds are set in the menu Parameters >
Parameters Profiles: Media Dispatcher> Default
profile > Player tab: ShiftSpeedMax parameter.
Fast Rewind
Plays the media backward at a preset fast speed.
The button changes to a Stop icon when the
media is being played backward.
Fast Rewind (with modified speed)
+
Changes the preset speed to hig her speed value.
The speeds are set in the menu Parameters >
Parameters Profiles: Media Dispatcher> Default
profile > Player tab: ShiftSpeedMax parameter.
or
Go to Prev. Frame
Moves 1 frame before the current position in
Pause mode.
or
Go to Next Frame
Moves 1 frame after th e current position in Pause
mode.
Page 51

Issue 3.1.B Xedio Dispatcher – Version 3.1 – User’s Manual
EVS Broadcast Equipment – December 2010
Field/Button Keyboard
Shortcut
-
or
-
or
Function Name and Description
Previous 10 Frames
Moves 10 frames before the current position in
Pause mode.
+
Next 10 Frames
Moves 10 frames after the current position in
Pause mode.
+
Go to Next Transition (Storyboard Player only)
Go to Prev. Transition (Storyboard Player only)
4.8.9 CLIP CREATION FIELDS
The Clip Creation fields are specific to the Clip Player. The storyboard clips can
indeed not be modified once the y are included in the storyboard.
Moves to the next storyboard clip.
Moves to the previous storybo ard clip.
Duration of the storyb oard.
This field is not used in the Storyboard Player.
44
Page 52

Xedio Dispatcher – Version 3.1
45
EVS Broadcast Equipment – December 2010
The following table describes the various fields that are used to create clips:
User’s Manual
Issue 3.1.B
Field/Button Keyboard
Function Name and Description
Shortcut
or
Mark IN
Sets a mark IN point at the nowline po sition on
the media bar:
• A timecode value is added in Mark IN TC field.
• A [ sign is shown on the video display
• A green mark is added at this timecode on the
media bar.
or
Mark OUT
Sets a mark OUT point at the nowline position on
the media bar:
• the timecode value is added in Mark OUT TC
field.
• A ] sign is shown on the video display
• A red mark is added at this timecode on the
media bar.
Clip Name
Field where the clip name can be entered.
Mark IN TC
Timecode of the Mark IN defined on the loaded
media.
Mark OUT TC
Timecode of the Mark OUT defined on the loaded
media.
Nowline TC
Timecode of the nowlin e defined on the loaded
media.
To move the mark IN, mark OUT or nowline to a given TC, type the timecode in the
corresponding field and press ENTER.
You can edit hours, minutes, seconds or frames separately in the timecode fields:
• Double-click on the hours, minutes, seconds or frames area, and the
corresponding area will be activated for editing.
• Simple-click in the timecode field, the cursor should blink on the right and you
can type the full timecode value.
Page 53

Issue 3.1.B Xedio Dispatcher – Version 3.1 – User’s Manual
EVS Broadcast Equipment – December 2010
4.8.10 LOG BUTTONS
The Log buttons are common to the Clip Player and Storyboard Player.
The logs are reference points to a specific frame in a video sequence. Their
purpose is to mark points of interest on the media. The log is identified by a TC
value, and relates to an action in a given event. It is associated to keywords
and/or a ranking in Xedio Dispatcher. When no metadata is associated to them,
they are named ‘cue po ints’.
The three Log buttons are used to add and delete logs, as well as to move from
one log to the other.
For more information on how to create and manage logs, refer to the section 5.5
‘Adding Logs to a Clip’, o n page 52.
4.8.11 AUDIO TRACK MONITORING BUTTONS
The Audio Track Monitoring buttons are specific to the Storyboard Player.
The radio buttons below the video display allow you to select the audio track you
want to monitor.
4.8.12 AUDIO GUIDE TRACK RECORD BUTTON
The Audio Guide Track Record button is specific to the Storyboard Player.
The Audio Guide Track Record button allows you to record a voice-over
sequence on one track of the storyboard.
You can only record one audio guide track for one storyboard. Once the audio
guide track has been created, you cannot modify it. If you want to change it, you
need to delete it and record a new one.
For more information on how to record an Audio Guide track, refer to the section
5.6 ‘Recording an Audio Guide Track’, on page 55.
46
Page 54

Xedio Dispatcher – Version 3.1
47
EVS Broadcast Equipment – December 2010
User’s Manual
5. Operation
5.1 GENERAL WORKING PROCESS
When you want to create and export a storyboard, you will usually apply the
following steps. These steps are explained as simple procedures in the following
sections. Click on the step to jump di rectly to the corresponding section.
Issue 3.1.B
1. Creating an empty storyboard
2. Selecting media, on page 49
3. Adding sub-clips to the storyboard
4. Adding logs to clips and/or storyboard (optional), on page 52
5. Checking the storyboard, on page 56
6. Exporting the storyboard, on page 57
, on page 47
, on page 50
5.2 MANAGING THE STORYBOARDS
5.2.1 HOW TO CREATE AN EMPTY STORYBOARD
To create a storyboard, proceed as follows:
1. Click the + sign in the top left corner of the Stor yboard area.
This opens The Storyboard Name window.
2. Type the name of the storyboard in the Storyboard Name field.
3. Click OK.
The new storyboard is now available in the Storyb oard area as a new tab. The tab
name is the storyboard name. When a storyboard is active, the tab is underlined in
the Storyboard area.
Page 55

Issue 3.1.B Xedio Dispatcher – Version 3.1 – User’s Manual
EVS Broadcast Equipment – December 2010
5.2.2 OTHER POSSIBLE ACTIONS ON STORYBOARDS
The following table de scribes the various actions you c an perform on a storyboard:
Action Description
Opening a
storyboard
Renaming a
storyboard
Deleting a
storyboard
Sending a
storyboard to
the Export tool
Click on the tab of the requested storyboard:
The tab name is underlined and the storyboard clips are
displayed in the tab as thumbnails.
Right-click the storyboard tab and select Rename Storyboard
from the contextual menu:
The Storyboard Name window is displayed. Type the new name
and click OK.
Right-click the storyboard tab and select Delete Storyboard
from the contextual menu:
A message will ask you for confirmation before deleting the
storyboard.
Right-click the storyboard tab and select Send Storyboard to
Export Tool from the contextual menu:
48
The storyboard is added to the li st of exports:
For more information on Exporting storyboards, refer to the
section 5.8 ‘Exporting the Storyboard’, on page 57.
Page 56

Xedio Dispatcher – Version 3.1
49
EVS Broadcast Equipment – December 2010
User’s Manual
5.3 SELECTING RELEVANT MEDIA
5.3.1 OPENING THE SOURCE CLIPS IN THE THUMBNAIL VIEW
You will create the storyboard clips on the basis of source clips included in the
available media.
Ticking the check box corresponding to a media will display thumbnails for each
source clip included in this media in the Thumbnail view on the Workspace area.
Issue 3.1.B
5.3.2 LOADING A SOURCE CLIP IN THE CLIP PLAYER
Double-clicking a source clip in the Thumbnail view will load the source clip in the
Clip Player. You can then create sub-clips from the source clip and include them
into the storyboard. For more information, refer to the section 5.4 ‘Adding Clips or
Sub-Clips to the Storyboard’, on page 50.
Page 57

Issue 3.1.B Xedio Dispatcher – Version 3.1 – User’s Manual
EVS Broadcast Equipment – December 2010
5.4 ADDING CLIPS OR SUB-CLIPS TO THE
STORYBOARD
You can create sub-clips of the source clips in the Clip Player, or take over the
source clips, and add them to the open storyboard.
5.4.1 HOW TO ADD A SUB-C LIP TO THE STORYBOARD
To create a sub-clip and add it to the storyboard, proceed as follows:
1. Ensure the requested storyboard is open in the Storyboard area (see section
5.2.1, on page 47).
2. Open the requested source clip in the Clip Player view (see section 5.3, on
page 49).
3. Add a mark IN point in one of the following ways:
o Use the transport control buttons (see page 40) to move the nowli ne to the
requested frame and press mark IN button .
o Type the requested TC in the TC Mark IN field and press ENTER.
4. Add a mark OUT point in one of the following ways:
o Use the transport control buttons (see page 40) to move the nowli ne to the
requested frame and press mark OUT button .
o Type the requested TC in the TC Mark OUT field and press ENTER.
5. Enter a name in the Clip Name field, if requested.
6. Drag the sub-clip to the open storyboard and drop it either at the end of the
storyboard, or between two storyboard clips. The position where the clip will
be dropped when you re lease the mouse is shown with a vertical green bar:
Note
You cannot modify a storyboard clip once it is included in a storyboard. If
you want to change the boundaries of the storyboard clip, you need to
delete the storyboard clip (see p.51), and add a new one with the
requested boundaries.
50
Page 58

Xedio Dispatcher – Version 3.1
51
EVS Broadcast Equipment – December 2010
User’s Manual
5.4.2 HOW TO ADD SOURCE CLIPS TO THE STORYBOARD
To add a source clip to the storyboard, you can drag it from the thumbnail view of
the workspace and drop it at the requ ested place in the Storyboard area.
To add several source clips at a time, you can select them thanks to the usual
commands, as detailed in sect ion ‘Selecting Techniques’ on page 24.
Clips are then added in chronological order.
5.4.3 HOW TO REPLACE A CLIP IN THE STORYBOARD
To replace a clip in the storyboard by a source clip or a sub-clip, press the CTRL
key while dragging the source clip or the sub-clip to the storyboard.
The storyboard element that is going to be replaced is surrounded by a green line:
Issue 3.1.B
5.4.4 HOW TO MODIFY THE STORYBOARD CLIP BOUNDARIES
You cannot edit the boundaries of a storyboard clip. In this case you need to
replace the storyboard clip.
To modify the boundaries of a storyboard clip, proceed as follows:
1. In the open storyboard, double-click the storyboard clip you want to replace.
This loads the source clip of the storyboard clip on the Clip Player.
The displayed clip boundaries are the ones of the storyboard clip.
2. Modify the ma rk IN and/or mark OUT points t o prepare the new sub-clip.
3. Drag the new sub-clip to the storyboard and drop it after the clip to be deleted.
4. Right-click the clip to be deleted in the storyboard and select Delete Selected
Edit Clip from the contextual menu.
Page 59

Issue 3.1.B Xedio Dispatcher – Version 3.1 – User’s Manual
EVS Broadcast Equipment – December 2010
5.5 ADDING LOGS TO A CLIP
5.5.1 INTRODUCTION
Whenever you want, you can add logs to the material loaded in the Clip Player, or
in the Storyboard Player. Even if you add the log in the Storyboard Player, the
logs are in fact added to the source clip. You can associate a ranking and/or
keywords to the log.
5.5.2 HOW TO ADD A LOG TO A CLIP
The following procedure explains how to add logs, with associated metadata.
If you want to add a cue point (no associated metadata), simply click the Add Log
button after step 2.
To add a log to a clip, proceed as follo ws:
1. Load the source clip in the Clip Player or the storyboard clip in the Storyboard
Player. For more information, see the sections 4.8.2 and 4.8.3.
2. Position the nowline on the frame where you want to add a log in one of the
following ways:
o Using the transport buttons
o Dragging the nowline to the requested frame
o Typing the requested TC in the nowline TC field (in Clip Player only) and
pressing ENTER.
3. Click the Logger tab in the Tools area.
4. Click within the Keyword Grid Selection field.
The list of available keyword gr ids is displayed:
5. Select the keyword grid you want to use.
6. Click the keywords you want to associate to your log, and/or the requested
ranking button.
A log is added to the media bar.
52
Page 60

Xedio Dispatcher – Version 3.1
53
EVS Broadcast Equipment – December 2010
User’s Manual
5.5.3 LOG AND METADATA DISPLAY
The log created is added to the med ia bar, but the log and its associated metadata
are displayed in different ways in the user interface:
LOG COLOR AND RANKING
The log will have a different color depending on the ranking assigned:
• White log for no-star ranking (default)
• Blue log for 1-star ranking
• Green log for 2-star ranking
• Red log for 3-star ranking
Issue 3.1.B
KEYWORD DISPLAY
The keywords are listed below the video display and are displayed as a tool tips
when you roll the mouse over the log:
LOGGER AREA
When the nowline is positioned on a log, you can easily find back the keywords
assigned to this log in the Logge r area as:
• The keyword grid and keyword grid pages that contain keywords assigned to
the selected log are displayed with an asterisk.
• The keywords assigned to the selected log are displayed on a lighter
background, like ‘Controversy’ in the screenshot below.
Page 61

Issue 3.1.B Xedio Dispatcher – Version 3.1 – User’s Manual
EVS Broadcast Equipment – December 2010
5.5.4 OTHER POSSIBLE ACTIONS ON LOGS
The following table describ es shortly other possible actions on logs:
Action Description
Moving from one log to the
other
• Click the Go to Prev. Log button to move to
the log positioned on the left of the nowline.
• Click the Go to Next Log button to move to
the log positioned on the right of the nowline.
Deleting a log When the nowline is positioned on a log (using the
, buttons) you can delete it (and all its
metadata) in one of the following ways:
• Pressing the Delete Log button at the
bottom of the Logger area.
• Clicking CTRL+ .in the Player area.
Displaying only logs having a
given ranking
By default, all logs are displayed in the loaded
material.
If you want to display only the logs having a
specific ranking, right- click on the log, right above
the media bars.
The following contextual menu is displayed.
Select the check boxes (external) that correspond
to the ranking(s) you want to display.
Do the reverse operation to re display all logs.
54
Page 62

Xedio Dispatcher – Version 3.1
55
EVS Broadcast Equipment – December 2010
User’s Manual
Issue 3.1.B
5.6 RECORDING AN AUDIO GUIDE TRACK
5.6.1 INTRODUCTION
You have the possibility to record a voice-over sequence on one track of the
storyboard.
You can only record one audio guide track for one storyboard. Once the audio
guide track has been created, you cannot modify it. If you want to change it, you
need to delete it and record a new one.
By default, the audio guide track is stored and exported on the stereo track 3 of
the storyboard. The track on which it is stored is defined via the menu Parameters
> Parameter Profiles: Media Dispatcher > Default parameter profile > Storyboard
tab: AudioGuideTrackOutput setting. Audio guide track will be mixed over any
existing audio on this audio track .
5.6.2 HOW TO RECORD AN AUDIO GUIDE TRACK
The storyboard on which you want to add the audio guide track is already loaded
in the Storyboard Player (see section 4.8.3 ‘How to Load a Storyboard in the
Storyboard Player’, on page 35).
To record an Audio Guide Track on th e storyboard, proceed as follows:
1. Position the nowline where you want to start the audio guide sequence.
2. Click the Start Audio Guide button .
A countdown (default 3-second preroll) starts and is sh own on the button
. It indicates the numb er of seconds before the recordin g process
starts and allows you to get ready for the recording.
3. Start speaking when the button turns red .
4. Click the butt on again when the voiceover sequ ence is finished.
The record button becomes the Delete Audio Guide button : click on this
button if you are not satisfied with the recorded audio guide, and create a new
one.
Note
The default value for the Audio Track Guide Preroll can be modified in
the AudioGuideTrackPreRoll setting defined via the menu Parameters >
Parameter Profiles: Media Dispatcher > Default parameter profile >
Storyboard tab.
Page 63

Issue 3.1.B Xedio Dispatcher – Version 3.1 – User’s Manual
EVS Broadcast Equipment – December 2010
5.7 CHECKING THE STORYBOARD
5.7.1 INTRODUCTION
Once the storyboard is created, you can check the result by loading the storyboard
in the Storyboard Player .
5.7.2 HOW TO LOAD A STORYBOARD IN THE STORYBOARD PLAYER
To load a storyboard in the Storyboard Player, proceed as follows:
1. Click the Storyboard Player button to open the Storyboard Player.
2. Drag the tab of the re quested storyboard to the Storyboard Play er:
The storyboard is open in the Storyboard player. In play mode, the frame
around the storyboard clip will turn black when the corresponding clip is being
played:
56
Page 64

Xedio Dispatcher – Version 3.1
57
EVS Broadcast Equipment – December 2010
User’s Manual
5.8 EXPORTING THE STORYBOARD
5.8.1 INTRODUCTION
Once your storyboard is finalized, you can export it to multiple destinations and to
multiple formats at the same tim e. The destination folders and formats are defined
in the target profiles you can select before you launch the export process. For
more information on creating new target profiles, refer to the section 3.1 ‘Export
Target Profiles’, on page 8.
5.8.2 HOW TO EXPORT A STORYBOARD
To export a storyboard open in the Storyboard area, proceed as follows:
1. Click the ExportTool tab in the Tools area to expand the Export Tool area.
2. In the Target field, select the name of the Target Profile you want to use to
export the storyboard.
Issue 3.1.B
3. From the Storyboard area, add the storyboard to the list of export jobs in one
of the following ways:
o Right-click in the Storyboard area, and select the Send Storyboard to
Export Tool command in the contextual menu:
Page 65

Issue 3.1.B Xedio Dispatcher – Version 3.1 – User’s Manual
EVS Broadcast Equipment – December 2010
o Drag the storyboard tab to the List of export jobs in the Export tool:
4. The storyboard name is added to the list of export jobs.
5. Click Start at the bottom of the Export tool.
The storyboard is exported as defined in the selected target profile.
The progress of the export job is displayed in the List of export jobs:
When the export has been success ful, OK is displayed on a green background:
The storyboards added to the list will remain available in the list, whether they
have been exported or not, until the end of the user s ession.
58
Page 66

Xedio Dispatcher – Version 3.1
59
EVS Broadcast Equipment – December 2010
User’s Manual
5.8.3 EXPORTING CLIPS AND SUB-CLIPS
You can also export individual source clips, or sub-clips using the Export tool.
Proceed in the same way as for storyboards for exporting clips and sub-clips.
To add a source clip, drag the thumbnail of the source clip from the thumbnail
view of the workspace to the List of export jobs in the Export tool. To add several
source clips at a time, you can select them thanks to the usual commands, as
detailed in section ‘Selecting Techniques’ on page 24. Clips are then added in
chronological order.
To add a sub-clip created in the Clip Player, define the IN and OUT points, and
possibly name for the sub-clip in the Clip Player, and drag it to the List of export
jobs in the Export tool.
5.8.4 RESULT OF EXPORT JOB
Exporting a storyboard generates the following output files for each codec/format,
and destination folder defined in the target profile.
• The file that contains the A/V material. It is generated in the defined codec
and format.
Issue 3.1.B
• An .evs.xml file that contains the definition of storyboard.
• An .xml file that contains the log in formation. This file can then be imported to
and used in IPDirector.
5.8.5 OTHER POSSIBLE ACTIONS ON EXPORT JOBS
The following table describes other possible actions on export jobs:
Action Description
Deleting an item in the list of
export jobs
Clearing the list of export
jobs
Right-click the item in the list that you want to
remove, and select Delete Selected Item from the
contextual menu
OR
Select the item and press the Delete key.
To clear the list of export jobs, already exported
or not, click the Clear List button at the bottom of
the Export Tool area.
It does not clear the output of export jobs stored
on the various destinat ion folders.
Moving an item in the list of
export jobs
To move an item within the export list, drag it to
required position. A thin red line indicates the
drop position.
Page 67

Issue 3.1.B Xedio Dispatcher – Version 3.1 – User’s Manual
EVS Broadcast Equipment – December 2010
60
Page 68

Xedio Dispatcher – Version 3.1
61
EVS Broadcast Equipment – December 2010
Term/Acronym Definition/Explanation
Cue Point Reference point to a specific frame in a video
Event Event that is associated to a production show. It can
Keyword Metadata attached to a log that provides information
Keyword grid Keywords displayed as icons in a grid.
User’s Manual
Issue 3.1.B
Glossary
sequence. Their purpose is to mark points of interest
on the media. The cue point is only identified by a TC
value.
be a football game, an entertainment show, a reality
show, …
on the media content.
Level of interest See ‘Ranking’
Log Reference points to a specific frame in a video
sequence. Their purpose is to mark points of interest
on the media. The log is identified by a TC value, and
relates to an action in a given event. It is associated
to keywords and/or a ranking, and possibly other
metadata related to the action.
Log sheet File that contains all logs for a given event.
Ranking Metadata attached to a log that characterizes the
importance given to the log, and usually symbolized by
stars (no star = not important, 1 star = useful, 2 stars
= important, 3 stars = very important).
Source clip A/V material stored on the device that has recorded it
(for example P2, XDCAM cameras, or an EVS server),
and used as source content to create another A/V
output (playlist, timeline, storyboard, etc.). This is
also called ‘shoot’ or ‘foot age’.
Source file A/V material stored on a workstation or storage, and
used as source content to create another A/V output
(playlist, timeline, storyboard, etc.).
Storyboard clip Individual element included in a storyboard. This can
be a sub-clip or a full source clip/file.
Sub-clip Part of a source material, defined by an IN and OUT
points, that represen ts a new A/V material.
Page 69

Page 70

Xedio Dispatcher – Version 3.1
63
EVS Broadcast Equipment – December 2010
A
Areas
device∙22
Exporttool∙31
Logger∙29
storyboard∙33
workspace∙23
AudioGuideTrack
button∙28,46
enable∙17
record∙55
User’s Manual
Issue 3.1.B
Index
clearoutputfiles∙59
ExportTargetProfile∙8
creation∙8
selection∙32
Exporttool∙31
F
FastForward∙41
FastRewind∙41
Formatssupported∙1
G
C
Cleanup
DB∙21
Clip
loading∙34
ClipPlayer
clipcreationfields∙44
description∙33
transportcommands∙40
view∙23,25
Codecssupported
forexport∙1
forsourcefiles∙1
D
DB
cleanup∙21
parameters∙15
Definition
exporttargetprofile∙8
Devicearea∙22
Goto
IN/OUT∙40
Nextframe∙41
Prev.frame∙41
H
HD∙4
I
ImportKeyFile∙5
INpoint∙39
Installation∙6
J
Jogbar∙38
K
E
Enable
AudioGuideTrack∙17
MatchFrame∙18
Export
clip∙59
result∙59
storyboard∙57
Exportjob
clearlist∙59
delete∙59
moveitem∙59
Exportjobs
Keyboardprofiles∙21
Keyword
display∙53
displayusedkeywords∙53
Keywordgrids∙29
availability∙12
L
Launch
XedioDispatcher∙19
Licenses∙5
Loading
Page 71

Issue 3.1.B Xedio Dispatcher – Version 3.1 – User’s Manual
EVS Broadcast Equipment – December 2010
clip∙34
storyboard∙35
Log
add∙52
color∙53
description∙46
displaybasedonranking∙54
displayedinformation∙53
movebetweenlogs∙54
Logger∙29
M
MarkINpoint∙39,45
MarkOUTpoint∙39,45
MatchFrame
button∙28
enable∙18
Mediabar∙38
Menubar∙21
Moving
points∙40,45
N
Next/Previous
clip∙26
storyboard∙28
nowline∙39
S
SD∙4
Settings∙13
videodisplay∙36
Sourceclips
displaythumbnails∙49
load∙49
Start
XedioDispatcher∙19
Stop∙40
Storyboard
addclips∙50
addingtoexportlist∙48
check∙56
create∙47
delete∙48
deleteclip∙51
export∙57
loading∙35
modifyclip∙50,51
open∙48
overwriteclip∙51
rename∙48
selectingtracks∙37
Storyboardarea∙33
StoryboardPlayer
description∙33
view∙23,27
Supportedformats∙1
O
OUTpoint∙39
P
Parameter
AllowAudioGuideTrack∙17
AllowMatchFrame∙18
GrabStill‐FrameFolder∙13
JogRangeHI∙17
logcolor∙14
ParameterProfiles∙13
Play∙40,42
R
ranking∙29
Ranking
logcolor∙53
Requirements
hardware∙4
software∙4
sourcefiles∙3
RTProf∙8
T
TargetProfile
definition∙8
Thumbnailview∙23,24
openclips∙49
Trackselection∙37
V
Videodisplay∙36
Views
inworkspace∙23
W
Workspacearea∙23
X
XedioDispatcher
launch∙19
overview∙19
workingprocess∙47
XSecure∙5
64
Page 72

EVS Broadcast Equipment
Liège Science Park
16, rue Bois St Jean
B-4102 Ougrée
Belgium
Corporate
Headquarters
+32 4 361 7000
North & Latin America
Headquarters
+1 973 575 7811
To learn more about EVS go to www.evs.tv
Asia & Pacific
Headquarters
+852 2914 2501
Other regional offices
available on
www.evs.tv/contact
 Loading...