

Page 1
User Manual
Version 1.0 - January 2012
Studio Ingest Software
Page 2

Page 3

ProNotes Version 1.0 – User Manual
EVS Broadcast Equipment – January 2012
Issue 1.0.D
I
Copyright
EVS Broadcast Equipment – Copyright © 2011-2012. All rights reserved.
Disclaimer
The information in this manual is furnished for informational use only and subject to
change without notice. While every effort has been made to ensure that the information
contained in this user manual is accurate, up-to-date and reliable, EVS Broadcast
Equipment cannot be held responsible for inaccuracies or errors that may appear in this
publication.
Improvement Requests
Your comments will help us improve the quality of the user documentation. Do not
hesitate to send improvement requests, or report any error or inaccuracy on this user
manual by e-mail to
doc@evs.tv.
Regional Contacts
You will find the full list of addresses and phone numbers of the EVS headquarters and
local offices either at the end of this user manual (for manuals on hardware products) or
on the EVS website on the following page:
http://www.evs.tv/contacts.
User Manuals on EVS Website
The latest version of the user manual, if any, and other user manuals on EVS products
can be found on the EVS download center, on the following webpage:
http://www.evs.tv/downloadcenter.
Page 4

Issue 1.0.D
ProNotes Version 1.0 – User Manual
EVS Broadcast Equipment – January 2012
II
Page 5

ProNotes Version 1.0 – User Manual
EVS Broadcast Equipment – January 2012
Issue 1.0.D
III
Table of Contents
TABLE OF CONTENTS .................................................................................................... III
1. INTRODUCTION ...................................................................................................... 1
1.1 Purpose ...................................................................................................................................... 1
1.2 Workflow ..................................................................................................................................... 1
1.3 Project Structure ........................................................................................................................ 2
2. CONFIGURING PRONOTES ...................................................................................... 3
2.1 Accessing the Settings ............................................................................................................. 3
2.2 Overview of the Settings ........................................................................................................... 3
2.2.1 Info .......................................................................................................................................... 3
2.2.2 General Settings ..................................................................................................................... 4
2.2.3 User Info ................................................................................................................................. 4
2.2.4 Communication ....................................................................................................................... 5
2.2.5 Color ....................................................................................................................................... 5
2.2.6 Production Notes Roles .......................................................................................................... 6
3. GETTING STARTED ................................................................................................ 9
3.1 Opening Pronotes ...................................................................................................................... 9
3.2 Connecting to Production Notes Server ............................................................................... 10
3.3 Selecting a project ................................................................................................................... 11
3.3.1 Select a Project Screen ........................................................................................................ 11
3.3.2 How to Select a Project ........................................................................................................ 11
3.3.3 How to Add a New Project .................................................................................................... 12
3.3.4 How to Edit a Project ............................................................................................................ 12
3.3.5 How to Delete a Project ........................................................................................................ 13
3.4 Selecting a role ........................................................................................................................ 14
3.4.1 About Roles .......................................................................................................................... 14
3.4.2 Select a Role Screen ............................................................................................................ 14
3.4.3 How to Select a Role ............................................................................................................ 14
3.4.4 How to Add a Role ................................................................................................................ 15
3.4.5 How to Edit a Role ................................................................................................................ 16
3.4.6 How to Delete a Role ............................................................................................................ 16
3.5 Selecting an Episode............................................................................................................... 18
3.5.1 Select an Episode Screen .................................................................................................... 18
3.5.2 How to Select an Episode .................................................................................................... 18
3.5.3 How to Add an Episode ........................................................................................................ 19
3.5.4 How to Edit an Episode ........................................................................................................ 19
3.5.5 How to Delete an Episode .................................................................................................... 20
3.6 Selecting a scene and take ..................................................................................................... 21
4. SELECTING A SCREEN LAYOUT ............................................................................. 23
4.1 Overview of the main screen .................................................................................................. 23
4.1.1 Title Bar ................................................................................................................................ 23
4.1.2 Available Panes .................................................................................................................... 23
4.1.3 Pane Description .................................................................................................................. 24
4.2 Customizing the Main screen layout ..................................................................................... 27
4.2.1 Introduction ........................................................................................................................... 27
4.2.2 Locked vs. Unlocked Mode .................................................................................................. 27
4.2.3 Rearranging and Resizing Panes ......................................................................................... 27
4.2.4 Hiding and Revealing Panes ................................................................................................ 28
4.2.5 Adding New Panes ............................................................................................................... 30
5. MANAGING KEYWORDS AND KEYWORD GRIDS ....................................................... 31
Page 6

Issue 1.0.D
ProNotes Version 1.0 – User Manual
EVS Broadcast Equipment – January 2012
IV
5.1 About Keywords, keyword categories and Keyword grids ................................................. 31
5.2 Creating New Keyword Grids ................................................................................................. 31
5.2.1 Introduction ........................................................................................................................... 31
5.2.2 Creating a Keyword Grid Step by Step ................................................................................ 32
5.2.3 Creating a Keyword Grid Based on a Keyword Category .................................................... 37
5.3 Managing keyword categories and keywords ...................................................................... 38
5.3.1 Opening the Keyword Dictionary .......................................................................................... 38
5.3.2 Managing Keywords ............................................................................................................. 39
5.3.3 Managing Keyword Categories ............................................................................................ 43
5.3.4 Creating Keyword Categories as Basis for Keyword Grids .................................................. 49
5.4 Editing Existing Keyword grids ............................................................................................. 51
5.4.1 Changing the Grid Name and Dimensions ........................................................................... 51
5.4.2 Editing the Tabs .................................................................................................................... 53
5.4.3 Editing the Keyword Buttons ................................................................................................ 56
5.5 Deleting keyword grids ........................................................................................................... 60
6. MAKING AND REVIEWING NOTES AND COMMENTS .................................................. 63
6.1 About Notes and comments ................................................................................................... 63
6.1.1 Types of Notes ..................................................................................................................... 63
6.1.2 On Air Mode vs. Off-Air Mode .............................................................................................. 63
6.1.3 Auto Follow Mode vs. Show All Mode .................................................................................. 63
6.1.4 Public vs. Private .................................................................................................................. 64
6.1.5 Free Text vs. Keywords ........................................................................................................ 65
6.2 About Time Codes ................................................................................................................... 66
6.2.1 Types of Time Codes ........................................................................................................... 66
6.2.2 Synchronizing with an External Time Code Source ............................................................. 66
6.2.3 Entering a Custom Time Code ............................................................................................. 66
6.3 Making Notes and Comments ................................................................................................ 68
6.3.1 How to Make Notes in Stand Alone Mode ............................................................................ 68
6.3.2 How to Make Comments in Stand Alone Mode.................................................................... 70
6.3.3 How To Make Notes in Server Mode ................................................................................... 72
6.3.4 How to Make Comments in Server Mode ............................................................................. 73
6.4 Managing Scenes and Takes .................................................................................................. 74
6.4.1 Adding Scenes and Takes .................................................................................................... 74
6.4.2 Deleting Scenes and Takes .................................................................................................. 74
6.4.3 Adding a Take Rating ........................................................................................................... 76
6.5 Reviewing Notes and comments ........................................................................................... 77
6.5.1 How to Edit Notes and Comments ....................................................................................... 77
6.5.2 How to Delete Notes and Comments ................................................................................... 77
6.5.3 Filtering Notes and Comments ............................................................................................. 78
7. CREATING NOTES & COMMENTS REPORTS ............................................................ 81
7.1 About notes & Comments Reports ........................................................................................ 81
7.2 Creating and mailing or exporting Reports .......................................................................... 82
7.2.1 Prerequisites ......................................................................................................................... 82
7.2.2 How to Create and Mail or Export Reports ........................................................................... 82
7.3 Transferring reports ................................................................................................................ 85
7.4 Changing the company logo .................................................................................................. 86
INDEX .......................................................................................................................... 87
Page 7

ProNotes Version 1.0 – User Manual
EVS Broadcast Equipment – January 2012
Issue 1.0.D
V
Page 8

Page 9
ProNotes Version 1.0 – User Manual
EVS Broadcast Equipment – January 2012
Issue 1.0.D
1
1. Introduction
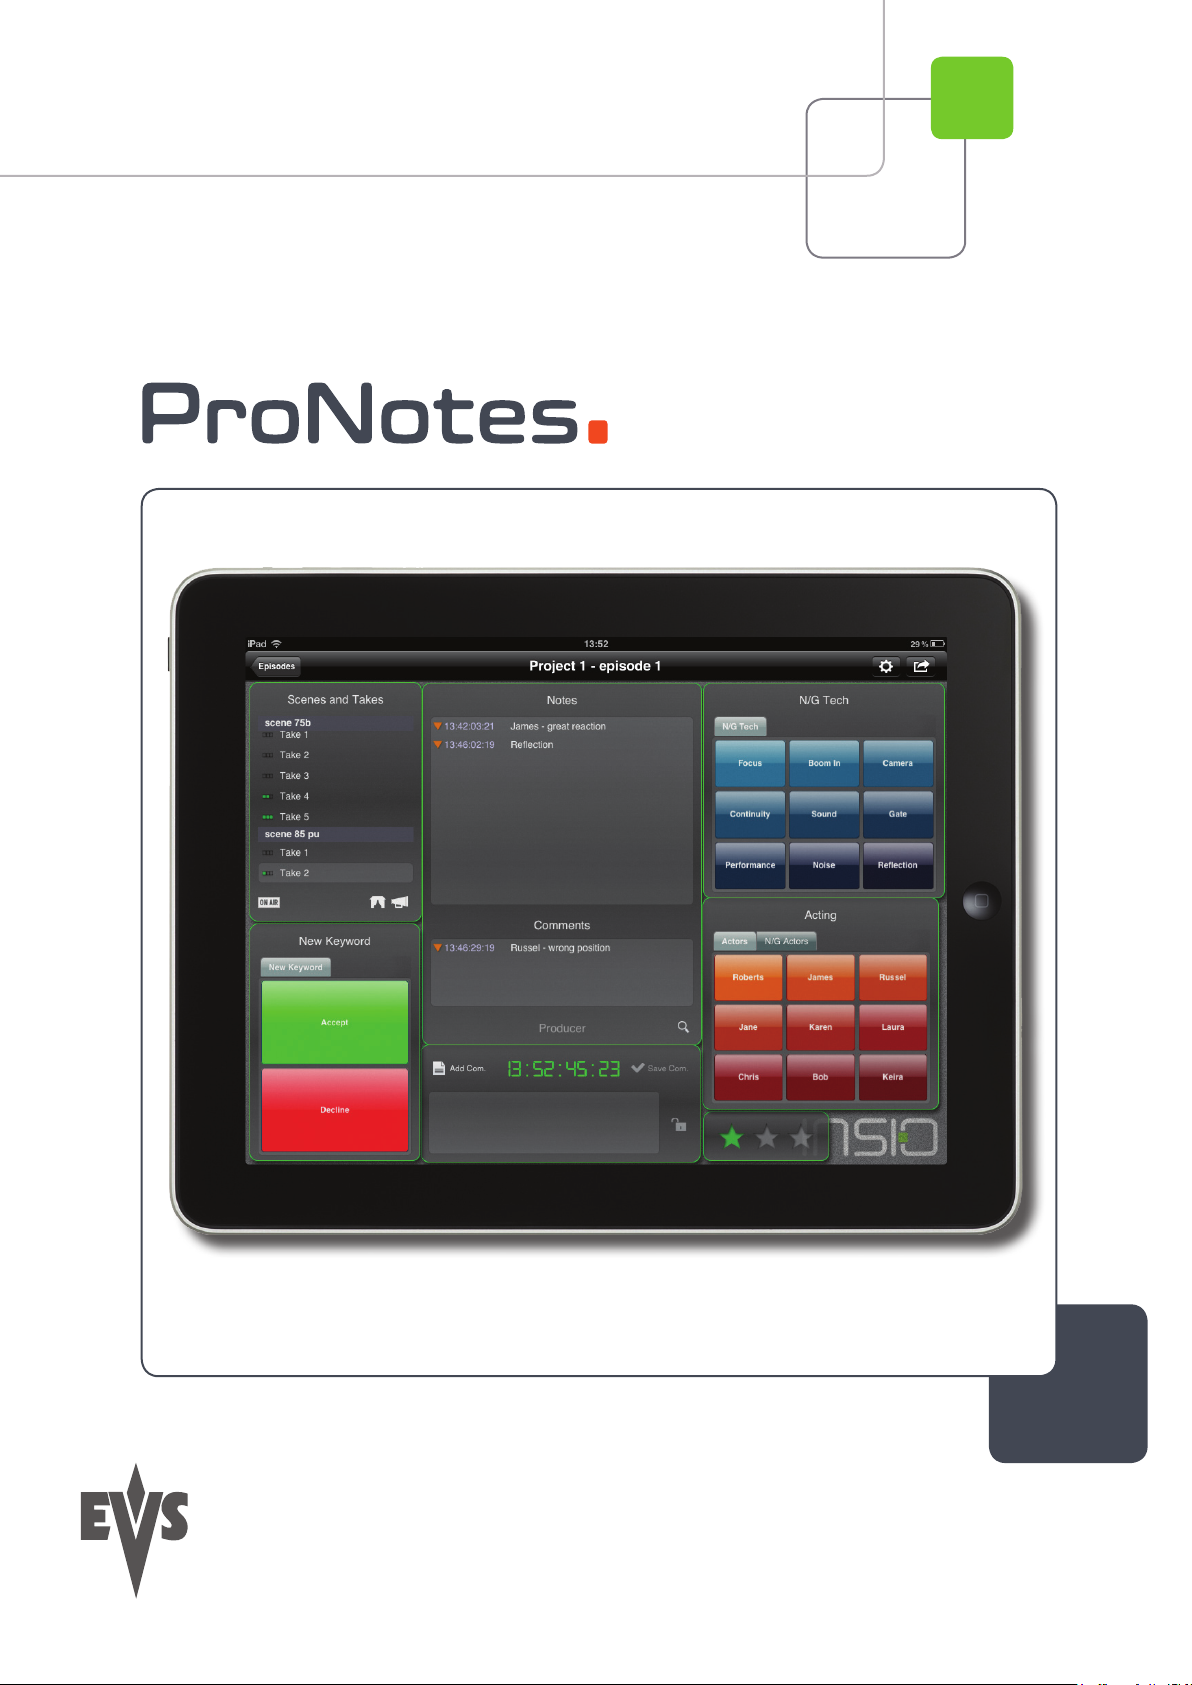
1.1 Purpose
ProNotes is an application used for logging, note- and comment taking. It can be used as
a standalone application or it can be ‘server connected’. Various production crew
members (e.g. production assistant, wardrobe mistress, make-up person, lighting and
sound engineers, etc.) can make use of it.
ProNotes can be used at different moments during the production process, during or after
the recording session, and from different locations, such as within the studio or in the
studio control room for actions happening on stage, or anywhere else for actions
previously recorded. It can even be used when reviewing content on a DVD. Therefore,
the user interface layout is very flexible to fi t the needs of the various users.
Keywords can be associated to the notes. Then notes are printable or exportable to nonlinear editing systems. They are added as metadata to the clips and visible as markers
and text in the non-linear editing system tim eli ne.
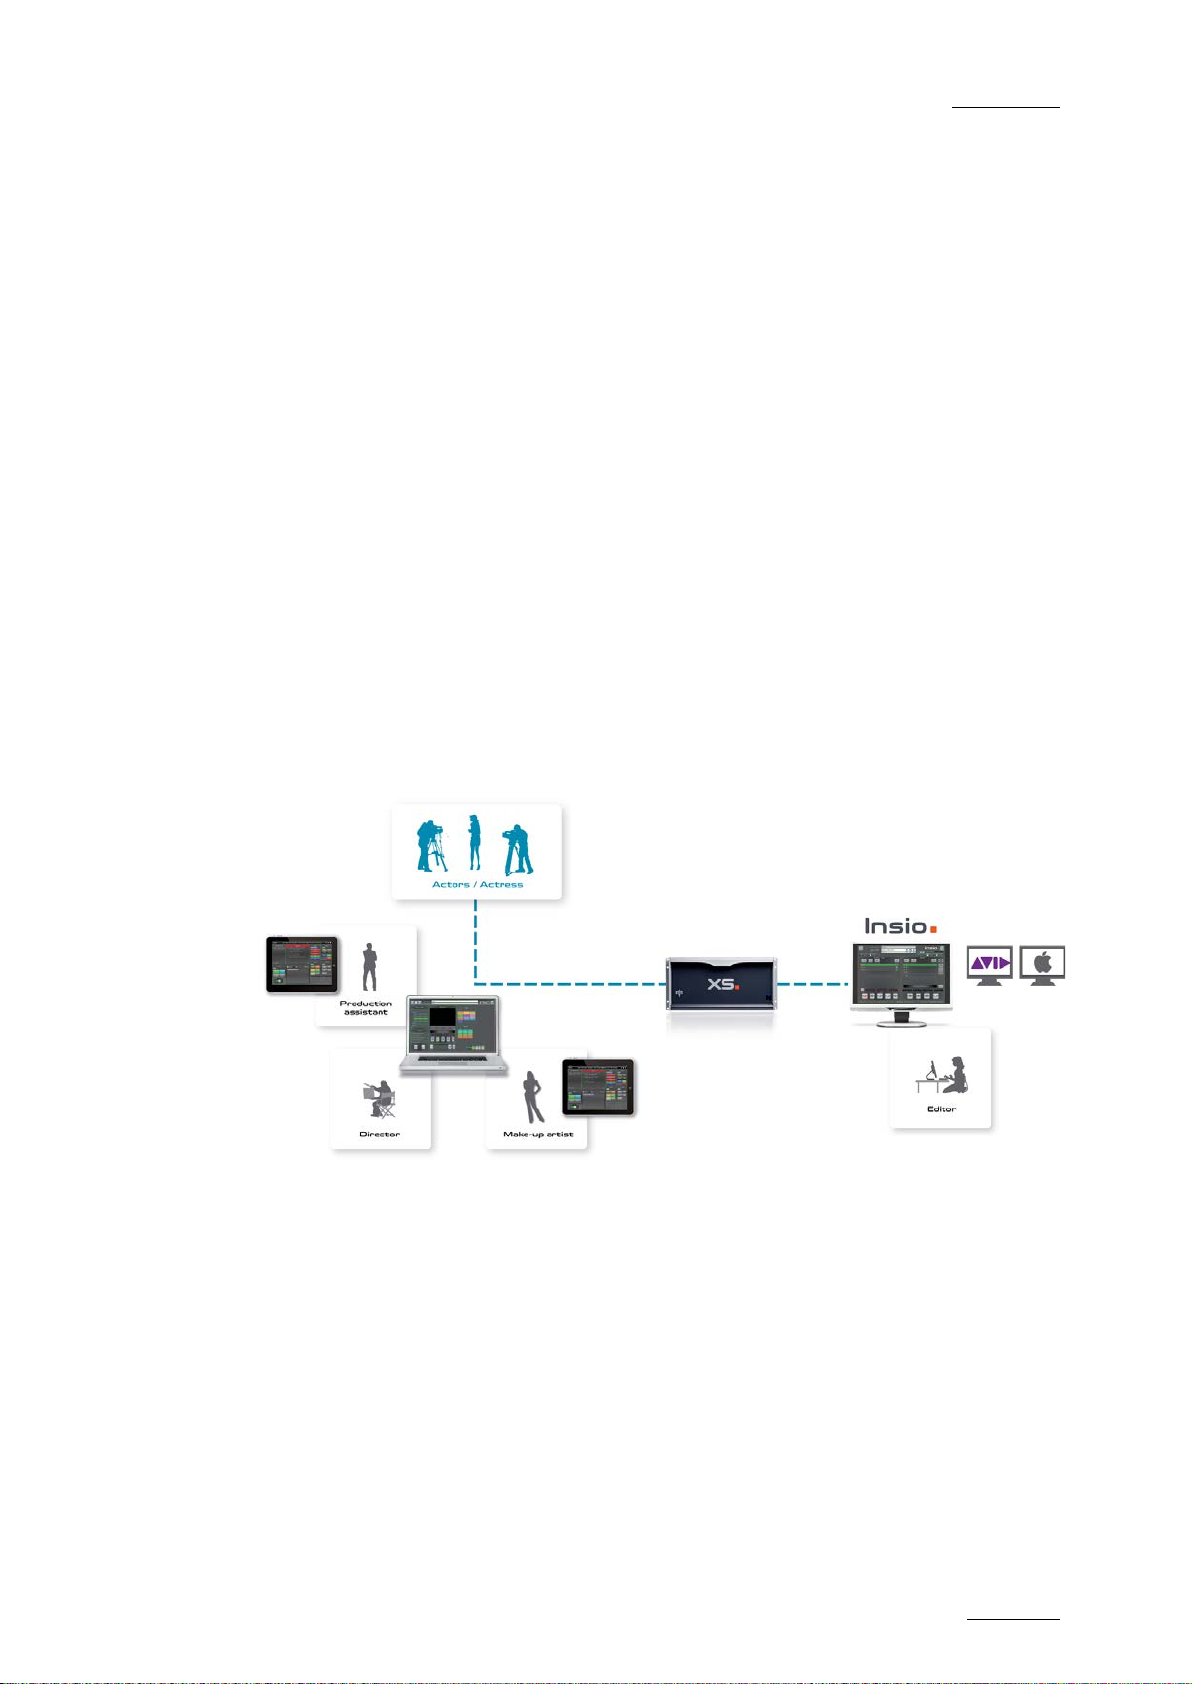
1.2 Workflow
Page 10

Issue 1.0.D
ProNotes Version 1.0 – User Manual
EVS Broadcast Equipment – January 2012
2
1.3 Project Structure
Refer to the INSIO user manual for details on the project structure. A brief explanation is
given hereafter.
Within INSIO, a project, or production, is made up of a series of episodes, or programs,
themselves composed of several scenes. The project must be created before the
beginning of the first recording session.
During the recording session, cameras will record one or several takes within a scene.
Page 11
ProNotes Version 1.0 – User Manual
EVS Broadcast Equipment – January 2012
Issue 1.0.D
3
2. Configuring ProNotes
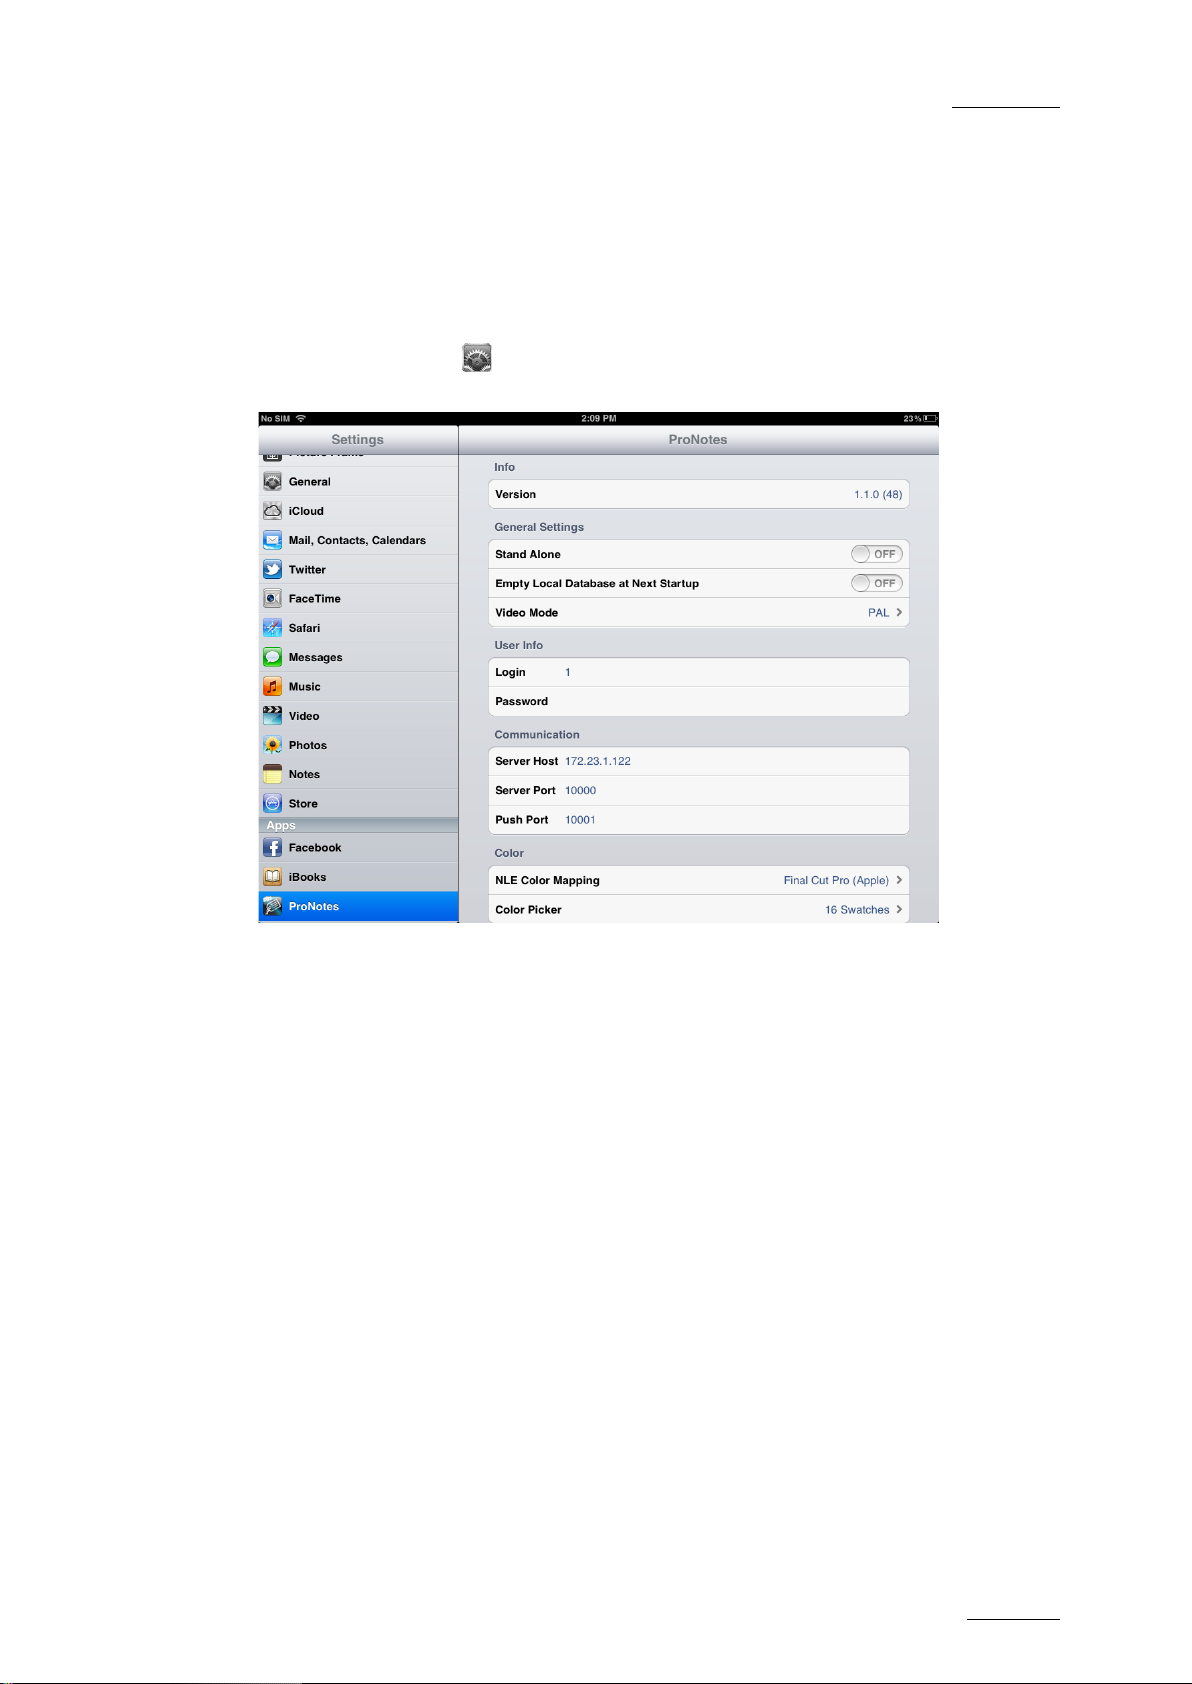
2.1 Accessing the Settings
Tap the Settings icon on your iPad Hom e screen, and then, in the Settings column
under Apps, select ProNotes.
2.2 Overview of the Settings
The settings are divided into the following six categories:
• Info
• General Settings
• User Info
• Communication
• Color
• Production Notes Roles
2.2.1 Info
In this field you can see the software version of ProNotes. Each time you download a new
version of ProNotes, this field will be updated.
Page 12
Issue 1.0.D
ProNotes Version 1.0 – User Manual
EVS Broadcast Equipment – January 2012
4
2.2.2 General Settings
Turn Stand Alone Mode On or Off
In Stand Alone Mode, there is no communication between ProNotes and Production
Notes Server. All data is stored in a local database on your iPad. When this mode is
turned off, ProNotes enters into Server Mode. In this mode, it will try to make connection
with Production Notes Server at start-up and interchange information with INSIO once
connected. By default, Stand Alone Mode is turned on.
Tap Stand Alone to turn it on or off.
Empty Local Database at Next Startup
When you turn on this setting, the local database will be automatically emptied at the next
start-up. All your data will be lost. By default, this setting is turned off. Once the local
database is emptied, this setting is automatically turned off agai n.
Tap Empty Local Database at Next Startup to turn it on or off.
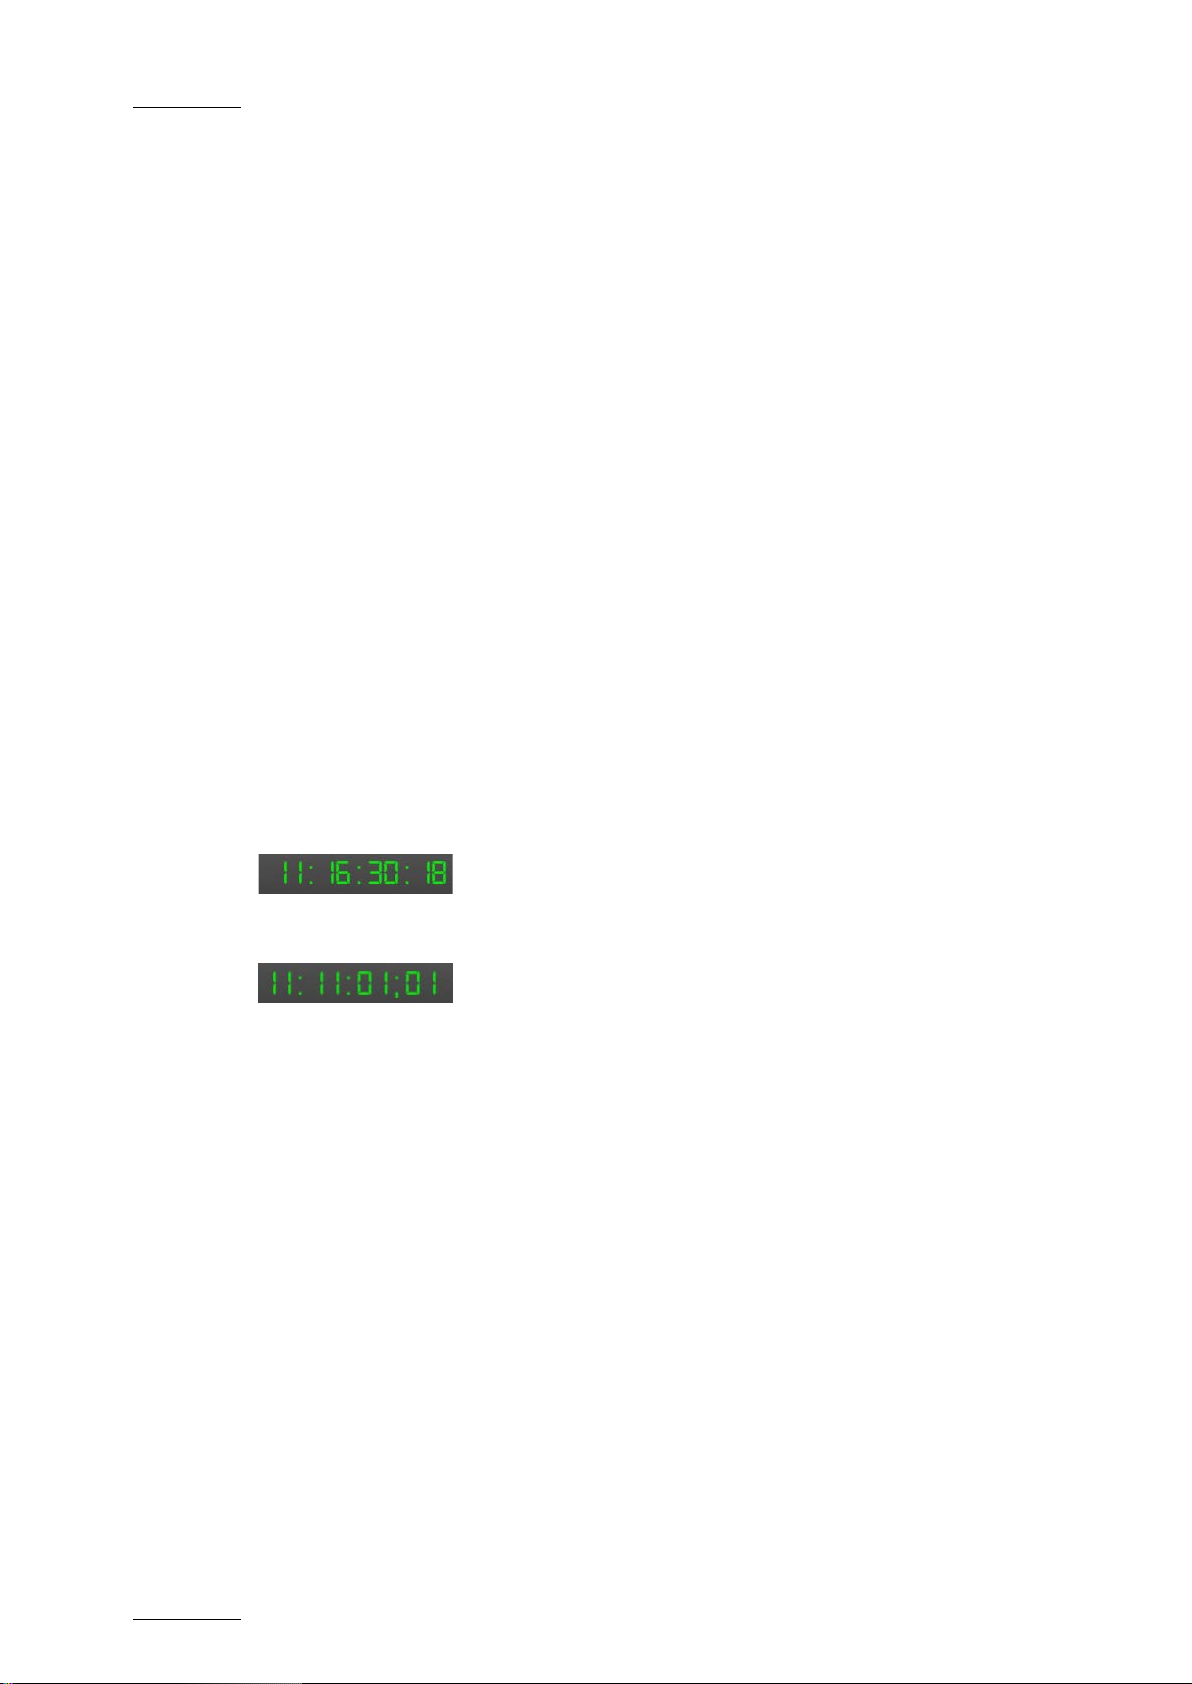
Set the Video Mode
Select ProNotes > Video Mode, then choose the video mode you want. You can choose
between PAL and NTSC. This will have an impact on the time code displayed in the Time
Code field of the Note Creation pane. If you select PAL, the time code will have a frame
rate of 25 frames per second and the notati on wil l be 00:00:00:00.
If you select NTSC, the time code will have a frame rate of 29.97 frames per second and
the notation will be 00:00:00;00.
2.2.3 User Info
Enter Your Login Information
Here, you have to enter your login and password necessary to log into Production Notes
Server.
Tap each field and enter the required information using the onscreen keyboard. Your
password will be hidden behind bullets.
Page 13
ProNotes Version 1.0 – User Manual
EVS Broadcast Equipment – January 2012
Issue 1.0.D
5
2.2.4 Communication
Enter IP Address, Server Port and Push Port Number
ProNotes uses this information to communicate with Production Notes Server. The
default server port number (10000) and push port number (10001) are already filled in,
but you can change them. They need to be set according to the settings on the
Production Notes Server.
Tap Server Host and enter the correct IP address, server port and push port number
using the onscreen keyboard.
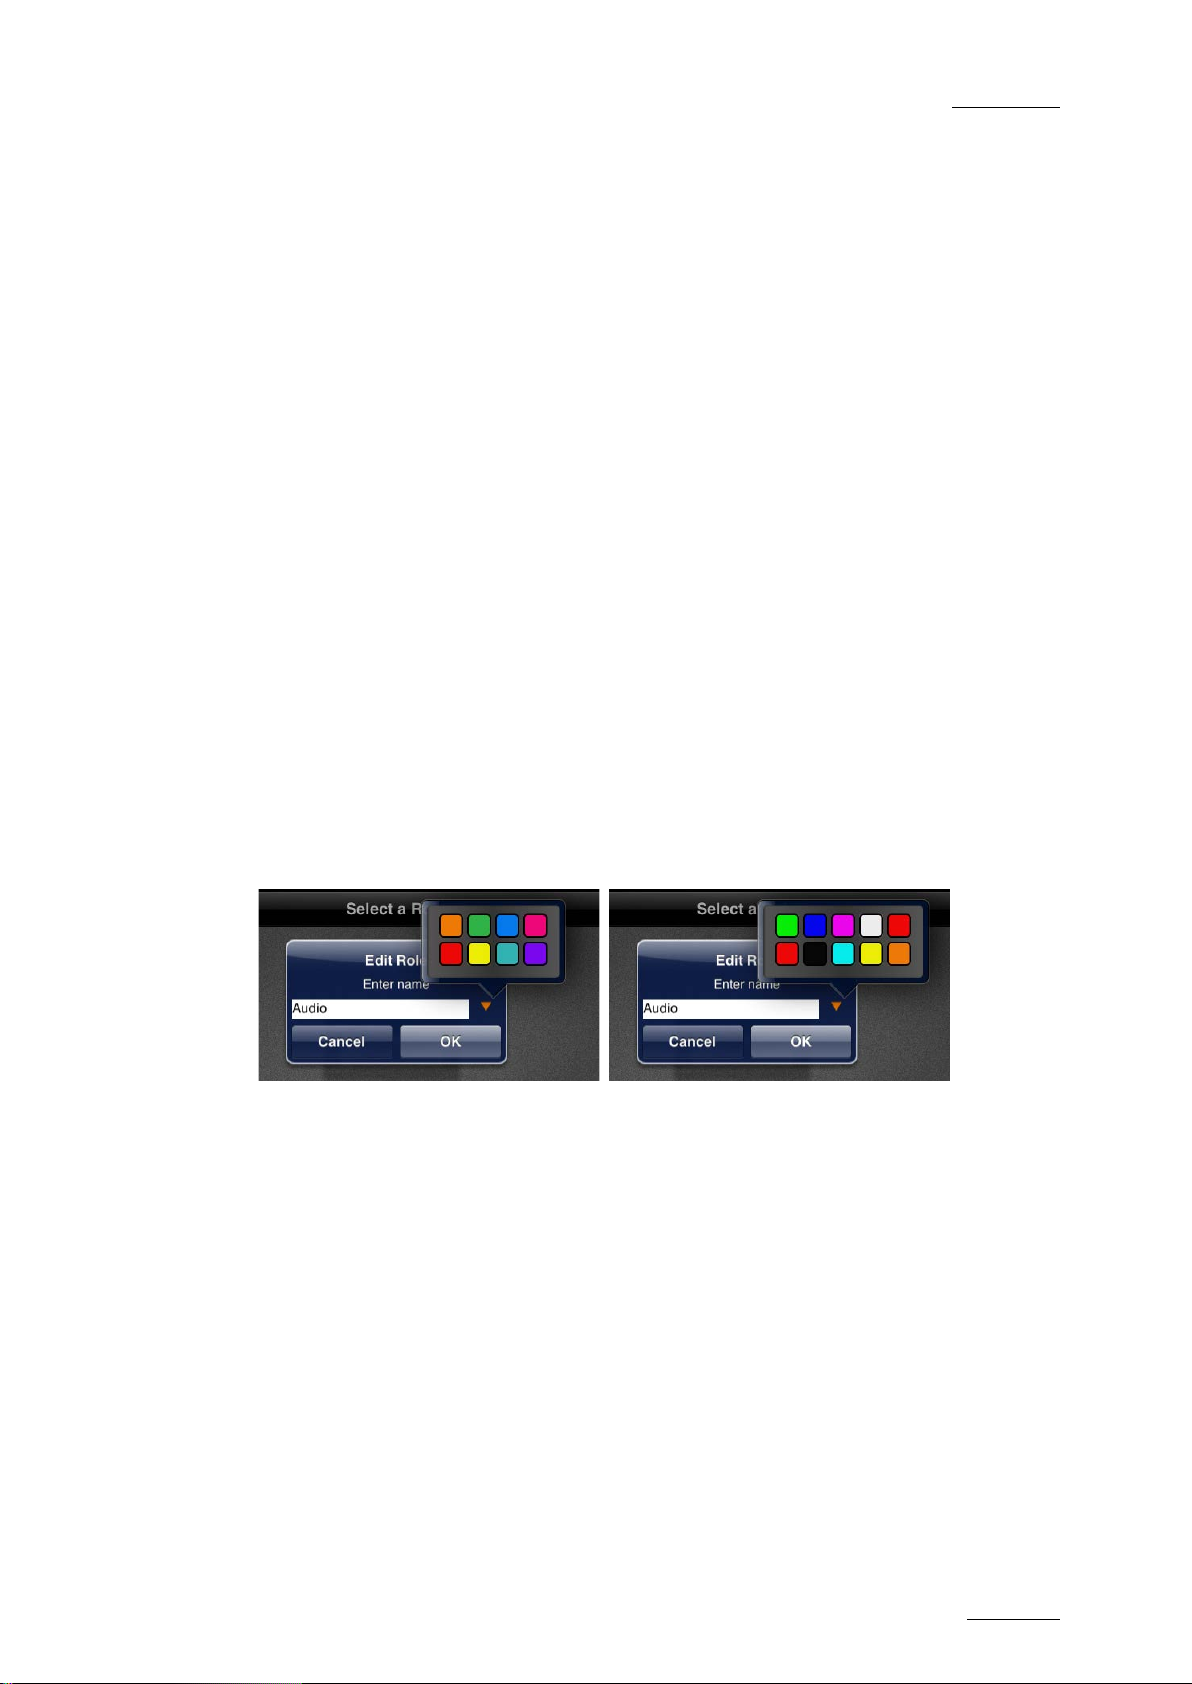
2.2.5 Color
Choose Set of Locator Colors
The notes and comments you enter in ProNotes get a colored locator that is linked to
your role. This allows you to distinguish them from the notes and comments entered by
you with another role or by other crew members. At the start of a new project, you can
choose the color of the locator linked to your role from a set of colors.
In the NLE Color Mapping field, you have to define which set of colors will appear by
default when selecting a color for your locator. ProNotes offers you two sets of locator
colors from which you can choose. The first set corresponds to the locator colors used in
Apple’s Final Cut Pro, and the second to those used in Avid’s Media Composer.
Select Color Picker
ProNotes allows you to choose the color of each keyword grid button by means of a color
picker. In the Color Picker field, you have to define which type of color picker will appear
by default.
The simple color picker (16 Swatches) only consists of a set of 16 predefined colors.
Page 14
Issue 1.0.D
ProNotes Version 1.0 – User Manual
EVS Broadcast Equipment – January 2012
6
The full color picker also has a color wheel, a luminance slider and a field for previewing
the selected color.
2.2.6 Production Notes Roles
Choosing Predefined Roles
ProNotes offers you a number of predefined roles for your projects. Roles you turn on
here become automatically available for each new project you create. By default, all the
roles are turned on.
Tap a role to turn it on or off.
ProNotes offers you the following predefi ned roles:
• Director
• Producer
• Script
• First Assistant
• Digital Image Technician
• Director of Photography
• Floor Manager
Page 15

ProNotes Version 1.0 – User Manual
EVS Broadcast Equipment – January 2012
Issue 1.0.D
7
• Wardrobe
• Make Up
• Audio
• Props
• Extras
• Special Effects
• Set Supervisor CG
• Art Director
• Production Designer
Page 16

Issue 1.0.D
ProNotes Version 1.0 – User Manual
EVS Broadcast Equipment – January 2012
8
Page 17
ProNotes Version 1.0 – User Manual
EVS Broadcast Equipment – January 2012
Issue 1.0.D
9
3. Getting Started
3.1 Opening Pronotes
Tap the ProNotes icon on your iPad Home screen to open the applicat ion.
The ProNotes splash screen appears.
Press the Home button on your iPad to close ProNotes and return to the Home screen.
Page 18
Issue 1.0.D
ProNotes Version 1.0 – User Manual
EVS Broadcast Equipment – January 2012
10
3.2 Connecting to Production Notes Server
Production Notes Server is an application that manages the communication between
ProNotes and the INSIO database. For more information, see the INSIO technical
reference manual.
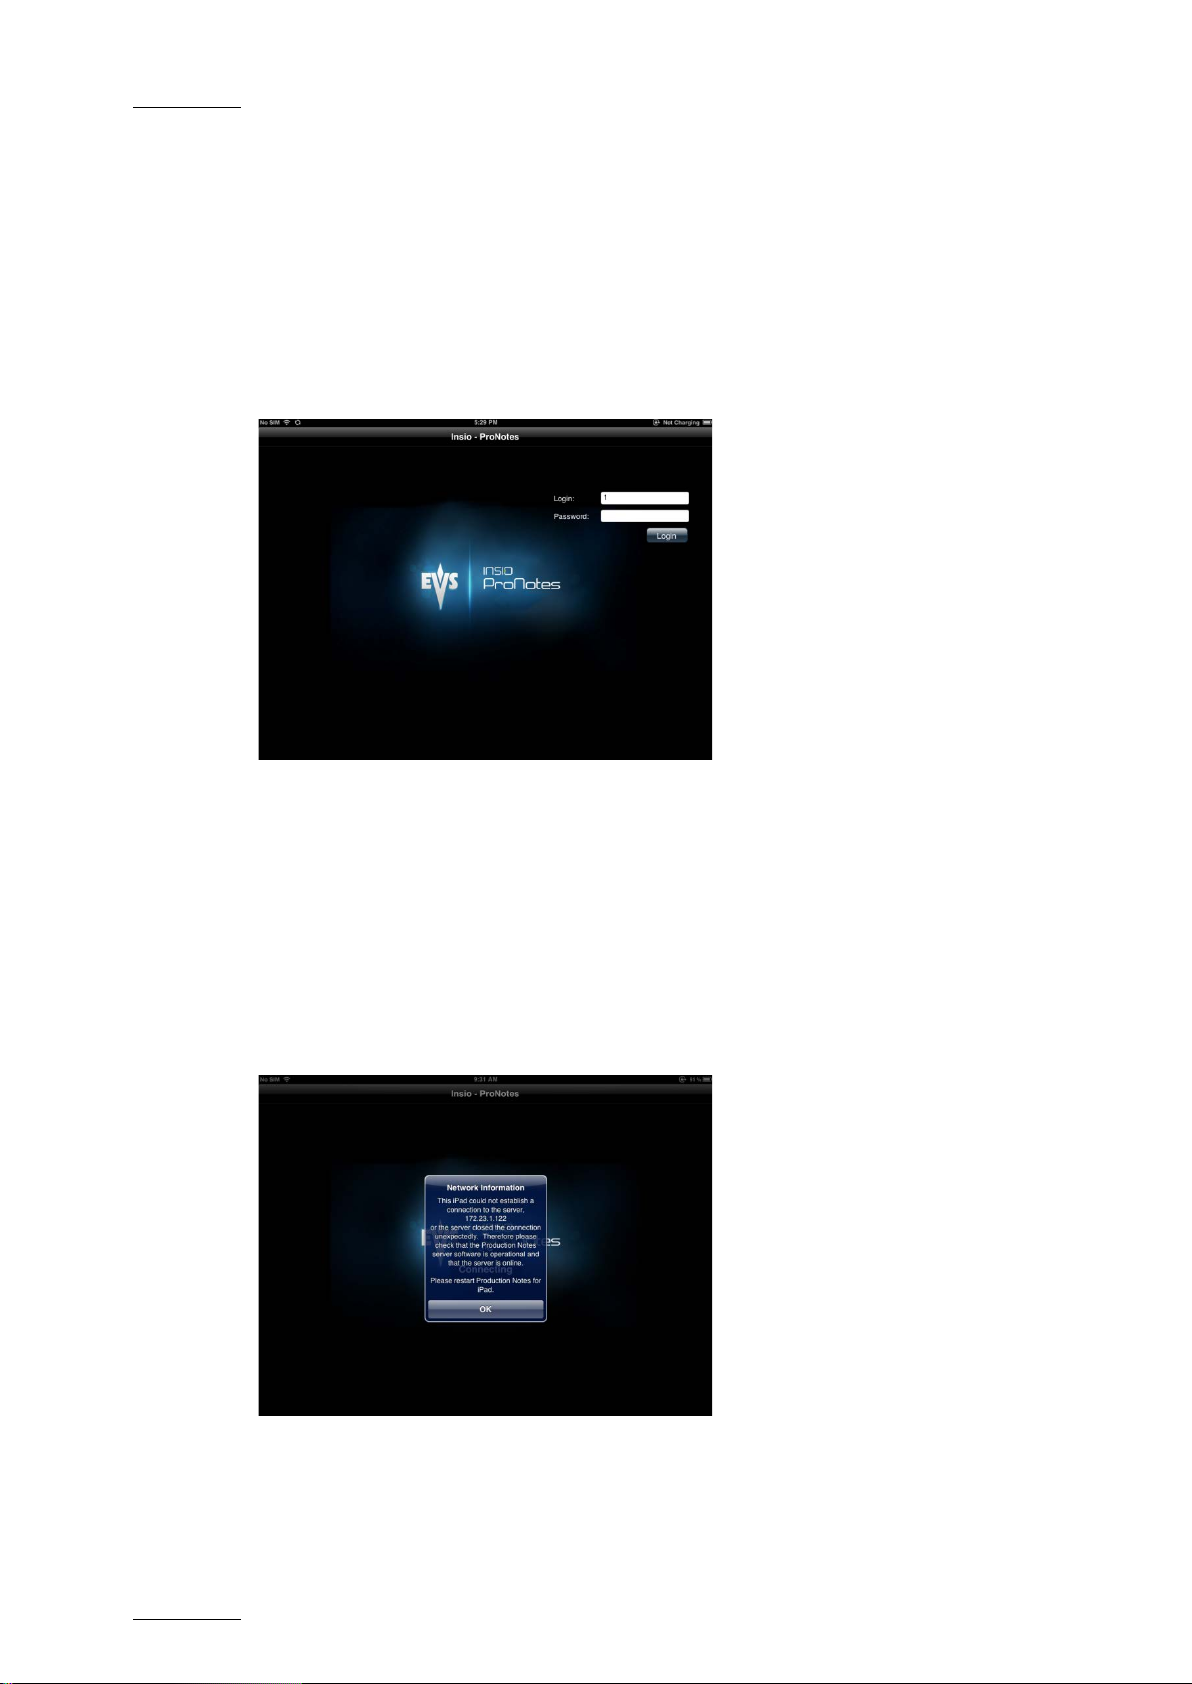
In Server Mode, ProNotes will try to conn ect to Production Notes Server at start-up. A
pop-up will appear asking you to enter your login information. If you have entered your
login and password in the settings, they will automatically appear in the login window.
See section 2.2.3 ‘User Info’ on page 4 for more information.
Tap Login to make connection.
To be able to connect to Production Notes Server, make sure the following conditions are
met:
• Wi-Fi on your iPad must be turned on.
• You must have selected and joined the correct Wi-Fi network.
• You must have entered the IP address of Production Notes Server and the push and
server port number in the settings.
• INSIO and Production Notes Server must be launched.
If not, an error message will appear.
Page 19
ProNotes Version 1.0 – User Manual
EVS Broadcast Equipment – January 2012
Issue 1.0.D
11
3.3 Selecting a project
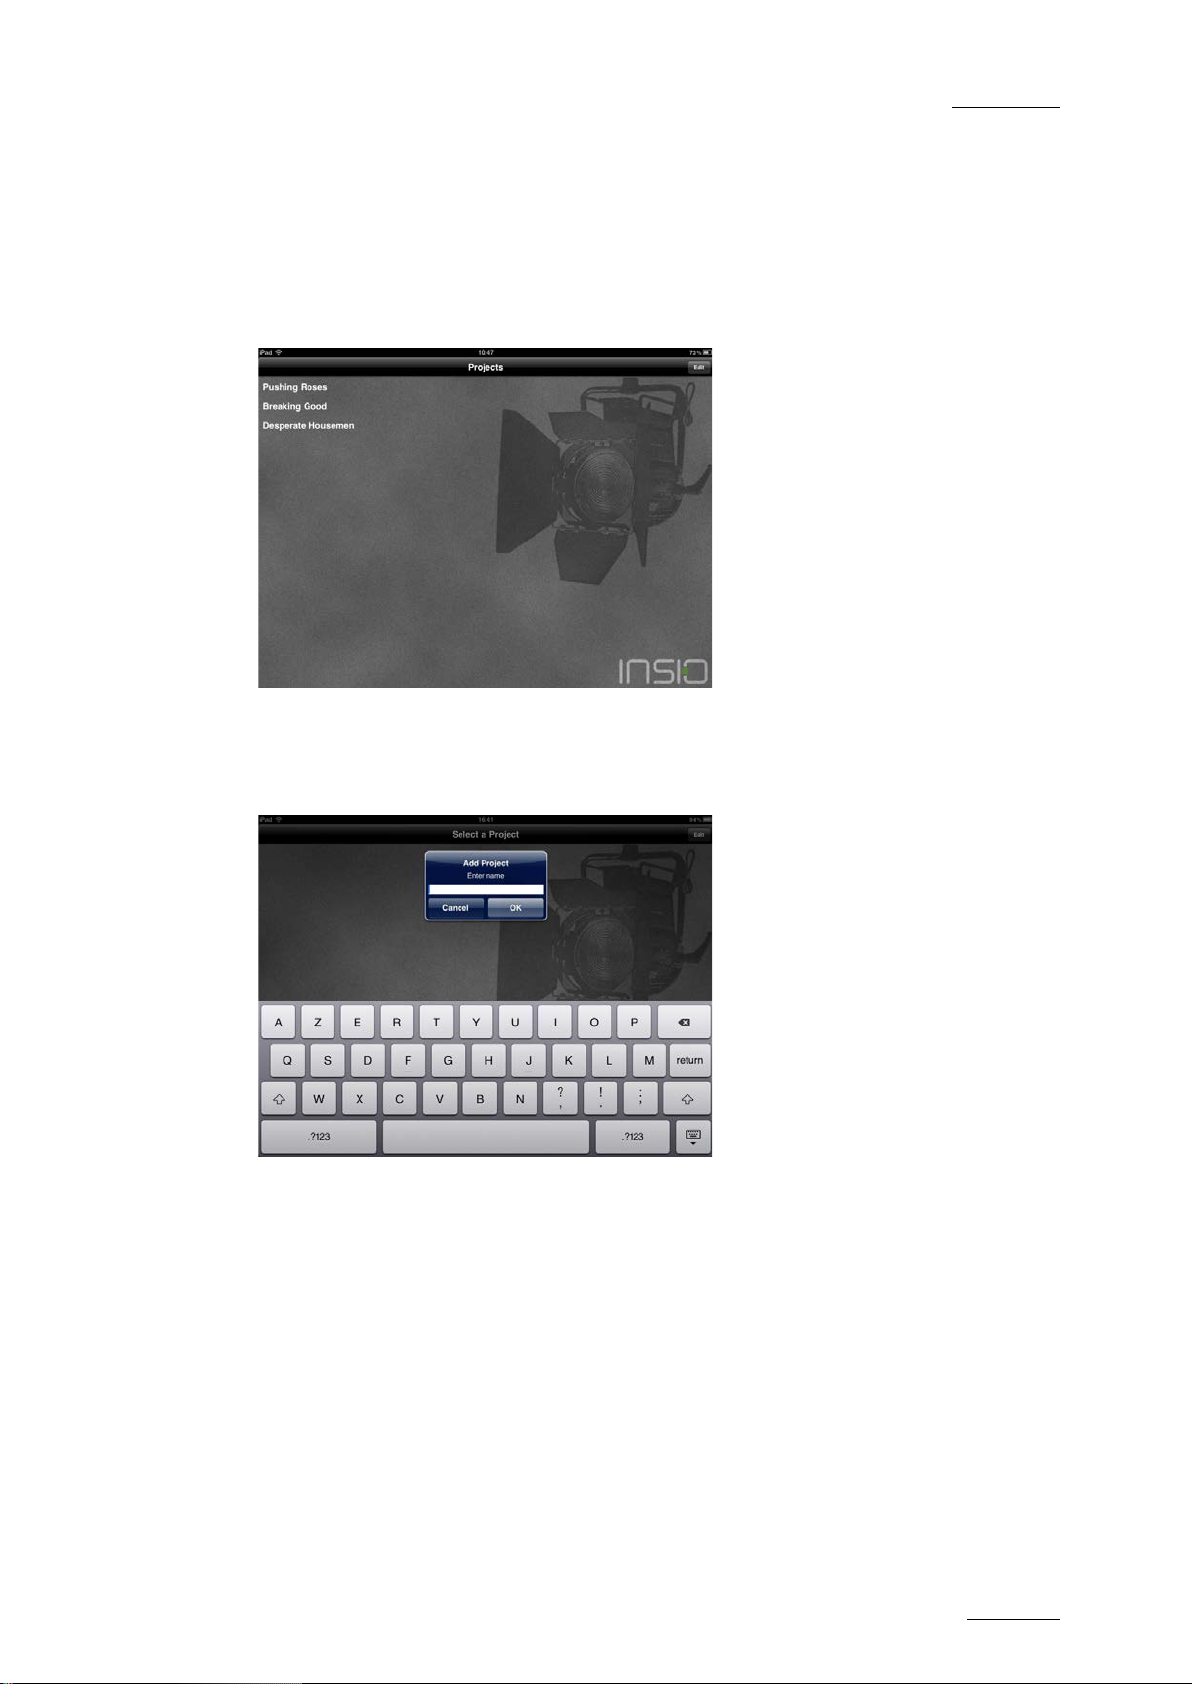
3.3.1 Select a Project Screen
The Select a Project screen appears at start-up.
In Stand Alone Mode, this screen lists the projects created by you locally. You can add
new, and edit and delete existing projects.
If you haven’t added any projects yet, a pop-up will automatically appear asking you to do
so.
In Server Mode, this screen will only list the projects created in and imported from INSIO.
You cannot add new, and edit or delete existing projects.
3.3.2 How to Select a Project
To select a project in the Select a Project screen, tap its name.
Page 20
Issue 1.0.D
ProNotes Version 1.0 – User Manual
EVS Broadcast Equipment – January 2012
12
3.3.3 How to Add a New Project
To add a new project to the Select a Project scr een, proceed as follows:
1.
2.
Do one of the following:
• If you haven’t added any projects yet, a pop-up will appear asking you to do so.
Go to step 3.
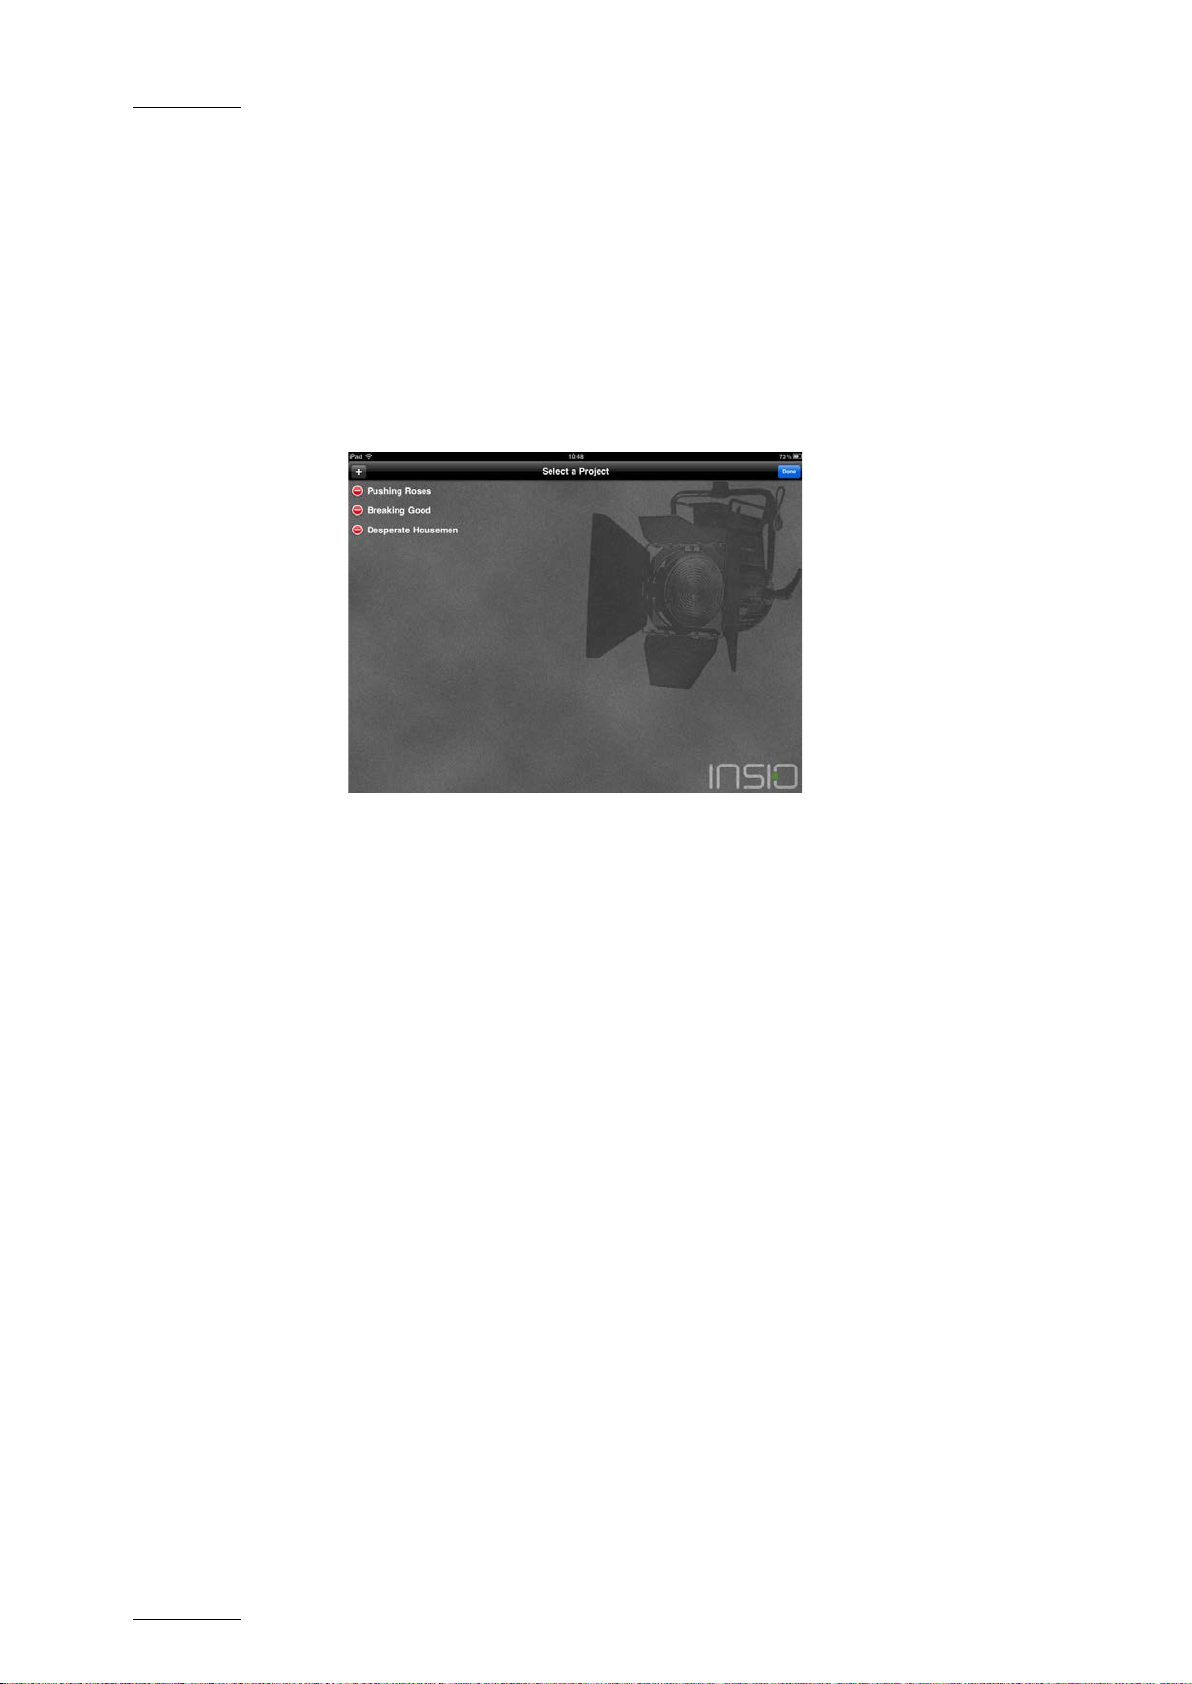
• If the Select a Project screen already contains projects, tap Edit in the Title bar.
The Select a Project screen enters into Edit Mode. You can now add a new
project. Go to step 2.
In the Title bar, tap
+.
A pop-up and the onscreen keyboard appear.
3.
4.
Enter a name for the project, and then tap OK.
The new project is added to the Select a Project screen. If it already contains
projects, the new project is added below the existing projects.
In the Title bar, tap Done to close the Edit Mode again.
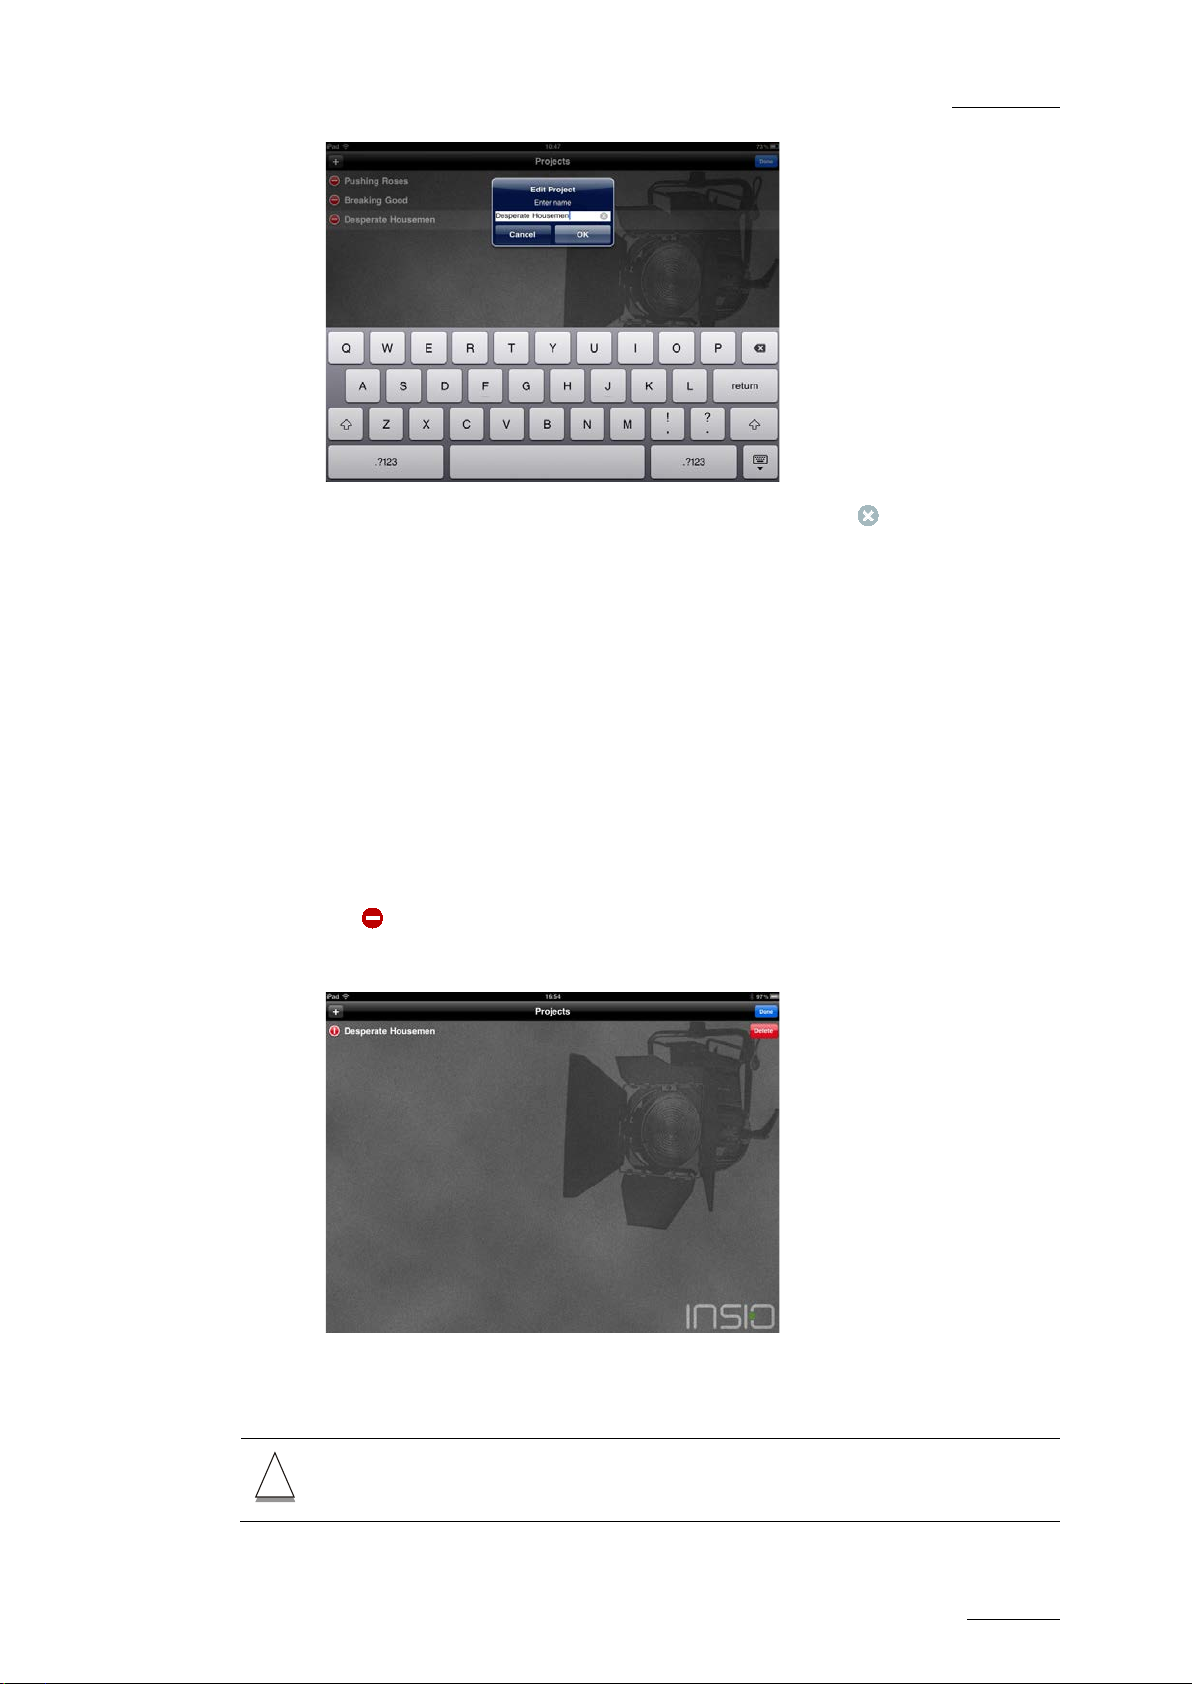
3.3.4 How to Edit a Project
To edit the name of a project that is displayed in the Select a Project screen, proceed as
follows:
1.
2.
In the Title bar, tap Edit.
The Select a Project screen enters into Edit Mode. You can now edit the name of
the displayed projects.
Tap the name of the project you want to edit.
A pop-up and the onscreen keyboard appear.
Page 21
ProNotes Version 1.0 – User Manual
EVS Broadcast Equipment – January 2012
Issue 1.0.D
13
!
3.
4.
5.
Use the onscreen keyboard to edit the project name. Tap in the text field to
delete it entirely.
Tap OK.
In the Title bar, tap Done to close the Edit Mode again.
3.3.5 How to Delete a Project
To delete a project from the Select a Project s creen, proceed as follows:
1.
2.
3.
In the Title bar, tap Edit.
The Select a Project screen enters into Edit Mode. You can now delete projects.
Tap next to the project you want to delete.
Tap Delete.
4.
In the Title bar, tap Done to close the Edit Mode again.
Warning
If you delete a project, all data related to that project will be lost.
Page 22
Issue 1.0.D
ProNotes Version 1.0 – User Manual
EVS Broadcast Equipment – January 2012
14
3.4 Selecting a role
3.4.1 About Roles
A television crew consists of various members. Each member is responsible for a
particular aspect of the television production. For each of these crew members a role can
be created in ProNotes allowing them to create annotations during the recording of the
various scenes. ProNotes offers 16 predefined roles, but it also allows the users to create
their own roles.
Within a project, each role has its own colored locator. The locator is associated to the
notes and comments entered by the user with this role. The layout of the main screen is
linked to a particular role.
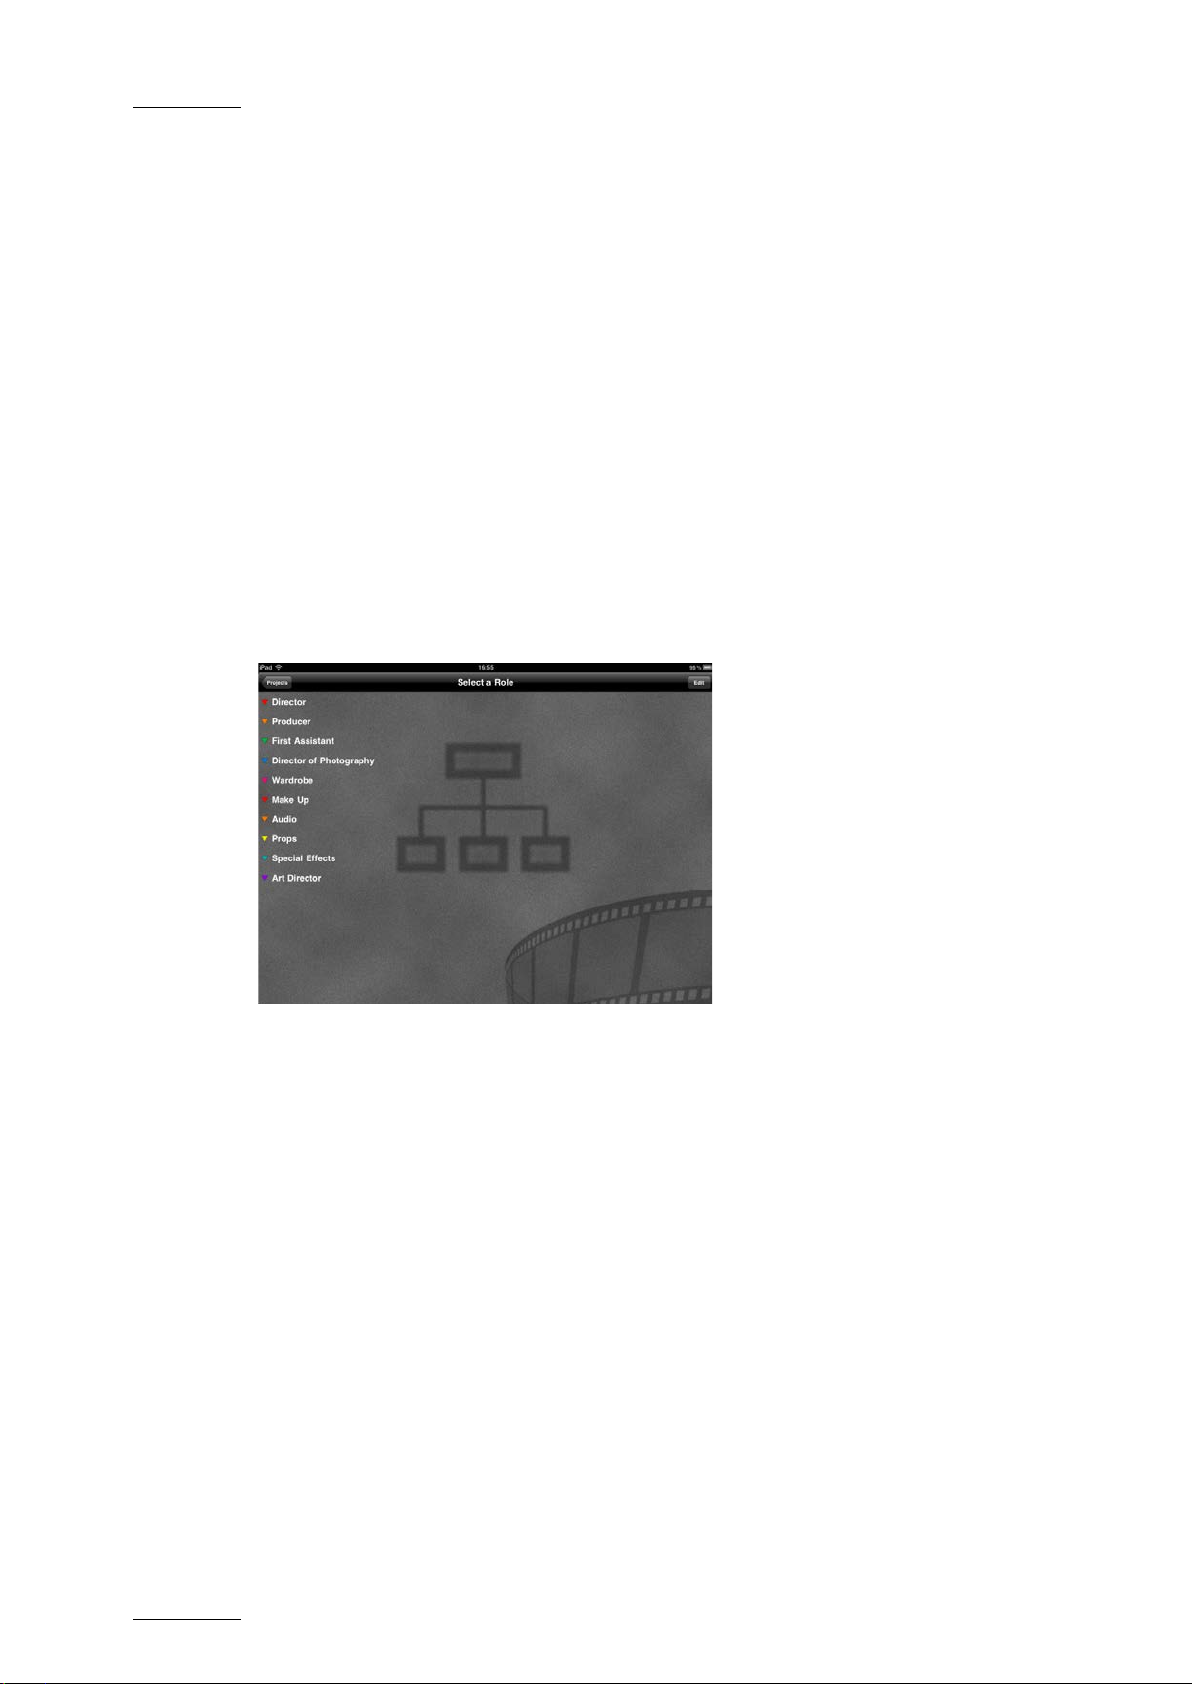
3.4.2 Select a Role Screen
As soon as you have selected a project, the S el ect a Role screen opens.
In Stand Alone Mode, the roles that you have created for a particular project will appear in
this screen. It allows you to add new, and to edit and delete existing roles. When you
create a new project, this screen will only show the predefined roles you have turned on
in the settings.
In the Title bar, a button is provided to ret urn to the Select a Project screen.
3.4.3 How to Select a Role
To select a role in the Select a Role screen, tap its name.
Page 23

ProNotes Version 1.0 – User Manual
EVS Broadcast Equipment – January 2012
Issue 1.0.D
15
3.4.4 How to Add a Role
To add a custom role to the Select a Role screen, proceed as fol lows:
1.
2.
3.
4.
In the Title bar, tap Edit.
The Select a Role screen enters into Edit Mode. You can now add new roles.
In the Title bar, tap
A pop-up appears.
Enter a name for the new role using the onscreen keyboard.
Tap the colored locator to the right to select a color.
+.
5.
6.
A color picker appears. The color mapping is a recurring color sequence based
on the NLE profile chosen in the settings. For more information, see section 2.2.5
‘Color’ on page 5. If, by coincidence, 2 roles with the same color are chosen, you
can choose another color for a role to differenti ate between the two.
Tap a color to select it.
The locator takes on the color you have sele ct ed.
Tap OK.
7.
The new role is added below the existing roles.
In the Title bar, tap Done to close the Edit Mode again.
Page 24
Issue 1.0.D
ProNotes Version 1.0 – User Manual
EVS Broadcast Equipment – January 2012
16
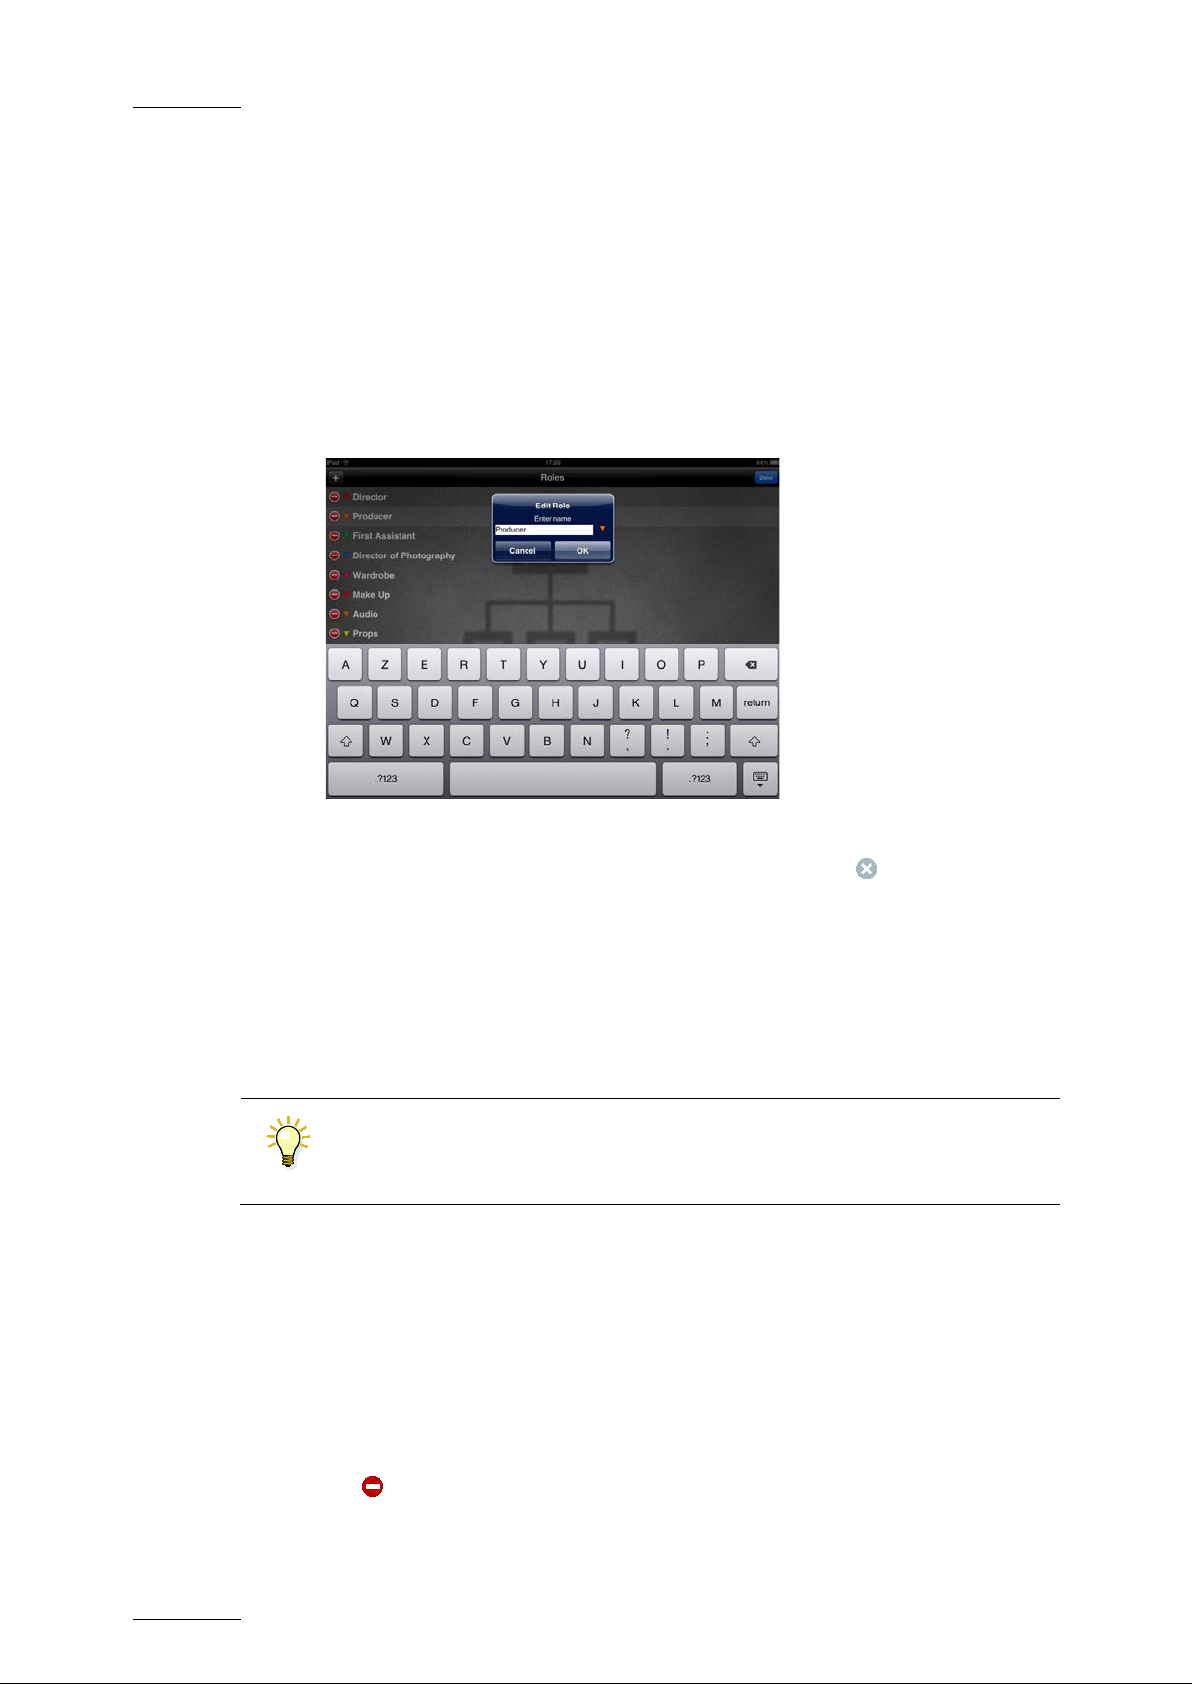
3.4.5 How to Edit a Role
To edit the name of a role that is displayed in the Select a Role screen or to change the
color of its locator, proceed as follows:
1.
2.
3.
In the Title bar, tap Edit.
The Select a Role screen enters into Edit Mode. You can now edit the name of
the roles that are displayed.
Tap the name of a role to select it.
A pop-up appears.
Do one of the following:
• Use the onscreen keyboard to edit the role name. Tap in the text field to
delete it entirely.
• Tap the colored locator and select a new color.
4.
5.
Tap OK.
In the Title bar, tap Done to close the Edit Mode again.
Note
If you change the locator color of a particular role, the locator color of all notes
already made by that role will also change.
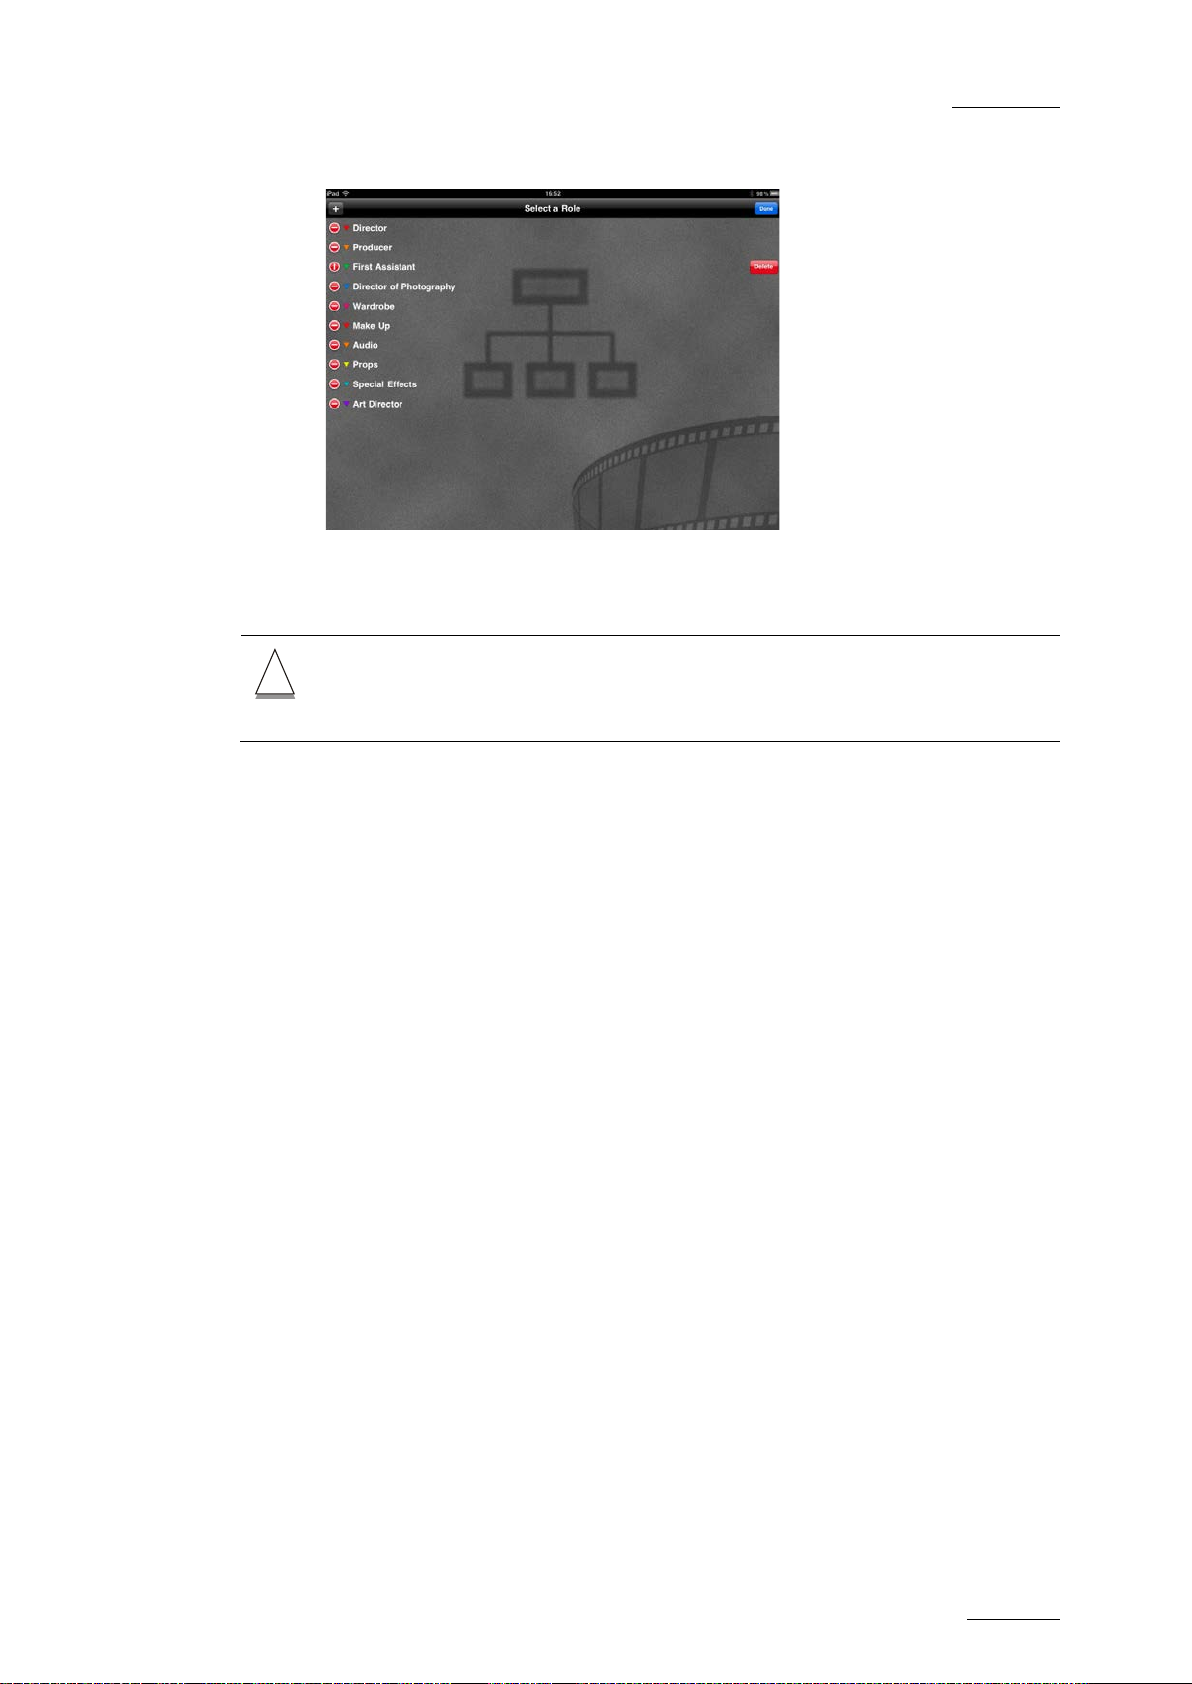
3.4.6 How to Delete a Role
To delete a role from the Select a Role screen, p roceed as follows:
1.
2.
In the Title bar, tap Edit.
The Select a Role screen enters into Edit Mode. You can now delete the roles
that are displayed.
Tap next to the role you want to delete.
Page 25
ProNotes Version 1.0 – User Manual
EVS Broadcast Equipment – January 2012
Issue 1.0.D
17
!
3.
4.
Tap Delete.
In the Title bar, tap Done to close the Edit Mode again.
Warning
If you delete a role, all the notes and comments you made with that role and the
main screen layout linked to that role will be lost .
Page 26
Issue 1.0.D
ProNotes Version 1.0 – User Manual
EVS Broadcast Equipment – January 2012
18
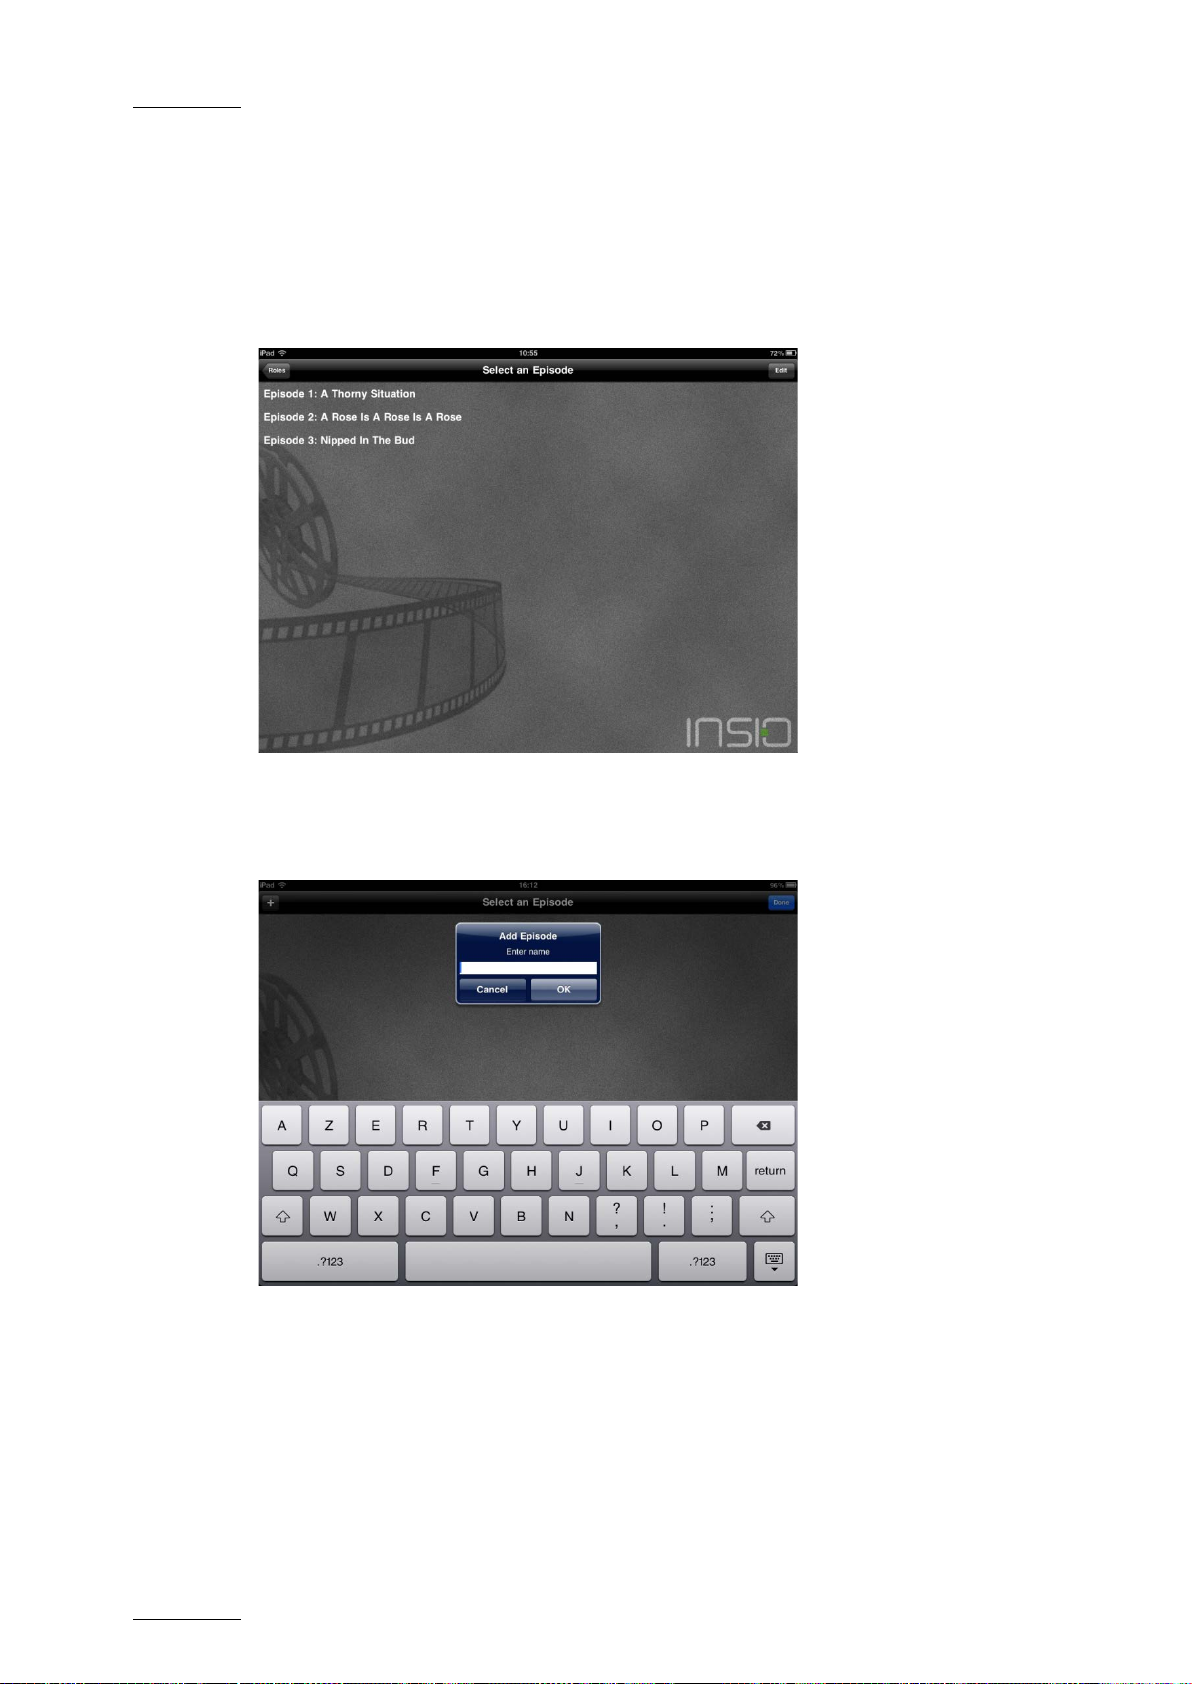
3.5 Selecting an Episode
3.5.1 Select an Episode Screen
As soon as you have selected a role, the Select an Episode screen opens.
In Stand Alone Mode, this screen lists the episodes created by you locally. It allows you
to add new, and edit or delete existing episodes.
If you haven’t added any episodes yet, a pop-up will automatically appear asking you to
do so.
In Server Mode, this screen will only list the episodes created in and imported from
INSIO. You cannot add new, and edit or delete existing episodes.
In the Title bar, a button is provided to ret urn to the Select a Role screen.
3.5.2 How to Select an Episode
To select an episode in the Select an Episode s creen, tap its name.
Page 27
ProNotes Version 1.0 – User Manual
EVS Broadcast Equipment – January 2012
Issue 1.0.D
19
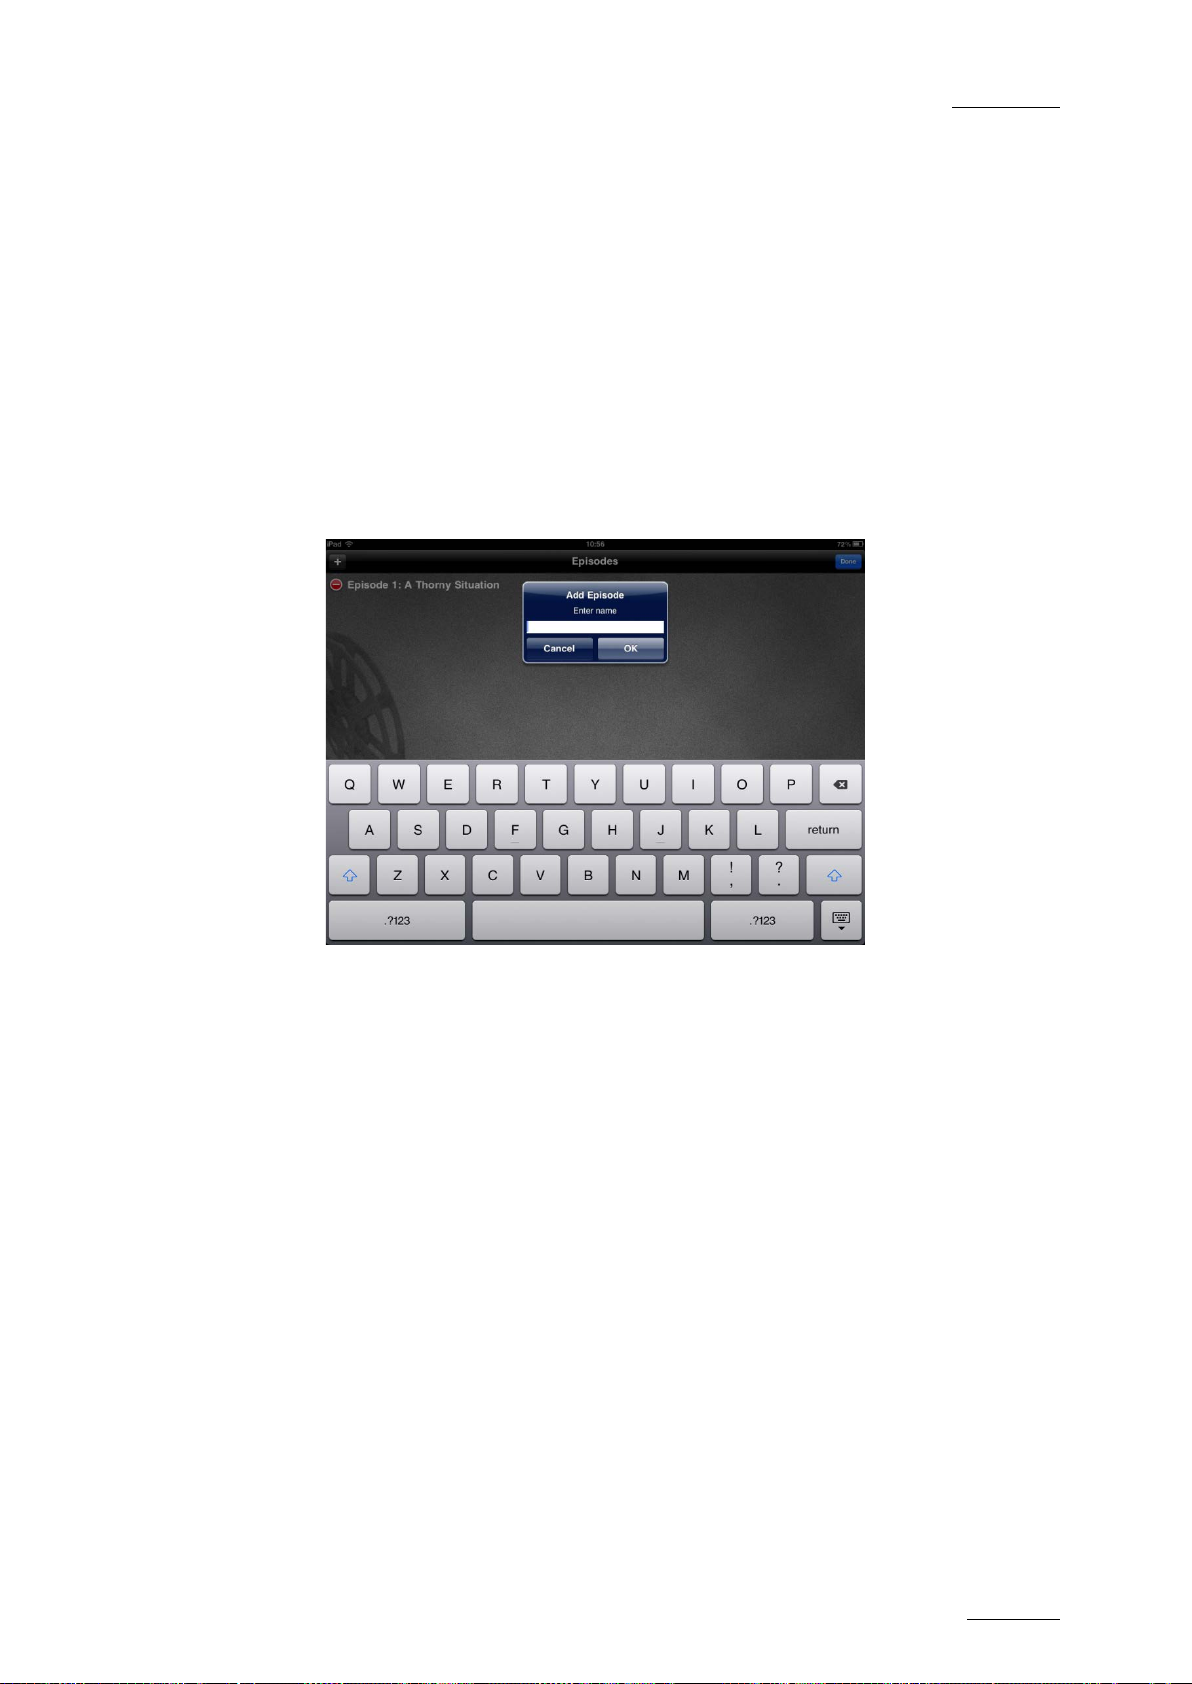
3.5.3 How to Add an Episode
To add a new episode to the Select an Episode screen, proceed as follows:
1.
2.
Do one of the following:
• If no episodes have been added yet, a pop-up will automatically appear asking
you to do so. Go to step 3.
• If episodes have already been added, tap Edit in the Title bar.
The Select an Episode screen enters into Edit Mode. You can now add new
episodes. Go to step 2.
In the Title bar, tap
A pop-up will appear.
+.
3.
4.
Enter a name for the episode by using the onscreen keybo ard, and then tap OK.
The new episode is added below the existing episo des.
In the Title bar, tap Done to close the Edit Mode again.
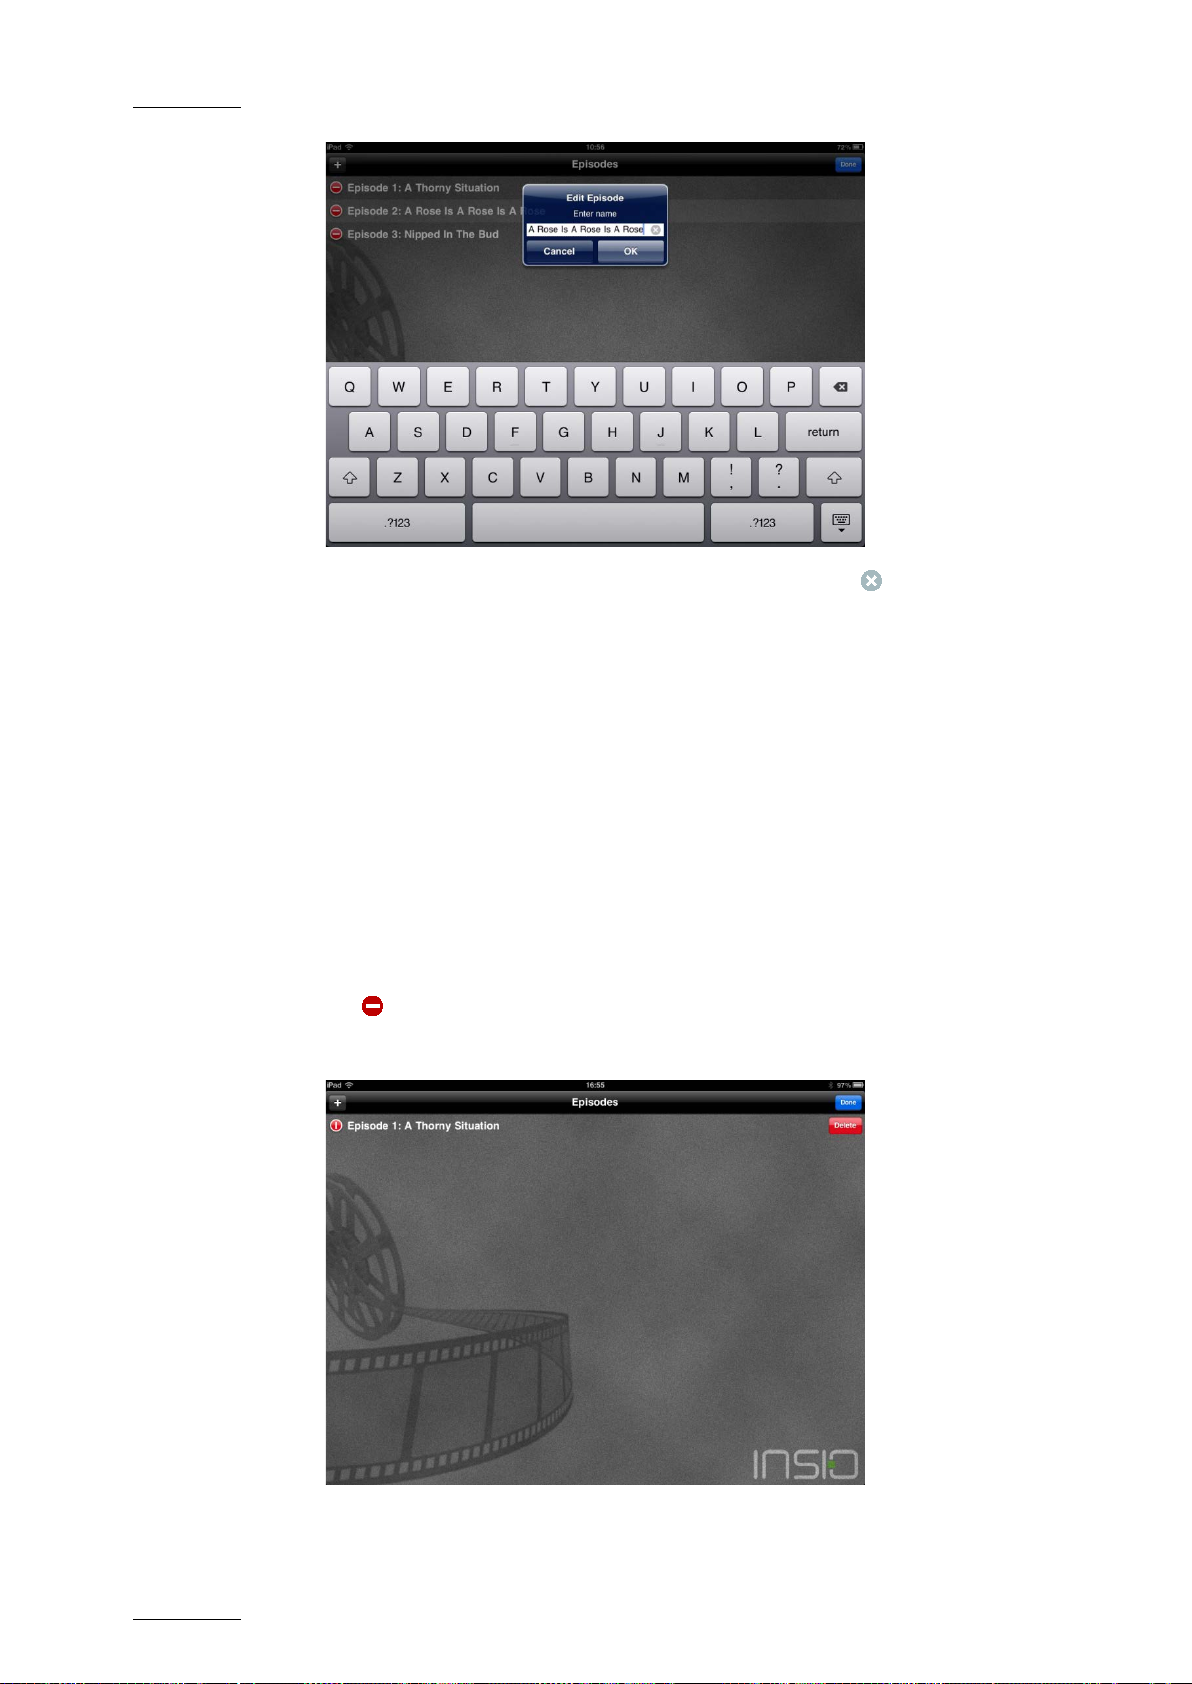
3.5.4 How to Edit an Episode
To edit the name of an episode that is displayed in the Select an Episode screen,
proceed as follows:
1.
2.
In the Title bar, tap Edit.
The Select an Episode screen enters into Edit Mode. You can now edit the name
of the displayed episodes.
Tap the name of the episode you want to edit.
A pop-up appears.
Page 28
Issue 1.0.D
ProNotes Version 1.0 – User Manual
EVS Broadcast Equipment – January 2012
20
3.
4.
5.
Use the onscreen keyboard to edit the episode name. Tap in the text field to
delete it entirely.
Tap OK.
In the Title bar, tap Done to close the Edit Mode again.
3.5.5 How to Delete an Episode
To delete an episode from the Select an Episode screen, proceed as follows:
1.
2.
3.
In the Title bar, tap Edit.
The Select an Episode screen enters into Edit Mode. You can now delete the
displayed episodes.
Tap next to the episode you want to delet e.
Tap Delete.
Page 29
ProNotes Version 1.0 – User Manual
EVS Broadcast Equipment – January 2012
Issue 1.0.D
21
!
4.
In the Title bar, tap Done to close the Edit Mode again.
Warning
If you delete an episode, all notes and comments connected to that episode will
be lost.
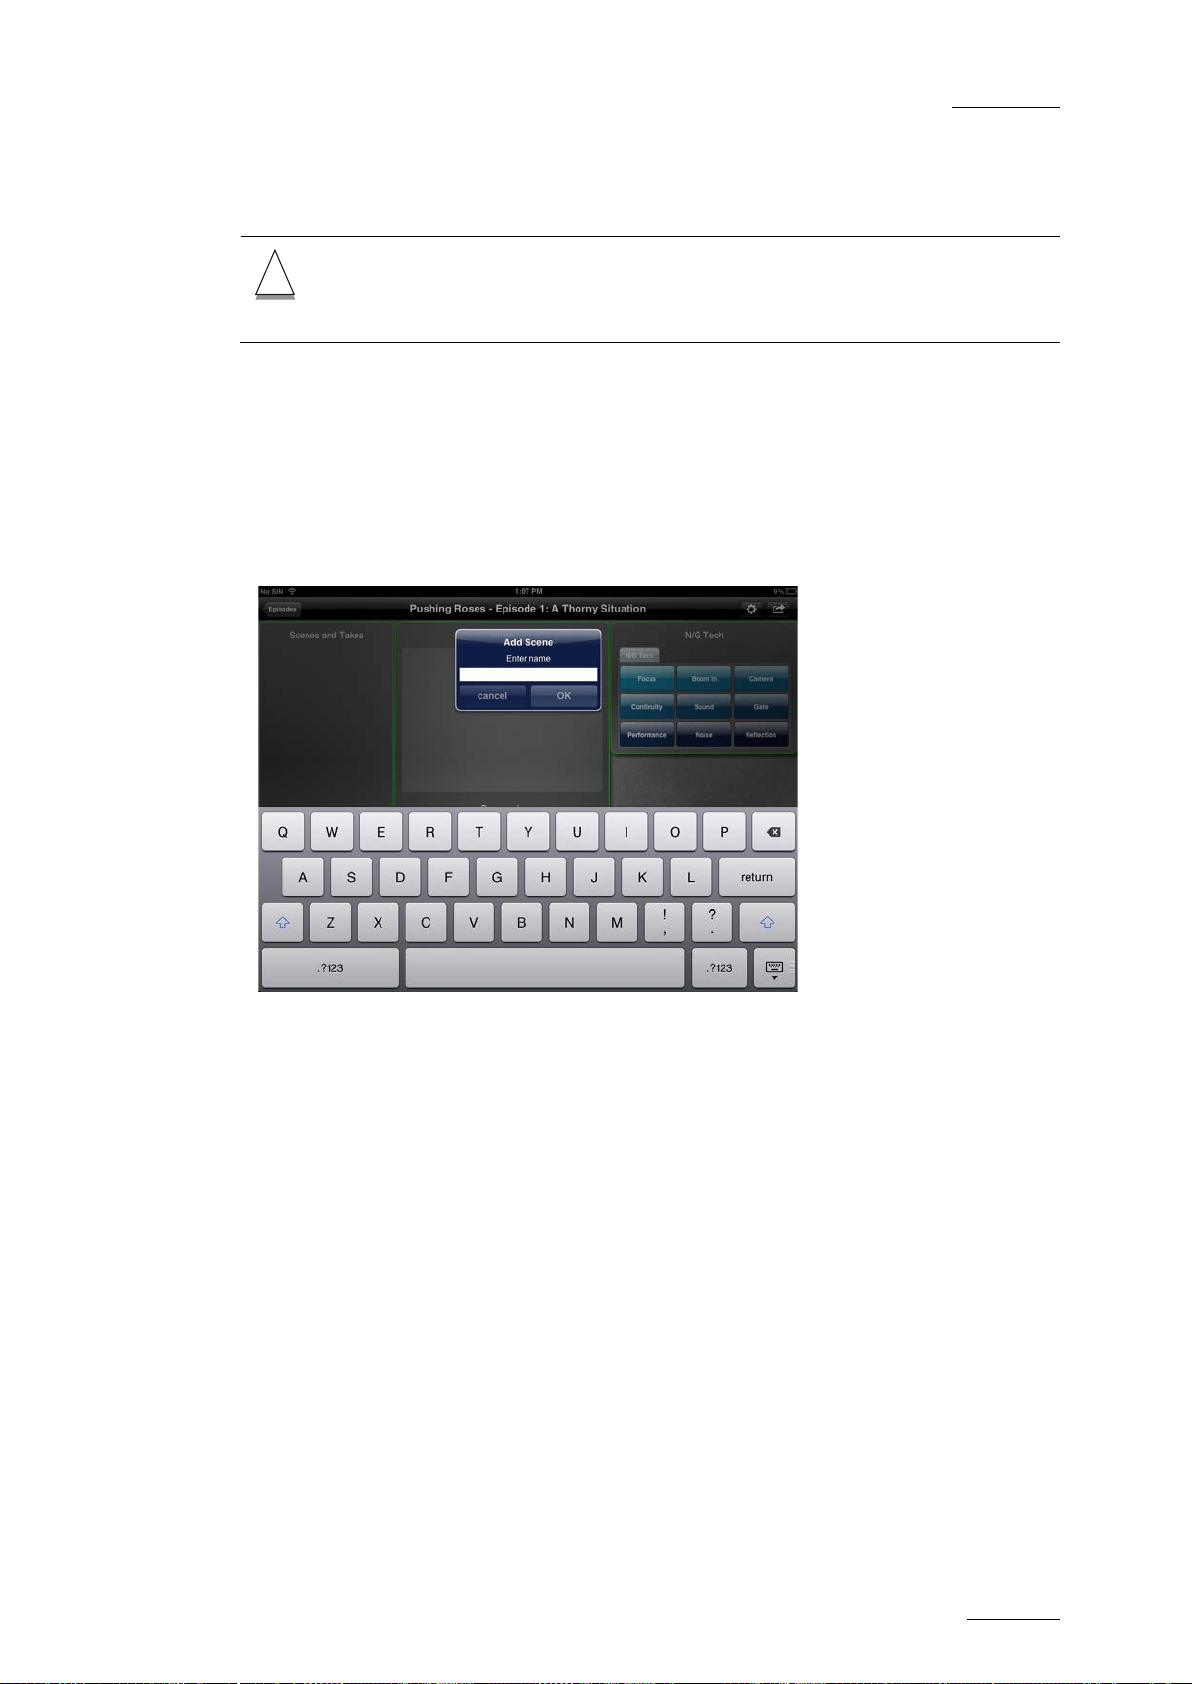
3.6 Selecting a scene and take
As soon as you have selected an episode, the ProNotes main screen opens.
In Stand Alone Mode, a pop-up will automatically appear if you have selected a newly
created episode. This pop-up will ask you to add a new scene. Use the onscreen
keyboard to enter a name, and then tap OK.
ProNotes will add a new scene in the Scenes and Takes pane. It will also automatically
create a first take for this scene. In the Note Creation pane, the time code will start
running.
If you have selected an existing episode, no pop-up will appear.
In Server Mode, the Scenes and Takes pane will only list the scenes and takes created in
and imported from INSIO. You cannot add new scenes and takes.
Page 30

Issue 1.0.D
ProNotes Version 1.0 – User Manual
EVS Broadcast Equipment – January 2012
22
Page 31

ProNotes Version 1.0 – User Manual
EVS Broadcast Equipment – January 2012
Issue 1.0.D
23
4. Selecting a Screen Layout
4.1 Overview of the main screen
The ProNotes main screen opens after you have selected an episode. The main screen
allows you to add new scenes and takes to a selected episode, manage keyword grids
and keywords, make notes and comments for a take or scene and assign an interest level
to a take, generate a Notes & Comments Report and mail or export it.
4.1.1 Title Bar
The Title bar displays the name of the project an d episode you selected. In the left corner,
a button is provided to return to the Select an Episode screen. In the right corner, you
also find buttons. The first button ( ) is used to unlock and lock ( ) the layout of the
main screen. With the second button ( ) a popover can be opened that allows you to
create a PDF report containing an overview of the notes and comments made for the
selected episode or for a specific scene, and to mail it or open it in a PDF reading app on
your iPad.
4.1.2 Available Panes
The following panes are always displayed in the main screen:
• Scenes and Takes
• Notes and Comments
• Note Creation
The following panes can be hidden or revealed:
• Take Rating pane
• Keyword grids
Page 32

Issue 1.0.D
ProNotes Version 1.0 – User Manual
EVS Broadcast Equipment – January 2012
24
4.1.3 Pane Description
Scenes and Takes Pane
In Stand Alone Mode, this pane displays the scenes and takes created by you for the
selected project and episode. It allows you to add new and delete existing scenes and
takes.
In Server Mode, only the scenes and takes created in and imported from INSIO are
displayed. No scenes and takes can be added or deleted. A button is provided that allows
you to either only display the scene and take that are being recorded in INSIO (Auto
Follow), or to display all scenes and takes (Show All) of the selected episode.
For each take a rating is displayed.
Page 33

ProNotes Version 1.0 – User Manual
EVS Broadcast Equipment – January 2012
Issue 1.0.D
25
Notes and Comments Pane
This pane contains two lists. The first list displays the notes made for a particular take,
the second list displays the comments made for a particular scene.
In Stand Alone Mode, this pane can display the notes and comments made by you with
one role, but it can also display those you made with another role.
In Server Mode, this pane can also display the notes and comments made by other
users.
The notes and comments are displayed together with their time code and the colored
locator associated to their owner’s role. Private notes and comments are grayed out.
Their time code is highlighted in green.
Notes and comments are entered in “last item below” order. In the bottom right corner of
the pane a button is provided to filter the notes and comments by role.
Note Creation Pane
This pane is used to add new and edit existing notes and comments. In Stand Alone
Mode, the Time Code field can display the device time code or a custom time code. In
Page 34

Issue 1.0.D
ProNotes Version 1.0 – User Manual
EVS Broadcast Equipment – January 2012
26
Server Mode, the server time code is displayed when the Auto Follow Mode is turned on.
A button is provided to make a note or comment priva te or public.
Take Rating Pane
The Take Rat ing pane allows you to assign an interest rating to a take. Four levels of
take rating can be used to define a take. By default, they are ‘No rating’, ‘OK’, ‘Good’ and
‘Best. The background of the button corresponding to the selected interest level is in
green.
Keyword Grids
Keyword grids contain custom or predefined keywords you can assign to a take. Keyword
grids can be created and added to the main screen.
Page 35

ProNotes Version 1.0 – User Manual
EVS Broadcast Equipment – January 2012
Issue 1.0.D
27
the pane border is red. Blue smart guides appear to help you
4.2 Customizing the Main screen layout
4.2.1 Introduction
The layout of the ProNotes main screen can be customized to fit the needs of various
users. Existing panes can be resized, rearranged, hidden and revealed again, and
keyword grids can be added or deleted.
The customized screen layout is associated to the role you use to log in and is also
project dependent. So, this layout will be displayed next time you log in with this role.
4.2.2 Locked vs. Unlocked Mode
By default, the main screen opens in Locked Mode. This means that you cannot change
its layout. To unlock the main screen, tap in the Title bar. To make the user clear that
the main screen enters into Unlocked Mode, the panes that are visible in the main screen
wiggle briefly. In Unlocked Mode ( ) you can add, resize, rearrange, hide and delete
panes.
4.2.3 Rearranging and Resizing Panes
How to Rearrange Panes
To rearrange a pane in the main screen, proceed as f ollows:
1.
2.
In the Title bar, tap to unlock the layout of the main screen.
Arrange a pane by dragging it by its border.
While dragging,
position a pane relative to another pane.
3.
In the Title bar, tap to lock the layout of the main screen again.
Page 36

Issue 1.0.D
ProNotes Version 1.0 – User Manual
EVS Broadcast Equipment – January 2012
28
A popover appears that displays the name of the Take Rating pane and the
How to Resize Panes
To resize a pane in the main screen, proceed as f ol lows:
1.
2.
4.
In the Title bar, tap to unlock the layout of the main screen.
A small, downward pointing arrow appears at the bottom right corner of each
pane.
Adjust the size of the appropriate pane by dragging the small arrow.
While resizing, the pane border is red.
In the Title bar, tap to lock the layout of the main screen again.
4.2.4 Hiding and Revealing Panes
Only keyword grids and the Take Rating pane can be hidden and made visible again. The
other panes are always visible in the main scree n.
How to Hide Panes
To hide the Take Rating pane and/or a keyword g rid, proceed as follows:
1.
2.
In the Title bar, tap to unlock the layout of the main screen.
Do one of the following:
• Tap in the top left corner of a keyword grid or the Take Rating pane to hide
it.
• Pinch your fingers apart.
keyword grids that you have created. Those that are turned on are visible in the
main screen. Go to step 3.
Page 37

ProNotes Version 1.0 – User Manual
EVS Broadcast Equipment – January 2012
Issue 1.0.D
29
3.
4.
Turn off the Take Rating pane and/or the appropriate keyword grid(s) by tapping
the corresponding switch.
Tap outside the popover to close it again.
5.
In the Title bar, tap to lock the layout of the main screen again.
Page 38

Issue 1.0.D
ProNotes Version 1.0 – User Manual
EVS Broadcast Equipment – January 2012
30
pane and the
keyword grids that you have created. Those that are turned off are not visible in
How to Reveal Panes
To make the Take Rating pane and/or a keyword grid visible in the main screen, proceed
as follows:
1.
2.
In the Title bar, tap to unlock the layout of the main screen.
Pinch your fingers apart.
A popover appears that displays the name of the Take Rating
the main screen. Go to step 3.
3.
4.
5.
Turn on and make visible the Take Rating pane and/or the appropriate keyword
grid(s) by tapping the corresponding switch.
Tap outside the popover to close it again.
In the Title bar, tap to lock the layout of the main screen again.
4.2.5 Adding New Panes
You can create one or more new keyword grids and add them to the main screen. For
more information, see section 5.2 ‘Creating New Keyword Grids’ on page 31.
Page 39

ProNotes Version 1.0 – User Manual
EVS Broadcast Equipment – January 2012
Issue 1.0.D
31
5. Managing Keywords and Keyword
Grids
5.1 About Keywords, keyword categories
and Keyword grids
ProNotes allows you to store and re-use the words you use most frequently when
commenting a scene or a take. You can add your ‘keywords’ to the ProNotes Keyword
Dictionary and group them according to keyword category.
In Stand Alone Mode, the Keyword Dictionary not only contains your own keywords and
keyword categories, but also a set of predefined keywords a nd key word categ o ries.
In Server Mode, the Keyword Dictionary can also contain keywords and keyword
categories defined by other users.
A keyword grid is a pane in the main screen that consists of one or mor e tabs. Each tab
groups a number of related keywords in keyword buttons. You can create a keyword grid
step by step, or you can base your keyword grid on existing keyword categories.
5.2 Creating New Keyword Grids
5.2.1 Introduction
There are two ways of creating new keyword grids. The first way is to create a grid step
by step. You create an empty grid, add one or more tabs and keyword buttons, and finally
assign keywords. The second way is to base your keyword grid on existing keyword
categories (i.e. created by you or other users, or offered by ProNotes). The second way is
much faster. The tabs, keyword buttons and keywords are added automatically to the
grid, and the grid and tabs are named automatically. ProNotes generates a default
gradient color (EVS Blue) for the keyword buttons, but you can change this color.
Page 40

Issue 1.0.D
ProNotes Version 1.0 – User Manual
EVS Broadcast Equipment – January 2012
32
5.2.2 Creating a Keyword Grid Step by Step
Step 1: Creating an Empty Keyword Grid
To create an empty keyword grid, proceed as follows:
1.
2.
In the Title bar, tap to unlock the layout of the main screen.
Pinch your fingers apart.
A popover appears that allows you to create new keyword grids. The Grids area
displays the grids that have already been created. The Other area displays the
Take Rating pane.
3.
Tap New Grid.
A window appears that allows you to determine t he dim ensions of the new grid.
Page 41

ProNotes Version 1.0 – User Manual
EVS Broadcast Equipment – January 2012
Issue 1.0.D
33
4.
5.
Determine the number of rows and columns for your keyword grid, and then tap
Create.
A new, empty keyword grid is added to the main screen.
Resize and position the new keyword grid.
For more information, see section 4.2.3 ‘Rearranging and Resizing Panes’ on
page 27.
Step 2: Adding Tabs
When you create a new, empty keyword grid, ProNotes automatically adds a first tab and
a first, empty keyword button. A default value (New Keyword) is used as grid name, tab
name and keyword. The keyword button gets a default blue color.
To add additional tabs, tap + in the keyword grid.
Step 3: Naming the Grid and the Tabs
Once you have created the empty grid and added one or more tabs, you have to name
the grid and the tabs. You can choose a keyword or keyword category as name for your
grid or for a tab.
To name a grid or tab, proceed as follows:
Page 42

Issue 1.0.D
ProNotes Version 1.0 – User Manual
EVS Broadcast Equipment – January 2012
34
1.
2.
In the new keyword grid, do one of the following:
• Tap the grid or a tab title once.
A popover appears. Go to step 2.
• Double-tap the grid or a tab title.
The Keyword Dictionary opens. Go to step 3.
Tap Name.
The Keyword Dictionary appears.
3.
4.
For more information about creating keywords and keyword categories, see section 5
‘Managing Keywords and Keyword Grids’ on page 31.
Select the appropriate keyword or keyword category to add it as grid or tab title.
Tap outside the popover to close it again.
Step 4: Adding Keyword Buttons
To add additional keyword buttons to a tab, tap the empty grid cells.
Step 5: Assigning Keywords
Once you have named a tab, you can assign a keyword to each button. You can assign
the keywords created by you and by other users or those offered by ProNotes. You can
also use keyword categories as keywords.
Page 43

ProNotes Version 1.0 – User Manual
EVS Broadcast Equipment – January 2012
Issue 1.0.D
35
it to the keyword
To assign an existing keyword or keyword category to a keyword button, proceed as
follows:
1.
2.
3.
In the appropriate tab of the new keyword grid, do one of the following:
• Tap the desired keyword button.
A popover appears. Go to step 2.
• Double-tap the desired keyword button.
The Keyword Dictionary appears. Go to step 3.
Tap Name.
The Keyword Dictionary appears.
Select the desired keyword or keyword category to assign
button.
4.
5.
For more information about creating keywords and keyword categories, see section 5
‘Managing Keywords and Keyword Grids’ on page 31.
Tap outside the popover to close it again.
Repeat steps 1 to 3 until you have assigned the desi red number of keywords.
Note that when the Keyword Dictionary appears again, it will display the keywords
of the last category that you visited.
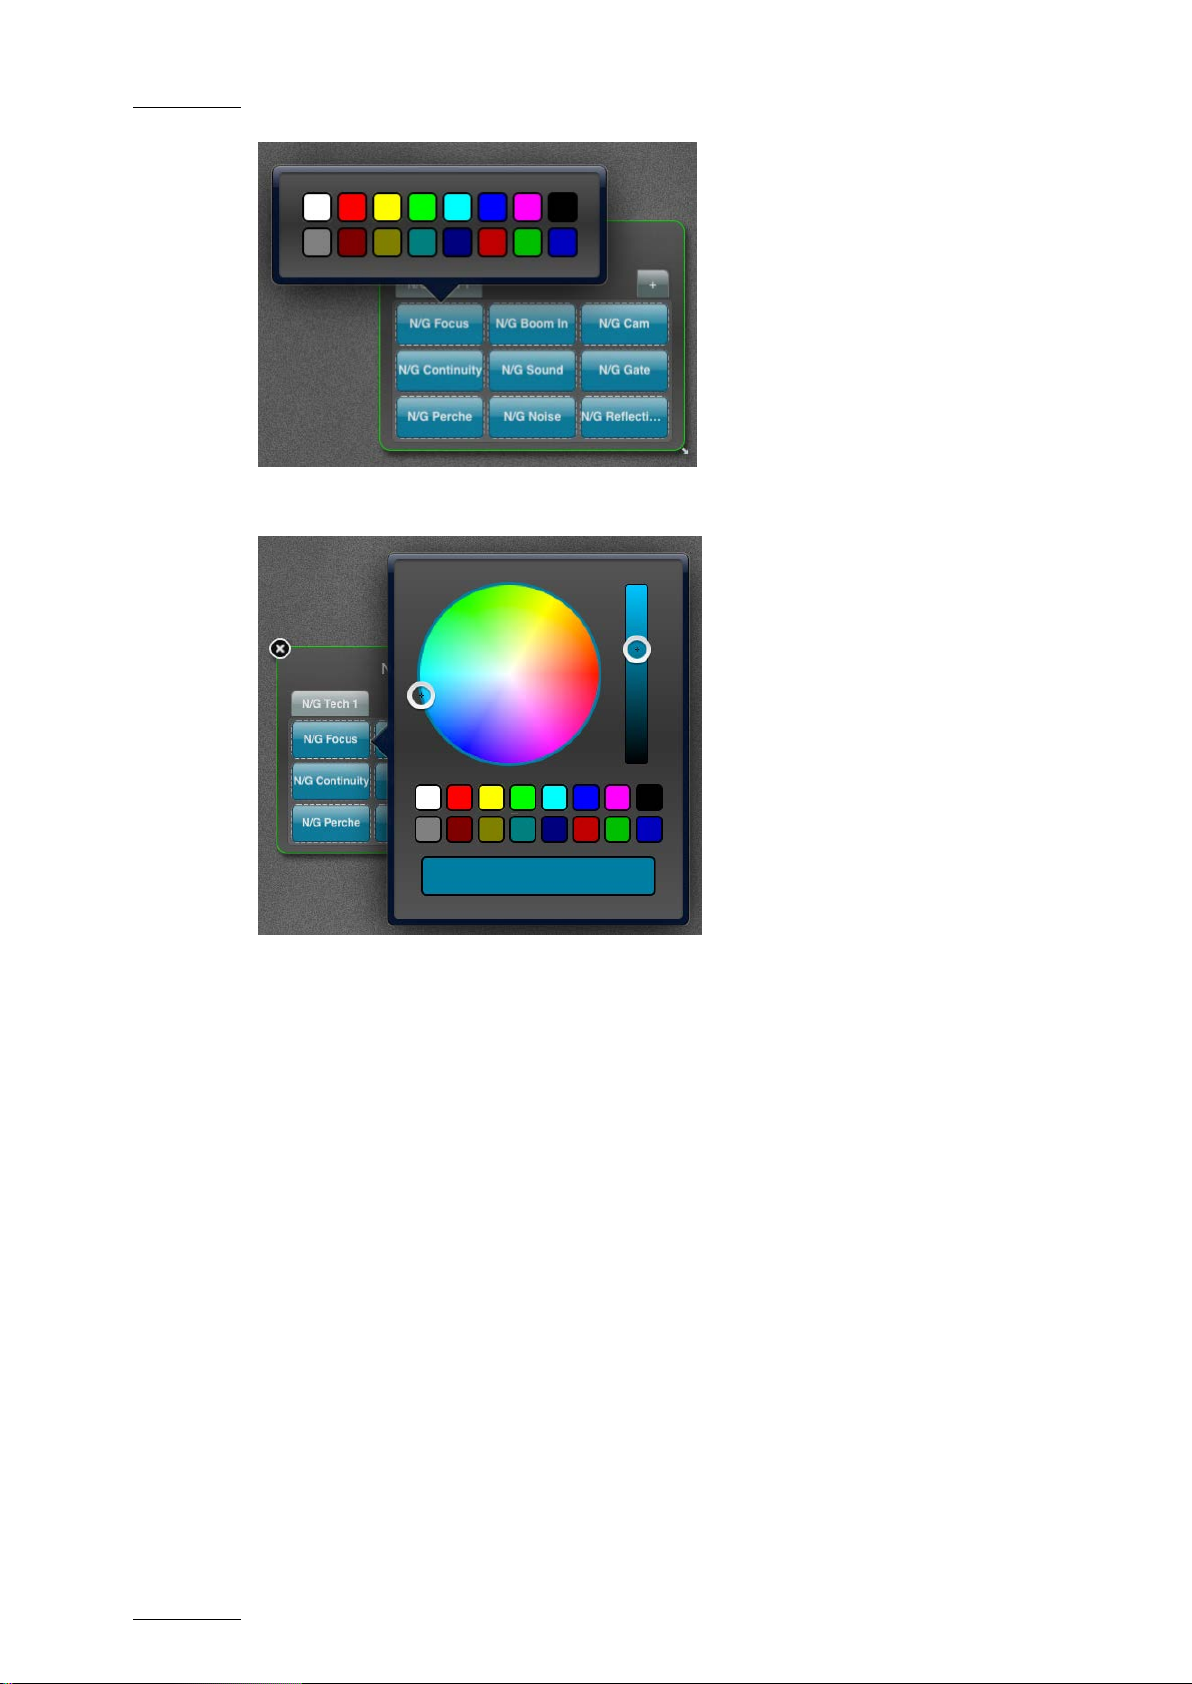
Step 6: Choosing a Color for Individual Keyword Buttons
To choose a color for an individual keyword button, proce ed as follows:
1.
In the appropriate tab of the new keyword grid, tap a keyword button.
A popover appears.
Page 44

Issue 1.0.D
ProNotes Version 1.0 – User Manual
EVS Broadcast Equipment – January 2012
36
The font color of the keyword is adjusted
If you use the full color picker, first adjust the brightness, and then select the
2.
Tap Color.
A color picker appears. Depending on your settings, either the simple or full color
picker will appear. For more information, see secti on 2.2.5 ‘Color’on page 5.
The simple color picker only allows you to select one of the 16 predefined colors.
The full color picker also allows you to pick a color from the color wheel. With the
luminance slider to the right you can adjust the brightness. At the bottom you get
a preview of the selected color.
automatically.
3.
Select the desired color.
Page 45

ProNotes Version 1.0 – User Manual
EVS Broadcast Equipment – January 2012
Issue 1.0.D
37
desired color.
you can base your new keyword grid on. The overview contains the predefined
n also contain keyword
keywords are added automatically to the grid, and the grid and tabs are named
for the
4.
Tap outside the color picker to close it again.
5.2.3 Creating a Keyword Grid Based on a
Keyword Category
To create a keyword grid based on a keyword catego ry, proceed as follows:
1.
2.
3.
4.
In the Title bar, tap to unlock the layout of the main screen.
Pinch your fingers apart.
A popover appears that allows you to create ne w keyword grids.
Tap New Grid.
A popover appears that gives you an overview of the existing keyword categories
keyword categories offered by ProNotes, but it ca
categories created by you or by other users.
From the overview, select the desired keyword category.
5.
6.
7.
8.
Tap Create.
The keyword grid is added to the main screen. The tabs, keyword buttons and
automatically. ProNotes generates a default color gradient (EVS Blue)
keyword buttons. As name for the grid and the tabs, ProNotes uses the selected
keyword category and its keyword subcategories. The keywords in each tab are
the keywords from a particular subcategory.
Resize and position the keyword grid.
For more information, see section 4.2.3 ‘Rearranging and Resizing Panes’ on
page 27.
If necessary, change the default color gradient assigned to the keyword buttons of
one or more tabs. For more information, see section 0 ‘
Editing the Tabs’ on page 53.
In the Title bar, tap to lock the layout of the main screen again.
You have created a keyword grid based on an existing keyword category.
Page 46

Issue 1.0.D
ProNotes Version 1.0 – User Manual
EVS Broadcast Equipment – January 2012
38
5.3 Managing keyword categories and
keywords
5.3.1 Opening the Keyword Dictionary
To open the ProNotes Keyword Dictionary, proceed as follows:
1.
2.
3.
In the Title bar, tap to unlock the layout of the main screen.
If you haven’t created a keyword grid yet, first create one. Otherwise, go to step 3.
Do one of the following:
• Tap the grid name, a tab name or a keyword button.
A popover appears. Go to step 4.
• Double-tap the grid name, a tab name or a keyword button.
The Keyword Dictionary appears.
4.
Tap Name to open the Keyword Dictionary.
Page 47

ProNotes Version 1.0 – User Manual
EVS Broadcast Equipment – January 2012
Issue 1.0.D
39
5.3.2 Managing Keywords
How to Add a Keyword to the Keyword Dictionary
To add a keyword to the Keyword Dictionary, proceed as follows:
1.
2.
3.
Open the Keyword Dictionary. For more information, see section 5.3.1 ‘Opening
the Keyword Dictionary’ on page 38.
Tap Edit.
The Keyword Dictionary enters into Edit Mode.
Tap +.
4.
A text field appears. By default, ProNotes automatically enters New Keyword in
the text field and adds it to the list of existing keyword categories and key words.
In the text field, tap to delete New Keyword, and then enter your own
keyword.
Page 48

Issue 1.0.D
ProNotes Version 1.0 – User Manual
EVS Broadcast Equipment – January 2012
40
5.
Tap Done.
Your keyword is added to the Keyword Dictionary.
How to Edit an Existing Keyword
To edit a keyword in the Keyword Dictionary, pro ceed as follows:
1.
2.
Open the Keyword Dictionary. For more information, see section 5.3.1 ‘Opening
the Keyword Dictionary’ on page 38.
In the Keyword Dictionary, tap Edit.
The Keyword Dictionary enters into Edit Mode. Only the keywords created by you
with a particular role can be edited. The predefined keywords and the keywords
created with another role or by other users are unavailable.
3.
Select the keyword you want to edit.
A text field appears. The selected keyword appears in the text field.
Page 49

ProNotes Version 1.0 – User Manual
EVS Broadcast Equipment – January 2012
Issue 1.0.D
41
4.
Edit the keyword, and then tap Done.
How to Delete an Existing Keyword
To delete an existing keyword, proceed as follows:
1.
2.
Open the Keyword Dictionary. For more information, see section 5.3.1 ‘Opening
the Keyword Dictionary’ on page 38.
In the Keyword Dictionary, tap Edit.
The Keyword Dictionary enters into Edit Mode. Only the keywords created by you
with a particular role can be deleted. The predefined keywords and the keywords
created with another role or by other users are unavailabl e.
3.
4.
Tap next to the keyword you want to delet e.
Tap Delete.
Page 50

Issue 1.0.D
ProNotes Version 1.0 – User Manual
EVS Broadcast Equipment – January 2012
42
The keyword is removed from the Keyword Dictionary .
Page 51

ProNotes Version 1.0 – User Manual
EVS Broadcast Equipment – January 2012
Issue 1.0.D
43
The keyword is turned into a keyword category and the page containing its
5.3.3 Managing Keyword Categories
How to Add a Keyword Category to the Keyword
Dictionary
You can add a keyword category to the Keyword Dictionary by turning an existing or a
new keyword into a keyword category. Note that only the keywords created by you with a
particular role can be turned into keyword categories, not those you created with another
role or those of other users.
To add a keyword category to the Keyword Dictionar y , proceed as follows:
1.
2.
3.
Open the Keyword Dictionary. For more information, see s ection 5.3.1 ‘Opening
the Keyword Dictionary’ on page 38.
Tap Edit.
The Keyword Dictionary enters into Edit Mode.
Do one of the following:
• Tap + to create a new keyword.
A text field appears displaying New Keyword. Go to step 4.
• Select the keyword you want to turn into a keyword category .
A text field appears displaying the keyword you selected. Go to step 5.
4.
5.
In the text field, tap to delete New Key word and enter y our own keyword.
Tap Make Cat. .
keywords is opened. ProNotes automatically adds a first default keyword New
Keyword to this page.
Page 52

Issue 1.0.D
ProNotes Version 1.0 – User Manual
EVS Broadcast Equipment – January 2012
44
6.
7.
In the text field, tap to delete New Key word and enter your own keyword.
Do one of the following:
• Tap Make Cat. to also turn this keyword into a keyword category, and then
add keywords to this keyword category. Tap Done to conclude.
• Tap Done.
To return to the overview containing the name of the keyword category you just
created, tap the button with the name of the key word category.
You have added a keyword category to the Keyword Dictionary and created a first
keyword for this keyword category.
Page 53

ProNotes Version 1.0 – User Manual
EVS Broadcast Equipment – January 2012
Issue 1.0.D
45
The Keyword Dictionary enters into Edit Mode. Only the keyword categories
categories and those created by you with another role or by other users are
How to Edit a Keyword Category
To edit an existing keyword category, proceed as f ol l ows:
1.
Open the Keyword Dictionary. For more information, see section 5.3.1 ‘Opening
the Keyword Dictionary’ on page 38.
2.
Tap Edit.
created by you with a particular role can be edited. The predefined keyword
unavailable.
3.
Select the keyword category you want to edit.
A text field appears. The selected keyword category appears in the text field.
Page 54

Issue 1.0.D
ProNotes Version 1.0 – User Manual
EVS Broadcast Equipment – January 2012
46
4.
Edit the keyword category, and then tap Done.
How to Delete a Keyword Category
A keyword category can only be deleted if al l i ts keywords have been deleted first.
To delete a keyword category, proceed as follows:
1.
2.
Open the Keyword Dictionary. For more information, see section 5.3.1 ‘Opening
the Keyword Dictionary’ on page 38
In the Keyword Dictionary, select the keyword category you want to delete.
The related keywords are displayed.
3.
Tap Edit.
The Keyword Dictionary enters into Edit Mode. Only the keywords created by you
with a particular role can be deleted. The predefined keywords and those created
by you with another role or by other users are unavailable.
Page 55

ProNotes Version 1.0 – User Manual
EVS Broadcast Equipment – January 2012
Issue 1.0.D
47
4.
5.
6.
Tap next to each keyword, and then tap Delete each time. Deleting the last
keyword will remove the category property.
Tap next to the keyword category.
Tap Delete.
Page 56

Issue 1.0.D
ProNotes Version 1.0 – User Manual
EVS Broadcast Equipment – January 2012
48
The keyword category is removed from t he K eyword Dictionary.
Page 57

ProNotes Version 1.0 – User Manual
EVS Broadcast Equipment – January 2012
Issue 1.0.D
49
keywords of a keyword subcategory will be assigned to the
rd category that you have just created appears in the overview of
5.3.4 Creating Keyword Categories as Basis for
Keyword Grids
To create a keyword category as basis for your key word grids, proceed as follows:
1.
2.
3.
4.
7.
Open the Keyword Dictionary. For more information, see section 5.3.1 ‘Opening
the Keyword Dictionary’ on page 38
Create a first keyword category and add one or more keywords. The name of this
first keyword category will be used as grid title.
Turn each of these keywords into a keyword subcategory and add keywords to
each keyword subcategory. For more informati on, see section 5 ‘
Managing Keyword Categories’ on pag e 43.
The name of these keyword subcategories will be used as the tab titles of your
keyword grid. The
keyword buttons of the corresponding tab.
Close the Keyword Dictionary.
Pinch your fingers apart.
A popover appears that allows you to create ne w keyword grids.
8.
Tap New Grid.
The keywo
keyword categories.
Page 58

Issue 1.0.D
ProNotes Version 1.0 – User Manual
EVS Broadcast Equipment – January 2012
50
keywords are added automatically to the grid, and the grid and tabs are named
for the
9.
Select the keyword category, and then tap Create.
The keyword grid is added to the main screen. The tabs, keyword buttons and
automatically. ProNotes generates a default gradient color (EVS Blue)
keyword buttons. As name for the grid and the tabs, ProNotes uses the selected
keyword category and its keyword subcategories. The keywords in each tab are
the keywords from a particular keyword sub cat egory.
Page 59

ProNotes Version 1.0 – User Manual
EVS Broadcast Equipment – January 2012
Issue 1.0.D
51
5.4 Editing Existing Keyword grids
ProNotes allows you to edit your existing keyword grids. You can choose another name
for your grid and change its dimensions. You can also add extra tabs and keyword
buttons and delete those that are no longer relevant. Finally, you can choose another
color for each keyword button and change its keyword.
5.4.1 Changing the Grid Name and Dimensions
How to Change the Name of a Grid
To change the name of a keyword grid, proceed as follows:
1.
In the Title bar, tap to unlock the layout of the main screen.
Do one of the following:
2.
• Tap the name of the keyword grid.
A popover appears. Go to step 3.
• Double-tap the name of the keyword grid.
The Keyword Dictionary appears. Go to step 4.
Tap Name.
3.
The ProNotes Keyword Dictionary opens.
Do one of the following:
4.
• Select another keyword or keyword category.
5.
• Search the original keyword or keyword category and edit it.
• Create a new keyword or keyword category.
Note
The predefined keyword categories and keywords or those created by
you with another role or by other users cannot be edit ed or deleted.
Tap outside the Keyword Dictionary to close it again.
Page 60

Issue 1.0.D
ProNotes Version 1.0 – User Manual
EVS Broadcast Equipment – January 2012
52
The name of the grid has changed.
6.
In the Title bar, tap to lock the layout of the main screen again.
How to Change the Grid Dimensions
To add one or more rows and columns to an existing key word grid, proceed as follows:
1.
2.
3.
4.
In the Title bar, tap to unlock the layout of the main screen.
Tap the title of the desired keyword grid.
A popover appears.
Tap Change Grid Size.
A popover appears that allows you to determine the number of grid rows and
columns. By default, a grid with three rows a nd three columns is offered.
Select the desired number of rows and/or columns, and then tap Change.
The dimensions of the grid are automatically adjusted.
5.
In the Title bar, tap to lock the layout of the main screen again.
Page 61

ProNotes Version 1.0 – User Manual
EVS Broadcast Equipment – January 2012
Issue 1.0.D
53
were predefined and
5.4.2 Editing the Tabs
How to Change the Name of a Tab
To change the name of a tab, proceed as follows:
1.
2.
3.
In the Title bar, tap to unlock the layout of the main screen.
Do one of the following:
• Tap the name of the desired tab.
A popover appears. Go to step 3.
• Double-tap the name of the desired tab.
The Keyword Dictionary opens. Go to step 4.
Tap Name.
The Keyword Dictionary opens.
4.
Do one of the following:
• Select another keyword or keyword category.
• Search the original keyword or keyword category and edit it.
• Create a new keyword or keyword category.
Note
The keyword categories and keywords that
those that were created by another role cannot be edited or deleted.
However, new keywords can be added to a predefined category.
5.
In the Title bar, tap to lock the layout of the main screen again.
How to Add a Tab
To add an extra tab to a keyword grid, proceed as f oll ows:
1.
2.
In the Title bar, tap to unlock the layout of the main screen.
Tap +.
Page 62

Issue 1.0.D
ProNotes Version 1.0 – User Manual
EVS Broadcast Equipment – January 2012
54
An extra tab is added to the grid. ProNotes automatically adds a first, empty
keyword button to the new tab.
3.
In the Title bar, tap to lock the layout of the main screen again.
How to Delete a Tab
To delete a tab, proceed as follows:
1.
2.
In the Title bar, tap to unlock the layout of the main screen.
Tap the name of the tab you want to delete.
A popover appears.
3.
Tap Delete. Note that if your grid only contains one tab, the Delete button will not
be available.
The tab is removed from the grid.
4.
In the Title bar, tap to lock the layout of the main screen again.
Page 63

ProNotes Version 1.0 – User Manual
EVS Broadcast Equipment – January 2012
Issue 1.0.D
55
How to Change the Color Gradient of a Grid
When you create a new keyword grid that is based on an existing keyword category, see
section 5.2.3 ‘Creating a Keyword Grid Based on a Keyword Category’ on page 37,
ProNotes automatically assigns a default color gradient (EVS Blue) to the keyword
buttons of the grid. ProNotes not only allows you to change the color of each keyword
button individually, it also allows you to change the default color gradient assigned to the
keyword buttons of the grid. To do this, proceed as follows:
1.
2.
3.
4.
If necessary, tap in the Title bar to unlock the layout of the main screen.
Tap the name of the tab whose color gradient you want to change.
A popover appears.
Tap Grid Color.
A color picker appears. Depending on your settings, either a simple or a full color
picker will appear.
Select the desired color gradient.
Note that the tab temporarily takes on the color that you selected.
5.
6.
Tap outside the color picker to close it.
In the Title bar, tap to lock the layout of the main screen again.
Page 64

Issue 1.0.D
ProNotes Version 1.0 – User Manual
EVS Broadcast Equipment – January 2012
56
5.4.3 Editing the Keyword Buttons
How to Delete a Keyword Button
1.
2.
3.
In the Title bar, tap to unlock the layout of the main screen.
In the desired keyword grid, tap the keyword button you want to delete.
A popover appears.
Tap Delete.
The button is removed from the grid.
4.
In the Title bar, tap to lock the layout of the main screen again.
How to Change the Color of a Keyword Button
To pick another color for a keyword button, procee d as follows:
1.
2.
In the Title bar, tap to unlock the layout of the main screen.
Tap the button whose color you want to change.
A popover appears.
Page 65

ProNotes Version 1.0 – User Manual
EVS Broadcast Equipment – January 2012
Issue 1.0.D
57
full color picker, first adjust the brightness, and then select the
3.
Tap Color.
A color picker appears. Depending on your settings, either the simple or full color
picker will appear. For more information, see section 2.2.5 ‘Color’on page 5. The
full color picker displays the current color of the selected button.
The simple color picker only allows you to sele ct one of the 16 predefined colors.
The full color picker also allows you to pick a color from the color field. With the
slider to the right you can adjust the brightness. At the bottom you get a preview
of the selected color. The font color of the keyword is adjusted automatically.
4.
5.
Select the desired color.
If you use the
desired color.
Tap outside the color picker to close it.
Page 66

Issue 1.0.D
ProNotes Version 1.0 – User Manual
EVS Broadcast Equipment – January 2012
58
The button color has changed.
6.
In the Title bar, tap to lock the layout of the main screen again.
How To Change the Keyword of a Button
To assign a different keyword to a keyword button, proceed as follows:
1.
2.
In the Title bar, tap to unlock the layout of the main screen.
Do one of the following:
• Tap the desired keyword button.
A popover appears. Go to step 3.
• Double-tap the desired keyword button.
The Keyword Dictionary opens. Go to step 4.
3.
Tap Name.
The Keyword Dictionary opens.
4.
Do one of the following:
• Select another keyword or keyword category.
• Search the original keyword or keyword category and edit it.
• Create a new keyword or keyword category.
Note
The predefined keyword categories and keywords and those that
were created by you with another role or by other users cannot be
edited or deleted.
5.
In the Title bar, tap to lock the layout of the main screen again.
Page 67

ProNotes Version 1.0 – User Manual
EVS Broadcast Equipment – January 2012
Issue 1.0.D
59
How to Move Keyword Buttons
To move a button in a keyword grid, proceed as fol l ows:
1.
2.
3.
In the Title bar, tap to unlock the layout of the main screen.
Keep the keyword button pressed for 1 second.
Drag the button to another location and drop it at the desired spot.
When dropped on another button, buttons will be swapped.
4.
In the Title bar, tap to lock the layout of the main screen again.
Page 68

Issue 1.0.D
ProNotes Version 1.0 – User Manual
EVS Broadcast Equipment – January 2012
60
the keyword grids that you have
5.5 Deleting keyword grids
To delete a keyword grid, proceed as follows:
1.
2.
In the Title bar, tap to unlock the layout of the main screen.
Pinch your fingers apart.
A popover appears that displays the name of
created and the Take Rating pane.
3.
4.
5.
Tap Edit.
Tap next to the grid you want to delete.
A Delete button appears.
Tap Delete.
Page 69

ProNotes Version 1.0 – User Manual
EVS Broadcast Equipment – January 2012
Issue 1.0.D
61
6.
The keyword grid is deleted from the main scre en.
Page 70

Issue 1.0.D
ProNotes Version 1.0 – User Manual
EVS Broadcast Equipment – January 2012
62
Page 71

ProNotes Version 1.0 – User Manual
EVS Broadcast Equipment – January 2012
Issue 1.0.D
63
6. Making and Reviewing Notes and
Comments
6.1 About Notes and comments
6.1.1 Types of Notes
ProNotes distinguishes two types of notes: notes that are created during the recording of
a take and that comment on what is going on, and notes that are created before or after
the recording and give more general remarks about a scene or an episode. The second
type of notes are ‘comments’. Notes are related to a take, comments are related to a
scene.
6.1.2 On Air Mode vs. Off-Air Mode
In Stand Alone Mode, Notes are created in On Air Mode, i.e. during the recording of a
take, comments are created in Off-Air Mode, i.e. before or after the recording. By default,
ProNotes opens in Off-Air Mode.
In the Scenes and Takes pane, a button is provided to switch between On Air Mode
and Off-Air Mode .
In On Air Mode, the Note Creation pane displays a button to add (Add Note) and save
(Save Note) a note.
In Off Air Mode, the Note Creation pane displays a button to add (Add Com.) and save
(Save Com.) a comment.
6.1.3 Auto Follow Mode vs. Show All Mode
In Server Mode, notes are created in Auto Follow Mode, i.e. during the recording of a take
in INSIO. To activate the Auto Follow Mode click the corresponding button in the Scenes
Page 72

Issue 1.0.D
ProNotes Version 1.0 – User Manual
EVS Broadcast Equipment – January 2012
64
and Takes pane. Then, as soon as the recording starts, the Scenes and Takes pane will
only display the take that is being r ecorded and its corresponding scene. ProNotes also
automatically switches to the correct project and episode.
Comments are created in Show All Mode, i.e. before or after the recording of a take in
INSIO. The Scenes and Takes pane will then display all the scenes and takes that exist
for the episode you selected. In Server Mode, ProNotes opens in Show All Mode by
default. To switch from the Auto Follow Mode to the Show All Mode click the Show All
button.
6.1.4 Public vs. Private
A note or comment can be created as “Public” or “Private”. Public notes and comments
can be read by everyone, private notes and comments can only be read by the creator.
By default, notes and comments are public. In the Note Creation pane, a button is
provided to make a note or comment public or private .
Page 73

ProNotes Version 1.0 – User Manual
EVS Broadcast Equipment – January 2012
Issue 1.0.D
65
6.1.5 Free Text vs. Keywords
You can type your notes and comments freely in the New Note field using the onscreen
keyboard, but you can also insert keywords by clicking the corresponding buttons in the
keyword grids. To make a distinctio n between the two, free text entries get a light blue
background, whereas keywords take on the color of the corresponding keywo rd button.
Page 74

Issue 1.0.D
ProNotes Version 1.0 – User Manual
EVS Broadcast Equipment – January 2012
66
Make sure you have unplugged the Dock Connector to USB cable, otherwise the
!
6.2 About Time Codes
6.2.1 Types of Time Codes
In Stand Alone Mode, the Time Code field in the Note Creation pane can either display
the ‘Time of Day’ time code, or a custom time code. The custom time code can be either
a time code that you entered manually, or it can be a time code that originates from an
external time code source (VTR, camera, OB van, time code generator, etc.).
In Server Mode, the Time Code field can also display t he serv er time code.
Depending on your settings, the Time Code field can also either display the PAL time
code (00:00:00:00) or the NTSC time code (00:00:00;00). For more information, see
section 2.2.2 ‘General Settings ’on page 4.
6.2.2 Synchronizing with an External Time Code
Source
You can synchronize the time code of your iPad with the time code of an external time
code source using a time code cable. The time code that is displayed in the Time Code
field will briefly change color until the syncing has been completed.
Picture 1 Time Code Cable
Warning
synching won’t succeed.
6.2.3 Entering a Custom Time Code
You can enter a custom time code by double-tapping the hours, minutes, seconds or
frames in the Time Code field. The time code freezes and a box appears around the digit
pair you tapped on. Change the values by using the onscreen keyboard.
Page 75

ProNotes Version 1.0 – User Manual
EVS Broadcast Equipment – January 2012
Issue 1.0.D
67
You can enter a custom time code before you start making notes and comments. The
time code in the Time Code field will then start running from the time code that you
entered.
You can also enter a custom time code for a note or a comment. This will only change the
time code associated to the note or the comment and have no impact on the running time
code.
Page 76

Issue 1.0.D
ProNotes Version 1.0 – User Manual
EVS Broadcast Equipment – January 2012
68
6.3 Making Notes and Comments
6.3.1 How to Make Notes in Stand Alone Mode
To make notes in Stand Alone Mode, proceed as foll ows:
1.
2.
3.
In the Scenes and Takes pane, select the scene and take you want to comment.
As soon as the recording of the take starts, tap the On Air button in the Scenes
and Takes pane.
The On Air button and the header of the Notes list light up red.
As soon as you see something on stage for which you want to take a note, do one
of the following:
• Tap the Add Note button or tap in the New Note field to enter free text. Go to
step 4.
The onscreen keyboard appears and the time code f reezes.
• Tap a keyword button to enter a keyword. Go to step 5.
Page 77

ProNotes Version 1.0 – User Manual
EVS Broadcast Equipment – January 2012
Issue 1.0.D
69
The keyword appears in the New Note field and the time code freezes.
Note
To remove a keyword you’ve just entered in the New Note field, tap
the keyword button again.
4.
5.
Enter free text using the onscreen keyboard.
If necessary, double-tap the Time Code field and enter a custom time code.
6.
Tap the Public/Private button once to make the note private, tap it again to make
it public again.
8.
Tap Save Note to save the note. Tap Cancel Note to cancel it.
The note is displayed in the Notes list with its associated time code and colored
marker linked to its owner’s role.
Page 78

Issue 1.0.D
ProNotes Version 1.0 – User Manual
EVS Broadcast Equipment – January 2012
70
6.3.2 How to Make Comments in Stand Alone
Mode
To make comments in Stand Alone Mode, proceed as follows:
1.
2.
3.
If necessary, tap the button in the Scenes and Takes pane to switch to the
Off-Air mode.
In the Scenes and Takes pane, select the scene and take you want to comment.
Do one of the following:
• Tap the Add Com. button or tap in the New Note field to enter free text. Go to
step 4.
The onscreen keyboard appears and the time code f reezes.
• Tap a keyword button to enter a keyword. Go to step 5.
The keyword appears in the New Note field and the time code freezes.
Page 79

ProNotes Version 1.0 – User Manual
EVS Broadcast Equipment – January 2012
Issue 1.0.D
71
Note
To remove a keyword you’ve just entered in the New Note field, tap
the keyword button again or select the keyword and tap .
4.
5.
6.
Enter free text using the onscreen keyboard.
If necessary, double-tap the Time Code field and enter a cu st om time code.
Tap the Public/Private button once to make the comment private, tap it again to
make it public again.
7.
Tap Save Com. to save the comment. Tap Cancel Com. to cancel it.
The comment is displayed in the Comments list with its associated time code and
colored marker linked to its owner’s role.
Page 80

Issue 1.0.D
ProNotes Version 1.0 – User Manual
EVS Broadcast Equipment – January 2012
72
6.3.3 How To Make Notes in Server Mode
To make notes in Server Mode, proceed as follo ws:
1.
2.
In the Scenes and Takes pane, tap the Auto Follow button.
As soon as the Start/In button has been tapped in INSIO, the Notes list title lights
up red and only the scene and take that are being recorded by INSIO are listed in
the Scenes and Takes pane.
As soon as you see something on stage for which you want to take a note, do one
of the following:
• Tap the Add Note button or tap in the New Note field to enter free text. Go to
step 3.
The onscreen keyboard appears and the time code f reezes.
• Tap a keyword button to enter a keyword. Go to step 4.
The keyword appears in the New Note field and the time code freezes.
Note
To remove a keyword you’ve just entered in the New Note field, tap
the keyword button again.
3.
Enter free text using the onscreen keyboard.
Page 81

ProNotes Version 1.0 – User Manual
EVS Broadcast Equipment – January 2012
Issue 1.0.D
73
4.
5.
If necessary, double-tap the Time Code field and change the time code.
Tap the Public/Private button once to make the note private, tap it again to make
it public again.
6.
Tap Save Note to save the note.
The note is displayed in the Notes list with its associated time code and colored
marker linked to its owner’s role.
6.3.4 How to Make Comments in Server Mode
To make comments in Server Mode, proceed as fol l ows:
1.
In the Scenes and Takes pane, tap Show All.
2.
3.
4.
5.
6.
7.
Select a scene and take from the Scenes and Takes p ane.
Do one of the following:
• Tap the Add Com. button or tap in the New Note field when other notes have
already been entered to enter free text. Go to step 4.
The onscreen keyboard appears and the time code f reezes.
• Tap a keyword button to enter a keyword. Go to step 5.
The keyword appears in the New Note field and the time code freezes.
Note
To remove a keyword you’ve just entered in the New Note field, tap
the keyword button again.
Enter free text using the onscreen keyboard.
If necessary, double-tap the Time Code field and change the time code.
Tap the Public/Private button once to make the comment private, tap it again to
make it public again.
Tap Save Com. to save the comment. Tap Cancel Com. to cancel i t.
The comment is displayed in the Comments list with its associated time code and
colored marker linked to its owner’s role.
Page 82

Issue 1.0.D
ProNotes Version 1.0 – User Manual
EVS Broadcast Equipment – January 2012
74
new scene is added under the existing scenes. ProNotes also automatically
6.4 Managing Scenes and Takes
In Stand Alone Mode, you can add new, and delete existing scenes and takes. In Server
Mode, this is not possible. Scenes and takes are added in INSIO.
6.4.1 Adding Scenes and Takes
How to Add a Scene
To add a scene to the selected episode, proceed as f oll ows:
1.
2.
In the Scenes and Takes pane, tap .
A pop-up appears asking you to enter a name for the new scene.
Enter a name using the onscreen keyboard, and then tap OK.
The
creates a first take for this scene.
How to Add a Take
To add a take to a scene, proceed as follows:
1.
2.
In the Scenes and Takes pane, select a take.
Tap .
ProNotes adds a new take under the selected take.
6.4.2 Deleting Scenes and Takes
How to Delete a Take
To delete a take, proceed as follows:
1.
In the Title bar, tap to unlock the layout of the main screen.
In the Scenes and Takes pane the icon appears next to the latest take in the
list. The other takes cannot be deleted yet.
Page 83

ProNotes Version 1.0 – User Manual
EVS Broadcast Equipment – January 2012
Issue 1.0.D
75
!
2.
3.
Tap .
A Delete button appears next to the name of the take.
Tap Delete.
A pop-up appears asking you to confirm your action.
4.
5.
Tap Yes to continue.
The take is removed from the Scenes and Takes pane. The icon now appears
next to the following take in the list.
In the Title bar, tap to lock the layout of the main screen again.
Warning
If you delete a take, all notes linked to that t ake will be lost!
Page 84

Issue 1.0.D
ProNotes Version 1.0 – User Manual
EVS Broadcast Equipment – January 2012
76
!
How to Delete A Scene
To delete a scene, proceed as follows:
1.
2.
3.
4.
5.
In the Title bar, tap to unlock the layout of the main screen.
Delete all but the last remaining take of the s cene you want to delete.
Tap next to the last remaining take, and then t ap Delete.
A pop-up appears warning you that deleting this last t ake will delete the scene.
Tap Yes to continue.
The scene is removed from the Scenes and Ta kes p ane.
In the Title bar, tap to lock the layout of the main screen again.
Warning
If you delete a scene, all notes and comments linked to that scene will be lost!
6.4.3 Adding a Take Rating
Select a take in the Scenes and Takes pane and select an interest level in the Take
Rating pane. The selected interest level appears next to the take in the Scenes and
Takes pane. By default, each new take has No Rating as interest level.
Page 85

ProNotes Version 1.0 – User Manual
EVS Broadcast Equipment – January 2012
Issue 1.0.D
77
comments made with that role. The other notes and comments cannot be
button appears at the bottom left corner of the Notes and Comments
6.5 Reviewing Notes and comments
6.5.1 How to Edit Notes and Comments
To edit a note or comment, proceed as follows:
1.
2.
3.
4.
In the Notes and Comments pane, select the note or comment you want to edit.
The selected note or comment appears in the New Note field.
Tap the note text or comment text to select it.
The onscreen keyboard appears.
Tap to delete the note or comment and enter a new one.
Tap Save Note or Save Com. to save the new note or comment.
The new note or comment is displayed in the Notes and Comments pane.
Note
If you are logged in with a particular role, you can only edit the notes and
edited.
6.5.2 How to Delete Notes and Comments
To delete a note or comment, proceed as follows:
1.
2.
3.
In the Notes and Comments pane, select the note or comment you want to delete.
A Delete
pane.
Tap the Delete button.
A pop-up appears asking you to confirm your action.
Tap Yes to continue.
The note or comment is removed from the Notes and Comments pane.
Page 86

Issue 1.0.D
ProNotes Version 1.0 – User Manual
EVS Broadcast Equipment – January 2012
78
If you are logged in with a particular role, you can only delete the notes and
comments made with that role. The other notes and comments cannot be
default, the role you are logged in with is selected. The other roles are
Note
deleted.
6.5.3 Filtering Notes and Comments
By default, the Notes and Comments pane only displays the notes and comments you
made with a particular role.
In Stand Alone Mode, the Filter function allows you to also display the notes and
comments you made with other roles.
In Server Mode, the Filter function allows you to also display and hide the notes and
comments made by other users with the same or a different role. However, notes and
comments that are made private by other users will not be displayed.
How to Filter Notes and Comments
To filter the notes and comments that are displayed in the Notes and Comments pane,
proceed as follows:
1.
In the Notes and Comments pane tap the Filter button.
A popover appears that allows you to filter the notes and comments by role. By
deselected.
2.
Do one of the following:
• Tap Select All if you want to select or deselect all roles. Note that you cannot
deselect the role with which you are logged in.
Page 87

ProNotes Version 1.0 – User Manual
EVS Broadcast Equipment – January 2012
Issue 1.0.D
79
•
The notes and comments made with the roles you selected are displayed in the
The notes and comments that you made with another role and indicated as
Select or deselect the desired roles one by one.
3.
Tap outside the popover to close it.
Notes and Comments pane. The notes and comments made by the roles you
deselected have disappeared.
Note
private will not be displayed in the Notes and Comments pane.
Page 88

Issue 1.0.D
ProNotes Version 1.0 – User Manual
EVS Broadcast Equipment – January 2012
80
Page 89

ProNotes Version 1.0 – User Manual
EVS Broadcast Equipment – January 2012
Issue 1.0.D
81
7. Creating Notes & Comments
Reports
ProNotes allows you to generate PDF reports that list the notes and comments you made
for a whole episode or a specific scene of a project. You can mail these reports to other
crew members, open them in iBooks or another PDF reading app on your iPad, or
transfer them to a folder on your computer via iTunes.
7.1 About notes & Comments Reports
Notes & Comments Reports display the notes and comments you made for a whole
episode or a specific scene and take of a project. The notes and comments can be
grouped by scene, by role or by time code. For each note and comment the
corresponding time code and the user’s role is displayed. For each note the scene and
take number is also displayed. Comments are indicated by a ‘c’. For each take the rating
(**) is displayed.
Besides information about notes and comments, the Notes & Comments Report also
contains the following information: a company logo, the creation date of the report, the
name and role of the user who created the report, and the name of the project and
episode for which the notes and comment s we re m ade.
Page 90

Issue 1.0.D
ProNotes Version 1.0 – User Manual
EVS Broadcast Equipment – January 2012
82
• Whole Episode, if you want the notes and comments made for a whole
7.2 Creating and mailing or exporting Reports
7.2.1 Prerequisites
To be able to send a Notes & Comments report by email, make sure:
• you have set up an email account on your iPad;
• you have turned on Wi Fi on your iPad;
• you have joined a Wi Fi network.
Otherwise, an error message will appear.
To be able to open a Notes & Comments report on your iPad, you need a PDF reading
application like iBooks.
For more information, see the user manual of your iPad.
7.2.2 How to Create and Mail or Export Reports
To create a report and mail it or open it in a PDF reading app on your iPad, proceed as
follows:
1.
2.
In the Title bar, tap .
A popover with two action buttons appears.
Tap:
• Send via Mail, if you want to mail your report.
• Export, if you want to open your report in a PDF reading app on your iPad.
A window appears that allows you to filter your not es and comme nts.
3.
In the Report Scope field, tap and select:
Page 91

ProNotes Version 1.0 – User Manual
EVS Broadcast Equipment – January 2012
Issue 1.0.D
83
episode to be included in the report.
the notes and comments made for a
• Specific Scene, if you only want
particular scene to be included in the report.
An additional field appears that allows you to select the desired scene.
4.
5.
6.
In the Group Notes By field, tap and select:
• Time Code, if you want to group the notes of the various users by time code.
• Scenes, if you want to group the notes of the various users by scene.
• Role, if you want to group the notes by role.
Tap Create.
ProNotes will generate the PDF report. If you have chosen to export the report, a
message will appear informing you that the export has finished.
Tap OK to close the message.
If you have chosen to mail the report, do one of the f ol l owing:
• Tap Send, type a name or email address in the To field, or tap to add a
name from your contacts, and then tap Send again.
The report is sent by email.
• Tap Cancel to save a draft of your email or to discard it .
If you have chosen to export the report, do one of t he following:
• Tap Export and select the application in which you want to open the report.
The PDF report is opened in that application.
Page 92

Issue 1.0.D
ProNotes Version 1.0 – User Manual
EVS Broadcast Equipment – January 2012
84
•
Close
Tap
to close the report.
Page 93

ProNotes Version 1.0 – User Manual
EVS Broadcast Equipment – January 2012
Issue 1.0.D
85
7.3 Transferring reports
To transfer one or more reports from your iPad via iTunes to a folder on your computer,
proceed as follows:
Connect your iPad to your computer and select your device in iTunes.
1.
Click the Apps button.
2.
Below File Sharing, select the ProNotes appli cat i on from the Apps list.
3.
The reports on your iPad are displayed in the P roNotes Documents field.
Select one or more reports, and then click the Save To button.
4.
Browse to the folder on your computer where you want to store your reports, and
5.
then click Select Folder.
The reports are stored in this folder.
Page 94

Issue 1.0.D
ProNotes Version 1.0 – User Manual
EVS Broadcast Equipment – January 2012
86
7.4 Changing the company logo
By default, the company logo of EVS is displayed on a report. To add your own company
logo to a report, proceed as follows:
1.
2.
3.
4.
5.
Rename the file containing your company logo to company_logo.png.
In iTunes, select your device (below Devices), and then click the Apps button.
Below File Sharing, select the ProNotes appli cat i on from the Apps list.
The reports on your iPad are displayed.
Click the Add button.
Select the file company_logo.png, and then click OK.
The file is added to the list. From now on, the reports created by you will contain
your own company logo.
Page 95

ProNotes Version 1.1 – User Manual
EVS Broadcast Equipment – July 2011
Issue 1.1.D
87
Index
A
Auto Follow Mode ......................................................... 63
C
color picker
select .......................................................................... 5
comments
delete ........................................................................ 77
edit ............................................................................ 77
filter .......................................................................... 78
make in Server Mode ................................................ 73
make in Stand Alone Mode ...................................... 70
make public or private .............................................. 64
E
add a tab .................................................................. 53
base on a keyword category..................................... 37
change the dimensions ............................................ 52
change the name ...................................................... 51
change the name of a tab ......................................... 53
create step by step ................................................... 32
delete ....................................................................... 60
delete a tab .............................................................. 54
move keyword buttons ............................................ 59
keywords
add to Keyword Dictionary ....................................... 39
delete from Keyword Dictionary .............................. 41
edit ........................................................................... 40
L
locator
change color ............................................................. 16
choose set of colors .................................................... 5
Locked Mode ................................................................ 27
empty local database at next start-up ............................ 4
episode
add ............................................................................ 19
delete ........................................................................ 20
edit name .................................................................. 19
select ........................................................................ 18
G
Grid
change color gradient ............................................... 55
K
keyword button
change the color ....................................................... 56
change the keyword ................................................. 58
delete ........................................................................ 56
keyword categories
add to Keyword Dictionary ....................................... 43
create as basis for new keyword grids ...................... 49
delete ........................................................................ 46
edit ............................................................................ 45
Keyword Dictionary
add keyword category .............................................. 43
add keywords ........................................................... 39
delete a keyword category ....................................... 46
delete keyword ......................................................... 41
edit keyword category .............................................. 45
edit keywords ........................................................... 40
open .......................................................................... 38
keyword grid ................................................................. 26
M
main screen
add new panes ......................................................... 30
hide panes ................................................................ 28
rearrange panes ....................................................... 27
resize panes .............................................................. 28
reveal panes ............................................................. 30
unlock and lock layout .............................................. 23
N
Note Creation pane ....................................................... 25
notes
delete ....................................................................... 77
edit ........................................................................... 77
filter .......................................................................... 78
make in Server Mode ............................................... 72
make in Stand Alone Mode ...................................... 68
make public or private ............................................. 64
Notes & Comments Reports
about ........................................................................ 81
change the company logo ........................................ 86
create ....................................................................... 82
export ....................................................................... 82
mail ........................................................................... 82
transfer to computer ................................................ 85
Notes and Comments pane .......................................... 25
Page 96

Issue 1.0.D
ProNotes Version 1.0 – User Manual
EVS Broadcast Equipment – January 2012
88
O
Off-Air Mode ................................................................. 63
On Air Mode .................................................................. 63
P
panes
hide ........................................................................... 28
rearrange .................................................................. 27
resize ........................................................................ 28
reveal ........................................................................ 30
Production Notes Server
connect ..................................................................... 10
enter login information .............................................. 4
project
add ............................................................................ 12
delete ........................................................................ 13
edit name .................................................................. 12
select ........................................................................ 11
R
role
about ........................................................................ 14
add ............................................................................ 15
change locator color ................................................. 16
choose predefined roles ............................................. 6
delete ........................................................................ 16
edit name .................................................................. 16
select ........................................................................ 14
add ........................................................................... 74
add take .................................................................... 74
delete ....................................................................... 76
select ........................................................................ 21
Scenes and Takes pane ................................................. 24
Server Mode
turn on or off .............................................................. 4
settings
access ......................................................................... 3
overview ..................................................................... 3
Show All Mode .............................................................. 63
Stand Alone Mode
turn on or off .............................................................. 4
T
take
add rating ................................................................. 76
add to scene ............................................................. 74
delete ....................................................................... 74
select ........................................................................ 21
Take Rating pane .......................................................... 26
time code
enter a custom ~ ...................................................... 66
synchronizing with an external time code ................ 66
types ......................................................................... 66
Title bar ......................................................................... 23
U
Unlocked Mode ............................................................. 27
S
scene
V
video mode, set .............................................................. 4
Page 97

EVS Broadcast Equipment
Liège Science Park
16, rue Bois St Jean
B-4102 Ougrée
Belgium
Corporate
Headquarters
+32 4 361 7000
North & Latin America
Headquarters
+1 973 575 7811
To learn more about EVS go to www.evs.tv
Asia & Pacific
Headquarters
+852 2914 2501
Other regional offices
available on
www.evs.tv/contact
 Loading...