

Page 1
Page 2

iLog User Guide
2
Contents
Contents ....................................................................................................................................2
Safety Instructions ....................................................................................................................3
Safety Instructions ....................................................................................................................4
Logger features .........................................................................................................................5
iLog Display...............................................................................................................................5
Connecting your iLog to your PC .............................................................................................6
Installing and using a USB to serial port cable........................................................................ 6
Installing ESCORT Console ......................................................................................................7
Programming your iLog logger ................................................................................................7
Description & Passwords .............................................................................................. 10
Connecting a sensor .....................................................................................................11
Configuring logger sensors ........................................................................................... 11
Setting a date and time ................................................................................................. 17
Setting start conditions.................................................................................................. 18
Logger summary...........................................................................................................19
Program window ...........................................................................................................20
Bookmarking.................................................................................................................22
Downloading your iLog logger ............................................................................................... 23
Commencing Download ................................................................................................23
Analysing your downloaded information ........................................................................28
Viewing downloaded information ................................................................................... 29
List of readings ............................................................................................................. 29
Readings and Summary................................................................................................30
2D Line graph ...............................................................................................................30
Step Graph ...................................................................................................................31
Cleaning an iLog’s humidity sensor....................................................................................... 35
Specifications.......................................................................................................................... 36
Warranty information ..............................................................................................................37
Contact details ........................................................................................................................38
Page 3
iLog User Guide
3
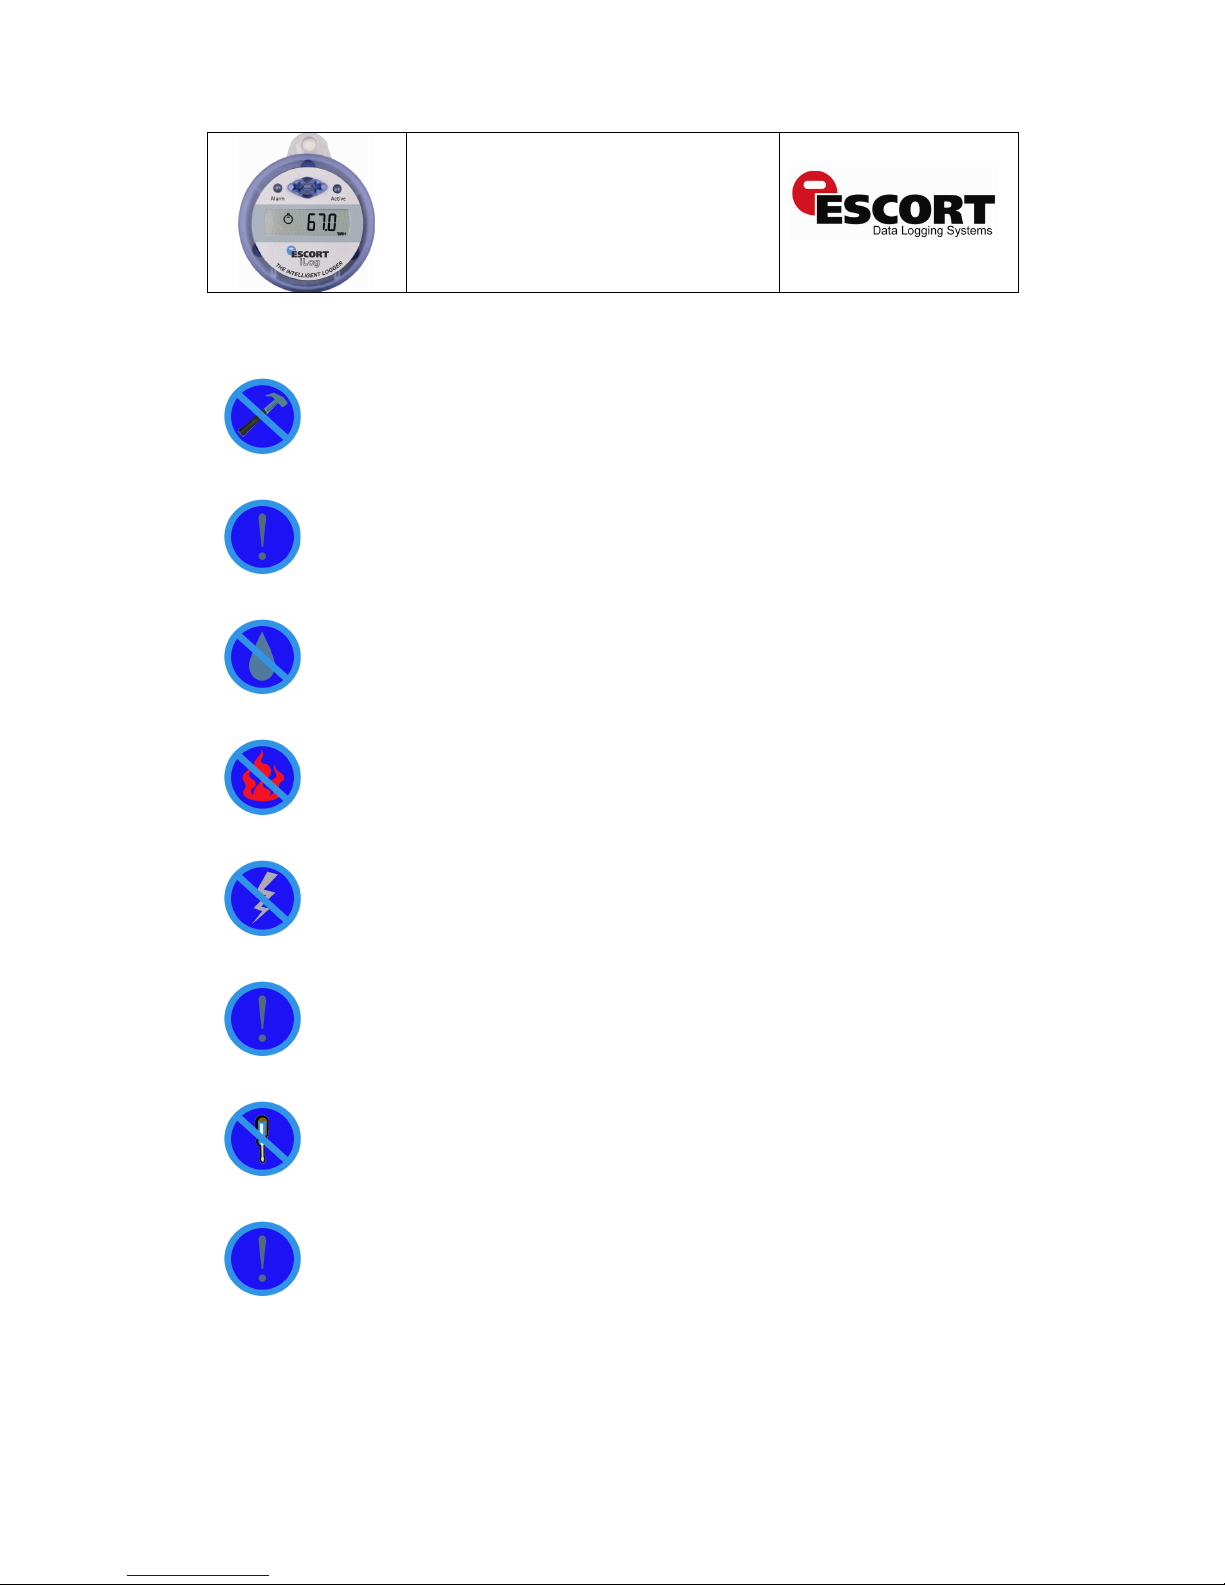
Safety Instructions
In no circumstance should heavy force be applied to your iLog logger. Applying
heavy force to any part of your iLog could result in logger malfunction and/or injury.
Your iLog logger should only be operated within the parameters specified in the
technical data discussed within this user manual. A failure to follow these
instructions could result in you iLog logger malfunctioning and cause permanent
damage to the unit.
Certain models of iLog loggers are vulnerable to damage when contact with water
takes place. Please check your iLog loggers IP rating before placing your iLog
logger in such conditions.
Your iLog logger is not to be subjected to a naked flame. Exposures to such
conditions may result in damage to your iLog logger, and result in an explosion of
the battery.
Never operate your iLog logger with a low battery. We recommend that you replace
the battery as soon as the battery low symbol is indicated on your iLog logger’s
display.
For iLog loggers which operate external sensors, we recommend that the sensor be
unplugged by holding the gold connector, not removed via the sensor cable.
Do not attempt to repair or modify any part of this logger. Such actions will result in
a loss of warranty. All repairs are to be made by an official ESCORT Data logging
Systems service centre.
For iLog loggers which operate external sensors, it is important to keep the sensor
tip clean to ensure that the data collected is accurate.
Page 4
iLog User Guide
4
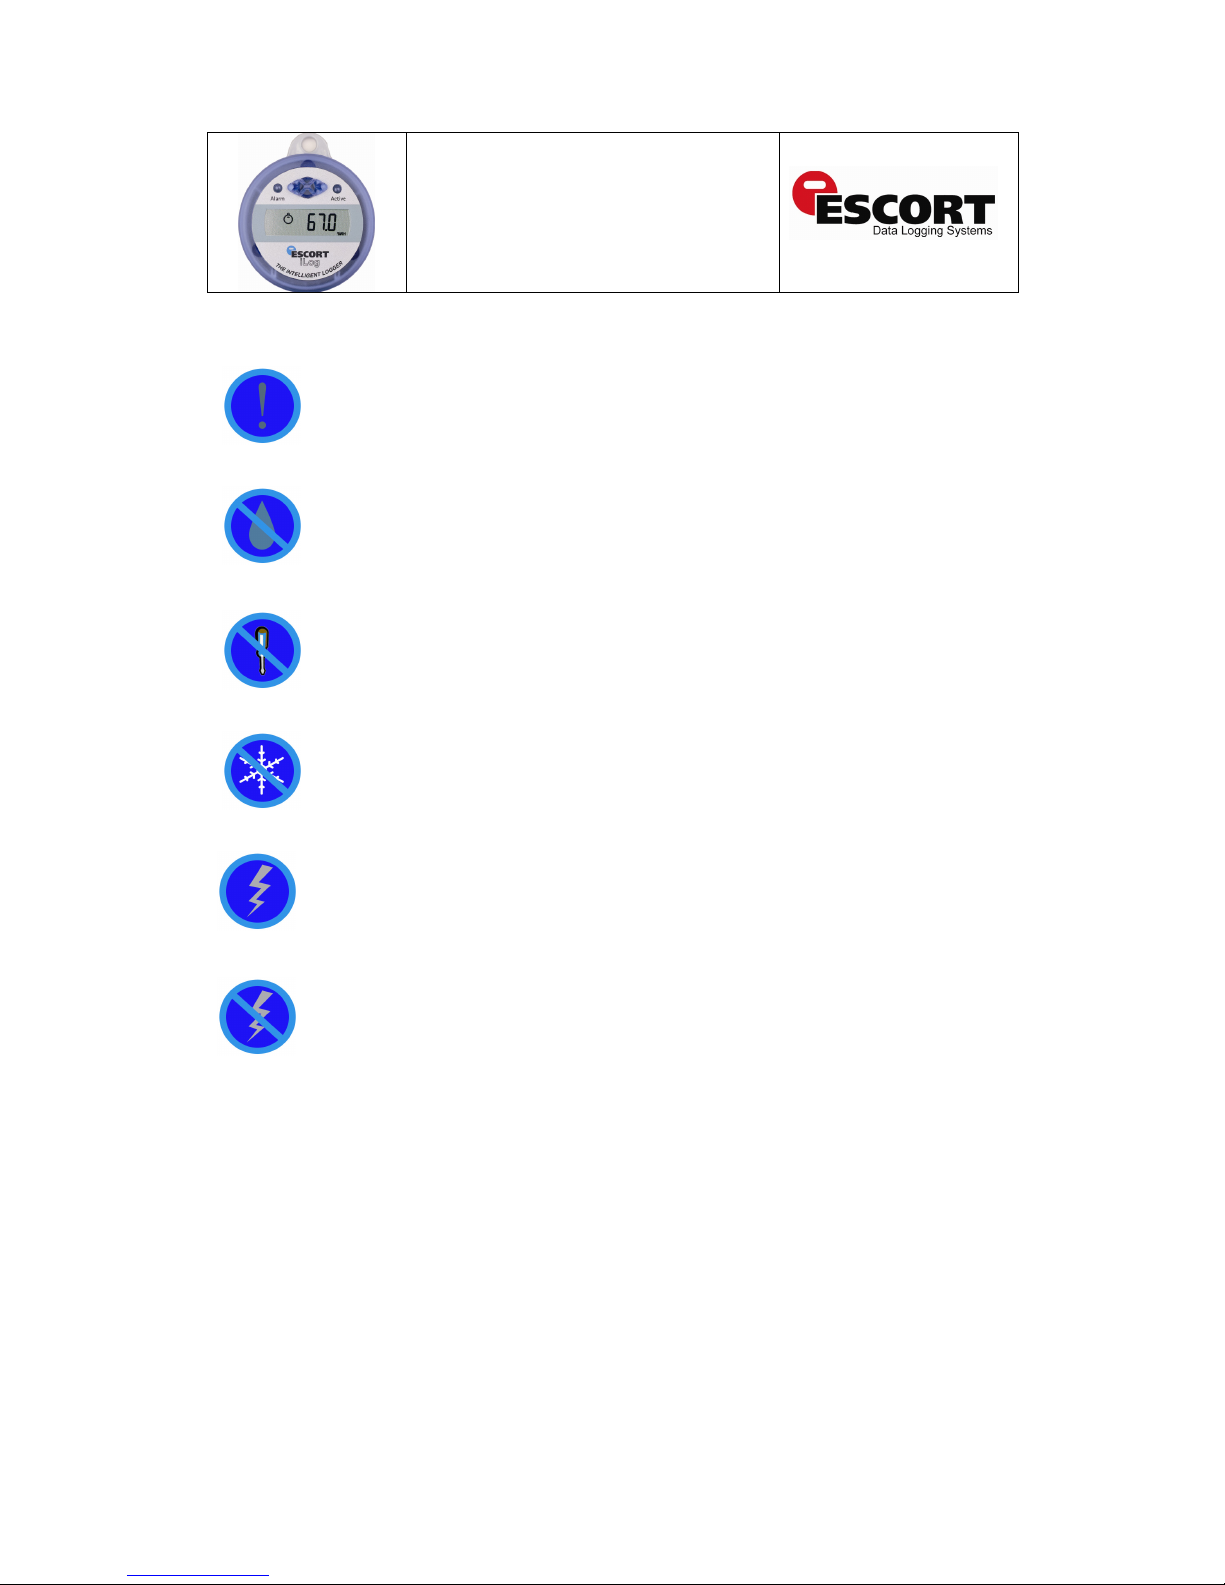
Safety Instructions
In order to keep your iLog loggers recordings accurate, we recommend that you
perform annual calibration of this device.
If an iLog Humidity loggers humidity sensor comes into direct contact with moisture
it will not perform accurately. We recommend that that you clean your iLog’s
humidity sensor on a regular basis (see instructions located within this manual).
Once your logger’s case has been opened and the warranty seal is broken your
iLog logger is no longer covered by warranty. This includes the replacement of your
logger’s battery.
Only subject your iLog logger external sensor(s) to temperatures below -40 ºC. The
logger itself is not designed to operate at temperatures below this point.
Battery life depends greatly on the quality of battery fitted, the temperature your iLog
logger is operated at and the recording frequency your iLog logger is logging at.
Do not use batteries other than those specified in our documentation. A failure to
use the correct battery could result in poor performance and/or logger malfunction.
Page 5

iLog User Guide
5
Logger features
Internal, Internal/External, Two External and Internal/humidity sensor options.
Rear label specifying product code and serial number plus bar coded serial number
according to EAN 128.
Lug (loop on top) to fix logger on wall or other surface as required.
Removable external temperature sensor options (depending on model), with external
sensor connector(s) being located on either side of your logger's case for fast
temperature response.
Display showing last temperature measurement taken plus alarm status (High Alarm /
Low Alarm), or status of the logger. Optional statistics (e.g. highest, lowest, and average)
can be chosen during logger programming.
Start the logger via magnet swipe or pre-program to start at a specific date and time.
Logging interval as low as 1 second per reading and as high as one day (24 hours).
User replaceable battery. To replace the battery, simply remove the three screws located
on the rear of your logger’s case. Carefully pull the front half of the logger away from the
back, being careful not to lose the rubber seal located inside the lid, and the three small
seals, located on each screw. Replace the battery and seals in correct position. For
humidity loggers, DO NOT touch the sensors. Seal your logger’s case with the three
logger screws.
Note: Stored readings cannot be lost by removing the battery. However if you are
currently logging, or you need the real-time clock to keep time, it is important that you
replace your old battery with a new battery immediately upon removal of the old
battery.
iLog Display
Page 6
iLog User Guide
6
Connecting your iLog to your PC
You can connect your iLog logger directly to an ESCORT Logger Interface, which is attached
to a serial port located on your PC.
Remember the COM port that the logger was connected to and open your ESCORT Console
software. To learn how to use our ESCORT Console Software, kindly refer to the help file
attached to the software or section.
Installing and using a USB to serial port cable
Close any ESCORT software which may be currently running on your machine.
Open the Device Manager (Click Start, go to Control Panel, choose System, in Hardware tab
click on Device Manager) and look up which COM ports are already available
Connect a USB to serial port adapter (available from ESCORT as JA-USB-SER or at your
local electronics store) to a USB port on your computer
Do not connect the logger interface to the USB cable yet
Install the USB to serial port adapter
Windows XP: Wait for operating system to
recognize the new hardware (USB device).
Windows 98 and 2000: Follow Installation
Manual delivered with the adapter
Simplified instructions for JA-USB-SER:
Restart you computer
Plug in the USB-Serial cable into the USB
port and run the Add New Hardware Wizard
(Click Start, go to Control Panel, choose
Add Hardware) to assist you in setting up
the new device
Insert the USB-Serial cable software driver
into the CD-ROM drive and locate the driver
on the CD-ROM drive D:\un8be-a\pc driver
(D: represents CD-ROM)
Follow the instructions provided within the
provided driver disc
Complete installation using the Add Hardware Wizard
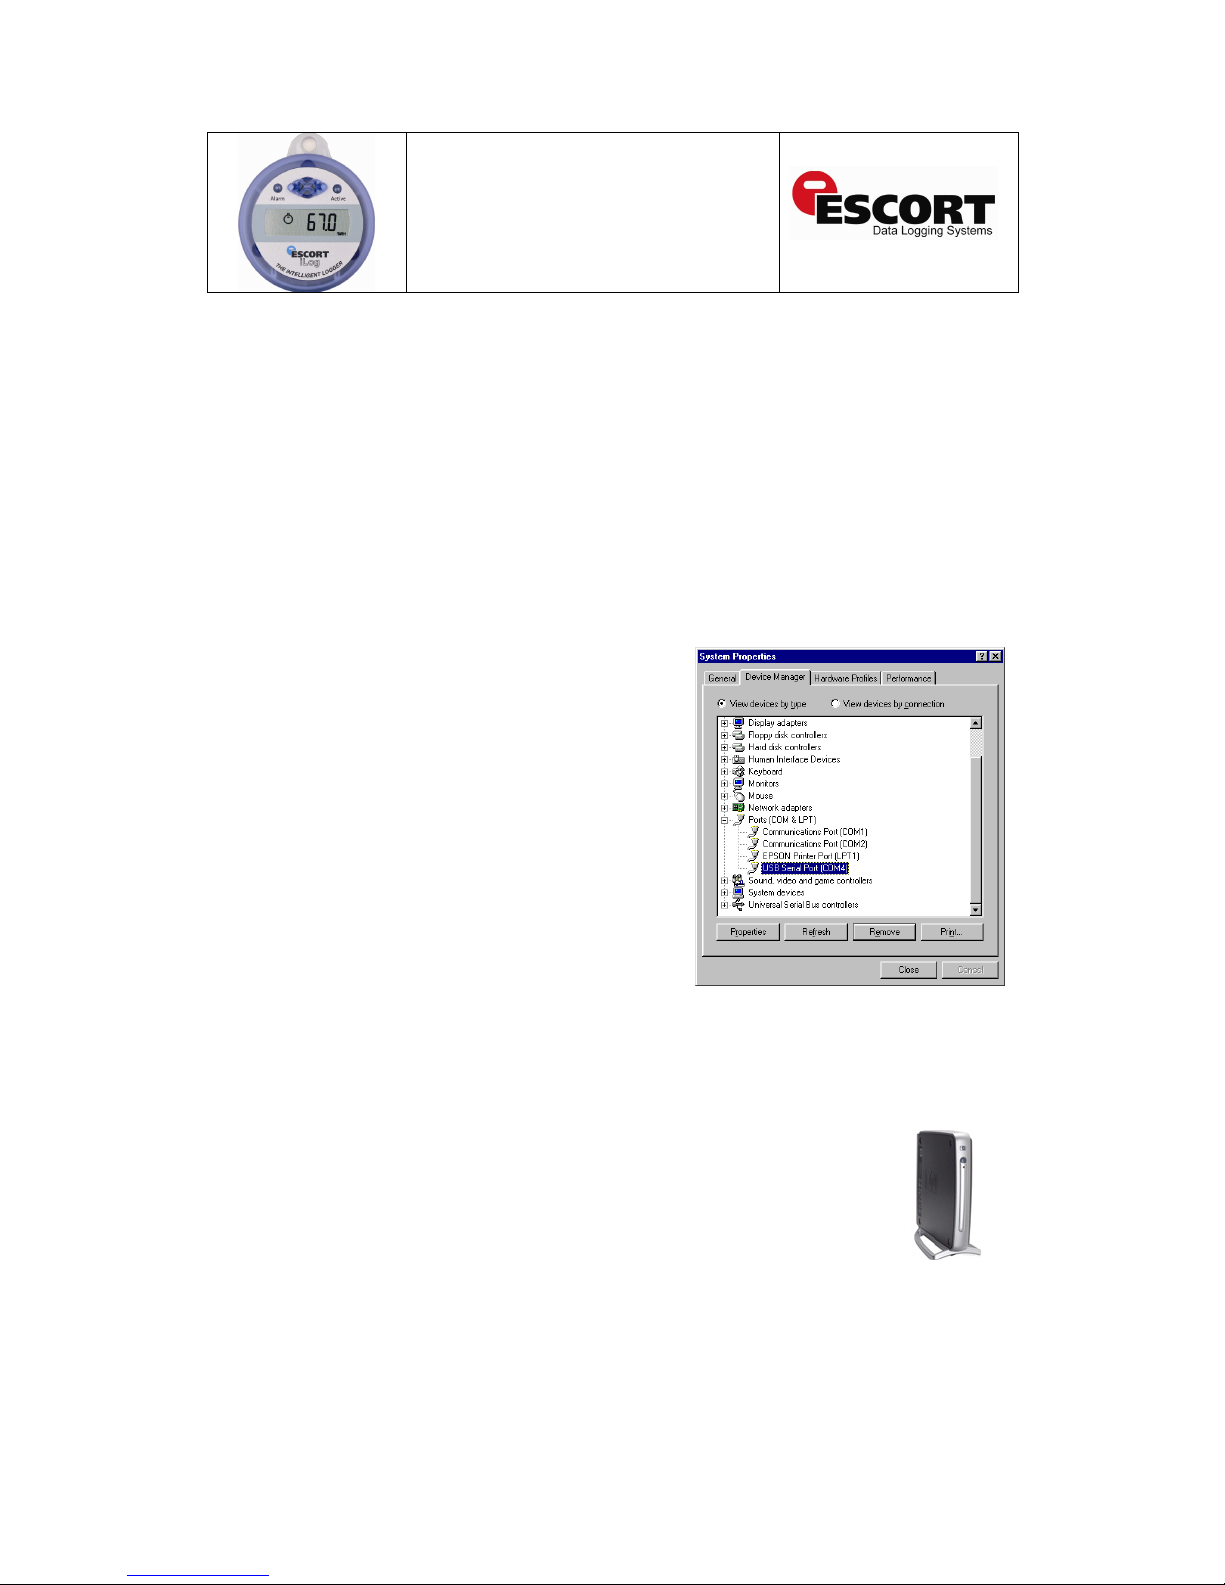
See the Device Manager (screenshot on right) to check which number was assigned to the
new COM port USB Serial Port
Connect your iLog logger and interface to your USB serial port adapter
Note: It is not possible to install the USB to serial port cable drivers on thin client
work stations. A thin client is a term used to describe a network computer that is
designed to interface with a client’s server directly. A thin client does not have a
hard disk drive, whereas a fat client includes a disk drive.
Example of a thin
client work station
Page 7
iLog User Guide
7
Installing ESCORT Console
Download ESCORT Console software from our website (www.escortdls.com) or insert your
software CD JA-SWP-WIN into your CD Rom drive.
Follow the on-screen instructions taking you through the installation process. Read the
warnings and information carefully.
Open ESCORT Console.
Choose the COM port that your iLog is connected to. This dialog appears automatically when
you first install ESCORT Console. If you have already used Console before, go to the Edit
menu and choose the command Options. In the Communication tab you can select the
correct COM port. If you are using a USB to serial port converter you may have to look up the
correct COM port number in your Device Manager.
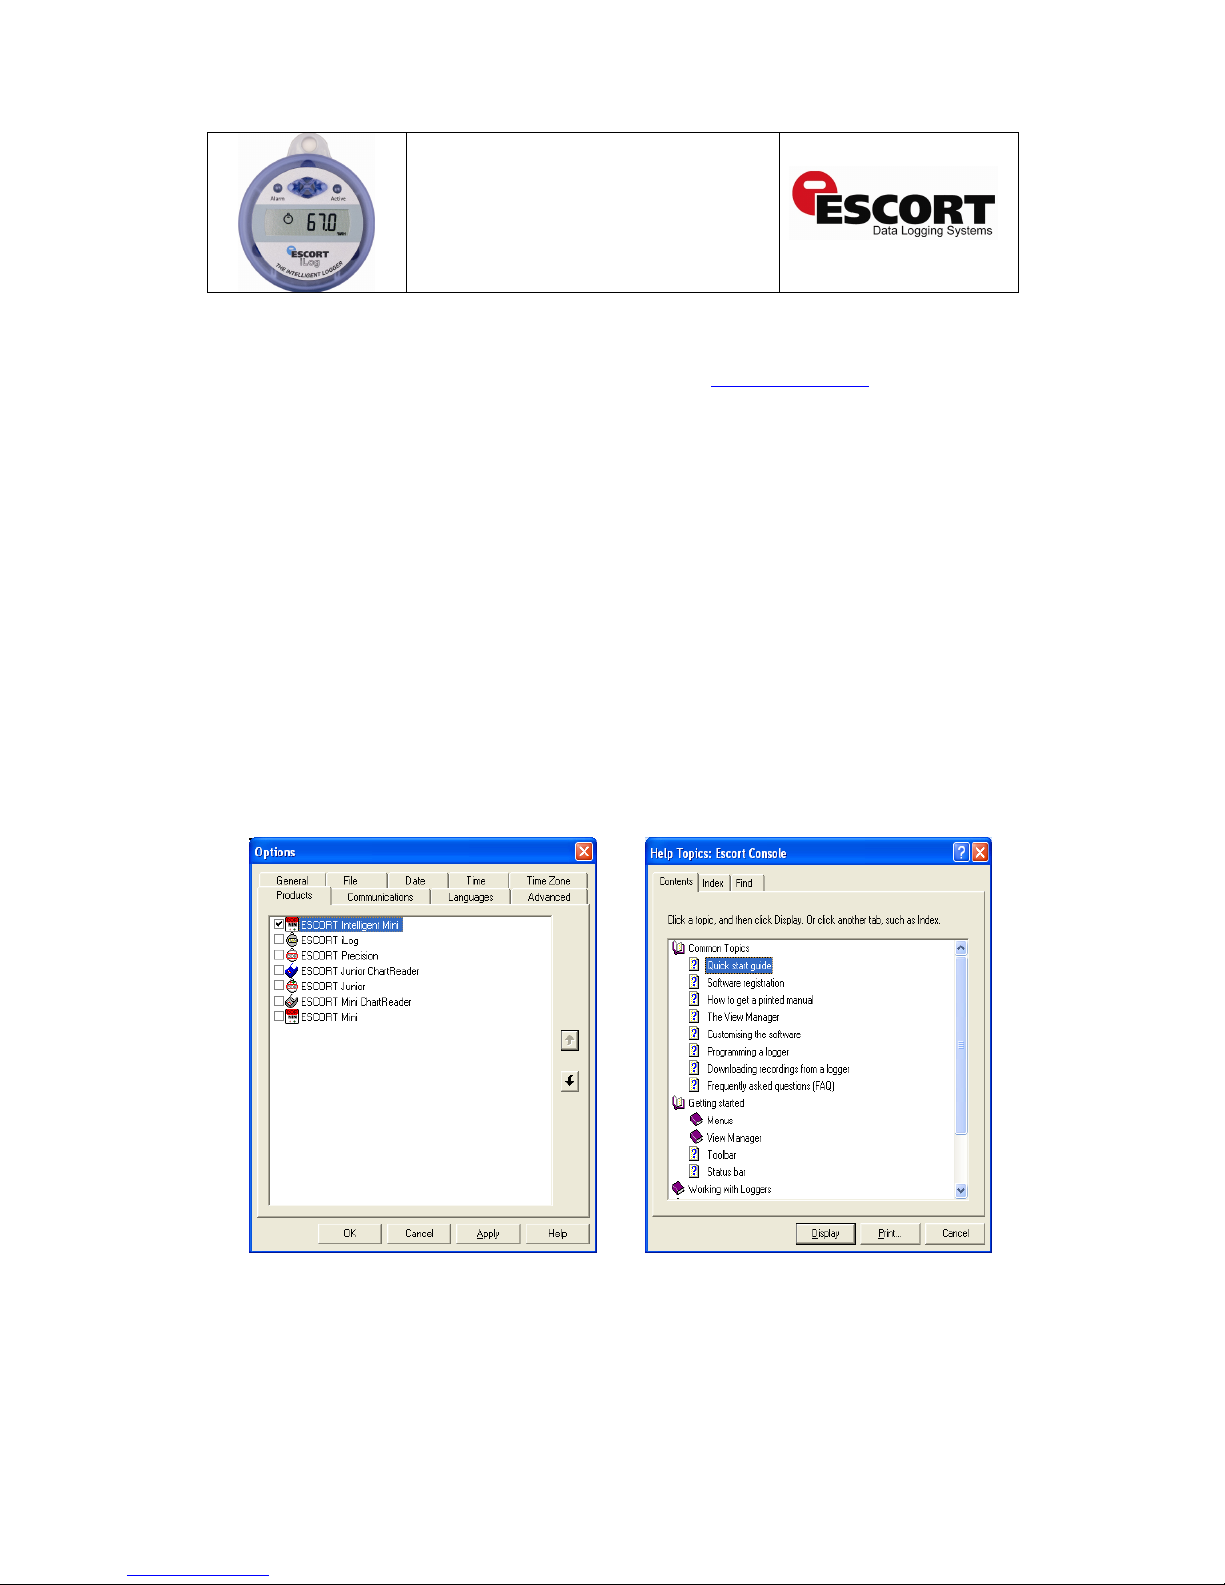
Select the iLog tick box as one of the ESCORT products you want to use. This dialog
appears automatically when you first install ESCORT Console. If you have already used
Console before, go to the Edit menu and choose the command Options. In the Products tab
you can select the ESCORT products you wish to use and put them into the sequence in
which ESCORT Console will search for them
Read tips of the day. Turn off this feature by ticking the box on the bottom if you do not wish
to see those tips in the future.
The help file is the ESCORT user manual. Go to the Help menu and
choose the command Help Topics. If you use ESCORT products for
the first time, have a look at the “Quick Start Guide” in the Common
Topics.
Page 8
iLog User Guide
8
Programming your iLog logger
Open ESCORT Console.
Connect your iLog to an ESCORT interface and ensure the correct COM port is selected in
Console.
From the Action menu, select the ‘Program and Configure’ command.
Follow the on-screen instructions (see below).
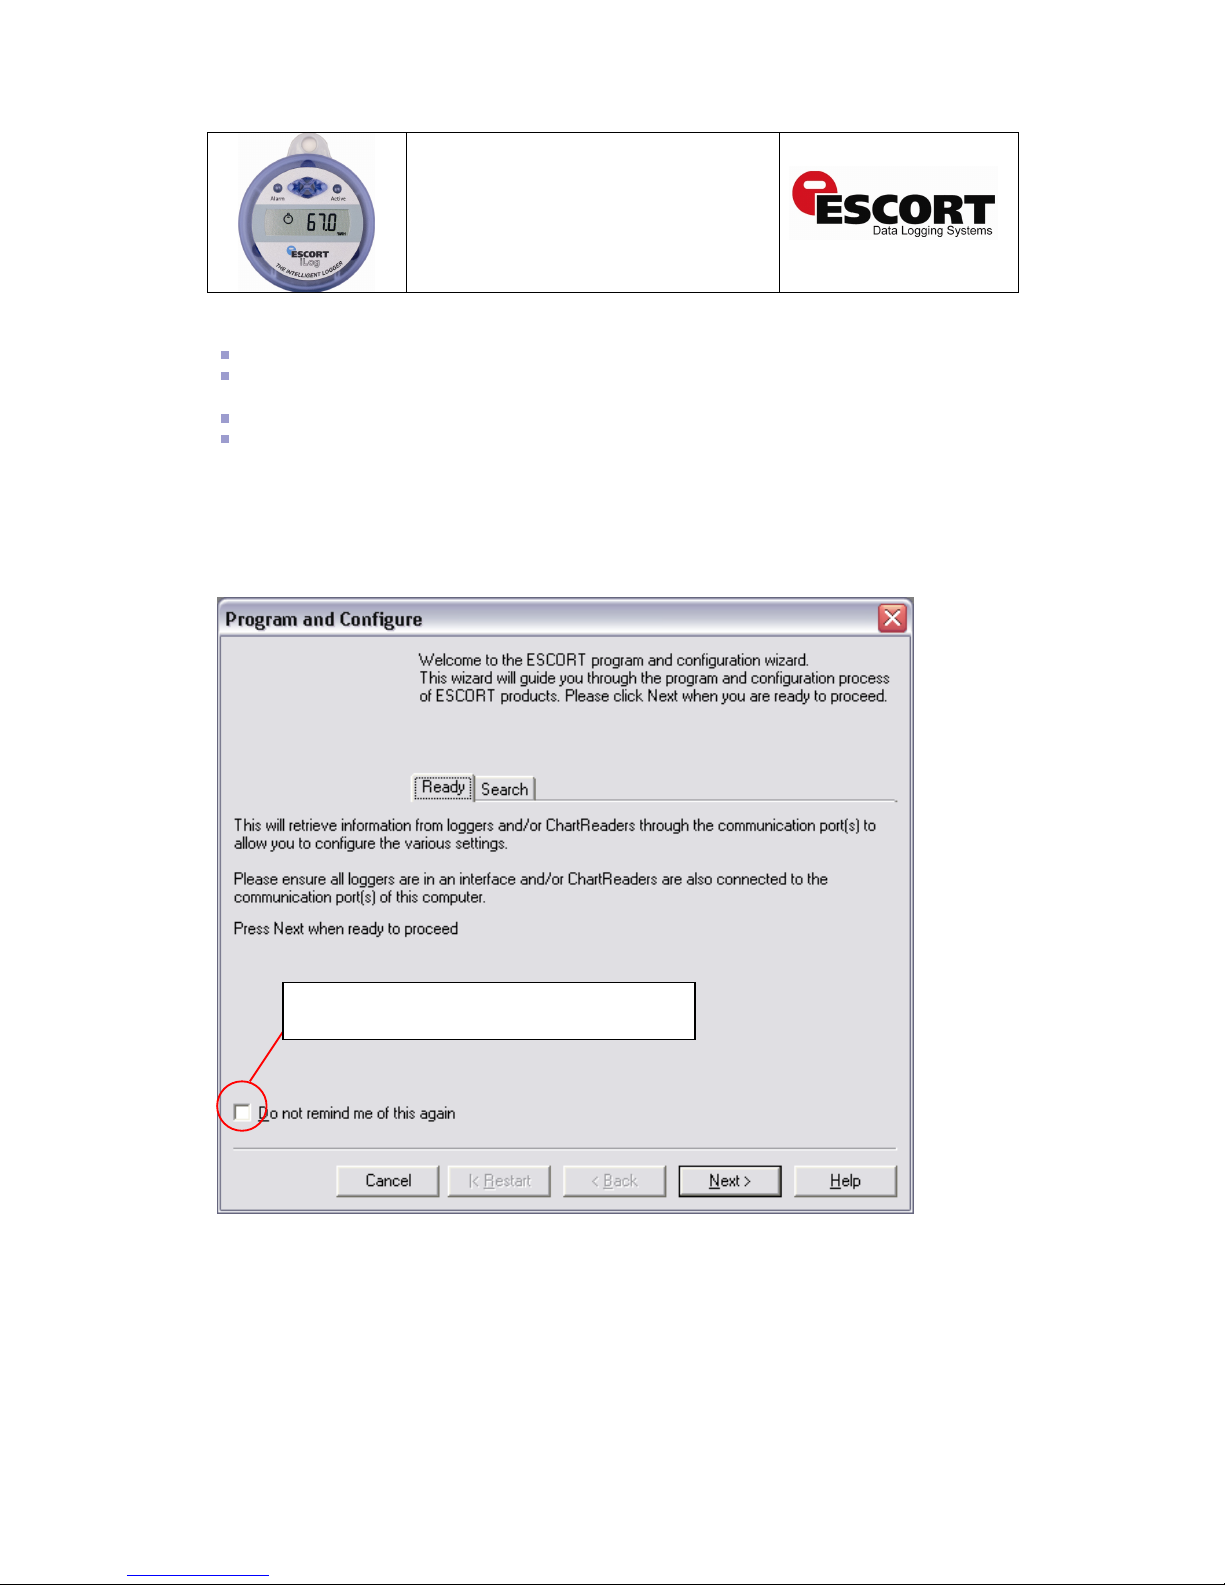
Once you have opened the ‘Program and Configure’ wizard a welcome screen will appear (see
figure 1.4). If you do not wish to see this message when downloading future loggers, select the
‘Do not remind me of this again’ tick box, located at the bottom left of the screen, followed by the
‘Next’ button (see figure 1.4).
Figure 1.4 – ‘Program and Configure – Welcome’ window
Select this tick box if you do not wish to see the welcome
screen before programming your logger(s)
Page 9

iLog User Guide
9
The ‘Program and Configure’ wizard will display the following window (see figure 1.5 below). If
your iLog logger cannot be programmed the logger tick box (located below the description
heading) will not be checked and you will not be able to proceed. If your logger is passwordprotected, you will be prompted for the password upon selecting the tick box.
To proceed to the next stage of the ‘Program and Configure’ wizard select the next button located
at the bottom of the wizard window.
Figure 1.5 – Program and Configure Search Window
Logger tick box
Page 10

iLog User Guide
10
Description & Passwords
The ‘Details’ window allows for the assignment of a unique logger description for easy logger
identification and the ability to assign a password to your iLog logger (see figure 1.6 below).
To assign a password click the ‘Change Password’ button located at the bottom right of the
‘Program and Configure Details’ window (see figure 1.6 below). The ‘Password Settings’ window
will appear (see figure 1.7). Here you are given two options, the ‘Protect program settings’ option,
which provides for the protection of the programming settings you have issued for you logger.
The second option is the ‘Protect retrieval of readings’ option, which disallows individuals from
viewing information downloaded from your logger without a password.
Once you have selected the password protect options you require and have entered and
confirmed your password select the ‘OK’ button. Once you have entered a description and
password (if required) select the ‘Next’ button.
Figure 1.6 – Program and Configure Details Window
Select
to assign Password to you
r iLog
Page 11

iLog User Guide
11
Figure 1.7 – Password Settings Window
Connecting a sensor
iLog loggers have internal and external sensor options. The models of iLog that have external
sensor options are EI-1E-D-32-L, EI-1E-DC-32-L and EI-2E-32-L. Users are able to connect
external sensors to their iLog by inserting the sensor connector into the sensor socket located on
the left and/or the right side(s) of the logger (see figure 1.8).
Configuring logger sensors
Following the ‘Details’ window is the ‘Sensors’ window, which allows for the selection and
configuration of you iLog’s sensor(s). All of the sensors attached to your logger will be
automatically selected, if you do not wish to use a particular sensor for any reason, simply
deselect the tick box located to the left of the sensors icon (see figure 1.9 below).
Password options – Tick to select
iLog sensor connecting socket.
Insert sensor connector to add
sensor to your iLog logger
Page 12
iLog User Guide
12
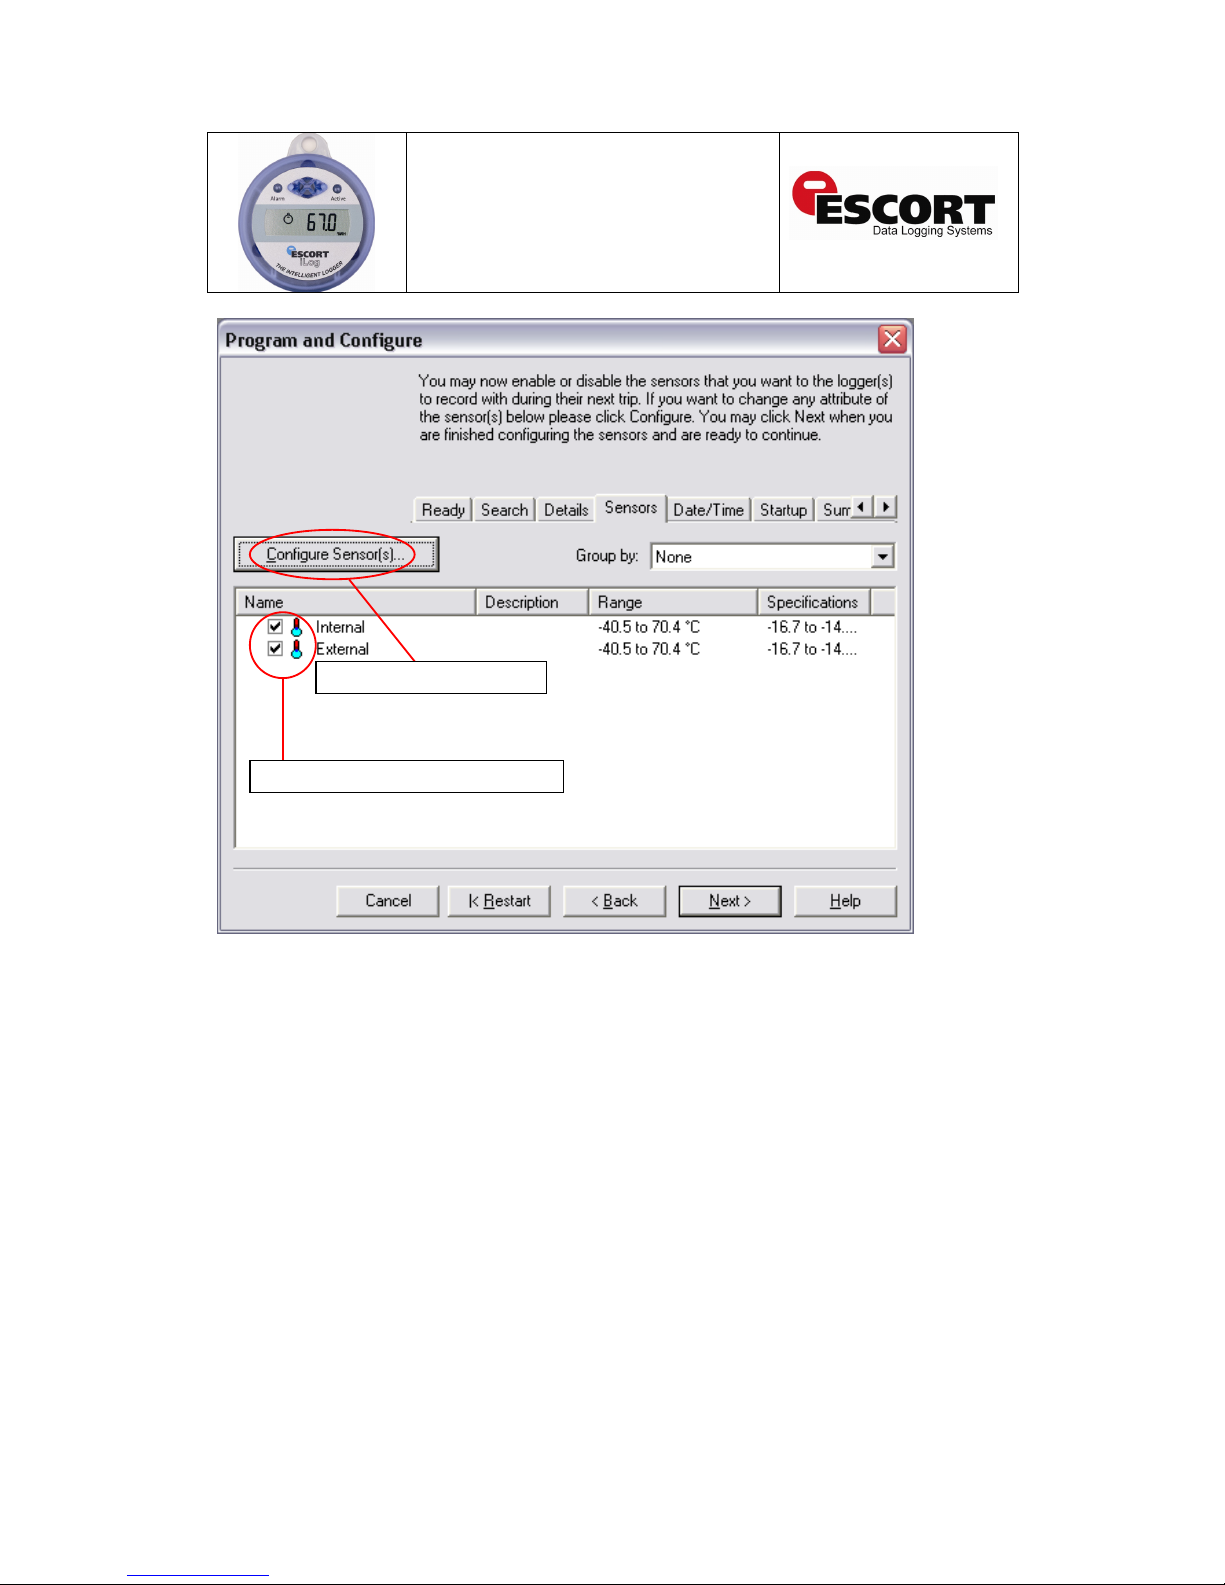
Figure 1.9 – Program and Configure Sensors Window
If you wish to configure your logger’s sensor(s), simply highlight the appropriate sensor(s) and
select the Configure Sensor(s) button located in the top left corner of the ‘Program and Configure’
window. To select multiple sensors, hold the control key (located on your computers keyboard)
down and select the appropriate sensors.
Once you have selected the ‘Configure Sensor(s) button, a new screen will appear that allows
you to add and alter the different features relating to each of your loggers sensors.
Sensor options – Tick to select or deselect
Select to Configure Sensor(s)
Page 13

iLog User Guide
13
The first window to appear is the ‘Configure Sensors - Information’ window (see figure 1.10),
which supplies specific information relating to you logger and allows for the addition of logger
description for easy logger identification. Once you have entered a description and checked your
sensor(s) information, click the ‘Next’ button.
Figure 1.10 – ‘Configure Sensors – Information’ window
Description text box Enter text
and select the ‘Next’ button
Page 14

iLog User Guide
14
The second window displayed is the ‘Configure Sensors – Specification’ window (see figure
1.11). This window provides you with the ability to add and adjust your sensor(s) out of
specification settings and the increment in which your ESCORT Console software will display
changes in your logger readings.
Figure 1.11 – ‘Configure Sensors – Specification’ window
Change your sensor settings by applying the required
temperatures to the text boxes or using the scrolling
arrows located to the right
Page 15

iLog User Guide
15
The third window is the ‘Configure Sensors – alarm’ window (see figure1.12). You can select a
series of different option relating to your sensor(s) alarm settings by selecting the corresponding
tick box. If you wish to alter the number of out of specification readings or consecutive readings
out of specification that a logger records before generating an alarm, simply select the
appropriate tick box and enter the required number into the text box provided or use the scrolling
arrows located to the right of the text box.
Figure 1.12 - ‘Configure Sensors – Alarm’ window
Change your alarm settings by applying the
required figures into the text boxes or using
the scrolling arrows located to the right
Page 16

iLog User Guide
16
The fourth window is the ‘Configure Sensors – Display’ window (see figure 1.13). This widow
provides you with the ability to activate or restrict the information displayed on your loggers
screen. To alter your logger display settings, first ensure that you have selected the ‘Show this
sensor’s readings on display’ tick box.
You also have the ability to select the unit of temperature you would prefer and the number of
seconds that your logger will pause for before advancing to the next display setting. Once you
have selected the combination of logger settings that wish to view, select the ‘Finish’ button.
Figure 1.13 - ‘Configure Sensors – Display’ window
Select this tick box before attempting
to select the text boxes below
Change these settings by selecting the
arrows located to the right
Page 17

iLog User Guide
17
Setting a date and time
Following the ‘Sensors’ window is the ‘Date/Time’ window (see figure 1.14), which allows for the
selection and configuration of you iLog’s clock settings. You are given three options; the first
allows you to simply keep your loggers current clock settings. The second option is the
recommended option and updates your logger with you computers current clock settings. The
final option allows you to manually enter a date and time for your logger. To manually change
your clock settings, simply select the scrolling arrow keys. Alternatively, if you select the larger
arrow to the left of the scrolling arrow keys, a calendar will appear, allowing you to simply select
the date that you require.
Figure 1.14 – ‘Program and Configure - Date/Time’ window
Select an appropriate radio button
to alter your logger’s clock settings
Select large arrow
to view calendar
Page 18

iLog User Guide
18
Setting start conditions
Following the ‘Date/Time’ window is the ‘Start-up’ window (see figure 1.15), which allows for the
selection and configuration of you iLog’s start-up settings. This window allows users to enter a
logger’s trip duration from 0 to 60 days, define your loggers recording intervals (1 hour to 10
days), enter your logger start conditions (magnetic start, or programmed start), enter your logger
finish date and time, select whether you require continuous background logging and provides the
ability to enable the beeper within the logger.
Figure 1.15 – ‘Program and Configure – Startup’ window
option.
Enter trip duration by clicking
on the drop down box
Enter your logger’s reading interval
settings by selecting the scrolling
arrows
Enter your logger’s
finishing settings by
selecting the
scrolling arrows
Program your logger
for continuous logging
Enter your logger’s start
settings by selecting the
scrolling arrows
Select tick box to
enable the beeper
within you logge
r
Page 19

iLog User Guide
19
Logger summary
Following the ‘Startup’ window is the ‘Summary’ window (see figure 1.16), which provides a brief
summary of you iLog’s startup settings. Once you have checked that your logger’s settings are
correct, simply click the ‘Program’ button.
Figure 1.16 ‘Program and Configure – Summary’ window
Check the logger details and
select the program button
Page 20

iLog User Guide
20
Program window
The final window to be displayed is the ‘Program’ window (see figure 1.17), which is simply an
indication that your updated logger settings are being uploaded into your iLog logger’s memory.
Once your logger has been programmed the ‘Program and Configure’ wizard will allow you to
program additional loggers with the same settings. To do this simply click the ‘Program and
Configure addition devices with the same settings’ tick box located at the bottom left of the
window and select the ‘Next’ button (which will appear after the tick box has been selected) (see
figure 1.18).
Figure 1.17 ‘Program and Configure – Program’ window
Page 21

iLog User Guide
21
Figure 1.18 - ‘Program and Configure – Program’ window
Select this tick box to program additional loggers with
the same settings and select the ‘Next’ button (which
will appear once the tick box is selected)
Page 22

iLog User Guide
22
Bookmarking
A bookmark is an identification method used to locate a place or time when an action has taken
place. iLog users have the ability to ‘bookmark’ logger readings by swiping a magnet over the
iLog’s label. Once your iLog is downloaded, your ESCORT Console software will highlight
bookmarked readings using the colour green (see figure 1.19).
Figure 1.19 Bookmarking in ESCORT Console
A bookmarked reading as shown in an
ESCORT Console readings report
A bookmarked reading as shown in
an ESCORT Console line graph
Page 23

iLog User Guide
23
Downloading your iLog logger
Open ESCORT Console.
Connect your iLog to your ESCORT interface and ensure the correct COM port is chosen in Console.
In the Action menu, choose the ‘Download’ command.
Follow the on-screen instructions (see below).
Commencing Download
The first window to be displayed in the ‘Download’ wizard is called the ‘search’ window, and
displays a task bar which simulates that a logger search is taking place. Once a logger is located
the following screen will appear (see figure 2.1). If your logger has been recording and has
information saved within its memory a tick box will be checked to the left of the iLog icon. If the
tick box is not checked this indicates that your logger has no recorded information within its
memory, your logger is unable to be downloaded, or your logger is password protected. If your
iLog logger is password protected please refer to the relevant password information located on
page ten and eleven of this user manual.
To proceed to the next stage of the ‘Download’ wizard, select the next button located at the
bottom of the window.
Figure 2.1 – ‘Download – Search’ window
Logger tick bo
x
Download button
Page 24

iLog User Guide
24
Download Readings
The second window to be displayed in the ‘Download’ wizard is called the ‘download’ window,
and displays a task bar which simulates that a logger download is taking place (see figure 2.2).
Once the wizard has successfully downloaded your logger the ‘Next’ button located at he button
of the window will become available, simply select the ‘Next button to proceed. If a logger
download is unsuccessful, the following window will appear (see figure 2.3). If this occurs, simply
click the search button (see figure 2.3) or return to step one.
Figure 2.2 – ‘Download – Download’ window
Page 25

iLog User Guide
25
Figure 2.3 - ‘Download – Unsuccessful search’ window
Select the search button to
reattempt logger download
Page 26

iLog User Guide
26
Logger summary and start conditions
The fourth window to be displayed in the ‘Download’ wizard is called the ‘Finish’ window. This
window allows for start conditions to be added to your logger once your loggers download is
complete (see figure 2.4). To change your logger settings select the appropriate radio button
located to left of the ‘Download’ window (below the heading ‘Logger options’). If the start setting
requires specific date and/or time, simply use the scrolling arrows located to the right of the
appropriate text box (see figure 1.4). Once you have assigned the appropriate start conditions to
your logger select the ‘Rearm’ button.
If you would prefer not to interrupt your loggers recording cycle please select the ‘Do not upload
any new start conditions to the logger(s) radio button.
Figure 2.4 - ‘Download – Finish’ window
Logger start condition Radio
buttons. Select to activate
appropriate start conditions
Select large arrow to
view calendar
Use the scrolling arrows
to alter start conditions
Page 27

iLog User Guide
27
Rearming your iLog
If you choose to rearm the logger, the final screen to be displayed within the ‘Download’ wizard is
the ‘Rearm’ window (see figure 2.5). This window is helpful when you have more than one logger
to download. To use this function select the ‘Download information for additional Loggers and/or
ChartReaders tick box and select the next button. You will then repeat steps one through four.
Figure 2.5 - ‘Download – Rearm’ window
Select this tick box to
download additional loggers
Click the ‘Next’
button to proceed
Page 28

iLog User Guide
28
Analysing your downloaded information
Once downloaded using ESCORT Console, the data saved within your iLog logger will be
displayed as a readings summary. Within this summary you are able to view the following
information; your logger’s serial number, hardware version, trip number, your loggers description
(if assigned), battery status, the time zones with which your logger was programmed and
downloaded, the time your logger started and finished logging, your loggers sampling interval, the
number of readings recorded, the temperature range it recorded within, the alarm limits and the
highest, lowest and average readings.
Figure 3.1 Downloaded file
Below the information relating to your loggers you will see each individual reading which was
saved within your logger, the date and time the reading was recorded, bookmarked readings (if
recorded) and if your logger has more than one sensor attached, you will see the readings
displayed adjacent to each other.
Figure 3.2 Downloaded readings
Information
relating to your
downloaded iLog
logger file
Reading number, date
and time of iLog
information downloaded
Temperature
readings for
a two sensor
iLog logger
Page 29

iLog User Guide
29
Viewing downloaded information
Your ESCORT Console software provides the ability to view your iLog logger data in several
different formats. These formats are; Readings (list of readings and readings and summary), 2D
graph (line and step) and summary (overview, statistics, analysis and out of specification). You
are able to access the different views by selecting (double click to select) from the views menu
located on the left of your Console window.
Figure 3.3 Different views
List of readings
The first option under the readings menu is the list of readings menu option. This option displays
a list of your loggers reading in their entirety. If you have an iLog with two sensors, Console will
display your logger’s readings side by side.
Figure 3.4 List of Readings
The different views
available in ESCORT
Console software
Console displays reading
number, elapsed time,
date, time of reading and
temperature/ humidity
readings
Page 30

iLog User Guide
30
Readings and Summary
The second option under the readings menu is the readings and summary menu option. This is
the default menu option and displays all the information mentioned in the analysing your
downloaded information section on page 28.
Figure 3.5 Readings and Summary
2D Line graph
The first menu option under the 2D Graph menu is the line graph menu option. Here your logger
data is displayed in an easy to view format, with each sensor displayed in different colours and if
required your above/below specification limits and calibration limits are marked in different
colours. To customise the way in which you view your graphs please refer to the help files
supplied with your Console software.
Figure 3.6 Line Graph
Page 31

iLog User Guide
31
Step Graph
The second menu option under the 2D Graph menu is the step graph menu option. This format is
similar to that of the line graph format except that changes in the readings are shown as a line as
opposed to smooth lines.
Figure 3.6 Step Graph
Summary Overview
The first menu option under the Summary menu is the Overview menu option. This menu option
provides the basic information relating to your downloaded logger file, such as; your logger’s
serial number, hardware (firmware) version, logger description, battery status, time zone
information, start and finish times, sampling frequency, operating temperature and time out of
specification.
Figure 3.7 Summary Overview
Statistics
Page 32

iLog User Guide
32
The second menu option under the Summary menu is the Statistics menu option. This menu
option provides the basic statistics relating to your logger file, including; your loggers serial
number, description and average, highest and lowest readings.
Figure 3.8 Statistics
Analysis
The third menu option under the Summary menu is the Analysis menu option. This menu option
is a combination of the summary overview and statistics menu options.
Figure 3.9 Analysis
Out of Specification
Page 33

iLog User Guide
33
The fourth menu option under the Summary menu is the Out of Specification menu option. This
menu option simply displays those readings in your downloaded file which are above or below the
alarm temperatures specified.
Figure 3.10 Out of Specification
Note: For detailed information regarding the operation of ESCORT Console please refer to the
help guide provided within the software. You can access the help menu via the dropdown menu
Help, or CONTROL H. Alternatively you can select the help symbol from the Console task bar
located below the dropdown menu, and click on an item located on the screen that you require
assistance with.
Figure 3.11 Help options
Help menu option
Help cursor
Page 34

iLog User Guide
34
Changing your iLog’s battery
You have the ability to change your iLog’s battery, but once opened your loggers IP rating
becomes void and will not be covered under warranty. To replace your logger’s battery, please
follow the following steps:
1. Purchase a SAFT 3.6V ½ AA, Lithium battery (can be purchased through your ESCORT
distributor or local electronics store).
2. Remove the three screws located on the rear of your iLog logger.
3. Carefully separate the two halves of your iLog’s plastic case and ensure that you can
locate the three small screw o-ring seals and larger o-ring case seal.
Note: If you are changing the battery on an iLog humidity logger it is important not to
make contact with the sensor. If you accidentally remove the humidity sensor and bung
from the iLog case, you can reinsert the sensor using the guide hole in the PCB (Printed
Circuit Board).
4. Move the battery located within the battery compartment so that the batteries polarity can
be viewed. The polarity of the battery should be as follows + C -.
5. Remove the battery by pushing firmly on either end of the battery and pulling the battery
towards you.
6. Insert the new battery by separating the battery springs, ensuring that the battery is fitted
in the correct direction (polarity + C -).
7. Place the three small screw o-ring seals and larger o-ring case seal on their appropriate
positions and replace the lid of your iLog case ensuring the lid of the case is the correct
direction.
8. Finally, re-attach the three screws located on the back of the logger case so that a tight
seal is formed between both case halves.
iLog back view iLog side view iLog internal view
Page 35

iLog User Guide
35
Cleaning an iLog’s humidity sensor
The iLog humidity sensor needs to be clean in order to operate at an optimum level. If your iLog’s
humidity sensor comes into contact with a foreign object (e.g. fingers), it is vital that the sensor is
cleaned with a cleaning solution. We recommend that a cleaning solution which is 50% isopropyl
alcohol (IPA) and 50% water is used to clean the sensor. We also advise that you use a cotton
bud or clean cloth to clear the sensor of foreign materials.
iLog humidity internal view iLog humidity sensor iLog humidity and
temperature sensor
Page 36

iLog User Guide
36
Specifications
iLog Temperature Logger
Temperature Range D range -40ºC to 70ºC (-40ºF to 158ºF)
C range -20ºC to 100ºC (-4ºF to 212ºF)
N range -100ºC to 40ºC (-148ºF to 104ºF)
Specifications Internal, Internal/External, 2x External and Internal/Humidity
Memory 32,000 readings
Resolution 0.1ºC (0.2ºF)
Accuracy +/- 0.3ºC
LCD Software programmable
LED’s Active and Alarm
Data Recovery Via standard ESCORT PC interface and ESCORT Console software
Size Diameter 76mm, height 36mm
IP Rating Internal sensor IP67, others IP51
Warranty 2 years (excluding battery)
Power 1x User replaceable SAFT 3.6 volt ½ AA battery
Case Material Polycarbonate
iLog Humidity Logger
Humidity Range 0 – 100% RH
Memory 32,000 readings
Resolution 0.1% RH
Accuracy +/- 3%
Page 37

iLog User Guide
37
Warranty information
Warrant conditions are set out the ESCORT Data Logging Systems’ current Terms and Conditions as published on the
date a claim is made. Below please find the wording as per version TCEDLSINT042. This is, however, not binding and the
current Terms and Conditions will prevail over the details given here.
Product Warranty period is 24 months (excluding batteries).
Warranty does not cover:
- Loss of use or consequential loss,
- Calibration if the unit has been subject to environmental conditions outside the specified ones
- Willful damage, mistreatment, misuse or abuse of the product,
- Loss or damage caused by the ingress of moisture, unless ordered with immersion rating,
- Batteries,
- Circumstances where the unit has been modified from manufacturers specifications,
- Exposure of the logger to temperatures outside the specified storage temperature,
- Exposure of the logger to environmental conditions outside the specified ones
In case of a warranty claim ESCORT Data Logging Systems Ltd. will repair the goods or supply
an equivalent replacement.
In some circumstances, where a specific return was authorized, ESCORT Data Logging Systems
Ltd. may permit the use of its Federal Express account for returning goods. Such permission is
valid ONLY for the authorized shipment. ESCORT Data Logging Systems Ltd. will not accept any
freight charges for goods that have been returned without ESCORT Data Logging Systems Ltd’ s
expressed permission.
Customers and distributors may return product to us for accuracy testing, if they have
doubts as to the product’s overall accuracy:
- If the product is returned within the warranty period, a Traceability certification will be performed,
and a certificate issued.
- If the logger does not pass the certification, i.e. the logger is at fault, the logger will be replaced
or repaired as per the warranty conditions and no charges (other than freight charges) will apply.
The new logger will be issued with a Traceability certificate free of charge.
- If the logger reads within the specifications, a Traceability certificate will be issued and you will
be charged for this service.
- If the product is returned outside the warranty period, a Traceability certificate will be issued and
charged regardless of the outcome of the test.
- ESCORT Data Logging Systems Ltd. will not pay for any performance tests undertaken by any
outside organization without prior approval.
Recycling of electronic devices
Some parts in products from ESCORT Data Logging Systems consist of recyclable materials, but
others should not be disposed of in household waste. To avoid pollution, we kindly ask you to
adhere to national policies and regulations concerning waste disposal and recycling. iLog data
loggers must be returned to your distributor for disposal (European Standard EN 50419:2005).
Page 38

iLog User Guide
38
Contact details
If you require further information regarding ESCORT Data logging Systems products
please contact us at:
ESCORT Data Logging Systems Ltd
PO Box 15-639,
New Lynn,
Auckland,
New Zealand
Tel: 0064 9 826 0960
Fax: 0064 9 826 0285
Email: mail@escortdls.com
Alternatively, you can find additional information regarding all of our products on our
website:
www.escortdls.com
 Loading...