

Eschenbach Optik Liberty Solo User Manual

Page 1
Rev E EN
Liberty Solo
User Manual
Table of Contents
Installation .......................................................................................................... 2
Mouse Camera ................................................................................................... 3
Zoom Adjust ..................................................................................................... 4
Writing with the Liberty Solo .......................................................................... 5
Main Unit Controls ............................................................................................ 6
Power Button .................................................................................................... 6
Mode Select Button .......................................................................................... 6
Scroll Knob ...................................................................................................... 7
Function Buttons .............................................................................................. 7
Menu.................................................................................................................... 7
Main Menu ....................................................................................................... 9
Display Settings Menu ..................................................................................... 9
Button Functions Menu .................................................................................. 10
Configuration Menu ....................................................................................... 10
Function descriptions ...................................................................................... 11
Battery ............................................................................................................... 12
Battery Status Indication ................................................................................ 13
Maintenance ..................................................................................................... 13
Warranty .......................................................................................................... 13
Specifications .................................................................................................... 14
Important Instructions for Use ...................................................................... 15
Before using this product, refer to page 15 for the
Important Instructions for Use.

Page 2
Rev E EN
Installation
The Liberty solo is supplied the following components:
o Main Unit
o Liberty Solo Mouse Camera
o Handwriting stand
o Power supply adapter
o Mains cable
o Carry case
When setting up, it is important to choose your workplace carefully to avoid an
uncomfortable or awkward position. You should not have to raise your arm to
use the mouse; your wrist should be on the resting on the surface. The monitor
should be below eye level to avoid strain.
• Remove the Liberty Solo main unit from its case and place on the work
surface.
• Depress both handle release buttons and rotate the handle to allow you to
look onto or slightly down on the display.
• Plug the mouse camera into either socket at the right hand side of the
main unit.
! The mouse camera must be plugged in before powering on. If it is
plugged in when the power is on, it may not operate properly.
• An additional external camera or other video source (not supplied) can be
plugged into the second camera connector on the right hand side of the
unit. A suitable adapter is available from your distributor.
• As it is supplied with the battery partially charged, we recommend that
you initially operate the Liberty Solo from the power supply. Plug the
power supply into a wall socket and insert the connector into the right
hand side of the unit above the mouse cable.
• Power up the Liberty Solo by pressing the red power button (the right-
most button on the front panel).
• When you place the mouse camera on some text you should see the
magnified image on the screen.
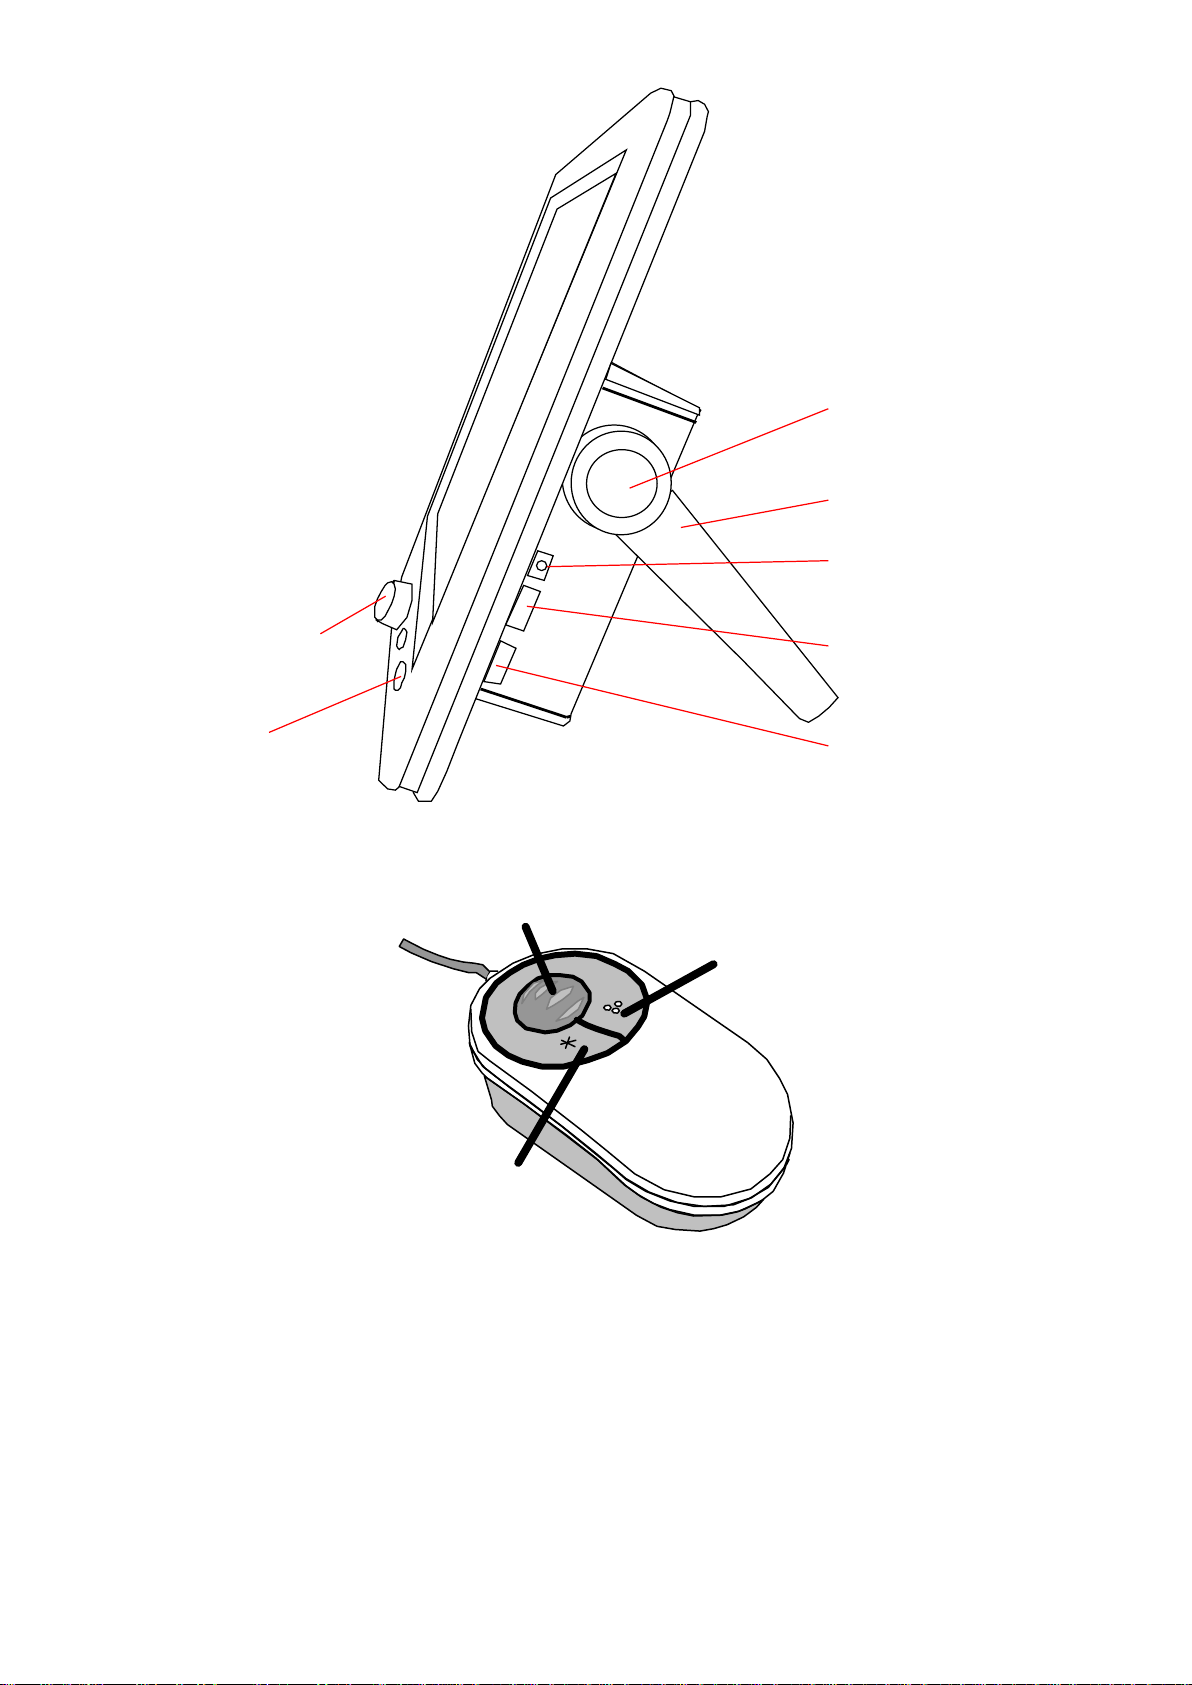
Page 3
Rev E EN
Scroll Knob
Power
On/Off
Button
Handle Release
Button
Handle
Power Supply
Connector
Camera 1
Connector
Camera 2
Connector
Mouse Camera
Right
Left
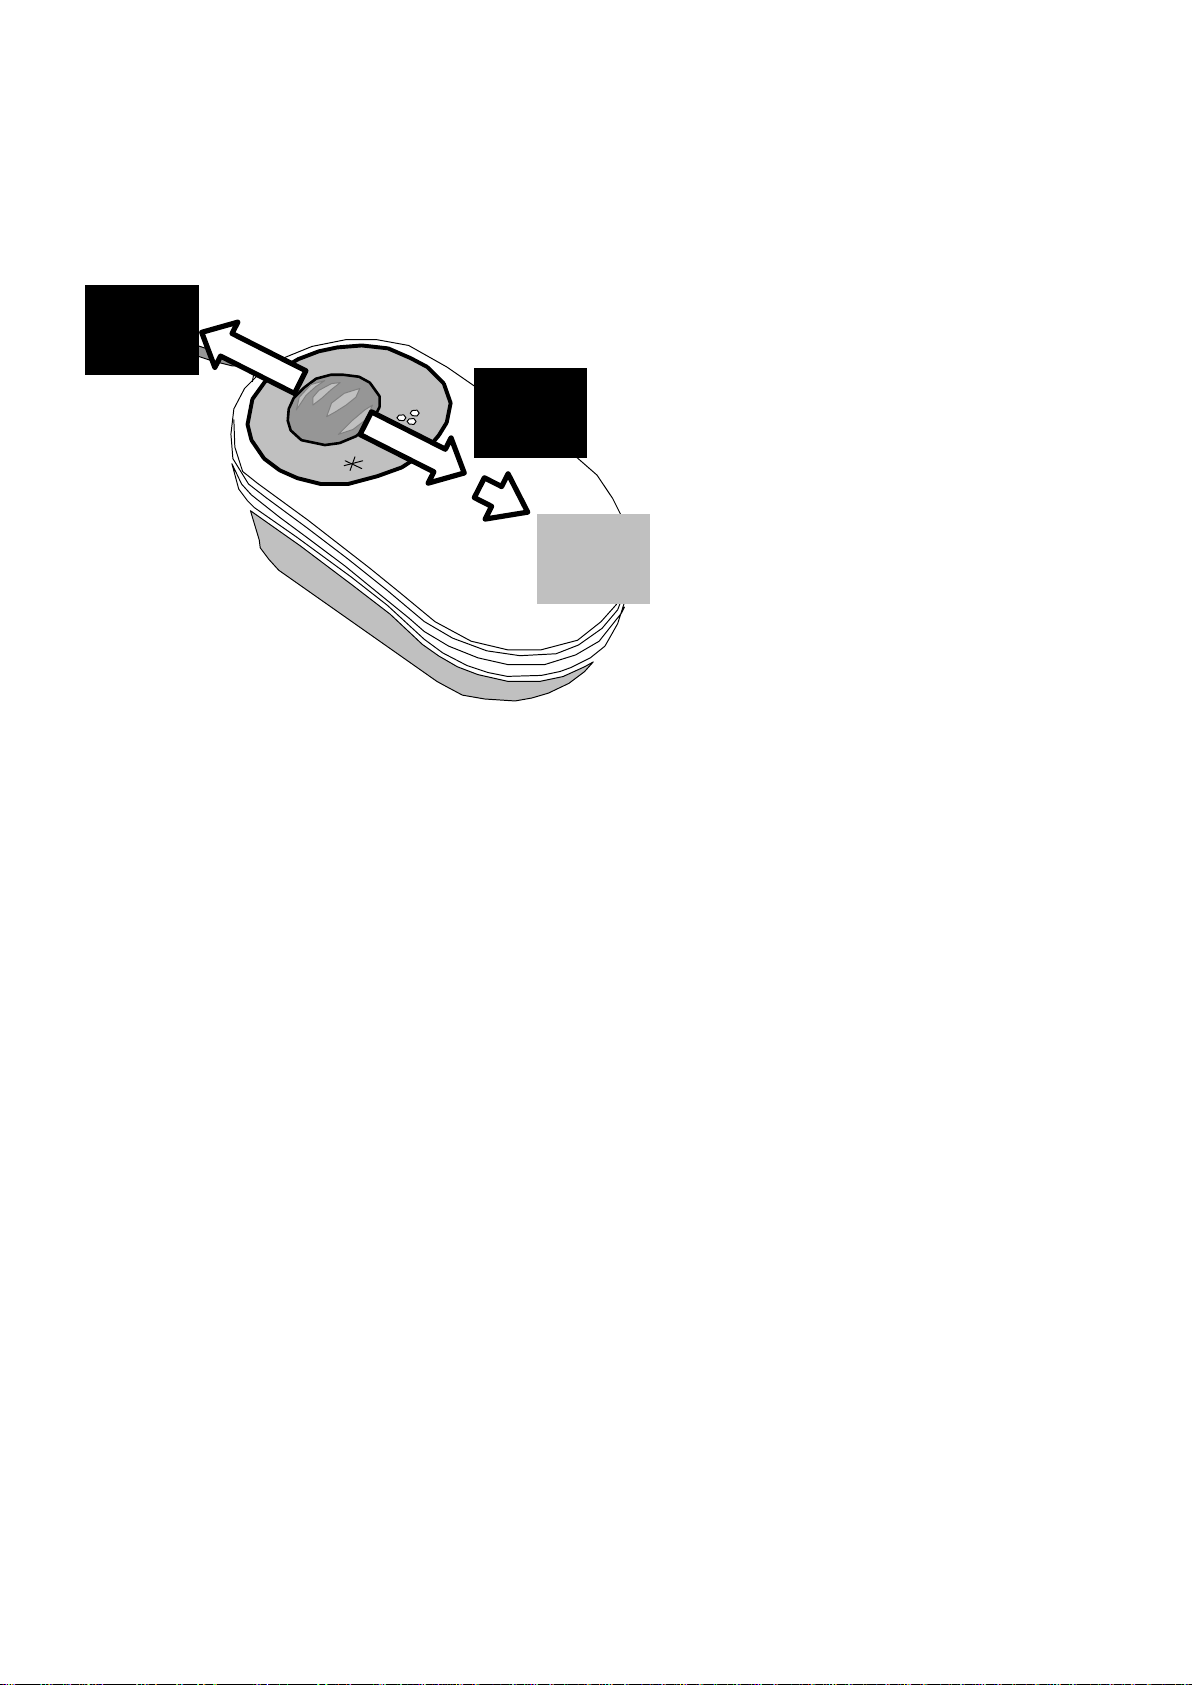
Scroll Zoom
The left button will switch digital magnification on and off.
The right button will change modes just like the mode button on the main unit.
Pressing both buttons will have no effect by default, but can be programmed to
alternately display mouse and external camera. See the section on the Menu
for details.
Page 4
Rev E EN
Zoom Adjust
Rotate the scroll-zoom wheel forwards and backwards to select the level of
magnification you are comfortable with.
ABCDEFGHI
JKLMNOPQ
RSTUVWXY
ZABCDEFG
ABCD
EFGH
ABCDEFGHIJK
LMNOPQRSTU
VWXYZABCDE
FGHIJKLMNO
PQRSTU
Sliding the scroll wheel forwards increases the magnification, while rotating
backwards will decrease the magnification. Rotate the scroll wheel fully
backwards and the mechanism will click into an overview mode, which moves
the focusing area beyond the base of the mouse. This mode is needed when
using the handwriting stand.
The overview mode can also be used to orientate your position on a page or to
view text or objects in awkward places. Be advised that the further the objects
are away from the mouse camera, the smaller they will appear on screen. In
overview mode it may be easier to view the image using the photo mode and if
needed adjust the brightness level using the scroll knob.
The magnification level cannot be altered in overview mode.
Page 5
Rev E EN
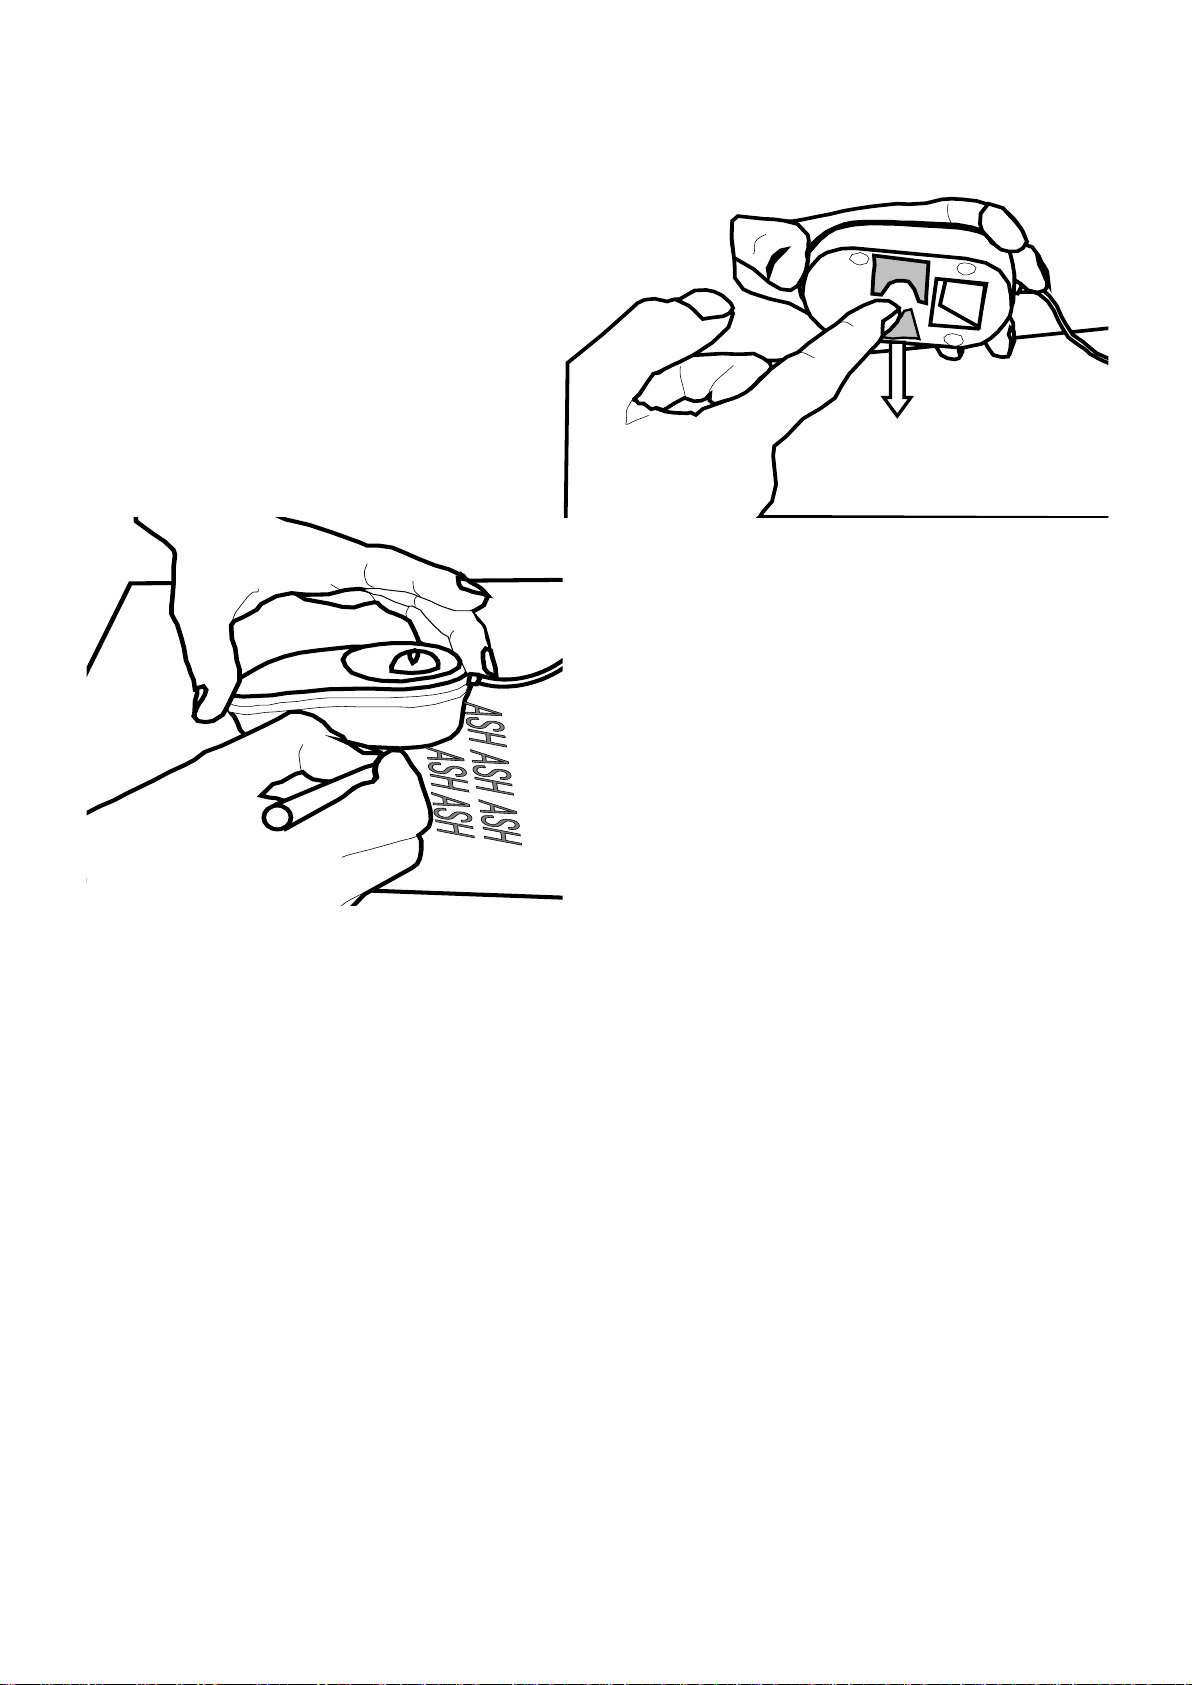
Writing with the Liberty Solo
The mouse has handwriting stands
that can be pulled out that allow
you to write with the aid of the
camera. Flip out one of the stands:
use the left-hand-side stand if you
are right handed and vice versa.
Rotate the scroll-zoom wheel on the
mouse fully backwards i.e. into
overview mode.
When using the handwriting stand, it is best to use the full color mode, press
the Mode button on the Liberty Solo to change.
 Loading...