

Epson PT-6000, DPR-6000, TA-6000 Installation Manual
PT-6000
Affixing
tape
Projections
401344201
PT-6000/DPR-6000/TA-6000 Installation Manual
Installing the PT-6000
The PT-6000 is an optional tray to hold a TM-H6000/H6000II/H6000III printer, especially
when it is used with an IBM
it does not require much space behind it. Therefore, the tray is a valuable space-saving device
for small countertops. The package includes the PT-6000 and 2 sets of affixing tape.
Note:
Before installing the PT-6000, clean any dirt, oil, or other foreign matter off of the countertop or other
surface where the printer will be installed.
Follow the steps below to install the PT-6000. If you are installing the printer on an IBM
series computer with a projection around the host computer, see the other side of this sheet.
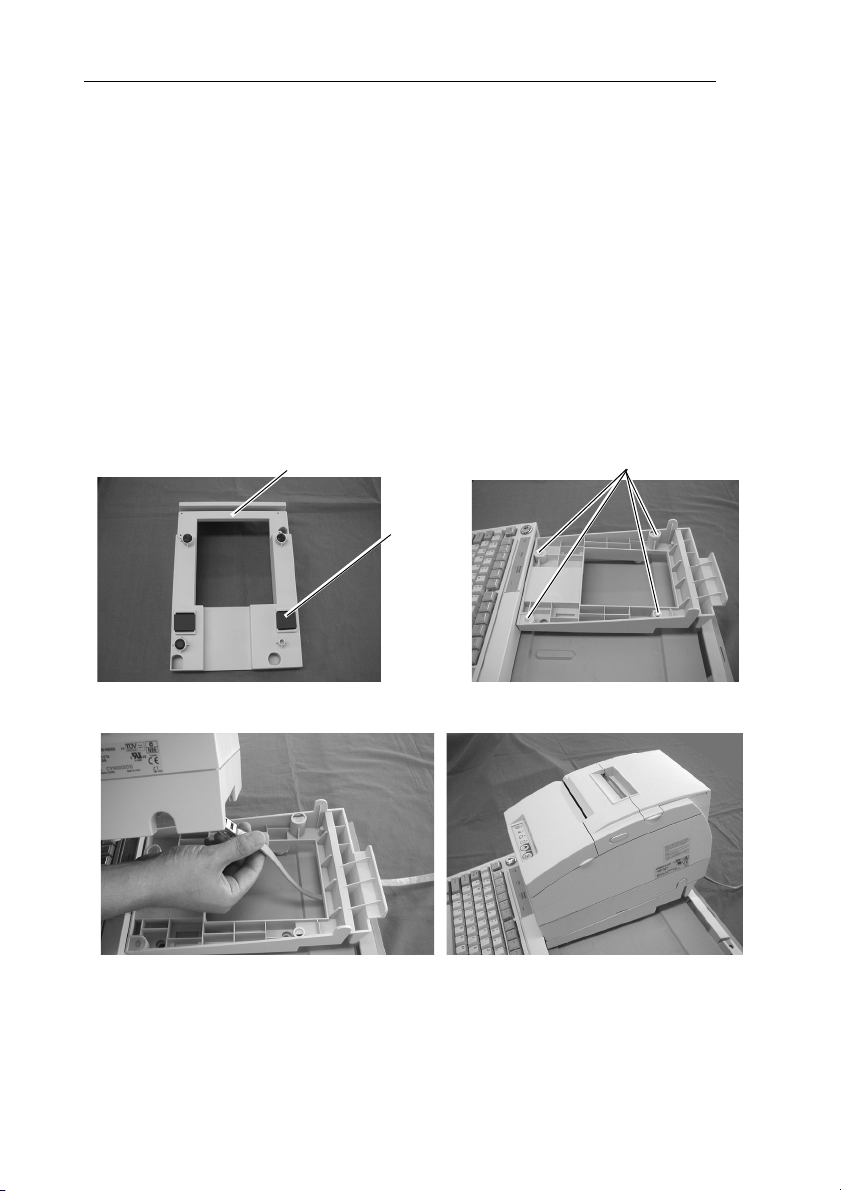
1. With 2 pieces of the affixing tape combined, peel off the stickers on one side of the 2 sets of
combined tape, and paste them to the bottom of the PT-6000.
2. Peel off the stickers on the other sides of the affixing tapes, and press the PT-6000 onto the
countertop; it will be held firmly in place by the affixing tapes.
®
host computer. Because this tray can hold the printer at an angle,
469X
3. Connect the cable and install the printer on the PT-6000, aligning the 4 rubber feet of the
printer with the 4 projections on the PT-6000 shown above.
IBM is a registered trademark of International Business Machines Corporation.
© 2000 Seiko Epson Corporation. All rights reserved.
Printed in China
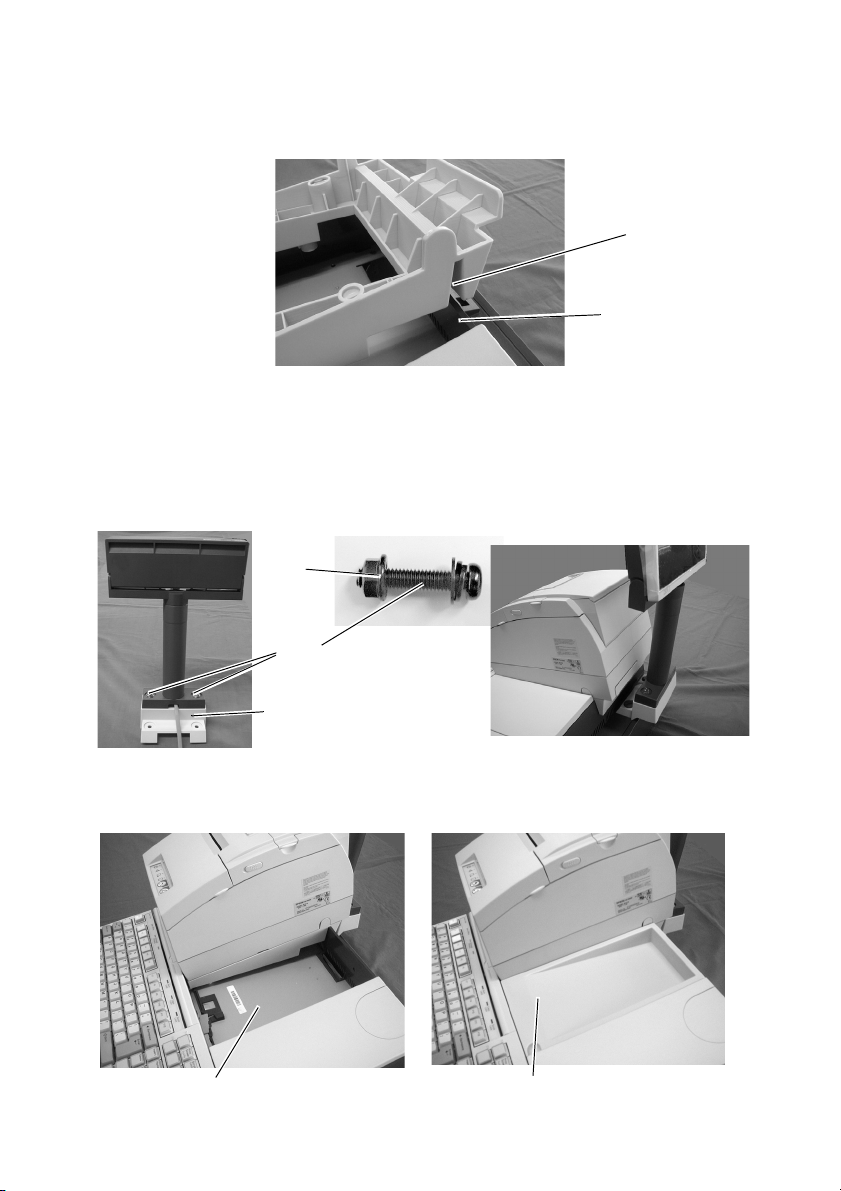
Using the PT-6000 with an IBM 469X computer with a projection
Slot
Projection
Bolt
DPR-6000
Nut
Space
TA-6000
1. Install the PT-6000 onto the IBM 469X series so that the slot in the PT-6000 fits over the
projection on the host computer. It is not necessary to use the affixing tape.
2. Connect the cable and install the printer, aligning the rubber feet of the printer with the
proper locations on the PT-6000.
Installing the DPR-6000
Set the display module on the DPR-6000, which is also an option for the TM-H6000/H6000II/
H6000III printer and is in a separate package. The package includes the DPR -6000 and 2 bolts
with nuts. Remove the nuts from the bolts, insert the 2 bolts in the places shown below, and
replace the nuts and tighten them. Then attach the DPR-6000 to the host computer.
Installing the TA-6000
If you want to cover the space beside the printer, use the TA-6000, which is provided in a
separate package.
 Loading...