

Page 1

®
EPSON
®
PowerLite 5550C/7550C
User’s Guide
Page 2

Copyright Notice
All rights reserved. No part of this publication may be reproduced, stored in a retrieval system, or transmitted
in any form or by any means, electronic, mechanical, photocopying, recording, or otherwise, without the prior
written permission of SEIKO EPSON CORPORATION. No patent liability is assumed with respect to the use
of the information contained herein. Neither is any liability assumed for damages resulting from the use of the
information contained herein.
Neither SEIKO EPSON CORPORATION nor its affiliates shall be liable to the purchaser of this product or
third parties for damages, losses, costs, or expenses incurred by purchaser or third parties as a result of:
accident, misuse, or abuse of this product or unauthorized modifications, repairs, or alterations to this product,
or (excluding the U.S.) failure to strictly comply with SEIKO EPSON CORPORATION’s operating and
maintenance instructions.
SEIKO EPSON CORPORATION shall not be liable against any damages or problems arising from the use of
any options or any consumable products other than those designated as Original EPSON Products or EPSON
Approved Products by SEIKO EPSON CORPORATION.
EPSON and PowerLite are registered trademarks of SEIKO EPSON CORPORATION.
SoundAdvice is a service mark and FaxAdvice is a trademark of Epson America, Inc.
General Notice:
of their respective owners. EPSON disclaims any and all rights in those marks.
Other product names used herein are for identification purposes only and may be trademarks
ii
Copyright © 1999 by Epson America, Inc. CPD 8299
Torrance, CA USA 7/99
Page 3

Important Information About Your Projector
Important Safety Information
Warning: Never look into the projector lens when the lamp is turned on; the bright light can damage your
eyes. Never let children look into the lens when it is on. Never open any cover on the projector, except the
lamp and filter covers. Dangerous electrical voltages inside the projector can severely injure you. Except as
specifically explained in this User’s Guide, do not attempt to service this product yourself. Refer all servicing
to qualified service personnel.
Warning: The projector and its accessories come packaged in plastic bags. Keep plastic bags away from
small children to avoid any risk of suffocation.
Caution: When you replace the lamp, never touch the new lamp with your bare hands; the invisible residue
left by the oil on your hands may shorten the lamp life. Use a cloth or glove to handle the new lamp.
Remote Control Information
You can operate the projector by remote control via a line-of-sight infrared (IR) receiver at the front of the
projector. The projector may not respond to remote control commands under the following conditions:
p
There is an object between the remote control IR emitter and the IR receiver on the projector.
p
Ambient light is too bright.
p
Certain types of fluorescent lighting are used.
p
A strong light source shines into the IR receiver.
p
Other equipment that emits infrared energy, such as a radiant room heater, is in the room.
These conditions commonly cause problems for most infrared-controlled equipment. Try the following
solutions:
p
The remote control unit’s batteries may be low on power; replace them.
p
Dim the ambient lighting and/or turn off any fluorescent lights.
p
Close any window coverings and/or move the projector out of direct sunlight.
p
Turn off other equipment that emits infrared energy.
If the remote control still does not work properly, remember you can always control your computer-based
iii
Page 4

presentation directly from the computer, even in an environment containing one of the conditions listed above.
FCC Compliance Statement For United States Users
This equipment has been tested and found to comply with the limits for a Class B digital device, pursuant to
Part 15 of the FCC Rules. These limits are designed to provide reasonable protection against harmful
interference in a residential installation. This equipment generates, uses, and can radiate radio frequency
energy and, if not installed and used in accordance with the instructions, may cause harmful interference to
radio or television reception. However, there is no guarantee that interference will not occur in a particular
installation. If this equipment does cause interference to radio and television reception, which can be
determined by turning the equipment off and on, the user is encouraged to try to correct the interference by
one or more of the following measures.
p
Reorient or relocate the receiving antenna.
p
Increase the separation between the equipment and receiver.
p
Connect the equipment into an outlet on a circuit different from that to which the receiver is connected.
p
Consult the dealer or an experienced radio/TV technician for help.
WARNING
The connection of a non-shielded equipment interface cable to this equipment will invalidate the FCC
Certification of this device and may cause interference levels which exceed the limits established by the FCC
for this equipment. It is the responsibility of the user to obtain and use a shielded equipment interface cable
with this device. If this equipment has more than one interface connector, do not leave cables connected to
unused interfaces. Changes or modifications not expressly approved by the manufacturer could void the user’s
authority to operate the equipment.
For Canadian Users
iv
This Class B digital apparatus meets all requirements of the Canadian Interference-Causing Equipment
Regulations.
Cet appareil numérique de la classe B respecte toutes les exigences du Règlement sur le materiel brouilleur du
Canada.
Page 5
Contents
Introduction 1
Optional Accessories . . . . . . . . . . . . . . . . . . . . . . . . . . . . . . . . . . . . . . . . . . . . . . . 3
About This Manual . . . . . . . . . . . . . . . . . . . . . . . . . . . . . . . . . . . . . . . . . . . . . . . . 4
Safety Instructions . . . . . . . . . . . . . . . . . . . . . . . . . . . . . . . . . . . . . . . . . . . . . . . . . 5
Where to Get Help . . . . . . . . . . . . . . . . . . . . . . . . . . . . . . . . . . . . . . . . . . . . . . . . 7
Electronic Support Services . . . . . . . . . . . . . . . . . . . . . . . . . . . . . . . . . . . . . . 7
Automated Telephone Services . . . . . . . . . . . . . . . . . . . . . . . . . . . . . . . . . . . 8
1
Setting Up the Projector 11
Unpacking the Projector . . . . . . . . . . . . . . . . . . . . . . . . . . . . . . . . . . . . . . . . . . . 12
Additional Components . . . . . . . . . . . . . . . . . . . . . . . . . . . . . . . . . . . . . . . . 14
Attaching the Hand Strap . . . . . . . . . . . . . . . . . . . . . . . . . . . . . . . . . . . . . . . . . . 16
Installing the Remote Control Batteries . . . . . . . . . . . . . . . . . . . . . . . . . . . . . . . 18
Where to Place the Projector . . . . . . . . . . . . . . . . . . . . . . . . . . . . . . . . . . . . . . . . 19
Connecting the Power Cord . . . . . . . . . . . . . . . . . . . . . . . . . . . . . . . . . . . . . . . . 21
v
Page 6

Connecting to a Computer . . . . . . . . . . . . . . . . . . . . . . . . . . . . . . . . . . . . . . . . . .21
Connecting to a PC Desktop Computer . . . . . . . . . . . . . . . . . . . . . . . . . . . .23
Connecting to a PC Laptop Computer . . . . . . . . . . . . . . . . . . . . . . . . . . . . .26
Connecting to a Desktop Macintosh . . . . . . . . . . . . . . . . . . . . . . . . . . . . . . .29
Connecting to a PowerBook . . . . . . . . . . . . . . . . . . . . . . . . . . . . . . . . . . . . .35
Connecting to a Video Source Other Than a Computer . . . . . . . . . . . . . . . . . . .41
Connecting to an External Speaker or Public Address System . . . . . . . . . . . . . .45
Turning the Equipment On and Off . . . . . . . . . . . . . . . . . . . . . . . . . . . . . . . . . . .46
Turning the Projector On and Off . . . . . . . . . . . . . . . . . . . . . . . . . . . . . . . . .46
Sleep Mode . . . . . . . . . . . . . . . . . . . . . . . . . . . . . . . . . . . . . . . . . . . . . . . . . .48
2
Using the Projector 49
Positioning the Projector . . . . . . . . . . . . . . . . . . . . . . . . . . . . . . . . . . . . . . . . . . .51
Calculating Image Size and Projection Distance . . . . . . . . . . . . . . . . . . . . .52
Focusing and Positioning the Screen Image . . . . . . . . . . . . . . . . . . . . . . . . . . . .54
Resizing the Projected Image . . . . . . . . . . . . . . . . . . . . . . . . . . . . . . . . . . . .56
Controlling the Projector . . . . . . . . . . . . . . . . . . . . . . . . . . . . . . . . . . . . . . . . . . .57
Using the Remote Control . . . . . . . . . . . . . . . . . . . . . . . . . . . . . . . . . . . . . .58
Using the Control Panel . . . . . . . . . . . . . . . . . . . . . . . . . . . . . . . . . . . . . . . .63
Projector Status Lights . . . . . . . . . . . . . . . . . . . . . . . . . . . . . . . . . . . . . . . . . . . . .65
Power Light . . . . . . . . . . . . . . . . . . . . . . . . . . . . . . . . . . . . . . . . . . . . . . . . .65
Projector Lamp Light . . . . . . . . . . . . . . . . . . . . . . . . . . . . . . . . . . . . . . . . . .66
Temperature Light . . . . . . . . . . . . . . . . . . . . . . . . . . . . . . . . . . . . . . . . . . . . .66
vi
3
Adjusting Projector Settings 67
Accessing the Main Menu . . . . . . . . . . . . . . . . . . . . . . . . . . . . . . . . . . . . . . . . . .69
Changing a Menu Setting . . . . . . . . . . . . . . . . . . . . . . . . . . . . . . . . . . . . . . . . . .70
Adjusting Video Settings (Image Source = Computer) . . . . . . . . . . . . . . . . . . .72
Adjusting Video Settings (Image Source = Video) . . . . . . . . . . . . . . . . . . . . . .74
Contents
Page 7

Adjusting Audio Settings . . . . . . . . . . . . . . . . . . . . . . . . . . . . . . . . . . . . . . . . . . 75
Changing Basic Projector Settings . . . . . . . . . . . . . . . . . . . . . . . . . . . . . . . . . . . 76
Creating and Assigning a User Logo . . . . . . . . . . . . . . . . . . . . . . . . . . . . . . . . . 78
Creating the User Logo . . . . . . . . . . . . . . . . . . . . . . . . . . . . . . . . . . . . . . . . 78
Assigning the Logo to the AV/Mute Button . . . . . . . . . . . . . . . . . . . . . . . . 80
Modifying the Special Effects . . . . . . . . . . . . . . . . . . . . . . . . . . . . . . . . . . . . . . . 81
Displaying Information About Your Projector . . . . . . . . . . . . . . . . . . . . . . . . . . 82
Resetting All Menu Options . . . . . . . . . . . . . . . . . . . . . . . . . . . . . . . . . . . . . . . . 83
4
Using ELP Link III 85
Unpacking the ELP Link III Kit . . . . . . . . . . . . . . . . . . . . . . . . . . . . . . . . . . . . . 86
Connecting the ELP Link III Cables . . . . . . . . . . . . . . . . . . . . . . . . . . . . . . . . . . 87
Connecting to a PC Desktop or Laptop . . . . . . . . . . . . . . . . . . . . . . . . . . . . 88
Connecting to a Macintosh Desktop or PowerBook . . . . . . . . . . . . . . . . . . 92
Installing the ELP Link III Software . . . . . . . . . . . . . . . . . . . . . . . . . . . . . . . . . . 96
Installing the Software for Windows . . . . . . . . . . . . . . . . . . . . . . . . . . . . . . 96
Installing the Software on a Macintosh . . . . . . . . . . . . . . . . . . . . . . . . . . . . 97
Starting ELP Link III . . . . . . . . . . . . . . . . . . . . . . . . . . . . . . . . . . . . . . . . . . . . . 98
Starting the Program from Windows . . . . . . . . . . . . . . . . . . . . . . . . . . . . . . 99
Starting the Program on a Macintosh . . . . . . . . . . . . . . . . . . . . . . . . . . . . . 100
Changing the COM Port Assignment . . . . . . . . . . . . . . . . . . . . . . . . . . . . . . . . 101
Assigning Functions to the Effects Buttons . . . . . . . . . . . . . . . . . . . . . . . . . . . 102
Modifying Functions . . . . . . . . . . . . . . . . . . . . . . . . . . . . . . . . . . . . . . . . . 107
Defining and Using Key Macros . . . . . . . . . . . . . . . . . . . . . . . . . . . . . . . . 110
Saving and Recalling Effects Button Assignments . . . . . . . . . . . . . . . . . . 112
Assigning Functions to the Keyboard . . . . . . . . . . . . . . . . . . . . . . . . . . . . . . . . 114
vii
Page 8

Using the Projector Setting Dialog Box . . . . . . . . . . . . . . . . . . . . . . . . . . . . . .116
Using the Quick Change Toolbar . . . . . . . . . . . . . . . . . . . . . . . . . . . . . . . .118
Changing Projector Settings . . . . . . . . . . . . . . . . . . . . . . . . . . . . . . . . . . . .118
Testing Projector Performance . . . . . . . . . . . . . . . . . . . . . . . . . . . . . . . . . .124
Running ELP Link III Without the Projector . . . . . . . . . . . . . . . . . . . . . . . . . .129
5
Maintenance 131
Cleaning the Lens . . . . . . . . . . . . . . . . . . . . . . . . . . . . . . . . . . . . . . . . . . . . . . .132
Cleaning the Projector Case . . . . . . . . . . . . . . . . . . . . . . . . . . . . . . . . . . . . . . . .132
Cleaning the Air Filter . . . . . . . . . . . . . . . . . . . . . . . . . . . . . . . . . . . . . . . . . . . .133
Replacing the Lamp . . . . . . . . . . . . . . . . . . . . . . . . . . . . . . . . . . . . . . . . . . . . . .134
Transporting the Projector . . . . . . . . . . . . . . . . . . . . . . . . . . . . . . . . . . . . . . . . .137
6
Troubleshooting 139
Using the Online Help Menu . . . . . . . . . . . . . . . . . . . . . . . . . . . . . . . . . . . . . . .140
Problems with the Projector . . . . . . . . . . . . . . . . . . . . . . . . . . . . . . . . . . . . . . . .141
Problems with the Remote Control . . . . . . . . . . . . . . . . . . . . . . . . . . . . . . . . . .144
Problems with the Image or Sound . . . . . . . . . . . . . . . . . . . . . . . . . . . . . . . . . .145
7
Technical Specifications 149
Glossary 155
viii
Index 159
Contents
Page 9

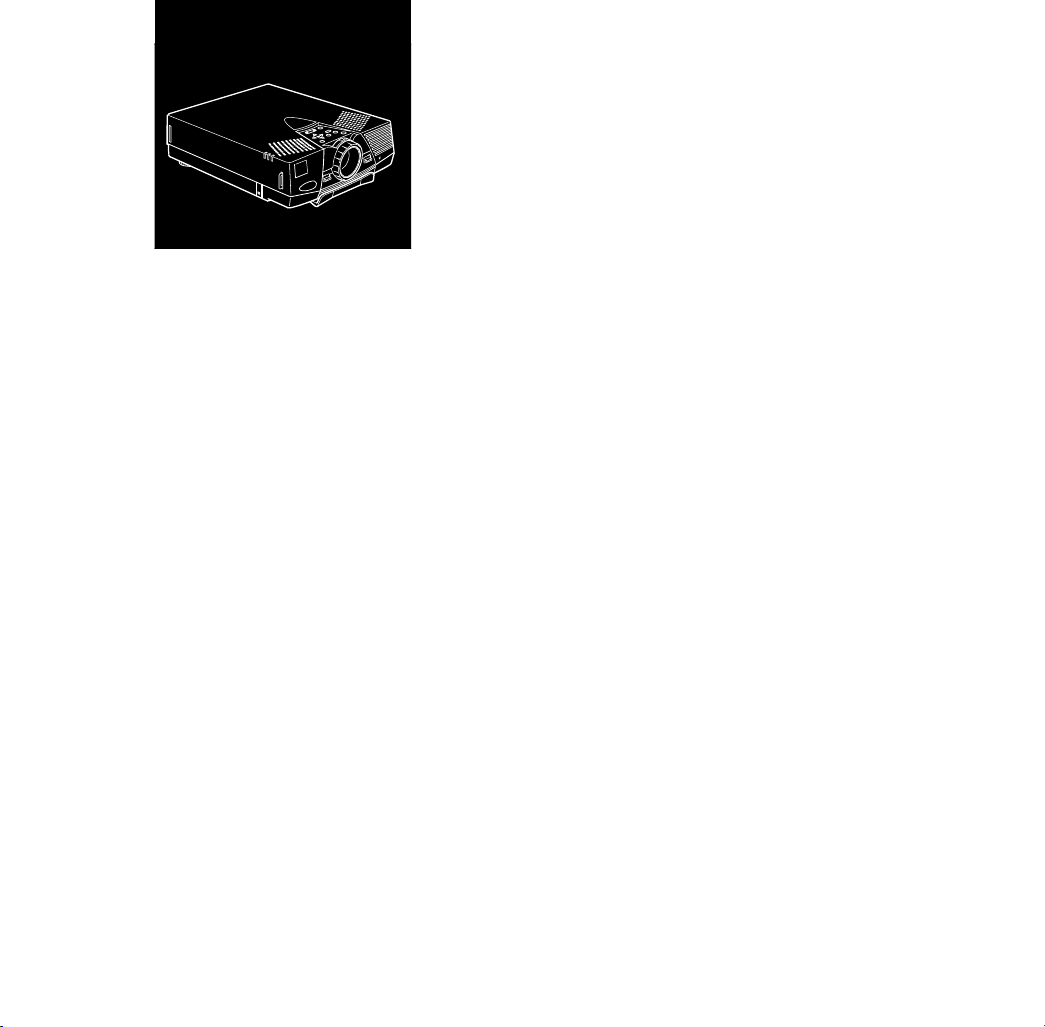
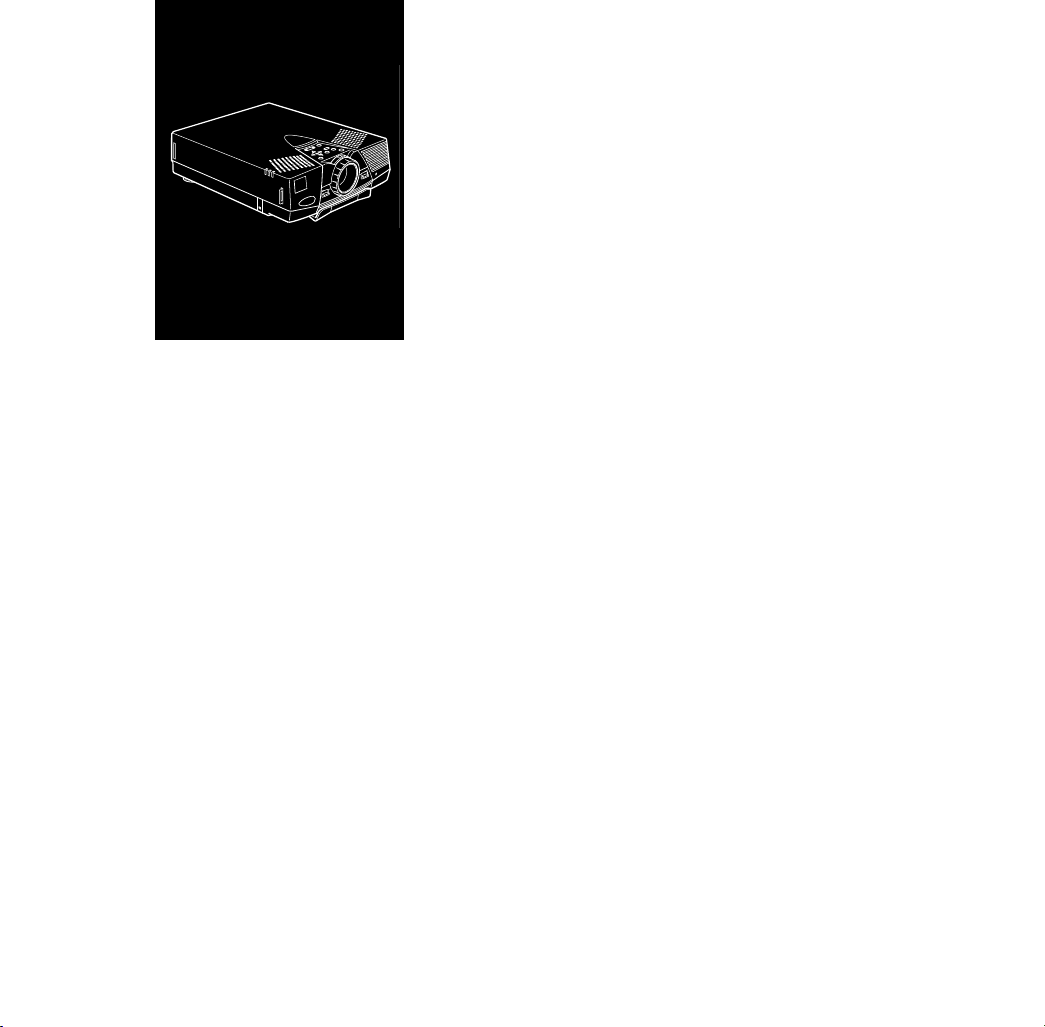
Introduction
T
he EPSON®
projector that lets you project full-color images and video onto a
large screen for presentations. It supports IBM
laptops, as well as Apple
PowerBook
The projector also supports a wide range of video formats.
Note:
See page 153 for details on supported computers and video formats.
In addition to its size and versatility, your projector offers the
following advantages:
p
You can connect it simultaneously to two image sources: one
PC or Apple Macintosh computer plus one video source, such as
a VCR or camcorder.
p
You can connect the projector to an audio source for one or both
image sources. The audio source can be the computer, video
source, or another device such as a stereo.
PowerLite® projector is a compact, lightweight
®
compatible PCs and
®
computers.
®
Macintosh,®
Power Macintosh,™
and
1
Page 10

p
It produces images that can be easily seen in rooms light enough
to take notes. The PowerLite 5550C displays images in SVGA
at a resolution of 800 × 600 pixels. The PowerLite 7550C
displays images in XGA at a resolution of 1024 × 768 pixels.
p
Its two speakers employ a built-in SRS 3D Sound System for
rich, powerful audio output. You can also connect an external
speaker when further amplification is required.
p
You can select front, rear, or ceiling projection, according to the
specific needs of your presentation.
p
The projector’s new patented SizeWize™ chip supports a variety
of computer output resolutions. For example, the resize feature
lets you display VGA or XGA images at the projector’s SVGA
resolution.
p
You can control your projector through a hand-held remote
control, which can also act as a wireless mouse to control the
cursor on your computer screen during presentations.
p
The optional ELP Link III software enables you to control the
projector from a computer. In addition, it lets you assign
functions both to your keyboard and to the remote control, and
even program the keyboard and remote control with your own
customized functions.
p
The projector’s sleep mode conserves electricity by
automatically turning off the lamp after the projector has not
been used for 30 minutes. The projector remains on, but the
lamp is turned off, cooling the projector and extending the life
of the lamp.
2
Introduction
Page 11

Optional Accessories
To enhance your use of the projector, EPSON provides the
following optional accessories:
Accessory Product code
Replacement lamp and filter ELPLP07
Soft travel case for projector and laptop
Hard travel case ELPKS14
Computer cable ELPKC02
ELP Link III kit for PC for Windows
(includes ELP Link III software and cables)
ELP Link III kit for Macintosh
(includes ELP Link III software and cables)
Mac adapter set ELPAP01
Portable projection screen ELPSC06
ELPKS13
ELPSW03
ELPSW04
You can purchase these accessories from your dealer or by calling
EPSON Accessories at
(800) 873-7766
; or visit our web site at
www.epsonsupplies.com (U.S. sales only). In Canada, please call
(800) 873-7766 for dealer referral.
Optional Accessories
3
Page 12

About This Manual
This manual describes how to set up and use the EPSON
PowerLite 5550C and PowerLite 7550C projectors. Except where
noted, the instructions apply to both projectors.
Chapter 1, “Setting Up the Projector,” gives step-by-step
instructions for connecting your projector to a computer, video, or
audio source, and turning on the equipment.
Chapter 2, “Using the Projector,” gets you started with the basics:
how to position and focus your projector, and how to use the buttons
on the remote control and control panel.
Chapter 3, “Adjusting Projector Settings,” shows you how to use the
projector’s built-in menus to change operational settings.
Chapter 4, “Using ELP Link III,” explains how to connect the
ELP Link III cables and use the optional ELP Link III software.
Chapter 5, “Maintenance,” describes how to perform limited
maintenance, such as replacing the lamp or cleaning the air filter.
Chapter 6, “Troubleshooting,” describes how to interpret your
projector’s warning lights and what to do when you encounter
specific problems.
Chapter 7, “Technical Specifications,” lists the projector’s technical
specifications.
A Glossary and Index are provided at the end of the manual.
4
Introduction
Page 13

Safety Instructions
Always follow these safety instructions:
1. Place the projector on a flat, stable surface.
2. Don’t use the projector near water or sources of heat. Don’t
place the projector or remote control on top of heat-producing
equipment, and avoid places subject to shocks and vibrations, or
high or rapidly changing temperatures and humidity.
3. Use attachments only as recommended.
4. Use the type of power source indicated on the projector. If
you’re not sure of the power available, consult your dealer or
power company.
5. Place the projector near a wall outlet where you can easily
unplug it.
Placez le projecteur près d’une prise de contacte où la fiche
peut être débranchée facilement.
6. Insert the projector’s three-wire grounding-type plug into a
properly grounded outlet. If you have a two-prong outlet,
contact an electrician to replace it. Don’t touch the plug with
wet hands, as this can cause electric shock.
7. Always insert the plug firmly into the outlet. Also, avoid dusty
outlets. Failure to follow these precautions could result in fire.
8. Don’t overload wall outlets, extension cords, or integral
convenience receptacles. This can cause fire or electric shock.
Safety Instructions
5
Page 14

9. Don’t place the projector where the cord can be walked on,
which can result in fraying or damage to the plug.
10. Unplug the projector from the wall outlet before cleaning. Use a
damp cloth for cleaning. Don’t use liquid or aerosol cleaners.
11. Don’t block the slots and openings in the projector case. They
provide ventilation and prevent the projector from overheating.
Don’t operate the projector on a sofa, rug, or other soft surface,
or in a closed-in cabinet unless proper ventilation is provided.
12. Never push objects of any kind through cabinet slots. Never
spill liquid of any kind into the projector.
13. Except as specifically explained in this User’s Guide, don’t
attempt to service the projector yourself. Refer all servicing to
qualified service personnel. Opening or removing covers may
expose you to dangerous voltages and other hazards.
14. Unplug the projector during electrical storms, or when it will
not be used for extended periods.
15. Unplug the projector from the wall outlet and refer servicing to
qualified service personnel under the following conditions:
p
When the power cord or plug is damaged or frayed
p
If liquid has been spilled into the projector, or if it has been
exposed to rain or water
p
If it doesn’t operate normally when you follow the operating
instructions, or if it exhibits a distinct change in
performance
p
If it has been dropped or the housing has been damaged
6
Introduction
Page 15

Where to Get Help
If you’re having trouble setting up or using your projector, see the
projector’s Help menu or read Chapter 6, “Troubleshooting.” If you
can’t resolve the problem, EPSON provides technical assistance
through electronic support services and automated telephone
services 24 hours a day, as listed in the following tables.
Electronic Support Services
Service Access
World Wide Web From the Internet, you can reach EPSON’s Home Page at
http://www.epson.com
.
EPSON Internet
FTP Site
EPSON Forum on
CompuServe
®
If you have Internet FTP capability, use your Web browser
(or other software for FTP downloading) to log onto
ftp.epson.com
e-mail address as the password.
Members of CompuServe can type
at the menu prompt to reach the Epson America Forum.
For a free introductory CompuServe membership, call
(800) 848-8199
with the user name
and ask for representative #529.
Where to Get Help
anonymous
GO EPSON
and your
7
Page 16

Automated Telephone Services
Service Access
EPSON SoundAdvice
EPSON FaxAdvice
EPSON Referral Service For the location of your nearest Authorized
SM
For pre-recorded answers to commonly asked questions
about EPSON products 24 hours a day, seven days a
week, call
™
Access EPSON’s technical information library by
calling
number to use this service.
EPSON Reseller or Customer Care Center, call
(800) 922-8911
(800) 922-8911
(800) 922-8911
.
.
. You must provide a return fax
When support is required, follow the calling instructions on the back
of the EPSON Private Line Technical Support card included with
the projector. Technical support is also available in the U.S. by
calling (310) 974-1202 between 6
AM
and 6PM, Pacific time,
Monday through Friday. In Canada, call (905) 709-3839. Toll or
long distance charges may apply.
Before you call, please have the following information ready:
p
Product name
p
Product serial number
p
Personal identification number (PIN) for EPSON Private Line
Technical Support
8
Introduction
Page 17

p
Computer configuration
p
Description of the problem
You can purchase accessories from
(800) 873-7766
; or visit our web site at www.epsonsupplies.com
EPSON
Accessories at
(U.S. sales only). In Canada, please call (800) 873-7766 for dealer
referral.
Where to Get Help
9
Page 18

10
Introduction
Page 19
1
Setting Up the Projector
T
his chapter describes how to unpack the projector, connect it to
other equipment, and turn it on.
Before it can project any images, the projector must be connected to
a video source, such as a computer, VCR, camcorder, or DVD
player. If you want, you can connect your projector to both a
computer and a second video source. You can also do any of the
following:
p
Connect the projector to an audio source for one or both video
sources. The audio source can be the computer, a video device
capable of producing audio (such as a VCR or camcorder), or
another device such as a stereo.
11
Page 20
p
Connect the mouse cable to use the remote control as a wireless
mouse. Except for some laptops, this disables your computer’s
mouse. If you are also viewing the display on your monitor, the
remote control’s pointer controls the screen cursor.
p
Connect the projector to an external speaker or public address
(PA) system to amplify the audio.
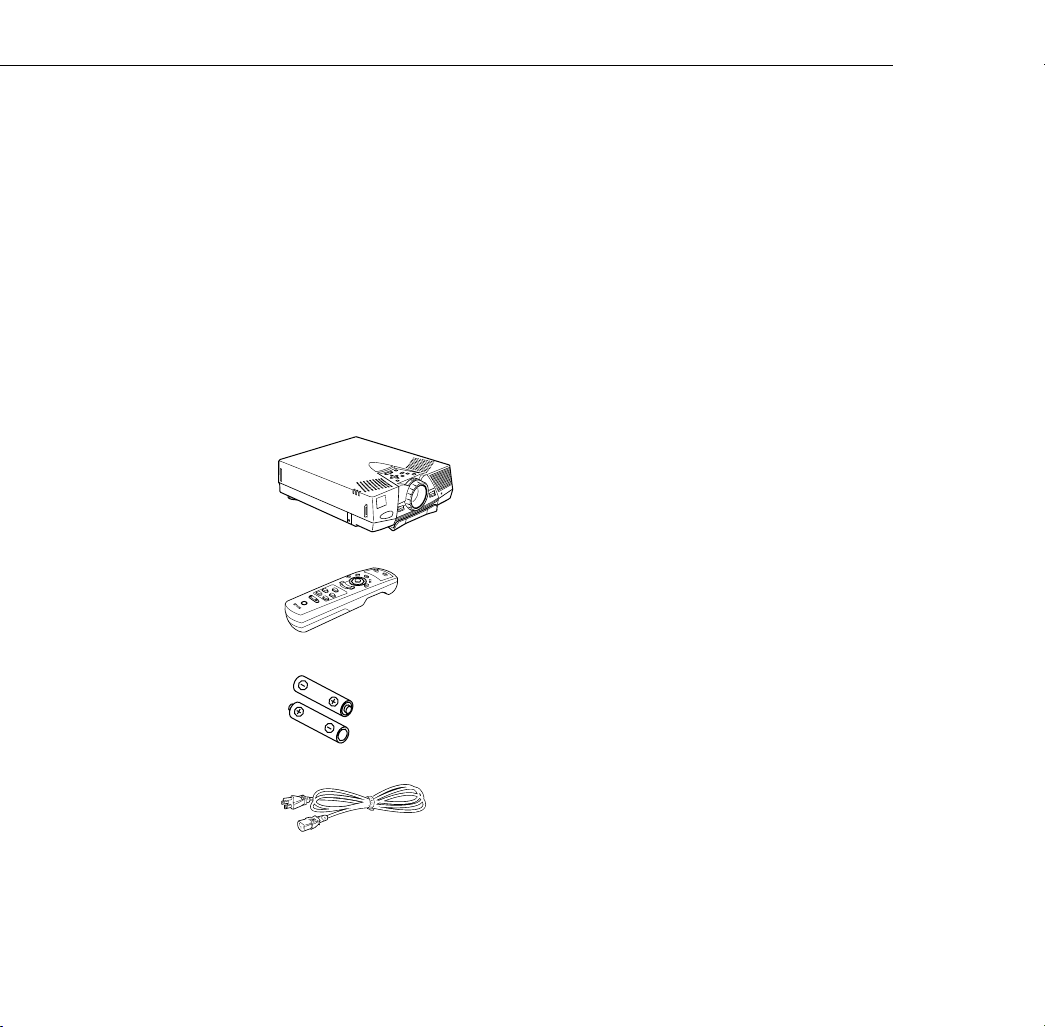
Unpacking the Projector
When you unpack the projector, make sure you have all these
components:
Projector
Remote control
2 AA batteries
12
Power cord
1 • Setting Up the Projector
Page 21
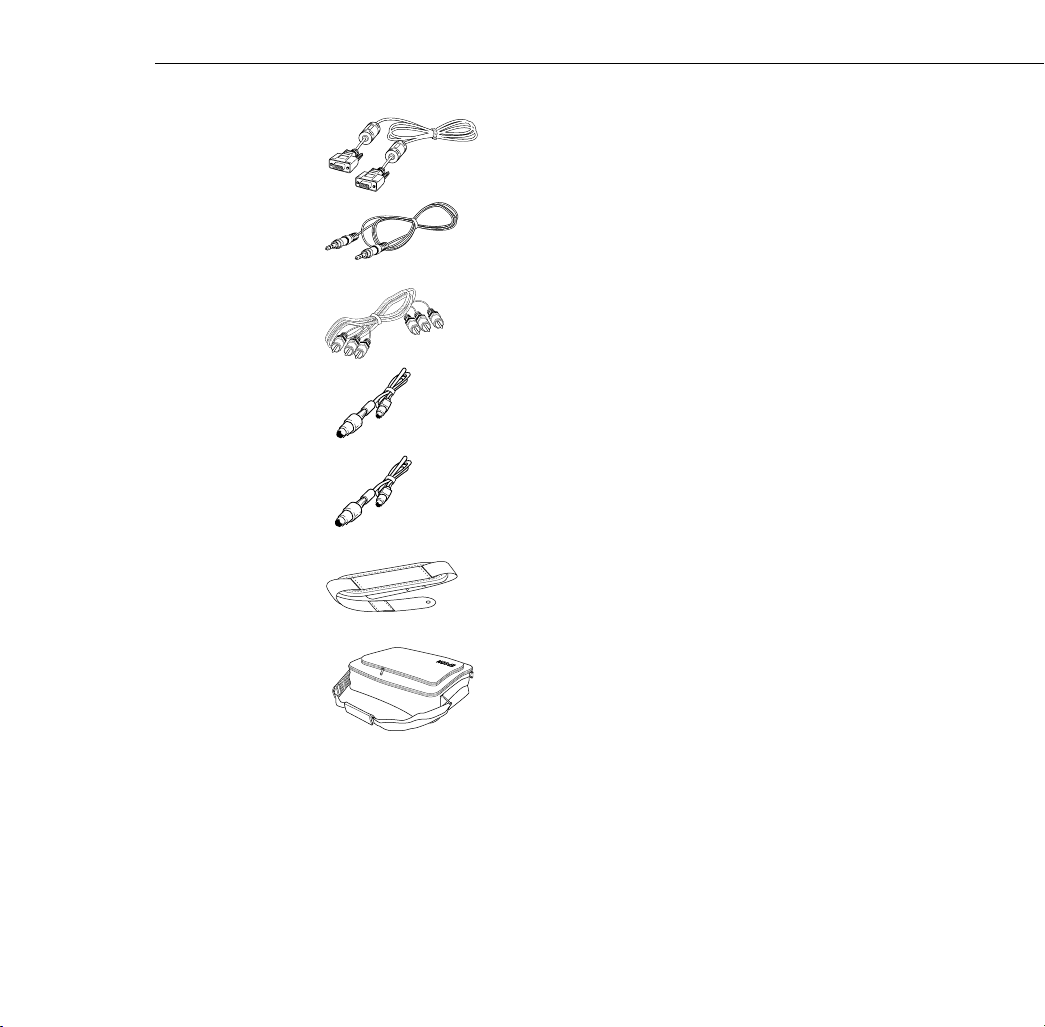
Projector video cable
Audio cable
Audio/video (A/V) cable
®
mouse cable (for the PC)
PS/2
Mac mouse cable (for the Macintosh)
Hand strap (with 2 screws)
Soft carrying case
Unpacking the Projector
13
Page 22
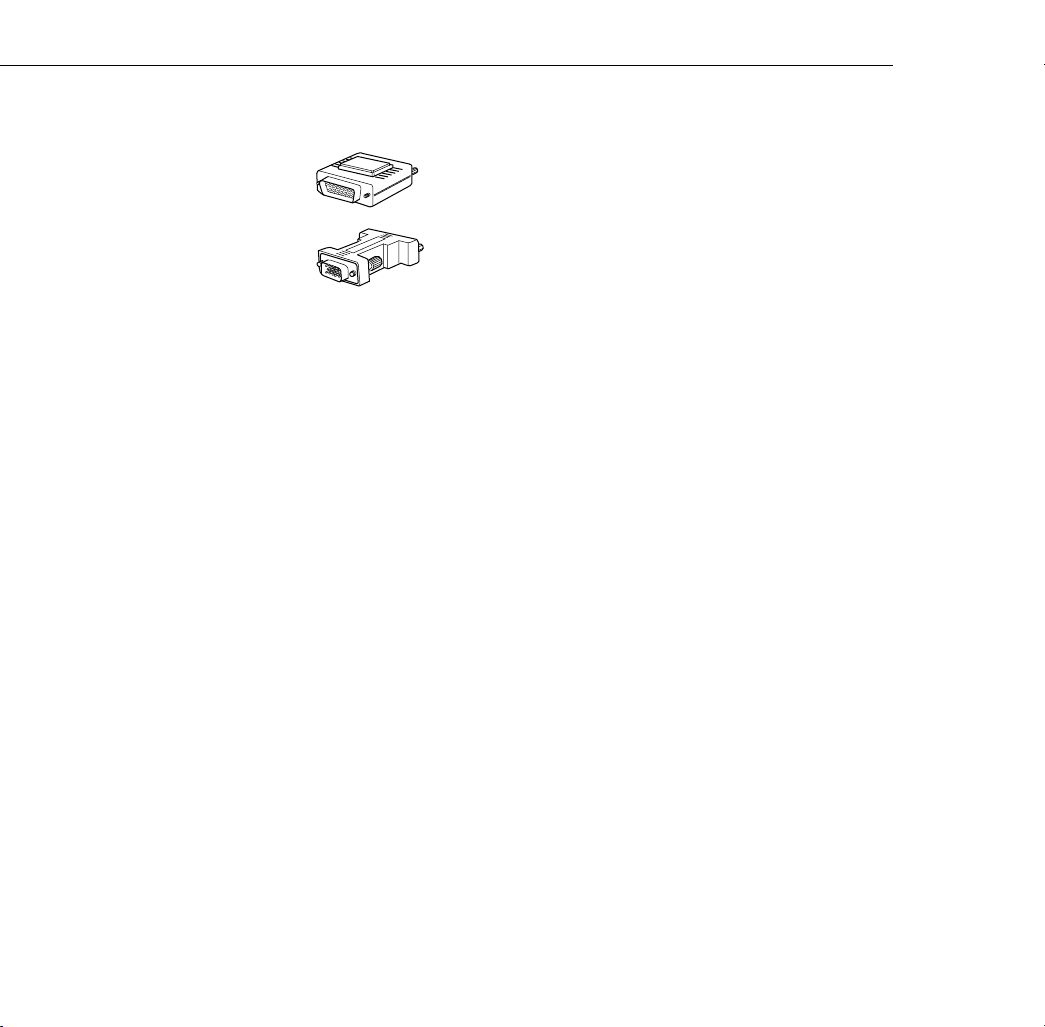
Macintosh adapter set:
You will not need all these components.
Save all packaging in case you need to ship the projector in the
future. Always transport the projector in its original packaging (or
the equivalent) or use a carrying case if you are carrying the
projector by hand. (See “Transporting the Projector” on page 137
for instructions.)
Additional Components
Depending on how you plan to use the projector, you may need
these additional components:
p
For complete control of the projector from your computer or to
program enhanced special effects on the remote control, you
need the optional ELP Link III kit. You can purchase the kit
from
your dealer or by calling EPSON Accessories at
(U.S. sales only).
Macintosh desktop adapter
Macintosh monitor adapter
(800) 873-7766
14
1 • Setting Up the Projector
Page 23

p
To receive an S-Video signal, you will need an S-Video cable.
(One is usually provided with your video device.) A separate
cable is required for each video source.
p
To connect the projector to a Macintosh PowerBook, you may
need a video-out cable and an adapter. (The video-out cable is
provided by—or can be purchased from—Apple
Computer for
all PowerBooks that have video-out capability and require the
cable. If your PowerBook doesn’t include one, see your
Macintosh dealer. Additionally, some PowerBooks come with
an adapter for a high-density, 15-pin, VGA connector.)
p
To connect the projector to an external sound system, you need
an RCA-to-3.5 mm stereo audio cable. You can obtain one from
your computer dealer.
p
To use the remote control when the projector is not in
line-of-sight of the remote, you need an optional infrared
repeater. For more information, call
web address:
p
To connect a serial mouse cable to your computer, you may
www.xantech.com
(800) 843-5465 or
.
require a special connector, cable, or other components. You
can obtain these items from your computer dealer.
p
To protect your projector, you can connect a Kensington
MicroSaver
®
anti-theft device in the hole on the back of the
projector. Contact your local computer dealer.
visit this
Unpacking the Projector
15
Page 24
Attaching the Hand Strap
Follow the steps below to attach the hand strap to the projector with
the two screws included with the strap.
1. Gently place the projector on its side, so you are looking at the
bottom and the back of the projector is facing left.
Caution:
Do not lift or hold the projector by its lens; this can
damage the lens.
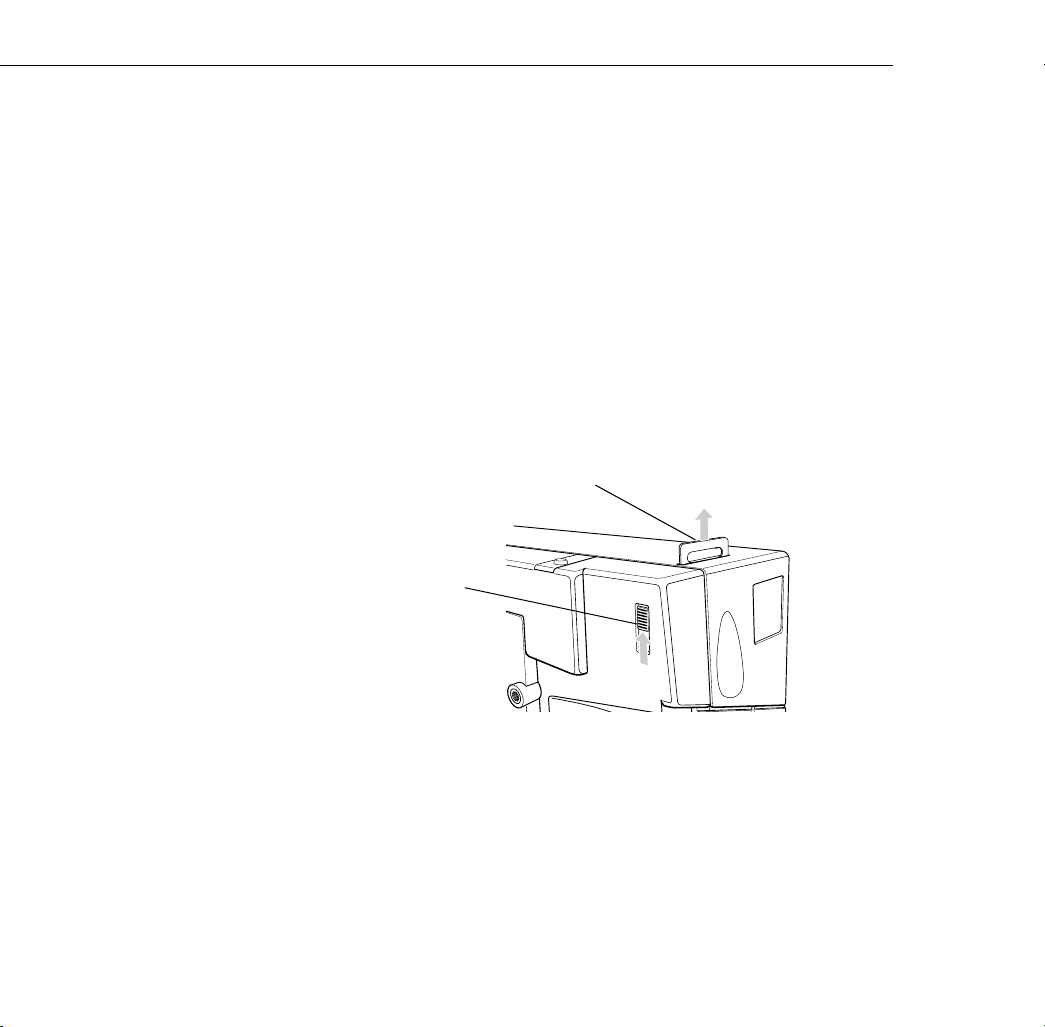
2. Locate the blue slider button on the bottom front of the projector
and slide the button up until the front strap connector is fully
extended
.
front strap connector
slider button
16
1 • Setting Up the Projector
Page 25
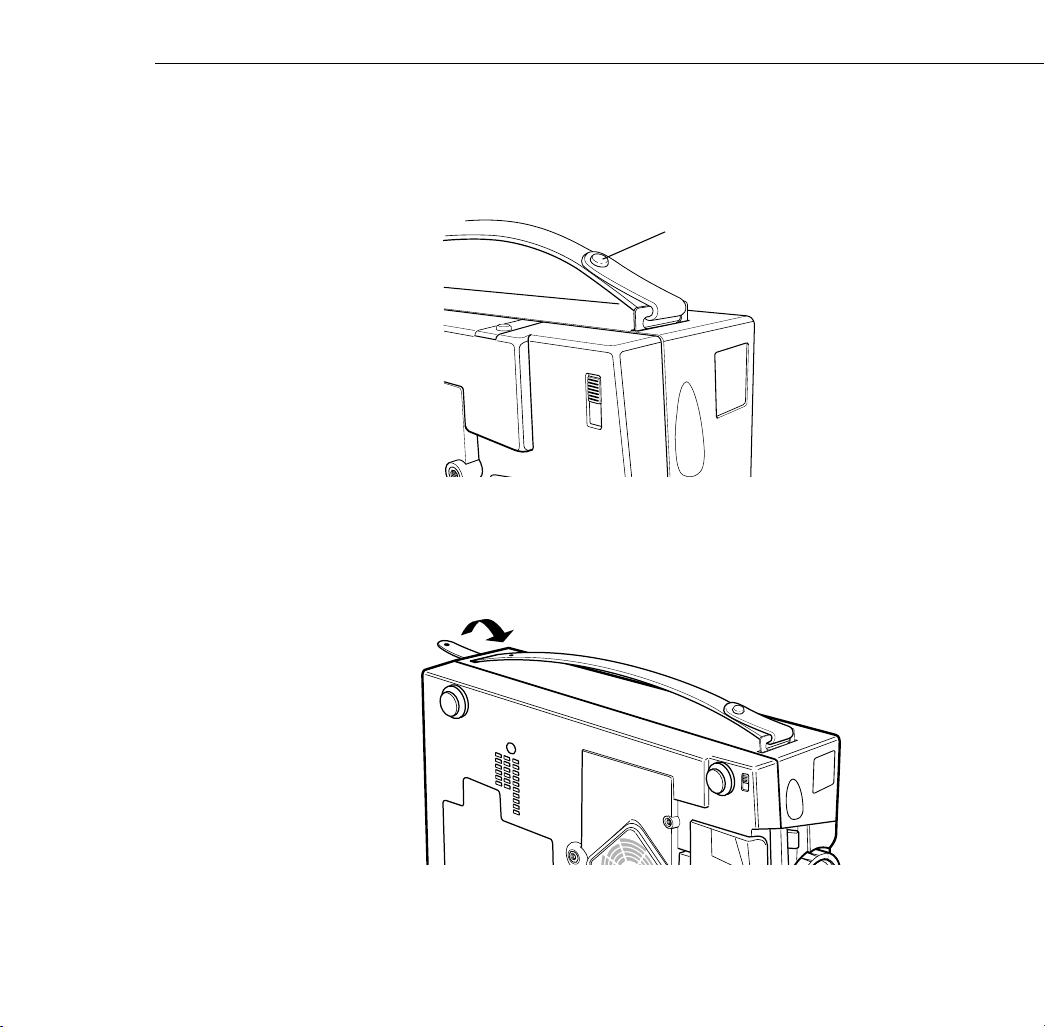
3. Place one end of the strap through the front strap connector and
use a screwdriver to fasten one of the screws through the strap.
Make sure the screw is securely fastened.
screw
4. Place the other end of the strap through the rear strap connector
and fasten it with the other screw. (There is no slider button for
the rear strap connector.)
Attaching the Hand Strap
17
Page 26
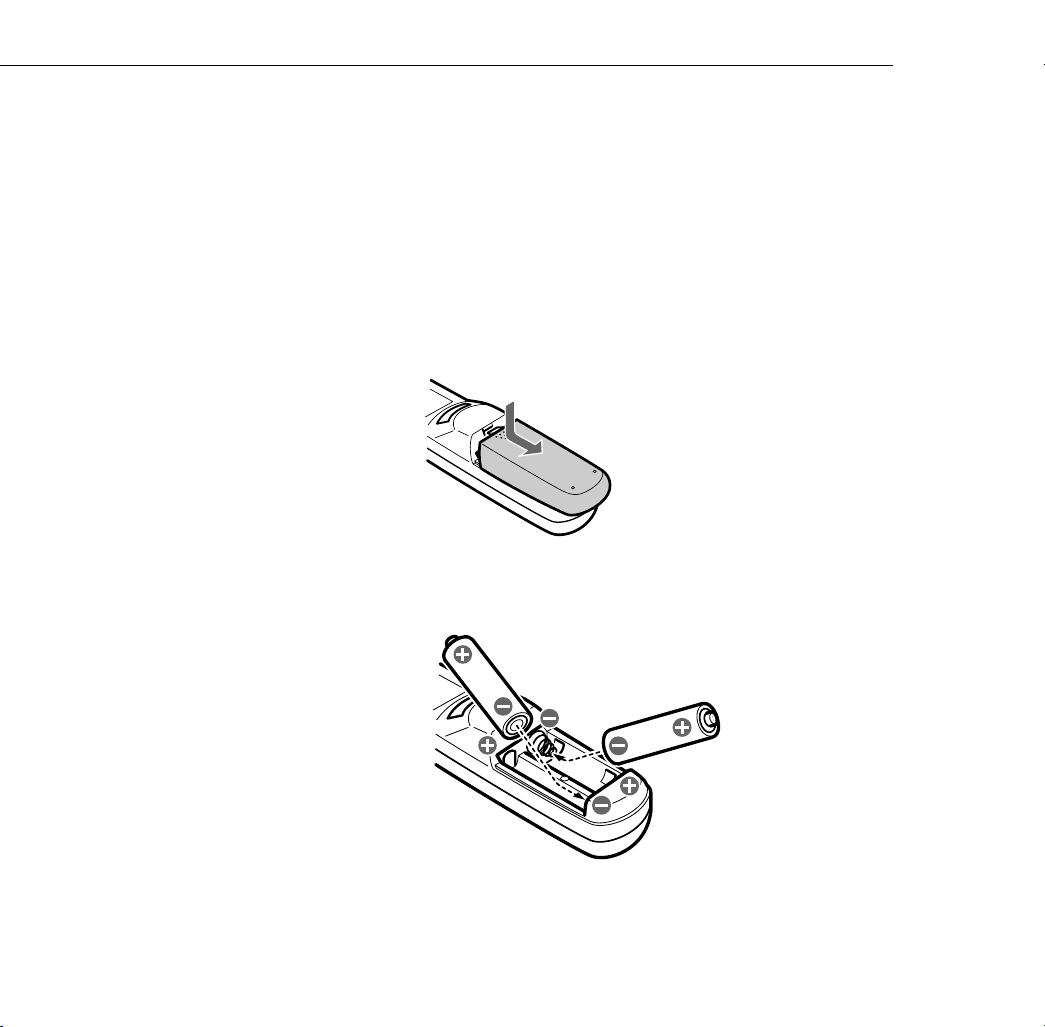
Installing the Remote Control Batteries
You can use the remote control as a wireless mouse instead of your
computer’s mouse to control your presentation. If you purchased the
optional ELP Link III kit, you can assign different functions to the
Effects buttons, and even program the buttons with your own
customized functions. (See “Assigning Functions to the Effects
Buttons” on page 102.) Follow these steps to install the batteries:
1. Slide off the battery compartment cover
.
2. Insert the two AA batteries included with the projector. Make
sure the polarity of the batteries is correct.
18
1 • Setting Up the Projector
Page 27

3. Replace the battery compartment cover.
When replacing batteries, take the following precautions:
p
Don’t mix old and new batteries.
p
Replace batteries as soon as they run out. If the batteries leak,
wipe away battery fluid with a soft cloth. If fluid gets on your
hands, wash them immediately.
p
Remove the batteries if you plan not to use the projector for a
long period of time.
Where to Place the Projector
Before you start connecting cables, decide where you want to place
the projector and computer or video source. Follow these
guidelines:
p
Place the projector on a sturdy, level surface within five feet of
your computer or video source. Remember not to place the
projector near sources of heat, or in a location where the cord is
likely to be stepped on.
p
Because the distance between the projector and screen
determines image size, position the projector the proper distance
from the screen for the size image you want to project. Use the
following table to determine the correct distance. (For more
precise calculations, see page 52.)
Where to Place the Projector
19
Page 28

In addition to front projection, your projector supports rear
Note:
and ceiling projection. To use rear or ceiling projection, you need
to select the Ceiling or Rear Projection mode in the Setting menu.
See “Changing Basic Projector Settings” on page 76 for more
information.
Horizontal distance from projector to screen
Image size (diagonal)
300 inches (762 cm) 494 inches (12.6 m) 639 inches (16.3 m)
200 inches (508 cm) 328 inches (8.4 m) 423 inches (10.8 m)
100 inches (254 cm) 163 inches (4.2 m) 213 inches (5.4 m)
80 inches (203 cm) 129 inches (3.3 m) 170 inches (4.3 m)
60 inches (152 cm) 96 inches (2.5 m) 127 inches (3.2 m)
50 inches (127 cm) 80 inches (2.0 m) 105 inches (2.7 m)
40 inches (102 cm) 67 inches (1.7 m) 83 inches (2.1 m)
30 inches (76 cm) 47 inches (1.2 m) 58 inches (1.5 m)
25 inches (64 cm) 38 inches (1.0 m) 46 inches (1.2 m)
19 inches (48 cm) None 38.0 inches (1.0 m)
The projector must be between 3.3 and 53.5 feet (1.0 to 16.3
Note:
Minimum Maximum
meters) from the screen.
20
1 • Setting Up the Projector
Page 29
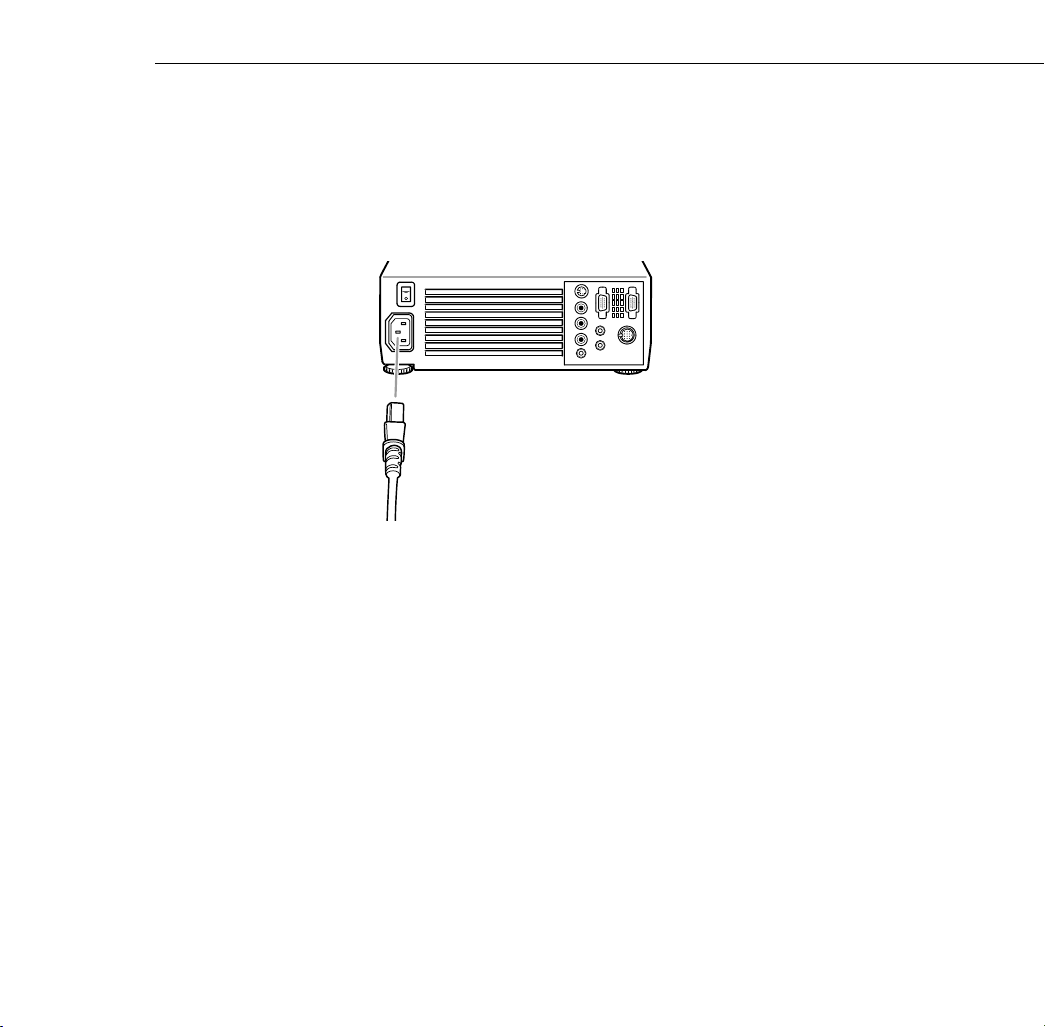
Connecting the Power Cord
Connect the appropriate end of the power cord to the power inlet on
the back of the projector, as shown below. Connect the other end to
a grounded electrical outlet.
Connecting to a Computer
You can connect the projector to a computer capable of XGA, VGA,
or SVGA output. The PowerLite 7550C is also capable of projecting
SXGA images. (The projector resizes VGA and XGA images for the
PowerLite 5550C and VGA, SVGA, and SXGA images for the
7550C.) The following types of computers are supported:
p
IBM compatible desktop or laptop PC
p
Apple Macintosh desktop computer, including Macintosh
Quadra,
p
Any Apple PowerBook with video-out capability
®
Macintosh Centris,®
and Power Macintosh
Connecting the Power Cord
21
Page 30

You can connect the projector to two video sources simultaneously
(for example, a computer and a VCR), and you can connect a
separate audio source for each video source.
If you will be using the optional ELP Link III software, you’ll also
need to connect the ELP Link III cables. See Chapter 4 for
instructions after you finish connecting the projector to your
computer.
: If you want to use the remote as a mouse and your computer
Note
doesn’t have a PS/2 mouse connector, you must use the ELP Link III
kit to connect the projector to a computer.
22
1 • Setting Up the Projector
Page 31

The illustration below identifies all the interface ports on the back of
the projector; you may want to refer to this as you connect your
computer or other equipment to the projector.
Left Audio
Video In
power switch
AC inlet
Right Audio
Repeater
Connecting to a PC Desktop Computer
This section describes how to connect the projector to your PC
desktop with the projector’s video, audio, and mouse cables. (You
must connect the video cable; the audio and mouse cables are
optional.)
S-Video In
Audio In
Computer Out
Computer In
Mouse/Com
Audio Out
Connecting to a Computer
23
Page 32

Connecting the projector’s video cable
Computer Out port
computer’s monitor cable
(optional)
Computer configurations vary. See your computer manual for
Note:
the location of the ports needed to connect your projector.
1. Turn off the projector and computer, if they’re on.
2. Connect either end of the projector’s video cable to the
Computer In port.
3. Disconnect the computer’s monitor cable from the video port on
the back of the computer.
Computer In
port
projector video cable
projector video cable
24
4. Connect the other end of the projector’s video cable to the
computer’s video port.
1 • Setting Up the Projector
Page 33

5. If you want to view the video on the computer monitor, connect
the computer’s monitor cable to the projector’s Computer Out
port. (This is especially useful when the projection screen is
behind you.)
6. Tighten the screws on all connectors.
Connecting the projector’s audio cable
1. If you will be using audio, connect one end of the audio cable
that came with the projector to the Audio In jack on the
projector.
Audio In jack
audio cable
2. Connect the other end of the audio cable to the audio out port on
a sound card in the computer.
Connecting to a Computer
25
Page 34

Connecting the projector’s mouse cable
Connect the projector’s PS/2 mouse cable if you want to use the
projector’s remote control as a mouse pointer for the computer.
If you’ll be using the optional ELP Link III software, you need
Note:
to connect the mouse cable included in the ELP Link III kit instead.
See Chapter 4 for instructions.
1. Disconnect the computer’s PS/2 mouse cable from the mouse
port on the back of your computer and replace it with the small
end of the PS/2 mouse cable that came with the projector.
Mouse/Com port
PS/2 mouse cable
26
2. Connect the other end of the PS/2 mouse cable to the projector’s
Mouse/Com port.
1 • Setting Up the Projector
Page 35

Connecting to a PC Laptop Computer
This section describes how to connect the projector to your PC
laptop with the projector’s video, audio, and mouse cables. (You
must connect the video cable; the audio and mouse cables are
optional.)
Connecting the projector’s video cable
Computer In port
Laptop configurations vary. See your computer manual for
Note:
the location of ports needed to connect your projector.
1. Turn off the projector and computer, if they’re on.
2. Connect either end of the projector’s video cable to the
Computer In port.
3. Connect the other end of the video cable to the laptop’s video
(monitor) port.
projector video cable
Connecting to a Computer
27
Page 36

4. Tighten the screws on both connectors.
5. Check the documentation for your laptop for instructions on
setting the display to appear on an external monitor (the
projector screen) only or on both the LCD screen and the
projector screen. If the projector’s image is dim or not displayed
correctly, try setting up the laptop to display for external
monitor only.
Connecting the projector’s audio cable
If you want to use audio, your laptop must have an Audio Out jack
to connect the audio cable.
1. Connect one end of the audio cable that came with the projector
to the Audio In jack on the projector.
Audio In jack
28
audio cable
1 • Setting Up the Projector
Page 37

2. Connect the other end of the audio cable to the audio out port on
your laptop.
Connecting to a Computer
29
Page 38

Connecting the projector’s mouse cable
Connect the projector’s PS/2 mouse cable if you want to use the
projector’s remote control as a mouse pointer for your computer.
If you’ll be using the optional ELP Link III software, you need
Note:
to connect the mouse cable included in the ELP Link III kit instead.
See Chapter 4 for instructions.
1. Connect the small end of the PS/2 mouse cable included with
the projector to the laptop’s mouse port.
Mouse/Com
port
PS/2 mouse cable
30
2. Connect the other end of the PS/2 mouse cable to the projector’s
Mouse/Com port.
1 • Setting Up the Projector
Page 39

Connecting to a Desktop Macintosh
This section describes how to connect the projector to your desktop
Macintosh with the projector’s video, audio, and mouse cables.
(You must connect the video cable; the audio and mouse cables are
optional.) Make sure you also have ready the Macintosh desktop
adapter and monitor adapter that came with the projector. (You’ll
need the monitor adapter only if you’ll be displaying the image on
your monitor screen as well.)
Connecting to a Computer
31
Page 40

Connecting the projector’s video cable
Computer Out port
Macintosh
monitor adapter
Macintosh computer configurations vary. See your computer
Note:
Computer In port
Macintosh desktop
adapter
projector video cable
computer’s monitor cable
manual for the location of the ports needed to connect your
projector.
1. Turn off the projector and your Macintosh, if they’re on.
2. Connect either end of the projector’s video cable to the
Computer In port.
32
1 • Setting Up the Projector
Page 41

3. Locate the Macintosh desktop adapter that came with your
projector and remove the small cover, as shown below.
4. Set the DIP switches on the desktop adapter to select the
resolutions you want to use (such as 16-inch mode). See your
Macintosh documentation for instructions.
5. Connect the small terminal of the Macintosh desktop adapter to
the other end of the projector’s video cable (now attached to the
projector’s Computer In port).
projector video cable
Macintosh desktop
adapter
Connecting to a Computer
33
Page 42

6. Disconnect the monitor cable from the video port on the back of
your Macintosh.
7. Connect the projector’s video cable (with the desktop adapter
attached) to the video port on the back of your Macintosh.
8. If you want to view images on your computer’s monitor, locate
the Macintosh monitor adapter that came with your projector.
9. Attach the large end of the adapter to your computer’s monitor
cable, and attach the small end of the Macintosh monitor
adapter to the projector’s Computer Out port.
34
10. Tighten the screws on all the connectors.
1 • Setting Up the Projector
Page 43

Connecting the projector’s audio cable
1. If you will be using audio, connect one end of the audio cable
that came with the projector to the projector’s Audio In jack.
2. Connect the other end of the audio cable to the audio out port on
your computer.
Audio In jack
audio cable
Connecting to a Computer
35
Page 44

Connecting the projector’s mouse cable
Connect the Macintosh mouse cable that came with your projector if
you want to use the projector’s remote control as a mouse pointer
for your Macintosh.
If you’ll be using the optional ELP Link III software, you need
Note:
to connect the Macintosh mouse cable included in the ELP Link III
kit instead. See Chapter 4 for instructions.
1. Disconnect your Macintosh’s mouse cable.
Mouse/Com
port
mouse cable
36
2. Connect the small end of the mouse cable that came with your
projector to the mouse port on your Macintosh.
3. Connect the other end of the projector’s mouse cable to the
Mouse/Com port on the projector.
1 • Setting Up the Projector
Page 45

Connecting to a PowerBook
This section describes how to connect the projector to your
Macintosh PowerBook with the projector’s video, audio, and mouse
cables. (You must connect the video cable; the audio and mouse
cables are optional.)
When you’ve finished connecting the cables, you may need to
Note:
choose Mirroring in the Display Control Panel to display the image
on the PowerBook screen as well as the projector screen. See your
Macintosh documentation for details. (This step is not necessary on
some newer systems, which can detect a dual video signal.)
Connecting to a Computer
37
Page 46

Connecting the projector’s video cable
Computer Out port
Some new PowerBooks may let you connect the projector
Note:
Computer In port
desktop adapter
projector video cable
Macintosh
Video-out cable
video cable directly to the computer without using a video-out
cable. In addition, PowerBook configurations vary, so the location
of your computer’s ports may not match the illustration. See your
computer manual for additional information on connecting a video
cable.
1. Turn off the projector and your PowerBook, if they’re on.
2. Connect either end of the projector’s video cable to the
projector’s Computer In port.
38
1 • Setting Up the Projector
Page 47

3. Locate the Macintosh desktop adapter that came with your
projector and remove the small cover, as shown below.
4. Set the DIP switches on the desktop adapter to select the
resolutions you want to use. See your Macintosh documentation
for instructions.
5. Connect the small terminal of the Macintosh desktop adapter to
the other end of the video cable that came with your projector.
projector video cable
Macintosh desktop
adapter
Connecting to a Computer
39
Page 48

6. If your PowerBook requires a video-out cable, connect the
smaller end to the video-out connector on the back of the
PowerBook. Then connect the other end to the projector’s video
cable (with the Macintosh desktop adapter attached).
7. Tighten the screws on all the connectors.
40
1 • Setting Up the Projector
Page 49

Connecting the projector’s audio cable
1. If you want to use audio, connect one end of the audio that came
with the projector to the projector’s Audio In jack.
2. Connect the other end of the audio cable to the audio out port on
your computer.
Audio In jack
audio cable
Connecting to a Computer
41
Page 50

Connecting the projector’s mouse cable
Connect the Macintosh mouse cable that came with your projector if
you want to use the projector’s remote control as a mouse pointer
for your Macintosh.
If you’ll be using the optional ELP Link III software, you need
Note:
to connect the Macintosh mouse cable included in the ELP Link III
kit instead. See Chapter 4 for instructions.
Mouse/Com port
Mac mouse cable
42
1. Connect the small end of the projector’s Mac mouse cable to the
mouse port on your PowerBook.
2. Connect the cable’s other end to the projector’s Mouse/Com
port.
1 • Setting Up the Projector
Page 51

Connecting to a Video Source Other Than a Computer
In addition to your computer, you can connect a VCR, camcorder,
DVD player, or any other compatible video source to your projector.
If you want, you can connect a single video source, such as a VCR.
You don’t have to connect a computer unless you want to use the
optional ELP Link III software. You can also connect a computer
plus a second video source simultaneously. If your video source has
audio capability, it can also be an audio source.
The projector can receive composite video or S-Video:
p
If your video device has a one-pin RCA video jack, it’s a
composite video source. Use the audio/video (A/V) cable
supplied with the projector to connect the projector to your
video device.
p
If your video device has a four-pin video jack, it’s an S-Video
source. To connect the video device to your projector, use the
S-Video cable supplied with your video device, or obtain an
S-Video cable from your computer dealer.
The projector is not compatible with a cable TV-style F
Note:
connector.
If both a composite video and S-Video device are connected to the
projector, the projector automatically selects S-Video as the default
video source. To display composite video, disconnect the S-Video
device.
Connecting to a Video Source Other Than a Computer
43
Page 52

The projector supports NTSC, PAL, PAL60, and SECAM video
formats, and automatically detects and identifies the video format.
However, if automatic selection is not possible for some reason, you
can specify that a specific video format be detected (see page 74).
If you change the Video Signal setting in the Setting menu to
Note:
specify a particular video format, the projector will be able to detect
only the format specified. To have the projector automatically detect
any supported video format, reset the Video Signal setting to Auto.
Follow these steps to connect a video device:
1. Turn off the projector and video device, if they’re on.
2. Locate the appropriate video cable:
p
If your video source has a large, round, four-prong S-Video
connector, use the cable that came with your video device, or
purchase an S-Video cable from your computer dealer.
p
If your video source has a small, round, one-prong composite
(RCA) video connector, use the audio/video (A/V) cable that
came with the projector. (The A/V cable has three RCA
plugs on either end of the cable.)
44
1 • Setting Up the Projector
Page 53

3. For S-Video, insert one end of an S-Video cable into the
projector’s S-Video In connector. Insert the other end into the
S-Video Out jack on your video device.
S-Video In
connector
S-Video cable
If you want to use your S-Video device as an audio source too,
follow the instructions earlier in this chapter for connecting the
projector’s audio cable, except connect it to your S-Video
device instead of your computer.
Connecting to a Video Source Other Than a Computer
45
Page 54

4. For composite video, connect the yellow RCA plug on one end
of the audio/video cable to the projector’s Video In port.
Connect the other yellow RCA plug to the video-out jack on
your video device.
L Audio
R Audio
Video In port
audio/video (A/V) cable
If you want to use your composite video device as an audio
source too, connect the other plugs on the audio/video cable to
the Audio jacks on the projector: insert the white plug into the L
Audio jack and the red plug into the R Audio jack. Connect the
plugs at the other end of the audio/video cable to the audio
output jacks on your video device.
46
1 • Setting Up the Projector
Page 55

Connecting to an External Speaker or Public Address
System
Although the projector’s internal speakers are enough for most
small- or medium-size rooms, you can connect the projector to an
external speaker or public address (PA) system for large rooms or to
gain maximum benefit from the projector’s built-in 3D sound
function.
To connect the projector to an external sound system, you need to
get an RCA-to-3.5 mm stereo audio cable from your computer
dealer.
1. Turn off the projector and speaker or PA system, if they’re on.
2. Connect the cable’s 3.5 mm stereo miniplug to the projector’s
Audio Out jack.
stereo audio
cable
Audio Out jack
Connecting to an External Speaker or Public Address System
47
Page 56

3. Connect the RCA plugs to the speaker or PA system. Insert the
cable’s red plug into the Audio R jack, and the white plug into
the Audio L jack.
48
1 • Setting Up the Projector
Page 57

Turning the Equipment On and Off
It’s best to turn on the projector and its attached equipment in the
following order:
1. Video source (such as a VCR), if your video source is not your
computer
2. Audio source (if different from the computer or video source)
3. External amplified speaker or PA system (if you’ve connected
one)
4. Projector (see instructions below)
5. Computer
When you’re ready to turn off the equipment, do so in the reverse
order.
Turning the Projector On and Off
Before you turn on the projector, make sure it is plugged in and
connected to your video source.
1. Remove the projector lens cap.
2. Turn on the main power switch located at the rear of the
projector and wait until the power light turns orange.
Turning the Equipment On and Off
49
Page 58

3. Press the Power button on the remote control or the control
panel on top of the projector. The power light flashes green as
the projector warms up. When the projector is fully warmed up,
this light remains green.
If computer or video equipment is attached, the computer or video
signal is projected. Allow about 30 seconds for full illumination.
Warning:
Never look into the lens when the lamp is on. This can
damage your eyes. It is especially important that children not look
into the lens.
When you want to stop projecting images, press the Power button
again. The fan remains on and the power light flashes orange for
about two minutes as the projector cools down.
Projecting an image for an extended time may cause an
Note:
afterimage to appear on the screen.
power light
projector lamp light
temperature light
50
1 • Setting Up the Projector
Page 59

Sleep Mode
When the projector has cooled down, the power light stops flashing
and remains orange.
To turn off the projector completely, wait until it cools down and the
power light stops flashing. Then turn off the switch on the back of
the projector.
If you press the Power button to turn the projector back on
Note:
while the power light is orange, there may be a delay before a
projected image appears.
Sleep mode conserves electricity by automatically turning off the
lamp after the projector has not been used for 30 minutes. In sleep
mode, the projector’s power light turns a steady orange and only a
minimum amount of the projector’s circuitry remains on. This
conserves electricity, cools the projector, and extends the life of the
lamp.
When the projector is in sleep mode, press the Power button to
resume projecting images, or press the power switch on the back of
the projector to turn it off.
Turning the Equipment On and Off
51
Page 60

2
Using the Projector
T
his chapter provides instructions for the following:
p
Positioning the projector relative to the screen
p
Focusing and positioning the screen image
p
Using the remote control and control panel to control
the projector
p
Monitoring the projector’s operating status
49
Page 61

The illustration below identifies the parts of your projector.
status lights
rear feet (left
foot not visible)
hand strap
connectors
control panel
infrared receiver
speakers
adjustable foot
projector
lens/focus/zoom
foot adjust levers
50
2 • Using the Projector
Page 62

Positioning the Projector
Your projector supports front, rear, and ceiling projection, allowing
you to choose the best method for displaying your images. If you
use rear or ceiling projection, you need to select a special mode in
the projector’s Setting menu. See page 76 for more information.
To get the best results, it’s important to position the projector at the
proper height and distance relative to the screen.
When projecting from a table or desk, place the projector so the lens
is aligned as closely as possible with the bottom of your screen:
Positioning the Projector
51
Page 63

When projecting from the ceiling, align the lens as closely as
possible with the top of your screen:
Calculating Image Size and Projection Distance
The distance between the projector and the screen determines the
actual image size. To determine the exact distance required for a
particular image size (or to determine the size of an image at a
particular distance), use the formulas given below. (Remember that
the size of the image can also be changed by rotating the zoom ring;
see page 54 for more information.)
52
2 • Using the Projector
Page 64

To determine the minimum and maximum diagonal size of an image
when you know the projection distance:
p
Inches:
Maximum diagonal size = (0.6038 × projection distance) +
1.8898
Minimum diagonal size = (0.4631 × projection distance) +
1.4000
p
Centimeters:
Maximum diagonal size = (0.6038 × projection distance) +
4.8001
Minimum diagonal size = (0.4631 × projection distance) +
3.5560
To determine the projection distance when you know the diagonal
size of the screen image:
p
Inches:
Maximum projection distance = (2.1593 × diagonal size)
−
3.0229
Minimum projection distance = (1.6562 × diagonal size) −
3.1291
p
Centimeters:
Maximum projection distance = (2.1593 × diagonal size) −
7.6782
Minimum projection distance = (1.6562 × diagonal size) −
4.2068
Positioning the Projector
53
Page 65

For example, here are the measurements for three installations:
Horizontal distance from projector to screen
Image size (diagonal)
300 inches* (762 cm) 494 inches (12.6 m) 639 inches (16.3 m)
200 inches (508 cm) 328 inches (8.4 m) 423 inches (10.8 m)
100 inches (254 cm) 163 inches (4.2 m) 213 inches (5.4 m)
* For an image size of 300 inches, the projector may be up to 53.7 feet away from the
screen, depending on the setting of the zoom ring.
Minimum Maximum
54
2 • Using the Projector
Page 66

Focusing and Positioning the Screen Image
When an image appears on screen, check that it is in focus and
correctly positioned on the screen.
zoom ring
p
To focus the image, rotate the focus ring (the front ring on the
lens).
p
To adjust the size of the image, rotate the zoom ring (the rear
ring). Rotate the zoom ring clockwise (facing the projector) to
make the screen image larger or counterclockwise to make it
smaller.
focus ring
Focusing and Positioning the Screen Image
55
Page 67
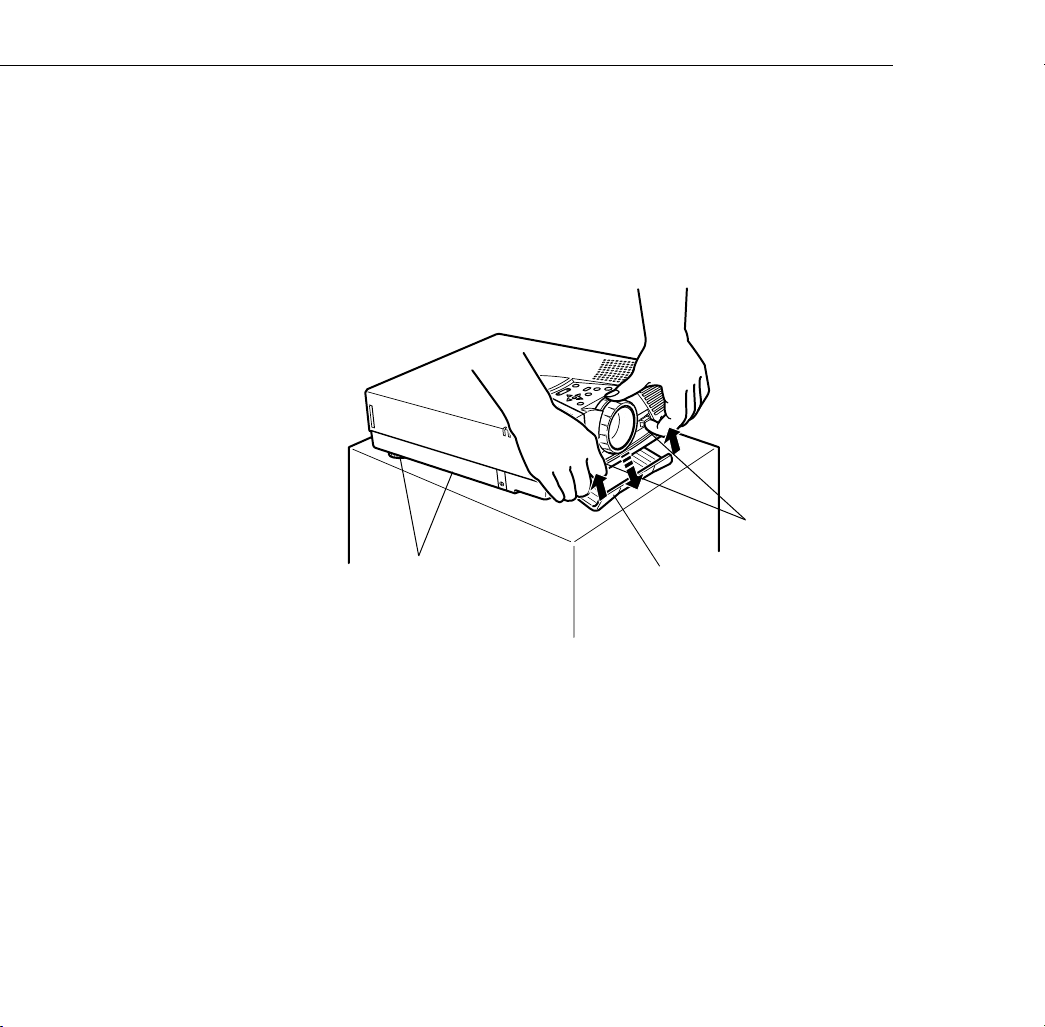
If you need to raise or lower the image on the screen, extend or
retract the foot at the bottom front of the projector as follows:
1. Stand behind the projector and support the front of it while you
lift the blue foot adjust levers above the adjustable foot. This
unlocks the foot so it can move up and down. Be careful not to
drop the projector.
foot adjust levers
56
rear feet (left
foot not visible)
Caution:
Don’t hold or lift the projector by its lens. This can
adjustable foot
damage the lens.
2. While lifting the foot adjust levers, raise or lower the projector
until the screen image is correctly positioned.
2 • Using the Projector
Page 68

3. Release the levers to lock the foot in its new position. Make sure
the foot is locked before letting go of the projector.
4. If the projector is not on a level surface, level the projector by
turning one of its rear feet to adjust its height.
Resizing the Projected Image
The Resize button lets you select the projection method for certain
types of image signals input from a computer. Press the Resize
button on the control panel or the remote control to select one of the
following projection methods for your projector.
PowerLite 5550C:
p
With images less than SVGA size (800 × 600 pixels), you can
either display the image in the center of the projection area or
display it full size.
p
With images greater than SVGA size (up to 1024 × 768 pixels),
you can project the entire image in a compressed format. If you
keep pressing the Resize button, the projector will pan around
areas of the image. The projector automatically reduces the
image size to the projector’s maximum resolution.
The Resize button cannot be used with images at SVGA
Note:
resolution.
PowerLite 7550C:
p
With images less than XGA size (1024 × 768 pixels), you can
either display the image in the center of the projection area or
display it full size.
Focusing and Positioning the Screen Image
57
Page 69

p
With images greater than XGA size, you can either project a
portion of the image or project the entire image in a compressed
format. If you keep pressing the Resize button, the projector
will pan around areas of the image. The projector automatically
reduces the image size to the projector’s maximum resolution.
The Resize button cannot be used with images at XGA
Note:
resolution.
Controlling the Projector
You can use the remote control or the control panel on top of the
projector to do the following:
p
Turn the power on or off
p
Display the help menu
p
Switch between input sources (video or computer)
p
Access the projector menus to adjust video, audio, and basic
projector settings
p
Resize the projected image (see “Resizing the Projected Image”
on page 56)
p
Adjust the volume
p
Temporarily display a blank screen and turn off sound
(AV/Mute button)
p
Freeze the display (remote control only)
p
Display special effects assigned to the Effects buttons (remote
control only)
58
2 • Using the Projector
Page 70

Using the Remote Control
pointer button
top multi-purpose
button
The remote control uses a line-of-sight infrared signal. To use the
remote control, point it toward the infrared receiver located at the
front of the projector (see page 50).
bottom multi-purpose
button
To be able to use the remote control as a wireless mouse,
Note:
make sure you’ve connected the mouse cable to the projector and
your computer. (See Chapter 1 for instructions.)
Controlling the Projector
59
Page 71

You can use the remote control up to 32.8 feet (10 meters) from the
projector. (This distance may be shorter if the remote control
batteries are low.) You must also hold the remote control so that it is
within
±30°
left or right of, and ± 15° higher or lower than, the
infrared receiver.
If the projector doesn’t respond to remote commands, the
Note:
room may be too light or a strong light source (such as direct
sunlight) may be hitting the infrared receiver. The presence of a
certain type of fluorescent light or equipment emitting infrared
energy (such as a radiant room heater) can also interfere with
transmission of remote commands.
This table summarizes the functions on the remote control.
Button Function
Source Switches the input source between computer and video.
60
Menu Displays or hides the active menu. When a submenu is displayed,
returns to the main menu.
Effects buttons Press each Effects button to use its assigned function. The function
may be a factory default, or you can assign a new one with the
optional ELP Link III software. See “Using the Effects buttons” on
page 60 for default settings.
Pointer button Lets you navigate the menus. Press left or right to select menu
options. Can also be used as a mouse pointer in place of the
computer’s mouse pointer. (The projector must be connected to the
computer with the mouse cable included with the projector, or with
the ELP Link III mouse cable.)
2 • Using the Projector
Page 72

Button Function
Top
multi-purpose
button
Bottom
multi-purpose
button
AV/Mute Turns the projector’s audio and video output off and back on
Resize Resizes the image on the screen to match the resolution of your
Custom Lets you zoom the image using the top (zoom out) and bottom
Freeze Keeps the current computer or video image on the screen until
Help Displays the Help menu. See“Using the Online Help Menu” on
– Volume +
Power Turns the projector lamp on or off.
Using the Effects buttons
Acts as a right mouse click. Press to open submenus.
Acts as a left mouse click. Press to open submenus.
again—clears all special effects, and displays a black, blue, or
user-defined logo screen.
computer display. See page 56 for details.
(zoom in) multi-purpose buttons.
pressed again.
page 140 for details.
Adjusts the volume.
The Effects buttons on the remote control allow you to enhance your
presentation with special effects (for example, you can use
highlighting or a box or line to emphasize different parts of the
Controlling the Projector
61
Page 73

screen). Each button is assigned a function in the factory. You can
use the Effect menu to modify the appearance and behavior of these
functions. (See “Modifying the Special Effects” on page 81.)
If you have the optional ELP Link III software, you can assign
different functions to each button, or you can program buttons with
your own functions. (See “Assigning Functions to the Effects
Buttons” on page 102 for details.)
To cancel a function, press the bottom multi-purpose button twice.
To repeat a function, move the pointer to a new location and repeat
the process.
The following table summarizes the default assignments.
Button Function Description
1 Pointer Displays the pointer as a three-dimensional arrow (or
2 Box Draws a box on the screen:
other user-defined shape) rather than a flat black
arrow.
Press the Effects button, then press the bottom
multi-purpose button once to define the position of
one corner. Use the pointer button to move the
pointer. Then press the bottom multipurpose button again to define the position of the
opposite corner of the box.
62
2 • Using the Projector
Page 74

Button Function Description
3 Line Draws a straight line on the screen:
Press the Effects button, then press the bottom
multi-purpose button once to define the line position.
To draw another line, move the pointer away from the
line you just created and press the bottom
multi-purpose button again to define the new line
position.
4 Marker Lets you highlight an area of the screen with a colored
5 Clear Clears the screen of all special effects.
bar:
Press the Effects button, then press the bottom
multi-purpose button once to define the start position
for the bar. Use the pointer button to select the end
point of the bar. To draw another bar, move the
pointer to the area you want to highlight and repeat
the process. (This function can create horizontal and
vertical bars only; it cannot draw diagonal lines.)
Controlling the Projector
63
Page 75

Using the Control Panel
Although you must use the remote control to access custom
features, such as functions assigned to the Effects buttons, you can
use the control panel to perform most standard operations, such as
selecting menu options, adjusting volume, or resizing the image on
the screen.
Enter button
64
2 • Using the Projector
Page 76

The following table summarizes the functions on the control panel.
Button Function
Power Turns the projector lamp on or off.
Source Switches the input source between computer and video.
Menu Displays or hides the active menu.
Up, down
arrows
(Sync+/Sync-)
Left, right
arrows
(tracking-/
tracking+)
Enter Selects a menu option.
Resize Resizes the image on the screen to match the resolution of your
AV/Mute Turns the projector’s audio and video output off and back on
– Volume +
Help Displays the Help menu. See “Using the Online Help Menu” on
Synchronize the computer’s graphic signal to remove flicker. Also
let you navigate menus.
Correct vertical fuzzy lines by matching the projector’s internal
clock to various computer graphic signals (tracking adjustment).
Change menu settings.
computer display. See page 56 for details.
again—clears all special effects, and displays a black, blue, or
user-defined logo screen.
Adjusts the volume.
page 140 for details.
Controlling the Projector
65
Page 77

Projector Status Lights
The lights on top of the projector tell you about its operating status.
power light
projector lamp light
temperature light
66
Caution:
A red light warns you if a serious problem occurs. See
Chapter 6, “Troubleshooting,” for what to do if a warning light
comes on.
2 • Using the Projector
Page 78

Power Light
Light status Meaning
Steady orange The projector is in sleep mode. (The projector is plugged in, but
not projecting.)
Steady green Power and projector lamp are on.
Flashing green The projector is warming up. Allow about 30 seconds.
Flashing orange The projector is cooling down.
Off There is an internal projector problem, or the power to the
projector has been cut off.
Projector Status Lights
67
Page 79

Projector Lamp Light
Light status Meaning
Orange and red
flashing alternately
The lamp needs to be replaced. See “Replacing the Lamp” on
page 134 for instructions.
Steady red Projector lamp has burned out. Replace it to project images. See
Flashing red There’s a problem with the projector lamp, lamp power supply, or
Off The lamp is functioning normally.
Temperature Light
Light status Meaning
Flashing orange Projector is too hot.
Steady red Projector has turned off automatically because of overheating.
Flashing red There’s a problem with the cooling fan or temperature sensor. Call
Off The projector is functioning normally.
“Replacing the Lamp” on page 134 for instructions.
lamp fuse, or a circuit malfunctioned in the projector.
a service representative.
68
2 • Using the Projector
Page 80

3
Adjusting Projector Settings
Y
ou can use the buttons on the remote control or the projector’s
control panel to access seven projector menus, which let you control
the following settings:
p
The Video menu controls the look and quality of the projected
image, whether the image source is a computer or another video
source (for example, a VCR).
p
The Audio menu controls audio features, such as the volume
level, tone setting, and stereo sound.
p
The Setting menu lets you adjust basic projector options.
p
The User’s Logo menu lets you define a logo for the screen and
assign it to the AV/Mute button.
67
Page 81

p
The Effect menu lets you modify the appearance of the default
special effects assigned to the Effects buttons on the remote
control. (To assign different functions to the buttons, you need
the optional ELP Link III software. See “Assigning Functions to
the Effects Buttons” on page 102 for more information.)
p
The About menu displays basic information about the projector,
such as the number of hours the lamp has been used or the video
signal being used.
p
The Reset All menu returns the settings in all menus to their
factory defaults.
If you have the optional ELP Link III software, you can also
Note:
adjust these settings from your computer. See “Changing Projector
Settings” on page 118 for more information.
68
3 • Adjusting Projector Settings
Page 82

Accessing the Main Menu
To display the Main menu, press the Menu button on the control
panel or the remote control. The Main menu appears:
Press the Menu button again to hide the menu.
Accessing the Main Menu
69
Page 83

Changing a Menu Setting
To change a menu setting:
1. Press the Menu button on the control panel or remote control to
display the Main menu.
2. Press the up or down arrows (control panel) or press up or down
on the pointer button (remote) to scroll through the menu
choices.
up and down
buttons
pointer
button
70
As you select a menu, a submenu of options appears to the right.
The options available in some submenus vary, depending on
whether the current image source is the computer or a video
source.
3 • Adjusting Projector Settings
Page 84

3. Press either the Enter button (control panel) or the top or
bottom multi-purpose button (remote) to move to a submenu
list.
The following screen display shows the options for the Video
menu when the image source is the computer.
4. Press the up or down arrows (control panel) or press up or down
on the pointer button (remote) to scroll through the submenu
options.
5. Press either the left or right arrow buttons (control panel) or
press right or left on the pointer button (remote) to change a
setting on one of the submenus.
6. When you have finished changing settings, press the Menu
button to go back to the Main menu (you may need to press it
more than once). Your changes are saved automatically.
Changing a Menu Setting
71
Page 85

Adjusting Video Settings (Image Source = Computer)
You can adjust the projected image by using the Video menu. The
following options are available when the image source is Computer.
The computer must be connected and operating, and the
Note:
image source on the projector must be set to Computer for you to
access these menu options. To change the image source on the
projector, press the Source button on the remote control or control
panel.
Menu item Description
72
Position Select this item by pressing the Enter
top or bottom multi-purpose button (remote) to enter screen position
(H/V) adjustment mode. Then use the pointer button (remote) or up,
down, left, and right buttons (control panel) to move the screen position
in the corresponding direction.
When you finish making adjustments, press the Menu button on the
control panel or the remote to return to the Video menu.
Tracking Matches the projector’s internal clock to various computer graphic
signals. Adjust this setting to remove vertical lines from the image.
Sync. Synchronizes with the tracking signal sent from the computer. Adjust
this setting to correct fuzziness or screen flicker.
Brightness Lightens or darkens the overall image. Increase brightness to lighten an
image, or decrease it to darken the image.
Contrast Adjusts the difference between light and dark areas. Increase the
contrast to make light areas lighter and dark areas darker. Decrease it to
minimize the difference between light and dark areas.
3 • Adjusting Projector Settings
button (control panel) or the
Page 86

Menu item Description
Color Adjusts the color balance of the input source.
Select this item by pressing the Enter
either multi-purpose button on the remote. The projector enters color
adjustment mode. Use the pointer button (remote) or up and down
buttons (control panel) to select a color.
Next, use the pointer button (remote) or left and right buttons (control
panel) to adjust the selected color. Increase the setting for more intense
color, or lower the setting for less intense color.
When you finish making adjustments, press the Menu button on the
control panel or the remote to return to the Video menu.
Auto Set Up When enabled, this feature allows the projector to sense the computer
signal input and adjust it to the current projector settings. If the
projector doesn’t automatically recognize the video source, disable this
option. Then adjust the tracking and sync settings. If this does not
resolve the problem, try setting your computer’s video to a different
resolution or refresh rate.
Reset Returns all menu items to their factory defaults.
Select this item and then press the Enter
either multi-purpose button (remote) to display the confirmation screen.
Next, select Yes and then press the Enter
multi-purpose button (remote) to reset the menu.
If you change your mind, select No and then press a multipurpose button (remote) or the Enter
the confirmation screen without changing any settings.
button (control panel) or press
button (control panel) or
button (control panel) or a
button (control panel) to clear
Adjusting Video Settings (Image Source = Computer)
73
Page 87

Adjusting Video Settings (Image Source = Video)
You can adjust the projected image by using the Video menu. The
following options are available when the image source is Video.
The projector’s image source must be set to Video, and the
Note:
video source (such as a VCR or camcorder) must be connected and
operating for you to access these menu options (for example, the
projector must actually be projecting an image from a video tape, if
you’re using a VCR). To change the image source on the projector,
press the Source button on either the remote control or control
panel.
Menu item Description
Brightness Lightens or darkens the overall image. Increase brightness to lighten an
image, or decrease it to darken the image.
74
Contrast Adjusts the difference between light and dark areas. Increase the
Color Adjusts color density. Increase the setting for darker and more opaque
Tint
(NTSC only)
Sharpness Adjusts the sharpness of the screen image.
3 • Adjusting Projector Settings
contrast to make light areas lighter and dark areas darker. Decrease it to
minimize the difference between light and dark areas.
colors. Decrease it for lighter and less opaque colors.
Adjusts the red-green color balance of the screen. Increase tint to add
more green, or decrease it to add more red. This setting only works with
NTSC video signals.
Page 88

Menu item Description
Reset Returns all menu items to their factory defaults.
Select this item and then press the Enter
multi-purpose button (remote) to display the confirmation screen. Next,
select Yes and then press a multi-purpose button (remote) or the Enter
button (control panel) to reset the Video Menu.
If you change your mind, select No and then press a multi-purpose
button (remote) or the Enter
confirmation screen without changing any settings.
Adjusting Audio Settings
You can use the Audio menu to adjust the settings shown in the
following table.
Menu item Description
Volume Adjusts the volume level for the speakers and audio-out terminal.
button (control panel) or a
button (control panel) to clear the
Treble Adjusts the treble tone of the speakers. Press the right arrow button
(control panel) or press right on the pointer button (remote) to increase
the treble tone. Press the left arrow button (control panel) or left on the
pointer button (remote) to decrease the treble tone.
Bass Adjusts the bass tone of the speakers. See Treble for details.
SRS SPACE Adjusts stereo sound. Increasing the value widens the sound.
Adjusting Audio Settings
75
Page 89

Menu item Description
SRS
CENTER
Reset Returns all menu items to their factory defaults.
Adjusts stereo sound. Use this setting to balance the stereo sound.
Select this item and then press the Enter
multi-purpose button (remote) to display the confirmation screen. Next,
select Yes and then press a multipurpose button (remote) or the Enter
the Video menu.
If you change your mind, select No and then press a multipurpose button (remote) or the Enter
the confirmation screen without changing any settings.
Changing Basic Projector Settings
You can adjust basic projector settings by using the Setting menu.
Menu item Description
Prompt Temporarily displays a message on the projector screen to identify
Color
Temperature
which source (computer or video) is providing the image. Select OFF
if you don’t want this prompt to appear.
Adjusts the whiteness of the screen. Positive color temperature values
provide a cold white; negative values provide a warmer white. Press
the right arrow button (control panel) or press right on the pointer
button (remote) to increase the color temperature value. Press the left
arrow button (control panel) or left on the pointer button (remote) to
decrease the color temperature value.
button (control panel) or a
button (control panel) to reset
button (control panel) to clear
76
3 • Adjusting Projector Settings
Page 90

Menu item Description
Ceiling Flips the projected image so it looks correct when you’re hanging the
projector upside-down from the ceiling. Selecting ON turns this
feature on, while OFF turns it off (for a normal image).
Rear Projection Mirrors the projected image so it looks correct when you’re projecting
Blank
(AV/Mute)
Video Signal
Language Selects the menu language: Japanese, English, French, German,
Reset Returns all menu items to their factory defaults.
from behind onto a translucent screen. Selecting ON turns mirroring
on, while OFF turns it off (for a normal image).
Specifies whether a black screen, a blue screen, or a user-defined logo
displays when the screen is blanked. See page 78 and page 126 for
more information about creating a user logo.
Specifies the input image signal mode. You can select from AUTO,
NTSC, NTSC 4.43, PAL, PAL N, PAL M, PAL 60, and SECAM.
Italian, Spanish, or Portuguese.
Select this item and then press the Enter
a multi-purpose button (remote) to display the confirmation screen.
Next, select Yes and then press a multi-purpose button (remote) or the
Enter
If you change your mind, select No and then press a multi-purpose
button (remote) or the Enter
confirmation screen without changing any settings.
button (control panel) to reset the Setting menu.
button (control panel) to clear the
button (control panel) or
Changing Basic Projector Settings
77
Page 91

Creating and Assigning a User Logo
You can use the User’s Logo menu to define a logo for the screen
and assign it to the AV/Mute button. Once you’ve assigned a logo,
you can press the AV/Mute button on either the remote control or
the control panel to display the logo.
Creating the User Logo
Follow these steps to create and store a logo:
1. Display the image (with the projector) you wish to use as a logo.
2. Press the Menu button to open the Main menu.
3. Select the User’s Logo menu by pressing the down arrow button
on the control panel or the pointer button on the remote control.
Then press the Enter button to display the User’s Logo Setting
window.
4. The message, “Do you use the present image as a user logo?”
appears on the screen. Choose Yes or No by pressing the left or
right arrow buttons on the control panel or pressing left or right
on the pointer on the remote control. Then press Enter.
5. A selection box appears over the image. To select the portion of
the image you wish to use as the logo, use the arrow buttons on
the control panel or the pointer button on the remote control.
Once you’ve selected the desired area, press the Enter button.
78
3 • Adjusting Projector Settings
Page 92

6. The message “Do you use this image?” appears on the screen.
Select Yes and press the Enter button. If you want to change the
position, select No.
7. Next, the Zoom rate setting window appears on the screen.
Select a rate using the arrow buttons or pointer, then press the
Enter button.
8. The message “Do you save the user logo?” appears on the
screen. Select Yes and press the Enter button. If you don’t want
to save the logo, select No.
Saving the logo may take a moment. Don’t use the
Note:
projector or other sources (computer, video, speaker, etc.)
while the logo is being saved.
9. When the message “Saving the user logo is completed.” appears
on the screen, press the Menu or Enter button to display the
Main menu.
Creating and Assigning a User Logo
79
Page 93

Assigning the Logo to the AV/Mute Button
Follow these steps to assign the logo to the AV/Mute button:
1. Press the Menu button to open the Main menu.
2. Select the Setting menu and press the Enter button.
3. Select the Blank (AV/Mute) option, then highlight Logo.
4. Press the Menu button to return to the Main menu.
Now you can press the AV/Mute button on the control panel or the
remote control to display your logo. Press it again when you want to
stop displaying the logo.
80
3 • Adjusting Projector Settings
Page 94

Modifying the Special Effects
The Effect menu lets you modify the appearance of special effects.
You can also use it to change the cursor speed or reset the Effects
buttons to their factory defaults.
Item Description
Pointer Changes the pointer’s shape and size. (This is similar to the
Box Specifies the color of the box outline.
Line Specifies the line width and color.
Marker Specifies the color and width of highlighting.
Clear Clears the screen of special effects.
Cursor Speed Sets the cursor (pointer) speed to Low, Middle, or High.
Reset Returns all functions assigned to the Effects buttons to their
Cursor Change function in the ELP Link III software; see
page 105 and page 109.)
factory defaults.
Select this item and then press the Enter
panel) or a multi-purpose button (remote) to display the
confirmation screen. Next, select Yes and then press a
multi-purpose button (remote) or the
Enter
If you change your mind, select No and then press a
multi-purpose button (remote) or the Enter
panel) to clear the confirmation screen without changing any
settings.
button (control panel) to reset the Effect menu.
button (control
button (control
Modifying the Special Effects
81
Page 95

If you have the optional ELP Link III software, you can reconfigure
the Effects buttons with different functions. See “Assigning
Functions to the Effects Buttons” on page 102 for more information.
Displaying Information About Your Projector
The About menu displays information about your projector. You see
the following when the image source is Computer:
Item Description
Frequency Displays the horizontal and vertical frequency of the computer.
Resolution Displays the output resolution of the computer video output.
Refresh Rate Displays the refresh rate of the computer video output.
82
Lamp Displays the number of hours the current lamp has been used. The
lamp light flashes orange and red when the projector lamp is near the
end of its normal life. When this happens, replace the projector lamp
with a new one as soon as possible.
You see the following when the image source is Video:
Item Description
Video Signal Displays the video signal.
Lamp Displays the number of hours the current lamp has been used. The
lamp light flashes orange and red when the projector lamp is near the
end of its normal life. When this happens, replace the lamp with a new
one as soon as possible.
3 • Adjusting Projector Settings
Page 96

Resetting All Menu Options
Selecting the Reset All menu option from the Main Menu resets the
settings in all menus to their factory defaults. It does not change or
delete any user logo you may have stored.
You will be prompted to confirm the reset action. Select Yes or No,
then press the top or bottom multi-purpose button (remote) or the
Enter button (control panel) to reset all the settings.
Resetting All Menu Options
83
Page 97

84
3 • Adjusting Projector Settings
Page 98

4
Using ELP Link III
T
he optional ELP Link III software gives you greater flexibility in
using your projector. Its most important advantage is that it allows
you to control the projector from a computer. However, it also lets
you do the following:
p
Reconfigure the remote control’s Effects buttons with a wider
range of functions, and even program Effects buttons with your
own functions
p
Assign functions to your keyboard so that you can enable
special effects without using the remote control
p
Test projector performance
p
Adjust the images you project to show greater detail
85
Page 99

If your computer doesn’t have a PS/2 mouse connector, you
Note:
must use the ELP Link III kit to connect the projector to a computer.
If you purchased the optional ELP Link III kit, you need to connect
the special ELP Link III cables after you’ve finished connecting the
projector’s power cable, video cable, and audio cable (if needed), as
described in Chapter 1.
This chapter covers:
p
Unpacking the ELP Link III kit
p
Connecting the ELP Link III cables
p
Installing the software
p
Using the software
Unpacking the ELP Link III Kit
When you unpack the ELP Link III kit, make sure you have all these
components:
Main cable
86
4 • Using ELP Link III
9-pin serial cable (PC set)
Page 100

PS/2 mouse cable* (PC set)
Serial mouse cable (PC set)
Mouse cable* (Mac set)
Serial cable (Mac set)
ELP Link III software on CD-ROM
(PC or Mac)
* These mouse cables are different from the cables included with
your projector.
Connecting the ELP Link III Cables
To use the ELP Link III software, you need to connect the ELP
Link III main cable and the special ELP Link III serial cable. If you
want to use the remote control as a mouse, you also need to connect
the ELP Link III mouse cable.
Connecting the ELP Link III Cables
87
 Loading...