

Page 1

For Customers Using Windows for Network
Connections
When using a different operating system or architecture for the
server and client, the connection may not work properly using the
procedures described in the Printer Software section of the
manual. Please set up the connection according to the procedures
shown below.
Setting Up a Shared Printer
Server Settings
Please refer to the manual for the appropriate printer.
[Printer Software] – [Setting Up Your Printer on a Network] –
[Setting the printer server]
Client Settings
Note:
If the printer drivers are not already installed on the client, please install
them before performing these settings.
English
BPS0044-00
1
Page 2

Windows NT4.0/2000/XP/Vista
1. On the Windows Start menu, open the Printers or Printers
and Faxes folder.
• Windows Vista
Click Start, click Control Panel, and then click Printers.
• Windows NT4.0/2000
Click Start, click Settings, and then click Printers.
• Windows XP Professional
Click Start and then click Printers and Faxes.
• Windows XP Home Edition
Click Start, click Control Panel, and then click Printers and
Faxes.
2. Right-click the icon for the printer you wish to change the
settings for, and then click Properties.
2
Page 3
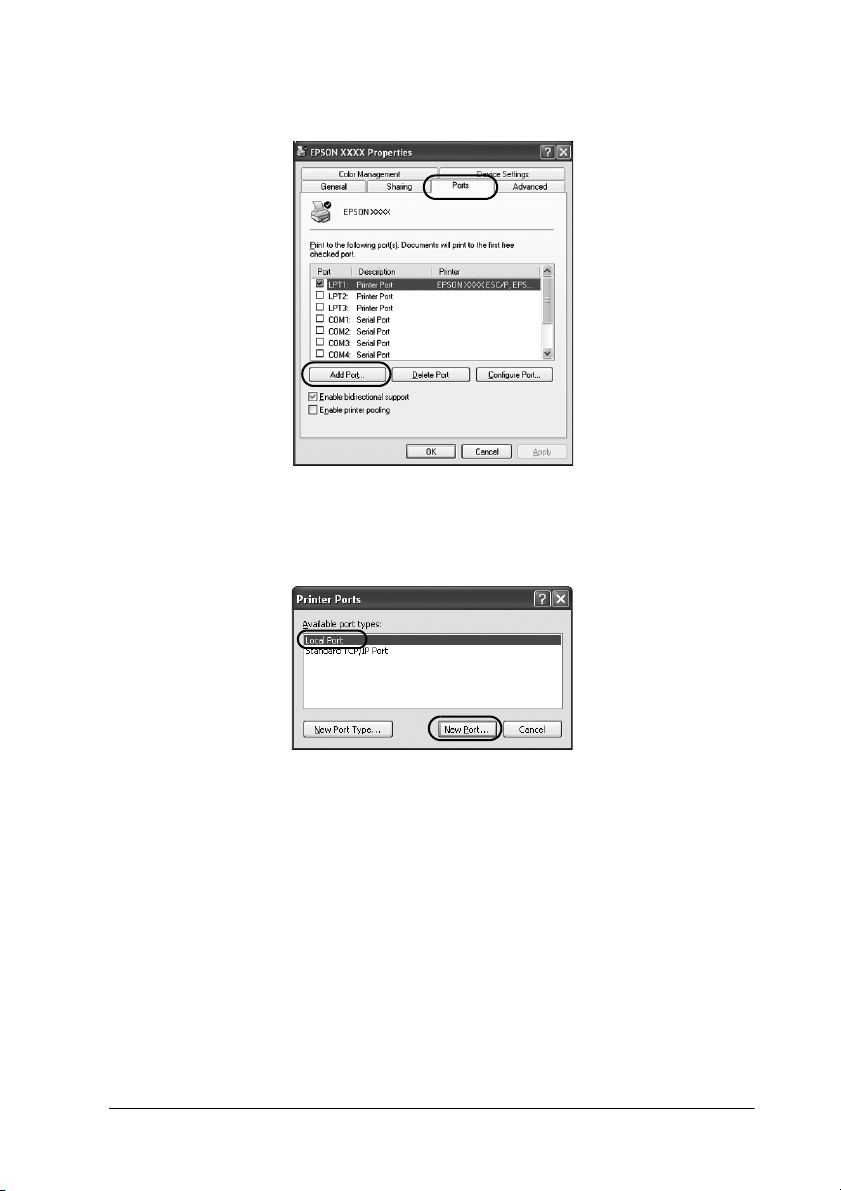
3. Click the Ports tab and then click Add Port.
4. When the Printer Ports window appears, select Local Port,
and then click New Port.
3
Page 4

5. Enter the following information for the port name and then
click OK.
\\Name of computer connected to the target printer\name of
shared printer
6. After returning to the Printer Ports window, click Close.
7. Check that the name you entered for the port has been added
and selected, and then click Close.
4
Page 5

Windows 95/98/Me
1. On the Windows Start menu, click Settings and then click
Printers.
2. Right-click the icon for the printer you wish to change the
settings for, and then click Properties.
3. Click the Details tab and then click Add Port.
5
Page 6

4. Click Network, enter the following information for Specify
the network path to the printer, and then click OK.
\\Name of computer connected to the target printer\name of
shared printer
Note:
If you do not know the path to the network printer, click Browse to
search for the appropriate printer.
6
Page 7

5. Check that the port name you added is selected for Print to
the following port, and then click OK.
Important:
When using the same operating systems or architectures for servers
and clients, the connection can be set up according to the procedures
described in the manual.
[Printer Software] – [Setting Up Your Printer on a Network] –
[Setting the clients]
7
Page 8

Problems and Solutions
Network problems
A communication error occurs
Cause What to do
Are multiple users are logged into
a single computer at the same time?
You are unable to monitor the shared printer using EPSON Status Monitor 3
Cause What to do
Are you using a Windows XP
(64-bit)/Vista (32-bit/64-bit) print
server with a client set up for an
operating system (Windows
95/98/Me/NT4.0/2000) which is
older than Windows XP (32-bit)?
On a Windows XP (64 bit)/Vista (32
bit/64 bit) system with multiple
users, a communication error may
occur when switching to a new user
and starting a new print job while
the previous user is still printing.
Make sure that the print job for the
first user is complete and that user
is logged off before switching to a
new user and starting a new print
job.
When using an operating
environment with this
combination, the error window for
EPSON Status Monitor 3 may not
pop up on the client when an error
occurs.
Please keep EPSON Status Monitor
3 running when using the printer.
8
 Loading...