


 Loading...

EPSON®
D F X - 8 0 0 0
User’s Manual

Contents
About This Manual |
1 |
|
Introduction |
3 |
|
Chapter 1 Setting Up the Printer |
1-1 |
|
Unpacking the Printer ................................................ |
1-2 |
|
Choosing a Place for the Printer .................................. |
1-7 |
|
Assembling the Printer ............................................... |
1-9 |
|
Testing the Printer .................................................... |
1-13 |
|
Connecting the Printer to Your Computer ..................... |
1-26 |
|
Setting Up Your Application Software .......................... |
1-36 |
|
Chapter 2 Paper Handling |
2-1 |
|
Using the Two-Tractor System .................................... |
2-2 |
|
Switching between Front and Rear Tractors ................... |
2-20 |
|
Changing the Paper ................................................... |
2-24 |
|
Printing on Special Paper ........................................... |
2-29 |
|
Chapter 3 Using the Printer |
3-1 |
|
Operating the Control Panel ....................................... |
3-2 |
|
Setting the DIP Switches ............................................ |
3-7 |
|
Page Length ............................................................. |
3-17 |
|
Skip Over Perforation ............................................... |
3-18 |
|
Using the Paper Memory Feature ................................. |
3-20 |
|
Adjusting the Top of Form Position ............................. |
3-33 |
|
Adjusting the Printing Position .................................... |
3-37 |
|
Using Short Tear-Off ................................................. |
3-40 |
|
Selecting Typestyless ................................................... |
3-43 |
|
C o n t e n t s v

Selecting an International Character Set ........................ |
3-47 |
Choosing a Character Table ........................................ |
3-49 |
Data Dump Mode ..................................................... |
3-51 |
Chapter 4 Software and Graphics |
4-1 |
Enhancing Your Printing ............................................ |
4-2 |
Graphics ................................................................. |
4-10 |
User-defined Characters .............................................. |
4-22 |
Chapter 5 Using the Printer Options |
5 - 1 |
Pull Tractor ............................................................. |
5-2 |
Paper Cutter ............................................................ |
5-19 |
Interface Boards ........................................................ |
5-32 |
Chapter 6 Maintenance |
6-1 |
Cleaning the Printer .................................................. |
6-2 |
Replacing the Ribbon ................................................. |
6-4 |
Transporting the Printer ............................................. |
6-9 |
Chapter 7 Troubleshooting |
7-1 |
Problems and Solutions .............................................. |
7-2 |
Power Supply .......................................................... |
7-3 |
Printing ................................................................... |
7-4 |
Paper Handling ........................................................ |
7-13 |
Options ................................................................... |
7-18 |
Chapter 8 Technical Specifications |
8-1 |
Printer Specifications ................................................. |
8-2 |
Interface Specifications ............................................... |
8-11 |
Initialization ............................................................. |
8-17 |
vi Contents


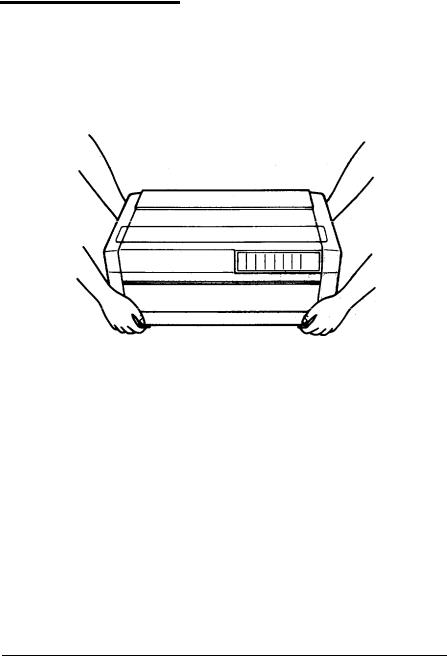
Unpacking the Printer
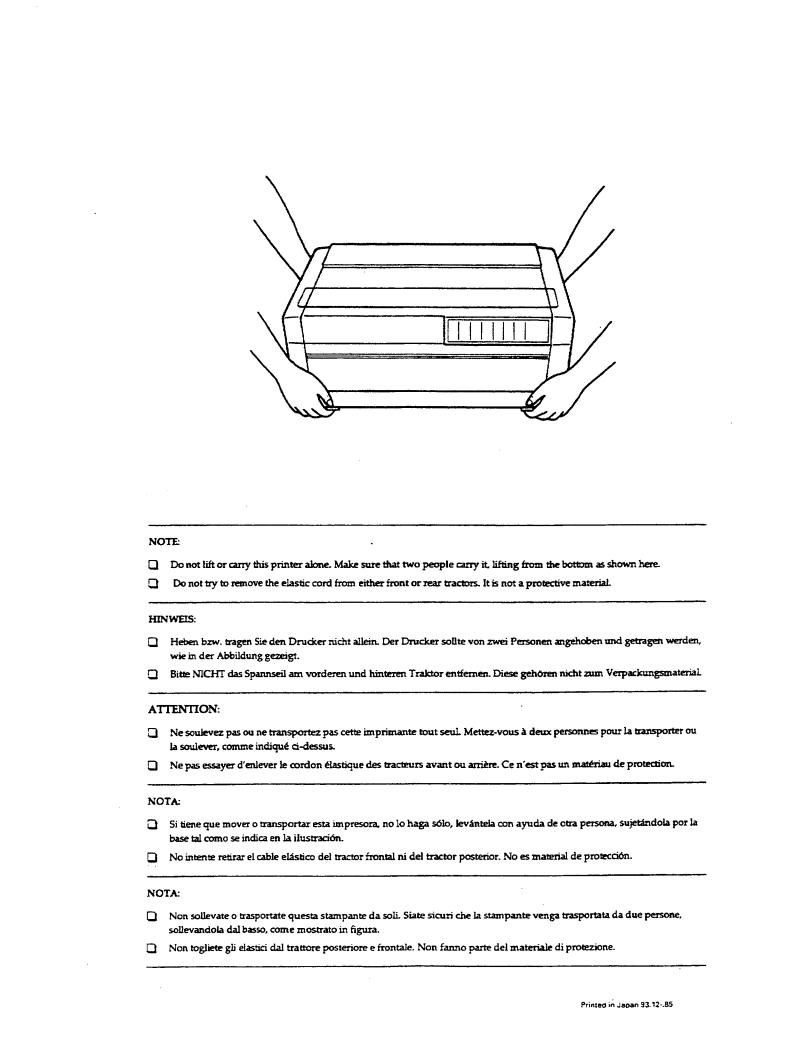
Because the printer weighs approximately 64 lbs. (29 kg),
you should not lift or carry it alone. Two people should carry it by the bottom, as shown here:
1-2 Setting Up the Printer

Unpacking the Printer
Checking the parts
When you unpack the printer, make sure that you have all the parts shown below and that none have been damaged during transportation.
power cable
optional connector lock nuts
ribbon cartridge |
cross-head screwdriver |
In some locations, the power cable may be attached to the printer.
Setting Up the Printer |
1-3 |
Unpacking the Printer
WARNING: There are several different versions of the printer designed for different electrical standards. The power supply voltage is shown on the label on the back of the printer. If the voltage shown is not correct for your country, contact your dealer. It is not possible to adjust the printer for use with different voltages.
After you unpack the printer, save the packaging materials in case you ever need to transport your printer.
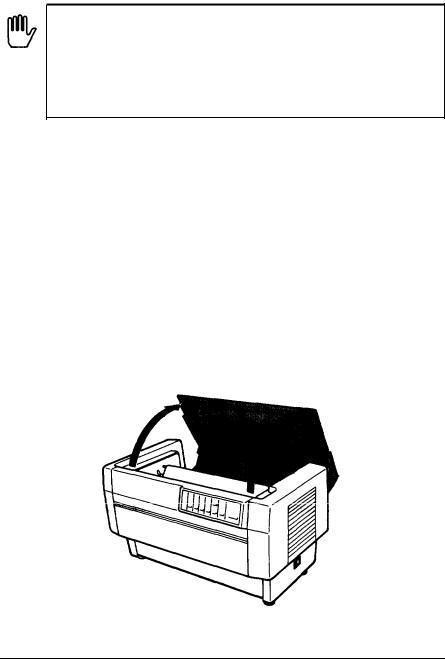
Removing the protective materials
The printer is protected during shipping by two brackets, a carriage guide support bar, and a plastic print head protector. Your printer may also be protected by several pieces of foam packaging. These protective items must be removed before you turn on the printer. After removing the protective materials as described below, store them with the other packaging material.
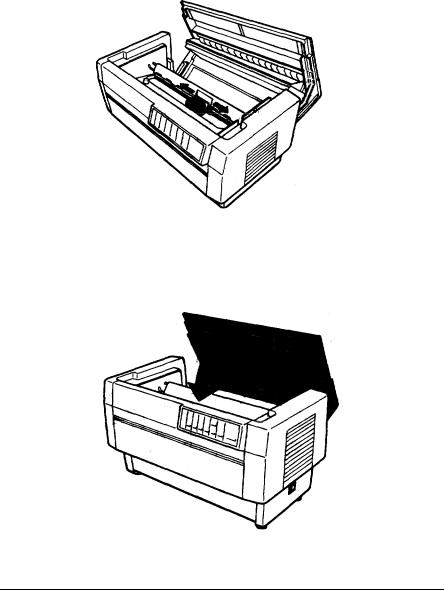
1.Open the top cover by lifting its front edge up and away from you. Remove any packing materials in the printer.
1-4 Setting Up the Printer
Unpacking the Printer
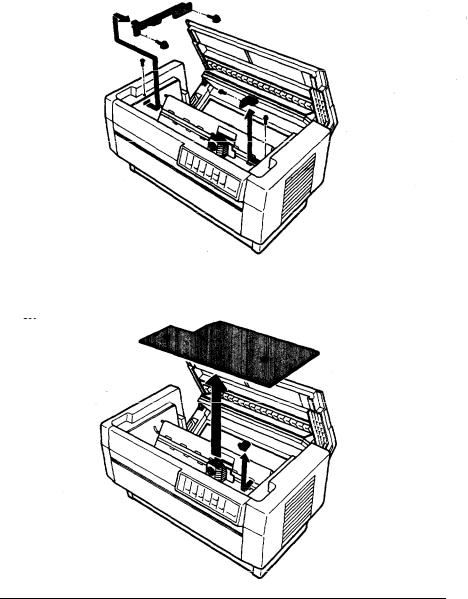
2. Use the enclosed cross-head screwdriver to remove the five screws and the two transport locking brackets from the inside of the printer.
3.Remove the print head protector, as shown below. Then lift up the paper bail and remove the piece of foam packing underneath it.
Setting Up the Printer |
1-5 |
Unpacking the Printer
4. Using the enclosed cross-head screwdriver, remove the carriage guide support bar.
WARNING: Be sure to remove all protective materials before you turn on the printer.
1-6 Setting Up the Printer
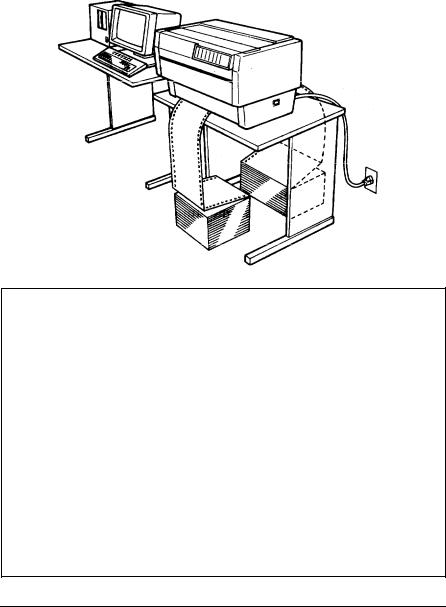
Choosing a Place for the Printer
When you select a location for your printer, keep the following in mind:
•Place the printer on a flat, stable surface.
•Place the printer close enough to the computer for the printer cable to reach.
•Leave plenty of room around the printer for your front and rear stacks of continuous paper as well as your printed output.
•Use a grounded outlet; do not use an adapter plug.
WARNING: Avoid locations that are subject to direct sunlight, excessive heat, moisture, or dust.
Avoid using electrical outlets that are controlled by wall switches or automatic timers. Accidental interruption of power can wipe out information in your computer’s and your printer’s memory.
Avoid using outlets on the same circuit with large motors or electrical appliances that might cause fluctuations in line voltage.
Keep the entire computer system away from potential sources of electromagnetic interference; such as loudspeakers or the base units of cordless telephones.
Setting Up the Printer |
1-7 |
Choosing a Place for the Printer
The illustration below shows a good printer location.
Notes: If you plan to use a printer stand, follow these guidelines to select and set up the stand:
The stand should be able to support at least 128 lbs. (58 kg), which is twice the weight of the DFX-8000 printer.
Never use a stand that supports the printer at an angle. The printer should always be kept level.
If you keep your paper supply underneath the printer stand, be sure there is enough clearance to prevent the paper from catching on the underside of the stand. Also, check to see that the distance between the stand supports is wide enough to accommodate the paper you will be using.
Position your printer’s power cable and interface cable so that they do not interfere with paper feeding. If possible, fasten the cables to the printer stand to keep them away from the paper.
1-8 Setting Up the Printer
Assembling the Printer
After you’ve decided on the best place to set up your printer, you need to install the ribbon cartridge.
Installing the ribbon cartridge
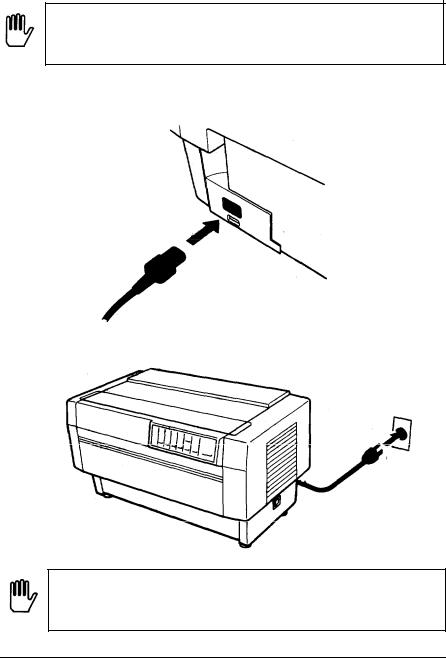
Before installing the ribbon cartridge, make sure that the printer is not plugged into an electrical outlet. Remove the ribbon cartridge from its box and plastic wrapper and ‘then follow these steps to install the ribbon cartridge:
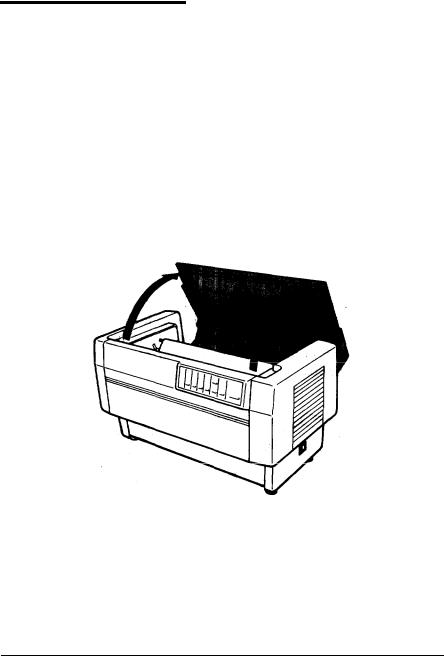
1.Open the top cover by lifting its front edge up and away from you.
Setting Up the Printer 1-9
Assembling the Printer
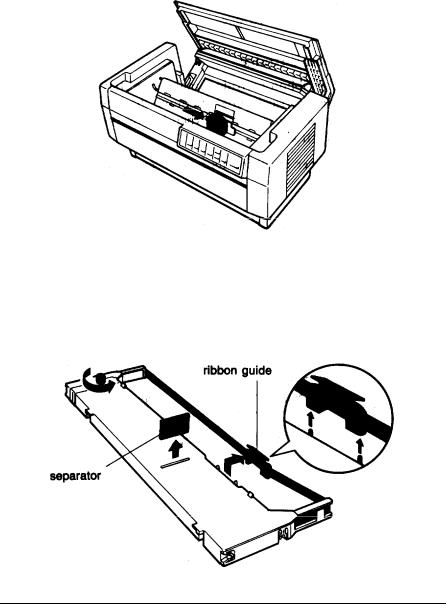
2. Slide the print head to the exposed part of the paper bail as shown below.
3. Remove the separator from the middle of the ribbon cartridge and discard it. Then detach the ribbon guide from the ribbon cartridge (but not fromthe ribbon) and turn the ribbontightening knob in the direction of the arrow to take up any slack in the ribbon.
1-10 setting Up the Printer
Assembling the Printer
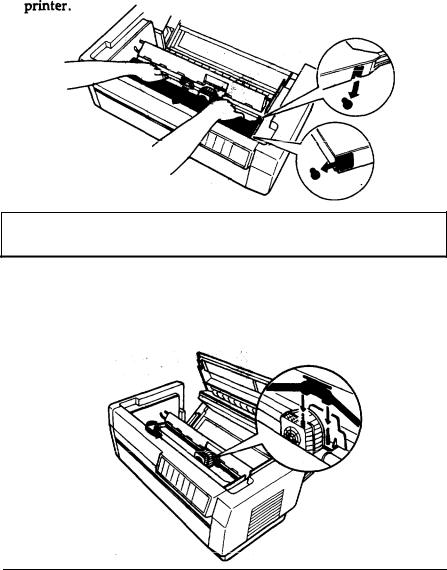
4.Hold the ribbon cartridge with both hands and lower it into the printer. Pulling the cartridge toward you, slide the hooks in the sides of the cartridge over the two corresponding pins in the printer. Then push the cartridge down into position until the other two hooks snap into place over the mounting pins in the
Note: Press lightly on both sides of the cartridge to make sure the hooks are properly connected.
5. Insert the ribbon guide over the metal pins on each side of the print head. The smaller end of the guide should be on top, with its angled edge toward the platen. Turn the ribbon-tightening knob again to remove any slack in the ribbon.
Setting Up the Printer |
1-11 |
Assembling the Printer
6.Slide the print head from side to side to make sure that it moves smoothly and that the ribbon is not twisted or creased.
7. Close the top cover.
1-12 Setting Up the Printer
Testing the Printer
Now that your printer is fully assembled, you can use its built-in self test function to be sure the printer is working correctly before you connect it to a computer. You should perform this test to make sure that your printer was not damaged during shipping and that the ribbon is correctly installed.
Before performing the self test, you need to plug in your printer and load paper.
Plugging in the printer
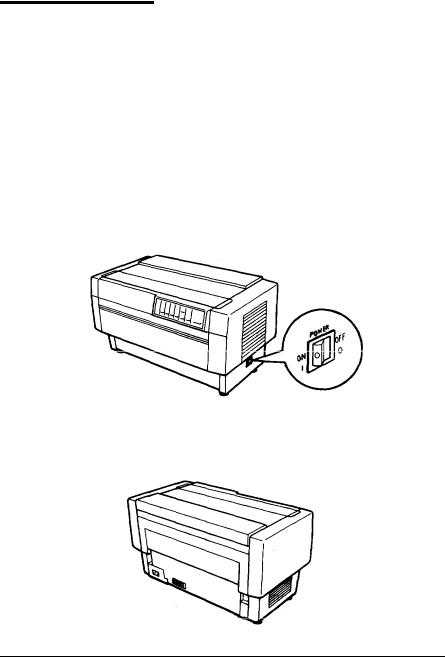
1. Make sure that the printer is turned off.
2.Check the label on the printer’s back panel to make sure the voltage required by the printer matches that of your electrical outlet.
Setting Up the Printer |
1-13 |
Testing the Printer
Running the self test
The self test can be run in draft or Near Letter Quality (NLQ) mode, depending on which button you hold down as you turn on the printer.
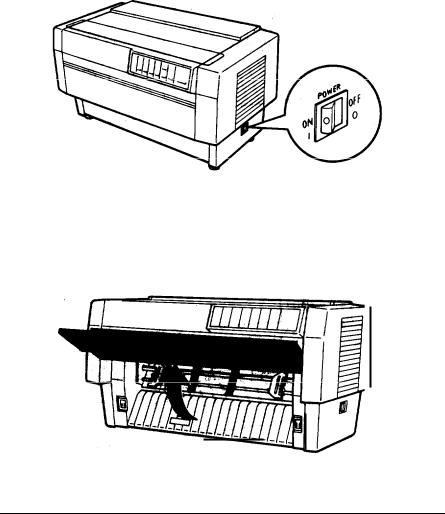
1. Be sure the printer is turned off.
2. Open the front cover by lifting its bottom edge up and toward you.
Setting Up the Printer |
1-15 |
Loading...