

Page 1
Setting Your AcuLaser CX11NF to Receive Faxes
By default your Epson AcuLaser® CX11NF is set to receive distinctive
ring pattern telephone calls. This may prevent the AcuLaser CX11NF
from receiving incoming faxes.
If your AcuLaser CX11NF does not pick up a telephone or fax call,
follow these steps to change the DRPD (Distinctive Ring Pattern
Detection) setting:
1. Press the Setup button.
The Setup light turns on and the LCD screen displays Setup
Mode for a few seconds, and then changes to the Setup menu.
2. Press the d button twice to select Fax Settings. Then press the r
button.
3. Press the d button twice to select Reception Settings. Then
press the r button.
4. Press the d button three times to select DRPD. Then press the r
button.
5. Press the u button to select ALL. Then press the r button.
DRPD is set to ALL.
6. Press the Setup button to exit the menu.
Your telephone company can add a second telephone number to your
main telephone line that will ring with a distinctive pattern. DRPD
allows the AcuLaser CX11NF to distinguish between different ring
patterns. When DRPD is set to NORMAL, the AcuLaser CX11NF
will only answer the distinctive ring and ignore the one regular ring.
© 2005 Epson America, Inc. 7/05 CPD-20347
Printed in USA
Page 2
Epson AcuLaser® CX11N/CX11NF
Packing Instructions
If you need to ship the Aculaser CX11N/CX11NF, follow these steps to package it to
prevent damage during transit:
1. Make sure the CX11N/CX11NF is turned on, then press the Setup button
The Setup light turns on and the LCD screen displays Setup Mode for a few
seconds, then changes to the Setup menu screen.
2. Use the u or d button to select Scan Settings, then press the r button.
3. Use the u or d button to select Carriage Lock, then press the r button.
4. Set the transportation lock on the left side of the document table to the locked
position.
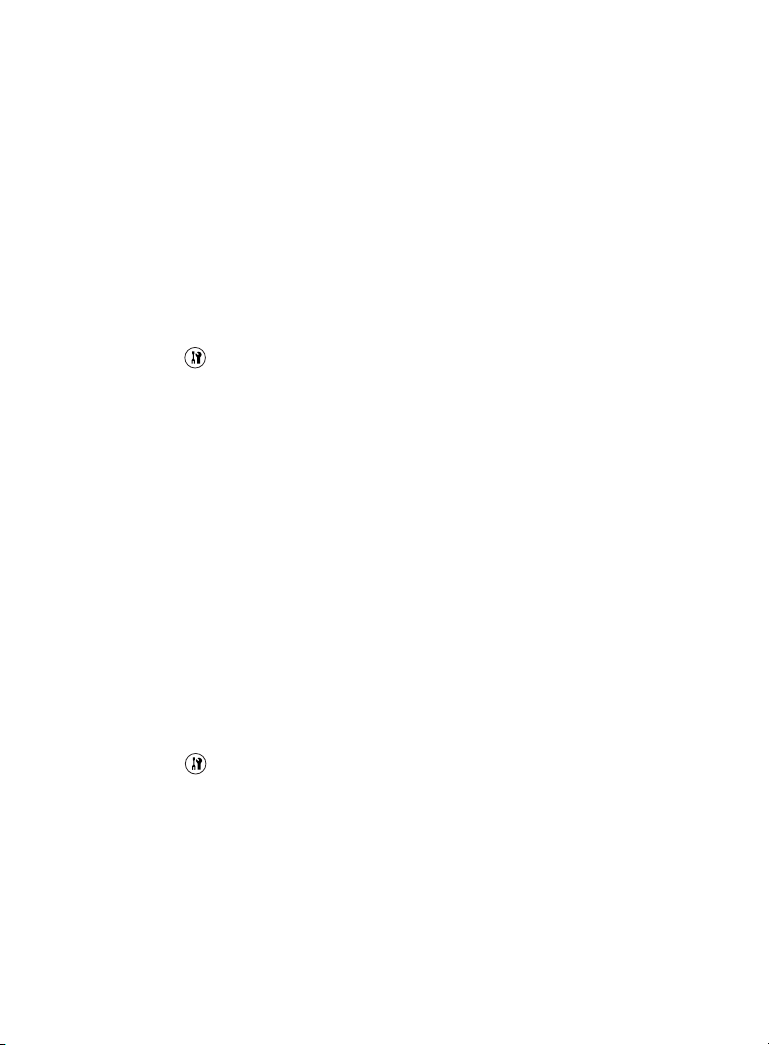
5. Slowly flip back the scanner until it
stops.
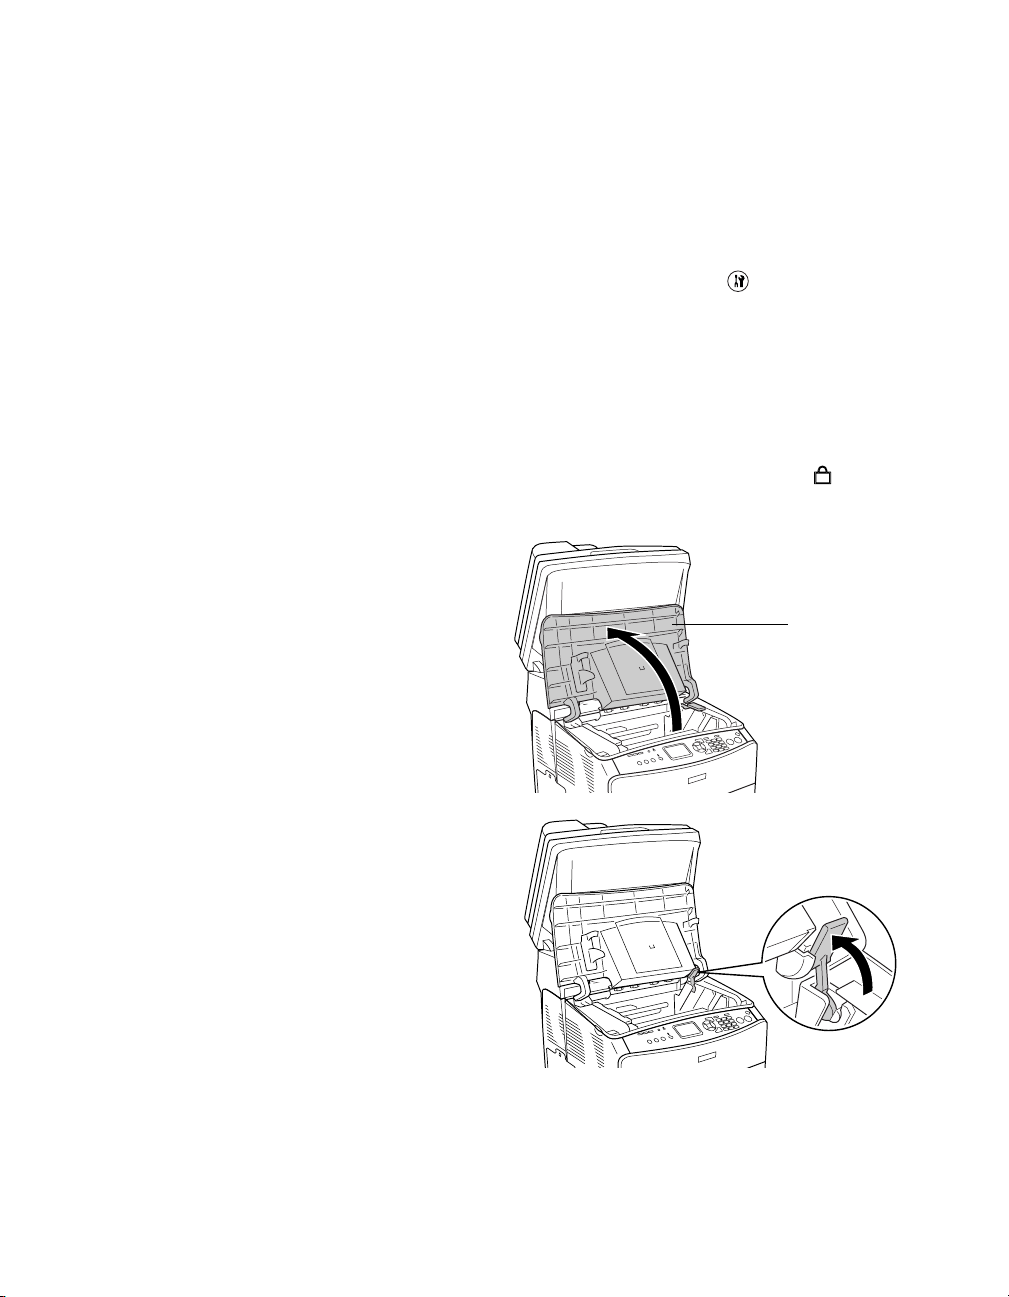
6. Close the output tray extension, then
lift up cover B.
7. Pull up the orange lever inside
cover B.
8. Lift out the photoconductor using its
handle.
9. Package the photoconductor in a
separate box or bag large enough to
hold it.
Note:
Do not remove the toner cartridges.
10. Flip down the orange lever, then close cover B.
11. Slowly push down the scanner to its original position.
Cover B
Page 3

12. Turn off the CX11N/CX11NF and remove the following items:
■ Any loaded paper in the MP tray
■ Optional paper cassette unit (if installed; see the online User’s Guide for more
information)
■ USB cable
■ Power cord
13. Use shipping tape to tape the scanner and
supporting foam to the printer as shown:
Caution:
Don’t forget to place the foam in-between
the scanner and printer; otherwise, the
scanner hinges may be damaged during
shipping.
14. Place the CX11N/CX11NF in the original
lower box housing.
Warning:
The back side of the CX11N/CX11NF is
heavier than the front, so prepare for this
difference as you lift. Two people should lift
the CX11N/CX11NF.
Foam
Page 4

15. Attach foam to the top corners of the CX11N/CX11NF as shown below:
16. Lower the top of the original box and attach the four white handles, turning them
to the closed (locked) position. Then tape the top of the box closed with shipping
tape.
© 2005 Epson America, Inc. 8/05
OPEN
CLOSED
Page 5

CPD-20616
Printed in XXXXXX XX.XX-XX XXX
Page 6

Epson AcuLaser® CX11NF
Fax Forwarding Instructions
You can set up your CX11NF to automatically forward any faxes it receives to another
fax machine.
Follow these steps to set up fax forwarding:
1. Press the Setup button.
The Setup light turns on and the LCD screen displays Setup Mode for a few
seconds, and then changes to the Setup menu.
2. Press the d button twice to select Fax Settings, then press the r button.
3. Press the d button four times to select Forward Settings, then press the
r button.
4. Make sure Number= is selected, then press the r button.
The speed dial list appears.
Note:
Numbers must be registered to the speed dial list before a forward number can
be selected. Unregistered appears if no numbers are registered.
5. Press the u or d button to select the number you want, then press the r button.
6. Press the d button once to select Forward, then press the r button.
7. Press the u or d button to select On, then press the r button.
The CX11NF is now ready to forward any fax it receives to the selected number.
© 2006 Epson America, Inc. 3/06
CPD-21549
Printed in XXXXXX XX.XX-XX XXX
 Loading...