


Business Solutions
User Manual
EWS Indoor Access Point User Manual
version 1.3
11ax Indoor Ceiling Mount Managed Access Point
IMPORTANT
To install this Access Point please refer to the Quick Installation Guide included in the product packaging.
2
Table of Contents
Chapter 1 Product Overview............................................... |
4 |
Key Features/Introduction........................................................ |
5 |
System Requirements............................................................... |
6 |
Package Contents......................................................................... |
6 |
Technical Specifications.............................................................. |
7 |
Physical Interface........................................................................... |
9 |
Chapter 2 Before You Begin................................................. |
10 |
Computer Settings....................................................................... |
11 |
Hardware Installation ................................................................. |
15 |
Mounting the AP................................................................. |
16 |
Chapter 3 Configuring Your Access Point......................... |
18 |
Default Settings./Web Configuration................................ |
19 |
Chapter 4 Building a Wireless Network........................... |
20 |
Access Point Mode...................................................................... |
21 |
Chapter 5 Status.................................................................... |
22 |
Main Status..................................................................................... |
23 |
Connection...................................................................................... |
25 |
Chapter 6 Network .............................................................. |
27 |
Basic IPv4/IPv6 Settings.......................................................... |
28 |
Spanning Tree Protocol Setting............................................. |
29 |
Chapter 7 2.4 GHz/5 GHz Wireless....................................... |
30 |
Wireless Settings........................................................................... |
31 |
Band Steering................................................................................ |
31 |
2.4 GHz/5 GHz Wireless Network........................................... |
32 |
2.4GHz/5 GHz SSID Profile...................................................... |
33 |
Wireless Security.......................................................................... |
34 |
Wireless Traffic Shaping........................................................... |
36 |
Wireless MAC Filtering............................................................... |
37 |
Fast Roaming................................................................................ |
38 |
Guest Network Settings............................................................ |
39 |
Chapter 8 Management ........................................................ |
40 |
Management VLAN Settings.................................................. |
41 |
Advanced Settings....................................................................... |
42 |
CLI Settings/Email Alert............................................................. |
42 |
Time Zone........................................................................................ |
45 |
Auto Reboot Settings................................................................ |
46 |
Wi-Fi Scheduler............................................................................... |
47 |
Tools.................................................................................................. |
48 |
Account/Firmware........................................................................ |
51 |
Backup/Restore ............................................................................. |
52 |
Log.................................................................................................... |
54 |
Logout/Reset................................................................................. |
55 |
Appendix................................................................................. |
56 |
FCC Interference Statement................................................... |
57 |
IC Interference Statement...................................................... |
58 |
FCC Interference Statement................................................... |
60 |
3
Chapter 1
Product Overview
4

Introduction
Key Features - EWS357AP nad EWS377AP
•EWS357AP: Supports IEEE802.11ax/ac/a/b/g/n wireless standards with up to 574 Mbps data rate on 2.4GHz band and 1200
Mbps on 5GHz bands.
•EWS377AP: Supports IEEE802.11ax/ac/a/b/g/n wireless standards with up to 1148 Mbps data rate on 2.4GHz band and 2400 Mbps on 5GHz bands.
•Support MU-MIMO function on both 2.4GHz and 5GHz radio.
•Support Tx Beamforming to enlarge the transmitting distance.
•Perform 1024-QAM to increase 25% better throughput compare to 802.11AC 256-QAM.
•Systemic and distributed management over EnGenius ezMaster and EWS Management switch without licensing or subscription. fee.
•More customized items on Band Steering for intellgent
Management.
•Perform one-click update to deliver a configuration over multisegments for these managed Access Points.
Introduction
EWS managed APs are dual-band wireless 802.11 ax/ac/a/ b/g/n wireless Access Point that built in powerful interfaces to achieve great performance and evenly coverage under a pervasiveenvironment.Itcanbeconfiguredasan:Managed mode or Stand-alone mode to network with multiple client devices including mobile, NB and other client devices for
providing an optimal connecting spped which could be the best choice to pro-users, SMB, hotel, hospital and enterprise. Its high-powered, long-range characteristics make it a costeffective alternative to ordinary Access Points that do not have the range and reach to connect to a growing number of wireless users who wish to connect to a business network.
Maximum data rates are based on IEEE 802.11 standards. Actual throughput and range may vary depending on many factors including environmental conditions, distance between devices, radio interference in the operating environment, and mix of devices in the network. Features and specifications subject to change without notice. Trademarks and registered trademarks are the property of their respective owners. For United States of America: Copyright © 2019 EnGenius Technologies, Inc. All rights reserved.
5
To protect sensitive data during wireless transmissions, the device offers different encryption settings for wireless transmissions, including industry standard WPA2 encryption. The device also includes MAC address filtering to allow network administrators to offer network access only to known computers and other devices based on their MAC addresses.
System Requirements
The following are the Minimum System Requirements in order to configure the device.
•Computer with an Ethernet interface or wireless network capability
•Windows OS (XP, Vista, 7, 8, 10), Mac OS, or Linux-based operating systems
•Web-BrowsingApplication(i.e.:Edge,InternetExplorer,Firefox,Safari,or another similar browser application)
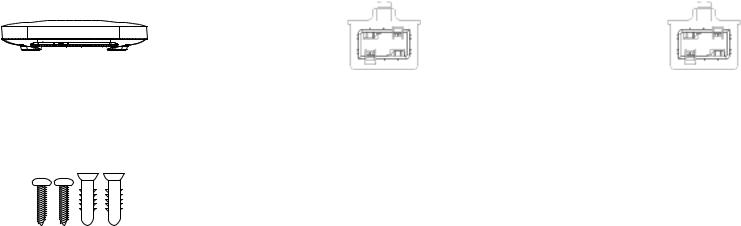
Package Contents
•Access Point
•Ceiling Mount Base (9/16” T-Rail)
•Ceiling Mount Base (15/16” T-Rail)
•Mounting Screw Kit
•Quick Installation Guide
*(all items must be in package to issue a refund):
6
Technical Specifications (EWS357AP/EWS377AP)
Standard:
IEEE802.11ax/ac/a/n on 5 GHz
IEEE802.11ax/b/g/n on 2.4 GHz
Antenna
Integrated Omni-directional antennas
Physical Interfaces
EWS357AP: 1 x 10/100/1000 Ethernet Port with PoE support
EWS377AP: 1 x 10/100/1000/2500 Ethernet Port with PoE support
LED Indicators
Power
LAN 1
LAN 2
2.4 GHz
5 GHz
Power Requirements
EWS357AP: DC12V/1.5A from adapter or Proprietary 54V from
PoE
EWS377AP: DC12V/2A from adapter or Proprietary 54V from PoE
Operation Modes
Managed Mode
Stand alone Mode
Exquisite RF Management
Backgorund Scanning
Auto Transmit Power
Auto Channel Selection
Fast Roaming (802.11K)
Band Steering
RSSI Threshold
Optimize Performance
Quality of Service (QoS): Follow 802.11e Power Save Mode (UAPSD)
Pre-Authentication (Compliance with 802.11i&x) PMK Cahcing (Compliance with 802.11i)
Fast Roaming (802.11r) Multicast/Unicast Conversion
Easy to Management
BSSID Multiple SSIDs Guest Network VLAN Tag VLAN Per SSID
Management VLAN
Captive Portal (Support on Manged mode) Finger Printing (support on Managed Mode) Traffic Shaping Per user / Per client
MAC Address Filtering E-Mail Alert
Save Configuration as Users Default
Wi-Fi Scheduler (Support on Managed mode)
SNMP V1/V2c/V3
MIB I/II, Private MIB Clients Statistics
7
RADIUS Accounting
Comprehensive Protection
Wireless encryption standard Hidden SSID in beacons
Rogue AP Detection (Support on Manged mode)
L2 Isolation Client Isolation Https
SSH tunnel
Security
WPA2 Personal (AES)
WPA2 Enterprise (WPA-PSK AES)
Hides SSID in beacons
MAC address filtering, up to 32 MACs per SSID Wireless STA (Client) connection list
Https Support
SSH Support
Physical/Environment Conditions
Operating:
Temperature: 0 °C to 40 °C (32 °F to 158 °F) Humidity (non-condensing): 90% or less
Storage:
Temperature: -40 °C to 80 °C (-40 °F to 176 °F ) Humidity (non-condensing): 90% or less
8

Physical Interface
(EWS357AP)
Dimensions and Weights
Length:160 mm (6.30”) Width: 160 mm (6.30”) Depth: 34 mm (1.34”)
Weight: 370 g (0.75 lbs)
6
1
|
|
|
|
|
|
|
|
|
|
|
|
|
|
|
|
|
|
|
|
|
|
|
|
|
|
|
5 |
|
|
|
|
|
5 |
||
2 |
3 |
|
||||||
|
|
4 |
|
|||||
|
|
|
|
|
|
|
||
1Latch: Fix mounting when sliding bracket into this slot
2Reset Button: Push this button to reset or reboot this device
3LAN Port (Proprietary 54V/0.6A or 802.3af): Ethernet port for RJ-45 cable.
4DC-Jack: Powered from a DC12V/1.5A adapter
5Ceiling Mount Holes: Use these ports to assemble with mounting bracket
6LED Indicators: LED lights for Power, LAN Port, 2.4 GHz Connection and 5 GHz Connection.
9

Physical Interface
(EWS377AP)
Dimensions and Weights
Length:205.73 mm (8.10”) Width: 205.73 mm (8.10”) Depth: 33.25 mm (1.31”)
Weight: 597 g (1.32 lbs)
6 |
1 |
|
|
|
|
|
|
|
|
|
|
|
|
|
|
|
|
|
|
|
|
|
|
|
|
|
|
|
|
5 |
|
|
|
|
|
5 |
||
2 |
3 |
|
||||||
|
|
4 |
|
|||||
|
|
|
|
|
|
|
||
1Latch: Fix mounting when sliding bracket into this slot
2Reset Button: Push this button to reset or reboot this device
3LAN Port (Proprietary 54V/0.6A or 802.3at): Ethernet port for RJ-45 cable.
4DC-Jack: Powered from a DC12V/2A adapter
5Ceiling Mount Holes: Use these ports to assemble with mounting bracket
6LED Indicators: LED lights for Power, LAN Port, 2.4 GHz Connection and 5 GHz Connection.
10
Chapter 2
Before You Begin
11

Computer Settings
Windows XP/Windows 7/Windows 8/Windows
10
InordertousetheAccessPoint,youmustfirst configure the TCP/IPv4 connection of your Windows OS computer system.
1a. Click the Start button and open the Control Panel
1b. Move your mouse to the lower right hot corner to display the Charms Bar and select the Control Panel in
Windows 8 OS.
Windows 8
1c. In Windows 10, click Start to select All APPs to enter the folder of Windows system for selecting Control Panel.
Windows XP |
Windows 7 |
Windows 10
12

2a.In Windows XP, click Network Connections.
2b.In Windows 7/Windows 8/Windows 10, click View
Network Status and Tasks in the Network and Internet section, then select Change adapter settings.
3. RightclickonLocalAreaConnectionandselectProperties.
4.Select Internet Protocol Version 4 (TCP/IPv4) and then select Properties.
5.Select Use the following IP address and enter an IP address that is different from the Access Point and Subnet mask, then click OK.
13

Note: Ensure that the IP address and Subnet mask are on the same subnet as the device.
For example: EWS35xAP IP address: 192.168.1.1
PC IP address:192.168.1.2–192.168.1.255
PC Subnet mask: 255.255.255.0
14

Apple Mac OS X
1.Go to System Preferences (Which can be opened in the Applications folder or selecting it in the Apple Menu).
2.Select Network in the Internet & Network section.
3. Highlight Ethernet.
4.In Configure IPv4, select Manually.
5.Enter an IP address that is different from the Access Point and Subnet mask then press OK.
Note: Ensure that the IP address and Subnet mask are on the same subnet as the device.
For example: AP IP address: 192.168.1.1
PCIPaddress:192.168.1.2–192.168.1.255
PC Subnet mask: 255.255.255.0
6. Click Apply when done.
15

Hardware Installation
1.Connect one end of the Ethernet cable into the LAN port of the Access Point and the other end to the Ethernet port on the computer.
2.Connect a Power cord with the PoE Adapter and plug the other end into an electrical outlet.
3.Connect the second Ethernet cable into the LAN port of this PoE Adapter and the other end to the Ethernet port on the computer.
Note1: The Access Point can be powered by 802.3af/at PoE (Power over Ethernet). You can consider to adopt
EnGenius EPA5006GP or EPA5006GAT for powering up your 11AX device.
Note2: EWS357AP can be driven by IEEE 802.3af and . EWS377AP should be driven by IEEE802.3at.
1
|
2 |
|
3 |
||
|
16
Mounting the AP
Using the provided hardware, the AP can be attached to a wall or a ceiling.
1. Managed Indoor Access |
2. Ceiling Mount Base |
3. Ceiling Mount Base |
Point |
(9/16” T-Rail) |
(15/16” T-Rail) |
4. Mounting Screw Kit
17

Ceiling Mount an Access Point
1)Slide the ceiling mount base into the slot of the Access
Point.
2)Hold the Access Point with one hand to reach the other hand over the T-Rail sides of the bracket. Then hook the stationary end of the ceiling mount bracket onto the T-Rail.
1
2
Wall Mount an Access Point
3)Continued from A, determine where the Access Point to be placed and mark location on the surface for the two mounting holes. Use the appropriate drill bit to drill two
8.1mm diagram and 26mm depth holes in the markings and hammer the bolts into the openings.
4)Screw the anchors unto the holes until they are flush with the wall ; screw the included screws into the anchors.h
5)Place the Access Point against wall with the mounting screw heads.
4
3
5
18

Chapter 3
Configuring Your
Access Point
19
 Loading...