

Endress+Hauser Promag 50W, Promag 50, Promag 53, Promag 53P, Promag 53W Conversion Instructions
...
NOTICE
NOTICE
EA00059D/06/A2/13.15
Products Solutions Services
71294946
Conversion Instructions
Conversion transmitter Promag 50/53 W, P, H to Promag 55 remote version
Promag 50W, P, H, 53W, P, H
Instruction is valid for the following conversion kit:
Order-Code Conversion kit
DK5UP8
1 × notice label for the sensor
1 × form data storage
1 × conversion instruction
Overview of the personnel authorized to carry out conversion
Authorization to carry out
for each.
The person who carries out conversion is responsible for safety during the work, the quality of work completed and safety of the device
after conversion.
Approval of the measuring device Group of persons authorized to carry out conversion
without approval 1, 2, 3
with approval FM/CSA Div. 2 1, 2, 3
1 Trained customer technician
2 Service technician authorized by Endress+Hauser
3 Endress+Hauser (send measuring device back to manufacturer)
conversion
depends on the approval of the measuring device. The table shows the respective group of persons
Transmitter that can be used for the conversion
The transmitter for the conversion has to be ordered seperatly. Only transmitter with the following order code can be used:
1 2 3 4 5 6 7 8 9 10 11 12 13 14 15 16 17 18
Order-Code
Transmitter
Promag
55XXX–XXXXXA, R C, S, 3 *****
Conversion transmitter Promag 50/53 W, P, H to Promag 55 remote version
Safety instructions
• Use genuine parts from Endress+Hauser only.
• In the case of Ex-certified measuring devices: Only open in
a de-energized state (once a delay of 10 minutes has elapsed
after switching off the power supply) or in environments which
do not have a potentially explosive atmosphere.
• The measuring device is energized. Danger: Risk of electric
shock! Open the measuring device in a de-energized state only.
• Before removing the device: set the process in a safe condition
and purge the pipe of dangerous materials.
• Hot surfaces! Risk of injury! Before commencing work, allow the
system and measuring device to cool down to a touchable
temperature.
• Comply with national regulations governing mounting, electrical
installation, commissioning, maintenance and conversion
procedures.
• Requirements with regard to specialized technical staff for the
mounting, electrical installation, commissioning, maintenance
and conversion of the measuring devices:
–trained in instrument safety
–familiar with the individual operation conditions of the devices
–for Ex-certified measuring devices: also trained in explosion
protection
• Follow the Operating Instructions for the device.
• Risk of damaging electronic components! Ensure you have
a working environment protected from electrostatic discharge.
• After removing the electronics cover, there is a risk of electric shock
as shock protection is removed!
Switch off the measuring device before removing internal covers.
• In the case of measuring devices in safety-related applications in
accordance with IEC 61508 or IEC 61511: After
conversion
recommission in accordance with Operating Instructions.
Document the
conversion
procedure.
• Only open housing for a brief period. Avoid the penetration of
foreign bodies, moisture or contaminants.
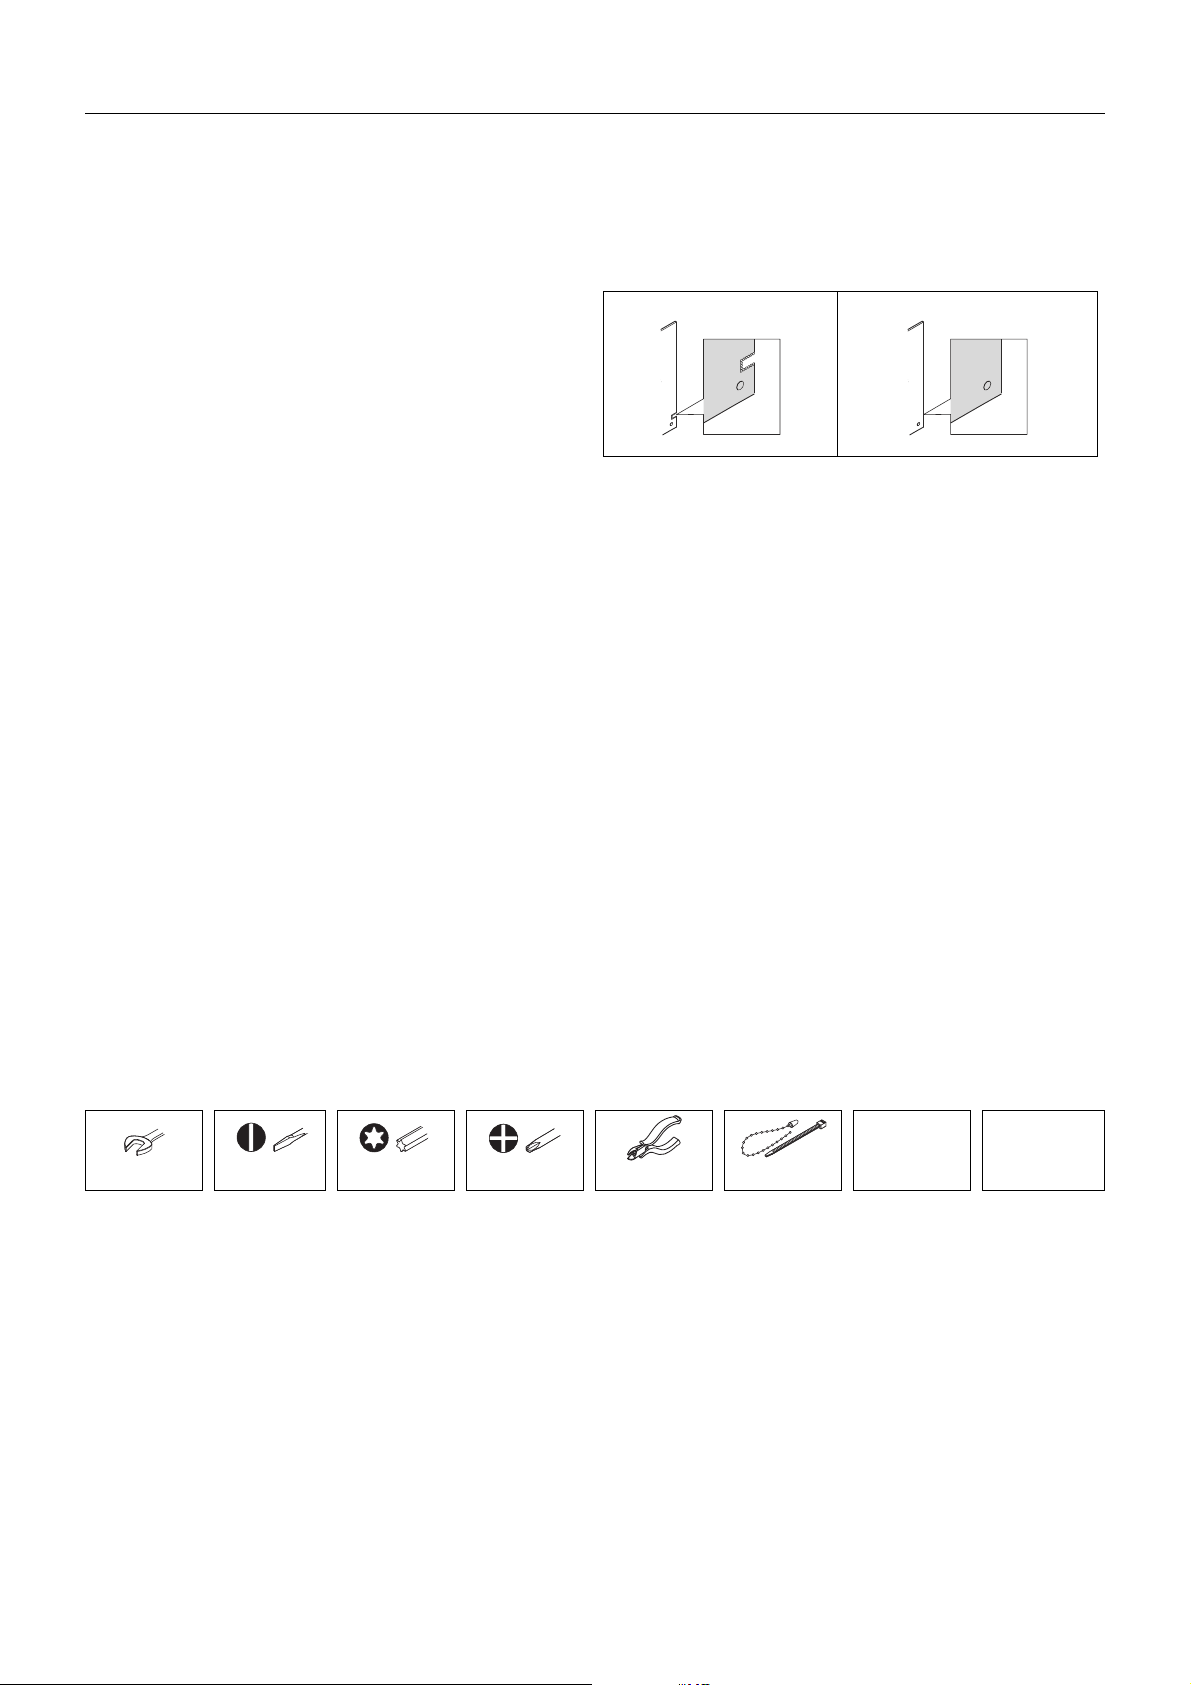
• Printed circuit boards for devices in categories II1G, II1D, II 2G,
II 2D, Zone 1 and Class I, Div. 1, Gp. A, B, C, D have a recess or
printed board code. Unauthorized breaking of this coding is not
permitted, as explosion protection will then be invalidated.
Example Coding, Ex-board
Example Coding, Non-Ex board
A0011688
A0011689
• Caution! When replacing amplifier boards, I/O boards or
submodules, ensure compatibility with existing software. The
process for reading out the software revision number is
described in the Operating Instructions (device functions). If the
software of the board is not compatible, it should be updated
using an operating software package (e.g. Field Care). In the
event of functional changes, notify the plant owner/operator.
• Replace defective seal/gaskets with genuine parts from
Endress+Hauser only.
• If threads are damaged or defective, the measuring device must
be repaired.
• Threads (e.g. of the cover for the electronics and connection
compartments) must be lubricated. Use an acid-free, non-hardening
grease if an abrasion resistant dry lubricant is non-existent.
• If spacing is reduced or the dielectric strength of the measuring
device cannot be guaranteed during conversion work, perform
a test on completion of the work (e.g. high-voltage test in
accordance with the manufacturer's instructions).
• Service connector:
–do not connect in potentially explosive atmospheres.
–only connect to Endress+Hauser service devices.
• Observe the instructions for transporting and returning the
device outlined in the Operating Instructions.
• If you have any questions, contact your E+H service
organization.
Tool List
pen/ tool
Ø < 2 mm
22 mm
0.5 × 3.5 mm T20 PH2 side cutter cable tie
(0.08 inch)
2 Endress + Hauser
acid-free,
non-hardening
grease
Conversion transmitter Promag 50/53 W, P, H to Promag 55 remote version
A Information about the modified device
Relevant documentation
Not only the already existing documentation, but also the documentation delivered with the transmitter will be relevant additionally,
cause of the conversion.
be
For the sensor the documentation for Promag 50, 53 is relevant.
For the transmitter the documentation for Promag 55 is relevant.
Changes and restrictions conditioned by conversion
• Accuracy
After conversion of the device an additional measured error of ± 0,2% to the measured value must be calculated.
B Preparatory operations: Save device data
• Conversion Promag 50
Select important parameter out of the application (e.g. with the aid of the Quick Setup "Commisioning" see Operating Instructions) and
fill them into the "list of parameter", chapter H. After Conversion enter the noted parameter into the new transmitter.
• Conversion Promag 53
Save the parameters of the transmitter to the T-DAT using the "T-DAT SAVE/ LOAD" function".
Replace the T-DAT into the transmitter after conversion.
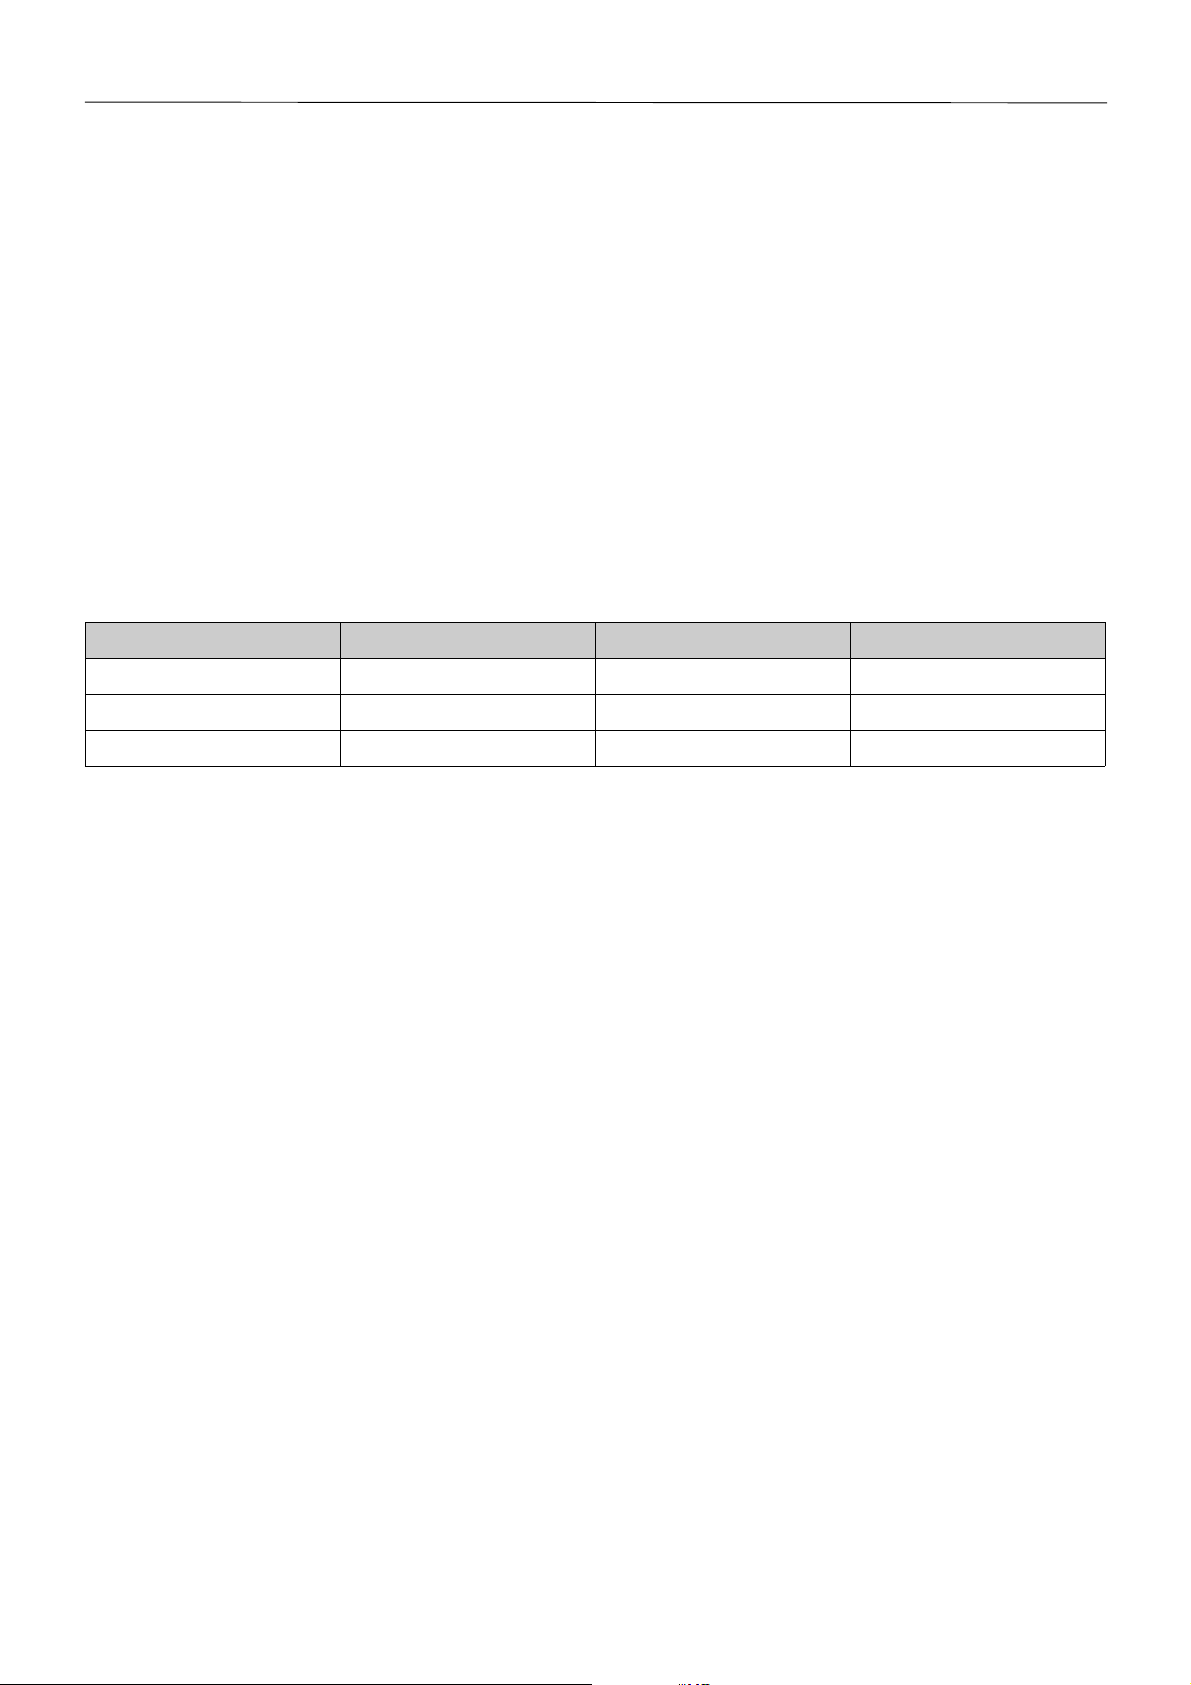
C Overview data storage (Histo-ROM) and F-CHIP
Data storage Colour Promag 50 to Promag 55 Promag 53 to Promag 55
S-DAT blue Re-assembly Re-assembly
T-DAT black New Re-assembly
F-CHIP (Optional) red New New
Endress + Hauser 3
Conversion transmitter Promag 50/53 W, P, H to Promag 55 remote version
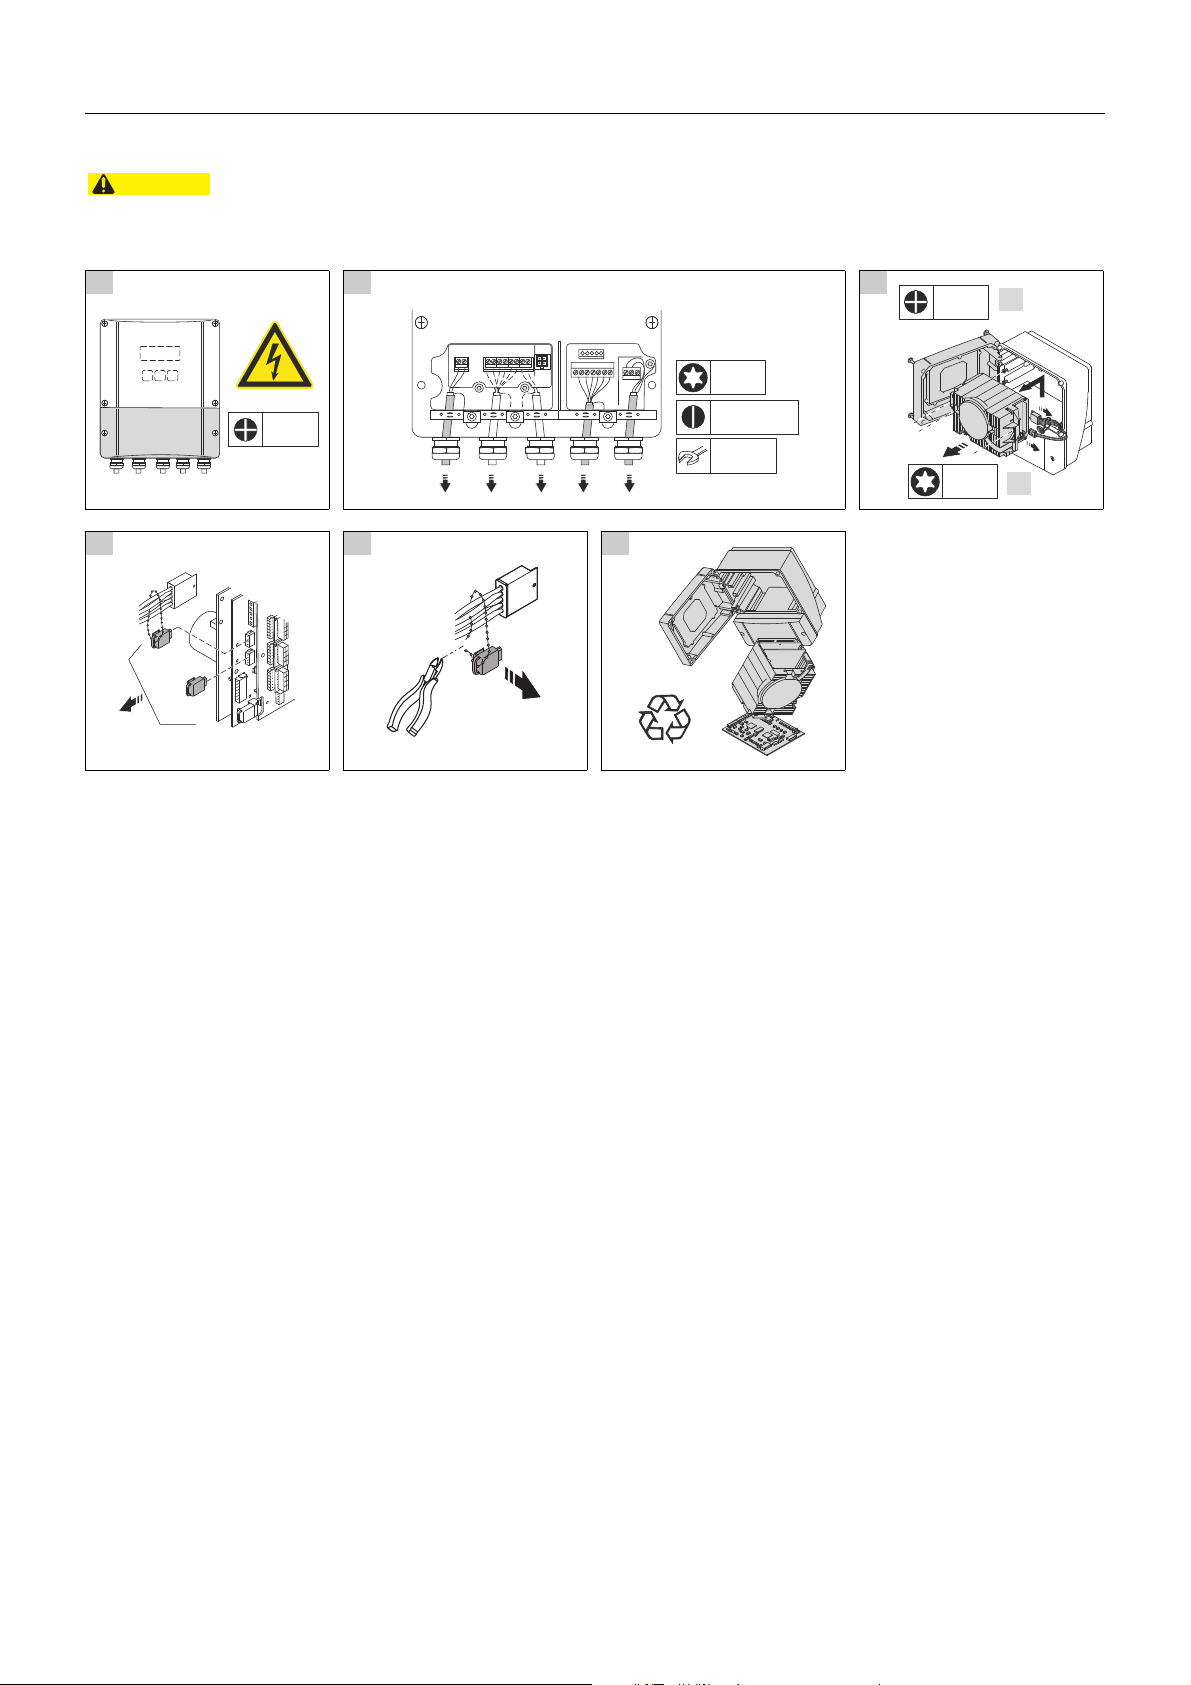
CAUTION
PH2
0.5 × 3.5
T20
22 mm
T20
1.
2.
PH2
S-DAT
T-DAT
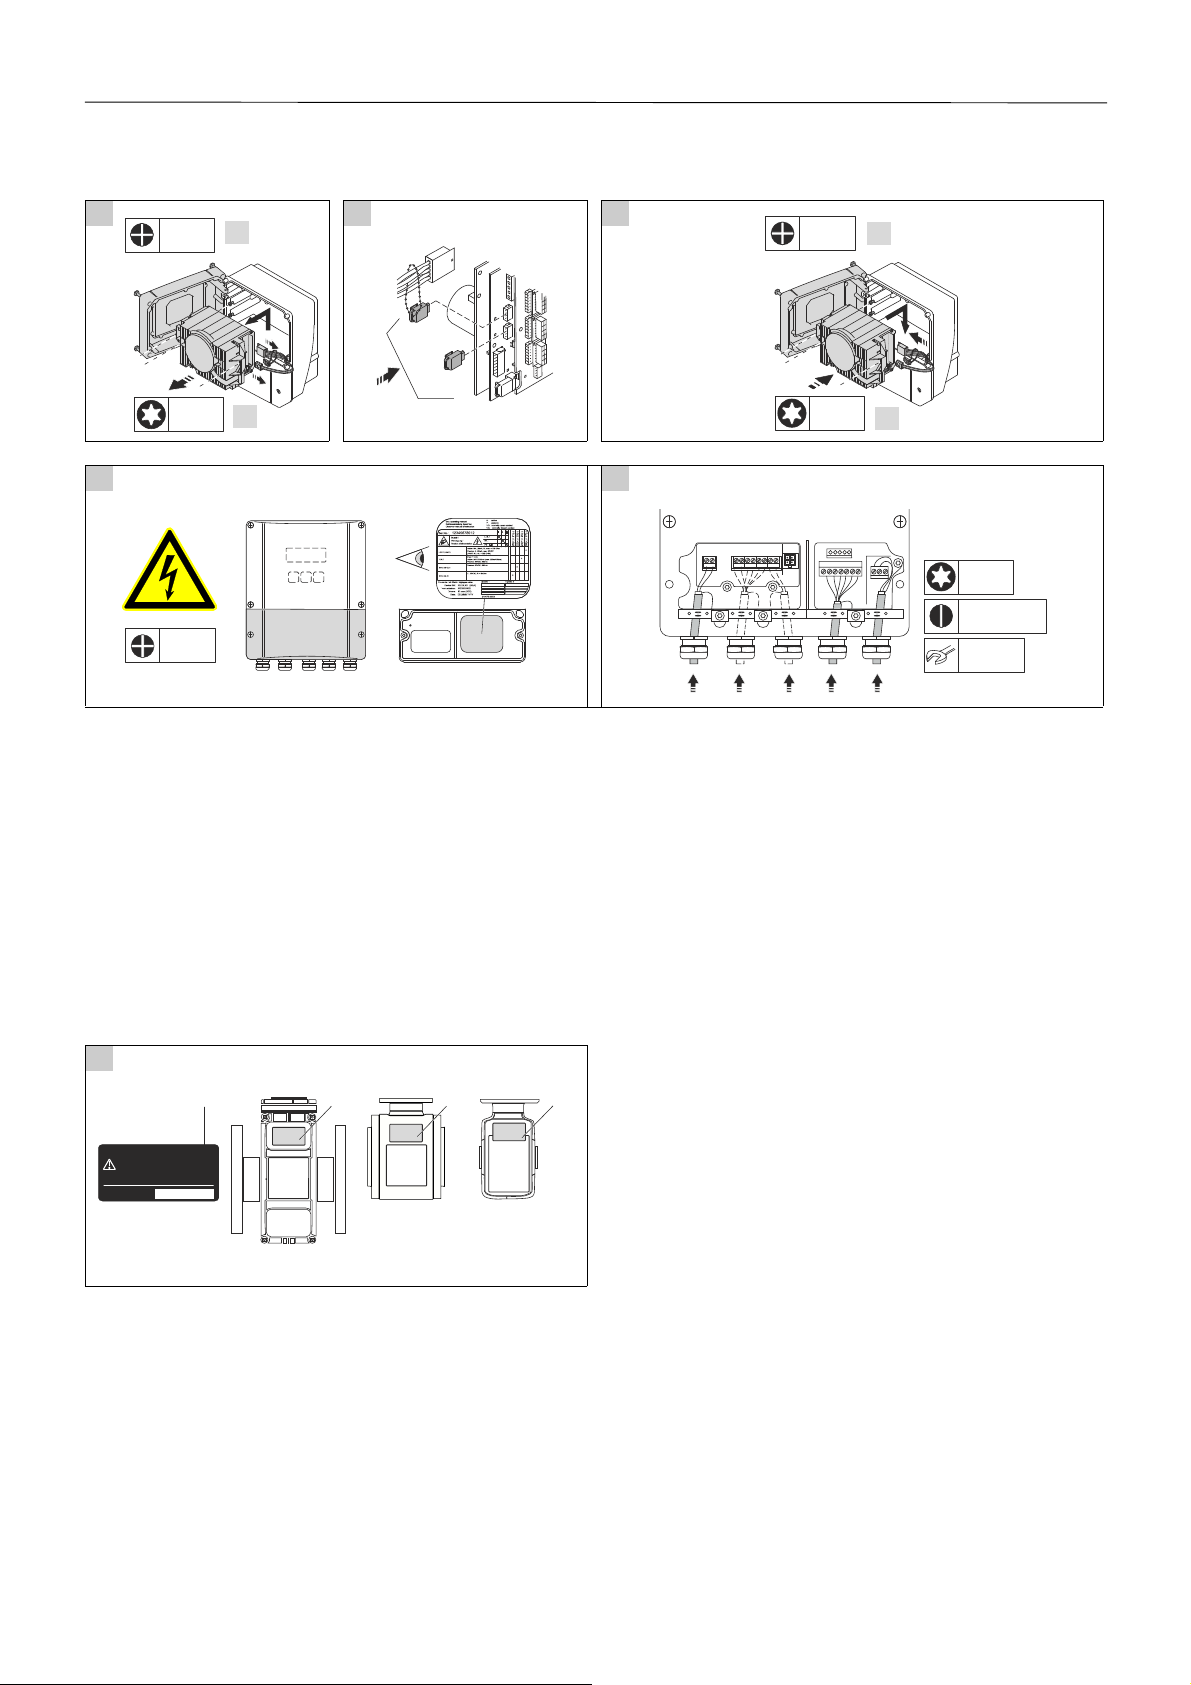
D Disassambling the transmitter Promag 50, 53
Cut off the power of the device bevore conversion. Only switch on power after conclusion of all works.
1 2 3
A0011958 A0011959 A0011684
4 5 6
A0011383 A0014762 A0011960
4 Endress + Hauser
Conversion transmitter Promag 50/53 W, P, H to Promag 55 remote version
T20
1.
2.
PH2
S-DAT
T-DAT
T20
1.
2.
PH2
PH 2
0.5 × 3.5
T20
22 mm
H
DN 40...100
(1 ...4")
1/2
H
DN 2...25
(1/12"...4")
W/P/S
1
1
1
Instrument modified,
for the new Order-Code specifications of the
transmitter, see nameplate on transmitter.
für die neue Order-Code-Ausprägungen des
Messumformers ist dasTypenschild auf
dem Messumformer zu beachten
Gerät wurde umgebaut,
Instrument modifié,
pour les nouvelles spécifications du code de
commande du transmetteur, observez
l’etiquette signalétique sur le transmetteur
Date of modification:
Umbaudatum:
Date de modification:
1
E Assembly the transmitter
1 2 3
A0011684 A0014645 A0011961
4 5
A0011963 A0011964
F Commissioning the device
• The measuring period and especially the integration time, depending on pipe diameter and the main frequency (50Hz/60Hz), have
to be set according to the table in chapter I. (Some parameter requiere the service code)
• Fill in the added form "Storage" and send it to the given adress for archiving (Data storage in the data base of Endress+Hauser).
• When Promag 50 is converted: Enter the data from the parameter list.
• When Promag 53 is converted: Function T-DAT SAFE/LOAD
→ use LOAD Selection.
• If necessary make an empty-pipe/full-pipe adjustment according to the description in the Operating Instructions.
• The conversion is complete.
G Changing the identification
1
A0014774
1. After conversion the label has to be changed!
Affix the notice label (1) as indicated in the graphic.
Endress + Hauser 5
 Loading...