

Page 1
10x • 60x • 120x • 220x
*
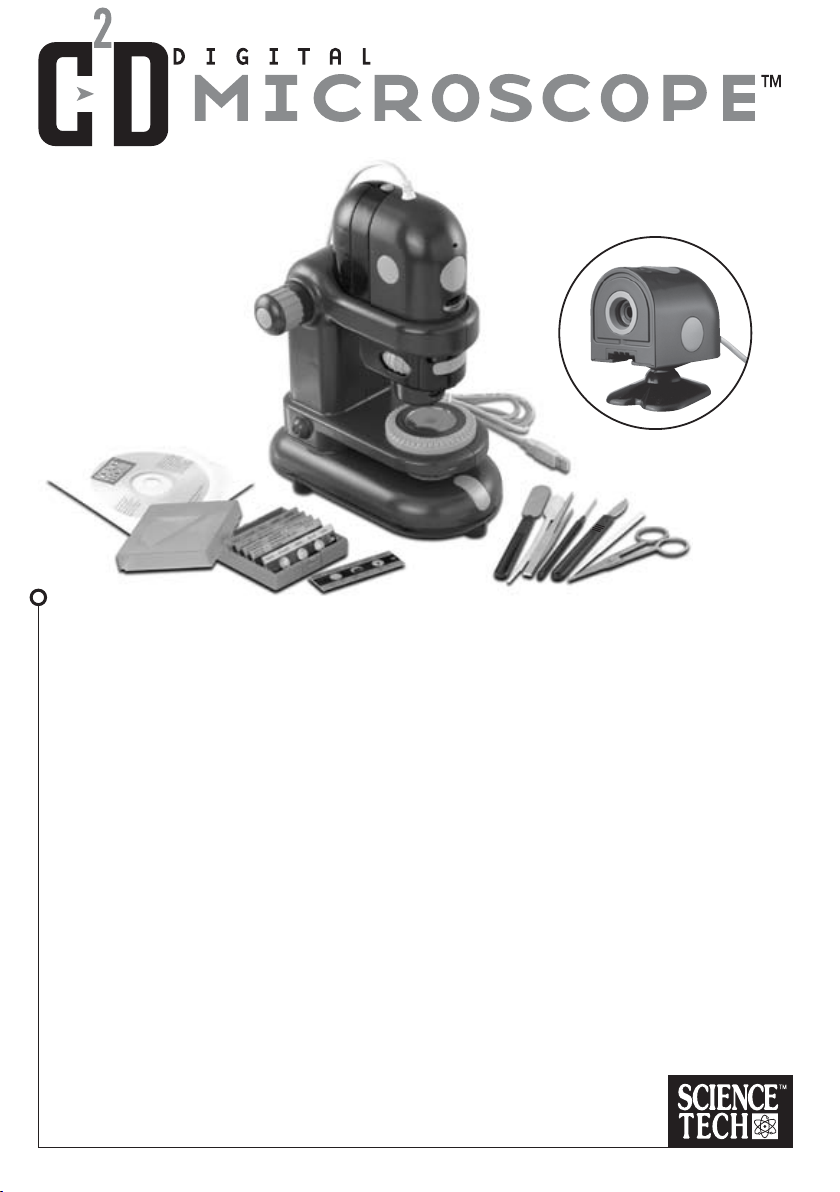
C2D Digital Microscope
*
C2D Camera Stand
*
USB Cable (5ft. or 1.5m )
*
Software (CD-ROM)
*
Six Prepared Slides with Case
*
Dissecting Tools
*
Instruction Manual
WARNING!
Only for use by children over 10 years old. Only for use under the supervision of an
adult. This toy contains functional sharp needle, sharp edge on scalpel, scissors,
spatula, tweezers, and prepared slide.
CAUTION!
Read the instructions before use, follow them and keep
them for reference.
Page 2
Congratulations for purchasing the C2D Digital Microscope, one of the newest learning tools!
ABOUT THE
2
C
D DIGITAL MICROSCOPE
C2D DIGITAL MICROSCOPE
This C2D digital Microscope will encourage creative play activities that are directed by your children by
harnessing the power of your PC. With the C2D Digital Microscope, you will be able to explore your
surroundings in a way as never before and share these findings with friends and family. There are many
benefits from using the C2D Digital Microscope and some are:
• Use software to manipulate images in numerous and insightful ways
• Create shows with video recording features
• View the images with your friends on the computer
ABOUT THE
About this manual
This manual is being designed so that the information is easy and ready to find in order to make setting up
your microscope simple and less frustrating.
This instruction manual helps to you:
• Set up your C2D Digital Microscope
• Maintain it
• Change bulb when required
• Troubleshoot any problems that arise
TABLE OF CONTENTS
TABLE OF CONTENTS
Basic Components
Detailed Components
System Requirements
System Support
Software Installation
1
2
3
3
4 - 7
Using the C
Using Handheld Microscope Mode
Using the C2D Camera
Using the C2D Software
Care & Maintenance
Troubleshooting
2
D Digital Microscope
8
9
9
10-12
13
14
* TRADEMARKS:
Microsoft Office 97, Office 2000, Windows 2000, Windows XP, NetMeeting, Windows 98TM ( 2nd Edition),
Windows Me and DirectX are registered trademarks of Microsoft Corporation.
Intel and Pentium are trademarks of Intel Corporation.
Adobe and PhotoShop are registered trademarks of Adobe Corporation.
Page 3

BASIC COMPONENTS
BASIC COMPONENTS
CAMERA
CD Camera
Configurable Microscope basement
USB cable (1.5m long)
Instruction manual
Software (CD-ROM)
Six prepared slides
Seven Scientific Instruments
WARNING!
Only for use by children over 10 years old. Only for use under the supervision of an
adult. This toy contains functional sharp needle, sharp edge on scalpel, scissors and
prepared slide.
CAUTION!
Read the instructions before use, follow them and keep
them for reference.
1
Page 4
DETAILED COMPONENTS
DETAILED COMPONENTS
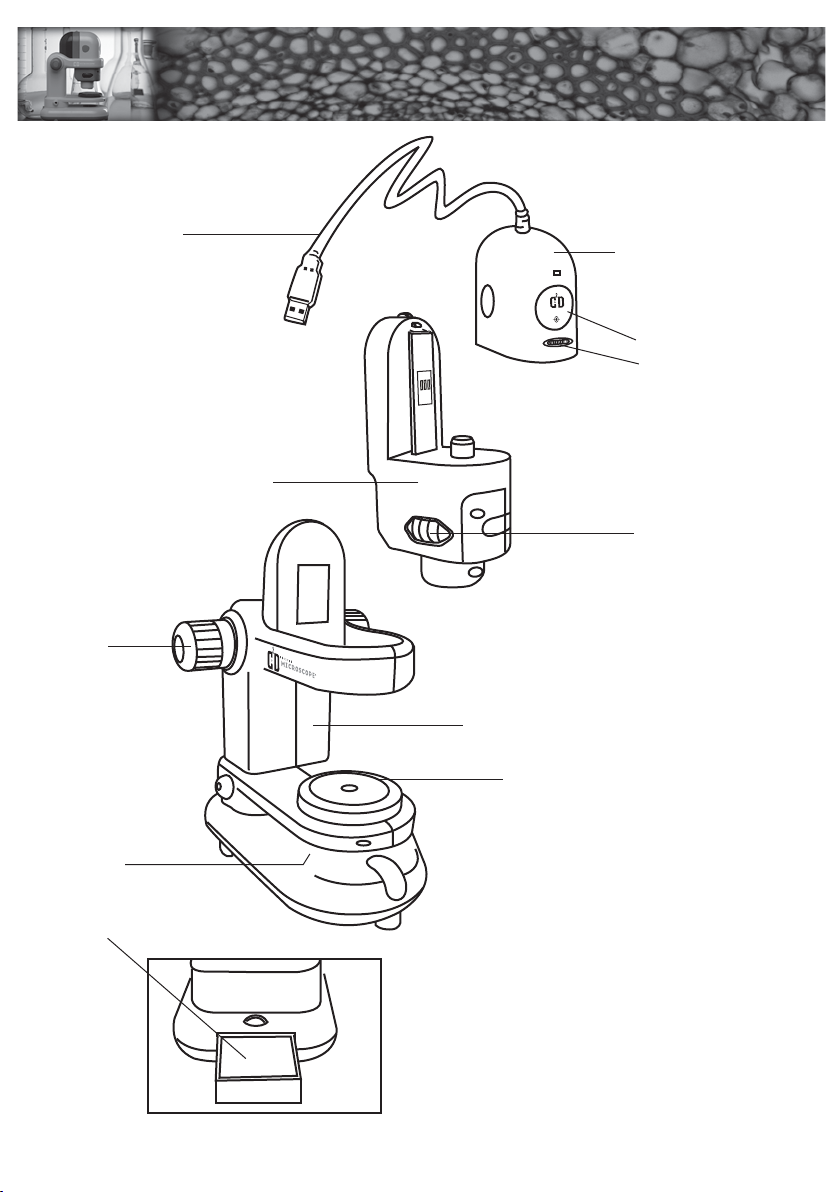
Focus
Knob
USB Cable
C2D CAMERA
CAMERA
Shutter Button
Focus Adjustment
Handheld Unit
Revolving Turret Ring
C2D Digital Microscope Arm
Color Filter / Aperture
Light
Compartment
Your Package contains:
1. C2D Digital Microscope
2. C2D Camera Stand
3. USB Cable (5 ft. or 1.5m)
4. Software (CD-ROM)
5. Prepared Slides (6) with Case
6. Stainless Steel Spatula
7. Stainless Steel Scissors
8. Stainless Steel Tweezers
9. Stainless Steel Needle
10. Stainless Steel Scalpel
11. Stirring Rod
12. Dropper
2
13. Instruction Manual
Page 5
SYSTEM REQUIREMENTS
SYSTEM REQUIREMENTS
• A computer that is USB capable
• Windows 98
• Intel® Pentium
• 64 MB RAM
• Minimum 75 MB free hard disk space
• Sound and Video that are compatible with Microsoft® DirectX® 8.0 or up
• Quad speed (4x) or higher CD-ROM
• 800x600 display resolution, 16 bit colour
• 16-bit windows compatible sound device
• Mouse and Keyboard
TM
(2nd Edition), Me Windows
TM
200 MHz or faster
SYSTEM SUPPORT
SYSTEM SUPPORT
®
2000 Professional and Windows XP
This C2D Digital Microscope supports* Microsoft
software that supports VFW to access this product. This C2D Digital Microscope also supports* Microsoft
NetMeeting. You can preview your pictures via the Internet with your friends!
Please check Microsoft® web site http://www.microsoft.com for details.
* Feature only available on computer running Windows 98
®
Video for Windows® (VFW). You can use third party
TM
(2nd Edition) or Me.
3
Page 6

SOFTWARE INSTALLATION
SOFTWARE INSTALLATION
The installation of the software consists two steps:
STEP ONE - Device driver installation
STEP TWO - C2D software installation
1. Insert the CD-ROM into the CD-ROM drive, the setup program will be
activated automatically.
NOTE: Clicking the button
will skip to STEP TWO - Install
the C
2
Next >
D Software.
Next
Cancel
STEP ONE - Install Device Driver
NOW CONNECT THE C2D DIGITAL MICROSCOPE ™ TO THE COMPUTER
2. After connecting the C2D Digital Microscope to the computer, you will see a "new hardware
found" message.
Next
Cancel
Next
Cancel
4
Page 7

3. Click the button
Next >
Back
Next
Cancel
Next
Cancel
4. Click the button again and you will see the following screen.
Next >
Back
Next
Cancel
Next
Cancel
5
Page 8

5. Select "CD-ROM Drive" and click button to install the driver accordingly.
Next >
Back
Next >
Cancel
Next
Cancel
For Windows 2000 or XP:
A pop - up window will appear when the
C2D device driver is being installed,
please click
6. Once the new hardware device has
been installed properly, please proceed
to step two to install the C2D software.
Once the hardware has been installed
properly, click the button to
finish the device driver installation.
Finish
Cancel
Next
Cancel
6
Page 9

USING THE C2D SOFTWARE, continued
STEP TWO - Install the C2D Software
dfasdasd
Next
Cancel
1. Click the button to finish the application
Next >
Finish
software installation.
2. Once the software has finished installation,
click the button. You can now run
2
the C
NOTE: The setup program will take a while to install Microsoft
D software.
®
DirectX® 8.0 components.
It does not mean that your computer has crashed. You might have to restart your computer.
7
Page 10
2
2
USING THE C
USING THE C
DIGITAL MICROSCOPE
DIGITAL MICROSCOPE
Setup Suggestion
Please remember that the C2D Digital Microscope can be used in the handheld mode, so make sure that
the work area is free from obstruction and the monitor is viewable.
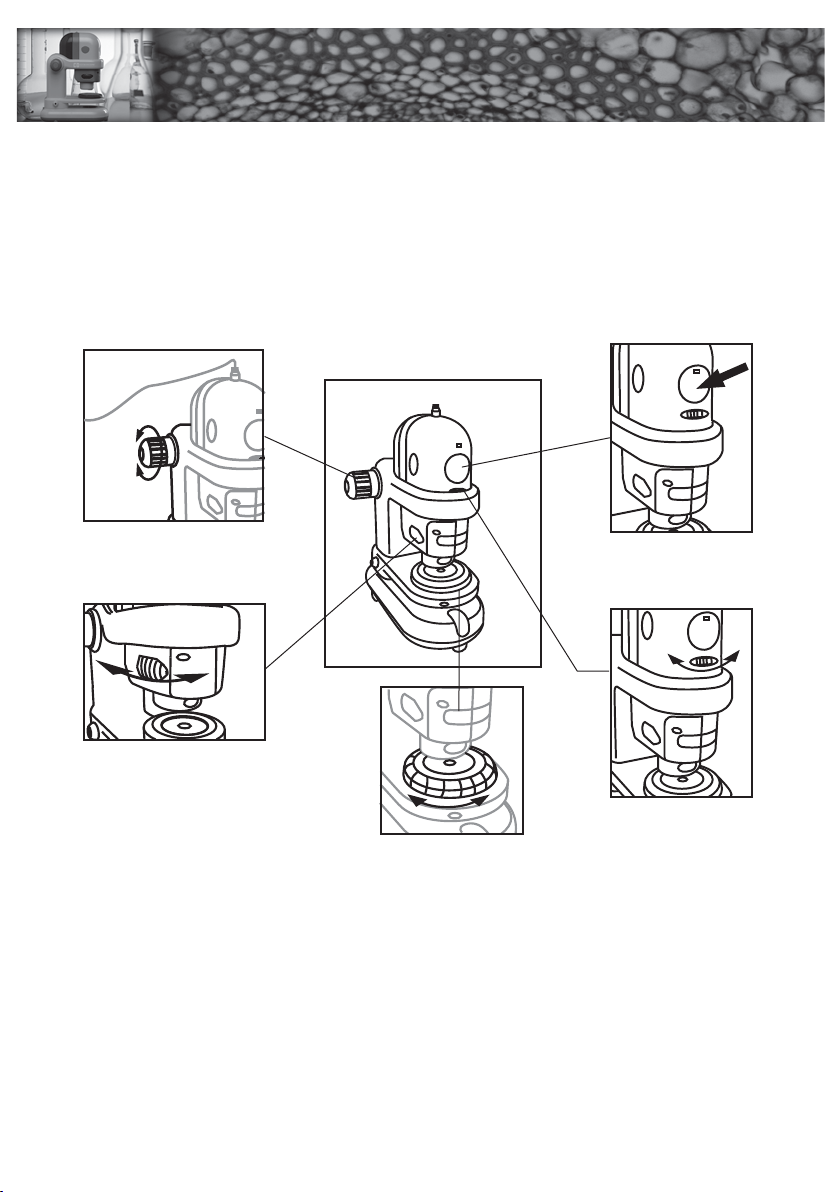
Controls
Learning the C2D controls
Once you have the C2D software installed and running, you can use the controls to focus, change
magnification and capture picturess/movies.
D
D
Focus Knob
Revolving Turret Ring
Color Filter / Aperture
Focusing – 1. Focus the image on the screen with the focusing knob.
2. You should be able to see the image become closer or further away as the focus knob
is adjusted very slowly.
NOTE : This image on the screen will have a delay. Turn the focus knob slowly and wait for the
image to refresh before adjusting again.
Changing Magnification – Change the magnification of the image by turning the Revolving Turret Ring.
Changing Color Filter – Different specimen effect can be displayed by rotating the Color Filter/Aperture.
Taking Images – Images on the screen can be captured (recorded) by pressing the Shutter Button.
Lighting – The light can be turned on or off through the software.
Shutter Button
Focus Adjustment
8
Page 11

USING HANDHELD
USING HANDHELD
MICROSCOPE MODE
MICROSCOPE MODE
Focusing – The handheld unit itself can be used to focus by moving the unit closer or further from
the object
NOTE : This image on the screen will have a delay. Turn the focus knob slowly and wait for the
image to refresh before adjusting again.
Changing Magnification – Change the magnification of the image by turning the Revolving Turret Ring.
Taking Images – Images on the screen can be captured by pressing the Shutter Button.
2
USING THE C
USING THE C2D CAMERA
Focusing – Focus the image by turning the Focus Adjustment.
Taking Images – Images on the screen can be captured (recorded) by pressing the Shutter Button.
D CAMERA
9
Page 12

USING THE C
USING THE C
C2D Main Studio
Light
Contrast
Light
Press button to turn the light on/off.
2
2
D SOFTWARE
D SOFTWARE
Delete
Contrast
Move the tap left and right to adjust the contrast.
Take Image
Press button to capture the current image to "My records".
Make Video
Press button to start making video to "My records".
NOTE: Press this button again to finish recording.
My records
Images
A list of images have been saved in your hard disk. You can select
the record and view them from the lmage Viewer.
Videos
A list of videos have been saved in your hard disk. You can select
the record and playback them from the Video Viewer.
Delete
Click button to delete current selected record from the list.
10
Page 13

USING THE C2D SOFTWARE, continued
Image Viewer
Copy to clipboard
Print
Click button to print out the image from the printer.
NOTE: It would not have any effect unless you have installed the appropriate printer driver.
Copy to clipboard
Copy to clipboard
Click button to copy the image to the clipboard.
TIPS: You can utilize this feature to process the image further from the other software such as Adobe®
PhotoShop®. You can also use Microsoft®Office to make your own presentation.
11
Page 14
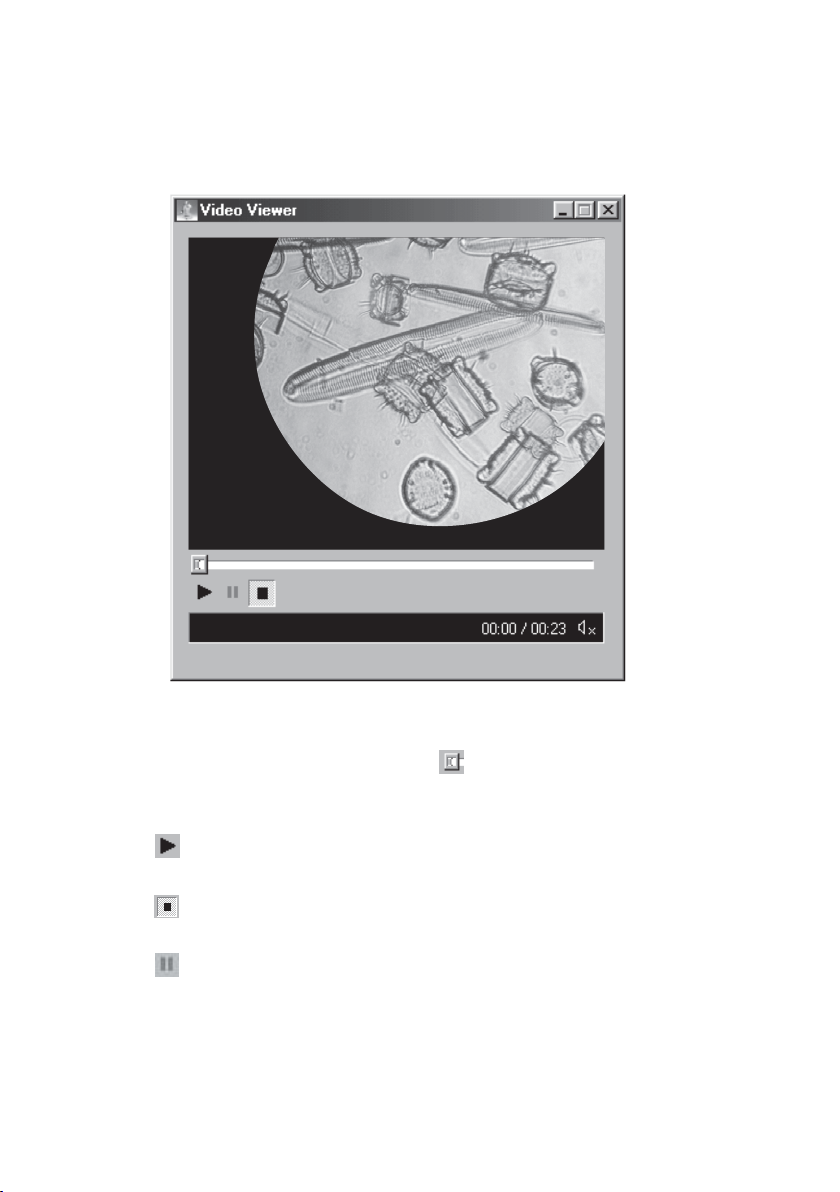
USING THE C2D SOFTWARE, continued
Video Viewer
Stopped
Seek Bar
Position the mouse pointer on the Seek Bar . You can locate frames directly without
playing the whole video sequentially.
Play
Click button to start playing the video.
Stop
Click button to stop immediately.
Pause
Click button to suspend playing the video.
12
Page 15

CARE & MAINTENANCE
CARE & MAINTENANCE
Bulb Replacement
Use a Philips screw driver to open the light compartment.
Bulb Specification: 2.2V DC 150mA
13
Page 16

TROUBLESHOO TING
TROUBLESHOO TING
MESSAGE SOLUTION
The C2D Digital Microscope is not connected to
the computer.
Video recording feature is not available.
Out of memory. Please exit other software to free up more
Cannot turn on the light. Please refer to the section "Care & Maintenance"
Error found when loading image into the memory. Run ScanDisk to check your hard disk for logical
Your computer does not have a default printer.
Cannot initialize clipboard.
Connect the C2D Digital Microscope to the
computer.
If the problem still exists, you have to remove
the C2D Digital Microscope device driver and
install it again. (Please consult Windows® User
Guide).
Reinstall the C
memory.
to replace the bulb.
and physical errors. ScanDisk can then repair
the damaged areas of your hard disk.
Please check your computer whether an
appropriate printer is installed onto your
computer.
Please exit other software to free up more
memory.
2
D software.
Support e-mail address: support@edu-science.com.hk
14
P38-MS288-810010001
 Loading...