

Page 1

Домашний кинотеатр HT-111
Инструкция
пользователя
Page 2

СОДЕРЖАНИЕ
Описание ..................................................................... 3
К Вашему сведению ..................................................... 4
Комплектация .............................................................. 5
Панель управления ...................................................... 6
Подключение ............................................................... 7
Система установок ...................................................... 8
Воспроизведение ....................................................... 12
Устранение неполадок ............................................. 16
Техническая характеристика .................................... 17
2
Page 3

ОПИСАНИЕ
Пожалуйста, внимательно прочитайте это руководство, перед
тем как подключить, и начать пользоваться нашим продуктом.
DVD-плеер позволяет воспроизводить видео и аудио продукцию
с высоким качеством. Данная модель плеера вобрала в себя все
лучшие качества предыдущих разработок и новых технологических
решений, что делает его лучшим решением для Вашего дома.
• Встроенный декодер форматов цифрового звука Dolby Digital, LPCM, MPEG и т.п.
• Высококачественный цифровой процессор звукового сигнала,
поддерживающий частоту до 96 кГц с разрядностью 24
бита.
• Оптический и коаксиальный цифровые выходы.
• Полная поддержка форматов DVD/VCD/CD/JPEG PICTURE CD.
• Полнофункциональный пульт дистанционного управления.
• Встроенный усилитель мощности с высоким качеством звука.
3
Page 4
К ВАШЕМУ СВЕДЕНИЮ
ВАЖНАЯ ИНФОРМАЦИЯ:
• Перед подключением и запуском плеера внимательно прочитайте
это руководство.
• Не открывать крышку и не прикасаться к внутренним деталям.
• Отключать электропитание, если плеер не будет использоваться
в течение длительного времени.
• Держать вдали от источников тепла, не ставить “на солнце”.
• Не допускать попадания влаги.
• Располагать плеер вертикально, не заслонять вентиляционные
отверстия. Перегрев может привести к поломке.
• Чистить мягкой тряпкой, без применения спирто-содержащих
или моющих средств.
• Это руководство лишь описывает возможные установки
оборудования, но не определяет их конфигурацию.
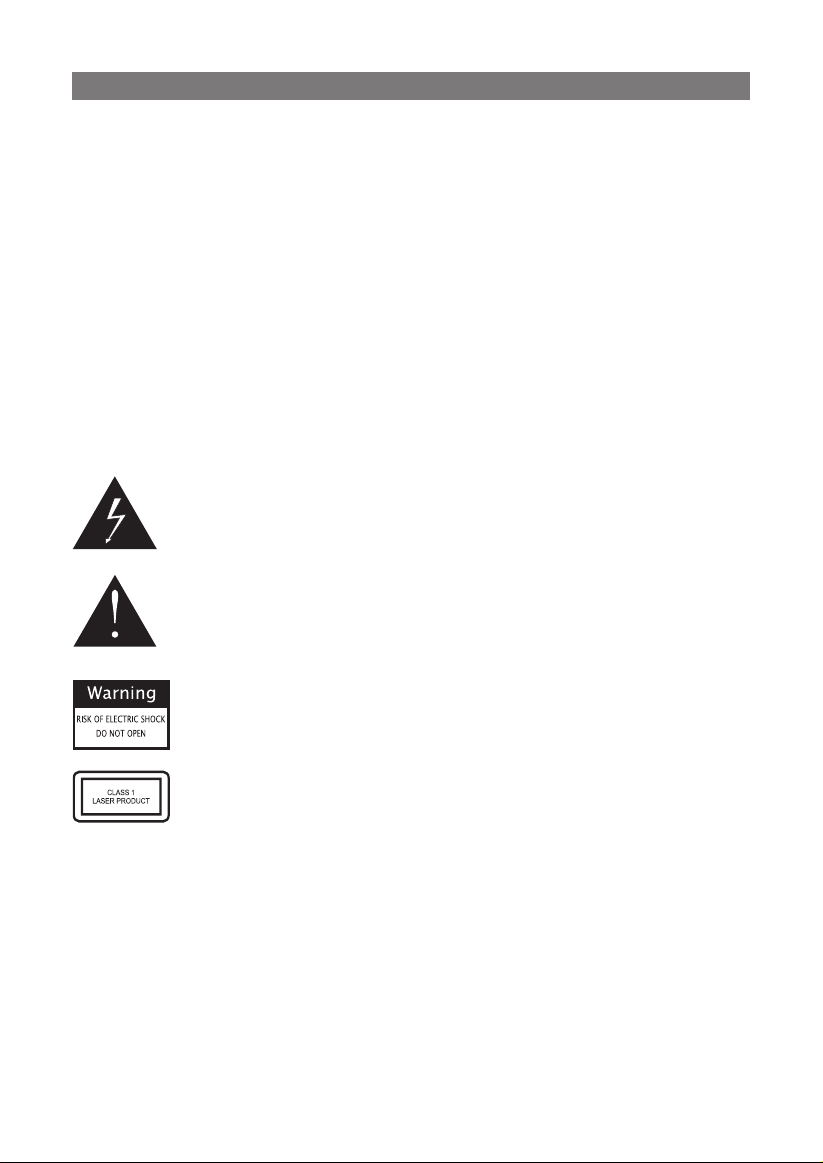
Чтобы избежать поражения током - не прикасайтесь к
внутренним частям плеера. Будьте осторожны при его
подключение к сети.
Подобный значок означает наличие инструкций,
следование которым обязательно.
Чтобы избежать пожара или удара током не открывайте
плеер. Доверьте его ремонт квалифицированному
специалисту.
Данный значок показывает, что устройство использует
лазер первого класса, который может причинить
радиоактивный вред частям человеческого тела при
попадании на них.
4
Page 5
КОМПЛЕКТАЦИЯ
К плееру прилагаются:
Руководство пользователя
Пульт управления
Аудио/Видео кабель
Пульт дистанционного управления (ПДУ).
• Вставьте батарейки в ПДУ. Пульт действует в пределах 8 метров
от плеера и под углом 30 градусов.
• Вынимайте батарейки из ПДУ, если не собираетесь пользоваться
им в течении продолжительного времени.
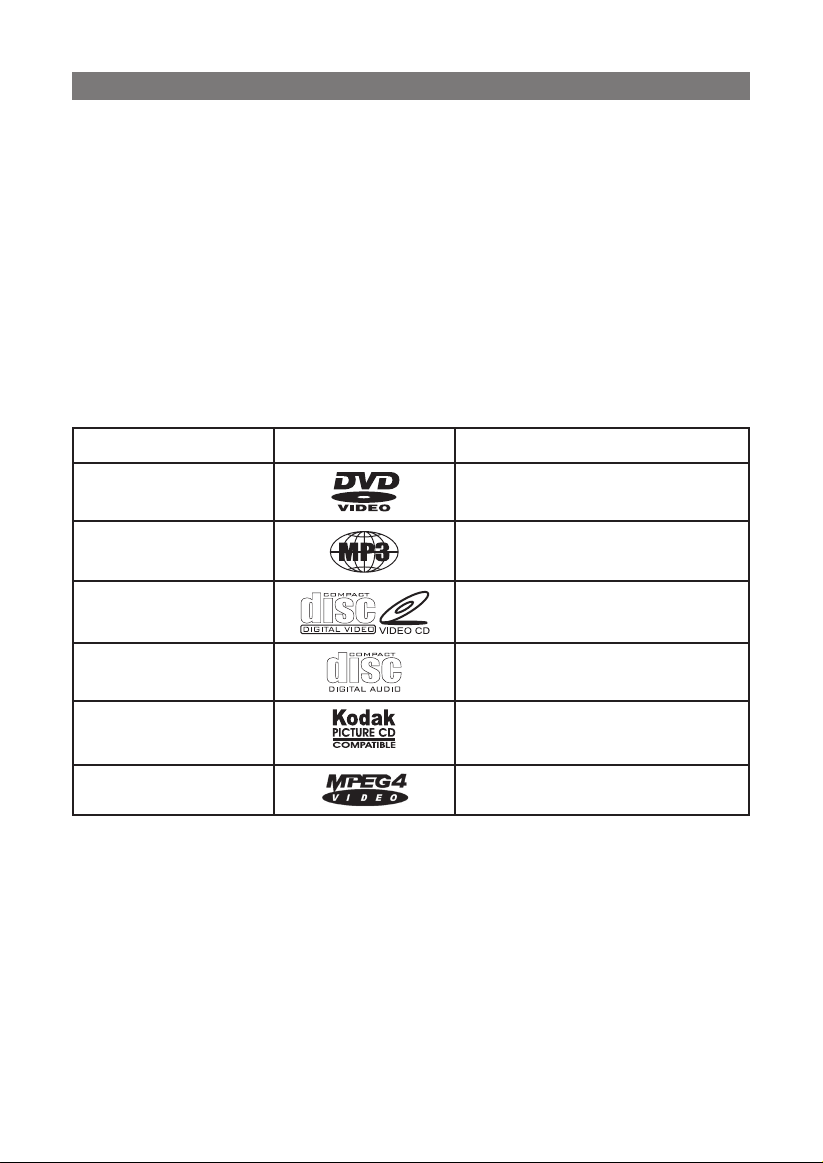
Плеер может воспроизводить следующие типы дисков:
Тип диска Обозначение Тип данных
DVD Аудио+Видео
МР3 МР3 Аудио
VCD Аудио+Видео
CD-DA Аудио
Picture CD Фотографии в
формате JPEG
MPEG-4 Аудио+Видео
5
Page 6
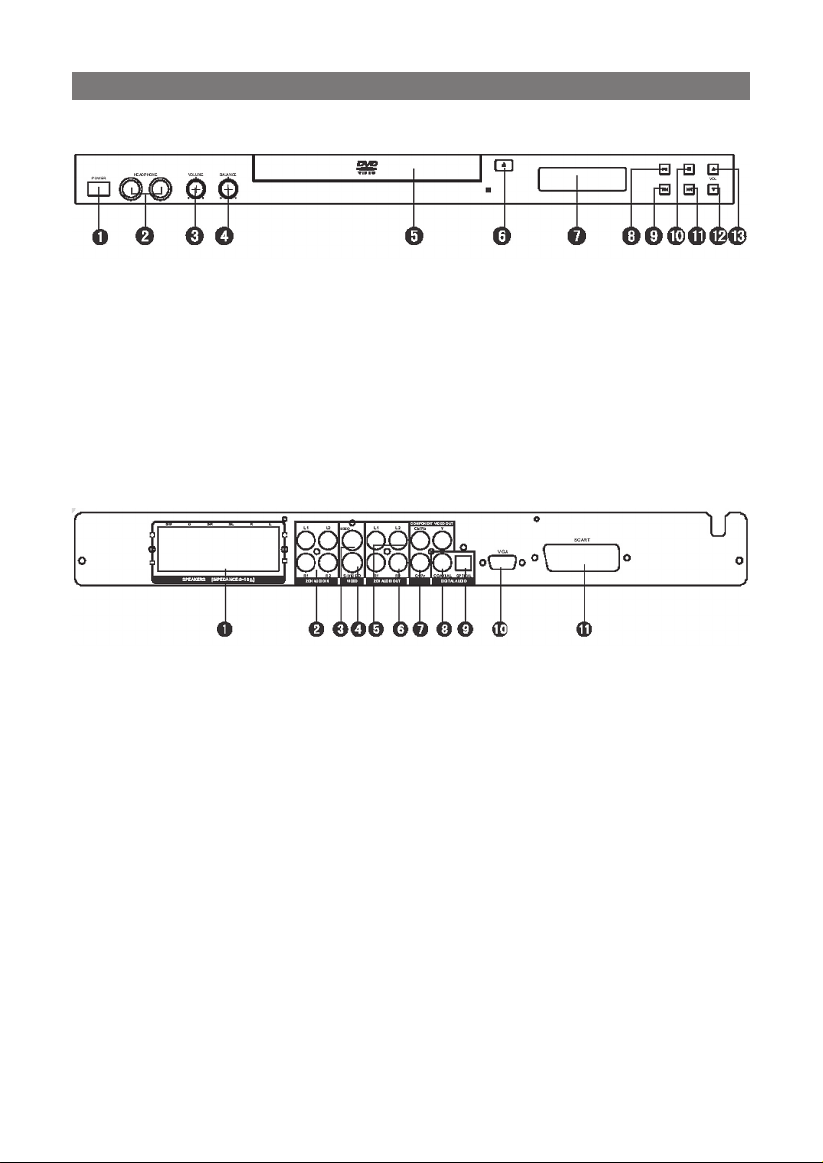
Передняя панель
ПАНЕЛЬ УПРАВЛЕНИЯ
1. Кнопка Вкл./Выкл.
2. Разъем для
наушников
3. Громкость
(Наушники)
4. Баланс (Наушники)
5. Лоток для дисков
Задняя панель
1. Клемы для под-
ключения колонок
2. 2-х канальный
аудио выход
3. Видео выход
4. S-VIDEO выход
6. Кнопка Открыть/
Закрыть
7. Экран
8. Кнопка Воспр./
Пауза
9. Кнопка
“Предыдущий”
5. Левый аудио выход
6. Правый аудио
выход
7. Компонентный
выход Y/Cb/Cr
10. Кнопка “Стоп”
11. Кнопка
“Следующий”
12. Убавить
громкость
13. Увеличить
громкость
8. Коаксиальный
выход
9. Оптический выход
10. VGA
11. SCART
6
Page 7
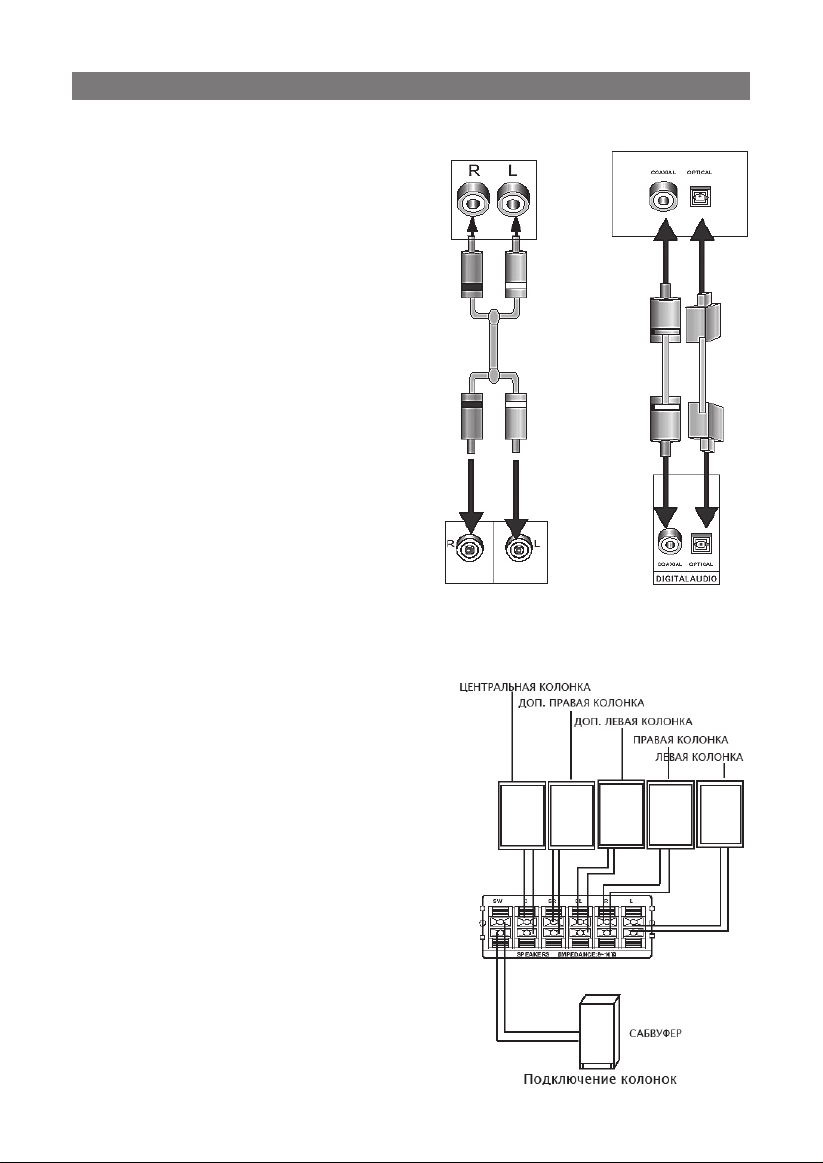
ПОДКЛЮЧЕНИЕ
Выходящий стереофонический сигнал
Для подключения стереофонического звукового выхода этого
аппарата к стереофоническому
выходу телевизора или
усилителя мощности с помощью
аудио/видеокабеля (красный
разъем для подключения
правого канала, белый - для
левого).
Коаксиальный цифровой
звуковой выход
Для подключения коаксиального
выхода этого аппарата к
коаксиальному входу усилителя
мощности воспользуйтесь
специальным коаксиальным
кабелем.
Оптический цифровой звуковой
выход (дополнительный)
Для подключения цифрового оптического выхода данного
аппарата к оптическому входу усилителя мощности используйте
специальный оптический кабель.
Подключение колонок
• Для подключения колонок к
данному аппарату воспользуйтесь
кабелями акустической системы.
Примечание:
Установите настройку звукового
сигнала в соответствии с
выбранным соединением. Только
таким образом можно получить
качественный звук.
7
Page 8

СИСТЕМА УСТАНОВОК
УПРАВЛЕНИЕ МЕНЮ:
Нажмите кнопку SETUP [Настройка], при этом на экране появится
меню настройки. Чтобы выйти из режима настройки, нажмите
кнопку SETUP еще раз. Для выбора необходимого пункта меню
используйте кнопку со стрелкой, а для подтверждения выбора
нажмите кнопку ENTER [Ввод].
(1) Не все пункты настройки относятся к текущему режиму. Пункты
меню, обозначенные серым цветом, использовать нельзя.
(2) Все заданные настройки запоминаются и сохраняются при
отключении питания.
GENERAL SETUP PAGE [Основные настройки]:
TV Display
4:3 Panscan: Если в этом режиме плеер подключается к обычному
телевизору, то широкоэкранные фильмы показываются во весь
экран, но некоторые части изображения при этом срезаны.
4:3 Letterbox: Если в этом режиме плеер подключается к
обычному телевизору, то широкоэкранные фильмы показываются
с черными полосами сверху и снизу экрана.
16:9 Wide Screen: Используйте этот пункт, если плеер подключен
к широкоэкранному телевизору.
ANGLE MARK [Угол обзора]
Если в этом пункте задать режим ON [Включено], то при
воспроизведении DVD диска, позволяющего наблюдать сцены
с разных точек, будет показана пиктограмма ANGLE.
OSD LANG [Язык экранного меню]
Выбор языка экранного дисплея.
DIGITAL INPUT [Цифровой вход]
SPDIF OFF: Цифровой сигнал отсутствует (коаксиальный и
оптический выходы отключены), на выходе только аналоговый
звуковой сигнал.
ALL: Цифровые сигналы выводятся в том формате, в котором
они записаны на диске.
PCM ONLY: цифровые сигналы выводятся в форме
декодированных сигналов импульсно-кодовой модуляции
PCM.
CLOSED CAPTIONS [Скрытые субтитры]
Эта функция не работает с дисками, не имеющими скрытых
субтитров. Если скрытые субтитры находятся в режиме OFF
[выключено], то для их включения нажмите на пульте ДУ SUB-
TITLE [Субтитры]. По умолчанию задано состояние CAPTION ON
8
Page 9

[Скрытые субтитры включены].
SCREEN SAVER [Экранная заставка]
Если пункт SCREEN SAVER находится в состоянии ON (вкл.) и
аппарат включен без установки какого-либо диска в течение
нескольких минут, то на экране появляется экранная заставка, а
еще через 20 минут аппарат перейдет в режим ожидания. Чтобы
включить аппарат, находящегося в режиме ожидания, нажмите
кнопку STANDBY на пульте дистанционного управления.
LAST MEMORY [Запомнить последнее]
Когда эта функция включена, система запоминает время,
на котором было остановлено воспроизведение диска, и в
следующий раз воспроизведение начнется с этого времени.
SPEAKER SETUP [Настройка звука]
DOWNMIX [Микширование]
LT/RT: Выход осуществляется только на левый и правый канал,
даже если исходным форматом является формат 5.1.
STEREO: Выходным форматом является стереозвук, даже если
исходным форматом является формат 5.1.
SURROUND: Создается эффект звука “окружающего” Вас (только
для формата 5.1).
OFF: Отключить микширование.
SPDIF SETUP PAGE
SPDIF OUTPUT
SPDIF OFF: Выход цифрового сигнала отключен (отключен
оптический или коаксиальный выход), включен только
аналоговый выход.
SPDIF/RAW: Выход цифрового сигнала осуществляется в
оригинальном формате, в котором записан диск.
SPDIF/PCM: Выход цифрового сигнала осуществляется в
формате PCM.
MANUAL: Если выбран этот пункт меню, то вы можете установить
форматы CD, DOLBY DIGIT, DTS и MPEG.
CD, DOLBY DIGITAL, DTS, MPEG
Вышеуказанные установки действительны только для режима
SPDIF MANUAL. Устанавливайте установку SPDIF в соответствии
с форматом CD, DOLBY DIGIT, DTS и MPEG. Исходной заводской
установкой является SPDIF/RAW.
PCM CHANNEL
В режиме SPDIF/PCM установка PCM канала зависит от ваших
предпочтений..
LPCM OUT: Выбирайте PCM частоту 48 или 96 кГц.
Примечание: Некоторые усилители не поддерживают битрейт
9
Page 10

96 кГц, и установка в плеере частоты 96 кГц может привести к
неправильной работе оптического или коаксиального выхода.
Исходной заводской установкой является 48 кГц.
DOLBY DIGITAL SETUP [Настройка режима DOLBY DIGITAL]
DYNAMIC
При просмотре динамичного фильма в позднее время выбор
этого режима позволит Вам значительно уменьшить общую
громкость, но сохранить при этом отчетливость звучания. Это
позволит не беспокоить членов семьи и повышает качество
звучания.
CHANNEL DELAY PAGE [Запоздание канала] (недоступно на
двухканальных DVD)
Если предыдущие настройки не удовлетворяют Вас, то можно
настроить расстояние до колонок в соответствии с реальными
условиями. Для выбора колонки нажмите кнопку [▲/▼], и
регулируйте расстояние, кнопками [◀/▶].
3D PROCESSING [Трехмерное звучание] (недоступно на
двухканальных DVD)
Если режим PROLOGIC включен (ON), то становится доступной
настройка реверберации. По умолчанию установлено: OFF
[Выключено].
HDCD SETUP PAGE [Настройка фильтра] (
DVD и DVD без
Вы можете установить фильтр на 44.1 КГц или 88.2 КГц. По
умолчанию фильтр отключен.
DTS)
недоступно на двухканальных
VIDEO SETUP PAGE [Настройка видео]
COMPONENT VIDEO
OFF: видеовыход переключается на композитный сигнал.
YUV: при подключении к разъемам Y/U/V формат видео выхода
установите аналоговый компонентный выходной сигнал.
P-YUV: Включается прогрессивная развертка каналов YUV.
Подключение — аналогично режиму YUV.
RGB: При подключении к разъемам SCART устанавливается
формат выходного сигнала RGB.
VGA: Используйте этот режим при подсоединении к разъемам
VGA.
Для некоторых устройств описанные ниже режимы
неприменимы:
P-RGB: Включается прогрессивная развертка каналов RGB.
Примечание:
Если настройки видео отличаются от реального подключения, то
изображение на телевизоре может отсутствовать. В этом случае
10
Page 11

Вы можете сбросить настройки плеера (RESET), а затем, нажимая
кнопку [V_MODE]. добейтесь качественного изображения на
экране.
QUALITY [Качество]:
Вы можете настроить яркость, контрастность и т.п. согласно
Вашим предпочтениям.
PREFERENCE SETUP [Дополнительные настройки]
TV TYPE [Телевизионная система]
Данный аппарат подходит для всех типов телевизионных
систем. Вы можете выбрать PAL, NTSC или AUTO.
AUTO: телевизионная система автоматически переключается в
соответствие с системой, присутствующей на диске.
NTSC: Эта система применяется в США, Тайване, Японии и т.д..
PAL: Эта система применяется в Китае, Европейских странах,
Гонконге и т.д.
AUDIO, SUBTITLE, DISC MENU LANGUAGE SETUP [Настройка языка
звукового сопровождения, языка субтитров и языка меню
диска]:
Эти первоначальные настройки устанавливаются в
зависимости от Ваших предпочтений. Если какая-либо
настройка соответствует содержимому диска, то она будет
функционировать. В противном случае работают установки
диска, заданные по умолчанию. При воспроизведении эти
настройки могут быть изменены нажатием кнопок [AUDIO]
(Аудио) и [SUBTITLE] (Субтитры).
PARENTAL CONTROL [Родительский контроль]:
Средство защиты, помогающее родителям контролировать
воспроизводимые детьми фильмы и тем самым оградить их от
просмотра сцен насилия и эротики. Если уровень ограничения
диска выше заданного уровня, то диск воспроизводиться не
будет.
PASSWORD SETUP [УСТАНОВКА ПАРОЛЯ]:
Для смены пароля. Исходным паролем, установленным на
предприятии-изготовителе, является 136900. Вы можете задать
свой пароль. Если Вы забыли свой пароль, то в качестве общего
пароля Вы можете использовать 136900.
DEFAULT [Исходное состояние]:
Сбрасывает все настройки и возвращает их к значениям,
заданным на предприятии-изготовителе (по умолчанию).
11
Page 12

ВОСПРОИЗВЕДЕНИЕ
STANDBY [Режим ожидания]
Режим ожидания обеспечивает экономию электроэнергии.
SOURCE SELECT [Выбор источника]
Источники переключаются в следующем порядке: DVD/LINE 1/
LINE 2
OPEN/CLOSE [Открыть/Закрыть]
Открыть/закрыть лоток для дисков.
CH-LEVEL [Уровень канала]
Нажмите эту кнопку, чтобы выбрать канал, затем нажмите VOL-
UME [Громкость] [▲/▼], чтобы установить уровень.
TITLE [Оглавление]
Нажатие этой кнопки осуществляет переход в основное меню
диска.
MENU [Меню]
Возврат в предыдущее меню при воспроизведении диска.
При работе с диском VCD2.0 эта кнопка работает как функция
контроля воспроизведения. Нажмите кнопку MENU, чтобы
включить или отключить эту функцию. В меню Вы можете
выбирать программу. При отключенном режиме контроля
воспроизведения, меню не появляется на экране. VCD1.1, CD-
DA и Mp3 диски, не имеют функции контроля воспроизведения.
V-MODE [Видео режим]
Позволяет выбрать режим изображения (используйте при плохом
изображении).
A-MODE [Аудио режим]
Эта кнопка переключает двухканальный/5.1 канальный режимы.
TONE [Настройка звука]
Нажмите TONE, затем VOLUME [Громкость] [▲/▼] чтобы
отрегулировать верхние, средние и низкие частоты.
KEY [Ключ]
При воспроизведении CD, VCD, DVD дисков, нажмите KEY [+]
или [-], чтобы изменить тональность.
AUDIO [Аудио]
Выберите нужный аудио канал DVD.
SUBTITLE [Субтитры]
Эта кнопка позволяет переключать язык субтитров.
ANGLE [Угол обзора]
Эта кнопка позволяет включать разные ракурсы просмотра.
L/R/ST
При воспроизведение многоканальных VCD, CD дисков, эта
12
Page 13

кнопка позволяет переключаться между ними.
DIGITS BUTTONS [Кнопки с цифрами]
При воспроизведение VCD1.1, CD, MP3 дисков, используйте
эти кнопки, чтобы сразу выбрать нужный трек или главу. Чтобы
набрать номер больше десяти, используйте кнопку 10+.
Эти кнопки можно использоваться при программировании и
работе с меню.
STOP [Стоп] [■]
При воспроизведении DVD, VCD, CD дисков, нажмите [■] чтобы
остановить его, запомнив позицию. Нажатие кнопки [▶II],
продолжит воспроизведение. Двойное нажатие кнопки [■],
остановит воспроизведение без запоминания позиции.
PLAY [Воспроизведение] [▶II]
Нажатие кнопки [▶II] при воспроизведении, включает паузу,
повторное нажатие, продолжает воспроизведение.
STEP [Шаг]
При воспроизведении DVD, VCD, SVCD дисков, нажмите STEP
чтобы сменить текущую картинку на следующую. Нажатие кнопки
PLAY продолжит нормальное воспроизведение.
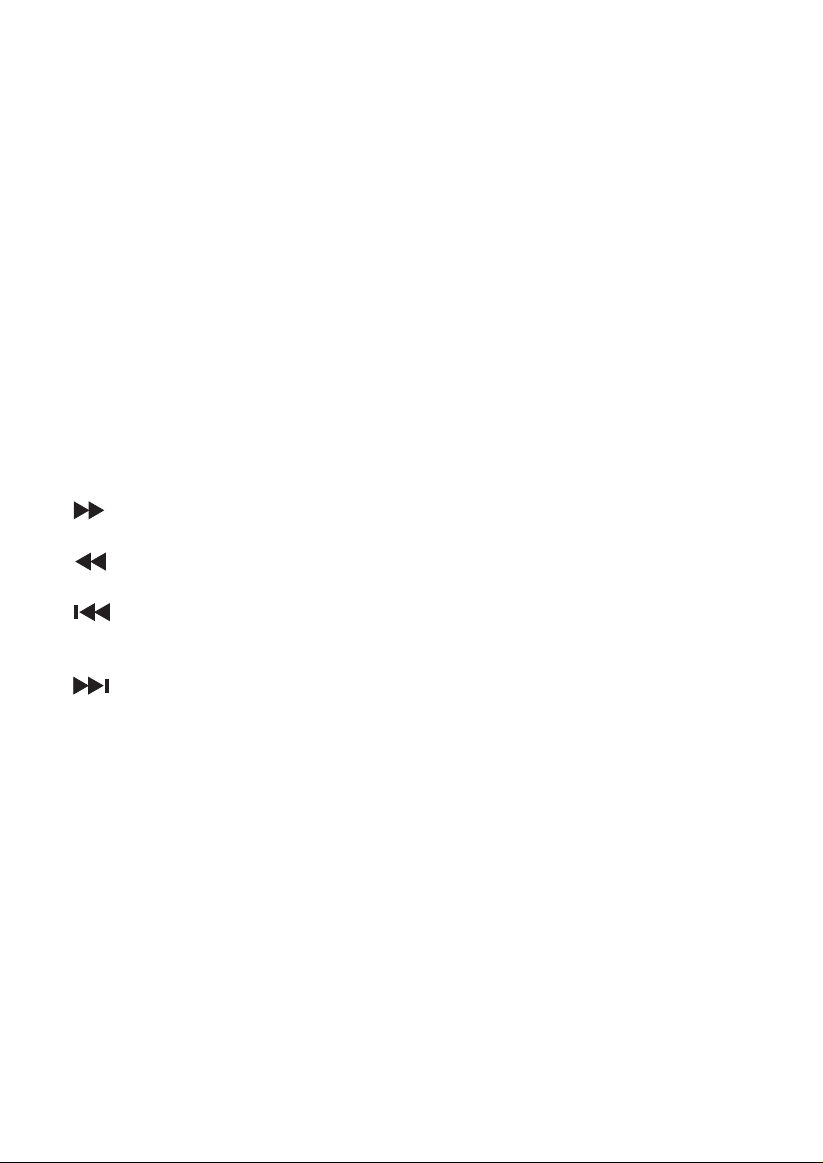
Используйте эту кнопку для быстрого поиска вперед.
Используйте эту кнопку для быстрого поиска назад.
При воспроизведении DVD диска, нажмите эту кнопку для
перехода к предыдущей главе.
Для VCD и CD дисков, переход осуществляется на предыдущий
трек.
При воспроизведении DVD диска, нажмите эту кнопку для
перехода к следующей главе.
Для VCD, SVCD и CD дисков, переход осуществляется на
следующий трек.
Замечание: При работе с MP3 дисками, используйте кнопки [▲/▼]
и ENTER [Ввод], чтобы выбрать и воспроизвести нужный трек.
Если Вы нажмете кнопку [◀], то вернетесь в корневой каталог.
PROGRAM [Программа]
• Если на диске более 2-х треков или глав, то их можно
запрограммировать, используя кнопку PROGRAM [Программа].
• Используйте кнопки с цифрами, чтобы выбирать нужные треки.
Если количество треков больше 10, используйте кнопку NEXT
для перехода к следующим трекам. (В программе может быть
13
Page 14

максимум 20 позиций). Чтобы запустить программу, кнопками
[◀/▲/▼/▶], выберите START [Старт]и нажмите ENTER [Ввод].
• Программирование не работает с MP3 дисками! Используйте
кнопку PROGRAM [Программа] чтобы выбрать режим “директория/
файлы. При режиме “директория” будут воспроизводиться
все файлы в выбранной папке, иначе, можно выбирать для
воспроизведения отдельные файлы, содержащиеся внутри
папки.
REPEAT [Повтор]
Используйте эту кнопку для повтора трека, главы, всего диска.
При воспроизведении DVD диска при последовательном нажатии
кнопки REPEAT [Повтор] на экране будет высвечиваться: “chapter
repeat” [Повтор главы], “title repeat” [Повтор по названию], “all
repeat” [Повтор всего], “repeat cancel” [Отменить повтор].
A-B кнопка
При воспроизведении DVD, VCD и CD дисков, нажмите A-B чтобы
задать отрезок для повтора. Первое нажатие задает точку (A),
второе - точку (B). Третье нажатие отменяет заданный отрезок.
GOTO [Переход]
Нажмите GOTO [Переход], чтобы выбрать переход по времени:
оглавления (title), главы (chapter), трека (track). Для выбора
нужного времени можно использовать кнопки с цифрами.
ZOOM [Увеличение]
При воспроизведении DVD и VCD, нажмите ZOOM чтобы увеличить
или уменьшить изображение. Пользуйтесь кнопками [◀/▲/▼/▶],
чтобы передвигаться по увеличенному изображению.
S.EFFECT [Звуковые эффекты]
Используйте кнопку S.EFFECT, чтобы переключать звуковые
эффекты. Эти звуковые эффекты лучше отключать при
воспроизведении дисков с системой Dolby 5.1, чтобы они не
портили оригинальное звучание.
VOLUME [Громкость]
Нажмите [▲], чтобы увеличить громкость и [▼], чтобы
уменьшить.
MUTE [Тишина]
Нажатие этой кнопки отключает звук, повторное нажатие,
включает.
OSD [Отображение информации]
Нажмите эту кнопку, чтобы увидеть информацию о текущем
состоянии диска.
Воспроизведение PICTURE CD
• Нажмите кнопку STOP. На экран телевизора выводится 12
14
Page 15

миниатюр.
• Выберите необходимую картинку, пользуясь кнопками «вверх»
/ «вниз» / «влево» / «вправо».
С помощью кнопок «вверх» / «вниз» / «влево» / «вправо»
выберите пункт MENU, а затем нажмите кнопку ENTER, чтобы
войти в меню управления. В нем содержатся следующие
команды:
[PROGRAM]: изменить режим преобразования картинки; [STOP]:
ввод режима предварительного просмотра; [PREV]: предыдущая
картинка; [NEXT]: следующая картинка; [PLAY]: показать
картинку; [UP]: зеркальное изображение по вертикали; [DOWN]:
зеркальное изображение по горизонтали; [LEFT]: поворот
изображения на 90 градусов против часовой стрелки; [RIGHT]:
поворот изображения на 90 градусов по часовой стрелке;
[ZOOM]: изменение масштаба; [FAST FORWARD]: увеличить
изображение; [FAST REWIND]: уменьшить изображение; [UP
(вверх) / DOWN (вниз) / LEFT (влево) / RIGHT (вправо)]:
переместить центр масштабированного изображения. Чтобы
выйти из меню, выберите пункт CONTINUE [Продолжить].
ИСПОЛЬЗОВАНИЕ ЛИНЕЙНЫХ ВХОДОВ:
Данный аппарат обладает дополнительной группой входных
разъемов, чтобы Вы могли подсоединить аналоговый источник
стереофонического звукового сигнала, например, DVD плеер,
CD плеер, кассетная дека и настроить входной сигнал по своему
вкусу.
В режиме LINE INPUT можно использовать кнопки [VOLUME +/-
], [CH_LEVEL], [MUTE], [TONE], [S.EFFECT] для настройки сигнала
по своему вкусу. Подробнее см. раздел «Воспроизведение».
15
Page 16

УСТРАНЕНИЕ НЕПОЛАДОК
Проблема Причина Решение
Нет питания Не подключен шнур питания Подключите шнур
питания
Нет
изображения
Нет звука Плохо присоединен аудио
Изображение
рябит
Цвета мигают
или картинка
рябит
Не
проигрывает
ПДУ не
работает
Не получается настроить
канал
(Тюнер)
Установки телевизора не
верны
Неверные видео установки Проверьте установки
Не подключен видео кабель Подсоединить его
кабель
Не включено питание аудио
аппаратуры
Не верные звуковые
установки
Грязный диск Почистить диск
Включена перемотка Рябь в этом режиме
Не верно выбрана система
(PAL/NTSC...)
Нет диска Вставьте диск
Диск испорчен Почистить или удалить
Диск положен неправильно Переверните диск
На экране высвечено меню Используйте меню
Активизирован режим
защиты от детей
Пульт не направлен на плеер Направьте его на сенсор
ПДУ слишком далеко от
плеера
Батареи сели Заменить батареи
Антенна не подключена Подключите антенну
Не включен режим “Тюнер” Включите режим “Тюнер”
Поставить правильные
установки
Проверить подключение
кабеля
Включить питание
Выставить правильные
значения
нормальна
Выбрать верную систему
диск
установок, чтобы убрать
его
Отключите его
Подойдите поближе
16
Page 17

ТЕХНИЧЕСКОЕ ОПИСАНИЕ
Потребляемая мощность 230В ~ 50Гц
Потребляемая мощность 150 Вт
Выход
сигнала с
DVD
Выходная мощность (макс.) 15Вт x 2+30Вт
Диапазон частот ±1.5дБ (20Гц~20КГц)
ТВ системы PAL/NTSC
Диапазон частот 20Гц ~ 20КГц
Отношение сигнал/
шум
Общий коэффици-
ент гармоник+
шумы
Коэффициент
детонации
>80дБ (1КГц)
≤-60дБ (1КГц)
Ниже предела чувствительности
измерений
236010, г. Калининград, проспект Мира, 136
ООО “РАДИОИМПОРТ-Р” Россия
17
Page 18

Home Theatre HT-111
User Manual
Page 19

CONTENT
Features ..................................................................... 20
For your Attention ..................................................... 21
Accessories ................................................................ 22
Panel .......................................................................... 23
Connection ................................................................. 24
System Setup ............................................................ 25
Play ............................................................................ 28
Troubleshooting ......................................................... 32
Specification ............................................................... 33
19
Page 20

FEATURES
Thank you for purchasing our product. Please go through
this manual carefully before connection and operation.
Please keep this manual for the future reference.
This DVD player is a new generation home player, which
can produce high quality video and audio for your continued enjoyment!
• Built in DTS, LPCM, MPEG etc. digital audio output
• Hi-fi, 96kHz/24bitaudio digital processor.
• OPTICAL, COAXIAL digital audio output
• Compatible with DVD/VCD/CD/MP3/JPEG PICTURE CD
• Full function remote controller
• High quality amplifier
20
Page 21

FOR YOUR ATTENTION
IMPORTANT NOTES:
• Please read through the manual carefully before connection and
operation.
• Do not open the cover or touch any internal components for non-
professionals.
• Turn off the power when the unit is not being used. (Unplug the
power cord if the unit is not used for a long time).
• Don’t expose this unit to direct sun light. Keep away the heating
sources or equipments.
• Don’t expose this unit to the rain or moisture.
• Place the unit on a horizontal level. Keep the unit ventilated. Don’t
block the heat hole. Overheat may cause malfunction.
• Сlean the cabinet with soft cloth. Detergent or alcohol is forbid-
den.
• This book is only a guide for user’s operation, not a criterion for
configuration.
The lightning flash is intended to alert the user to the presence of dangerous voltage within the product’s enclosure,
and touching the inner parts may result in a risk of electric
shock to persons.
The exclamatory mark is intended to alert the user to the
presence of important operating instructions.
To reduce the risk of electric shock or fire, do not open the
cover. Refer servicing to the qualified service personnel.
This mark indicates this unit belongs to class 1 laser prod
uct. The laser beam may produce radiation harm to the
directly touching human body.
-
21
Page 22

ACCESSORIES
Accessories:
User manual
Remote controller
Audio/Video cable
Remote control operation
• Insert the batteries into the cell box. The remote control points at
remote sensor within 8 meters and within 30 degree at left or right
side.
• Take the battery out of the controller if it is not used for a long
time.
This unit can play the following types of discs:
Disk types Symbol Contents
DVD Audio+Video
MP3 Dolby Digital Audio
VCD Audio+Video
CD-DA Audio
Picture CD JPEG Photo CD
MPEG-4 Audio+Video
22
Page 23

Front panel
PANEL
1. POWER BUTTON
2. HEADPHONE JACKS
3. HEADPHONE VOL
4. HEADPHONE BAL
5 DVD DOOR
Rear panel
1. SPEAKER OUTPUT
TERMINALS
2. 2CH AUDIO INPUT
3. VIDEO OUT
4. S-VIDEO OUT
6. OPEN/CLOSE BUTTON
7. DISPLAY
8. PLAY/PAUSE BUTTON
5. L AUDIO OUT
6. R AUDIO OUT
7. COMPONENT
Y/Cb,Pb/Cr,Pr
9. PREV BUTTON
10. STOP BUTTON
11. NEXT BUTTON
12. VOL- BUTTON
13. VOL+ BUTTON
8. COAXIAL DIGITAL
OUT
9. OPTICAL OUT
10. VGA
11. SCART
23
Page 24

CONNECTION
Stereo Audio
Use a pair of AV cable (red for right /white for left) to connect
the stereo audio output of this unit to the TV or a stereo input of
power amplifier.
Coaxial Digital Audio
Use the special coaxial cable to
connect the coaxial output of this
unit to the coaxial input of power
amplifier.
Optical Digital Audio(Option)
Use the optical cable to connect
the optical audio output of this
unit to the optical input of power
amplifier.
Speaker Output
Use the speaker cable to connect
the speaker output of this unit to
the sound box.
Notes:
The physical connection should accord with audio output setup of
this unit. Please refer to Audio Setup in System Setup.
24
Page 25

SYSTEM SETUP
Press SETUP key, screen show setup page. In setup mode, press SETUP
key again to quit the setup page. Press arrow button to the desired
item, press ENTER to confirm.
(1) Some setup items are concerning the present modes. The items in
gray can’t be setup.
(2) The setup is memorized and kept after power off.
GENERAL SETUP PAGE
TV Display
4:3 Panscan: When the unit connects to the normal TV set, the
wide-screen image shows on the full screen, but some part is cut
off.
4:3 Letterbox: When the unit connects to the normal TV set, the
wide-screen image shows and black bars appear on the top and
bottom of screen.
16:9 Wide Screen: Use this item when the unit is connected with
the wide screen TV set.
ANGLE MARK
It will show the ANGLE mark when playing DVD disc with multi-
angle view if selecting ON
OSD LANGUAGE
Select on-screen display language
CAPTIONS
This function doesn’t work when the disc without caption. If the
caption is OFF, press SUBTITLE key on the remote controller to
make caption on. The default setup is CAPTIONON.
SCREEN SAVER
If the SCREEN SAVER is set ON and the unit is switched on without
a disc playing for several minutes, a moving picture appears on
the screen, and the unit will go to standby mode after 20 minutes.
You can press STANDBY key on the remote controller to wake it
up.
LAST MEMORY
When this function is on, the unit can memorize the time elapsed
from the last time you played the disc. Then at the next playing, it
will resume playing from the memorized time.
SPEAKER SETUP
DOWNMIX
LT/RT: The audio out is Left and Right channels format even if the
original sound is 5.1CH format.
STEREO :The audio out format is stereo even if the original sound
25
Page 26

is 5.1 CH format.
SURROUND: The audio out is virtual surround sounds (only for
5.1CH player).
OFF: Turn off downmix function. If playing 5.1CH discs or the unit
is connected with 5.1 channel amplifier, this item should be se-
lected. (only for 5.1CH player)
SPDIF SETUP PAGE
SPDIF OUTPUT
SPDIF OFF: no digital signal out( optical or coaxial output off ),
only analog audio output.
SPDIF/RAW: digital signal output in the original format recorded in
the disc.
SPDIF/PCM: digital signal output in the decoded PCM form.
MANUAL
If this item is selected, you can set up the following CD,DOLBY
DIGIT,DTS and MPEG respectively.
CD, DOLBY DIGITAL, DTS, MPEG
In SPDIF MANUAL mode, the above setup will work. Make the SPDIF
setup respectively for CD, DOLBY DIGITAL, DTS, and MPEG. The
initial factory setup is SPDIF/RAW.
PCM CHANNEL
In SPDIF/PCM mode, setup PCM channel according to your pref-
erence.
LPCM OUT: Select PCM frequency at 48kHz or 96kHz.
DOLBY DIGITAL SETUP
DYNAMIC
Select this to reduce the overall volume and still keep defined au-
dio sound.
CHANNEL DELAY PAGE (NOT AVAILABLE FOR 2CH DVD)
If the above setup disatisfies you, you can set the speaker dis-
tances in the real conditions. Press the key UP/DOWN to select the
speaker. Press the key LEFT/RIGHT to adjust the distance.
3D PROCESSING (NOT AVAILABLE FOR 2CH DVD)
In PROLOGIC ON mode, the reverb mode setup is available. The
initial factory setup is off.
HDCD SETUP PAGE (NOT AVAILABLE FOR 2CH DVD and DVD without DTS)
You can select the digital filter at 44.1kHz or 88.2kHz. The initial fac-
tory setup is off.
VIDEO SETUP PAGE
COMPONENT VIDE
YUV: set video output in analog component video format when
connecting to Y/U/V terminals
26
Page 27

P-YUV: set progressive YUV signals. Connection same as YUV
RGB: set video output in Red/Green/Blue format when connecting
to SCART terminals
P-RGB: progressive RGB signals. Connection same as RGB
VGA: set to this item when connecting to VGA terminals.
Notes:
If the video setting differs with the physical connection, the TV set
may be without picture. In case of no picture, you can RESET the
machine, then keep pressing key [V_MODE] until the picture is OK
again.
QUALITY:
You can set the sharpness brightness, contrast, etc. according to
your preference.
PREFERENCE SETUP
TV TYPE
This unit is suitable for all kinds of TV systems. You can select one
of the PAL, NTSC or AUTO.
AUTO: the TV system is auto switched according to the disc sys-
tem.
NTSC: this system is used in USA,TAIWAN, JAPAN etc.
PAL: this system is used in CHINA, EUROPE, HONGKONG etc.
AUDIO, SUBTITLE, DISCMENU LANGUAGE SETUP
These are the initial settings by your preference. If a setting is
supported by disc content, it will work. Otherwise the disc default
value works. And these settings can be changed respectively by
press key AUDIO, SUBTITLE when playing.
PARENTAL CONTROL:
The control level is for parental to control playing content and
protect your children from violence and erotism. The disc, the lev-
el of which is higher than the setting level can not be played.
PASSWORD SETUP
Change the password. The initial factory password is 136900. You
can set your own password. If you forget your own password, you
can use 136900 as general password.
DEFAULT
Reset to the initial factory setups.
27
Page 28

PLAY
STANDBY
Stand by/working mode switch.
SOURCE SELECT
A/V Source switch among DVD/LINE 1/LINE2
OPEN/CLOSE
Eject or load the disc tray
CH-LEVEL
Press this key to select a channel then press VOLUME [▲] or [▼] to
adjust its level.
TITLE
Return to the top menu when playing DVD disc.
MENU
Return to the previous menu when playing DVD disc.
When playing VCD2.0 disc, it works as PBC. Press MENU button to
switch PBC ON and PBC OFF, under PBC ON mode, the disc menu
will show. You can select a program in the menu. Under PBC OFF
mode, the menu will not appear, press digit key to select the track
directly. VCD1.1, CD-DA and Mp3 have no PBC menu.
V-MODE
Video output mode switch (if losing pictures or picture is abnormal,
keep switching until you reach a clear picture).
A-MODE
2 channel/ 5.1 channel switch (not available for 2 channel mode).
TONE
Press [TONE], then press VOLUME [▲] or [▼] to control bass mediant
and treble.
KEY
When playing CD, VCD, DVD discs, press KEY [+] or [-]buttons to
change tone.
AUDIO
Select the desired audio channel when playing DVD disc, tuner
mode.
SUBTITLE
When playing the disc with multi-subtitle, press SUBTITLE continu-
ally, select the desired subtitle.
ANGLE
When playing the disc with multi-angle, it’s convenient to change
the view angle.
L/R/ST
When playing VCD, CD disc with multi-channel, press L/R/ST but-
28
Page 29
ton to select left channel/right channel/stereo/mix audio output.
DIGITS BUTTONS
When playing VCD1.1, CD, MP3 disc, after loading the disc, use the
digit key to select the desired track or chapter directly. Press 10+
key and then another digit key to select the track which number is
10 or more.
You can press digit keys at PROGRAM and MENU selection.
STOP [■]
When playing DVD, VCD, CD disc, press [■] button once, the unit
will memorize the previous ending point. Press [▶II] button to go on
the play. Press [■] button for the second time to stop the play and
end memory.
PLAY [▶II]
When playing the disc, press [▶II] button once to pause, press [▶II]
button again to return to normal play.
STEP
When playing DVD, VCD, SVCD disc, press STEP once, the picture
changes to next frame. Press PLAY to resume normal play.
Press this button for quick forward search.
Press this button for quick rewind search.
When playing DVD disc, press PREV to the previous chapter.
When playing VCD, CD disc, press PREV to the previous track.
When playing DVD disc, press NEXT to the next chapter.
When playing VCD, SVCD, CD disc, press NEXT to the next track.
Note: When playing Mp3 disc, you must select the song reuired by
up or down direction arrow, then press ENTER to play. If you press
the left direction arrow, the system will return superior root direc-
tory.
PROGRAM
• If the disc is with 2 or more tracks, chapters or titles, set up the
playing order as your preference. Press this button to enter pro-
gram menu.
• Press digit key to input the number of the track, title or chapter.
If the programmed tracks are over ten, press NEXT to go on pro-
gramming. (Maximum 20 programable items) use the up/down/
left/right key to move the cursor to the START. Press ENTER to start
PROGRAM play.
• When playing MP3 disc, NO program function! Press PROGRAM but-
29
Page 30

ton once to enter DIRECTORY- PLAY mode, you can select program
to play in the current directory; Press PROGRAM again to enter FILE-
LIST mode, you can select program to play in the file list of whole
disc.
REPEAT
Press REPEAT button to repeat a title, chapter, track or the whole
disc. When playing DVD disc, press REPEAT button continually, the
TV screen shows chapter repeat, title repeat, all repeat, repeat can-
cel in turn.
When playing VCD, CD disc, the turn is track repeat, all repeat,
repeat cancel. When playing MP3 disc, the turn is single repeat,
directory repeat, repeat cancel.
A-B button
When playing DVD, VCD, CD disc, press A-B button to repeat a
certain contents. Press A-B key on the start point (A) and the ending
point (B) to select the repeat part. Press A-B the third time, cancel
A-B repeat and return to normal play.
GOTO
Press GOTO to select title time, chapter time, track time to play.
You can use digit keys input the goto time.
ZOOM
When playing DVD, VCD disc, press ZOOM to zoom in or zoom out
the picture. In zoom in mode, press up/down/left/right to move
the picture for viewing. The picture can not be moved in zoom out
mode.
S.EFFECT
Press S.EFFECT button to obtain different sound effect. CD playing
is more proper to obtain better sound effect. You had better close
S.EFFECT when playing disc with Dolby 5.1 channel in order to ob-
tain real 5.1 effect.
VOLUME
Press [▲] to adjust volume up. Press [▼] to adjust volume down.
MUTE
Press MUTE button, no sound will give out and the mute symbol will
display on the TV screen. Press MUTE again, MUTE OFF will display
and the sound will resume.
OSD
Press the OSD button, the relative information of the disc will dis-
play on the TV screen.
30
Page 31

PLAY PICTURE CD DISC
• Press STOP key, 12 small pictures will show on the TV screen.
• Press up/down/left/right to select the desired picture.
• Use up/down/left/right key to MENU, the press ENTER to instruc-
tion menu.
Instruction menu as follows:
[PROGRAM]: to change picture transform mode; [STOP]: entering
picture preview mode; [PREV]: previous picture; [NEXT]: next pic-
ture; [PLAY]: to play picture; [ UP]: mirror image in vertical; [DOWN]:
mirror image in horizon; [LEFT]: rotate 90 degrees anticlockwise;
[RIGHT]: rotate 90 degrees clockwise; [ZOOM]: change zoom mode;
[FAST FORWARD]: zoom in the picture; [FAST REWIND] :zoom out
the picture; [UP/DOWN/LEFT/RIGHT]: move zoom center, select
CONTINUE to exit.
LINE INPUT OPERATION:
• This unit has extra group of line input terminal. You can input the
analogue stereo audio signals from extra devices such as DVD, CD,
TAPE PLAYER and process the input signal to meet your prefer-
ence.
• Under LINE INPUT mode, you can press [A_MODE] to change the
steteo input to 5.1CH output. At the same time [VOLUME+/-], [CH_
LEVEL], [MUTE], [TONE], [S.EFFECT] buttons are available, please re-
fer to the PLAY chapter for details.
NOTE:
Most buttons on the remote controller works only when playing
DVD.
31
Page 32

TROUBLESHOOTING
Symptom Cause(s) Remedy
No power The power cord isn’t connect-edConnect the power cord
properly
Fuse melting Replace a same specifica-
tion fuse!
No picture TV video setup isn’t correct Select the suitable setup
Player video setup isn’t correct Select the suitable setup
No sound
Distorted
picture
Luminance
unsteady or
picture with
noise
Unable to
play
Key malfunction
Remote
control
doesn’t
work
Can’t locate
any
channels
Video cable isn’t connected well
Audio cable isn’t connected well
Source select incorrect Switch to the proper source
Audio setup isn’t correct
Dirty disc Clean the disc
In fast forward or fast rewind
mode
Anti-copy circuit influence Connect the DVD unit to TV
Without disc Put in the disc
Disc is bad Clean or replace the disc
Disk is put upside down Put the disc properly
Dirty disc Clean the disc
There are menu on TV screen Use SETUP to turn off menu
Perental control is working Set up parental off or change
Power wave or other static in
terference
Remote control isn’t pointed at
the sensor
Remote control is too far from
DVD unit
Batteries are exhausted Replace the batteries
Antenna is not connected Connect antenna
Source mode is not in tuner
mode
Connect the cable properly
Connect the cable properly
Select the suitable audio setup
Sometimes the tiny distortion appears. It’s normaly
directly
the setup
-
Turn on/off the power and
try again
Point the remote control at
the sensor
Operate the remote control
within 7m
Switch to tuner mode
32
Page 33

SPECIFICATION
Power supply AC 230V ~ 50Hz
Power consumption 150W
Disc
output
Power output (RMS) 15Wx2+30W
Frequency response ±1.5dB(20Hz~20KHz)
TV System PAL/NTSC
Frequency Response 20Hz~20KHz
S/N A weight >80dB(1KHz)
THD+NOISE ≤-60dB(1KHz)
WOW FLUTTER Below the limit of apparatus mea-
sure
33
 Loading...