

Page 1
PERFEKT IN FORM UND FUNKTION
Microwave oven with grill
Mikrowellengerät mit grill
Four à micro-ondes avec gril
Magnetronoven met grill
Horno Microondas con grill
Operating instructions
Gebrauchsanweisung
Notice d’utilisation
Gebruiksaanwijzing
Instrucciones de Manjo
MCD2660E / MCD2661E
UK
D
F
NL
E
AG-71+72D-EU COVER 29/03/2005 10:52 Page A
Page 2

Dear Customer,
Thank you for buying an AEG-Electrolux microwave oven and putting your
trust in the AEG-Electrolux brand name.
Before using your AEG-Electrolux microwave oven for the first time, please
read the instruction book thoroughly. This will enable you to take advantage
of all the features that the appliance offers. It will also ensure trouble-free
operation and minimize unnecessary service calls.
Important information concerning your safety or the operation of your
appliance is noted by this symbol and/or mentions words such as «Warning»,
«Take care». Be sure to follow all instructions carefully.
Throughout the manual, this symbol guides you step by step when operating
the appliance.
This symbol indicates further information concerning the use of the
appliance.
The clover indicates energy-saving tips and hints for environmentally friendly
use of your appliance.
In the event of malfunctioning, please follow the instructions given in the
section «What to do if...»
1. AG-71+72D-EU English 29/03/2005 10:48 Page B
Page 3

1
UK
Contents
Important safety instructions . . . . . . . . . . . . . . . . . . . . . . . . . . . . . . . . . . . . . . . . . . . . . . . . . .2 - 4
Oven & accessories . . . . . . . . . . . . . . . . . . . . . . . . . . . . . . . . . . . . . . . . . . . . . . . . . . . . . . . . . . . . . .5
Control panel . . . . . . . . . . . . . . . . . . . . . . . . . . . . . . . . . . . . . . . . . . . . . . . . . . . . . . . . . . . . . . . . . . .6
Before operation . . . . . . . . . . . . . . . . . . . . . . . . . . . . . . . . . . . . . . . . . . . . . . . . . . . . . . . . . . . . . . . .7
Setting the clock . . . . . . . . . . . . . . . . . . . . . . . . . . . . . . . . . . . . . . . . . . . . . . . . . . . . . . . . . . . . . . . .7
What are microwaves? . . . . . . . . . . . . . . . . . . . . . . . . . . . . . . . . . . . . . . . . . . . . . . . . . . . . . . . . . . .8
Suitable ovenware . . . . . . . . . . . . . . . . . . . . . . . . . . . . . . . . . . . . . . . . . . . . . . . . . . . . . . . . . . . .8 - 9
Tips & advice . . . . . . . . . . . . . . . . . . . . . . . . . . . . . . . . . . . . . . . . . . . . . . . . . . . . . . . . . . . . . .10 - 14
Microwave power levels . . . . . . . . . . . . . . . . . . . . . . . . . . . . . . . . . . . . . . . . . . . . . . . . . . . . . . . . .15
Microwave cooking . . . . . . . . . . . . . . . . . . . . . . . . . . . . . . . . . . . . . . . . . . . . . . . . . . . . . . . . . . . . .16
Grill & dual grill cooking . . . . . . . . . . . . . . . . . . . . . . . . . . . . . . . . . . . . . . . . . . . . . . . . . . . . . . . .17
Other convenient functions . . . . . . . . . . . . . . . . . . . . . . . . . . . . . . . . . . . . . . . . . . . . . . . . .18 - 19
Auto cook & defrost operation . . . . . . . . . . . . . . . . . . . . . . . . . . . . . . . . . . . . . . . . . . . . . . .20 - 21
Auto cook & defrost charts . . . . . . . . . . . . . . . . . . . . . . . . . . . . . . . . . . . . . . . . . . . . . . . . . .22 - 24
Recipes for auto cook . . . . . . . . . . . . . . . . . . . . . . . . . . . . . . . . . . . . . . . . . . . . . . . . . . . . . . .25 - 26
Cooking charts . . . . . . . . . . . . . . . . . . . . . . . . . . . . . . . . . . . . . . . . . . . . . . . . . . . . . . . . . . . . .27 - 29
Recipes . . . . . . . . . . . . . . . . . . . . . . . . . . . . . . . . . . . . . . . . . . . . . . . . . . . . . . . . . . . . . . . . . . .30 - 44
Care & cleaning . . . . . . . . . . . . . . . . . . . . . . . . . . . . . . . . . . . . . . . . . . . . . . . . . . . . . . . . . . . . . . . .45
What to do if... . . . . . . . . . . . . . . . . . . . . . . . . . . . . . . . . . . . . . . . . . . . . . . . . . . . . . . . . . . . . . . . . .46
Service & spare parts . . . . . . . . . . . . . . . . . . . . . . . . . . . . . . . . . . . . . . . . . . . . . . . . . . . . . . . . . . . .47
Guarantee conditions . . . . . . . . . . . . . . . . . . . . . . . . . . . . . . . . . . . . . . . . . . . . . . . . . . . . . . . . . . .47
Specifications . . . . . . . . . . . . . . . . . . . . . . . . . . . . . . . . . . . . . . . . . . . . . . . . . . . . . . . . . . . . . . . . . .48
Important information . . . . . . . . . . . . . . . . . . . . . . . . . . . . . . . . . . . . . . . . . . . . . . . . . . . . . . . . . .48
Installation . . . . . . . . . . . . . . . . . . . . . . . . . . . . . . . . . . . . . . . . . . . . . . . . . . . . . . . . . . . . . . . .49 - 50
The symbol on the product or on its packaging indicates that this product may not be treated as household
waste. Instead it shall be handed over to the applicable collection point for the recycling of electrical and
electronic equipment. By ensuring this product is disposed of correctly, you will help prevent potential negative
consequences for the environment and human health, which could otherwise be caused by inappropriate waste
handling of this product. For more detailed information about recycling of this product, please contact your
local city office, your household waste disposal service or the shop where you purchased the product.
1. AG-71+72D-EU English 29/03/2005 10:48 Page 1
Page 4

2
Important safety instructions
To avoid the danger of fire
The microwave oven should not be left unattended
during operation. Power levels that are too high or
cooking times that are too long may overheat
foods resulting in a fire.
The electrical outlet must be readily accessible so that
the unit can be unplugged easily in an emergency.
The AC power supply must be 230 V, 50 Hz, with a
minimum 16 A distribution line fuse, or a minimum 16 A
distribution circuit breaker.
It is recommended that a separate circuit serving only
this appliance be provided.
Do not store or use the oven outdoors.
If food being heated begins to smoke, DO NOT
OPEN THE DOOR. Turn off and unplug the oven
and wait until the food has stopped smoking.
Opening the door while food is smoking may cause
a fire.
Only use microwave-safe containers and utensils.
See Page 8 - 9.
Do not leave the oven unattended when using
disposable plastic, paper or other combustible food
containers.
Clean the waveguide cover, the oven cavity, the
turntable and turntable support after use. These
must be dry and free from grease. Built-up grease
may overheat and begin to smoke or catch fire.
Do not place flammable materials near the oven or
ventilation openings. Do not block the ventilation
openings.
Remove all metallic seals, wire twists, etc., from food
and food packages. Arcing on metallic surfaces may
cause a fire.
Do not use the microwave oven to heat oil for deep
frying. The temperature cannot be controlled and the
oil may catch fire.
To make popcorn, only use special microwave popcorn
makers.
Do not store food or any other items inside the oven.
Check the settings after you start the oven to ensure
the oven is operating as desired.
See the corresponding hints in this operation manual.
To avoid the possibility of injury
WARNING:
Do not operate the oven if it is damaged or
malfunctioning. Check the following before use:
a) The door; make sure the door closes properly and
ensure it is not misaligned or warped.
b) The hinges and safety door latches; check to make
sure they are not broken or loose.
c) The door seals and sealing surfaces; ensure that
they have not been damaged.
d) Inside the oven cavity or on the door; make sure
there are no dents.
e) The power supply cord and plug; ensure that they
are not damaged.
Never adjust, repair or modify the oven yourself.
It is hazardous for anyone other than a competent
person to carry out any service or repair operation
which involves the removal of a cover which gives
protection against exposure to microwave energy.
Do not operate the oven with the door open or alter
the door safety latches in any way.
Do not operate the oven if there is an object between
the door seals and sealing surfaces.
Do not allow grease or dirt to build up on the door
seals and adjacent parts. Follow instructions for
“Care and Cleaning”, Page 45. Failure to maintain
the oven in a clean condition could lead to a
deterioration of the surface that could adversely
affect the life of the appliance and possibly result
in a hazardous situation.
Individuals with PACEMAKERS should check with their
doctor or the manufacturer of the pacemaker for
precautions regarding microwave ovens.
To avoid the possibility of electric shock
Under no circumstances should you remove the outer
cabinet.
Never spill or insert any objects into the door lock
openings or ventilation openings. In the event of a spill,
turn off and unplug the oven immediately and call an
authorised AEG-Electrolux service agent.
Do not immerse the power supply cord or plug in water
or any other liquid.
Do not allow the power supply cord to run over any hot
or sharp surfaces, such as the hot air vent area at the
top rear of the oven.
IMPORTANT SAFETY INSTRUCTIONS: READ CAREFULLY AND KEEP FOR FUTURE REFERENCE
1. AG-71+72D-EU English 29/03/2005 10:48 Page 2
Page 5

3
UK
Important safety instructions
Temperature of the container is not a true indication of
the temperature of the food or drink; always check the
food temperature.
Always stand back from the oven door when opening to
avoid burns from escaping steam and heat.
Slice stuffed baked foods after heating to release steam
and avoid burns.
Keep children away from the door and accessible parts
that may become hot when the grill is in use. Children
should be kept away to prevent them burning
themselves.
Do not touch the oven door, outer cabinet, rear cabinet,
oven cavity, ventilation openings, accessories and dishes
during GRILL mode, DUAL GRILL mode and AUTO
COOK operation as they will become hot. Before
cleaning make sure they are not hot.
To avoid misuse by children
Warning: Only allow children to use the oven
without supervision when adequate instructions
have been given so that the child is able to use the
oven in a safe way and understands the hazards of
improper use.
Do not lean or swing on the oven door. Do not play
with the oven or use it as a toy.
Children should be taught all important safety
instructions: use of pot holders, careful removal of food
coverings; paying special attention to packaging (e.g.
self-heating materials) designed to make food crisp, as
they may be extra hot.
Other warnings
Never modify the oven in any way.
This oven is for home food preparation only and may
only be used for cooking food. It is not suitable for
commercial or laboratory use.
To promote trouble-free use of your oven and avoid
damage.
Never operate the oven when it is empty except where
recommended in the operation manual, see page 17
note 2. Doing so may damage the oven.
When using a browning dish or self-heating material,
always place a heat-resistant insulator such as a
porcelain plate under it to prevent damage to the
turntable and turntable support due to heat stress. The
preheating time specified in the dish’s instructions must
not be exceeded.
Do not attempt to replace the oven lamp yourself or
allow anyone who is not authorised by AEG-Electrolux
to do so. If the oven lamp fails, please consult your
dealer or an authorised AEG-Electrolux service agent.
If the power supply cord of this appliance is damaged,
it must be replaced with a special cord. The exchange
must be made by an authorised AEG-Electrolux service
agent.
To avoid the possibility of explosion and sudden
boiling:
WARNING: Liquids and other foods must not be
heated in sealed containers since they are liable to
explode.
Never use sealed containers. Remove seals and lids
before use. Sealed containers can explode due to a
build up of pressure even after the oven has been
turned off.
Take care when microwaving liquids. Use a widemouthed container to allow bubbles to escape.
Microwave heating of beverages can result in
delayed eruptive boiling, therefore care has to be
taken when handling the container.
To prevent sudden eruption of boiling liquid and
possible scalding:
1. Stir liquid prior to heating/reheating.
2. It is advisable to insert a glass rod or similar utensil
into the liquid whilst reheating.
3. Let liquid stand in the oven at the end of cooking
time to prevent delayed eruptive boiling.
Do not cook eggs in their shells, and whole hard
boiled eggs should not be heated in microwave
ovens since they may explode even after
microwave cooking has ended. To cook or reheat
eggs which have not been scrambled or mixed,
pierce the yolks and the whites, or the eggs may
explode. Shell and slice hard boiled eggs before
reheating them in the microwave oven.
Pierce the skin of such foods as potatoes, sausages and
fruit before cooking, or they may explode.
To avoid the possibility of burns
Use pot holders or oven gloves when removing food
from the oven to prevent burns.
Always open containers, popcorn makers, oven cooking
bags, etc., away from the face and hands to avoid
steam burns.
To avoid burns, always test food temperature and
stir before serving and pay special attention to the
temperature of food and drink given to babies,
children or the elderly.
1. AG-71+72D-EU English 29/03/2005 10:48 Page 3
Page 6

4
Important safety instructions
Do not use plastic containers for microwaving if the
oven is still hot from using the GRILL mode, DUAL
GRILL mode and AUTO COOK operation, because they
may melt. Plastic containers must not be used during
above modes unless the container manufacturer says
they are suitable.
NOTE:
If you are unsure how to connect your oven, please
consult an authorised, qualified electrician.
Neither the manufacturer nor the dealer can accept any
liability for damage to the oven or personal injury
resulting from failure to observe the correct electrical
connection procedure.
Water vapour or drops may occasionally form on the
oven walls or around the door seals and sealing
surfaces. This is a normal occurrence and is not an
indication of microwave leakage or a malfunction.
Do not use metal utensils, which reflect microwaves
and may cause electrical arcing. Do not put cans in the
oven.
Only use the turntable and the turntable support
designed for this oven. Do not operate the oven
without the turntable.
To prevent the turntable from breaking:
(a) Before cleaning the turntable with water, leave the
turntable to cool.
(b) Do not put hot foods or hot utensils on a cold
turntable.
(c) Do not put cold foods or cold utensils on a hot
turntable.
Do not place anything on the outer cabinet during
operation.
1. AG-71+72D-EU English 29/03/2005 10:48 Page 4
Page 7

5
UK
Oven & accessories
ACCESSORIES:
Check to make sure the following accessories are
provided:
(16) Turntable (17) Turntable support (18) High rack
(19) Low rack (20) 4 fixing screws (not shown)
• Place the turntable support in the seal packing on
the floor of the cavity.
• Then place the turntable on the turntable support.
• To avoid turntable damage, ensure dishes or
containers are lifted clear of the turntable rim when
removing them from the oven.
NOTE: When you order accessories, please mention two
items: part name and model name to your dealer or
authorised AEG-Electrolux service agent.
1. Grill heating element
2. Front trim
3. Oven lamp
4. Control panel
5. Door opening button
6. Waveguide cover
7. Oven cavity
8. Seal packing
9. Door seals and sealing surfaces
10. Fixing points (4 points)
11. Ventilation openings
12. Outer cover
13. Rear cabinet
14. Power supply cord support clips
15. Power supply cord
1 2
67
89
11
12
14
15
13
16
17
10
3
4
5
18
19
1. AG-71+72D-EU English 29/03/2005 10:48 Page 5
Page 8

6
Control panel
1 Digital Display
2 Indicators
The appropriate indicator will flash or light up, just
above each symbol according to the instruction.
When an indicator is flashing, press the appropriate
button (having the same symbol) or carry out the
necessary operation.
Stir
Turn over
Weight/power level
Grill
Microwave
Cooking in progress
3 TIMER/WEIGHT/POWER knob
4 AUTO COOK button
Press to select one of the 2 automatic programmes.
5 AUTO COOK PLUS GRILL 1 button
Press to select one of the 2 automatic programmes.
6 AUTO COOK PLUS GRILL 2 button
Press to select one of the 4 automatic programmes.
7 AUTO DEFROST button
Press to select one of the 4 automatic programmes.
8 COOKING MODE button
Press to select either microwave, grill or dual grill, or
use to set the clock.
1. press once to select microwave function.
2. press twice to select the grill.
3. press three times to select dual grill mode,
microwave with grill.
9 START/QUICK button
10 STOP button
11 DOOR OPENING button
1
2
3
7
9
11
10
6
5
4
8
1. AG-71+72D-EU English 29/03/2005 10:48 Page 6
Page 9

7
UK
Before operation
There are two setting modes: 12 hour clock and 24 hour clock.
1. To set the 12 hour clock, hold the COOKING MODE button down for 3 seconds.
will appear in the display.
2. To set the 24 hour clock, press the COOKING MODE button once more after
Step 1, in the example below will appear in the display.
Setting the clock
Plug in the oven.
1. The oven display will flash:
2. Press the STOP button, the display will show:
3. To set the clock, see below.
4. Heat the oven without food. (See page 17 note 2).
Using the STOP button
Use the STOP button to:
1. Erase a mistake during programming.
2. Stop the oven temporarily during cooking.
3. Cancel a programme during cooking, touch twice.
x1
1. Choose the clock function.
(12 hour clock).
Choose the 24 hour
clock.
3. Press the COOKING
MODE button to
change from hours to
minutes.
4. Set the minutes. Rotate the
TIMER/WEIGHT/POWER
knob until the correct
minute is displayed (35).
5. Press the COOKING
MODE button to start
the clock.
2. Set the hours. Rotate the TIMER/WEIGHT/
POWER knob until the correct hour is
displayed (23).
x1 and hold for 3 seconds
x1
x1 x1
Example: To set the 24 hour clock to 23:35.
x1 and hold for
3 secs.
To set the clock, follow the example below.
NOTES:
1. You can rotate the TIMER/WEIGHT/POWER knob
clockwise or counter-clockwise.
2. Press the STOP button if you make a mistake during
programming.
3. If the electrical power supply to your microwave oven
is interrupted, the display will intermittently show
after the power is reinstated. If this
occurs during cooking, the programme will be
erased. The time of day will also be erased.
4. When you want to reset the time of day, follow the
above example again.
1. AG-71+72D-EU English 29/03/2005 10:48 Page 7
Page 10

8
What are microwaves?
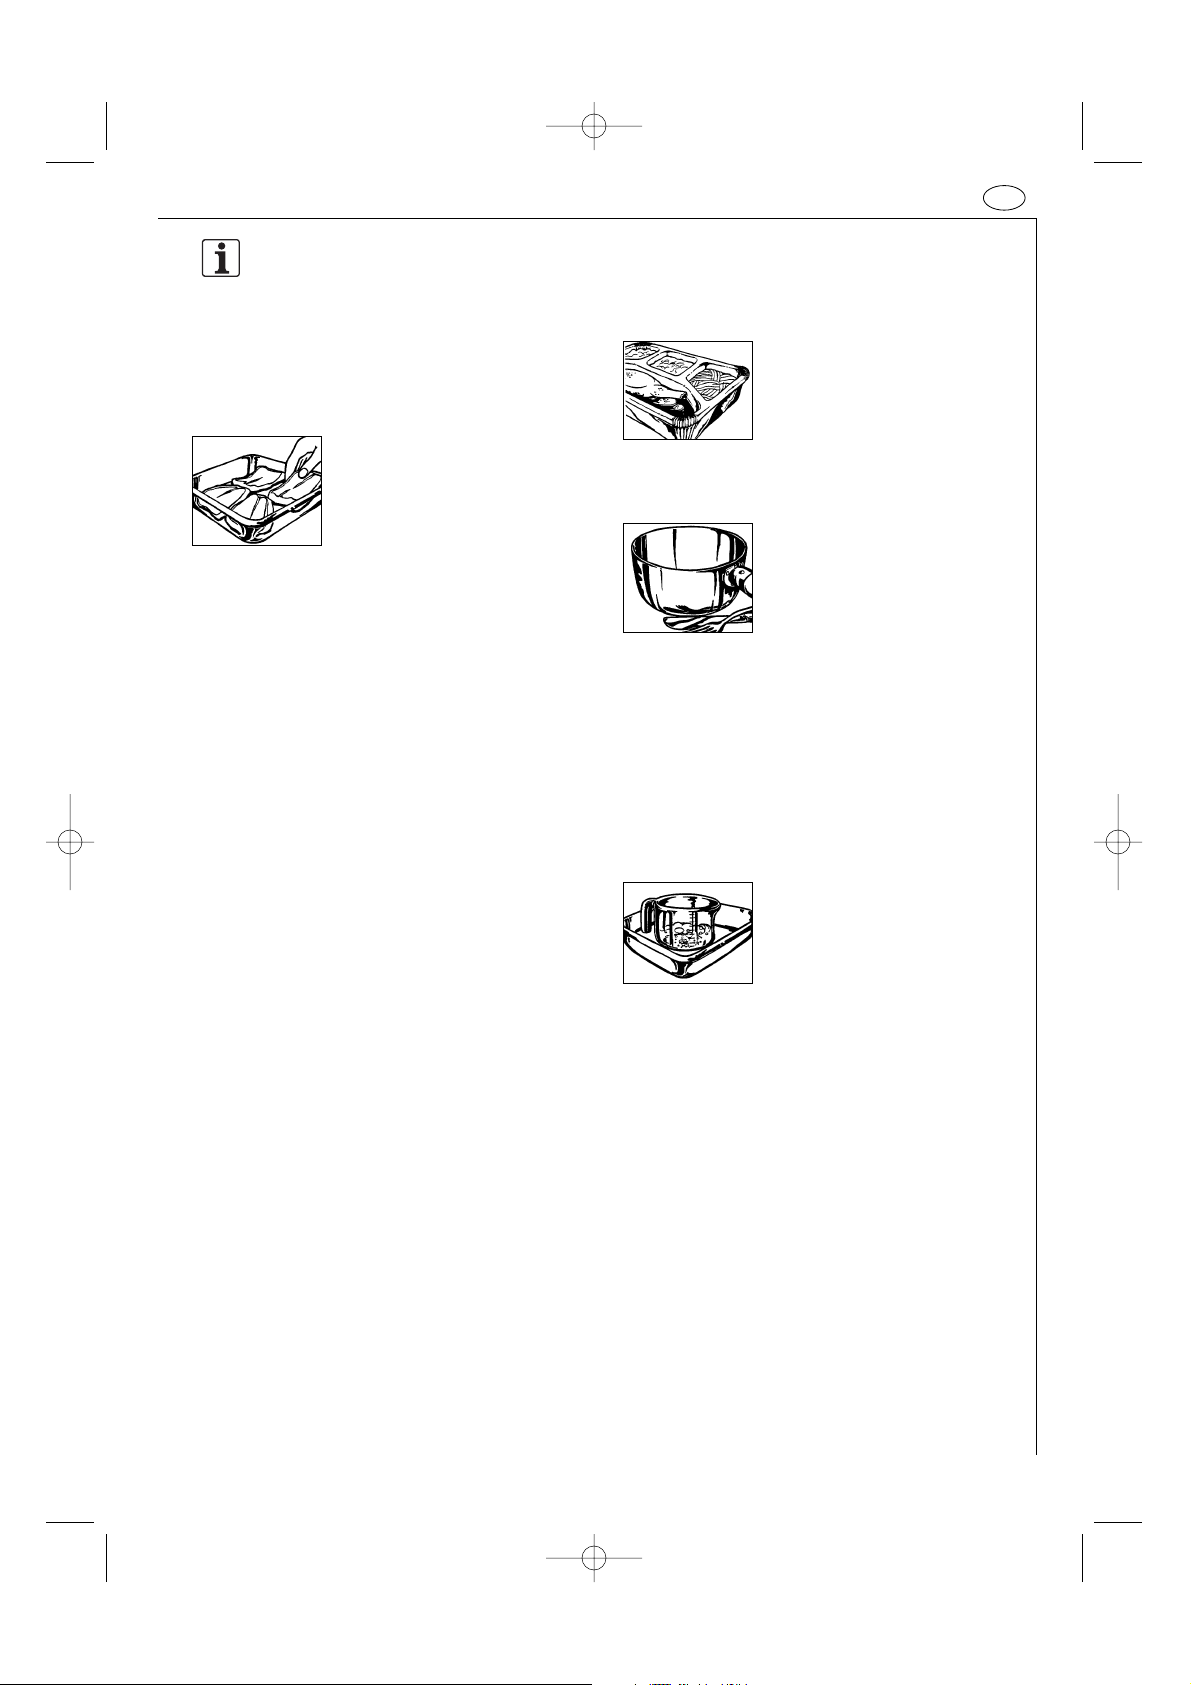
Suitable ovenware
Plastic utensils
Heat resistant plastic utensils which
are suitable for use in the
microwave can be used to thaw,
heat and cook food. Follow the
manufacturer's recommendations.
Paper utensils
Heat resistant paper made for use in a microwave oven
is also suitable. Follow the manufacturer's
recommendations.
Kitchen paper
can be used to absorb any moisture
which occurs in short heating
methods, e.g. of bread or products
in bread crumbs. Insert the paper
between the food and the revolving
plate. The surface of the food will
stay crispy and dry. Covering greasy food with kitchen
paper will catch splashes.
What are microwaves?
Like radio and television waves, microwaves are
electromagnetic waves.
Microwaves are produced by a magnetron inside the
microwave oven, and these vibrate the molecules of
water present in the food. The friction this causes
produces heat, which ensures that the food is
defrosted, heated or cooked through.
The secret of the reduced cooking times is the fact that
the microwaves penetrate the food from every
direction. Energy is used to the full. In comparison, the
energy from a conventional hob passes from the
burner through the pan and so to the food.
This method wastes a great deal of energy.
The characteristics of microwaves
Microwaves penetrate all non-metal objects made of
glass, china, earthenware, plastic, wood or paper. This is
why the microwaves never make these materials hot.
Dishes become hot only because the food inside them
is hot.
The food absorbs the microwaves and is heated.
Microwaves cannot pass through objects made of
metal and so they are deflected. For this reason metal
objects are not normally suitable for microwave
cookery. There are exceptions where you can actually
make use of the fact that the microwaves cannot pass
through metal. If you cover food with aluminium foil
at specific points while it is defrosting or cooking, you
can prevent those parts from getting too warm, too
hot, or overcooked. Please check out the advice given
in the guide.
Glass & ceramic glass
Heat-resistant glass utensils are very suitable. The
cooking process can be observed
from all sides. They must not,
however, contain any metal (e.g.
lead crystal), nor have a metallic
overlay (e.g. gold edge, cobalt blue
finish).
Ceramics
Generally very suitable. Ceramics must be glazed, since
with unglazed ceramics moisture can get into the
ceramic. Moisture causes the material to heat up and
may make it shatter. If you are not certain whether
your utensil is suitable for the microwave, carry out
the utensil suitability test. (See page 9).
Porcelain
Very suitable. Ensure that the porcelain does not have a
gold or silver overlay and that it does not contain any
metal.
1. AG-71+72D-EU English 29/03/2005 10:48 Page 8
Page 11
Microwave cling film
This, or heat-resistant film, is very suitable for covering
or wrapping. Please follow the manufacturer's
recommendations.
Roasting bags
Can be used in a microwave oven.
Metal clips are not suitable for
fastening them since the roasting
bag foil might melt. Fasten the
roasting bag with string and pierce
it several times with a fork. Non heat-resistant food
wraps are not recommended for use in a microwave
oven.
The right utensils for combined
operation
For combined operation (Microwave + grill) and grill
operation, you can use any heat-resistant accessories,
e. g. porcelain, pottery, glass. It is possible to use metal
accessories only for a simple grill operation.
Browning dish
A special microwave dish made from ceramic glass with
a metal alloy base, which allows food to be browned.
When using the browning dish a suitable insulator, e.g.
a porcelain plate, must be placed between the
turntable and the browning dish. Be careful to adhere
exactly to the pre-heating time given in the
manufacturer's instructions. Excessive pre-heating can
damage the turntable and the turntable stand or can
trigger the safety-device which will switch off the
oven.
Metal
Generally speaking, metal should
not be used, since microwaves do
not pass through metal and
therefore cannot reach the food.
There are, however, exceptions:
small strips of aluminium foil may be used to cover
certain parts of the food, so that these do not thaw
too quickly or begin to cook (e.g. chicken wings). Small
metal skewers and aluminium
containers (e.g. of readycooked
meals) can be used. They must,
however, be small in relation to the
food, e.g. aluminium containers
must be at least 2/3 to 3/4 filled
with food. It is recommended that you transfer the
food into a dish suitable for use in the microwave.
When using aluminium containers or other metal
utensils there must be a gap of approx. 2 cms between
them and the walls of the cooking area, otherwise the
walls could be damaged by possible arcing.
NO UTENSIL SHOULD HAVE A METAL overlay, or
metal parts such as screws, bands or handles..
Utensil suitability test
If you are not sure whether your utensil is suitable for
use in your microwave oven, carry
out the following test: Place the
utensil into the oven. Place a glass
container filled with 150 ml of
water on or next to the utensil.
Switch on the oven at 900 W power for 1 to 2 minutes.
If the utensil stays cool or just warm to the touch, it is
suitable. Do not use this test on a plastic utensil. It
could melt.
9
UK
Suitable ovenware
1. AG-71+72D-EU English 29/03/2005 10:48 Page 9
Page 12
10
Tips & advice
Before you start...
To make it as easy as possible to use the microwave
oven we have put together a few hints and tips for
you. Only switch on the oven when the food is already
inside.
Setting the cooking time
Defrosting, re-heating and cooking times are generally
much shorter than in a conventional oven or hob. So
you will need to consult this book for the
recommended cooking times. It is better to set shorter
rather than longer cooking times. Always test the food
after the cooking time has elapsed. It is better then to
continue cooking it for a little longer, than to have
overcooked food.
Starting temperature
Defrosting, re-heating and cooking times depend on
the temperature of the food when you start. For
example, deep frozen and refridgerated food will need
longer than food that is at room temperature.
Standard storage temperaturs of food are assumed for
re-heating and cooking times (refridgerator
temperature of 5° C, Room temperature of
approximately 20° C). For defrosting food a starting
temperature of -18° C is assumed.
Cook popcorn only in special microwave safe
containers. Refer exactly to the manufacturer’s
instructions. Do not use a normal paper or glass
container.
Do not cook eggs in the unbroken
shells. Pressure builds up inside the
shell and this may result in the egg
exploding.
Do not heat oil or fat for deepfrying inside the microwave oven. It
is impossible to control the
temperature of the oil and it may
suddenly splash out of the pan.
Do not heat sealed containers such
as jars or tins. The pressure inside the container could
cause the container to explode. (The exception is when
you are making preserves).
Cooking times
All the times given in this book are guidelines, which
can be varied according to the initial temperature,
weight and condition of the food (water or fat content
etc.).
Salt, spices & herbs
Food cooked in your microwave retains its individual
flavour better than it does when conventional
preparation methods are used. For this reason you
should use salt sparingly and normally add it only after
cooking. Salt absorbs liquid and dries out the outer
layer of food. Herbs and spices can be used as normal.
Types of use
Microwave: you can defrost frozen foods in a short
time.
Combined operation: With the combination of
microwave and grill you can cook and roast at the
same time. Therefore, the advantages of these
appliances will combine sensibly and mutually. The
heat of the grill quickly seals the pores of the food and
the microwave functions for a short time. The food
keeps its moisture inside and is crispy on the outside.
Grill: Your oven is provided with a quartz grill, which
you can also use without microwave operation like any
other conventional grill.
Cooking test
The cooking status of meals can be tested as with
conventional preparation:
• Food thermometer: Each food has a certain interior
temperature at the end of the heating process. With
a food thermometer you can determine whether
the food is hot or cooked enough.
• Fork: You can check fish with a fork. If the fish
meat is no longer clear and comes easily from the
fishbones, it is. If it is over-cooked, it becomes
tough and dry.
• Wooden skewer: Cakes and bread can be tested by
inserting a wooden skewer. If the skewer remains
clean and dry after pulling it out they are done.
1. AG-71+72D-EU English 29/03/2005 10:48 Page 10
Page 13

11
UK
Tips & advice
Blanching vegetables
Before freezing vegetables, they should be blanched.
This preserves the quality and
flavour at their best. Method: wash
and chop the vegetables. Put 250g
of vegetables in a dish with 275 ml
water and cover. Heat for 3-5
minutes. After blanching, immerse
immediately in cold water to prevent further cooking
and then allow to drain. Pack vegetables in an airtight
container and freeze.
Preserving fruit and vegetables
Using the microwave for preserving is quick and easy.
There are preserving jars, rubber vacuum seals and
suitable seals made of plastic available specially made
for microwaves. The manufacturers will supply precise
instructions for use.
Large & small quantities
Microwave times are directly
dependent upon the amount of
food which you would like to thaw,
heat or cook. This means that small
portions cook more quickly than
larger ones. As a rule of thumb:
TWICE THE AMOUNT = ALMOST TWICE THE TIME
HALF THE AMOUNT = HALF THE TIME
Deep & shallow containers
Both containers have the same capacity, but the
cooking time is longer for the deeper one. You should
therefore choose as flat a container as possible with a
large surface area. Only use deep containers for dishes
where there is a danger of overcooking, e.g. for
noodles, rice, milk etc..
Round & oval containers
Food cooks more evenly in round or oval containers
than in containers with corners, since the microwave
energy concentrates in the corners and the food in
these areas could become overcooked.
Addition of water
Vegetables and other foods with a high water content
can be cooked in their own juice or with the addition
of a little water. This ensures that many vitamins and
minerals are preserved.
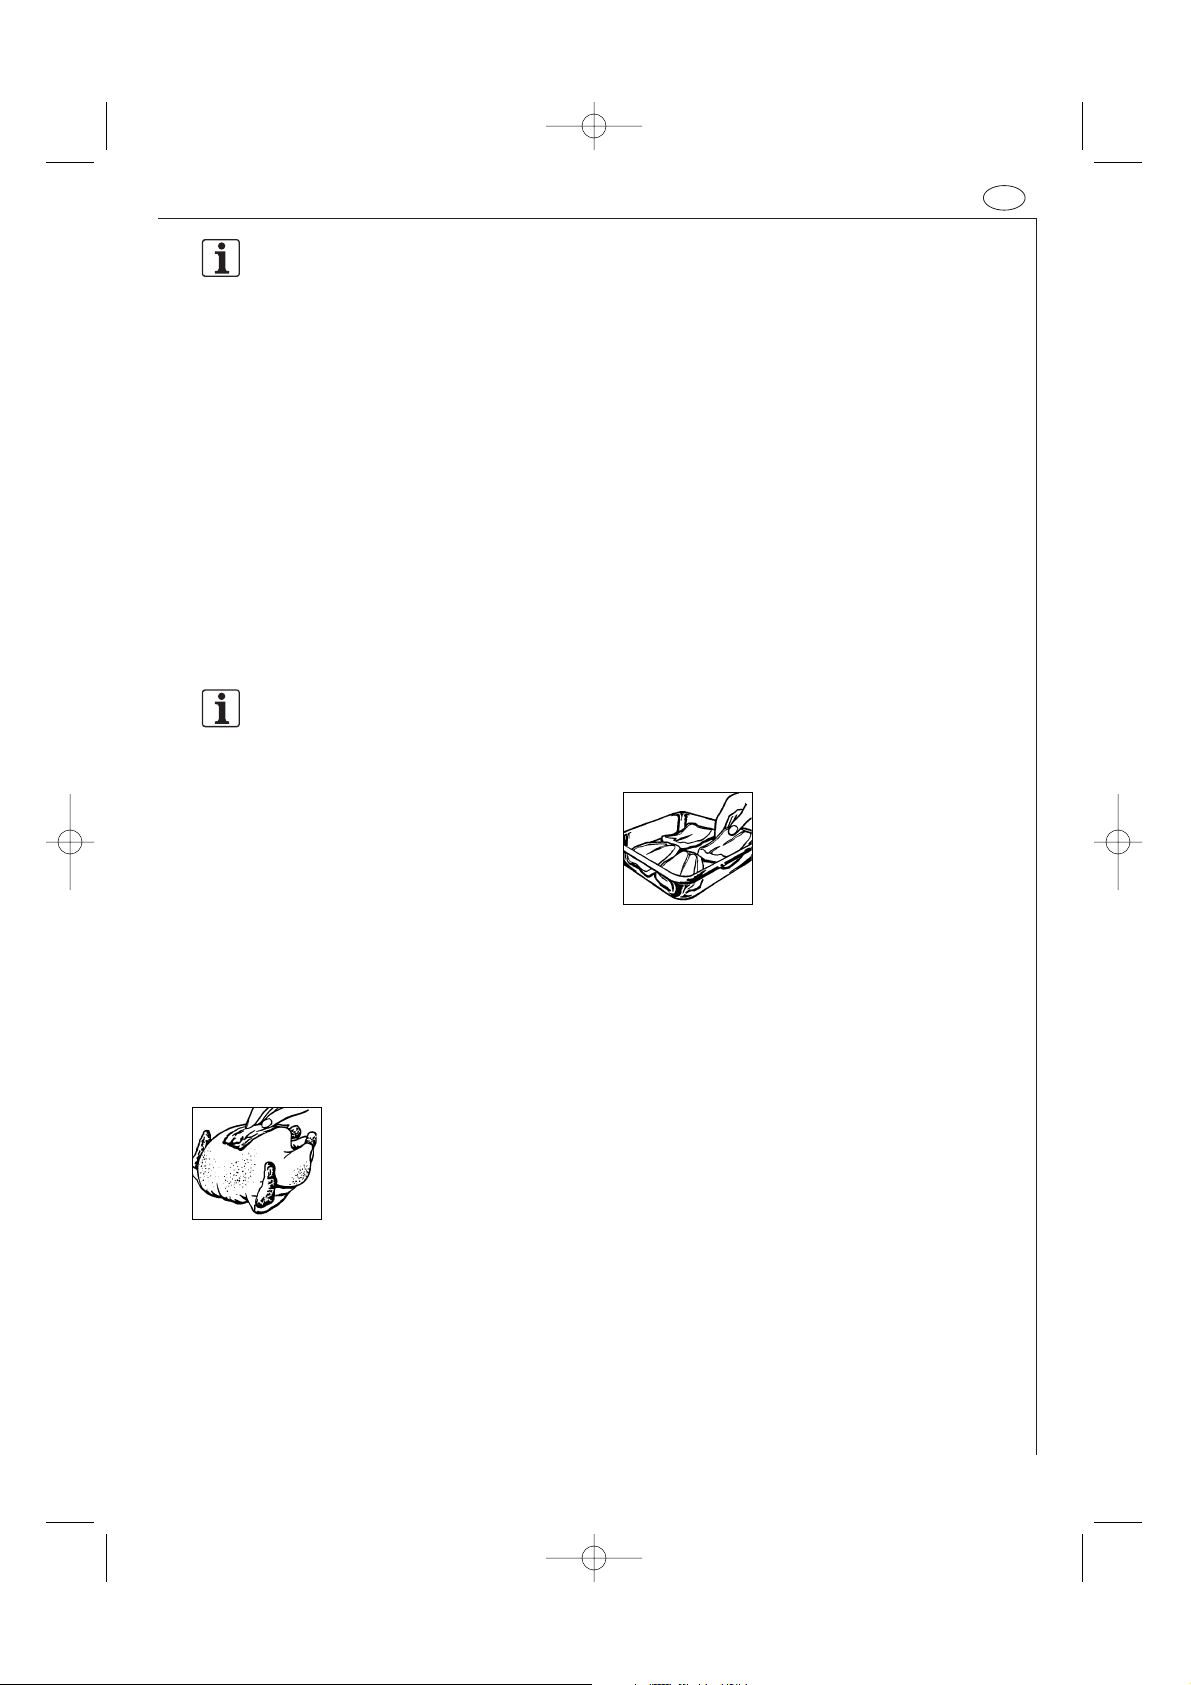
Food in skin or shells
Foods such as sausages, chickens, chicken legs, baked
potatoes, tomatoes, apples, egg yolks or such like
should be pricked or pierced with a fork or small
wooden skewer. This will enable the steam which forms
to dissipate without splitting the skin or shell.
Fatty foods
Fatty meat and layers of fat cook better than lean
portions of meat. Before cooking, cover the fatty
portions with a piece of aluminium foil or place the
food with the fat side down.
Using a food thermometer to
determine cooking time
The internal temperature of food and drink can be
ascertained with a food thermometer. The most
important temperatures are specified in the
temperature table.
Heating drinks
(Coffee, Water, Tea, Milk
etc.)
Heating soup
Heating stew
Poultry
Lamb
Pink
Well done
Roast beef
Rare
Medium
Well done
Pork, Veal
Drink / Food Internal Internal temp.
temperature after 10 - 15 mins
once cooked standing time
65-75o C
75-80o C
75-80o C
80-85o C
70o C
75-80o C
50-55o C
60-65o C
75-80o C
80-85o C
85-90o C
70-75o C
80-85o C
55-60o C
65-70o C
80-85o C
80-85o C
1. AG-71+72D-EU English 29/03/2005 10:48 Page 11
Page 14

12
Tips & advice
Covering
Covering the food retains the moisture within it and
shortens the cooking time. Use a lid,
microwave cling film or a cover.
Foods which are to be crispy, e.g.
roasts or chickens, should not be
covered. As a general rule, whatever
would be covered in a conventional
oven should also be covered in a microwave oven.
Whatever would be uncovered in a conventional oven
can also be left uncovered in a microwave oven.
Irregular shaped food
Place the thicker, more compacted
end of the food pointing towards
the outside. Place vegetables (such
as broccoli) with the stalks pointing
outward.
Stirring
Stirring the food is necessary, since
the microwaves begin by heating
the outer areas. The temperature is
thereby equalised and the food
heats up evenly.
Arrangement of food
Place a number of individual portions, such as small
pudding moulds, cups or potatoes in their jackets, in a
circle on the turntable. Keep the portions at a distance
from each other so that the microwave energy can
reach the food from all sides.
Turning
Medium-sized items, such as hamburgers and steaks,
should be turned over once during cooking, in order to
shorten the cooking process. Large items, such as roasts
and chickens, must be turned, since the upper side
receives more microwave energy and could dry out if
not turned.
Standing time
Keeping to the standing time is one
of the most important rules with
microwaves. Almost all foods, which
are thawed, heated or cooked in the
microwave, require a certain
amount of time to stand, during
which temperature equalisation takes place and the
moisture in the food is evenly distributed.
1. AG-71+72D-EU English 29/03/2005 10:48 Page 12
Page 15
Defrosting
13
UK
Heating
Your microwave is ideal for defrosting. Defrosting times
are usually considerably shorter than in traditional
methods. Here are a few tips. Take the frozen item out
of its packaging and place on a plate for defrosting.
Boxes & containers
Boxes and containers suitable for microwaves are
particularly good for defrosting and heating food, since
they can withstand temperatures in a deep freeze
(down to approx. -40° C) as well as being heat-resistant
(up to approx. 220° C). You can therefore use the same
container to freeze, defrost, heat and even cook the
food, without having to transfer it.
Covering
Cover thin parts with small strips of aluminium foil
before defrosting. Defrosted or
warm parts should likewise be
covered with aluminium strips
during defrosting. This stops the
thin parts becoming too hot while
thicker parts are still frozen.
Correct setting
It is better to choose a setting which is too low rather
than one which is too high. By so doing you will ensure
that the food defrosts evenly. If the microwave setting
is too high, the surface of the food will already have
begun to cook while the inside is still frozen.
Turning/stirring
Almost all foods have to be turned
or stirred from time to time. As
early as possible, separate parts
which are stuck together and
rearrange them.
Small amounts...
defrost more quickly and evenly than larger ones. We
recommend that you freeze portions which are as small
as possible. By so doing you will be able to prepare
whole menus quickly and easily.
Foods requiring careful handling,
such as gateaux, cream, cheese and bread should only
be partially defrosted and then left to defrost
completely at room temperature. By so doing you will
avoid the outer areas becoming too hot while the
inside is still frozen.
Standing time
This is particularly important after defrosting food, as
the defrosting process continues during this period. In
the defrosting table you will find the standing times
for various foods. Thick, dense foods require a longer
standing time than thinner foods or food of a porous
nature. If the food has not defrosted sufficiently, you
may continue defrosting it in the microwave oven or
lengthen the standing time accordingly. At the end of
the standing time you should process the food as soon
as possible and not re-freeze it.
• Ready-prepared meals in aluminium containers
should be removed from the aluminium container
and heated on a plate or in a dish.
• Food should be covered with microwave cling film, a
plate or cover (obtainable from stores), so that the
surface does not dry out. Drinks need not be
covered.
• Remove the lids from firmly closed containers.
• When boiling liquids such as water, coffee, tea or
milk, place a glass stirrer in the container.
• If possible, stir large quantities from time to time, to
ensure that the temperature is evenly distributed.
• The times are for food at a room temperature of
20° C. The heating time for food stored in a
refrigerator should be increased slightly.
• After heating allow the food to stand for 1-2
minutes, so that the temperature inside the food
can be evenly distributed (standing time).
• The times given are guidelines which can be varied
according to the initial temperature, weight, water
content, fat content or the result which you wish to
achieve.
1. AG-71+72D-EU English 29/03/2005 10:48 Page 13
Page 16

14
Cooking fresh vegetables
Cooking meat, fish & poultry
Defrosting & cooking
• When buying food items, try to ensure that, as far
as possible, they are of similar size. This will ensure
that they are cooked properly.
• Before preparation wash meat, fish and poultry
thoroughly under cold running water and pat them
dry with kitchen paper. Then continue as normal.
• Beef should be well hung and have little gristle.
• Even though the pieces may be of a similar size,
cooking results may vary. This is due, amongst other
things, to the kind of food, variations in the fat and
moisture content as well as the temperature before
cooking.
• Turn large pieces of meat, fish or poultry half way
through the cooking time, so that they are cooked
evenly from all sides.
• After cooking cover roasts with aluminium foil and
allow them to stand for approx. 10 minutes
(standing time). During this period the roast carries
on cooking and the liquid is evenly distributed, so
that when it is carved a minimum amount of juice is
lost.
• When buying vegetables try to ensure that, as far as
possible, they are of similar size. This is particularly
important when you want to cook the vegetables
whole (e.g. boiled potatoes).
• Wash the vegetables before preparing them, clean
them and only then weigh the required quantity for
the recipe and chop them up.
• Season them as you would normally, but as a rule
only add salt after cooking.
• Add about 5 tbsps of water for 500 g of vegetables.
Vegetables which are high in fibre require a little
more water. You will find information about this in
the table (see page 27).
• Vegetables are usually cooked in a dish with a lid.
Those with a high moisture content, e.g. onions or
boiled potatoes, can be cooked in microwave cling
film without adding water.
• After half the cooking time has elapsed vegetables
should be stirred or turned over.
• After cooking allow the vegetables to stand for
approx. 2 minutes, so that the temperature disperses
evenly (standing time).
• The cooking times given are guidelines and depend
upon the weight, initial temperature and condition
of the type of vegetable in question. The fresher the
vegetables, the shorter the cooking times.
Deep-frozen dishes can be defrosted and cooked at the
same time in one process in your microwave. You will
find some examples in the table. Do take note,
however, of the general advice given on "heating" and
"defrosting" food.
Please refer to the manufacturer's instructions on the
packaging when preparing deep- frozen dishes. These
usually contain precise cooking times and offer advice
on preparation.
1. AG-71+72D-EU English 29/03/2005 10:48 Page 14
Page 17

15
UK
Microwave power levels
To set the microwave power level :
Rotate the TIMER/WEIGHT/POWER knob clockwise or counter-clockwise to select cooking time.
Press the COOKING MODE button once (microwave only).
To change the microwave power level rotate the knob until the desired power level is reached.
Press the START/QUICK button.
NOTE: If the power level is not selected, 900 W is automatically set.
Your oven has 5 power levels. To choose the power level
for cooking, follow the advice given in the recipe
section. Generally the following recommendations
apply:
900 W used for fast cooking or reheating e.g. soup,
casseroles, canned food, hot beverages, vegetables, fish,
etc.
630 W used for longer cooking of dense foods such as
roast joints, meat loaf and plated meals, also for
sensitive dishes such as cheese sauce and sponge cakes.
At this reduced setting, the sauce will not boil over and
food will cook evenly without over cooking at the sides.
450 W for dense foods which require a long cooking
time when cooked conventionally, eg. beef dishes, it is
advisable to use this power setting to ensure the meat
will be tender.
270 W (Defrost setting) to defrost, select this power
setting, to ensure that the dish defrosts evenly. This
setting is also ideal for simmering rice, pasta, dumplings
and cooking egg custard.
90 W For gentle defrosting, eg. cream gateaux or
pastry.
W = WATT
1. AG-71+72D-EU English 29/03/2005 10:48 Page 15
Page 18

16
Microwave cooking
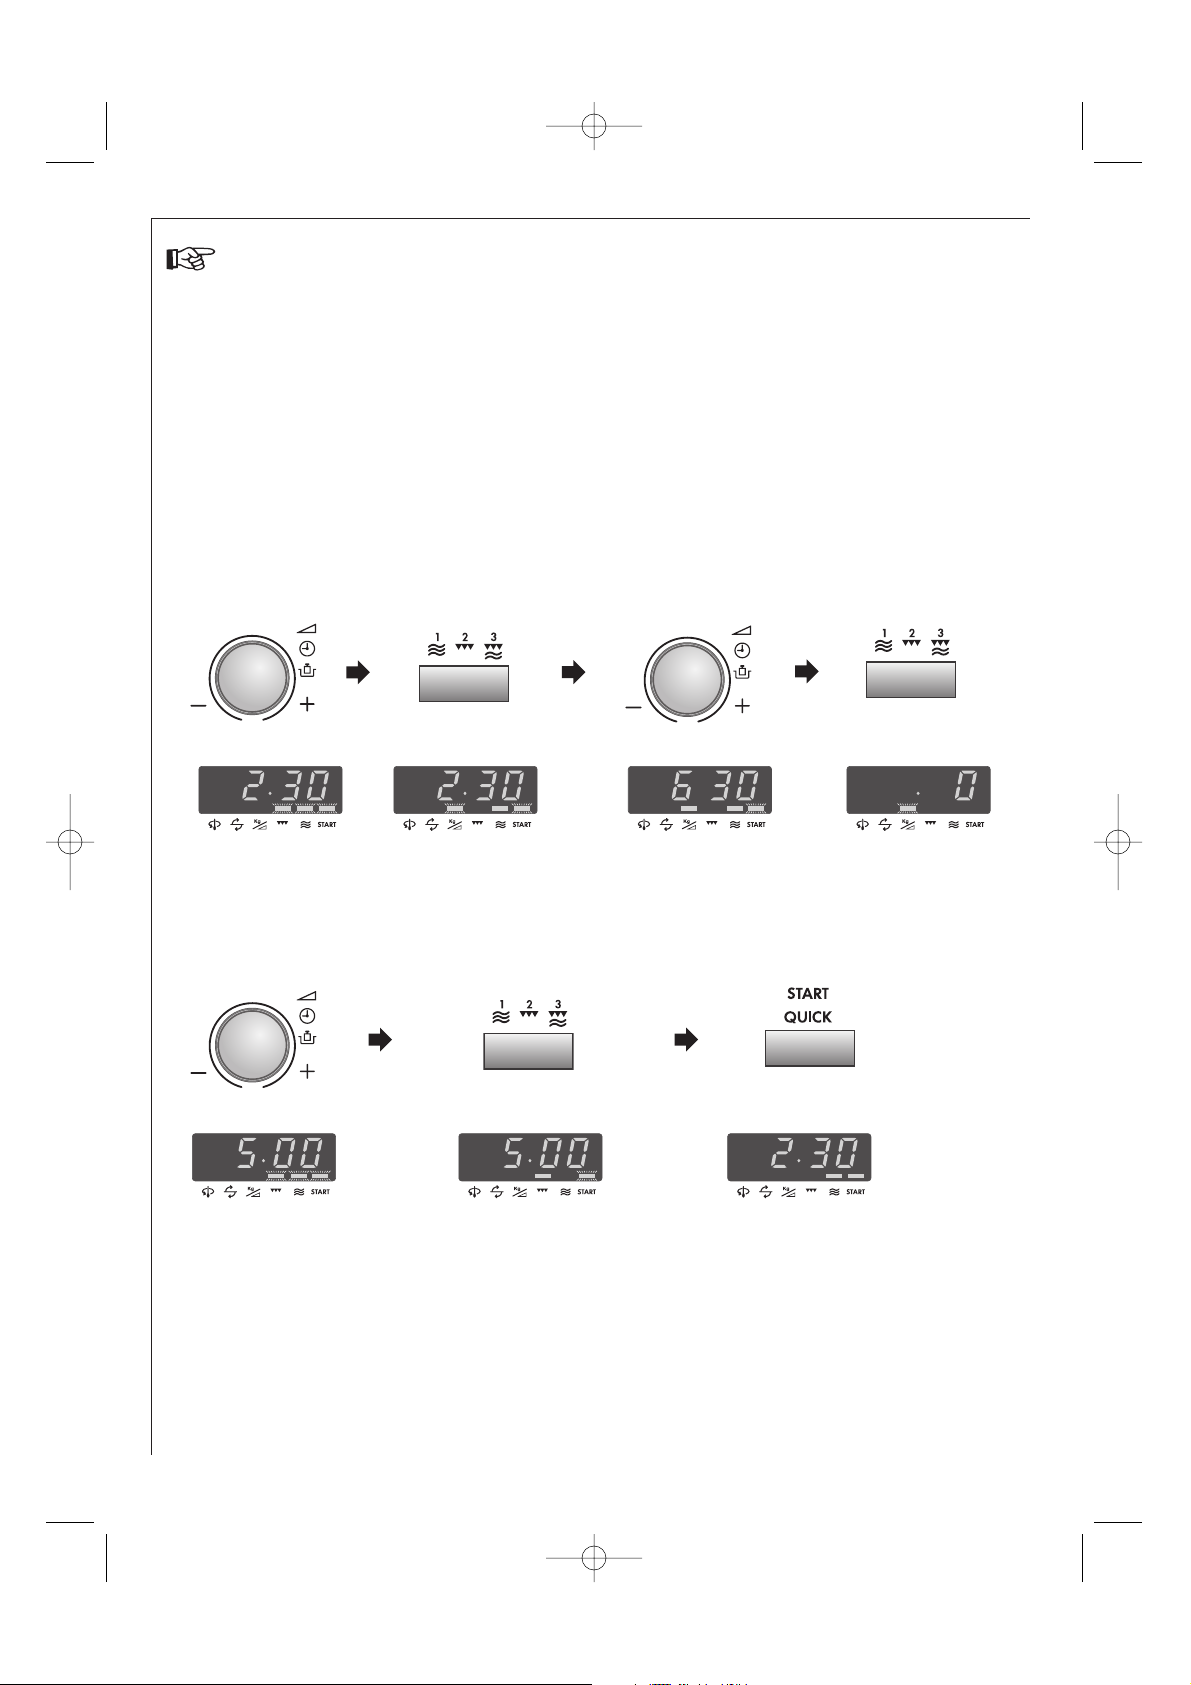
Example:
Suppose you want to heat soup for 2 minutes and 30 seconds on 630 W microwave power.
Your oven can be programmed for up to 90 minutes.
(90.00) The input unit of cooking (defrosting) time
varies from 10 seconds to five minutes. It depends on
the total length of the cooking (defrosting) time as
shown on the table.
Cooking time Increasing unit
0-5 minutes 10 seconds
5-10 minutes 30 seconds
10-30 minutes 1 minute
30-90 minutes 5 minutes
1. Enter desired
cooking time by
rotating TIMER/
WEIGHT/POWER
knob clockwise.
2. Choose desired cooking
mode by pressing
COOKING MODE button
once (microwave only).
3. Choose desired power by
rotating the TIMER/
WEIGHT/POWER knob
clockwise.
4. Press START/QUICK
button once to begin
cooking.
x1
NOTE:
1. When the door is opened during the cooking process, the cooking time on the digital display stops automatically.
The cooking time starts to count down again when the door is closed and the START/QUICK button is pressed.
2. If you wish to know the power level during cooking, press the COOKING MODE button.
As long as your finger is touching the COOKING MODE button, the power level will be displayed.
3. You can rotate the TIMER/WEIGHT/POWER knob clockwise or counter-clockwise.
If you rotate the knob counter-clockwise, the cooking time will decrease from 90 minutes by degrees.
x1
Check the display.
1. AG-71+72D-EU English 29/03/2005 10:48 Page 16
Page 19

17
UK
Grill & dual grill cooking
This microwave oven has two GRILL cooking modes: 1. Grill only. 2. Dual Grill (Grill with microwave).
1.GRILL ONLY COOKING
This mode can be used to Grill/Brown food.
Example: To make toast for 4 minutes.
1. Enter desired cooking time
by rotating the TIMER/
WEIGHT/POWER knob.
2. Choose the desired cooking
mode by pressing the
COOKING MODE button
twice. (Grill only).
3. Press the START/QUICK
button once to begin
cooking.
NOTES:
1. The high or the low rack is recommended for grilling.
2. You may detect smoke or a burning smell when using the grill for the first time, this is normal and not a sign
that the oven is out of order.
To avoid this problem, when first using the oven, operate the grill without food for 20 minutes.
This mode uses a combination of Grill power and Microwave power (90 W to 630 W).
The microwave power level is preset to 270 W.
Example: To cook grill skewers (see recipe on page 35) for 7 minutes on DUAL GRILL (450 W).
1. Enter the desired
cooking time by
rotating the TIMER/
WEIGHT/POWER knob.
2. Choose the desired
cooking mode by
pressing the COOKING
MODE button three
times (Dual Grill).
3. Rotate the TIMER/
WEIGHT/POWER knob
to the desired
microwave power level.
4. Press the
START/QUICK
button once to
begin cooking.
2. DUAL GRILL COOKING
Check the display.
x1
x2
x1
x3
Check the display.
1. AG-71+72D-EU English 29/03/2005 10:48 Page 17
Page 20
18
Other convenient functions
1. MULTIPLE SEQUENCE COOKING
A sequence of 3 stages (maximum) can be programmed using combinations of MICROWAVE, GRILL or DUAL
GRILL.
Example:
To cook: 2 minutes and 30 seconds on 630 W power (Stage 1)
5 minutes Grill only (Stage 2)
STAGE 1
1. Enter the desired
cooking time by
rotating TIMER/
WEIGHT/POWER
knob.
2. Choose the desired
cooking mode by pressing
COOKING MODE button
once (microwave only).
3. Enter the desired power
level by rotating TIMER/
WEIGHT/POWER knob.
4. Press the COOKING
MODE button before
programming Stage 2.
STAGE 2
5. Enter desired time by
rotating TIMER/WEIGHT/
POWER knob.
6. Choose the desired cooking
mode by pressing the COOKING
MODE button twice (Grill only).
7. Press START/QUICK button
once to begin cooking.
(The oven will begin to cook for 2 minutes and 30 seconds at 630 W, and then for 5 minutes on Grill only.)
Example:
To cook Courgette & Noodle Gratin (see recipe on page 37).
1. 18 minute at 900 W.
2. 7 minutes Dual Grill at 630 W.
NOTE: If you set any programme after setting GRILL mode, omit the steps 3 and 4.
If you press the COOKING MODEbutton continually after setting GRILL mode, the GRILL mode will
be changed to the DUAL GRILL mode automatically.
Check the display.
x1
x1
Check the display.
x2
x1
1. AG-71+72D-EU English 29/03/2005 10:48 Page 18
Page 21
19
UK
Other convenient functions
The display will show:
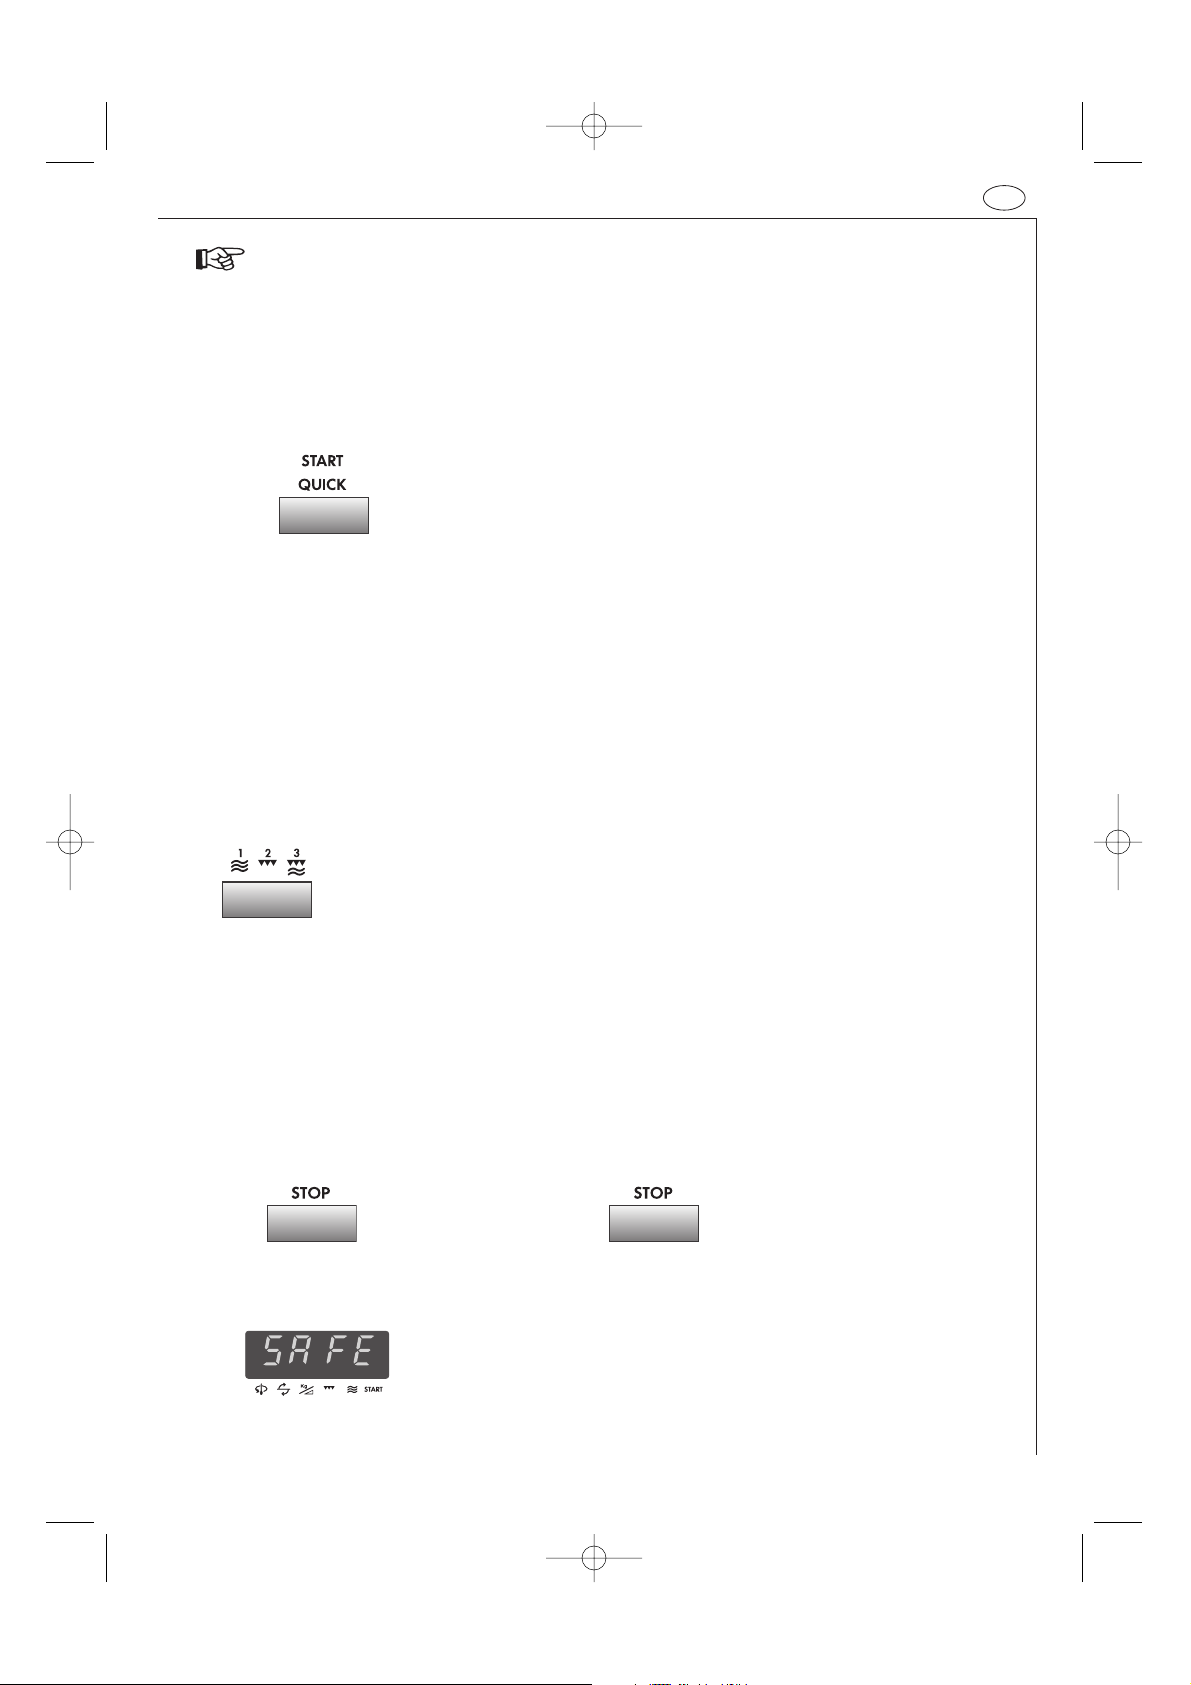
TO SET THE SAFETY LOCK FUNCTION
1. Press and hold the STOP key for 3
seconds.
NOTE: When Safety Lock is set you cannot input any buttons except the STOPbutton.
x1 for 3 seconds
The display will show the
time of day, if set.
TO CANCEL THE SAFETY LOCK FUNCTION
1. Press and hold the STOP key for 3
seconds.
x1 for 3 seconds
4.SAFETY LOCK FUNCTION
2.QUICK START FUNCTION
The START/QUICK button allows you to operate the two following functions:
a. Direct start
You can directly start cooking on 900 W microwave power level for 30 seconds by pressing the
START/QUICK button.
NOTE:
To avoid the misuse by children the START/QUICK button can be used only within 3 minutes after preceding
operation, i.e., closing the door, pressing the STOP button or cooking completion.
b. Extend the cooking time
You can extend the cooking time during manual cooking for multiples of 30 seconds if the START/QUICK button
is pressed while the oven is in operation.
3.TO CHECK THE POWER LEVEL
To check the microwave power level during cooking press the COOKING MODE button.
As long as your finger is touching the COOKING MODE button the power level will be displayed.
The oven continues to count down although the display shows the power level.
x1
1. AG-71+72D-EU English 29/03/2005 10:48 Page 19
Page 22

20
Auto cook & auto defrost operation
AUTOCOOK and AUTO DEFROST automatically work out the correct cooking mode and cooking time. You can
choose from 2 AUTOCOOK, 6 AUTOCOOK plus GRILL and 4 AUTO DEFROST menus.
What you need to know when using this automatic function:
TIMER/WEIGHT/
POWER knob
START/QUICK button
1a.
1b.
x1
2.
3.
Menu number
x1
Menu number
x1
Menu number
x1
Menu number
2. The weight or quantity of the food can be input by
rotating the TIMER/WEIGHT/POWER knob until
the desired weight/quantity is displayed.
• Enter the weight of the food only. Do not include
the weight of the container.
• For food weighing more or less than weights/
quantities given in the AUTOCOOK & AUTO DEFROST
charts, use manual operation. For best results,
follow the cooking charts on pages 27 -29.
3. To start cooking press START/QUICK button.
When action is required (e.g. to turn food over) the
oven stops and the audible signals sound, remaining
cooking time and any indicator will flash on the
display. To continue cooking, press the
START/QUICK button.
For example:
1a. AUTO COOK: The AUTO COOK button has two
menus. Press the AUTO COOK button once, the
display will appear as shown.
1b. AUTO COOK plus GRILL 1: The AUTO COOK PLUS
GRILL 1 button has two menus. Press the AUTO
COOK PLUS GRILL 1 button once, the display will
appear as shown.
1c. AUTO COOK plus GRILL 2: The AUTO COOK PLUS
GRILL 2 button has four menus. Press the AUTO
COOK PLUS GRILL 2 button once, the display will
appear as shown.
1d. AUTO DEFROST: The AUTO DEFROST button has
four menus. Press the AUTO DEFROST button once,
the display will appear as shown.
The menu can be chosen by pressing the AUTO DEFROST or desired AUTO COOK button until the desired menu
number is displayed. See pages 22 - 24 “AUTO COOK & AUTO DEFROST charts”.
The menu will be changed automatically by holding down the AUTO COOK or AUTO DEFROST button.
The final temperature will vary according to the
initial temperature. Check food is piping hot after
cooking. If necessary, you can extend the cooking
time and change the power level.
NOTE: If you use the ADD 30 SECONDS function during
the cooking/defrosting, the food may be overcooked.
x1
1c.
1d.
1. AG-71+72D-EU English 29/03/2005 10:48 Page 20
Page 23

21
UK
Auto cook & auto defrost operation
Example 1 for AUTO COOK plus GRILL 1:
To cook Gratinated Fish Fillet 1,5 kg using Auto Cook plus Grill 1 (A1-1).
2. Enter the weight by rotating
the TIMER/WEIGHT/POWER
knob.
x1
3. Press the START/QUICK
button once.
1. Select the menu required by
pressing the AUTO COOK PLUS
GRILL 1 button once.
x1
Check the display.
Example 2 for AUTO DEFROST:
To defrost Steak 0,2 kg using Auto Defrost (Ad-1).
2. Enter the weight by rotating
the TIMER/WEIGHT/POWER
knob.
x1
3. Press the START/QUICK
button once.
1. Select the menu required by
pressing the AUTO DEFROST
button once.
x1
Check the display.
1. AG-71+72D-EU English 29/03/2005 10:48 Page 21
Page 24
22
Auto cook & auto defrost charts
BUTTON
PROCEDURE
• See recipe for Chicken Pan with Vegetables on
page 25.
* Total weight of all ingredients.
• See recipe for Mince and Onion on page 25.
* Total weight of all ingredients.
AUTO COOK
AC-1 Cook
Chicken Pan with
Vegetables
AC-2 Cook
Mince and Onion
WEIGHT (Increasing
Unit) / UTENSILS
0,5 - 1,5 kg* (500 g)
(initial temp Chicken 5° C)
Gratin dish with
microwave cling film
0,5 - 1,5 kg* (500 g)
(initial temp Mince 5° C)
Casserole dish with lid
x1
x2
BUTTON
PROCEDURE
• See recipes for Gratinated Fish Fillet on pages
25 - 26.
* Total weight of all ingredients.
• See recipes for Gratin on page 26.
* Total weight of all ingredients.
AUTO COOK
plus GRILL 1
A1-1 Cook
Gratinated Fish
Fillet
A1-2 Cook
Gratin
WEIGHT (Increasing
Unit) / UTENSILS
0,5 - 1,5 kg* (500 g)
(initial temp Fish 5° C)
Gratin dish
Low rack
0,5 - 1,5 kg* (500 g)
(initial temp 20° C)
Gratin dish
Low rack
x1
x2
1. AG-71+72D-EU English 29/03/2005 10:49 Page 22
Page 25

23
UK
Auto cook & auto defrost charts
BUTTON
PROCEDURE
• Remove the frozen french fried potatoes from
the package and place them on a flan dish.
• Place the dish on the high rack in the oven.
• When the audible signals sound, turn over.
• After cooking, remove from the dish and put on
a plate for serving.
(No standing time is necessary).
• Add salt to taste.
NOTE: The dish gets very hot during cooking.
To avoid burning yourself, please use oven
gloves for removing the flan dish from the
oven.
• Prepare the grill skewers.
• Place on the high rack and cook.
• When the audible signal sounds turn over.
• After cooking, remove and put on a plate for
serving. (No standing time necessary).
• Mix the ingredients and spread on the chicken
legs.
• Pierce the skin of the chicken legs.
• Put the chicken legs on the high rack, skin side
down, with the thin ends towards the centre.
• When audible signals sound, turn the food over.
• After cooking, remove and stand for
approximately 5 minutes.
• Mix the ingredients and spread on the chicken.
• Pierce the skin of the chicken.
• Put chicken breast side down on the low rack.
• When audible signals sound, turn the chicken
over.
• After cooking, leave for approx. 3 minutes in
the oven, remove and put on a plate for
serving.
AUTO COOK
plus GRILL 2
A2-1 Cook
French Fried
Potatoes
Thick type
(recommended
for conventional
ovens)
A2-2 Cook
Grill Skewers
See recipe on
page 35.
A2-3 Cook
Chicken Legs
A2-4 Cook
Grilled Chicken
WEIGHT (Increasing
Unit) / UTENSILS
0,20 - 0,40 kg (50 g)
(initial temp -18° C)
Flan dish
High rack
0,2 - 0,8 kg (100 g)
(initial temp 5° C)
High rack
0,20 - 0,80 kg (50 g)
(initial temp 5° C)
High rack
0,9 - 1,8 kg (100 g)
(initial temp 5° C)
Low rack
x1
x3
x4
x2
Ingredients for 0,6 kg chicken legs:
3 pieces, 1-2 tbsp oil,
1
/
2 tsp salt,
1 tsp sweet paprika, 1 tsp rosemary
Ingredients for 1,2 kg grilled chicken:
Salt & pepper, 1 tsp sweet paprika,
2 tbsp oil
1. AG-71+72D-EU English 29/03/2005 10:49 Page 23
Page 26

24
NOTE: Auto Defrost
1. Steaks and Chops should be frozen in one layer.
2. Minced meat should be frozen in a thin shape.
3. After turning over, shield the defrosted portions with small, flat pieces of aluminium foil.
4. Gateaux topped and coated with cream are very sensitive to microwave energy. For the best result, if the cream
begins to soften rapidly, it is best to remove it from the oven immediately and stand for 10 - 30 minutes at room
temperature
5. For Steaks and Chops arrange the food in the oven as shown:
Food
Plate
Turntable
Steaks and Chops
BUTTON
PROCEDURE
• Place the food on a plate in the centre of the
turntable.
• When the oven stops and the audible signals
sound, turn the food over, rearrange and
separate. Shield thin parts and warm spots with
aluminium foil.
• After defrosting, wrap in aluminium foil for 10
- 15 minutes, until thoroughly defrosted.
• Cover the turntable with cling film.
• Place the block of minced meat onto the
turntable.
• When the oven stops and the audible signals
sound, turn the food over. Remove the
defrosted parts if possible.
• After defrosting, stand for 5 - 10 minutes, until
thoroughly defrosted.
• Remove all packaging from the cake.
• Place on a flat dish in the middle of the
turntable.
• After defrosting, cut the cake into similar sized
pieces keeping space between each piece and
let stand for 15 - 60 minutes until evenly
defrosted.
• Distribute on a flat dish in the centre of the
turntable.
• When the audible signal sounds rearrange, and
remove defrosted slices.
• After defrosting separate all slices and
distribute on a large plate. Cover the bread with
aluminium foil and let stand for 5 - 10 minutes
until thoroughly defrosted.
AUTO DEFROST
NO.
Ad-1 Defrost
Steak and Chops
Ad-2 Defrost
Minced Meat
Ad-3 Defrost
Cake
Ad-4 Defrost
Bread
WEIGHT (Increasing
Unit) / UTENSILS
0,2 - 1,0 kg (100 g)
(initial temp -18° C)
(See note below)
0,2 - 1,0 kg (100 g)
(initial temp -18° C)
Cling film
(See note below)
0,1 - 1,4 kg (100 g)
(initial temp -18° C)
Flat dish
0,1 - 1,0 kg (100 g)
(initial temp -18° C)
Flat dish
(Only sliced bread is
recommended for this
programme.)
x1
x2
x3
x4
Auto cook & auto defrost charts
1. AG-71+72D-EU English 29/03/2005 10:49 Page 24
Page 27

25
UK
Recipes for auto cook
CHICKEN PAN WITH VEGETABLES (AC-1)
Spicy chicken fricassee
Ingredients
0,5 kg 1,0 kg 1,5 kg
60 g 120 g 180 g long grain rice (parboiled)
1 1 1 sachet saffron
25 g 50 g 75 g onion (sliced)
50 g 100 g 150 g red pepper (in strips)
50 g 100 g 150 g leek (in strips)
150 g 300 g 450 g fillet of chicken breast (cubed)
pepper, paprika powder
10 g 20 g 30 g butter or margarine
150 ml 300 ml 450 ml meat stock
Preparation
1. Mix the rice and saffron and place in the greased
dish.
2. Mix the onions, red pepper, leek and chicken. Season
and place on the rice.
3. Put butter on the top.
4. Pour the stock over and cover with microwave cling
film and cook on AUTO COOK (AC-1), “Chicken Pan
with Vegetables”.
5. After cooking, let stand for 5-10 minutes.
GRATINATED FISH FILLET (A1-1)
Fish gratin Italian style
Ingredients
0,5 kg 1,0 kg 1,5 kg
200 g 430 g 630 g fish fillet
1
/
2 tbsp 1 tbsp 1
1
/
2 tbsp lemon juice
1
/
2
tbsp 1 tbsp 1
1
/
2
tbsp anchovy butter
30 g 50 g 80 g Gouda (grated)
salt and pepper
150 g 300 g 450 g fresh tomatoes
1 tbsp 1
1
/
2 tbsp 2 tbsp chopped mixed herbs
100 g 180 g 280 g Mozarella
1
/
2
tbsp
3
/
4
tbsp 1 tbsp Basil (chopped)
Preparation
1. Wash and dry the fish and sprinkle with lemon juice,
salt and anchovy butter.
2. Place in a gratin dish (size depends on weight).
3. Sprinkle the Gouda over the fish.
4. Wash the tomatoes and remove the stalk-spore.
Cut into slices and place on top of the cheese.
5. Season with salt, pepper and the mixed herbs.
6. Drain the Mozarella, cut into slices and place on the
tomatoes. Sprinkle the basil over the cheese.
7. Place the gratin dish on the low rack and cook on
AUTO COOK plus GRILL 1 (A1-1), “Gratinated fish
fillet”.
8. After cooking, let stand for approximately 5
minutes.
Preparation
1. Mix together the minced meat, onion, egg and the
breadcrumbs. Season with salt and pepper. Place the
meat dough into a casserole.
2. Mix the meat stock with the tomato purée.
3. Add the liquid, potatoes, carrots and parsley to the
meat, mix it up well.
4. Cover and cook on AUTO COOK (AC-2), “Mince and
Onion”.
5. When the oven stops and the audible signals sound,
stir and re-cover.
6. After cooking, stir and stand for approx. 5 minutes.
Sprinkle with parsley and serve.
MINCE AND ONION (AC-2)
Ingredients
0,5 kg 1,0 kg 1,5 kg
150 g 300 g 450 g minced meat (
1
/
2 beef,
1
/
2 pork)
50 g 100 g 150 g onion (finely chopped)
1
/
2
11
1
/
2
egg
15 g 30 g 45 g white breadcrumbs
salt and pepper
115 ml 230 ml 345 ml meat stock
20 g 40 g 60 g tomato purée
65 g 125 g 190 g potatoes (finely chopped)
65 g 125 g 190 g carrots (finely chopped)
1
/
2
tbsp 1 tbsp 1
1
/
2
tbsp chopped parsley
1. AG-71+72D-EU English 29/03/2005 10:49 Page 25
Page 28

26
Recipes for auto cook
GRATIN (A1-2)
Spinach gratin
Ingredients
0,5 kg 1,0 kg 1,5 kg
150 g 300 g 450 g leaf spinach (defrosted, drained)
15 g 30 g 45 g onion (finely chopped)
salt, pepper, nutmeg
150 g 300 g 450 g boiled potatoes (sliced)
35 g 75 g 110 g cooked ham (diced)
50 g 100 g 150 g crème fraîche
1 2 3 eggs
40 g 75 g 115 g grated cheese
Preparation
1. Mix together the leaf spinach with the onion and
season with salt, pepper and nutmeg.
2. Grease the gratin dish. Place alternate layers of
potato slices, diced ham and spinach in the dish. The
top layer should be spinach.
3. Mix the eggs with crème fraîche, add salt and
pepper and pour over the vegetables.
4. Cover the gratin with the grated cheese.
5. Place on the low rack and cook on AUTO COOK plus
GRILL 1 (A1-2), “Gratin”.
6. After cooking, let stand for 5-10 minutes.
GRATIN (A1-2)
Potato-courgette-gratin
Ingredients
0,5 kg 1,0 kg 1,5 kg
200 g 400 g 600 g boiled potatoes (sliced)
115 g 230 g 345 g courgette (finely sliced)
75 g 150 g 225 g crème fraîche
1 2 3 eggs
1
/
2
1 2 clove of garlic (crushed)
salt, pepper
40 g 80 g 120 g grated Gouda cheese
10 g 20 g 30 g sunflower kernel
Preparation
1. Grease the gratin dish and place alternate layers of
potato slices and courgette in the dish.
2. Mix the eggs with crème fraîche, season with salt,
pepper and garlic and pour over the vegetables.
3. Cover the gratin dish with the grated Gouda cheese.
4. Finally sprinkle the gratin with sunflower kernel.
5. Place on the low rack and cook on AUTO COOK plus
GRILL 1 (A1-2), “Gratin”.
6. After cooking, let stand for 5-10 minutes.
GRATINATED FISH FILLET (A1-1)
Fish esterhazy
Ingredients
0,5 kg 1,0 kg 1,5 kg
230 g 450 g 680 g fish fillet
100 g 200 g 300 g leeks (cut into rings)
20 g 40 g 60 g onion (finely sliced)
40 g 100 g 140 g carrot (grated)
10 g 10 g 20 g butter or margarine
salt, pepper and nutmeg
1 tbsp 1
1
/
2
tbsp 2 tbsp lemon juice
50 g 100 g 150 g crème fraîche
50 g 100 g 150 g Gouda (grated)
Preparation
1. Put vegetables, butter and the spices into a casserole
dish and mix well. Cook for 2-6 minutes on 900 W
depending on weight.
2. Wash the fish, dry and sprinkle with lemon juice and
salt.
3. Mix the crème fraîche with the vegetables and season
again.
4. Put half of the vegetables in a gratin dish. Place the
fish on top and cover with the remaining vegetables.
5. Spread the Gouda over the top, place on the low rack
and cook on AUTO COOK plus GRILL 1 (A1-1),
“Gratinated fish fillet”.
6. After cooking, let stand for approximately 5 minutes.
1. AG-71+72D-EU English 29/03/2005 10:49 Page 26
Page 29

27
UK
Cooking charts
Coffee, 1 cup 150 900 W approx. 1 Do not cover
Milk, 1 cup 150 900 W approx. 1 Do not cover
Water, 1 cup 150 900 W approx. 2 Do not cover, bring to the boil
6 cups 900 900 W 8-10 Do not cover, bring to the boil
1 dish 1000 900 W 9-11 Cover, bring to the boil
One-plate meal 400 900 W 4-6 Sprinkle sauce with water, cover, stir half
(Veg, Meat + side dishes) way through cooking time
Stew 200 900 W 11/2-2 Cover, stir after heating
Soup, clear 200 900 W 1-11/2 Cover, stir after heating
Cream soup 200 900 W 11/2-21/2 Cover, stir after heating
Vegetables 200 900 W 2-3 Add water if necessary, cover, stir half
500 900 W 3-5 way through cooking time
Side dishes 200 900 W 2-3 Sprinkle with a little water, cover, stir half
500 900 W 4-5 way through cooking time
Meat, 1 slice
1
200 900 W approx. 3 Sprinkle with a little sauce, cover
Fish fillet 200 900 W 3-5 Cover
Sausages, 2 pieces 180 900 W 1-11/2 Prick skin several times
Cake, 1 slice 150 450 W
1
/2-1 Place on a plate
Baby food, 1 jar 190 450 W
1
/2-1 Remove lid, stir well after heating
Check the temperature
Melting Margarine or Butter
1
50 900 W approx. 1
Melting chocolate 100 450 W 3-4 Stir during cooking
Dissolving 6 sheets of 10 450 W approx. 1/2 Soak in water, squeeze out well and put in
gelatine soup bowl, stir during cooking
Cake glaze for 1/4l 10 450 W 4-6 Stir with sugar and 250ml liquid, cover and,
liquid stir well during and after cooking
1
from chilled
Artichokes 300 900 W 5-7 remove the stalk, cover 3-4 tbsp
Leaf Spinach 300 900 W 4-5 wash, dry well, cover, stir once or twice during cooking Cauliflower 800 900 W 12-15 1 whole head, cover, divide into florets 5-6 tbsp
500 900 W 6-8 stir during cooking 4-5 tbsp
Broccoli 500 900 W 6-8 divide into florets, cover, stir occasionally during cooking 4-5 tbsp
Mushrooms 500 900 W 6-8 whole heads, cover, stir occasionally during cooking Chinese leaves 300 900 W 5-7 cut into strips, cover, stir occasionally during cooking 4-5 tbsp
Peas 500 900 W 6-8 cover, stir occasionally during cooking 4-5 tbsp
Fennel 500 900 W 6-8 cut into quarters, cover, stir occasionally during cooking 4-5 tbsp
Onions 250 900 W 4-5 whole, cook in microwave cling film Carrots 500 900 W 9-11 cut into rings, cover, stir occasionally during cooking 4-5 tbsp
Green peppers 500 900 W 6-8 cut into strips, stir once or twice during cooking 4-5 tbsp
Jacket potatoes 500 900 W 6-8 cover, stir occasionally during cooking 4-5 tbsp
Leeks 500 900 W 7-9 cut into rings, cover, stir occasionally during cooking 4-5 tbsp
Red cabbage 500 900 W 15-17 cut into strips, stir once or twice during cooking 50 ml
Brussels sprouts 500 900 W 7-9 whole sprouts, cover, stir occasionally during cooking 50 ml
Boiled potatoes 500 900 W 7-9 cut into large pieces of a similar size, add a little salt, 150 ml
(salted) cover, stir occasionally during cooking
Celery 500 900 W 7-9 dice finely, cover, stir occasionally during cooking 50 ml
White cabbage 500 900 W 15-17 cut into strips, cover, stir occasionally during cooking 50 ml
Courgettes 500 900 W 6-8 slice, cover, stir occasionally during cooking 4-5 tbsp
Food / Drink Quantity Setting Power Time Hints
-g/ml- -Level- -Min-
TABLE: HEATING FOOD & DRINK
Vegetable Quantity Setting Power Time Hints Added water
-g- -Level- -Min- -Tbsps/ml-
TABLE: COOKING FRESH VEGETABLES
1. AG-71+72D-EU English 29/03/2005 10:49 Page 27
Page 30
28
Cooking charts
Rump steaks 400 11-12* Place on the high rack, turn over after *,
2 pieces, medium 6-8 season after grilling
Fillet steaks, 200 11-12* Place on the high rack, turn over after *,
2 pieces, medium 6-8 season after grilling
Lamb cutletts 300 13-14* Place on the high rack, turn over after *,
2 pieces, pink 9-10 season after grilling
Grilled sausages 400 9-11* Place on the high rack, turn over after *
5 pieces 6-7
Browning of gratin dishes 8-13 Place gratin dish on the low rack.
The grilling time depends on the type of cheese used
Welsh rarebit 1 piece 450 W
1
/
2 Toast the bread and spread it with butter;
5-6 top with a slice of cooked ham, a slice of pineapple and
4 pieces 450 W
1
/
2-1 a slice of cheese. Prick the centre and place on the high rack
4 5-6
TABLE: GRILLING & BROWNING OF MEAT, GRATIN & WELSH RAREBIT
Roasts 500 450 W 5-8 Season to taste, place on the low rack, 10
(Pork,Veal, Lamb) 450 W 6-8* turn over after *
450 W 5-8
450 W 4-5
1000 450 W 16-18 10
450 W 5-7*
450 W 14-16
450 W 4-6
1500 450 W 26-28 10
450 W 5-8*
450 W 26-28
450 W 4-5
Roast beef (medium) 1000 630 W 5-8 Season to taste, place fatty side down on the low rack 10
630 W 8-10* tun over after *
630 W 3-5
1500 630 W 12-15 10
630 W 12-15*
630 W 4-6
Cooked mince 1000 630 W 20-23 Prepare mince (half pork/half beef), place in an oven proof 10
630 W 6-9 dish and cook on the low rack
Chicken 1200 900 W 9-11 Season to taste, place breast side down on the low rack, 3
630 W 5-7* turn over after *
900 W 9-11
630 W 3-5
Chicken legs 200 450 W 6-7* Season to taste, place skin side down on the high rack, 3
4-6 turn over after *
Trout 250 90 W 7-9* Wash, sprinkle with lemon juice, salt the fish inside and out, 2
90 W 4-5 place on the high rack, turn over after *
TABLE: COOKING, GRILLING & BROWNING
Food Quantity Setting Power Time Hints Standing time
-g- -Level- -Min- -Min-
Food Quantity Setting Power Time Hints
-g- -Level- -Min-
1. AG-71+72D-EU English 29/03/2005 10:49 Page 28
Page 31

29
UK
Cooking charts
To defrost cutlets, steaks, minced meat, bread and cake use the Automatic programmes Ad-1 to Ad-4.
Goulash 500 270 W 8-9 stir halfway through defrosting time 10-15
Ham or sausage in pieces 200 270 W 2-3 only begin to defrost 5
Cold cuts 200 270 W 2-4 remove the outside slices after each minute 5
Sausages, 8 pieces 600 270 W 6-8 place next to each other, turn over halfway 5-10
4 pieces 300 270 W 3-5 through defrosting time 5-10
Chicken 1200 270 W 18-20 place on an upturned plate, turn over halfway 30-90
through defrosting time
1000 270 W 13-15 place on an upturned plate, turn over halfway 30-90
through defrosting time
Chicken legs 1000 270 W 13-15 turn over halfway through defrosting time 30-90
200 270 W 3-4 turn over halfway through defrosting time 10-15
Chicken breast 450 270 W 7-9 turn over halfway through defrosting time 30-90
Whole Fish 800 270 W 12-13 turn over halfway through defrosting time 10-15
Fish fillet 400 270 W 5-7 turn over halfway through defrosting time 5-10
Crab 300 270 W 6-8 turn over halfway through defrosting time 30
and take off defrosted parts
Bread rolls, 2 pieces 80 270 W 1-1
1
/2 only begin to defrost White bread, whole 500 270 W 3-5 turn over halfway through defrosting time (centre still frozen) 30
Mixed flour bread, whole 1000 270 W 8-10 turn over halfway through defrosting time (centre still frozen) 30
Cake, 1 piece 150 270 W 1-3 place on a plate 5
Fruit cake,1 Stück 150 270 W 2-3 place on a plate 10
Butter 250 270 W 1-3 only begin to defrost 5
Cream 200 270 W 2+2 remove lid; after 2 Min defrosting put in 5-10
a dish and allow to finish defrosting
Cheese slices 200 270 W 1-2 only begin to defrost 10
Fruit e.g. strawberries 250 270 W 3-5 place next to each other, spread out evenly 5
raspberries, cherries, plums turn over halfway through defrosting time
Potato chips 250 630 W 3-4 Place in a shallow gratin dish and put on the high rack.
8-10 After approx. 5-6 Min. of grill time turn over.
(Thin potato chips need a shorter grill time).
Pizza 300 450 W 4-6 Place on the low rack
450 W 4-6
400 450 W 6-7
450 W 5-7
Onion quiche 300 450 W 8-10 Place on the low rack
Filled baguettes 250 450 W 8-10 Place on the high rack
TABLE: COOKING OF FROZEN SNACKS
Frozen snack Quantity Setting Power Time Hints
-g- -Level- -Min-
Food Quantity Power Time Hints Standing time
-g- -Setting- -Min- -Min-
TABLE: DEFROSTING
Food Quantity Power Time Added water Hints Standing time
-g- -Setting- -Min- -
tbsps
- -Min-
TABLE: DEFROSTING AND COOKING
Fish fillet 300 900 W 9-11 - cover 1-2
Trout, 1 fish 250 900 W 6-8 - cover 1-2
Platter 400 900 W 8-10 - cover, stir after 6 minutes 2
Leaf spinach 300 900 W 7-10 - cover, stir once or twice during cooking 2
Broccoli 300 900 W 6-8 3-5 cover, stir halfway through cooking time 2
Peas 300 900 W 6-8 3-5 cover, stir halfway through cooking time 2
Kohlrabi 300 900 W 7-8 3-5 cover, stir halfway through cooking time 2
Mixed vegetables 500 900 W 9-11 3-5 cover, stir halfway through cooking time 2
Brussels sprouts 300 900 W 6-8 3-5 cover, stir halfway through cooking time 2
Red cabbage 450 900 W 10-12 3-5 cover, stir halfway through cooking time 2
1. AG-71+72D-EU English 29/03/2005 10:49 Page 29
Page 32

30
Recipes
ADAPTING RECIPES FOR THE
MICROWAVE OVEN
If you would like to adapt your favourite recipes for the
microwave, you should take note of the following:
Shorten cooking times by a third to a half. Follow the
example of the recipes in this book. Foods which have a
high moisture content such as meat, fish, poultry,
vegetables, fruit, stews and soups can be prepared in
your microwave without any difficulty.
Foods which have little moisture, such as platters of
food, should have the surface moistened prior to
heating or cooking.
The amount of liquid to be added to raw foods, which
are to be braised, should be reduced to about two
thirds of the quantity in the originall recipe. If
necessary, add more liquid during cooking.
The amount of fat to be added can be reduced
considerably. A small amount of butter, margarine or oil
is sufficient to flavour food. For this reason your
microwave is excellent for preparing low-fat foods as
part of a diet.
HOW TO USE THE RECIPES
• All the recipes in this book are calculated on the
basis of 4 servings - unless otherwise stated.
• Recommendations relating to suitable utensils and
the total cooking times are given at the beginning
of every recipe.
• As a rule the quantities shown are assumed to be
wholly consumable, unless specifically indicated
otherwise.
• When eggs are given in the recipes they are assumed
to have weight of approx. 55 g (medium).
FOR COMBINED OPERATION
In general the same rules apply as for microwave
operation. The following additional tips should be
borne in mind:
1. The microwave power setting must match the type
of food and the cooking time. Consult the recipes in
this book.
2. When preparing food in microwave-grill
combination mode remember that microwave times
are longer for large, bulky food, such as roast pork,
than for small flat food. As far as grilling is
concerned the situation is quite the opposite. The
nearer the food is to the grill, the quicker it browns.
This means that when you cook large pieces of
meat, for example, in combination mode, the
grilling time needs to be shorter than for smaller
pieces of meat.
3. Use the high rack for normal grilling to get quick
and even browning (exceptions are large, bulky
foods and puddings, which are also grilled on the
bottom rack).
ABBREVIATIONS USED
tbsp = tablespoon
tsp = teaspoon
Cup = cupful
kg = kilogram
g = gram
l = litre
ml = millilitre
cm = centimetre
DFC = dry fat content
DF = deep frozen
min = minutes
sec = seconds
dm = diameter
app. = approximate
sach. = sachet
1. AG-71+72D-EU English 29/03/2005 10:49 Page 30
Page 33

31
UK
Soups & starters
Switzerland
Barley soup
Total cooking time: approx. 27-34 minutes
Utensils: Bowl with lid (2 litre capacity)
Ingredients
2 tbsp butter or margarine (20 g)
1 onion (50 g), finely chopped
1-2 carrots (130 g), sliced
15 g celery, diced
1 leek (130 g), cut in rings
3 white cabbage leaves (100 g), shredded
200 g veal bones
50 g streaky bacon, shredded
pepper
50 g barleycorns
700 ml meat stock
4 frankfurters
1. Put the butter and the onion in the bowl. Cover and
cook.
approx. 1-2 min. 900 W
2. Put the vegetables in the bowl. Add the bones, streaky
bacon and barley and top up with meat stock. Season
with salt. Cover and microwave.
1. 9-11 min. 900 W
2. 17-21 min. 450 W
3. Cut up the sausages in small pieces and heat them in
the bowl for the last 5 minutes.
4. Let the soup stand for about 5 minutes after cooking.
Remove the bones from the soup shortly before
serving.
Sweden
Crab soup
Total cooking time: approx. 11-15 minutes
Utensils: Bowl with lid (2 litre capacity)
Ingredients
1 onion (50 g), finely chopped
50 g carrots, sliced
3 tbsp butter or margarine (30 g)
500 ml meat stock
100 ml white wine & 100 ml Madeira wine
200 g tinned crab meat
1
/2
bay leaf
3 white peppercorns
thyme
3 tbsp flour (30 g)
100 ml cream
1. Place the vegetables with 2 tbsp of the fat in the bowl.
Cover and microwave.
2-3 min. 900 W
2. Add the meat stock, wine and Madeira together with
the crab meat and the seasoning to the vegetables.
Cover and microwave.
7-9 min. 450 W
3. Remove the bay leaf and the peppercorns from the
soup. Blend the flour with a little cold water and add
to the soup. Add the cream, stir it in and reheat.
2-3 min. 900 W
4. Stir the soup and leave it to stand for about 5 minutes.
Add the butter shortly before serving.
France
Onion soup
Total cooking time: approx. 14 - 17 minutes
Utensils: Bowl with lid (2 litre capacity)
4 soup bowls (200 ml)
Ingredients
1 tbsp butter or margarine
2 onions (100 g), sliced
800 ml meat stock
salt & pepper
2 slices of bread for toasting
4 tbsp grated cheese (40 g)
1. Place the butter cut up into pieces in the bowl. Add the
sliced onion, the meat stock and the seasoning. Cover
and microwave..
9-11 min. 900 W
2. Toast the slices of bread, cut them into cubes and
divide them among the soup bowls. Pour the soup over
the toast cubes and sprinkle on the cheese.
3. Place the bowls on the turntable, use the top grill and
brown the cheese topping.
6-7 min.
1. AG-71+72D-EU English 29/03/2005 10:49 Page 31
Page 34

32
Soups & starters
Spain
Mushrooms with rosemary
Total cooking time: approx. 10-17 minutes
Utensils: Bowl with lid (1 litre capacity)
Shallow round dish with lid
(approx. 22 cm diameter)
Ingredients
8 large mushrooms (approx. 225 g), whole
2 tbsp butter or margarine (20 g)
1 onion (50 g), finely chopped
50 g bacon, finely diced
black pepper, ground
fresh rosemary, bruised
125 ml dry white wine
125 ml cream
2 tbsp flour (20 g)
1. Remove the stalks from the mushrooms and chop the
stalks into small pieces.
2. Spread the butter on the bottom of the dish. Add the
onions, the diced bacon and the mushroom stalks.
Season with pepper and rosemary, cover and cook.
3-5 min. 900 W
Leave to cool.
3. Heat 100 ml of the wine and cream in the other dish
with its lid on.
1-3 min. 900 W
4. Mix the remaining wine with the flour, stir into the hot
liquid and cook with the lid on. Stir once during
cooking.
approx. 1 min. 900 W
5. Fill the mushrooms with the bacon mixture, place in
the sauce and cook on the high rack.
6-8 min. 270 W
Allow the mushrooms to stand for approximately 2
minutes once cooked.
Spain
Stuffed ham
Total cooking time: approx. 13-18 minutes
Utensils: Bowl with lid (2 litre capacity)
Shallow oval gratin dish
(approx. 26 cm long)
Ingredients
150 g fresh spinach, stalks removed
150 g quark, 6 % fat
50 g grated Emmental cheese
pepper
paprika, mild
6 slices cooked ham (300 g)
125 ml water
125 ml cream
2 tbsp flour (20 g)
2 tbsp Butter or Margarine (20 g)
1 tsp Butter or Margarineto grease the dish
Tip: You can also use ready-made béchamel
sauce for this recipe
1. Cut the spinach finely, mix with the quark and the
cheese and season to taste.
2. Place a tablespoon of the filling on each slice of the
cooked ham and roll up. Secure the ham with a
wooden toothpick.
3. Make a béchamel sauce. To do this, pour the liquid into
the dish, cover and heat.
2-4 min. 900 W
Rub the butter into the flour, add to the liquid and
beat with a balloon whisk, until it is smooth. Cover,
bring to the boil until thickened.
1-2 min. 900 W
Stir and taste.
4. Pour the sauce into the greased dish, place the ham
rolls in the dish and cook on the turntable
10-12 min. 630 W
Allow the ham rolls to stand for approximately 5
minutes after cooking.
1. AG-71+72D-EU English 29/03/2005 10:49 Page 32
Page 35

33
UK
Meat, fish & poultry
Greece
Aubergines stuffed with minced meat
Total cooking time: approx. 17-22 minutes
Utensils: Bowl with lid (1 litre size)
Shallow oval gratin dish with lid
(approx. 30 cm long)
Ingredients
2 aubergines, less stalks (app. 250 g)
3 tomatoes (app. 200 g)
1 tbsp olive oil to grease the dish
2 onions (100 g), chopped
4 mild green chillies
200 g mince (beef or lamb)
2 garlic cloves, crushed
2 tbsp parsley, chopped
salt & pepper
pink paprika
60 g Feta cheese, diced
Tip: You can substitute courgettes for the aubergines.
1. Cut the aubergines in half lengthways. Scoop out the
flesh with a teaspoon to leave a shell about 1 cm thick.
Sprinkle the aubergines with salt and dice the
scooped-out flesh.
2. Remove the skin from two of the tomatoes and chop
them up, having first cut out the stalks.
3. Grease the bottom of the bowl with the olive oil. Add
the onions. Cover and cook.
approx. 2 min. 900 W
4. Remove the stalks and seeds from the chillies and cut
them into rings. Retain a third for the garnish. Mix the
minced meat with the diced aubergines, onions and
tomatoes, the chilli rings, the crushed garlic clove and
the parsley. Season to taste.
5. Dry the aubergine halves. Fill with half of the mince
mixture, spread the sheep's cheese on top, and then
add the rest of the filling.
6. Arrange the aubergine halves in the greased ovenproof
dish, place the dish on the low rack and cook.
11-13 min. 630 W
Garnish the aubergine halves with the chilli rings and
slices of tomato and continue cooking.
4-7 min. 630 W
Allow the aubergines to stand for about 2 minutes
after cooking.
Germany
Almond trout
Total cooking time: approx. 16-19 minutes
Utensils: Shallow oval gratin dish
(ca. 32 cm lang)
Ingredients
4 trout (200 g), trimmed
juice of one lemon
salt
30 g butter or margarine
5 tbsp flour (50 g)
1 tsp butter or margarine to grease the dish
50 g almond flakes
1. Wash and dry the trout and sprinkle with lemon juice.
Apply salt to the interior and exterior of the fish and
leave to stand for 15 minutes.
2. Melt the butter.
1 min. 900 W
3. Dry the fish, spread on the butter and roll in the flour.
4. Grease the dish. Put the trout in the dish and cook on
the low rack. Two thirds through the cooking period
turn the trout and scatter the almonds over them.
15-18 min. 450 W
Allow the almond trout to stand for 2 minutes after
cooking.
Tip: Suitable accompanying dishes are parsley potatoes
and a green salad.
1. AG-71+72D-EU English 29/03/2005 10:49 Page 33
Page 36

34
Meat, fish & poultry
Netherlands
Meatloaf
Total cooking time: approx. 20-23 minutes
Utensils: Bowl with lid (2 Iitre capacity)
Ingredients
500 g minced meat (half pork, half beef)
3 onions (150 g), finely chopped
1 egg
50 g breadcrumbs
salt & pepper
350 ml meat stock
70 g tomato puree
2 potatoes (200 g), diced
2 carrots (200 g), diced
2 tbsp parsley, chopped
1. Knead the minced meat, onion cubes, egg and
breadcrumbs into a dough and season with salt and
pepper. Place the meat loaf in the dish.
2. Mix the meat stock with the tomato puree.
3. Arrange the potatoes and carrots around the meat loaf
together with the liquid. Cover and microwave. Turn
once during cooking.
20-23 min. 900 W
Give the contents of the dish a final adjustment and
leave to stand for about 5 minutes.
Serve sprinkled with parsley.
Austria
Stuffed Roast Chicken
2 portions
Total cooking time: approx. 36-40 minutes
Utensils: Bowl (2 Iitre capacity)
String
Ingredients
1 chicken (1000 g)
salt
rosemary & majoram, bruised
1 stale bread (roll, 40 g)
1 bunch parsley, finely chopped (10 g)
1 pinch nutmeg
5 tbsp butter or margarine (50 g)
1 egg yolk
1 tbsp sweet paprika
1 tsp butter or margarine to grease the dish
1. Wash the chicken, dry it and season it internally with
salt, rosemary and marjoram.
2. For the filling soak the bread roll in cold water for
about 10 minutes and then squeeze the water out. Mix
with salt, parsley, nutmeg, butter (20 g) and egg yolk
and stuff the chicken with the mixture. Tie up the
opening with string.
3. Heat the butter (30 g).
ca. 1 min. 900 W
Stir the paprika and salt into the butter and spread
over the chicken.
4. Place chicken in the greased dish and cook.
Turn over halfway through cooking.
35-39 min. 630 W
Leave the stuffed roast chicken to stand for approx. 3
minutes after cooking.
1. AG-71+72D-EU English 29/03/2005 10:49 Page 34
Page 37

35
UK
Meat, fish & poultry
Germany
Grill skewers
(This recipe makes approx. 800 g)
Total cooking time: approx. 17-18 minutes
Utensils: High rack
4 wooden skewers (approx. 25 cm lang)
Ingredients
400 g escalope of pork
100 g smoked belly of pork
2 onions (100 g), quartered
4 tomatoes (250 g), quartered
1
/
2 green pepper (100 g), in eight pieces
2 tbsp oil
4 tsp sweet paprika
salt
1 tsp cayenne pepper
1 tsp worcester sauce
1. Cut the escalope of pork and the pork belly into 2-3
cm cubes.
2. Thread meat and vegetables alternately on four
wooden skewers.
3. Combine the oil with the spices and brush over the grill
skewers. Place the grill skewers on the high rack and
cook.
AUTO COOK
PLUS GRILL 2
Switzerland
Zurich veal stew
Total cooking time: approx. 9-14 minutes
Utensils: Bowl with lid (2 Iitre capacity)
Ingredients
600 g veal fillet
1 tbsp butter or margarine
1 onion (50 g), finely chopped
100 ml white wine
gravy thickener to make approx. 1/2 litre
300 ml cream
1 tbsp parsley, chopped
1. Slice the meat into finger-thick strips.
2. Smear the butter evenly around the dish. Add the
onion and the meat to the dish, cover and cook. Stir
once during cooking.
6-9 min. 900 W
3. Add the white wine, the gravy powder and the cream,
stir, cover and continue to cook. Stir once during
cooking.
3-5 min. 900 W
4. Taste the stew, stir again and allow to stand for 5
minutes. Serve with parsley garnish.
Italy
Veal cutlet with mozzarella
Total cooking time: approx. 24-31 minutes
Utensils: Shallow square gratin dish with lid
(approx. 25 cm long)
Ingredients
2 mozzarella cheese (150 g)
500 g drained, peeled tinned tomatoes
4 veal cutlets (600 g)
20 ml olive oil
2 cloves of garlic, sliced
pepper, freshly milled
2 tbsp capers (20 g)
oregano, salt
1. Cut the mozzarella into slices. Puree the tomatoes with
the puree attachment of a hand mixer.
2. Wash the cutlets, dry them and beat them flat.
Distribute the oil and the garlic slices over the bottom
of the oven-proof dish. Add the cutlets and pour over
the tomato puree. Sprinkle with pepper, capers and
oregano, cover and cook on the low rack
15-19 min. 630 W
Turn the meat slices.
3. Place a few slices of mozzarella on each piece of meat,
add salt and cook uncovered on the high rack.
9-12 min. 630 W
After cooking allow to stand for about 5 minutes.
Tip: Spaghetti and a fresh salad can be served with this
dish.
1. AG-71+72D-EU English 29/03/2005 10:49 Page 35
Page 38

36
Meat, fish & poultry
France
Fillet of sole
2 portions
Total cooking time: approx. 11-13 minutes
Utensils: Shallow oval gratin dish with lid
(approx. 26 cm long)
Ingredients
400 g fillet of sole
1 lemon, untreated
2 tomatoes (150 g)
1 tsp butter or margarine to grease the dish
1 tbsp vegetable oil
1 tbsp parsley, chopped
salt & pepper
4 tbsp white wine (30 ml)
2 tbsp butter or margarine (20 g)
1. Wash the fish and pat dry. Remove any bones.
2. Slice the lemon and the tomatoes finely.
3. Grease the gratin dish with butter. Place the fish in it
and drizzle with vegetable oil.
4. Sprinkle the fish with parsley, lay the slices of tomato
on top and season. Lay the slices of lemon on top of
the tomato and pour the white wine over this.
5. Dot the lemon with butter, cover and cook.
11-13 min. 630 W
Leave the fish fillets to stand for 2 minutes after
cooking.
Tip: You can also use rosefish, halibut, mullet, plaice or
cod in this recipe.
Italy
Quails in cheese & herb sauce
Total cooking time: approx. 27-33 minutes
Utensils: Kitchen twine
Flat round gratin dish
(diameter approx. 22 cm)
Bowl with lid (2 Iitre capacity)
Ingredients
4 quails (600 g)
salt & pepper
200 g streaky bacon, thinly sliced
1 tsp butter or margarine to grease the dish
1 tbsp fresh parsley
rosemary & basil, finely chopped
150 ml port
250 ml meat stock
2 tbsp butter or margarine (20 g)
2 tbsp flour (20 g)
50 g grated Emmental cheese
1. Wash the quails and carefully dab them dry. Season
with salt and pepper inside and out, wrap bacon
around each bird, and tie up tightly with the twine.
2. Grease the dish, place the quails in the dish and cook.
Turn over once halfway through.
10-12 min. 900 W
3. Chop the herbs very fine, sprinkle over the quails, and
pour the port over the top. Continue to cook the
quails.
13-15 min. 630 W
Take the quails out of the roasting sauce.
4. To make the sauce, heat the meat stock in the covered
bowl.
2-3 min. 900 W
Blend the butter with the flour, stir into the liquid,
allow to boil, and cook. Stir once halfway through.
1-2 min. 900 W
5. Stir the cheese into the sauce. Add the cheese sauce to
the sauce, stir everything together well, and reheat.
approx. 1 min. 900 W
6. Pour the sauce over the quails and serve.
1. AG-71+72D-EU English 29/03/2005 10:49 Page 36
Page 39

Vegetables, noodles, rice & pasta
37
UK
Meat, fish & poultry
Switzerland
Fish fillet with cheese sauce
Total cooking time: approx. 21-25 minutes
Utensils: Bowl with lid (1 litre capacity)
Shallow oval gratin dish
(approx. 25 cm long)
Ingredients
4 fish fillets (approx. 800 g)
(e.g. perch, flounder or cod)
2 tbsp lemon juice
salt
1 tbsp butter or margarine
1 onion (50 g), finely chopped
2 tbsp flour (20 g)
100 ml white wine
1 tsp vegetable to grease the dish
100 g grated Emmental cheese
2 tbsp chopped parsley
1. Wash the fish, pat dry and sprinkle with lemon juice.
Leave to stand for 15 minutes, pat dry again and rub
with salt.
2. Smear the butter on the bottom of the dish. Add the
diced onion, cover with the lid and steam.
1-2 min. 900 W
3. Sprinkle the flour over the onions and stir.
Add the white wine and mix.
4. Grease the gratin dish and place the fish in it. Pour the
sauce over the fish and sprinkle with cheese. Place on
the low rack and cook.
1. 7-8 min. 450 W and then
2. 14-16 min. 450 W
Allow fish to stand for approximately 2 minutes after
cooking. Serve with a garnish of chopped parsley.
Germany
Courgette and noodle gratin
Total cooking time: approx. 37-44 minutes
Utensils: Bowl with lid (2 l Inhalt)
Gratin dish (approx. 26 cm long)
Ingredients
500 ml water
1
/2 tsp oil
80 g macaroni
400 g tinned chopped tomatoes
3 onion (150 g), finely chopped
basil, thyme, salt & pepper
1 tbsp oil to grease the dish
450 g courgettes, sliced
150 g sour cream
2 eggs
100 g grated Cheddar cheese
1. Put the water, oil and salt in the bowl, cover and bring
to the boil.
3-4 min. 900 W
2. Break the macaroni into pieces and add them to the
dish. Stir and allow to soak.
9 -11 min. 270 W
Drain the pasta and allow to cool.
3. Mix the tomatoes with the onions and season well.
Add the macaroni and pour over the tomato sauce.
Divide the courgette slices on top.
4. Beat the sour cream and the eggs and pour over the
dish. Sprinkle the grated cheese on top. Place on the
low rack and cook.
1. 18-21 min. 900 W
and then
2. 7-8 min. 630 W
Allow the gratin to stand for about 5-10 minutes after
cooking.
1. AG-71+72D-EU English 29/03/2005 10:49 Page 37
Page 40

38
Vegetables, noodles, rice & pasta
Austria
Bread dumplings
5 portions
Total cooking time: approx. 8-11 minutes
Utensils: Bowl with lid (1 Iitre capacity)
5 cups or pudding moulds
Ingredients
2 tbsp butter or margarine (20 g)
1 onion (50 g), finely chopped
500 ml milk
200 g dried bread cubes
(from approx. 5 bread rolls)
3 eggs
1. Cut the bread rolls into small cubes and soak in the
milk.
2. Divide the fat on the bottom of the bowl and add the
chopped onion. Cover and cook.
1-2 min. 900 W
3. Add the onion to the bread cubes. Beat the eggs, add
them and mix well to form a workable paste. If
necessary add a little milk.
4. Divide the paste equally into 5 cups or pudding
moulds, cover with microwave cling film, arrange on
the edge of the turntable and cook.
6-8 min. 900 W
Allow the dumplings to stand for about 2 minutes
after cooking. Turn the dumplings into a plate before
serving.
Italy
Lasagne al forno
Total cooking time: approx. 18-25 minutes
Utensils: Bowl with lid (2 Iitre capacity)
Shallow, square gratin dish with lid
(approx. 20 x 20 x 6 cm)
Ingredients
300 g canned tomatoes
50 g ham, finely cubed
1 onion (50 g), finely chopped
1 clove of garlic, crushed
250 g minced meat (beef)
2 tbsp mashed tomato (30 g)
salt & pepper
oregano, thyme & basil
150 ml cream (crème fraîche)
100 ml milk
50 g grated Parmesan cheese
1 tsp mixed chopped herbs
1 tsp olive oil
salt & pepper
nutmeg
1 tsp vegetable to grease the dish
125 g green flat pasta
1 tbsp grated Parmesan cheese
1 tbsp butter or margarine
1. Cut the tomatoes into slices, mix with the ham, onion
cubes, garlic, minced meat and mashed tomato.
Season and cook with the lid on.
5-8 min. 900 W
2. Mix the cream with the milk, Parmesan cheese, herbs,
oil and spices.
3. Grease the soufflé mould and cover the bottom of the
mould with about
1
/3 of the pasta. Put half of the
minced meat mixture on the pasta and pour on some
sauce. Put an additional
1
/3 of the pasta on top
followed by another layer of the minced meat mixture
and some sauce, finishing with the remaining pasta on
top. Finally, cover the pasta with lots of sauce and
sprinkle with Parmesan cheese. Place butter flakes on
top and cook with the lid on.
13-17 min. 630 W
After cooking, let the lasagne stand for approximately
5-10 minutes.
1. AG-71+72D-EU English 29/03/2005 10:49 Page 38
Page 41

39
UK
Vegetables, noodles, rice & pasta
Greece
Potato-garlic paté
Total cooking time: approx. 8-10 minutes
Utensils: Bowl with lid (1 Iitre capacity)
Ingredients
400 g boiled potatoes (with skins)
2-3 tbsp water
2-3 garlic cloves
6 tbsp olive oil
6 tbsp meat stock
salt
juice of one lemon
1 mild chilli pepper
1. Place the potatoes and water in the dish. Cover and
cook. Stir once halfway through.
8-10 min. 900 W
2. Peel the potatoes and press through a potato press or
a fine sieve.
3. Crush the garlic cloves with the garlic press and add to
the potatoes.
4. Add olive oil, meat stock, salt and lemon juice with the
potatoes to taste, and stir until a smooth mixture is
formed. Add more oil or stock as required.
5. Decorate the paté with chilli pepper rings and serve.
Switzerland
Kohlrabi in dill sauce
2 Portions
Total cooking time: approx. 10
1
/2-131/2 minutes
Utensils: 2 bowls with lids (1 Iitre capacity)
Ingredients
400 g Kohlrabi, sliced (approx. 2 pieces)
4-5 tbsp water
2 tbsp butter or margarine (20 g)
150 ml cream (crème fraîche)
salt, pepper, nutmeg & ground paprika
lemon juice
1 bunch dill, finely chopped
Tip: Black salsify can be used instead of kohlrabi.
1. Place the kohlrabi and water in the dish, cover and
cook. Stir once halfway through.
9-12 min. 900 W
Pour off the liquid
2. Spread the butter in the bowl. Add the cream and heat
uncovered. Do not allow to boil!
approx. 1
1
/2
min. 900 W
3. Add salt, seasonings and lemon juice as desired. Fold in
the dill and pour the sauce over the kohlrabi. Allow the
kohlrabi to stand for approx. 2 minutes after cooking.
Italien
Tagliatelle with cream & basil sauce
2 portions
Total cooking time: approx. 16-22 minutes
Utensils: Bowl with lid (2 Iitre capacity)
Round soufflé dish (approx. 20 cm diam.)
Ingredients
1 I water
1 tsp salt
200 g tagliatelle
1 clove of garlic
15-20 basil leaves
200 g cream (crème fraîche)
30 g grated Parmesan cheese
salt & pepper
1. Place the water and the salt into the bowl, cover and
bring to the boil.
9-11 min. 900 W
2. Add the pasta, bring to the boil again, and then
simmer.
1. 1-2 min. 900 W
2. 6-9 min. 270 W
3. Meanwhile rub the garlic cloves over the soufflé dish.
Chop the basil leaves. Keep some aside for garnishing.
4. Drain the pasta well. Stir in the crème fraîche and
sprinkle the basil over the pasta.
5. Add the parmesan cheese, salt and pepper, place into a
soufflé dish and stir. Garnish the dish with basil and
serve hot.
1. AG-71+72D-EU English 29/03/2005 10:49 Page 39
Page 42

40
Vegetables, noodles, rice & pasta
Drinks, desserts & cakes
Switzerland
Tessiner risotto
Total cooking time: approx. 20-25 minutes
Utensils: Bowl with lid (2 Iitre capacity)
Ingredients
50 g streaky bacon
2 tbsp butter or margarine (20 g)
1 onion (50 g), finely chopped
200 g pudding rice (Arboris)
400 ml meat stock
70 g Sbrinz cheese, grated, (use grated
Emmental cheese as a substitute)
1 pinch saffron
salt & pepper
1. Cut the bacon into cubes. Spread the butter over the
base of the bowl. Place the onions and bacon cubes,
cover, and braise.
2-3 min. 900 W
2. Add the rice, fill with the meat stock, bring to the boil,
and then simmer.
1. 3-5 min. 900 W and then
2. 15-17 min. 270 W
Allow the rice to stand for about 3-5 minutes after
cooking.
3. Mix the cheese with the saffron and season to taste.
Tip: Braised chanterelle mushrooms, or button
mushrooms and a mixed salad go very well with this
dish.
Spain
White peach mounds
makes approx. 8 pieces
Total cooking time: approx. 3-5 minutes
Utensils: Shallow, round glass dish
(approx. 24 cm diameter)
Ingredients
470 g tinned peach halves, drained
2 egg whites
70 g sugar
75 g ground almonds
2 egg yolks
2 tbsp cognac
1 tsp butter or margarine to grease dish
1. Dry off the peach halves.
2. Beat the egg whites until stiff. Then trickle in a little
sugar (35 g).
3. Mix together the almonds, the remaining sugar (35 g),
the egg yolks and the cognac.
4. Fill each peach half with the mixture. Pipe the beaten
egg whites over the filling.
5. Grease the dish. Place the peaches in the glass dish
and grill on the low rack.
3-5 min. 630 W
1. AG-71+72D-EU English 29/03/2005 10:49 Page 40
Page 43

41
UK
Drinks, desserts & cakes
Germany
Semolina pudding with raspberry sauce
Total cooking time: approx. 15-20 minutes
Utensils: Bowl with lid (2 Iitre capacity)
Ingredients
500 ml milk
40 g sugar
15 g chopped almonds
50 g semolina
1 egg yolk
1 tbsp water
1 egg white
250 g raspberries
50 ml water
40 g sugar
1. Put the milk, sugar and almonds into the bowl, cover
and heat.
3-5 min. 900 W
2. Add the semolina and stir. Cover and microwave. Stir
once during cooking.
10-12 min. 270 W
3. Mix the egg yolk with the water in a cup and fold into
the hot semolina. Beat the egg white until stiff and
lightly fold it in. Transfer the pudding to small bowls.
4. For the sauce wash the raspberries, dry carefully and
put into a bowl with water and sugar.
Cover and heat.
2-3 min. 900 W
5. Puree the raspberries and serve either hot or cold with
the semolina pudding.
France
Pears in chocolate sauce
Total cooking time: approx. 8-13 minutes
Utensils: Bowl with lid (2 Iitre capacity)
Bowl with lid (1 Iitre capacity)
Ingredients
4 pears (600 g)
60 g sugar
1 pack vanilla sugar (10 g)
1 tbsp pear liqueur, 30 % proof
150 ml water
130 g plain chocolate pieces
100 g cream (crème fraîche)
1. Peel the pears, keeping them whole.
2. Put sugar, vanilla sugar, liqueur and water into the
bowl. Stir and heat.
1-2 min. 900 W
3. Place the pears in the juice, cover and cook.
5-8 min. 900 W
Take the pears out of the juice and allow to cool.
4. Put 50 ml of the juice in the small bowl, add the cream
and chocolate. Cover and heat.
2-3 min. 900 W
5. Stir the sauce well and pour over the pears to serve.
Tip: You could also serve this with vanilla ice cream.
Austria
Chocolate with cream
1 portion
Total cooking time: approx. 1 minute
Utensils: Large cup (200 ml capacity)
Ingredients
150 ml milk
30 g plain chocolate, grated
30 ml cream
chocolate vermicelli
1. Pour the milk into the cup. Add the chocolate, stir and
heat. Stir occasionally.
approx. 1 min. 900 W
2. Whip the cream until stiff and spoon this on top of the
chocolate. Serve garnished with chocolate vermicelli.
1. AG-71+72D-EU English 29/03/2005 10:49 Page 41
Page 44

42
Drinks, desserts & cakes
Sweden
Pistachio rice with strawberries
Total cooking time: approx. 27-31 minutes
Utensils: Bowl with lid (2 Iitre capacity)
Ingredients
125 g long grain rice
150 ml milk
175 ml water
1 vanilla pod
1 pinch salt
50 g sugar
250 g strawberries
40 g sugar
40 ml Cointreau (Orange liqueur, 40 % proof)
200 ml cream
1 egg white
50 g pistachio
1. Put the rice and the liquid in the bowl. Slit open the
vanilla pod and add it to the rice with the salt and
sugar. Cover and microwave. Stir once during cooking.
1. 3-5 min. 900 W
2. 24-26 min. 270 W
Leave the rice to stand for 5 minutes after cooking.
2. Cut the strawberries in half and mix with sugar and
the orange liqueur.
3. Remove the vanilla pod from the rice and cool the rice
by stirring it in a bain-marie. Beat the cream and the
egg white separately until stiff. Fold first the
pistachios, then the cream and finally the egg white
into the cold rice.
4. Put the rice in a large bowl, make a depression in the
rice and fill it with strawberries.
Netherlands
Fiery drink
for 30 servings
Total cooking time: approx. 8-10 minutes
Utensils: Bowl with lid (2 Iitre capacity)
Ingredients
500 ml white wine
500 ml dry red wine
500 ml rum, 54 % proof
1 whole orange
3 cinnamon sticks
75 g sugar
10 tsp rock candy
1. Pour the alcohol into the bowl. Peel the orange so that
the peel is thin and put this in the alcohol together
with the cinnamon and sugar.
Cover and heat.
8-10 min. 900 W
2. Remove the peel and cinnamon. Put one teaspoon of
the rock candy into each grog glass, top up with the
fiery drink and serve.
1. AG-71+72D-EU English 29/03/2005 10:49 Page 42
Page 45

43
UK
Drinks, desserts & cakes
Denmark
Berry jelly with vanilla sauce
Total cooking time: approx. 8-12 minutes
Utensils: Bowl with lid (2 Iitre capacity)
Ingredients
150 g redcurrants, washed and sorted
150 g strawberries, washed and sorted
150 g raspberries, washed and sorted
250 ml white wine
100 g sugar
50 ml lemon juice
8 gelatine sheets
300 ml milk
flavouring from
1
/2 vanilla pod
30 g sugar
15 g cornflour
Tip: You can also use frozen fruit once it is defrosted.
1. Reserve some of the fruit for decoration. Puree the rest
of the berries with the wine. Put into the bowl and
cook cover.
5-7 min. 900 W
Add sugar and lemon juice.
2. Leave gelatine in cold water for 10 minutes to soften.
Remove and squeeze out water. Stir gelatine into the
hot fruit until it dissolves. Put the jelly into the fridge
to set.
3. To make the vanilla sauce, put the milk in a bowl. Slice
the vanilla pod open and scrape out the vanilla
flavouring. Stir the flavouring, sugar and cornflour
into the milk and cover before cooking. Stir
occasionally during cooking and to finish.
3-5 min. 900 W
4. Tip the set jelly onto a plate and garnish with the
whole berries. Serve with the vanilla sauce.
Germany
Cheesecake
12 portions
Total cooking time: approx. 21-27 minutes
Utensils: Round baking tin (approx. 26 cm diam.)
Ingredients
300 g flour
1 tbsp cocoa
3 tsp baking powder (9 g)
150 g sugar
1 egg
150 g butter or margarine
1 tsp butter or margarine to grease the dish
100 g butter or margarine
100 g sugar
1 pack vanilla sugar (10 g)
3 eggs
400 g fromage frais, 20 % fat content
1 pack powdered vanilla pudding mix (40 g)
1. Mix the flour and cocoa with the baking flour. Add the
sugar, egg and butter and use the kneading hook on
the hand-held blender to knead.
2. Grease the tin, roll out
2
/3 of the dough and place it in
the tin. Lift the edges 2 cm to form a rim. Pre-bake the
pastry.
6-8 min. 630 W
3. For the filling, whisk the butter until light and fluffy,
add the sugar and eggs one at a time. Finally add the
fromage frais and the powdered vanilla pudding mix.
4. Spread the filling over the pre-baked dough and add
the remaining crumbling dough on the cake and bake.
15-19 min. 630 W
1. AG-71+72D-EU English 29/03/2005 10:49 Page 43
Page 46

44
Drinks, desserts & cakes
Great Britain
Chocolate cake with ice-cream
12 portions
Total cooking time: approx. 15-21 minutes
Utensils: Baking tin (approx. 21 cm diameter,
10 cm high)
2 bowls with lids (1 Iitre capacity)
Ingredients
175 g butter or margarine
175 g sugar
3 eggs
175 g flour
1 tsp baking powder
2 tbsp cocoa (20 g)
50 ml milk
500 ml vanilla ice-cream
65 g frozen raspberries
250 g dark chocolate coating
Variations:
a) Cherry cake: Replace the cocoa with 1 tbsp of vanilla
flavour and add 50 g of chopped cherries (glazed) to
the mixture. Cover with white chocolate.
b) Coffee cake: Prepare a small coffee (2 spoonfuls of
instant coffee + 2 spoonfuls of hot water and add to
mixture. Reduce the quantity of milk to one teaspoon.
Cover with brown chocolate.
c) Nut cake: Add 50 g of walnuts. Cover with nuts then
with chocolate coating.
1. Beat the butter until smooth and slowly add the sugar.
Gradually add the eggs and then whisk into the
mixture. Mix flour, baking powder and cocoa then put
into mixture. Add the milk and mix everything well.
2. Grease baking tin, pour in the mixture and cook.
8-10 min. 630 W
Check with a knife whether the dough is ready.
3. Leave the cake to cool in the baking tin for 10 minutes,
then remove it. Leave it to cool down completely.
4. Cut horizontally 2 cm of the top part of the cake and
leave to one side. Turn the cake over, cut vertically 1
cm at the edges and lift out the inner part with a
spoon.
5. Put the ice-cream into a bowl and defrost.
approx. 1 min. 270 W
Fill the cake with ice-cream. Add the raspberries to the
ice-cream. Place the base and turn the cake upside
down.
6. Put the coating in the second bowl and melt.
3 - 6 min. 450 W
Stir and cover the cake.
7. Freeze the cake and defrost before serving
3-4 min. 270 W
Tip: This cake tastes good even without a filling.
Germany
Hot lemon
1 portion
Total cooking time: approx. 1 minute
Utensils: Tea glass (150 ml capacity)
Ingredients
100 ml water
juice of 1 lemon
2-3 tsp sugar
1. Pour water and lemon juice into the glass and heat.
ca. 1 min. 900 W
Stir in sugar to taste.
1. AG-71+72D-EU English 29/03/2005 10:49 Page 44
Page 47

45
UK
Care & cleaning
CAUTION: DO NOT USE COMMERCIAL OVEN
CLEANERS, STEAM CLEANERS, ABRASIVE, HARSH
CLEANERS, ANY THAT CONTAIN SODIUM
HYDROXIDE OR SCOURING PADS ON ANY PART OF
YOUR MICROWAVE OVEN.
Oven exterior
The outside of your oven can be cleaned easily with
mild soap and water. Make sure the soap is wiped off
with a moist cloth, and dry the exterior with a soft
towel.
Control panel
Open the door before cleaning to de-activate the
control panel. Care should be taken when cleaning the
control panel. Using a cloth dampened with water only,
gently wipe the panel until it becomes clean. Avoid
using excessive amounts of water. Do not use any sort
of chemical or abrasive cleaner.
Oven Interior
1. For cleaning, wipe any splatters or spills with a soft
damp cloth or sponge after each use while the oven
is still warm. For heavier spills, use a mild soap and
wipe several times with a damp cloth until all
residues are removed. Do not remove the waveguide
cover.
2. Make sure that mild soap or water does not
penetrate the small vents in the walls which may
cause damage to the oven.
3. Do not use spray type cleaners on the oven interior.
4. Heat up your oven regularly by using the grill, refer
to note 2 on page 17. Remaining food or fat
splashed can cause smoke or a bad smell.
Turntable and turntable support
Remove the turntable and turntable support from the
oven. Wash the turntable and turntable support in mild
soapy water. Dry with a soft cloth. Both the turntable
and the turntable support are dishwasher safe.
Door
To remove all trace of dirt, regularly clean both sides of
the door, the door seals and sealing surfaces with a
soft, damp cloth.
Racks
These should be washed in a mild washing up liquid
solution and dried. The racks are dishwasher safe.
NOTE: A steam cleaner should not be used.
1. AG-71+72D-EU English 29/03/2005 10:49 Page 45
Page 48

46
What to do if...
... the microwave appliance is not working
properly ?
Check that
- the fuses in the fuse box are working,
- there has not been a power outage.
- If the fuses continue to blow, please contact
a qualified electrician.
... the microwave mode is not working ?
Check that
- the door is properly closed,
- the door seals and their surfaces are clean,
- the START-button has been pressed
... the turntable is not turning ?
Check that
- the turntable support is correctly connected
to the drive,
- the ovenware does not extend beyond the
turntable,
- food does not extend beyond the edge of
the turntable preventing it from rotating.
- there is nothing in the well beneath the
turntable.
... the microwave will not switch off ?
- Isolate the appliance from the fuse box.
- Contact an authorised AEG-Electrolux
service agent.
... the interior light is not working ?
- Call an authorised AEG-Electrolux service
agent. The interior light bulb can be
exchanged only by an authorised AEGElectrolux service agent.
... the food is taking longer to heat through
and cook than before ?
- Set a longer cooking time (double quantity
= nearly double time) or
- if the food is colder than usual, rotate or
turn from time to time or
- set a higher power setting.
Cooking Mode
Microwave (900 W)
Grill
Dual Grill
Standard time
20 minutes
30 minutes
Grill - 30 minutes
Reduced power level
Microwave - 630 W
Grill - 50%
Grill - 50%
NOTE: If you cook the food over the standard time with only the same cooking mode, the power of the oven
will lower automatically to avoid overheating. (The microwave power level will be reduced or the grill
heating element will begin to light on and off). After pausing for 90 seconds, full power can be reset.
1. AG-71+72D-EU English 29/03/2005 10:49 Page 46
Page 49

47
UK
Guarantee conditions
Service & spare parts
Standard guarantee conditions
We, AEG-Electrolux, undertake that if within 24 months of the date of the purchase this AEG-Electrolux appliance or any
part thereof is proved to be defective by reason only of faulty workmanship or materials, we will, at our discretion repair or
replace the same FREE OF CHARGE for labour, materials or carriage on condition that:
• The appliance has been correctly installed and used only on the electricity or gas supply stated on the rating plate.
• The appliance has been used for normal domestic purposes only, and in accordance with the manufacturer's operating
and maintenance instructions.
• The appliance has not been serviced, maintained, repaired, taken apart or tampered with by any person not authorised
by us.
• All service work under this guarantee must be undertaken by an authorised AEG-Electrolux service agent.
Any appliance or defective part replaced shall become the Company's property.
• This guarantee is in addition to your statutory and other legal rights.
• Home visits are made between 8.30am and 5.30pm Monday to Friday.
Visits may be available outside these hours in which case a premium will be charged.
Exclusions
This guarantee does not cover:
• Damage or calls resulting from transportation, improper use or neglect, the replacement of any light bulbs or
removable parts of glass or plastic.
• Costs incurred for calls to put right an appliance which is improperly installed or calls to appliances outside your
country of residence.
• Appliances found to be in use within a commercial environment, plus those which are subject to rental agreements.
• Products of AEG-Electrolux manufacture which are not marketed by AEG-Electrolux.
European Guarantee
If you should move to another country within Europe then your guarantee moves with you to your new home subject to
the following qualifications:
• The guarantee starts from the date you first purchased your product.
• The guarantee is for the same period and to the same extent for labour and parts as exists in the new country of use
for this brand or range of products.
• This guarantee relates to you and cannot be transferred to another user.
• Your new home is within the European Community (EC) or European Free Trade Area.
• The product is installed and used in accordance with our instructions and is only used domestically, i.e. a normal
household.
• The product is installed taking into account regulations in your new country.
Before you move please contact your nearest Customer Care centre, listed below, to give them details of your new home.
They will then ensure that the local Service Organisation is aware of your move and able to look after you and your
appliances.
France Senlis +33 (0) 3 44 62 29 29
Germany Nürnberg +49 (0) 800 234 7378
Italy Pordenone +39 (0) 800 117511
Sweden Stockholm +46 (0) 8 672 5360
UK Slough +44 (0) 1753 219899
If you wish to purchase spare parts or require an engineer, contact your local authorised service agent.
The telephone number can be obtained from the operator.
1. AG-71+72D-EU English 29/03/2005 10:49 Page 47
Page 50

48
Specifications
48
AC Line Voltage
Distribution line fuse/circuit breaker
AC Power required: Microwave
Grill
Microwave/Grill
Output power: Microwave
Grill
Microwave Frequency
Outside Dimensions: MCD2660E
MCD2661E
Cavity Dimensions
Oven Capacity
Turntable
Weight
Oven lamp
: 230 V, 50 Hz, single phase
: Minimum 16 A
: 1.37 kW
: 1.00 kW
: 2.35 kW
: 900 W (IEC 60705)
: 1000 W
: 2450 MHz * (Group 2 / Class B)
: 592 mm (W) x 460 mm (H) x 437 mm (D)
: 592 mm (W) x 388 mm (H) x 437 mm (D)
: 342 mm (W) x 207 mm (H) x 368 mm (D) **
: 26 litres **
: ø 325 mm, glass
: approx. 20 kg
: 25 W/240 - 250 V
Important information
Ecologically responsible disposal of packaging materials and old
appliances
Packaging materials
AEG-Electrolux microwave ovens require effective packaging to protect them during transportation.
Only the minimum packaging necessary is used.
Packaging materials (e.g. foil or styrofoam) can place children at risk.
Danger of suffocation. Keep packaging material away from children.
All packaging materials used are environment friendly and can be recycled. The cardboard is made from
recycled paper and the wooden parts are untreated. Plastic items are marked as follows:
«PE» polyethylene eg packaging film
«PS» polystyrene eg packaging (CFC-free)
«PP» polypropylene eg packaging straps
By using and re-using the packaging, raw materials are saved and waste volume is reduced.
Packaging should be taken to your nearest recycling centre.
Contact your local council for information.
Disposal of old appliances
Old appliances should be made safe before disposal by removing the plug, and cutting off and disposing
of the power cable.
It should then be taken to the nearest recycling centre. Check with your local Council or Environmental
Health Office to see if there are facilities in your area for recycling the appliance.
This oven complies with the requirements of Directives 89/336/EEC and 73/23/EEC as amended by 93/68/EEC.
SPECIFICATIONS ARE SUBJECT TO CHANGE WITHOUT NOTICE AS PART OF CONTINUOUS IMPROVEMENT
* This Product fulfils the requirement of the European standard EN55011.
In conformity with this standard, this product is classified as group 2 class B equipment.
Group 2 means that the equipment intentionally generates radio-frequency energy in the form of
electromagnetic radiation for the heat treatment of food.
Class B equipment means that the equipment is suitable to be used in domestic establishments.
** Internal capacity is calculated by measuring maximum width, depth and height.
Actual capacity for holding food is less.
1. AG-71+72D-EU English 29/03/2005 10:49 Page 48
Page 51

49
UK
Installation
INSTALLING THE APPLIANCE
1. Remove all packaging and check carefully for any
signs of damage.
2. If fitting the microwave oven above a conventional
oven (position A) then use the mylar sheet provided.
a. Cut the Mylar sheet to fit the internal width of
the unit.
b. Peel back the protective cover on the tape and fix
to the rear of the shelf
so that it covers
the service
gap. (See
diagram).
3. Fit the appliance into the kitchen cupboard slowly,
and without force, until the front frame of the oven
seals against the front opening of the cupboard.
4. Ensure the appliance is
stable and not leaning.
Ensure that a 5mm gap is
kept between the cupboard
door above and the top of
the frame (see diagram).
5. Fix the oven in position with the
screws provided.
The fixing points are located on
the top and bottom corners of
the oven (see diagram, item 10,
on page 5).
6. It is important to ensure that the installation of this
product conforms to the instructions in this
operation manual and the conventional oven
manufacturer’s installation instructions.
Mylar sheet
Position A
Position B
Conventional
oven
Conventional
oven
Internal width
Service gap
The microwave can be fitted in position A or B:
POSITION NICHE SIZE CHIMNEY Gap Between
W D H (min) Cupboard & Ceiling
A 560 x 550 x 450 50 50
560 x 550 x 380 50 50
B 560 x 500 x 450 40 50
560 x 500 x 380 40 50
Measurements in (mm)
Chimney Chimney
NOTE: Ensure the bottom of the oven is 85 cm or more above the floor.
1. AG-71+72D-EU English 29/03/2005 10:49 Page 49
5 mm
Page 52

50
Installation
50
• The electrical outlet should be readily accessible so that the unit can
be unplugged easily in an emergency.
• The socket should not be positioned behind the cupboard.
• The best position is above the cupboard, see (A).
When not connecting the power supply cord to position (A) it should be
removed from the support clip (see diagram, item 14, on page 5) and
routed under the oven.
• Connect the appliance to a single phase 230 V/50 Hz alternating current
via a correctly installed earth socket.
The socket must be fused with a 16 A fuse.
• The power supply cord may only be replaced by an electrician.
• Before installing, tie a piece of string to the power supply cord to facilitate connection to point (A) when the
appliance is being installed.
• When inserting the appliance into the high-sided cupboard, DO NOT crush the power supply cord.
• Do not immerse the power supply cord or plug in water or any other liquid.
CONNECTING THE APPLIANCE TO THE POWER SUPPLY
(A)
ELECTRICAL CONNECTIONS
WARNING:
THIS APPLIANCE MUST BE EARTHED
The manufacturer declines any liability should
this safety measure not be observed.
If the plug that is fitted to your appliance is not
suitable for your socket outlet, you must call your local
authorised AEG-Electrolux service agent.
1. AG-71+72D-EU English 29/03/2005 10:49 Page 50
Page 53

51
D
Sehr geehrte Kundin, sehr geehrter Kunde,
Wir bedanken uns für den Kauf dieses Mikowellengerätes und das damit der
Marke AEG-Electrolux entgegengebrachte Vertrauen.
Zur Nutzung aller Vorteile dieses Gerätes lesen Sie bitte die
Gebrauchsanweisung sorgfältig durch. Danach bewahren Sie diese bitte zum
Nachlesen gut auf. Ihr neues Mikowellengerät belohnt Sie für diese kleine
Mühe mit einer tadellosen Leistung. Ferner vermeiden Sie unnötige
Servicekosten.
Mit diesem Warndreieck und/oder durch Signalwörter (Warnung!, Vorsicht!,
Achtung!) sind Hinweise hervorgehoben, die für Ihre Sicherheit oder für die
Funktionsfähigkeit des Gerätes wichtig sind. Bitte unbedingt beachten.
Dieses Zeichen leitet Sie Schritt für Schritt beim Bedienen des Gerätes.
Nach diesem Zeichen erhalten Sie ergänzende Informationen zur Bedienung
und praktischen Anwendung des Gerätes.
Mit dem Kleeblatt sind Tipps und Hinweise zum wirtschaftlichen und
umweltschonenden Einsatz des Gerätes gekennzeichnet.
Für eventuell auftretende Störungen enthält die Gebrauchsanweisung Hinweise
zur selbständigen Behebung, siehe Abschnitt ‘Was tun, wenn...’
2. AG-71+72D-EU German 29/03/2005 10:47 Page 51
Page 54

52
Inhalt
Wichtige sicherheitshinweise . . . . . . . . . . . . . . . . . . . . . . . . . . . . . . . . . . . . . . . . . . . . . . . . .53 -55
Gerät & Zubehör . . . . . . . . . . . . . . . . . . . . . . . . . . . . . . . . . . . . . . . . . . . . . . . . . . . . . . . . . . . . . . .56
Bedienblende . . . . . . . . . . . . . . . . . . . . . . . . . . . . . . . . . . . . . . . . . . . . . . . . . . . . . . . . . . . . . . . . . .57
Vor Inbetriebnahme . . . . . . . . . . . . . . . . . . . . . . . . . . . . . . . . . . . . . . . . . . . . . . . . . . . . . . . . . . . . .58
Tageszeit einstellen . . . . . . . . . . . . . . . . . . . . . . . . . . . . . . . . . . . . . . . . . . . . . . . . . . . . . . . . . . . . .58
Was sind Mikrowellen? . . . . . . . . . . . . . . . . . . . . . . . . . . . . . . . . . . . . . . . . . . . . . . . . . . . . . . . . . .59
Das Geeignete Geschirr . . . . . . . . . . . . . . . . . . . . . . . . . . . . . . . . . . . . . . . . . . . . . . . . . . . . . .59 - 60
Tipps & techniken . . . . . . . . . . . . . . . . . . . . . . . . . . . . . . . . . . . . . . . . . . . . . . . . . . . . . . . . . .61 - 65
Hinweis zur Leistungseinstellen . . . . . . . . . . . . . . . . . . . . . . . . . . . . . . . . . . . . . . . . . . . . . . . . . . .66
Garen mit der Mikrowelle . . . . . . . . . . . . . . . . . . . . . . . . . . . . . . . . . . . . . . . . . . . . . . . . . . . . . . . .67
Garen mit dem grill & Kombi-Betrieb . . . . . . . . . . . . . . . . . . . . . . . . . . . . . . . . . . . . . . . . . . . . . .68
Andere nützliche Funktionen . . . . . . . . . . . . . . . . . . . . . . . . . . . . . . . . . . . . . . . . . . . . . . . . .69 - 70
Autokoch- & Autoauftau-Betrieb . . . . . . . . . . . . . . . . . . . . . . . . . . . . . . . . . . . . . . . . . . . . .71 - 72
Autokoch- & Autoauftau-Tabeller . . . . . . . . . . . . . . . . . . . . . . . . . . . . . . . . . . . . . . . . . . . .73 - 75
Rezepte für Autokoch . . . . . . . . . . . . . . . . . . . . . . . . . . . . . . . . . . . . . . . . . . . . . . . . . . . . . . .76 - 77
Gar-Tabellen . . . . . . . . . . . . . . . . . . . . . . . . . . . . . . . . . . . . . . . . . . . . . . . . . . . . . . . . . . . . . .78 - 80
Rezepte . . . . . . . . . . . . . . . . . . . . . . . . . . . . . . . . . . . . . . . . . . . . . . . . . . . . . . . . . . . . . . . . . . .81 - 95
Reinigung & Pflege . . . . . . . . . . . . . . . . . . . . . . . . . . . . . . . . . . . . . . . . . . . . . . . . . . . . . . . . . . . . .96
Was tun, wenn… . . . . . . . . . . . . . . . . . . . . . . . . . . . . . . . . . . . . . . . . . . . . . . . . . . . . . . . . . . . . . . .97
Kundendienst . . . . . . . . . . . . . . . . . . . . . . . . . . . . . . . . . . . . . . . . . . . . . . . . . . . . . . . . . . . . . . . . . .98
Garantiebedingungen . . . . . . . . . . . . . . . . . . . . . . . . . . . . . . . . . . . . . . . . . . . . . . . . . . . . . . . . . . .99
Kundendienst & ersatzteile (Belgien) . . . . . . . . . . . . . . . . . . . . . . . . . . . . . . . . . . . . . . . . . . . . .100
Garantiebedingungen (Belgien) . . . . . . . . . . . . . . . . . . . . . . . . . . . . . . . . . . . . . . . . . . . . . . . . . .101
Technische Daten . . . . . . . . . . . . . . . . . . . . . . . . . . . . . . . . . . . . . . . . . . . . . . . . . . . . . . . . . . . . . .102
Wichtige Hinweise . . . . . . . . . . . . . . . . . . . . . . . . . . . . . . . . . . . . . . . . . . . . . . . . . . . . . . . . . . . . .102
Aufstellanweisungen . . . . . . . . . . . . . . . . . . . . . . . . . . . . . . . . . . . . . . . . . . . . . . . . . . . . . . .103-104
Das Symbol auf dem Produkt oder seiner Verpackung weist darauf hin, dass dieses Produkt nicht als
normaler Haushaltsabfall zu behandeln ist, sondern an einem Sammelpunkt für das Recycling von elektrischen
und elektronischen Geräten abgegeben werden muss. Durch Ihren Beitrag zum korrekten Entsorgen dieses
Produkts schützen Sie die Umwelt und die Gesundheit Ihrer Mitmenschen. Umwelt und Gesundheit werden
durch falsches Entsorgen gefährdet. Weitere Informationen über das Recycling dieses Produkts erhalten Sie
von Ihrem Rathaus, Ihrer Müllabfuhr oder dem Geschäft, in dem Sie das Produkt gekauft haben.
2. AG-71+72D-EU German 29/03/2005 10:47 Page 52
Page 55

53
D
Wichtige sicherheitshinweise
Zur Vermeidung von Verletzungen
Warnhinweis:
Das Gerät nicht betreiben, wenn es beschädigt ist oder
Fehlfunktionen aufweist. Überprüfen Sie vor dem
Betrieb die folgenden Punkte:
a) Die Tür muss einwandfrei schließen und darf nicht
schlecht ausgerichtet oder verzogen sein.
b) Die Scharniere und Türsicherheitsverriegelungen
dürfen nicht gebrochen oder lose sein.
c) Die Türdichtungen und Dichtungsoberflächen
dürfen nicht beschädigt sein.
d) Im Garraum und an der Tür dürfen keine Dellen
oder andere Beschädigungen vorhanden sein.
e) Das Netzkabel und der Netzstecker dürfen nicht
beschädigt sein.
Nehmen Sie unter keinen Umständen Reparaturen
oder Änderungen an Ihrem Mikrowellengerät
selbst vor. Reparaturen, insbesondere solche, bei
denen die Abdeckung des Geräts entfernt werden
muss, dürfen ausschließlich von entsprechend
qualifizierten Technikern vorgenommen werden.
Das Gerät nicht bei geöffneter Tür oder mit auf
irgendeine Weise veränderter Türsicherheitsverriegelung betreiben.
Niemals das Gerät betreiben, wenn sich Gegenstände
zwischen den Türdichtungen und den abdichtenden
Oberflächen befinden.
Darauf achten, dass sich weder Fett noch Schmutz
auf den Türdichtungen bzw. den benachbarten
Geräteteilen ansammeln. Befolgen Sie die Hinweise
unter "Reinigung und Pflege" auf Seite 96. Wird
das Gerät nicht saubergehalten, kann dies die
Oberfläche beeinträchtigen und sich negativ auf
die Lebensdauer des Geräts auswirken.
Schlimmstenfalls kann die Sicherheit des Geräts
beeinträchtigt werden.
Personen mit HERZSCHRITTMACHERN sollten ihren Arzt
oder den Hersteller des Herzschrittmachers nach
Vorsichtsmaßnahmen beim Umgang mit
Mikrowellengeräten befragen.
Zur Vermeidung von elektrischem Schlag
Unter keinen Umständen sollte das äußere Gehäuse
entfernt werden.
Niemals Flüssigkeiten in die Öffnungen der
Türsicherheitsverriegelung oder Lüftungsöffnungen
kommen lassen oder Gegenstände in diese Öffnungen
stecken.
Zur Vermeidung von Feuer
Mikrowellengeräte sollten während des Betriebs
nicht unbeaufsichtigt gelassen werden. Zu hohe
Leistungsstufen oder zu lange Garzeiten können
das Gargut überhitzen und Feuer verursachen.
Die Steckdose muss ständig zugänglich sein, so dass der
Netzstecker im Notfall einfach abgezogen werden kann.
Die Netzspannung muss 230 V Wechselstrom, 50 Hz
betragen und sollte mit einer Sicherung von mindestens
16 A oder einem Sicherungsautomaten von mindestens
16 A ausgestattet sein.
Es wird empfohlen das Gerät an einen separaten
Stromkreis anzuschließen.
Das Gerät nicht im Freien lagern oder aufstellen.
NIEMALS DIE TÜR ÖFFNEN, wenn im Gerät
erwärmte Lebensmittel zu rauchen beginnen. Das
Gerät ausschalten, den Netzstecker ziehen und
warten, bis die Lebensmittel nicht mehr rauchen.
Öffnen der Tür während der Rauchentwicklung
kann Feuer verursachen.
Nur für Mikrowellengeräte vorgesehene Behälter
und Geschirr verwenden. Siehe Seite 59 - 60.
Niemals das Gerät unbeaufsichtigt lassen, wenn
Kunststoff-, Papier- oder andere brennbare
Lebensmittelbehälter verwendet werden.
Den Spritzschutz für den Hohlleiter, den Garraum,
den Drehteller und den Drehteller-Träger nach der
Verwendung des Gerätes reinigen. Diese Bauteile
sollten trocken und fettfrei sein. Zurückbleibende
Fettspritzer können überhitzen, zu rauchen
beginnen oder sich entzünden.
Keine brennbaren Materialien in der Nähe des Gerätes
oder den Lüftungsöffnungen lagern.
Niemals die Lüftungsöffnungen blockieren.
Alle Metallverschlüsse, Drähte usw. von Lebensmitteln
und Verpackungen entfernen. Funkenbildung auf
Metalloberflächen kann zu Feuer führen.
Das Mikrowellengerät nicht zum Frittieren von
Lebensmitteln in Öl oder Fett verwenden. Temperaturen
können nicht kontrolliert werden und das Fett kann
sich entzünden.
Zum Herstellen von Popcorn sollte nur für
Mikrowellengeräte vorgesehenes Popcorn-Geschirr
verwendet werden.
Keine Lebensmittel oder andere Gegenstände im Gerät
lagern.
Die Einstellungen nach dem Starten des Gerätes
überprüfen um sicherzustellen, dass das Gerät wie
gewünscht arbeitet. Diese Bedienungsanleitung
verwenden.
WICHTIG FÜR IHRE SICHERHEIT: LESEN SIE DIE FOLGENDEN HINWEISE AUFMERKSAM DURCH, UND
BEWAHREN SIE DIE BEDIENUNGSANLEITUNG AUF.
2. AG-71+72D-EU German 29/03/2005 10:47 Page 53
Page 56

54
Wichtige sicherheitshinweise
Eier nicht in der Schale kochen. Hartgekochte Eier
dürfen nicht in Mikrowellengeräten erwärmt
werden, da sie selbst nach der Erwärmung
explodieren können. Zum Kochen oder Aufwärmen
von Eiern, die nicht verquirlt oder verrührt wurden,
das Eigelb und Eiweiß anstechen, damit es nicht
explodiert. Vor dem Aufwärmen im
Mikrowellengerät die Schale von gekochten Eiern
entfernen und die Eier in Scheiben schneiden.
Die Schale von Lebensmitteln, z.B. Kartoffeln,
Würstchen oder Obst, vor dem Garen anstechen, damit
der Dampf entweichen kann.
Zur Vermeidung von Verbrennungen
Beim Entnehmen von Gargut aus dem Garraum sollten
Topflappen o.ä. verwendet werden.
Behälter, Popcorngeschirr, Kochbeutel, usw. immer vom
Gesicht und den Händen abgewandt öffnen, um
Verbrennungen durch Dampf zu vermeiden.
Um Verbrennungen zu vermeiden, immer die
Lebensmitteltemperatur prüfen und umrühren,
bevor Sie das Gargut servieren. Besondere Vorsicht
ist geboten, wenn die Lebensmittel oder Getränke
an Babys, Kinder oder ältere Personen
weitergereicht werden.
Die Temperatur des Behälters ist kein echter Hinweis
auf die tatsächliche Temperatur des Lebensmittels oder
Getränks; immer die Temperatur prüfen.
Halten Sie beim Öffnen der Gerätetür ausreichenden
Abstand, um Verbrennungen durch austretende Hitze
oder Dampf zu vermeiden.
Schneiden Sie gefüllte, gebackene Speisen nach dem
Garen in Scheiben, um den Dampf entweichen zu lassen
und Verbrennungen zu vermeiden.
Kinder von der Tür und von allen erreichbaren
Teilen fernhalten, die während des Grillbetriebs
heiß werden können, um Verbrennungen zu
vermeiden.
Die Gerätetür, die Geräteaußenflächen, die
Geräterückseite, der Geräteinnenraum,
Lüftungsöffnungen, Zubehörteile und das Geschirr im
GRILL, KOMBI- und AUTOKOCH-Betriebsart nicht
berühren, da sie heiß werden. Vor der Reinigung
sicherstellen, dass alle Geräteteile abgekühlt sind.
Zur Vermeidung von Fehlbedienung durch Kinder
WARNUNG: Kinder dürfen das Gerät nur unter
Aufsicht benutzen oder wenn sie ausreichende
Anweisungen zur sicheren Benutzung erhalten
haben und die Gefahren eines unsachgemäßen
Gebrauchs verstehen.
Wenn größere Mengen Flüssigkeiten verschüttet
werden, müssen Sie sofort das Gerät ausschalten, den
Netzstecker ziehen und den AEG-Electrolux
autorisierten Kundendienst anfordern.
Niemals das Netzkabel bzw. den Netzstecker in Wasser
oder andere Flüssigkeiten legen.
Das Netzkabel darf nicht über heiße oder scharfe
Oberflächen geführt werden, wie zum Beispiel über den
heißen Lüftungsöffnungen an der oberen Rückwand
des Gerätes.
Auf keinen Fall versuchen, die Garraumlampe selbst
auszuwechseln, sondern nur von einem von AEGElectrolux autorisierten auswechseln lassen! Wenn die
Garraumlampe ausfallen sollte, wenden Sie sich bitte an
Ihren Elektrohändler oder eine von AEG-Electrolux
autorisierte Kundendienststelle!
Wenn das Netzkabel beschädigt ist, muss es durch ein
neues Spezialkabel ersetzt werden.
Bitte das Auswechseln durch einen von AEG-Electrolux
autorisierten Kundendienst vornehmen lassen.
Zur Vermeidung von Explosionen und plötzlichem
Sieden:
WARNUNG: Speisen in flüssiger und anderer Form
dürfen nicht in verschlossenen Gefäßen erhitzt
werden, da sie explodieren könnten.
Niemals verschlossene Behälter verwenden. Verschlüsse
und Abdeckungen entfernen. Verschlossene Behälter
können durch den Druckanstieg selbst nach dem
Ausschalten des Gerätes noch explodieren.
Beim Erhitzen von Flüssigkeiten vorsichtig sein. Behälter
mit großer öffnung verwenden, damit entstehende
Blasen entweichen können.
Beim Erhitzen von Flüssigkeiten in
Mikrowellengeräten beim Entnehmen des
Behälters vorsichtig sein, da es zu einem
verspätetem Aufwallen durch Siedeverzug kommen
kann.
Um Verbrennungen durch plötzliches Überkochen
(Siedeverzug) zu vermeiden:
1. Die Flüssigkeiten vor dem Kochen/Erhitzen
umrühren.
2. Es wird empfohlen, während des Erhitzens einen
Glasstab oder ähnlichen Gegenstand in den Behälter
zu stecken.
3. Nach dem Erhitzen die Flüssigkeit noch kurze Zeit im
Gerät stehen lassen, um verspätetes Aufwallen durch
Siedeverzug zu verhindern.
2. AG-71+72D-EU German 29/03/2005 10:47 Page 54
Page 57

55
D
Wichtige sicherheitshinweise
Nicht an die Gerätetür lehnen oder an der Tür hängend
schwingen. Das Mikrowellengerät ist kein Spielzeug!
Kinder sollten mit allen wichtigen Sicherheitshinweisen
vertraut gemacht werden: z.B. Verwendung von
Topflappen und vorsichtiges Abnehmen von Deckeln.
Beachten Sie besonders Verpackungen, die Lebensmittel
knusprig machen (z.B. selbstbräunende Materialien),
indem sie besonders heiß werden.
Sonstige Hinweise
Niemals das Gerät auf irgendeine Weise verändern.
Dieses Gerät ist nur für den Hausgebrauch vorgesehen
und darf nur zum Garen von Lebensmitteln verwendet
werden. Es eignet sich nicht für gewerbliche Zwecke
oder den Gebrauch in einem Labor.
Zur Vermeidung von Fehlfunktionen und
Beschädigungen dieses Gerätes
Das Gerät niemals leer in Betrieb nehmen, es sei denn,
dies wird in der Bedienungsanleitung ausdrücklich
empfohlen (siehe Seite 68).
Durch Inbetriebnahme des Gerätes ohne Gargut kann
das Gerät beschädigt werden.
Bei der Verwendung von Bräunungsgeschirr oder
selbsterwärmenden Materialien muss eine wärmefeste
Isolierung (z.B. ein Porzellanteller) zwischen Geschirr
und Drehteller gestellt werden. Dadurch werden
Beschädigungen des Drehtellers und des DrehtellerTrägers durch Wärme vermieden. Die angegebene
Aufheizzeit für das Geschirr sollte nicht überschritten
werden.
Kein Metallgeschirr verwenden, da Mikrowellen
reflektiert werden und dies zu Funkenbildung führt.
Keine Konserven in das Gerät stellen.
Nur den für dieses Gerät vorgesehenen Drehteller und
den Drehteller-Träger verwenden. Benutzen Sie das
Mikrowellengerät nicht ohne den Drehteller.
Um das Zerspringen des Drehtellers zu vermeiden:
(a) Vor dem Reinigen, den Drehteller abkühlen lassen.
(b)Kein heißes Gargut oder heißes Geschirr auf den
kalten Drehteller stellen.
(c) Keine kalten Lebensmittel oder kaltes Geschirr auf
den heißen Drehteller stellen.
Während das Gerät arbeitet, keine Gegenstände auf das
äußere Gehäuse stellen.
Keine Kunststoffbehälter für den Mikrowellenbetrieb
verwenden, wenn das Gerät nach dem Gebrauch GRILL,
KOMBI- und AUTOKOCH-Betriebsart noch heiss ist, da
diese sonst schmelzen könnten. In diesen Betriebsarten
dürfen keine Kunststoffbehälter verwendet werden, es
sei denn, der Hersteller weist auf deren Eignung zu
diesem Zweck hin.
HINWEISE:
Bei Fragen zum Anschluss des Gerätes wenden Sie sich
bitte an einen autorisierten Elektrofachmann.
Sowohl der Hersteller als auch der Händler können
keine Verantwortung für Beschädigungen des Gerätes
oder Verletzungen von Personen übernehmen, die als
Folge eines falschen elektrischen Anschlusses entstehen.
Wasserdampf und Tropfen können sich auf den Wänden
im Innenraum bzw. um die Türdichtungen und
Dichtungsoberflächen bilden. Dies ist normal und ist
kein Anzeichen für den Austritt von Mikrowellen oder
einer sonstigen Fehlfunktion.
2. AG-71+72D-EU German 29/03/2005 10:47 Page 55
Page 58

56
Gerät & Zubehör
ZUBEHÖR:
Überprüfen Sie, dass folgende Zubehörteile mitgeliefert
wurden:
(16) Drehteller (17) Drehteller-Träger
(18) Hoher Rost (19) Niedriger Rost
(20) 4 Befestigungsschrauben (nicht abgebildet)
• Den Drehteller-Träger in die Antriebswelle am
Garraumboden einsetzen.
• Dann den Drehteller darauf legen.
• Um Schäden am Drehteller zu vermeiden, ist darauf zu
achten, dass Geschirr und Behälter bei der Entnahme
nicht den Rand des Drehtellers berühren.
HINWEIS: Bei der Bestellung von Zubehör,
teilen Sie Ihrem Händler oder dem AEG-Electrolux
autorisierten Kundendienst bitte folgende Angaben mit:
Name des Zubehörteils und Bezeichnung des Modells.
1. Grill-Heizelement
2. Gerätefront
3. Innenbeleuchtung
4. Bedienblende
5. Türöffnungs-Taste
6. Spritzschutz für den Hohlleiter
7. Garraum
8. Antrieb
9. Türdichtungen und Dichtungsoberlächen
10. Befestigungspunkte (4 Stellen)
11. Lüftungsöffnungen
12. Gehäuse
13. Geräterückseite
14. Netzkabel-Träger
15. Netzkabel
1 2
67
89
11
12
14
15
13
16
17
10
3
4
5
18
19
2. AG-71+72D-EU German 29/03/2005 10:47 Page 56
Page 59

57
D
Bedienblende
1 Display
2 Anzeigen und Symbole
Je nach Instruktion leuchtet die entsprechende
Anzeige über dem Symbol auf oder sie blinkt. Wenn
eine Anzeige blinkt, drücken Sie die entsprechende
Taste (mit dem gleichen Symbol) oder führen Sie den
erforderlichen Bedienungsschritt aus.
Umrühren
Wenden
Gewicht/Leistungsstufe
Grill
Mikrowellen-Anzeige
Symbol für Garen
3 ZEITSCHALTUHR/GEWICHT/LEISTUNGS-Knopf
4 AUTOKOCH-Taste
Diese Taste zur Auswahl von einem der 2
Automatikprogramme drücken.
5 AUTOKOCH-PLUS-GRILL 1-Taste
Diese Taste zur Auswahl von einem der 2
Automatikprogramme drücken.
6 AUTOKOCH-PLUS-GRILL 2-Taste
Diese Taste zur Auswahl von einem der 4
Automatikprogramme drücken.
7 AUTOAUFTAU-Taste
Diese Taste zur Auswahl von einem der 4
Automatikprogramme drücken.
8 BETRIEBSARTEN-Taste
Mit dieser Taste wählen Sie die Mikrowellen-, Grilloder Kombifunktion.
1. einmal drücken, um die MikrowellenFunktion auszuwählen
2. zweimal drücken, um den Grill auszuwählen
3. dreimal drücken, um die Kombi-Betriebsart,
d. h. Mikrowelle mit Grill auszuwählen.
9 START/QUICK-Taste
10 STOP-Taste
11 TÜRÖFFNUNGS -Taste
1
2
3
7
9
11
10
6
5
4
8
2. AG-71+72D-EU German 29/03/2005 10:47 Page 57
Page 60

58
Vor Inbetriebnahme
Den Gerätestecker in die Steckdose stecken.
1. Die Anzeige blinkt:
2. Die STOP-Taste drücken. Auf dem Display erscheint:
3. Hinweise zum Einstellen der Uhr finden Sie unten.
4. Wenn Sie den Grill benutzen wollen, das Gerät
zunächst 20 Minuten ohne Lebensmittel betreiben
(Siehe Seite 68, Hinweis 2).
Benutzung der STOP-Taste
1. Löschen eines Eingabefehlers beim Programmieren.
2. Vorübergehendes Unterbrechen des laufenden
Betriebes.
3. Löschen eines Programms während des laufenden
Betriebes durch zweimaliges Drücken.
Beispiel: Einstellen der 24 Stunden-Uhr auf 23.35 Uhr
HINWEIS:
1. Sie können den ZEITSCHALTUHR/GEWICHT/
LEISTUNGS-Knopf im oder gegen den Uhrzeigersinn
drehen.
2. Drücken Sie die STOP-Taste, wenn Sie beim
Programmieren einen Fehler gemacht haben.
3. Wenn die Stromversorgung Ihres Mikrowellengerätes
unterbrochen wird, meldet das Display in Abständen
, nachdem die Stromversorgung
wiederhergestellt wurde. Wenn das während des
Garvorgangs passiert, wird das Programm gelöscht.
Die Uhrzeit wird ebenfalls gelöscht.
4. Wenn Sie die Uhrzeit neu einstellen möchten,
verfahren Sie wie im obigen Beispiel.
Die Uhr läuft im 12 Stunden- oder im 24 Stunden-Format.
1. Um die Uhr auf das 12 Stunden-Format einzustellen, die BETRIEBSARTEN-Taste 3
Sekunden lang gedrückt halten. erscheint auf dem Display.
2. Um die Uhr auf das 24 Stunden-Format einzustellen, die BETRIEBSARTEN-Taste
nach Schritt 1 noch einmal drücken, wird auf dem Display angezeigt.
x1
3 Sekunden lang
Zum Einstellen der Uhr verfahren Sie wie im folgenden Beispiel.
1. Wählen Sie die
Uhren-Funktion.
(12 Stunden-Uhr)
Wählen Sie die 24
Stunden-Uhr.
3. Drücken Sie die
BETRIEBSARTEN-Taste um
von den Stunden zu den
Minuten zu wechseln.
4. Stellen Sie die Minuten ein. Den
ZEITSCHALTUHR/GEWICHT/
LEISTUNGS-Knopf im Uhrzeigersinn
drehen, bis die richtigen
Minuten angezeigt werden (35).
5. Drücken Sie die
BETRIEBSARTEN-Taste
um die Uhr zu starten.
2. Stellen Sie die Stunden ein. Den ZEITSCHALTUHR/
GEWICHT/LEISTUNGS-Knopf im Uhrzeigersinn
drehen, bis die richtige Stunde angezeigt wird (23).
x1 für 3 Sekunden lang drücken
x1
x1
x1
Tageszeit einstellen
2. AG-71+72D-EU German 29/03/2005 10:47 Page 58
Page 61

59
D
Was sind Mikrowellen?
Kunststoff
Hitzebeständiges, mikrowellengeeignetes Kunststoffgeschirr ist
zum Auftauen, Erhitzen und Garen
geeignet. Beachten Sie bitte die
Angaben des Herstellers.
Papier-geschirr
Hitzebeständiges, mikrowellengeeignetes Papiergeschirr
ist ebenfalls geeignet. Beachten Sie bitte die Angaben
des Herstellers.
Küchenpapier
kann benutzt werden, um
entstehende Feuchtigkeit bei kurzen
Erhitzungsvorgängen aufzunehmen,
z.B. von Brot oder Paniertem. Das
Papier zwischen die Speise und den
Drehteller legen. So bleibt die
Oberfläche der Speise knusprig und trocken. Durch
Abdecken von fettigen Speisen mit Küchenpapier
werden Spritzer aufgefangen.
Mikrowellen sind wie Radio- und Fernsehwellenelektromagnetische Wellen.
Mikrowellen werden im Mikrowellengerät vom
Magnetron erzeugt und versetzen die Wassermoleküle
im Lebensmittel in Schwingungen. Durch die
verursachte Reibung entsteht Wärme, die dafür sorgt,
dass die Speisen aufgetaut, erhitzt oder gegart werden.
Das Geheimnis der kurzen Garzeiten liegt darin, dass
die Mikrowellen von allen Seiten direkt in das Gargut
eindringen. Die Energie wird optimal ausgenutzt. Im
Vergleich dazu gelangt die Energie beim Kochen mit
dem Elektroherd über Umwege von der Herdplatte an
den Kochtopf und dann erst zum Lebensmittel. Auf
diesem Umweg geht viel Energie verloren.
EIGENSCHAFTEN DER MIKROWELLEN
Mikrowellen durchdringen alle nichtmetallischen
Gegenstände aus Glas, Porzellan, Keramik, Kunststoff,
Holz und Papier. Das ist der Grund dafür, warum diese
Materialien in der Mikrowelle nicht erhitzt werden. Das
Geschirr wird nur indirekt über die Speise erwärmt.
Speisen nehmen Mikrowellen auf (absorbieren) und
werden dadurch erhitzt.
Materialien aus Metall werden von der Mikrowelle
nicht durchdrungen, die Mikrowellen werden
zurückgeworfen (reflektiert). Deshalb sind Gegenstände
aus Metall für die Mikrowelle in der Regel nicht
geeignet. Es gibt jedoch Ausnahmen, wo Sie genau
diese Eigenschaften ausnutzen können. So werden
Speisen an bestimmten Stellen während des Auftauens
oder Garens mit etwas Aluminiumfolie abgedeckt.
Dadurch vermeiden Sie zu warme oder zu heisse bzw.
übergarte Bereiche bei unregelmässigen Teilen.
Beachten Sie hierzu die folgenden Hinweise.
Glas und gas-keramik
Hitzebeständiges Glasgeschirr ist
sehr gut geeignet. Der Garvorgang
kann von allen Seiten beobachtet
werden. Es darf jedoch nicht
metallhaltig (z.B. Bleikristall) oder
mit einer Metallauflage versehen
sein (z.B. Goldrand, Kobaltblau).
Keramik
ist im allgemeinen gut geeignet. Keramik muss glasiert
sein, da bei unglasierter Keramik Feuchtigkeit in das
Geschirr eindringen kann. Feuchtigkeit erhitzt das
Material und kann es zum Zerspringen bringen. Falls
Sie nicht sicher sind, ob Ihr Geschirr für die Mikrowelle
geeignet ist, führen Sie den Geschirr-Eignungstest
durch. (Siehe Seite 60).
Porzellan
ist sehr gut geeignet. Achten Sie darauf, Sie darauf,
dass das Porzellan keine Gold- oder Silberauflage hat
bzw. nicht metallhaltig ist.
Das Geeignete Geschirr
2. AG-71+72D-EU German 29/03/2005 10:47 Page 59
Page 62

60
Das Geeignete Geschirr
Mikrowellenfolie
oder hitzebeständige Folie ist zum Abdecken oder
Umwickeln gut geeignet. Beachten Sie bitte die
Angaben des Herstellers.
Bratbeutel
können im Mikrowellengerät verwendet werden.
Metallclipse sind jedoch zum
Verschliessen ungeeignet, da die
Bratbeutel-folie schmelzen kann.
Nehmen Sie Bindfaden zum
Verschliessen und stechen Sie den
Bratbeutel mehrmals mit einer
Gabel ein. Nicht hitzebeständige Folie, wie z.B.
Frischhaltefolie, ist für die Benutzung im
Mikrowellengerät nicht empfehlenswert.
Das geeignete geschirr für den
kombibetrieb
Für den Kombibetrieb (Mikrowelle + Grill) und
Grillbetrieb können Sie jedes hitzebeständige Geschirr
einsetzen, z.B. Porzellan, Keramik oder Glas. Geschirr
aus Metall ist nur für den reinen Grillbetrieb zu
benutzen.
Bräunungsgeschirr
ist spezielles Mikrowellenbratgeschirr aus Glaskeramik
mit einer Metallegierung am Boden, die dafür sorgt,
dass die Speise gebräunt wird. Bei Verwendung von
Bräunungsgeschirr muss ein geeigneter Isolator, z.B. ein
Porzellanteller,
zwischen Drehteller und Bräunungsschale gelegt
werden. Beachten Sie genau die Vorheizzeit gemäss
Herstelleranweisung. Bei überschreitung kann es zur
Beschädigung des Drehtellers und Drehteller-Trägers
kommen bzw. die Schutzsicherung des Gerätes
auslösen und das Gerät ausschalten.
Metall
sollte in der Regel nicht verwendet
werden, da Mikrowellen Metall
nicht durchdringen und so nicht an
die Speisen gelangen können. Es
gibt jedoch Ausnahmen: Schmale
Streifen aus Aluminiumfolie können zum Abdecken
von Teilen verwendet werden, damit diese nicht zu
schnell auftauen oder garen (z.B. die Flügel beim
Hähnchen).
Kleine Metallspiesse und Aluminiumschalen (z.B. bei
Fertiggerichten) können benutzt werden. Sie müssen
aber im Verhältnis zur Speise klein sein, z.B. müssen
Aluminiumschalen mindestens 2/3 bis 3/4 mit Speise
gefüllt sein. Empfehlenswert ist, die
Speise in mikrowellengeeignetes
Geschirr umzufüllen.
Bei Verwendung von
Aluminiumschalen oder anderem
Metallgeschirr muss ein
Mindestabstand von ca. 2,0 cm zu den Garraumwänden
eingehalten werden, da diese sonst durch mögliche
Funkenbildung beschädigt werden können.
Kein geschirr mit metallauflage,
Metallteilen oder Metalleinschlüssen, wie z.B. mit
Schrauben, Bändern oder Griffen verwenden.
Geschirr-eignungstest
Wenn Sie nicht sicher sind, ob Ihr Geschirr
mikrowellengeeignet ist, führen Sie
folgenden Test durch: Das Geschirr
in das Gerät stellen. Ein Glasgefäss
mit 150 ml Wasser gefüllt auf oder
neben das Geschirr stellen. Das
Gerät 1 bis 2 Minuten bei 900 W
Leistung betreiben. Wenn das Geschirr kühl oder
handwarm bleibt, ist es geeignet. Diesen Test nicht für
Kunststoffgeschirr durchführen. Es könnte schmelzen.
2. AG-71+72D-EU German 29/03/2005 10:47 Page 60
Page 63

61
D
Tipps & techniken
Bevor Sie beginnen ...
Um Ihnen den Umgang mit der Mikrowelle so einfach
wie möglich zu machen, haben wir für Sie die
wichtigsten Hinweise und Tips nachfolgend
zusammengestellt: Starten Sie Ihr Gerät nur dann,
wenn sich Lebensmittel im Garraum befinden.
Einstellung der zeiten
Die Auftau-, Erhitzungs- und Garzeiten sind im
allgemeinen erheblich kürzer als in einem
konventionellen Herd oder Backofen. Halten Sie sich
deshalb an die in diesem Buch empfohlenen Zeiten.
Stellen Sie die Zeiten eher kürzer als länger ein.
Machen Sie nach dem Garen eine Garprobe. Lieber kurz
nachgaren als etwas übergaren lassen.
Ausgangstemperatur
Die Auftau-, Erhitzungs- und Garzeiten sind von der
Ausgangstemperatur der Lebensmittel abhängig.
Tiefgefrorene und kühlschrank-temperierte
Lebensmittel benötigen beispielsweise länger als
raumtemperierte.
Für das Erhitzen und Garen von Lebensmitteln werden
normale Lagertemperaturen vorausgesetzt
(Kühlschranktemperatur ca. 5° C, Raumtemperatur ca.
20° C). Für das Auftauen von Lebensmitteln wird von 18° C Tiefkühltemperatur ausgegangen.
Popcorn nur in speziellen mikrowellengeeigneten
Popcorn-Behältern zubereiten.
Richten Sie sich genau nach den
Angaben des Herstellers. Keine
normalen Papierbehälter oder
Glasgeschirr verwenden.
Eier nicht in der Schale kochen. In
der Schale baut sich Druck auf, der
zum Explodieren des Eies führen
könnte. Das Eigelb vor dem Garen
anstechen.
Kein öl oder Fett zum Fritieren im
Mikrowellengerät erhitzen. Die
Temperatur des öls kann nicht kontrolliert werden. Das
öl könnte plötzlich aus dem Gefäss spritzen.
Keine geschlossenen gefässe
wie Gläser oder Dosen, erhitzen. Durch den
entstehenden Druck könnten die Gefässe zerspringen.
(Ausnahme: Einkochen).
Alle angegebenen zeiten
in diesem Buch sind Richtwerte, die je nach
Ausgangstemperatur, Gewicht und Beschaffenheit
(Wasser-, Fettgehalt etc.) der Lebensmittel variieren
können.
Salz, gewürze und kräuter
In der Mikrowelle gegarte Speisen erhalten ihren
Eigengeschmack besser als bei konventionellen
Zubereitungsarten. Verwenden Sie deshalb Salz sehr
sparsam und salzen Sie in der Regel erst nach dem
Garen. Salz bindet Flüssigkeit und trocknet die
Oberfläche aus. Gewürze und Kräuter können wie
gewohnt verwendet werden.
Einsatzmöglichkeiten
Mikrowellenbetrieb: Mit dieser Betriebsart können Sie
in kürzester Zeit Speisen auftauen, erhitzen und garen.
Kombibetrieb: Durch die Kombination der Mikrowelle
mit dem Grill können Sie gleichzeitig garen und
bräunen. Die Vorteile dieses Gerätes werden also
sinnvoll miteinander kombiniert. Die Hitze des Grills
versiegelt schnell die Poren der Gargutrandschichten
und die Mikrowellen sorgen für eine kurze schonende
Garzeit. Das Lebensmittel bleibt innen saftig und wird
aussen knusprig.
Grillbetrieb: Ihr Gerät ist mit einem Quarzgrill
ausgestattet. Diesen können Sie auch ohne
Mikrowellenbetrieb wie jeden anderen konventionellen
Grill benutzen.
Garproben
Der Garzustand von Speisen kann wie bei
konventioneller Zubereitung getestet werden:
• Speisenthermometer: Jede Speise hat bei Abschluss
des Erhitzungs- oder Garvorgangs eine bestimmte
Innentemperatur. Mit einem Speisenthermometer
können Sie feststellen, ob die Speise heiss genug
bzw. gegart ist.
• Gabel: Fisch können Sie mit einer Gabel prüfen.
Wenn das Fischfleisch nicht mehr glasig ist und sich
leicht von den Gräten löst, ist es gar. Ist es übergart,
wird es zäh und trocken.
• Holztäbchen: Kuchen und Brot können durch
Einstechen eines Holztäbchens getestet werden.
Wenn das Stäbchen nach dem Herausziehen sauber
und trocken bleibt, ist die Speise gar.
2. AG-71+72D-EU German 29/03/2005 10:47 Page 61
Page 64

62
Tipps & techniken
Blanchieren von gemüse
Gemüse sollte vor dem Einfrieren
blanchiert werden. So bleiben die
Qualität und die Aromastoffe am
besten erhalten.
Verfahren: Das Gemüse waschen
und zerkleinern. 250 g Gemüse mit 275 ml Wasser in
eine Schüssel geben und abgedeckt 3-5 Minuten
erhitzen. Nach dem Blanchieren sofort in Eiswasser
tauchen, um ein Weiterkochen zu verhindern, und
danach abtropfen lassen. Das blanchierte Gemüse
luftdicht verpacken und einfrieren.
Einkochen von obst und gemüse
Das Einkochen in der Mikrowelle ist schnell und
einfach. Im Handel gibt es speziell für die Mikrowelle
geeignete Einmachgläser, Gummiringe und passende
Einmachklammern aus Kunststoff. Die Hersteller geben
genaue Anwendungshinweise.
Kleine und grosse mengen
Die Mikrowellenzeiten sind direkt
abhängig von der Menge des
Lebensmittels, das Sie auftauen,
erhitzen oder garen möchten. das
bedeutet, kleine Portionen garen
schneller als grosse.
Als Faustregel gilt:
Doppelte menge=fast doppelte Zeit
halbe menge=halbe Zeit
Hohe und flache gefässe
Beide Gefässe haben das gleiche Fassungsvermögen,
aber in der hohen Form ist die Garzeit länger als in der
flachen. bevorzugen Sie deshalb möglichst flache
Gefässe mit grosser Oberfläche. Hohe Gefässe nur für
Gerichte verwenden, bei denen die Gefahr des
Überkochens besteht, z.B. für Nudeln, Reis, Milch etc.
Runde und ovale Gefässe
In runden und ovalen Formen garen Speisen
gleichmässiger als in eckigen, da sich in Ecken
Mikrowellenenergie konzentriert und die Speise an
diesen Stellen übergaren könnte.
Wasserzugabe
Gemüse und andere sehr wasserhaltige Lebensmittel
können im eigenen Saft oder mit wenig Wasserzugabe
gegart werden. Dadurch bleiben viele Vitamine und
Mineralstoffe im Lebensmittel erhalten.
Lebensmittel mit haut oder schale
wie Würstchen, Hähnchen, Hähnchenschenkel,
Pellkartoffeln, Tomaten, äpfel, Eigelb oder ähnliches,
mit einer Gabel oder einem Holzstäbchen einstechen.
Dadurch kann der sich bildende Dampf entweichen,
ohne dass die Haut oder Schale platzt.
Fette speisen
Mit Fett durchwachsenes Fleisch und Fettschichten
garen schneller als magere Teile. Decken Sie deshalb
diese Teile beim Garen mit etwas Aluminiumfolie ab
oder legen Sie die Lebensmittel mit der fetten Seite
nach unten.
Getränke erhitzen
(Kaffee, Wasser, Tee,
Milch, etc. )
Suppen erhitzen
Eintöpfe erhitzen
Geflügel
Lammfleisch
Rosa gebraten
Durchgebraten
Roastbeef
Leicht angebraten
Halb durchgebraten
Gut durchgebraten
Schweine-, Kalbfleisch
Getränk/Speise Innentemperatur Innentemperatur
am Ende der nach 10 bis 15
Garzeit MinutenStandzeit
65-75° C
75-80° C
75-80° C
80-85° C
70° C
75-80° C
50-55° C
60-65° C
75-80° C
80-85° C
85-90° C
70-75° C
80-85° C
55-60° C
65-70° C
80-85° C
80-85° C
TABELLE: GARZEITBESTIMMUNG MIT
DEM SPEISENTHERMOMETER
Die Innentemperatur von Speisen und Getränken
können Sie mit einem Speisenthermometer feststellen.
In der Temperaturtabelle sind die wichtigsten
Temperaturen angegeben.
2. AG-71+72D-EU German 29/03/2005 10:47 Page 62
Page 65

63
D
Tipps & techniken
Abdecken
Durch Abdecken bleibt die
Feuchtigkeit im Lebensmittel
erhalten und die Garzeit verkürzt
sich. Zum Abdecken einen Deckel,
Mikrowellenfolie oder eine
Abdeckhaube verwenden. Speisen,
die eine Kruste erhalten sollen, z.B. Braten oder
Hähnchen, nicht abdecken. Es gilt die Regel, was im
konventionellen Herd abgedeckt wird, sollte auch im
Mikrowellengerät abgedeckt werden. Was im Herd
offen gegart wird, kann auch im Mikrowellengerät
offen gegart werden.
Unregelmässige Teile
mit der dickeren bzw. kompakten
Seite nach aussen plazieren.
Gemüse (z.B. Broccoli) mit den
Stielen nach aussen legen.
Dickere Teile benötigen eine längere
Garzeit und erhalten an den
Aussenseiten mehr Mikrowellenenergie, so dass die
Lebensmittel gleichmässig garen.
Umrühren
Das Umrühren der Speisen ist
notwendig, da die Mikrowellen
zuerst die äusseren Bereiche
erhitzen. Dadurch wird die
Temperatur ausgeglichen und die
Speise gleichmässig erhitzt.
Anordnung
Mehrere Einzelportionen, z.B. Puddingförmchen, Tassen
oder Pellkartoffeln, ringförmig auf dem Drehteller
anordnen. Zwischen den Portionen Platz lassen, so dass
die Mikrowellenenergie von allen Seiten eindringen
kann.
Wenden
Mittelgrosse Teile, wie Hamburger und Steaks, während
des Garvorgangs einmal wenden, um die Garzeit zu
verkürzen. Grosse Teile, wie Braten und Hähnchen,
müssen gewendet werden, da die nach oben gerichtete
Seite mehr Mikrowellenenergie erhält und austrocken
könnte, falls nicht gewendet wird.
Standzeit
Die Einhaltung der Standzeit ist eine der wichtigsten
Mikrowellen-Regeln. Fast alle
Speisen, die in der Mikrowelle
aufgetaut, erhitzt oder gegart
werden, benötigen eine kurze oder
längere Standzeit, in der ein
Temperaturausgleich stattfindet
und sich die Flüssigkeit in der Speise gleichmässig
verteilen kann.
2. AG-71+72D-EU German 29/03/2005 10:48 Page 63
Page 66

64
Erhitzen
Die Mikrowelle ist ideal zum Auftauen von
Lebensmitteln. Die Auftauzeiten sind in der Regel
erheblich kürzer als beim Auftauen auf herkömmliche
Weise. Nachfolgend einige Tips.
Nehmen Sie das Gefriergut aus der Verpackung und
legen Sie es zum Auftauen auf einen Teller.
Verpackungen und Behälter
Gut geeignet zum Auftauen und Erhitzen von Speisen
sind mikrowellengeeignete Verpackungen und Behälter,
die sowohl tiefkühlgeeignet (bis ca. -40° C) als auch
hitzebeständig (bis ca. 220° C) sind. So können Sie im
gleichen Geschirr auftauen, erhitzen und sogar garen,
ohne die Speise zwischendurch umfüllen zu müssen.
Abdecken
Dünnere Teile vor dem Auftauen mit
kleinen Aluminiumstreifen
abdecken. Angetaute oder warme
Teile während des Auftauens
ebenfalls mit Aluminiumstreifen
abdecken. Dies verhindert, dass
dünnere Teile bereits zu heiss werden, während dickere
Teile noch gefroren sind.
Die Mikrowellenleistung
eher niedriger als zu hoch wählen. So erzielen Sie ein
gleichmässiges Auftauergebnis. Ist die
Mikrowellenleistung zu hoch, gart die
Speisenoberfläche bereits an, während das Innere noch
gefroren ist.
Wenden/umrühren
Fast alle Lebensmittel müssen
zwischendurch einmal gewendet
oder umgerührt werden. Teile, die
aneinanderhaften, so bald wie
möglich voneinander trennen und
umordnen.
Kleinere mengen
tauen gleichmässiger und schneller auf als grosse. Wir
empfehlen deshalb, möglichst kleine Portionen
einzufrieren. So können Sie sich schnell und einfach
ganze Menüs zusammenstellen.
Empfindliche lebensmittel,
wie Torte, Sahne, Käse und Brot, nicht vollständig
auftauen, sondern nur antauen und bei
Raumtemperatur fertig auftauen. Dadurch wird
vermieden, dass die äusseren Bereiche bereits zu heiss
werden, während die inneren noch gefroren sind.
Die standzeit
nach dem Auftauen von Lebensmitteln ist besonders
wichtig, da der Auftauvorgang während dieser Zeit
forgesetzt wird. In der Auftautabelle finden Sie die
Standzeiten für verschiedene Lebensmittel. Dicke,
kompakte Lebensmittel benötigen eine längere
Standzeit als flache oder Lebensmittel mit poröser
Struktur. Sollte das Lebensmittel nicht ausreichend
aufgetaut sein, können Sie es weiter im
Mikrowellengerät auftauen oder die Standzeit
entsprechend verlängern. Die Lebensmittel nach der
Standzeit möglichst sofort weiterverarbeiten und nicht
wieder einfrieren.
• Fertiggerichte in Aluminiumbehältern sollten
herausgenommen und auf einem Teller oder in einer
Schüssel erhitzt werden.
• Speisen mit Mikrowellenfolie, Teller oder
Abdeckhaube (im Handel erhältlich) abdecken,
damit die Oberfläche nicht austrocknet. Getränke
müssen nicht abgedeckt werden.
• Bei fest verschlossen Gefässen die Deckel entfernen.
• Beim Kochen von Flüssigkeiten wie Wasser, Kaffee,
Tee oder Milch, einen Glasstab in das Gefäss stellen.
• Grössere Mengen, wenn möglich, zwischendurch
umrühren, so dass sich die Temperatur gleichmässig
verteilt.
• Die Zeiten sind für Lebensmittel bei einer
Zimmertemperatur von 20° C angegeben. Bei
kühlschranktemperierten Lebensmitteln erhöht sich
die Erhitzungszeit geringfügig.
• Lassen Sie die Speisen nach dem Erhitzen 1-2
Minuten stehen, so dass sich die Temperatur
gleichmässig innerhalb der Speise verteilt
(Standzeit).
• Die angegebenen Zeiten sind Richtwerte, die je nach
Ausgangstemperatur, gewicht, Wassergehalt,
Fettgehalt und gewünschtem Endzustand etc.
variieren können.
Auftauen
2. AG-71+72D-EU German 29/03/2005 10:48 Page 64
Page 67

65
D
Garen von frischem gemüse
• Achten Sie beim Einkauf darauf, dass die Stücke
möglichst gleichmässig sind. So erhalten Sie ein
gutes Garergebnis.
• Fleisch, Fisch und Geflügel vor der Zubereitung
gründlich unter fliessend kaltem Wasser abwaschen
und mit Küchenpapier trockentupfen. Danach wie
gewohnt weiterverarbeiten.
• Rindfleisch sollte gut abgehangen und sehnenarm
sein.
• Trotz gleicher Grösse der Stücke kann das
Garergebnis unterschiedlich ausfallen. Dies liegt u.a.
an der Art des Lebensmittels, am unterschiedlichen
Fett- und Flüssigkeitsgehalt als auch an der
Temperatur vor dem Garen.
• Grössere Fleisch-, Fisch- und Geflügelstücke nach
der halben Garzeit wenden, so dass sie von allen
Seiten gleichmässig gegart werden.
• Decken Sie Braten nach dem Garen mit
Aluminiumfolie ab und lassen ihn ca. 10 Minuten
ruhen (Standzeit). Während dieser Zeit gart der
Braten nach, und die Flüssigkeit verteilt sich
gleichmässig, so dass beim Anschneiden weniger
Fleischsaft verlorengeht.
• Achten Sie beim Kauf von Gemüse darauf, dass die
Stücke möglichst gleichmässig sind. Dies ist vor
allem dann wichtig, wenn Sie das Gemüse im Stück
garen möchten (z.B. Pellkartoffeln).
• Gemüse vor der Zubereitung waschen, putzen und
dann erst die erforderliche Menge für das Rezept
abwiegen und zerkleinern.
• Würzen Sie wie gewohnt, aber salzen Sie in der
Regel erst nach dem Garen.
• Pro 500 g Gemüse ca. 5 EL Wasser zugeben.
Faserreiches Gemüse benötigt etwas mehr
Wasserzugabe. Angaben hierzu finden Sie in der
Tabelle, (siehe Seite 78).
• Gemüse wird in der Regel in einer Schüssel mit
Deckel gegart. Flüssigkeitsreiche Gemüsesorten, wie
z.B. Gemüsezwiebeln oder Pellkartoffeln, können
ohne Wasserzugabe in Mikrowellenfolie gegart
werden.
• Gemüse nach der Hälfte der Garzeit umrühren oder
wenden.
• Nach dem Garen das Gemüse ca. 2 Minuten
stehenlassen, damit sich die Temperatur
gleichmässig verteilt (Standzeit).
• Die angegebenen Garzeiten sind Richtwerte und
hängen vom Gewicht, der Ausgangstemperatur und
der Beschaffenheit der Gemüsesorte ab. Je frischer
das Gemüse ist, desto kürzer sind die Garzeiten.
Tiefkühl-Gerichte können in der Mikrowelle in einem
Arbeitsgang aufgetaut und gleichzeitig gegart werden.
In der Tabelle finden Sie hierzu einige Beispiele (siehe
Seite 80). Beachten Sie ausserdem die allgemeinen
Hinweise zu “Erhitzen” und “Auftauen” von
Lebensmitteln. Für die Zubereitung von
handelsüblichen Tiefkühl-Fertiggerichten richten Sie
sich bitte nach den Herstellerangaben auf der
Verpackung. In der regel werden genaue Garzeiten und
Hinweise für die Zubereitung im Mikrowellengerät
gegeben.
Garen von fleisch, fish & geflügel
Auftauen & garen
2. AG-71+72D-EU German 29/03/2005 10:48 Page 65
Page 68

66
Hinweis zur Leistungseinstellen
Ihr Mikrowellengerät hat 5 Leistungsstufen. Zur
Auswahl der erforderlichen Leistungsstufe befolgen Sie
bitte die Hinweise im Abschnitt Rezepte. Im
allgemeinen gelten folgende Empfehlungen:
900 W für schnelles Garen oder Erwärmen, z.B. für
Suppen, Eintöpfe, Dosengerichte, heisse Getränke,
Gemüse, Fisch usw.
630 W zum längeren Garen von kompakteren Speisen
wie Braten, Hackbraten und Tellergerichten, auch für
empfindliche Gerichte wie Käsesossen oder
Rührkuchen. Mit dieser niedrigeren Einstellung kochen
Sossen nicht über und die Speisen garen gleichmässig,
ohne am Rand hart zu werden oder überzulaufen.
Um die Mikrowellen-Leistungsstufe einzustellen:
Den ZEITSCHALTUHR/GEWICHT/LEISTUNGS-Knopf im Uhrzeigersinn drehen, um die Garzeit auszuwählen.
Die BETRIEBSARTEN-Taste einmal drücken (nur Mikrowelle).
Um die Mikrowellen-Leistungsstufe zu ändern, den Knopf drehen, bis die gewünschte Einstellung auf dem Display
erscheint.
Die Taste START/QUICK drücken.
450 W für kompaktere Speisen, die beim Garen mit
herkömmlichen Methoden eine lange Garzeit erfordern,
z.B. Rindfleischgerichte, wird diese Leistungsstufe
empfohlen, damit das Fleisch zart bleibt.
270 W (Auftau-Einstellung) wählen Sie diese Stufe zum
Auftauen, damit Speisen gleichmässig auftauen. Diese
Stufe ist auch bestens geeignet, um Reis, Nudeln und
Klösse zu köcheln und gebackenen Eierpudding zu
kochen.
90 W zum sanften Auftauen, z.B. für Sahnetorten oder
Blätterteig.
HINWEIS: Wenn keine Auswahl der Leistungsstufe erfolgt, wird automatisch die volle Leistung (900 W) eingestellt.
W = Watt
2. AG-71+72D-EU German 29/03/2005 10:48 Page 66
Page 69

67
D
Garen mit der Mikrowelle
Beispiel:
Angenommen, Sie wollen Suppe 2 Minuten und 30 Sekunden lang bei 630 W Mikrowellen-Leistung erwärmen.
Ihr Gerät lässt sich bis zu 90 Minuten programmieren.
(90.00) Die Garzeit (Auftauzeit) kann in Einheiten von
10 Sekunden bis fünf Minuten eingegeben werden. Sie
hängt von der in der Tabelle angegebenen Gesamtlänge
der Garzeit (Auftauzeit) ab.
Garzeit Zeiteinheiten
0-5 Minuten 10 Sekunden
5-10 Minuten 30 Sekunden
10-30 Minuten 1 Minute
30-90 Minuten 5 Minuten
1. Geben Sie durch Drehen
des Zeitschaltuhr/
GEWICHT/LEISTUNGSKnopfs im Uhrzeigersinn
die gewünschte Garzeit
ein.
2. Wählen Sie durch
einmaliges Drücken
der BETRIEBSARTENTaste die gewünschte
Betriebsart (nur
Mikrowelle).
3. Wählen Sie durch Drehen
des ZEITSCHALTUHR/
GEWICHT/LEISTUNGSKnopfs die gewünschte
Leistungsstufe.
4. Starten Sie den
Garvorgang durch
einmaliges Drücken
der START/QUICKTaste.
HINWEIS:
1. Wird die Gerätetür während des Garvorgangs geöffnet, wird die Garzeit auf dem Display automatisch
angehalten. Die Rückwärtszählung der Garzeit setzt wieder ein, wenn die Tür geschlossen und die
START/QUICK-Taste gedrückt wird.
2. Wenn Sie während des Garvorgangs die Leistungsstufe überprüfen wollen, drücken Sie die BETRIEBSARTEN-
Taste. Solange Ihr Finger diese Taste berührt, wird die Leistungsstufe angezeigt.
3. Sie können den ZEITSCHALTUHR/GEWICHT/LEISTUNGS-Knopf im oder entgegen dem Uhrzeigersinn drehen.
Wenn Sie den Drehknopf entgegen dem Uhrzeigersinn drehen, wird die Garzeit graduell von 90 Minuten
vermindert.
x1
x1
Überprüfen Sie das Display.
2. AG-71+72D-EU German 29/03/2005 10:48 Page 67
Page 70

68
Garen mit grill & kombi-betrieb
Dieses Mikrowellengerät bietet zwei GRILL-Betriebsarten: 1. Nur Grill 2. Grill und Mikrowelle.
1.GAREN MIT DEM GRILL
Mit dieser Zubereitungsart können Speisen gegrillt/gebräunt werden.
Beispiel : Toasten für 4 Minuten.
1. Geben Sie durch Drehen des
ZEITSCHALTUHR/GEWICHT/
LEISTUNGS-Knopfs im Uhrzeigersinn
die gewünschte Garzeit ein.
2. Wählen Sie durch zweimaliges
Drücken der BETRIEBSARTEN Taste die gewünschte
Zubereitungsart (nur Grill).
3. Drücken Sie die START/QUICK-
Taste, um den Garvorgang zu
starten.
HINWEIS:
1. Der hohe oder der niedrige Rost wird zum Grillen empfohlen.
2. Bei der ersten Benutzung des Grills kann es zu Rauchentwicklung oder Brandgeruch kommen. Das ist normal
und kein Anzeichen dafür, dass das Gerät funktionsuntüchtig ist. Um dieses Problem beim erstmaligen Gebrauch
des Gerätes zu vermeiden, betreiben Sie den Grill 20 Minuten lang ohne Speisen.
Diese Betriebsart ist eine Kombination von Grill und Mikrowelle (90 W bis 630 W).
Die Mikrowellen-Leistungsstufe ist auf 270 W voreingestellt.
Beispiel:
Zubereitung von Grillspiessen (Rezept auf Seite 86 ) für 7 Minuten mit der KOMBI-BETRIEBSART (450 W).
1. Geben Sie durch Drehen
des ZEITSCHALTUHR/
GEWICHT/LEISTUNGSKnopfs im Uhrzeigersinn
die gewünschte Garzeit ein.
2. Wählen Sie durch
dreimaliges Drücken der
BETRIEBSARTEN-Taste
die gewünschte
Zubereitungsart
(Mikrowelle mit Grill).
3. Drehen Sie den
ZEITSCHALTUHR/GEWICHT/
LEISTUNGS-Knopf auf die
gewünschte MikrowellenLeistungsstufe.
4. Drücken Sie die
START/QUICK-
Taste, um den
Garvorgang zu
starten.
2. GAREN IN DER KOMBI-BETRIEBSART
Überprüfen Sie das Display.
Überprüfen Sie das Display.
x2
x1
x3
x1
2. AG-71+72D-EU German 29/03/2005 10:48 Page 68
Page 71

69
D
Andere nützliche Funktionen
1. GAREN MIT VERSCHIEDENEN GARFOLGEN
Eine Folge von (maximal) 3 Stufen kann mit den kombinierten Betriebsarten MIKROWELLE, GRILL oder KOMBI
programmiert werden.
Beispiel:
Garen : 2 Minuten und 30 Sekunden bei 630 W (Stufe 1)
5 Minuten nur Grill (Stufe 2)
STUFE 1
1. Geben Sie durch Drehen
des ZEITSCHALTUHR/
GEWICHT/ LEISTUNGS-
Knopfs im Uhrzeigersinn
die gewünschte Garzeit
ein.
2. Wählen Sie durch
einmaliges Drücken der
BETRIEBSARTEN-Taste
die gewünschte
Zubereitungsart (nur
Mikrowelle).
3. Drehen Sie den
ZEITSCHALTUHR/
GEWICHT/LEISTUNGS-Knopf
im Uhrzeigersinn auf die
gewünschte MikrowellenLeistungsstufe.
4. Vor dem
Programmieren von
Stufe 2 drücken
Sie die
BETRIEBSARTENTaste.
STUFE 2
5. Geben Sie durch Drehen des
ZEITSCHALTUHR/GEWICHT/LEIS
TUNGS-Knopfs im Uhrzeigersinn
die gewünschte Garzeit ein.
6. Wählen Sie durch zweimaliges
Drücken der BETRIEBSARTENTaste die gewünschte
Zubereitungsart (nur Grill).
7. Drücken Sie die
START/QUICK-Taste, um
den Garvorgang zu starten.
(Das Gerät arbeitet nun 2 Minuten und 30 Sekunden lang bei 630 W und anschliessend 5 Minuten mit dem Grill).
Anwendungsbeispiel:
Zubereitung eines Zucchini-Nudel-Auflaufs (siehe Seite 88).
1. 18 Minuten bei 900 W.
2. 7 Minuten Kombi bei 630 W.
Überprüfen Sie das Display.
x1
x2
x1
x1
ACHTUNG: Wenn Sie ein Programm einstellen, nachdem Sie GRILL gewählt haben, lassen Sie Schritte 3 und 4 aus.
Wenn Sie nach der Auswahl von GRILL die BETRIEBSARTEN-Taste gedrückt halten, wechselt GRILL
automatisch zu KOMBI über.
2. AG-71+72D-EU German 29/03/2005 10:48 Page 69
Page 72

70
Andere nützliche Funktionen
3.ÜBERPRÜFEN DER LEISTUNGSSTUFE
Um während des Garvorgangs die Mikrowellen-Leistungsstufe zu überprüfen, drücken Sie die BETRIEBSARTENTaste.
Solange Sie mit dem Finger die BETRIEBSARTEN-Taste berühren, wird die Leistungsstufe angezeigt.
Die Rückzählung der Garzeit läuft weiter, auch wenn auf dem Display die Leistungsstufe angezeigt wird.
2.SCHNELLKOCHFUNKTION
Mit der START/QUICK-Taste können Sie die folgenden Funktionen bedienen:
a. Direktstart
Sie können sofort 30 Sekunden lang mit einer Leistung von 900 W kochen, wenn Sie die START/QUICK-Taste
drücken.
HINWEIS:
Um einen Missbrauch durch Kinder zu verhindern, kann die START/QUICK-Taste nur 3 Minute nach dem
vorausgehenden Bedienungsschritt, d. h. Schliessen der Tür oder Drücken der STOP-Taste, betätigt werden.
b. Verlängern der Garzeit
Während des manuellen Kochens können Sie die Kochzeit durch wiederholten Tastendruck jeweils um weitere 30
Sekunden verlängern.
x1
Überprüfen Sie das Display.
EINSTELLEN DER SICHERHEITSSPERRFUNKTION
1. Drücken Sie die STOP-Taste und halten Sie sie
3 Sekunden lang heruntergedrückt.
HINWEIS: Bei eingestellter Sicherheitssperre können Sie keine Tasten außer der STOP-Taste betätigen.
x1 für 3 Sekunden
Bei eingestellter
Sicherheitsfunktion zeigt das
Display die Tageszeit an.
AUFHEBEN DER SICHERHEITSSPERRFUNKTION
1. Drücken Sie die STOP-Taste und halten Sie sie 3
Sekunden lang heruntergedrückt.
x1 für 3 Sekunden
4.SICHERHEITSSPERRFUNKTION
2. AG-71+72D-EU German 29/03/2005 10:48 Page 70
Page 73

71
D
Autokoch- & Autoauftau-Betrieb
Bei der AUTOKOCH- & AUTOAUFTAU-Funktion werden der korrekte Kochmodus die korrekte Kochzeit automatisch
errechnet. Sie haben die Wahl zwischen 2 AUTOKOCH-, 6 AUTOKOCH-PLUS-GRILL-und 4 AUTOAUFTAU Menüs.
Was Sie bei der Benutzung dieser Automatikfunktion wissen müssen.
ZEITSCHALTUHR/
GEWICHT/
LEISTUNGS-Knopf
START/QUICK-Taste
2.
3.
2. Das Gewicht der Speise durch Drehen des
ZEITSCHALTUHR/GEWICHT/LEISTUNGS-Knopfs
eingeben, bis das gewünschte Gewicht angezeigt
wird.
• Nur das Gewicht des Garguts eingeben. Das Gewicht
des Geschirrs nicht mit einbeziehen.
• Für Speisen, deren Gewicht höher oder niedriger ist
als es in der AUTOKOCH & AUTOAUFTAU-Tabelle
angegeben wird, verwenden Sie den manuellen
Betrieb. Die Anleitungen in den Tabellen beachten,
um einwandfreie Resultate zu erzielen.
3. Um den Garvorgang zu beginnen, die
START/QUICK-Taste drücken.
Wenn ein Bedienungsschritt erforderlich ist (z.B.
zum Wenden der Speisen), stoppt das Gerät
automatisch, das akustische Signal ertönt, die
verbleibende Garzeit u. a. Symbole werden blinkend
angezeigt. Um den Garvorgang fortzusetzen,
drücken Sie die START/QUICK-Taste.
Das Menü wird durch Drücken der AUTOAUFTAUoder der gewünschten AUTOKOCH-Taste gewählt, bis die
gewünschte Menünummer angezeigt wird. Siehe Seiten 73 - 75 "AUTOKOCH- und AUTOAUFTAU TABELLEN".
Das Menü wird automatisch durch Drücken der Taste AUTOKOCH oder AUTOAUFTAU geändert.
Die Temperatur am Ende der Garzeit hängt von der
Ausgangstemperatur ab. Vergewissern Sie sich, dass die
Speisen nach dem Garen ausreichend gegart sind. Falls
erforderlich, können Sie die Garzeit verlängern und eine
höhere Leistungsstufe einstellen.
HINWEIS: Bei Verwendung der
SCHNELLKOCHFUNKTION, während des
Auto-Garen/ Auftauvorgangs,
könnten die Gerichte übergaren.
1a.
1b.
x1
Menünummer
x1
Menünummer
x1
Menünummer
x1
Menünummer
Beispiel:
1a. AUTOKOCH: Die AUTOKOCH-Taste hat 2 Menüs.
Drücken Sie die AUTOKOCH-Taste einmal, das
Display wird daraufhin wie dargestellt angezeigt.
1b. AUTOKOCH-PLUS-GRILL 1: Die AUTOKOCH-PLUS-
GRILL 1-Taste hat 2 Menüs. Drücken Sie die
AUTOKOCH-PLUS-GRILL 1-Taste einmal, das
Display wird daraufhin wie dargestellt angezeigt.
1c. AUTOKOCH-PLUS-GRILL 2: Die AUTOKOCH-PLUS-
GRILL 2-Taste hat 4 Menüs. Drücken Sie die
AUTOKOCH-PLUS-GRILL 2-Taste einmal, das
Display wird daraufhin wie dargestellt angezeigt.
1d. AUTOAUFTAU: Die AUTOAUFTAU-Taste hat 4
Menüs. Drücken Sie die AUTOAUFTAU-Taste einmal,
das Display wird daraufhin wie dargestellt angezeigt.
1c.
1d.
x1
2. AG-71+72D-EU German 29/03/2005 10:48 Page 71
Page 74

72
Autokoch- & Autoauftau-Betrieb
Beispiel 1 für AUTOKOCH-PLUS-GRILL 1:
Zum Garen von Gratiniertes Fischfilet mit einem Gewicht von 1,5 kg verwenden Sie Autokoch-plus-grill 1 (A1-1).
2. Geben Sie durch Drehen des
ZEITSCHALTUHR/GEWICHT/
LEISTUNGS-Knopf das Gewicht ein.
x1
3. Drücken Sie die
START/QUICK-Taste, um
den Garvorgang zu starten.
1. Das gewünschte
Automatikprogramm durch
einmaliges Drücken der
AUTOKOCH-PLUS-GRILL 1-Taste
einstellen.
x1
Überprüfen Sie das Display.
1. Wählen Sie das gewünschte Menü,
indem Sie die AUTOAUFTAU-Taste
einmal drücken.
2. Geben Sie das gewicht durch
Drehen des ZEITSCHALTUHR/
GEWICHT/LEISTUNGS-Knopf
ein.
3. Drücken Sie die
START/QUICK-Taste, um
den Garvorgang zu starten.
Beispiel 2 für AUTOAUFTAU:
Zum Auftauen von 0,2 kg Steakfleisch unter Benutzung der AUTOAUFTAU-Funktion (Ad-1).
x1
x1
Überprüfen Sie das Display.
2. AG-71+72D-EU German 29/03/2005 10:48 Page 72
Page 75

73
D
Autokoch- & Autoauftau-Tabellen
TASTE VERFAHREN
• Siehe Rezepte für “Hähnchenpfanne mit
Gemüse”
auf Seite 76.
* Gesamtgewicht von allen Zutaten.
• Siehe Rezepte für “Hack und Zwiebel” auf
Seite 76.
* Gesamtgewicht von allen Zutaten.
AUTOKOCH
Nr.
AC-1 Garen
Hähnchenpfanne
mit Gemüse
AC-2 Garen
Hack und Zwiebel
MENGE (Gewichts-
einheit) / GESCHIRR
0,5 - 1,5 kg* (500 g)
(Ausgangstemp.
Hähnchenfleisch 5° C)
Auflaufform mit
Mikrowellenfolie
0,5 - 1,5 kg* (500 g)
(Ausgangstemp.
Hack 5° C)
Schüssel mit Deckel
x1
x2
TASTE VERFAHREN
• Siehe Rezepte für “Gratiniertes Fischfilet” auf
Seite 76 - 77.
* Gesamtgewicht von allen Zutaten.
• Siehe Rezepte für “Aufläufe” auf
Seite 77.
* Gesamtgewicht von allen Zutaten.
AUTOKOCH-
PLUS-GRILL 1 Nr.
A1-1 Garen
Gratiniertes
Fischfilet
A1-2 Garen
Aufläufe
MENGE (Gewichts-
einheit) / GESCHIRR
0,5 - 1,5 kg* (500 g)
(Ausgangstemp.
Fisch 5° C)
Auflaufform
0,5 - 1,5 kg* (500 g)
(Ausgangstemp. 20° C)
Auflaufform
x1
x2
2. AG-71+72D-EU German 29/03/2005 10:48 Page 73
Page 76

74
Autokoch- & AutoAuftau-Tabellen
TASTE VERFAHREN
• Die tiefgekühlten Pommes frites aus der Packung
nehmen und in eine flache Form aus Porzellan
geben.
• Die Form auf den hohen Rost ins Gerät stellen.
• Wenn das Signal ertönt, wenden.
• Nach dem Garen auf einem Servierteller
anrichten. (Es ist keine Standzeit erforderlich.)
• Nach Geschmack salzen.
HINWEIS: Die Form wird während des Garens sehr
heiss. Verwenden Sie beim Entnehmen der Form
Ofenhandschuhe oder Topflappen, um
Verbrennungen zu vermeiden.
• Die Grillspiesse vorbereiten, siehe Rezept auf
Seite 88.
• Auf den hohen Rost legen und garen.
• Wenn das akustische Signal ertönt, wenden.
• Nach dem Garen auf einem Servierteller
anrichten. (Es ist keine Standzeit erforderlich).
• Die Zutaten vermischen und auf den
Hähnchenschenkeln verteilen.
• Die Haut der Hähnchenschenkel anstechen.
• Die Hähnchenschenkel mit der Hautseite nach
unten auf den Rost legen, die dünnen Enden
zeigen zur Mitte.
• Wenn das akustische Signal ertönt, die
Hähnchenschenkel wenden.
• Nach dem Garen ca. 5 Minuten stehen lassen.
• Die Zutaten mischen und das Hähnchen damit
bestreichen.
• Die Haut des Hähnchens anstechen.
• Das Hähnchen mit der Brustseite nach unten auf
den niedrigen Rost legen und garen.
• Wenn das akustische Signal ertönt, das Hähnchen
wenden.
• Nach dem Garen ca. 3 Minuten lang im Gerät
lassen, herausnehmen und zum Servieren auf
einen Teller geben.pendant environ 3 minutes
avant de les sortir et de les servir.
AUTOKOCH-
PLUS-GRILL 2
A2-1 Garen
Pommes frites
(Empfohlen für
die Verwendung
in
herkömmlichen
Backöfen)
A2-2 Garen
Grillspiesse
A2-3 Garen
Hähnchenschenkel
A2-4 Garen
Grillhähnchen
MENGE (Gewichts-
einheit) / GESCHIRR
0,20 - 0,40 kg (50 g)
(Ausgangstemp. -18° C)
Auflaufform,
Hoher Rost
0,2 - 0,8 kg (100 g)
(Ausgangstemp. 5° C)
Hoher Rost
0,20 - 0,80 kg (50 g)
(Ausgangstemp. 5° C)
Hoher Rost
0,9 - 1,8 kg (100 g)
(Ausgangstemp. 5° C)
Auflaufform
Niedriger Rost
Zutaten für 1,2 kg Grillhähnchen:
Salz und Pfeffer, 1 TL Paprika edelsüss, 2 EL Öl
Zutaten für 0,6 kg Hähnchenschenkel: (3 Stück), 1-2
EL Öl,
1
/
2
TL Salz, 1 TL Paprika edelsüss,
1 TL Rosmarin.
x1
x2
x3
x4
2. AG-71+72D-EU German 29/03/2005 10:48 Page 74
Page 77

75
D
Autokoch- & AutoAuftau-Tabellen
HINWEIS: Autoauftau
1. Steaks und Koteletts sollten nebeneinander (einlagig) eingefroren werden.
2. Hackfleisch sollte flach eingefroren werden.
3. Nach dem Wenden die aufgetauten Portionen mit dünnen Aluminiumstreifen abdecken.
4. Torte, die aus Sahne/Creme hergestellt oder damit verziert wurde, reagiert sehr empfindlich auf Mikrowellen-
Energie. Sobald sich die Creme schnell verflüssigt, nehmen Sie die Torte am besten sofort aus dem Ofen und
lassen Sie bei Raumtemperatur 10 bis 30 Minuten stehen.
5. Für Ad-1 die Speisen wie in der Abbildung gezeigt in das Gerät stellen:
Speise
Geschirr
Drehteller
Steaks und Koteletts
TASTE VERFAHREN
• Die Speise auf einem Teller in die Mitte des
Drehtellers stellen.
• Wenn das Gerät stoppt und das Signal ertönt, die
Speise wenden, neu anordnen und ggf. trennen.
Decken Sie dünne Teile und warme Stellen mit
Aluminiumfolie ab.
• Nach dem Auftauen mit Aluminiumfolie
abgedeckt 10 - 15 Minuten stehen lassen, bis
alles vollständig aufgetaut ist.
• Decken Sie den Drehteller mit Frischhaltefolie ab.
• Legen Sie den Block Hackfleisch auf den
Drehteller.
• Wenn das Gerät stoppt und das Signal ertönt,
drehen Sie das Hackfleisch um. Entfernen Sie die
aufgetauten Teile, sofern möglich.
• Nach dem Auftauen 5 - 10 Minuten stehen
lassen, bis alles vollständig aufgetaut ist.
• Den Kuchen von jeglicher Verpackung befreien.
• Auf einen flachen Teller in die Mitte des
Drehtellers stellen.
• Den Kuchen nach dem Auftauen in möglichst
gleich grosse Stücke schneiden, zwischen den
Stücken etwas Abstand lassen und 15 - 60
Minuten stehenlassen, bis er gleichmässig
aufgetaut ist.
• Auf einen flachen Teller in die Mitte des
Drehtellers stellen.
• Wenn das Signal ertönt, die Scheiben neu
anordnen und aufgetaute Scheiben abnehmen.
• Nach dem Auftauen alle Scheiben voneinander
trennen und auf einem grossen Teller verteilen.
Das Brot mit Aluminiumfolie abdecken und 5 - 10
Minuten stehenlassen, bis es vollständig
aufgetaut ist.
AUTOAUFTAU
Nr.
Ad-1 Auftauen
Steak und
Kotelett
Ad-2 Auftauen
Hackfleisch
Ad-3 Auftauen
Kuchen
Ad-4 Auftauen
Brot
MENGE (Gewichts-
einheit) / GESCHIRR
0,2 - 1,0 kg (100 g)
(Ausgangstemp. -18° C)
(Siehe HINWEIS unten)
0,2 - 1,0 kg (100 g)
(Ausgangstemp. -18° C)
Frischhaltefolie
( Siehe HINWEIS unten)
0,1 - 1,4 kg (100 g)
(Ausgangstemp. -18° C)
Flachen Teller
0,1 - 1,0 kg (100 g)
(Ausgangstemp. -18° C)
Flachen Teller
(Für dieses Programm
werden nur Brotscheiben
empfohlen.)
x1
x2
x3
x4
2. AG-71+72D-EU German 29/03/2005 10:48 Page 75
Page 78

76
Rezepte für Autokoch
GRATINIERTES FISCHFILET (A1-1)
Fischauflauf auf italienische Art
Zutaten
0,5 kg 1,0 kg 1,5 kg
200 g 430 g 630 g Fischfilet
1
/
2 tbsp 1 tbsp 1
1
/
2 tbsp Zitronensaft
1
/
2
tbsp 1 tbsp 1
1
/
2
tbsp Anchovis-butter
30 g 50 g 80 g Gouda (geriebenen)
Salz und Pfeffer
150 g 300 g 450 g frische Tomaten
1 tbsp 1
1
/
2
tbsp 2 tbsp gehackte gemischte Kräuter
100 g 180 g 280 g Mozarella
1
/
2 tbsp
3
/
4 tbsp 1 tbsp gehacktes Basilikum
HACK UND ZWIEBEL (AC-2)
Zutaten
0,5 kg 1,0 kg 1,5kg
150 g 300 g 450 g Hackfleisch (
1
/
2 Schwein,
1
/
2 Rind)
50 g 100 g 150 g Zwiebel (fein gehackt)
1
/
2 11
1
/
2 Ei
15 g 30 g 45 g Semmelbrösel
Salz und Pfeffer
115 ml 230 ml 345 ml Fleischbrühe
20 g 40 g 60 g Tomatenmark
65 g 125 g 190 g Kartoffeln (fein gehackt)
65 g 125 g 190 g Karotten (fein gehackt)
1
/
2 tbsp 1 tbsp 1
1
/
2 tbsp gehackte Petersilie
HÄHNCHENPFANNE MIT GEMÜSE (AC-1)
Pikante Hähnchenpfanne
Zutaten
0,5 kg 1,0 kg 1,5kg
60 g 120 g 180 g Langkornreis
1 1 1 Briefchen Safranfäden
25 g 50 g 75 g Zwiebel (in Scheiben)
50 g 100 g 150 g Rote Paprikaschote (in Streifen)
50 g 100 g 150 g Porree (in Streifen)
150 g 300 g 450 g Hähnchenbrust (gewürfelt)
Pfeffer, Paprikapulver
10 g 20 g 30 g Butter oder Margarine
150 ml 300 ml 450 ml Fleischbrühe
Zubereitung
1. Den Reis mit den Safranfäden mischen und in die
gefettete Auflaufform geben.
2. Die Zwiebelscheiben, Paprika, Porreestreifen und
die Hähnchenbrustwürfel mischen und würzen.
Auf den Reis schichten.
3. Die Butter in Flöckchen darauf verteilen.
4. Die Fleischbrühe darübergiessen und mit
Mikrowellenfolie abdecken. Mit AUTOKOCH
(AC-1) für “Hähnchenpfanne mit Gemüse“ garen.
5. Nach dem Garen 5 - 10 Minuten stehen lassen.
Zubereitung
1. Das Hackfleisch mit den Zwiebelwürfeln, dem Ei
und den Semmelbröseln zu einem Teig kneten
und mit Salz und Pfeffer würzen. Den
Hackfleischteig in die Schüssel geben.
2. Die Fleischbrühe mit dem Tomatenmark mischen.
3. Die Kartoffeln und Möhren mit der Flüssigkeit auf
das Hackfleisch geben, miteinander vermengen.
4. Abdecken und mit AUTOKOCH (AC-2) für “Hack
und Zwiebel“ garen.
5. Wenn das Gerät stoppt und das Signal ertönt,
umrühren und wieder abdecken.
6. Nach dem Garen, umrühren und ca. 5 Minuten
stehen lassen. Mit Petersilie bestreut servieren.
Zubereitung
1. Den Fisch waschen und abtrocknen, mit
Zitronensaft beträufeln, salzen und mit
Anchovis-Butter einreiben.
2. In eine Auflaufform geben.
3. Den Gouda auf dem Fisch verteilen.
4. Die Tomaten waschen, die Stielansätze entfernen.
In Scheiben schneiden und auf den Käse geben.
5. Mit Salz, Pfeffer und gemischten Kräutern
würzen.
6. Mozarella abtropfen lassen, in Scheiben
schneiden und auf die Tomaten geben. Mit
Basilikum bestreuen.
7. Die Auflaufform auf den niedrigen Rost stellen
und mit AUTOKOCH-PLUS-GRILL 1 (A1-1) für
“Gratiniertes Fischfilet“ garen.
8. Nach dem Garen ca. 5 Minuten stehen lassen.
2. AG-71+72D-EU German 29/03/2005 10:48 Page 76
Page 79

77
D
Rezepte für Autokoch
AUFLÄUFE (A1-2)
Spinatauflauf
Zutaten
0,5 kg 1,0 kg 1,5 kg
150 g 300 g 450 g Blattspinat (auftauen und
abgiessen)
15 g 30 g 45 g Zwiebel (fein gehackt)
Salz, Pfeffer, Muskat
150 g 300 g 450 g Kartoffeln (in Scheiben)
35 g 75 g 110 g gekochter Schinken (gewürfelt)
50 g 100 g 150 g Crème fraîche
1 2 3 Eier
40 g 75 g 115 g geriebenen Käse
Paprikapulver
AUFLÄUFE (A1-2)
Kartoffel-Zucchini-Auflauf
Zutaten
0,5 kg 1,0 kg 1,5 kg
200 g 400 g 600 g Kartoffeln (in Scheiben)
115 g 230 g 345 g Zucchini (feine Scheiben)
75 g 150 g 225 g Crème fraîche
1 2 3 Ei(er)
1
/
2
1 2 Zehen Knoblauch (zerdrückt)
Salz, Pfeffer
40 g 75 g 120 g Gouda (geriebenen)
10 g 20 g 30 g Sonnenblumenkerne
Paprikapulver
Zubereitung
1. Den Blattspinat mit der Zwiebel mischen und
mit Salz, Pfeffer und Muskatnuss würzen.
2. Die Schüssel einfetten. Abwechselnd die
Kartoffelscheiben, die Schinkenwürfel und den
Spinat in die Auflaufform schichten. Die letzte
Lage sollte Spinat sein.
3. Die Eier mit dem Rahm verrühren, würzen und
über das Gemüse giessen.
4. Den Auflauf mit dem geriebenen Käse und
Paprika bestreuen.
5. Auf den Drehteller stellen, mit AUTOKOCH-
PLUS-GRILL 1 (A1-2) für “Aufläufe“ garen.
6. Nach dem Garen 5 - 10 Minuten stehen lassen.
Zubereitung
1. Die Auflaufform einfetten und abwechselnde
Lagen von Kartoffelscheiben und
Zucchinischeiben in die Schüssel geben.
2. Die Eier mit Crème fraîche mischen, mit Salz,
Pfeffer und Knoblauch würzen und über das
Gemüse giessen.
3. Den Auflauf mit dem geriebenen Gouda und
Paprika bestreuen.
4. Abschliessend den Auflauf mit
Sonnenblumenkernen bestreuen.
5. Auf den Drehteller stellen, mit AUTOKOCH-
PLUS-GRILL 1 (A1-2) für “Aufläufe“ garen.
6. Nach dem Garen 5 - 10 Minuten stehen lassen.
GRATINIERTES FISCHFILET (A1-1)
Fisch Esterhazy
Zutaten
0,5 kg 1,0 kg 1,5 kg
230 g 450 g 680 g Fischfilet
100 g 200 g 300 g Porree (in Ringe schneiden)
20 g 40 g 60 g Zwiebel (feine Scheiben)
40 g 100 g 140 g Möhre (gerieben)
10 g 10 g 20 g Butter oder Margarine
Salz, Pfeffer und Muskat
1 tbsp 1
1
/
2
tbsp 2 tbsp Zitronensaft
50 g 100 g 150 g Crème fraîche
50 g 100 g 150 g Gouda (geriebenen)
Zubereitung
1. Das Gemüse, die Butter und die Gewürze in eine
Schüssel mit Deckel geben und gründlich
vermischen. Abhängig vom Gewicht für 2-6
Minuten auf 900 W garen lassen.
2. Den Fisch waschen, abtrocknen, mit Zitronensaft
beträufeln und salzen.
3. Die Crème fraîche mit dem Gemüse mischen und
würzen.
4. Die Hälfte des Gemüses in eine Auflaufform geben.
Den Fisch darauf legen und mit dem restlichen
Gemüse bedecken.
5. Den Gouda darauf verteilen und die Form auf den
Drehteller stellen, mit AUTOKOCH-PLUS-
GRILL 1 (A1-1) für “Gratiniertes Fischfilet“ garen.
6. Nach dem Garen ca. 5 Minuten stehen lassen.
2. AG-71+72D-EU German 29/03/2005 10:48 Page 77
Page 80

78
Gar-Tabellen
Getränk/Speise Menge Ein- Leistung Zeit Verfahrenshinweise
-g/ml- stellung -Stufe- -Min-
TABELLE : ERHITZEN VON GETRÄNKEN UND SPEISEN
Gemüse Menge Ein- Leistung Zeit Verfahrenshinweise Wasserzugabe
-g- stellung -Stufe- -Min- -EL/ml-
TABELLE : GAREN VON FRISCHEM GEMÜSE
Kaffee, 1 Tasse 150 900 W ca.1 nicht abdecken
Milch, 1 Tasse* 150 900 W ca.1 nicht abdecken
Wasser, 1 Tasse 150 900 W ca.2 nicht abdecken, zum Kochen bringen
6 Tassen 900 900 W 8-10 nicht abdecken, zum Kochen bringen
1 Schüssel 1000 900 W 9-11 abdecken, zum Kochen bringen
Tellergericht (Gemüse, 500 900 W 4-6 Sauce mit Wasser beträufeln, abdecken,
Fleisch und Beilagen) zwischendurch umrühren
Eintopf 200 900 W 11/2-2 abdecken, nach dem Erhitzen umrühren
Suppe, klar 200 900 W 1-11/
2
abdecken, nach dem Erhitzen umrühren
Cremesuppe 200 900 W 11/2-21/
2
abdecken, nach dem Erhitzen umrühren
Gemüse 200 900 W 2-3 eventuell etwas Wasser zugeben, abdecken,
500 900 W 3-5 nach der halben Erhitzungszeit umrühren
Beilagen 200 900 W 2-3 mit etwas Wasser beträufeln, abdecken,
500 900 W 4-5 zwischendurch umrühren
Fleisch, 1 Scheibe* 200 900 W ca. 3 mit etwas Sauce beträufeln, abdecken
Fischfilet* 200 900 W 3-5 abdecken
Würstchen, 2 Stück 180 900 W 1-11/
2
die Haut mehrmals einstechen
Kuchen, 1 Stück 150 450 W1/2-1 auf ein Kuchengitter legen
Babynahrung, 1 Glas 190 450 W1/2-1 Deckel entfernen, nach dem Erhitzen gut
umrühren und die Temperatur prüfen
Margarine oder Butter schmelzen* 50 900 W ca. 1
Schokolade schmelzen 100 450 W 3-4 zwischendurch umrühren
6 Blatt Gelatine auflösen 10 450 W ca.1/
2
in Wasser einweichen, gut ausdrücken und in eine
Suppentasse geben; zwischendurch umrühren
Tortenguss für 1/41 Flüssigkeit 10 450 W 4-6 mit Zucker und 250 ml Flüssigkeit anrühren,abdecken,
zwischendurch und nach dem Erhitzen gut umrühren
* ab Kühlschranktemperatur
Artischocken 300 900 W 5-7 den Stiel entfernen, abdecken 3-4 EL
Blattspinat 300 900 W 4-5 nach dem Waschen gut abtropfen lassen, -
abdecken, zwischendurch ein- bis zweimal umrühren
Blumenkohl 800 900 W 12-15 1 ganzer Kopf, abdecken 5-6 EL
500 900 W 6-8 in Röschen teilen, abdecken, zwischendurch umrühren 4-5 EL
Brokkoli 500 900 W 6-8 in Röschen teilen, abdecken, zwischendurch umrühren 4-5 EL
Champignons 500 900 W 6-8 ganze Köpfe, abdecken, zwischendurch umrühren Chinakohl 300 900 W 5-7 in Streifen schneiden, abdecken, zwischendurch umrühren 4-5 EL
Erbsen 500 900 W 6-8 abdecken, zwischendurch umrühren 4-5 EL
Fenchel 500 900 W 6-8 in Viertel schneiden, abdecken, zwischendurch umrühren 4-5 EL
Gemüsezwiebel 250 900 W 4-5 ganz, in Mikrowellenfolie garen Kohlrabi 500 900 W 7-9 in Würfel schneiden, abdecken, zwischendurch umrühren 50 ml
Möhren 500 900 W 9-11 in Scheiben schneiden,abdecken, zwischendurch umrühren 4-5 EL
Paprikaschote 500 900 W 6-8 in Würfel schneiden, abdecken, zwischendurch umrühren 4-5 EL
Pellkartoffeln 500 900 W 6-8 abdecken, zwischendurch umrühren 4-5 EL
Porree/Lauch 500 900 W 7-9 in Ringe schneiden, abdecken, zwischendurch umrühren 4-5 EL
Rotkohl 500 900 W 15-17 in Streifen schneiden,abdecken, ein- bis zweimal 50 ml
zwischendurch umrühren
Rosenkohl 500 900 W 7-9 ganze Köpfe, abdecken, zwischendurch umrühren 50 ml
Salzkartoffeln 500 900 W 7-9 in gleich grosse Stücke schneiden, etwas salzen, 150 ml
abdecken, zwischendurch umrühren
Sellerie 500 900 W 7-9 in feine Würfel schneiden, abdecken, zwischendurch umrühren 50 ml
Weisskohl 500 900 W 15-17 in Streifen schneiden, abdecken, zwischendurch umrühren 50 ml
Zucchini 500 900 W 6-8 in Scheiben schneiden, abdecken, zwischendurch umrühren 4-5 EL
2. AG-71+72D-EU German 29/03/2005 10:48 Page 78
Page 81

79
D
Gar-Tabellen
TABELLE : GAREN VON FLEISCH, FISCH UND GEFLÜGEL
Rumpsteaks
2 Stück, medium
Filetsteaks,
2 Stück, medium
Lammkoteletts
2 Stück, rosa
Grillwürste
5 Stück
Gratinieren von Aufläufen u.a.
Käsetoast 1 Stück
4 Stück
4
Auf den hohen Rost legen, nach (*) wenden, nach dem
Grillen würzen.
Auf den hohen Rost legen, nach (*) wenden, nach dem
Grillen würzen.
Auf den hohen Rost legen, nach (*) wenden, nach dem
Grillen würzen.
Auf den hohen Rost legen, nach (*) wenden.
Auflaufform auf den niedrigen Rost stellen. Die Grillzeit ist
abhängig von der verwendeten Käsesorte.
Toastbrot toasten, mit Butter bestreichen, mit einer Scheibe
gekochten Schinken, einer Scheibe Ananas und einer
Scheibe Schmelzkäse belegen, auf dem hohen Rost grillen.
Vor dem Grillen in der Mitte einstechen.
400
200
300
400
TABELLEN: GRILLEN UND GRATINIEREN VON FLEISCH, AUFLÄUFEN UND KÄSETOASTS
Gericht Menge
Ein- Leistung
Zeit Verfahrenshinweise
-g-
stellung
-Stufe- -Min-
11-12
6-8
11-12
6-8
13-14
9-10
9-11
6-7
8-13
1/2
5-6
1/2-1
5-6
(*)
(*)
(*)
(*)
(*)
(*)
Nach Geschmack würzen, auf den niedrigen Rost legen
nach (*) wenden.
Nach Geschmack würzen, mit der fetten Seite nach
unten auf den niedrigen Rost legen, nach (*) wenden.
Hackfleischteig (halb Schwein/halb Rind) zubereiten, in
eine Auflaufform legen und auf dem niedrigen Rost garen
Nach Geschmack würzen, mit der Brustseite nach unten
auf den niedrigen Rost legen, nach (*) wenden.
Nach Geschmack würzen, mit der Hautseite nach unten
auf den hohen Rost legen, nach (*) wenden.
Waschen, mit Zitronensaft beträufeln, von innen und
aussen salzen, auf den hohen Rost legen, nach (*) wenden
10
10
10
10
10
10
3
2
5-8
6-8
5-8
4-5
16-18
5-7
14-16
4-6
26-28
5-6
26-28
4-5
5-8
8-10
3-5
12-15
12-15
4-6
20-23
6-9
9-11
5-7
9-11
3-5
6-7
4-6
7-9
4-5
500
1000
1500
1000
1500
1000
1200
200
250
(*)
(*)
(*)
(*)
(*)
(*)
450 W
450 W
450 W
450 W
450 W
450 W
450 W
450 W
450 W
450 W
450 W
450 W
630 W
630 W
630 W
630 W
630 W
630 W
630 W
630 W
900 W
630 W
900 W
630 W
450 W
90 W
90 W
Braten
(Schwein,
Kalb, Lamm)
Roastbeef (medium)
Hackbraten
Hähnchen
Hähnchenschenkel
Forelle
450 W
450 W
Fleisch, Fisch Menge
Ein- Leistung
Zeit Verfahrenshinweise Standzeit
und Geflügel -g-
stellung
-Stufe- -Min- -Min-
2. AG-71+72D-EU German 29/03/2005 10:48 Page 79
Page 82

80
Gar-Tabellen
Gemüse Menge Leistung Garzeit Verfahrenshinweise Standzeit
-g- -Stufe- -Min- -Min-
TABELLE : AUFTAUEN UND GAREN
TABELLE : AUFTAUEN
Lebensmittel Menge Leistung
Auftauzeit
Verfahrenshinweise Standzeit
-g- -Stufe- -Min- -Min-
Zum Auftauen von Koteletts, Steaks, Hackfleisch, Brot und Kuchen die Automatikprogramme Ad-1 bid Ad-4 benutzen.
TABELLE : AUFBACKEN VON TIEFGEKÜHLTEN SNACKS
Pommes frites
Pizza
Flammkuchen
Belegte Baguettes
In eine flache Auflaufform legen und auf den hohen Rost stellen.
Nach ca. 5-6 Min. Grillzeit wenden. (Dünne
Pommes frites benötigen eine etwas kürzere Grillzeit).
Auf den niedrigen Rost legen.
Auf den niedrigen Rost legen.
Auf den hohen Rost legen.
250
300
400
300
250
3-4
8-10
4-6
4-6
6-7
5-7
8-10
8-10
630 W
450 W
450 W
450 W
450 W
450 W
270 W
Fischfilet 400 900 W 9-11 - abdecken 1-2
Forelle, 1 Stück 250 900 W 6-8 - abdecken 1-2
Tellergericht 400 900 W 8-10 - abdecken, nach ca. 6 Minuten umrühren 2
Blattspinat 300 900 W 7-10 - abdecken, ein- bis zweimal zwischendurch umrühren 2
Brokkoli 300 900 W 6-8 3-5 EL abdecken, nach der halben Zeit umrühren 2
Erbsen 300 900 W 6-8 3-5 EL abdecken, nach der halben Zeit umrühren 2
Kohlrabi 300 900 W 7-8 3-5 EL abdecken, nach der halben Zeit umrühren 2
Mischgemüse 500 900 W 9-11 3-5 EL abdecken, nach der halben Zeit umrühren 2
Rosenkohl 300 900 W 6-8 3-5 EL abdecken, nach der halben Zeit umrühren 2
Rotkohl 450 900 W 10-12 3-5 EL abdecken, nach der halben Zeit umrühren 2
Grünkohl 600 900 W 13-15 3-5 EL abdecken, nach der halben Zeit umrühren 2
Gulasch 500 270 W 8-9 nach der halben Auftauzeit trennen/umrühren 10-15
Schinken oder Wurst im Stück 200 270 W 2-3 nur antauen 5
Aufschnitt 200 270 W 2-4 nach je 1 Min. die äusseren Scheiben abnehmen 5
Würstchen, 8 Stück 600 270 W 6-8 nebeneinander legen, nach der halben 5-10
4 Stück 300 270 W 3-5 Auftauzeit wenden 5-10
Hähnchen 1200 270 W 18-20 auf einen umgedrehten Teller legen, nach der 30-90
halben Auftauzeit wenden
1000 270 W 13-15 auf einen umgedrehten Teller legen, nach der 30-90
halben Auftauzeit wenden
Hähnchenschenkel 1000 270 W 13-15 nach der halben Auftauzeit wenden 30-90
200 270 W 3-4 nach der halben Auftauzeit wenden 10-15
Hähnchenbrust 450 270 W 7-9 nach der halben Auftauzeit wenden 30-90
Fisch im Stück 800 270 W 12-13 nach der halben Auftauzeit wenden 10-15
Fischfilet 400 270 W 5-7 nach der halben Auftauzeit wenden 5-10
Krabben 300 270 W 6-8 nach der halben Auftauzeit wenden 30
und aufgetaute Teile wegnehmen
Brötchen, 2 Stück 80 270 W 1-11/
2
nur antauen Weissbrot,ganz 500 270 W 3-5 nach der halben Auftauzeit wenden, Eiskern bleibt 30
Mischbrot, ganz 1000 270 W 8-10 nach der halben Auftauzeit wenden, Eiskern bleibt 30
Kuchen, 1 Stück 150 270 W 1-3 auf einen Teller legen 5
Obstkuchen,1 Stück 150 270 W 2-3 auf einen Teller legen 10
Butter 250 270 W 1-3 nur antauen 5
Sahne 200 270 W 2+2 den Deckel entfernen; nach 2 Min Auftauzeit in 5-10
eine Schüssel geben und weiter auftauen lassen
Käse in Scheiben 200 270 W 1-2 nur antauen 10
Obst wie Erdbeeren 250 270 W 3-5 gleichmässig nebeneinander legen 5
Himbeeren, Kirschen, Pflaumen nach der halben Auftauzeit wenden
Tiefkühl- Menge Ein- Leistung Zeit Verfahrenshinweise
Snacks -g- stellung -Stufe- -Min-
2. AG-71+72D-EU German 29/03/2005 10:48 Page 80
Page 83

81
D
Rezepte
ABWANDLUNG VON
KONVENTIONELLEN REZEPTEN
Wenn Sie Ihre altbewährten Rezepte auf die Mikrowelle
abwandeln wollen, sollten Sie folgendes beachten:
Die Garzeiten um ein Drittel bis zur Hälfte verkürzen.
Orientieren Sie sich an den Rezepten in diesem Buch.
Flüssigkeitsreiche Lebensmittel wie Fleisch, Fisch,
Geflügel, Gemüse, Obst, Eintöpfe und Suppen können
problemlos in der Mikrowelle zubereitet werden. Bei
flüssigkeitsarmen Lebensmitteln, wie Tellergerichte,
sollte die Oberfläche vor dem Erhitzen oder Garen
angefeuchtet werden.
Die Flüssigkeitszugabe bei rohen Lebensmitteln, die
gedünstet werden, auf etwa zwei Drittel der Menge im
Originalrezept reduzieren. Falls notwendig, während des
Garens Flüssigkeit zugeben.
Die Fettzugabe kann erheblich reduziert werden. Eine
kleine Menge Butter, Margarine oder Öl ist ausreichend,
um der Speise Geschmack zu geben. Deshalb ist die
Mikrowelle hervorragend zur Zubereitung fettarmer
Speisen im Rahmen einer Diät geeignet.
DER UMGANG MIT DEN REZEPTEN
• Alle Rezepte in diesem Buch sind - wenn nicht
anders angegeben - für 4 Portionen berechnet.
• Empfehlungen für das geeignete Geschirr und die
Gesamtgarzeit finden Sie jeweils am Anfang der
Rezepte.
• Es wird in der Regel von verzehrsfertigen Mengen
ausgegangen, ausser wenn speziell etwas anderes
angegeben ist.
• Die in den Rezepten angegebenen Eier haben ein
Gewicht von ca. 55 g (Gewichtsklasse M).
FÜR DEN KOMBIBETRIEB
Im allgemeinen gelten die gleichen Regeln wie für den
Mikrowellenbetrieb. Zusätzlich sollten Sie folgende
Hinweise beachten:
1. Die Mikrowellenleistung sollte auf die Art des
Lebensmittels und die Garzeit abgestimmt
werden. Richten Sie sich nach den Rezepten in
diesem Kochbuchteil.
2. Wenn Sie Speisen im Kombibetrieb Mikrowelle-
Grill zubereiten, sollten Sie folgendes
beachten: Für grosse, dicke Lebensmittel, wie
z.B. Schweinebraten, ist die Mikrowellenzeit
entsprechend länger als für kleine, flache
Lebensmittel. Beim Grill verhält es sich jedoch
umgekehrt. Je näher das Lebensmittel an den
Grill gelangt, desto schneller wird es braun. Das
heisst, wenn Sie grosse Bratenstücke im
Kombibetrieb zubereiten, ist die Grillzeit
gegebenenfalls kürzer als für kleinere Bratenstücke.
3. Für das Grillen benutzen Sie den hohen Rost, um
eine schnelle und gleichmässige Bräunung zu
erzielen (Ausnahme: grosse, dicke Lebensmittel und
Aufläufe werden auch auf dem niedrigen Rost
gegrillt.)
VERWENDETE ABKüRZUNGEN
EL = Eßlöffel ml = Milliliter
TL = Teelöffel cm = Zentimeter
Pr = Prise Durchm = Durchmesser
Ta = Tasse TK = Tiefkühlprodukt
Min = Minuten Msp = Messerspitze
Pck = Päckchen kg = Kilogramm
MW = Mikrowellen g = Gramm
Sec = Sekunden l = Liter
F.i.Tr. = Fett in der Trockenmasse
MWG = Mikrowellengerät
2. AG-71+72D-EU German 29/03/2005 10:48 Page 81
Page 84

82
Suppen & vorspeisen
Schweiz
Bündner gerstensuppe
Gesamtgarzeit: ca. 27-34 Minuten
Geschirr: Schüssel mit Deckel (3 I Inhalt)
Zutaten
2 EL Butter oder Margarine (20 g)
1 Zwiebel (50 g), fein gehackt
1-2 Möhren (130 g), in Scheiben
15 g Sellerie, gewürfelt
1 Porreestange (130 g), in Ringen
3 Weisskohlblätter (100 g), in Streifen
200 g Kalbsknochen
50 g durchwachsener Schinkenspeck, in Streifen
Pfeffer
50 g Gerstenkörner
700 ml Fleischbrühe
4 Wiener Würstchen (300 g)
1. Die Butter und die Zwiebelwürfel in die Schüssel geben
und abgedeckt dünsten.
ca. 1-2 Min. 900 W
2. Das Gemüse in die Schüssel geben. Die Knochen, die
Schinkenspeckstreifen und die Gerste zugeben und mit
Fleischbrühe auffüllen. Mit Pfeffer würzen und
abgedeckt garen.
1. 9-11 Min. 900 W
2. 17-21 Min. 450 W
3. Die Würstchen kleinschneiden und die letzten 5
Minuten darin erhitzen.
4. Die Suppe nach dem Garen ca. 5 Minuten stehen
lassen. Die Knochen vor dem Servieren aus der Suppe
nehmen.
Schweden
Krebssuppe
Gesamtgarzeit: ca. 11-15 Minuten
Geschirr: Schüssel mit Deckel (2 I Inhalt)
Zutaten
1 Zwiebel (50 g), fein gehackt
50 g Möhren, in Scheiben
3 EL Butter oder Margarine (30 g)
500 ml Fleischbrühe
100 ml Weisswein & 100ml Madeira
200 g Krebsfleisch aus der Dose
1
/2
Lorbeerblatt
3 weisse Pfefferkörner
Thymian
3 EL Mehl (30 g)
100 ml Sahne
1. Das Gemüse mit dem Fett (2 EL) in die Schüssel geben
und abgedeckt erhitzen.
2-3 Min. 900 W
2. Die Fleischbrühe, den Wein, den Madeira sowie das
Krebsfleisch und die Gewürze zum Gemüse geben.
Abdecken und garen.
7-9 Min. 450 W
3. Das Lorbeerblatt und die Pfefferkörner aus der Suppe
nehmen. Das Mehl mit wenig kaltem Wasser anrühren
und zur Suppe geben. Die Sahne zufügen, verrühren
und nochmals erhitzen.
2-3 Min. 900 W
4. Die Suppe umrühren und ca. 5 Minuten stehen lassen.
Kurz vor dem Servieren die Butter (1 EL) zugeben.
Frankreich
Zwiebelsuppe
Gesamtgarzeit: ca 14 - 17 Minuten
Geschirr: Schüssel mit Deckel (2 l Inhalt)
4 Suppentassen (à 200 ml)
Zutaten
1 EL Butter oder Margarine
2 Zwiebeln (100 g), in Scheiben
800 ml Fleischbrühe
Salz, Pfeffer
2 Toastscheiben
4 EL geriebener Käse (40 g)
1. Die Butter in der Schüssel verteilen. Die
Zwiebelscheiben, die Fleischbrühe und die Gewürze
dazugeben und abgedeckt garen.
9-11 Min. 900 W
2. Die Toastscheiben toasten, in Würfel schneiden und
auf die Suppentassen verteilen. Die Suppe
darübergiessen und mit dem Käse bestreuen.
3. Die Tassen auf den hohen Rost stellen und die Suppe
gratinieren.
6-7 Min.
2. AG-71+72D-EU German 29/03/2005 10:48 Page 82
Page 85

83
D
Suppen & vorspeisen
Spanien
Champignons mit rosmarin
Gesamtgarzeit: ca. 10-17 Minuten
Geschirr: Schüssel mit Deckel (1 l Inhalt)
Flache runde Schüssel mit Deckel
(Durchm. ca. 22 cm)
Zutaten
8 grosse Champignons (ca. 225g), ganz
2 EL Butter oder Margarine (20 g)
1 Zwiebel (50 g), fein gehackt
50 g Schinken, fein gewürfelt
schwarzer Pfeffer, gemahlen,
Rosmarin, gekerbelt
125 ml Weisswein, trocken
125 ml Sahne
2 EL Mehl (20 g)
1. Die Stiele aus den Champignons herausschneiden und
die Stiele kleinschneiden.
2. Die Butter in die Schüssel geben und auf dem Boden
verstreichen. Die Zwiebel und Schinkenwürfel und die
Champignonstiele zufügen, mit Pfeffer und Rosmarin
würzen, abdecken und garen.
3-5 Min. 900 W
Abkühlen lassen.
3. In der zweiten Schüssel 100 ml Wein und die Sahne
abgedeckt erhitzen.
1-3 Min. 900 W
4. Mit dem restlichen Wein das Mehl anrühren, in die
heisse Flüssigkeit einrühren und abgedeckt garen.
Zwischendurch einmal umrühren.
ca. 1 Min. 900 W
5. Die Champignons mit der Schinkenmischung füllen, in
die Sauce setzen und auf dem hohen Rost gratinieren.
6-8 Min. 270 W
Die Champignons nach dem Garen ca. 2 Minuten
stehen lassen.
Spanien
Gefüllter schinken
Gesamtgarzeit: ca. 13-18 Minuten
Geschirr: Schüssel mit Deckel (2 I Inhalt)
Flache ovale Auflaufform
(ca. 26 cm lang)
Zutaten
150 g Blattspinat, entstielt
150 g Speisequark, 20 % F.i.Tr.
50 g geriebener Emmentaler Käse
Pfeffer
Paprika, edelsüss
8 Scheiben gekochter Schinken (400 g)
125 ml Wasser
125 ml Sahne
2 EL Mehl (20 g)
2 EL Butter oder Margarine (20 g)
1 TL Butter oder Margarine zum Einfetten der
Form
1. Den Spinat fein schneiden, mit dem Quark und dem
Käse verrühren und nach Geschmack würzen.
2. Auf jede Scheibe des gekochten Schinkens einen
Esslöffel der Füllung geben und aufrollen. Mit einem
Holzspiess den Schinken feststecken.
3. Eine Béchamelsauce herstellen. Dafür die Flüssigkeit in
die Schüssel geben, abdecken und erhitzen.
2-4 Min. 900 W
Die Butter mit dem Mehl verkneten, in die Flüssigkeit
geben und mit dem Schneebesen glattrühren, bis sie
sich gelöst hat. Abdecken, aufkochen und binden
lassen.
1-2 Min. 900 W
Umrühren und abschmecken.
4. Die Sauce in die gefettete Auflaufform geben, die
Röllchen hineinsetzen und auf dem Drehteller garen.
10-12 Min. 630 W
Die Schinkenröllchen nach dem Garen ca. 5 Minuten
stehen lassen.
Tipp: Sie können auch fertige Béchamelsauce aus
dem Handel verwenden.
2. AG-71+72D-EU German 29/03/2005 10:48 Page 83
Page 86

84
Fleisch, fisch & geflügel
Griechenland
Auberginen mit hackfleischfüllung
Gesamtgarzeit: ca. 17-22 Minuten
Geschirr: Schüssel mit Deckel (1 I Inhalt)
Flache ovale Auflaufform mit Deckel
(ca. 30 cm lang)
Zutaten
2 Auberginen, ohne Stiele (je ca.250 g)
3 Tomaten (ca. 200 g)
1 TL Olivenöl zum Einfetten der Form
2 Zwiebeln (100 g), gehackt
4 milde grüne Peperoni
200 g Hackfleisch (Rind oder Lamm)
2 Knoblauchzehen, zerdrückt
2 El glatte Petersilie, gehackt
Salz & Pfeffer
Rosenpaprika
60 g griech. Schafskäse, gewürfelt
Tipp: Sie können die Auberginen durch Zucchini
ersetzen.
1. Die Auberginen längs halbieren. Das Fruchtfleisch mit
einem Teelöffel so herauslösen, dass ein etwa 1 cm
breiter Rand zurückbleibt. Die Auberginen salzen. Das
Fruchtfleisch würfeln.
2. Zwei Tomaten häuten, die Stengelansätze
herausschneiden und würfeln.
3. Den Boden der Schüssel mit dem Olivenöl einfetten,
die Zwiebeln zugeben, abdecken und andünsten.
ca. 2 Min. 900 W
4. Die Peperoni entstielen, entkernen und in Ringe
schneiden. Ein Drittel für die Garnierung aufheben. Das
Hackfleisch mit den Auberginen- Zwiebel- und
Tomatenwürfeln, den Peperoniringen, den zerdrückten
Knoblauchzehen und der Petersilie mischen und
würzen.
5. Die Auberginenhälften trockentupfen. Die Hälfte der
Hackfleischmasse einfüllen, den Schafskäse darauf
verteilen, dann die restliche Füllung daraufgeben.
6. Die Auberginenhälften in die gefettete Auflaufform
setzen, auf den niedrigen Rost stellen und garen.
11-13 Min. 630 W
Die Auberginenhälften mit den Peperoniringen und
den Tomatenscheiben garnieren und weitergaren.
4-7 Min. 630 W
Die Auberginen nach dem Garen ca. 2 Minuten stehen
lassen.
Deutsch
Mandelforellen
Gesamtgarzeit: ca. 16-19 Minuten
Geschirr: Flache ovale Auflaufform
(ca. 32 cm lang)
Zutaten
4 Forellen (à 200 g), küchenfertig
Saft einer Zitrone
Salz
30 g Butter oder Margarine
5 EL Mehl (50 g)
1 TL Butter oder Margarine zum Einfetten der
Form
50 g Mandelblättchen
1. Die Forellen waschen und trockentupfen und mit
Zitronensaft beträufeln. Den Fisch innen und aussen
salzen und 15 Minuten stehen lassen.
2. Die Butter schmelzen.
1 Min. 900 W
3. Den Fisch trockentupfen, mit der Butter bestreichen
und im Mehl wälzen.
4. Die Form einfetten, die Forellen hineinlegen und auf
dem niedrigen Rost garen. Nach zwei Drittel der Zeit
wenden und die Mandeln über die Forellen streuen.
15-18 Min. 450 W
Nach Ende der Garzeit die Mandelforellen 2 Minuten
stehen lassen.
Tipp: Dazu passen Petersilien-Kartoffeln und grüner
Salat.
2. AG-71+72D-EU German 29/03/2005 10:48 Page 84
Page 87

85
D
Fleisch, fisch & geflügel
Niederlande
Hackschüssel
Gesamtgarzeit: ca. 20-23 Minuten
Geschirr: Schüssel mit Deckel (2 I Inhalt)
Zutaten
500 g Hackfleisch (halb Schwein, halb Rind)
3 Zwiebeln (150 g), fein gehackt
1Ei
50 g Semmelbrösel
Salz & Pfeffer
350 ml Fleischbrühe
70 g Tomatenmark
2 Kartoffeln (200 g), gewürfelt
2 Möhren (200 g), gewürfelt
2 EL Petersilie, gehackt
1. Das Hackfleisch mit den Zwiebelwürfeln, dem Ei und
den Semmelbröseln zu einem Teig kneten und mit Salz
und Pfeffer würzen. Den Hackfleischteig in die
Schüssel geben.
2. Die Fleischbrühe mit dem Tomatenmark mischen.
3. Die Kartoffeln und Möhren mit der Flüssigkeit auf das
Hackfleisch geben, miteinander vermengen und
abgedeckt garen.
Zwischendurch einmal umrühren.
20-23 Min. 900 W
Die Hackschüssel nochmals umrühren, und ca. 5
Minuten stehen lassen. Mit Petersilie bestreut
servieren.
Österreich
Gefülltes brathähnchen
(2 Portionen)
Gesamtgarzeit: ca. 36-40 Minuten
Geschirr: Schüssel (2 I Inhalt) Zwirnsfaden
Zutaten
1 Hähnchen (1000 g)
Salz
Rosmarin, gekerbelt & Majoran, gekerbelt
1 altbackenes Brötchen (Semmel, 40 g)
1 Bund Petersilie, fein gehackt (10 g)
1 Pr. Muskatnuss
5 EL Butter oder Margarine (50 g)
1 Eigelb
1 EL Paprika, edelsüss
1 TL Butter oder Margarine zum Einfetten
der Form
1. Das Hähnchen waschen, trockentupfen und innen mit
Salz, Rosmarin und Majoran würzen.
2. Für die Füllung das Brötchen ca. 10 Minuten in kaltem
Wasser einweichen, danach ausdrücken. Mit Salz,
Petersilie, Muskatnuss, Butter (20 g) und Eigelb
mischen und das Hähnchen damit füllen. Die Öffnung
mit Bindfaden oder Fleischerrollfaden zunähen.
3. Die Butter (30 g) erhitzen.
ca. 1 Min. 900 W
Paprika und Salz unter die Butter rühren und das
Hähnchen damit bestreichen.
4. Das Hähnchen in der gefetteten Schüssel offen garen.
Nach der Hälfte der Garzeit wenden.
35-39 Min. 630 W
Das gefüllte Brathähnchen nach dem Garen ca. 3
Minuten stehen lassen.
2. AG-71+72D-EU German 29/03/2005 10:48 Page 85
Page 88

86
Fleisch, fisch & geflügel
Deutschland
Bunte fleischspiesse
Gesamtgarzeit: 17-18 Minuten
Geschirr: Hoher Rost
Vier Holzspiesse (ca. 25 cm lang)
Zutaten
400 g Schweineschnitzel
100 g Schinkenspeck
2 Zwiebeln (100 g) geviertelt
4 Tomaten (250 g) geviertelt
1
/2 grüne Paprikaschote (100 g), geachtelt
2 EL Öl
4 TL Paprika, edelsüss
Salz
1 TL Cayennepfeffer
1 TL Worcestersauce
1. Das Schnitzelfleisch und den Schinkenspeck in etwa 23 cm grosse Würfel schneiden.
2. Das Fleisch und das Gemüse abwechselnd auf vier
Holzspiesse stecken.
3. Das Öl mit den Gewürzen verrühren und die Spiesse
damit bestreichen. Die Spiesse auf den hohen Rost
legen und mit dem
AUTOKOCHPLUS-GRILL 2
Schweiz
Züricher geschnetzeltes
Gesamtgarzeit: ca. 9-14 Minuten
Geschirr: Schüssel mit Deckel (2 I Inhalt)
Zutaten
600 g Kalbsfilet
1 EL Butter oder Margarine
1 Zwiebel (50 g), fein gehackt
100 ml Weisswein
gewürtzter Saucenbinder, dunkel, für ca.
1
/2 I Sauce
300 ml Sahne
1 EL Petersilie, gehackt
1. Das Filet in fingerdicke Streifen schneiden.
2. Die Butter in der Schüssel gleichmässig verstreichen.
Die Zwiebel und das Fleisch in die Schüssel geben und
abgedeckt garen. Zwischendurch einmal umrühren.
6-9 Min. 900 W
3. Den Weisswein, den Saucenbinder und die Sahne
zufügen, umrühren und abgedeckt weitergaren.
Zwischendurch einmal umrühren.
3-5 Min. 900 W
4. Das Geschnetzelte abschmecken, nochmals umrühren
und ca. 5 Minuten stehen lassen. Mit der Petersilie
garniert servieren.
Italien
Kalbsschnitzel mit mozzarella
Gesamtgarzeit: ca. 24-31 Minuten
Geschirr: Flache, quadratische Auflaufform mit
Deckel (ca. 25 cm lang)
Zutaten
2 Mozzarella-Käse (à 150 g)
500 g geschälte Tomaten, aus der Dose
(ohne Flüssigkeit)
4 Kalbsschnitzel (600 g)
20 ml Olivenöl
2 Knoblauchzehen, in Scheiben
Pfeffer, frisch gemahlen
2 EL Kapern (20 g)
Oregano, Salz
1. Den Mozzarella in Scheiben schneiden. Die Tomaten
mit dem Pürierstab eines Handrührgerätes pürieren.
2. Die Schnitzel waschen, trockentupfen und
flachklopfen. Das Öl und die Knoblauchscheiben in der
Auflaufform verteilen. Die Schnitzel hineinlegen und
das Tomatenpüree darauf verteilen. Mit Pfeffer, Kapern
und Oregano bestreuen und abgedeckt auf dem
niedrigen Rost garen.
15-19 Min. 630 W
Die Fleischscheiben wenden.
3. Auf jedes Stück Fleisch einige Scheiben Mozzarella
legen, salzen und offen auf dem hohen Rost grillen.
9-12 Min. 630 W
Nach dem Garen ca. 5 Minuten stehen lassen.
Tipp: Dazu können Sie Spaghetti und einen frischen Salat
reichen.
2. AG-71+72D-EU German 29/03/2005 10:48 Page 86
Page 89

87
D
Fleisch, fisch & geflügel
Frankreich
Seezungenfilets
(für 2 Portionen)
Gesamtgarzeit: ca. 11-13 Minuten
Geschirr: Flache ovale,
Auflaufform mit Deckel (ca. 26 cm lang)
Zutaten
400 g Seezungenfilets
1 Zitrone, unbehandelt
2 Tomaten (150 g)
1 TL Butter oder Margarine zum Einfetten der
Form
1 EL Pflanzenöl
1 EL Petersilie, gehackt
Salz & Pfeffer
4 EL Weisswein (30 ml)
2 EL Butter oder Margarine (20 g)
1. Die Seezungenfilets waschen und trockentupfen.
Vorhandene Gräten entfernen.
2. Die Zitrone und die Tomaten in feine Scheiben
schneiden.
3. Die Auflaufform mit Butter einfetten. Die Fischfilets
hineinlegen und mit dem Pflanzenöl beträufeln.
4. Den Fisch mit der Petersilie bestreuen, darauf die
Tomatenscheiben legen und würzen. Auf die Tomaten
die Zitronenscheiben legen und mit dem Weisswein
angiessen.
5. Die Zitronen mit Butterflöckchen belegen, abdecken
und garen.
11-13 Min. 630 W
Die Fischfilets nach dem Garen ca. 2 Min. stehen
lassen.
Tipp: Für dieses Gericht können Sie auch Rotbarsch,
Heilbutt, Meeräsche, Scholle oder Kabeljau
verwenden.
Italien
Wachteln in käse-kräutersauce
Gesamtgarzeit: ca. 27-33 Minuten
Geschirr: Zwirnsfaden
Flache runde Auflaufform
(Durchm. ca. 22 cm)
Schüssel mit Deckel (2 I Inhalt)
Zutaten
4 Wachteln (600 g)
Salz & Pfeffer
200 g durchwachsener Speck, dünne
Scheiben
1 TL Butter/Margarine zum Einfetten der Form
1 EL frische Petersilie
Rosmarin & Basilikum, fein gehackt &
Salbei
150 ml Portwein
250 ml Fleischbrühe
2 EL Butter oder Margarine (20 g)
2 EL Mehl (20 g)
50 g geriebener Emmentaler Käse
1. Die Wachteln waschen und sorgfältig trockentupfen.
Aussen und innen salzen und pfeffern, mit
Speckscheiben umwickeln und mit Zwirnsfaden
festbinden.
2. Die Auflaufform einfetten, die Wachteln hineinlegen
und andünsten. Zwischendurch wenden.
10-12 Min. 900 W
3. Die Kräuter fein hacken, über die Wachteln streuen
und den Portwein darübergiessen. Die Wachteln
weitergaren.
13-15 Min. 630 W
Die Wachteln aus dem Bratenfond nehmen.
4. Für die Sauce die Fleischbrühe in der Schüssel
abgedeckt erhitzen.
2-3 Min. 900 W
Die Butter mit dem Mehl verkneten, in die Flüssigkeit
rühren, aufkochen lassen und garen. Zwischendurch
einmal umrühren.
1-2 Min. 900 W
5. Den Käse in die Sauce rühren. Die Käsesauce zum
Bratenfond geben, alles gut verrühren, und nochmals
erhitzen.
ca. 1 Min. 900 W
6. Die Sauce über die Wachteln giessen und servieren.
2. AG-71+72D-EU German 29/03/2005 10:48 Page 87
Page 90

88
Fleisch, fisch & geflügel
Schweiz
Fischfilet mit käsesauce
Gesamtgarzeit: ca. 21-25 Minuten
Geschirr: Schüssel mit Deckel (1 l Inhalt)
Flache ovale Auflaufform
(ca. 25 cm lang)
Zutaten
4 Fischfilets (ca. 800 g)
(z.B. Egli, Flunder oder Kabeljau)
2 EL Zitronensaft
Salz
1 EL Butter oder Margarine
1 Zwiebel (50 g), fein gehackt
2 EL Mehl (20 g)
100 ml Weisswein
1 TL Pflanzenöl zum Einfetten der Form
100 g geriebener Emmentaler Käse
2 EL gehackte Petersilie
1. Die Filets waschen, trockentupfen und mit Zitronensaft
beträufeln. Etwa 15 Min. stehen lassen, nochmals
trockentupfen und salzen.
2. Die Butter auf dem Boden der Schüssel verteilen. Die
Zwiebelwürfel hineingeben und abgedeckt andünsten.
1-2 Min. 900 W
3. Das Mehl über die Zwiebeln streuen und verrühren.
Den Weisswein dazugiessen und mischen.
4. Die Auflaufform einfetten und die Filets hineinlegen.
Die Sauce über die Filets giessen und mit Käse
bestreuen. Auf den niedrigen Rost stellen und garen.
1. 7-8 Min. 450 W anschliessend
2. 14-16 Min. 450 W
Die Fischfilets nach dem Garen ca. 2 Minuten stehen
lassen. Mit gehackter Petersilie garniert servieren.
Deutschland
Zucchini-nudel-auflauf
Gesamtgarzeit: ca. 37 - 44 Minuten
Geschirr: Schüssel mit Deckel (2 l Inhalt)
Auflaufform (ca. 26 cm lang)
Zutaten
500 ml Wasser
1
/2 TL Öl
80 g Makkaroni
400 g Tomaten, aus der Dose, zerkleinert
3 Zwiebeln (150 g), fein gehackt
Basilikum, Thymian, Salz, Pfeffer
1 EL Öl zum Einfetten der Form
450 g Zucchini, in Scheiben
150 g Sauerrahm
2 Eier
100 g geriebener Cheddar
1. Das Wasser, das Öl und das Salz in die Schüssel geben
und abgedeckt zum Kochen bringen.
3-4 Min. 900 W
2. Die Makkaroni in Stücke brechen, zugeben, umrühren
und quellen lassen.
9 -11 Min. 270 W
Die Nudeln abtropfen und abkühlen lassen.
3. Die Tomaten mit den Zwiebeln verrühren und gut
würzen. Die Makkaroni hineingeben und mit der
Tomatensauce begiessen. Die Zucchinischeiben darauf
verteilen.
4. Den Sauerrahm mit den Eiern verschlagen und über
den Auflauf giessen. Den geriebenen Käse
darüberstreuen. Auf den niedrigen Rost stellen und
garen.
1.18-21 Min. 900 W anschliessend
2. 7-8 Min. 630 W
Den Auflauf nach dem Garen etwa 5-10 Minuten
stehen lassen.
Gemüse, nudeln, reis und knödel
2. AG-71+72D-EU German 29/03/2005 10:48 Page 88
Page 91

89
D
Gemüse, nudeln, reis und knödel
Österreich
Semmelknödel
Gesamtgarzeit: ca. 8-11 Minuten (für 5 Portionen)
Geschirr: Schüssel mit Deckel (1 I Inhalt)
5 Tassen oder Puddingförmchen
Zutaten
2 EL Butter oder Margarine (20 g)
1 Zwiebel (50 g), fein gehackt
ca. 500 ml Milch
200 g getrocknete Semmelwürfel
(von ca. 5 Semmeln = Brötchen)
3 Eier
1. Die Semmel in kleine Würfel schneiden und mit der
Milch begiessen.
2. Das Fett auf dem Boden der Schüssel verteilen, die
Zwiebelwürfel zugeben, abdecken und dünsten.
1-2 Min. 900 W
3. Die Zwiebeln zu den Brotwürfeln geben. Die Eier
verschlagen, zugeben und alles gut verrühren, bis ein
geschmeidiger Teig entsteht. Bei Bedarf etwas Milch
zugeben.
4. Die Teigmasse gleichmässig in 5 Tassen oder
Puddingförmchen verteilen, mit Mikrowellenfolie
abdecken, am Drehtellerrand anordnen und garen.
6-8 Min. 900 W
Die Knödel nach dem Garen ca. 2 Min. stehen lassen.
Vor dem Servieren die Knödel auf einen Teller stürzen.
Italien
Lasagne al forno
Gesamtgarzeit: ca. 18-25 Minuten
Geschirr: Schüssel mit Deckel (2 I Inhalt)
Flache, quadratische Auflaufform mit
Deckel (ca. 20x20x6 cm)
Zutaten
300 g Tomaten aus der Dose
50 g Schinken, fein gewürfelt
1 Zwiebel (50 g), fein gehackt
1 Knoblauchzehe, zerdrückt
250 g Hackfleisch vom Rind
2 EL Tomatenmark (30 g)
Salz & Pfeffer
Oregano & Thymian & Basilikum
150 ml Rahm (Crème fraîche)
100 ml Milch
50 g geriebener Parmesankäse
1 TL gemischte gehackte Kräuter
1 TL Olivenöl
Salz & Pfeffer
Musskatnuss
1 TL Pflanzenöl zum Einfetten der Form
125 g grüne Plattennudeln
1 EL geriebener Parmesankäse
1 EL Butter oder Margarine
1. Die Tomaten in Scheiben schneiden, mit den Schinkenund Zwiebelwürfeln, dem Knoblauch, dem Rinderhack
und dem Tomatenmark mischen. Würzen, und
abgedeckt dünsten.
5-8 Min. 900 W
2. Den Rahm mit der Milch, dem parmesankäse, den
Kräutern und dem Öl verrühren und würzen.
3. Die Auflaufform fetten. den Boden der Form mit einem
Drittel der Nudelplatten auslegen. Die Hälfte der
Hackfleischmasse auf die Nudeln geben und mit etwas
Sauce begiessen. Das zweite Drittel der Nudeln
darüberlegen und nacheinander die Hackfleischmasse,
etwas Sauce und die restlichen Nudeln
obenaufschichten. Zum Abschluss die Nudeln mit viel
Sauce bedecken und mit Parmesankäse bestreuen.
Butterflöckchen obenaufsetzen und abgedeckt garen.
13-17 Min. 630 W
Die Lasagne nach dem Garen etwa 5 bis 10 Minuten
ruhen lassen.
2. AG-71+72D-EU German 29/03/2005 10:48 Page 89
Page 92

90
Gemüse, nudeln, reis und knödel
Griechenland
KaRtoffel-knoblauch-paste
Gesamtgarzeit: ca. 8-10 Minuten
Geschirr: Schüssel mit Deckel (1 I Inhalt)
Zutaten
400 g Pellkartoffeln
2-3 EL Wasser
2-3 knoblauchzehen
6 EL Olivenöl
6 EL Fleischbrühe
Salz
Saft von einer Zitrone
1 milde Peperoni
1. Die Kartoffeln und das Wasser in die Schüssel geben,
abdecken und garen. Zwischendurch einmal umrühren.
8-10 Min. 900 W
2. Die Kartoffeln pellen und noch heiss durch eine
Kartoffelpresse oder durch ein feines Sieb drücken.
3. Die Knoblauchzehen mit der Knoblauchpresse
zerdrücken und zu den Kartoffeln geben.
4. Das Olivenöl, die Fleischbrühe, Salz und Zitronensaft
nach Geschmack mit den Kartoffeln verrühren, bis eine
geschmeidige Masse entsteht. Eventuell noch etwas Öl
oder Fleischbrühe zugeben.
5. Die Paste mit Peperoniringen garniert servieren.
Schweiz
Kohlrabi in dillsauce (2 Portionen)
Gesamtgarzeit: ca. 101/2-131/2 Minuten
Geschirr: 2 Schüsseln mit Deckel (1 I Inhalt)
Zutaten
400 g Kohlrabi, in Scheiben (ca. 2 Stück)
4-5 EL Wasser
2 EL Butter oder Margarine (20 g)
150 ml Rahm (Crème fraîche)
Salz, Pfeffer, Muskat & Paprikapulver
einige Tropfen Zitronensaft
1 Bund Dill, fein gehackt
1. Den Kohlrabi mit dem Wasser in die Schüssel geben
und abgedeckt garen. Zwischendurch einmal
umrühren.
9-12 Min. 900 W
Die Flüssigkeit abgiessen.
2. Die Butter in der Schüssel verteilen, den Rahm
zugeben und offen erhitzen. Nicht kochen lassen!
ca. 1
1
/2 Min. 900 W
3. Die Sauce mit Salz, den Gewürzen und dem
Zitronensaft abschmecken. Den Dill unterheben, und
die Sauce über den Kohlrabi giessen. Den Kohlrabi nach
dem Garen ca. 2 Minuten stehen lassen.
Tipp: Der Kohlrabi kann durch Schwarzwurzeln ersetzt
werden.
Italien
Tagliatelle mit sahne und basilikum
(für 2 Portionen)
Gesamtgarzeit: ca. 16-22 Minuten
Geschirr: Schüssel mit Deckel (2 I Inhalt)
Runde Souffléform (Durchm. ca. 20 cm)
Zutaten
1 I Wasser
1 TL Salz
200 g Tagliatelle (Bandnudeln)
1 Knoblauchzehe
15-20 Basilikumblätter
200 g Rahm (Crème fraîche)
30 g geriebener Parmesankäse
Salz & Pfeffer
1. Das Wasser mit dem Salz in die Schüssel geben,
abdecken und zum Kochen bringen.
9-11 Min. 900 W
2. Die Nudeln zufügen, nochmals ankochen
und garziehen lassen.
1. 1-2 Min. 900 W
2. 6-9 Min. 270 W
3. In der Zwischenzeit die Souffléform mit der
Knoblauchzehe ausreiben. Die Basilikumblätter
kleinschneiden. Etwas zur Garnierung beiseitestellen.
4. Die Nudeln gut abtropfen lassen. Den Rahm
unterrühren und die Nudeln mit dem Basilikum
bestreuen.
5. Den Parmesankäse, Salz und Pfeffer hinzufügen, in die
Souffléform füllen und umrühren. Das Gericht mit
Basilikum garnieren und heiss servieren.
2. AG-71+72D-EU German 29/03/2005 10:48 Page 90
Page 93

91
D
Gemüse, nudelin, reis und knödel
Schweiz
Tessiner risotto
Gesamtgarzeit ca. 20-25 Minuten
Geschirr: Schüssel mit Deckel (2 I Inhalt)
Zutaten
50 g durchwachsener Speck
2 EL Butter oder Margarine (20 g)
1 Zwiebel (50 g), fein gehackt
200 g Rundkornreis (Arboris)
400 ml Fleischbrühe
70 g Sbrinz, gerieben, (ersatzweise geriebener
Emmentaler Käse)
1 Prise Safran
Salz & Pfeffer
1. Den Speck würfeln. Die Butter auf dem Boden der
Schüssel verstreichen. Die Zwiebel- und Speckwürfel
hineingeben und abgedeckt andünsten.
2-3 Min. 900 W
2. Den Reis zugeben, mit der Fleischbrühe auffüllen,
ankochen und garziehen lassen.
1.3-5 Min. 900 W anschliessend
2.15-17 Min. 270 W
Den Reis nach dem Garen ca. 2 Minuten stehen lassen.
3. Den Käse und den Safran untermischen und
abschmecken.
Tipp: Dazu passen geschmorte Pfifferlinge oder
Champignons und ein gemischter Salat.
Spanien
WeiSSe pfirsichberge
(ergibt ca. 8 Stück)
Gesamtgarzeit: ca. 3-5 Minuten
Geschirr: Runde flache Glasform
(Durchm. ca. 24 cm)
Zutaten
470 g Pfirsichhälften, abgetropft, aus der Dose
2 Eiweiss
70 g Zucker
75 g gemahlene Mandeln
2 Eigelb
2 EL Cognac
1 TL Butter oder Margarine zum
Einfetten der Form
1. Die Pfirsichhälften trockentupfen.
2. Das Eiweiss steifschlagen. Zum Schluss etwas Zucker
(35 g) einrieseln lassen.
3. Die Mandeln, den restlichen Zucker (35 g), das Eigelb
und den Cognac miteinander verrühren.
4. Die Pfirsichhälften mit der Mischung füllen. Den
Eischnee mit einem Spritzbeutel auf die Füllungen
spritzen.
5. Die Form einfetten. Die Pfirsiche in die Glasform setzen
und auf dem niedrigen Rost gratinieren.
3-5 Min. 630 W
Getränke, desserts & kuchen
2. AG-71+72D-EU German 29/03/2005 10:48 Page 91
Page 94

92
Getränke, desserts & kuchen
Deutschland
Griessflammeri mit himbeersauce
Gesamtgarzeit: ca. 15-20 Minuten
Geschirr: Schüssel mit Deckel (2 I Inhalt)
Zutaten
500 ml Milch
40 g Zucker
15 g mandeln, gehackt
50 g Griess
1 Eigelb
1 EL Wasser
1 Eiweiss
250 g Himbeeren
50 ml Wasser
40 g Zucker
1. Milch, Zucker und Mandeln in die Schüssel geben und
abgedeckt erhitzen.
3-5 Min. 900 W
2. Den Griess hineingeben, umrühren und abgedeckt
garen, zwischendurch einmal umrühren.
10-12 Min. 270 W
3. Das Eigelb mit dem Wasser in einer Tasse verrühren
und unter den heissen Brei rühren. Eiweiss
steifschlagen und locker unterheben. Den
Griessflammeri in Schälchen umfüllen.
4. Für die Sauce die Himbeeren waschen, vorsichtig
trockentupfen und mit Wasser und Zucker in eine
Schüssel geben. Abgedeckt erhitzen.
2-3 Min. 900 W
5. Die Himbeeren pürieren und entweder kalt oder heiss
zum Griessflammeri servieren.
Frankreich
Birnen in schokolade
Gesamtgarzeit: ca. 8-13 Minuten
Geschirr: Schüssel mit Deckel (2 I Inhalt)
Schüssel mit Deckel (1 I Inhalt)
Zutaten
4 Birnen (600 g)
60 g Zucker
1 Pck. Vanillezucker (10 g)
1 EL Birnenlikör, 30 % Vol
150 ml Wasser
130 g Zartbitterschokolade
100 g Rahm (Crème fraîche)
Tipp: Dazu kann noch eine Kugel Vanilleeis gereicht
werden.
1. Die Birnen im Ganzen schälen.
2. Den Zucker, den Vanillezucker, den Likör und das
Wasser in die Schüssel geben, verrühren und
abgedeckt erhitzen.
1-2 Min. 900 W
3. Die Birnen in die Flüssigkeit setzen und abgedeckt
garen.
5-8 Min. 900 W
Die Birnen aus dem Sud nehmen und kalt stellen.
4. 50 ml von dem Birnensud in die kleinere Schüssel
geben. Die zerkleinerte Schokolade und den Rahm
zufügen und abgedeckt erhitzen.
2-3 Min. 900 W
5. Die Sauce gut umrühren. Die Birnen mit der Sauce
übergiessen und servieren.
Österreich
Schokolade mit sahne
(für 1 Portion)
Gesamtgarzeit: ca. 1 Minute
Geschirr: Grosse Tasse (200 ml Inhalt)
Zutaten
150 ml Milch
30 g Zartbitterschokolade, geraspelt
30 ml Sahne
Schokoladenstreusel
1. Die Milch in die Tasse giessen. Die Blockschokolade, zur
Milch geben, umrühren und erhitzen. Zwischendurch
nochmals umrühren.
ca. 1 Min. 900 W
2. Die Sahne steifschlagen, auf die Schokolade geben und
mit Schokoladenstreuseln garniert servieren.
2. AG-71+72D-EU German 29/03/2005 10:48 Page 92
Page 95

93
D
Getränke, desserts & kuchen
Schweden
Pistazienreis mit erdbeeren
Gesamtgarzeit: ca. 27-31 Minuten
Geschirr: Schüssel mit Deckel (2 I Inhalt)
Zutaten
125 g Langkornreis
150 ml Milch
175 ml Wasser
1 Vanilleschote
1 Prise Salz
50 g Zucker
250 g Erdbeeren
40 g Zucker
40 ml Cointreau (Orangenlikör, 40 % Vol)
200 ml Sahne
1 Eiweiss
50 g Pistazienkerne
1. Den Reis in die Schüssel geben und mit der Flüssigkeit
auffüllen. Die Vanilleschote aufschlitzen, mit dem Salz
und dem Zucker zum Reis geben und abgedeckt garen,
zwischendurch einmal umrühren.
1. 3-5 Min. 900 W
2. 24-26 Min. 270 W
Den Reis nach dem Garen 5 Minuten stehen lassen.
2. Die Erdbeeren halbieren, mit Zucker und Orangenlikör
mischen.
3. Die Vanilleschote aus dem Reis herausnehmen und den
Reis im Wasserbad unter Rühren erkalten lassen. Die
Sahne und das Eiweiss getrennt steifschlagen. Zuerst
die Pistazien, dann die Sahne und zum Schluss das
Eiweiss unter den kalten Reis heben.
4. Den Reis in einer grossen Schüssel anrichten, eine
Vertiefung hineindrücken und die Erdbeeren in die
Vertiefung legen.
Niederlande
Feuertrunk
(für10 Portionen)
Gesamtgarzeit: ca. 8-10 Minuten
Geschirr: Schüssel mit Deckel (2 I Inhalt)
Zutaten
500 ml Weisswein
500 ml Rotwein, trocken
500 ml Rum, 54 % Vol
1 unbehandelte Apfelsine
3 Stangen Zimt
75 g Zucker
10 TL Kluntjes (Kandiszucker)
1. Den Alkohol in die Schüssel giessen. Die Apfelsine
dünn schälen, und die Apfelsinenschale mit dem Zimt
und dem Zucker zum Alkohol geben. Den Feuertrunk
abgedeckt erhitzen.
8-10 Min. 900 W
2. Die Apfelsinenschale und den Zimt herausnehmen. In
die Groggläser jeweils einen Teelöffel Kluntjes geben,
den Feuertrunk hineingiessen und servieren.
2. AG-71+72D-EU German 29/03/2005 10:48 Page 93
Page 96

94
Getränke, desserts & kuchen
Dänemark
Beerengrütze mit vanillesauce
Gesamtgarzeit: ca. 8-12 Minuten
Geschirr: Schüssel mit Deckel (2 I Inhalt)
Zutaten
150 g Johannisbeeren, rot, gewaschen und verlesen
150 g Erdbeeren, gewaschen und verlesen
150 g Himbeeren, gewaschen und verlesen
250 ml Weisswein
100 g Zucker
50 ml Zitronensaft
8 Blatt Gelatine
300 ml Milch
Mark einer 1/2 Vanilleschote
30 g Zucker
15 g Speisestärke
Tipp: Sie können auch gefrorenes Obst verwenden,
wenn dieses zuvor aufgetaut wurde.
1. Einige Früchte zum Garnieren zurückbehalten. Die
restlichen Beeren mit dem Weisswein pürieren, in die
Schüssel geben und abgedeckt erhitzen.
5-7 Min. 900 W
Den Zucker und den Zitronensaft unterziehen.
2. Die Gelatine in kaltem Wasser ca. 10 Minuten
einweichen, danach herausnehmen und ausdrücken.
Die Gelatine in das heisse Früchtepüree rühren, bis sie
sich gelöst hat. Die Grütze in den Kühlschrank stellen
und fest werden lassen.
3. Für die Vanillesauce die Milch in eine Schüssel geben.
Die Vanilleschote aufschlitzen und das Mark
herauskratzen. Das Vanillemark, den Zucker und die
Speisestärke in die Milch einrühren und abgedeckt
garen. Zwischendurch und zum Schluss noch einmal
umrühren.
3-5 Min. 900 W
4. Die Grütze auf einen Teller stürzen und mit den
ganzen Früchten garnieren. Die Vanillesauce dazu
reichen.
Deutschland
Käsekuchen
(für 12 Portionen)
Gesamtgarzeit: ca. 21-27 Minuten
Geschirr: Runde Backform (Durchm. ca. 26 cm)
Zutaten
300 g Mehl
1 EL Kakao
3 TL Backpulver (9 g)
150 g Zucker
1Ei
150 g Butter oder Margarine
1 TL Butter oder Margarine zum
Einfetten der Form
100 g Butter oder Margarine
100 g Zucker
1 Pck. Vanillezucker (10 g)
3 Eier
400 g Speisequark, 20 % F.i.Tr.
1 Pck. Vanillepuddingpulver (40 g)
1. Das Mehl mit dem Kakao und dem Backpulver
mischen. Den Zucker, das Ei und die Butter zugeben
und mit dem Knethaken des Handrührgerätes
verrühren.
2. Die Form einfetten, etwa 2/3 des Teiges hineingeben
und auf dem Boden andrücken. Einen Rand von 2 cm
hochdrücken und den Teig vorbacken.
6-8 Min. 630 W
3. Für die Füllung die Butter mit dem Schneebesen des
Handrührgerätes schaumig rühren, den Zucker
dazugeben und die Eier nach und nach einrühren. Zum
Schluss den Quark und das Puddingpulver
unterrühren.
4. Die Quarkmasse auf dem vorgegarten Teig verteilen,
die restlichen Teigkrümel auf dem Kuchen verteilen
und backen.
15-19 Min. 630 W
2. AG-71+72D-EU German 29/03/2005 10:48 Page 94
Page 97

95
D
Getränke, desserts & kuchen
Grossbritannien
Schokoladenkuchen mit eis
(für 12 Portionen)
Gesamtgarzeit: ca. 15-21 Minuten
Geschirr: Gugelhupfform (Durchm. ca. 21 cm,
10 cm hoch)
2 Schüsseln mit Deckel (1 I Inhalt)
Zutaten
175 g Butter oder Margarine
175 g Zucker
3 Eier
175 g Mehl
1 TL Backpulver
2 EL Kakao (20 g)
50 ml Milch
500 ml Vanilleeis
65 g tiefgekühlte Himbeeren
250 g Kuvertüre, halbbitter
Variationen:
a) Kirschkuchen: Den Kakao durch 1TL Vanilleessenz
ersetzen und 50 g gehackte Kirschen (kandiert) zum
Teig geben. Mit weisser Schokolade überziehen.
b) Kaffeekuchen: 2 EL Instantkaffee in 2 EL heissem
Wasser aufgelöst dazugeben. Die Milchmenge auf
einen Esslöffel reduzieren.
Mit brauner Schokolade überziehen.
c) Nusskuchen: 50 g Walnüsse dazugeben. Mit
Nusskuvertüre überziehen.
1. Die Butter schaumig rühren und den Zucker langsam
unterrühren. Die Eier nach und nach zufügen und gut
verrühren. Mehl, Backpulver und Kakao mischen und
dazugeben. Die Milch zugiessen und alles gut
verrühren.
2. Die Form einfetten, den Teig einfüllen und garen.
8-10 Min. 630 W
Prüfen Sie mit einem Holzstäbchen, ob der Teig gar ist.
3. Den Kuchen in der Form 10 Minuten ruhen lassen,
dann aus der Form stürzen. Bis zum Füllen vollständig
auskühlen lassen.
4. Den unteren Rand des Kuchens 2 cm waagerecht
abschneiden und beiseite legen. Den Kuchen drehen, 1
cm vom inneren und äusseren Rand entfernt senkrecht
einschneiden und das Innere mit dem Löffel
herausheben.
5. Die Eiscreme in die Schüssel geben und antauen.
ca. 1 Min. 270 W
Die Eiscreme in den Kuchen füllen und die Himbeeren
in das Eis drücken. Den Boden darauflegen und den
Kuchen umdrehen.
6. Die Kuvertüre in die zweite Schüssel geben und
schmelzen lassen.
3-6 Min. 450 W
Umrühren und den Kuchen damit überziehen.
7. Den Kuchen einfrieren und vor dem Servieren antauen.
3-4 Min. 270 W
Tipp (Schokoladenkuchen mit Eis):
Dieser Kuchen schmeckt auch ohne Füllung sehr lecker.
Deutschland
HeiSSe zitrone
Gesamtgarzeit: ca. 1 Minute (für 1 Portion)
Geschirr: Teeglas (150 ml Inhalt)
Zutaten
100 ml Wasser
Saft einer Zitrone
2-3 TL Zucker
1. Wasser und Zitronensaft in eine Tasse geben und
erhitzen.
ca. 1 Min. 900 W
Zucker nach Geschmack einrühren.
2. AG-71+72D-EU German 29/03/2005 10:48 Page 95
Page 98

96
Reinigung und Pflege
VORSICHT: ZUR REINIGUNG DÜRFEN KEINESFALLS
KOMMERZIELLE OFENREINIGER, DAMPFREINIGER,
SCHEUERMITTEL, SCHARFE REINIGUNGSMITTEL,
NATRIUMHYDROXID ENTHALTENDE
REINIGUNGSMITTEL ODER SCHEUERSCHWÄMME
VERWENDET WERDEN. DIES GILT FÜR ALLE TEILE
DES GERÄTS.
Gerätegehäuse
Die Aussenseite des Gerätes mit einer milden
Seifenlauge reinigen. Die Seifenlauge gründlich mit
einem feuchten Tuch abwischen und mit einem
Handtuch nachtrocknen.
Bedienfeld
Öffnen Sie vor dem Reinigen die Gerätetür, um das
Bedienfeld zu deaktivieren. Beim Reinigen des
Bedienfeldes vorsichtig verfahren. Das Bedienfeld mit
einem feuchten Tuch reinigen. Niemals zuviel Wasser
und keine chemischen oder scheuernden Reiniger
verwenden, da das Bedienfeld dadurch beschädigt
werden kann.
Garraum
1. Nach jedem Gebrauch das noch warme Gerät zur
Reinigung mit einem weichen, feuchten Tuch oder
Schwamm abwischen, um leichte Verschmutzungen
zu entfernen. Für starke Verschmutzungen eine
milde Seifenlauge verwenden und mehrmals mit
einem weichen, feuchten Tuch oder Schwamm
gründlich nachwischen, bis alle Rückstände
vollständig entfernt sind. Entfernen Sie nicht den
Spritzschutz für den Hohlleiter.
2. Sicherstellen, dass weder Seifenlauge noch Wasser
durch die kleinen Öffnungen an der Wand
eindringen, da dies das Gerät beschädigen kann.
3. Verwenden Sie keine Sprühreiniger im Garraum.
4. Erhitzen Sie Ihr Gerät regelmässig unter Verwendung
des Grills, siehe HINWEIS 2 auf Seite 68. Speisereste
oder Fettspritzer können Rauch oder unangenehme
Gerüche verursachen.
Drehteller und Drehteller-Träger
Entfernen Sie zuerst den Drehteller und den DrehtellerTräger aus dem Garraum. Den Drehteller und den Träger
mit einer milden Seifenlauge reinigen und mit einem
weichen Tuch trocknen. Beide Teile sind
spülmaschinenfest.
Gerätetür
Die Tür auf beiden Seiten, die Türdichtung und die
Dichtungsoberflächen des öfteren mit einem feuchten
Tuch abwischen, um Verschmutzungen zu entfernen.
Roste
Die Roste mit einem milden Spülmittel reinigen und
nachtrocknen. Die Roste sind spülmaschinengeeignet.
HINWEIS: Dampfreiniger dürfen nicht verwendet
werden.
2. AG-71+72D-EU German 29/03/2005 10:48 Page 96
Page 99

97
D
Was tun, wenn…
... das Mikrowellengerät nicht arbeitet?
Überprüfen Sie, ob
– der Netzstecker eingesteckt ist,
– die Sicherungen in der Installation in
Ordnung sind,
– eventuell der Strom ausgefallen ist, Sollten
die Sicherungen mehrfach auslösen, rufen
Sie bitte einen zugelassenen
Elektroinstallateur.
– die Kindersicherung programmiert ist.
... die Mikrowelle nicht arbeitet?
Überprüfen Sie, ob
– die Tür richtig geschlossen ist,
– peisereste oder Fremdkörper in der Tür
klemmen,
– die Türdichtungen und Türdichtungsflächen
sauber sind,
– die START/QUICK-Taste gedrückt wurde.
... sich der Drehteller nicht dreht?
Überprüfen Sie,
- das Drehkreuz richtig auf dem Antrieb sitzt,
– der Drehteller ausgeschaltet ist,
– Geschirr verwendet wird, das über den
Drehteller herausragt oder
– Lebensmittel über den Drehteller ragen und
ihn somit blockieren,
– sich Speisereste unter dem Drehteller
befinden.
... die Mikrowelle nicht abschaltet?
– Ziehen Sie den Netzstecker oder schalten Sie
die Sicherung aus.
– Rufen Sie den AEG-Electrolux-Kundendienst
oder Ihren Fachhändler.
... die Garraumlampe ausfällt?
- Rufen Sie den AEG-Electrolux-Kundendienst
oder eine durch AEG-Electrolux geschulte
Elektro-Fachkraft an. Der Austausch der
Garraumbeleuchtung darf nur durch diese
durchgeführt werden.
... die Speisen langsamer heiß und gar
werden als bisher?
- Stellen Sie eine längere Garzeit ein (doppelte
Menge = fast doppelte Zeit) oder,
– wenn die Speisen kälter waren als sonst,
drehen Sie diese zwischendurch um oder
wenden Sie sie oder
– stellen Sie eine höhere Leistung ein.
Betriebsart
Mikrowelle (900 W)
Grill
Kombi-Betrieb
Standardzeit
20 minuten
30 minuten
Grill - 30 minuten
Reduzierte Leistung
Mikrowelle - 630 W
Grill - 50 %
Grill - 50 %
HINWEIS: Wenn Sie die Speisen in der Standardgarzeit in nur einer Betriebsart garen, wird die Leistung des
Gerätes automatisch reduziert, um eine Überhitzung zu vermeiden. (Die Mikrowellenleistung wird
vermindert oder das Grillheizelement wird ein- und ausgeschaltet.)
Nach einer Pause von 90 Sekunden kann die volle Leistung wieder eingestellt werden.
2. AG-71+72D-EU German 29/03/2005 10:48 Page 97
Page 100

98
Kundendienst
Sehr geehrter Kunde,
der Werkskundendienst von AEG-Electrolux Hausgeräte ist ezentral organisiert. Damit bieten wir Ihnen überall einen
zuverlässigen Service. Unter der für Sie kostengünstigen Rufnummer
0180 322 66 22 (EUR 0.09 /Minute)
können Sie im Bedarfsfall einen unserer Spezialisten oder Service-Partner anfordern.
Ihre Ersatzteil-Bestellung geben Sie bitte unter der zentralen Rufnummer
0180 5 00 10 76 auf.
(EUR 0.12 /Minute)
Mit freundlichen Grüßen
Ihr AEG-Electrolux Werkskundendienst
Sie können sich auch persönlich an unsere Service-Stellen wenden.
PLZ Adresse
01099 Dresden Industriegelände,
W. Hartmann-Straße
04299 Leipzig* Holzhäuser Str. 120
04357 Leipzig* W.-Busch-Str. 38
07548 Gera* Südstraße 11
14482 Potsdam-Babelsberg Wetzlarer Straße 14-16
16866 Kyrik* Hamburger Str. 31
18069 Rostock* Gewerbestr. 1
22525 Hamburg-Bahrenfeld Holstenkamp 40
24113 Kiel* v. d. Goltz-Allee 2
25770 Hemmingstedt* Kösliner Str. 18
27721 Ritterhude* Stader Landstr. 4
28208 Bremen* Emil-von-Behring-Straße 3
30179 Hannover Wiesenauer Straße 13
34123 Kassel-Bettenhausen* Lilienthalstraße 5
35745 Herborn-Burg* Junostraße 1
41541 Dormagen-St. Peter Sachtlebenstraße 1
46562 Voerde* Friedrich-Wilhelm-Straße 22
48165 Münster* Zum Kaiserbusch 1
49084 Osnabrück* Pferdestraße 23
52068 Aachen* Auf der Hüls 197
56068 Koblenz* Rheinstraße 17
56070 Koblenz* A.-Hosch-Str. 14
57076 Siegen* Weidenauer Straße 239
PLZ Adresse
59071 Hamm Ostwennemarstr. 1
60326 Frankfurt Mainzer Landstraße 349
66115 Saarbrücken-Malstatt* Ludwigstraße 55-57
67663 Kaiserslautern* Pariser Straße 200
71034 Böblingen-Hulb Dornierstraße 7
74743 Seckach Bergstr. 9F
76185 Karlsruhe-Mühlburg* Neureuther Straße 5-7
78054 Villingen-Schwenningen* Alleenstr. 28/1
79108 Freiburg* Tullastraße 84
82401 Rottenbuch Solder 13
84307 Eggenfelden Dorfzellhub 32
85598 Baldham/Vaterstetten Neue Poststr. 23
86159 Augsburg* Piccardstraße 15a
87437 Kempten* Brodkorbweg 22
88213 Ravensburg* Henri-Dunant-Straße 6
90429 Nürnberg Muggenhofer Straße 135
92260 Ammerthal* Nikolausstraße 2
93059 Regensburg* Im Gewerbepark B54
94032 Passau* Kühberg 1
95038 Hof* Pinzigweg 49
97078 Würzburg* Versbacher Straße 22a
99096 Erfurt* Arnstädter Straße 28
(*) Hier steht Ihnen ein Service-Partner zur Verfügung
Weitere Service-Stellen sind in:
03222 Groß Klessow
06896 Wittenberg-Reinsdorf
15517 Fürstenwalde
16515 Oranienburg
17039 Ihlenfeld
18069 Rostock
19057 Schwerin
24354 Rieseby
25980 Westerland/Sylt
26639 Wiesmoor
27726 Worpswede
30900 Wedemark
32825 Blomberg
34497 Korbach
36043 Fulda
39114 Magdeburg
49377 Vechta
63906 Erlenbach
78244 Bietingen
84307 Eggenfelden
87549 Rettenberg
99819 Ettenhausen
2. AG-71+72D-EU German 29/03/2005 10:48 Page 98
 Loading...