


EN Operating instructions
Cordless wet/dry vacuum
FR Mode d’emploi
Aspirateur sec/humide sans fi l
SP Manual de instrucciones
Aspiradora para seco/mojado
inalámbrica
TE-VC 36/30 Li S
7
Art.-Nr.: 2347141 I.-Nr.: 21021
Anl_TE_VC_36_30_Li_S_USA_SPK7.indb 1Anl_TE_VC_36_30_Li_S_USA_SPK7.indb 1 13.04.2022 14:00:1013.04.2022 14:00:10

1
26
1
10
11
2
8
7
17
13
2 3
10
23
16
12
14
18
15
35
36
3
6
22
12
30
13
31
28
11
27
20
- 2 -
22
29
32
26
Anl_TE_VC_36_30_Li_S_USA_SPK7.indb 2Anl_TE_VC_36_30_Li_S_USA_SPK7.indb 2 13.04.2022 14:00:1113.04.2022 14:00:11

4 5
19
9
4
5
6 7
13
1
7
6
29
32
8 9
31 28
Anl_TE_VC_36_30_Li_S_USA_SPK7.indb 3Anl_TE_VC_36_30_Li_S_USA_SPK7.indb 3 13.04.2022 14:00:1413.04.2022 14:00:14
22
28
29
- 3 -
29,28, 22
7
31
28
37

10 11
28
31
22
12 13
29
31
30
22
31
28
22
28
14 15
15
18
- 4 -
Anl_TE_VC_36_30_Li_S_USA_SPK7.indb 4Anl_TE_VC_36_30_Li_S_USA_SPK7.indb 4 13.04.2022 14:00:2213.04.2022 14:00:22

16 17
19
21
18 19
35
36
38
24
25
81410
34
20
33
34
Anl_TE_VC_36_30_Li_S_USA_SPK7.indb 5Anl_TE_VC_36_30_Li_S_USA_SPK7.indb 5 13.04.2022 14:00:2813.04.2022 14:00:28
21
40
39
- 5 -

EN
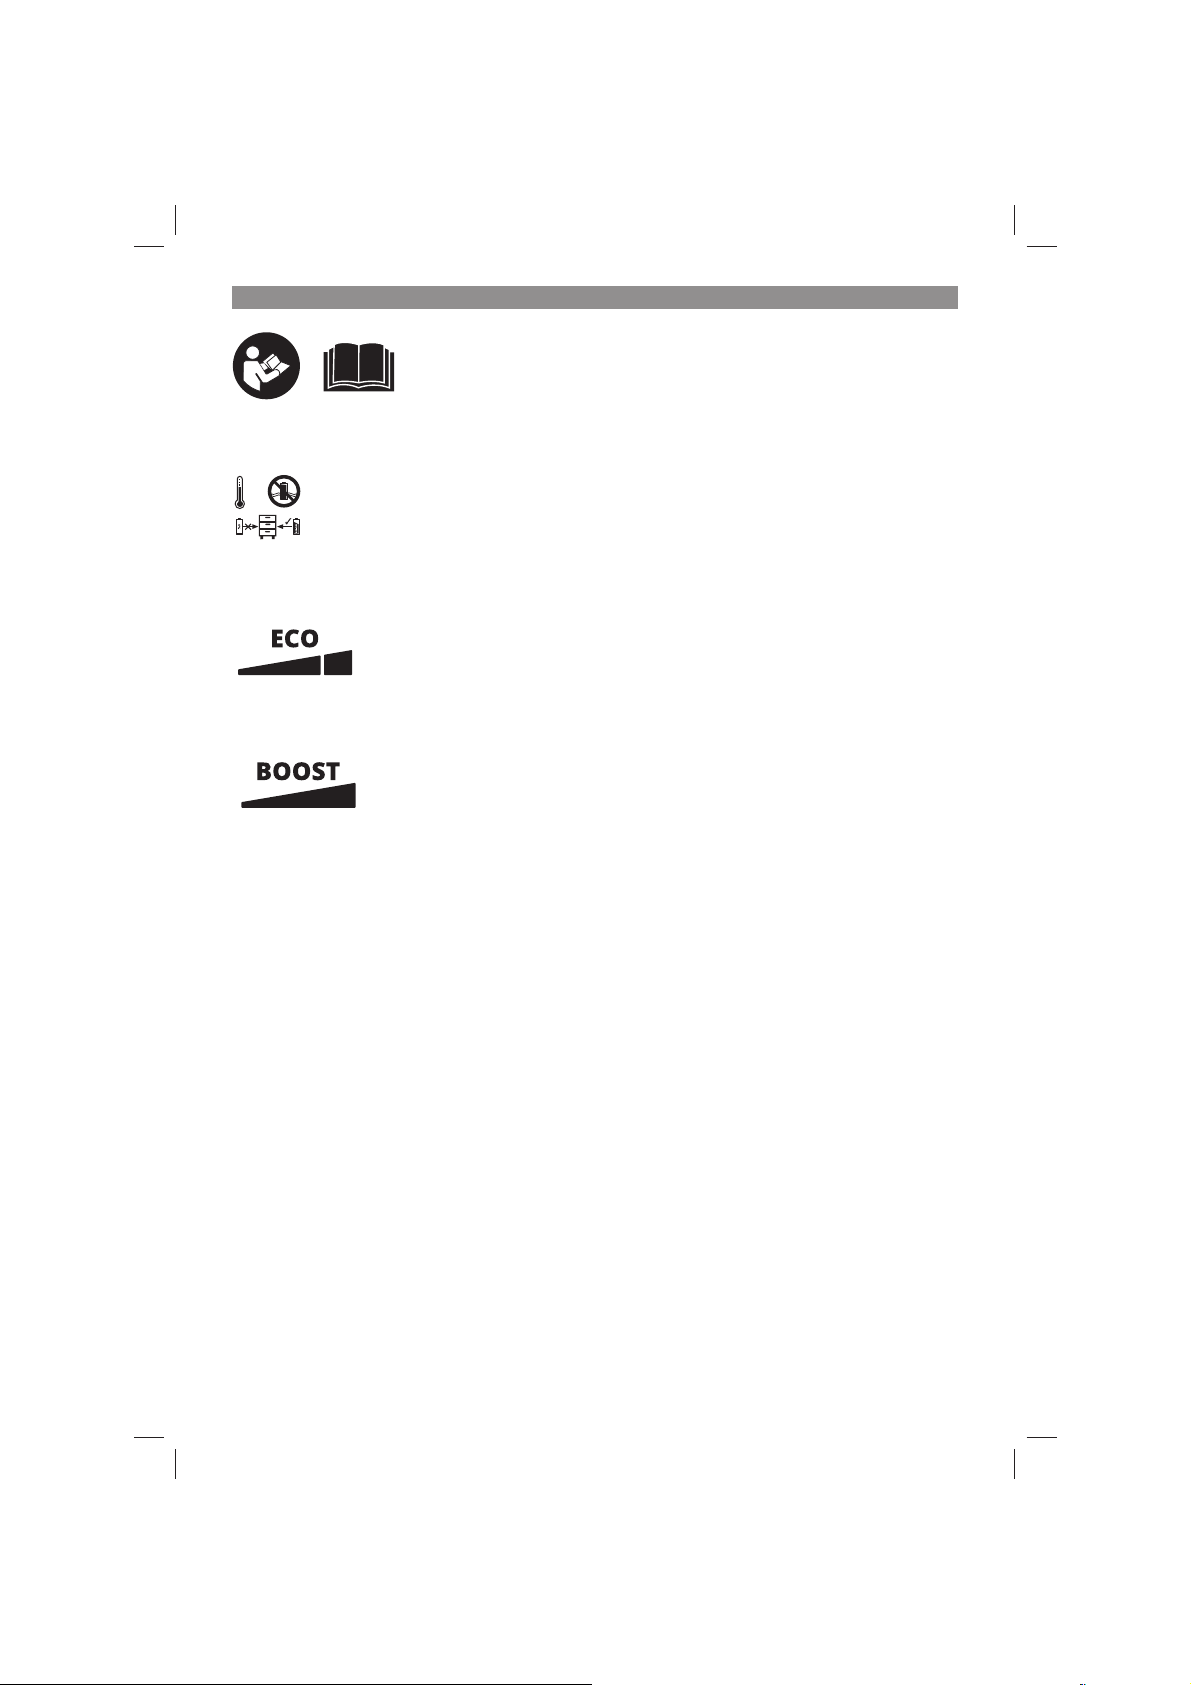
Danger! - Read the operating instructions to reduce the risk of injury.
104°F
(+40°C)
50°F
(+10°C)
Store the batteries only in dry rooms with an ambient temperature of 50°F to 104°F (+10°C to +40°C).
Place only fully charged batteries in storage (charged at least 40%).
Vacuum setting 1
Vacuum setting 2
- 6 -
Anl_TE_VC_36_30_Li_S_USA_SPK7.indb 6Anl_TE_VC_36_30_Li_S_USA_SPK7.indb 6 13.04.2022 14:00:3313.04.2022 14:00:33

EN
DANGER!
When using the equipment, a number of safety
precautions must be observed to avoid injuries
and damage. Please read the complete operating
instructions and safety information with due care.
Keep these operating instructions in a safe place
so that the information is available at all times. If
you give the equipment to any other person, hand
over these operating instructions and the safety
information as well. We cannot accept any liability
for damage or accidents which arise due to
failure to follow these instructions and the safety
information.
1. Safety information
IMPORTANT SAFETY INSTRUCTIONS
When using an electrical appliance, basic
precautions should always be followed, including
the following:
READ ALL INSTRUCTIONS BEFORE USING
(THISAPPLIANCE), Failure to follow the
warnings and instructions may result in
electric shock, fi re and/or serious injury.
WARNING–To reduce the risk of fi re, electric
shock, or injury:
1. Indoor use only.
2. Do not allow to be used as a toy. Close
attention is necessary when used by or near
children, pets or plants.
3. Use only as described in this manual.
Use only manufacturer’s recommended
attachments
4. Do not use with damaged cord or plug. If
appliance is not working as it should, has
been dropped, damaged, left outdoors,
or dropped into water, return it to a service
center.
5. Do not pull or carry by cord, use cord as a
handle, close a door on cord, or pull cord
around sharp edges or corners. Do not run
appliance over cord. Keep cord away from
heated surfaces.
6. Do not unplug by pulling on cord. To unplug,
grasp the plug, not the cord.
7. Do not handle charger, including charger
plug, and charger terminals with wet
hands
8. Do not put any object into openings. Do not
use with any opening blocked; keep free of
dust, lint, hair, and anything that may reduce
air fl ow.
9. Keep hair, loose clothing, fi ngers, and all
parts of body away from openings and
moving parts.
10. Use extra care when cleaning on stairs.
11. Do not use to pick up fl ammable or
combustible liquids, such as gasoline, or use
in areas where they may be present.
12. Do not pick up anything that is burning or
smoking, such as cigarettes, matches, or hot
ashes.
13. Do not use without fi lter
14. Prevent unintentional starting. Ensure the
switch is in the off -position before connecting
to battery pack, picking up or carrying the
appliance. Carrying the appliance with your
fi nger on the switch or energizing appliance
that have the switch on invites accidents.
15. Disconnect the battery pack from the
appliance before making any adjustments,
changing accessories, or storing appliance.
Such preventive safety measures reduce the
risk of starting the appliance accidentally.
16. Recharge only with the charger specifi ed by
the manufacturer. A charger that is suitable
for one type of battery pack may create a risk
of fi re when used with another battery pack.
17. Use appliances only with specifi cally
designated battery packs. Use of any other
battery packs may create a risk of injury and
fi re.
18. When battery pack is not in use, keep it away
from other metal objects, like paper clips,
coins, keys, nails, screws or other small metal
objects, that can make a connection from
one terminal to another. Shorting the battery
terminals together may cause burns or a fi re.
19. Under abusive conditions, liquid may be
ejected from the battery; avoid contact. If
contact accidentally occurs, fl ush with water.
If liquid contacts eyes, additionally seek
medical help. Liquid ejected from the battery
may cause irritation or burns.
20. Do not use a battery pack or appliance that is
damaged or modifi ed. Damaged or modifi ed
batteries may exhibit unpredictable behavior
resulting in fi re, explosion or risk of injury.
21. Do not expose a battery pack or appliance
to fi re or excessive temperature. Exposure to
fi re or temperature above 130°C may cause
explosion.
22. Follow all charging instructions and do
not charge the battery pack or appliance
outside of the temperature range specifi ed
in the instructions. Charging improperly or at
temperatures outside of the specifi ed range
- 7 -
Anl_TE_VC_36_30_Li_S_USA_SPK7.indb 7Anl_TE_VC_36_30_Li_S_USA_SPK7.indb 7 13.04.2022 14:00:3313.04.2022 14:00:33

EN
may damage the battery and increase the risk
of fi re.
23. Have servicing performed by a qualifi ed
repair person using only identical
replacement parts. This will ensure that the
safety of the product is maintained.
24. Do not modify or attempt to repair the
appliance or the battery pack except as
indicated in the instructions for use and care.
SAVE THESE INSTRUCTIONS
Household use only.
2. Layout and items supplied
2.1 Layout
1. Carry-handle
2. On/Off /Vacuum setting switch
3. Head
4. Filter cage
5. Safety fl oat valve
6. Locking hook
7. Tank
8. Suction hose connection
9. Blow connector
10. Flexible suction hose
11. Suction tube, telescopic
12. Combination nozzle
13. Castors
14. Dust bag
15. Foam fi lter
16. Crevice nozzle
17. Water drain screw
18. Pleated fi lter with cover
19. Battery cover
20. Tool adapter
21. Pushlock button
22. Wheels
23. Upholstery nozzle
24. Holder for push bar
25. Accessory compartment
26. Handle
27. Air regulator
28. Washers for fi tting the wheels (4x)
29. Split pins for fi tting the wheels (2x)
30. Covers for fi tting the wheels (2x)
31. Axle for fi tting the wheels
32. Screws for push bar assembly(2x)
33. Filters
34. Filter cover
35. Push bar
36. Fastening nuts for push bar
37. Chain
38. Push bar mounts
39. Battery capacity indicator
40. Battery capacity indicator button
2.2 Items supplied
Please check that the article is complete as
specifi ed in the scope of delivery. If parts are
missing, please contact our service center or the
store where you made your purchase at the latest
within 5 work days after purchasing the article and
upon presentation of a valid bill of purchase.
Open the packaging and take out the
•
equipment with care.
Remove the packaging material and any
•
packaging and/or transportation braces (if
present).
Check to see if all the items are supplied.
•
Inspect the equipment and accessories for
•
transport damage.
If possible, keep the packaging until the end
•
of the guarantee period.
Danger!
The equipment and packaging material are
not toys. Do not let children play with plastic
bags, plastic sheets and small parts. There is
a risk of choking and suff ocating!
Original operating instruction with safety
•
information
The equipment comes with a chain (37) on the
tank bottom. The chain helps to prevent static
charging during use.
Separately available accessories
18V 1.5Ah PXC Lithium-Ion battery
18V 2.0Ah PXC Lithium-Ion battery
18V 2.5Ah PXC Lithium-Ion battery
18V 3.0Ah PXC Lithium-Ion battery
18V 4.0Ah PXC Lithium-Ion battery
18V 3.0Ah PXC Plus Lithium-Ion battery
18V 4.0Ah PXC Plus Lithium-Ion battery
18V 5.2Ah PXC Plus Lithium-Ion battery
18V 4.0Ah/6.0Ah PXC Plus Lithium-Ion battery
18V 5.0Ah/8.0Ah PXC Plus Lithium-Ion battery
18V PXC Dual Port Fast Charger
18V PXC Fast Charger
Contact your local retailer for more specifi c
models of batteries and charger available in your
area. You can also explore battery + charger
options at Einhell.com.
- 8 -
Anl_TE_VC_36_30_Li_S_USA_SPK7.indb 8Anl_TE_VC_36_30_Li_S_USA_SPK7.indb 8 13.04.2022 14:00:3313.04.2022 14:00:33

EN
3. Intended use
The cordless wet/dry vacuum is designed for wet
and dry vacuuming using the appropriate fi lter.
The equipment is not suitable for the vacuuming
of combustible, explosive or harmful substances.
The equipment is allowed to be used only for its
prescribed purpose. Any other use is deemed to
be a case of misuse. The user/operator and not
the manufacturer will be liable for any damage or
injuries of any kind resulting from such misuse.
Please note that our equipment has not been
designed for use in commercial, trade or
industrial applications. Our warranty will be voided
if the equipment is used in commercial, trade or
industrial businesses or for equivalent purposes.
4. Technical data
Motor power supply: .............36 V (2x 18 V)
Air fl ow: ............................ 56 CFM (1.59 m³/min)
Sealed suction:
BOOST: ...................... 59'' (water lift) (150 mbar)
ECO: ........................... 40'' (water lift) (100 mbar)
Vacuum hose length: ....................... 8.2 ft (2.5 m)
Tank capacity: .............................. 8 Gallon (30 l )
Weight: ..........................................17.6 lbs (8 kg)
5. Before starting the equipment
5.1 Assembling the equipment
Fitting the appliance head (Fig. 1/5)
The equipment head (3) is fastened to the
tank (7) by the locking hook (6). To remove the
equipment head (3), open the locking hook (6)
and take off the equipment head (3). When fi tting
the equipment head (3), make sure that the
locking hook (6) locks into place correctly.
Fitting the wheels (Fig. 7-13)
Place a split pin for fi tting the wheels (29)
through the appropriate hole in the axle (31)
and fi t a washer (28), a wheel (22) and a washer
to the axle (31) (Fig. 7-8). Now slide the axle
(31) through the guides provided for it on the
underside of the tank (7) (Fig. 9). Fit a washer and
the second wheel (22) to the empty end of the
axle (31) and secure it with the other washer (28)
and the split pin (29) (Fig. 10-12). Push the covers
(30) on to the outside of the wheels (22) so that
the detents engage on the covers (30) for the
wheel (22). (Fig. 13)
Fitting the castors (Fig. 6/Item 13)
Fit the castors (13) into the appropriate mountings
on the underside of the tank (7). Push the castors
(13) fi rmly into the mounting until they engage
with a clicking noise (Fig. 6).
Fitting the push bar (Fig. 18)
Fit the push bar handle (35) onto the push bar
mounts (38) of the tank and secure the push bar
with the supplied screws (32) and fastening nuts
(36) as shown in Figure 18.
5.2 Fitting the fi lters
Important!
Never use the wet/dry vacuum without a fi lter.
Always ensure that the fi lters are securely seated.
Fitting the foam fi lter (Fig. 14/Item 15)
For wet-vacuuming, slip the supplied foam fi lter
(15) over the fi lter basket (Fig. 4/Item 4).
Fitting the pleated fi lter (Fig. 15)
For dry-vacuuming, slip the pleated fi lter (Fig. 18)
onto the fi lter basket (Fig. 4/Item 4) and secure
in place by rotating clockwise until the locking
knobs connect. The pleated fi lter is suitable for
dry-vacuuming only.
Fitting the dust bag (Fig. 17/Item 14)
For vacuuming fi ne, dry dirt it is recommended
that you fi t the dust bag (Fig. 2/Item 14). Slip
the dust bag (14) over the vacuuming hole. The
dust bag (14) is suitable for dry-vacuuming only.
The dust bag makes it easier to dispose of the
sucked-in dust.
5.3 Fitting the suction hose (Fig. 17/Item 10)
Connect the suction hose (10) to the
corresponding connector on the wet/dry vacuum,
depending on the application required.
Vacuuming
Connect the suction hose (10) to the suction hose
connector (8).
Blowing
Connect the suction hose (10) to the blow
connector (9).
- 9 -
Anl_TE_VC_36_30_Li_S_USA_SPK7.indb 9Anl_TE_VC_36_30_Li_S_USA_SPK7.indb 9 13.04.2022 14:00:3313.04.2022 14:00:33

EN
Air regulator (Fig. 2/Item 27)
The air regulator (27) can be fi tted between the
suction hose (10) and the suction tube (11).
The suction power of the nozzle can be infi nitely
adjusted using the air regulator (27).
When wet vacuuming, make selective use of the
air regulator to suck in air as well as liquids. This
will help to take some strain off the equipment
when vacuuming liquids.
5.4 Suction nozzles
Combination nozzle (Fig. 2)
The dual-purpose nozzle (12) is for vacuuming
solids and liquids over medium to large areas.
Crevice nozzle (Fig. 2)
The crevice nozzle (16) is designed for
vacuuming solids and liquids in corners, edges
and other areas that are diffi cult to access.
Upholstery nozzle (Fig. 2)
The upholstery nozzle (23) is specially designed
for vacuuming solids on upholstery and carpets.
Fitting the Lithium-Ion battery (not included)
(Fig. 16)
Flip up the battery cover (19) as shown in Figure
16. Slot the two rechargeable batteries into the
mounts. The device does not work with only one
battery
Water drain screw (Fig.1)
To make the tank (7) easier to empty after wet
vacuuming, it is fi tted with a water drain screw
(17).
Open the water drain screw (17) by turning it anticlockwise and drain the liquid.
When wet-vacuuming, the fl oating safety switch
(Fig. 4/Item 5) closes when the maximum tank
level is reached. At the same time, the suction
noise of the equipment will change and become
louder.
You must then switch off the equipment and
empty the tank.
Danger!
The wet/dry vacuum is not suitable for the
vacuuming of combustible liquids. For wet
vacuuming, use only the supplied foam fi lter.
6.4 Blowing
Connect the suction hose (10) to the blow
connector (9) on the wet/dry vacuum.
6.5 Charging the Lithium-Ion battery (not
included)
The corresponding instructions can be found
in the original operating instructions for your
charger.
6.6 Battery capacity indicator (Fig. 21 / item
6. Operation
6.1 On/Off switch (Fig. 1/Item 2)
Switch position 0: Off
Switch position I: Vacuum setting 1 (ECO)
Switch position II: Vacuum setting 2 (BOOST)
6.2 Dry vacuuming
Use the pleated fi lter (18) for dry vacuuming
(see point 5.2). The dust bag (14) can be fi tted in
addition when removing particularly stubborn dirt
(see point 5.3).
Always ensure that the fi lters are securely seated.
6.3 Wet vacuuming
For wet-vacuuming, use the foam fi lter (15) (see
point 5.2).
Check that the fi lter is securely seated at all times.
19)
Press the battery capacity indicator switch (40).
The battery capacity indicator (39) shows the
charge status of the battery using 3 LEDs.
All 3 LEDs lit:
The battery is fully charged.
2 or 1 LED(s) lit:
The battery has an adequate remaining charge.
1 LED fl ashing:
The battery is empty, recharge the battery.
All LEDs fl ashing:
The temperature of the battery is too low. Remove
the battery from the device and leave it at room
temper-ature for a day. If the error occurs again,
this means that the battery has been completely
depth-discharged and is defective. Remove the
battery from the device. Never use or charge a
defective battery.
- 10 -
Anl_TE_VC_36_30_Li_S_USA_SPK7.indb 10Anl_TE_VC_36_30_Li_S_USA_SPK7.indb 10 13.04.2022 14:00:3313.04.2022 14:00:33

EN
7. Cleaning and maintenance
HAZARD!
Always pull out the battery pack before starting
any cleaning work.
7.1 Cleaning
Keep all safety devices, air vents and the
•
motor housing free of dirt and dust as far as
possible.
We recommend cleaning the equipment
•
immediately each time after use.
7.2 Cleaning the appliance head
(Fig. 1/Item 3)
Clean the equipment regularly with a damp cloth
and some soft soap. Do not use cleaning agents
or solvents; these may be aggressive to the
plastic parts in the equipment.
7.3 Cleaning the tank (Fig. 1/Item 7)
The tank can be cleaned with a damp cloth
and some soft soap or under running water,
depending on the amount of dirt.
7.4 Cleaning the fi lters
Cleaning the pleated fi lter (Fig. 2)
Clean the pleated fi lter (18) regularly by carefully
patting it and cleaning it with a fi ne brush or hand
brush.
Cleaning the foam fi lter (Fig. 2)
Clean the foam fi lter (15) with a little soft soap
under running water and allow it to air-dry.
8. Disposal and recycling
The equipment is supplied in packaging to
prevent it from being damaged in transit. The
raw materials in this packaging can be reused or
recycled. The equipment and its accessories are
made of various types of material, such as metal
and plastic. Never place defective equipment in
your household refuse. The equipment should
be taken to a suitable collection center for proper
disposal. If you do not know the whereabouts of
such a collection point, you should ask in your
local council offi ces.
9. Storage
Store the equipment and its accessories out
of children‘s reach in a dark and dry place at
above freezing temperature. The ideal storage
temperature is between 41°F and 86°F
(5°C and 30°C). Keep the electric tool in its
original packaging.
The reprinting or reproduction by any other
means, in whole or in part, of documentation
and papers ac-companying the products is
strictly subject to the express consent of Einhell
Germany AG.
Subject to technical changes.
Cleaning the fi lter (Figs. 19/20)
The fi lter (33) should be checked and cleaned
after every use.
1. Remove the fi lter cover (34) (Fig. 19).
2. Take out the fi lter (33) (Fig. 20)
3. Clean the fi lter by tapping it or blowing it out.
4. Assemble in reverse order
7.5 Maintenance
At regular intervals and before each use, check
that the fi lters in the wet/dry vacuum are securely
fi tted.
- 11 -
Anl_TE_VC_36_30_Li_S_USA_SPK7.indb 11Anl_TE_VC_36_30_Li_S_USA_SPK7.indb 11 13.04.2022 14:00:3413.04.2022 14:00:34
FR
Danger! - Lire le mode d’emploi pour diminuer le risque de blessures.
104°F
(+40°C)
50°F
(+10°C)
Conservez les batteries uniquement dans des locaux secs et à une température ambiante de 50-104 °F
(+10-+40 °C). Conservez les batteries uniquement en état chargé (au moins 40 % de charge).
Niveau d’aspiration 1
Niveau d’aspiration 2
- 12 -
Anl_TE_VC_36_30_Li_S_USA_SPK7.indb 12Anl_TE_VC_36_30_Li_S_USA_SPK7.indb 12 13.04.2022 14:00:3413.04.2022 14:00:34

FR
Danger !
Certaines mesures de sécurité doivent être respectées pendant l’utilisation des appareils pour
empêcher les blessures et les dommages. Par
conséquent, lisez attentivement le présent mode
d’emploi / les con-signes de sécurité. Conservez-les bien pour avoir les informations toujours
à la portée de la main. Si vous devez passer
l’appareil à d’autres personnes, veuillez leur
remettre également le présent mode d’emploi /
les consignes de sécurité. Nous ne sommes pas
tenus des accidents ou dommages survenus à
cause de non-respect du présent mode d’emploi
et des consignes de sécurité.
1. Consignes de sécurité
IMPORTANTES MESURES DE SÉCURITÉ
L’utilisation d’un appareil électrique demande certaines précautions:
LIRE TOUTES LES INSTRUCTIONS AVANT
DE FAIRE FONCTIONNER (CETAPPAREIL), Le
non-respect des mises en garde et des instructions peut causer des chocs électriques,
des incendies et/ou des blessures graves.
AVERTISSEMENT. Pour réduire les risques d’incendie, de choc électrique ou de blessure:
1. Utilisation intérieure seulement.
2. Ne pas permettre aux enfants de jouer avec
l’appareil. Une attention particulière est nécessaire lorsque l’appareil est utilize par des
enfants ou à proximité de ces derniers.
3. N’utiliser que conformément à cette notice
avec les accessories recommandés par le
fabricant.
4. Ne pas utiliser si le cordon ou la fi che est
endommagé. Retourner l’appareil à un atelier
de reparation s’il ne fonctionne pas bien, s’il
est tombé ou s’il a été endommagé, oublié à
l’extérieur ou immergé.
5. Ne pas tirer soulever ni trainer l’appareil par le
cordon. Ne pas utiliser le cordon comme une
poignée, le coincer dans l’embrasure d’une
porte ou l’appuyer contre des arêtes vives ou
des coins. Ne pas faire rouler l’appareil sur
le cordon. Garder le cordonà l’écart des surfaces chaudes.
6. Ne pas débrancher en tirant sur le cordon.
Tirer plutôt la fi che.
7. Ne pas manipuler le chargeur, y compris la
prise du chargeur, et les bornes du chargeur
avec les mains mouillées
8. N’insérez aucun objet dans les ouvertures.
Ne pas utiliser l’appareil lorsqu’une ouverture
est bloquée. S’assurer que de la poussière,
de la peluche, des cheveux ou d’autres matières ne réduisent pas le debit d’air.
9. Maintenir les cheveux, les vêtements amples,
les doigts et toutes les parties du corps à
l’écart des ouvertures et des pieces mobiles.
10. Utilisez de la prudence lors du nettoyage des
escaliers.
11. Ne pas aspirer des liquids infl ammables ou
combustibles, comme de l’essence, et ne
pas faire fonctionner dans des endroits où
peuvent se trouver de tells liquides.
12. Ne pas aspirer de matières en combustion
ou qui dégagent de la fumée, comme des
cigarettes, des allumettes ou des cendres
chaudes.
13. Ne pas utiliser l’aspirateur sans son fi ltre.
14. Empêchez une mise en marche accidentelle.
S’assurer que l’interrupteur est à la position
arrêt avant de raccorder la batterie, de lever
ou de déplacer l’appareil. Transportez l’appareil en gardant un doigt sur l’interrupteur, ou
mettre sous tension un appareil dont l’interrupteur est à la position marche peut causer
un accident.
15. Retirez la batterie de l’appareil avant d’eff ec-
tuer des réglages, changer les accessoires
ou ranger l’appareil. Ces mesures de sécurité
ont pour but d’éviter une mise en marche accidentelle de l’appareil.
16. Rechargez uniquement avec le chargeur
prescrit par le fabricant. Un chargeur convenant à un type de batterie peut présenter un
risque d’incendie lorsqu’il est utilisé avec une
autre batterie.
17. Utilisez uniquement les batteries recommandées pour l’appareil. L’utilisation d’autres
types de batteries peut présenter un risque
de blessure ou d’incendie.
18. Lorsque l’appareil n’est pas utilisé, tenez la
batterie loin d’objets métalliques comme des
trombones, des pièces de monnaie, des clés,
des clous, des vis ou autres petits objets qui
pourraient établir une liaison entre les bornes.
Un courtcircuit des bornes des batteries peut
causer des brûlures ou un incendie.
19. En condition d’usage abusif, du liquide peut
s’échapper de la batterie ; évitez tout contact
avec ce liquide. En cas de contact accidentel,
rincez abondamment avec de l’eau. En cas
de contact avec les yeux, consultez également un médecin. Le liquide projeté peut
causer des irritations ou des brûlures.
- 13 -
Anl_TE_VC_36_30_Li_S_USA_SPK7.indb 13Anl_TE_VC_36_30_Li_S_USA_SPK7.indb 13 13.04.2022 14:00:3413.04.2022 14:00:34

FR
20. Ne pas utiliser une batterie ou un appareil endommagé ou qui a été modifi é. Des batteries
endommagées ou modifi es peuvent avoir un
comportement imprévisible pouvant causer
un incendie, une explosion ou un risque de
blessure.
21. Ne pas exposer une batterie ou un appareil à
la fl amme ou à des températures excessives.
L’exposition à une fl amme ou à des tempéra-
tures supérieures à 130 °C peut causer une
explosion.
22. Respectez toutes les instructions de chargement et ne pas charger la batterie ou
l’appareil à des températures qui ne sont pas
incluses dans la gamme de températures
indiquées dans la notice d’instructions. Un
chargement mal eff ectué.
23. Confi ez les réparations à une personne
qualifi ée qui utilisera uniquement des pièces
de remplacement identiques. Cette façon de
faire garantira la sécurité du produit.
24. Ne pas modifi er ni tenter de réparer l’appareil
ou la batterie sauf comme il est indiqué dans
les instructions d’utilisation et d’entretien.
CONSERVER CES INSTRUCTIONS
Usage Domestique seulement
2. Description de l’appareil et
contenu de l’emballage
2.1 Description de l’appareil
1. Poignée de transport
2. Commutateur de marche / arrêt / niveaux
d’aspiration
3. Tête d’appareil
4. Panier à fi ltre
5. Vanne à fl otteur de sécurité
6. Crochet de verrouillage
7. Réservoir
8. Raccord de tuyau d’aspiration
9. Raccord de souffl age
10. Tuyau d’aspiration fl exible
11. Tube d’aspiration télescopique
12. Embout combiné
13. Roulettes
14. Sac de collection
15. Filtre en mousse
16. Embout à fentes
17. Vis d’écoulement d’eau
18. Filtre plissé avec couvercle
19. Couvercle de la batterie
20. Adaptateur d’outil
21. Touche d’enclenchement
22. Roulettes
23. Buse à rembourage
24. Support pour la poignée de manœuvre
25. Compartiment à accessoires
26. Poignée
27. Régulateur de carence d’air
28. 4 rondelles de calage pour le montage des
roulettes
29. 2 goupilles de sécurité pour le montage des
roulettes
30. 2 protections pour le montage des roulettes
31. Essieu pour le montage des roulettes
32. 2 vis pour le montage de la poignée de
manœuvre
33. Filtre
34. Couvercle de fi ltre
35. Poignée de manœuvre
36. Écrou de fi xation pour la poignée de
manœuvre
37. Chaîne
38. Raccordements de poignée de manœuvre
39. Témoin de charge de la batterie
40. Bouton de témoin de charge de la batterie
2.2 Contenu d’emballage
Veuillez contrôler l’intégralité de l’article au moyen
du contenu d’emballage décrit. En cas de pièces
man-quantes, veuillez contacter notre centre de
service à la clientèle ou le point de vente où vous
avez acheté l’appareil au plus tard dans les 5
jours ouvrables à compter de l’achat de l’article
en présentant un ticket de caisse valable.
Ouvrez l’emballage et retirez prudemment
•
l’appareil.
Enlevez le matériau d’emballage ainsi que les
•
sécurités d’emballage et de transport (le cas
échéant).
Vérifiez l’intégralité du contenu d’emballage.
•
Vérifiez si l’appareil et les accessoires pré-
•
sentent des dommages dus au transport.
Si possible, conservez l’emballage jusqu’à
•
l’expiration de la durée de garantie.
Danger !
L’appareil et le matériau d’emballage ne sont
pas un jouet ! Les enfants ne doivent pas
jouer avec des sachets en plastique, des
fi lms ou de petites pièces ! Il existe le risque
d’ingestion et de suff ocation !
Mode d’emploi d’origine avec consignes de
•
sécurité
- 14 -
Anl_TE_VC_36_30_Li_S_USA_SPK7.indb 14Anl_TE_VC_36_30_Li_S_USA_SPK7.indb 14 13.04.2022 14:00:3413.04.2022 14:00:34

FR
L’appareil est équipé d’une chaîne (37) au fond
du réservoir. Il sert à réduire la charge statique
pendant l’utilisation.
Accessoires disponibles séparément
18V 1,5Ah PXC batterie Lithium-Ion
18V 2,0Ah PXC batterie Lithium-Ion
18V 2,5Ah PXC batterie Lithium-Ion
18V 3,0Ah PXC batterie Lithium-Ion
18V 4,0Ah PXC batterie Lithium-Ion
18V 3,0Ah PXC Plus batterie Lithium-Ion
18V 4,0Ah PXC Plus batterie Lithium-Ion
18V 5,2Ah PXC Plus batterie Lithium-Ion
18V 4,0Ah/6,0Ah PXC Plus batterie Lithium-Ion
18V 5,0Ah/8,0Ah PXC Plus batterie Lithium-Ion
18V PXC chargeur rapide à double raccord
18V PXC chargeur rapide
Contactez votre détaillant pour les modèles plus
spécifi ques de batteries et de chargeurs dispo-
nibles dans votre région. Vous pouvez également
explorer les options de batterie + chargeur sur
Einhell.com.
3. Utilisation conforme
L’aspirateur sec/humide sans fi l convient pour
l’aspiration humide et à sec à l’aide du fi ltre ap-
proprié. L’appareil ne convient pas pour l’aspiration de substances combustibles, explosives ou
nocives.
La machine ne doit être utilisée que conformément à sa destination. Toute autre utilisation
dépassant ce cadre n’est pas conforme. C’est
l’utilisateur / l’opérateur qui est responsable de
tous les dommages ou blessures de toute nature
en résultant et non pas le fabricant.
Veuillez noter que nos appareils n’ont pas été
conçus pour une utilisation commerciale, artisanale ou industrielle. Nous n’accordons aucune
garantie si l’appareil est utilisé dans des entreprises commerciales, artisanales ou industrielles
ou pour des activités équivalentes.
4. Caractéristiques techniques
Alimentation électrique
du moteur: ............................36 V
Débit d’air: ..................... 1,59 m³/min (56 pi³/min)
Pression d’aspiration:
BOOST: ................ 150 mbar (59'' pouces d’eau)
ECO: ..................... 100 mbar (40'' pouces d’eau)
Longueur du tuyau: ......................... 2,5 m (8,2 ft)
Contenance de la cuve: ...............30 l (8 gallons)
Poids: ..............................................8 kg (17,6 lb)
(2x 18 V)
5. Avant la mise en service
5.1 Montage de l’appareil
Montage de la tête d’appareil (fi g. 1/5)
La tête d’appareil (3) est fi xée sur le réservoir (7)
au moyen du crochet de verrouillage (6). Pour retirer la tête d’appareil (3), ouvrir le crochet de verrouillage (6) et retirer la tête d’appareil (3). Lors du
montage de la tête d’appareil (3), veiller à ce que
le crochet de verrouillage (6) soit bien enclenché.
Montage des roues (fi g. 7-13)
Insérez une goupille de sécurité pour le montage
des roulettes (29) à travers le perçage correspondant sans l’essieu de roues (31) et passez une
rondelle de calage (28), une roulette (22) et une
rondelle de calage sur l’essieu de roulettes (31)
(fi g. 7-8). Maintenant, fi xez l’essieu de roues (31)
par les guidages prévus à cette fi n au-dessous
du réservoir (7) (fi g. 9). Insérez une rondelle de
calage et la deuxième roue (22) sur l’extrémité
libre de l’essieu de roues (31) et fi xez-le avec la
rondelle de calage restante (28) et la goupille
de sécurité (29) (fi g. 10-12). Appuyez sur les
protections (30) sur l’extérieur des roues (22)
de manière à ce que les ergots de fi xation des
couvertures (30) s’enclenchent dans la roue (22).
(Fig. 13).
Montage des roulettes (fi g. 6/ 13)
Introduisez les roulettes (13) dans les logements
correspondants sur le dessous du réservoir (7).
Pressez puissamment les roulettes (13) dans les
logements jusqu’à ce qu’ils s’enclenchent avec
un clic (fi g. 6).
Montage de la poignée de manœuvre (fi g. 18)
Insérez la poignée de manœuvre (35) dans les
raccordements de poignée de manœuvre (38)
du réservoir et fi xez la poignée de manœuvre
- 15 -
Anl_TE_VC_36_30_Li_S_USA_SPK7.indb 15Anl_TE_VC_36_30_Li_S_USA_SPK7.indb 15 13.04.2022 14:00:3413.04.2022 14:00:34

FR
à l’aides des vis fournies (32) et des écrous de
fi xation (36), comme il est représenté dans la
fi gure 18.
5.2 Montage des fi ltres
Remarque !
Ne jamais utilisez l’aspirateur sec/humide sans
fi ltres !
Veillez constamment à ce que les fi ltres soient
bien fi xés !
Montage du fi ltre en mousse (fi g. 14 / pos. 15)
Pour l’aspiration humide, tirez le fi ltre en mousse
(15) fourni sur le panier à fi ltres (fi g. 4 / pos. 4).
Montage du fi ltre plissé (fi g. 15)
Pour l’aspiration à sec, faites glisser le fi ltre plis-
sé (pos. 18) sur le panier-fi ltre et fi xez-le en le
tournant dans le sens des aiguilles d’une montre
jusqu’à ce que les boutons de verrouillage s’enclenchent. Le fi ltre plissé ne convient que pour
l’aspiration à sec
Montage du sac de collection
(fi g. 17 / pos. 14)
Pour aspirer des saletés sèches et fi nes, il est re-
commandé de monter le sac de collection (fi g. 2 /
pos. 14). Tirez le sac de collection (14) sur l’orifi ce
d’aspiration. Le sac de collection (14) convient
uniquement pour l’aspiration à sec. La poussière
aspirée peut être éliminée plus aisément avec le
sac de collection.
5.3 Montage du tuyau d’aspiration (fi g. 17 /
pos. 10)
Selon l’utilisation, reliez le tuyau d’aspiration (10)
avec le raccord correspondant de l’aspirateur
sec/humide.
Aspiration
Raccordez le tuyau d’aspiration (10) au raccord
de tuyau d’aspiration (8).
Souffl age
Raccordez le tuyau d’aspiration (10) au raccord
de souffl age (9).
Régulateur de carence d’air (fi g. 2 / pos. 27)
Le régulateur de carence d’air (27) peut être
inséré entre le tuyau d’aspiration (10) et le tube
d’aspiration (11). Le régulateur de carence d’air
(27) permet de régler en continu sur la buse la
puissance d’aspiration.
Utilisez surtout le régulateur de carence d’air pour
l’aspiration de liquides pour aspirer de l’air en
plus du liquide. Cela permet de décharger l’appareil lors de l’aspiration du liquide.
5.4 Embouts d’aspiration
Embout combiné (fi g. 2)
L’embout combiné (12) convient pour aspirer des
matières solides et des liquides sur des surfaces
moyennes à grandes.
Embout à fentes (fi g. 2)
L’embout à fentes (16) convient pour aspirer les
matières solides et les liquides dans des coins,
sur des arrêtes et dans d’autres endroits diffi cile-
ment accessibles.
Buse de rembourage (fi g. 2)
La buse à rembourage (23) convient particulièrement pour aspirer des matières solides sur les
coussins et les tapis.
Montage de la batterie au Lithium-Ion (non
inclus) (fi g. 16)
Relevez le couvercle des batteries (19) comme
montré dans la fi gure 16. Puis, insérez les deux
batteries dans les logements. L’appareil n’a aucune fonction avec une seule batterie
6. Fonctionnement
6.1 Interrupteur Marche / Arrêt (fi g. 1 / pos. 2)
Position de l’interrupteur 0 : Arrêt
Position de l’interrupteur I :
Niveau d’aspiration 1 (ECO)
Position de l’interrupteur II :
Niveau d’aspiration 2 (BOOST)
6.2 Aspiration à sec
Pour l’aspiration à sec, utilisez le fi ltre plissé (18)
(voir le point 5.2). Pour l’enlèvement de salissures
particulièrement fortes, vous pouvez également
monter le sac de collection (14) (voir le point 5.3).
Veillez constamment à ce que le fi ltre soit bien
fi xé!
6.3 Aspiration humide
Pour l’aspiration humide, utilisez le fi ltre en
mousse (15) (voir le point 5.2).
Veillez constamment à ce que le fi ltre soit bien
fi xé !
- 16 -
Anl_TE_VC_36_30_Li_S_USA_SPK7.indb 16Anl_TE_VC_36_30_Li_S_USA_SPK7.indb 16 13.04.2022 14:00:3413.04.2022 14:00:34

FR
Vis d’écoulement d’eau (fi g. 1)
Pour un vidage aisé du réservoir (7) pendant
l’aspiration humide, celui-ci est équipé d’une vis
d’écoulement d’eau (17).
Desserrer la vis d’évacuation d’eau (17) en la
tournant vers la gauche et évacuez le liquide.
Lors de l’aspiration humide, la vanne à fl otteur
de sécurité (fi g. 4 / pos. 5) se referme dès que
le niveau maximal du réservoir est atteint. À ce
moment le bruit d’aspiration de l’appareil change,
il devient plus fort.
Éteignez alors l’appareil et videz le réservoir.
Danger !
L’aspirateur sec/humide ne convient pas pour
aspirer des liquides combustibles ! Utilisez
pour l’aspiration humide uniquement le fi ltre en
mousse fourni !
6.4 Souffl age
Reliez le tuyau d’aspiration (10) avec le raccord
de souffl age (9) de l’aspirateur sec/humide.
6.5 Chargement de la batterie au Lithium-Ion
(non inclus)
Vous trouverez les instructions correspondantes
dans le mode d’emploi d’origine de votre chargeur.
6.6 Affi chage de la capacité de la batterie
(Fig. 21/Pos. 39)
Appuyez sur l’interrupteur de l’affi chage de la ca-
pacité de la batterie (40). L’affi chage de la capaci-
té de la batterie (39) signale l’état de charge de la
batterie au moyen de 3 DEL.
Les 3 DEL s’allument:
La batterie est complètement chargée.
2 ou 1 DEL s’allument:
La batterie a une charge résiduelle suffi sante.
1 DEL clignote:
La batterie est déchargée, chargez la batterie.
7. Nettoyage et entretien
Danger !
Retirez la batterie avant tous les travaux de nettoyage.
7.1 Nettoyage
Gardez les dispositifs de sécurité, les fentes
•
d’aération et le carter du moteur aussi
exempts de poussière et de salissures que
possible.
Nous recommandons de nettoyer l’appareil
•
immédiatement après chaque utilisation.
7.2 Nettoyage de la tête de l’appareil (fi g. 1 /
pos. 3)
Nettoyez l’appareil régulièrement avec un petit
chiff on humide et un peu de savon doux. N’utili-
sez pas de détergents ni de solvants parce qu’ils
peuvent attaquer les pièces en plastique de
l’appareil.
7.3 Nettoyage du réservoir (fi g. 1 / pos. 7)
Selon le degré de salissure, nettoyez le réservoir
avec un chiff on humide et un peu de savon doux
ou sous l’eau courante.
7.4 Nettoyage des fi ltres
Nettoyage du fi ltre plissé (fi g. 2)
Nettoyez régulièrement le fi ltre plissé (18) en le
tapotant précautionneusement et en l’époussetant avec une brosse fi ne ou une balayette.
Nettoyage du fi ltre en mousse (fi g. 2)
Nettoyez le fi ltre en mousse (15) avec un peu
de savon doux sous l’eau courante et laissez-le
sécher à l’air.
Nettoyage du fi ltre (fi g. 19 / 20)
Le fi ltre (33) doit être vérifi é et nettoyé après
chaque utilisation.
1. Retirez le couvercle de fi ltre (34) (fi g. 19)
2. Enlever le fi ltre (33) (fi g. 20)
3. Nettoyez le fi ltre par tapotage et souffl age
4. L’assemblage s’eff ectue dans l’ordre inverse
Tous les voyants clignotent :
La température de la batterie est trop basse.
Retirez la batterie de l’appareil, laissez-la à température am-biante pendant une journée. Si le
défaut se reproduit, cela signifi e que la batterie
rechargeable a subi une décharge complète et
est défectueuse. Retirez la batterie de l’équipement. N’utilisez ou ne chargez jamais une batterie
défectueuse.
Anl_TE_VC_36_30_Li_S_USA_SPK7.indb 17Anl_TE_VC_36_30_Li_S_USA_SPK7.indb 17 13.04.2022 14:00:3413.04.2022 14:00:34
7.5 Maintenance
Vérifi ez régulièrement et avant chaque utilisation
si les fi ltres de l’aspirateur sec/humide sont bien
fi xés.
- 17 -

8. Élimination et recyclage
L’appareil se trouve dans un emballage pour
empêcher les dommages dus au transport. Cet
emballage constitue une matière première et peut
par conséquent est réutilisé ou peut être recyclé.
L’appareil et ses accessoires sont fabriqués à
partir de diff érents produits, comme par exemple
le métal et les matières plastiques. Ne jetez pas
les appareils défectueux dans les déchets ménagers. Pour être éliminé de façon appropriée,
l’appareil devrait être déposé à un lieu de collecte
approprié. Si vous ne connaissez aucun lieu de
collecte, informez-vous auprès de l’administration
municipale.
9. Entreposage
Entreposez l’appareil et ses accessoires dans un
endroit sombre, sec et exempt de gel ainsi que
hors la portée des enfants. La température d’entreposage optimale se situe entre 41 °F et 86 °F
(5 °C et 30 °C). Entreposez l’outil électrique dans
l’emballage d’origine.
FR
Une réimpression ou toute autre reproduction
de la documentation et des documents accompagnant les produits, même par extraits, ne sont
autorisées qu’avec accord exprès d’Einhell Germany AG.
Sous réserve des modifi cations techniques.
- 18 -
Anl_TE_VC_36_30_Li_S_USA_SPK7.indb 18Anl_TE_VC_36_30_Li_S_USA_SPK7.indb 18 13.04.2022 14:00:3413.04.2022 14:00:34

SP
Peligro! - Leer el manual de instrucciones para reducir cualquier riesgo de sufrir daños
104°F
(+40°C)
50°F
(+10°C)
Almacenamiento de las baterías sólo en espacios secos con una temperatura ambiente de 50°F to
104°F (+10°C to +40°C). Guardar las baterías únicamente cuando estén cargadas (mín. al 40%).
Nivel de aspiración 1
Nivel de aspiración 2
- 19 -
Anl_TE_VC_36_30_Li_S_USA_SPK7.indb 19Anl_TE_VC_36_30_Li_S_USA_SPK7.indb 19 13.04.2022 14:00:3413.04.2022 14:00:34

SP
Peligro!
Al usar aparatos es preciso tener en cuenta una
serie de medidas de seguridad para evitar lesiones o daños. Por este motivo, es preciso leer
atentamente este manual de instrucciones/advertencias de seguridad. Guardar esta información
cuidadosamente para poder consultarla en cualquier momento. En caso de entregar el aparato a
terceras personas, será preciso entregarles, asimismo, el manual de instrucciones/advertencias
de seguridad. No nos hacemos responsables de
accidentes o daños provocados por no tener en
cuenta este manual y las instrucciones de seguridad.
1. Instrucciones de seguridad
INSTRUCCIONES IMPORTANTES DE
SEGURIDAD
A la hora de usar un aparato eléctrico, es preciso
tener en cuenta una serie de medidas básicas,
incluyendo las siguientes:
LEER TODAS LAS INSTRUCCIONES ANTES
DE USAR (ESTE APARATO). Si no se siguen
las advertencias e instrucciones, se puede
correr el riesgo de sufrir una descarga eléctrica, provocar un incendio y/o sufrir lesiones
graves.
ADVERTENCIA–Para reducir el riesgo de incendio, descarga eléctrica o lesión:
1. Solamente para uso en interiores.
2. No permitir que se use a modo de juguete. Es
preciso estar muy atento si se utiliza en las
inmediaciones de niños, animales o plantas.
3. Utilizar solo según se describe en este manual. Utilizar solo accesorios recomendados
por el fabricante.
4. No utilizar si el cable o enchufe presentan daños. Si el aparato no funciona como debería,
se ha caído, dañado, dejado a la intemperie
o se ha caído en agua, llevarlo a un centro de
servicio.
5. No tirar del aparato ni transportarlo por el
cable, ni utilizar el cable a modo de asa. No
cerrar una puerta pillando el cable ni acercarlo a bordes afi lados ni esquinas. No pasar
el aparato por encima del cable. Mantener el
cable alejado de superfi cies calientes.
6. No desenchufar el aparato tirando del cable.
Para desenchufarlo, hacerlo agarrando el enchufe, no el cable.
7. No manipular el cargador (incl. el enchufe del
cargador) ni los terminales de carga con las
manos mojadas.
8. No introducir objetos en las aberturas. No
utilizar si alguna abertura está bloqueada.
Mantenerlas libres de polvo, pelusas, pelo y
cualquier cosa que pueda reducir el fl ujo de
aire.
9. Mantener el cabello, la ropa holgada, los dedos y todas las partes del cuerpo alejadas de
las aberturas y de las piezas en movimiento.
10. Prestar especial cuidado a la hora de limpiar
en escaleras.
11. No utilizar para absorber líquidos infl amables
o combustibles, como por ejemplo gasolina,
ni utilizarlo en áreas donde puedan estar presentes.
12. No absorber nada que esté encendido o de
lo que salga humo, como por ejemplo cigarrillos, cerillas o cenizas calientes.
13. No lo use sin el fi ltro.
14. Evitar un arranque inesperado. Asegurarse
de que el interruptor se encuentre en la posición OFF antes de conectar la batería, alzar
el aparato o transportarlo. El transporte de
aparatos con el dedo en el interruptor o la
activación de aparatos eléctricos con el interruptor en ON puede provocar accidentes.
15. Desconectar la batería del aparato antes
de realizar ajustes, cambiar accesorios o
almacenar el aparato. Este tipo de medidas
de seguridad preventivas sirve para reducir
el riesgo de poner en marcha el aparato de
manera involuntaria.
16. Recargar solo con el cargador especifi cado
por el fabricante. Un cargador adecuado para
un tipo de batería puede conllevar el riesgo
de provocar un incendio si se usa con otro
tipo de batería.
17. Utilizar los aparatos solo con las baterías
designadas específi camente. El uso de
cualquier otro tipo de batería puede suponer
un riesgo de sufrir lesiones y de provocar un
incendio.
18. Si no se está usando la batería, mantenerla
alejada de otros objetos metálicos, como
clips, monedas, llaves, clavos, tornillos u
otros objetos pequeños de metal que puedan
realizar una conexión de un terminal al otro.
Si se cortocircuitan los terminales de la batería, se pueden provocar quemaduras o un
incendio.
19. En caso de uso excesivo, es posible que algo
de líquido goteé de la batería. Evitar el contacto. En caso de contacto accidental, lavar
- 20 -
Anl_TE_VC_36_30_Li_S_USA_SPK7.indb 20Anl_TE_VC_36_30_Li_S_USA_SPK7.indb 20 13.04.2022 14:00:3413.04.2022 14:00:34

SP
con agua. Si el líquido entra en contacto con
los ojos, buscar atención médica. El líquido
que sale de la batería puede causar irritación
o quemaduras.
20. No utilizar baterías ni aparatos que estén dañados o modifi cados. Las baterías dañadas
o modifi cadas pueden manifestar comporta-
mientos impredecibles que den lugar a incendio, explosión o riesgo de lesión.
21. No exponer una batería ni un aparato al fuego
o a una temperatura excesiva. La exposición
al fuego o a una temperatura superior a los
130°C puede provocar una explosión.
22. Seguir todas las instrucciones de carga y
no cargar la batería ni el aparato fuera del
margen de temperatura especifi cado en las
instrucciones. Una carga inadecuada o a
temperaturas fuera del margen especifi cado
puede dañar la batería e incrementar el riesgo de incendio.
23. Encargar el servicio exclusivamente a una
persona cualifi cada que use solo piezas de
repuesto idénticas. Solo así se podrá mantener la seguridad del producto.
24. No modifi car ni intentar reparar el aparato o la
batería de forma distinta a lo que se indique
en las instrucciones de uso y conservación.
GUARDAR ESTAS INSTRUCCIONES
Para un uso exclusivamente doméstico.
2. Descripción del aparato y
volumen de entrega
2.1 Descripción del aparato (fi g. 1-21)
1. Asa de transporte
2. Interruptor ON/OFF/niveles de aspiración
3. Cabezal del aparato
4. Recipiente de fi ltraje
5. Válvula de fl otador de seguridad
6. Ganchos de cierre
7. Recipiente
8. Conexión de la manguera de aspiración
9. Conexión de soplado
10. Manguera de aspiración fl exible
11. Tubo de aspiración, telescópico
12. Boquilla multiuso
13. Ruedecillas
14. Bolsa de recogida
15. Filtro de espuma
16. Boquilla esquinera
17. Tornillo para la purga de agua
18. Filtro plisado con tapa
19. Tapa de la batería
20. Adaptador de herramienta
21. Dispositivo de retención
22. Ruedas
23. Boquilla cepillo
24. Soporte para arco de empuje
25. Compartimento accesorios
26. Empuñadura
27. Trampilla de regulación
28. 4 arandelas para el montaje de las ruedas
29. 2 pasadores de aletas de seguridad para el
montaje de las ruedas
30. 2 cubiertas para el montaje de las ruedas
31. Eje para montaje de ruedas
32. 2 tornillos para el montaje del arco de empuje
33. Filtro
34. Cubierta del fi ltro
35. Arco de empuje
36. Tuerca de sujeción para arco de empuje
37. Cadena
38. Conexiones del arco de empuje
39. Indicador de capacidad de batería
40. Pulsador para indicar la capacidad de batería
2.2 Volumen de entrega
Sirviéndose de la descripción del volumen de entrega, comprobar que el artículo esté completo. Si
faltase alguna pieza, dirigirse a nuestro Service
Center o a la tienda especializada más cercana
en un plazo máximo de 5 días laborales tras la
compra del artículo presentando un recibo de
compra válido.
Abrir el embalaje y extraer cuidadosamente
•
el aparato.
Retirar el material de embalaje, así como los
•
dispositivos de seguridad del embalaje y para
el transporte (si existen).
Comprobar que el volumen de entrega esté
•
completo.
Comprobar que el aparato y los accesorios
•
no presenten daños ocasionados durante el
transporte.
Si es posible, almacenar el embalaje hasta
•
que transcurra el periodo de garantía.
Peligro!
¡El aparato y el material de embalaje no son
un juguete! ¡No permitir que los niños jueguen con bolsas de plástico, láminas y piezas pequeñas! ¡Riesgo de ingestión y asfi xia!
Manual de instruccion original con instruction
•
de seguridad
- 21 -
Anl_TE_VC_36_30_Li_S_USA_SPK7.indb 21Anl_TE_VC_36_30_Li_S_USA_SPK7.indb 21 13.04.2022 14:00:3413.04.2022 14:00:34

SP
El aparato está equipado con una cadena (37) en
la base del recipiente. Sirve para evitar la carga
estática durante la utilización.
Accesorios disponibles por separado
18V 1.5Ah PXC batería Li-Ion
18V 2.0Ah PXC batería Li-Ion
18V 2.5Ah PXC batería Li-Ion
18V 3.0Ah PXC batería Li-Ion
18V 4.0Ah PXC batería Li-Ion
18V 3.0Ah PXC Plus batería Li-Ion
18V 4.0Ah PXC Plus batería Li-Ion
18V 5.2Ah PXC Plus batería Li-Ion
18V 4.0Ah/6.0Ah PXC Plus batería Li-Ion
18V 5.0Ah/8.0Ah PXC Plus batería Li-Ion
18V PXC cargador rápido de doble Puerto
18V PXC cargador rápido
Comuníquese con su distribuidor local para
obtener modelos más específi cos de baterías y
cargadores disponibles en su área. Explorar las
opciones de batería y cargador en einhell.com
3. Uso adecuado
La aspiradora para seco/mojado inalámbrica ha
sido concebida para aspirar materiales sólidos
y líquidos utilizando el fi ltro correspondiente. El
aparato no está indicado para aspirar materiales
infl amables, explosivos ni perjudiciales para la
salud.
Utilizar la máquina sólo en los casos que se indican explícitamente como de uso adecuado. Cualquier otro uso no será adecuado. En caso de uso
inadecuado, el fabricante no se hace responsable
de daños o lesiones de cualquier tipo; el responsable es el usuario u operario de la máquina.
Tener en consideración que nuestro aparato no
está indicado para un uso comercial, industrial o
en taller. No asumiremos ningún tipo de garantía
cuando se utilice el aparato en zonas industriales, comerciales o talleres, así como actividades
similares.
4. Características técnicas
Alimentación de tensión
de motor: ..............................36 V
Flujo de aire: .................... 56 CFM (1.59 m³/min)
Succión hermética:
BOOST: ..................59’’ (PULGADAS DE AGUA)
ECO: .......................40'' (PULGADAS DE AGUA)
Longitud de manguera
de aspirado: ................................8.2 pies (2.5 m)
Capacidad de tanque: ....................8 gallon (30 l)
Peso: ...............................................17.6 lb (8 kg)
(2x 18 V)
5. Antes de la puesta en marcha
5.1 Montaje del aparato
Montaje del cabezal del aparato (fi g. 1/5)
El cabezal del aparato (3) está sujeto al recipiente (7) por medio de ganchos de cierre (6). Para
sacar el cabezal (3), abrir los ganchos de cierre
(6) y extraer el cabezal (3). Al montar el cabezal
(3) asegurarse de que los ganchos de cierre (6)
se enclaven bien.
Montaje de las ruedas (fi g. 7/13)
Introducir un pasador de aletas de seguridad
para el montaje de las ruedas (29) en la perforación del eje (31) y encajar una arandela (28), una
rueda (22) y una arandela en el eje (31) (fi g. 7-8).
A continuación, introducir el eje (31) en las perforaciones previstas para ello situadas en la parte
inferior del recipiente (7) (fi g. 9). Introducir la aran-
dela y la segunda rueda (22) en el extremo libre
del eje (31) y asegurarla con la otra arandela (28)
y el pasador de aletas de seguridad (29) (fi g. 10-
12). Colocar la cubierta (30) sobre el lado exterior
de las ruedas (22) de forma que las lengüetas
de sujeción de las cubiertas (30) encajen en las
ruedas (22). (Fig. 13).
Montaje de las ruedecillas (fi g. 6/pos. 13)
Encajar las ruedecillas (13) en el alojamiento
adecuado en la parte inferior del recipiente (7).
Presionar con fuerza las ruedecillas (13) hasta
que se pueda percibir que han quedado encajadas (fi g. 6).
- 22 -
Anl_TE_VC_36_30_Li_S_USA_SPK7.indb 22Anl_TE_VC_36_30_Li_S_USA_SPK7.indb 22 13.04.2022 14:00:3413.04.2022 14:00:34

SP
Montaje del arco de empuje (fi g. 18)
Encajar el arco de empuje (35) en las conexiones
del arco de empuje (38) del recipiente y asegurarlo con ayuda de los tornillos suministrados (32)
y las tuercas de sujeción (36) según se muestra
en la fi gura 18.
5.2 Montaje del fi ltro
¡Advertencia!
¡No utilizar nunca la aspiradora para seco/mojado
sin fi ltro!
¡Asegurarse de que los fi ltros estén siempre bien
colocados!
Montaje del fi ltro de espuma (fi g. 14/pos. 15)
Para aspirar en mojado, colocar el fi ltro de es-
puma suministrado (15) sobre el recipiente de
fi ltraje (fi g. 4/pos. 4).
Montaje del fi ltro plisado (fi g. 15)
Para aspirar en seco, deslice el fi ltro plisado (ele-
mento 18) en la cesta del fi ltro y fíjelo girando en
el sentido de las agujas del reloj hasta que los
pomos de bloqueo encajen. El fi ltro plisado sólo
es adecuado para la aspiración en seco
Montaje de la bolsa de recogida
(fi g. 17/pos. 14)
Para aspirar suciedad fi na y seca, recomen-
damos montar la bolsa de recogida (fi g. 2/pos.
14). Colocar la bolsa de recogida (14) sobre la
perforación de aspiración. La bolsa de recogida
(14) es adecuada únicamente para la aspiración
en seco. El polvo aspirado puede eliminarse con
mayor facilidad con la bolsa de recogida.
5.3 Montaje de la manguera de aspiración
(fi g. 17/pos. 10)
Dependiendo del tipo de uso, conectar la manguera de aspiración (10) a la conexión correspondiente de la aspiradora para seco/mojado.
Aspiración
Conectar la manguera de aspiración (10) a la conexión de la manguera de aspiración (8).
Soplado
Conectar la manguera de aspiración (10) a la conexión de soplado (9).
Trampilla de regulación (fi g. 2/pos. 27)
La trampilla de regulación (27) se puede colocar
entre la manguera de aspiración (10) y el tubo de
aspiración (11). En la trampilla de regulación (27)
se puede regular de forma continua la potencia
de aspiración en la boquilla.
En la aspiración en mojado, utilizar la trampilla de
regulación para aspirar aire además de líquido a
través de ella. De este modo, el aparato se descarga durante la aspiración del líquido.
5.4 Boquillas aspiradoras
Boquilla multiuso (fi g. 2)
La boquilla multiuso (12) está indicada para aspirar materiales sólidos y líquidos en superfi cies
medianas a grandes.
Boquilla esquinera (fi g. 2)
La boquilla esquinera (16) sirve para aspirar sólidos y líquidos en esquinas, cantos y otros lugares
de difícil acceso.
Boquilla cepillo (fi g. 2)
La boquilla cepillo (23) está especialmente diseñada para aspirar sólidos de materiales tapizados
y alfombras.
Montaje de la batería (fi g. 16)
Subir la tapa de la batería (19) como se muestra
en la fi gura 16. A continuación, introducir las dos
baterías en el alojamiento. El dispositivo no tiene
ninguna función con una sola batería.
6. Manejo
6.1 Interruptor ON/OFF (fi g. 1/pos. 2)
Posición de interruptor 0: apagado
Posición de interruptor I: nivel de aspiración 1
Posición de interruptor II: nivel de aspiración 2
6.2 Aspiración en seco
Para aspirar en seco, utilizar el fi ltro plisado (18)
(véase punto 5.2). Para eliminar la suciedad
especialmente resistente, se puede montar
adicionalmente la bolsa de recogida (14) (véase
punto 5.3).
¡Asegurarse de que los fi ltros estén siempre bien
colocados!
6.3 Aspiración en mojado
Para aspirar en mojado, utilizar el fi ltro de espuma
(15) (véase punto 5.2).
¡Asegurarse de que el fi ltro esté siempre bien
colocado!
Tornillo para la purga de agua (fi g. 1)
El recipiente (7) está provisto de un tornillo para
la purga de agua (17) con el fi n de facilitar su va-
- 23 -
Anl_TE_VC_36_30_Li_S_USA_SPK7.indb 23Anl_TE_VC_36_30_Li_S_USA_SPK7.indb 23 13.04.2022 14:00:3413.04.2022 14:00:34

SP
ciado cuando se aspira en mojado.
Abrir el tornillo para la purga de agua (17) girándolo hacia la izquierda y dejar que salga el
líquido.
En la aspiración en mojado, la válvula de fl o-
tador de seguridad (fi g. 4/pos. 5) se cierra una
vez alcanzado el nivel de llenado máximo en el
recipiente. En tal caso, el ruido de aspiración del
aparato aumenta.
Apagar entonces el aparato y vaciar el recipiente.
¡Peligro!
La aspiradora para seco/mojado no ha sido concebida para aspirar líquidos infl amables. ¡Para
aspirar en mojado, utilizar sólo el fi ltro de espuma
suministrado!
6.4 Soplado
Conectar la manga de aspiración (10) al empalme de soplado (9) de la aspiradora para seco/
mojado.
6.5 Cómo cargar la batería de litio (no incluido en el volumen de entrega)
Las instrucciones correspondientes se encuentran en el manual de instrucciones original del
cargador.
6.6 Indicador de capacidad de batería
(fi g. 21/pos. 39)
Pulsar el interruptor para acceder al indicador
de capacidad de la batería (40). El indicador de
capacidad de batería (39) le indica el estado de
carga de la batería sirviéndose de 3 LEDs.
Los 3 LED están iluminados:
La batería está completamente cargada.
2 o 1 LED están iluminados
La batería dispone de sufi ciente carga residual.
1 LED parpadea:
La batería está vacía, es preciso cargarla.
Si todos los LED parpadean:
La temperatura de la batería es demasiado baja.
Quitar la batería del aparato y dejarla durante un
día a temperatura ambiente. Si vuelve a aparecer
el fallo, la batería se ha descargado completamente y está defectuosa. Quitar la batería del
aparato. Está prohibido emplear o cargar una
batería defectuosa.
7. Mantenimiento y limpieza
Peligro!
Quitar la batería antes de realizar cualquier trabajo de limpieza.
7.1 Limpieza
Evitar al máximo posible que la suciedad y
•
el polvo se acumulen en los dispositivos de
seguridad, las rendijas de ventilación y la carcasa del motor.
Se recomienda limpiar el aparato inmediata-
•
mente después de cada uso.
7.2 Limpieza del cabezal del aparato (fi g. 1/
pos. 3)
Limpiar el aparato de forma periódica con un
paño húmedo y un poco de jabón blando. No
utilizar productos de limpieza o disolventes ya
que podrían deteriorar las piezas de plástico del
aparato.
7.3 Limpieza del recipiente (fi g. 1/pos. 7)
Dependiendo del nivel de suciedad, el recipiente
se puede limpiar con un paño húmedo, un poco
de jabón blando y agua abundante.
7.4 Limpieza del fi ltro
Limpieza del fi ltro plisado (fi g. 2)
Limpiar regularmente el fi ltro plisado (18) sacu-
diéndolo con cuidado y limpiándolo con un cepillo
blando o una escobilla.
Limpieza del fi ltro de espuma (fi g. 2)
Limpiar el fi ltro de espuma (15) con un poco de
jabón blando y con abundante agua y dejar que
se seque al aire.
Limpieza del fi ltro (fi g. 19/20)
El fi ltro (33) debe ser revisado y limpiado des-
pués de cada uso.
1. Retirar la cubierta del fi ltro (34) (fi g. 19).
2. Extraer el fi ltro (33) (fi g. 20).
3. Limpiar el fi ltro sacudiéndolo o soplando
4. El montaje se realiza siguiendo el mismo orden pero a la inversa
7.5 Mantenimiento
Controlar regularmente el fi ltro de la aspiradora
para seco/mojado, así como que siempre esté
bien sujeto.
- 24 -
Anl_TE_VC_36_30_Li_S_USA_SPK7.indb 24Anl_TE_VC_36_30_Li_S_USA_SPK7.indb 24 13.04.2022 14:00:3413.04.2022 14:00:34

SP
8. Eliminación y reciclaje
El aparato está protegido por un embalaje para
evitar daños producidos por el transporte. Este
embalaje es materia prima y, por eso, se puede
volver a utilizar o llevar a un punto de reciclaje. El
aparato y sus accesorios están compuestos de
diversos materiales, como, p. ej., metal y plástico.
Los aparatos defectuosos no deben tirarse a la
basura doméstica. Para su eliminación adecuada,
el aparato debe entregarse a una entidad recolectora prevista para ello. En caso de no conocer
ninguna, será preciso informarse en el organismo
responsable del municipio.
9. Almacenamiento
Guardar el aparato y sus accesorios en un lugar
oscuro, seco, protegido de las heladas e inaccesible para los niños. La temperatura de almacenamiento óptima se encuentra entre los 41°F y
86°F (5 y 30 ˚C). Guardar la herramienta eléctrica
en su embalaje original.
Sólo está permitido copiar la documentación y
documentos anexos del producto, o extractos de
los mismos, con autorización expresa de Einhell Germany AG.
Nos reservamos el derecho a realizar modifi ca-
ciones técnicas
- 25 -
Anl_TE_VC_36_30_Li_S_USA_SPK7.indb 25Anl_TE_VC_36_30_Li_S_USA_SPK7.indb 25 13.04.2022 14:00:3413.04.2022 14:00:34

- 26 -
Anl_TE_VC_36_30_Li_S_USA_SPK7.indb 26Anl_TE_VC_36_30_Li_S_USA_SPK7.indb 26 13.04.2022 14:00:3413.04.2022 14:00:34

- 27 -
Anl_TE_VC_36_30_Li_S_USA_SPK7.indb 27Anl_TE_VC_36_30_Li_S_USA_SPK7.indb 27 13.04.2022 14:00:3413.04.2022 14:00:34

- 28 -
Anl_TE_VC_36_30_Li_S_USA_SPK7.indb 28Anl_TE_VC_36_30_Li_S_USA_SPK7.indb 28 13.04.2022 14:00:3413.04.2022 14:00:34

- 29 -
Anl_TE_VC_36_30_Li_S_USA_SPK7.indb 29Anl_TE_VC_36_30_Li_S_USA_SPK7.indb 29 13.04.2022 14:00:3413.04.2022 14:00:34

www.Einhell.com
EH 04/2022 (01)
Anl_TE_VC_36_30_Li_S_USA_SPK7.indb 30Anl_TE_VC_36_30_Li_S_USA_SPK7.indb 30 13.04.2022 14:00:3413.04.2022 14:00:34
 Loading...