

Bedienungsanleitung
Gartenhäcksler
t
Operating Instructions
Refusew shredder
Mode dʼemploi
Broyeurs
Gebruiksaanwijzing
Elektrische tuinhakselaar
Manuale istruzioni
Biotrituratori
Manuale istruzioni
Biotrituratori
T Руководство по эксплуатации
садового измельчителя
Instrukcja obsługi
Rozdrabniacz ogrodowy
RGH 2040
Art.-Nr.: 34.303.60 I.-Nr.: 01016
Anleitung RGH 2040_SPK1:Anleitung EGH 2745_SPK1 17.01.2007 8:30 Uhr Seite 1

2
Vor Inbetriebnahme Bedienungsanleitung und
Sicherheitshinweise lesen und beachten
Read and follow the operating instructions and safety information
before using for the first time.
Avant la mise en service, lisez le mode dʼemploi et les consignes
de sécurité et respectez-les.
Vóór ingebruikneming de handleiding en de
veiligheidsvoorschriften lezen en in acht nemen!
Prima della messa in esercizio leggete e osservate le istruzioni
per lʼuso e le avvertenze di sicurezza.
Betjeningsvejledningen og sikkerhedsanvisningerne skal læses,
inden maskinen tages i brug. Alle anvisninger skal følges.
Przed uruchomieniem należy przeczytać instrukcję obsługi i
wskazówki dotyczące bezpieczeństwa oraz stosować się do nich.
T Перед первым использованием прочтите руководство по
эксплуатации и следуйте содержащимся в нем указаниям.
Anleitung RGH 2040_SPK1:Anleitung EGH 2745_SPK1 17.01.2007 8:30 Uhr Seite 2
3
2 3
1
9
14
13
6
7
4
5
9
15
2
8
12
1
11
10
3
6
7
5
Anleitung RGH 2040_SPK1:Anleitung EGH 2745_SPK1 17.01.2007 8:30 Uhr Seite 3
4
6 7
5
8 9
4
Anleitung RGH 2040_SPK1:Anleitung EGH 2745_SPK1 17.01.2007 8:30 Uhr Seite 4
5
10 11
12
13
C
D
B
A
Anleitung RGH 2040_SPK1:Anleitung EGH 2745_SPK1 17.01.2007 8:30 Uhr Seite 5

6
Inhaltsverzeichnis Seite
11. Allgemeine Sicherheitsvorschriften 7
12. Technische Daten 7
13. Aufbauübersicht und Lieferumfang 7
14. Ordnungsgemäßer Gebrauch 7
15. Zusammenbau des Gartenhäckslers 7
16. Inbetriebnahme 8
17. Arbeitshinweise 8
18. Austausch, Schärfen, Messerwechsel 9
19. Wartung und Pflege 9
10. Ersatzteilbestellung 9
11. Entsorgung 9
12. Fehlersuchplan 10
D
Anleitung RGH 2040_SPK1:Anleitung EGH 2745_SPK1 17.01.2007 8:30 Uhr Seite 6

7
Verpackung:
Das Gerät befindet sich in einer Verpackung um
Transportschäden zu verhindern. Diese Verpackung
ist Rohstoff und ist somit wiederverwendbar oder
kann dem Rohstoffkreislauf zurückgeführt werden.
Beim Benutzen von Geräten müssen einige
Sicherheitsvorkehrungen eingehalten werden,
um Verletzungen und Schäden zu verhindern:
앬 Lesen Sie die Bedienungsanleitung sorgfältig
durch und beachten Sie deren Hinweise. Machen
Sie sich anhand dieser Gebrauchsanweisung mit
dem Gerät, dem richtigen Gebrauch sowie den
Sicherheitsvorschriften vertraut.
앬 Bewahren Sie diese gut auf, damit Ihnen die
Informationen jederzeit zur Verfügung stehen.
앬 Falls Sie das Gerät an andere Personen überge-
ben sollten, händigen Sie diese Bedienungsanleitung bitte mit aus.
Wir übernehmen keine Haftung für Unfälle oder
Schäden, die durch Nichtbeachten dieser
Anleitung entstehen.
1. Allgemeine Sicherheitsvorschriften
Die Allgemeinen Sicherheitsvorschriften und die
Erklärung der Hinweisschilder entnehmen Sie dem
beiliegendem Heftchen.
2. Technische Daten
Netzspannung: 230 V ~ 50 Hz
Leistungsaufnahme: 2000W
Leerlaufdrehzahl n
0
:
4500 min
-1
Astdurchmesser: max. 40 mm
Schalldruckpegel LpA: 86 dB
Schallleistungspegel LWA: 107 dB
Gewicht: 10,5 kg
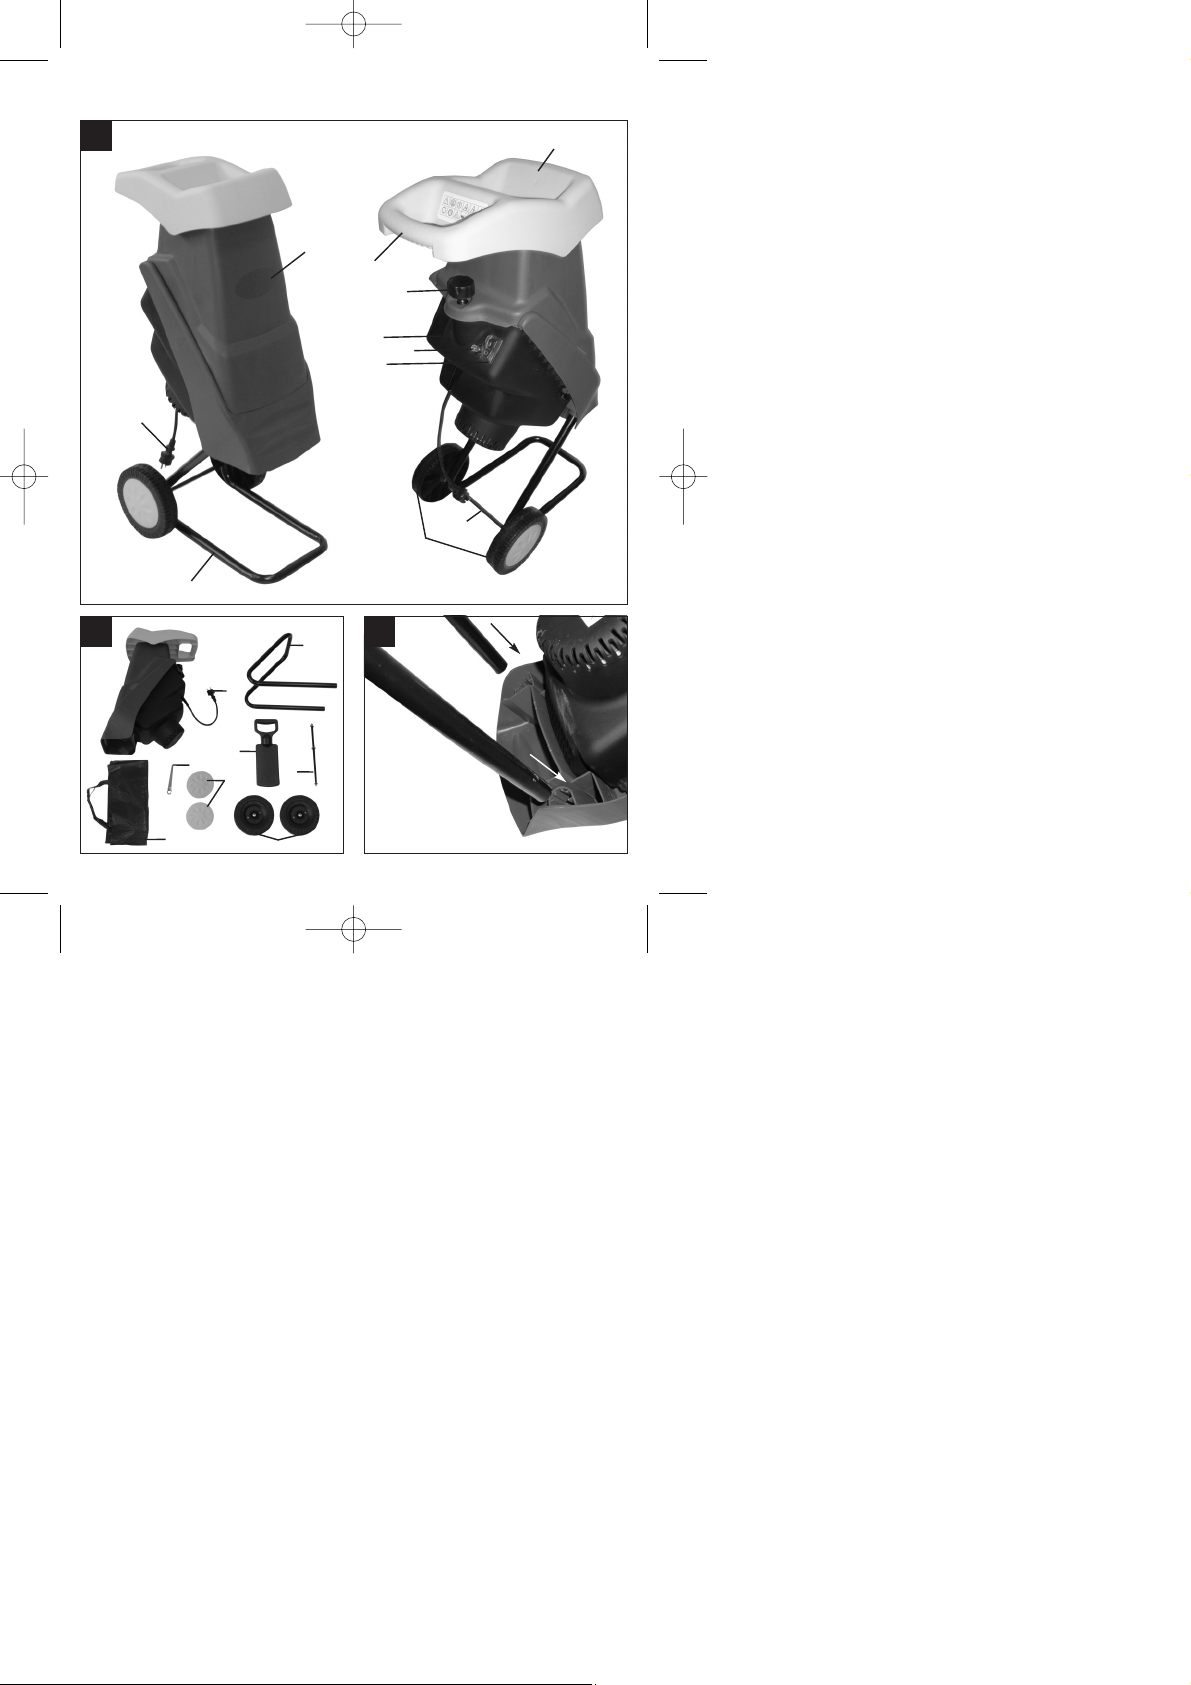
3. Aufbauübersicht und Lieferumfang
(Bild 1/2)
1 Einfülltrichter
2 Fülltrichter
3 Motorgehäuse mit Messerplatte
4 Stopfer
5 Fahrgestell komplett
6 Räder
7 Achse (incl. Unterlegscheiben und Muttern)
8 Transportgriff
9 Netzstecker
10 Überlastschalter
11 Ein- /Ausschalter
12 Sicherheitsschraube
13 Radkappen
14 Ringschlüssel
15 Häckselgutfangsack
4. Ordnungsgemäßer Gebrauch
Der Elektrogartenhäcksler ist nur zum Zerkleinern
von organischem Gartenabfall bestimmt. Führen Sie
das biologisch abbaubare Material (z.B. Blätter,
Zweige) in den Einfülltrichter ein.
Bitte beachten Sie, dass unsere Geräte bestimmungsgemäß nicht für den gewerblichen, handwerklichen oder industriellen Einsatz konstruiert wurden.
Wir übernehmen keine Gewährleistung, wenn das
Gerät in Gewerbe-, Handwerks- oder Industriebetrieben sowie bei gleichzusetzenden Tätigkeiten
eingesetzt wird.
Aufnahme des Häckselgutes
Es kann der mitgelieferte Häckselgutfangsack
unter die Auswurföffnung gestellt werden.
5. Zusammenbau des Gartenhäckslers
Der Gartenhäcksler ist bei Auslieferung demontiert.
Das Fahrgestell und die Räder müssen vor Gebrauch montiert werden. Folgen Sie der Gebrauchsanweisung Schritt für Schritt und orientieren Sie sich
an den Bildern, damit der Zusammenbau einfach für
Sie wird.
5.1 Fahrgestell montieren (Bild 3)
앬 Das Motorgehäuse umgedreht auf den Boden
legen
앬 Das Fahrgestell bis zum Anschlag in die dafür
D
Anleitung RGH 2040_SPK1:Anleitung EGH 2745_SPK1 17.01.2007 8:30 Uhr Seite 7

8
D
vorgesehenen Öffnungen stecken.
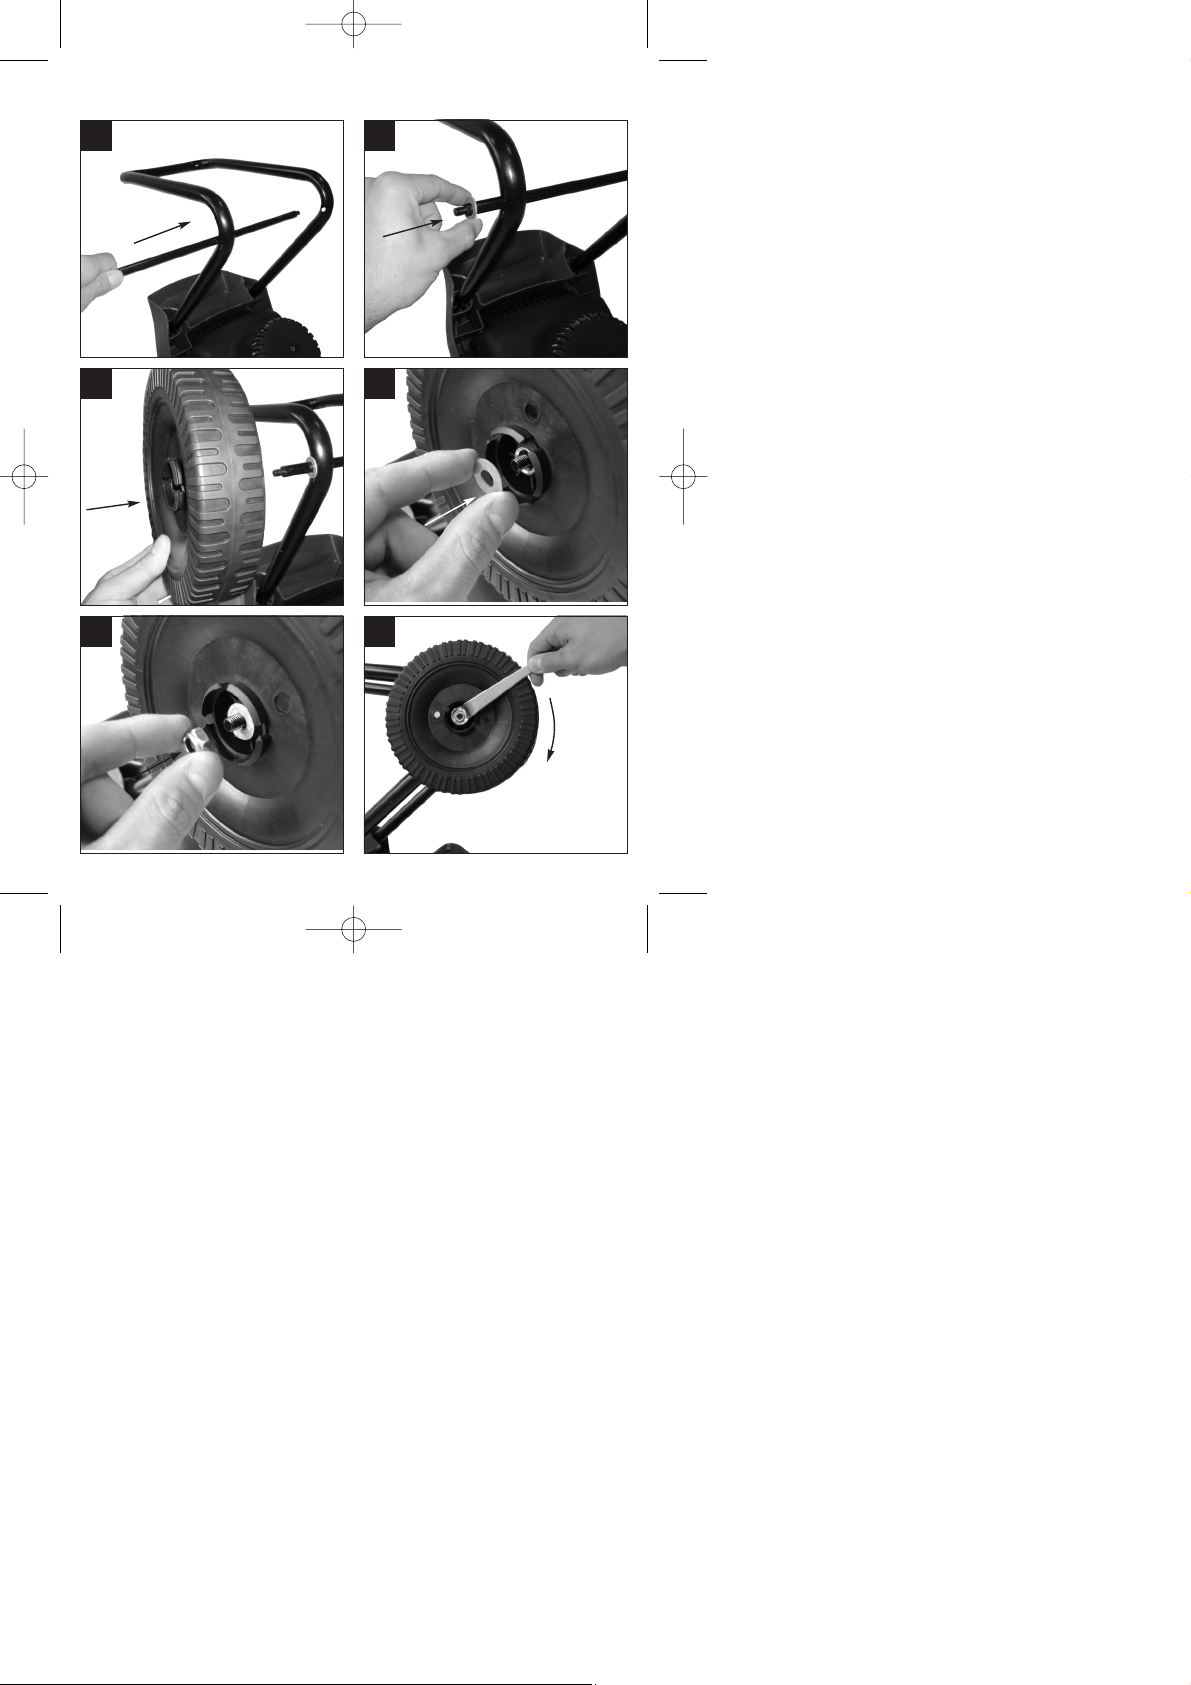
5.2 Achse und Räder montieren (Bild 4-10)
앬 Muttern und Unterlegscheiben von der Achse
entfernen
앬 Das Fahrgestell wie in den Abbildungen 4-10
dargestellt montieren.
6. Inbetriebnahme
6.1 Gerät anschließen und einschalten
앬 Stecken Sie die Kupplung der Geräteanschluss-
leitung (Verlängerung) an das Netzkabel.
(Bild 1/Pos. 9)
앬 Durch Betätigung des Ein- Ausschalters (Bild
1/Pos. 11) kann das Gerät EIN (Schalterstellung
„I“) bzw. AUS (Schalterstellung „0“) geschaltet
werden.
Hinweis: Ist keine Netzspannung am Gerät vorhanden, lässt sich das Gerät nicht einschalten. Wird die
Stromzufuhr unterbrochen, schaltet das Gerät selbstständig ab (Schalterstellung „0“). Das Gerät lässt sich
erst nach Wiederherstellung der Spannungs-versorgung und betätigen des Ein- Ausschalters in
Schalterstellung „I“ wieder einschalten.
6.2 Überlastsicherung (Motorschutz)
Der Motor wird durch einen Überlastschalter vor
Überlastung geschützt.
Im Betrieb ragt der Schaltstift etwa 4mm aus dem
Überlastschaltergehäuse. Wird der Motor längere
Zeit überlastet, so spricht der Überlastschalter an
und schaltet das Gerät ab. Ist dies der Fall, ragt der
Schaltstift des Überlastschalters etwa 8mm aus dem
Gehäuse und der Ein- Ausschalter schaltet selbstständig auf „0“.
Nach mindestens 1 Minute Wartezeit kann der
Schaltstift des Überlastschalters gedrückt und der
Ein- Ausschalter wieder eingeschaltet (Schalterstellung „I“) werden.
Sollte der Motor nicht anlaufen, so ist der Auswurfkanal zu reinigen.
6.3 Reinigen des Auswurfkanals
앬 Tragen Sie immer feste Arbeitshandschuhe
앬 Versichern Sie sich, dass der Schalter auf
Position „0“ steht.
앬 Ziehen Sie die Kupplung der Geräteanschluss-
leitung (Verlängerung) vom Gerätestecker ab.
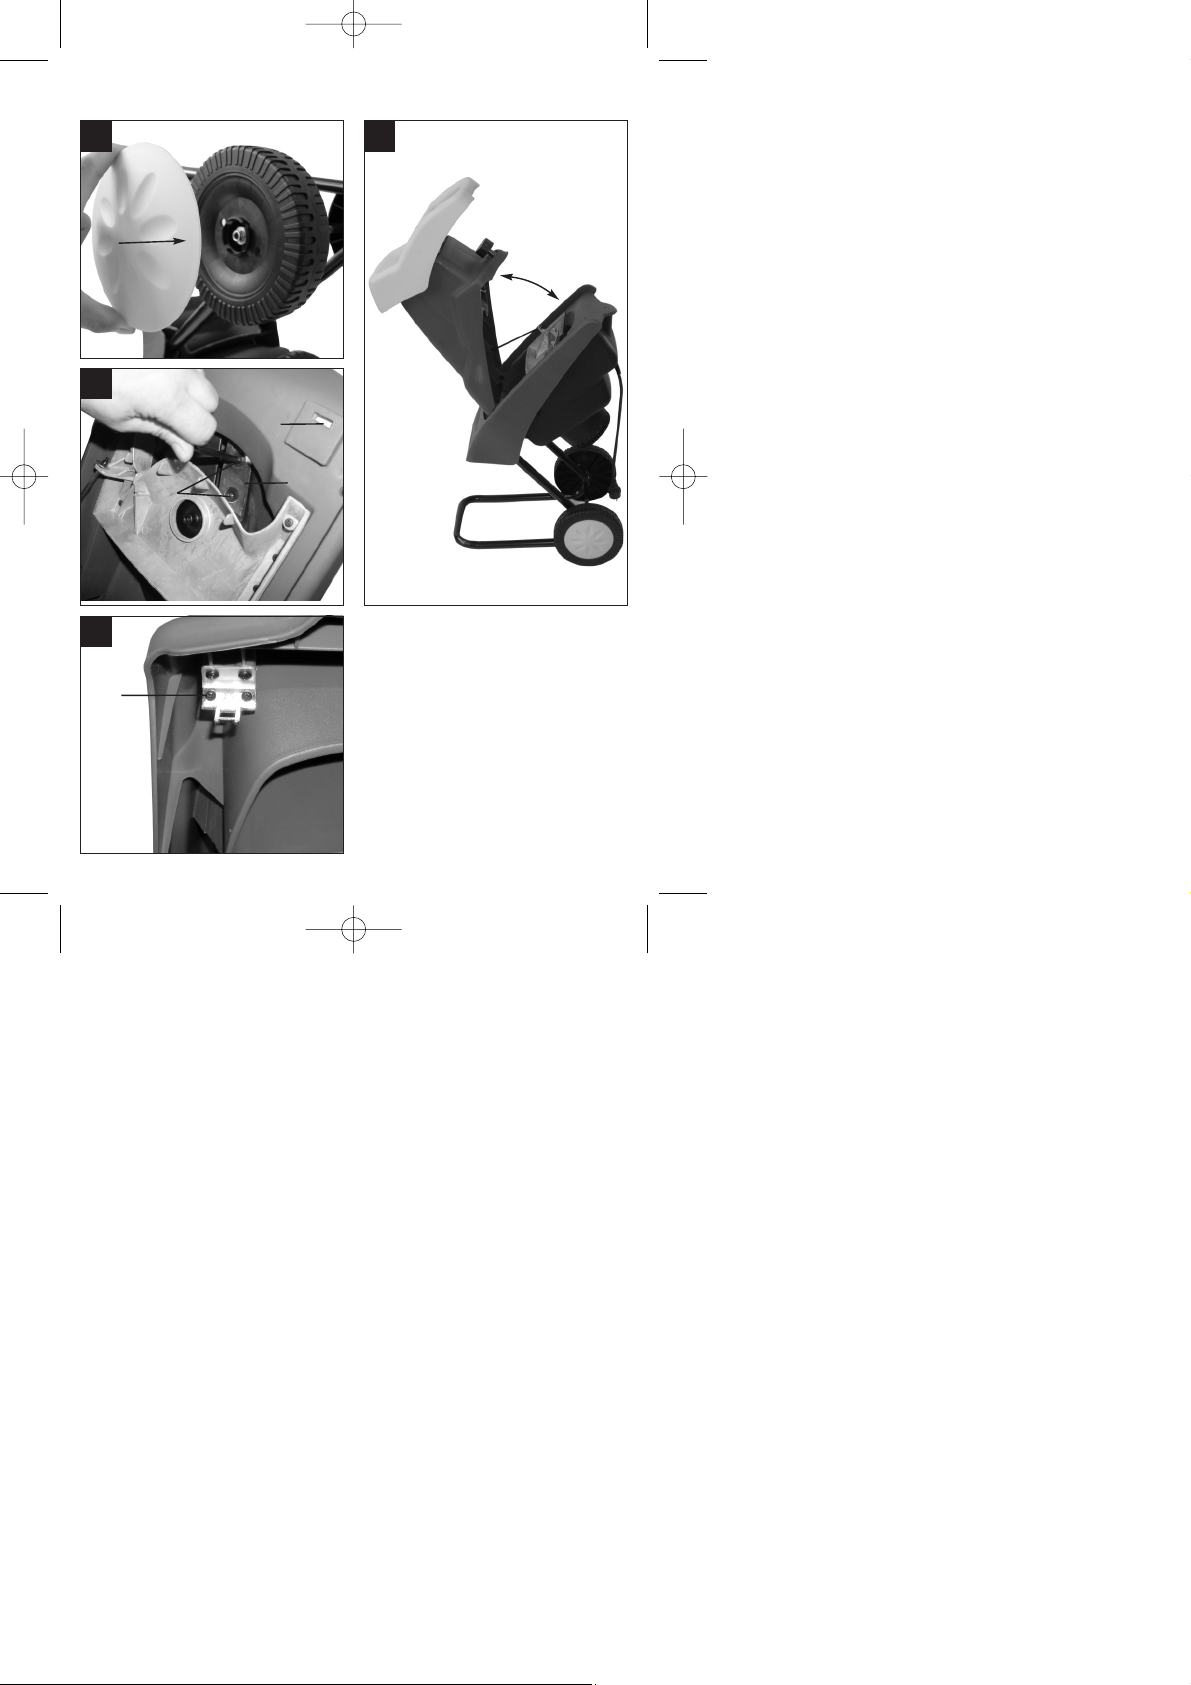
앬 Schrauben Sie die Sicherheitsschraube (Bild
1/Pos. 12) auf und klappen Sie anschließend den
Fülltrichter hoch (Bild 11).
앬 Reinigen Sie die Schneidflächen der Messer, die
Messerscheibe und den Auswurfkanal mit einer
Bürste oder Pinsel. Entfernen Sie dabei
Holzstückchen oder andere Teile, die das
Drehen der Messerscheibe blockieren können.
앬 Klappen Sie den Fülltrichter wieder zu und dre-
hen Sie die Sicherheitsschraube wieder fest.
6.4 Sicherheit
Der Häcksler ist mit einem Sicherheitsschalter (Bild
12/Pos. A) im Innenraum am Motorgehäuse ausgestattet. Die Betätigungseinheit (Bild 13/Pos. D) ist am
Fülltrichter platziert.
Sitzt der Fülltrichter nicht perfekt bzw. wird er nicht
gegen das Motorgehäuse gedrückt, schaltet der
SICHERHEITSSCHALTER und unterbindet die
Funktion des Motors. Tritt diese Situation ein, klappen Sie wie oben beschrieben den Fülltrichter auf.
Reinigen Sie sorgfältig den Innenraum. Klappen Sie
den Fülltrichter wieder wie zuvor beschrieben zu und
achten Sie beim Wiedereinschalten des Gerätes
darauf, dass der Fülltrichter richtig sitzt und die
Sicherheitsschraube ganz zugeschraubt ist.
ACHTUNG! NIEMALS die Entriegelungsschraube
(Bild 1/Pos. 12) lösen, ohne vorher das Gerät am
Ein- Ausschalter (Bild 1/Pos. 11) ausgeschaltet und
die Kupplung der Geräteanschlussleitung
(Verlängerung) vom Gerätestecker abgezogen zu
haben.
7. Arbeitshinweise
앬 Arbeitshandschuhe, Schutzbrille und Gehör-
schutz tragen.
앬 Zugeführtes Häckselgut wird selbstständig einge-
zogen.
ACHTUNG! Längeres, aus dem Gerät ragendes
Häckselgut kann beim Einziehen rutenartig ausschlagen - ausreichenden Sicherheitsabstand
einhalten.
앬 Nur soviel Häckselgut einführen, dass der
Fülltrichter nicht verstopft.
앬 Welke, feuchte, bereits mehrere Tage gelagerte
Gartenabfälle sind im Wechsel mit Ästen zu
häckseln. Dadurch wird ein Festsetzen des
Häckselgutes im Fülltrichter vermieden.
앬 Extrem weiche Abfälle (z.B. Küchenabfälle) nicht
häckseln sondern direkt kompostieren.
앬 Stark verzweigtes, laubhaltiges Gut erst vollkom-
men häckseln, bevor neues Häckselgut nachgeführt wird.
앬 Der Auswurfkanal des Fülltrichters darf nicht
Anleitung RGH 2040_SPK1:Anleitung EGH 2745_SPK1 17.01.2007 8:30 Uhr Seite 8

D
9
durch gehäckseltes Material verstopft werden Rückstaugefahr.
앬 Die Lüftungsschlitze dürfen nicht abgedeckt wer-
den.
8. Austausch, Schärfen,
Messerwechsel
Die Messer der Messerscheibe sind austauschbar.
Falls Sie Messer ersetzen müssen, dürfen Sie aus
Qualitäts- und Sicherheitsgründen nur Originalmesser verwenden.
Achtung: Wir empfehlen aus Sicherheitsgründen
das Schärfen und einen Messerwechsel nur von
Fachwerkstätten durchführen zu lassen.
Tragen Sie immer feste Arbeitshandschuhe
Zum Wechsel der Messer (Bild 12 / Pos. B) entfernen Sie die Messerschrauben (Bild 12 / Pos. C). Die
Messer können jetzt gedreht oder gegen neue
Messer ersetzt werden. Der Zusammenbau erfolgt in
umgekehrter Reihenfolge.
9. Wartung und Pflege
Achtung! Vor jedem Eingriff zur Kontrolle oder
Wartung des Gerätes unterbrechen Sie die Stromversorgung indem Sie die Geräteanschlussleitung
(Verlängerung) vom Stecker des Gerätes entfernen.
Wenden Sie sich bei Reparaturen an unsere Kundendienststelle.
앬 Verwenden Sie nur Original Ersatzteile.
앬 Reinigen Sie das Gerät regelmäßig. Dadurch
gewährleisten Sie die Funktionstüchtigkeit und
eine lange Lebensdauer.
앬 Nach beendeter Arbeit klappen Sie den
Fülltrichter nach vorne und reinigen Sie den
Innenraum. Ablagerungen an den inneren
Metallteilen entfernen Sie mit einer Bürste. Ölen
Sie die gereinigte Messerplatte und Messer
leicht ein.
앬 Beim Zuklappen des Fülltrichters achten Sie
darauf, dass der Sicherheitsschalter und die
Entriegelungsschraube frei von Verschmutzung
ist.
앬 Halten Sie während der Arbeit die Lüftungs-
schlitze sauber.
앬 Den Kunststoffkörper und die Kunststoffteile mit
leichten Haushaltsreiniger und einem feuchten
Tuch säubern. Verwenden Sie für die Reinigung
keine aggressiven Mittel oder Lösungsmittel!
앬 Spritzen Sie den Häcksler nie mit Wasser ab.
앬 Vermeiden Sie unbedingt ein Eindringen von
Wasser in das Gerät.
10. Ersatzteilbestellung
Bei der Ersatzteilbestellung sollten folgende
Angaben gemacht werden:
앬 Typ des Gerätes
앬 Artikelnummer des Gerätes
앬 Ident- Nummer des Gerätes
앬 Ersatzteil-Nummer des erforderlichen Ersatzteils
Aktuelle Preise und Infos finden Sie unter
www.isc-gmbh.info
11. Entsorgung
Achtung!
Der Gartenhäcksler und dessen Zubehör bestehen
aus verschiedenen Materialien, wie z. B. Metall und
Kunststoffe.
Führen Sie defekte Bauteile der Sondermüllentsorgung zu. Fragen Sie im Fachgeschäft oder in der
Gemeindeverwaltung nach!
Anleitung RGH 2040_SPK1:Anleitung EGH 2745_SPK1 17.01.2007 8:30 Uhr Seite 9
10
D
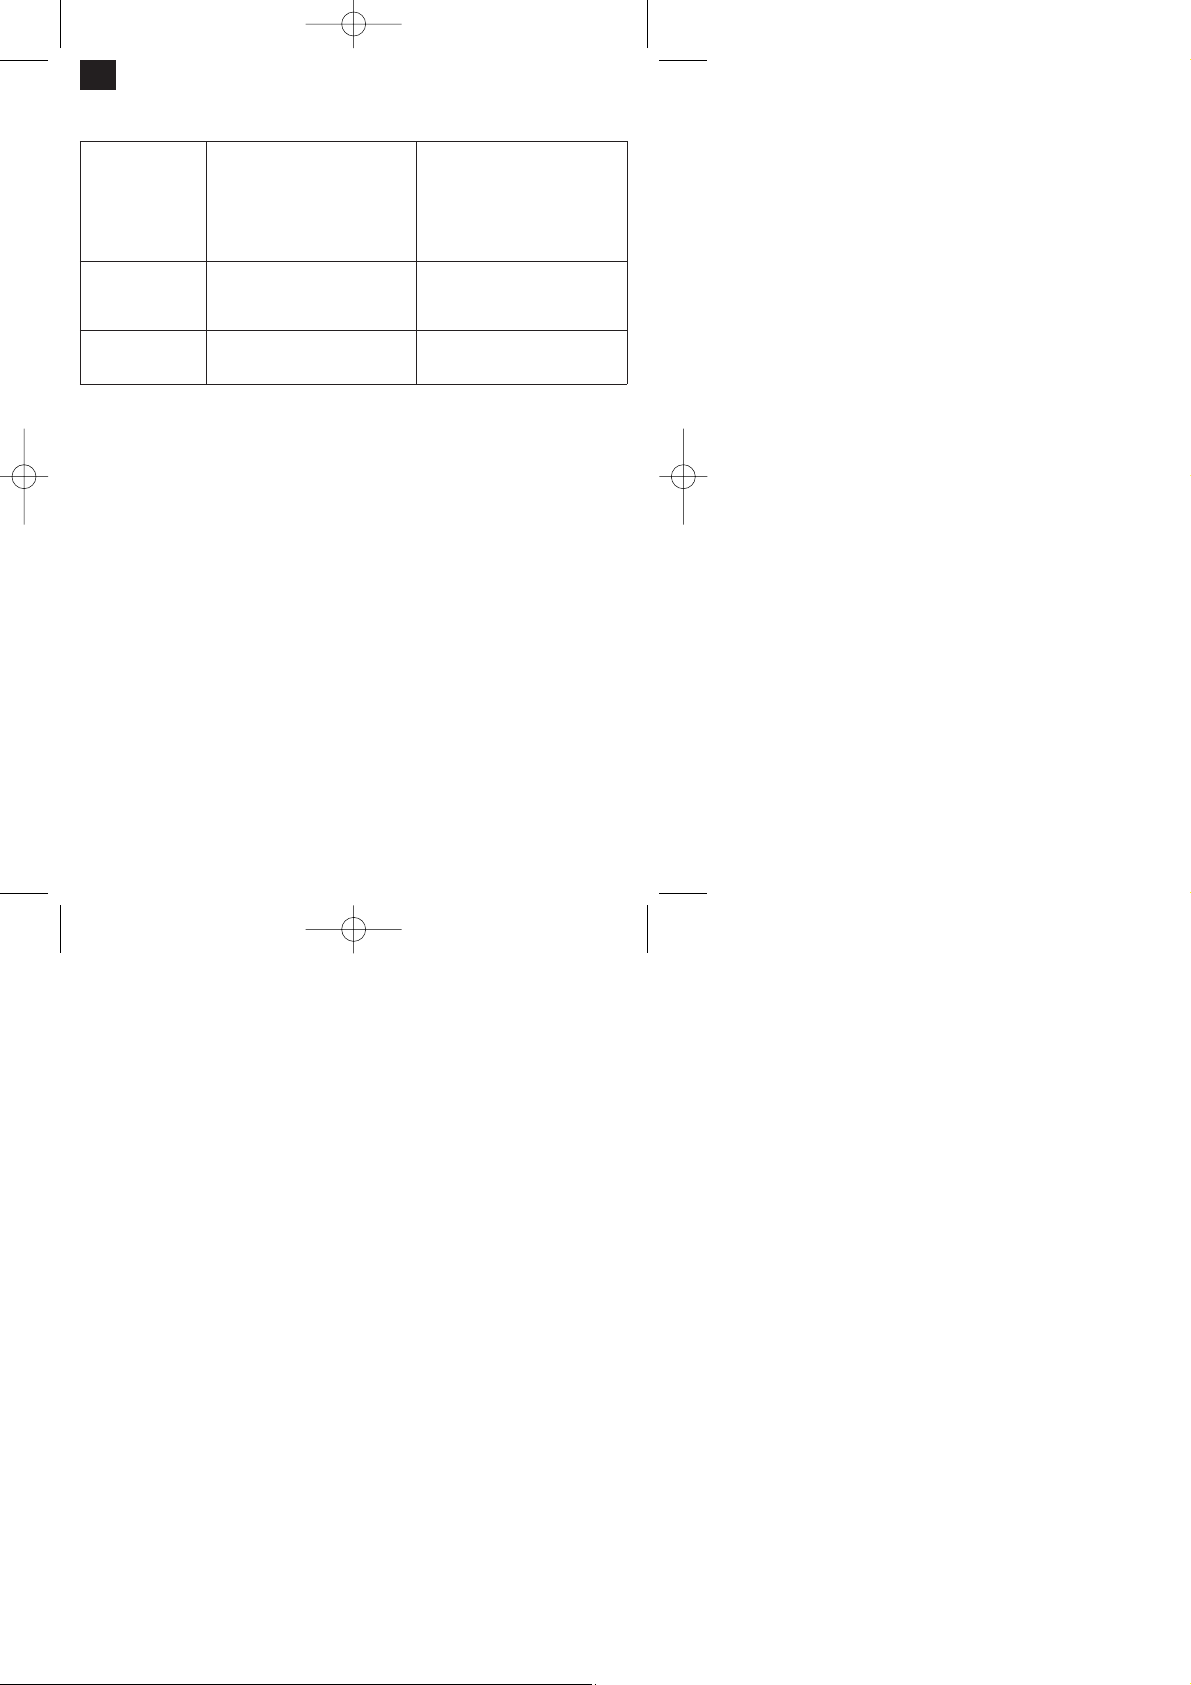
Gerät läuft nicht a) Kein Strom am Stecker
b) Gerät ist ausgeschaltet
c) Überlastschalter hat ausgelöst
d) Auswurfkanal ist verstopft
e) Fülltrichter sitzt nicht fest auf
Motorgehäuse
a) Zuleitung und Sicherung überprüfen
b) Gerät einschalten
c) Schaltstift am Überlastschalter
drücken
d) Auswurfkanal reinigen
e) Innenraum reinigen und
Sicherheitsschraube festziehen
Häckselleistung
unbefriedigend
a) Messer abgenutzt a) Messer drehen, schleifen oder
austauschen
Häckselleistung
lässt nach
a) Messer abgenutzt a) Messer drehen, schleifen oder
austauschen
12. Fehlersuchplan
Anleitung RGH 2040_SPK1:Anleitung EGH 2745_SPK1 17.01.2007 8:30 Uhr Seite 10

11
GB
Table of contents Page
1. General safety regulations 12
2. Technical data 12
3. Layout and items supplied 12
4. Proper operation 12
5. Assembly of the garden shredder 12
6. Starting up 12
7. Notes on working practice 13
8. Replace, sharp and change blades 13
9. Care and maintenance 14
10. Ordering spare parts 14
11. Waste disposal 14
12. Troubleshooting guide 15
Anleitung RGH 2040_SPK1:Anleitung EGH 2745_SPK1 17.01.2007 8:30 Uhr Seite 11
12
GB
Packaging:
The equipment is supplied in packaging to prevent it
from being damaged in transit. The raw materials in
this packaging can be reused or recycled.
When using the equipment, a few safety precautions must be observed to avoid injuries and
damage.
앬 Read the operating instructions carefully and
comply with them. It is important to consult these
instructions in order to acquaint yourself with the
equipment, its proper use and the important safety regulations.
앬 Keep this manual in a safe place so that the
information is available at all times.
앬 If you give the equipment to any other person,
make sure that you pass on these operating
instructions as well.
We can accept no liability for damage or accidents which arise due to non-compliance with
these instructions.
1. General safety regulations
The enclosed booklet contains general safety instructions and explains the meanings of the various information signs.
2. Technical data
Mains voltage: 230 V ~ 50 Hz
Power input: 2000 W
Idle speed n0: 4500 rpm
Branch diameter: max. 40 mm
LpAsound pressure level: 86 dB
LWAsound power level: 107 dB
Weight: 10.5 kg
3. Machine layout and items supplied
(Fig. 1/2)
1 Loading funnel inlet
2 Loading funnel
3 Motor housing with cutter plate
4 Prodder
5 Complete chassis
6 Wheels
7 Axle (complete with washers and nuts)
8 Transport handle
9 Mains plug
10 Overload switch
11 ON/OFF switch
12 Safety screw
13 Wheel hubs
14 Ring wrench
15 Shredded material bag
4. Proper operation
This electric garden refuse shredder is designed only
for shredding organic garden waste. Place biologically degradable material, e.g. leaves and branches,
into the loading funnel.
Please note that our equipment has not been
designed for use in commercial, trade or industrial
applications. Our warranty will be voided if the equipment is used in commercial, trade or industrial businesses or for equivalent purposes.
Collecting the shredded material
The shredded material bag supplied with the
machine can be placed under the chute opening.
5. Assembling the garden shredder
The garden shredder is delivered unassembled. The
chassis and the wheels must be fitted before use.
Follow the operating instructions step-by-step and
use the pictures provided as a visual guide to easily
assemble the machine.
5.1 Assembling the chassis (Fig. 3)
앬 Place the motor housing upside down on the
floor.
앬 Insert the chassis into the provided openings as
far as it will go.
5.2 Assembling the axle and wheels (Figs. 4-10)
앬 Remove the nuts and washers from the axle.
앬 Mount the chassis as shown in Figs. 4-10.
6. Starting up
6.1 Connecting up the machine and switching it
on
앬 Connect the coupling on the machine connection
cable (extension) to the power cable (Fig. 1/Item
9).
Anleitung RGH 2040_SPK1:Anleitung EGH 2745_SPK1 17.01.2007 8:31 Uhr Seite 12

13
GB
앬 The machine can be switched ON (switch posi-
tion “I”) and OFF (switch position “0”) using the
ON/OFF switch (Figure 1/Item 11).
Note: The machine cannot be switched on if there is
no voltage being supplied to it. If the power supply is
interrupted, the machine will switch off automatically
(switch position “0”). The machine cannot be
switched on again until the voltage supply has been
re-established and the ON/OFF switch has been
moved to position “I”.
6.2 Overload protection (motor circuit-breaker)
The motor is protected from overloads by an overload switch.
During operation the control pin projects out of the
overload switch housing by around 4 mm. If the
motor is overloaded for a lengthy period, the overload
switch (Fig. 3/Item 10) will trip and switch off the
machine. In this case the pin on the overload switch
will project out of the housing by around 8 mm and
the ON/OFF switch will automatically move to “0”.
After waiting for at least 1 minute the control pin in
the overload switch can be pressed and the ON/OFF
switch then switched on again (switch position “I”).
If the motor fails to start, clean the ejector chute.
6.3 Cleaning the ejector chute
앬 Always wear heavy duty working gloves
앬 Ensure that the switch is set to the “0” position
앬 Disconnect the coupling on the machine connec-
tion cable (extension) from the machine plug .
앬 Unscrew the safety screw (Figure 1/Item 12) and
then pull up the loading funnel (Figure 11).
앬 Clean the cutting surfaces of the blades, the
blade plate and the ejector chute with a brush or
paintbrush. Remove pieces of wood or other
parts that may prevent the blade plate from turning.
앬 Close the loading funnel again and tighten the
safety screw.
6.4 Safety
The shredder has a safety switch (Figure 12/Item A)
in its interior on the motor housing. The control unit
for it (Figure 13/Item D) is located on the loading funnel.
If the loading hopping is not perfectly position or if it
is not pressed against the motor housing, the
SAFETY
SWITCH
will trip and prevent the motor from working. If
this situation occurs, open the loading funnel as
described above. Carefully clean the interior. Close
the loading funnel again as described above and
ensure that when you switch on the machine again
the loading funnel is correctly position and the safety
screw is screwed right in.
CAUTION! NEVER undo the release screw (Figure
1/Item 12) without first switching off the machine at
the ON/OFF switch (Figure 1/Item 11) and disconnecting the coupling on the machine connection
cable (extension) from the machine plug.
7. Notes on working practice
앬 Wear work gloves, goggles and ear muffs.
앬 Material placed in the loading funnel is automati-
cally drawn into the shredder.
CAUTION! Long pieces of material projecting out
of the machine may whiplash when it is drawn in
– keep a safe distance from the machine.
앬 Judge the quantity of material which you put into
the loading funnel so that it does not clog.
앬 If you want to shred withered, damp material that
has been lying in the garden for several days,
alternate between putting in this material and
branches. This will help to prevent the loading
funnel becoming clogged with material.
앬 Do not shred extremely soft waste (e.g. kitchen
waste) – put it straight in the compost box.
앬 Entangled branches and leaves should be
thoroughly shredded before loading any more
material.
앬 Do not allow the ejector outlet of the funnel to
become clogged with shredded material – since
this may result in material pile-ups.
앬 Do not cover the vent slots.
8. Replace, sharp and change blades
The blades on the blade plate are replaceable. If you
have to replace any blade, you must only use genuine blades to ensure that they meet the relevant
quality and safety criteria.
Please note: For safety reasons we recommend that
you have all sharpening and blade replacement work
carried out by a specialist workshop.
Always wear heavy duty working gloves
Remove the blade screws (Fig. 12/Item C) to replace
the blades (Fig. 12/Item B). The blades can now be
turned or replaced with new blades. Assemble in
reverse order.
Anleitung RGH 2040_SPK1:Anleitung EGH 2745_SPK1 17.01.2007 8:31 Uhr Seite 13

14
GB
9. Care and maintenance
Important! Before carrying our any inspection or servicing work on the machine, disconnect it from the
power supply by disconnecting the machine connection cable (extension) from the machine plug.
If repairs are necessary, please contact our customer
service center.
앬 Use only genuine spare parts.
앬 Clean the machine regularly. This will help to
keep the machine in good working order and is
the basis for a long working life.
앬 When you have finished your work, pull the loa-
ding funnel forwards and clean the inside. Use a
brush to remove deposits from metal parts on the
inside. Apply a thin coating of oil to the cleaned
blade plate and blades.
앬 When you close the loading funnel, make sure
that the safety switch and the release screw are
clean.
앬 Keep the vent slots clean while you work.
앬 Clean the plastic body and other plastic parts
with a mild household cleaning agent and a
damp cloth. Do not use any aggressive agents or
solvents for cleaning purposes.
앬 Never spray down the shredder with water.
앬 Prevent water getting inside the machine at all
costs.
10. Ordering spare parts
Please provide the following information on all orders
for spare parts:
앬 Model/type of tool
앬 Article number of the tool
앬 ID number of the tool
앬 Number of the required spare part
For our latest prices and information please go to
www.isc-gmbh.info
11. Waste disposal
Important!
The shredder and its accessories are made of various types of material, such as metal and plastic.
Defective components must be disposed of as special waste. Ask your dealer or your local council.
Anleitung RGH 2040_SPK1:Anleitung EGH 2745_SPK1 17.01.2007 8:31 Uhr Seite 14
15
GB
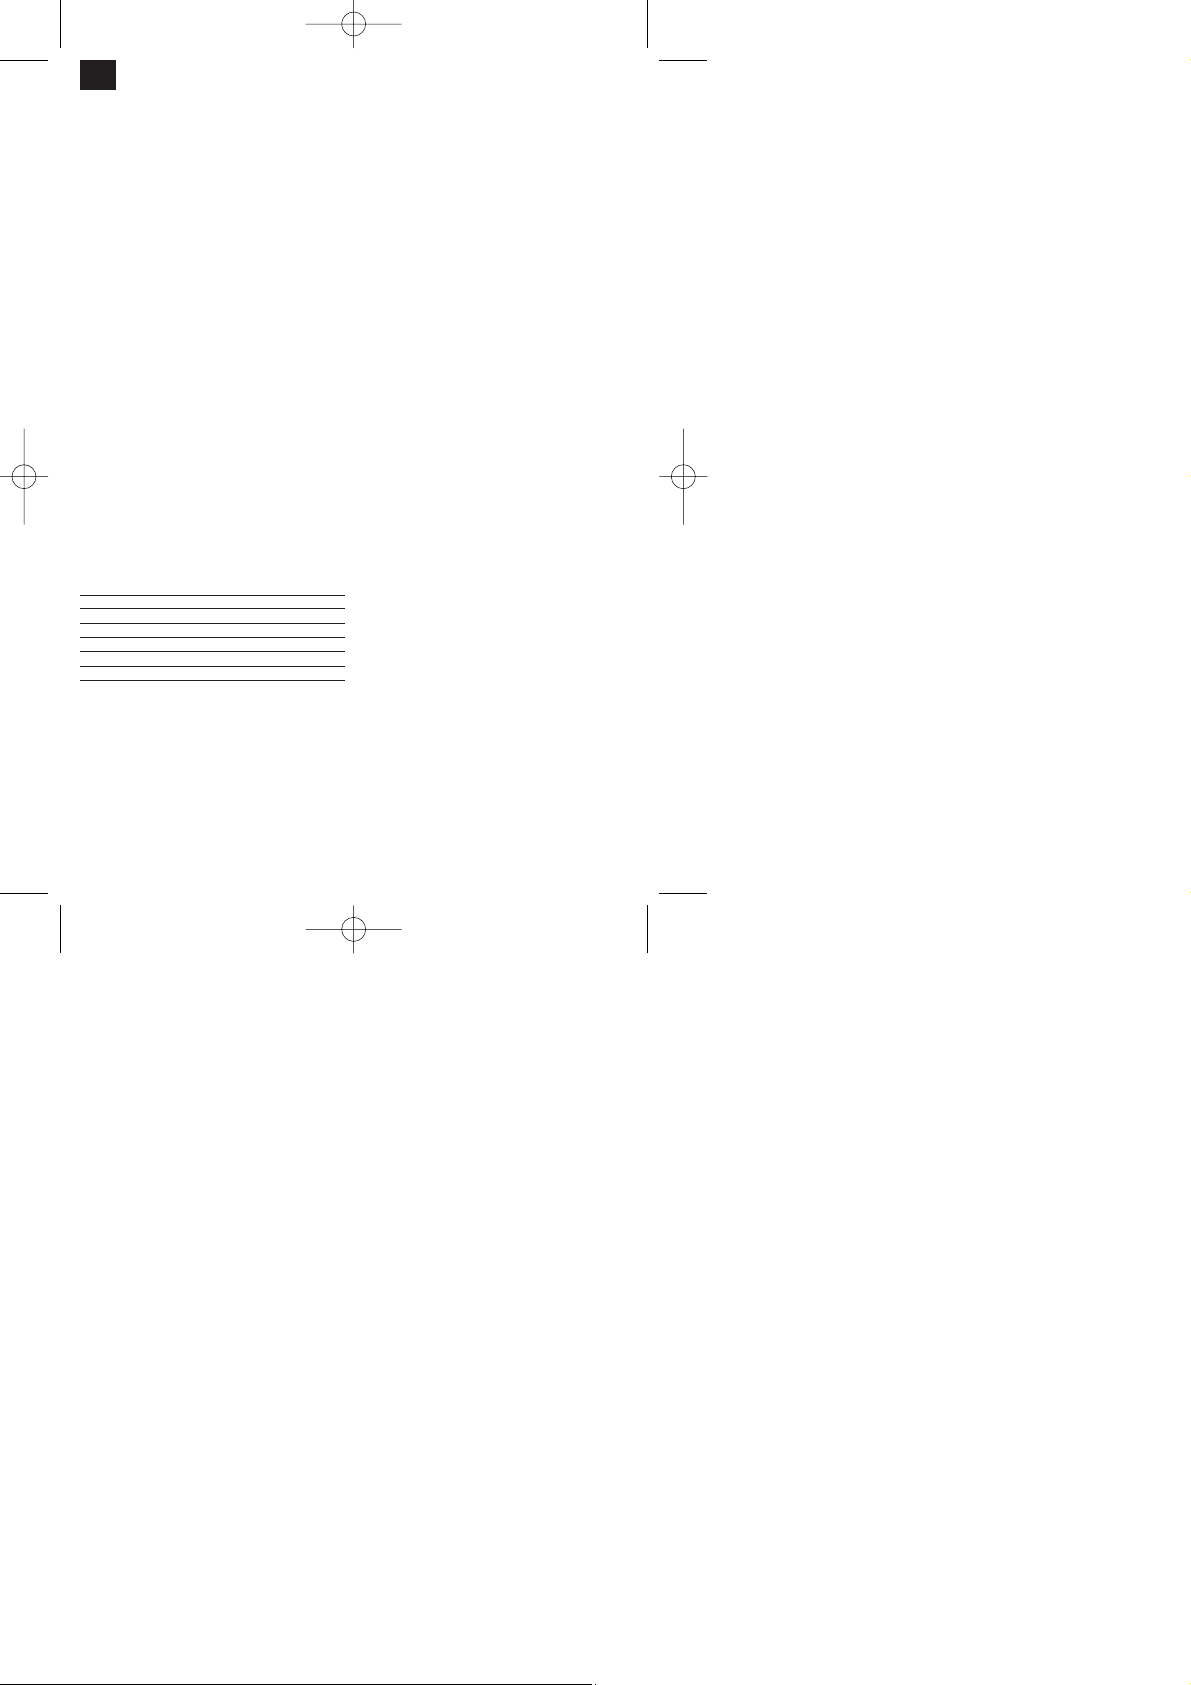
12. Troubleshooting guide
The machine does not
work
a) No power at the plug
b) Machine is switched off
c) Overload switch has tripped
d) Ejector chute is blocked
e) Loading funnel is not secure on the
motor housing
a) Check the power cable and fuse
b) Switch on machine
c) Press control on overload switch
b) Clean ejector chute
e) Clean interior and tighten safety
screw
Shredding performance
unsatisfactory
a) Blades worn a) Turn, sharpen or replace blades
Shredding performance
falls in quality
a) Blades worn
a) Turn, sharpen or replace blades
Anleitung RGH 2040_SPK1:Anleitung EGH 2745_SPK1 17.01.2007 8:31 Uhr Seite 15

16
F
Table des matières
1. Consignes de sécurité générales 17
2. Caractéristiques techniques 17
3. Conception et volume de livraison 17
4. Utilisation conforme 17
5. Montage de la hacheuse de jardin (broyeur) 17
6. Mise en service 18
7. Consignes de travail 18
8. Changement, affûtage, changement de couteau 19
9. Maintenance et entretien 19
10. Commande de pièces de rechange 19
11. Mise au rebut 19
12. Plan de recherche des erreurs 20
Anleitung RGH 2040_SPK1:Anleitung EGH 2745_SPK1 17.01.2007 8:31 Uhr Seite 16

17
F
Emballage :
Lʼappareil se trouve dans un emballage permettant
dʼéviter les dommages dus au transport. Cet emballage est en matière naturelle et recyclable et peut
donc être réutilisé ultérieurement ou réintroduit dans
le circuit des matières premières.
En cas dʼutilisation des appareils certaines
mesures de sécurité doivent impérativement être
respectées pour éviter tous dommages et blessures :
앬 Veuillez lire consciencieusement ce mode
dʼemploi jusquʼau bout et en respecter les
consignes. Apprenez à vous servir correctement
de lʼappareil à lʼaide de ce mode dʼemploi et
familiarisez-vous avec les consignes de sécurité.
앬 Veillez à le conserver en bon état pour pouvoir
accéder aux informations à tout moment.
앬 Si lʼappareil doit être remis à dʼautres personnes,
veillez a leur remettre aussi ce mode dʼemploi.
Nous déclinons toute responsabilité pour les
accidents ou dommages consécutifs au non-respect de ce mode dʼemploi.
1. Consignes de sécurité générales
Vous trouverez les consignes générales de sécurité
et lʼexplication des panneaux dʼindication dans le
cahier ci-joint.
2. Données techniques
Tension du réseau : 230 V ~ 50 Hz
Puissance absorbée : 2000W
vitesse de rotation de marche à vide n0: 4500 tr/min
Diamètre de branche : maxi. 40 mm
Niveau de pression acoustique LpA: 86 dB
Niveau de puissance acoustique LWA: 107 dB
Poids : 10,5 kg
3. Conception et volume de livraison
(figures 1/2)
1 Entonnoir de remplissage
2 Trémie de remplissage
3 Bâti de moteur avec plaque de couteaux
4 Bouchon
5 Châssis complet
6 Roues
7 Essieu (y compris les rondelles et écrous)
8 Poignée de transport
9 Fiche de contact
10 Interrupteur de surcharge
11 Interrupteur Marche/Arrêt
12 Vis de sécurité
13 Enjoliveur
14 Clé polygonale
15 Sac collecteur dʼherbes hachées
4. Utilisation conforme
La hacheuse électrique est uniquement conçue pour
hacher les déchets de jardin organiques. Introduisez
le matériau biodégradable (p. ex. feuilles, branches)
dans la trémie de remplissage.
Veillez au fait que nos appareils, conformément au
règlement, nʼont pas été conçus pour être utilisés
dans un environnement professionnel, industriel ou
artisanal. Nous déclinons toute responsabilité si
lʼappareil venait a être utilisé professionnellement,
artisanalement ou par des sociétés industrielles, tout
comme pour toute activité équivalente.
Introduction du matériau à hacher
On peut mettre le sac collecteur dʼherbes hachées
sous lʼorifice dʼéjection.
5. Montage de la hacheuse de jardin
(broyeur)
La hacheuse de jardin est livrée démontée. Il faut
monter le châssis et les roues avant de lʼemployer.
Suivez le mode dʼemploi, étape par étape, et orientez-vous sur les illustrations pour que le montage
vous soit simplifié.
5.1 Monter le châssis (figure 3)
앬 Posez le carter du moteur à lʼenvers sur le sol
앬 Enfichez le châssis jusquʼà la butée dans les
ouvertures prévues à cet effet.
5.2 Montez lʼessieu et les roues (figure 4-10)
앬 Retirez les écrous et les rondelles de lʼessieu
앬 Montez le châssis comme indiqué dans les
figures 4 à 10.
Anleitung RGH 2040_SPK1:Anleitung EGH 2745_SPK1 17.01.2007 8:31 Uhr Seite 17

18
F
6. Mise en service
6.1 Raccorder lʼappareil et le mettre en circuit
앬 Raccordez lʼaccouplement du câble de raccorde-
ment de lʼappareil (rallonge) au câble secteur.
(figure 1/pos. 9)
앬 Lʼappareil peut être mis EN (position “I”) et
HORS (position “0”) circuit en actionnant lʼinterrupteur Marche / Arrêt (figure 1/pos. 11).
Remarque : Si lʼappareil nʼest pas sous tension, il ne
peut pas être mis en circuit. Si lʼalimentation électrique est interrompue, lʼappareil se met automatiquement hors circuit (position de lʼinterrupteur “0”).
Lʼappareil peut alors être remis en circuit une fois
lʼalimentation en tension rétablie et le bouton
marche-arrêt actionné en position de lʼinterrupteur “I”.
6.2 Dispositif de sécurité anti-surcharge (protection du moteur)
Le moteur est protégé contre les surcharges par un
disjoncteur.
La cheville de commutation dépasse dʼenviron 4mm
le carter du disjoncteur pendant le fonctionnement. Si
le moteur est surchargé pendant une période prolongée, le disjoncteur se déclenche et met lʼappareil
hors service. Dans ce cas, la cheville de commutation du disjoncteur dépasse le carter dʼenviron 8 mm
et lʼinterrupteur Marche / Arrêt connecte automatiquement sur “0”.
Au bout dʼau moins 1 minute de temps dʼattente, on
peut appuyer sur la cheville de commutation du disjoncteur et mettre lʼinterrupteur Marche / Arrêt à nouveau en circuit (position “I”).
Si le moteur ne démarre pas, il faut nettoyer le canal
dʼéjection.
6.3 Nettoyage du canal dʼéjection
앬 Portez toujours des gants de travail solides
앬 Assurez-vous que lʼinterrupteur est bien en posi-
tion “0”
앬 Retirez lʼaccouplement du câble de raccorde-
ment de lʼappareil (rallonge) du connecteur.
앬 Dévissez la vis de sécurité (figure 1/rep. 12) et
relevez ensuite la trémie de remplissage (fig. 11).
앬 Nettoyez la surface de coupe de la lame, le dis-
que porte-lames et le canal dʼéjection avec une
brosse ou un pinceau. Supprimez ce faisant les
pièces en bois ou les autres pièces capables de
bloquer le disque porte-lames.
앬 Refermez la trémie de remplissage et resserrez
la vis de sécurité.
6.4 Sécurité
Le broyeur est doté dʼun interrupteur de sécurité
(figure 12/rep. A) à lʼintérieur du carter du moteur.
Lʼunité dʼactionnement (figure 13/rep. D) est placé
sur la trémie de remplissage.
Si la trémie de remplissage nʼest pas correctement
en place ou sʼil nʼest pas pressé contre le carter du
moteur, lʼINTERRUPTEUR DE SECURITE commute
et empêche le fonctionnement du moteur. Si cette
situation apparaît, ouvrez la trémie de remplissage
comme indiqué plus haut. Nettoyez minutieusement
lʼintérieur. Refermez la trémie de remplissage comme
décrit plus haut et veillez lors de la remise en marche
de lʼappareil à la bonne fixation de la trémie de remplissage et au vissage total de la vis de sécurité.
ATTENTION ! Ne desserrez JAMAIS la vis de déverrouillage (figure 1/rep. 12), sans avoir auparavant mis
lʼappareil hors circuit via lʼinterrupteur Marche / Arrêt
(figure 1/rep. 11) et sans avoir retiré lʼaccouplement
du câble de raccordement de lʼappareil (rallonge) du
connecteur .
7. Consignes de travail
앬 Portez des gants de protection, des lunettes de
protection et une protection de lʼouïe.
앬 Le matériau à hacher introduit est attiré automati-
quement vers lʼintérieur.
ATTENTION ! Lorsque le matériau à hacher est
long et dépasse de lʼappareil, il peut frapper lʼair
à la manière dʼune perche pendant son introduction dans lʼappareil - maintenez un écart de
sécurité suffisant.
앬 Introduisez juste assez de matériau à hacher
pour éviter que la trémie de remplissage ne se
bouche.
앬 Les déchets de jardin fanés, humides et déjà sto-
ckés depuis plusieurs jours doivent être hachés
alternativement avec des branches. Cela évite
que le matériau à hacher ne se coince dans la
trémie de remplissage.
앬 Ne hachez pas les déchets extrêmement mou
(par ex. déchets de cuisine) mais ajoutez-les
directement au compostage.
앬 Les branches très ramifiées et feuillues doivent
tout dʼabord être hachées complètement avant
de rajouter du matériau à hacher dans lʼappareil.
앬 Le canal dʼéjection de la trémie de moulage ne
doit pas être bouché par le matériau haché - danger de reflux.
앬 Les fentes dʼaération ne doivent pas être recou-
vertes.
Anleitung RGH 2040_SPK1:Anleitung EGH 2745_SPK1 17.01.2007 8:31 Uhr Seite 18

19
F
8. Changement, affûtage, changement
de couteau
Les lames du disque porte-lames sont échangeables.
Si vous devez remplacer des lames, vous devez
nʼutiliser que des lames dʼorigine pour des raison de
qualité et de sécurité.
Attention : Nous recommandons pour des raisons
de sécurité de faire effectuer par des ateliers spécialisés lʼaffûtage et le changement de lame.
Portez toujours des gants de travail solides
Pour remplacer les couteaux (figure 12 / pos. B),
supprimez les vis des couteaux (figure 12 / Pos. C).
Les lames peuvent être désormais tournées ou
échangées contre de nouvelles lames. Le montage
est effectué dans lʼordre inverse des étapes.
9. Maintenance et entretien
Attention ! Avant chaque intervention de contrôle ou
de maintenance de lʼappareil, coupez lʼalimentation
en courant en retirant le câble de raccordement de
lʼappareil (rallonge) de la prise de lʼappareil.
Pour les réparations, adressez-vous à notre service
clients.
앬 Utilisez exclusivement des pièces dʼorigine.
앬 Nettoyez lʼappareil régulièrement. Vous en assu-
rerez ainsi la bonne capacité de fonctionnement
et une longue durée de vie.
앬 Une fois le travail fini, rabattez la trémie de rem-
plissage en avant et nettoyez lʼintérieur. Eliminez
les dépôts sur les pièces métalliques à lʼintérieur
à lʼaide dʼune brosse. Huilez légèrement la
plaque de lames nettoyée et la lame.
앬 En refermant la trémie de moulage, veillez à ce
que lʼinterrupteur de sécurité et la vis de déverrouillage soient exempts dʼencrassement.
앬 Maintenez les fentes dʼaération propres pendant
le travail.
앬 Le corps et les pièces de matière plastique doi-
vent être nettoyés à lʼaide dʼun produit de nettoyage domestique et dʼun chiffon humide. Nʼutilisez aucun produit agressif ni solvant pour le
nettoyage !
앬 Nʼaspergez jamais le broyeur dʼeau.
앬 Evitez absolument que de lʼeau ne sʼimmisce
dans lʼappareil.
10. Commande de pièces de rechange
Indiquer ce qui suit pour toute commande de pièces
de rechange :
앬 Type de lʼappareil
앬 Numéro dʼarticle de lʼappareil
앬 Numéro dʼidentification de lʼappareil
앬 Numéro de pièce de rechange de la pièce de
rechange nécessaire
Vous trouverez les informations et le prix actuels à
lʼadresse www.isc-gmbh.info
11. Mise au rebut
Attention !
La hacheuse de jardin et ses accessoires sont composés de divers matériaux, comme par ex. des
métaux et matières plastiques.
Renseignez-vous dans un commerce spécialisé ou
auprès de lʼadministration de votre commune !
Anleitung RGH 2040_SPK1:Anleitung EGH 2745_SPK1 17.01.2007 8:31 Uhr Seite 19
20
F
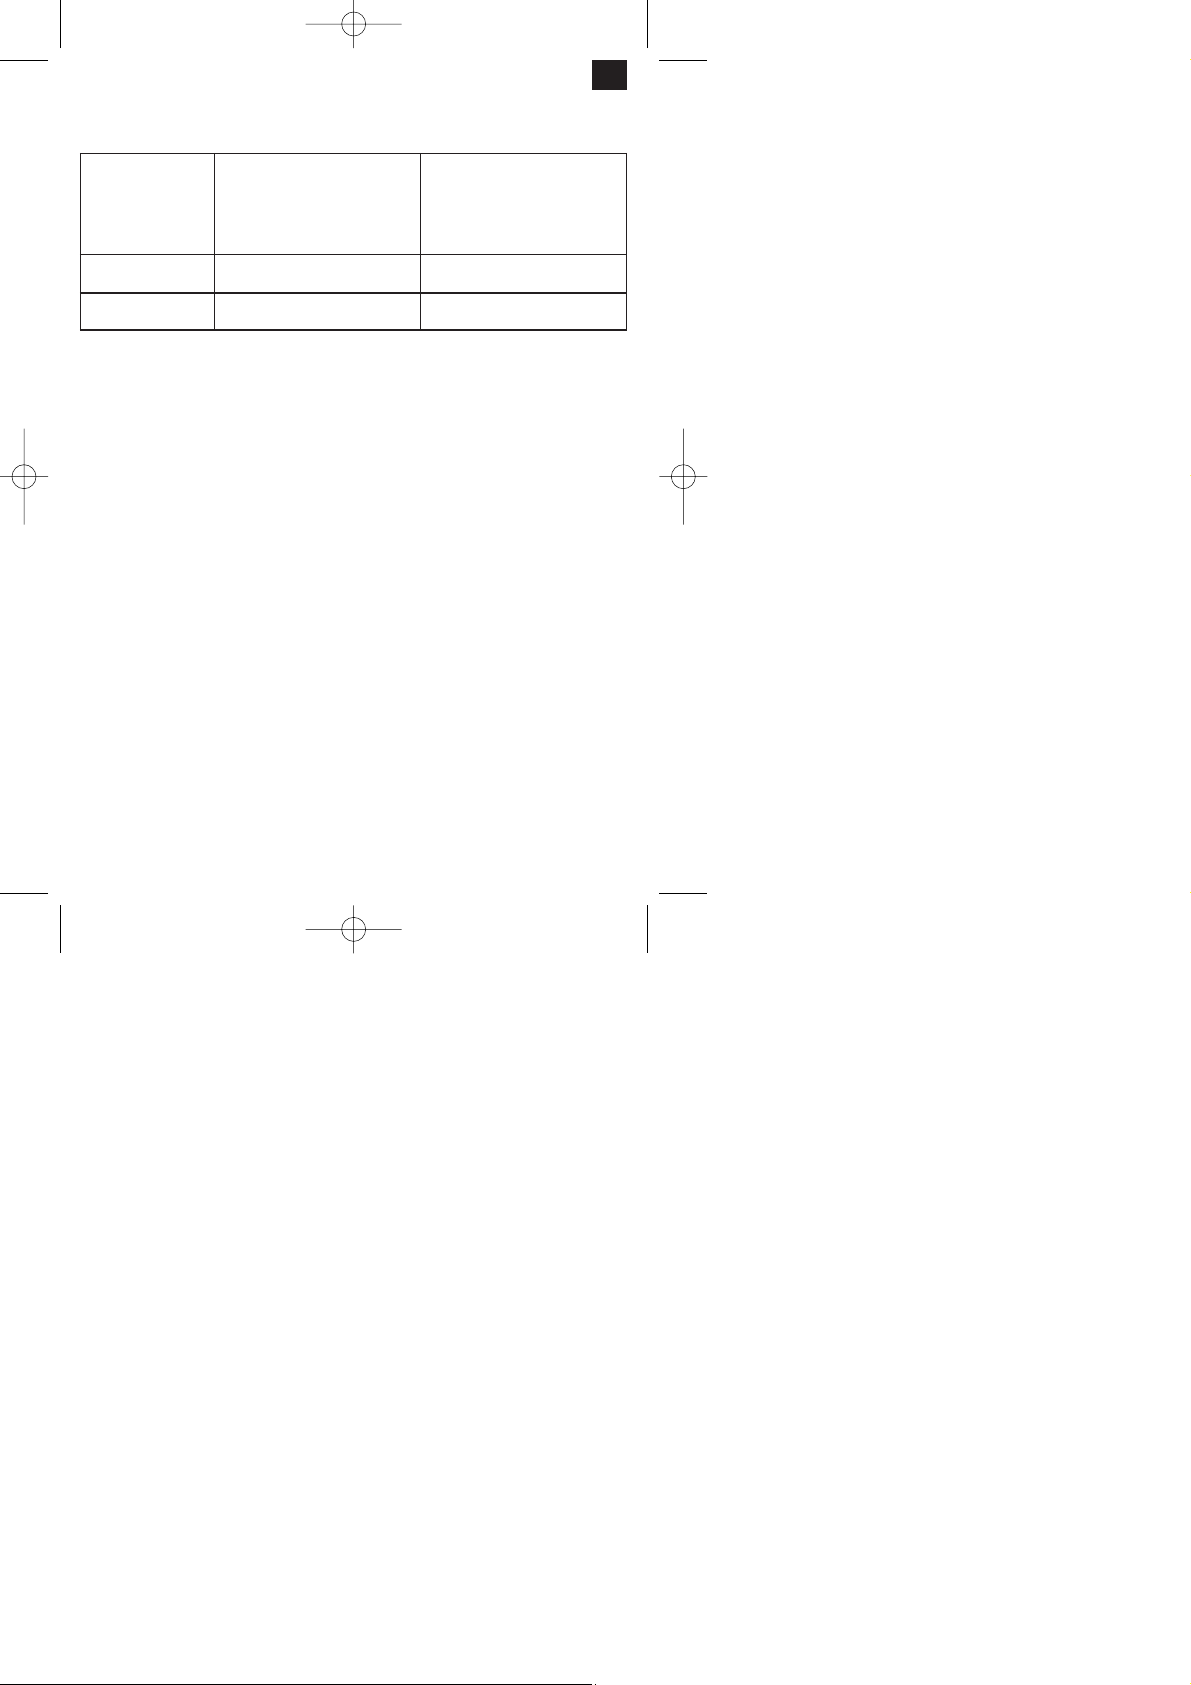
12. Plan de recherche des erreurs
Lʼappareil ne démarre
pas
a) aucun courant au connecteur
b) appareil hors circuit
c) disjoncteur déclenché
d) canal dʼéjection bouché
e) trémie de remplissage non fixée sur
le carter du moteur
a) contrôler la ligne dʼamenée et le
fusible
b) mettre lʼappareil en circuit
c) appuyer sur la cheville de commutation du disjoncteur
d) nettoyer le canal dʼéjection
e) nettoyer lʼintérieur et serrer la vis de
sécurité à fond
Performance insuffisante a) lame usée
a) tourner, affûter ou remplacer la lame
Performance baisse
a) lame usée
a) tourner, affûter ou remplacer la lame
Anleitung RGH 2040_SPK1:Anleitung EGH 2745_SPK1 17.01.2007 8:31 Uhr Seite 20

21
NL
Inhoudsopgave
11. Algemene veiligheidsvoorschriften 22
12. Technische gegevens 22
13. Overzicht van de opbouw en omvang van de levering 22
14. Behoorlijk gebruik 22
15. Assemblage van de tuinhakselaar 22
16. Inbedrijfstelling 23
17. Werkinstructies 23
18. Vervangen, slijpen, verwisselen van messen 24
19. Onderhoud 24
10. Bestellen van wisselstukken 24
11. Afvalbeheer 24
12. Foutopsporing 25
Anleitung RGH 2040_SPK1:Anleitung EGH 2745_SPK1 17.01.2007 8:31 Uhr Seite 21

22
NL
Verpakking:
Het gereedschap bevindt zich in een verpakking om
transportschade te voorkomen. Deze verpakking is
een grondstof en bijgevolg herbruikbaar of kan de
grondstofkringloop terug worden ingebracht.
Bij het gebruik van gereedschappen dienen enkele veiligheidsmaatregelen te worden nageleefd
om lichamelijk gevaar en schade te voorkomen:
앬 Lees deze handleiding zorgvuldig en leef de aan-
wijzingen ervan na. Maakt u zich aan de hand
van deze handleiding vertrouwd met het gereedschap, het juiste gebruik alsmede met de veiligheidsvoorschriften.
앬 Bewaar deze goed zodat u de informatie op elk
moment kunt terugvinden.
앬 Mocht u dit gereedschap aan andere personen
doorgeven, gelieve dan deze handleiding mee te
geven.
Wij zijn niet aansprakelijk voor ongevallen of
schade die te wijten zijn aan niet-naleving van
deze handleiding.
1. Algemene veiligheidsvoorschriften
De algemene veiligheidsvoorschriften en de verklaring van de aanwijzingsborden vindt u terug in de bijgaande brochure.
2. Technische gegevens
Netspanning: 230 V ~ 50 Hz
Opgenomen vermogen: 2000 watt
Nullasttoerental n0: 4500 t/min.
Diameter van de takken: max. 40 mm
Geluidsdrukniveau LpA: 86 dB
Geluidsvermogen LWA: 107 dB
Gewicht: 10,5 kg
3. Overzicht van de opbouw en leveringsomvang (fig. 1/2)
1 Vulopening
2 Vultrechter
3 Motorbehuizing met messenplaat
4 Stopper
5 Verrijdbaar onderstel compleet
6 Wielen
7 As (inclusief sluitringen en moeren)
8 Transportgreep
9 Netstekker
10 Overbelastingsschakelaar
11 AAN/UIT-schakelaar
12 Veiligheidsschroef
13 Wielkappen
14 Ringsleutel
15 Hakselgoedopvangzak
4. Behoorlijk gebruik
De elektrische tuinhakselaar is bedoeld om organische tuinafval te verhakselen. Breng het biologisch
afbreekbare materiaal (b.v. bladeren, takken) de vultrechter in.
Wij wijzen erop dat onze gereedschappen overeenkomstig hun bestemming niet geconstrueerd zijn voor
commercieel, ambachtelijk of industrieel gebruik. Wij
geven geen garantie indien het gereedschap in
ambachtelijke of industriële bedrijven alsmede bij
gelijk te stellen activiteiten wordt gebruikt.
Verzamelen van het hakselgoed
U kan de bijgeleverde hakselgoedopvangzak onder
de uitwerpopening plaatsen.
5. Assemblage van de tuinhakselaar
De tuinhakselaar is bij aflevering gedemonteerd. Het
onderstel en de wielen moeten voor gebruik worden
gemonteerd. Volg de handleiding stap voor stap en
raadpleeg de illustraties voor een gemakkelijke
assemblage.
5.1 Verrijdbaar onderstel monteren (fig. 3)
앬 De motorbehuizing onderste boven op de grond
leggen.
앬 Het onderstel de ervoor voorziene openingen in
schuiven tot tegen de aanslag.
5.2 As en wielen monteren (fig. 4-10)
앬 Moeren en sluitringen van de as verwijderen.
앬 Het onderstel monteren zoals voorgesteld in de
fig. 4-10.
Anleitung RGH 2040_SPK1:Anleitung EGH 2745_SPK1 17.01.2007 8:31 Uhr Seite 22

23
NL
6. Inbedrijfstelling
6.1. Het gereedschap aansluiten en inschakelen
앬 Verbind de koppeling van de aansluitkabel van
het gereedschap (verlenging) met de netkabel.
(fig. 1/pos. 9)
앬 Door bediening van de AAN/UIT-schakelaar (fig.
1/pos. 11) kan u het gereedschap AANzetten
(schakelaar naar de stand “I” brengen) of
UITzetten (schakelaar naar de stand “0” brengen).
Aanwijzing: Als op het toestel geen netspanning
staat kan het toestel niet worden ingeschakeld.
Wordt de stroomtoevoer onderbroken wordt het toestel automatisch uitgeschakeld (stand “0“ van de
schakelaar). Het toestel kan pas worden ingeschakeld na het herstellen van de stroomtoevoer en nadat
de AAN-UIT-schakelaar naar stand “I” is gebracht.
6.2 Beveiliging tegen overbelasting (motorbeveili-
ging)
De motor is door een overbelastingsschakelaar
beveiligd tegen overbelasting.
Terwijl de motor in werking is steekt de schakelpen
ca. 4 mm boven het huis van de overbelastingsschakelaar uit. Als de motor vrij lang wordt overbelast,
reageert de beveiliging en wordt het toestel uitgeschakeld. Als dit het geval is steekt de schakelpen
van de overbelastingsschakelaar ca. 8 mm boven het
huis uit en gaat de AAN/Uit-schakelaar vanzelf naar
de stand “0“.
Na minstens 1 minuut wachttijd kan de schakelpen
van de overbelastingsschakelaar worden ingedrukt
en kan de AAN/UIT-schakelaar terug naar stand “I“
worden gebracht om het toestel in te schakelen.
Indien de motor niet start, moet het uitwerpkanaal
worden gereinigd.
6.3 Reinigen van het uitwerpkanaal
앬 Draag steeds stevige werkhandschoenen.
앬 Vergewis u er zich van dat de schakelaar naar de
stand “0“ is gebracht.
앬 Trek de koppeling van de aansluitkabel (verlen-
ging) de stekker van het toestel uit.
앬 Draai de veiligheidsschroef (fig. 1, pos. 12) los en
klap daarna de vultrechter omhoog (fig. 11).
앬 Maak de snijvlakken van de messen, de messen-
schijf en het uitwerpkanaal schoon m.b.v. een
borstel. Verwijder daarbij stukjes hout of ander
materiaal dat het roteren van de messenschijf
kan blokkeren.
앬 Klap de vultrechter terug dicht en draai de veilig-
heidsschroef opnieuw aan.
6.4 Veiligheid
De hakselaar is in de binnenruimte op het motorhuis
voorzien van een veiligheidsschakelaar (fig. 12, pos.
A). Het element dat de schakelaar in werking zet (fig.
13, pos. D) is op de vultrechter aangebracht.
Als de vultrechter niet naar behoren op zijn plaats zit
of niet tegen het motorhuis wordt gedrukt, gaat de
VEILIGHEIDSSCHAKELAAR reageren en het aanlopen van de motor verhinderen. Mocht zich deze
situatie voordoen klapt u de vultrechter open zoals
hierboven beschreven. Maak de binnenruimte zorgvuldig schoon. Klap de vultrechter dan opnieuw dicht
zoals hierboven beschreven en let bij het herinschakelen van het toestel erop dat de vultrechter naar
behoren op zijn plaats zit en de veiligheidsschroef
helemaal is dichtgedraaid.
LET OP! NOOIT de ontgrendelschroef (fig. 1, pos.
12) losdraaien zonder voordien het toestel met de
AAN/Uit-schakelaar (fig. 1, pos. 11) te hebben uitgeschakeld en de koppeling van de aansluitkabel (verlenging) de stekker van het toestel uit te hebben
getrokken.
7. Werkinstructies
앬 Draag werkhandschoenen, een veiligheidsbril en
een gehoorbeschermer.
앬 Het ingebrachte te versnipperen goed wordt
automatisch gegrepen en naar binnen getrokken.
LET OP! Vrij lang hakselgoed dat er boven uitsteekt kan bij het intrekken als een roede uitslaan
- blijf op een voldoende veiligheidsafstand.
앬 Breng er slechts zoveel hakselgoed in dat de
vultrechter niet verstopt geraakt.
앬 Verwelkte, vochtige tuinafval die reeds meerdere
dagen is blijven liggen, versnippert u best afwisselend met takken. Daardoor voorkomt u het
blokkeren van het hakselgoed in de vultrechter.
앬 Extreem zachte afval (b.v. keukenafval) niet vers-
nipperen maar rechtstreeks composteren.
앬 Sterk vertakt lof houdend goed eerst helemaal
versnipperen voordat u er nieuw hakselgoed in
brengt.
앬 De uitlaatopening van de vultrechter mag niet
door versnipperd materiaal verstopt raken gevaar voor opstuwing.
앬 De ventilatiespleten mogen niet worden afgedekt.
Anleitung RGH 2040_SPK1:Anleitung EGH 2745_SPK1 17.01.2007 8:31 Uhr Seite 23

24
NL
8. Vervangen, slijpen, verwisselen van
messen
De messen van de messenschijf zijn vervangbaar.
Indien de messen moeten worden vervangen mag u
om kwaliteits- en veiligheidsredenen enkel originele
messen gebruiken.
Let op! Het is aan te bevelen om veiligheidsredenen
het slijpen en verwisselen van messen alleen door
een vakwerkplaats te laten uitvoeren.
Draag steeds stevige werkhandschoenen
Om van messen te verwisselen (fig. 12/pos. B) verwijdert u de messenschroeven (fig. 12/pos. C). De
messen kunnen dan worden gedraaid of door nieuwe
messen worden vervangen. De assemblage gebeurt
in omgekeerde volgorde.
9. Onderhoud
Let op! Voor elke ingreep ter controle of onderhoud
van het toestel dient u de stroomtoevoer te onderbreken door de koppeling van de aansluitkabel (verlenging) de stekker van het toestel uit te trekken.
Voor herstellingen verzoeken wij u zich tot onze serviceplaats te wenden.
앬 Gebruik enkel originele wisselstukken.
앬 Maak het toestel regelmatig schoon. Daardoor
verzekert u dat het toestel in een goed functionerende staat blijft en een lange levensduur bereikt.
앬 Aan het einde van het werk klapt u de vultrechter
naar voren en maakt u de binnenruimte schoon.
Resten van het hakselgoed op de binnenste
metalen onderdelen verwijdert u met een borstel.
Olie de schoongemaakte messenplaat en de
messen lichtjes.
앬 Bij het dichtklappen van de trechter dient u erop
te letten dat de veiligheidsschakelaar en de ontgrendelschroef vrij zijn van vervuiling.
앬 Hou tijdens het werk de ventilatiespleten schoon.
앬 Het kunststoflichaam en de kunststofcomponen-
ten schoonmaken m.b.v. een lichte huishoudreiniger en een vochtige doek. Gebruik voor het
schoonmaken geen agressieve middelen of
oplosmiddelen!
앬 Spuit de hakselaar nooit met water af.
앬 Vermijdt zeker dat water het toestel binnendringt.
10. Bestellen van wisselstukken
Gelieve bij het bestellen van wisselstukken de volgende gegevens te vermelden:
앬 Type van het toestel
앬 Artikelnummer van het toestel
앬 Identnummer van het toestel
앬 Wisselstuknummer van het benodigde stuk.
Actuele prijzen en info vindt u terug onder www.iscgmbh.info
11. Afvalbeheer
Let op!
De tuinhakselaar en zijn accessoires bestaan uit
diverse materialen, zoals b.v. metaal en kunststof.
Ontdoet u zich van defecte onderdelen op de inzamelplaats waar u gevaarlijke afvalstoffen mag afgeven. Informeer u in uw speciaalzaak of bij uw
gemeentebestuur!
Anleitung RGH 2040_SPK1:Anleitung EGH 2745_SPK1 17.01.2007 8:31 Uhr Seite 24

25
NL
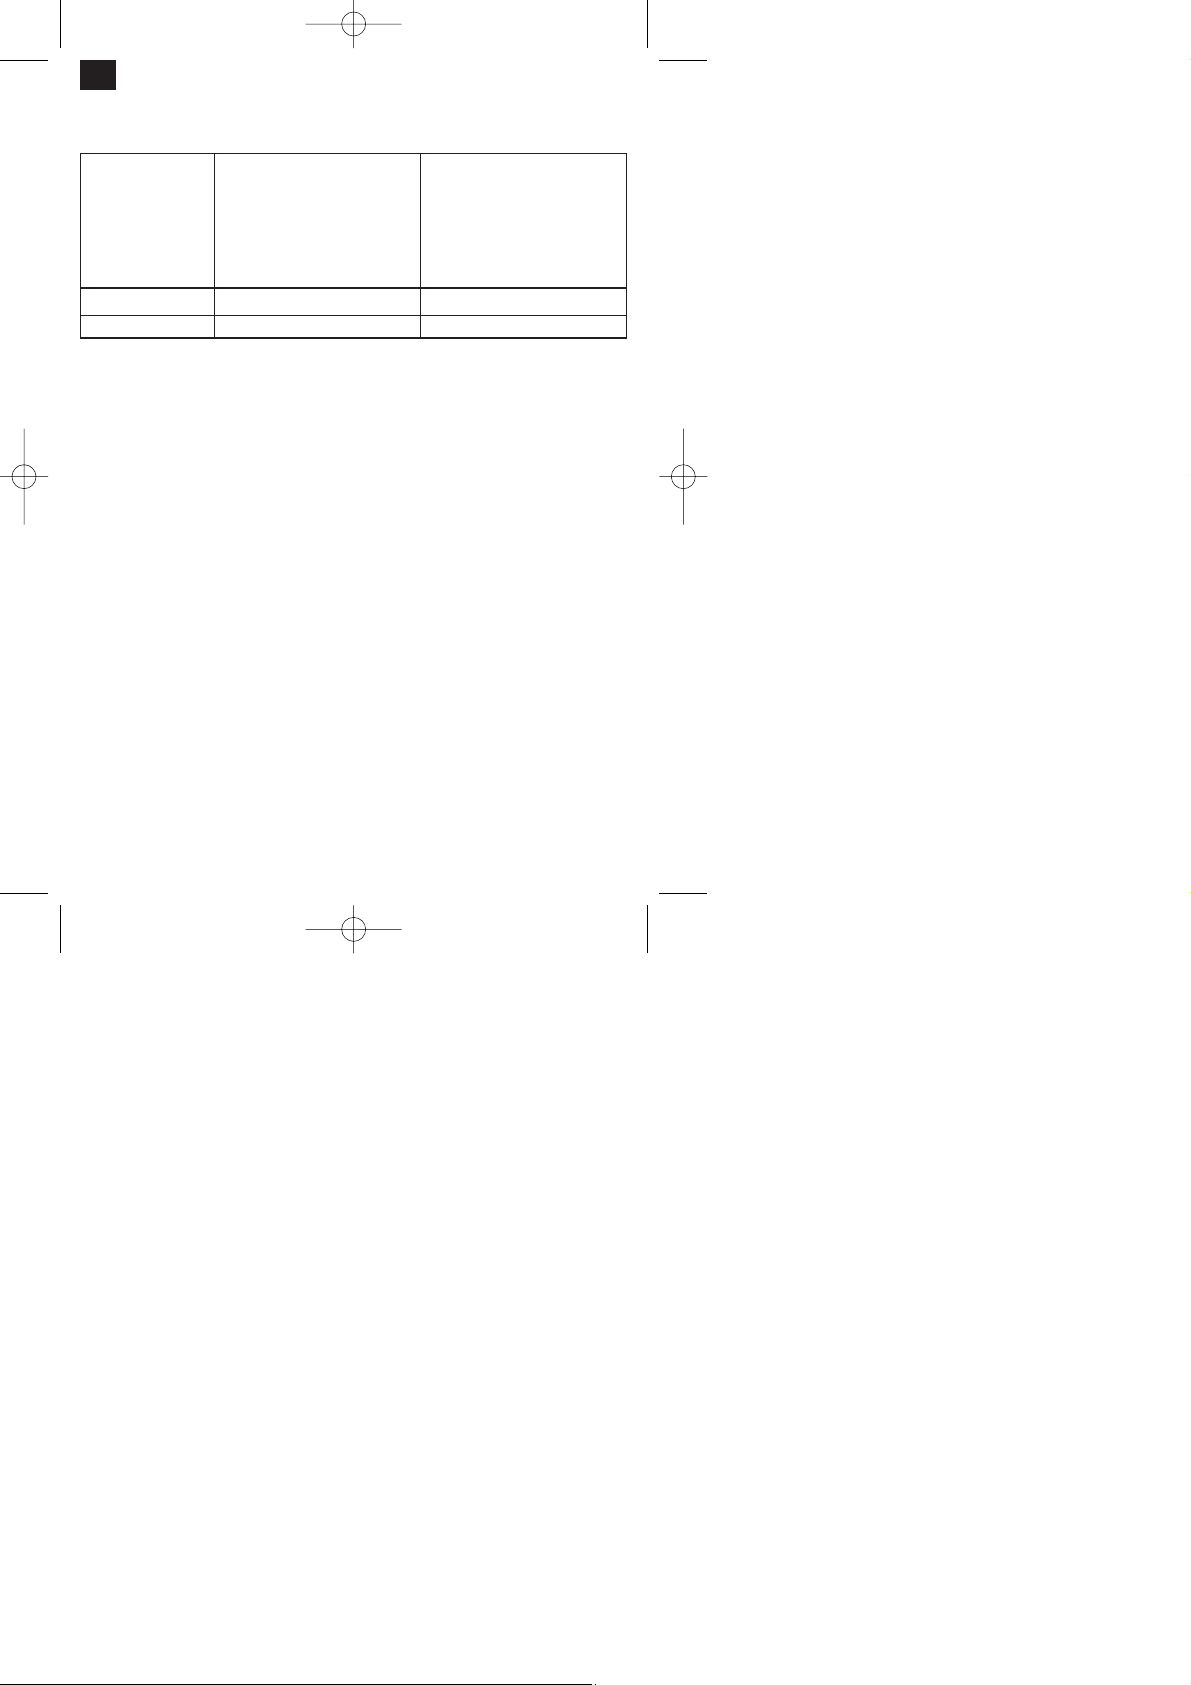
12. Foutopsporing
Het toestel werkt niet a) Geen stroom op de stekker
b) Het toestel is uitgeschakeld
c) De overbelastingsschakelaar heeft
gereageerd
d) Het uitwerpkanaal is verstopt
geraakt
e) De vultrechter zit niet vast op het
motorhuis
a) Leiding en zekering controleren
b) Het toestel inschakelen
c) Schakelpen op de overbelastingsschakelaar indrukken
d) Het uitwerpkanaal schoonmaken
e) Binnenruimte schoonmaken en veiligheidsschroef aanhalen
Hakselvermogen onvoldoende
a) Messen versleten a) Messen omdraaien, slijpen of ver-
vangen
Hakselvermogen gaat
achteruit
a) Messen nagenoeg versleten
a) Messen omdraaien, slijpen of vervangen
Anleitung RGH 2040_SPK1:Anleitung EGH 2745_SPK1 17.01.2007 8:31 Uhr Seite 25

26
I
Indice
11. Norme generali di sicurezza 27
12. Caratteristiche tecniche 27
13. Struttura generale ed elementi forniti 27
14. Uso corretto 27
15. Assemblaggio del trituratore da giardino 27
16. Messa in esercizio 28
17. Avvertenze per lʼuso 28
18. Sostituzione, affilatura, cambio trituratore 29
19. Manutenzione e cura 29
10. Ordinazione dei pezzi di ricambio 29
11. Smaltimento 29
12. Tabella per lʼeliminazione delle anomalie 30
Anleitung RGH 2040_SPK1:Anleitung EGH 2745_SPK1 17.01.2007 8:31 Uhr Seite 26

27
I
Imballaggio
Lʼapparecchio si trova in una confezione per evitare i
danni dovuti al trasporto. Questo imballaggio rappresenta una materia prima e può perciò essere riutilizzato o riciclato.
Nellʼusare gli apparecchi si devono prendere
diverse misure di sicurezza per evitare lesioni e
danni:
앬 Leggete attentamente le istruzioni per lʼuso ed
osservatene le avvertenze. Con lʼaiuto di queste
istruzioni per lʼuso, familiarizzate con lʼapparecchio, il suo uso corretto e le avvertenze di sicurezza.
앬 Conservate bene le informazioni per averle a
disposizione in qualsiasi momento.
앬 Se date lʼapparecchio ad altre persone conse-
gnate loro queste istruzioni per lʼuso insieme
allʼapparecchio.
Non ci assumiamo alcuna responsabilità per incidenti o danni causati dal mancato rispetto di queste istruzioni.
1. Norme generali di sicurezza
Per le norme generali di sicurezza e per la spiegazione delle targhette di avvertenze si veda lʼopuscolo
allegato.
2. Caratteristiche tecniche
Tensione di rete: 230 V ~ 50 Hz
Potenza assorbita: 2000 W
Numero di giri in folle n0: 4500 min
-1
Diametro dei rami: max. 40 mm
Livello di pressione acustica LpA: 86 dB
Livello di potenza acustica LWA: 107 dB
Peso: 10,5 kg
3. Struttura generale ed elementi forniti
(Fig. 1/2)
1 Tramoggia di riempimento
2 Tramoggia di alimentazione
3 Carcassa motore con piastra di taglio
4 Pressatore
5 Carrello completo
6 Ruote
7 Asse (incl. rosette e dadi)
8 Impugnatura di trasporto
9 Connettore di rete
10 Interruttore di protezione da sovraccarico
11 Interruttore ON/OFF
12 Vite di sicurezza
13 Coprimozzi
14 Chiave ad anello
15 Sacco di raccolta del materiale triturato
4. Uso corretto
Il trituratore elettrico da giardino è stato solo concepito per sminuzzare i rifiuti organici del giardino.
Inserite il materiale biodegradabile (per es. foglie,
rametti) nella tramoggia di riempimento.
Tenete presente che i nostri apparecchi non sono
stati costruiti per lʼimpiego professionale, artigianale
o industriale. Non ci assumiamo alcuna garanzia
quando lʼapparecchio viene usato in imprese commerciali, artigianali o industriali, o in attività equivalenti.
Inserimento del materiale da triturare
Il sacco di raccolta del materiale triturato può essere
messo sotto lʼapertura di scarico.
5. Assemblaggio del trituratore da giardino
Il trituratore da giardino viene fornito smontato. Il carrello e le ruote devono essere montati prima dellʼuso.
Seguite passo a passo le istruzioni per lʼuso e orientatevi con le figure per eseguire lʼassemblaggio con
facilità.
5.1 Montaggio del carrello (Fig. 3)
앬 Mettete la carcassa del motore capovolta sul
pavimento.
앬 Inserite il carrello nelle aperture appositamente
previste fino alla battuta.
5.2 Montaggio di asse e ruote (Fig. 4-10)
앬 Togliete dadi e rosette dallʼasse
앬 Montate il carrello come illustrato nelle Fig. 4-10.
Anleitung RGH 2040_SPK1:Anleitung EGH 2745_SPK1 17.01.2007 8:31 Uhr Seite 27

28
I
6. Messa in esercizio
6.1 Collegamento ed accensione dellʼapparecchio
앬 Collegate il connettore del cavo di collegamento
dellʼapparecchio (prolunga) al cavo di rete. (Fig.
1/Pos. 9)
앬 Azionando lʼinterruttore di ON/OFF (Fig. 1/Pos.
11) si può accendere (posizione “I” dellʼinterruttore) e spegnere (posizione “0” dellʼinterruttore)
lʼapparecchio.
Nota: se la tensione di rete non è presente sullʼapparecchio non è possibile accenderlo. Se viene interrotta lʼalimentazione di corrente lʼapparecchio si spegne
automaticamente (posizione “O” dellʼinterruttore). È
possibile riaccendere lʼapparecchio solo dopo avere
ripristinato lʼalimentazione di tensione e avere portato
lʼinterruttore di ON/OFF in posizione “I”.
6.2 Protezione da sovraccarico (salvamotore)
Il motore viene protetto dal sovraccarico da un interruttore automatico.
Durante lʼesercizio la spina di commutazione sporge
di circa 4 mm dallʼinvolucro del salvamotore. Se il
motore viene sottoposto per un certo tempo a
sovraccarico, interviene il salvamotore e lʼapparecchio si disinserisce. In tal caso la spina di commutazione del salvamotore sporge di circa 8 mm dallʼinvolucro del salvamotore e lʼinterruttore automatico si
porta su “0”.
Dopo almeno 1 minuto di attesa si può premere la
spina di commutazione dellʼinterruttore di protezione
da sovraccarico e inserire di nuovo lʼinterruttore di
ON/OFF (posizione “I” dellʼinterruttore).
Se il motore non dovesse avviarsi occorre pulire il
canale di scarico.
6.3 Pulizia del canale di scarico
앬 Portate sempre guanti da lavoro robusti
앬 Assicuratevi che lʼinterruttore sia in posizione “0”.
앬 Inserite lʼaccoppiamento del cavo di collegamen-
to dellʼapparecchio (prolunga) nel connettore
dellʼapparecchio.
앬 Svitate la vite di sicurezza (Fig. 1/pos. 12) e ribal-
tate verso lʼalto la tramoggia di alimentazione
(Fig. 11).
앬 Con una spazzola od un pennello pulite le super-
fici di taglio delle lame, il disco trituratore ed il
canale di scarico. Nel fare questo togliete i pezzetti di legno o altri pezzi che potrebbero bloccare la rotazione del disco trituratore.
앬 Ribaltate di nuovo la tramoggia di alimentazione
chiudendola e serrate di nuovo bene la vite di
sicurezza.
6.4 Sicurezza
Il trituratore è dotato di un interruttore di sicurezza
(Fig. 12/pos. A) allʼinterno della carcassa del motore.
Lʼunità di azionamento (Fig. 13/pos. D) è posta sulla
tramoggia di alimentazione.
Se la tramoggia di alimentazione non è in perfetta
posizione o se non viene premuta contro la carcassa
del motore, interviene lʼINTERRUTTORE DI SICUREZZA e interrompe il funzionamento del motore. In
questo caso ribaltate la tramoggia di alimentazione
come descritto in precedenza. Pulite con cura il vano
interno. Richiudete la tramoggia di alimentazione
come descritto in precedenza e nel riaccendere
lʼapparecchio fate attenzione che la tramoggia di alimentazione sia in posizione corretta e che la vite di
sicurezza sia completamente avvitata.
ATTENZIONE! NON allentare MAI la vite di sbloccaggio (Fig. 1/pos. 12) senza avere prima spento
lʼapparecchio con lʼinterruttore di ON/OFF (Fig.
1/pos. 11) e avere staccato lʼaccoppiamento del cavo
di collegamento dellʼapparecchio (prolunga) dal connettore dellʼapparecchio.
7. Avvertenze per lʼuso
앬 Portate guanti da lavoro, occhiali protettivi e cuf-
fie antirumore.
앬 Il materiale da triturare viene trascinato allʼinterno
automaticamente.
ATTENZIONE! Il materiale da triturare piuttosto
lungo che sporge dallʼapparecchio può spostarsi
improvvisamente con dei movimenti simili a frustate: tenere una distanza di sicurezza sufficiente.
앬 Inserite materiale da sminuzzare in una quantità
tale da non intasare la tramoggia di alimentazione.
앬 Il materiale umido ed il fogliame appassito, già
vecchio di qualche giorno, devono essere triturati
alternandoli a rametti. In questo modo si evita
che il materiale triturato si blocchi nella tramoggia
di alimentazione.
앬 I rifiuti molto molli (per es. quelli di cucina) non
devono essere sminuzzati, ma compostati direttamente.
앬 Sminuzzate completamente il materiale conte-
nente molti rametti e foglie prima di aggiungere
nuovo materiale.
앬 Il canale di scarico della tramoggia di alimenta-
zione non deve essere bloccato dal materiale
sminuzzato: pericolo di ostruzione.
앬 Le fessure di aerazione devono rimanere libere.
Anleitung RGH 2040_SPK1:Anleitung EGH 2745_SPK1 17.01.2007 8:31 Uhr Seite 28

29
I
8. Sostituzione, affilatura, cambio
trituratore
Le lame del disco trituratore possono essere sostituite. Se dovete sostituire le lame, dovete usare solo
lame originali per motivi di qualità e di sicurezza.
Attenzione per motivi di sicurezza consigliamo di
fare eseguire lʼaffilatura e la sostituzione delle lame
solo da officine specializzate.
Portate sempre guanti da lavoro robusti
Per cambiare le lame (Fig. 12 / Pos. B) togliete le viti
relative (Fig. 12 / Pos. C). Le lame possono ora
essere girate o sostituite con lame nuove. Lʼassemblaggio avviene nellʼordine inverso.
9. Manutenzione e cura
Attenzione! Prima di ogni operazione di controllo e di
manutenzione dellʼapparecchio si deve interrompere
lʼalimentazione elettrica dellʼapparecchio staccando il
cavo di collegamento dellʼapparecchio (prolunga) dal
connettore dellʼapparecchio.
Per le riparazioni rivolgetevi al nostro centro assistenza clienti.
앬 Usate solamente ricambi originali.
앬 Pulire regolarmente lʼapparecchio. In questo
modo si assicura la sua perfetta funzionalità ed
una lunga durata.
앬 Al termine del lavoro ribaltate in avanti la tramog-
gia di alimentazione e pulitene il vano interno.
Con una spazzola togliete i depositi dalle parti
metalliche interne. Oliate leggermente la piastra
di taglio e le lame pulite.
앬 Nel richiudere la tramoggia di alimentazione fate
attenzione che lʼinterruttore di sicurezza e la vite
di sblocco siano privi di sporco.
앬 Durante il lavoro tenete libere le fessure di aera-
zione.
앬 Pulite il corpo e le parti in plastica con un leggero
detergente domestico ed un panno umido. Per la
pulizia non usate mezzi aggressivi o solventi!
앬 Non pulite mai il trituratore con spruzzi dʼacqua.
앬 Evitate assolutamente che lʼacqua penetri
allʼinterno dellʼapparecchio.
10. Ordinazione dei pezzi di ricambio
In caso di ordinazione di pezzi di ricambio è necessario indicare quanto segue:
앬 tipo di apparecchio
앬 numero di articolo dellʼapparecchio
앬 numero di identificazione dellʼapparecchio
앬 numero del pezzo di ricambio richiesto.
Per i prezzi e le informazioni attuali si veda www.iscgmbh.info
11. Smaltimento
Attenzione!
Il trituratore i suoi accessori sono fatti di materiali
diversi, per es. metallo e plastica.
Consegnate i pezzi difettosi allo smaltimento di rifiuti
speciali. Per informazioni rivolgetevi ad un negozio
specializzato o allʼamministrazione comunale!
Anleitung RGH 2040_SPK1:Anleitung EGH 2745_SPK1 17.01.2007 8:31 Uhr Seite 29

30
I
12. Tabella per lʼeliminazione delle anomalie
Lʼapparecchio non funziona.
a) non cʼè corrente sulla presa
b) lʼapparecchio è spento
c) il salvamotore è intervenuto
d) il canale di scarico è ostruito
e) la tramoggia di alimentazione non è
ben collegata alla carcassa del motore
a) controllare il cavo di alimentazione
ed il dispositivo di protezione
b) inserire lʼapparecchio
c) premere la spina di commutazione
del salvamotore
d) pulire il canale di scarico
e) pulire il vano interno e serrare la vite
di sicurezza
Prestazioni insufficienti
del trituratore
a) lame consumate a) girare, affilare o sostituire le lame
Le prestazioni del trituratore diminuiscono
a) lame consumate
a) girare, affilare o sostituire
Anleitung RGH 2040_SPK1:Anleitung EGH 2745_SPK1 17.01.2007 8:31 Uhr Seite 30

31
DK/N
Indholdsfortegnelse Side
11. Generelle sikkerhedsforskrifter 32
12. Tekniske data 32
13. Maskinoversigt og leveringsomfang 32
14. Korrekt anvendelse 32
15. Samling af kompostkværnen 32
16. Idriftsættelse 32
17. Arbejdsmåde 33
18. Udskiftning, skærpning, knivskift 33
19. Vedligeholdelse og pleje 33
10. Bestilling af reservedele 34
11. Bortskaffelse 34
12. Fejlsøgningsskema 35
Anleitung RGH 2040_SPK1:Anleitung EGH 2745_SPK1 17.01.2007 8:31 Uhr Seite 31

32
DK/N
Emballage:
Produktet er pakket ind for at undgå transportskader.
Emballagen består af råmaterialer og kan genanvendes eller indleveres på genbrugsstation.
Ved brug af arbejdsredskaber er der visse sikkerhedsforanstaltninger, som skal overholdes for at
undgå skader på personer og materiel:
앬 Læs omhyggeligt betjeningsvejledningen igen-
nem, og følg alle anvisninger. Brug betjeningsvejledningen som en grundlæggende hjælp til at
gøre dig fortrolig med, hvordan kompostkværnen
anvendes korrekt og sikkerhedsmæssigt forsvarligt.
앬 Opbevar betjeningsvejledningen et praktisk sted,
så du altid kan tage den frem efter behov.
앬 Husk at lade betjeningsvejledningen følge med
kompostkværnen, hvis du overdrager den til
andre!
Vi fraskriver os ethvert ansvar for skader på personer eller materiel, som måtte opstå som følge
af, at anvisningerne i denne betjeningsvejledning
tilsidesættes.
1. Generelle sikkerhedsforskrifter
Generelle sikkerhedsforskrifter og oplysningsskiltenes betydning fremgår af vedlagte hæfte.
2. Tekniske data
Netspænding: 230 V ~ 50 Hz
Optagen effekt: 2000W
Omdrejningstal, ubelastet n0: 4500 min
-1
Grendiameter: Maks. 40 mm
Lydtryksniveau LpA: 86 dB
Lydeffektniveau LWA: 107 dB
Vægt: 10,5 kg
3. Maskinoversigt og leveringsomfang
(fig. 1/2)
1 Påfyldningstragt
2 Fødetragt
3 Motorhus med knivplade
4 Nedstopper
5 Kørestel komplet
6 Hjul
7 Aksel (inkl. mellemlægsskiver og møtrikker)
8 Transportgreb
9 Netstik
10 Overbelastningsafbryder
11 Tænd/Sluk-knap
12 Sikkerhedsskrue
13 Hjulkapsler
14 Stjernenøgle
15 Materialeopsamler
4. Korrekt anvendelse
Den elektriske kompostkværn er udelukkende beregnet til findeling af organisk haveaffald. Det biologisk
nedbrydelige materiale (f.eks. blade, grene) føres
ned i påfyldningstragten.
Bemærk, at vore produkter ikke er konstrueret til
erhvervsmæssig, håndværksmæssig eller industriel
brug. Vi fraskriver os ethvert ansvar, såfremt produktet anvendes i erhvervsmæssigt, håndværksmæssigt,
industrielt eller lignende øjemed.
Opsamling af kompostmateriale
Den medfølgende materialeopsamler kan stilles
under udkastningsåbningen.
5. Samling af kompostkværnen
Kompostkværnen leveres adskilt. Kørestellet og hjulene skal monteres inden brug. Følg betjeningsvejledningen trin for trin, og gør brug af illustrationerne –
det vil lette arbejdet med at samle maskinen.
5.1 Montering af kørestel (fig. 3)
앬 Læg motorhuset vendt om på jorden
앬 Stik kørestellet ind i åbningerne, så det går i ans-
lag.
5.2 Montering af aksel og hjul (fig. 4-10)
앬 Tag møtrikker og mellemlægsskiver ud af akslen
앬 Monter kørestellet som vist på figurerne 4-10.
6. Idriftsættelse
6.1 Tilslutning af maskinen
앬 Slut stikproppen på maskinkablet (forlænger) til
netledningen. (fig. 1/pos. 9).
앬 Med tænd/sluk-knappen (fig. 1/pos. 11) kan
maskinen tændes (ON = kontaktposition „I“) og
slukkes (OFF = kontaktposition „0“).
Anleitung RGH 2040_SPK1:Anleitung EGH 2745_SPK1 17.01.2007 8:31 Uhr Seite 32

33
DK/N
Bemærk: Tilføres der ikke netspænding til maskinen,
kan den ikke tændes. Hvis strømmen bliver afbrudt,
kobler maskinen automatisk fra (kontaktposition „0“).
For at tænde maskinen igen skal strømtilførslen
genetableres og tænd/sluk-knappen sættes i position
„I“.
6.2 Overbelastningssikring (motorværn)
En overbelastningsafbryder beskytter motoren mod
overbelastning.
Under driften rager kontaktstiften ca. 4 mm ud af
overbelastningsafbryderens hus. Overbelastes motoren over længere tid, reagerer overbelastningsafbryderen og slukker maskinen. I givet fald rager overbelastningsafbryderens kontaktstift ca. 8 mm ud af
huset, og tænd/sluk-knappen går automatisk på „0“.
Efter mindst 1 minuts ventetid kan kontaktstiften trykkes ind, og der kan tændes igen på tænd/sluk-knappen (position „I“).
Hvis motoren ikke vil gå i gang, skal udkastskakten
rengøres.
6.3 Rengøring af udkastskakt
앬 Brug altid solide arbejdshandsker
앬 Kontroller, at kontakten står i position „0“.
앬 Træk stikproppen på maskinkablet (forlængning)
ud af maskinstikket.
앬 Skru sikkerhedsskruen (fig. 1/pos. 12) op, og
klap fødetragten op (fig. 11).
앬 Rengør knivenes skæreflader, fræsevalsen og
udkastskakten med en børste eller pensel. Fjern
trærester eller andre dele, som kan blokere fræsevalsens omdrejning.
앬 Klap fødetragten i igen, og spænd sikkerheds-
skruen fast.
6.4 Sikkerhed
Kompostkværnen er udstyret med en sikkerhedsafbryder (fig. 12/pos. A) indvendigt i motorhuset.
Betjeningsenheden (fig. 13/pos. D) er anbragt på
fødetragten.
Sidder fødetragten ikke ordentligt, eller hvis den ikke
trykkes ind mod motorhuset, aktiveres SIKKERHEDSAFBRYDEREN og blokerer motorens funktion.
Hvis dette sker, klapper du fødetragten op som
beskrevet ovenfor. Rens grundigt indvendigt. Klap
fødetragten ned igen som tidligere beskrevet, og kontroller, at den sidder rigtigt, og at sikkerhedsskruen er
skruet helt i, inden du starter maskinen igen.
VIGTIGT! Løsn ALDRIG afmonteringsskruen (fig.
1/pos. 12) uden først at have slukket maskinen på
tænd/sluk-knappen (fig. 1/pos. 11) og have trukket
stikproppen på maskinkablet (forlængning) ud af
maskinstikket.
7. Arbejdsmåde
앬 Brug arbejdshandkser, sikkerhedsbriller og høre-
værn.
앬 Det tilførte materiale trækkes ind automatisk.
VIGTIGT! Længere materiale, som rager ud over
maskinen, kan svippe frem og tilbage, når det
trækkes ind – hold god afstand.
앬 Pas på ikke at tilføre så meget materiale, at
påfyldningstragten stopper til.
앬 Vissent, fugtigt haveaffald, som har ligget i flere
dage, skal findeles skiftevis med grene. Herved
undgås det, at materialet sætter sig fast i påfyldningstragten.
앬 Ekstremt blødt affald (f.eks. køkkenaffald) må
ikke kommes i kværnen, men skal komposteres,
som det er.
앬 Løvholdigt, kraftigt forgrentet materiale skal fin-
deles helt igennem, inden der tilføres nyt materiale.
앬 Fødetragtens udkastskakt må ikke stoppes til af
findelt materiale – fare for ophobning.
앬 Ventilationssprækken må ikke overdækkes.
8. Udskiftning, skærpning, knivskift
Knivene på fræsevalsen kan udskiftes. Hvis du på et
tidspunkt får brug for at udskifte knive, er det af kvalitets- og sikkerhedsgrunde vigtigt, at de nye, du sætter i, er af samme originale fabrikat.
Vigtigt: Af sikkerhedsgrunde anbefales det at overlade skærpning og udskiftning af knive til en fagmand.
Brug altid solide arbejdshandsker
Til udskiftning af knive (fig. 12 / pos. B) skal du fjerne
knivskruerne (fig. 12 / pos. C). Knivene kan nu drejes
eller erstattes med nye. Samling sker tilsvarende i
modsat rækkefølge.
9. Vedligeholdelse og pleje
Vigtigt! Inden du foretager indgreb i maskinen, inklusiv kontrol og eftersyn, skal du afbryde for strømtilførslen ved at trække maskinkablet (forlængning) ud af
maskinstikket. I tilfælde af behov for reparation henvises til vores kundeservice.
앬 Brug kun originale reservedele.
앬 Rengør maskinen med jævne mellemrum.
Anleitung RGH 2040_SPK1:Anleitung EGH 2745_SPK1 17.01.2007 8:31 Uhr Seite 33

34
DK/N
Herved sikres en stabil funktionsevne og lang
levetid.
앬 Når arbejdet er færdigudført, klapper du føde-
tragten frem, og rengør indvendigt. Aflejringer på
de indvendige metaldele fjernes med en børste.
Smør knivpladen og knivene med olie, efter at de
er blevet rengjorte.
앬 Tjek sikkerhedsafbryderen og afmonteringsskru-
en for snavs, når du klapper fødetragten på.
앬 Hold ventilationssprækken ren under arbejdet.
앬 Plastlegemet og diverse plastdele vaskes med
mildt rengøringsmiddel på en fugtig klud. Undgå
brug af skrappe rengøringsmidler eller
opløsningsmidler!
앬 Sprøjt aldrig vand på maskinen.
앬 Der må under ingen omstændigheder trænge
vand ind i maskinen.
10. Bestilling af reservedele
Følgende bedes oplyst ved bestilling af reservedele:
앬 Produktets typebetegnelse
앬 Produktets varenummer
앬 Produktets identifikationsnummer
앬 Nummeret på den ønskede reservedel
Aktuelle priser og øvrig information findes på
www.isc-gmbh.info
11. Bortskaffelse
Vigtigt!
Kompostkværnen og dens tilbehør består af forskellige materialer, f.eks. metal og plast.
Defekte komponenter skal kasseres ifølge miljøforskrifterne og må ikke smides ud som almindeligt husholdningsaffald. Hvis du er i tvivl: Spørg din forhandler, eller forhør dig hos din kommune!
Anleitung RGH 2040_SPK1:Anleitung EGH 2745_SPK1 17.01.2007 8:31 Uhr Seite 34

35
DK/N
12. Tabella per lʼeliminazione delle anomalie
Maskinen kører ikke a) Ingen strøm i stikket
b) Maskinen er slukket
c) Overbelastningsafbryderen har reageret
d) Udkastskakten er stoppet til
e) Fødetragten sidder ikke fast på
motorhuset
a) Kontroller tilførselsledningen og sikringen
b) Tænd for maskinen
c) Tryk på kontaktstiften på overbelastningsafbryderen
d) Rengør udkastskakten
e) Rengør indvendigt, og spænd sikkerhedsskruen
Arbejdsydelse
utilstrækkelig
a) Knive er slidt ned a) Drej, slib eller udskift
knive
Arbejdsydelse
aftager
a) Knive er slidt ned a) Drej, slib eller udskift
knive
Anleitung RGH 2040_SPK1:Anleitung EGH 2745_SPK1 17.01.2007 8:31 Uhr Seite 35

36
RUS
Оглавление
11. Общая инструкция по техинке безопасности 37
12. Технические данные 37
13. Состав устройства и объем поставки 37
14. Использование согласно назначению 37
15. Сборка садового измельчителя 38
16. Первый пуск 38
17. Указания к работе 39
18. Замена, заточка, замена ножа 39
19. Уход за устройством и очистка 39
10. Заказа запасных деталей 40
11. Утилизация 40
12. Порядок поиска неисправностей 41
Anleitung RGH 2040_SPK1:Anleitung EGH 2745_SPK1 17.01.2007 8:31 Uhr Seite 36

37
RUS
Упаковка:
Устройство находится в упаковке для того, чтобы
избежать его повреждений при транспортировке.
Эта упаковка является сырьем и поэтому может
быть использована вновь или направлена на
повторную переработку сырья.
При использовании устройств необходимо
предпринять некоторые меры безопасности,
для того чтобы предупредить травмы и возникновение ущерба:
앬 Прочитайте внимательно полностью руковод-
ство по эксплуатации и следуйте содержащимся в нем указаниям. Ознакомьтесь при
помощи настоящего руководства по эксплуатации с устройством, его надлежащим использованием, а также техникой безопасности.
앬 Храните это руководство по эксплуатации в
надежном месте, для того чтобы Вы могли
воспользоваться информацией в любое
время.
앬 В том случае, если Вы передаете устройство
другим лицам, то необходимо передать это
руководство по эксплуатации вместе с ним.
Мы не несем ответственности за травмы или
ущерб, которые возникли из-за несоблюдения указаний этого руководства.
1. Общие предписания по технике
безопасности
Общие предписания по технике безопасности и
пояснение значений указательных табличек находятся в приложенной брошюре.
2. Технические данные
Напряжение сети: 230 в ~ 50 Гц
Мощность: 2000 вт
Скорость вращения холостого хода n0:
4500 мин
-1
Диаметр сучьев: макс. 40 мм
Уровень давления шума LpA: 86 дБ
Уровень мощности шума L
WA
: 107 дБ
Вес: 10,5 кг
3. Состав оборудования и объем
поставки (рисунок 1/2)
1 Приемная воронка
2 Загрузочная воронка
3 Корпус двигателя с ножевой пластиной
4 Заглушка
5 Колесо в комплекте
6 Колеса
7 Ось (включая подкладные шайбы и гайки)
8 Рукоятка для транспортировки
9 Штекер
10 Выключатель перегрузки
11 Переключатель включено-выключено
12 Стопорный винт
13 Капы колес
14 Кольцевой гаечный ключ
15 Мешок сбора измельченного материала
4. Использование согласно назначению
Электрический садовый измельчитель
предназначен только для измельчения
органических садовых отходов. Заложите
биологически разлагаемые материалы
(например, листья ветки) в загрузочную воронку.
Пожалуйста, примите во внимание, что
конструкция наших устройств не предназначена
для использования их в промышленности,
ремесле или индустрии. Мы не даем гарантийных
обязательств, если устройство будет
использоваться в промышленной, ремесленной
или индустриальной, а также подобной
деятельности.
Сбор измельченных предметов
Существует возможность подставить
приложенный мешок сбора измельченного
материала под отверстие выброса.
Anleitung RGH 2040_SPK1:Anleitung EGH 2745_SPK1 17.01.2007 8:31 Uhr Seite 37

38
RUS
5. Сборка садового измельчителя
Садовый измельчитель поставляется в разобранном состоянии. Необходимо установить ходовую
часть и колеса перед использованием. Следуйте
руководству по эксплуатации шаг за шагом и
используйте рисунки для того, чтобы облегчить
себе сборку.
5.1 Установка ходовой части (рисунок 3)
앬 Корпус двигателя перевернуть и положить на
пол
앬 Вставить ходовую часть до упора в предна-
значенные для этого отверстия.
5.2 Установка оси и колес (рисунок 4-10)
앬 Удалить гайки и подкладные шайбы с оси
앬 Установить ходовую часть так, как это показа-
но на рисунках 4-10.
6. Ввод в эксплуатацию
6.1 Устройство подключить и включить
앬 Подсоедините штекер кабеля устройства
(удлинителя) к
кабелю электропитания. (рису-
нок 1/поз. 9)
앬 При помощи приведения в действие переклю-
чателя вкл/выкл (рисунок 1 / поз. 11) можно
устройство включить (положение переключателя „I“) или выключить (положение переключателя „0“).
Информация: Если напряжение сети не подлючено к устройству, то устройство не включится.
Если подача электропитания будет прервана, то
устройство отключится само (положение переключателя “0“). Устройство может быть вновь
включено только после того, как будет востановлено электропитание и будет включен переключатель в положение переключателя “I“.
6.2 Перегрузочный предохранитель (защита
двигателя)
Двигатель защищен при помощи выключателя
перегрузки от перегрузки. В рабочем режиме
выступает контактный штифт примерно на 4 мм
из корпуса выключателя перегрузки. Если двигатель длительное время будет подвержен перегрузке, то срабатывает выключатель перегрузки
и выключает устройство. Если это произойдет,
то контактный штифт выключателя перегрузки
выступит примерно на 8 мм из корпуса и переключатель включено-выключено перейдет сам в
положение “0“.
После времени ожидания минимально 1 минута
может контактный штифт выключателя перегрузки быть нажат и переключатель включеновыключено вновь включит (положение переключателя “I“).
Если двигатель не запускается, то необходимо
очистить канал выброса.
6.3 Очистка канала выброса
앬 Используйте всегда прочные рабочие
перчатки
앬 Убедитесь, что переключатель находится в
позиции “0“
앬 Выньте соединительный зажим кабеля
питания (удлинение) из розетки устройства .
앬 Ввинтите стопорный винт (рисунок 1 / поз. 12)
и откинте в заключении загрузочную воронку
вверх (рисунок 11).
앬 Очистите режущие кромки ножей, дисковый
нож и канал выброса при помощи щетки и
кисти. Удалите при этом части дерева или
прочие материалы, которые могут
заблокировать проворачивание дискового
ножа.
앬 Захлопните загрузочную воронку вновь и
ввинтите плотно стопорный винт вновь.
6.4 Техника безопасности
Измельчитель снабжен предохранительным
выключателем (рисунок 12 / поз. А), который
находится внутри на корпусе двигателя.
Пусковой узел (рисунок 13 / поз. D) расположен
на загрузочной воронке.
Если загрузочная воронка закреплена неправильно или если она не надавливает на корпус
двигателя, то включается ПРЕДОХРАНИТЕЛЬНЫЙ ВЫКЛЮЧАТЕЛЬ и прерывает работу двигателя. Если возинкает такая ситуация, то откиньте так, как это описано вверху загрузочную
воронку. Очистите акуратно внутренее пространство. Захлопните загрузочную воронку вновь так,
как описано выше и внимательно следите при
повторном включении устройства за тем, чтобы
загрузочная воронка была установлена правильно и стопорный винт полностью был ввинчен.
ВНИМАНИЕ! ЗАПРЕЩЕНО ослаблять деблокирующий внит (рисунок 1 / поз. 12), без предварительного отключения устройства переключате-
Anleitung RGH 2040_SPK1:Anleitung EGH 2745_SPK1 17.01.2007 8:31 Uhr Seite 38

39
RUS
лем включено-выключено (рисунок 1 / поз. 11) и
без выемки соединительного зажима кабеля
питания (удилинителя) из розетки устройства
(рисунок 3 / поз. 9).
7. Указания к работе
앬 Используйте рабочие перчатки, защитные
очки и средства защиты органов слуха.
앬 Заложенный измельчаемый материал
затягивается самостоятельно.
ВНИМАНИЕ! Длинный, торчащий из устройства измельчаемый материал может при
затягивании ударить как прутом - соблюдайте достаточную дистанцию.
앬 Загружайте столько измельчаемого
материала, чтобы загрузочная воронка не
забилась.
앬 Увядшие, влажные, пролежавшие уже
несколько дней садовые отходы необходимо
измельчать поочередно с ветками. Тем
самым будет предупреждено осаждение
измельчаемого материала в загрузочной
воронке.
앬 Чрезмерно мягкие отходы (например,
кухонные отбросы) не нужно измельчать, а
сразу компостировать.
앬 Очень ветвистый, содержащий листву
материал необходимо полностью измельчить,
прежде чем будет загружен новый
измельчаемый материал.
앬 Канал выброса загрузочной воронки не
должен быть забит измельчаемым
материалом - опасность обратного подпора.
앬 Запрещено закрывать вентиляционные
отверстия.
8. Замена, заточка, замена ножа
Ножи ножевого диска можно заменять. В том
случае если Вам нужно заменить нож, то разрешается использовать по причинам сохранения
качества и техники безопасности только оригинальные ножи.
Внимание: Мы рекомендуем по технике безопасности заточку и замену ножей осуществлять
только в специализированных мастерских.
Используйте всегда прочные рабочие перчатки
ДФя замены ножа (рисунок 12 / поз.B) удалите
винты ножа (рисунок 12 / поз. C). Нож можно
теперь повернуть заменить новым ножом.
Сборка осуществляется в обратном порядке.
9. Уход за устройством и очистка
Внимание! Перед каждым вмешательством для
контроля или техобслуживания устройства прервите электропитание, а именно удалите кабель
питания (удлинителя) из штекера устройства.
Для проведения ремонтных работ обратитесь в
нашу службу сервиса.
앬 используйте только оригинальные запасные
детали.
앬 Регулярно очищайте устройство. Тем самым
Вы обеспечите роботоспособность и
длительный срок службы.
앬 После окончания работы откиньте
загрузочную воронку вперед и очистите
внутреннее пространство. Отложения на
внутренних металлических частях удалить
щеткой. Слегка смажте маслом очищенные
ножевые пластины и ножи.
앬 При захлопывании загрузочной воронки
следите за тем, чтобы предохранительный
выключатель и деблокирующий винт были
свободны от загрязнений.
앬 Удерживайте во время работ
вентиляционную щель чистой.
앬 Поверхности из пластмассы и пластмассовые
части очищайте при помощи легких бытовых
средств очистки и влажной тряпки. Не
используйте для очистки едкие средства и
растворители!
앬 Запрещено обдавать измельчитель водой.
앬 В любом случае избегайте попадания воды в
устройство.
10. Заказ запасных деталей
При рсуществлении заказа запасных деталей
необходимо привести следующие данные:
앬 тип устройства
앬 номер арт. устройства
앬 идент. номер устройства
앬 номер запасной детали необходимой
запасной части
Актуальные цены и информация находятся на
www.isc-gmbh.info
Anleitung RGH 2040_SPK1:Anleitung EGH 2745_SPK1 17.01.2007 8:31 Uhr Seite 39

40
RUS
11. Утилизация
Внимание!
Садовый измельчитель и его принадлежности
состоят из различных материалов, таких как
например: металл и пластмасс.
Утилизируйте дефектные детали в местах сбора
особых отходов. Спросите в специализированных
мазинах или в местных органах управления!
Anleitung RGH 2040_SPK1:Anleitung EGH 2745_SPK1 17.01.2007 8:31 Uhr Seite 40

41
RUS
12. Схема поиска неисправностей
Устройство не
работает
а) в розетке нет напряжения
б) устройство выключено
в) сработал предохранитель перегрузки
г) забит канал выброса
д) воронка заполнения сидит не прочно
на корпусе двигателя
а) проверить проводку и предохранитель
б)включить устройство
в) стержень включения не предохранителе перегрузки нажать
г) очистить канал выброса
д) Очистить внутреннее пространство и
затянуть стопорный винт
Недостаточная
производительность измельчения
а) Нож износился а) Нож повернуть, наточить или заме-
нить
Производитель
ность измельчения снижается
а) Нож износился а) Нож повернуть, наточить или заме-
нить
Anleitung RGH 2040_SPK1:Anleitung EGH 2745_SPK1 17.01.2007 8:31 Uhr Seite 41

42
PL
Spis treści
11. Ogólne wskazówki bezpieczeństwa 43
12. Dane techniczne 43
13. Opis urządzenia i zakres dostawy 43
14. Użytkowanie zgodne z przeznaczeniem 43
15. Montaż rozdrabniarki ogrodowej 43
16. Pierwsze uruchomienie 43
17. Wskazówki pracy 44
18. Ostrzenie, wymiana noży 45
19. Konserwacja i czyszczenie 45
10. Zamawianie części zamiennych 45
11. Utylizacja 45
12. Wykrywanie i usuwanie usterek 46
Anleitung RGH 2040_SPK1:Anleitung EGH 2745_SPK1 17.01.2007 8:31 Uhr Seite 42

43
PL
Opakowanie:
Aby zapobiec uszkodzeniom podczas transportu,
urządzenie znajduje się w opakowaniu. Opakowanie
to jest surowcem, który można użytkować ponownie
lub można przeznaczyć do powtórnego przerobu.
Podczas użytkowania urządzenia należy przestrzegać wskazówek bezpieczeństwa w celu uniknięcia zranień i uszkodzeń.
앬 Proszę uważnie przeczytać instrukcję obsługi i
stosować się do zawartych w niej wskazówek.
Posługując się instrukcją obsługi proszę zapoznać się z funkcjonowaniem urządzenia, jego
właściwą obsługa i wskazówkami bezpieczeństwa.
앬 Proszę zachować instrukcję i wskazówki, aby
można było w każdym momencie do nich wrócić.
앬 W razie przekazania urządzenia innej osobie,
proszę wręczyć jej również instrukcję obsługi.
Nie odpowiadamy za wypadki i uszkodzenia
zaistniałe w wyniku nieprzestrzegania niniejszej
instrukcji.
1. Ogólne wskazówki bezpieczeństwa
Ogólne wskazówki bezpieczeństwa i objaśnienie
tabliczki ze wskazówkami na urządzeniu znajdą
Państwo w załączonym zeszycie.
2. Dane techniczne
Napięcie znamionowe: 230 V ~ 50 Hz
Moc: 2000W
Liczba obrotów biegu jałowego n
0
4500 min
-1
Średnica gałęzi: Max. 40 mm
Poziom ciśnienia akustycznego LpA: 86 dB
Poziom mocy akustycznej LWA: 107 dB
Waga: 10,5 kg
3. Opis urządzenia i zakres dostawy
(rys. 1 / 2)
1 Lej napełniania
2 Lej napełniający
3 Obudowa silnika z płytą nożową
4 Drążek popychający
5 Stojak
6 Koła
7 Oś ( w wyposażeniu podkładki i nakrętki)
8 Uchwyt do transportu
9 Wtyczka
10 Wyłącznik przeciążenia
11 Włącznik/ wyłącznik
12 Śruba zabezpieczająca
13 Pokrywy
14 Klucz oczkowy
15 Torba na rozdrobniony materiał
4. Użycie zgodne z przeznaczeniem
Elektryczny rozdrabniacz przeznaczony jest wyłącznie do rozdrabniania organicznych odpadków ogrodowych. Wprowadzać biologicznie rozkładające się
materiały ( np. liście, gałęzie) w lej napełniania.
Proszę pamiętać o tym, że nasze urządzenie nie jest
przeznaczone do zastosowania zawodowego, rzemieślniczego lub przemysłowego. Umowa gwarancyjna
nie obowiązuje, gdy urządzenie było stosowane w
zakładach rzemieślniczych, przemysłowych lub do
podobnych działalności.
Wkładanie materiału rozdrabnianego
Pod wylot można podstawić znajdujący się w dostawie pojemnik na materiał rozdrabniany.
5. Montaż rozdrabniacza ogrodowego
Rozdrabniacz ogrodowy jest zdemontowany przy
dostawie. Stojak i kółka muszą zostać zamontowane
przed użyciem. Należy postępować według instrukcji
obsługi krok po kroku i patrzeć na rysunki, aby montaż był dla Państwa prosty.
5.1 Montowanie stojaka ( rys. 3)
앬 Obudowę silnika odwrócić i położyć na ziemi
앬 Włożyć stojak, aż do oporu w przewidziane do
tego otwory.
5.2 Montowanie osi i kół (rys. 4-10)
앬 Nakrętki i podkładki usunąć z osi
앬 Stojak zamontować zgodnie ze zdjęciami 4-10.
Anleitung RGH 2040_SPK1:Anleitung EGH 2745_SPK1 17.01.2007 8:31 Uhr Seite 43

44
PL
6. Uruchamianie
6.1 Podłączenie i włączenie urządzenia
앬 Włożyć złącze kabla zasilającego (przedłużacza)
do sieci/kabla zasilającego. (Rys. 1/ Poz. 9)
앬 Przez uruchomienie włącznika/ wyłącznika (rys.
1/ poz. 11) urządzenie może zostać włączone (
pozycja przełącznika „I”), ewentualnie wyłączone
(„pozycja przełącznika „0”)
Wskazówka Jeżeli urządzenie nie jest podłączone
do zasilania, nie włączy się. Jeżeli dopływ prądu do
urządzenia zostanie przerwany, urządzenie samoistnie się wyłączy (pozycja 0). Urządzenie można włączyć dopiero, gdy ponowiony zostanie dopływ prąduwówczas nacisnąć włącznik (pozycja „I”).
6.2 Ochrona przed przeciążeniem (ochrona silni-
ka)
Silnik jest chroniony przed przeciążeniem za
pomocą wyłącznika przeciążenia.
Podczas pracy wyłącznik bezpieczeństwa wystaje
około 4 mm z obudowy włącznika. Jeżeli silnik jest
przed dłuższy czas przeciążony, zadziała wyłącznik
bezpieczeństwa i wyłączy automatycznie urządzenie. W tym przypadku przełącznik ochrony przed
przeciążeniem będzie wystawał około 8 mm z obudowy włącznika. Przycisk włącznika/ wyłącznika
ustawi się automatycznie w poz. „0”. Należy odczekać przynajmniej 1 minutę zanim będzie można
włączyć urządzenie, ustawiając przycisk włącznika/
wyłącznika w pozycji „I”.
Jeżeli silnik się nie włączy należy wyczyścić kanał wyrzutowy.
6.3 Czyszczenie kanału wyrzutowego
앬 Zawsze nosić grube rękawice robocze
앬 Upewnić się, że włącznik/ wyłącznik ustawiony
jest w poz. „0”.
앬 Wyciągnąć przedłużacz z wtyczki na urządzeniu.
앬 Śrubę zabezpieczającą (rys. 1/ poz. 12) a
następnie podnieść pokrywę leja urządzenia (rys.
11).
앬 Powierzchnie tnące noży, płytę nożową i kanał
wyrzutowy wyczyścić za pomocą szczotki lub
pędzla. Usunąć przy tym części drewna i inne
cząstki, które mogłyby hamować ruch noży.
앬 Ponownie zamknąć lej i dokręcić śrubę zabez-
pieczającą.
6.4 Bezpieczeństwo
Rozdrabniacz posiada wyłącznik bezpieczeństwa
(rys. 12/ poz. A), znajdujący się wewnątrz osłony silnika. Przycisk wyłącznika (rys. 13/ poz. D) umieszc-
zony jest na leju napełniającym.
Jeżeli lej napełniający nie jest umieszczony prawidłowo lub nie jest połączony ściśle z osłoną silnika,
wówczas zadziała WYŁĄCZNIK BEZPIECZEŃSTWA
i nie pozwoli na włączenie silnika. Jeżeli taka sytuacja będzie miała miejsce, należy otworzyć lej napełniający wg powyższych instrukcji. Dokładnie wyczyścić wnętrze urządzenia. Teraz zamknąć lej wg
powyższych wskazówek. Zwracać uwagę podczas
ponownego uruchomienia, aby lej był umieszczony
prawidłowo a śruba bezpieczeństwa solidnie
dokręcona.
Uwaga! NIGDY nie odkręcać śruby ryglującej (rys. 1/
poz. 12) jeżeli urządzenie nie jest wyłączone (włącznik/ wyłącznik- rys. 1/ poz. 11 w pozycji „0”) a przedłużacz wyciągnięty z gniazdka urządzenia.
7. Wskazówki dotyczące użytkowania
앬 Zawsze nosić okulary, rękawice i nauszniki
ochronne).
앬 Materiał rozdrabniany jest samoistnie wciągany
do urządzenia.
Uwaga! Dłuższe, wystające z urządzenia elementy rozdrabniane mogą zostać wyrzucone na zewnątrz- należy zachować bezpieczny odstęp od
urządzenia.
앬 Uważać, aby nie wprowadzić za dużo materiału
do rozdrabniania i nie zatkać tym samym urządzenia.
앬 Wilgotne, zbutwiałe odpadki ogrodowe, które
były przez pewien czas składowane w ogrodzie
wrzucać na przemian z gałęziami. Dzięki temu
materiał nie zaklinuje się w leju.
앬 Bardzo miękkich odpadków (np. odpadki
kuchenne) nie wrzucać do rozdrabniacza- poddać kompostowaniu.
앬 Gałęzie o wielu odnogach, pokryte liśćmi
rozdrobnić dokładnie przed wrzuceniem kolejnej
porcji materiału do rozdrabniania.
앬 Nie wolno pozostawiać materiału, który zaklino-
wał się w leju- istnieje niebezpieczeństwo wyrzucenia go z powrotem przez otwór wrzutowy.
앬 Otwory napowietrzające muszą być zawsze
wolne i czyste.
8. Wymiana i ostrzenie noży
Noże i płytę nożową można wymieniać. Jeżeli noże
wymagają wymiany, użyte nowe noże muszą wykazywać jakość i właściwości noży oryginalnych.
Anleitung RGH 2040_SPK1:Anleitung EGH 2745_SPK1 17.01.2007 8:31 Uhr Seite 44

45
PL
Uwaga! Ze względów bezpieczeństwa zalecamy,
aby noże ostrzyć w wykwalifikowanym warsztacie.
Podczas pracy zawsze nosić grube rękawice
robocze.
W celu wymiany noży (rys. 12/ poz. B) odkręcić
śruby noży (rys. 12/ poz. C). Teraz można odkręcić
noże i dokonać ich wymiany. montaż odbywa się w
odwrotnej kolejności.
9. Konserwacja i pielęgnacja
Uwaga! Przed każdorazowym otworzeniem, kontrolą
lub pracami konserwacyjnymi przy urządzeniu należy
odciąć dopływ prądu przez wyciągnięcie przedłużacza z wtyczki urządzenia. W razie potrzeby naprawy
urządzenia proszę zwrócić się do naszego
autoryzowanego serwisu.
앬 Należy zawsze używać oryginalnych części
zamiennych.
앬 Proszę regularnie czyścić urządzenie. Dzięki
temu zapewniają Państwo mu dłuższą żywotność.
앬 Po zakończeniu pracy otworzyć lej napełniający i
wyczyścić wnętrze urządzenia. Osady na
wewnętrznych częściach metalowych czyścić za
pomocą szczotki. Płytę nożową i noże naoliwić
lekko po ich uprzednim wyczyszczeniu.
앬 Podczas zamykania leja pamiętać o tym, aby
wyłącznik bezpieczeństwa i śruba ryglująca były
czyste.
앬 Podczas pracy otwory napowietrzające muszą
pozostawać w czystości.
앬 Korpus urządzenia z tworzywa sztucznego czyś-
cić za pomocą wilgotnej szmatki z niewielką ilością płynu do czyszczenia. Nigdy nie używać do
czyszczenia rozdrabniacza agresywnych środków i rozpuszczalników.
앬 Nigdy nie spryskiwać rozdrabniacza wodą.
앬 Należy zapobiegać dostaniu się wody do urząd-
zenia.
10. Zamawianie części zamiennych
Podczas zamawiania części zamiennych należy
podać następujące dane:
앬 Typ urządzenia
앬 Numer artykułu
앬 Numer identyfikacyjny
앬 Numer części zamiennej
Aktualne ceny artykułów i informacje znajdują się na
stronie: www.isc-gmbh.info.
11. Utylizacja
Uwaga!
Rozdrabniacz ogrodowy i osprzęt składa się z
różnych rodzajów materiałów, jak np. metal i tworzywa sztuczne.
Uszkodzone elementy urządzenia proszę dostarczyć
do punktu zbiorczego surowców wtórnych. Proszę
poprosić o informację w sklepie specjalistycznym
bądź w placówce samorządu lokalnego.
Anleitung RGH 2040_SPK1:Anleitung EGH 2745_SPK1 17.01.2007 8:31 Uhr Seite 45

46
12. Wykrywanie i usuwanie usterek
Urządzenie nie pracuje a) Brak zasilania
b) Urządzenie jest wyłączone
c)Zadziałał wyłącznik antyprzeciążeniowy
d) Lej wyrzutowy jest zapchany
e) Lej wrzutowy jest zamontowany
niestabilnie na obudowie silnika
a) Sprawdzić przewody zasilające i
bezpieczniki
b) Włączyć urządzenie
c) Nacisnąć przycisk wyłącznika
antyprzeciążeniowego
d) Oczyścić lej wyrzutowy
e) Oczyścić wnętrze leja wrzutowego i
dokręcić śrubę zabezpieczającą
Zbyt niska moc rozdrabniarki
a) Noże zużyte a) Odwrócić, naostrzyć lub wymienić
noże
Spada moc rozdrabniarkie
a) Noże zużyte
a) Naostrzyć lub wymienić noże
PL
Anleitung RGH 2040_SPK1:Anleitung EGH 2745_SPK1 17.01.2007 8:31 Uhr Seite 46

47
Anleitung RGH 2040_SPK1:Anleitung EGH 2745_SPK1 17.01.2007 8:31 Uhr Seite 47
ISC GmbH
Eschenstraße 6
D-94405 Landau/Isar
erklärt folgende Konformität gemäß EU-Richtlinie
k
und Normen für Artikel
declares conformity with the EU Directive
t
and standards marked below for the article
déclare la conformité suivante selon la
p
directive CE et les normes concernant lʼarticle
verklaart de volgende conformiteit in overeen-
stemming met de EU-richtlijn en normen voor
het artikel
declara la siguiente conformidad a tenor de la
m
directiva y normas de la UE para el artículo
declara a seguinte conformidade de acordo
O
com a directiva CE e normas para o artigo
förklarar följande överensstämmelse enl. EU-
U
direktiv och standarder för artikeln
ilmoittaa seuraavaa Euroopan unionin direkti-
q
ivien ja normien mukaista yhdenmukaisuutta
tuotteelle
erklærer herved følgende samsvar med EU-
direktiv og standarder for artikkel
заявляет о соответствии товара
T
следующим директивам и нормам EC
izjavljuje sljedeću uskladjenost s odredbama i
B
normama EU za artikl.
declarå urmåtoarea conformitate cu linia direc-
Q
toare CE μi normele valabile pentru articolul.
ürün ile ilgili olarak AB Yönetmelikleri ve
Z
Normlar∂ gere©ince aμa©∂daki uygunluk aç∂kla
mas∂n∂ sunar.
‰ЛПТУВИ ЩЛУ ·ОfiПФ˘ıЛ Ы˘МКˆУ›· Ы‡МКˆУ· МВ
z
ÙËÓ √‰ËÁ›· ∂∂ Î·È Ù· ÚfiÙ˘Ô ÁÈ· ÙÔ ÚÔ˚fiÓ
Konformitätserklärung
C dichiara la seguente conformità secondo la
direttiva UE e le norme per lʼarticolo
attesterer følgende overensstemmelse i
l
henhold til EU-direktiv og standarder for
produkt
prohlašuje následující shodu podle směrnice
j
EU a norem pro výrobek.
a következő konformitást jelenti ki a termékek-
A
re vonatkozó EU-irányvonalak és normák
szerint
pojasnjuje sledečo skladnost po smernici EU
X
in normah za artikel.
deklaruje zgodność wymienionego poniżej
artykułu z następującymi normami na
podstawie dyrektywy WE.
vydáva nasledujúce prehlásenie o zhode podľa
W
smernice EÚ a noriem pre výrobok.
деклаpиpа следното съответствие съгласно
e
диpективите и ноpмите на ЕС за пpодукта.
заявляє про відповідність згідно з Директивою
1
ЄС та стандартами, чинними для даного товару
deklareerib vastavuse järgnevatele EL direktiivi
EE
dele ja normidele
deklaruoja atitikti pagal ES direktyvas ir normas
G
straipsniui
izjavljuje sledeçi konformitet u skladu s odred
SCG
bom EZ i normama za artikl
Atbilstības sertifikāts apliecina zemāk minēto preču
H
atbilstību ES direktīvām un standartiem
Samræmisyfirl‡sing sta›festir eftirfarandi samræmi
E
samkvæmt reglum Evfrópubandalagsins og stö›lum
fyrir vörur
Gartenhäcksler RGH 2040
98/37/EG
x
x
73/23/EWG_93/68/EEC
97/23/EG
89/336/EWG_93/68/EEC
x
90/396/EWG
89/686/EWG
87/404/EWG
R&TTED 1999/5/EG
2000/14/EG:
x
95/54/EG:
97/68/EG:
LWM= 105,5 dB; LWA= 107 dB
P = 2 kW;
EN 60335-1; EN 13683; EN 55014-1; EN 55014-2;
EN 61000-3-2; EN 61000-3-11; KBV V
Landau/Isar, den 16.10.2006
Art.-Nr.: 34.303.60 I.-Nr.: 01016 Archivierung: 3430360-23-4155050-06
Subject to change without notice
Weichselgartner
General-Manager
Gottelt
Product-Management

48
Der Nachdruck oder sonstige Vervielfältigung von Dokumentation und
Begleitpapieren der Produkte, auch auszugsweise ist nur mit ausdrücklicher Zustimmung der ISC GmbH zulässig.
The reprinting or reproduction by any other means, in whole or in part,
of documentation and papers accompanying products is permitted only
with the express consent of ISC GmbH.
La réimpression ou une autre reproduction de la documentation et des
documents dʼaccompagnement des produits, même incomplète, nʼest
autorisée quʼavec lʼagrément exprès de lʼentreprise ISC GmbH.
Nadruk of andere reproductie van documentatie en geleidepapieren
van de producten, geheel of gedeeltelijk, enkel toegestaan mits uitdrukkelijke toestemming van ISC GmbH.
La ristampa o lʼulteriore riproduzione, anche parziale, della documentazione o dei documenti dʼaccompagnamento dei prodotti è consentita
solo con lʼesplicita autorizzazione da parte della ISC GmbH.
Eftertryk eller anden form for mangfoldiggørelse af skriftligt materiale,
ledsagepapirer indbefattet, som omhandler produkter, er kun tilladt
efter udtrykkelig tilladelse fra ISC GmbH.
Przedruk lub innego rodzaju powielanie dokumentacji wyrobów oraz
dokumentów towarzyszących, nawet we fragmentach dopuszczalne
jest tylko za wyraźną zgodą firmy ISC GmbH.
T
Перепечатывание или прочие виды размножения документации и
сопроводительных листов продукции фирмы, полностью или
частично, разрешено производить только с однозначного
разрешения ISC GmbH.
Technische Änderungen vorbehalten
Technical changes subject to change
Sous réserve de modifications
Technische wijzigingen voorbehouden
Con riserva di apportare modifiche tecniche
Der tages forbehold för tekniske ændringer
Bf Zadržavamo pravo na tehnične izmjene.
Zastrzega się wprowadzanie zmian technicznych
T Сохpaняeтcя прaво на тeхничeскиe изменения
Anleitung RGH 2040_SPK1:Anleitung EGH 2745_SPK1 17.01.2007 8:31 Uhr Seite 48

49
k Nur für EU-Länder
Werfen Sie Elektrowerkzeuge nicht in den Hausmüll!
Gemäß europäischer Richtlinie 2002/96/EG über Elektro- und Elektronik-Altgeräte und Umsetzung in
nationales Recht müssen verbrauchte Elektrowerkzeuge getrennt gesammelt werden und einer
umweltgerechten Wiederverwertung zugeführt werden.
Recycling-Alternative zur Rücksendeaufforderung:
Der Eigentümer des Elektrogerätes ist alternativ anstelle Rücksendung zur Mitwirkung bei der sachgerechten Verwertung im Falle der Eigentumsaufgabe verpflichtet. Das Altgerät kann hierfür auch einer
Rücknahmestelle überlassen werden, die eine Beseitigung im Sinne der nationalen Kreislaufwirtschaftsund Abfallgesetze durchführt. Nicht betroffen sind den Altgeräten beigefügte Zubehörteile und Hilfsmittel
ohne Elektrobestandteile.
t For EU countries only
Never place any electric tools in your household refuse.
To comply with European Directive 2002/96/EC concerning old electric and electronic equipment and its
implementation in national laws, old electric tools have to be separated from other waste and disposed of
in an environment-friendly fashion, e.g. by taking to a recycling depot.
Recycling alternative to the demand to return electrical devices:
As an alternative to returning the electrical device, the owner is obliged to cooperate in ensuring that the
device is properly recycled if ownership is relinquished. This can also be done by handing over the used
device to a returns center, which will dispose of it in accordance with national commercial and industrial
waste management legislation. This does not apply to the accessories and auxiliary equipment without
any electrical components which are included with the used device.
p Uniquement pour les pays de l'Union Européenne
Ne jetez pas les outils électriques dans les ordures ménagères.
Selon la norme européenne 2002/96/CE relative aux appareils électriques et systèmes électroniques
usés et selon son application dans le droit national, les outils électriques usés doivent être récoltés à
part et apportés à un recyclage respectueux de l'environnement.
Possibilité de recyclage en alternative à la demande de renvoi :
Le propriétaire de lʼappareil électrique est obligé, en guise dʼalternative à un envoi en retour, à contribuer
à un recyclage effectué dans les règles de lʼart en cas de cessation de la propriété. Lʼancien appareil
peut être remis à un point de collecte dans ce but. Cet organisme devra lʼéliminer dans le sens de la Loi
sur le cycle des matières et les déchets. Ne sont pas concernés les accessoires et ressources fournies
sans composants électroniques.
Anleitung RGH 2040_SPK1:Anleitung EGH 2745_SPK1 17.01.2007 8:31 Uhr Seite 49

50
Enkel voor EU-landen
Elektrisch gereedschap hoort niet bij het huisvuil thuis.
Volgens de Europese richtlijn 2002/96/EG op afgedankte elektrische en elektronische toestellen en
omzetting in nationaal recht dienen afgedankte elektrische gereedschappen afzonderlijk te worden
verzameld en milieuvriendelijk te worden gerecycleerd.
Recyclagealternatief i.p.v. het verzoek het toestel terug te sturen:
In plaats van het elektrische toestel terug te sturen is alternatief de eigenaar van het toestel gehouden
mee te werken aan de adequate recyclage als het eigendom wordt opgegeven. Hiervoor kan het
afgedankte toestel eveneens bij een inzamelplaats worden afgegeven waar het toestel wordt verwijderd
als bedoeld in de wetgeving in zake afvalverwerking en recyclage. Dit geldt niet voor toebehoorstukken
en hulpmiddelen zonder elektrische componenten die bij de afgedankte toestellen zijn bijgevoegd.
C Solo per paesi membri dell'UE
Non gettate gli utensili elettrici nei rifiuti domestici.
Secondo la Direttiva europea 2002/96/CE sui rifiuti di apparecchiature elettriche ed elettroniche e
l'applicazione nel diritto nazionale gli elettroutensili usati devono venire raccolti separatamente e smaltiti
in modo ecologico.
Alternativa di riciclaggio alla richiesta di restituzione
Il proprietario dellʼapparecchio elettrico è tenuto in alternativa, invece della restituzione, a collaborare in
modo che lo smaltimento venga eseguito correttamente in caso ceda lʼapparecchio. Lʼapparecchio
vecchio può anche venire consegnato ad un centro di raccolta che provvede poi allo smaltimento
secondo le norme nazionali sul riciclaggio e sui rifiuti. Non ne sono interessati gli accessori e i mezzi
ausiliari senza elementi elettrici forniti insieme ai vecchi apparecchi.
Gælder kun EU-lande
Smid ikke el-værktøj ud som almindeligt husholdningsaffald.
I henhold til EF-direktiv 2002/96 om elektroaffald og dets omsættelse til national lovgivning skal brugt
el-værktøj indsamles adskilt og indleveres på genbrugsstation.
Recycling-alternativ til tilbagesendelse af brugt vare:
Ejeren af det elektroniske apparat er forpligtet til – som et alternativ i stedet for tilbagesendelse – at
medvirke til, at relevante dele af apparatet genanvendes ifølge miljøforskrifterne i tilfælde af overdra
gelse af ejerskab til tredjeperson. Det brugte apparat kan også overdrages til et deponeringssted, som vil
varetage bortskaffelsen af apparatets dele i overensstemmelse med nationale bestemmelser vedrørende
skrotning og genbrug. Ikke omfattet heraf er tilbehørsdele og hjælpemidler, som ikke indeholder
elektroniske komponenter.
Tylko dla krajów UE
Zabrania się wyrzucania elektronarzędzi na śmieci.
Zgodnie z Europejską Dyrektywą 2002/96/WE o przeznaczonych na złomowanie elektronarzędziach i
sprzęcie elektronicznym oraz jej konwersji na prawo krajowe, elektronarzędzia należy zbierać osobno i
oddać do punktu zbiórki surowców wtórnych.
Recykling jako alternatywa wobec obowiązku zwrotu urządzenia:
Alternatywnie do obowiązku zwrotu urządzenia elektrycznego po zakończeniu jego użytkowania,
właściciel jest zobowiązany do współuczestnictwa w jego prawidłowej utylizacji. Wycofane z
eksploatacji urządzenie można oddać również do punktu zbiórki surowców wtórnych, który
przeprowadzi utylizację zgodnie z krajowymi przepisami o odpadach i wykorzystaniu surowców
wtórnych. Nie dotyczy to osprzętu należącego do wyposażenia urządzenia i środków pomocniczych nie
zawierających elementów elektrycznych.
Anleitung RGH 2040_SPK1:Anleitung EGH 2745_SPK1 17.01.2007 8:31 Uhr Seite 50

51
T Только для стран ЕС
Запрещено выбрасывать электроинструмент в обычный домашний мусор.
Согласно европейской директиве 2002/96/EG об использованных электрических и электронных
устройствах и реализации в правовой системе соответствующей страны необходимо
использованный электрический инструмент утилизировать отдельно и направлять на вторичную
переработку для охраны окружающей среды.
Вторичная переработка - альтернатива обязятельной отсылке устройства назад изґотовителю:
Владелец электрическоґо устройства в случае избавления от собственности обязан, в качестве
альтернативы отсылки назад изґотовителю, содействовать надлежащей утилизации. Пришедшее
в неґодность устройство может быть передано в приемный пункт, который осуществит
ликвидацию в соответствии с законом страны о цикличном производстве и обращении с
мусором. Это не относится к приложенным к пришедшему в неґодность оборудованию
дополнительным устройствам и вспомоґательным средствам, не содержащим электрические
части.
Anleitung RGH 2040_SPK1:Anleitung EGH 2745_SPK1 17.01.2007 8:31 Uhr Seite 51

52
Das Gerät kann bei ungünstigen Netzverhältnissen zu vorübergehenden Spannungsabsenkungen führen. Ist die Netzimpedanz
Z am Anschlusspunkt zum öffentlichen Netz größer als 0,391 Ohm können weitere Maßnahmen erforderlich sein bevor das
Gerät an diesem Anschluss bestimmungsgemäß betrieben werden kann. Wenn nötig kann die Impedanz beim örtlichen
Energieversorgungsunternehmen erfragt werden.
t
Given unfavorable conditions in the power supply the equipment may cause the voltage to drop temporarily. If the supply
impedance “Z” at the connection point to the public power supply exceeds 0,391 Ohm it may be necessary to take further measures before the equipment can be used as intended from this power supply. If necessary, you can ask your local electricity
supply company for the impedance value.
L’appareil peut entraîner des baisses de tension provisoires lorsque le réseau n’est pas favorable. Si l’impédance de réseau Z
sur le point de raccordement au réseau public est supérieur à 0,391 Ohm d’autres mesures peuvent être nécessaires avant
que l’appareil ne puisse être exploité sur ce raccord conformément à l’affectation. Si nécessaire, demandez l’impédance à
l’entreprise distributrice d’énergie électrique locale.
Het gereedschap kan bij ongunstige netomstandigheden leiden tot tijdelijke spanningsdalingen. Is de netimpedantie Z op het
aansluitpunt naar het openbare net groter dan 0,391 Ohm kunnen verdere maatregelen nodig zijn voordat het gereedschap op
deze aansluiting kan worden gebruikt als bedoeld. Indien nodig kan u de impedantie te weten komen door de plaatselijke energievoorzieningsmaatschappij te vragen.
In caso di condizioni di rete sfavorevoli l’apparecchio può causare degli abbassamenti temporanei di tensione. Se l’impedenza
di rete Z nel punto di allacciamento alla rete pubblica supera 0,391 Ohm possono rendersi necessarie altre misure prima che
l’apparecchio possa venire utilizzato in maniera conforme all’uso a partire da tale attacco. Se necessario, in materia di impedenza si può consultare l’ente locale responsabile della fornitura di energia elettrica.
Ved ugunstige netforhold kan maskinen forårsage forbigående spændingsfald. Er netimpedansen Z på tilslutningsstedet til det
offentlige forsyningsnet større end 0,391 Ohm kan yderligere foranstaltninger være påkrævet, inden maskinen kan tages i brug
via denne tilslutning. Du kan forhøre dig om impedans hos forsyningsselskabet.
Anleitung RGH 2040_SPK1:Anleitung EGH 2745_SPK1 17.01.2007 8:31 Uhr Seite 52

53
Urządzenie przy niekorzystnych zachowaniach sieciowych może prowadzić do przejściowych spadków napięcia. Jeśli impedancja sieci Z w miejscu podłączenia do sieci publicznej jest większa niż 0,391 Ohm Mogą być konieczne dodatkowe środki,
zanim urządzenie będzie można właściwie używać w tym miejscu podłączenia. Gdy jest to konieczne, o opór pozorny można
zapytać w przedsiębiorstwie energetycznym.
T
Устройство при неблагоприятных условиях электросети может вызвать временные падения напряжения. Если
полное сопротивление электросети Z в месте подключения к общественной электросети больше 0,391 Ohm то могут
понадобиться определенные мероприятия прежде чем можно будет использовать устройство от этого подключения
согласно предписанию. При необходимости можно запросить данные о полном сопротивлении электросети у
местного предприятия энергоснабжения.
Anleitung RGH 2040_SPK1:Anleitung EGH 2745_SPK1 17.01.2007 8:31 Uhr Seite 53

54
Anleitung RGH 2040_SPK1:Anleitung EGH 2745_SPK1 17.01.2007 8:31 Uhr Seite 54

55
Anleitung RGH 2040_SPK1:Anleitung EGH 2745_SPK1 17.01.2007 8:31 Uhr Seite 55

56
t
GUARANTEE CERTIFICATE
Dear Customer,
All of our products undergo strict quality checks to ensure that they reach you in perfect condition. In the unlikely
event that your device develops a fault, please contact our service department at the address shown on this
guarantee card. Of course, if you would prefer to call us then we are also happy to offer our assistance under
the service number printed below. Please note the following terms under which guarantee claims can be made:
1. These guarantee terms cover additional guarantee rights and do not affect your statutory warranty rights.
We do not charge you for this guarantee.
2. Our guarantee only covers problems caused by material or manufacturing defects, and it is restricted to the
rectification of these defects or replacement of the device. Please note that our devices have not been
designed for use in commercial, trade or industrial applications. Consequently, the guarantee is invalidated
if the equipment is used in commercial, trade or industrial applications or for other equivalent activities. The
following are also excluded from our guarantee: compensation for transport damage, damage caused by
failure to comply with the installation/assembly instructions or damage caused by unprofessional installation, failure to comply with the operating instructions (e.g. connection to the wrong mains voltage or current
type), misuse or inappropriate use (such as overloading of the device or use of non-approved tools or
accessories), failure to comply with the maintenance and safety regulations, ingress of foreign bodies into
the device (e.g. sand, stones or dust), effects of force or external influences (e.g. damage caused by the
device being dropped) and normal wear resulting from proper operation of the device.
The guarantee is rendered null and void if any attempt is made to tamper with the device.
3. The guarantee is valid for a period of 2 years starting from the purchase date of the device. Guarantee
claims should be submitted before the end of the guarantee period within two weeks of the defect being
noticed. No guarantee claims will be accepted after the end of the guarantee period. The original guarantee
period remains applicable to the device even if repairs are carried out or parts are replaced. In such cases,
the work performed or parts fitted will not result in an extension of the guarantee period, and no new guarantee will become active for the work performed or parts fitted. This also applies when an on-site service is
used.
4. In order to assert your guarantee claim, please send your defective device postage-free to the address
shown below. Please enclose either the original or a copy of your sales receipt or another dated proof of
purchase. Please keep your sales receipt in a safe place, as it is your proof of purchase. It would help us if
you could describe the nature of the problem in as much detail as possible. If the defect is covered by our
guarantee then your device will either be repaired immediately and returned to you, or we will send you a
new device.
Of course, we are also happy offer a chargeable repair service for any defects which are not covered by the
scope of this guarantee or for units which are no longer covered. To take advantage of this service, please send
the device to our service address.
Anleitung RGH 2040_SPK1:Anleitung EGH 2745_SPK1 17.01.2007 8:31 Uhr Seite 56

57
p
BULLETIN DE GARANTIE
Chère Cliente, Cher Client,
Nos produits sont soumis à un contrôle de qualité très strict. Si cet appareil devait toutefois ne pas fonctionner
impeccablement, nous en serions désolés. Dans un tel cas, nous vous prions de bien vouloir prendre contact
avec notre service après-vente à l‘adresse indiquée sur le bulletin de garantie. Nous restons également volontiers à votre disposition au numéro de téléphone de service indiqué plus bas. Pour faire valoir une demande de
garantie, ce qui suit est valable :
1. Les conditions de garantie règlent les prestations de garantie supplémentaires. Vos droits de garantie
légaux ne sont en rien altérés par la garantie présente. Notre prestation de garantie est gratuite.
2. La prestation de garantie s’applique exclusivement aux défauts occasionnés par des vices de fabrication ou
de matériau et est limitée à l’élimination de ces défauts ou encore au remplacement de l’appareil. Veillez au
fait que nos appareils, conformément à leur affectation, n’ont pas été construits pour être utilisés dans un
environnement professionnel, industriel ou artisanal. Un contrat de garantie ne peut avoir lieu dès lors que
l’appareil est utilisé à des activités dans des entreprises professionnelles, artisanales ou industrielles ou
toute autre activité du même genre. Sont également exclus de notre garantie : les prestations de substitution de dommages dus aux transports, les dommages occasionnés par le non-respect des instructions de
montage ou en raison d’une installation non conforme, du non-respect du mode d’emploi (comme par
exemple le raccordement à une mauvaise tension réseau ou à un mauvais type de courant), les applications abusives ou non conformes (comme par exemple une surcharge de l’appareil ou encore l’emploi
d’accessoires non homologués), le non-respect des prescriptions de maintenance et de sécurité, l’infiltration de corps étrangers dans l’appareil (comme par exemple du sable, des pierres ou de la poussière),
l’emploi de la force ou l’influence extérieure (comme par exemple les dommages dus à une chute), ainsi
que l’usure normale conforme à l’utilisation.
Le droit à la garantie disparaît dès lors que des interventions ont lieu sur l’appareil.
3. Le délai de garantie s’élève à 2 ans et commence à la date de l’achat de l’appareil. Les demandes de
garanties doivent être présentées avant écoulement du délai de garantie, dans les deux semaines suivant
le moment auquel le défaut a été reconnu. Toute reconnaissance de demande de garantie après écoulement du délai de garantie est exclue. La réparation ou l’échange de l’appareil n’entraîne nullement une prolongation de la durée de garantie. Elle ne fait pas non plus commencer un nouveau délai de garantie, en raison de cette prestation, pour l’appareil ou pour toute autre pièce de rechange intégrée. Ceci est également
valable lorsqu’un service après-vente sur place a été consulté.
4. Pour faire reconnaître votre demande de garantie, veuillez nous envoyer l’appareil défectueux franco de
port à l’adresse indiquée ci-dessous. Ajoutez à l’envoi l’original du bon d’achat ou de tout autre preuve de
l’achat datée. Veuillez donc toujours bien conserver le bon d’achat en guise de preuve ! Décrivez la raison
de la réclamation le plus précisément possible. Si le défaut de l’appareil est compris dans notre prestation
de garantie, nous vous retournerons sans délai un appareil réparé ou encore un nouveau.
Bien entendu, nous sommes prêts également à réparer les appareils défectueux contre remboursement des
frais, dès lors que l’appareil n’est plus ou pas garanti. Pour ce faire, veuillez envoyer l’appareil à notre adresse
de service après-vente.
Anleitung RGH 2040_SPK1:Anleitung EGH 2745_SPK1 17.01.2007 8:31 Uhr Seite 57

58
GARANTIEBEWIJS
Geachte klant,
onze producten zijn aan een strenge kwaliteitscontrole onderhevig. Mocht dit apparaat echter ooit niet naar
behoren functioneren, spijt het ons ten zeerste en vragen u zich tot onze servicedienst onder het adres vermeld
op dit garantiebewijs te wenden. Wij staan ook graag telefonisch tot uw dienst via het hieronder vermelde servicetelefoonnummer. Voor vorderingen in verband met garantie geldt het volgende:
1. Deze garantievoorwaarden regelen bijkomende garantieprestaties. Uw wettelijke garantieclaims blijven
onaangetast door deze garantie. Onze garantieprestatie is voor uw gratis.
2. De garantieprestatie heeft uitsluitend betrekking op gebreken die te wijten zijn aan materiaal- of fabricage-
fouten en is beperkt tot het verhelpen van deze gebreken of het vervangen van het apparaat. Wij wijzen
erop dat onze apparaten overeenkomstig hun bestemming niet geconstrueerd zijn voor commercieel,
ambachtelijk of industrieel gebruik. Een garantieovereenkomst komt daarom niet tot stand als het apparaat
in ambachtelijke of industriële bedrijven alsmede bij gelijk te stellen activiteiten wordt gebruikt. Uitgesloten
van onze garantie zijn verder schadeloosstellingen voor transportschade, schade door niet-naleving van de
montage-instructies of op grond van ondeskundige installatie, niet-naleving van de handleiding (zoals door
b.v. aansluiting op een verkeerde netspanning of stroomsoort), oneigenlijke of onoordeelkundige toepassingen (zoals b.v. overbelasting van het apparaat of gebruik van niet toegestane inzetgereedschappen of toebehoren), niet-naleving van de onderhouds- en veiligheidsbepalingen, binnendringen van vreemde voorwerpen in het apparaat (zoals b.v. zand, stenen of stof), gebruikmaking van geweld of invloeden van
buitenaf (zoals b.v. schade door neervallen) alsmede door normale slijtage die zich bij het doelmatig
gebruik van het apparaat voordoet.
Er kan geen aanspraak op garantie worden gemaakt als op het apparaat reeds ingrepen werden uitgevoerd.
3. De garantieperiode bedraagt 2 jaar en gaat in op de datum van aankoop van het apparaat. Garantieclaims
dienen voor het verloop van de garantieperiode binnen de twee weken na het vaststellen van het defect geldend te worden gemaakt. Het geldend maken van garantieclaims na verloop van de garantieperiode is uitgesloten. De herstelling of vervanging van het apparaat leidt noch tot een verlenging van de garantieperiode noch wordt door deze prestatie een nieuwe garantieperiode voor het apparaat of voor eventueel
ingebouwde wisselstukken op gang gebracht. Dit geldt ook bij het ter plaatse uitvoeren van een serviceactiviteit.
4. Om een garantieclaim geldend te maken dient u het defecte apparaat franco op te sturen aan het hieronder
vermelde adres. Voeg het originele verkoopbewijs of een ander gedateerd bewijs van aankoop bij. Gelieve
daarom de kassabon als bewijs goed te bewaren! Wij verzoeken u de reden van de klacht zo nauwkeurig
mogelijk te beschrijven. Valt het defect van het apparaat binnen onze garantieprestatie bezorgen wij u per
omgaande een hersteld of nieuw apparaat terug.
Uiteraard staan wij ook tot u dienst om mits betaling van de kosten defecten van het apparaat te verhelpen die
buiten de garantieomvang vallen. Te dien einde stuurt u het apparaat aan ons serviceadres op.
Anleitung RGH 2040_SPK1:Anleitung EGH 2745_SPK1 17.01.2007 8:31 Uhr Seite 58

59
C
CERTIFICATO DI GARANZIA
Gentili clienti,
i nostri prodotti sono soggetti ad un rigido controllo di qualità. Se l’apparecchio non dovesse tuttavia funzionare
correttamente, ci scusiamo e vi preghiamo di rivolgervi al nostro servizio di assistenza clienti all’indirizzo indicato in questa scheda di garanzia. Siamo a vostra disposizione anche telefonicamente al numero del servizio
assistenza sotto indicato. Per la rivendicazione dei diritti di garanzia vale quanto segue:
1. Queste condizioni di garanzia regolano ulteriori prestazioni di garanzia. La presente garanzia non tocca i
vostri diritti al ricorso di garanzia previsti dalla legge. Le nostre prestazioni di garanzia sono per voi gratuite.
2. La prestazione di garanzia riguarda esclusivamente le anomalie riconducibili a difetti del materiale o di pro-
duzione ed è limitata all’eliminazione di queste anomalie o alla sostituzione dell’apparecchio. Tenete presente che i nostri apparecchi non sono stati costruiti per l’impiego professionale, artigianale o industriale.
Un contratto di garanzia non viene concluso quando l’apparecchio viene usato in imprese commerciali, artigianali o industriali, o con attività equivalenti. Dalla nostra garanzia sono escluse inoltre le prestazioni di
risarcimento per danni dovuti al trasporto o danni causati dalla mancata osservanza delle istruzioni per il
montaggio o per installazione non corretta, dalla mancata osservanza delle istruzioni per l’uso (come per
es. collegamento a tensione di rete o tipo di corrente non corretto), dall’uso improprio o illecito (come per
es. sovraccarico dell’apparecchio o utilizzo di utensili o accessori non consentiti), dalla mancata osservanza delle norme di sicurezza e di manutenzione, dalla penetrazione di corpi estranei nell’apparecchio (come
per es. sabbia, pietre o polvere), dall’impiego della forza o dall’influsso esterno (come per es. danni dovuti a
caduta) e dall’usura normale e dovuta all’impiego.
Il diritti di garanzia decadono quando sono già effettuati interventi sull’apparecchio.
3. Il periodo di garanzia è 2 anni e inizia alla data d’acquisto dell’apparecchio. I diritti di garanzia devono esse-
re fatti valere prima della scadenza del periodo di garanzia, entro due settimane dopo avere accertato il
difetto. È esclusa la rivendicazione di diritti di garanzia dopo la scadenza del relativo periodo. La riparazione
o la sostituzione dell’apparecchio non comporta una proroga del periodo di garanzia e con questa prestazione per l’apparecchio o per pezzi di ricambio eventualmente installati non inizia un nuovo periodo di
garanzia. Questo vale anche nel caso si ricorra ad un servizio sul posto.
4. Per la rivendicazione dei vostri diritti di garanzia inviate l’apparecchio difettoso franco di porto all’indirizzo
sotto indicato. Allegate lo scontrino di cassa in originale o un’altra prova d’acquisto che riporti la data.
Conservate bene perciò lo scontrino di cassa come prova! Indicate il motivo di reclamo nel modo più dettagliato possibile. Se il difetto dell’apparecchio rientra nella nostra prestazione di garanzia, ricevete l’apparecchio riparato o un apparecchio nuovo a stretto giro di posta.
Naturalmente effettuiamo a pagamento anche riparazioni sull’apparecchio che non rientrano o non rientrano più
nella garanzia. A tale scopo inviate l’apparecchio all’indirizzo del servizio assistenza.
Anleitung RGH 2040_SPK1:Anleitung EGH 2745_SPK1 17.01.2007 8:31 Uhr Seite 59

60
GARANTIBEVIS
Kære kunde!
Vore produkter er underlagt streng kvalitetskontrol. Hvis produktet alligevel på et tidspunkt skulle udvise fejl,
beklager vi naturligvis dette og beder dig kontakte vores kundeservice på adressen, som står angivet på dette
garantibevis. Du kan naturligvis også ringe til os på det nedenfor angivne servicenummer. For indfrielse af
garantikrav gælder følgende:
1. Nærværende garanti fastsætter betingelserne for udvidede garantiydelser. Garantibestemmelser fastsat
ved lov berøres ikke af nærværende garanti. Vores garantiydelse er gratis.
2. Garantiydelsen omfatter udelukkende mangler, som kan føres tilbage til materiale- eller produktionsfejl, og
begrænser sig til afhjælpning af disse resp. levering af erstatningsprodukt. Bemærk, at vore produkter ikke
er konstrueret til erhvervsmæssig, håndværksmæssig eller industriel brug. Garantiaftale kan derfor ikke
anses for indgået, såfremt produktet anvendes i erhvervsmæssigt, håndværksmæssigt, industrielt eller lignende øjemed. Endvidere dækker garantien ikke erstatningsydelser for transportskader, skader som følge
af tilsidesættelse af montagevejledningens anvisninger eller som følge af usagkyndig installation, tilsidesættelse af brugsanvisningen (f.eks. tilslutning til forkert netspænding eller strømtype), misbrug eller usagkyndig anvendelse (f.eks. overbelastning eller brug af værktøj eller tilbehør, som ikke er godkendt), tilsidesættelse af vedligeholdelses- og sikkerhedsforskrifter, indtrængen af fremmedlegemer i apparatet (f.eks. sand,
sten eller støv), brug af vold eller eksterne påvirkninger udefra (f.eks. fordi produktet tabes) samt skader,
der hidrører fra almindelig slitage.
Garantien mister sin gyldighed, hvis der allerede er blevet foretaget indgreb i apparatet.
3. Garantiperioden udgør 2 år at regne fra købsdatoen. Garantikrav skal gøres gældende inden for to uger,
efter at defekten er blevet konstateret. Garantikrav kan ikke gøres gældende efter garantiperiodens udløb.
Reparation eller udskiftning af apparatet medfører ikke forlængelse af garantiperioden, heller ikke for eventuelt indbyggede reservedele. Dette gælder også servicearbejder, der foretages på stedet.
4. For at kunne gøre garantikrav gældende skal du sende det defekte produkt portofrit til nedenstående adres-
se. Original købskvittering eller lignende dateret dokumentation skal vedsendes. Købskvitteringen skal
gemmes som dokumentation! Beskriv venligst så nøjagtigt som muligt grunden til din reklamation. Er
defekten omfattet af garantien, vil produktet omgående blive repareret og returneret, eller du vil modtage et
helt nyt.
Mod betaling udbedrer vi naturligvis også gerne defekter på produktet, som ikke/ikke længere er omfattet af
garantien. Du skal blot indsende produktet til vores serviceadresse.
Anleitung RGH 2040_SPK1:Anleitung EGH 2745_SPK1 17.01.2007 8:31 Uhr Seite 60

61
CERTYFIKAT GWARANCJI
Na opisywane w instrukcji obsługi urządzenie udzielamy 2-letniej gwarancji, na
wypadek wadliwości naszego produktu. 2-letni okres gwarancyjny zaczyna
obowiązywać w momencie przejścia ryzyka lub przejęcia urządzenia przez
klienta.
Warunkiem skorzystania z uprawnień gwarancyjnych jest prawidłowa konserwacja urządzenia, zgodnie z instrukcją obsługi oraz użytkowanie zgodne z
przeznaczeniem.
Oczywiście w okresie tych 2 lat przysługują Państwu również uprawnienia
gwarancyjne w ramach ustawowej rękojmi.
Gwarancja obowiązuje na terenie Republiki Federalnej Niemiec lub w kraju
generalnego przedstawiciela handlowego, jako uzupełnienie obowiązujących
lokalnie przepisów ustawowych. Prosimy zwrócić się do odpowiedzialnego pracownika w regionalnym dziale obsługi klienta lub pod podany poniżej adres
serwisu technicznego.
Anleitung RGH 2040_SPK1:Anleitung EGH 2745_SPK1 17.01.2007 8:31 Uhr Seite 61

62
T
ГАРАНТИЙНОЕ СВИДЕТЕЛЬСТВО
Глубокоуважаемый клиент, глубокоуважаемая клиентка,
Качество наших продуктов подвергаются тщательному контролю. Если несмотря на это когда-либо
возникнут к нашему большому сожалению нарушения в работе инструмента, то мы просим Вас обратиться в нашу службу сервиса по указанному в этой гарантийной карте адресу. Мы также охотно ответим на Ваши вопросы по телефону, номер которого приведен ниже. Для предъявления претензий по
гарантийному обслуживанию действительно следующее:
1. Настоящие правила гарантии регулируют дополнительные условия оказания гарантийных услуг.
Эти гарантийные обязательства не затрагивают Ваши законные права на гарантийное обслуживание. Наши гарантийные услуги для Вас бесплатны.
2. Гарантийные услуги распространяются только на неисправности, которые возникли в результате
недостатков материала или процесса изготовления и предусматривают только устранение этих
недостатков или замену устройства. Необходимо учесть, что наши устройства разработаны согласно предписаниям для использования в промышленных, ремесленных или индустриальных областях.
Гарантийный договор считается недействительным, если устройство используется в промышленных, ремесленных или индустриальных целях, а также для подобной деятельности. Наши гарантийные обязательства не распространяются на повреждения при транспортировке, повреждения в
результате несоблюдения указаний руководства по монтажу или в результате проведенной ненадлежащим образом инсталляции, несоблюдения указаний руководства по эксплуатации (таких как
например, подключение к сети с ненадлежащим параметром напряжения), используется неправильно или ненадлежащим образом (например, перегрузка устройства или использование не допущенных к применению насадок или принадлежностей), при несоблюдении правил технического
обслуживания и техники безопасности, при попадании посторонних предметов в устройство (таких
как например: песок, камни или пыль), при использовании силы или посторонних воздействий
(таких как например, повреждения в результате падения), а также при обычном износе в результате использования.
Право на гарантийное обслуживание теряет силу, если были осуществлены вмешательства в
инструмент.
3. Гарантийный срок составляет 2 года и начинается со дня покупки устройства. Гарантийные права
необходимо предъявлять до истечения срока гарантии в течении двух недель после того как будет
обнаружена неисправность. Заявления на гарантийное обслуживание после истечения срока
гарантии не принимаются. Ремонт или замена устройства не ведет к удлинению срока службы и с
этими услугами не начинается новый срок гарантии для устройства или установленных запасных
деталей. Это действует также в случае оказания сервисных услуг по месту нахождения клиента.
4. Для предъявления претензий на гарантийное обслуживание вышлите, пожалуйста, неисправное
устройство без оплаты почтовых расходов по указанному ниже адресу. Приложите квитанцию
покупки в оригинале или любое другое свидетельство о совершенной покупке с указанной датой.
Необходимо поэтому сохранять кассовый чек для доказательства! Пожалуйста, опишите причину
предъявляемых претензий как можно точнее. Если неисправное устройство подлежит гарантийному обслуживанию, то Вы получите незамедлительно отремонтированное или новое устройство
обратно.
Само собой разумеется, мы можем также устранить при оплате затрат неисправности устройства,
которые не входят в объем гарантийных услуг или при истечении срока гарантии. Для этого Вам необходимо выслать устройство на адрес нашей службы сервиса.
Anleitung RGH 2040_SPK1:Anleitung EGH 2745_SPK1 17.01.2007 8:31 Uhr Seite 62

63
k
GARAN
TIEURKUNDE
Sehr geehrte Kundin, sehr geehrter Kunde,
unsere Produkte unterliegen einer strengen Qualitätskontrolle. Sollte dieses Gerät dennoch einmal nicht einwandfrei funktionieren, bedauern wir dies sehr und bitten Sie, sich an unseren Servicedienst unter der auf dieser Garantiekarte angegebenen Adresse zu wenden. Gern stehen wir Ihnen auch telefonisch über die unten
angegebene Servicerufnummer zur Verfügung. Für die Geltendmachung von Garantieansprüchen gilt Folgendes:
1. Diese Garantiebedingungen regeln zusätzliche Garantieleistungen. Ihre gesetzlichen
Gewährleistungsansprüche werden von dieser Garantie nicht berührt. Unsere Garantieleistung ist für Sie
kostenlos.
2. Die Garantieleistung erstreckt sich ausschließlich auf Mängel, die auf Material- oder Herstellungsfehler
zurückzuführen sind und ist auf die Behebung dieser Mängel bzw. den Austausch des Gerätes beschränkt.
Bitte beachten Sie, dass unsere Geräte bestimmungsgemäß nicht für den gewerblichen, handwerklichen
oder industriellen Einsatz konstruiert wurden. Ein Garantievertrag kommt daher nicht zustande, wenn das
Gerät in Gewerbe-, Handwerks- oder Industriebetrieben sowie bei gleichzusetzenden Tätigkeiten eingesetzt wird.
Von unserer Garantie sind ferner Ersatzleistungen für Transportschäden, Schäden durch Nichtbeachtung
der Montageanleitung oder aufgrund nicht fachgerechter Installation, Nichtbeachtung der
Gebrauchsanleitung (wie durch z.B. Anschluss an eine falsche Netzspannung oder Stromart), missbräuchliche oder unsachgemäße Anwendungen (wie z.B. Überlastung des Gerätes oder Verwendung von nicht
zugelassenen Einsatzwerkzeugen oder Zubehör), Nichtbeachtung der Wartungs- und
Sicherheitsbestimmungen, Eindringen von Fremdkörpern in das Gerät (wie z.B. Sand, Steine oder Staub),
Gewaltanwendung oder Fremdeinwirkungen (wie z. B. Schäden durch Herunterfallen) sowie durch verwendungsgemäßen, üblichen Verschleiß ausgeschlossen.
Der Garantieanspruch erlischt, wenn an dem Gerät bereits Eingriffe vorgenommen wurden.
3. Die Garantiezeit beträgt 2 Jahre und beginnt mit dem Kaufdatum des Gerätes. Garantieansprüche sind vor
Ablauf der Garantiezeit innerhalb von zwei Wochen, nachdem Sie den Defekt erkannt haben, geltend zu
machen. Die Geltendmachung von Garantieansprüchen nach Ablauf der Garantiezeit ist ausgeschlossen.
Die Reparatur oder der Austausch des Gerätes führt weder zu einer Verlängerung der Garantiezeit noch
wird eine neue Garantiezeit durch diese Leistung für das Gerät oder für etwaige eingebaute Ersatzteile in
Gang gesetzt. Dies gilt auch bei Einsatz eines Vor-Ort-Services.
4. Für die Geltendmachung Ihres Garantieanspruches übersenden Sie bitte das defekte Gerät portofrei an die
unten angegebene Adresse. Fügen Sie den Verkaufsbeleg im Original oder einen sonstigen datierten
Kaufnachweis bei. Bitte bewahren Sie deshalb den Kassenbon als Nachweis gut auf! Beschreiben Sie uns
bitte den Reklamationsgrund möglichst genau. Ist der Defekt des Gerätes von unserer Garantieleistung
erfasst, erhalten Sie umgehend ein repariertes oder neues Gerät zurück.
Selbstverständlich beheben wir gegen Erstattung der Kosten auch gerne Defekte am Gerät, die vom Garantieumfang nicht oder nicht mehr erfasst sind. Dazu senden Sie das Gerät bitte an unsere Serviceadresse.
iSC Gmbh • Eschenstrasse 6 • 94405 Landau/Isar (Deutschland)
Telefon: +49 [0] 180 5 120 509 • Telefax +49 [0] 180 5 835 830 (Anrufkosten: 0,14 Euro/Minute, Festnetz der T-Com)
E-Mail: info@isc-gmbh.info
• Internet: www.isc-gmbh.info
Anleitung RGH 2040_SPK1:Anleitung EGH 2745_SPK1 17.01.2007 8:31 Uhr Seite 63

EH 01/2007
Name:
Service Hotline: 01805 120 509 (0,14 €/min. Festnetz T-Com) - Mo-Fr. 8:00-20:00 Uhr
Straße / Nr.:
PLZ Ort
Mobil:
Telefon:
Projektnummer RT:
Kaufbeleg-Nr. / Datum:
Garantie:
JA
NEIN
Welcher Fehler ist aufgetreten (genaue Angabe):
Art.-Nr.: I.-Nr.:
Sehr geehrte Kundin, sehr geehrter Kunde,
bitte beschreiben Sie uns die von Ihnen festgestellte Fehlfunktion Ihres Gerätes als Grund Ihrer Beanstandung möglichst genau. Dadurch können wir
für Sie Ihre Reklamation schneller bearbeiten und Ihnen schneller helfen. Eine zu ungenaue Beschreibung mit Begriffen wie „Gerät funktioniert nicht“
oder „Gerät defekt“ verzögert hingegen die Bearbeitung erheblich.
Service Hotline kontaktieren - es wird Ihnen eine Projektnummer zugeteilt l Bitte Ihre Anschrift eintragen l Fehlerbeschreibung und bitte Art.-Nr.
und I.-Nr. angeben l Garantiefall JA/NEIN bitte ankreuzen sowie Kaufbeleg-Nr. und Datum bitte angeben und eine Kopie des Kaufbeleges bitte beilegen
Anleitung RGH 2040_SPK1:Anleitung EGH 2745_SPK1 17.01.2007 8:31 Uhr Seite 64
 Loading...