


Using TViX Net work
There are two network mode. One is SAMBA mode another is NFS mode.
SAMBA mode : You can play the file via network without specia l program, but the speed is lower than
NFS mode. ( Currently, do not Support in Vista )
NFS mode : You must install the TViX NetShare utilit y in to your PC, but you can play the TP or DVD
jukebox without stutter.
We recommend to share the NTFS file system. FAT32 file system does not contain enough information
to create a lasting file name, so TViX doesn’t load the file after changing the file name.
* Pease connect your TViX product to PC with USB cable once.
* All specifications and information are subject to changes without further notices
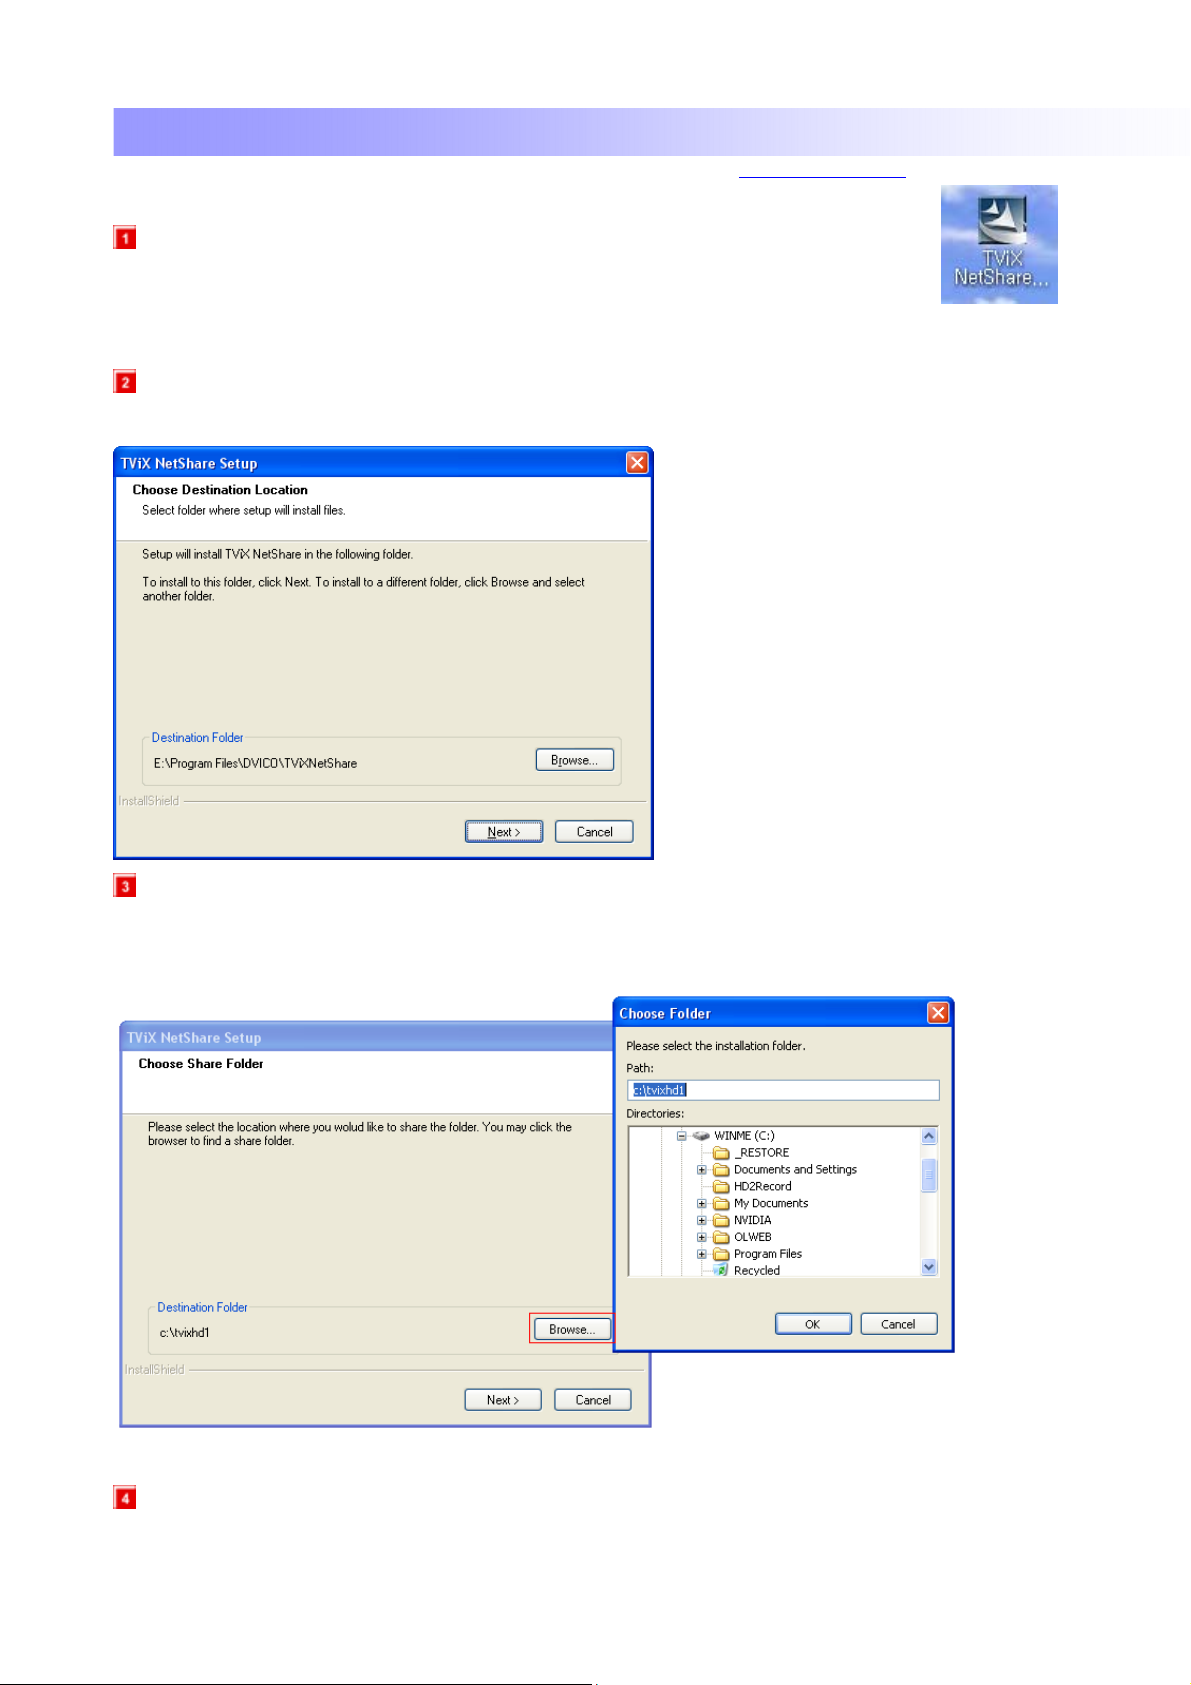
1. TViX NetShare Installation
Most likely there will be an updated version of the files on our web site(www.tvix.co.kr/eng)
You should download the latest TViX Netshare installer in advance.
Run TViX Netshare installer and follow the on-screen prompts to install software.
The “Choose Destination Location” window will appear. Click on “Next” if you want to install the
Net Share in the default directory. Otherwise, you can choose a different directory by clicking on “Browse”.
Pleas e select the loc ation where you wou ld like to share t he folder. You may click the bro wser to find a
shared folder.
We recommend to share the NTFS file system.
The “Setup status” window will appear.
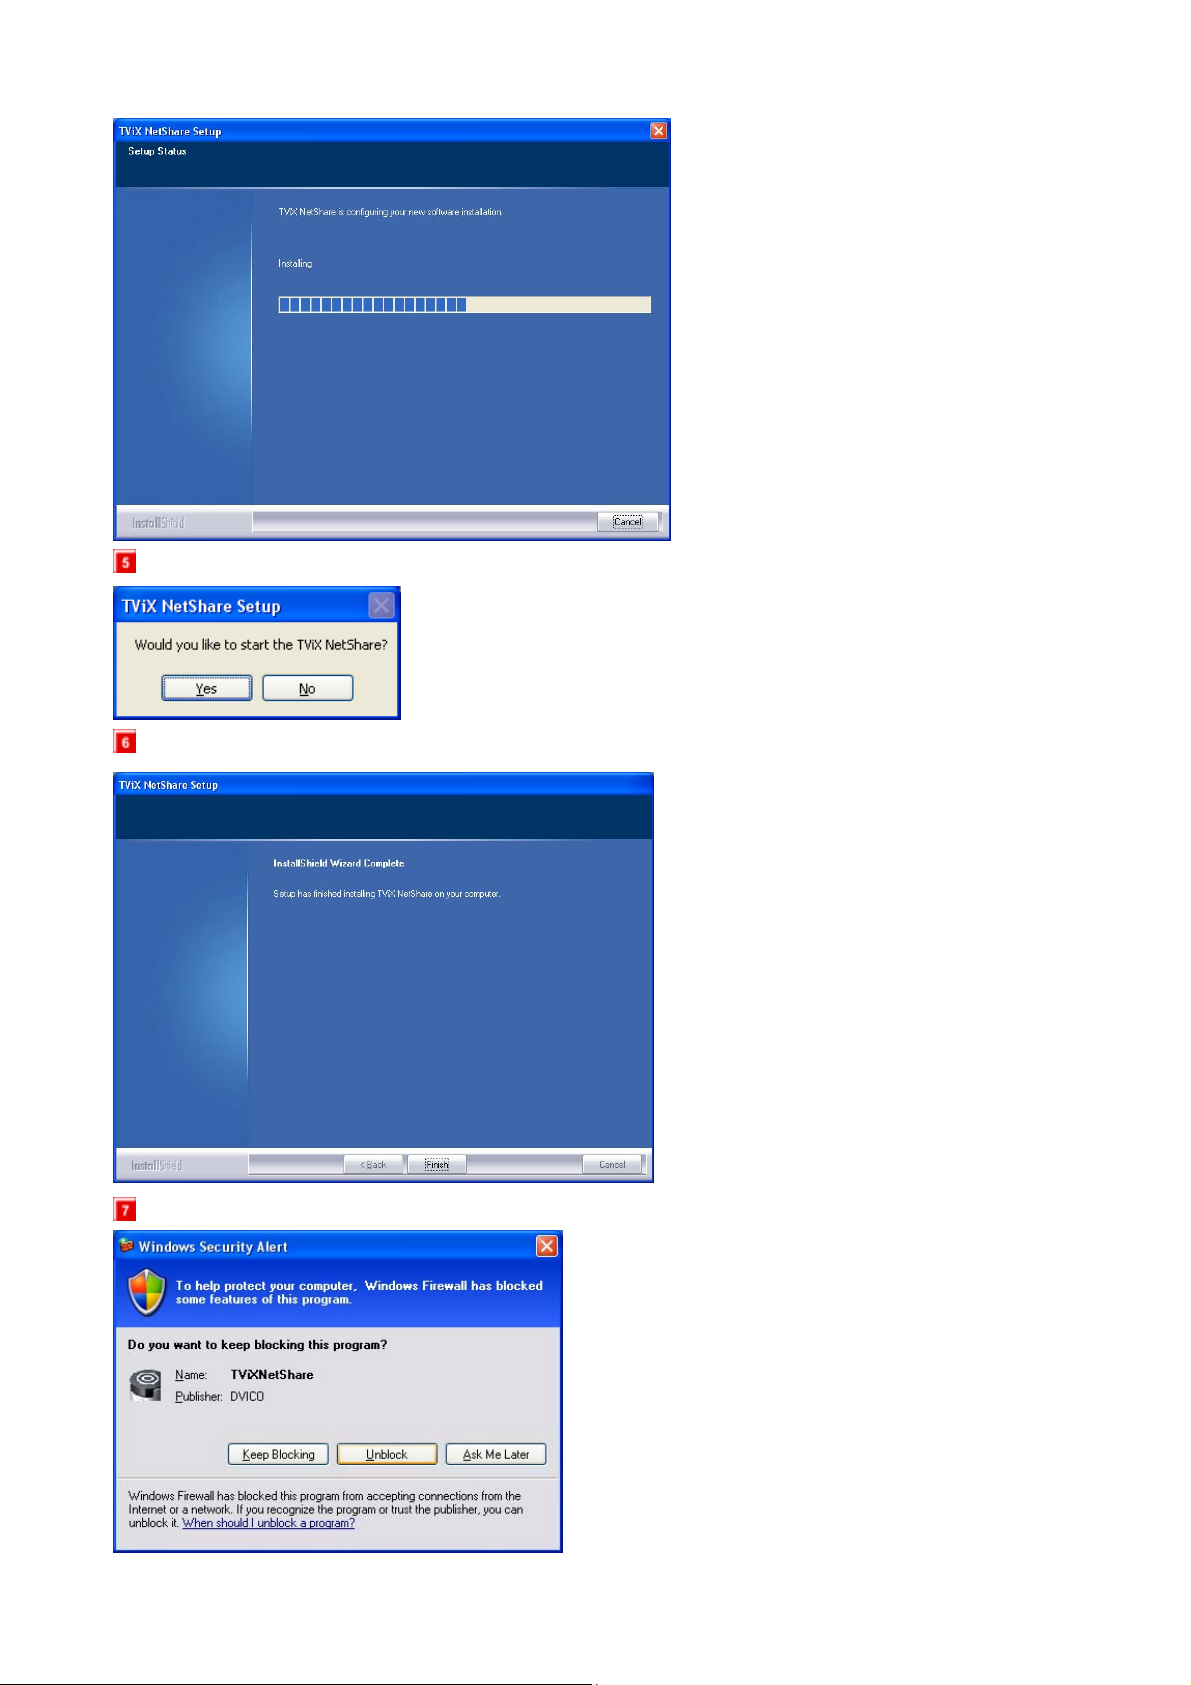
Press YES button if you want to run the TViX Net Share automatically.
By clicking the Finish button, the software installation is done.
Press “Unblock” for the Windows Security Alert.

2. Using TViX NetShare
Click Start, point to Program->DVICO->TViX NetShare.
If TViX Netshare is working, You don’t need to run this program again.
After starting the Net Share program, you can see Net Share icon on the tray..
Start the setting by right clicking the Net Share icon at the low
right bottom of the screen.
Start Sharing : Used to start the sharing
Stop Sharing : Used to stop the sharing
Settings : Used to set the share folder
Exit

After the Launch of Netshare software Application on the system. Right click on the ICON. Click on
Setting.
NetShare AutoRun : used to autorun when the windows re-starts.
Auto Sharing at Program Run : used to run with sharing at the same time.
Folder to Share : use to change the shared folder.
In case of FAT32 file system, TViX doesn’t load the file after changing the file name.
CAUTION
If you press the stop sharing when the network is connecting, you can see following message.
You must press the start the sharing on the tray again.

3. Use of Multiple Folder Option
ACTION ON SYSTEM DISPLAY
After running the Netshare software Application, right click on the Netshare ICON.
Click on Browse, Corresponding to Folder 1 to
Share.
Select the Appropriate folder, Containing Media
Files from desired Drive and Click OK.
Again Click on Browse, Correspond ing to Folder 2 ~
Folder4 to Share.
Select the Appropriate folder, Containing Media Files from the desired drive and Click OK.

4. NETWORK Setting
This section ind icates the NETWORK (Network or F TP) settings. Press the SETUP butto n on the remote
controller and select NETWORK.
This screen allows you to adjust the NETWORK settings of your TVX-HD to your personal taste. Select
menu to exit this SETUP. Press ‘NEXT’ button to change next setting.
** For detailed Network inst ructions, please refer to t he enclosed TVX- HD CD or the lat est pdf file on
the TVX-HD Homepage.
With NFS, TVX-HD can play tp files on a PC flawlessly through LAN.
We recommend the NFS connec tion rather than S AMBA. You need to install the TVX- HD Netshare program
(or other NFS server) on the server PC, but the settings are much easier than in SAMBA mode.
You can download NetShare installer from our website to easily configure your NFS network.
Default Network Type : Select Wired network or Wireless network.
Wired IP Setting: Default setting is DHCP. If you can not acces s via LA N with D HCP sett ing, us e the
Static IP setting. For a static IP, refer to the LAN Connection.

Wi-Fi IP Setting : Default setting is DHCP. If you cann ot acces s via LAN with DH CP settin g, us e the
Static IP setting. For a static IP, refer to the LAN Connection.
Search Wi-Fi Network : Connect the USB module into enclosed cradle after connecting the AP
Router to a PC. Pres s “Se a r ch Wi-Fi Network” to se arc h f or your A P or A P router. After some inter val
of searching, you can see the AP LIST popup menu. Select the AP that you want to connect to.
Setup Network Disk : Write the PC’s IP address in the Server IP. (ex: 192.168.001.128). Supports
up to 4 Network disk server.
Share Folder name should be written as TVX-HDhd1 / TVX-HDhd2 / TVX-HDhd3 / TVX-HDhd4
TVX-HD Network Info : You can see the information of TVX-HD’s Network.
FTP ID/PW : to use FTP function, you must use the ID & password displayed on the Network Menu
within SETUP. The FTP ID is TVX-HD ftp. You can use capital letters only for the password.
You may write the FTP address to the TVX-HD IP Address on the TVX-HD Network Information
 Loading...