

Ducati 2006 Monster S2R800 Workshop Manual

A
B
C
D
E
F
G
H
L
M
N
P
Generalità 0
Description 0
Informazioni sul modello 0
Model-specific information 0
Caratteristiche tecniche 0
Technical specification 0
Uso e manutenzione 0
Use and Maintenance operations 0
Vestizione 0
Fairing 0
Comandi - Dispositivi 0
Controls - Devices 0
Ruote - Sospensioni - Freni 0
Wheels - Suspensions - Brakes0
Mototelaio 0
Frame 0
Impianto di alimentazione / Scarico 0
Fuel system / Exhaust system 0
Impianto iniezione - accensione 0
Ignition - injection system 1
Motore 0
Engine 0
Impianto elettrico 0
Electric system 0
INDICE GENERALE 0
GENERAL SUMMARY 0

A
B
C
D
E
F
G
H
L
M
N
P
Indice generale
General summary
2 Monster S2R800/S2R800 Dark Aggiornamento/Update - M.Y. 2006 - edizione/edition 00
Sezione A
GENERALITÀ 0
1 - CONSULTAZIONE DEL MANUALE 3
Struttura del manuale 4
2 - SIMBOLOGIA - ABBREVIAZIONI -
RIFERIMENTI
5
Caratteristiche prodotti 6
3 - PRODOTTI PERICOLOSI -
AVVERTENZE
10
Regole generali di sicurezza 10
Regole per le operazioni di manutenzione 12
Sezione B
INFORMAZIONI SUL MODELLO 0
1 - IDENTIFICAZIONE MODELLO 3
Dati per l’identificazione del Monster S2R 3
Sezione C
CARATTERISTICHE TECNICHE 0
1.1 -DATI TECNICI 3
Generalità 3
Colori 4
Trasmissione 4
Distribuzione/valvole 4
Cilindro / pistone 5
Cambio 5
Sistema di raffreddamento 5
Ruota anteriore 6
Sospensione anteriore 6
Ruota posteriore 6
Sospensione posteriore 6
Freni idraulici 7
Sistema di carica / alternatore 7
Sistema di iniezione 7
Alimentazione 8
Sistema di alimentazione 8
Luci / strumentazione 8
1.2 -INGOMBRI 15
2 - RIFORNIMENTI E LUBRIFICANTI 16
3 - COPPIE DI SERRAGGIO 17
Coppie di serraggio mototelaio 17
Coppie di serraggio motore 22
4 - ATTREZZI DI SERVIZIO 33
Attrezzatura specifica motore 33
Attrezzatura specifica
mototelaio 37
Section A
DESCRIPTION 0
1 - HOW TO USE THE MANUAL 3
Manual layout 4
2 - SYMBOLS - ABBREVIATIONS -
REFERENCES
5
Product specifications 8
3 - DANGEROUS PRODUCTS –
WARNINGS
10
General safety rules 10
General maintenance indications 12
Section B
MODEL-SPECIFIC INFORMATION0
1 - IDENTIFICATION DATA 3
Identification data for Monster S2R 3
Section C
TECHNICAL SPECIFICATION 0
1.1 -TECHNICAL DATA 9
Description 9
Colors 10
Transmission 10
Timing/valves 10
Cylinder / piston 11
Gearbox 11
Cooling system 11
Front wheel 12
Front suspension 12
Rear wheel 12
Rear suspension 12
Hydraulic brakes 13
Charging system / generator 13
Injection system 13
Fuel system 14
Control unit 14
Lights / instrument panel 14
1.2 -DIMENSIONS 15
2 - FUELS AND LUBRICANTS 16
3 - TORQUE SETTINGS 25
Frame torque settings 25
Engine torque settings 30
4 - SERVICE TOOLS 33
Engine special tools 33
Frame special tool 37

A
B
C
D
E
F
G
H
L
M
N
P
Indice generale
General summary
3 Monster S2R800/S2R800 Dark Aggiornamento/Update - M.Y. 2006 - edizione/edition 00
Sezione D
USO E MANUTENZIONE 0
1 - CONTROLLI PRELIMINARI 3
Precauzioni per il primo periodo d'uso del motociclo 3
Controlli prima dell’avviamento 4
2 - AVVIAMENTO - RISCALDAMENTO
MOTORE
6
Avviamento motore 6
3 - TABELLA MANUTENZIONE
PERIODICA
8
4 - OPERAZIONI DI MANUTENZIONE 12
Controllo livello olio motore 12
Sostituzione olio motore e cartuccia filtro 13
Controllo gioco valvole 14
Registrazione gioco valvole 15
Sostituzione e pulizia filtri aria 16
Sostituzione liquido impianto frenante 17
Svuotamento circuito impianto frenante 19
Riempimento circuito impianti frenanti 20
Sostituzione liquido impianto frizione 22
Svuotamento circuito impianto frizione 23
Riempimento circuito impianto frizione 24
Registrazione gioco cuscinetti dello sterzo 26
Regolazione tensione catena 27
Controllo usura e sostituzione pastiglie freno 28
Regolazione cavi di comando acceleratore e starter 30
Registrazione posizione pedale comando cambio e freno
posteriore 32
Regolazione ammortizzatore posteriore 33
Variazione assetto moto 34
5 - STRUMENTI DI DIAGNOSI 35
Descrizione dello strumento di diagnosi 36
Alimentazione dello strumento 37
Strumento di diagnosi DDS 39
Controllo e registrazione tensione cinghie distribuzione 40
Azzeramento potenziometro farfalla TPS 43
Registrazione corpo farfallato 46
Controllo pressione olio motore 54
Controllo compressione cilindri motore 57
Controllo pressione carburante 59
Procedura per lo sblocco dell'immobilizer 61
Diagnosi guidata 64
Controllo corrente impianto di ricarica 66
Tabella icone 68
Sezione E
VESTIZIONE 0
1 - CUPOLINO (solo S2R) - SPECCHIETTI
RETROVISORI
3
Smontaggio specchietti retrovisori 4
Rimontaggio specchietti retrovisori 4
Smontaggio cupolino (S2R) 5
Rimontaggio cupolino (S2R) 5
3 - SELLA 6
Smontaggio sella 7
Rimontaggio sella 8
Smontaggio paraspruzzi 9
Section D
USE AND MAINTENANCE
OPERATIONS 0
1 - PRELIMINARY CHECKS 3
Running-in precautions 3
Pre-ride checks 4
2 - STARTING – ENGINE WARM-UP 6
Starting the engine 6
3 - ROUTINE MAINTENANCE TABLE 10
4 - MAINTENANCE OPERATIONS 12
Checking the engine oil level 12
Changing the engine oil and filter cartridge 13
Checking valve clearances 14
Adjusting valve clearances 15
Changing and cleaning the air filters 16
Changing the brake fluid 17
Draining the braking circuit 19
Filling the brake circuits 20
Changing the clutch fluid 22
Draining the clutch circuit 23
Filling the clutch circuit 24
Adjusting steering bearings play 26
Adjusting chain tension 27
Checking brake pad wear. Changing brake pads 28
Adjusting the throttle and choke cables 30
Adjusting the position of the gear change and rear
brake pedals 32
Adjusting the rear shock absorber 33
Changing motorcycle track alignment 34
5 - Diagnosis instruments 35
Diagnosis instrument description 36
Instrument power supply 37
DDS diagnosis instrument 39
Checking and adjusting timing belt tension 40
Zero setting the throttle position sensor 43
Adjusting the throttle body 46
Checking engine oil pressure 54
Checking cylinder compression 57
Checking fuel pressure 59
Procedure to override the immobilizer system 61
Guided diagnosis 64
Checking the charging system 66
Icons table 68
Section E
FAIRING 0
1 - HEADLIGHT FAIRING (version S2R
only) - REAR-VIEW MIRRORS
3
Disassembling the rear-view mirrors 4
Refitting the rear-view mirrors 4
Removing the headlight fairing (S2R) 5
Refitting the headlight fairing (S2R) 5
3 - SEAT 6
Removing the seat 7
Refitting the seat 8
Removing the splashguard 9
Refitting the splashguard 9

A
B
C
D
E
F
G
H
L
M
N
P
Indice generale
General summary
4 Monster S2R800/S2R800 Dark Aggiornamento/Update - M.Y. 2006 - edizione/edition 00
Rimontaggio paraspruzzi 9
Smontaggio fianchetti 10
Rimontaggio fianchetti 10
4 - PARAFANGO ANTERIORE E
POSTERIORE
11
Smontaggio parafango anteriore 12
Rimontaggio parafango anteriore 12
Sezione F
COMANDI - DISPOSIZIONE 0
1 - COMANDO ACCELERATORE -
STARTER
3
Regolazione cavo di comando acceleratore e starter 4
Smontaggio comando acceleratore 4
Rimontaggio comando acceleratore 4
Smontaggio comando starter 5
Rimontaggio comando starter 6
2 - COMANDO IDRAULICO FRIZIONE 8
Smontaggio gruppo pompa frizione 9
Rimontaggio gruppo pompa frizione 10
Smontaggio gruppo rinvio frizione 11
Rimontaggio gruppo rinvio frizione 12
3 - COMANDO FRENO ANTERIORE 14
Smontaggio pompa freno idraulico anteriore 15
Rimontaggio pompa freno idraulico anteriore 16
4 - COMANDO FRENO POSTERIORE 19
Smontaggio comando freno posteriore completo 20
Scomposizione comando freno posteriore 21
Rimontaggio comando freno posteriore 21
5 - COMANDO CAMBIO 24
Smontaggio comando cambio 25
Scomposizione comando cambio 25
Rimontaggio comando cambio 25
6 - DISPOSITIVI APERTURA 26
Smontaggio dispositivo apertura sella 27
Rimontaggio dispositivo apertura sella 27
Sezione G
RUOTE - SOSPENSIONI - FRENI 0
1 - RUOTA ANTERIORE 3
Smontaggio ruota anteriore 4
Revisione ruota anteriore 5
Rimontaggio ruota anteriore 7
2 - FORCELLA ANTERIORE 8
Smontaggio forcella anteriore 9
Revisione forcella anteriore 10
Rimontaggio forcella anteriore 16
3 - FRENO IDRAULICO ANTERIORE 17
Operazioni di manutenzione impianto 18
Smontaggio impianto freno anteriore 18
Smontaggio dischi freno 19
Revisione componenti freno anteriore 19
Rimontaggio impianto freno anteriore 20
Removing the side body panels 10
Refitting the side body panels 10
4 - FRONT AND REAR MUDGUARD 11
Removing the front mudguard 12
Refitting the front mudguard 12
Section F
CONTROLS - DEVICES 0
1 - THROTTLE CONTROL – CHOKE 3
Adjusting the throttle and choke cables 4
Disassembling the throttle control 4
Reassembling the throttle control 4
Removing the choke control 5
Refitting the choke control 6
2 - CLUTCH HYDRAULIC CONTROL 8
Removing the clutch master cylinder assembly 9
Refitting the clutch master cylinder assembly 10
Removing the clutch transmission unit 11
Refitting the clutch transmission assembly 12
3 - FRONT BRAKE CONTROL 14
Removing the front brake master cylinder 15
Refitting the front brake master cylinder 16
4 - REAR BRAKE CONTROL 19
Removing the complete rear brake control 20
Disassembling the rear brake control 21
Reassembling the rear brake control 21
5 - GEAR CHANGE CONTROL 24
Removing the gear change control 25
Disassembling the gear change control 25
Refitting the gear change control 25
6 - SEAT LOCK AND RELEASING
MECHANISMS
26
Removing the seat releasing mechanism 27
Refitting the seat releasing mechanism 27
Section G
WHEELS - SUSPENSIONS BRAKES 0
1 - FRONT WHEEL 3
Removing the front wheel 4
Overhauling the front wheel 5
Refitting the front wheel 7
2 - FRONT FORK 8
Removing the front fork 9
Overhauling the front fork 10
Refitting the front fork 16
3 - FRONT BRAKE 17
Braking system maintenance 18
Removing the front brake system 18
Removing the brake discs 19
Overhauling the front brake components 19
Refitting the front brake system 20

A
B
C
D
E
F
G
H
L
M
N
P
Indice generale
General summary
5 Monster S2R800/S2R800 Dark Aggiornamento/Update - M.Y. 2006 - edizione/edition 00
4 - RUOTA POSTERIORE 22
Smontaggio ruota posteriore 23
Revisione ruota posteriore 24
Rimontaggio ruota posteriore 25
5 - FORCELLONE POSTERIORE 26
Smontaggio mozzo eccentrico posteriore 27
Rimontaggio mozzo eccentrico posteriore 29
Smontaggio forcellone posteriore 30
Controllo perno forcellone 32
Verifica gioco assiale forcellone 32
Rimontaggio forcellone posteriore 33
6 - FRENO IDRAULICO POSTERIORE 35
Smontaggio pinza freno posteriore 36
Rimontaggio pinza freno posteriore 38
7 - SOSPENSIONE POSTERIORE 39
Sistema sospensione posteriore 40
Smontaggio ammortizzatore posteriore 40
Revisione ammortizzatore posteriore 41
Smontaggio bilanciere sospensione posteriore 42
Revisione bilanciere sospensione posteriore 43
Smontaggio e revisione tirante ammortizzatore 44
Rimontaggio sospensione posteriore 45
8 - TRASMISSIONE SECONDARIA 46
Ispezione trasmissione secondaria 47
Sostituzione pignone catena 48
Sostituzione corona 50
Rimontaggio corona 50
Lavaggio della catena 51
Lubrificazione della catena 51
Sezione H
MOTOTELAIO 0
1 - MANUBRIO 3
Smontaggio manubrio 4
Rimontaggio manubrio 5
2 - STERZO 6
Registrazione gioco cuscinetti di sterzo 7
Registrazione sterzata 7
Smontaggio componenti cannotto di sterzo 8
Rimontaggio componenti cannotto di sterzo 9
4 - SUPPORTI PEDANE 11
Smontaggio pedane 12
Smontaggio pedane posteriori 14
Rimontaggio pedane anteriori 15
Rimontaggio pedane posteriori 17
5 - CAVALLETTI 18
Smontaggio cavalletto laterale 19
Rimontaggio cavalletto laterale 19
6 - CONTROLLO TELAIO 20
Smontaggio componenti strutturali e telaio 21
Controllo del telaio 21
Rimontaggio componenti strutturali e telaio 21
7 - FANALE POSTERIORE E
PORTATARGA
25
Smontaggio fanale posteriore e portatarga 26
Rimontaggio fanale posteriore e portatarga 26
4 - REAR WHEEL 22
Removing the rear wheel 23
Overhauling the rear wheel 24
Refitting the rear wheel 25
5 - REAR SWINGARM 26
Removing the rear eccentric hub 27
Refitting the rear eccentric hub 29
Removing the rear swingarm 30
Swingarm shaft inspection 32
Checking swingarm end float 32
Refitting the rear swingarm 33
6 - REAR BRAKE 35
Removing the rear brake caliper 36
Refitting the rear brake caliper 38
7 - REAR SUSPENSION 39
Rear suspension 40
Removing the rear shock absorber 40
Overhauling the rear shock absorber 41
Removing the rear suspension rocker arm 42
Overhauling the rear suspension rocker arm 43
Removing and overhauling the shock absorber linkage 44
Refitting the rear suspension 45
8 - FINAL DRIVE 46
Final drive inspection 47
Replacing the front chain sprocket 48
Replacing the rear chain sprocket 50
Refitting the rear sprocket 50
Washing the chain 51
Chain lubrication 51
Section H
FRAME 0
1 - HANDLEBARS 3
Removing the handlebar 4
Refitting the handlebar 5
2 - STEERING 6
Adjusting steering bearing play 7
Adjusting the steering angle 7
Disassembling the steering tube components 8
Refitting the steering tube components 9
4 - FOOTPEG SUPPORTS 11
Removing the footpegs 12
Removing the rear footpegs 14
Refitting the front footpegs 15
Refitting the rear footpegs 17
5 - STANDS 18
Removing the side stand 19
Refitting the side stand 19
6 - FRAME INSPECTION 20
Removing the frame and related components 21
Checking the frame 21
Refitting frame and related components 21
7 - TAIL LIGHT AND NUMBER PLATE
HOLDER
25
Removing the tail light and number plate holder 26
Refitting the tail light and number plate holder 26

A
B
C
D
E
F
G
H
L
M
N
P
Indice generale
General summary
6 Monster S2R800/S2R800 Dark Aggiornamento/Update - M.Y. 2006 - edizione/edition 00
Sezione L
IMPIANTO DI ALIMENTAZIONE /
SCARICO 0
1 - DESCRIZIONE IMPIANTO DI
ALIMENTAZIONE
3
2 - SERBATOIO CARBURANTE
ROTAZIONALE
7
Smontaggio serbatoio carburante rotazionale 8
Smontaggio gruppo tappo serbatoio rotazionale 9
Rimontaggio gruppo tappo serbatoio rotazionale 9
Rimontaggio serbatoio carburante rotazionale 10
4 - FILTRO CARBURANTE PER
SERBATOIO ROTAZIONALE
13
Sostituzione filtro benzina per serbatoio rotazionale 14
6 - CORPO FARFALLATO PER
SERBATOIO ROTAZIONALE
15
Smontaggio corpo farfallato 16
Rimontaggio corpo farfallato 17
7 - ASPIRAZIONE ARIA 19
Smontaggio scatola filtro aria 20
Rimontaggio scatola filtro aria 22
8 - IMPIANTO DI SCARICO 25
Principio funzionamento catalizzatore (Solo EU) 27
Smontaggio impianto di scarico 29
Rimontaggio impianto di scarico 32
10 -FILTRO CANISTER 34
Impianto filtro canister (solo per versioni USA) 35
Smontaggio filtro canister 36
Rimontaggio filtro canister 36
Sezione M
IMPIANTE INIEZIONE ACCENSIONE 0
1 - DESCRIZIONE IMPIANTO 3
Informazioni generali sul sistema iniezione - accensione 3
Circuito carburante 6
Circuito aria aspirata 7
Fasi di funzionamento 8
2 - IMPIANTO INIEZIONE - ACCENSIONE 9
3 - COMPONENTI ELETTRICI DELL’IM-
PIANTO INIEZIONE ACCENSIONE
10
Centralina elettronica 10
Elettroiniettore 13
Sensore temperatura / pressione aria 14
Candela di accensione 15
Bobina 16
Potenziometro posizione farfalla 17
Sensore giri / fase 17
Relé principale e iniezione 18
Section L
FUEL SYSTEM / EXHAUST
SYSTEM 0
1 - DESCRIPTION OF THE FUEL FEED
SYSTEM
3
2 - PLASTIC FUEL TANK 7
Removing the plastic fuel tank 8
Removing the filler plug unit - plastic tank 9
Refitting the filler plug unit - plastic tank 9
Refitting the plastic fuel tank 10
4 - FUEL FILTER FOR PLASTIC
FUEL TANK
13
Replacing the fuel filter - plastic fuel tank 14
6 - THROTTLE BODY FOR
PLASTIC TANK
15
Removing the throttle body 16
Refitting the throttle body 17
7 - AIRBOX 19
Removing the airbox 20
Refitting the airbox 22
8 - EXHAUST SYSTEM 25
Operating principle of catalytic converter (EU only) 27
Removing the exhaust system 29
Refitting the exhaust system 32
10 -CANISTER FILTER 34
Canister Filter System (for USA versions only) 35
Removing the Canister filter 36
Refitting the Canister Filter 36
Section M
IGNITION - INJECTION SYSTEM0
1 - DESCRIPTION OF THE FUEL
INJECTION-IGNITION SYSTEM
3
General information on the fuel injection-ignition system 3
Fuel circuit 6
Intake air circuit 7
Operating stages 8
2 - IGNITION - INJECTION SYSTEM 9
3 - ELECTRICAL COMPONENTS OF THE
IGNITION/INJECTION SYSTEM
10
Electronic control unit 10
Electric injector 13
Air temperature / pressure sensor 14
Spark plugs 15
Coil 16
Throttle position sensor 17
Rpm/timing sensor 17
Main and injection relays 18

A
B
C
D
E
F
G
H
L
M
N
P
Indice generale
General summary
7 Monster S2R800/S2R800 Dark Aggiornamento/Update - M.Y. 2006 - edizione/edition 00
Sezione N
MOTORE 0
1 - SMONTAGGIO - RIMONTAGGIO
MOTORE COMPLETO
5
Smontaggio motore 6
Rimontaggio motore 8
2.1 -IMPIANTO DI LUBRIFICAZIONE:
POMPA OLIO
9
Impianto di lubrificazione 10
Smontaggio pompa olio 13
Scomposizione pompa olio 13
Revisione pompa olio 14
Ricomposizione pompa olio 14
Rimontaggio pompa olio 15
2.2 -IMPIANTO DI LUBRIFICAZIONE:
RADIATORE OLIO
16
Smontaggio radiatore olio 17
Ispezione radiatore olio 17
Rimontaggio radiatore olio 18
2.3 -IMPIANTO DI LUBRIFICAZIONE:
SERBATOIO SFIATO OLIO
19
Smontaggio serbatoio sfiato olio 20
Rimontaggio serbatoio sfiato olio 20
4.1 -GRUPPO TESTE: VERIFICHE E
REGOLAZIONI
21
Verifica e registrazione valvole 22
Verifica fasatura motore 26
4.2 -GRUPPO TESTE: COPERCHI
LATERALI / DISTRIBUZIONE
28
Smontaggio coperchi laterali distribuzione 29
Smontaggio gruppo distribuzione 30
Rimontaggio gruppo distribuzione 33
Rimontaggio coperchi laterali distribuzione 38
4.3 -GRUPPO TESTE : ALBERI
DISTRIBUZIONE
39
Smontaggio sensore temperatura olio motore 41
Rimontaggio sensore temperarura olio motore 41
Smontaggio collettori aspirazione 42
Rimontaggio collettori aspirazione 42
Smontaggio cappellotti laterali 43
Smontaggio coperchi valvole 44
Rimontaggio coperchi valvole 44
Smontaggio alberi distribuzione 45
Verifica alberi distribuzione 47
Verifica anelli di tenuta 47
Verifica anelli di arresto 47
Verifica cuscinetti 48
Rimontaggio albero distribuzione 49
Rimontaggio cappellotti distribuzione 51
4.4 -GRUPPO TESTE: VALVOLE -
BILANCIERI
52
Smontaggio gruppo teste motore 53
Revisione componenti testa 57
Rimontaggio gruppo testa 63
Section N
ENGINE 0
1 - REMOVING - REASSEMBLING THE
COMPLETE ENGINE
5
Removing the engine 7
Reassembling the engine 8
2.1 -LUBRICATION SYSTEM: OIL PUMP 9
Lubrication system diagram 10
Removing the oil pump 13
Disassembling the oil pump 13
Overhauling the oil pump 14
Oil pump reassembly 14
Refitting the oil pump 15
2.2 -LUBRICATION SYSTEM:
OIL COOLER
16
Removing the oil cooler 17
Oil cooler inspection 17
Refitting the oil cooler 18
2.3 -LUBRICATION SYSTEM:
OIL BREATHER RESERVOIR
19
Removing the oil breather reservoir 20
Refitting the oil breather reservoir 20
4.1 -HEAD UNIT: CHECKS AND
ADJUSTMENTS
21
Checking and adjusting valve clearance 22
Checking engine timing 26
4.2 -CYLINDER HEADS: SIDE COVERS /
TIMING SYSTEM
28
Removing the timing system side covers 29
Disassembling the timing system 30
Reassembling the timing system 33
Reassembling the side covers 38
4.3 -HEAD UNIT: CAMSHAFTS 39
Removing the engine oil temperature sensor 41
Refitting the engine oil temperature sensor 41
Disassembling the intake manifold 42
Refitting the intake manifolds 42
Removing the side rubber caps 43
Removing the valve cover 44
Refitting the valve covers 44
Removing the camshafts 45
Checking camshafts 47
Checking the oil seals 47
Checking the circlips 47
Checking the bearings 48
Refitting the camshaft 49
Refitting the cam covers 51
4.4 -HEAD UNIT: VALVES -
ROCKER ARMS
52
Disassembling the engine heads 53
Overhauling the head parts 57
Reassembling the head 63

A
B
C
D
E
F
G
H
L
M
N
P
Indice generale
General summary
8 Monster S2R800/S2R800 Dark Aggiornamento/Update - M.Y. 2006 - edizione/edition 00
5 - GRUPPO CILINDRI / PISTONI 69
Smontaggio gruppo cilindro / pistone 70
Revisione componenti gruppo cilindro / pistone 72
Rimontaggio gruppo cilindro / pistone 77
6.1 -GRUPPO FRIZIONE: FRIZIONE A
BAGNO D’OLIO APTC
79
Descrizione gruppo frizione APTC 80
Smontaggio frizione APTC 82
Revisione e verifiche organi frizione APTC 84
Rimontaggio frizione APTC 86
6.2 -GRUPPO FRIZIONE: COPERCHIO
FRIZIONE
88
Smontaggio coperchio frizione 89
Scomposizione coperchio frizione 90
Ricomposizione coperchio frizione 91
Rimontaggio coperchio frizione 92
6.3 -GRUPPO FRIZIONE: COPPIA
PRIMARIA
93
Smontaggio coppia primaria 94
Rimontaggio coppia primaria e verifica gioco ingranamento 97
7.1 -GRUPPO CAMBIO: LEVERAGGI 99
Smontaggio leveraggio selezione marce 100
Scomposizione leveraggio 100
Smontaggio puntalino e saltarello fissa marce 101
Rimontaggio saltarello e puntalino fissa marce 101
Ricomposizione leveraggio selezione marce 102
Rimontaggio leveraggio selezione marce 104
7.2 -GRUPPO CAMBIO:
ALBERI CAMBIO
105
Smontaggio gruppo cambio 107
Scomposizione alberi cambio 108
Revisione cambio di velocità 112
Ricomposizione alberi cambio 114
Ispezione forcelle selezione marce 116
Ispezione tamburo comando forcelle 116
Rimontaggio gruppo cambio 117
8 - VOLANO - ALTERNATORE 118
Smontaggio coperchio alternatore 120
Scomposizione coperchio alternatore 121
Smontaggio gruppo volano alternatore 122
Controllo gruppo volano alternatore 123
Rimontaggio gruppo volano alternatore 125
Rimontaggio coperchio alternatore 126
Controllo traferro sensore motore 127
9.1 -GRUPPO CARTER: COMPONENTI
ESTERNI
128
Smontaggio elementi esterni 129
Rimontaggio elementi esterni 131
Smontaggio ingranaggio rinvio distribuzione 132
Rimontaggio ingranaggio rinvio distribuzione 132
Smontaggio ingranaggio rinvio motorino avviamento 133
Rimontaggio ingranaggio rinvio motorino avviamento 133
9.2 -GRUPPO CARTER: SEMICARTER 134
Apertura semicarter 135
Revisione semicarter 137
Revisione cuscinetti di banco 138
Rimontaggio semicarter 139
Spessorazione alberi 140
Chiusura semicarter 148
5 - CYLINDER / PISTON ASSEMBLY 69
Disassembling the cylinder / piston assembly 70
Overhauling the cylinder / piston assembly 72
Reassembling the cylinder / piston assembly 77
6.1 -CLUTCH UNIT: APTC WET CLUTCH 79
APTC unit description 80
Disassembling the APTC system 82
Checking and overhauling the APTC unit 84
Reassembling the APTC unit 86
6.2 -CLUTCH UNIT: CLUTCH COVER 88
Removing the clutch cover 89
Disassembling the clutch cover 90
Reassembling the clutch cover 91
Refitting the clutch cover 92
6.3 -CLUTCH UNIT: PRIMARY GEARS 93
Disassembling the primary drive gears 94
Refitting the primary drive gears and checking
meshing play 97
7.1 -GEARBOX ASSEMBLY: GEAR
SELECTOR LEVERS
99
Removing the gear selector levers 100
Disassembling the lever 100
Removing the gear stopper and ratchet 101
Reassembling gear stopper and ratchet 101
Reassembling the gear selector lever 102
Reassembling the gear selector lever 104
7.2 -GEARBOX ASSEMBLY:
GEARBOX SHAFTS
105
Removing the gearbox 107
Disassembling the gearbox shafts 108
Overhauling the gearbox 112
Reassembling the gearbox shafts 114
Overhauling the gear selector forks 116
Inspecting the fork selector drum 116
Reassembling the gearbox 117
8 - FLYWHEEL - GENERATOR 118
Removing the generator cover 120
Disassembling the generator cover 121
Removing the flywheel - generator assembly 122
Checking the flywheel - generator assembly 123
Refitting flywheel / generator assembly 125
Reassembling generator cover 126
Checking the engine sensor air gap 127
9.1 -CASING UNIT: OUTER
COMPONENTS
128
Removing the outer components 129
Reassembling the outer parts 131
Removing the timing lay gear 132
Reassembling the timing lay gear 132
Removing the starter motor driven gear 133
Refitting the starter motor driven gear 133
9.2 -CASING UNIT: CRANKCASES 134
Opening the casings 135
Overhauling the casings 137
Overhauling the main bearings 138
Reassembling the casings 139
Shimming the shafts 140
Closing the casings 148

A
B
C
D
E
F
G
H
L
M
N
P
Indice generale
General summary
9 Monster S2R800/S2R800 Dark Aggiornamento/Update - M.Y. 2006 - edizione/edition 00
9.3 -GRUPPO CARTER: IMBIELLAGGIO 152
Smontaggio gruppo imbiellaggio 153
Scomposizione imbiellaggio 153
Revisione imbiellaggio 154
Ricomposizione imbiellaggio 158
Rimontaggio gruppo imbiellaggio 159
Sezione P
IMPIANTO ELETTRICO 0
1 - SCHEMA ELETTRICO 3
Legenda schema elettrico 5
Codici colore cavi schema elettrico 6
Legenda scatola fusibili 6
Disposizione dei cablaggi sul motociclo 6
Tavola A 9
Tavola B 10
Tavola C 11
Tavola D 11
Tavola E 12
Tavola F 13
Tavola G 14
Tavola H 15
Tavola J 16
Tavola K 17
Tavola L 17
Tavola M 18
Tavola N 19
Tavola P 20
Tavola Q 21
Tavola R 22
2 - SISTEMA DI RICARICA - BATTERIA 23
Controllo impianto di ricarica 23
Ricarica batteria 24
Aggiunta elettrolito 25
Batteria 28
Supporto batteria 29
Generatore 30
Regolatore raddrizzatore 31
3 - AVVIAMENTO ELETTRICO 33
Sistema avviamento elettrico 33
Motorino di avviamento 35
Teleruttore avviamento 37
4 - DISPOSITIVI DI ILLUMINAZIONE 38
Sostituzione lampadine luci 38
Orientamento del proiettore 41
5 - DISPOSITIVI DI SEGNALAZIONE 42
Controllo componenti dispositivi di segnalazione 42
Sostituzione lampadine 47
6 - DISPOSITIVI DI SICUREZZA E
PROTEZIONE
48
Controllo componenti dispositivi di sicurezza e
protezione 48
Controllo fusibili 50
7 - STRUMENTAZIONE 51
Cruscotto 51
9.3 -CASING UNIT: CONNECTING
RODS
152
Removing the connecting rods 153
Disassembling the connecting rods 153
Overhauling the connecting rod 154
Reassembling the connecting rods 158
Refitting the connecting rod unit 159
Section P
ELECTRIC SYSTEM 0
1 - WIRING DIAGRAM 3
Wiring diagram key 5
Wire color coding - wiring diagram 6
Legend of fuse box 6
Arrangement of wiring on frame 6
Diagram A 9
Diagram B 10
Diagram C 11
Diagram D 11
Diagram E 12
Diagram F 13
Diagram G 14
Diagram H 15
Diagram J 16
Diagram K 17
Diagram L 17
Diagram M 18
Diagram N 19
Diagram P 20
Diagram Q 21
Diagram R 22
2 - CHARGING SYSTEM – BATTERY 23
Checking the charging system 23
Recharging the battery 24
Adding electrolyte 25
Battery 28
Battery mount 29
Generator 30
Rectifier - regulator 31
3 - ELECTRIC STARTING 33
Electric starting system 33
Starter motor 35
Starter contactor 37
4 - LIGHTING DEVICES 38
Changing light bulbs 38
Beam setting 41
5 - INDICATORS AND LIGHTING
SYSTEM
42
Checking the indicators and lighting system components 42
Changing light bulbs 47
6 - PROTECTION AND SAFETY DEVICES 48
Checking protection and safety devices components 48
Checking the fuses 50
7 - WARNING LIGHTS AND
INDICATORS
51
Instrument panel 51

A
B
C
D
E
F
G
H
L
M
N
P
Indice generale
General summary
10 Monster S2R800/S2R800 Dark Aggiornamento/Update - M.Y. 2006 - edizione/edition 00
8 - IMMOBILIZER E TRASPONDER 54
9 - STRUMENTI DI DIAGNOSI 64
L'uso del multimetro per il controllo degli impianti
elettrici 64
8 - IMMOBILIZER AND TRANSPONDER 54
9 - TESTERS 64
How to use the multimeter to check electric systems 64

A
B
C
D
E
F
G
H
L
M
N
P
Generalità 0
Description 0

A
B
C
D
E
F
G
H
L
M
N
P
Generalità
Description
sezione / section
A
2 Monster S2R800/S2R800 Dark Aggiornamento/Update - M.Y. 2006 - edizione/edition 00
1 - CONSULTAZIONE DEL MANUALE 3
Struttura del manuale 4
2 - SIMBOLOGIA - ABBREVIAZIONI -
RIFERIMENTI
5
Caratteristiche prodotti 6
3 - PRODOTTI PERICOLOSI -
AVVERTENZE
10
Regole generali di sicurezza 10
Regole per le operazioni di manutenzione 12
1 - HOW TO USE THE MANUAL 3
Manual layout 4
2 - SYMBOLS - ABBREVIATIONS -
REFERENCES
5
Product specifications 8
3 - DANGEROUS PRODUCTS –
WARNINGS
10
General safety rules 10
General maintenance indications 12

A
B
C
D
E
F
G
H
L
M
N
P
Generalità
Description
sezione / section
A 1
3Monster S2R800/S2R800 Dark Aggiornamento/Update - M.Y. 2006 - edizione/edition 00
1 - CONSULTAZIONE DEL
MANUALE
Il presente manuale è stato redatto al
fine di fornire ai tecnici delle Stazioni
di Servizio Ducati, le informazioni
fondamentali per operare in perfetta
armonia con i moderni concetti di
"buona tecnica" e "sicurezza sul
lavoro", per tutti gli interventi di
manutenzione, riparazione e
sostituzione di parti originali, sia per la
parte ciclistica che motoristica del
motoveicolo in oggetto.
Gli interventi descritti nel presente
manuale richiedono esperienza e
competenza da parte dei tecnici
preposti, che sono invitati al pieno
rispetto delle caratteristiche tecniche
originali riportate dal Costruttore.
Alcune informazioni sono state
volontariamente omesse, in quanto
devono far parte dell'indispensabile
cultura tecnica di base che un tecnico
specializzato deve possedere. Altre
informazioni riguardanti il montaggio
dei componenti possono essere
dedotte dal catalogo ricambi.
Importante
La presente pubblicazione
contempla inoltre gli indispensabili
controlli da effettuarsi in fase di
preconsegna del motoveicolo.
La Ducati Motor Holding S.p.A.
declina ogni responsabilità per errori
ed omissioni di carattere tecnico,
prodotti nella redazione del presente
manuale e si riserva il diritto di
apportare qualsiasi modifica richiesta
dall'evoluzione tecnologica dei suoi
motocicli, senza l'obbligo di
divulgazione tempestiva.
Tutte le informazioni riportate, sono
aggiornate alla data di stampa.
Importante
Riproduzioni o divulgazioni
anche parziali degli argomenti trattati
nella presente pubblicazione, sono
assolutamente vietate. Ogni diritto è
riservato alla Ducati Motor Holding
S.p.A., alla quale si dovrà richiedere
autorizzazione (scritta)
specificandone la motivazione.
Ducati Motor Holding S.p.A.
1 - HOW TO USE THE
MANUAL
This manual has been prepared for
Ducati Authorized Service Centers
and workshop personnel involved in
the maintenance and repair of Ducati
motorcycles. It gives fundamental
information on how to work in perfect
harmony with the concepts of “good
technique” and “safety on work
sites” for servicing or replacing of
original spare parts both for chassis
and engine concerning this
motorcycle.
All operations described in this
manual must be carried out by senior
skilled technicians, who are
requested to strictly follow the
Manufacturer’s instructions.
Some information has been
intentionally omitted, as, at our
advice, a specialized technician must
have this technical background.
Additional information on how to
install the different components is
provided in the spare parts catalogue.
Caution
This manual also describes pre-
delivery checks.
Ducati Motor Holding S.p.A. declines
all responsibility for any technical
errors or omissions in this manual and
reserves the right to make changes
without prior notice.
The information given in this manual
was correct at the time of going to
print.
Caution
Reproduction and disclosure of
all or part of the contents of this
manual are strictly forbidden without
prior written authorization of Ducati
Motor Holding S.p.A. All rights on this
manual are reserved for Ducati Motor
Holding S.p.A. Applications for
authorization must be submitted in
writing and must specify the reasons
for reproduction or disclosure.
Ducati Motor Holding S.p.A.
A
B
C
D
E
F
G
H
L
M
N
P
Generalità
Description
sezione / section
A 1
4 Monster S2R800/S2R800 Dark Aggiornamento/Update - M.Y. 2006 - edizione/edition 00
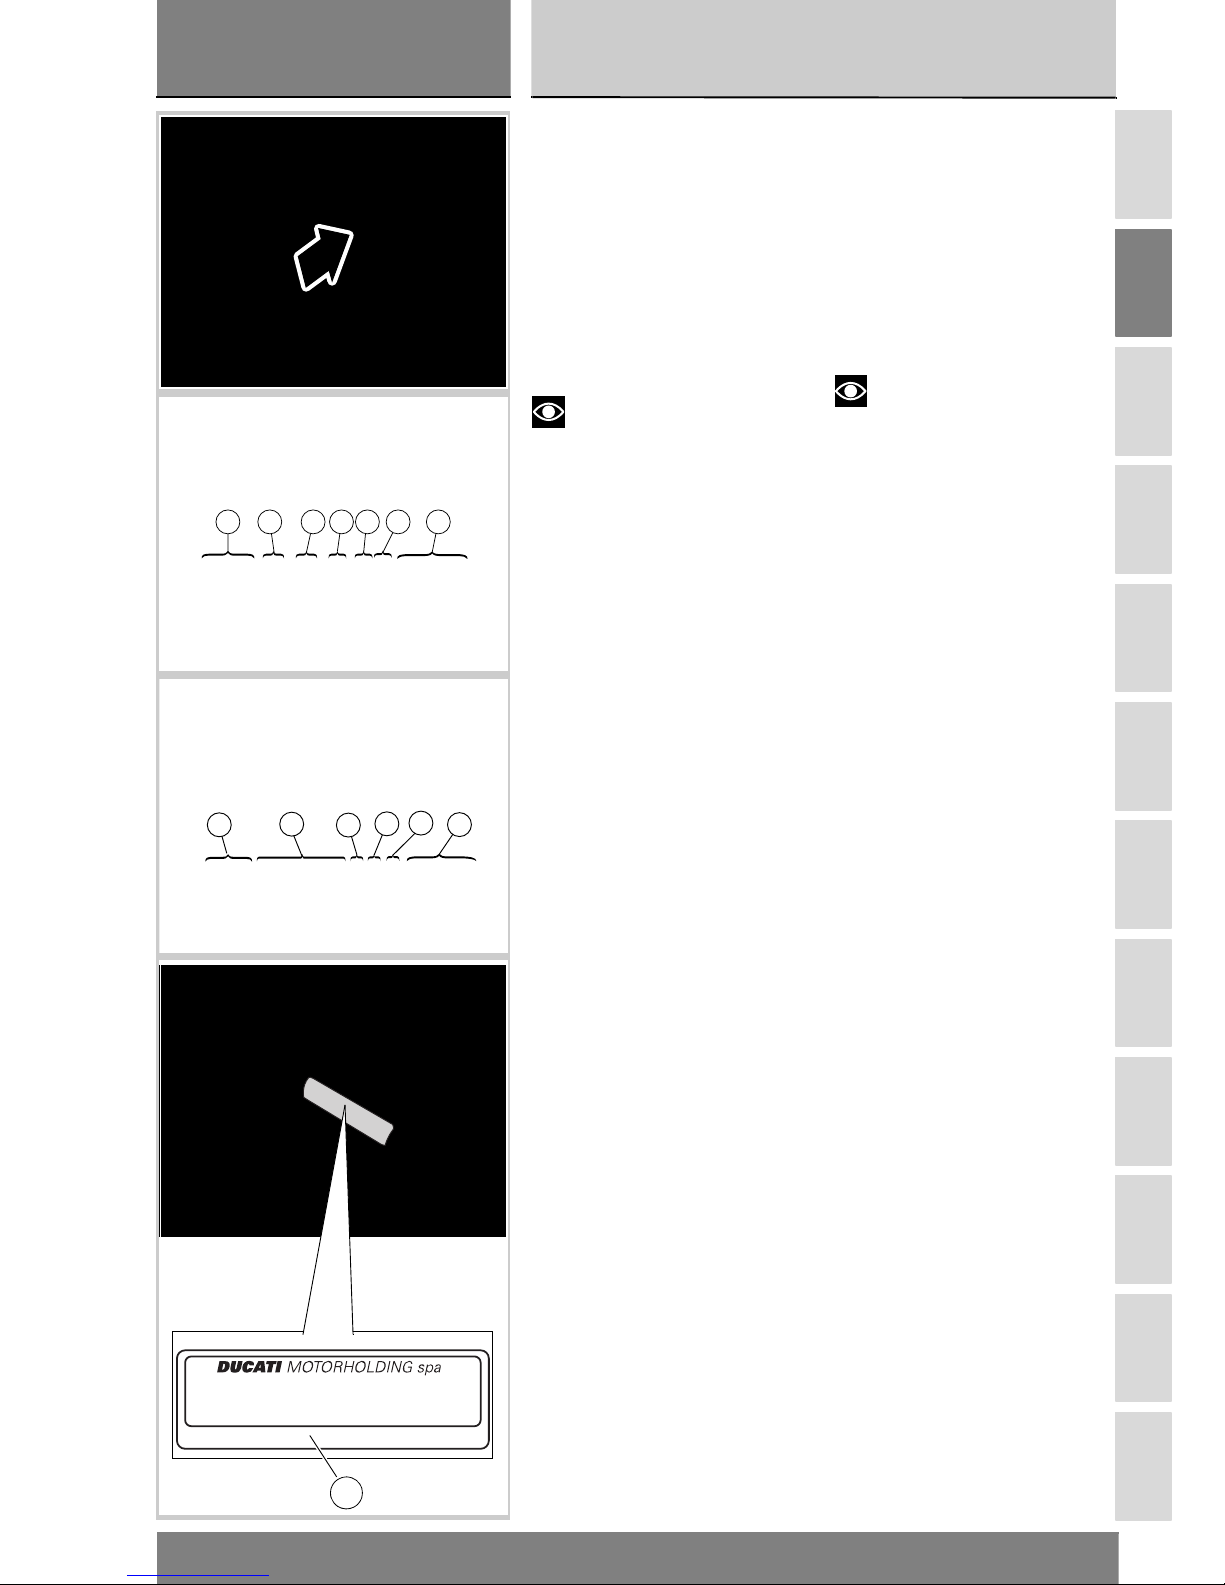
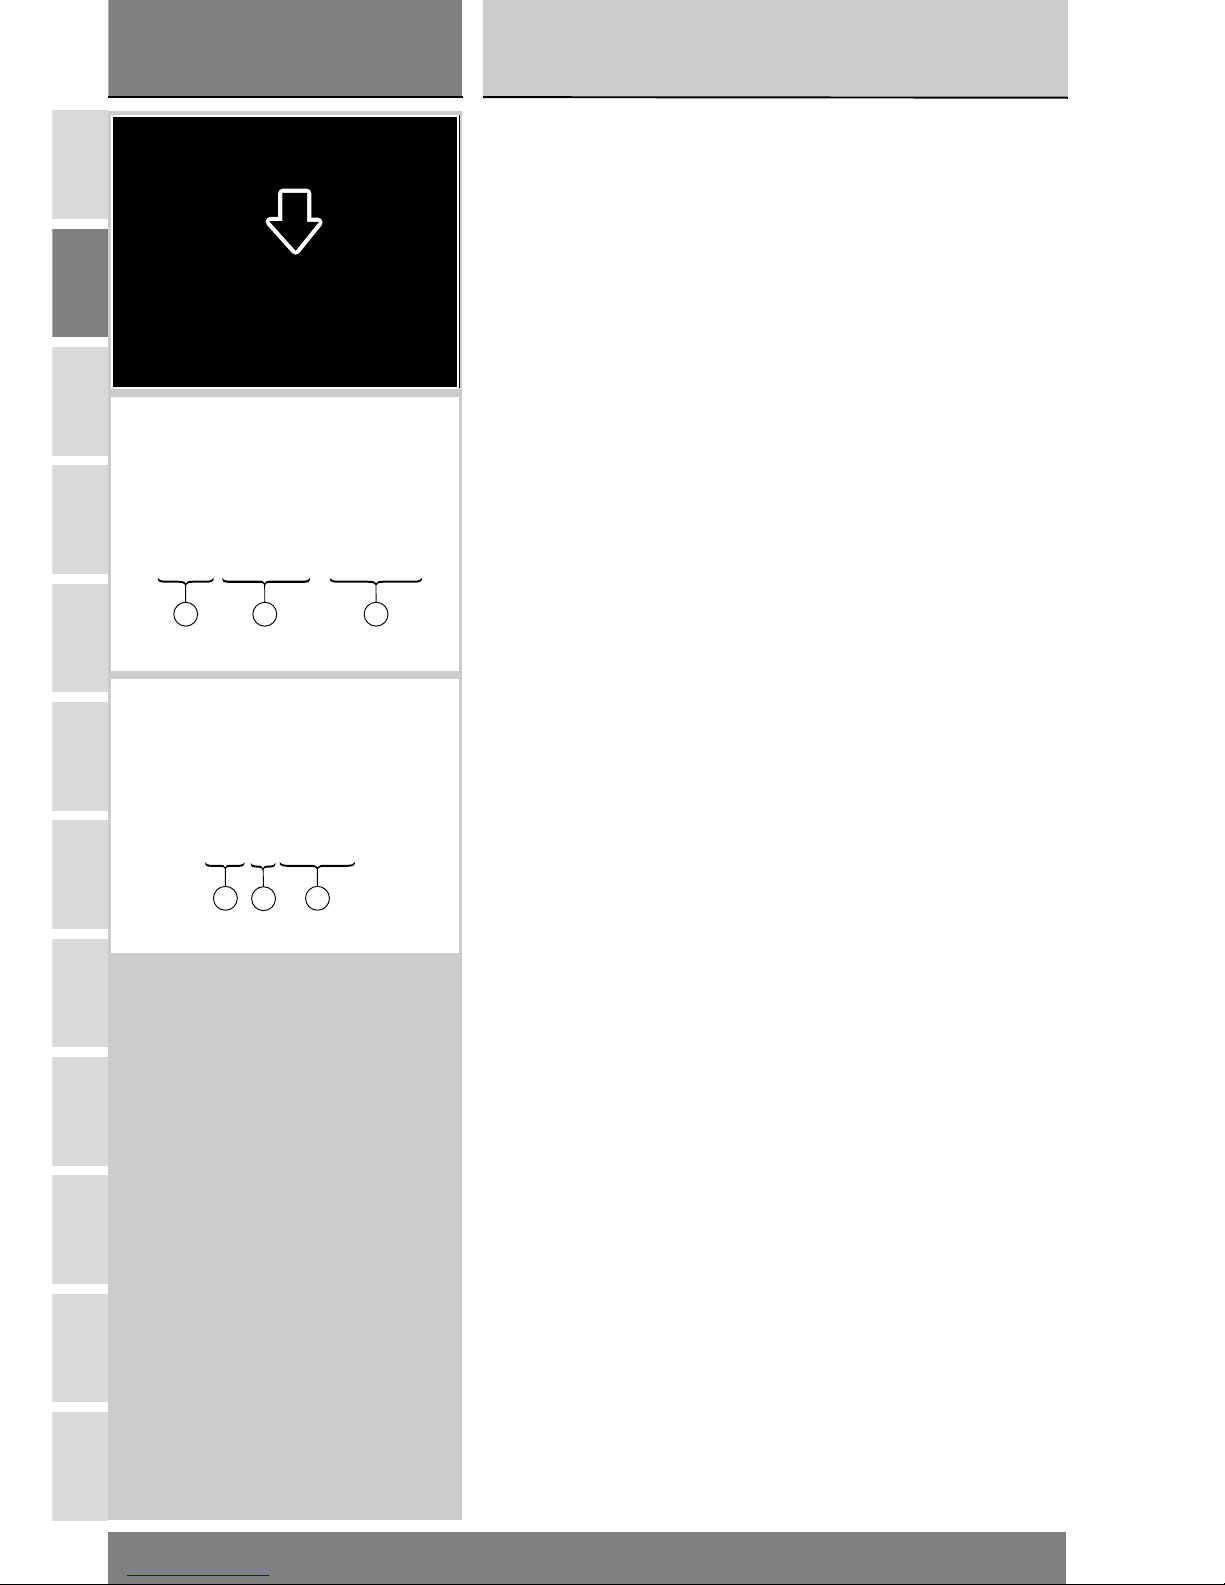
Struttura del manuale
Il manuale è suddiviso in sezioni (1)
indicate ciascuna con una lettera.
Ogni sezione (1) è suddivisa in capitoli
(2) identificati da un numero
progressivo. I capitoli (2) possono poi
essere divisi in paragrafi (3).
Il manuale descrive ogni intervento di
riparazione partendo dalla moto
completamente assemblata.
L’intervento viene descritto fino a
riportare il motociclo nella
configurazione di partenza.
Importante
Alcune sezioni di questo
manuale non sono presenti perchè il
motoveicolo è sprovvisto di tali
particolari.
Importante
La struttura del manuale è stato
studiato in modo da comprendere
tutte le tipologie dei modelli prodotti
da DUCATI MOTOR HOLDING.
Per una maggiore facilità di lettura del
manuale, l’indice dei capitoli viene
tenuto costante per tutti i modelli.
Note
Il presente documento è un
aggiornamento del Manuale
d'Officina Model Year 2005.
I capitoli indicati sono quelli che sono
stati aggiornati, mentre per tutti gli
altri fare riferimento al Manuale
d'Officina Model Year 2005.
Manual layout
This manual is divided in sections (1),
each identified by a letter. Each
section (1) includes several chapters
(2), which are numbered
consecutively. Each chapter (2) may
include several paragraphs (3).
The repair procedures described in
this manual include the necessary
disassembly and re-assembly
instructions,
i.e. the full procedure is detailed
starting with the motorcycle fully
assembled until bringing it back to the
original condition.
Caution
Some of the sections of this
manual are not present, being the
relevant parts not installed on the
vehicle.
Caution
The manual structure has been
designed to be applied to all the
different models manufactured by
DUCATI MOTOR HOLDING.
To make reading easier, the subsections table of contents is kept
unchanged for all models.
Note
This document is an update of
the Workshop Manual Model Year
2005.
The indicated sections are the ones
that have undergone changes; please
refer to the Workshop Manual Model
Year 2005 for all the other sections.
1
2
3
2
A
B
C
D
E
F
G
H
L
M
N
P
Generalità
Description
sezione / section
A 2
5Monster S2R800/S2R800 Dark Aggiornamento/Update - M.Y. 2006 - edizione/edition 00
2 - SIMBOLOGIA -
ABBREVIAZIONI RIFERIMENTI
Per una lettura rapida e razionale sono
stati impiegati simboli che
evidenziano situazioni di massima
attenzione, consigli pratici o semplici
informazioni. Prestare molta
attenzione al significato dei simboli, in
quanto la loro funzione è quella di non
dovere ripetere concetti tecnici o
avvertenze di sicurezza. Sono da
considerare, quindi, dei veri e propri
"promemoria". Consultare questa
pagina ogni volta che sorgeranno
dubbi sul loro significato.
Tutte le indicazioni destro o sinistro
si riferiscono al senso di marcia del
motociclo.
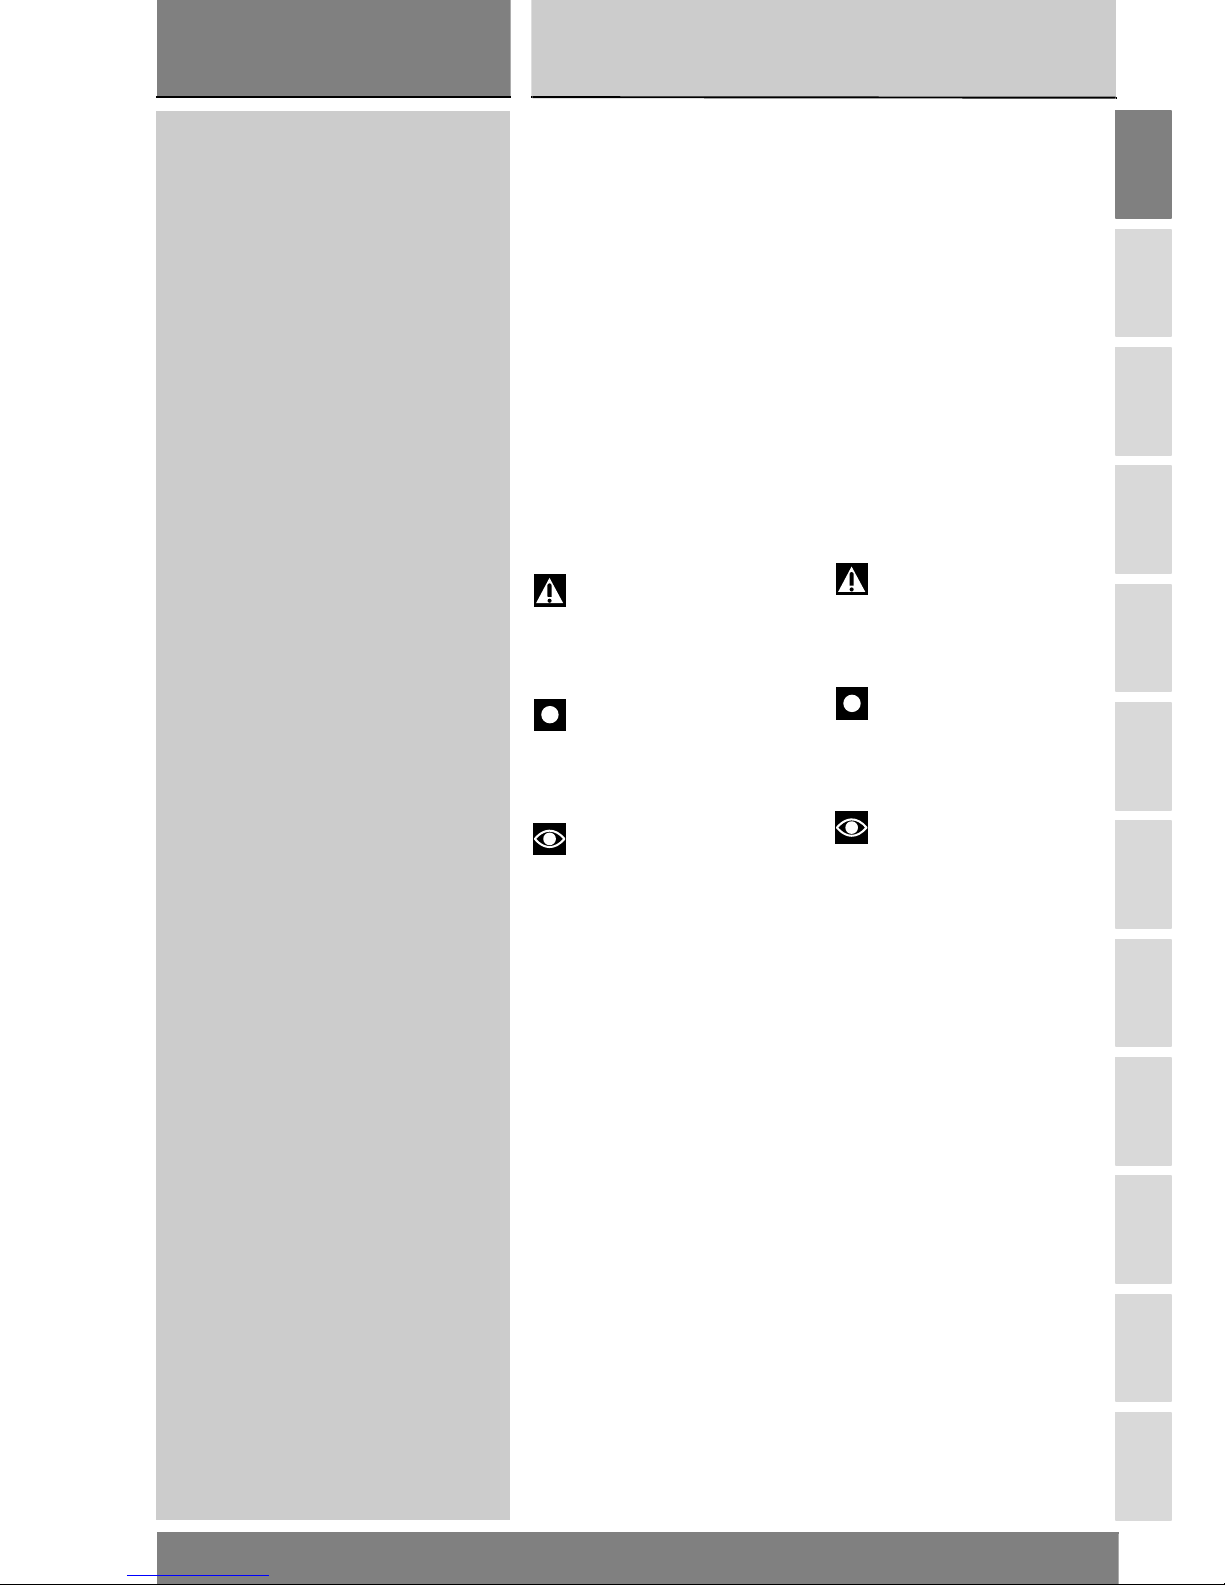
Attenzione
La non osservanza delle
istruzioni riportate può creare una
situazione di pericolo e causare gravi
lesioni personali e anche la morte.
Importante
Indica la possibilità di arrecare
danno al veicolo e/o ai suoi
componenti se le istruzioni riportate
non vengono eseguite.
Note
Fornisce utili informazioni
sull'operazione in corso.
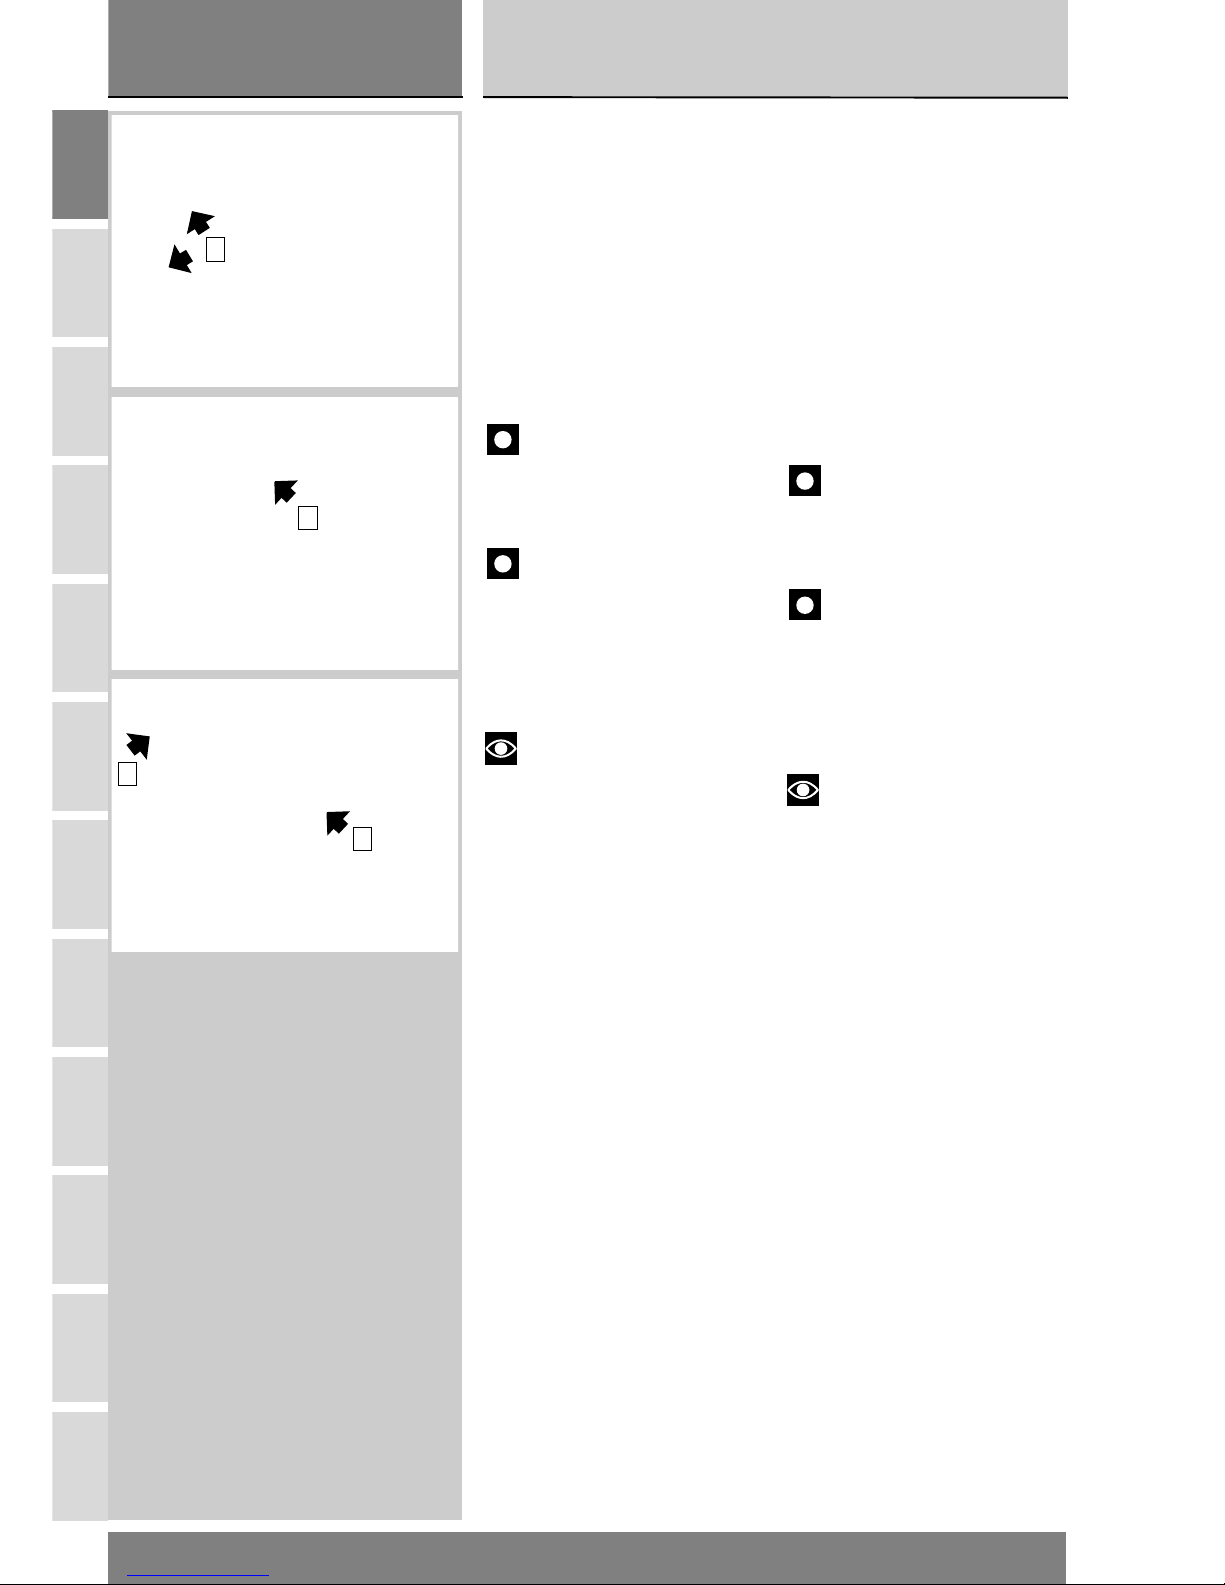
Riferimenti nel testo
(X)
Il riferimento in grassetto indica che il
particolare richiamato non è presente
nelle immagini a fianco del testo, ma
deve essere ricercato nelle tavole
esplose di inizio capitolo.
(X)
Il riferimento in sottile indica che il
particolare richiamato è presente
nelle immagini a fianco del testo.
2 - SYMBOLS -
ABBREVIATIONS REFERENCES
For easy and rational reading, this
manual uses graphic symbols for
highlighting situations in which
maximum care is required, practical
advice or simple information. Please
pay maximum attention to these
symbols as they are meant to avoid
repeating technical concepts or
safety rules throughout the text.
These symbols must be considered
as “hints” to important information.
Please refer to this page whenever in
doubt as to their meaning.
Left-hand and right-hand in the
descriptions refer to motorcycle
direction of travel.
Warning
Failure to follow the
instructions given in text marked with
this symbol can lead to serious
personal injury or death.
Caution
Failure to follow the
instructions in text marked with this
symbol can lead to serious damage to
the motorcycle and its components.
Note
This symbol indicates additional
useful information for the current
operation.
Text references
(X)
The bold reference indicates a part
that is not illustrated in the figures
next to the text, but can be found in
the exploded view at the beginning of
each section.
(X)
The non-bold reference indicates a
part that is illustrated in the figures
next to the text.
Generalità
Description
sezione / section
A 2
6
A
B
C
D
E
F
G
H
L
M
N
P
Monster S2R800/S2R800 Dark Aggiornamento/Update - M.Y. 2006 - edizione/edition 00
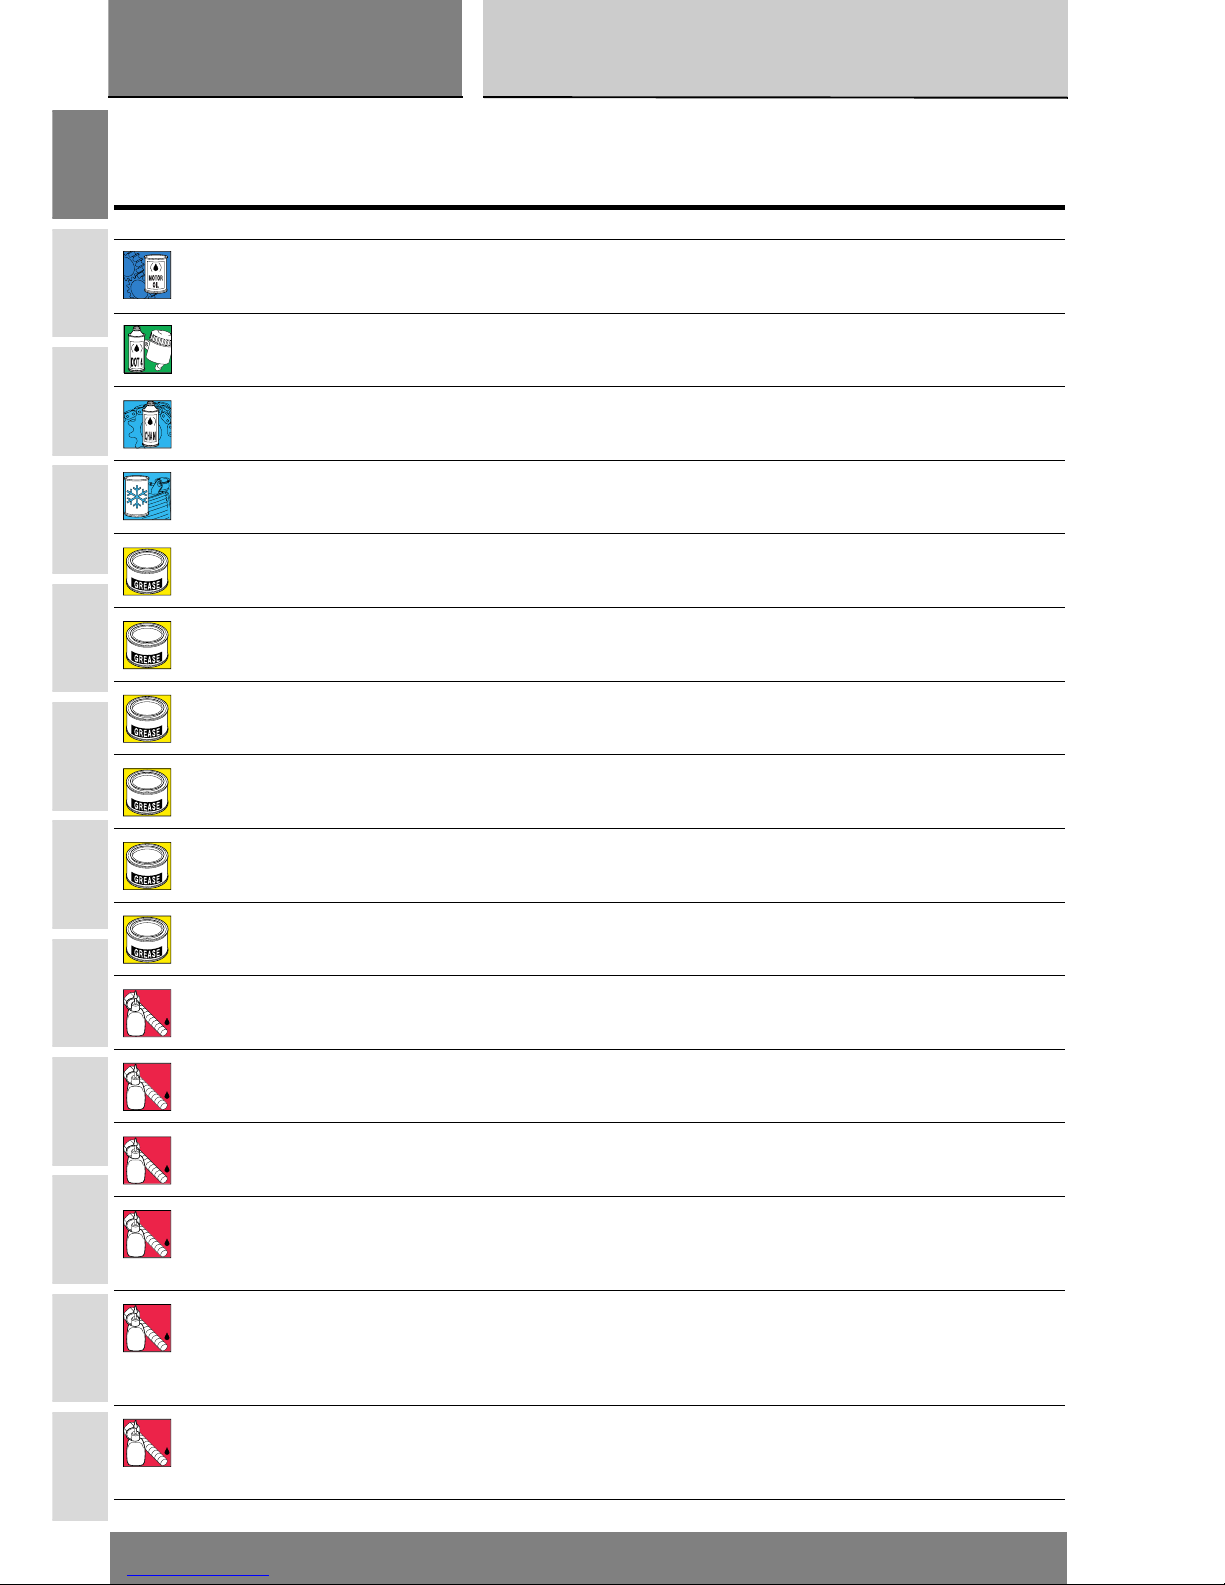
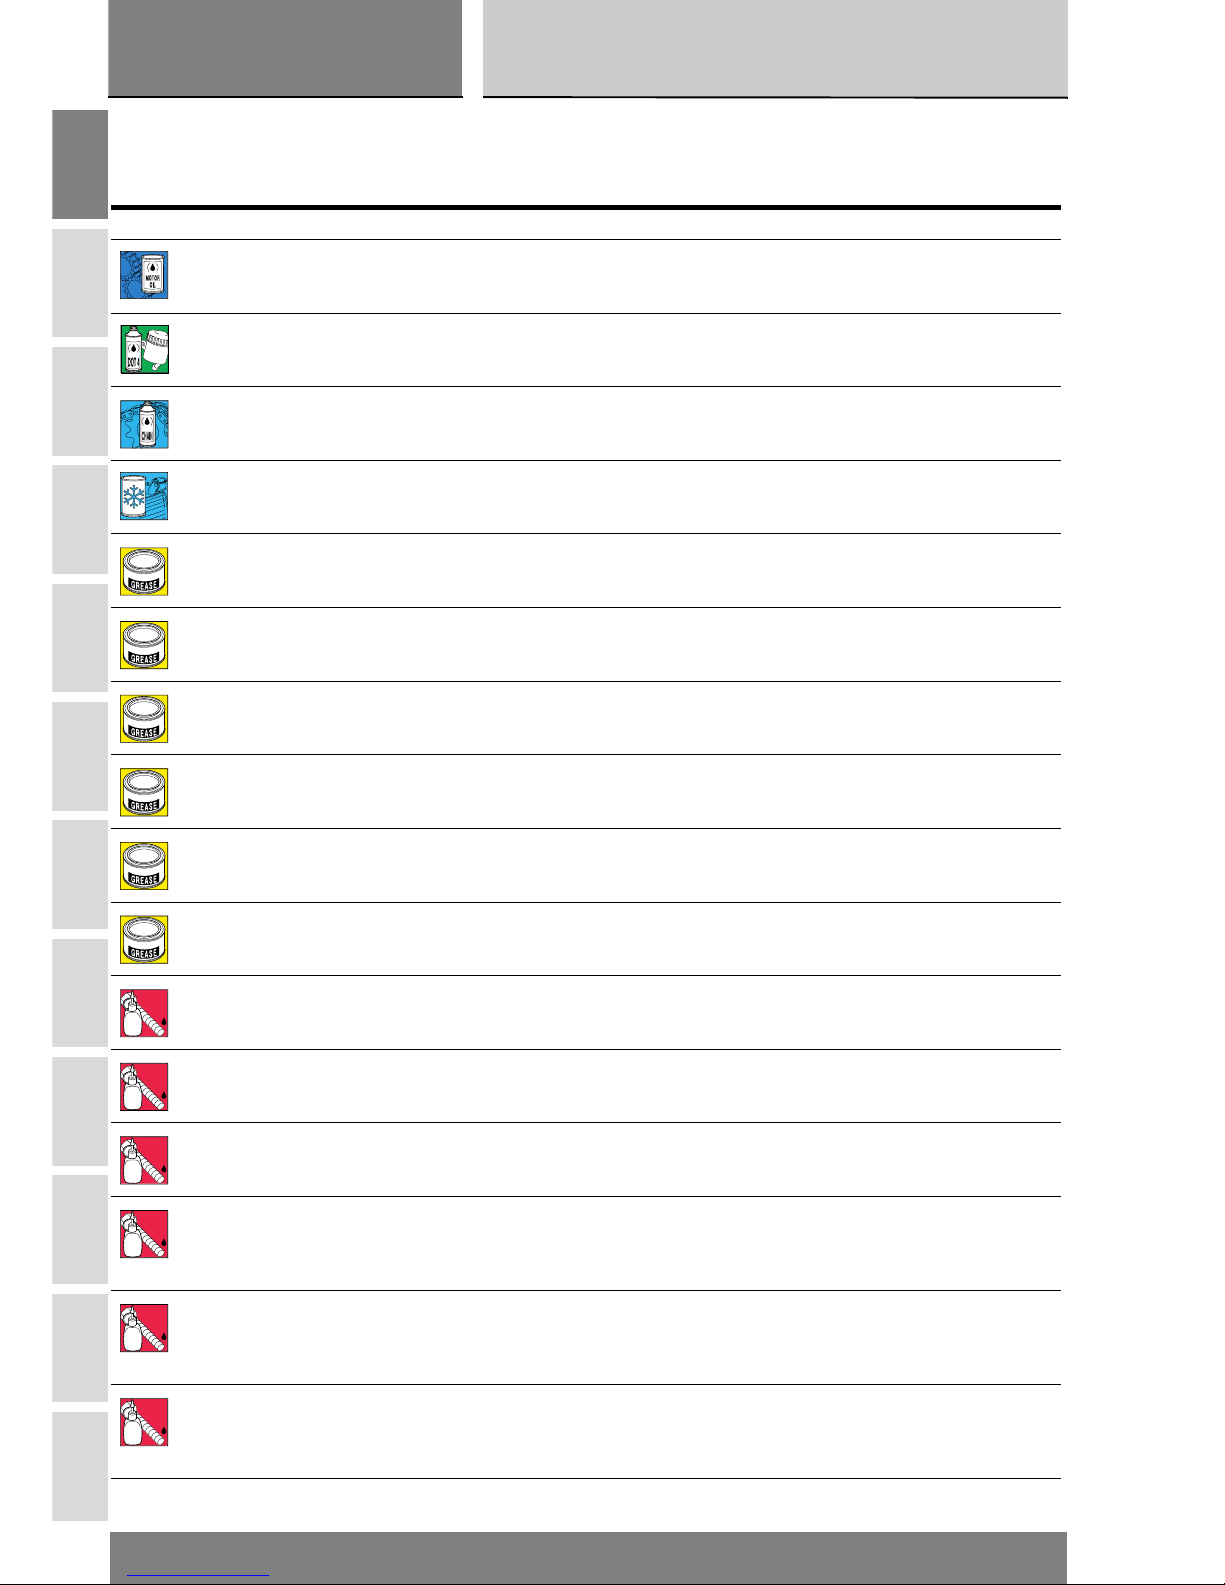
Caratteristiche prodotti
I prodotti usati per il serraggio, la sigillatura e la lubrificazione degli elementi verranno rappresentati all’interno della figura con un
simbolo. La tabella riporta i simboli utilizzati e le caratteristiche relative ai vari prodotti.
Simbolo Caratteristiche Prodotto consigliato
Olio motore (per caratteristiche vedi Sez. C 2) SHELL
Advance Ultra 4
Liquido speciale per i sistemi idraulici DOT 4. SHELL
Advance Brake DOT 4
Olio per ingranaggi SAE 80-90 o prodotti specifici
per catene con anelli OR.
SHELL
Advance Chain o Advance Teflon Chain
Liquido antigelo (totalmente assente da nitriti,
ammine e fosfati) 30÷40% + acqua.
SHELL
Advance coolant o Glycoshell
GREASE A Grasso a base di litio, a fibra media, di tipo
“multipurpose”.
SHELL Alvania R3
GREASE B Grasso al bisolfuro di molibdeno resistente ad
estreme sollecitazioni meccaniche e termiche.
SHELL
Retinax HDX2
GREASE C Grasso per cuscinetti e articolazioni sottoposti a
prolungate sollecitazioni meccaniche.
Temperatura di utilizzo da -10 a 110°C.
SHELL
Retinax LX2
GREASE D Grasso con proprietà protettive, anticorrosive e
di idrorepellenza.
SHELL
Retinax HD2
GREASE E Grasso PANKL - PLB 05.
GREASE F Grasso OPTIMOL - PASTE WHITE T.
LOCK 1 Frenafiletti a debole resistenza meccanica. Loctite 222
LOCK 2 Frenafiletti a media resistenza meccanica olio
compatibile.
Loctite 243
LOCK 3 Frenafiletti ad alta resistenza meccanica per
sigillatura di parti filettate.
Loctite 270
LOCK 4 Sigillante per piani ad alta reistenza meccanica e
ai solventi. Resiste al alte temperature (fino a
200°C), sigilla pressioni fino a 350 Atm e colma
giochi fino a 0,4 mm.
Loctite 510
LOCK 5 Adesivo strutturale permanente per
accoppiamenti cilindri a scorrimento libero o
filettati su parti meccaniche. Alta resistenza
meccanica ed ai solventi. Temperatura di utilizzo
da –55 a 175°C.
Loctite 128455
LOCK 6 Sigillante di tubazioni e raccorderie medio-grandi,
per acqua e ogni tipo di gas (ad eccezione
dell'ossigeno). Massima capacità di
riempimento: 0,40 mm (gioco diametrale).
Loctite 577
A
B
C
D
E
F
1
LOCK
2
LOCK
3
LOCK
4
LOCK
5
LOCK
6
LOCK
Generalità
Description
sezione / section
A 2
7
A
B
C
D
E
F
G
H
L
M
N
P
Monster S2R800/S2R800 Dark Aggiornamento/Update - M.Y. 2006 - edizione/edition 00
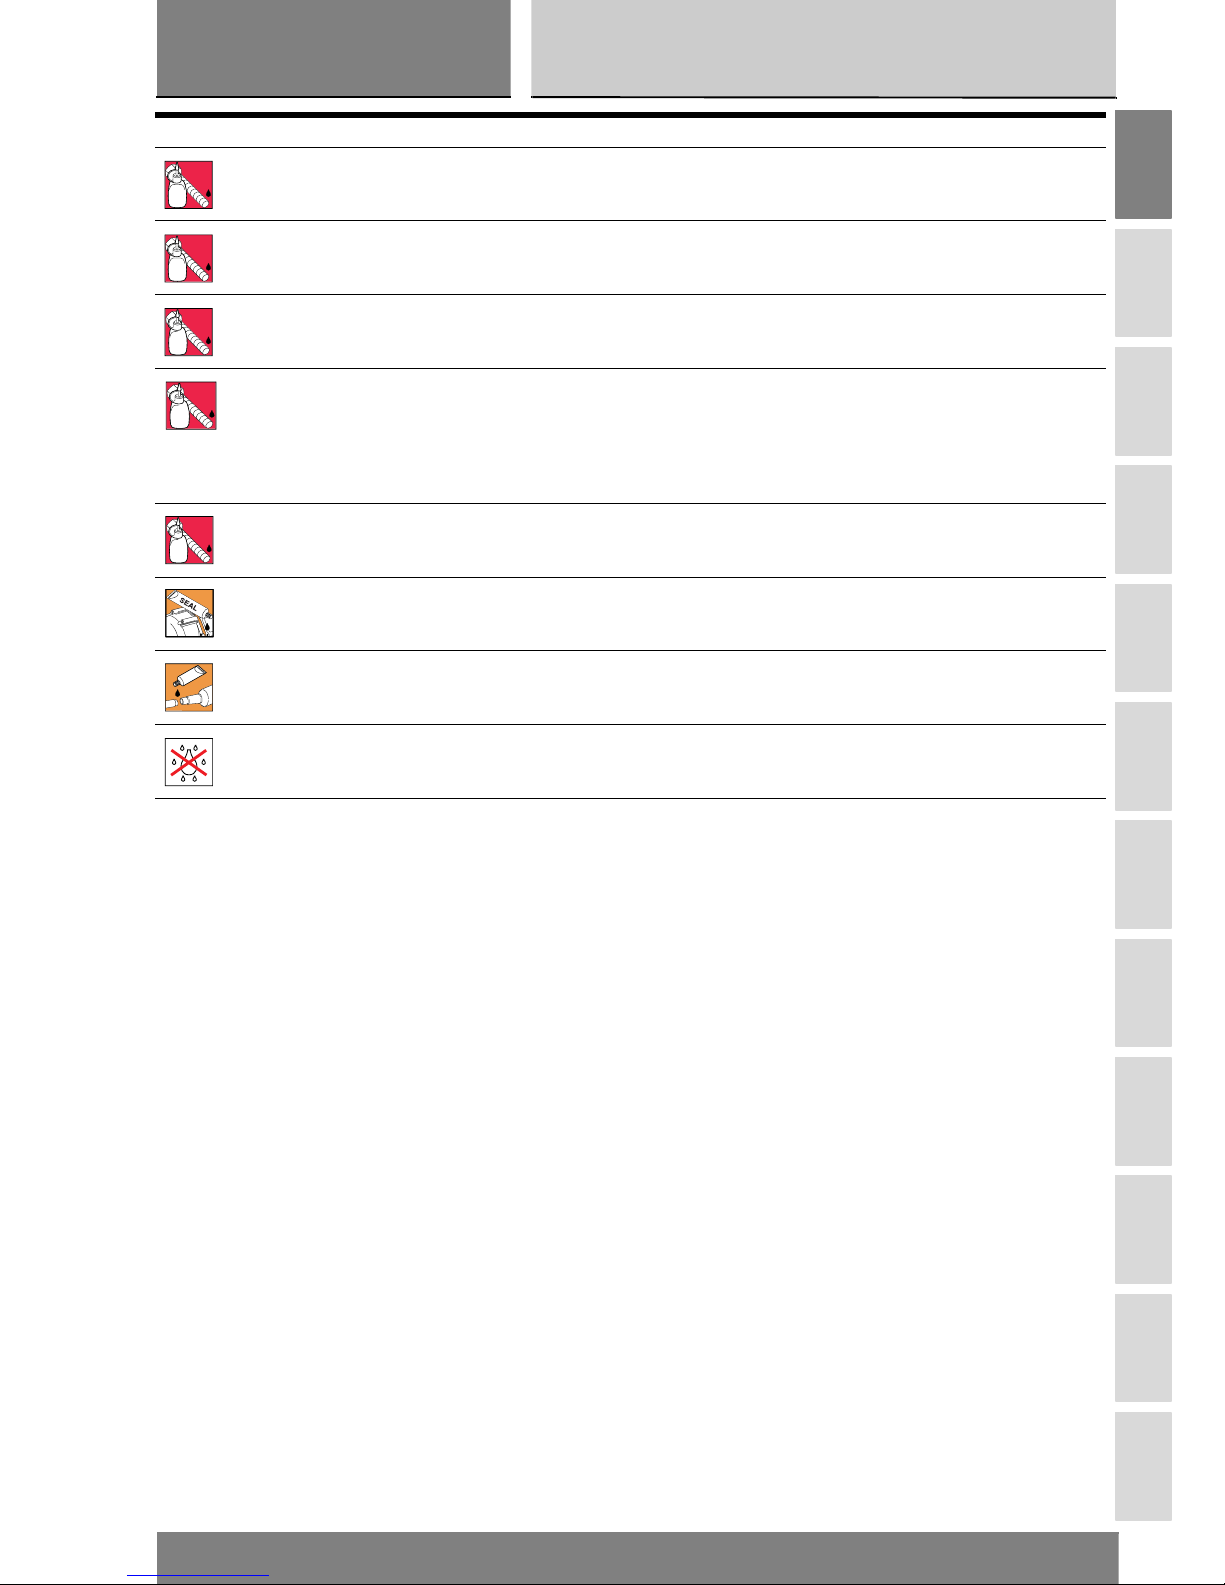
LOCK 7 Adesivo istantaneo gomma - plastica, con base
etilica caricato ad elastomeri.
Loctite 480
LOCK 8 Bloccante permanente di parti filettate,
cuscinetti, bussole, scanalati e chiavette.
Temperatura di esercizio da –55 a 150°C.
Loctite 601
LOCK 9 Frenafiletti a media resistenza meccanica. Loctite 401
LOCK 10 Prodotto adatto per sigillare e bloccare
accoppiamenti cilindrici a scorrimento libero o
accoppiamenti filettati, su parti metalliche.
Caratterizzato da una alta resistenza meccanica,
alta resistenza alla temperatura, eccellente
resistenza ai solventi ed all'agressione chimica.
Loctite 128443
LOCK 11 Adesivo istantaneo gelatinoso con resistenza a
trazione / taglio.
Loctite 454 gel
Guarnizione liquida DUCATI. 942470014
Pasta sigillante per tubi di scarico. Autosigillante
si indurisce al calore e resiste a temperature
superiori a 1000°C.
Fire gum holts
Spray impiegato nel trattamento degli impianti
elettrici. Rimuove umidità e condensa e offre alta
resistenza alla corrosione. Idrorepellente.
SHELL
Advance Contact Cleaner
Simbolo Caratteristiche Prodotto consigliato
7
LOCK
8
LOCK
LOCK
9
LOCK
10
LOCK
11
Generalità
Description
sezione / section
A 2
8
A
B
C
D
E
F
G
H
L
M
N
P
Monster S2R800/S2R800 Dark Aggiornamento/Update - M.Y. 2006 - edizione/edition 00
Product specifications
Symbols inside the diagram show the type of threadlocker, sealant or lubricant to be used at the points indicated. The table below
shows the symbols together with the product specifications.
Symbol Specifications Recommended product
Engine oil (for specifications, see sect. C 2). SHELL
Advance Ultra 4
DOT 4 special hydraulic brake fluid. SHELL
Advance Brake DOT 4
SAE 80-90 gear oil or special products for chains
with O-rings.
SHELL
Advance Chain or Advance Teflon Chain
Anti-freeze (nitride, amine and phosphate free)
30-40% water solution.
SHELL
Advance coolant or Glycoshell
GREASE A Multipurpose, medium fiber, lithium grease. SHELL Alvania R3
GREASE B Molybdenum disulphide grease, high mechanical
stress and high temperature resistant.
SHELL
Retinax HDX2
GREASE C Bearing/joint grease for parts subject to
prolonged mechanical stress. Temperature
range: -10 to 110° C.
SHELL
Retinax LX2
GREASE D Protective grease. Corrosion protectant,
waterproof.
SHELL
Retinax HD2
GREASE E PANKL grease PLB 05.
GREASE F OPTIMOL - PASTE WHITE T. Grease
LOCK 1 Low-strength threadlocker. Loctite 222
LOCK 2 Medium-strength threadlocker, compatible with
oil.
Loctite 243
LOCK 3 High-strength sealant for threaded parts. Loctite 270
LOCK 4 Flange sealant. Resistant to high mechanical
stress, solvents and high temperatures (up to
200°C). For pressures up to 350 atm. Fills gaps
up to 0.4 mm.
Loctite 510
LOCK 5 Permanent adhesive for smooth or threaded
cylindrical fasteners on mechanical parts. High
resistance to mechanical stress and solvents.
Temperature range: -55 to 175°C.
Loctite 128455
LOCK 6 Pipe sealant for pipes and medium to large
fasteners. For water and gases (except oxygen).
Maximum filling capacity: diameter gaps up to
0.40 mm.
Loctite 577
A
B
C
D
E
F
1
LOCK
2
LOCK
3
LOCK
4
LOCK
5
LOCK
6
LOCK

Generalità
Description
sezione / section
A 2
9
A
B
C
D
E
F
G
H
L
M
N
P
Monster S2R800/S2R800 Dark Aggiornamento/Update - M.Y. 2006 - edizione/edition 00
LOCK 7 Speed bonder for rubber and plastics. Elastomer
loaded ethylic base.
Loctite 480
LOCK 8 High-strength retaining compound for threaded
parts, bearings, bushes, splines and keys.
Temperature range: -55 to 150 °C.
Loctite 601
LOCK 9 Medium-strength threadlocker. Loctite 401
LOCK 10 Product for metal parts to seal and lock freely
sliding parallel or threaded couplings. Resistant
to high mechanical stress and high temperature,
solvent-proof and chemical-proof.
Loctite 128443
LOCK 11 Instantaneous jelly sealant featuring tensile / cut
strength.
Loctite 454 gel
DUCATI liquid gasket 942470014
Exhaust pipe paste. Self-curing sealant, hardens
when heated. For temperatures over 1,000°C.
Fire gum holts
Spray used in treating electrical systems to
eliminate moisture and condensation. Provides
high resistance to corrosion. Waterproof.
SHELL
Advance Contact Cleaner
Symbol Specifications Recommended product
7
LOCK
8
LOCK
LOCK
9
LOCK
10
LOCK
11
A
B
C
D
E
F
G
H
L
M
N
P
Generalità
Description
sezione / section
A 3
10 Monster S2R800/S2R800 Dark Aggiornamento/Update - M.Y. 2006 - edizione/edition 00
3 - PRODOTTI PERICOLOSI
- AVVERTENZE
Regole generali di
sicurezza
Monossido di carbonio
Qualora sia necessario tenere il
motore in funzione per l'esecuzione di
certe operazioni di manutenzione,
verificare che la zona di lavoro sia ben
ventilata. Non tenere mai il motore in
funzione in un luogo chiuso.
Attenzione
Gas di scarico contengono
monossido di carbonio, un gas
velenoso che può causare perdita
della coscienza, e condurre alla
morte.
Far funzionare il motore in un luogo
aperto o con l’aiuto di un sistema di
evacuazione dei gas di scarico, se in
luogo chiuso.
Carburante
Lavorare sempre in luoghi ben
ventilati. Tenere sigarette, fiamme e
scintille lontane dalla zona di lavoro, o
dal luogo in cui viene conservato il
carburante.
Attenzione
Il carburante è estremamente
infiammabile e, in certe particolari
condizioni, può anche esplodere.
Tenere lontano dalla portata dei
bambini.
Parti calde
Attenzione
Il motore e le parti del sistema
di scarico diventano molto calde con
l'uso della motocicletta, e rimangono
calde ancora per lungo tempo dopo
aver fatto funzionare il motore. Per
manipolare queste parti usare dei
guanti isolanti, o attendere che si
siano ben raffreddate.
Attenzione
L'impianto di scarico può
essere caldo, anche dopo lo
spegnimento del motore; prestare
molta attenzione a non toccare con
nessuna parte del corpo l'impianto di
scarico e a non parcheggiare il veicolo
in prossimità di materiali infiammabili
(compreso legno, foglie ecc.).
3 - DANGEROUS
PRODUCTS –
WARNINGS
General safety rules
Carbon oxide
When a maintenance operation must
be performed with the engine
running, position the motorcycle out
of doors or in a well-ventilated area.
Never operate the engine in an
enclosed place.
Warning
Exhaust emissions contain
carbon oxide, which is a poisonous
gas and may lead to loss of
conscience or even death.
Operate the engine out of doors or, if
working indoors, use an exhaust
emission extraction plant.
Fuel
Always make sure the area is well
ventilated. Do not smoke near the
motorcycle or the area where fuel is
stored and keep any sources of
ignition, such as flames or sparks,
well away from motorcycle and fuel
storage area.
Warning
The fuel used to operate
engines is highly flammable and
becomes explosive under particular
conditions. Keep away from children.
Hot component parts
Warning
The engine and exhaust
component parts become hot when
the engine is running and will stay hot
for some time after the engine has
been stopped. Wear heat gloves
before handling these components or
allow for the engine and exhaust
system to cool down before
proceeding.
Warning
The exhaust system will stay
hot for some time after the engine
has been stopped. Do not touch
these components with your body
and do not park the vehicle near
flammable materials (including wood,
leaves...).
A
B
C
D
E
F
G
H
L
M
N
P
Generalità
Description
sezione / section
A 3
11Monster S2R800/S2R800 Dark Aggiornamento/Update - M.Y. 2006 - edizione/edition 00
Olio motore usato
Attenzione
L'olio motore usato, se lasciato
ripetutamente a contatto con
l'epidermide per lunghi periodi di
tempo, può essere all'origine di
cancro epiteliale. Se l’olio motore
usato viene manipolato
quotidianamente, si consiglia di lavare
al più presto ed accuratamente le
mani con acqua e sapone dopo averlo
manipolato. Tenere lontano dalla
portata dei bambini.
Polvere dei freni
Non far mai uso di getti di aria
compressa, o di spazzole asciutte per
pulire il complesso dei freni.
Fluido per freni
Attenzione
Il rovesciamento del fluido sulle
parti di plastica, di gomma o
verniciate della motocicletta può
causare danni alle parti stesse. Prima
di procedere alla manutenzione del
sistema, appoggiare un panno da
officina pulito su queste parti ogni
volta che si procede all'esecuzione
delle operazioni di servizio. Tenere
lontano dalla portata dei bambini.
Liquido di raffreddamento
In certe condizioni, il glicole etilenico
presente nel liquido di
raffreddamento del motore è
combustibile e la sua fiamma non è
visibile. Se il glicole etilenico si
accendesse, la sua fiamma non è
visibile ma esso è in grado di
procurare serie ustioni.
Attenzione
Evitare di versare liquido di
raffreddamento del motore sul
sistema di scarico o su parti del
motore. Queste parti potrebbero
essere sufficientemente calde da
accendere il liquido che quindi brucia
senza fiamme visibili.
Il liquido di raffreddamento (glicole
etilenico) può causare irritazioni della
pelle ed è velenoso se inghiottito.
Tenere lontano dalla portata dei
bambini.
Non rimuovere il tappo del radiatore
quando il motore è ancora caldo. Il
liquido di raffreddamento è sotto
pressione e può provocare ustioni.
Tenere le mani e gli abiti lontani dalla
ventola di raffreddamento in quanto
essa si avvia automaticamente.
Used engine oil
Warning
Prolonged or repeated contact
with engine oil may cause skin
cancer. If exposed to engine oil on a
daily basis, make it a rule to wash
your hands thoroughly with soap right
after handling engine oil. Keep away
from children.
Brake lining debris
Never attempt to clean the brake
assembly using compressed air or a
dry brush.
Brake fluid
Warning
Avoid spilling brake fluid onto
plastic, rubber or paint-finished parts
or they will damage. Protect these
parts with a clean shop cloth before
proceeding to service the motorcycle.
Keep away from children.
Coolant
Engine coolant contains ethylene
glycol, which may ignite under
particular conditions, producing
invisible flames. This means that
ethylene glycol will not produce
visible fire when burning, but may
cause severe burns.
Warning
Take care not to spill engine
coolant on exhaust system or engine
parts. These parts may be hot and
ignite the coolant, which will burn
producing invisible flames.
Coolant contains ethylene glycol. It is
an irritant and is poisonous when
ingested. Keep away from children.
Never remove the radiator cap when
the engine is hot. Coolant is under
pressure and may cause scalds if
ejected.
The cooling fan operates
automatically. Keep hands away and
make sure your clothing does not
snag on the fan.

A
B
C
D
E
F
G
H
L
M
N
P
Generalità
Description
sezione / section
A 3
12 Monster S2R800/S2R800 Dark Aggiornamento/Update - M.Y. 2006 - edizione/edition 00
Batteria
Attenzione
La batteria libera gas esplosivi;
tenere lontane scintille, fiamme e
sigarette. Verificare che, durante la
ricarica della batteria, la ventilazione
della zona sia adeguata.
Regole per le operazioni
di manutenzione
Consigli utili
La Ducati consiglia, onde prevenire
inconvenienti e per il raggiungimento
del migliore risultato finale, di
attenersi genericamente alle seguenti
norme:
- in caso di una probabile riparazione
valutare le impressioni del Cliente,
che possono evidenziare anomalie
di funzionamento del motociclo, e
formulare le opportune domande di
chiarimento sui sintomi
dell'inconveniente;
- diagnosticare in modo chiaro le
cause dell'anomalia. Dal presente
manuale si potranno assimilare le
basi teoriche fondamentali, che
peraltro dovranno essere integrate
dall'esperienza personale e dalla
partecipazione ai corsi di
addestramento organizzati
periodicamente dalla Ducati;
- pianificare razionalmente la
riparazione onde evitare tempi morti
come ad esempio il prelievo di parti
di ricambio, la preparazione degli
attrezzi, ecc.;
- raggiungere il particolare da riparare
limitandosi alle operazioni
essenziali. A tale proposito sarà di
valido aiuto la consultazione dello
schema relativo alla sequenza di
smontaggio, esposto nel presente
manuale.
Battery
Warning
The battery gives off explosive
gases. Keep away from sources of
ignition, such as sparks and flames.
Do not smoke near the battery. Make
sure the area is well ventilated when
charging a battery.
General maintenance
indications
A word of advice
Ducati would like to suggest that you
follow the instructions below so to
ensure an efficient, fault-free
motorcycle operation.
- When diagnosing breakdowns,
primary consideration should always
be given to what the customer
reports. Your questions to the
customer should aim at clarifying
the problem.
- Diagnose the problem
systematically and accurately before
proceeding further. This manual
provides the theoretical background
for troubleshooting that should be
combined with personal experience
and attendance at Ducati training
courses.
- Repair work should be planned
carefully in advance to prevent any
unnecessary downtime, for
example picking-up of required
spare parts or arrangement of
required tools, etc.
- Time and money can be saved by
limiting the number of operations
needed to reach the part to be
repaired. The disassembly
procedure in this manual describes
the most efficient way to reach a
part to be repaired.

A
B
C
D
E
F
G
H
L
M
N
P
Generalità
Description
sezione / section
A 3
13Monster S2R800/S2R800 Dark Aggiornamento/Update - M.Y. 2006 - edizione/edition 00
Norme generali sugli interventi
riparativi
- Utilizzare sempre attrezzature di
ottima qualità. Utilizzare, per il
sollevamento del motoveicolo,
attrezzatura espressamente
realizzata e conforme alle direttive
Europee.
- Mantenere, durante le operazioni,
gli attrezzi a portata di mano,
possibilmente secondo una
sequenza predeterminata e
comunque mai sul veicolo o in
posizioni nascoste o poco
accessibili.
- Mantenere ordinata e pulita la
postazione di lavoro.
- Sostituire sempre le guarnizioni, gli
anelli di tenuta e le copiglie con
particolari nuovi.
- Allentando o serrando dadi o viti,
iniziare sempre da quelle con
dimensioni maggiori oppure dal
centro; bloccare alla coppia di
serraggio prescritta seguendo un
percorso incrociato.
- Contrassegnare sempre particolari o
posizioni che potrebbero essere
scambiati fra di loro all'atto del
rimontaggio.
- Usare parti di ricambio originali
Ducati ed i lubrificanti delle marche
raccomandate.
- Usare attrezzi speciali dove
specificato.
- Consultare le Circolari Tecniche in
quanto potrebbero riportare dati di
regolazione e metodologie di
intervento maggiormente
aggiornate rispetto al presente
manuale.
General advice on repair work
- Always use top quality tools. Lift the
motorcycle only with devices in full
compliance with relevant European
directives.
- During repair work always keep the
tools within reach, possibly in the
right order. Never put them on the
vehicle or in hardly reachable places
or somehow hidden.
- Work place must be neat and clean.
- During repair work always change
gaskets, seals and split pins.
- When loosening or tightening nuts
and bolts, always start with the
largest and always start from the
center. Tighten nuts and bolts
working crossways; tighten to the
specified torque.
- At disassembly, mark any parts and
positions which might easily be
confused at reassembly.
- Use Ducati original spare parts only.
Use the recommended lubricants
only.
- Use special service tools where
specified.
- Ducati Technical Bulletins often
contain updated versions of the
service procedures described in this
manual. Check the latest Bulletins
for details.


A
B
C
D
E
F
G
H
L
M
N
P
Informazioni sul modello 0
Model-specific information 0

A
B
C
D
E
F
G
H
L
M
N
P
Informazioni sul modello
Model-specific information
sezione / section
B
2 Monster S2R800/S2R800 Dark Aggiornamento/Update - M.Y. 2006 - edizione/edition 00
1 - IDENTIFICAZIONE MODELLO 3
Dati per l’identificazione del Monster S2R 3
1 - IDENTIFICATION DATA 3
Identification data for Monster S2R 3
A
B
C
D
E
F
G
H
L
M
N
P
Informazioni sul modello
Model-specific information
sezione / section
B 1
3 Monster S2R800/S2R800 Dark Aggiornamento/Update - M.Y. 2006 - edizione/edition 00
1 - IDENTIFICAZIONE
MODELLO
Dati per l’identificazione
del Monster S2R
Ogni motociclo Ducati è
contraddistinto da due numeri di
identificazione, rispettivamente per il
telaio e per il motore, e da una
targhetta costruttore CEE (A), non
presente nella versione U.S.A.
Note
Questi numeri che identificano
il modello del motociclo sono da
citare per la richiesta di parti di
ricambio.
Punzonatura del telaio
Versione Europa
1 Costruttore, Ducati Motor
Holding
2 Tipo - uguale per tutti i modelli
Monster
3Variante:
14 = full
15 = dep.
4 Versione=AA
5 Anno di costruzione (6=2006)
6 Sede costruttore
7 N ° progressivo di matricola
Punzonatura del telaio
Versione Stati Uniti
1 Ducati
2 Tipo di motociclo
3 Variante - Numerico oppure X
(Check digit)
4 Model year
5 Sede costruttore
6 N° progressivo di matricola
1 - IDENTIFICATION
DATA
Identification data for
Monster S2R
Each Ducati motorcycle has two
identification numbers - frame
number and engine number, and an
EC nameplate (A) (not used in the
USA version).
Note
The frame and engine numbers
identify the motorcycle model; please
state these numbers when ordering
spare parts.
Data punched on frame
European version
1 Manufacturer’s name: Ducati
Motor Holding
2 Model technical name – same on
all Monsters
3 Variant:
14 = full
15 = derated
4 Version=AA
5 Year of manufacture (6=2006)
6 Plant of manufacture
7 Progressive production No.
Data punched on frame
USA version
1 Ducati
2 Model
3 Variant – Code number or Check
digit (X)
4 Model year
5 Plant of manufacture
6 Progressive production No.
ZDM M4 14 AA X B 000001
15
43 5 6 721
Punzonatura del telaio
Versione Europa
Data punched on frame
Europe version
Punzonatura del telaio
Versione Stati Uniti
Data punched on frame
USA version
3
4
5
6
1
2
ZDM 1 R A A N # X B 000001
e ?*
??
/ ?? *
????
*
*ZDM
??????????????
*
??
dB(A) -
????
min
??? ? ??? ??
-1
A
A
B
C
D
E
F
G
H
L
M
N
P
Informazioni sul modello
Model-specific information
sezione / section
B 1
4 Monster S2R800/S2R800 Dark Aggiornamento/Update - M.Y. 2006 - edizione/edition 00
Data punched on engine
European version
1 Manufacturer’s name: Ducati
Motor Holding
2 Engine type
3 Progressive production No.
Data punched on engine
USA version
1 Engine type
2 Model year
3 Progressive production No.
Punzonatura del motore
Versione Europa
1 Costruttore, Ducati Motor
Holding
2 Tipo di motore
3 N° progressivo di produzione
Punzonatura del motore
Versione Stati Uniti
1 Tipo di motore
2 Model year
3 N° progressivo di produzione
ZDM 800A2 *000001*
21 3
Punzonatura del motore
Versione Europa
Data punched on engine
Europe version
RAA X 000001
1 3
Punzonatura del motore
Versione USA
Data punched on engine
USA version
2

A
B
C
D
E
F
G
H
L
M
N
P
Caratteristiche tecniche 0
Technical specification 0

Caratteristiche tecniche
Technical specification
sezione / section
C
2
A
B
C
D
E
F
G
H
L
M
N
P
D
Monster S2R800/S2R800 Dark Aggiornamento/Update - M.Y. 2006 - edizione/edition 00
1.1 -DATI TECNICI 3
Generalità 3
Colori 4
Trasmissione 4
Distribuzione/valvole 4
Cilindro / pistone 5
Cambio 5
Sistema di raffreddamento 5
Ruota anteriore 6
Sospensione anteriore 6
Ruota posteriore 6
Sospensione posteriore 6
Freni idraulici 7
Sistema di carica / alternatore 7
Sistema di iniezione 7
Alimentazione 8
Sistema di alimentazione 8
Luci / strumentazione 8
1.2 -INGOMBRI 15
2 - RIFORNIMENTI E LUBRIFICANTI 16
3 - COPPIE DI SERRAGGIO 17
Coppie di serraggio mototelaio 17
Coppie di serraggio motore 22
4 - ATTREZZI DI SERVIZIO 33
Attrezzatura specifica motore 33
Attrezzatura specifica
mototelaio 37
1.1 -TECHNICAL DATA 9
Description 9
Colors 10
Transmission 10
Timing/valves 10
Cylinder / piston 11
Gearbox 11
Cooling system 11
Front wheel 12
Front suspension 12
Rear wheel 12
Rear suspension 12
Hydraulic brakes 13
Charging system / generator 13
Injection system 13
Fuel system 14
Control unit 14
Lights / instrument panel 14
1.2 -DIMENSIONS 15
2 - FUELS AND LUBRICANTS 16
3 - TORQUE SETTINGS 25
Frame torque settings 25
Engine torque settings 30
4 - SERVICE TOOLS 33
Engine special tools 33
Frame special tool 37
 Loading...