

DragonWave LT5GT User Manual

Harmony Lite, R1.0
draft
Operation and Maintenance Guide
Revision 2, updated in May, 2014
Document Number: PM-000003-01-EN

Notice
draft
This document contains DragonWave proprietary information. Use, disclosure,
copying or distribution of any part of the information contained herein, beyond that
for which it was originally furnished, requires the written permission of
DragonWave Inc.
The information in this document is subject to change without notice and relates
only to the product defined in the introduction of this document. DragonWave
intends that information contained herein is, to the best of its knowledge, correct
and accurate. However, any/all liabilities associated with the use or accuracy of
the information contained herein must be defined in a separate agreement
between DragonWave and the customer/user.
Copyright © DragonWave Inc. 2014. All rights reserved.

Table of Contents
draft
1 Preface ....................................................................................................9
1.1 History of changes ...........................................................................................................9
1.2 Scope of the document ....................................................................................................9
1.3 Intended audience ............................................................................................................ 9
1.4 Document structure ..........................................................................................................9
2 Commissioning ....................................................................................11
2.1 Before commissioning ....................................................................................................11
2.2 Commission steps ..........................................................................................................11
2.2.1 Logging in .................. ... .... ... ... ....................................... ... ... ... .... ... ... ................................... 11
2.2.2 Setting the management IP ................................................................................................. 12
2.2.3 Setting the management VLAN ........................................................................................... 13
2.2.4 Setting the radio parameters ............................................................................................... 14
3 System configuration ...........................................................................19
3.1 System home .................................................................................................................19
3.2 System inventory ............................................................................................................19
3.3 Software inventory .........................................................................................................20
3.4 Software management ...................................................................................................21
3.5 Configuration management ............................................................................................21
3.6 P+E output .....................................................................................................................22

3.7 Licensing .........................................................................................................................22
draft
3.8 SNTP ..............................................................................................................................23
3.9 Synchronization ..............................................................................................................23
4 Wireless radio configuration ...............................................................25
4.1 Wireless radio #1 configuration ......................................................................................25
4.2 Received Signal Strength Indication ...............................................................................25
4.3 Modulation and ACM ......................................................................................................26
4.4 Tx power and Adaptive Transmit Power Control (ATPC) ...............................................27
5 Ethernet configuration .........................................................................29
5.1 Ports ...............................................................................................................................29
5.2 Speed .............................................................................................................................29
5.3 VLAN management ........................................................................................................30
5.4 QoS scheduler ................................................................................................................30
5.5 Traffic criteria ..................................................................................................................31
5.6 IP priority .........................................................................................................................31
5.7 VLAN PRI priority ............................................................................................................32
5.8 Port priority .....................................................................................................................32
5.9 Aging time .......................................................................................................................33
5.10 Static Unicast FDB ........................................................................................................33
5.11 All FDB ..........................................................................................................................33
6 Management .........................................................................................35
6.1 IP ....................................................................................................................................35
6.2 Management VLAN ........................................................................................................35
6.3 SNMP .............................................................................................................................36

6.4 Trap ................................................................................................................................36
draft
6.5 Event log ........................................................................................................................36
6.6 Account log ....................................................................................................................37
7 Alarms ...................................................................................................39
7.1 Active alarms ..................................................................................................................39
7.2 History alarms ................................................................................................................39
8 Performance .........................................................................................41
8.1 Ethernet ..........................................................................................................................41
8.2 Wireless .........................................................................................................................41
9 Diagnostics ...........................................................................................43
9.1 Link status ......................................................................................................................43
9.2 Link status trace .............................................................................................................43
9.3 System running log ........................................................................................................43
10 About ...................................................................................................45

draft

List of Tables
draft
TABLE 1. History of changes ..................................................................................................................... 9
TABLE 2. Document structure .................................................................................................................... 9
TABLE 3. Login parameters ..................................................................................................................... 12
TABLE 4. System home ........................................................................................................................... 12
TABLE 5. Management IP ........................................................................................................................ 13
TABLE 6. Management VLAN .................................................................................................................. 14
TABLE 7. Wireless parameters ................................................................................................................ 16
TABLE 8. Configuration summary ............................................ ... .... ... ... ... ... ....................................... ...... 17
TABLE 9. P+E output............................................................................................................................... 22
TABLE 10. SNTP ................................................................... ... ... .... ... ... ... ................................................ 23
TABLE 11. ACM ....................................................................................................................................... 27
TABLE 12. TPC ................................. ................................................................. ...................................... 27
TABLE 13. Ethernet ports ......................................................................................................................... 29
TABLE 14. Ethernet port speed configuration........ ... ... ....... ... ... ... .... ... ... ... ... .... ... ... ... .... ... ... ...... .... ... ... ... .. 29
TABLE 15. VLAN configuration ......................... .... ... ... ....................................... ... ... .... ... ... ... ................... 30
TABLE 16. Aging time.............................................................................................................................. 33
TABLE 17. Management VLAN ... ... ... .... ...................................... .... ... ... ... ... .... ... ......................................35

draft

1 Preface
draft
1.1 History of changes
The history of changes is shown in the following table:
TABLE 1. History of changes
Revision Updates Date
1 1st revision. January,
2 All across the document, the full name of the product is changed to Harmony
Lite.
1.2 Scope of the document
Preface
2014
May, 2014
This document provides the technical guide for commissioning and operating the software of Harmony Lite system, Lite Link Viewer.
INFO
This document only concerns Harmony Lite system release 1.0 (Lite, R1.0 in short) without
specific statements in the context.
1.3 Intended audience
This document is prepared for the use of ra dio network planners and technicians who are responsible for the system operation and maintenance.
WARNING!
PERSONS HANDLING THIS EQUIPMENT MAY BE EXPOSED TO HAZARDS WHICH
COULD RESULT IN PHYSICAL INJURY! IT IS THEREFORE MANDATORY TO CAREFULLY READ AND UNDERSTAND THIS DOCUMENT.
1.4 Document structure
The document is comprised of the following chapters.
TABLE 2. Document structure
Chapter Title Subject
Chapter 1 Preface Provides an introduction on who and how to use this document.
Chapter 2 Commissioning Provides the guidance to do the initial commission.
Chapter 3 System configuration Provides the guidance to make system configurations.
Chapter 4 Wireless configuration Provides the guidance to make wireless configurations.
Chapter 5 Ethernet configuration Provides the guidance to make Ethernet configurations.
Chapter 6 Management Provides the guidance to make management configurations.
9

Preface
draft
TABLE 2. Document structure
Chapter Title Subject
Chapter 7 Alarms Provides the information about alarm lists.
Chapter 8 Performance Provides the guidance to make performance configurations.
Chapter 9 Diagnostics Provides the guidance to make diagnostics configurations.
Chapter 10 About Provides the information about the link view.
10
2 Commissioning
draft
2.1 Before commissioning
Before Lite system become operational, initial configuration steps need to be carried out first. And
the Commissioning wizard is recommended to be executed pr ior to the har dware inst allation on site.
The Lite system can be accessed by the Web Browser on a PC, such as Google Chrome (28.0 or
higher), Firefox (26.0 or higher), IE (9.0 or higher). If Firefox or IE is to be used, Adobe Flash Player
plug-in has to be installed first. (To download Adobe Flash Player, go to website http://
get.adobe.com/cn/flashplayer/.)
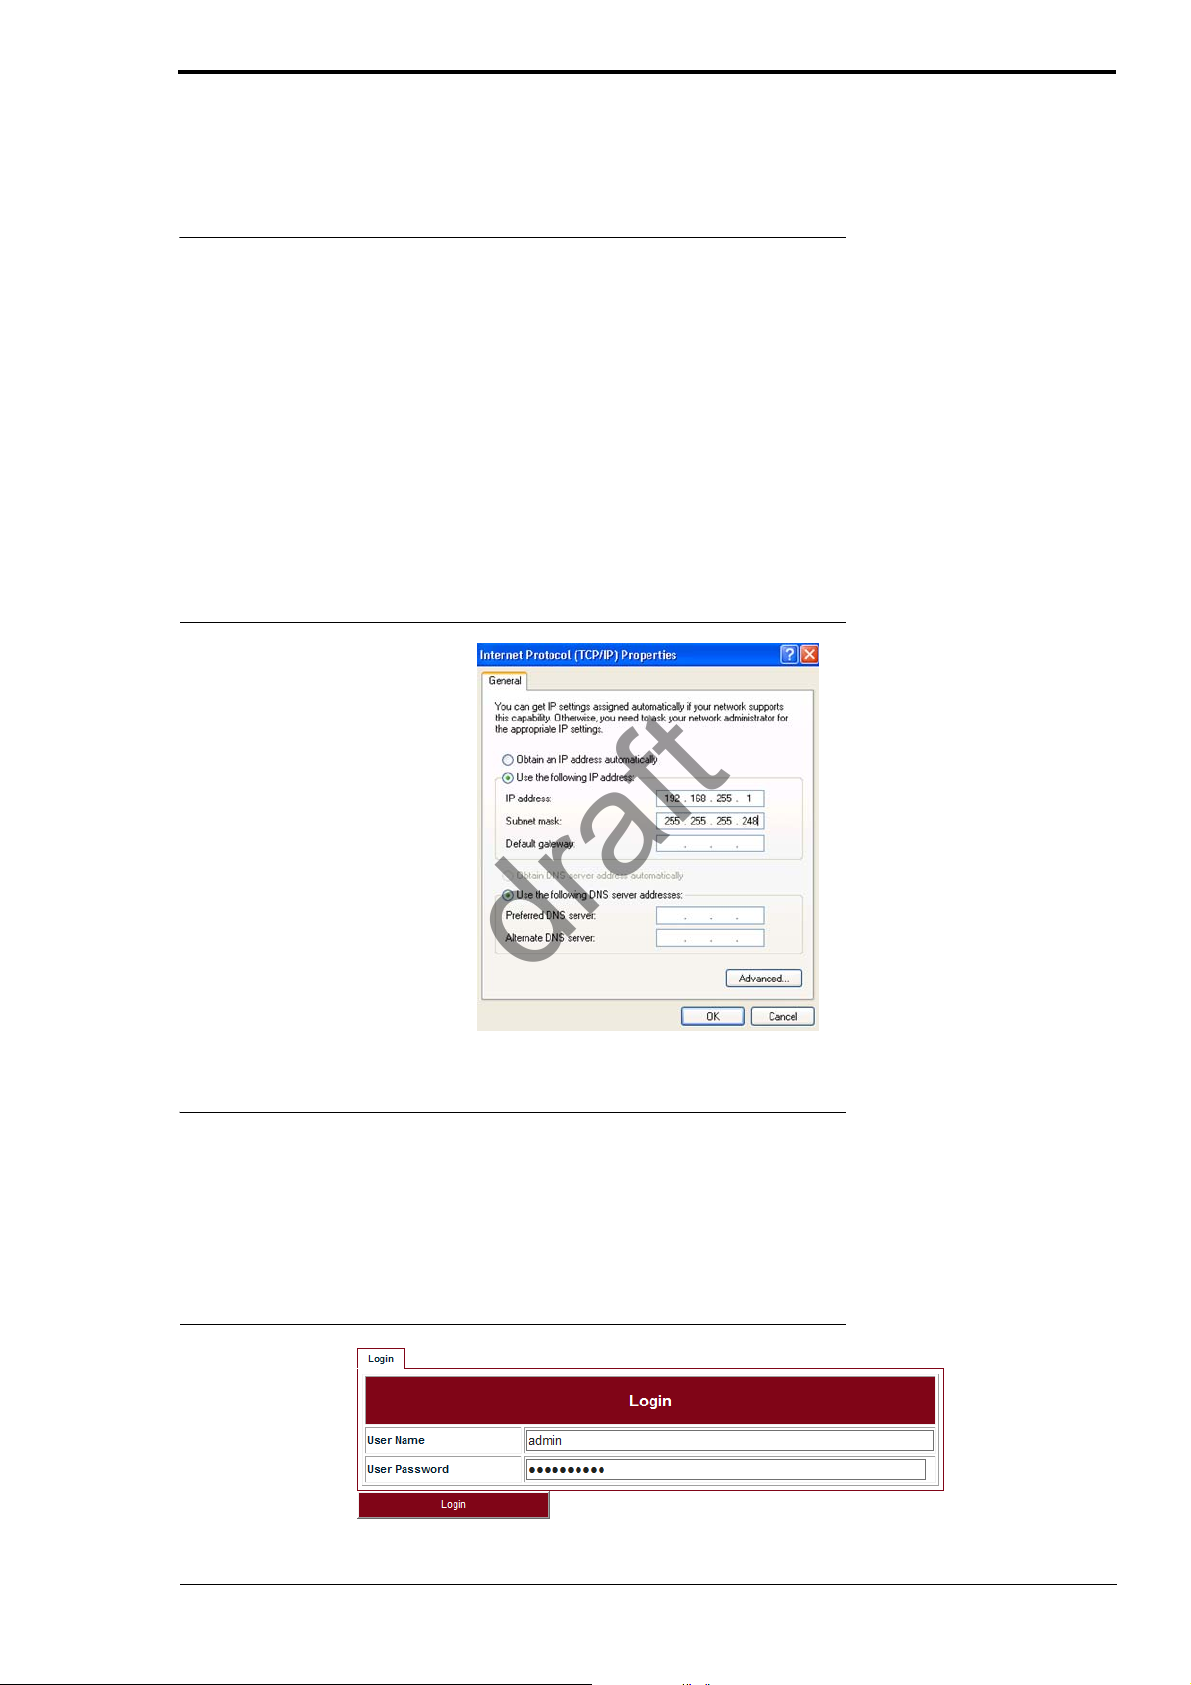
Before logging into the Lite Web interface, the network configuration of the PC must be set as
Figure 1. We suggest setting the PC IP address to 192.168.255.1 and subnet mask
255.255.255.248. This IP address is used to access Lite when the management PC is directly connected to Lite system. By default, the private IP address of Lite is 192.168.255.3 and the subnet
mask 255.255.255.248.
FIGURE 1. PC network configuration
Commissioning
2.2 Commission steps
2.2.1 Logging in
Steps
1. Use the Web Browser to access the private IP address of Lite.
FIGURE 2. Step 1
11
Commissioning
draft
2. Enter User Name and User Password, click Login. The home page of Link Viewer
appears.
TABLE 3. Login parameters
User Name User Password
energetic wireless
readwrite Rwrite
readonly readonly
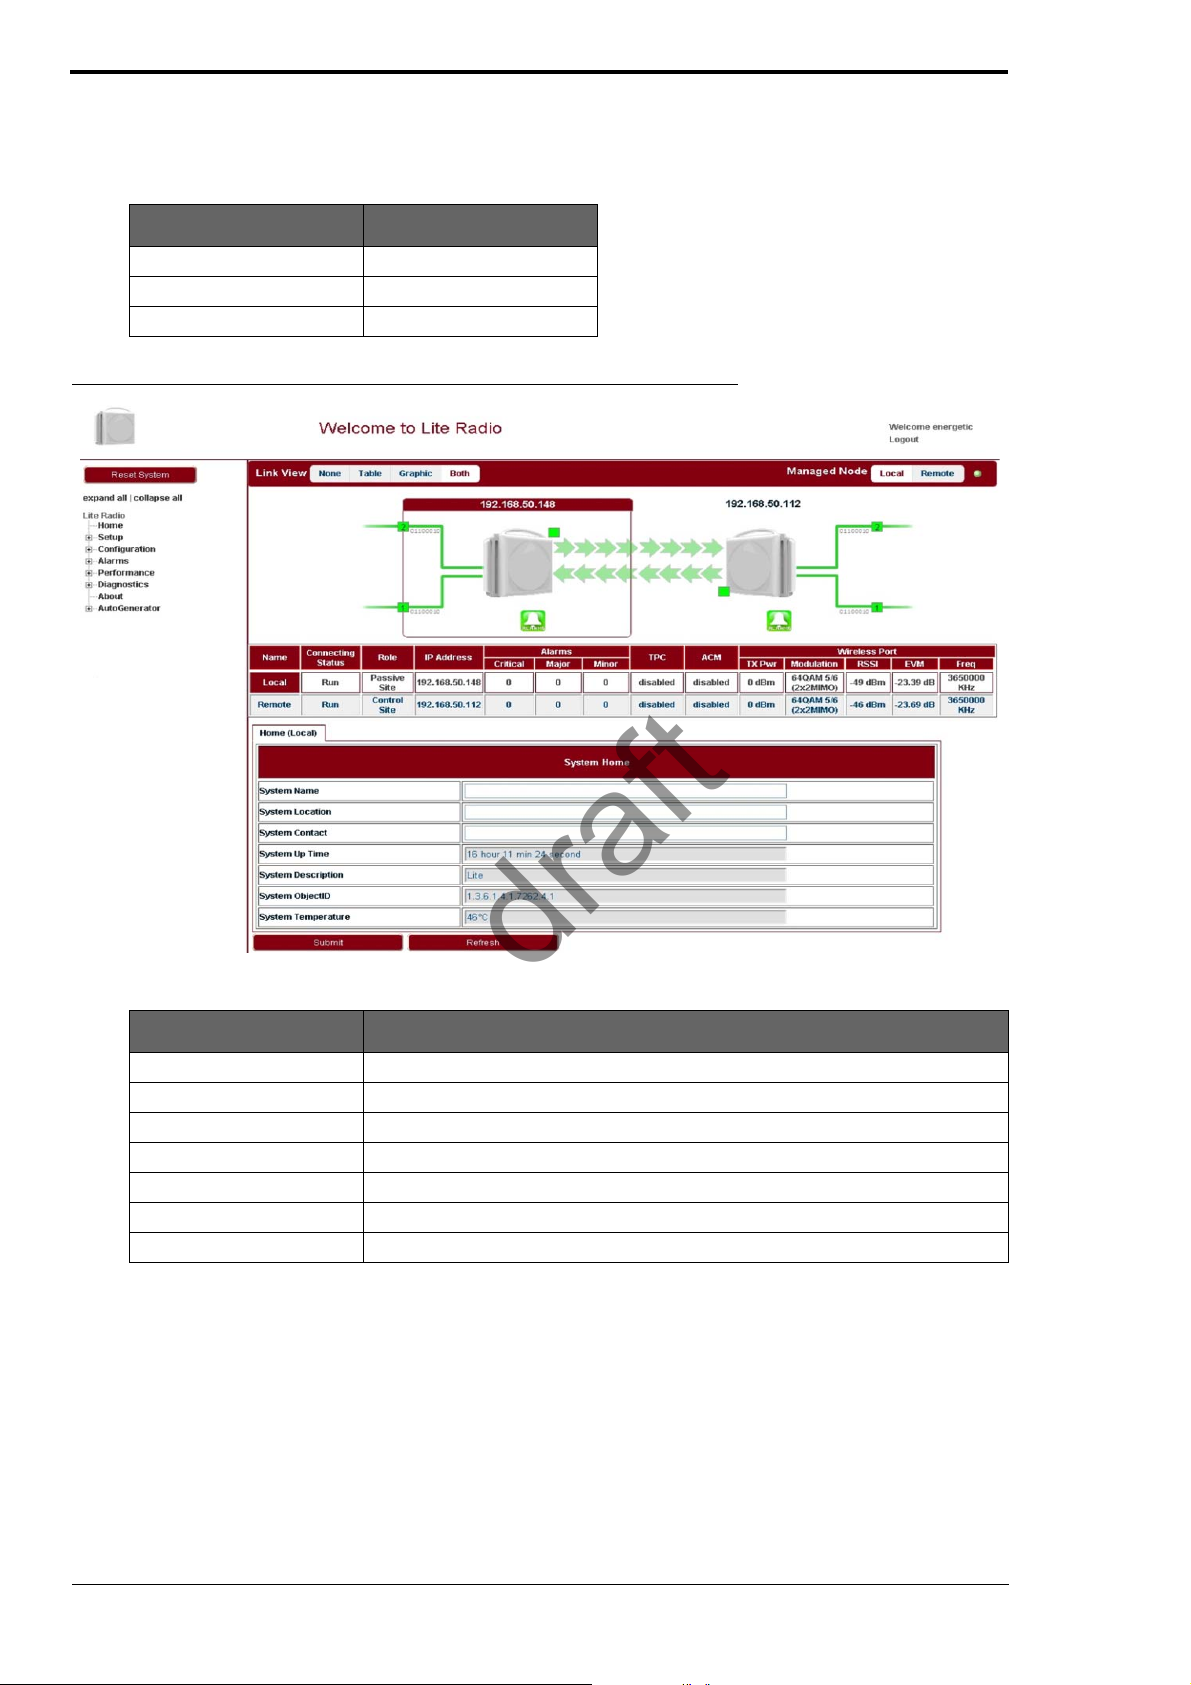
FIGURE 3. Link Viewer
TABLE 4. System home
Parameter Description
System Name Configure the system name to identify the NE.
System Location Configure the system location for easy management.
System Contact Configure the contact information for easy management.
System Up Time Show the system start up time. It is read only.
System Description Configure the system description for easy management.
System ObjectID It is used to SNMP. The value is 1.3.6.1.4.1.7262.4.1.
System Temperature Show the current temperature. It is read only.
2.2.2 Setting the management IP
Go to Configuration > Management > IP tab (see Figure 4). The public management IP address
and local management IP address are to be set.
INFO
Don’t use IP address from 192.168.254.96 ~ 192.168.254.99. These 4 IP addresses are
reserved for internal use.
12
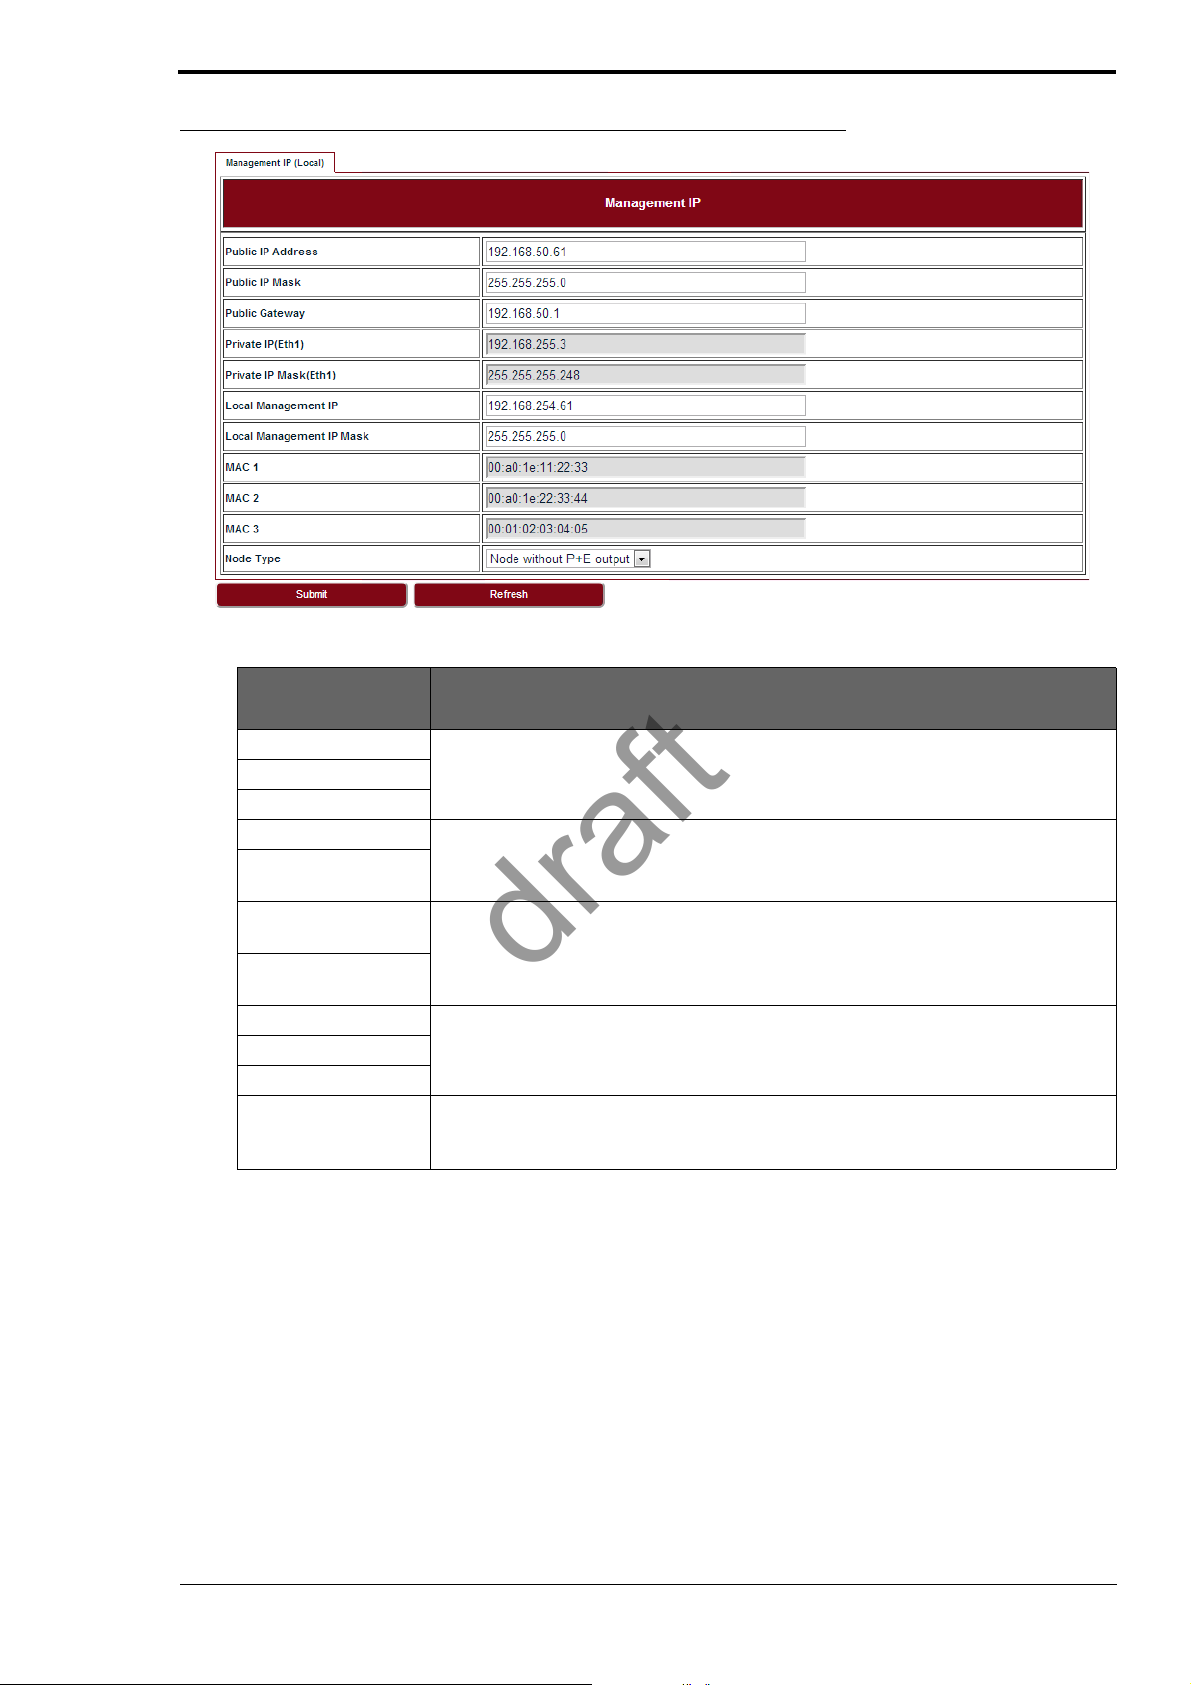
FIGURE 4. Management IP
draft
Commissioning
TABLE 5. Management IP
Parameter Description
Public IP Address Public IP is used to access Lite over Management VLAN (Tagged, typically using a
Public IP Mask
Public Gateway
Private IP (Eth 1) Private IP is used for commissioning.
Private IP Mask (Eth
1)
Local ManagementIPLocal Management IP is used to access Li te locally over o ne of the Ethernet ports
Local Management
IP Mask
MAC 1 Display the MAC addresses of Eth1, Eth2 and wireless port.
MAC 2
MAC 3
Node Type This field is used in chain site configuration. When it is changed to Node with P+E
2.2.3 Setting the management VLAN
switch or other intranet connectivity). It is for in-band management.
untagged, for example, from a PC running WebLCT. It is also for out-of-band management.
output, the private IP would be automatically changed to 192.168.255.4, to avoid IP
address conflict in the chain site.
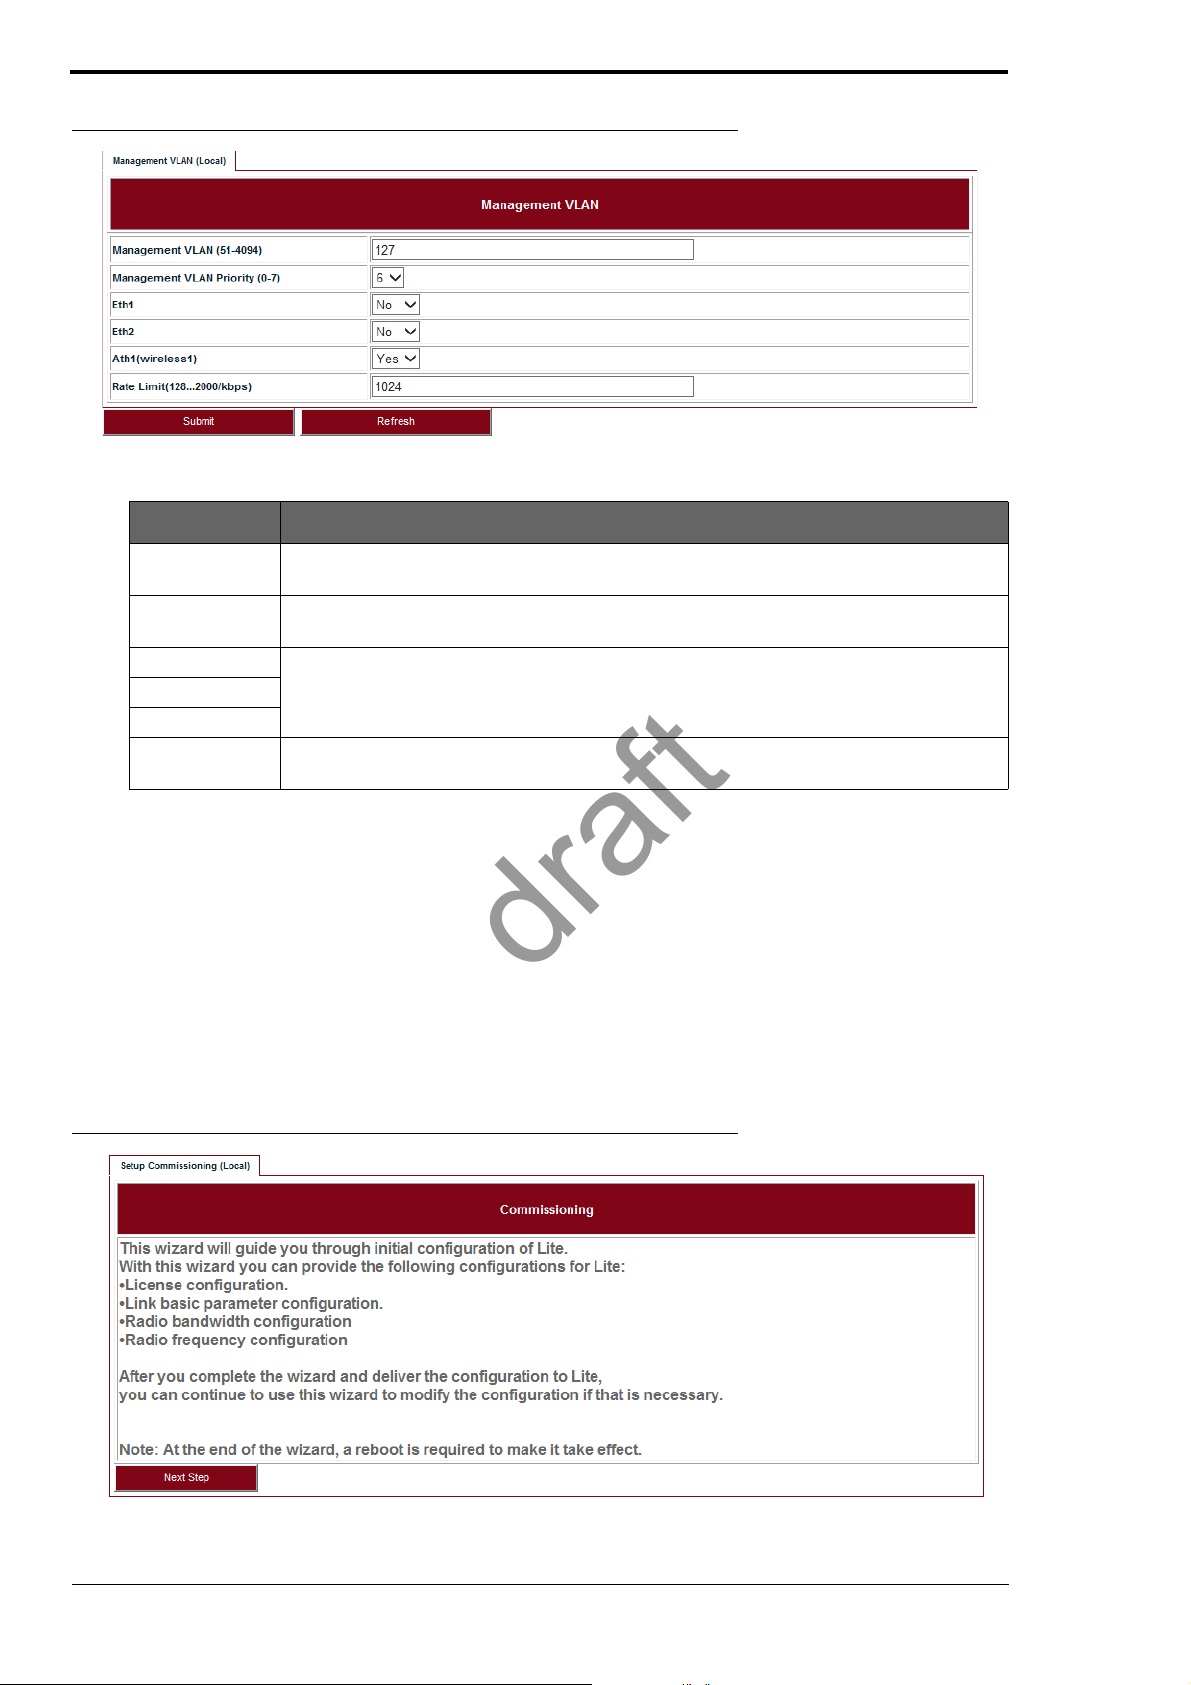
Go to Configuration > Management > Management VLAN tab (see Figure 5).
13
Commissioning
draft
FIGURE 5. Management VLAN
TABLE 6. Management VLAN
Parameter Description
Management
VLAN
Management
VLAN Priority
Eth1 If the port is to be used as a part of the management VLAN, set to Yes. If no, it means
Eth2
Ath1(wireless1)
Rate Limit Configure the engress and eggress rate limit for management VLAN. Value from
Configure the management VLAN ID for remote login. VLAN range from 51 ~ 4094.
Default: 127.
Configure the management VLAN priority. Value from 0 ~ 7. Default: 6.
this port is removed from the management VLAN.
128Kbps ~ 2Mbps. Default: 1024Kbps.
2.2.4 Setting the radio parameters
This operation should be done from both the passive and con trol ends of the lin k and chann el selections should match to ensure the link comes up when properly aligned. Before setting the radio
parameters, ensure that the correct radio standard is licensed for the geographic location where the
radio is to be installed. For example: FCC for USA or Canada, ETSI for Europe and Asia, etc.
It is also important to verify that the correct maximum speed required is licensed, as per the link
design specified for the radio in this location.
Steps
1. Go to Setup > Commissioning tab (see Figure 6) and click Next Step.
FIGURE 6. Step 1
2. Input the license key and click Modify. Click Refresh to make sure of the configuration.
14

FIGURE 7. Step 2
draft
Commissioning
INFO
If changing from one radio standard to another, existing license must be cleared.
Please contact DragonWave Customer Support if a new license needs to be entered to change the
radio standard or geographic location setting.
3. Set up wireless parameters according to Ta ble 7.
15
 Loading...