

DNP ID400W Quick Setup Manual
I
Select the language to be displayed:
1. Press the MENU button.
2. Press the DOWN arrow on the control button to
display [SYSTEM] on the LCD display.
3. Press the RIGHT arrow.
[SYSTEM SETTINGS] appears.
4. Press the RIGHT arrow.
The currently selected language appears.
5. Press UP or DOWN to select the language you want
to use, and press the EXEC button.
The LCD display appears in the selected language.
I
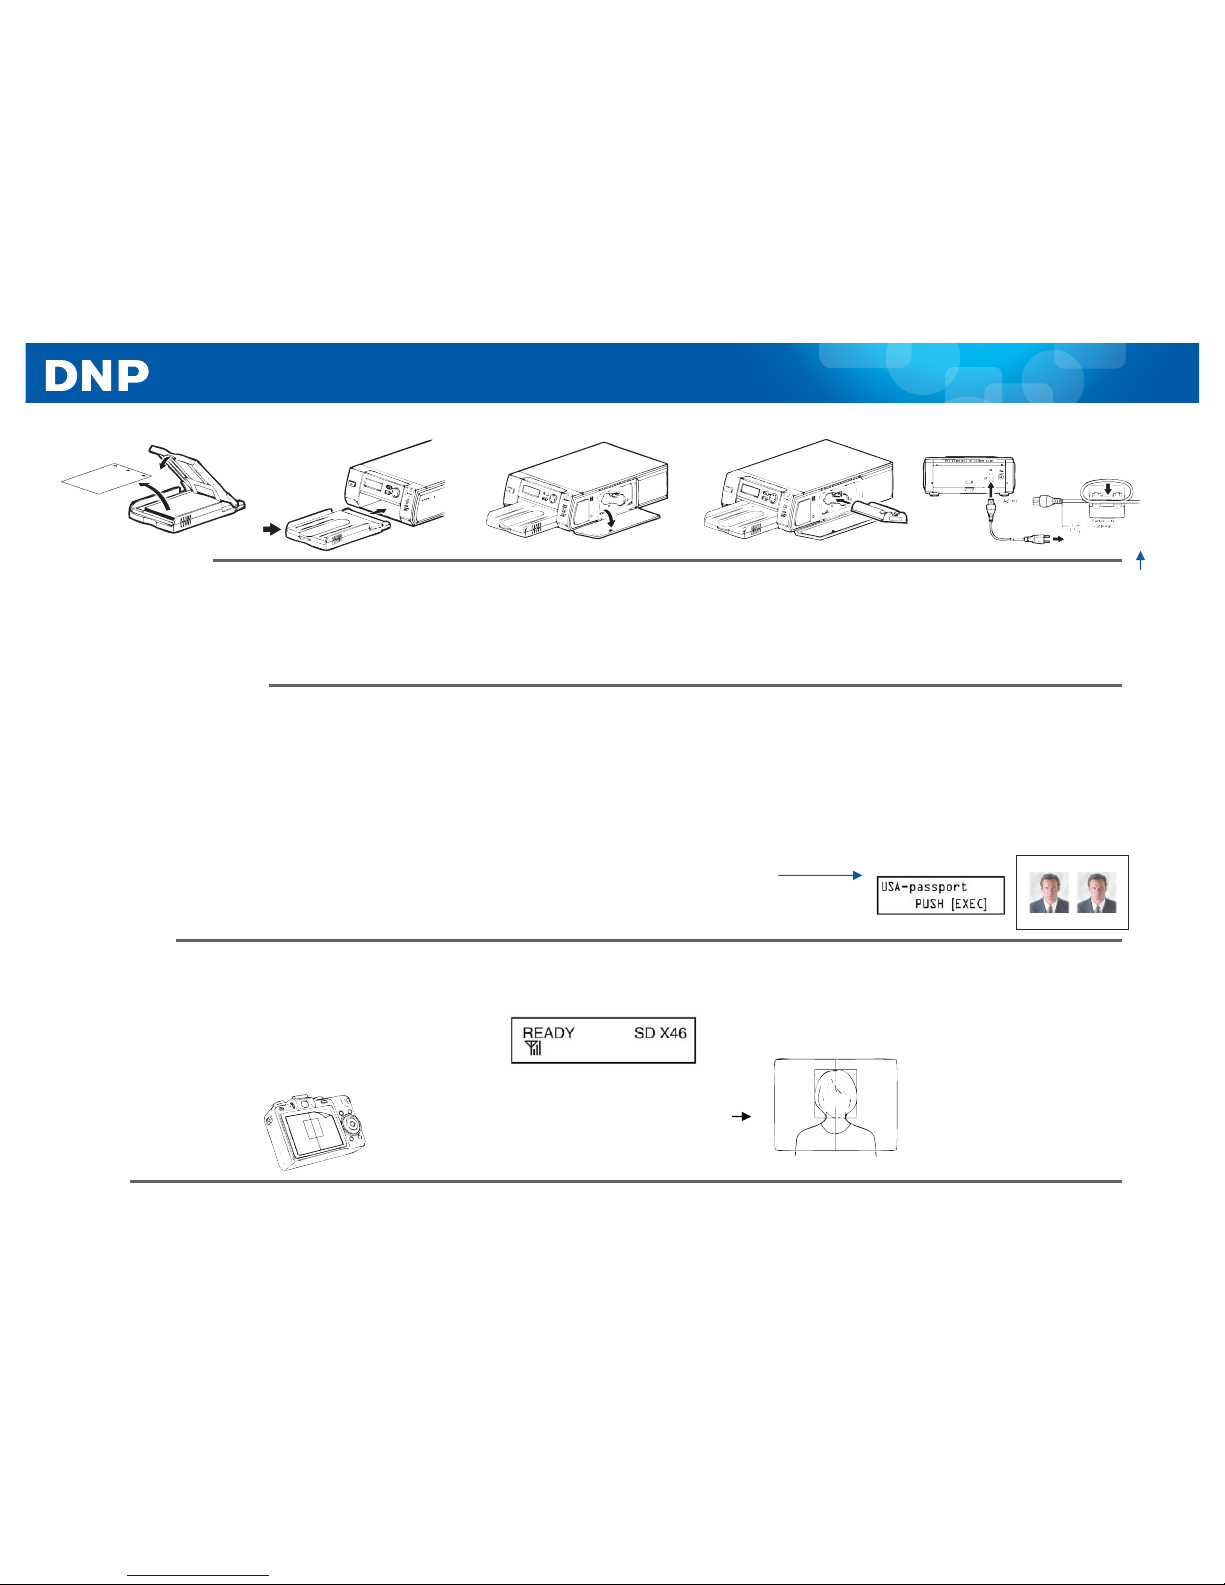
Load the paper with the arrow pointing toward the
printer (DNP ID Photo watermark side down).
Remove the protective sheet and set it aside for
future use as a cleaning sheet. Insert the paper tray
until it clicks into place.
III
Attach the supplied ferrite core to
the end of the cord as
shown. Connect
the power cord to the printer and plug
the other end to an outlet. Press the
power button on the front panel.
Print Media
II
Press the PUSH OPEN area at the top of the cartridge compartment to
open it. Insert the print cartridge until it clicks into place.
ID400 Passport and ID Photo Printer Quick Setup Guide www.dnpphoto.com
Printer Settings
II
Select the layout you want to print from the ID photo
layout templates stored on the unit.
1. Press the MENU button.
2. Press the DOWN arrow on the control button to
display [ID PHOTO LAYOUT] on the LCD display.
3. Press the RIGHT arrow.
The layout names appear.
4. Press UP and DOWN to select the layout you want to print,
and press the EXEC button.
5. The selected layout name appears
under [READY].
If the antenna icon appears instead, press UP or DOWN to
display the layout name.
Camera
I
Use a camera with the following features:
• SD card support
• DPOF print mark support
II
Three sizes of guideline stickers are supplied:
69 mm, (2.7"), 71 mm (2.8"), and 76 mm (3.0"). Use
the sticker size that matches the size of the LCD on
your camera. (The UP arrow on the sheet indicates the
top of the sticker).
DNP Customer Support: USA 888-749-3587, 800-467-4935 Canada & S America 512-753-7285 Mon to Fri 8am-5pm CST dnpsupport@dnpphoto.com tech@dnpphoto.com
III
In the case of the ID400W model,
the unit is shipped with the wireless
LAN SD card for the printer already
inserted in the SD card slot. For the
ID400BT model, refer to the supplied
instruction sheet.
III The cards for the digital camera and printer are labeled “C”
and “P” respectively. Insert the “C” card into the digital camera.
Once connected, the printer will display the following:
IV When shooting, use the following guidelines:
• Use a solid background color (ex: white screen).
• Keep the face within the frame of the guideline.
• The top of the head should align with the top of the
frame and the bottom of the chin should align with the
bottom of the frame.
IV To print, select the image via the
camera’s DPOF menu feat
ure (see
user manual).
Some select cameras, like the Canon
G12, have a direct print button.
The selected image will be transmitted
to the ID400 and printed.
2012 Printing
ID400W Passport and ID Photo Printer Quick Setup Guide
 Loading...