

Page 1
This product can be setup usingThis product can be setup using
This product can be setup using
This product can be setup usingThis product can be setup using
anan
y curry curr
enen
t Wt W
eb breb br
owserowser
, i.e, i.e
an
y curr
en
t W
eb br
anan
y curry curr
enen
t Wt W
Internet Explorer 6 or NetscapeInternet Explorer 6 or Netscape
Internet Explorer 6 or Netscape
Internet Explorer 6 or NetscapeInternet Explorer 6 or Netscape
Navigator 6.2.3 or aboveNavigator 6.2.3 or above
Navigator 6.2.3 or above
Navigator 6.2.3 or aboveNavigator 6.2.3 or above
eb breb br
owser
owserowser
, i.e
, i.e, i.e
.,.,
.,
.,.,
DSL-504T
ADSL Router
Before You Begin:
Please read and make sure you understand all the prerequisites for proper installation of
your new ADSL Router. Have all the necessary information and equipment on hand
before beginning the installation.
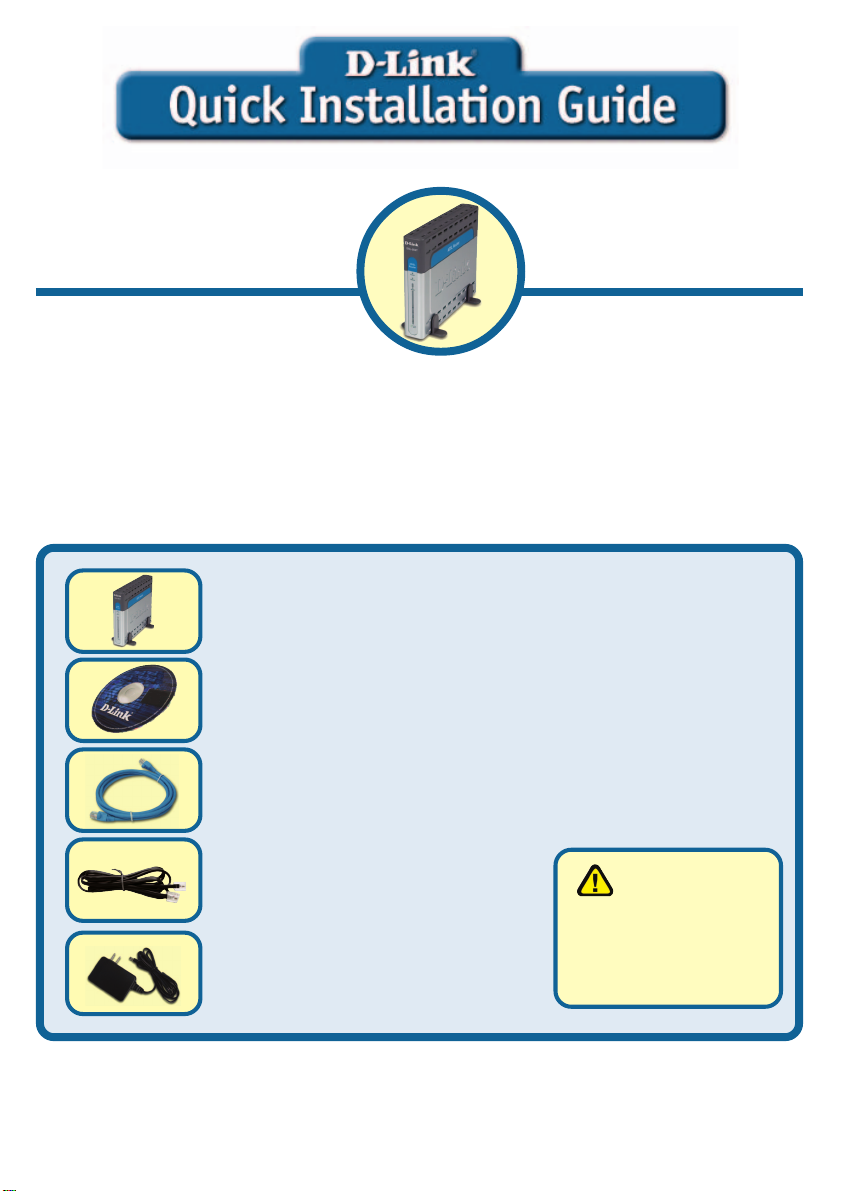
Check Y our Package Contents
DSL-504T ADSL Router
CD-ROM with Manual
Ethernet Cable
Telephone Cord
12V AC, 1.2A Power Adapter
If any of the above items are missing, please contact your reseller.
©2004 D-Link Systems, Inc. All rights reserved. Trademarks or registered trademarks are the property of their respective holders.
Software and specifications subject to change without notice. DSL-504T.12062004
Using a power
supply with a
different voltage rating
will damage this
product and void its
warranty.
Page 2
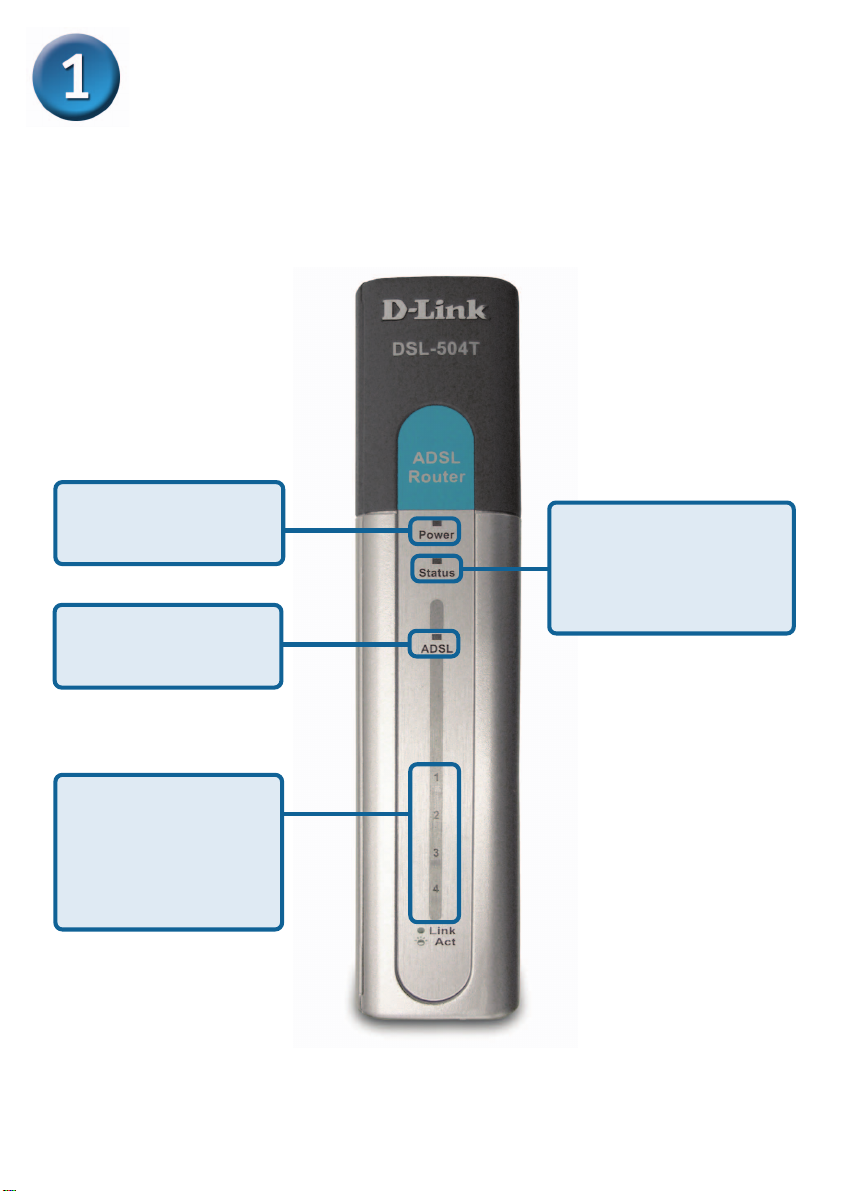
Hardware Overview
Front Panel
Power LED: Solid light
indicates a connection to
a good power connector.
ADSL LED: Lights solid
when sychronized with
the ADSL connection.
Status LED: A blinking
light indicates normal
operation. If this light is not
lit and the power light is on,
this indicates failure.
LAN Ports: A solid light
indicates a connection
on the associated port. A
blinking light indicates
activity on the associated
port.
2
Page 3
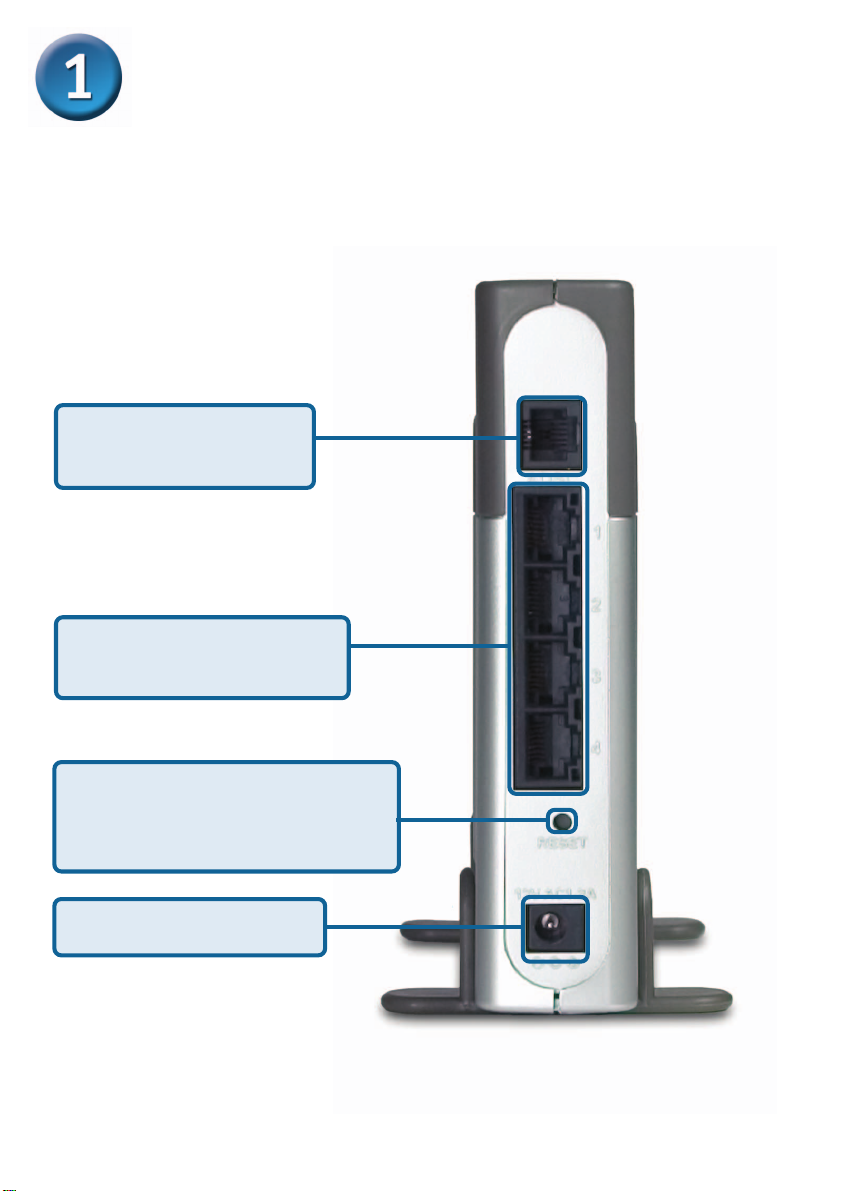
Hardware Overview (continued)
Rear Panel
ADSL Port: Connects to
your telephone jack using a
standard telephone cord.
LAN Ports: Your computers
connect here using standard
Ethernet cables.
Reset Button: Resets the DSL-504T
to the factory default settings. Hold for
seven seconds for the unit to factory
reset.
Power Receptor: The AC
Power Adapter connects here.
3
Page 4
Step a
Step b
Step a
Step c
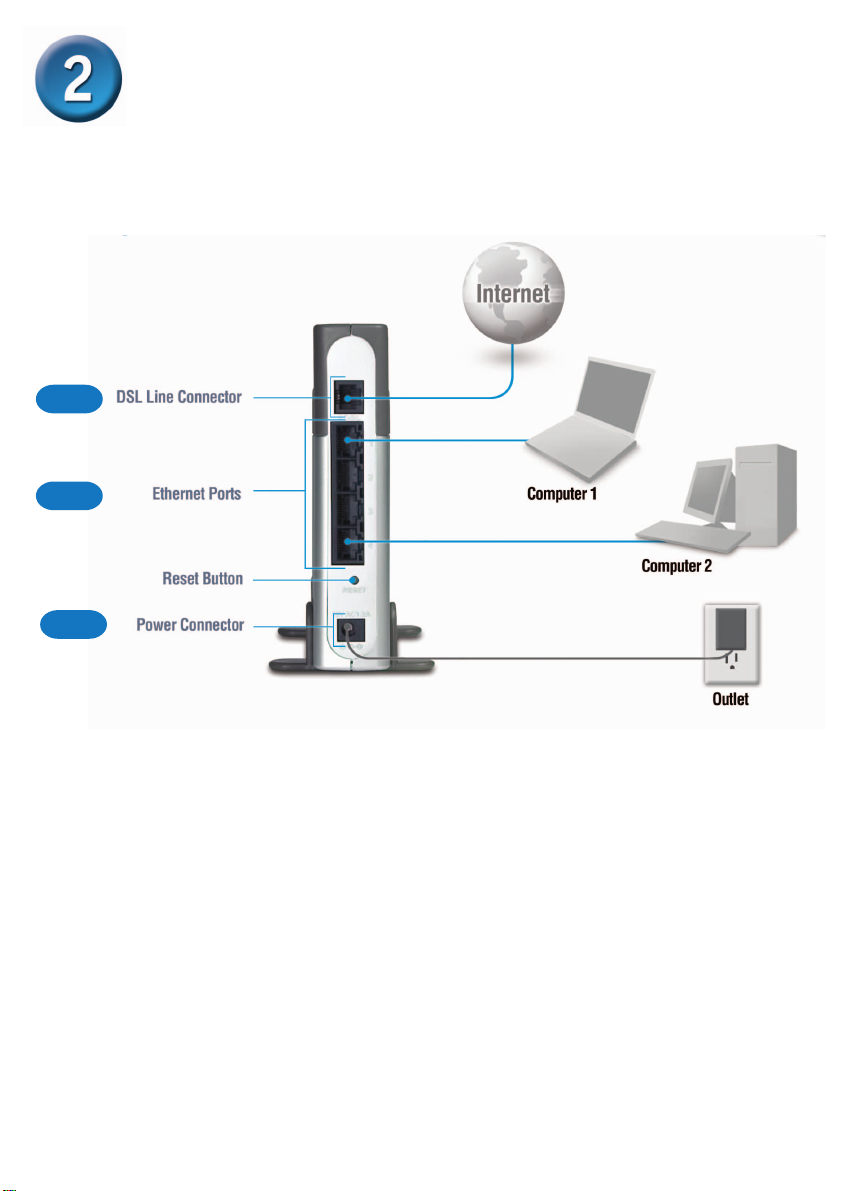
Hardware Installation
Please see the following page for an explanation of steps a-c, shown above.
4
Page 5

Hardware Installation (continued)
Step a
Connect the telephone cord from your phone
jack to the ADSL port on the DSL-504T.
Step b
Connect an Ethernet cable from your computer
to a LAN port on the DSL-504T .
Step c
Connect the power adapter to the power
connector on the DSL-504T and the other end
to a known good power source.
5
Page 6

Using the Setup Wizard
Step a
Launch your Web browser
(a shortcut is typically found
on your desktop).
Step b
Type http://192.168.1.1 into the
URL address box and press the
Enter or Return key.
Step c
Admin is the default User Name
and Password. T ype admin into
the User name and Password
fields.
Click OK
Step d
Click Run Wizard
6
Page 7

Using the Setup Wizard (continued)
Step e
Click Next
Step f
This screen allows you to enter
a new password for the admin
account. This password is used
to log into the web-based
management interface.
Click Next
Step g
Select your Time Zone
Click Next
7
Page 8

Using the Setup Wizard (continued)
You will need to select the Internet Connection Type. If you are unsure which type of
Internet Connection you have, please contact your Internet Service Provider. There are four
connection modes and settings vary depending on the connection type.
2c
1. Dynamic IP Address - see Dynamic IP Address on page 8.
Step h1
2. Static IP Address - see Static IP Address on page 9.
3. PPPoE/PPPoA - see PPPoE/PPPoA on page 9.
4. Bridge Mode - see Bridge Mode on page 10.
A checklist of necessary settings is provided in the Appendix. Contact your Internet Service
Provider to obtain the necessary details.
Step h2
Step h3
Step h4
Step h
Select your Connection T ype
and proceed to step h1, h2, h3,
or h4 depending upon your
connection type.
Click Next
Step h1
Dynamic IP Address
The DSL-504T defaults to the
most commonly used values in the
United States.
Note: If the MAC address does not
appear, please refer to the User
Manual on the CD-ROM.
Click Clone MAC Address
Click Next
8
Page 9

Using the Setup Wizard (continued)
Step h2
Static IP Address
The DSL-504T defaults to the most
commonly used values in the United
States. The IP address information on
the right is only shown as an example
of the format that you will use.
Click Next
Step h3
PPPoE/PPPoA
The DSL-504T defaults to the most
commonly used values in the United
States. Only modify these settings if
you are sure they need to be changed.
The User Name and Password will
be unique to your Internet account.
If you forget your account information,
please contact your Internet Service
Provider.
Click Next
9
Page 10

Using the Setup Wizard (continued)
Step h4
Bridge Mode
Click Next
Step i
Click Restart
Step j
Configuration is complete! T ype in
a URL such as www.dlink.com
to test your connection.
10
Page 11

Appendix - Settings Checklist
Y our ISP has provided you one of the four methods listed on the right for connecting to the
Internet. You may need to contact them to find out which method you are using and fill in
the appropriate details.
Step H1 - Dynamic IP Address
VPI:_____
VCI:_____
Connection Type:
1483 Bridged IP LLC
1483 Bridged IP VC-Mux
Step H3 - PPPoE/PPPoA
User Name: _____________________
Password: _____________________
VPI:_____
VCI:_____
Connection Type:
PPPoE LLC
PPPoA LLC
PPPoA VC-Mux
Step H2 - Static IP Address
VPI:_____
VCI:_____
IP Address: ____.____.____.____
Subnet Mask: ____.____.____.____
ISP Gateway Address: ____.____.____.____
Primary DNS: ____.____.____.____
Secondary DNS: ____.____.____.____
Connection Type:
1483 Bridged IP LLC
1483 Bridged IP VC-Mux
1483 Routed IP LLC
1483 Routed IP VC-Mux
IPoA
Step H4 - Bridged Mode
VPI:_____
VCI:_____
Connection Type:
1483 Bridged IP LLC
1483 Bridged IP VC-Mux
11
Page 12

TT
echniechni
T
echni
TT
echniechni
Y ou can find software updates and user documentation on the D-Link website.
D-Link provides free technical support for customers within the United St ates and
within Canada for the duration of the warranty period on this product.
U.S. and Canadian customers can contact D-Link technical support through our
website, or by phone.
Tech Support for customers within the United States:
D-Link Technical Support over the Telephone:
(877) 453-5465
24 hours a day , seven days a week
D-Link Technical Support over the Internet:
http://support.dlink.com
email:support@dlink.com
Tech Support for customers within Canada:
D-Link Technical Support over the Telephone:
(800) 361-5265
Monday to Friday 7:30am to 12:00am EST
D-Link Technical Support over the Internet:
http://support.dlink.ca
email:support@dlink.ca
cal Supportcal Support
cal Support
cal Supportcal Support
 Loading...