

Page 1

®
D-Link
Quick Install Guide
DSL-100D/CZ
PCI ADSL Modem
1
Page 2
This guide is for installation only. For more detailed information regarding
the product and its features, please refer to the user manual located on the
included CD-Rom.
Before you begin:
1. If you have had a service technician install your DSL Line, please skip
to Step 1 “Review Package Contents.” If you are installing DSL
yourself, please follow all instructions.
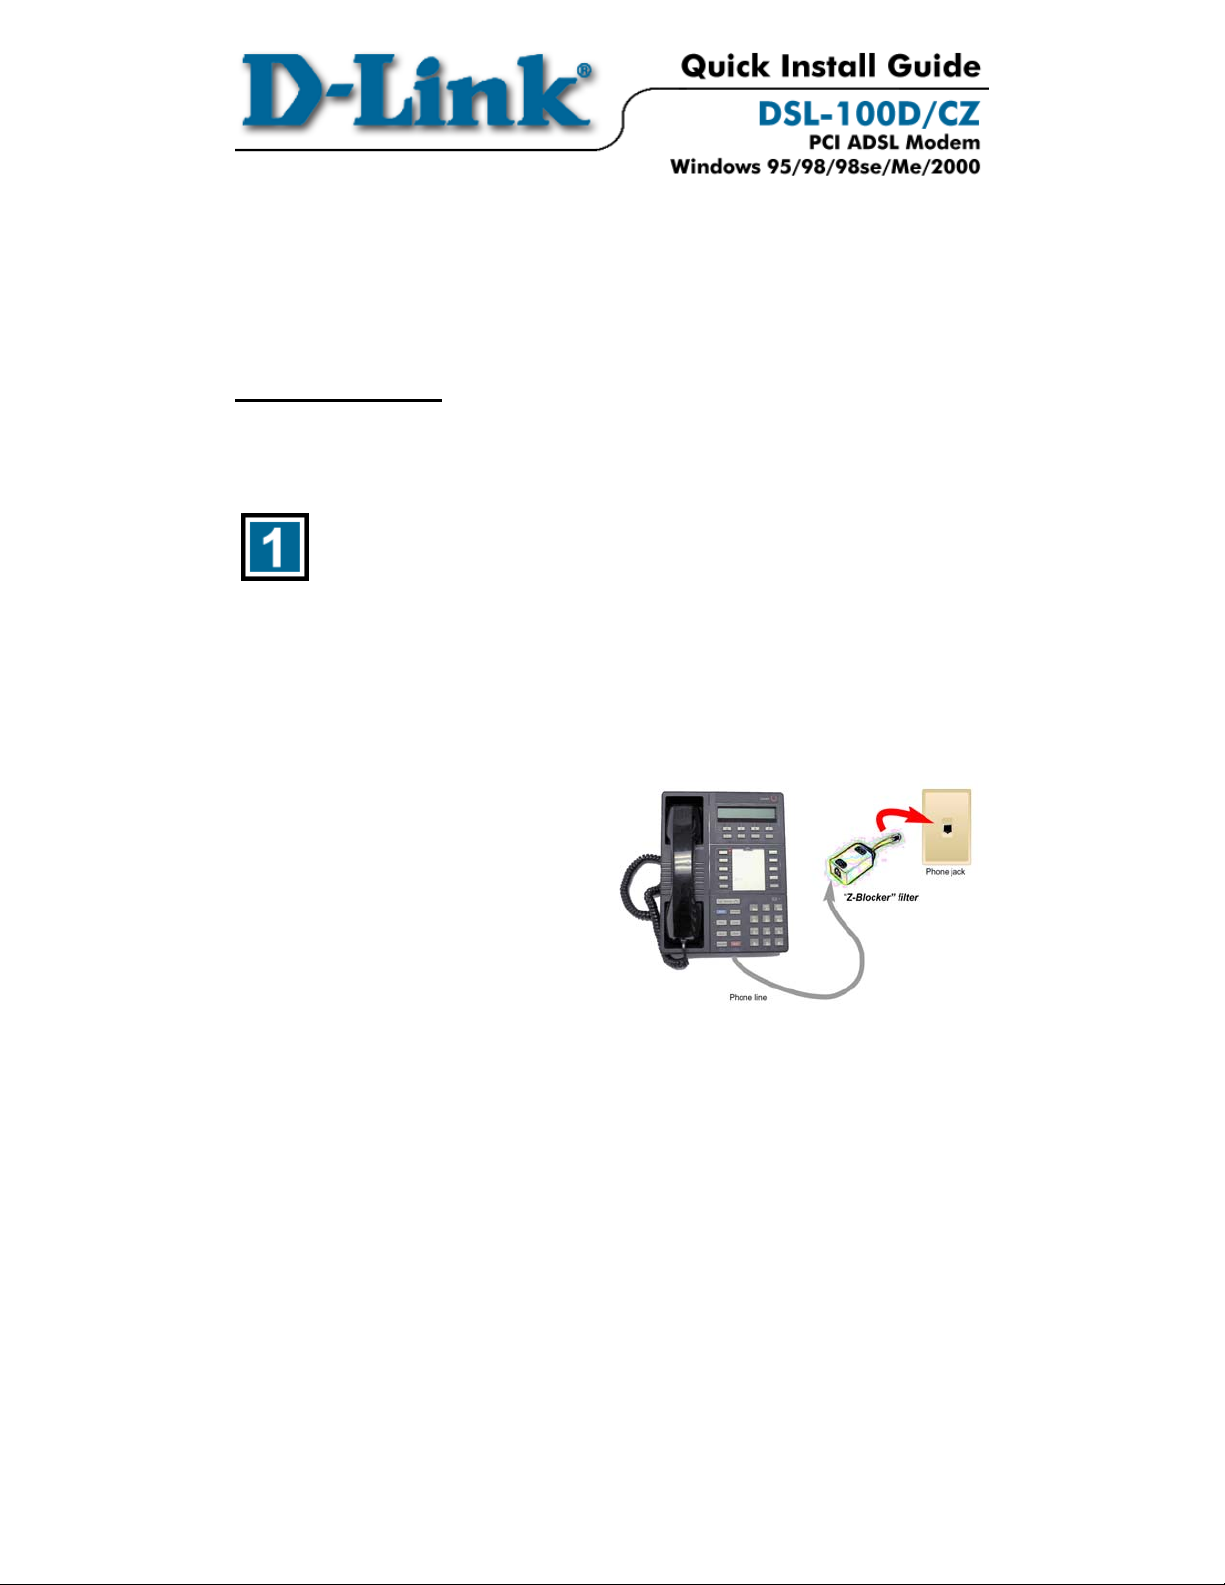
Install a “Z-Blocker” phone filter at EACH telephone wall
jack in your home.
Q: Why do I need these filters?
A: DSL service shares the line with your regular telephone service. In-line
filters prevent these services from interfering with each other, improving both
the telephone audio and DSL data rate.
Disconnect the existing cord from the wall jack.
Plug the LINE end of the
filter into the wall jack.
Plug the device into the
PHONE jack on the filter.
Use only filter for all devices
sharing the jack.
2
Page 3
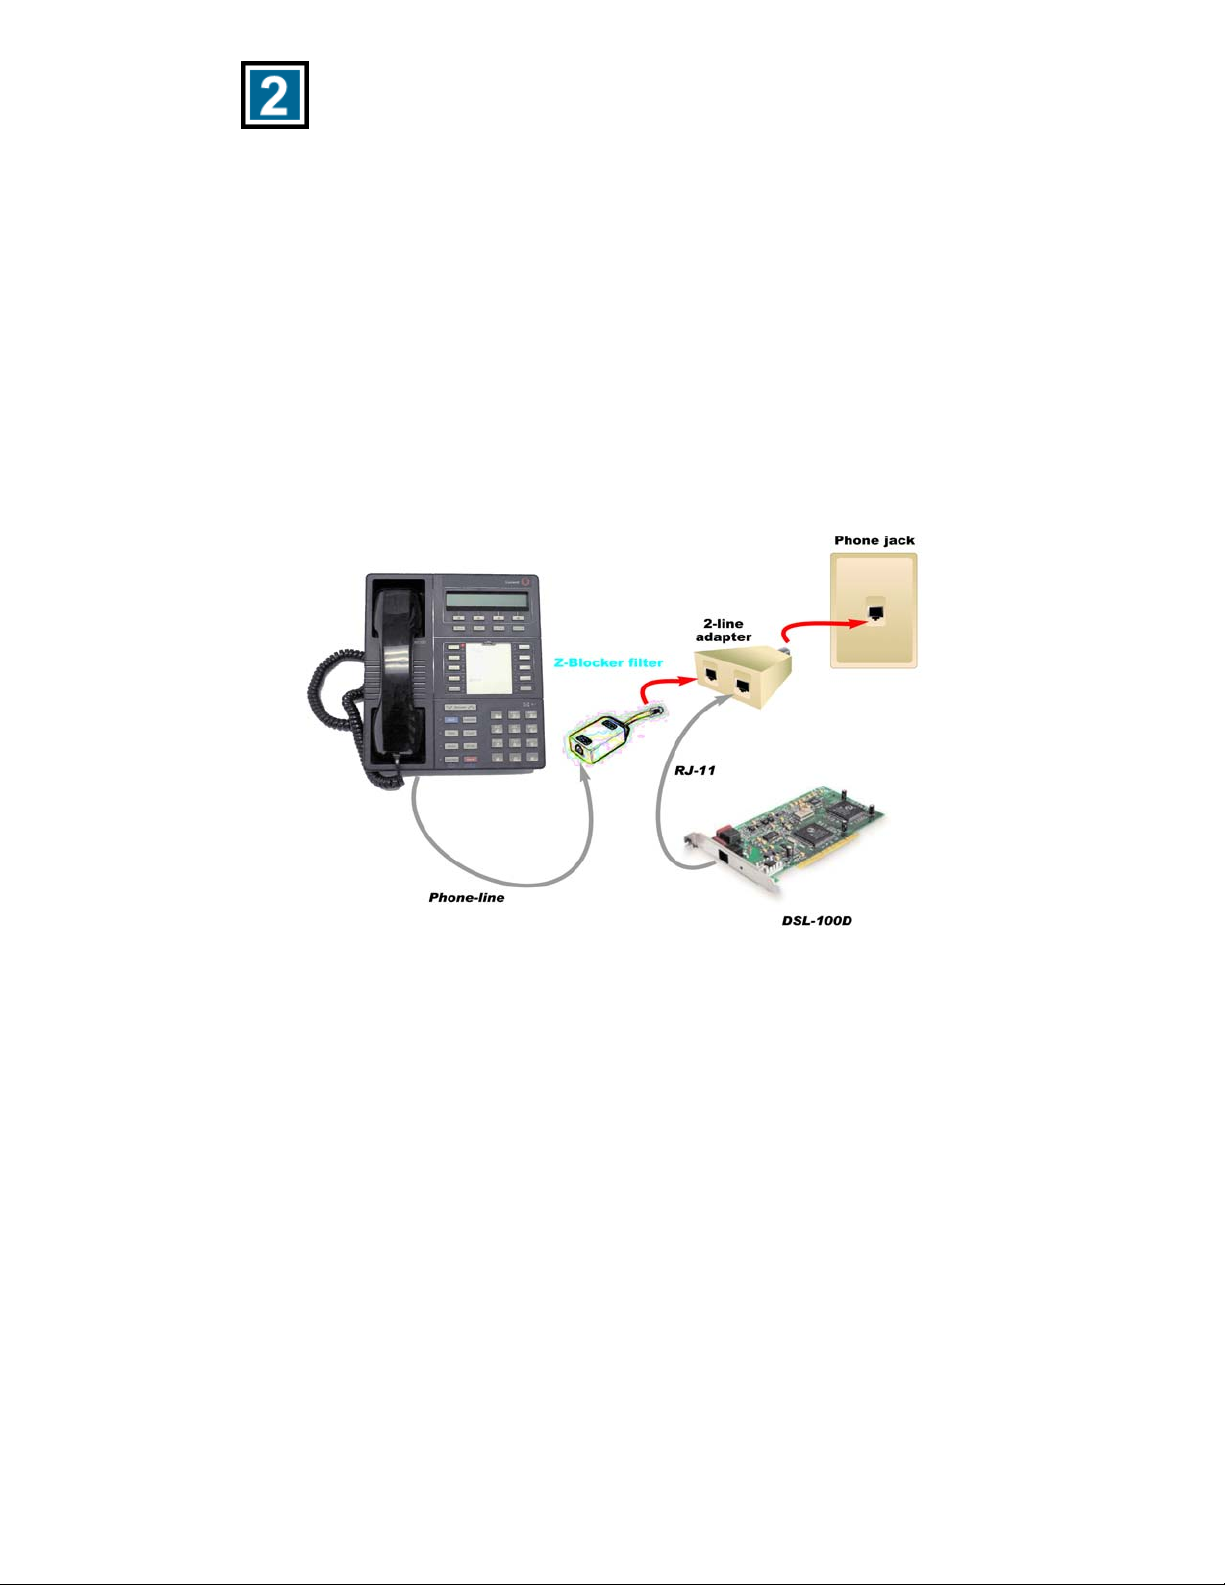
Sharing your phone jack with the modem and another
device.
If you would like to share your phone jack with the modem and your phone,
then use a standard 2-line adapter.
Install the 2-line adapter into the wall jack.
Plug the RJ-11 cable into one adapter jack.
Plug the Line end of a “Z-Blocker” filter into the other adapter jack.
Plug your telephone devices into the PHONE jack on the “Z-Blocker”
filter.
3
Page 4

Installing the “Z-Blocker” filter on a wall-mounted
telephone, using the wall-mount filter.
Remove the phone. On some phone you must pull out a locking lever
before removing the phone. Then push up on the phone and pull it out
from the wall.
Slide the filter locking tabs (located at the top and bottom on the front
of the filter) to the UNLOCKED position.
Place the filter over the existing wall outlet, aligning the plug and
mounting slots with the socket and mounting tabs on the existing
outlet, then push into place.
Move the locking tabs to the LOCKED position as indicated in the
drawing.
Mount the telephone. If your phone has a locking lever, be sure it is
unlocked before you mount it. Position the phone’s plug and mounting
slots over the filter jack and metal mounting pegs. Press the phone in
and pull down until secure.
If desired, install your ADSL or Home Phoneline Network (HPN)
device cord into the jack on the left side of the adapter. An answering
machine may also be attached to the jack on the right side of the filter.
4
Page 5

Filter Installation Tips
DO NOT install a filter on your DSL modem or on any broadband
devices.
Check the orientation of each filter.
1. PHONE jack towards the telephone device.
2. LINE connection towards the wall jack.
Try to limit the number of filters in your home to the fewest practical.
Do this by:
1. Using one filter to isolate several devices.
2. Not installing filters on unused phone jacks.
Do not use more than one filter for each telephone device or group of
devices.
Plug the filter directly into the wall jack using only the attached short
cord. If this cannot be done, then use a twisted-pair cable like the data
cable for the modem (i.e., NOT a flat phone cord) to connect the filter
to the wall jack.
5
Page 6
Review Package Contents
Make sure that the package contains the following items. If any items are
missing, contact the reseller.
DSL-100D/CZ ADSL Modem
Quick Installation Guide
Installation CD-Rom with User Manual
DSL-100D/CZ Hardware Installation
POWER OFF your computer.
Disconnect its power, and
remove its case.
(Follow your PC manufacturer’s
instructions to prevent damage or
injury.)
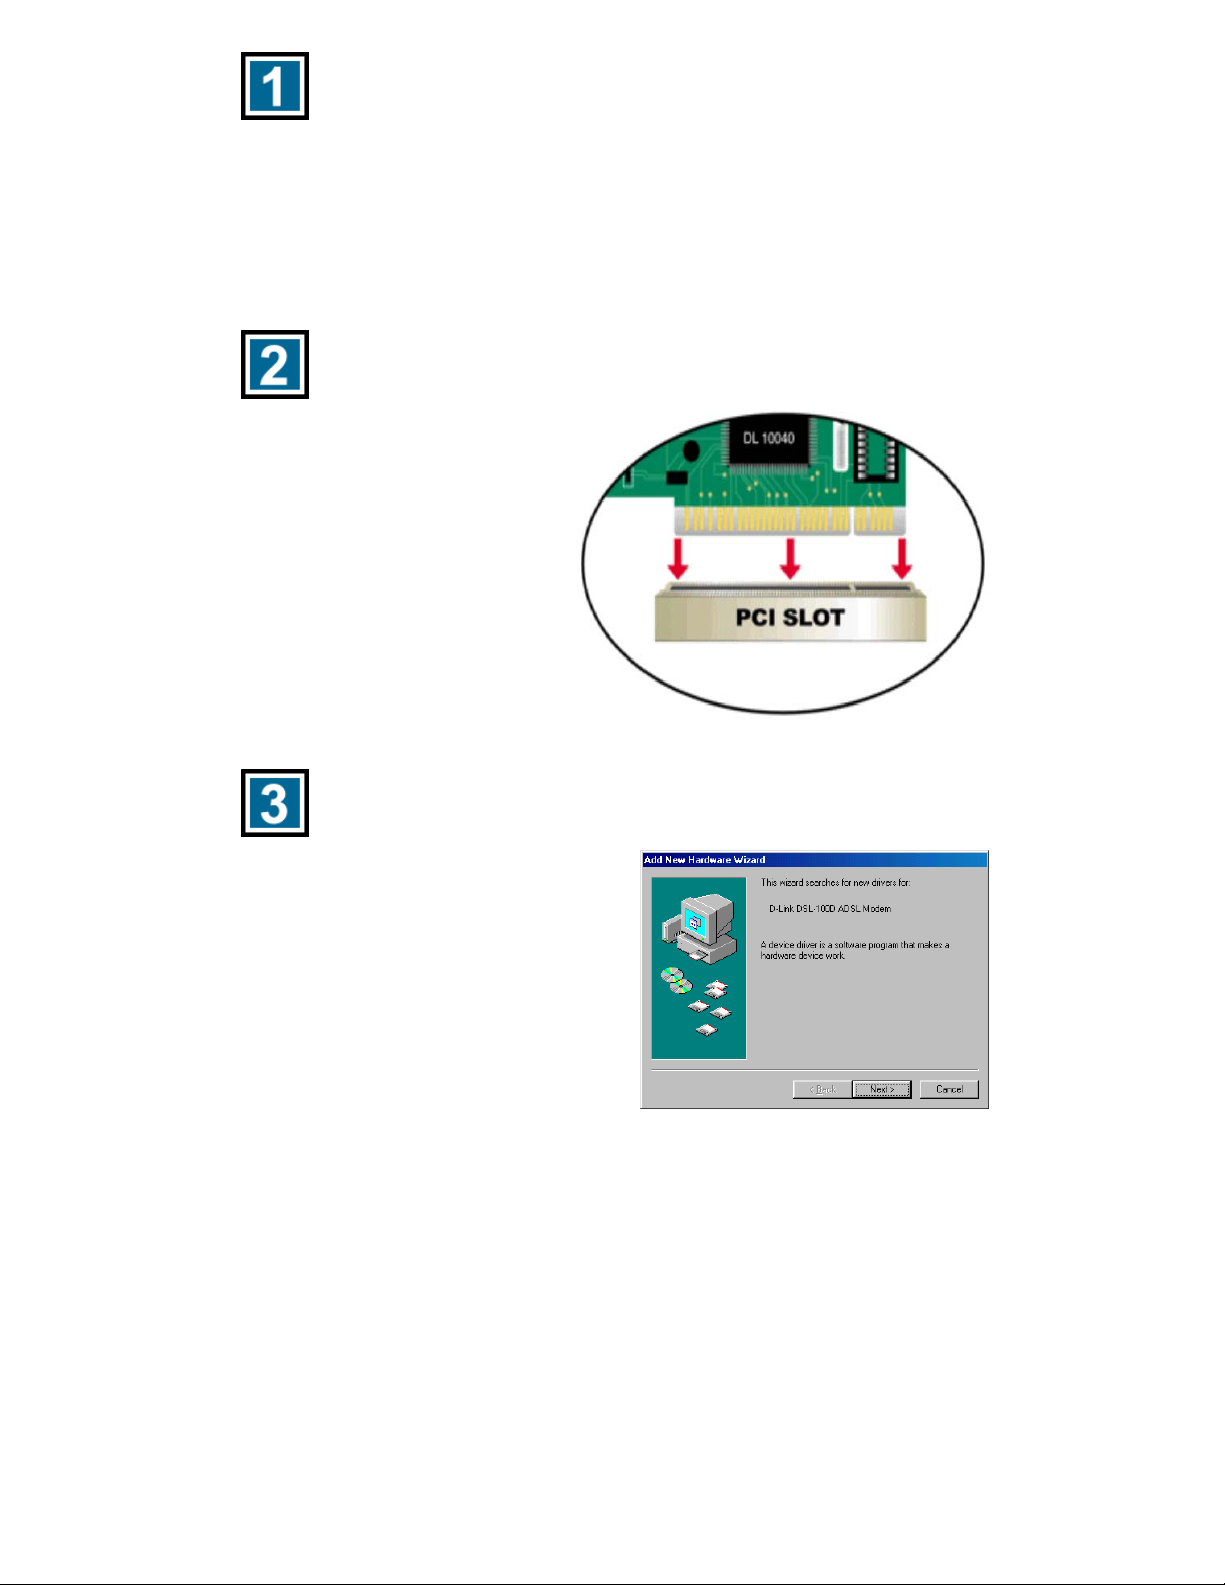
Place the DSL-100D/CZ into an
available PCI slot.
Replace the cover and POWER
ON your computer.
DSL-100D/CZ Driver Installation
At boot up, Windows will recognize t
DSL-100D/CZ modem and prompt for
drivers.
Click Next.
he
6
Page 7

DSL-100D/CZ Driver Installation Continued…
At the following screen, make sure that
“Search for the best driver for your
device…” is selected.
Click Next.
At this window, check “Specify a
location.”
Click Browse.
In the Browse for Folder window, please
highlight the folder that corresponds to
both your Operating System.
Use the chart below for
Windows 2000 – Windows 2K
Windows 95 – Windows 95
Windows 98 – Windows 98
Windows ME – Windows ME
Windows NT 4.0 – Windows NT
Click OK.
7
Page 8

DSL-100D/CZ Driver Installation Continued…
After you have selected the correct
folder, Click Next.
Once the correct version of the drivers
are found, Click Next.
If this screen appears, p
your Windows Operat
System CD into your CD
drive.
Click OK.
Now your driver installation is complete.
Click Finish.
lace
ing
8
Page 9
DSL-100D/CZ Driver Installation Continued…
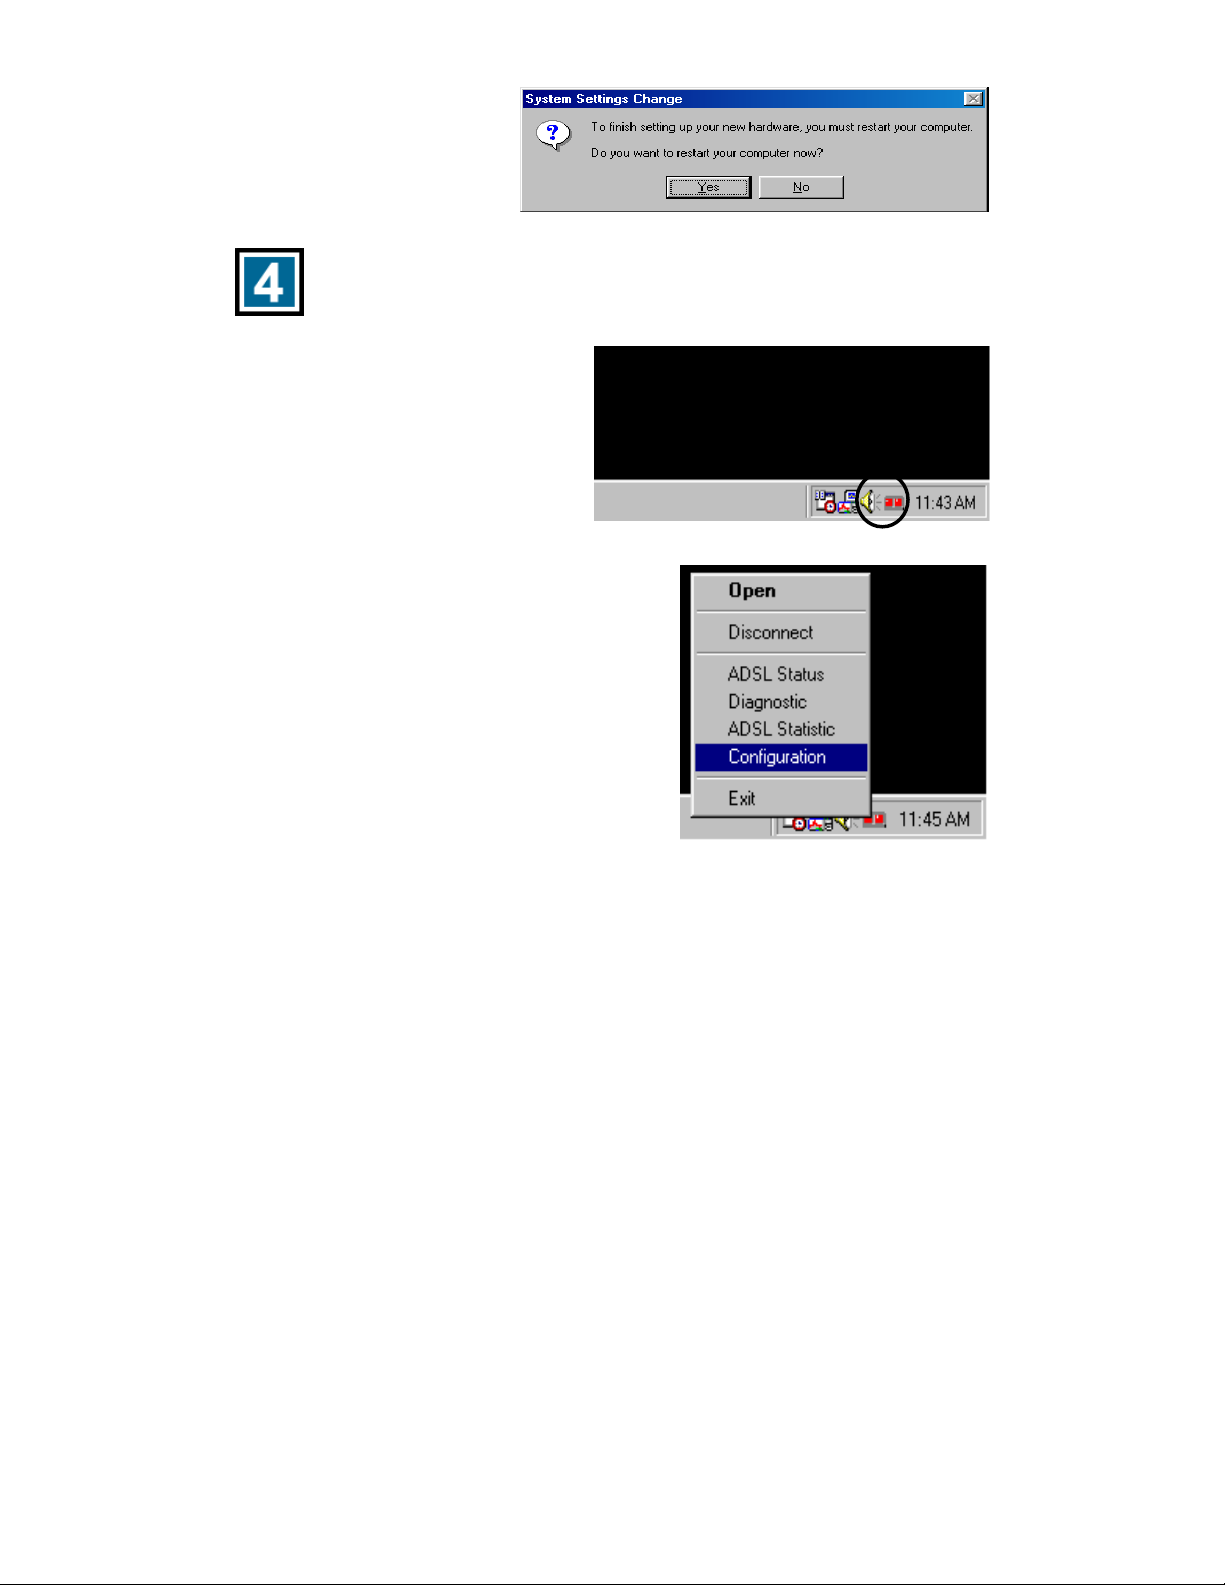
Click Yes and the
computer will restart
automatically.
DSL-100D/CZ Modem Configuration
Right click on this icon, pictured
above, located in the lower right
hand corner of your computer
screen, in the systray box.
Select “Configuration.”
9
Page 10

DSL-100D/CZ Driver Installation Continued…
In the configuration window, make sure that PVC Setup is selected to ADSL
Service Provider.
The default ADSL Mode is set to
ANSI T1.413 Issue 2. Remove the
Check Mark from ANSI T1.413
Issue 2.
Check ITU G.992.1 Annex A
(G.dmt)
Click on “Set Mode.”
Please wait approximate 2 minutes
for the ADSL mode to take its effect.
The link like will be turn off and then
will show once the connection is
made.
Click Close.
Note: If you are not sure of the correct settings, please contact your DSL
service provider for appropriate settings.
If any changes are made in the PVC Table, make sure that the settings comply
with the DSL provider’s settings.
Highlight ADSL Service
Provider and click Edit.
10
Page 11

DSL-100D/CZ Driver Installation Continued…
To make changes to your VPI
and VCI Settings,
Your setup should look like the
window on the right with these
settings.
VPI: 0
VCI: 35
Protocol: 2364 (PPPoA)
Framing: VC MUX
If changes were made in the Edit
PVC Entry, click Apply and
then click OK to save the
changes.
Note: If you are unsure of the proper settings, consult with your ADSL
provider for more information.
DSL-100D/CZ Logging On
On your desktop, you’ll see an Icon like the one on the right.
Double Click on the Icon.
*If you do not see the icon on the right, Skip to Step 6.
11
Page 12

DSL-100D/CZ Logging On Continued…
The “Connect To” windows will show.
Enter User name and Password.
Click Connect.
You can now access the Internet using your DSL-100D/CZ ADSL modem!
Setting up Dial-Up Networks
Go to
Start > Programs > Accessories >
Communications > Dial-Up
Networking.
Double Click on “Make New
Connection.”
Make sure that “D-Link DSL-100D/CZ
ADSL Modem” is selected in “Select a
device” menu.
Click Next.
12
Page 13

DSL-100D/CZ Setting up Dial-Up Networks Continued…
Enter “0” in the telephone number
section.
Click Next.
Click Finish
After “My Connection” setup is configured, go to Start > Programs >
Accessories > Communications > Dial-Up Networking.
There, you will see an icon that says “My Connection.”
Double Click on the Icon.
13
Page 14

DSL-100D/CZ Setting up Dial-Up Networks Continued…
The “Connect To” windows w
show. Enter User name and
Password.
Click Connect.
You can now access the Internet using your DSL-100D/CZ ADSL modem!
ill
14
Page 15

NOTES
15
Page 16

®
D-Link
DIGITAL HOME SOLUTIONS
Printed in Taiwan
Version 2.0
16
 Loading...